Humidity and rain can be the enemy of a polished hairstyle, but here’s what most people don’t realize: a well-executed French braid is actually one of the best defenses against frizz, moisture, and the chaos that moisture brings to loose hair. Unlike open styles that let every strand catch humidity independently, braids keep hair tightly bound and controlled, which means less surface area exposed to moisture and far fewer flyaways to deal with throughout the day.
The secret isn’t just about making any braid work on a rainy day—it’s about choosing the right kind of French braid and styling it in a way that holds up to real-world humidity, wind, and moisture. Some French braids are naturally tighter and more weather-resistant than others, and understanding the differences can mean the gap between a style that falls apart by lunch and one that looks polished all day long.
This guide walks you through eight specific French braid styles that perform exceptionally well in rainy conditions, along with the exact technique tweaks that make each one weather-proof. Whether you’re heading into a drizzly commute, planning an outdoor event, or just dealing with high humidity, these French braids are proven to stay put and look intentional even when the weather is working against you.
How to Prepare Your Hair for Rainy Days
Before you even start braiding, the foundation matters enormously for holding the style together through moisture and movement. Damp hair is actually easier to braid than completely dry hair—damp strands grip each other more easily and create less friction, which means your braid will be tighter and more secure from the start.
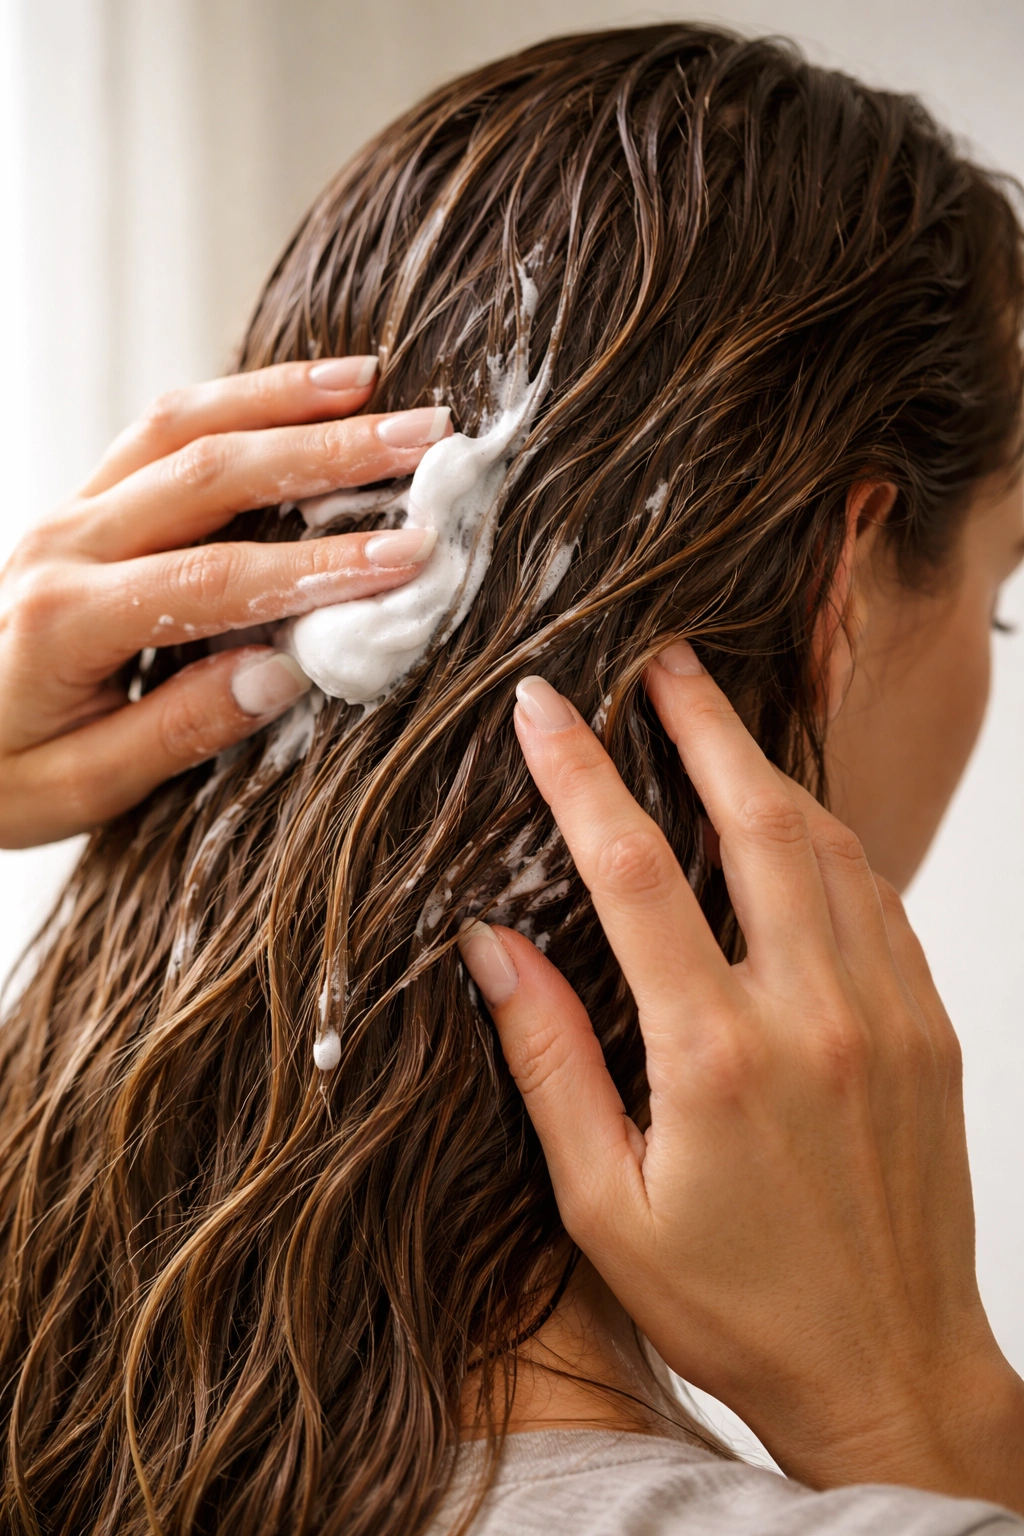
Apply a lightweight styling product to slightly damp hair before braiding. A mousse, a texturizing spray, or even a damp-hair styling cream will give the strands something to grip onto and help the braid hold its shape throughout the day. These products also provide a bit of frizz control without leaving hair looking slick or weighed down.
Avoid heavy oils or serums before braiding in rainy conditions—these can make the braid looser and encourage strands to slip out of place as humidity increases. Save richer styling products for after the braid is complete, and focus on lighter products that add hold without slickness.
Consider blow-drying your braid after it’s complete, especially the outer layer. A quick pass with a cool shot from the blow dryer will help set the style, seal the outer cuticles, and lock the strands firmly in place. This step alone can extend the life of your braid by hours in humid conditions.
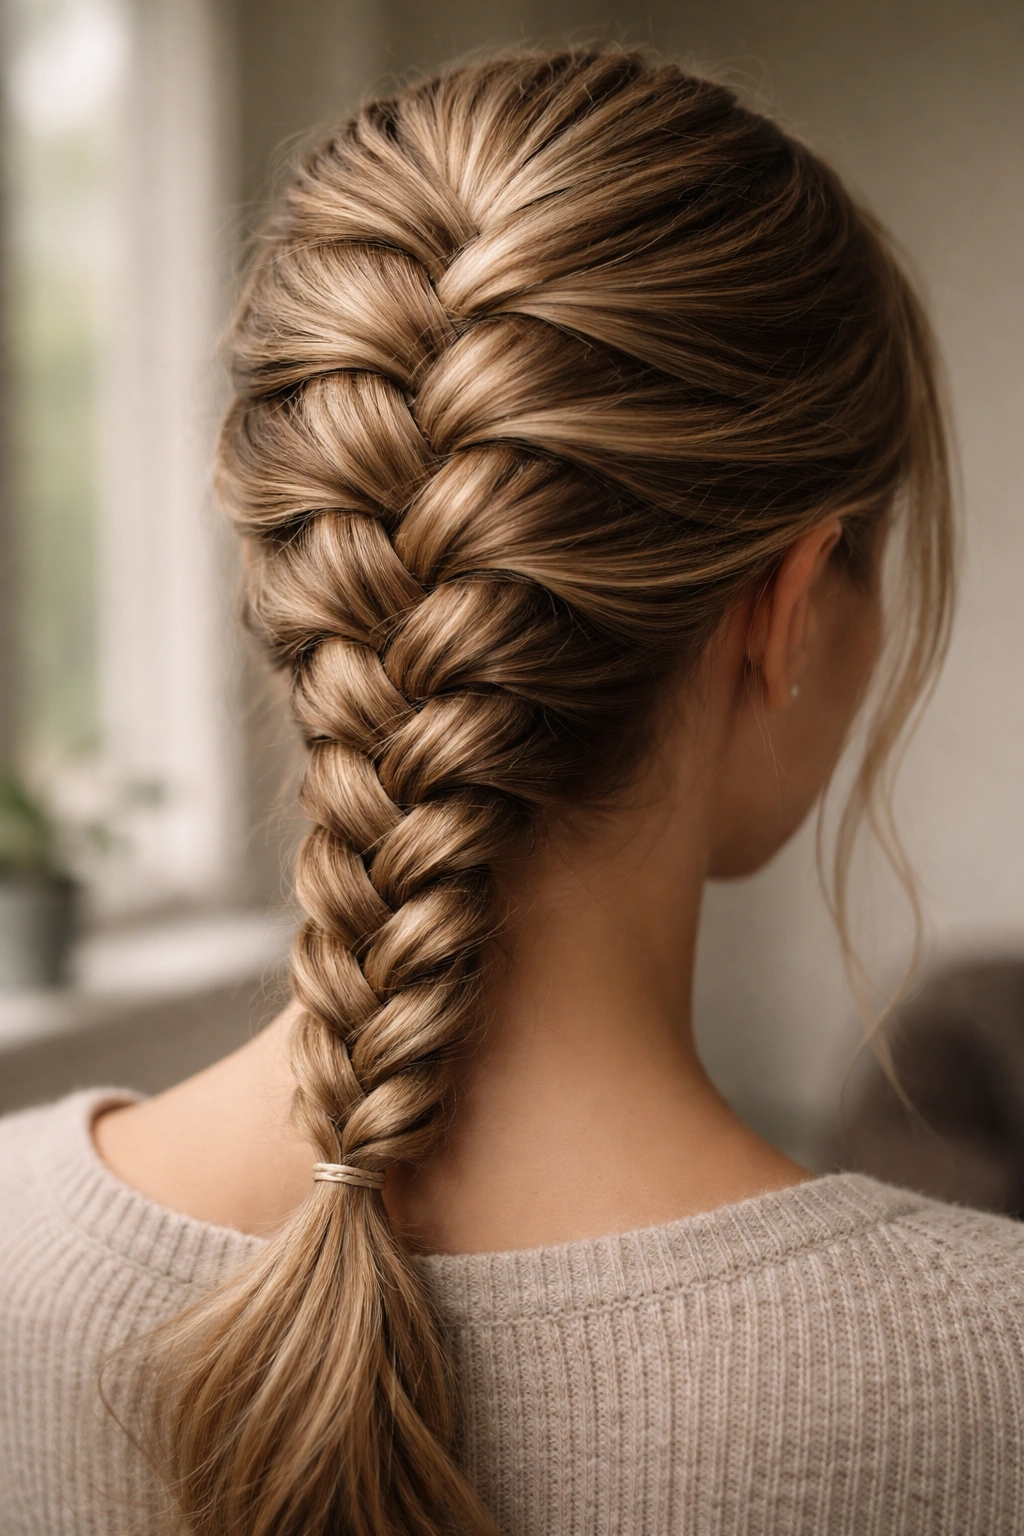
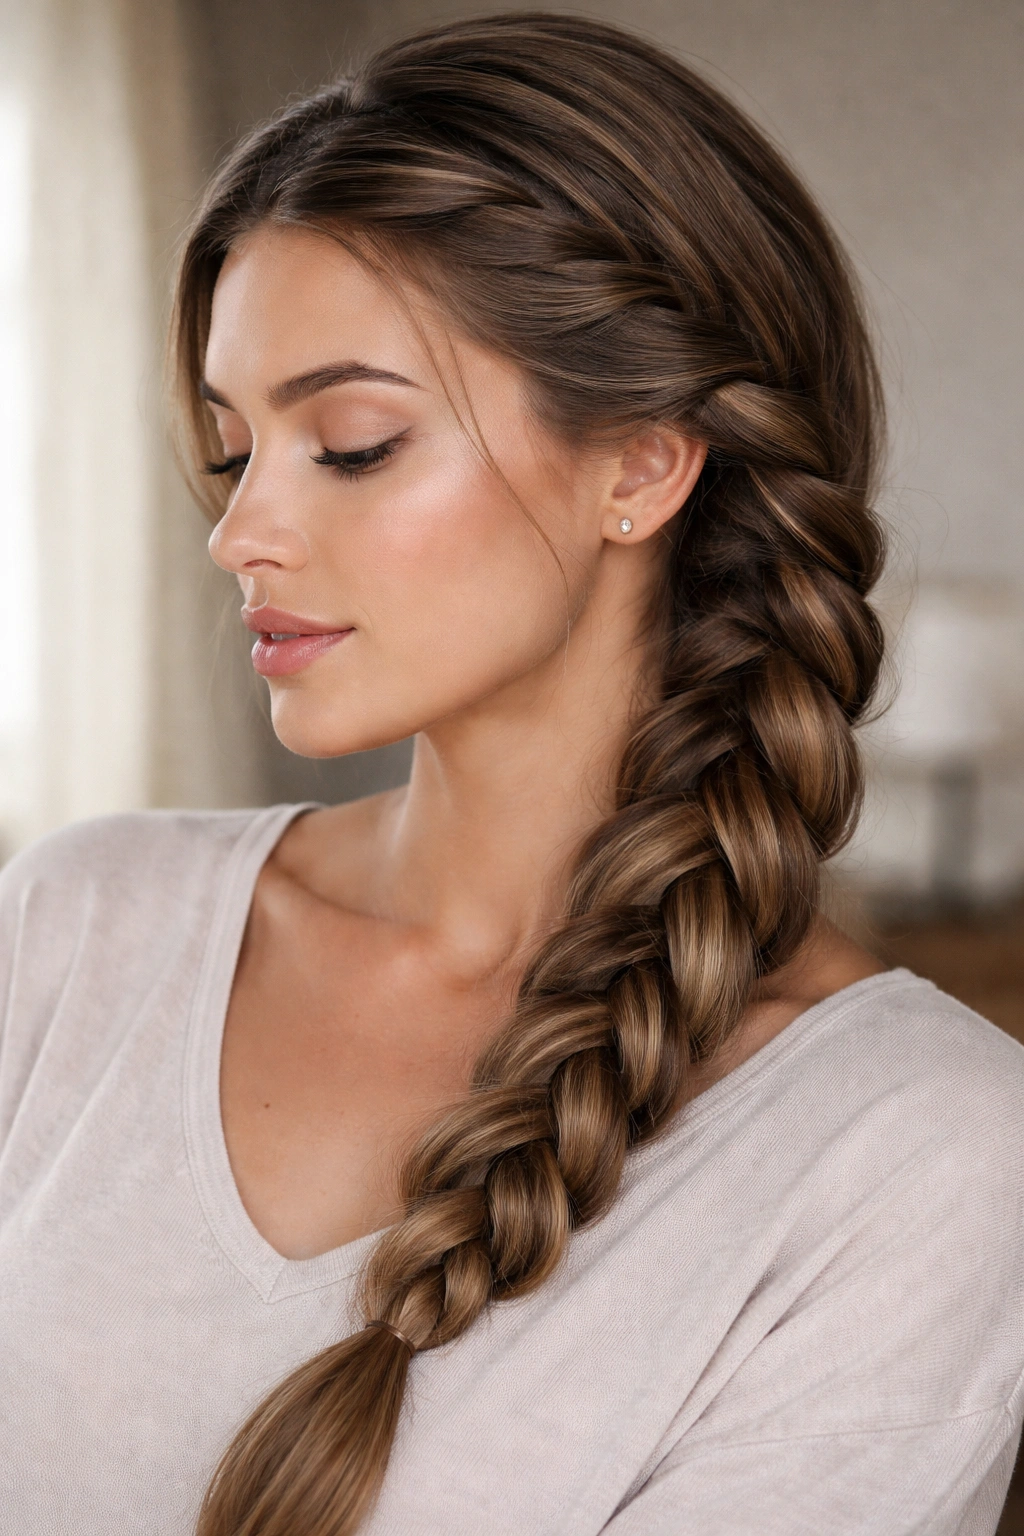
1. Classic Tight French Braid
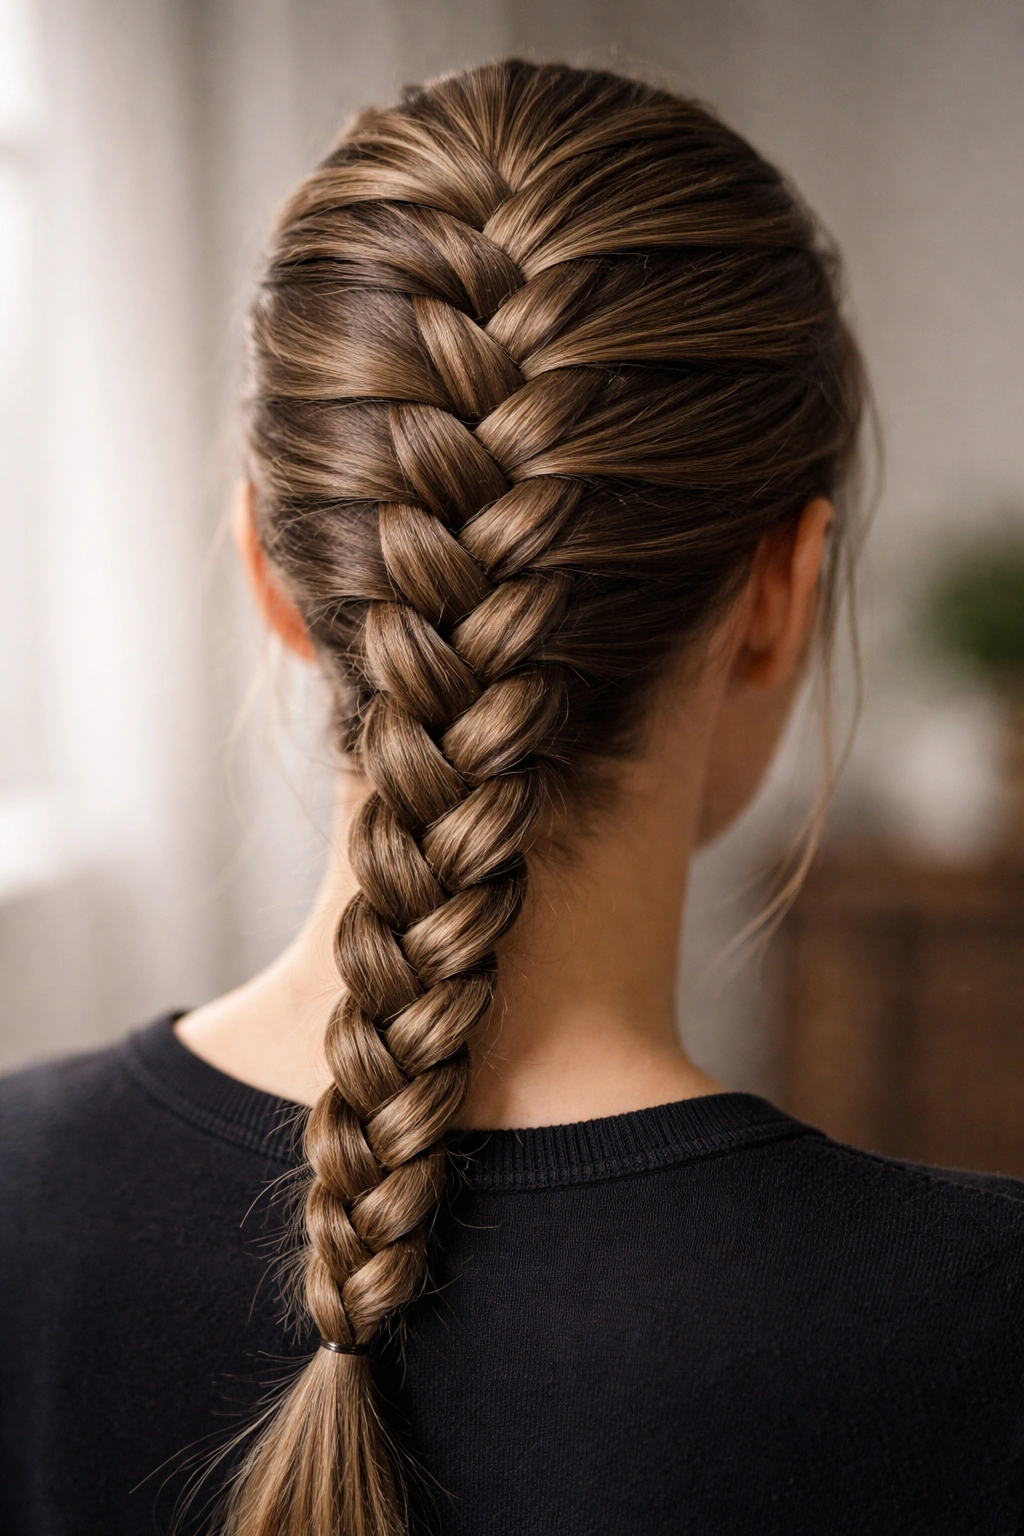
The classic French braid is the foundation of all French braiding, and when executed with intentional tightness, it becomes a powerhouse style for rainy days. This braid works by weaving three sections of hair together progressively, picking up new strands from each side as you move down the scalp, which creates an intricate, interlocking pattern that naturally resists loosening.
Why Tight Braiding Matters in Humid Conditions
A loosely executed French braid will loosen further as humidity swells the hair shaft and adds weight. A braid that’s woven tightly from the very first pass will have enough structural integrity to stay intact even as individual strands slightly swell and absorb moisture. The tighter the weave, the more resistance the braid has to loosening over time.
When you’re braiding tightly, you’re also reducing the amount of loose hair that can frizz around the edges. A slack braid always develops a halo of flyaways; a tight braid stays smooth and polished even if the individual strands are slightly frizzy.
How to Braid Tight Without Pulling Too Hard
- Start by dividing your hair into three equal sections at the crown, holding each section between specific fingers (this creates an anchor point and helps you maintain consistent tension)
- Cross the right section over the center, then the left over center—but pull each crossover snugly toward your scalp rather than loosely down
- As you add new hair from each side, pinch those new strands firmly between your existing sections before continuing the weave
- Keep your hands close to the scalp—working too far down encourages slack braiding
- Finish by tightening the final ponytail holder: wrap the elastic around the braid base twice, and slide it upward into the braid itself so you’re essentially trapping the end of the braid inside the elastic
Pro tip: Tightness is easiest to achieve on day-old hair (hair that was shampooed the day before). Freshly washed hair is slippery and harder to control, so if you’re planning a rainy-day style, consider styling in the evening or the morning after washing.
2. Double Dutch Braids
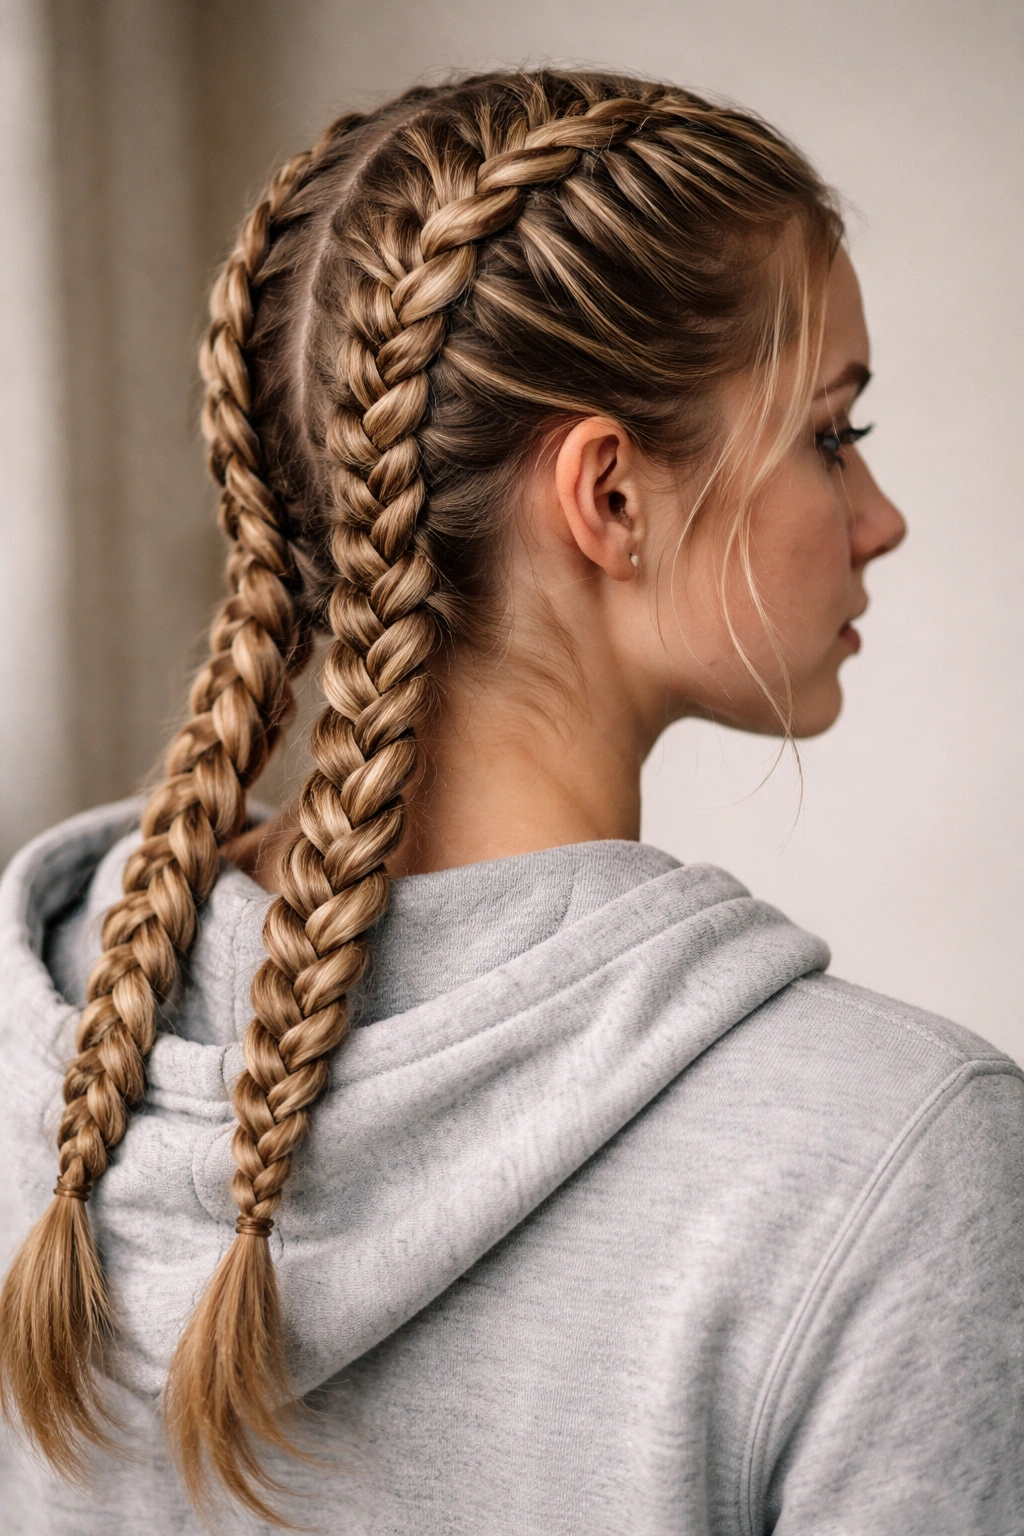
Double Dutch braids—two braids running parallel down the back of the head—offer an advantage that single braids don’t: they distribute the weight and moisture exposure across two separate styles instead of concentrating everything into one braid. This means better balance, less strain on any single section of hair, and twice the holding power.
The Dutch braid (which is an inverted French braid where strands cross under instead of over) also sits slightly closer to the scalp than a French braid, which makes it more protected from wind and moisture. Each braid is also slightly smaller in diameter, which means tighter weaving and less chance of loosening.
Why Dual Braids Are Rainy-Day Champions
Double Dutch braids look intentional and polished rather than like a backup-plan style, which is important psychologically if you’re stuck dealing with weather that would normally frustrate you. More importantly, they split the volume of your hair, making each individual braid tighter and more secure.
Two smaller braids are also less likely to come loose than one larger braid because the structural pressure is distributed across both sides of your head rather than pulling down the center. If one side loosens even slightly, the other remains intact—you never lose the entire style at once.
Execution Tips for Perfect Dutch Braids
- Part your hair straight down the middle from forehead to nape, clipping one side away
- Start the first braid at the crown on the unclipped side, using the under-weaving technique (cross strands under the center instead of over)
- Keep the braid tight from the first pass, and make sure you’re picking up strands from the scalp in neat, small sections rather than grabbing chunks
- The braid should sit close to the scalp, not floating away from it
- Repeat on the second side, matching the thickness and tightness of the first braid as closely as possible
- Use two small elastic bands or bobby pins to secure both braids, and consider locking them together at the nape with a small clip or braid-joining technique
Worth knowing: Dutch braids often look less finished than French braids when you’re done, but they get better as the day goes on and gravity and movement naturally tighten and refine the weave. Don’t second-guess the style—it’s supposed to look slightly loose in the first hour.
3. Reverse French Braid
A reverse French braid—where strands cross under the center instead of over—sits lower on the head than a classic French braid and naturally hugs the back of the neck and skull more closely. This proximity to the scalp means the braid is more protected from wind, rain, and environmental humidity that would otherwise tousle loose hair around the face and sides.
The reverse technique also looks visually different from a classic French braid; the weave pattern is more pronounced and sculptural, which means even if a few strands loosen slightly due to humidity, the style still reads as intentional and put-together.
How Reverse Braiding Resists Weather Better
The under-weaving pattern of a reverse braid creates a slightly different tension pattern than a classic French braid. Because strands are crossing underneath rather than over, there’s a compressive force that actually tightens the braid slightly as gravity pulls downward. A reverse braid becomes more secure throughout the day rather than loosening, which is the opposite of what happens with a standard French braid in humid conditions.
The visual boldness of the reverse braid also means that the style doesn’t depend on perfection to look good. A slightly loosened classic French braid looks messy; a slightly loosened reverse braid still looks intentionally textured and polished.
Step-by-Step Reverse Braiding Technique
- Divide hair into three equal sections at the crown—left, center, right
- Cross the right section under the center section, not over (this is the key difference)
- Cross the left section under the new center section
- Continue alternating, crossing under rather than over, while picking up new strands from each side as you move down the scalp
- Keep tension consistent and slightly tight
- Secure the end with a small elastic band
Pro tip: Reverse braids look particularly good when you tease or backcomb the very top of the head before starting the braid. This creates a bit of texture and volume that makes the braid look fuller and more interesting, which disguises any loosening that might happen as the day goes on.
4. French Braid Crown
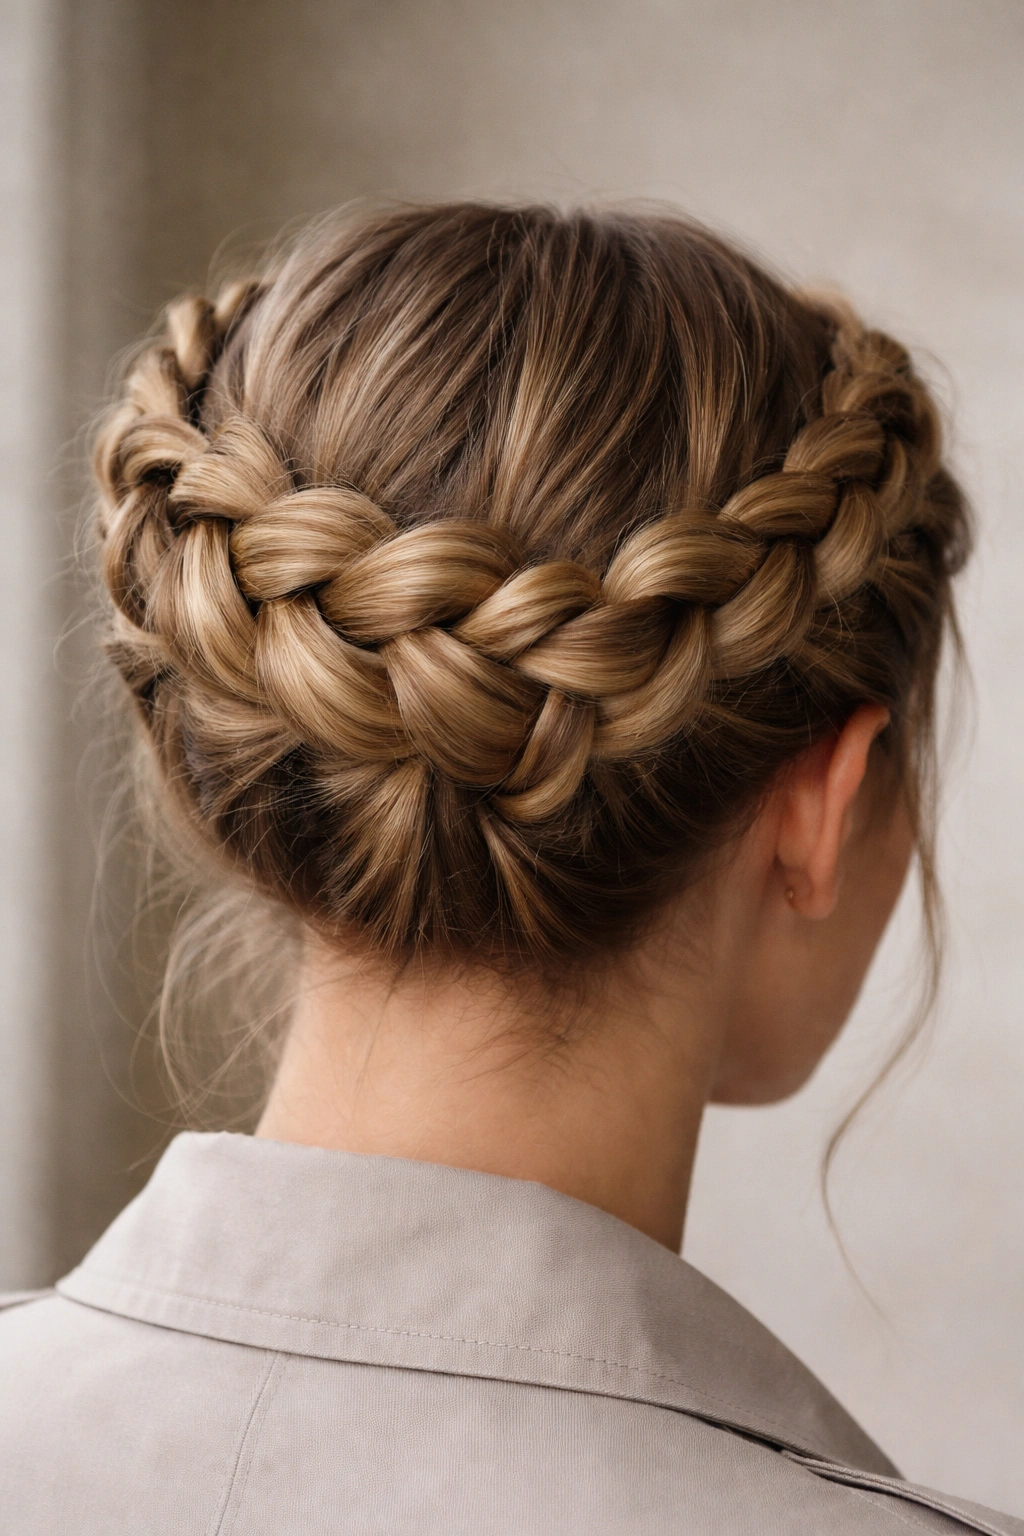
A French braid that wraps around the head like a crown—creating a continuous band of braided hair from one side of the head to the other—offers exceptional protection from rain and humidity because it distributes hair across a wider surface area and keeps all hair, including the underside, off the neck and shoulders. Rain exposure is minimized because most of your hair is tucked up and wrapped around your head.
This style also looks polished and intentional, almost like a fancy updo, which means it works for both casual rainy days and more formal occasions where weather might be a concern.
Why a Braid Crown Holds Up in Wet Weather
A crown braid works so well in rainy conditions because it’s essentially a braid wrapped around the perimeter of your head, which means every strand of hair is both protected and held in place by the structure of the braid itself. There’s no loose section of hair exposed to moisture and no vulnerable “tail” section at the end that could come undone.
The crown creates natural volume and texture, which means even as humidity causes slight swelling, the overall shape of the style stays intact. A loosened section of a crown braid still looks intentionally voluminous rather than messy.
How to Create a Crown Braid
- Part your hair to the side
- Start a French braid at the side of your head (behind the ear), using all three sections from that side
- Braid horizontally across the back of the head, picking up strands from both above and below the braid line as you work
- Continue braiding around to the opposite side of the head, aiming for a gentle arc that follows the natural curve of your skull
- Finish the braid at the opposite ear, and secure the end with bobby pins tucked into the braid itself—no visible elastic band
- Use a light hairspray to set any flyaways and add hold
Worth knowing: A crown braid is slightly more involved than other French braids, so practice it a few times before relying on it for a high-stakes rainy day. Once you have the technique down, though, it becomes faster and easier to execute.
5. Sleek Side-Swept French Braid
A French braid that starts at the top of one side of your head and sweeps diagonally across the back, ending near the opposite ear, offers both practical and aesthetic advantages in rainy conditions. The side angle means the braid isn’t centered on the scalp—instead, it sits in a way that offers good coverage without looking too formal or structured.
This style works beautifully for rainy weather because the side-swept angle naturally protects more of one side of the head and neck from direct rain exposure. It’s also a style that genuinely looks better slightly loosened and textured, which means minor humidity-related loosening actually works in your favor.
Why Side-Swept Braids Weather Rain Better
A centered braid draws attention to the center of the scalp and face. A side-swept braid moves the eye horizontally and works with the asymmetry that’s natural to human faces. This angle also means the braid doesn’t hang straight down—it angles, which is more protection from rain falling straight down.
The side-swept aesthetic is also inherently relaxed and textured, which means the style doesn’t require perfection. If a few strands loosen or frizz slightly, it looks like intentional texture rather than mistakes.
Creating a Flawless Side Sweep
- Part your hair deeply to one side
- Start the French braid at the temples on the side with more hair (the larger section from the deep side part)
- Braid diagonally backward and toward the opposite ear, creating a gentle arc across the back of the head
- Pick up strands from both above and below the braid line as you work, keeping the braid slightly loose to match the relaxed aesthetic of the style
- End the braid near the opposite ear, and secure it with a small elastic band or bobby pins
- Gently pull and tease the outer edges of the braid to add texture and loosen it intentionally
- A light hairspray holds the texture without making it look stiff
Pro tip: The side-swept look is enhanced if you apply texturizing spray or sea salt spray to the braided section before finishing. This adds grip and makes the braid look intentionally relaxed rather than just loosely woven.
6. Waterfall French Braid
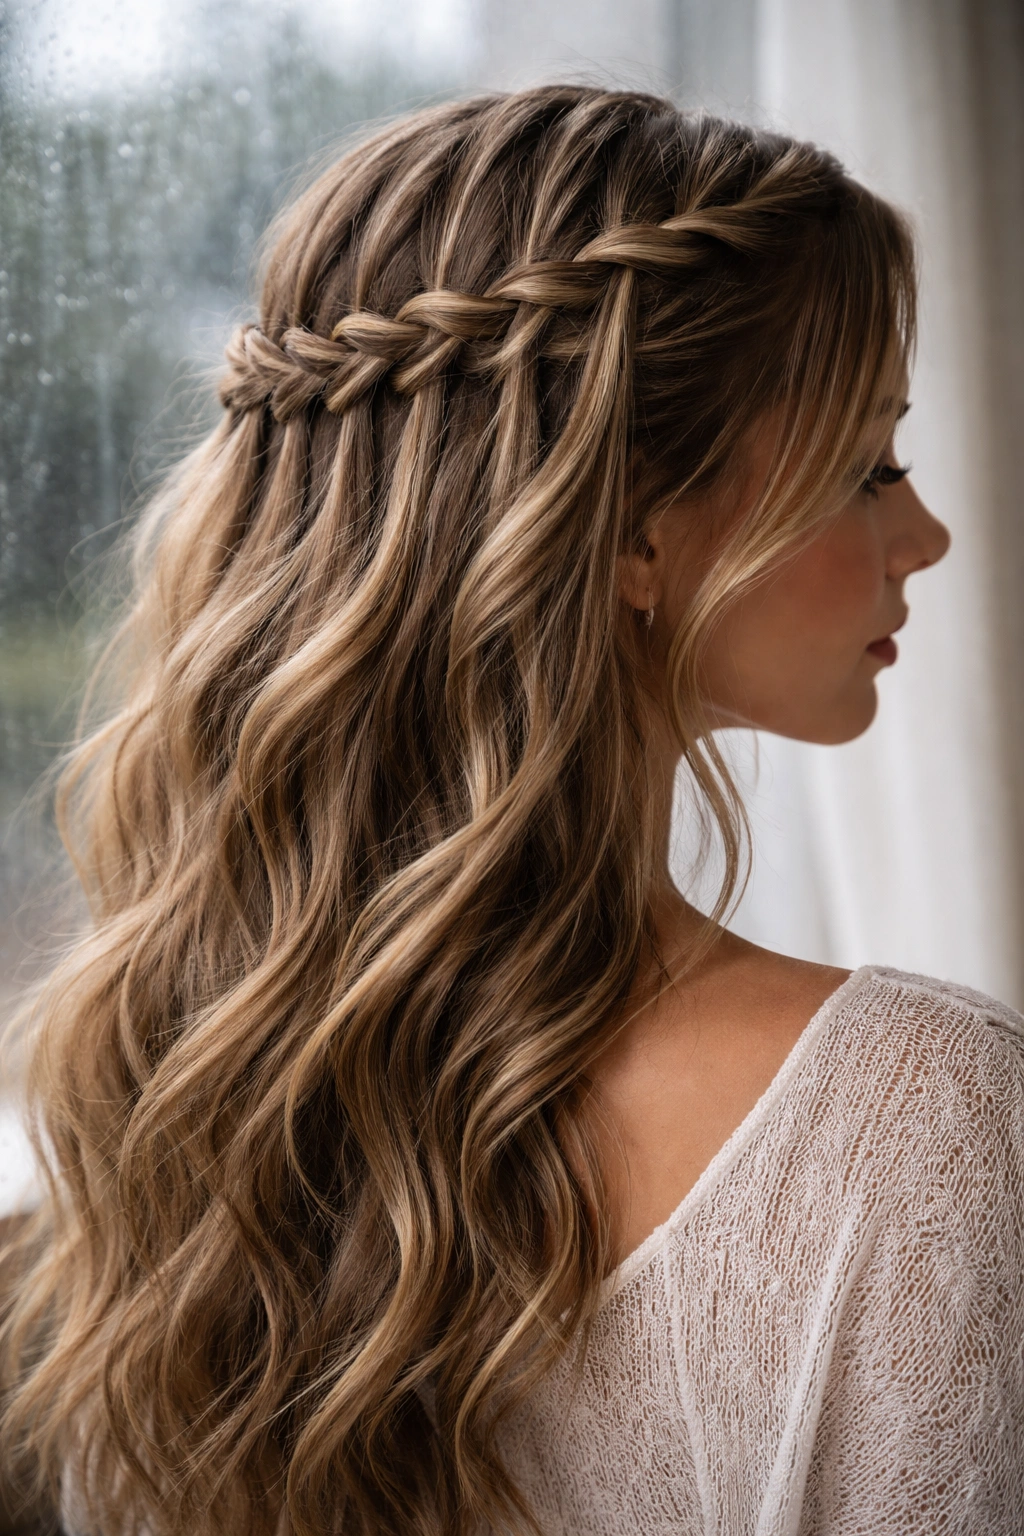
A waterfall braid is a variation where you drop strands of hair out of the weave as you move down the head, creating a cascading effect with braided strands alternating with loose sections. The beauty of this style in rainy conditions is that it looks intentionally incomplete and textured, which means actual loosening from humidity is nearly invisible because the whole point of the style is loose, flowing sections.
Waterfall braids also keep most of the hair controlled and braided while allowing some hair to flow, which gives you the best of both worlds: security and movement.
How Waterfall Braids Benefit from Humidity
Loose sections of a waterfall braid actually benefit from a bit of humidity and wave—the loose strands curl and wave more visibly, which makes the entire style look more dimensional and intentional. Humidity that would ruin a sleek braid actually enhances a waterfall braid.
The braided sections stay tight and secure, while the loose sections have freedom to move. Even in heavy humidity, the braided portions hold, and the loose portions move with intent rather than looking frizzy and out of control.
Executing a Waterfall Braid
- Start a French braid at the crown on one side
- At about the second or third weave cycle, drop the outermost strand (the one you just wove in) and let it fall loose—this is the start of your waterfall effect
- Pick up a new strand from the scalp in its place, and continue the braid weave
- Repeat the drop-and-replace pattern every second or third weave cycle as you move down the back of the head
- The loose strands create a gentle cascade of hair flowing down the back while the braid controls the top sections
- Secure the braided end with an elastic band, and allow the loose sections to flow naturally
Worth knowing: Waterfall braids look slightly chaotic when you finish them, but they settle into a beautiful shape within the first hour as the loose sections naturally fall into the proper cascade pattern. This makes them perfect for rainy days—by the time you care about your appearance, the style has naturally refined itself.
7. Thick, Chunky French Braid
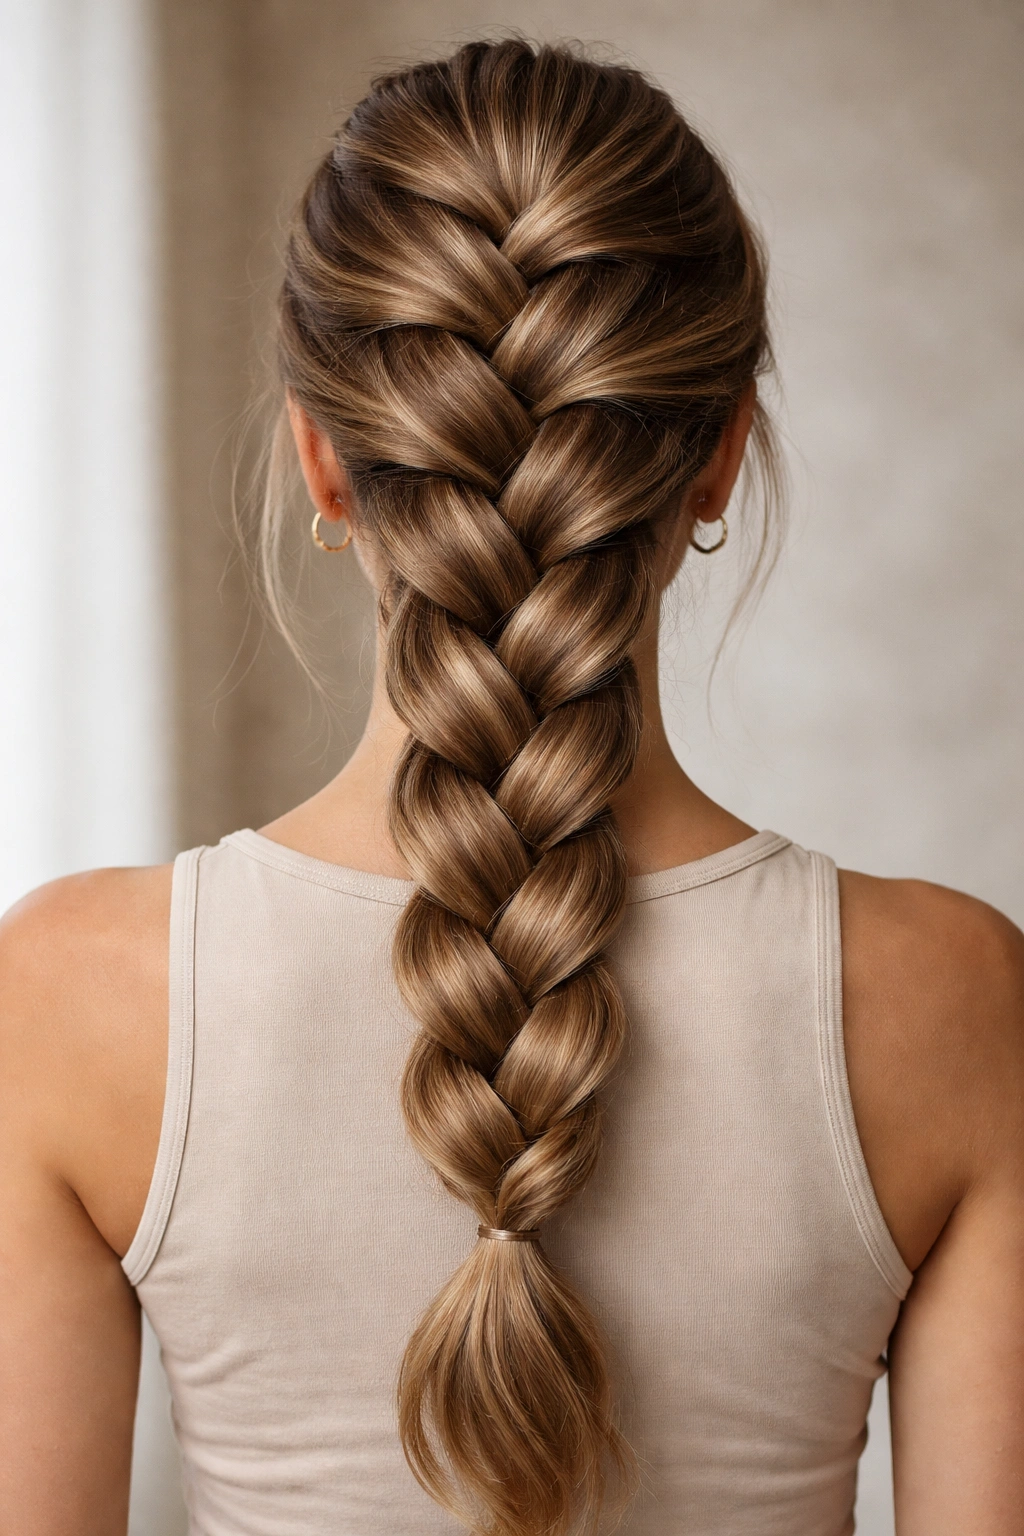
Instead of dividing your hair into traditional three equal sections and picking up small strands from the scalp, a thick, chunky French braid uses much larger base sections and picks up bigger chunks of hair as you move down the head. The result is a braid with fewer, thicker weaves and more visible texture and dimension.
Chunky braids are inherently more resilient to loosening because the large section sizes mean each weave cycle creates a more substantial lock. There’s less delicate detail to come undone, and more structural support holding everything in place.
Why Thick Braids Are Rainy-Day MVPs
A thin, detailed braid can appear messy when a few strands loosen. A thick, chunky braid looks more intentional when it’s slightly loose—the texture reads as design rather than damage. This is huge for rainy-day styling because you’re not fighting the natural movement and loosening that humidity causes.
Chunky braids are also much faster to create than detailed braids, which means less time spent styling in the morning and more confidence that the style will hold because you can braid faster with bigger sections while maintaining tension.
How to Braid with Chunk
- Instead of dividing hair into three thin sections, create three thick sections—imagine dividing your hair into thirds by thickness, not by detail
- Start the braid at the crown, and cross the thick sections over each other in the standard French braid pattern
- When picking up new hair from the scalp, grab a thick section (maybe a half-inch or inch wide) rather than a thin, delicate strand
- Keep the weaving tight, but don’t overthink the details—the larger sections will hold tension naturally
- Continue down to the nape, securing with an elastic band
- Gently pull the outer edges of the braid to loosen it intentionally and add texture
Pro tip: Chunky braids look amazing when you deliberately tease the weave slightly after finishing. Grab the braid and gently pull sections outward at different points along the length, creating a undone, textured appearance that’s actually intentional and not loosening from the braid coming undone.
8. Dutch Braid Wrapped Bun
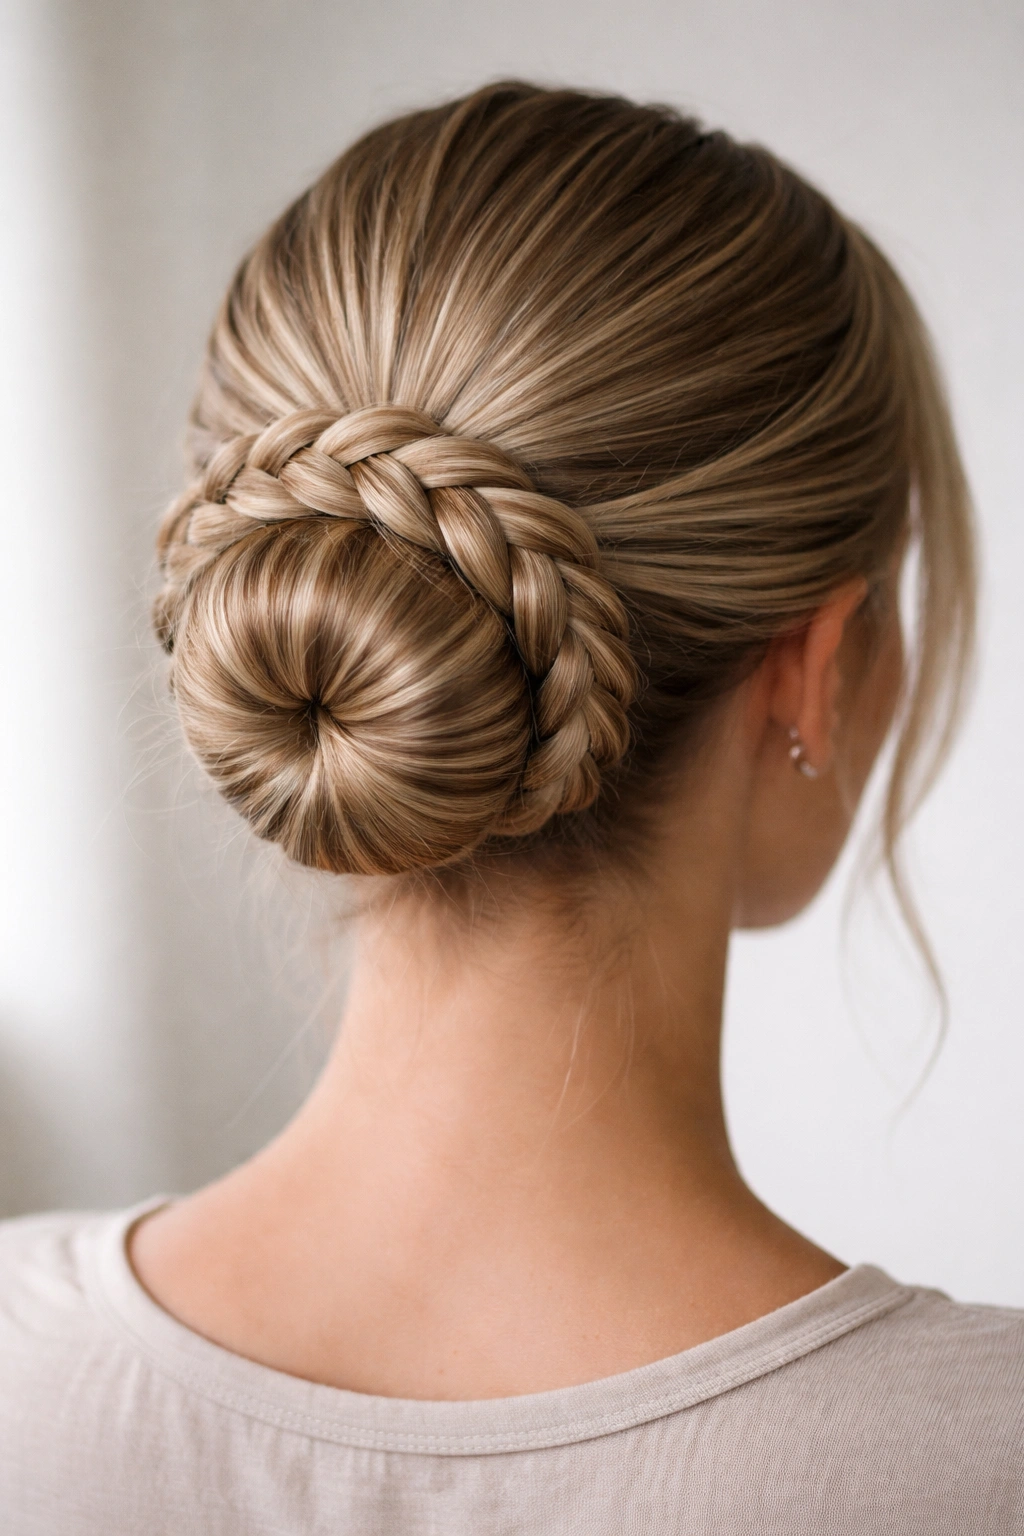
Combining the structural benefits of a Dutch braid with the protection of an updo, a Dutch braid wrapped around a bun offers maximum security and minimum exposure to rain and humidity. The braid forms the outer structure of the bun, holding everything in place, while the wrapped effect creates a polished, intentional look that works for professional settings, casual days, and everything in between.
This is essentially a Dutch braid that, instead of hanging down, is wrapped around a base bun (made from a ponytail). The braid forms a crown around the bun, locking everything securely in place.
Why This Combo Is Virtually Unbeatable in Rain
A basic bun can loosen and unravel in humidity, but when you wrap a tight Dutch braid around it, you’ve got two layers of security. The bun can’t unravel because it’s held in place by the braid, and the braid can’t loosen because it’s wrapped around a solid structure rather than hanging free.
This style also tucks virtually all hair up and away from the neck and shoulders, minimizing rain exposure. Most of the hair is encased in the braid wrapping, which provides physical protection from moisture.
How to Create a Wrapped Dutch Braid Bun
- Gather hair into a high or mid-height ponytail at the crown and secure with a elastic band
- Twist the ponytail loosely, and coil it into a bun shape, securing with bobby pins (this is your foundation bun)
- Take a small section of hair from the base of the bun (or use a thin hair extension if you need more length), and start a tight Dutch braid
- Braid around the base of the bun, wrapping the braid around and around the bun structure like you’re gift-wrapping it
- Tuck the braid end under and pin it securely into the bun structure itself
- Spray lightly with hairspray to set everything and tame any flyaways
Worth knowing: This style works best if you have enough hair length for both the ponytail and the wrapping braid. If your hair is shorter, use a thin clip-in extension to create the wrapping braid—no one will see the connection, and you’ll have enough material to create multiple wraps around the bun.
Tips for Keeping Your French Braids Neat in Humid Weather

Even the most secure French braid needs a little support to stay pristine through a rainy day. The right products and techniques can extend the life of your style and prevent weather-related loosening from becoming noticeable.
Use a texturizing product before braiding. Texturizing sprays, light mousse, or dry shampoo (even on clean hair) gives strands grip without weight. Apply to damp hair, and let it dry before braiding. The texture makes it harder for strands to slip out of place.
Finish with a strong-hold hairspray. Once your braid is complete, a light mist of strong-hold hairspray seals everything in place. Wait a moment for it to dry, then run your fingers through the braid gently—this distributes the product throughout the weave rather than leaving it concentrated on the surface.
Keep bobby pins or a small backup elastic in your bag. If a section does come loose during the day, a bobby pin can quickly secure it without the need to redo the entire braid. A small elastic band can temporarily hold a loose section until you can properly re-secure it.
Avoid touching your braid unnecessarily. Every time you run your fingers through a braid or adjust it, you’re slightly loosening the weave. The more you leave it alone, the longer it holds. If you need to adjust it, do so gently and intentionally.
Refresh the braid the night before. If you know you’re facing a rainy day, braid your hair the evening before, sleep on it, and then touch it up in the morning with a light spray and minimal manipulation. A braid that’s been sitting overnight is actually more secure because the weave has had time to truly set and the hair has naturally conformed to the braid shape.
Consider your hair type. Fine, slippery hair needs tighter braiding and possibly more product support. Thicker, coarser hair usually holds braids more naturally. Curly hair often doesn’t slip out of braids as easily as straight hair, but humidity can cause curls to expand and look less neat. Adjust your approach based on your specific hair texture and tendencies.
Final Thoughts
French braids aren’t just a cute hairstyle—they’re a practical solution to the specific challenges that rainy weather and humidity create. When you choose the right braid style for your hair texture and the conditions you’re facing, you’re not fighting the weather; you’re working with it.
The eight styles in this guide offer different aesthetic angles and different levels of hold, so you can pick the approach that matches both your skill level and your vibe for the day. A tight classic braid works when you want streamlined elegance. Double Dutch braids offer playfulness and security. A waterfall braid lets you have loose, flowing hair while keeping it controlled. A wrapped bun is your power move when you need maximum protection and an elevated look.
The real secret isn’t any single technique—it’s understanding that humidity and rain don’t have to ruin your style. They just require a different approach than a day with perfect weather. Lean into the nature of the weather, choose a braid that’s built to withstand it, and you’ll find that rainy days can actually result in some of your best hair days.