There’s something about a well-executed French braid that signals intention—you’ve put thought into how you look, but you’re not trying so hard that it screams “high maintenance.” A French braid on date night is the kind of hairstyle that works whether you’re heading to an upscale restaurant, a casual night out, or a coffee shop conversation you hope turns into something more. It keeps your hair off your face so you’re not tucking strands away mid-conversation, it looks polished without being formal, and it flatters almost every face shape and hair texture when done right.
The beauty of a French braid for a date is that it bridges the gap between “I made an effort” and “I’m still myself.” You’re not locked into a rigid, untouchable style—French braids have this inherent softness that makes them feel romantic and approachable. And here’s what most people don’t realize: the variations are endless. You can go classic and sleek, you can deliberately loosen it for a piece-y, undone vibe, or you can dress it up with subtle accessories that catch the light without looking overdone.
What makes these seven styles perfect for date night specifically is that they work across different date scenarios, hair types, and personal styles. Whether you’re someone who loves a polished look or you prefer an effortlessly tousled aesthetic, there’s a French braid approach here that’ll feel authentic to you. And honestly, the confidence boost you get from knowing your hair looks intentional? That translates into the kind of ease that makes for a genuinely good date.
1. Classic Romantic French Braid
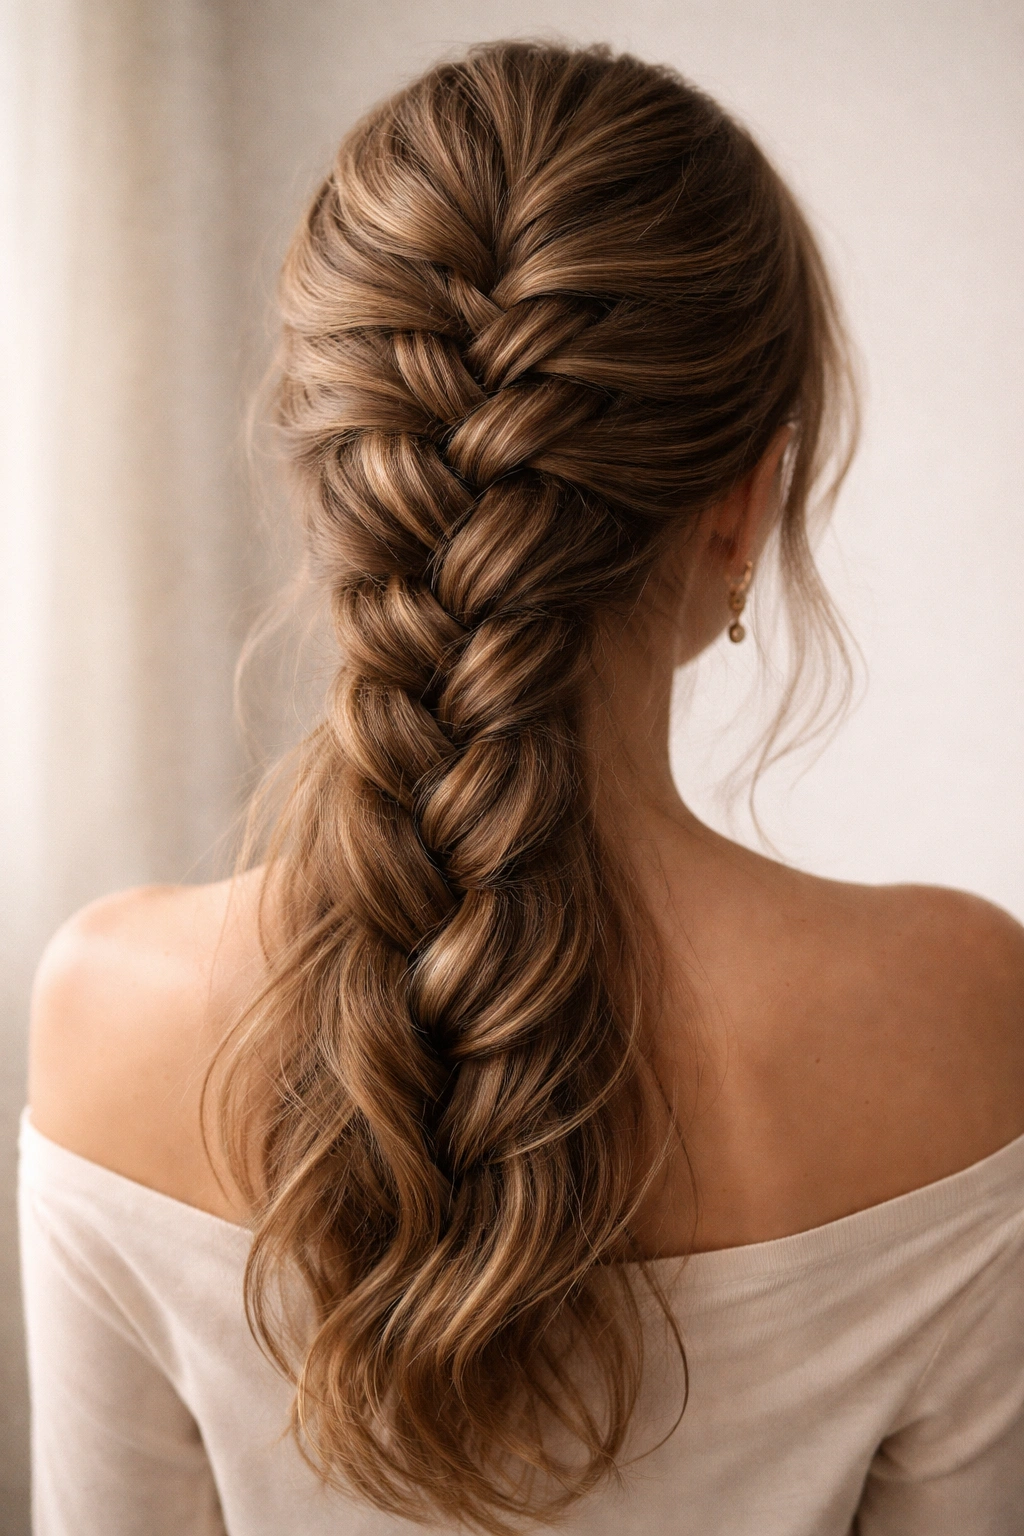
The classic French braid is the date night foundation—refined without looking like you’ve spent three hours getting ready. This version starts at the crown and travels straight down the back of your head, and the key to making it feel date-night ready is keeping the sections relatively tight for the first few inches, then gradually loosening them as you braid downward. This creates a polished top half and a softer, more romantic lower half that still reads as intentional.
Why It Works for Date Night
A tight-to-loose progression in a classic French braid hits that perfect balance between “I care about my appearance” and “I’m relaxed and genuine.” It frames your face subtly without requiring any products or complicated styling before you start braiding, and it photographs beautifully without looking overdone in person. The tight beginning prevents any flyaways at the crown while the gradual loosening gives you that romantic, petal-like quality that feels right for an intimate setting.
How to Execute It
Start by brushing your hair thoroughly and applying a light smoothing cream or texturizing spray—this gives you enough grip to braid without looking stiff. Take a section about two inches wide from your crown and divide it into three equal strands. Cross the right strand over the middle, then the left over the middle (that’s your basic French braid motion). As you continue down, keep pulling each new section of hair gently into the braid, but don’t pull so tight that your scalp feels uncomfortable or the braid looks strained.
Once you’ve braided about halfway down the back of your head, begin deliberately loosening the braid. Use your fingers to gently pull out small sections from each side of the braid, creating a softer, more voluminous appearance. Pull wider sections as you get lower, so the braid gradually transitions from neat to relaxed. Secure the end with a small elastic, and consider tucking the elastic slightly under the last few braids so it’s mostly hidden. Finish with a light hairspray to set any face-framing pieces.
Styling Touches That Elevate It
- Finish by curling the tail of the braid gently with a 1-inch barrel curling iron for romantic waves below the braid
- Leave 3-4 strategically placed face-framing pieces unbraided for a softer silhouette
- Use a rose gold bobby pin or delicate clip to secure any loose pieces, so it’s subtle but adds dimension when you move
- Apply a lightweight shine spray to the braid itself—catch the light, catch their attention
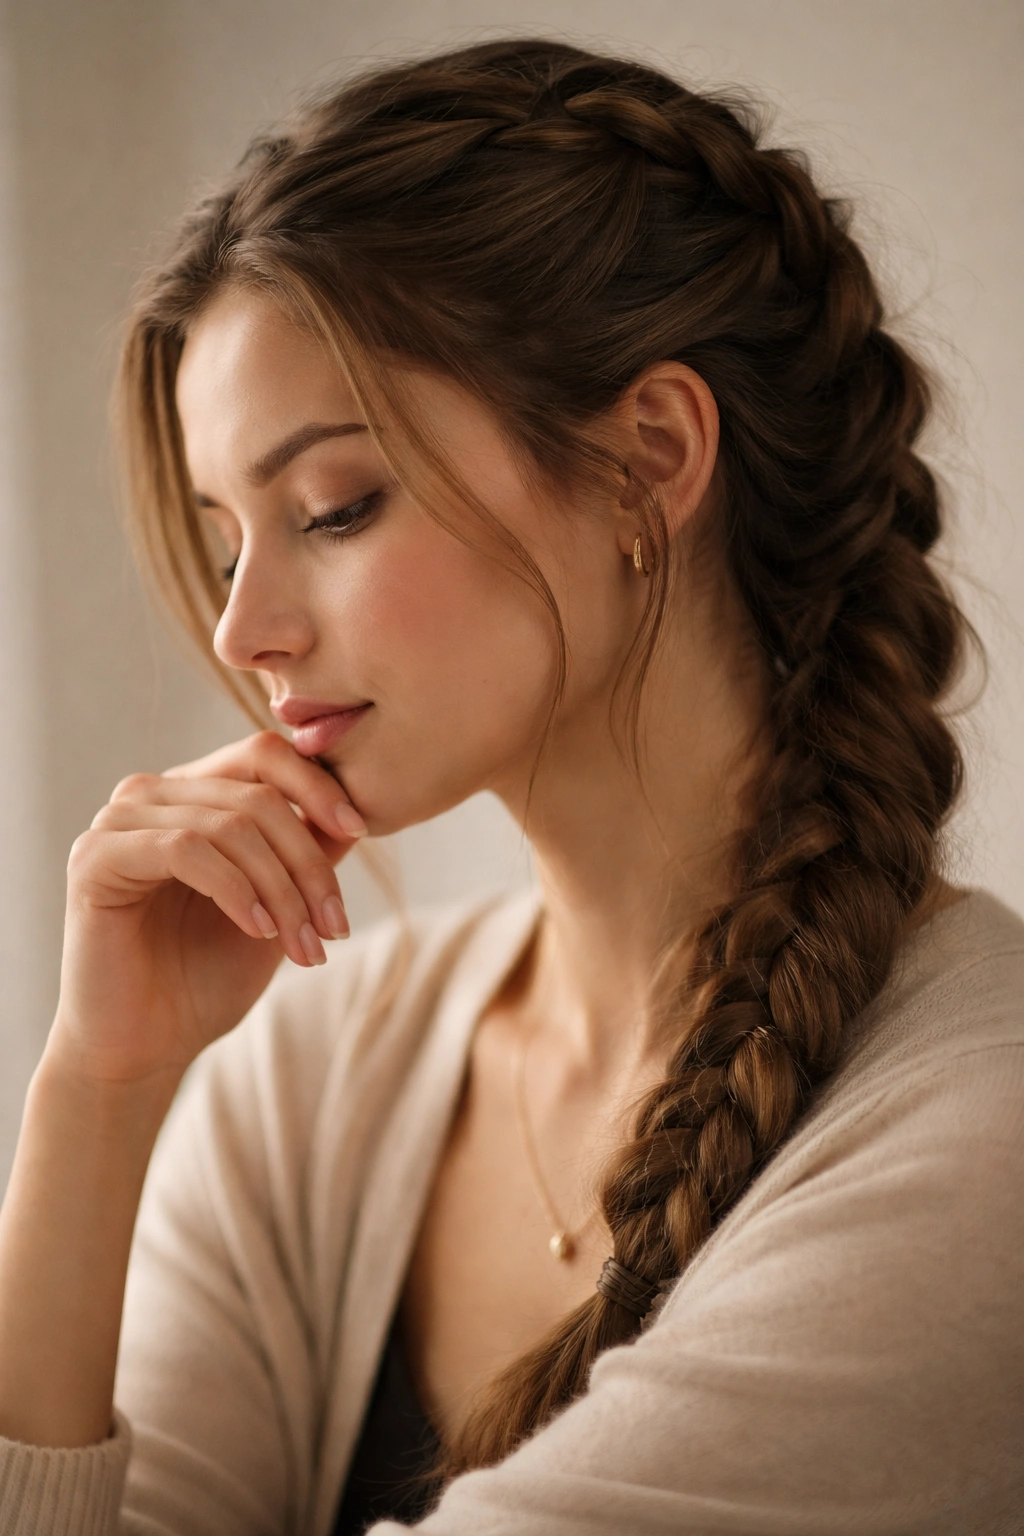
2. Loosened Textured French Braid for Effortless Elegance
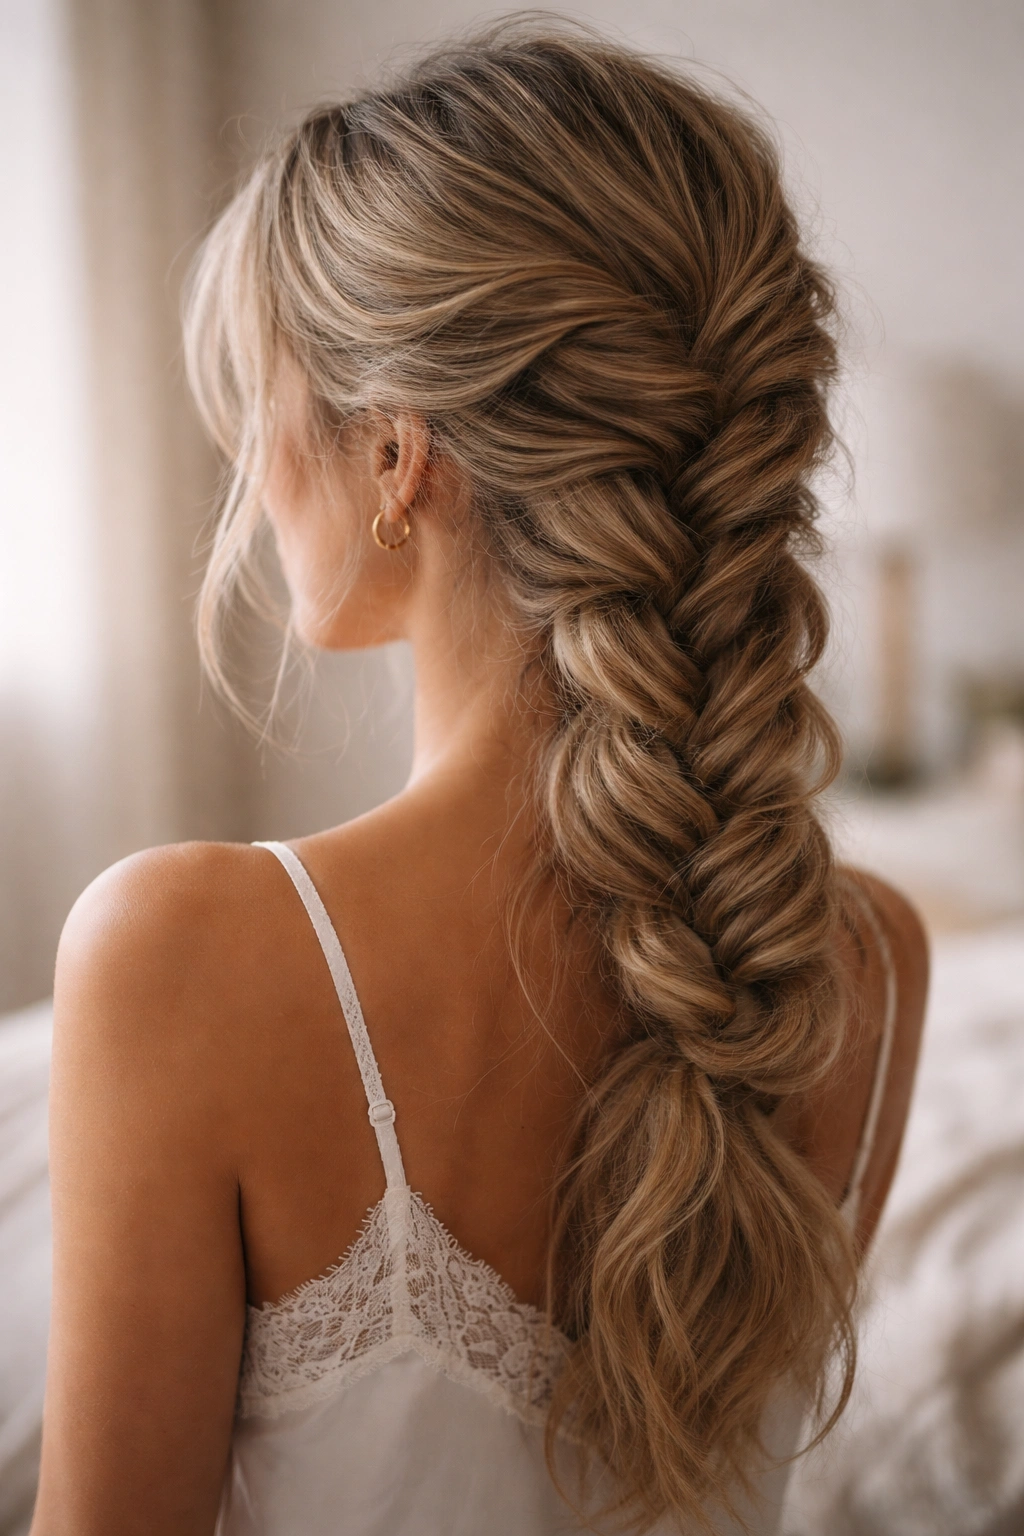
This is the French braid for people who want to look like they didn’t try, even though they absolutely did. The trick is starting with slightly textured hair (day-old waves or a light texturizing spray work beautifully), keeping the braid intentionally loose from the very beginning, and pulling out sections throughout to create a piece-y, undone aesthetic. It’s romantic without being formal, and it works whether your hair is fine and straight or thick and wavy.
Why It Feels Different from a Classic Braid
The looseness isn’t accidental—it’s the whole point. By starting loose rather than tight-then-loose, you’re creating a braid that feels organic and relaxed from your crown all the way down. This version works particularly well for date night because it signals confidence: you’re not worried about perfection; you’re comfortable in your own skin. It’s the hairstyle equivalent of wearing your favorite jeans instead of something you think you should wear.
How to Build the Texture First
Before you even start braiding, give your hair some grip and body. If you have naturally wavy or curly hair, consider using a lightweight texturizing spray or dry shampoo at the roots. If your hair is straight, blow-dry it with texture product applied beforehand, or even curl it loosely the night before and sleep on those waves. You want your hair to have some hold built in, not to start completely smooth.
Begin your French braid at the crown using the same three-strand technique, but this time, don’t pull it tight. Keep it relatively loose from your first crossover. As you continue braiding and adding new sections, maintain that loose tension throughout—you’re not trying to create a tight, structured braid. Once you’ve braided down to your mid-back or lower, start pulling. Working section by section, gently pull the strands outward from the braid to create a wider, lacier appearance. Pull bigger sections than you think you need to; the loosened version should look almost like a braid that’s about to fall apart, but held together by sheer will.
Accessories That Add Subtle Glamour
- A single pearl bobby pin or delicate gold clip positioned at the base of the braid adds an elegant detail without overdoing it
- Intertwine a thin silk ribbon that matches your dress or a metallic thread through the lower half of the braid
- Tuck a small sprig of baby’s breath or a single delicate flower into the loosened sections for a romantic, unexpected touch
- Finish with texturizing spray rather than hairspray to maintain the undone feel while keeping it in place
3. Double Dutch Braids for Modern Edge
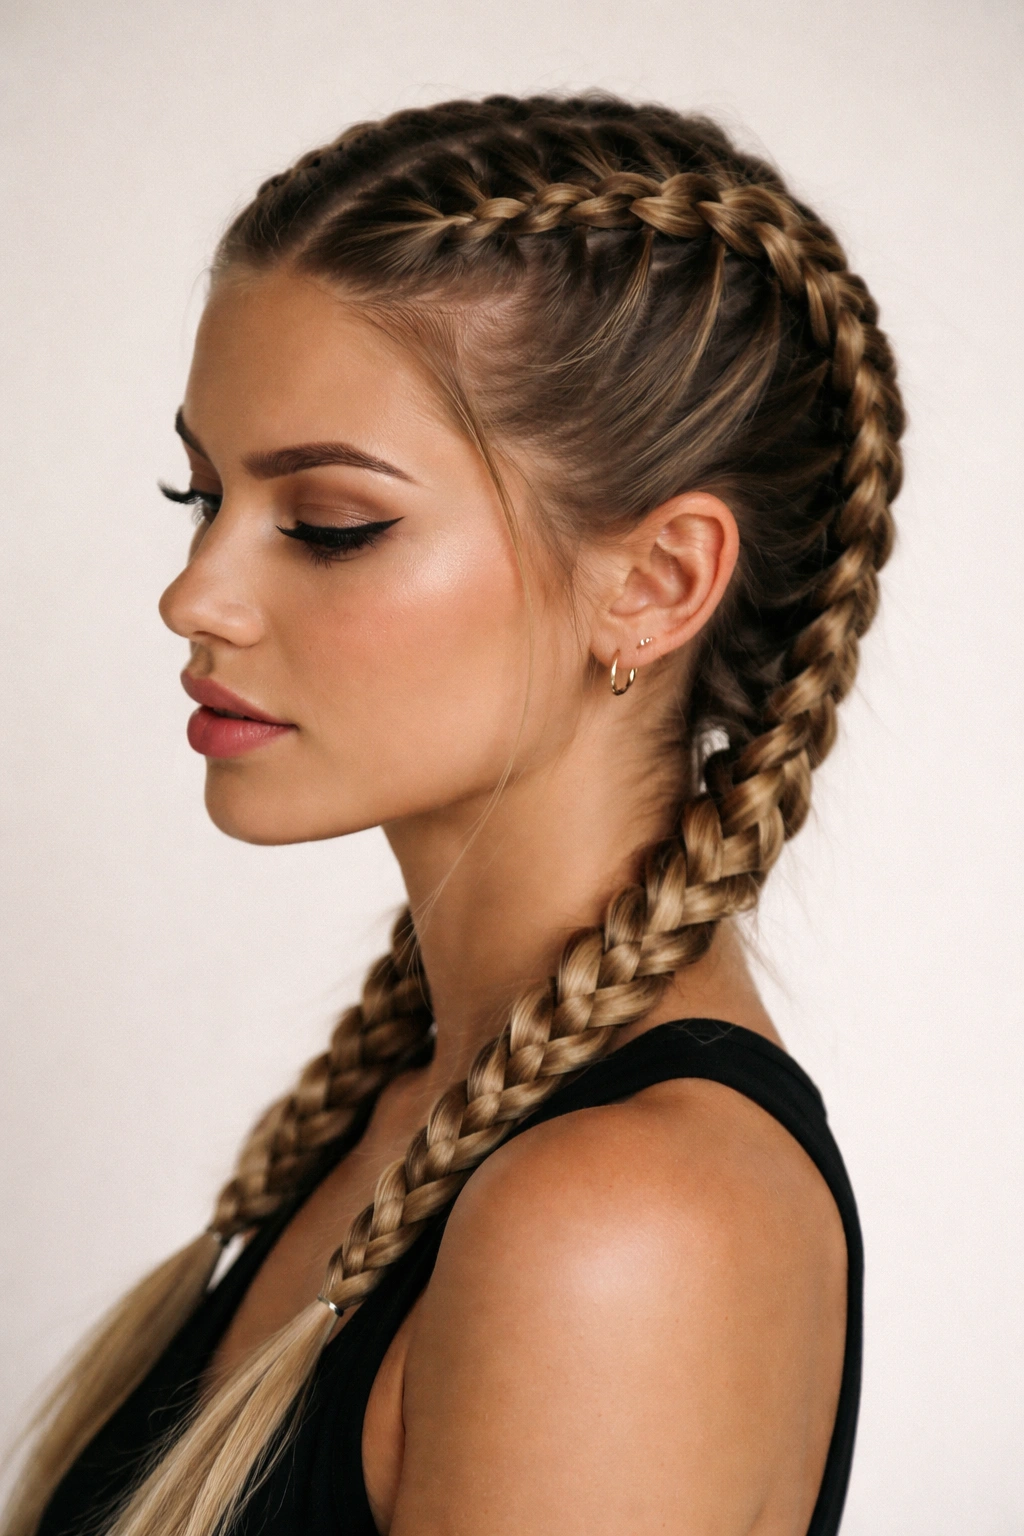
If a single braid feels too traditional for your vibe, double Dutch braids—also called double French braids—offer a younger, more playful energy that still reads as intentional and date-ready. These run parallel down the sides of your head and work especially well if you want something a bit more distinctive. They’re flattering for round or square face shapes and they actually feel more secure if you’re nervous about your braid coming loose during the date.
Why Double Works for Date Night
Two braids create visual interest and movement that a single braid doesn’t quite achieve. They frame your face naturally, they’re harder to mess up (if one side gets slightly imperfect, the symmetry of the other side often compensates), and they read as intentional and polished without being overly formal. Double braids also have a hint of playfulness to them—they suggest you’re confident and not afraid of a look that’s a little bolder than the standard single braid.
The Technique: Part and Braid Twice
Start by creating a clean center part from your forehead all the way down to the nape of your neck. You can use a rattail comb to make a precise line. Section off one side by clipping or securing the other half out of the way. On the side you’re working on, take a section from your temple and begin your French braid, adding hair as you braid downward. Keep both braids at the same tension so they look intentional rather than accidental.
Once you’ve braided one side down to below your ear, secure it with a small elastic. Move to the other side and repeat, creating the mirror image. The key is to braid both sides at the same tightness level and the same angle so they look like a cohesive style rather than two random braids. If you want to create visual balance, you can braid both sides tight for a polished look, or loosely braid both so they’re relaxed and romantic.
Variations on the Double Braid
- Converging braids: Instead of braiding straight down, angle each braid slightly toward the center back of your head so they meet at the nape, creating a crown-like effect. Secure them together with a single elastic or bobby pins for a stunning, intricate look.
- Braids with a twist: After braiding each side, twist the two braids around each other at the back of your head and secure with bobby pins for an unexpected detail.
- Half-up double braids: Braid only the upper half of each side from your temple down to ear level, then gather all the hair together at the back of your head for a half-up style that combines structure with softness.
- Loosened and textured: Braid both sides loosely from the start, then pull and loosen each section dramatically for a deliberately piece-y, undone look.
4. Side-Swept French Braid with Waves
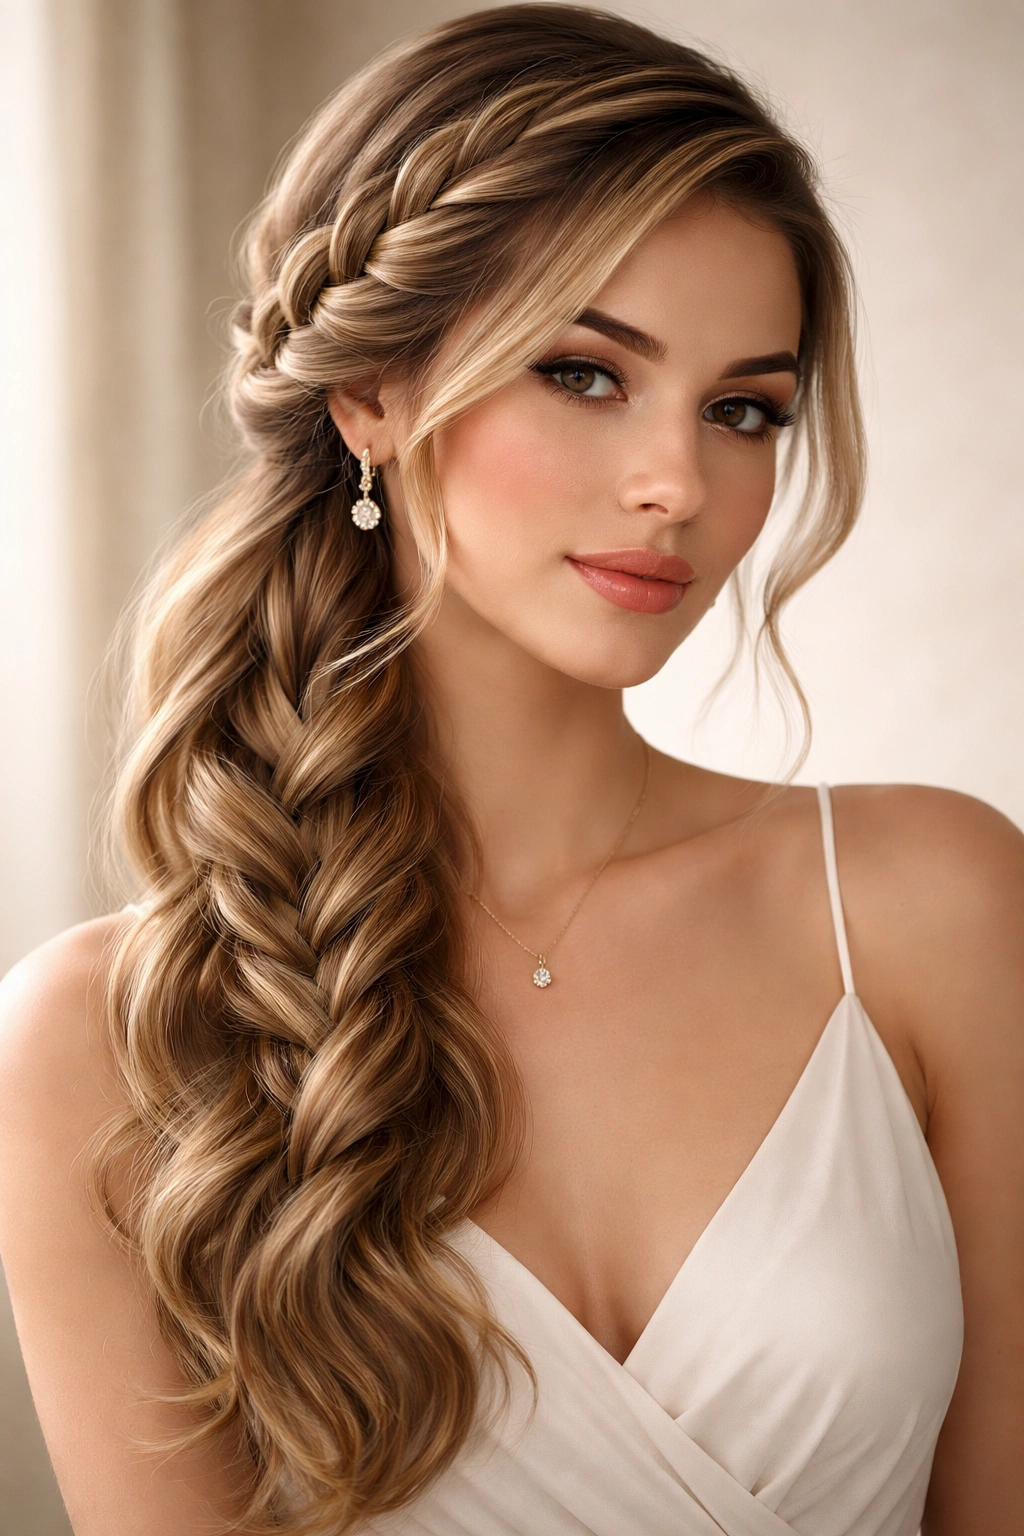
The side-swept French braid is sophisticated and romantic—it drapes across your shoulder or partially down your back, and it works beautifully with makeup and jewelry because it doesn’t cover your face or neck. This version is particularly effective if you want to show off a dress that’s special in front or if you want a hairstyle that feels asymmetrical and modern while still being classic.
Why This Style Photographs Well
Side-swept braids are inherently flattering in photos because they create movement and flow, they show more of your face (perfect for that first-date photo you might want to remember), and they look effortlessly elegant rather than overly styled. The asymmetry is inherently interesting to the eye, and the braid creates a beautiful line that complements most face shapes.
How to Create the Side Sweep
Begin by creating a deep side part—aim for a part that starts about an inch to the side of your center, beginning near your temple area. Brush all of your hair to one side. Starting from the deeper part area (above and behind your ear), begin a French braid using the three-strand technique, adding hair as you braid downward and across toward the opposite shoulder.
Here’s the key: as you braid, guide the braid across the back of your head rather than straight down. You’re creating a diagonal line, not a vertical one. Continue braiding until you reach approximately the opposite shoulder or mid-back, depending on your hair length and how dramatic you want the sweep to be. Secure with a small elastic.
To enhance the side-swept effect, create waves in the remaining hair (the side that’s not braided). Use a 1.5-inch curling iron to curl away from your face on the smaller side, and toward your face on the larger side, creating movement that emphasizes the asymmetry. The waves will make the entire style feel more romantic and less structured.
Styling Details That Add Impact
- Use a light reflecting spray or shine product specifically on the braid to make it catch light and stand out
- Secure the end of the braid with a delicate decorative hair clip instead of a basic elastic for added polish
- Leave a few face-framing pieces unbraided on the deeper-part side to soften the look
- Curl the tail of the braid with an iron for soft waves that extend below where you’ve secured it
- Tuck a thin piece of silk or a delicate chain through the lower section of the braid for an unexpected luxury detail
5. Fishtail Hybrid French Braid
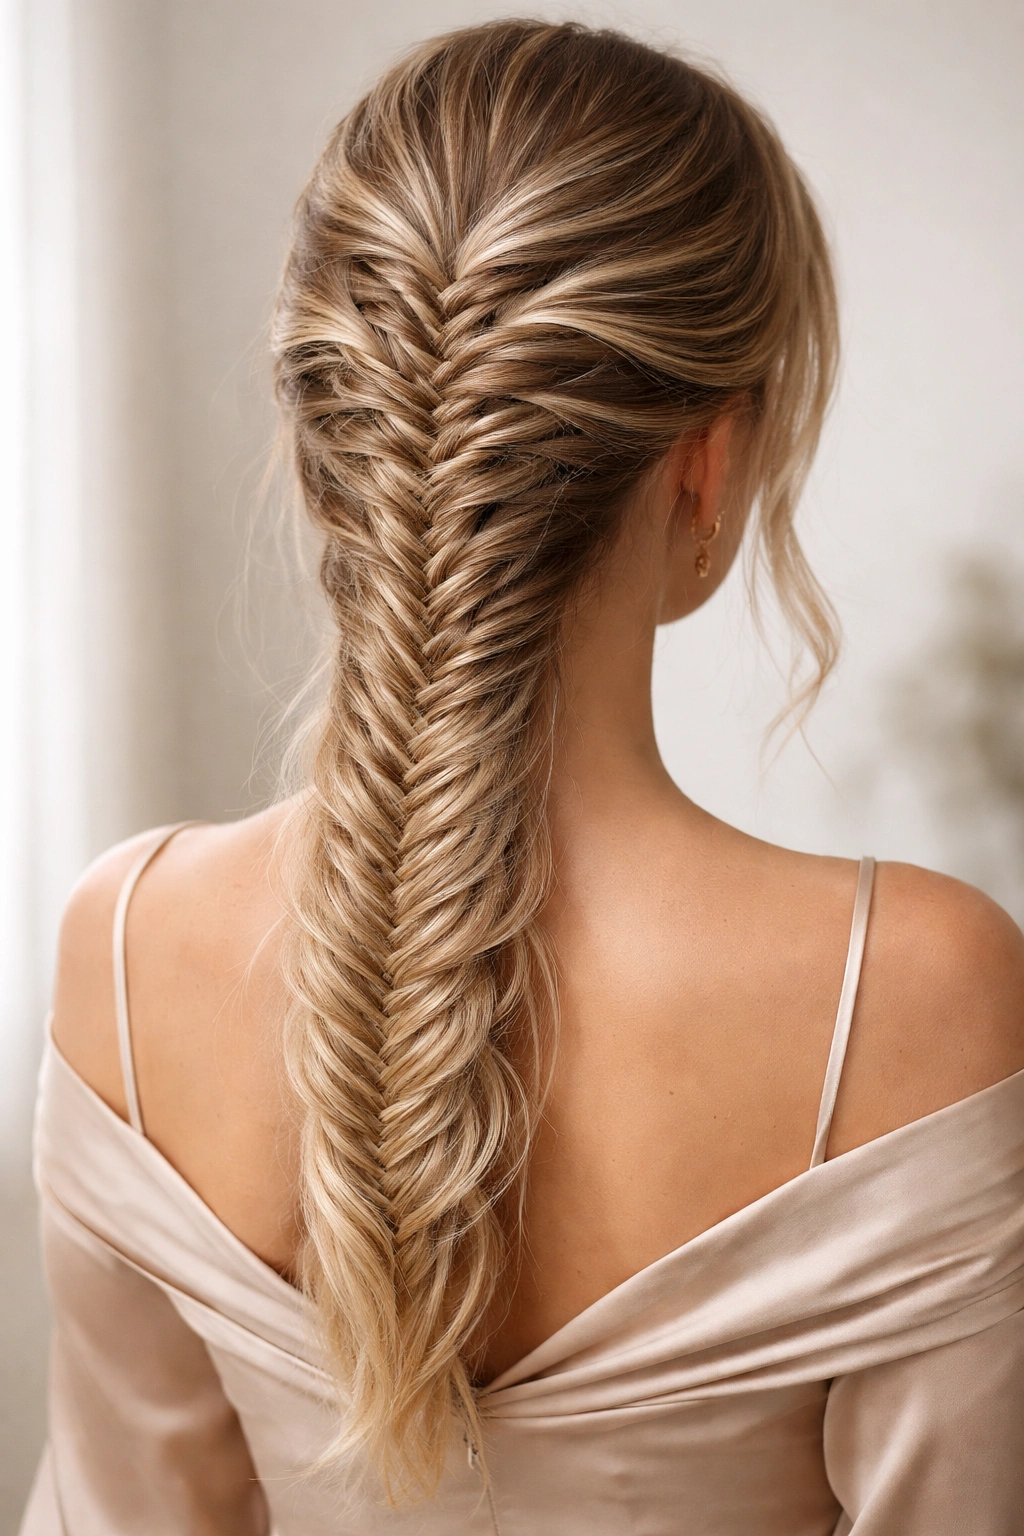
This is the braid that looks more complicated than it actually is—and that’s exactly what you want on a date night. A fishtail hybrid combines the structure of a French braid with the delicate, intricate appearance of a fishtail braid, creating something that reads as genuinely impressive while being totally manageable. It’s perfect if you want to seem effortlessly talented without actually spending hours on your hair.
Why the Fishtail Element Matters
A straight French braid can sometimes look a bit chunky if your hair is thick, but the fishtail technique creates thinner sections that interweave in a way that’s visually more refined and intricate. It has an almost lacey quality, which feels especially romantic and date-appropriate. The hybrid version gives you the security of a French braid (you’re adding new sections throughout, so it gets stronger as you go) with the visual elegance of a fishtail.
The Hybrid Technique Explained
Start with a classic French braid from your crown, but instead of using three thick sections, divide each strand into two thinner sections as you braid. Essentially, you’re creating four to six working sections (depending on how you divide them) instead of three. As you continue braiding and adding new hair, these thinner sections weave together in a fishtail-like pattern while you’re simultaneously doing the French braid movement of incorporating new hair.
This sounds more complicated than it is once your hands get the rhythm. Start your French braid normally with three sections at the crown. Take the right strand and split it in half, then cross the right half of that strand over the middle. Add new hair to that section as you normally would. Repeat on the left side. The added hair keeps it secure like a French braid, but the thinner individual sections create that delicate fishtail appearance.
Making It Look Polished
- Start with textured hair or apply a light texturizing spray so the braid has grip and doesn’t slip
- Keep the tension consistent throughout—not too tight, not too loose, just a comfortable middle ground
- Loosely pull the braid once you’ve reached your mid-back to create that romantic, soft appearance
- Finish with a light styling spray that holds without making the braid look stiff or shiny in an unflattering way
- Leave a few lighter face-framing pieces out of the braid entirely for softness around the face
6. Embellished French Braid with Accessories

This is where your French braid becomes jewelry for your hair. By adding subtle accessories—ribbon, chain, hairpins, or even tiny flowers—you can elevate a basic braid into something that feels special and occasion-appropriate without being costume-y. The key is restraint: one or two well-chosen accessories matter more than loading up your braid with everything at once.
Choosing Your Accessory Wisely
The best accessories for a date-night French braid complement without overwhelming. Consider the color palette of your outfit, your jewelry, and your makeup. If you’re wearing warm metallics in your jewelry, incorporate a gold ribbon or delicate gold chain through your braid. If your look is cooler and more silver-toned, choose a silver hairpin or white silk ribbon. If you’re wearing a dress with a particular texture or embellishment, echo that subtly in your braid accessory.
Real silk ribbon works beautifully because it doesn’t have that cheap plastic sheen that synthetic ribbons sometimes have. Delicate gold or silver chains (the kind meant for jewelry, not heavy hardware store chains) can be woven through the lower half of a looser braid for an unexpected luxury touch. Small pearl bobby pins are timeless and read as elegant rather than playful. A single piece of baby’s breath, a small sprig of greenery, or even one or two tiny delicate flowers tucked into a loosened braid can feel romantic and special without being over the top.
How to Incorporate Ribbon or Chain
If you’re using ribbon or a chain, decide whether you want it woven throughout the entire braid or just through certain sections. For a more subtle effect, focus it on the lower half of the braid. Begin braiding normally, and once you’re about halfway down, start incorporating your ribbon or chain. Simply include it as if it were a fourth strand—cross it over with your braiding motions, tuck it back under, and continue. The ribbon or chain will naturally weave through the braid as you work.
Secure both the end of your braid and the end of your ribbon or chain together with a single small elastic. If you want the ribbon or chain to extend slightly past the elastic for a finished look, leave a few inches of slack before securing so it creates a small dangling detail below your braid tie.
Accessory Ideas for Different Date Vibes
- Romantic dinner: Delicate pearl or crystal hairpins positioned around the base of the braid, or a fine silk ribbon in champagne or blush
- Casual outdoor date: A simple leather cord or natural hemp ribbon woven through, or even a thin wildflower stem tucked into the loosened braid
- Upscale venue: A delicate gold chain, or a ribbon in a jewel tone that coordinates with your outfit
- Modern casual date: A thin metallic ribbon or a single sleek geometric hairpin for contemporary flair
7. Twisted French Crown Braid
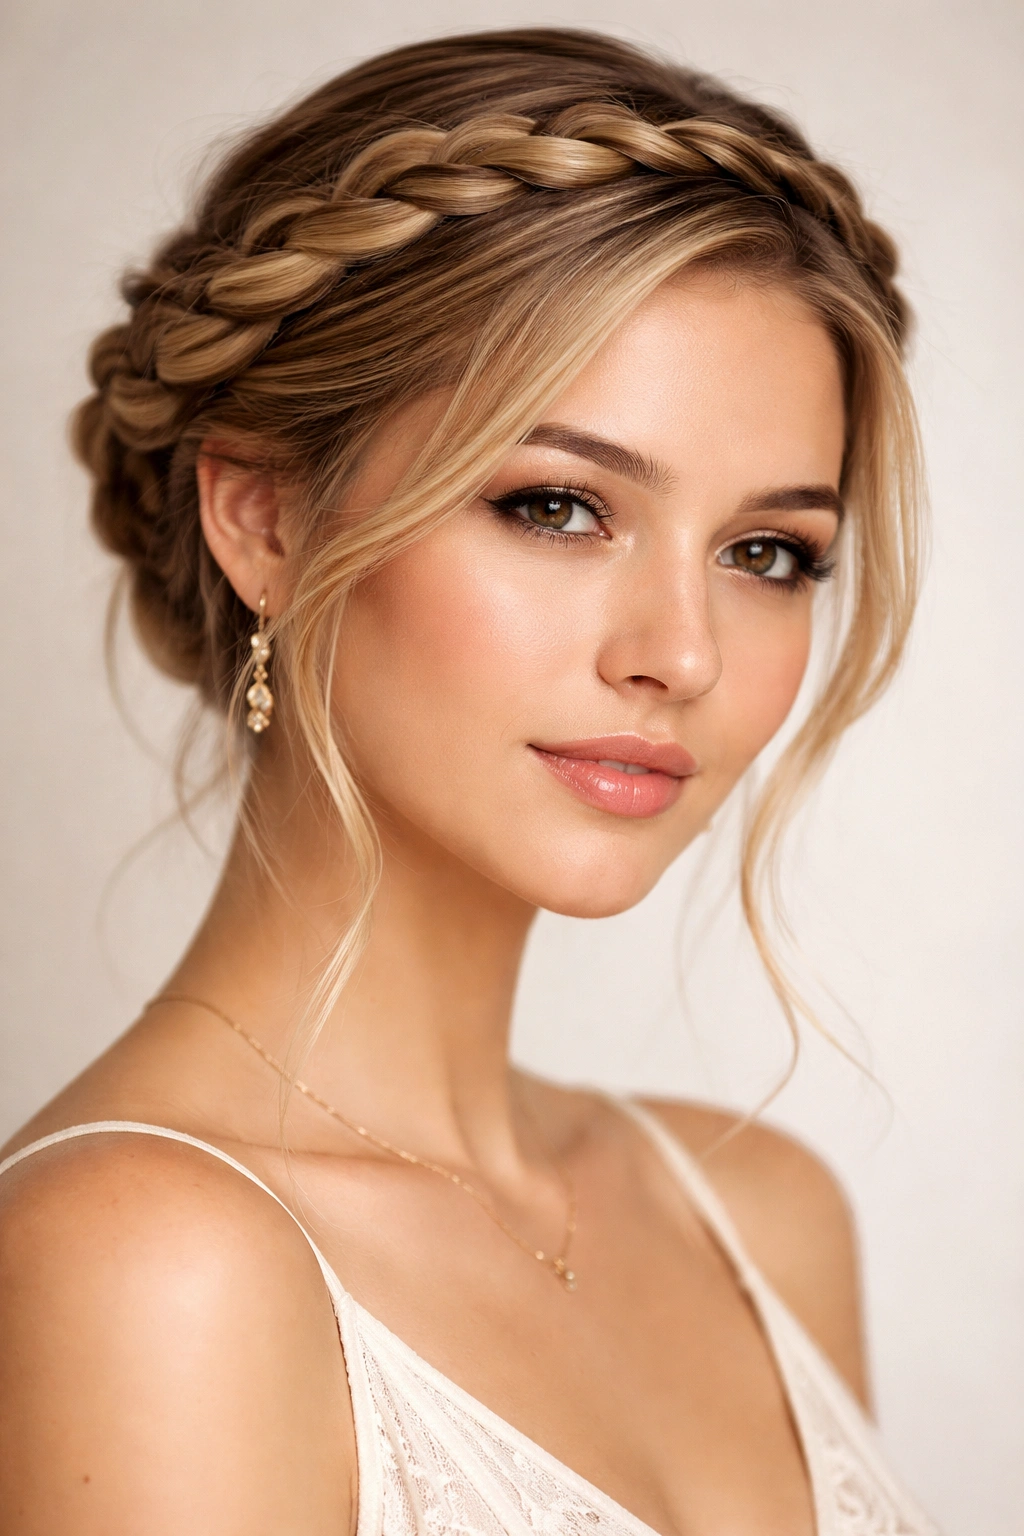
This is the style that looks like you’ve created an intricate crown around your head—and technically, you kind of have. A twisted French crown braid combines a braiding technique with a twisting motion, creating a style that’s distinctly more interesting than a standard braid while still being date-night appropriate. It works especially well if you want a hairstyle that frames your face delicately or if you want something that photographs beautifully from all angles.
Why the Crown Effect Is Date-Night Gold
A braid that goes around your head rather than down it creates an entirely different energy. It makes you feel special and treated (even though you did it yourself), it shows off your face fully without hair falling into your eyes, and it has a slightly ethereal, romantic quality that reads beautifully. The crown effect also works across many different outfit styles—it’s dressy enough for a nice dinner but relaxed enough for a casual date at a local favorite.
How to Create a Twisted Crown
Start by creating a deep side part again, but this time you’re going to braid from one temple area all the way around to the opposite temple, creating a semicircle or crown effect around the back of your head. Begin at the deeper-part side, near your temple. Divide your hair into three sections and start a French braid, adding hair as you go, but guide the braid diagonally upward and around your head toward the back rather than down.
Here’s where the twist comes in: instead of a standard three-strand braid throughout, occasionally twist two of your sections around each other for one rotation before returning to the braiding pattern. This creates a mixed texture—some sections are braided, some are twisted—that’s more visually interesting than a straight braid. It also gives you flexibility if you forget where you are in the three-strand pattern; the twists add visual interest that distracts from any minor imperfections.
Continue this braid-and-twist combination around the back of your head toward your opposite temple. Once you reach your opposite temple, secure the braid with bobby pins that match your hair color, tucking them underneath the braid so they’re mostly hidden. Any remaining hair falls loose from that point, which you can leave straight for a modern look or curl for more romance.
Variations and Adjustments
- Full crown: Instead of starting at one temple and ending at the other, create a full circle by continuing your braid all the way around back to where you started, then securing it with pins
- Double crown: Create two twisted braids that run parallel to each other, creating a double-crown effect that’s particularly striking for an updo event or upscale date
- Embellished crown: Weave delicate ribbon or chain through the twisted sections for added luxury, or tuck small flowers or greenery into the looser sections as you create your crown
- Loose and romantic: Intentionally keep your twisted crown braid loose and pull the sections out dramatically for an undone, ethereal effect that still frames your face beautifully
Final Thoughts
The French braid is genuinely one of those versatile, timeless styles that works across so many date scenarios because it occupies this perfect middle ground: you look intentional and put-together, but you’re not so overdressed or overstyle that it feels like you’re trying too hard. The variety of these seven styles means you can match your braid choice to your actual vibe on any given date—whether that’s romantic and classic, playfully modern, effortlessly undone, or subtly embellished.
What often gets overlooked is that a good braid is also practical. You’re not adjusting your hair throughout the night, you’re not worried about pieces falling in your face while you’re trying to have a genuine conversation, and you’re not dealing with the static or flyaways that come with an unstyled look. That freedom—not having to think about your hair—is underrated on a date. You can focus on being present rather than being preoccupied.
The most important thing is choosing the version that actually feels like you. A braid that matches your personal style will always feel more natural and confident than one you think you should wear. Experiment with these styles beforehand if you can, figure out which tension and looseness level suits your hair type, and nail down the technique so you’re not stressed while getting ready. A date-night French braid done by someone who’s practiced it and feels comfortable in it will always look better than a complicated style you’re struggling through for the first time.