A sweaty gym session is no time to worry about your hair falling in your face. Whether you’re running on the treadmill, lifting weights, or powering through a HIIT class, you need a hairstyle that stays put through intense movement and won’t distract you when you’re in the zone. French braids are the unsung heroes of workout hairstyles—they’re secure enough to handle serious sweat, they keep hair completely off your face and neck, and they look intentional rather than like you just didn’t have time to do your hair.
The beauty of French braids for the gym is their versatility. You can adapt them to your hair texture, the intensity of your workout, how much time you have to get ready, and your personal style preferences. A sleek, tight French braid keeps everything locked down during cardio. A messier, looser version works great if you’re strength training and want something you can pull down afterward without it looking formal. Double braids distribute the weight more evenly and are perfect for longer, thicker hair. There’s a French braid variation that works for almost every body type, hair type, and workout scenario.
Beyond just function, French braids give you that “I’ve got my life together” vibe even when you’re about to spend 45 minutes drenched in sweat. They read as intentional and put-together, which matters if you’re hitting the gym before work or grabbing a quick lunch-hour workout. And unlike a high ponytail, a French braid won’t create a breakage line or pull your hairline back so aggressively that you’re left with a tender scalp by evening.
What Makes the Perfect Gym Hairstyle
A truly functional gym hairstyle needs to balance several competing demands. It has to be tight enough that it won’t slip, slide, or come loose during high-impact movement, but not so tight that it gives you a headache halfway through your workout. It needs to keep hair completely off your face, neck, and shoulders so you can move freely without strands sticking to your skin or getting in your eyes. It should survive sweat without looking completely destroyed, and ideally, it should be something you can redo or touch up quickly if you’re heading somewhere after the gym.
French braids excel at all of this because of their structure. The interlocking three-strand weave naturally grips your hair tightly without requiring elastic bands at the roots. The braid pulls hair away from your face and scalp, which reduces the uncomfortable feeling of wet hair clinging to your skin. And unlike ponytails or buns, a French braid holds its shape even when soaked with sweat—you won’t end up with a wet, droopy tail or a bun that’s come half-undone.
The key is knowing which French braid variation will work best for your specific situation. A tight, sleek braid is non-negotiable for cardio. A slightly looser, textured version might be more comfortable if you’re doing strength training where you’re not moving as explosively. The thickness of your hair, the length, and whether you have any layers all affect which style will work best and how quickly you can braid it before heading to the gym.
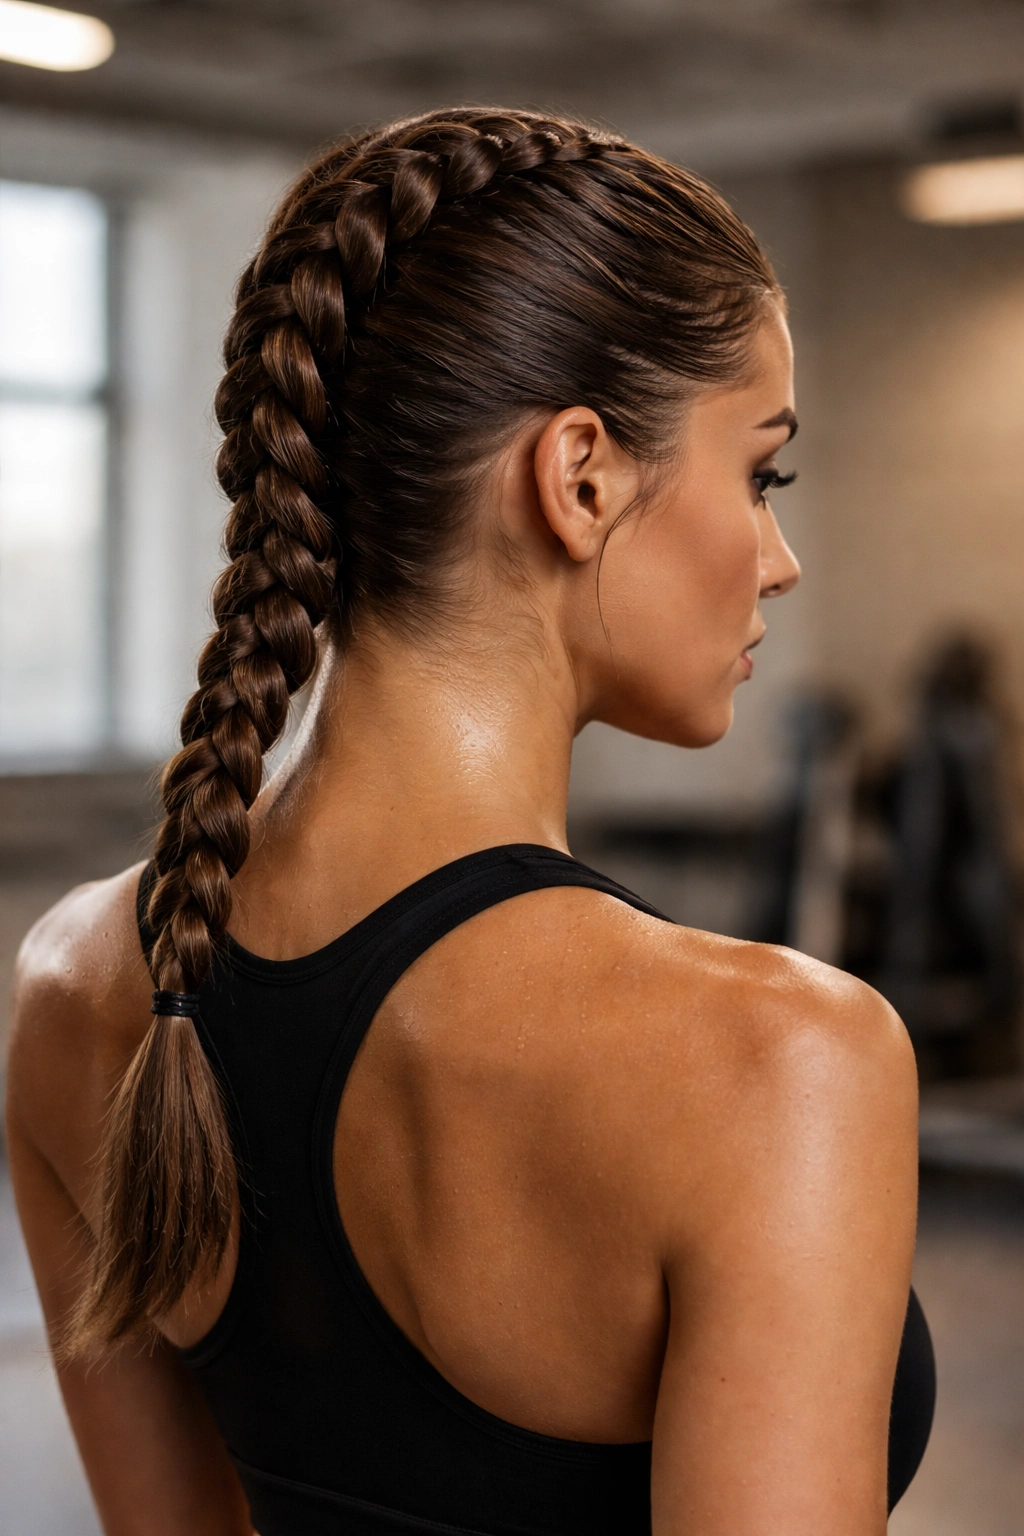
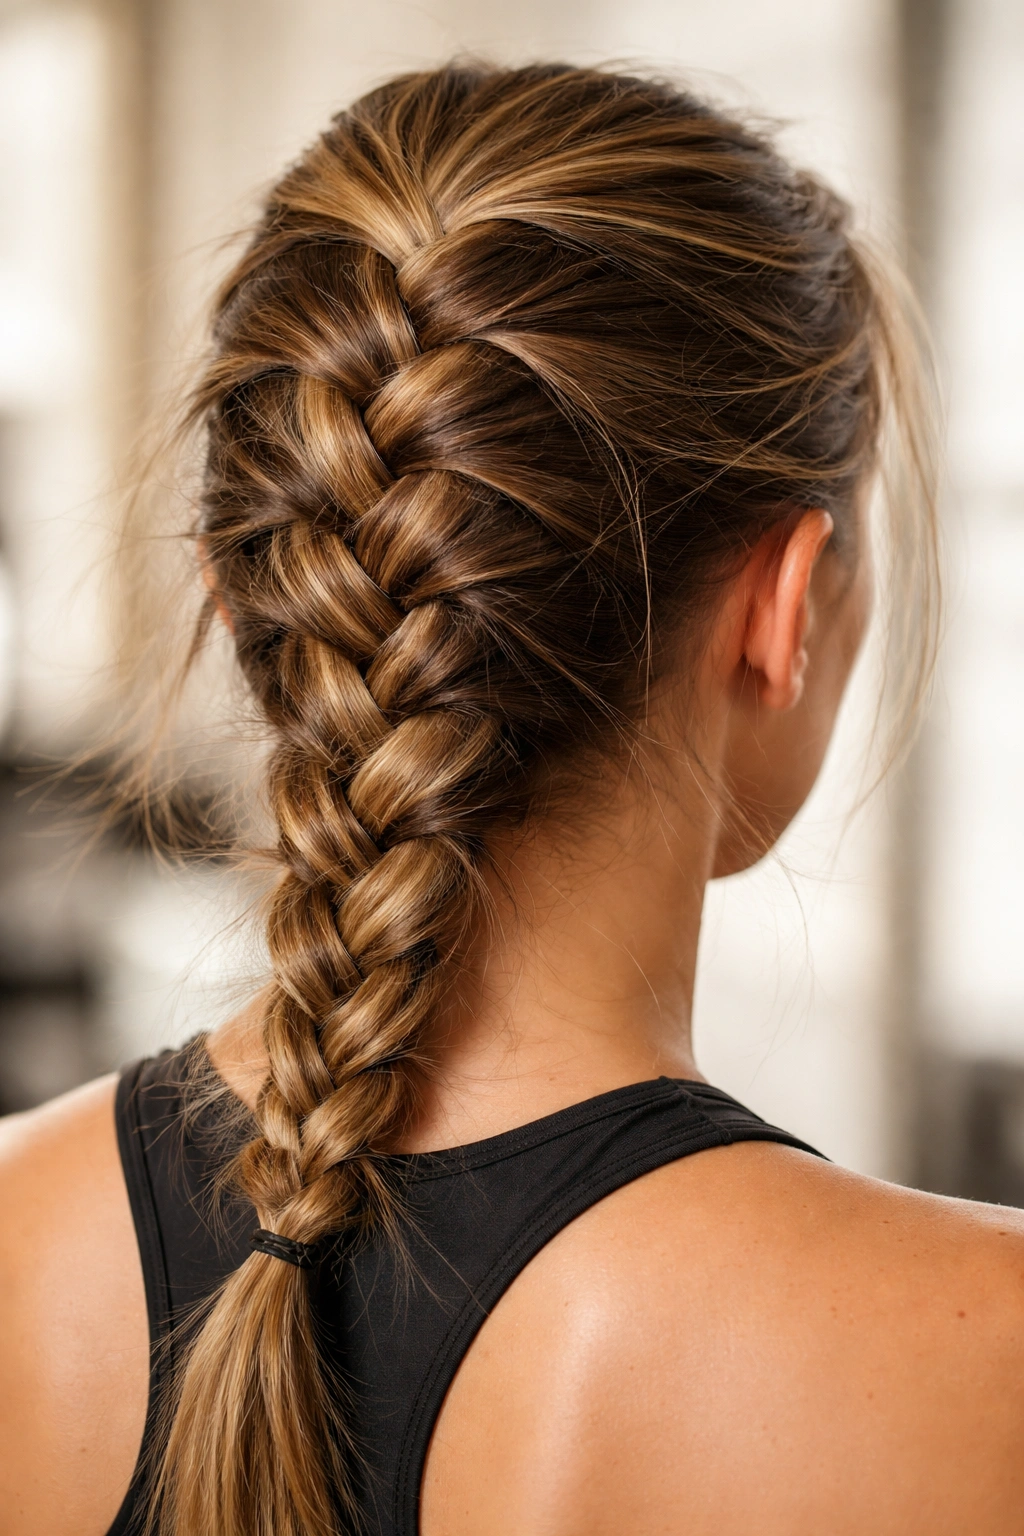
1. Classic Tight French Braid
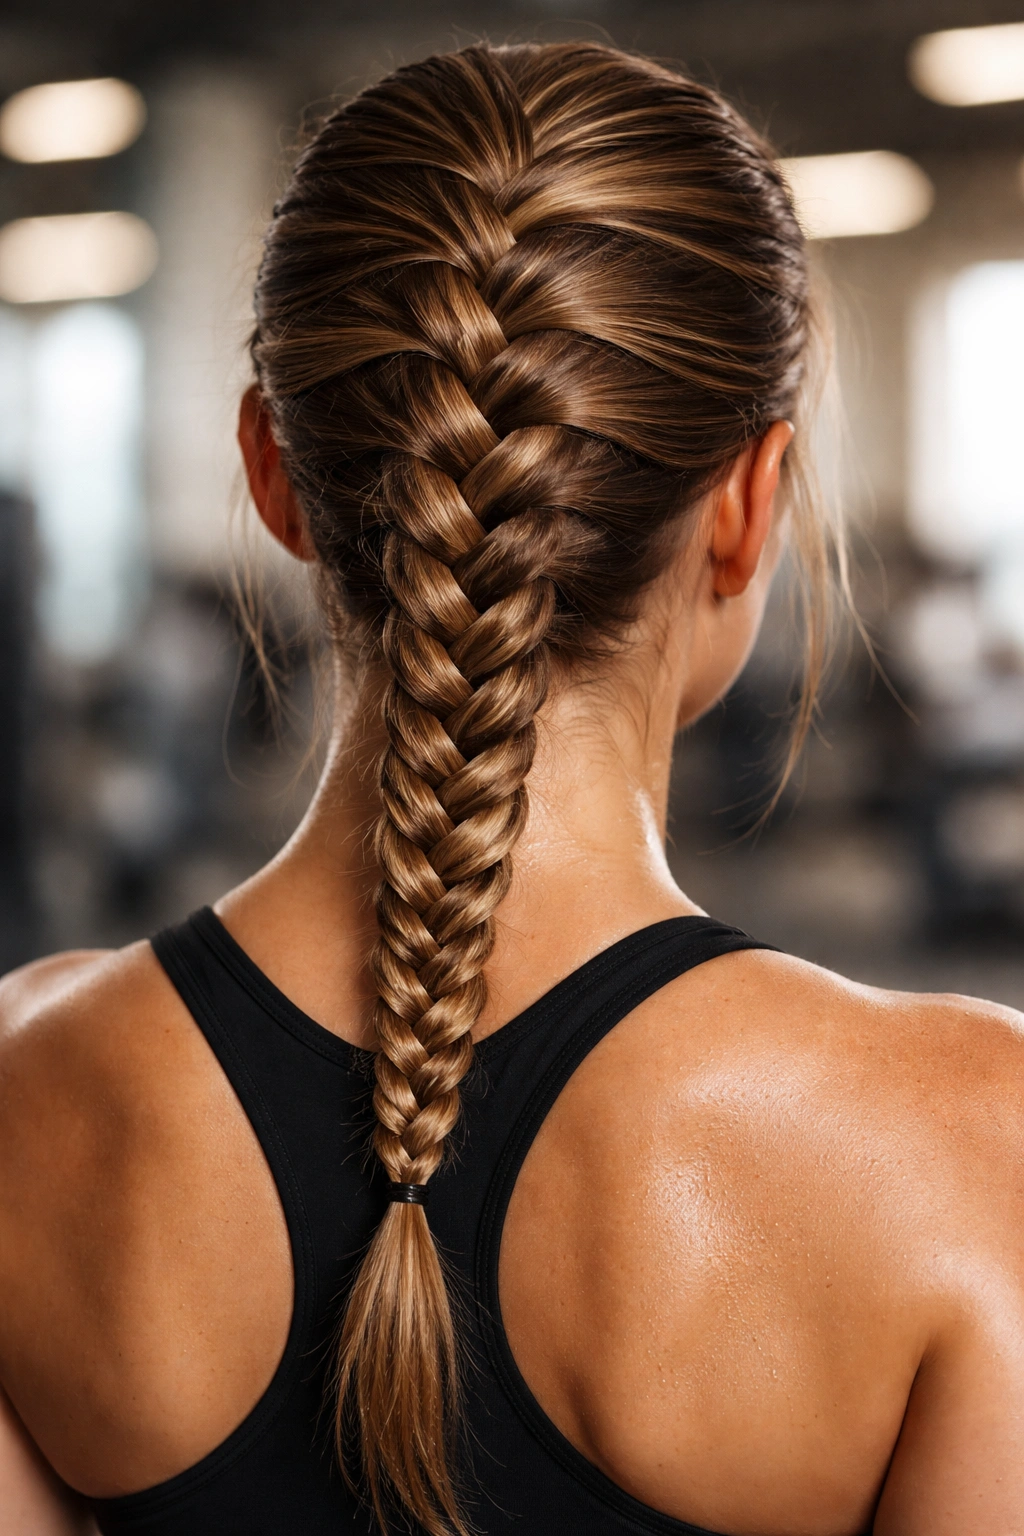
This is the workhorse of gym hairstyles—simple, incredibly secure, and unfailingly functional. A tight French braid runs down the back of your head from the crown to the nape of your neck, keeping every single strand contained and off your face. It’s perfect for any workout where you’ll be sweating heavily: cardio, running, cycling, dance classes, or circuits. The tightness is what makes it so effective. Because each section of hair is firmly woven into the braid, there’s no give, no loosening, no flyaways escaping as you move.
Why It Works for High-Impact Workouts
A tight French braid stays perfectly in place because the tension of the weave itself holds everything secure. You don’t need to rely on elastic bands at the roots or multiple bobby pins to keep it together. The three-strand structure grips your hair from scalp to tip, so even when you’re sweating heavily or moving your head rapidly, the braid stays exactly where you put it. This style is particularly brilliant for running or jump rope, where the repetitive impact could shake loose a looser style.
How to Create a Tight, Gym-Ready French Braid
- Start with dry or slightly damp hair and apply a light texturizing spray or dry shampoo to create grip—this prevents slipping
- Begin at the crown of your head (directly above your forehead) and take a small, neat section about the width of your thumb
- Divide this section into three even strands and start braiding: cross the right strand over the middle, then the left strand over the middle
- As you braid, add small sections of hair from each side, pulling them firmly into the strands—this is where you control the tightness
- Keep the tension consistent from root to tip; if you grip too loosely at the start and tightly at the end, the braid will look uneven
- Braid all the way down to the nape of your neck, then secure with a small elastic band
- Smooth down any flyaways with a light hairspray or edge control product
Pro tip: Use a small, discreet elastic (clear, black, or your hair color) rather than a chunky band—it’s less visible and won’t catch on your headphones or hoodie.
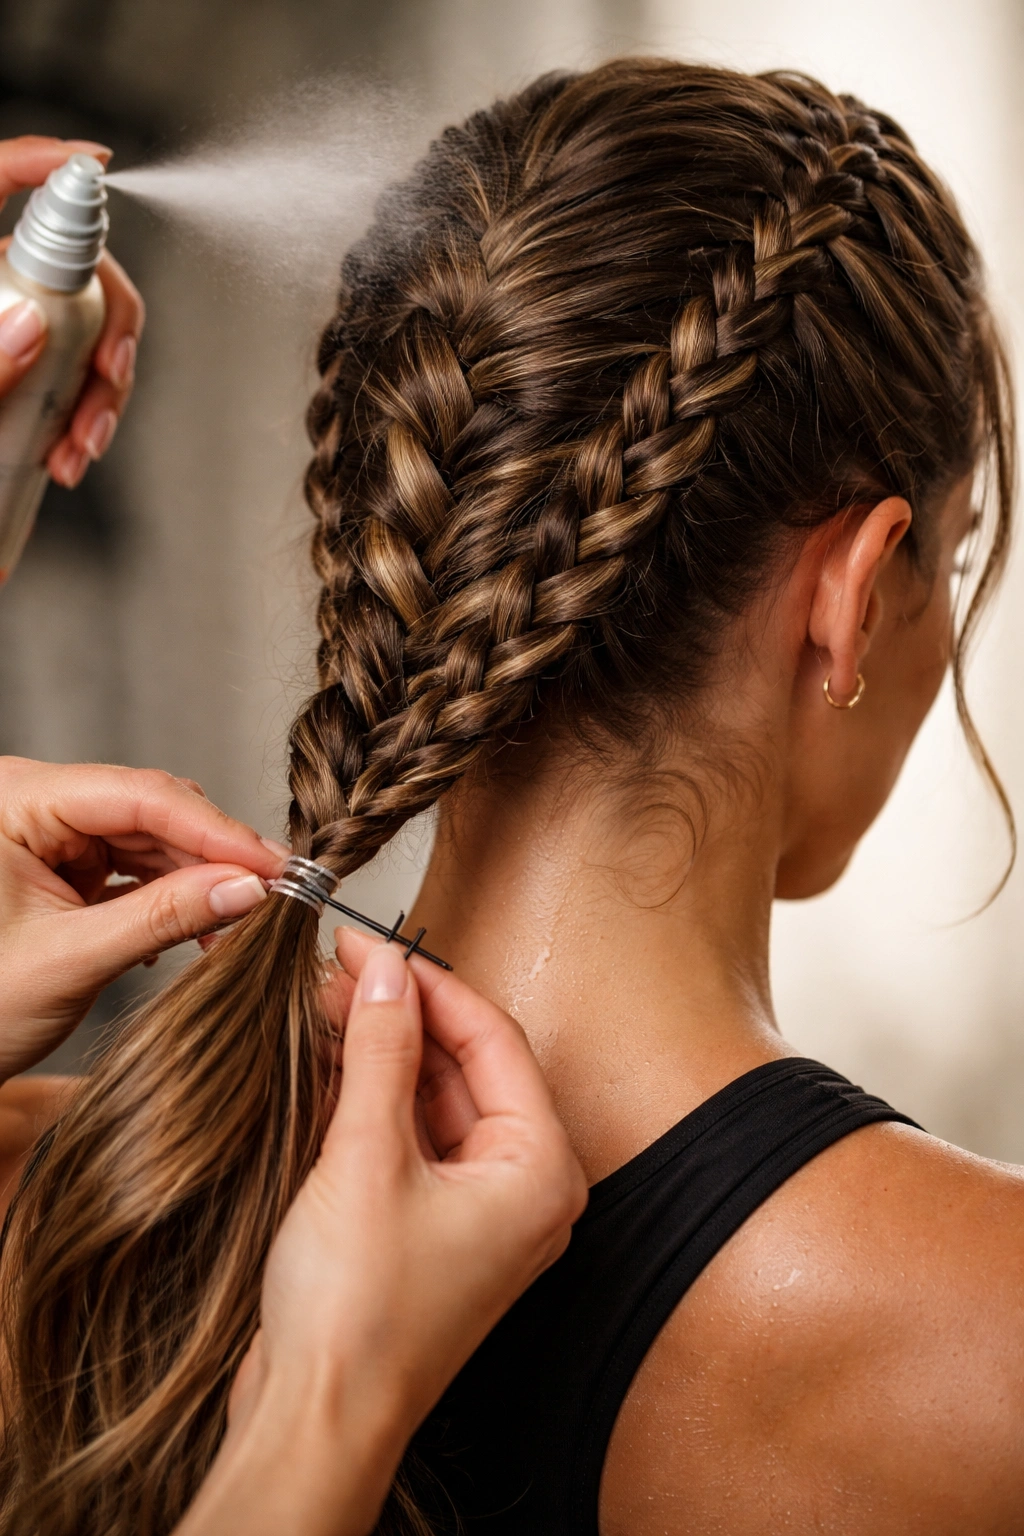
2. Double French Braids
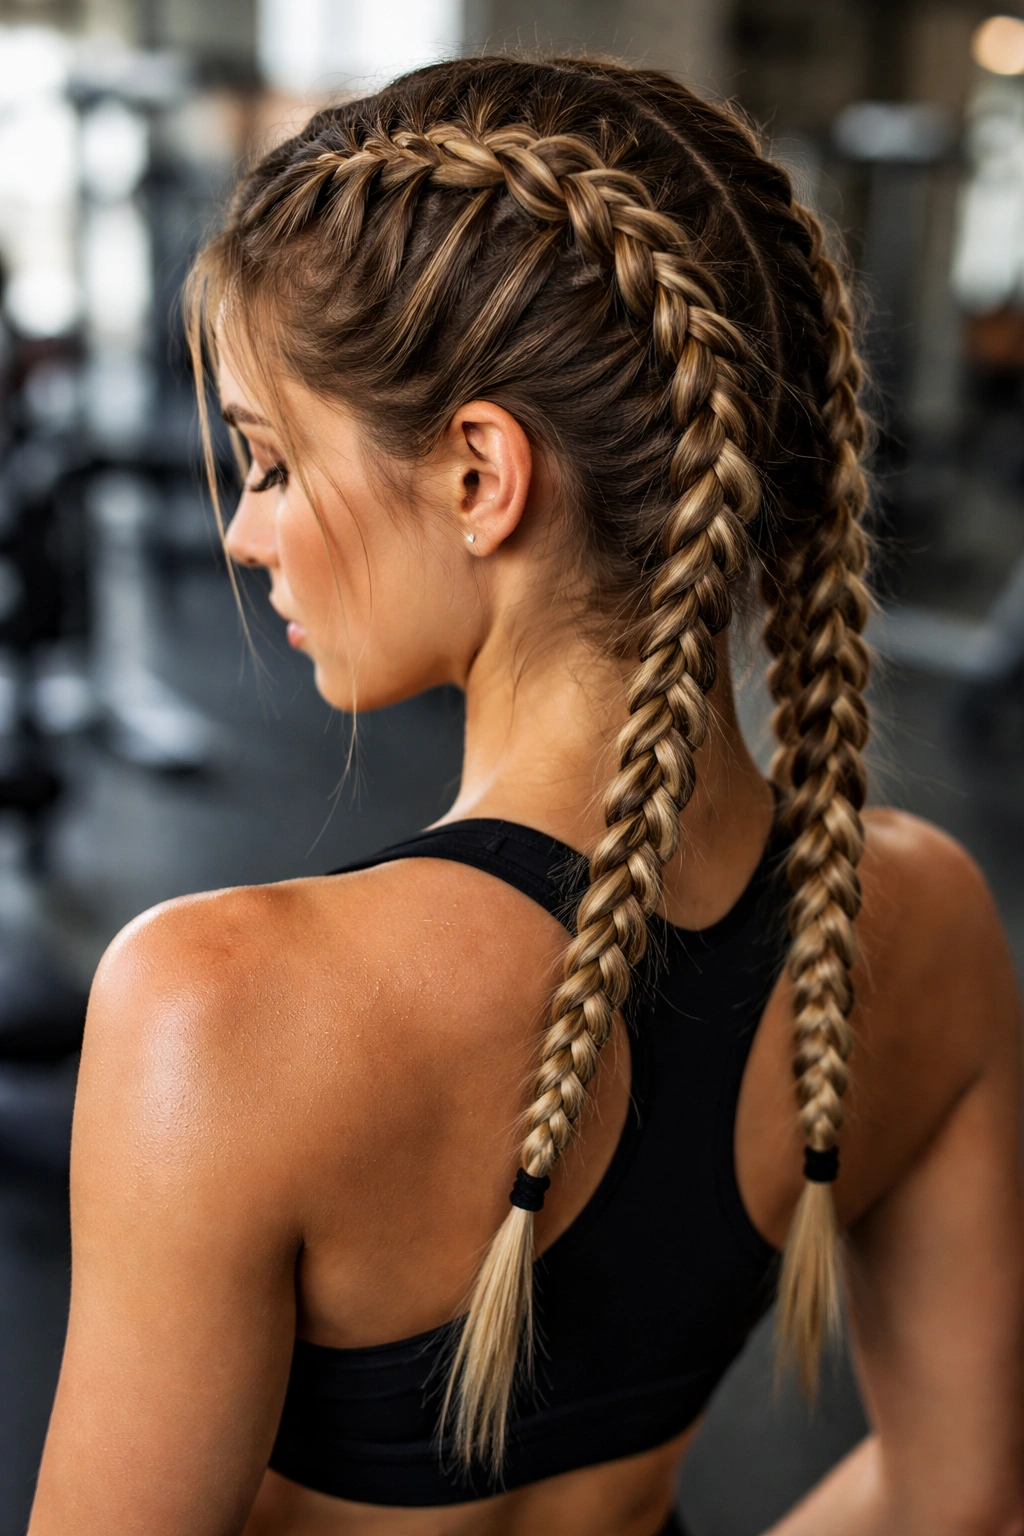
If your hair is thick, long, or prone to coming loose, double French braids are your secret weapon. By dividing your hair into two sections and braiding each side separately, you distribute the weight and tension more evenly, which means the braids stay tighter and more secure. This style also gives you more scalp coverage—rather than one braid running down the center, you have two running parallel from your temples to the base of your skull. Double braids won’t slip or loosen even during the most intense workouts.
Why Two Braids Are Better Than One for Thick Hair
The physics is simple: if you’re pulling your hair into one braid, all the tension is concentrated in that single weave. With two braids, the tension is distributed across your entire scalp, which reduces the strain on any single section and makes the whole structure more stable. For people with long, thick hair, this difference is massive. A single braid might feel heavy or start to loosen after 30-45 minutes, but two braids stay secure for hours. The parallel lines also look intentional and athletic rather than like you just couldn’t figure out how to do one braid properly.
Step-by-Step: Double French Braids for Maximum Hold
- Divide your hair down the center from forehead to nape, creating a clean part line
- Starting on the right side, take a small section at your temple (just above your ear) and divide it into three strands
- Braid tightly, adding sections from both the top and bottom of the partition line as you move down the right side
- Braid all the way to the base of your skull, secure with an elastic
- Repeat on the left side, using the same technique and matching the tightness of the right braid
- For a polished finish, smooth flyaways and lightly spray the entire braid with hold spray
Worth knowing: If your hair is very long, you can keep braiding below the nape to create tails, or secure both braids into a low ponytail at the back—this looks cute and keeps even more hair contained.
3. Dutch Braid (Reverse French Braid)
A Dutch braid is technically a reverse French braid—instead of weaving strands over the middle, you weave them under. The result is a braid that sits more prominently on your head and has a distinctive, chunky look. For the gym, a Dutch braid is excellent because it’s even more sculptural and gripping than a traditional French braid. The raised, textured appearance also holds up better when you’re sweating, since the weave itself is more visible and appears fuller even if you lose a tiny bit of definition.
What Makes a Dutch Braid Different
The under-weaving technique creates a braid that pops out from your scalp rather than lying flat against it. This isn’t just aesthetic—it’s functional. Because the braid is raised, it grips your hair more aggressively, and individual strands are less likely to slip out around the edges. The braid also looks more dramatic and finished, so even if you’re in a post-workout state, it still reads as intentional. Many people find Dutch braids more secure for swimming or water-based workouts, since the raised structure means less contact between the braid and a wet scalp.
How to Braid a Dutch Braid for the Gym
- Start at the crown with a small section divided into three strands
- Instead of crossing strands over the middle, cross them under: right strand goes under the middle, left strand goes under the middle
- As you work down, add small sections from the sides, continuing the under-weaving pattern
- Keep tension consistent and firm—Dutch braids benefit from slightly tighter tension than regular French braids
- Braid down to the nape of your neck and secure with an elastic
- Gently pull on the braid from top to bottom to widen and fluff the sections—this makes the braid fuller and more textured
Insider note: If you have fine or thin hair, a Dutch braid actually looks fuller and thicker than a regular French braid because of the raised structure.
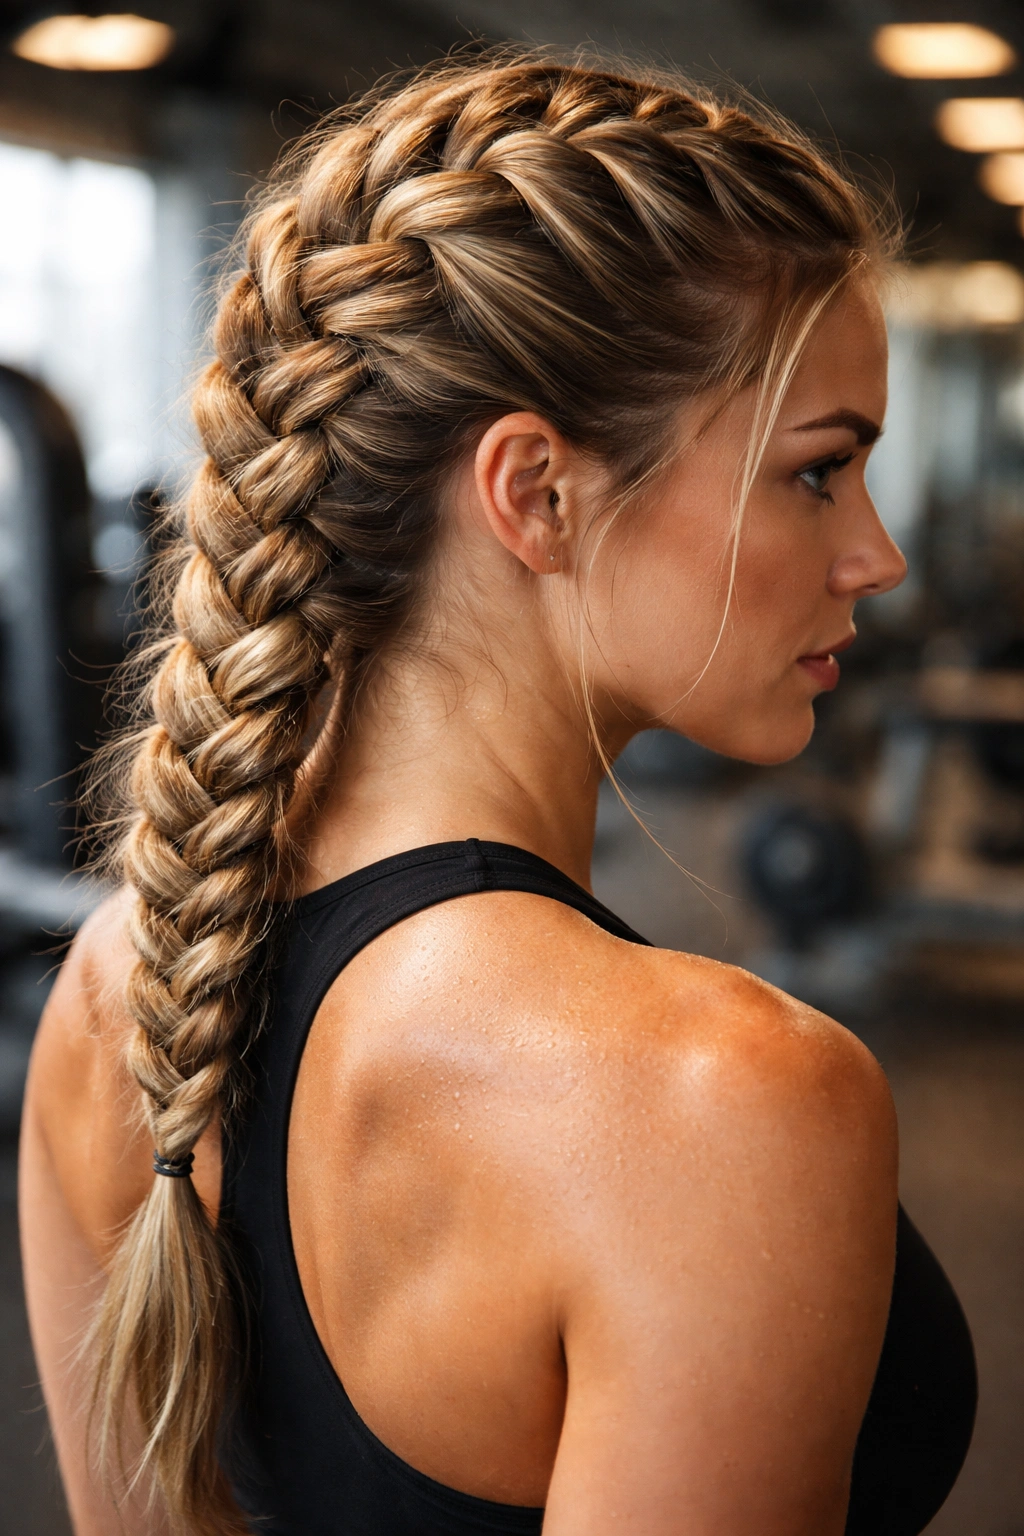
4. French Braids with Textured Waves
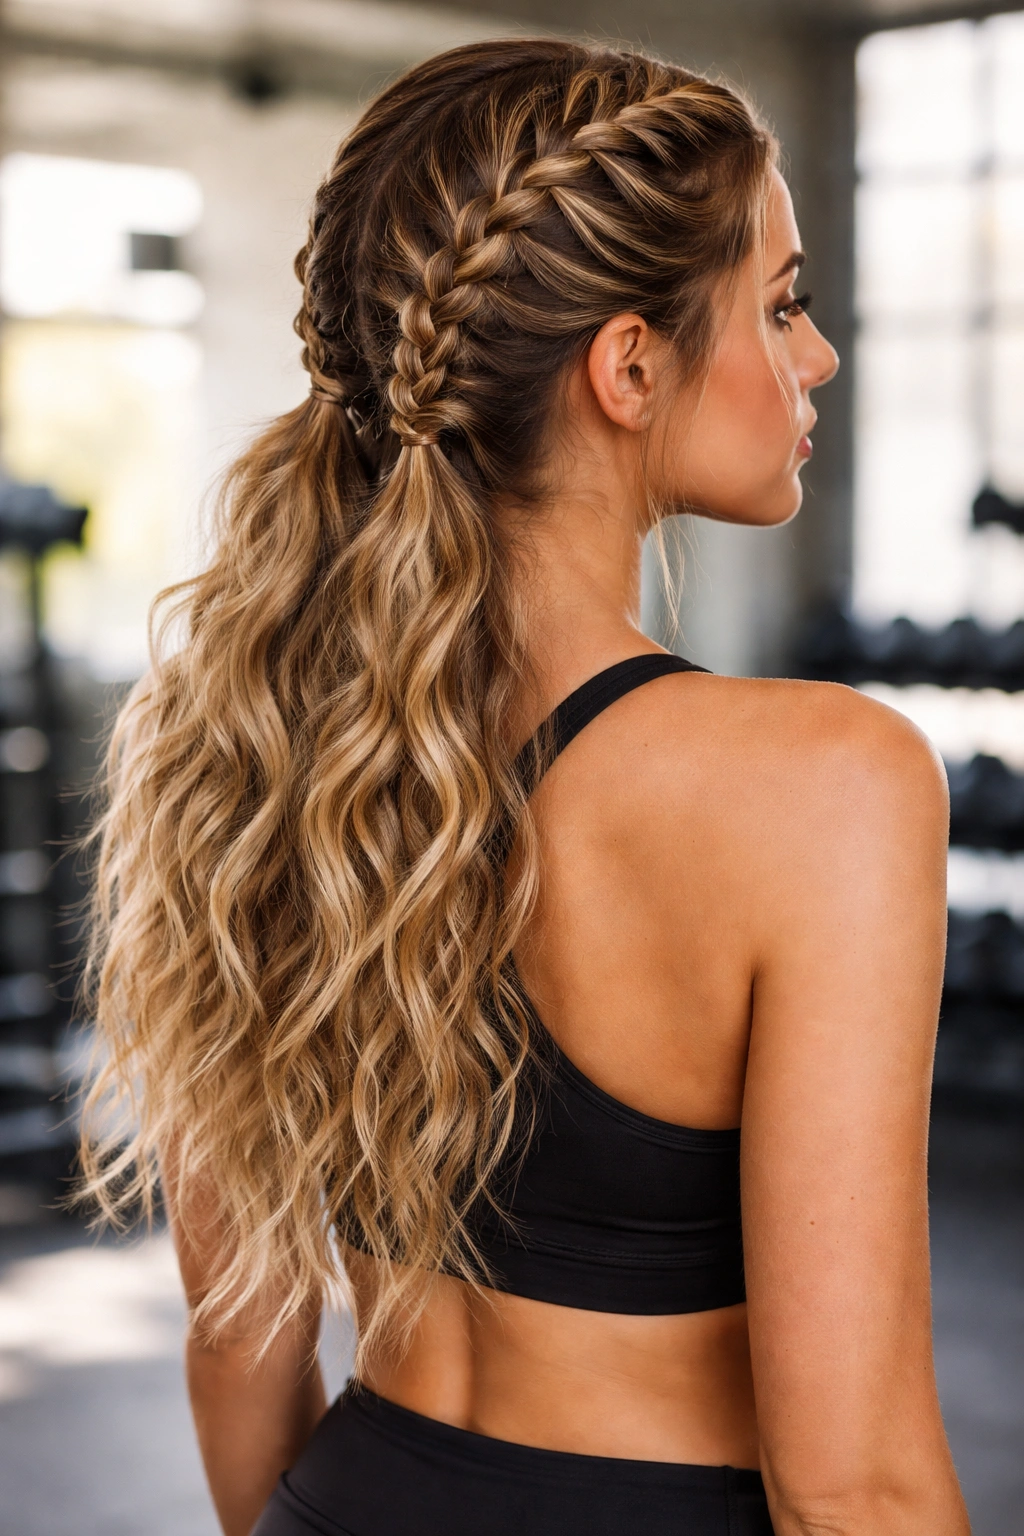
If you want your gym braid to look a bit more polished and less aggressively tight, starting with textured or wavy hair makes a huge difference. You don’t need heat tools or much prep—just work with your natural texture or create loose waves the night before. When you braid textured hair, the individual strands grip each other better, so you can braid slightly looser and still have excellent hold. The braid also looks fuller, more interesting, and less severe, which is great if you’re going from the gym straight to work or out with friends.
Why Texture Changes the Game
Smooth, straight hair can slip slightly within a braid, which is why gym braids for straight hair need to be very tight. Wavy or textured hair has natural friction between strands, so it grips itself within the braid without needing extreme tension. You can braid with medium tension instead of pulling everything super tight, which means the braid is more comfortable on your scalp and less likely to leave you with a tension headache. The braid also photographs and looks better—texture makes it appear fuller, and the visual interest means slight flyaways or imperfections are less noticeable.
Creating Texture Before You Braid
- The easiest method: braid your hair the night before, sleep on the braids, and undo them in the morning. Your hair will have natural waves.
- For faster texture: apply a texturizing spray, salt spray, or dry shampoo to clean dry hair and scrunch it in
- You can also create loose waves with a curling iron the night before and braid in the morning—the waves will last through your workout
- If your hair is naturally wavy or curly, simply apply a light styling cream or leave-in conditioner and braid without further prep
Pro tip: Textured braids also hide the slightly fuzzy base better than sleek braids, so if you’re re-braiding hair that’s been in a braid for a day or two, texture actually works in your favor.
5. Braided Crown or Halo Style
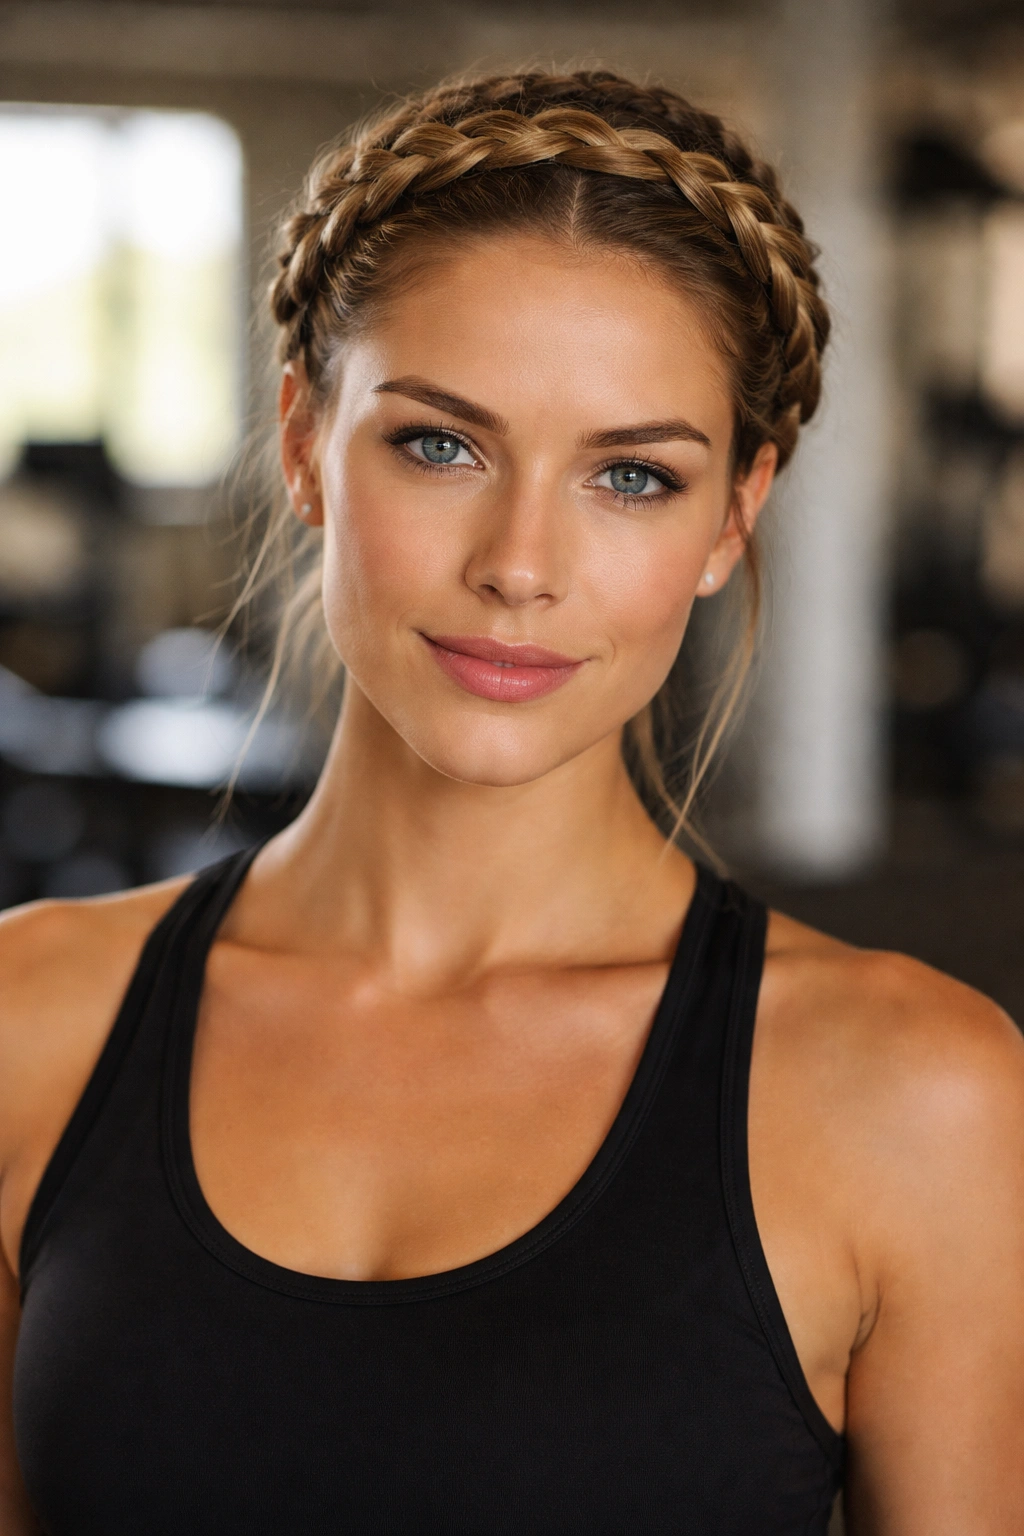
A braided crown, also called a halo braid, runs around your head from one side to the other like a crown or headband. Both sides of your hair are contained, you get full face exposure, and because the braid wraps around the side of your head rather than down the back, it won’t bang against your neck or upper back when you’re doing certain movements like pull-ups or rowing. This style is particularly great for strength training, Pilates, or yoga, where you’re moving more slowly but still need secure hair control.
When a Crown Braid Works Best
A braided crown is less practical for running or high-impact cardio, simply because your head is moving forward and back a lot, and a side-to-side braid won’t stay as immobilized. But for most gym scenarios, it’s fantastic. The crown style has the added benefit of being easy to accessorize if you’re heading somewhere after the gym—you can swap it for a more formal hairstyle or add a small clip to dress it up. It’s also surprisingly quick to do once you’ve practiced it a couple of times.
How to Create a Braided Crown
- Create a deep side part from your temple to behind your ear
- Start on the smaller side of the part with a small section of hair near your ear
- Create a tight French braid angling toward the back of your head, incorporating hair as you go
- Continue braiding around the side of your head, angling toward the opposite ear
- Braid until you’ve incorporated most of your hair and you reach the opposite side
- Secure the end with an elastic and tuck it behind your ear or secure it with bobby pins
- Smooth flyaways around your face and the crown line
Worth knowing: This style works beautifully on shoulder-length or longer hair, but you need at least 12-14 inches of length to create a full halo effect.
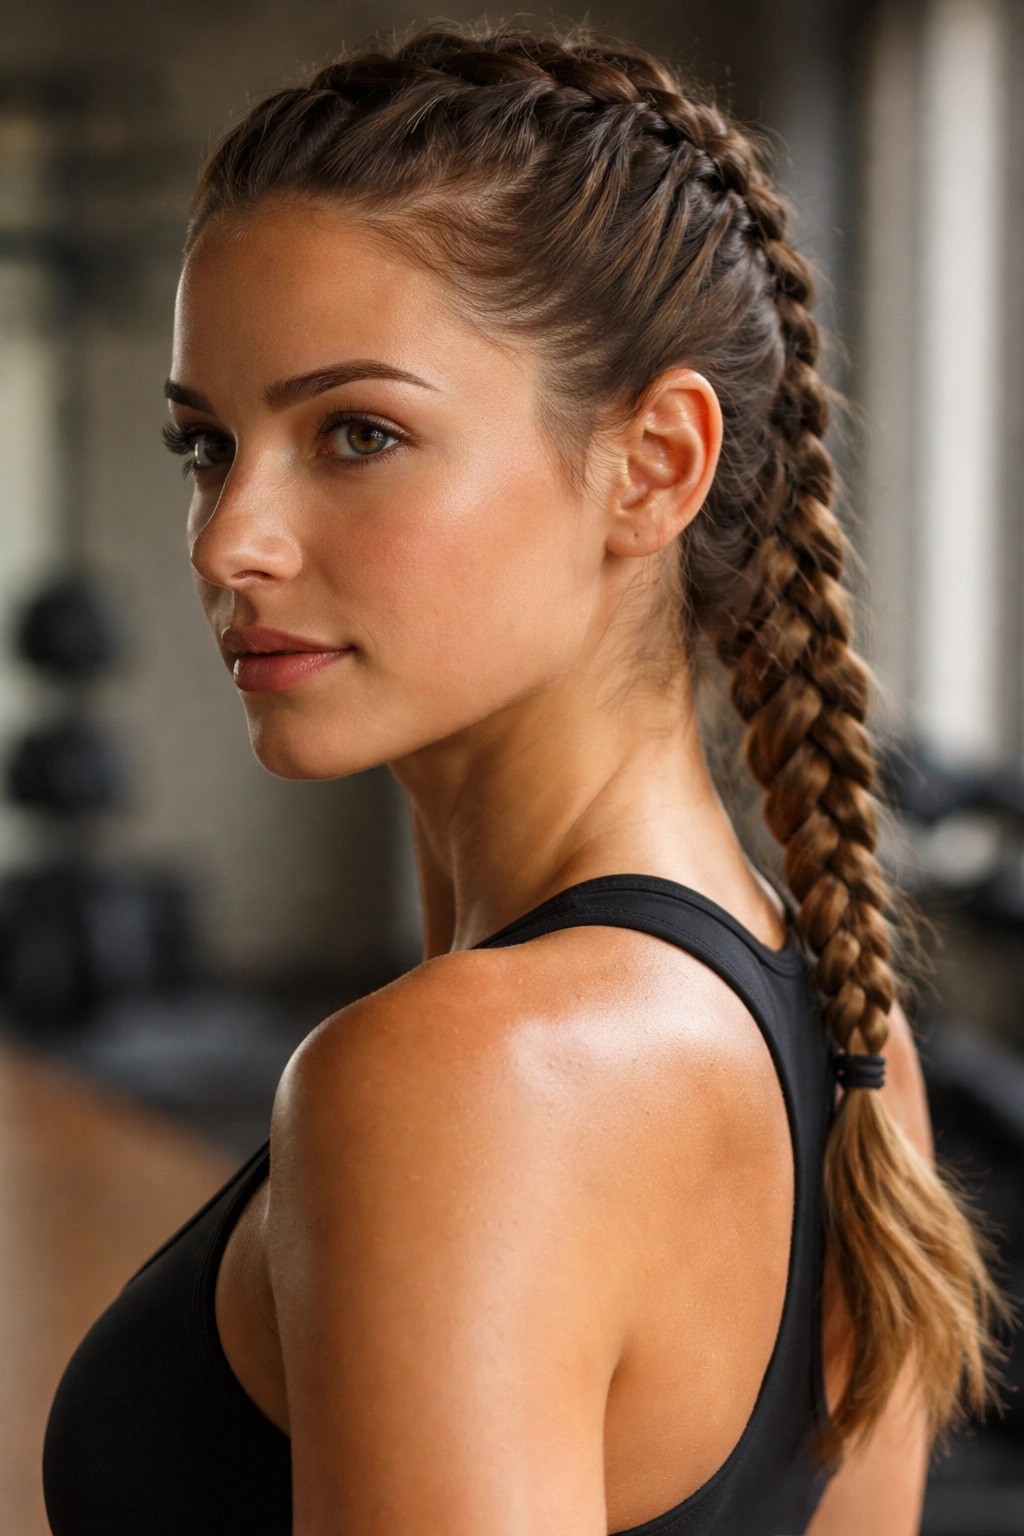
6. Side-Swept French Braid
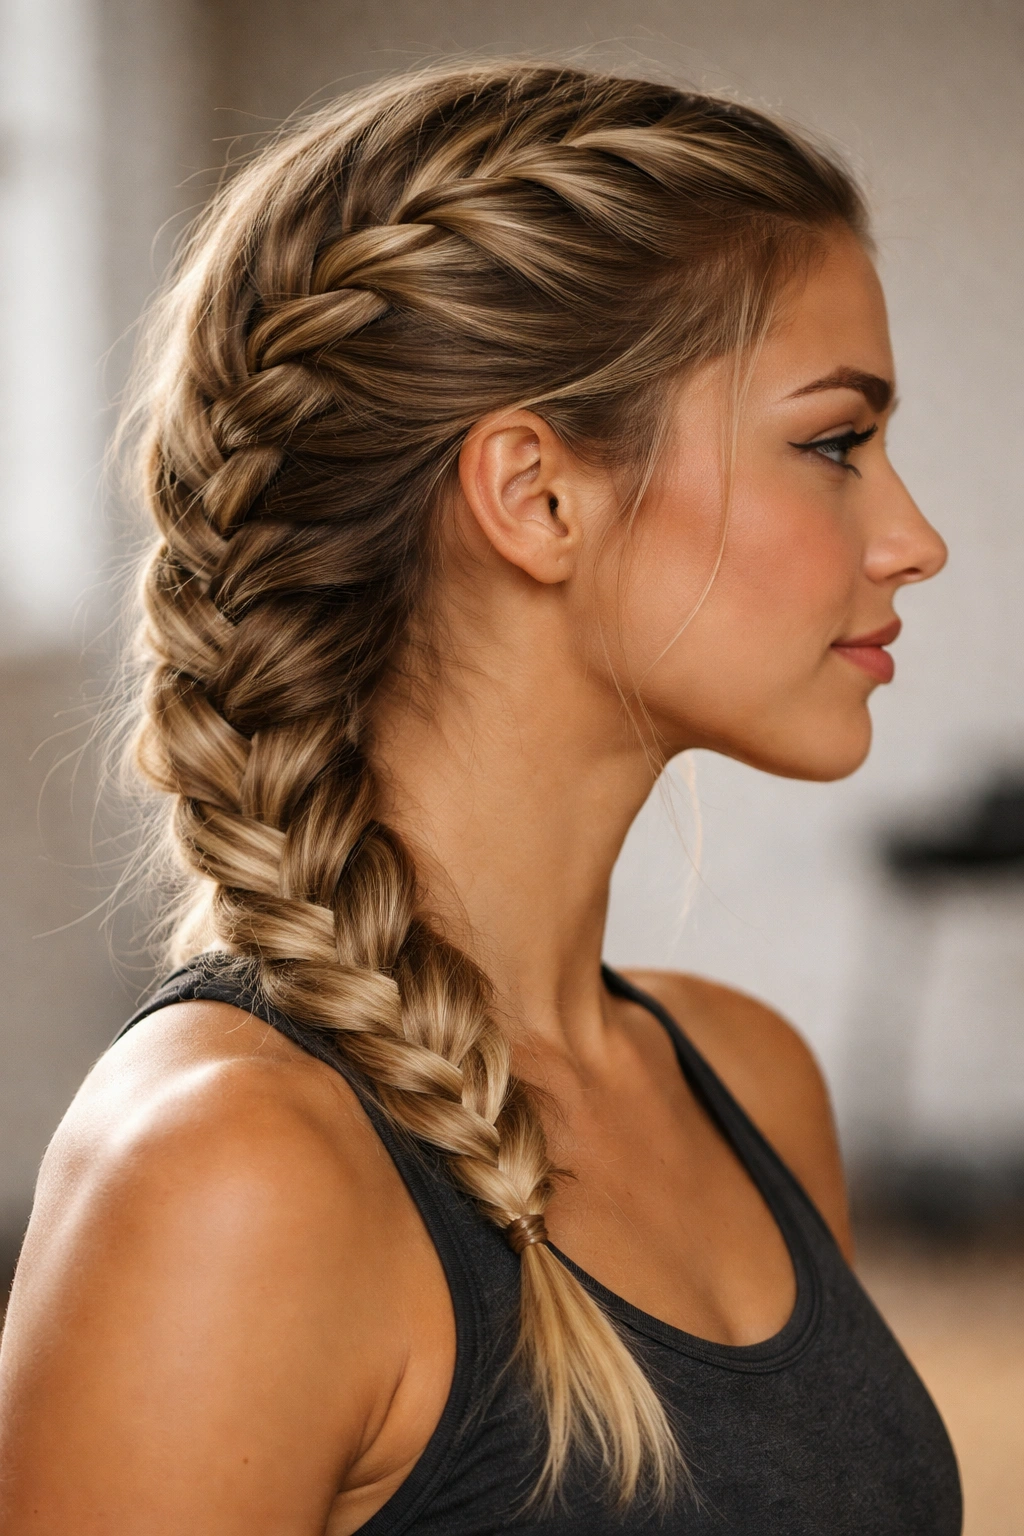
A side-swept French braid starts at one ear, travels diagonally across the back of your head, and ends behind the opposite ear. It’s the sweet spot between a center braid and a side braid—secure enough for any workout, but more visually interesting and flattering for most face shapes than a dead-center braid. The asymmetry means the braid sits slightly off your scalp rather than directly against it, which some people find more comfortable during intense sweating.
Why Asymmetry Wins for Workouts
An off-center braid pulls your hair back and away from your face effectively, but the slightly asymmetrical placement can be more forgiving if your braiding isn’t perfectly tight or perfectly centered. It also distributes sweat differently—rather than collecting sweat directly down the center part line of your scalp, a side braid means the sweat distributes more evenly. For people with any facial sensitivity or acne along the center part line, this can actually make a difference in preventing breakouts.
Creating a Side-Swept French Braid
- Create a deep side part on whichever side suits your face
- Start the braid at one temple with a small section
- Braid diagonally across the back of your head, angling toward the opposite ear
- As you braid, add sections from the top and bottom of your part line as normal for a French braid
- Continue until you reach the nape of the opposite ear, then braid a small section below the ear for a finished look
- Secure with an elastic; if you want extra security, use a bobby pin to pin the elastic to your hair beneath it
- Spray lightly with hold spray
Pro tip: This style works great for people with longer faces (you want the braid to angle downward, which is flattering), and it’s perfect if you usually part your hair on one side anyway.
7. Sporty Messy French Braid
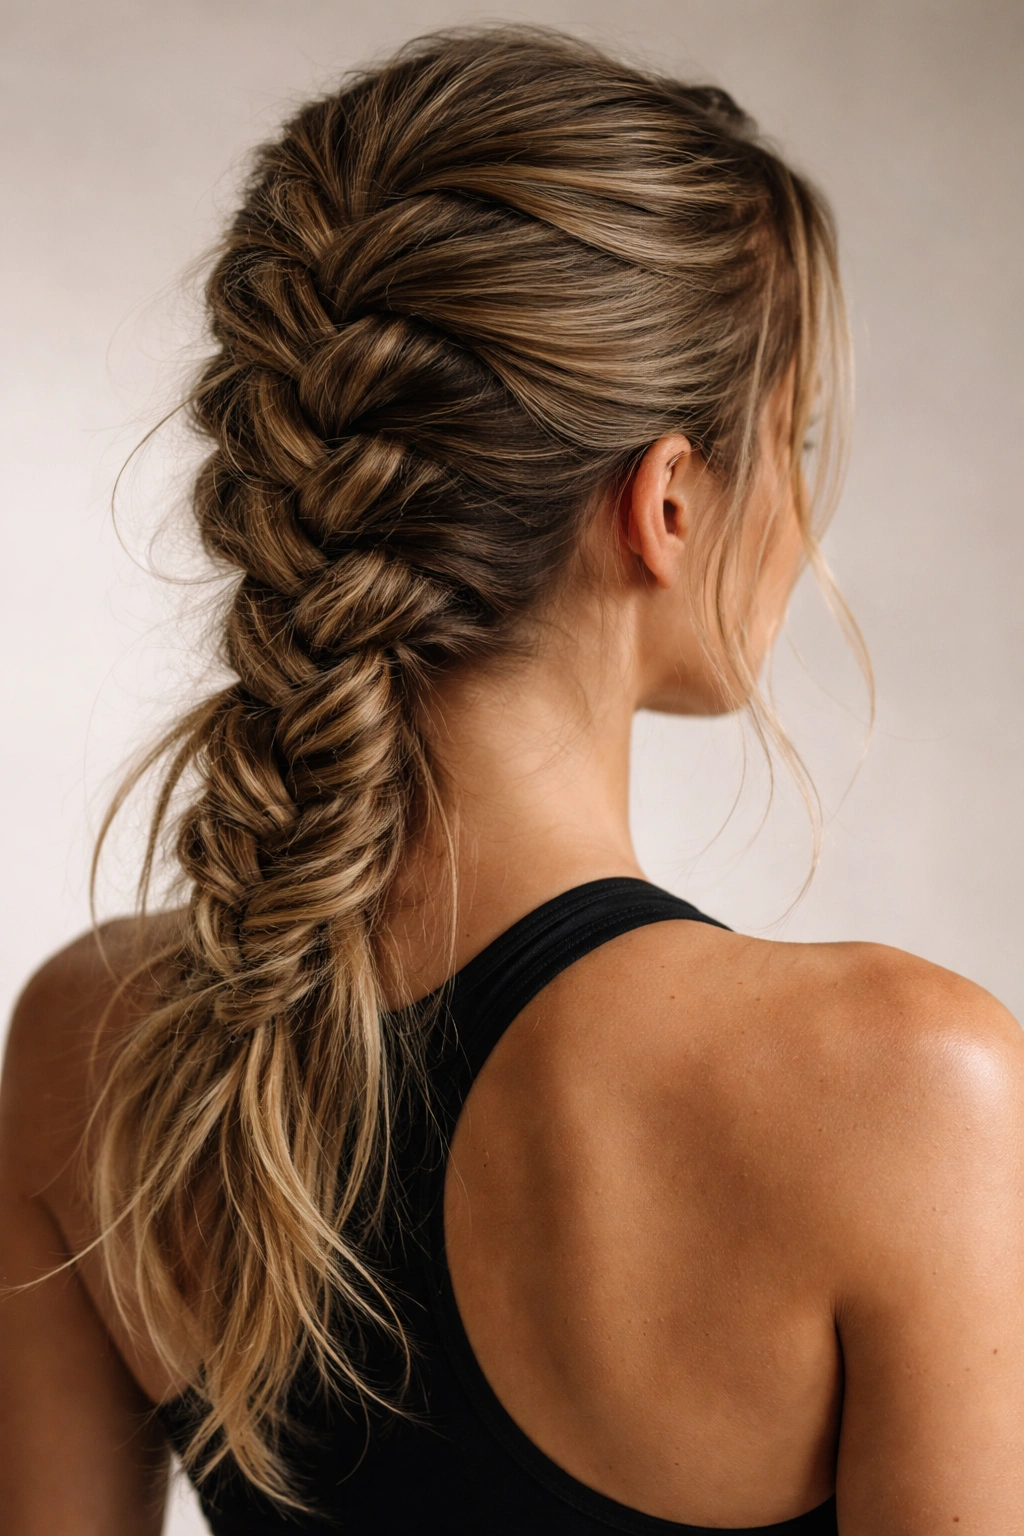
Sometimes you don’t have 10 minutes to perfect a tight braid, and a completely buttoned-up style isn’t necessary. A looser, “messy” French braid is still incredibly functional for the gym—it holds everything back and off your face, it doesn’t require flawless technique, and it looks intentional rather than sloppy. The looser texture actually hides imperfect braiding better than a tight braid, and it stays functional even if some sections come slightly loose as you exercise.
When Messy Is Actually Better
A slightly looser braid is more comfortable for longer workouts, since there’s less tension on your scalp and roots. It’s also faster to create if you’re running late. And paradoxically, a messy braid often stays more secure than a tight one, because you’re not relying on tension alone—the texture and volume of the looser braid grips your hair through friction. This style also looks more contemporary and less “gym class” than a severely tight braid, which matters if you care about your overall look.
Creating a Casual, Messy French Braid
- Start with slightly textured or wavy hair (spray or overnight braids create this)
- Begin braiding at the crown with medium tension rather than pulling super tight
- As you braid, don’t add incredibly small, neat sections—grab slightly larger chunks of hair for a fuller look
- Braid down the back and secure with an elastic
- Once the braid is done, pull gently on each section of the braid from top to bottom to loosen it and create texture
- Let a few small strands fall free around your face for a relaxed vibe
Worth knowing: This style works beautifully with dry shampoo or texturizing spray applied beforehand. The product grips your hair and makes the braid hold together even if it’s not tight.
Tips for Keeping Your French Braids Secure During Workouts
Even the best braid can start to loosen if you’re not setting yourself up for success. A few simple prep steps make a massive difference. Always start with clean or freshly dry-shampooed hair—product buildup makes hair slippery, and braids won’t grip as firmly. Apply a light texturizing spray, volumizing spray, or dry shampoo to your roots and mid-lengths before braiding. This creates friction between strands and makes your braid grip more securely.
Make sure your elastic band is small and tight enough to actually hold the braid, but not so tight that it cuts off circulation or causes pain. If your braid keeps slipping, try a slightly smaller elastic or use two elastics stacked on top of each other. Some people find that braiding damp hair rather than completely dry hair helps the braid set better, though this depends on your hair type.
For extra security, especially if you have fine or slippery hair, use a small bobby pin anchored through the elastic band and into the hair beneath it. This keeps the entire braid from shifting even slightly. And honestly, don’t be shy about using a light hairspray after you’ve finished braiding—it sets the style and keeps flyaways under control without making your hair feel stiff or crunchy.
Common French Braid Mistakes to Avoid at the Gym
The most common mistake is braiding too loosely, especially if you’re new to French braiding. For the gym, you genuinely need to braid tighter than you think necessary. Test the braid by gently pulling on it; there should be almost no give. If your braid slides or shifts when you tug it, it’s too loose.
Avoid starting your braid too far back on your head. Many people start at the very crown, but for the gym, you want to start slightly forward—at the hairline or just above it—so the braid has more coverage and grip from the beginning. Starting too far back means loose hair at the front that can fall forward into your face.
Don’t neglect the ends of your braid. Securing the very end with a good elastic band is just as important as the tension throughout. A loose or slippery elastic at the end can cause your entire braid to unravel. And if you have very long hair, make sure you’re braiding all the way down—don’t just braid the top half and leave the bottom half loose and uncontained.
Finally, don’t assume that a braid that works for everyday wear will automatically work for the gym. A braid tight enough for sitting at a desk probably isn’t tight enough for cardio or lifting. Err on the side of tighter when you’re preparing for a workout. You can always loosen it slightly if it causes discomfort, but you can’t tighten it once you’re in the middle of a workout.
Final Thoughts
French braids are genuinely one of the best hairstyle solutions for gym workouts, and the fact that there are so many variations means there’s a style that works for almost every hair type, workout intensity, and personal preference. Whether you’re doing a high-impact cardio session, a strength training workout, or something gentler like Pilates or yoga, there’s a French braid version that will keep your hair secure, off your face, and looking intentional.
The key is finding the style that feels most comfortable and stays most secure for your specific hair and workout. If you’ve never done a French braid before, practice one or two styles at home when you’re not rushed. Once you’ve done a braid a few times, the mechanics become automatic, and you can actually braid in less time than it takes to blow-dry and straighten your hair.
The difference between starting your workout with secure hair and showing up with a sloppy ponytail that’s falling apart is immediate and noticeable. You move better, you feel more confident, and honestly, you look more put-together—even when you’re about to drench yourself in sweat. That’s the real power of a good French braid. It’s functional, it’s effective, and it makes you feel ready to actually show up and do the work.