Salt water, sunshine, and wind are all part of a perfect beach day—but they can wreak havoc on loose hair. A French braid solves that problem in an elegant, practical way. It keeps your hair contained and protected from the elements while looking intentional and polished, whether you’re heading to the sand for a few hours or an entire day. What makes French braids particularly brilliant for the beach isn’t just their holding power—it’s the fact that they actually look better once they’ve been slightly loosened and textured by saltwater and ocean breeze.
The beauty of mastering French braids for beach days is that one basic technique opens up countless possibilities. You can modify the tightness, position, and finish of your braid to suit different hair types, hair lengths, and the specific vibe you’re going for. Whether your beach day includes swimming, lounging, paddleboarding, or walking along the shore, there’s a French braid variation designed to keep up with you.
What you’ll discover as you try different styles is that beach conditions actually work in your favor. The natural texture that saltwater creates makes braids grip better and last longer than they might on a regular day. You don’t need perfectly smooth, freshly blow-dried hair to pull off these styles—in fact, slightly textured or second-day hair is ideal.
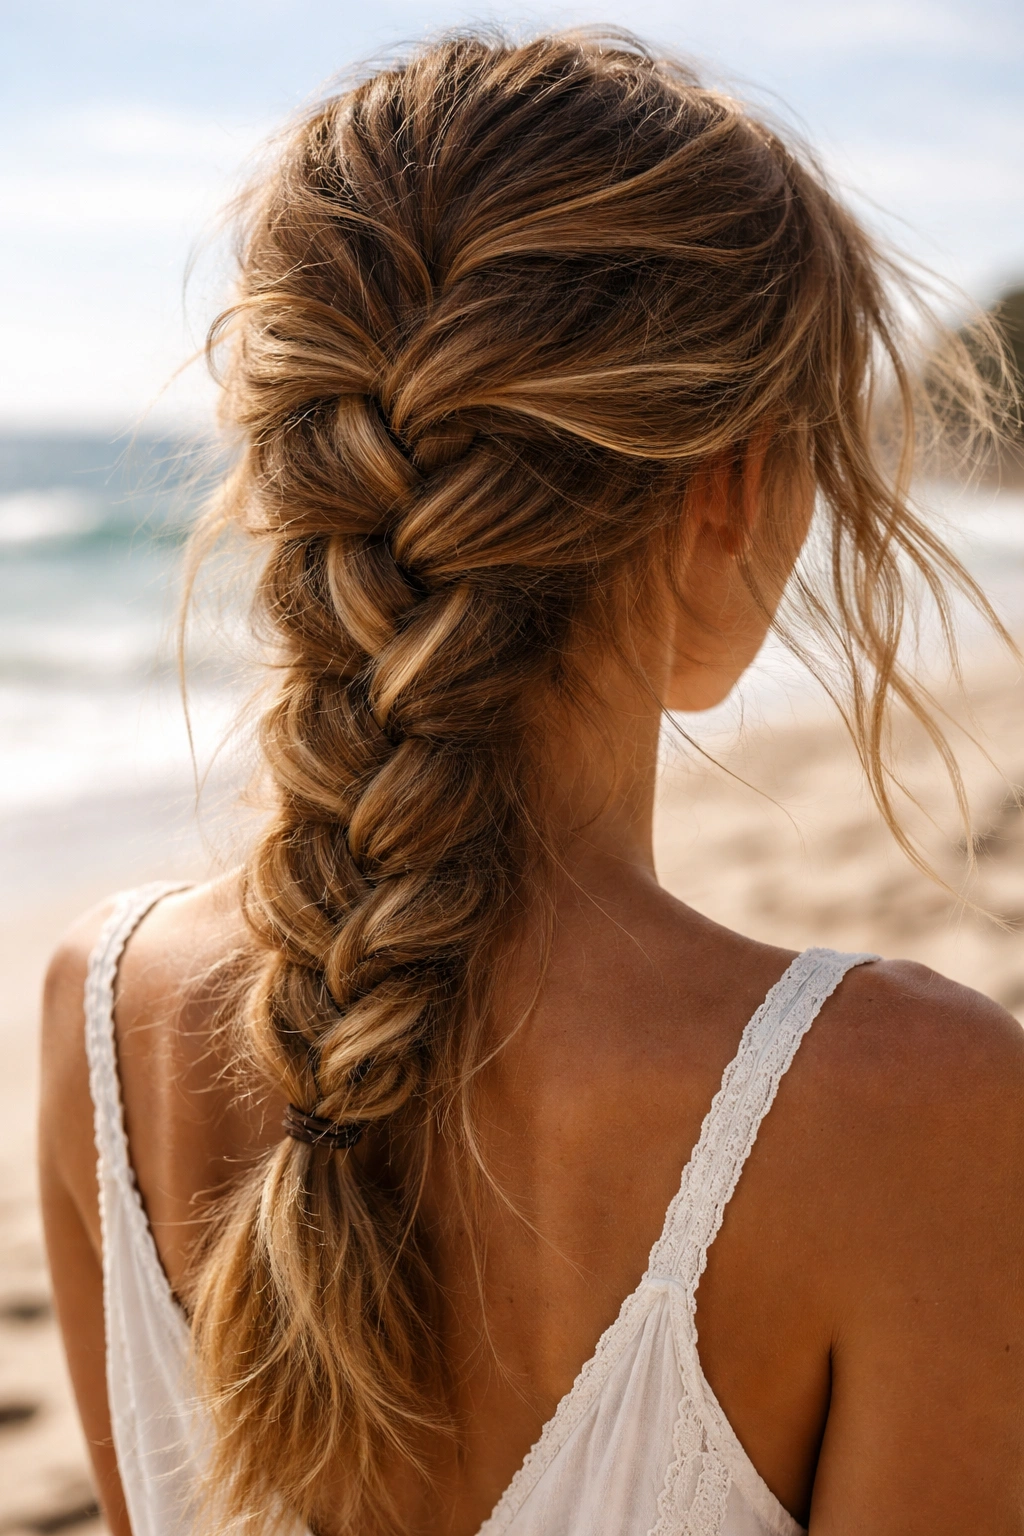
1. The Classic French Braid
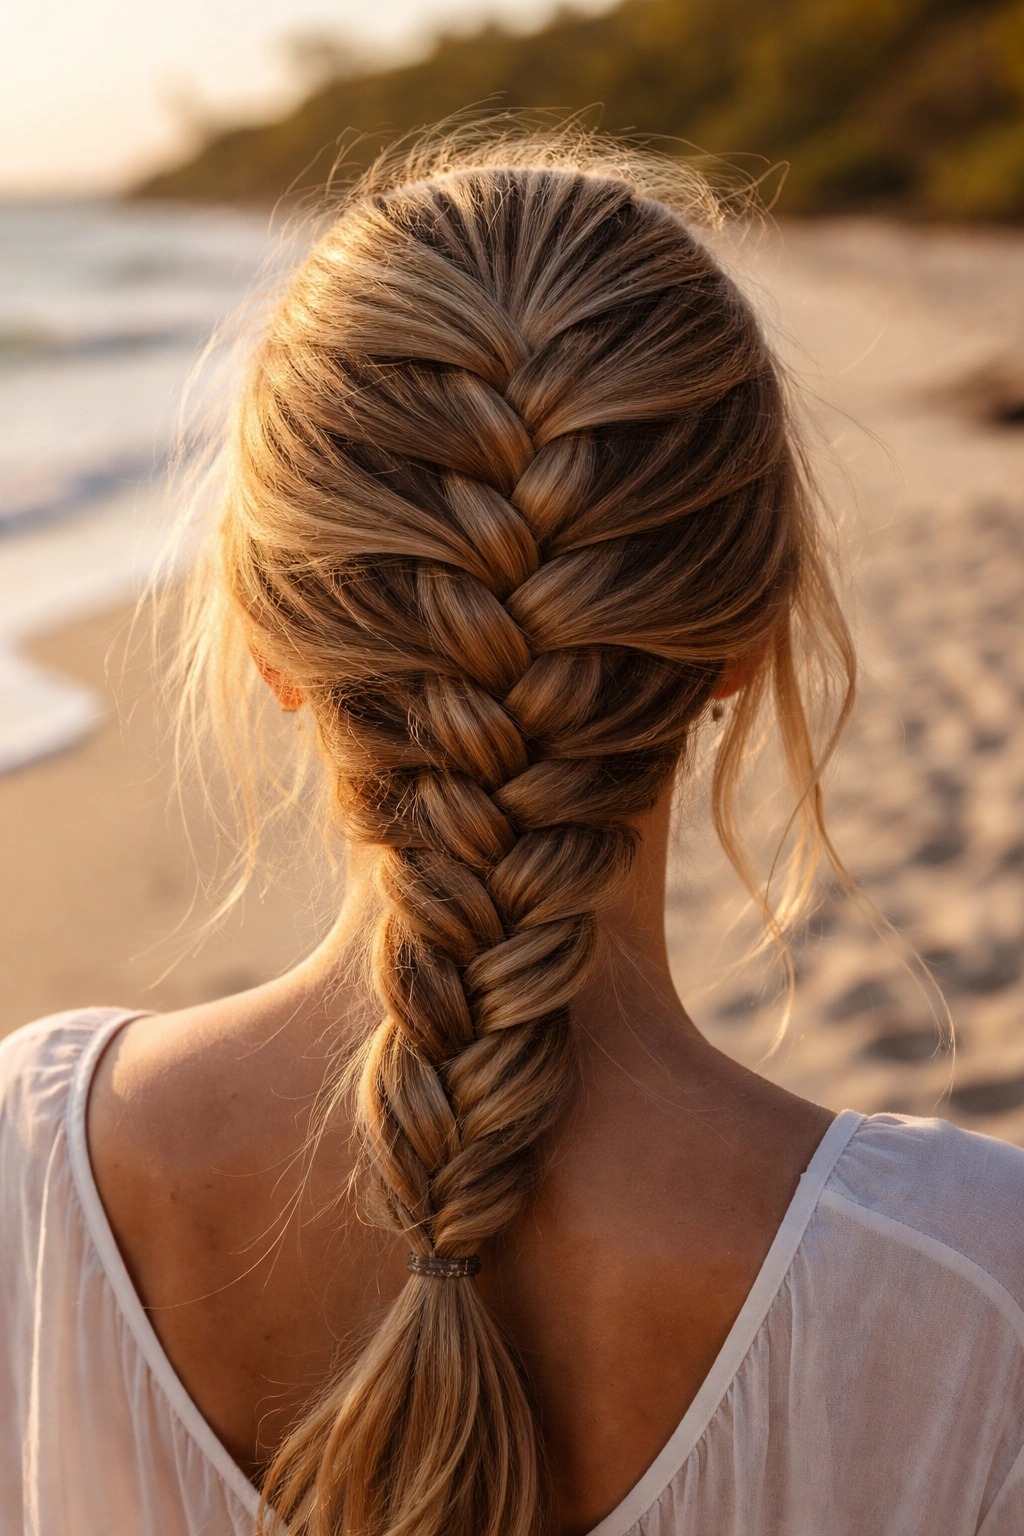
The classic French braid is the foundation for everything else—and it’s surprisingly forgiving for beach conditions. This is the braid where you start at the crown of your head and gradually weave sections of hair together, incorporating new hair as you travel down. On a beach day, the slight undone quality that develops as you move around actually adds to the charm.
Why It Works for Beach Days
The classic French braid has serious staying power because each section locks into the next one. This structure means the braid won’t slip or fall apart even when you’re getting splashed or sweating in the sun. As the day goes on and your hair picks up salt and moisture, the braid actually tightens slightly, making it even more secure. You can do this braid wet or dry, though slightly damp hair grabs better and creates a smoother starting point.
How to Create It
Start at the crown of your head with a small three-strand section. Cross the right strand over the middle, then the left over the middle. Now start incorporating new hair from the sides of your head—add a small section from the right side to the right strand before you cross it over, then add from the left side to the left strand. Continue this pattern down to the nape of your neck, then finish with a standard three-strand braid. Secure the end with a clear elastic or a small hair tie in a neutral tone.
Beach Styling Tips
Before heading to the beach, you can gently pull the braid slightly looser by tugging at the edges—this creates a softer, more romantic look and actually makes the braid feel less tight against your head in the heat. Spritz lightly with a texturizing spray if your hair is perfectly smooth, as the grip helps the braid hold longer. Once you’ve been in the water, let your hair air dry with the braid in and you’ll have beautiful natural texture when you take it down.
Pro tip: Secure the bottom with a small claw clip or a decorative hair tie instead of a standard elastic—it’s easier to remove for a quick rinse without undoing the whole braid.
2. The Double French Braids
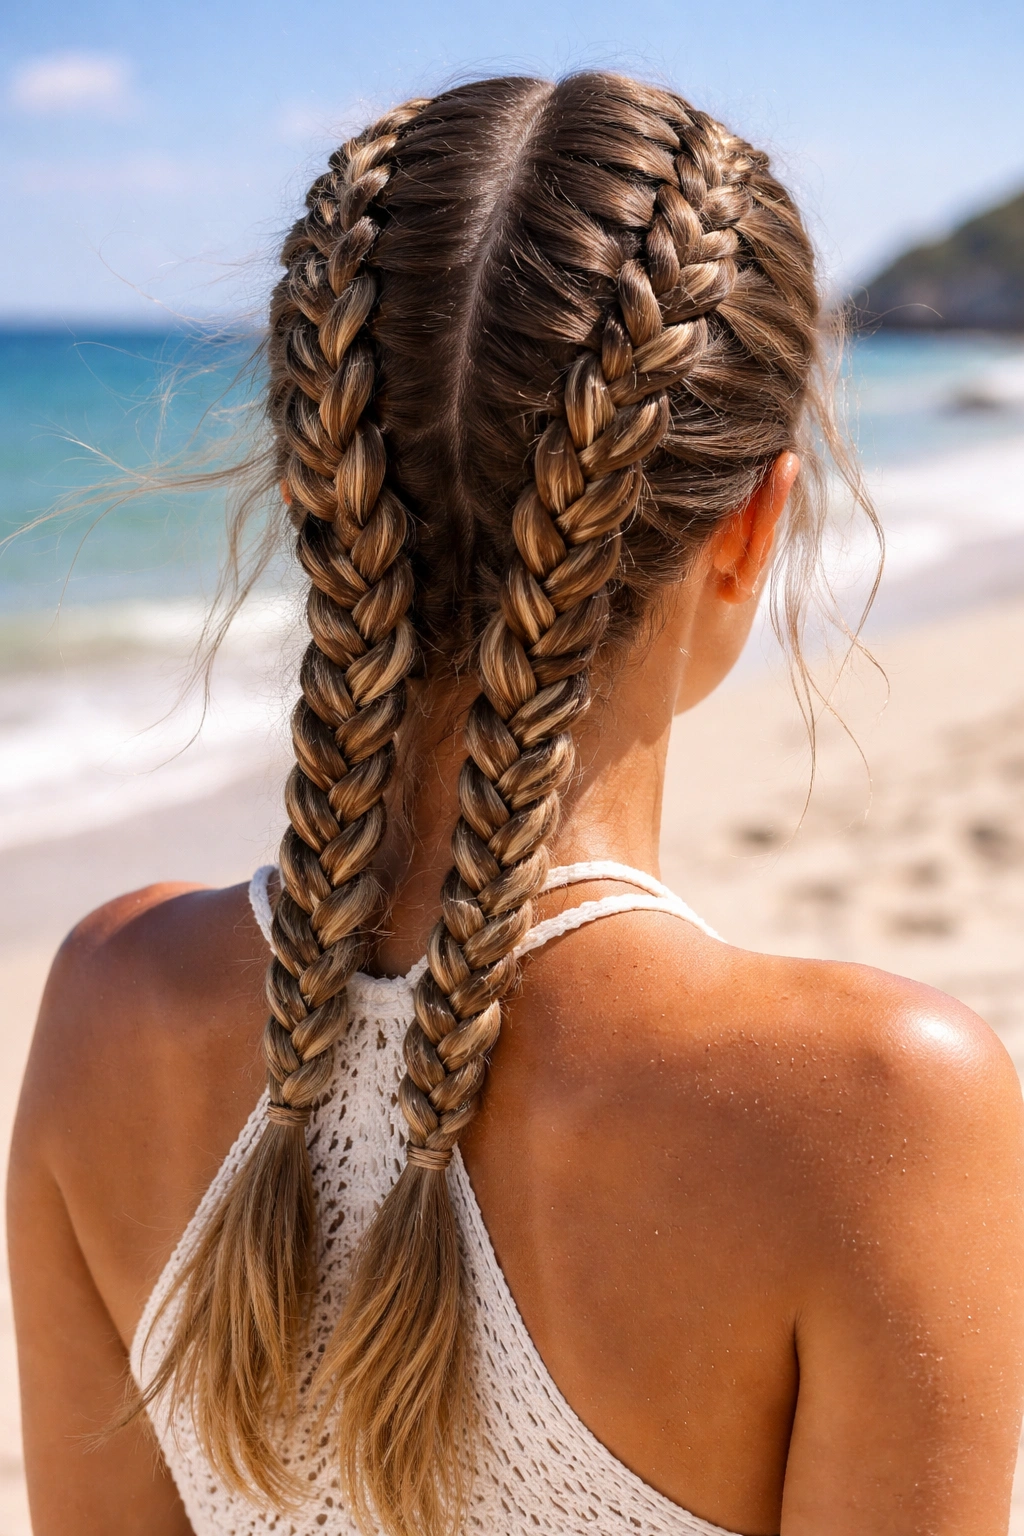
Double French braids split the visual weight of your hair into two sections, making the overall look lighter and more playful—perfect for a carefree beach aesthetic. Because the hair is divided, each braid is slightly thinner and less heavy against your head, which means better ventilation on a hot, humid day.
Why It Works for Beach Days
With two braids instead of one, you’re distributing the weight across your scalp more evenly, which reduces tension and makes the style more comfortable for extended wear. Two braids also mean double the grip and security—if one section loosens slightly, the other is still holding strong. This style is particularly brilliant if you have thick or heavy hair, because the double version keeps everything under control without looking overly structured.
How to Create It
Part your hair down the middle from your forehead to the nape of your neck. Take the right section and create a French braid starting from the right temple, incorporating hair only from the right side as you braid down. Repeat the exact same process on the left side. You’ll end up with two symmetrical braids framing your face, which creates a naturally balanced look even if your braids aren’t perfectly identical.
Beach Styling Tips
This style works beautifully with a damp start—part your wet hair in the morning, and by the time you’ve walked to the beach, your hair will be partially dry and the braids will be incredibly secure. You can wear the braids loose and romantic or keep them tight and athletic depending on your mood. The best part is that if you’re swimming, you can secure each braid separately with its own hair tie, then undo them at different times to create a layered texture effect.
Pro tip: Wrap a small piece of your own hair around each hair tie once you’ve secured it—it hides the elastic completely and looks intentional and polished.
3. The Reverse French Braid
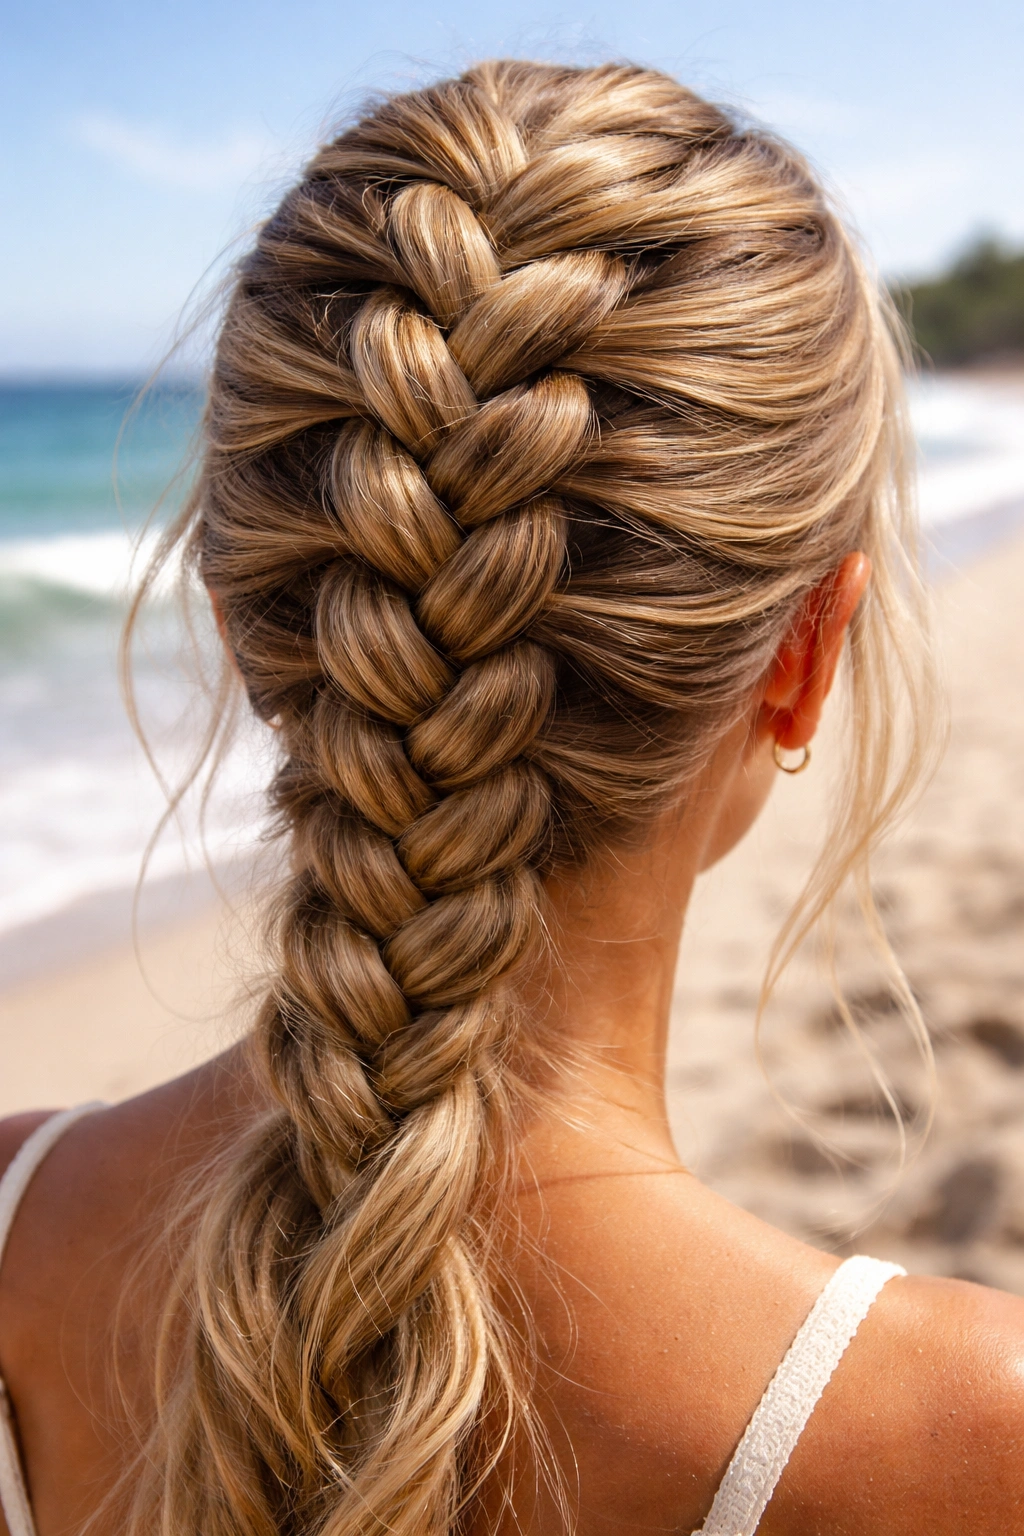
The reverse French braid, also called an inside-out or Dutch braid, uses the opposite weaving pattern from a classic French braid. Instead of crossing strands over the middle, you cross them under, which creates a braid that sits on top of your head and pops visually. On a beach day, this style photographs beautifully and has a slightly more intricate appearance.
Why It Works for Beach Days
Because the braid sits more prominently on the surface of your hair, it has more texture and dimension—and that texture is exactly what happens naturally in a beach environment. The reverse braid also tends to feel less tight against your scalp because the crossing-under pattern doesn’t create the same level of tension as a classic braid. It’s an excellent choice if you’re sensitive to braid tension or if you’re planning to wear your hair braided for hours.
How to Create It
Start at the crown with a three-strand section of hair. Cross the right strand under the middle strand, then cross the left strand under the middle. As you continue, add new hair from the sides to the appropriate outer strands before crossing them under. The braiding motion feels a bit different from a classic braid—it takes practice, but once you get the rhythm, it’s just as easy.
Beach Styling Tips
The reverse braid looks stunning with a slightly loose, piece-y finish. After you’ve secured it, spend a minute or two gently pulling the sections of the braid to widen it and soften the overall look. This style pairs beautifully with a few face-framing pieces left loose—they’ll wave naturally in the ocean breeze and create a romantic, undone vibe. You can also spray the finished braid with a light sea salt spray to enhance the texture before you even hit the beach.
Pro tip: If you’re worried about hair falling out of a reverse braid, use a slightly tighter tension when you’re incorporating new hair sections, but still pull the finished braid loose at the end for the softer look.
4. The Side-Swept French Braid
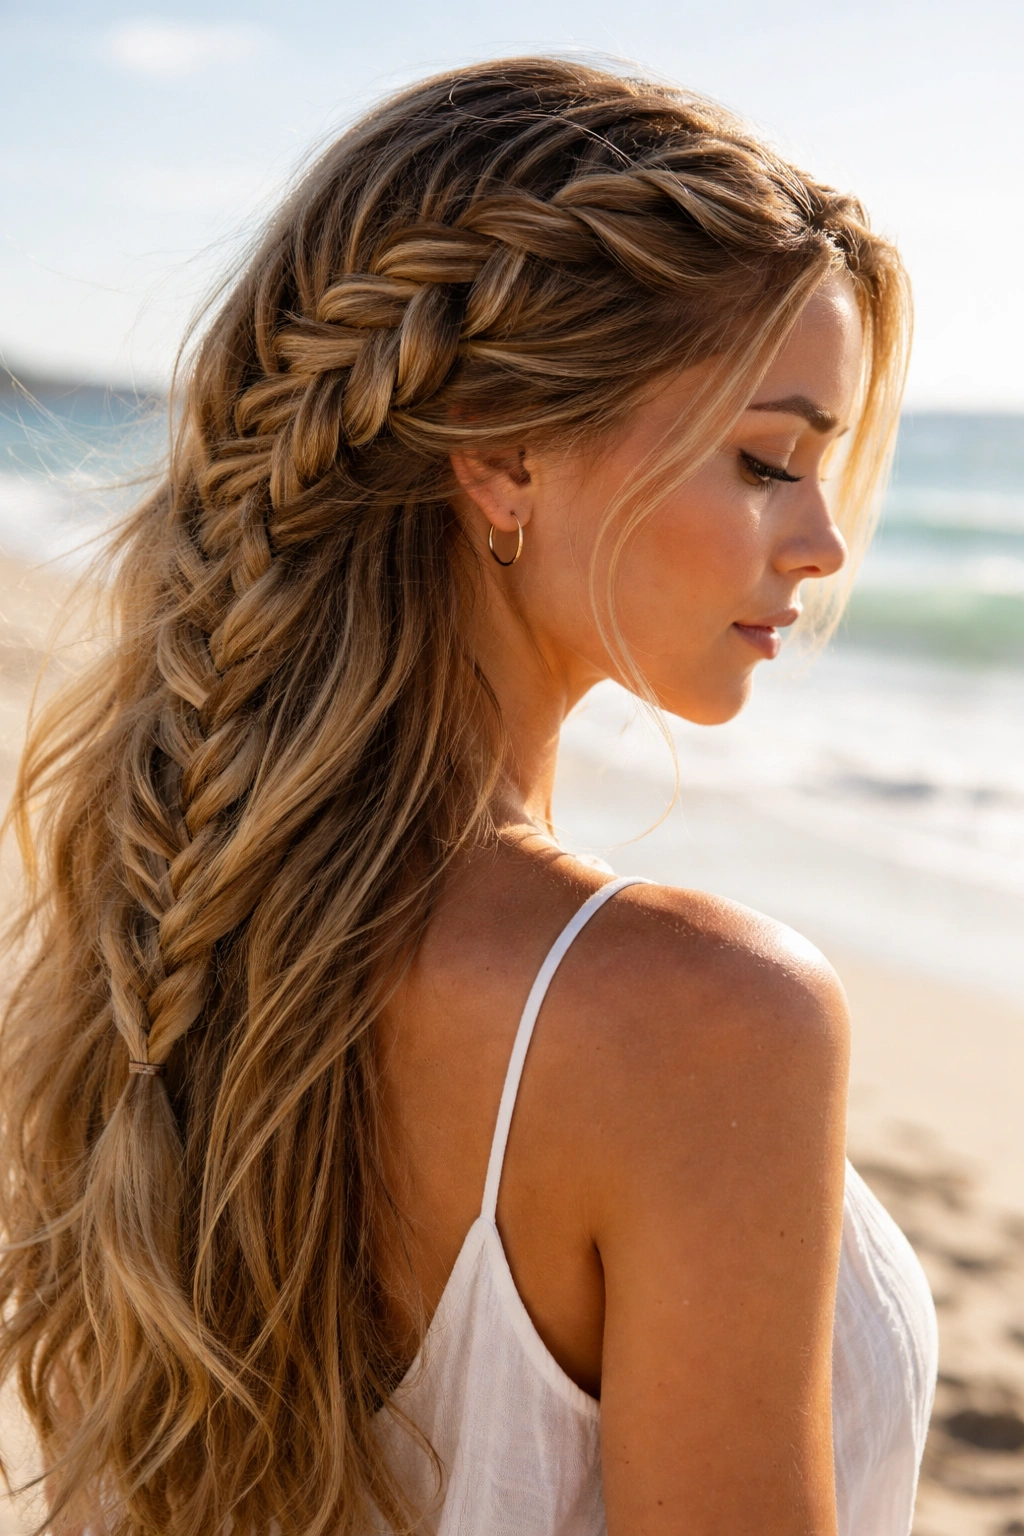
The side-swept French braid starts at one temple and travels diagonally across the back of your head toward the opposite ear. This asymmetrical style is both elegant and practical—it keeps most of your hair off one side of your face while maintaining a soft, romantic appearance that works perfectly for daytime beach wear.
Why It Works for Beach Days
By sweeping the braid to the side, you’re creating a style that works with wind rather than against it. When the breeze hits your hair, it will push the loose side of your style around your shoulders instead of whipping into your face. This braid also shifts the weight away from your crown, making it an excellent choice if you’re wearing sunglasses on your head or a sun hat. It’s one of the most flattering styles for taking photos because it shows your face without the bulk of hair being centered.
How to Create It
Start your French braid at your right temple (or left, depending on which side you prefer). Begin with a small three-strand section and braid diagonally back toward your left ear, incorporating hair as you go. The angle matters—aim for a line that goes from temple to below the opposite ear rather than straight across the back. Once you reach your lower left side, finish with a standard three-strand braid and secure the end.
Beach Styling Tips
You can wear this braid tight and sleek for a polished look, or loose and romantic for a more relaxed vibe. If you’re planning to get wet, start with damp hair so the braid will grip better. The side-swept style actually looks better as it loosens throughout the day—by late afternoon, the braid will have a beautiful undone quality that’s very current. Pull out a few face-framing pieces before you leave the house to soften the style even more.
Pro tip: Use bobby pins to anchor the end of your braid where it finishes below your ear—hidden under the braid itself—rather than just relying on the hair tie, which can slip as you move.
5. The Messy French Braid
The messy French braid is intentionally loose and piece-y from the start, giving it a relaxed, bohemian quality that perfectly matches a beach atmosphere. This version celebrates imperfection and texture, making it an excellent choice if you’re not a perfectionist or if you have naturally wavy or curly hair that resists tight, structured styles.
Why It Works for Beach Days
A messy French braid is forgiving by design. You don’t have to be precise with your sections, and you don’t need perfectly smooth hair to start with. In fact, the messier and more textured your hair is before you braid it, the better this style looks. Once you’re at the beach, the natural loosening and texturizing that happens from wind and saltwater only improves the style. This is the one French braid variation where you’re not fighting the elements—you’re working with them.
How to Create It
Create a standard French braid, but use slightly larger sections than you normally would and don’t pull each crossing too tight. As you add new hair sections, don’t worry about creating perfectly smooth lines—let the hair be a bit irregular and piece-y. Once you’ve secured the bottom, spend time gently pulling and loosening the braid. Tug at each section, working your way from top to bottom, until you’ve created a braid that looks soft, romantic, and intentionally undone.
Beach Styling Tips
Start with second-day hair or hair that’s been curled or waved—the texture provides a foundation for the messiness. You can add a sea salt spray before you braid to enhance the texture even further. Pull out a few longer pieces around your face and let them hang loose. The goal is to look like you braided your hair without thinking too hard about it, which is perfect for a casual beach day. This style also works beautifully if you’re bringing a light scarf or hair wrap—just tie it around the braid casually.
Pro tip: If your hair is very straight and won’t hold the messy look, use a texturizing spray or even a light sea salt spray before you braid—it adds grip and makes the “messy” look intentional rather than accidental.
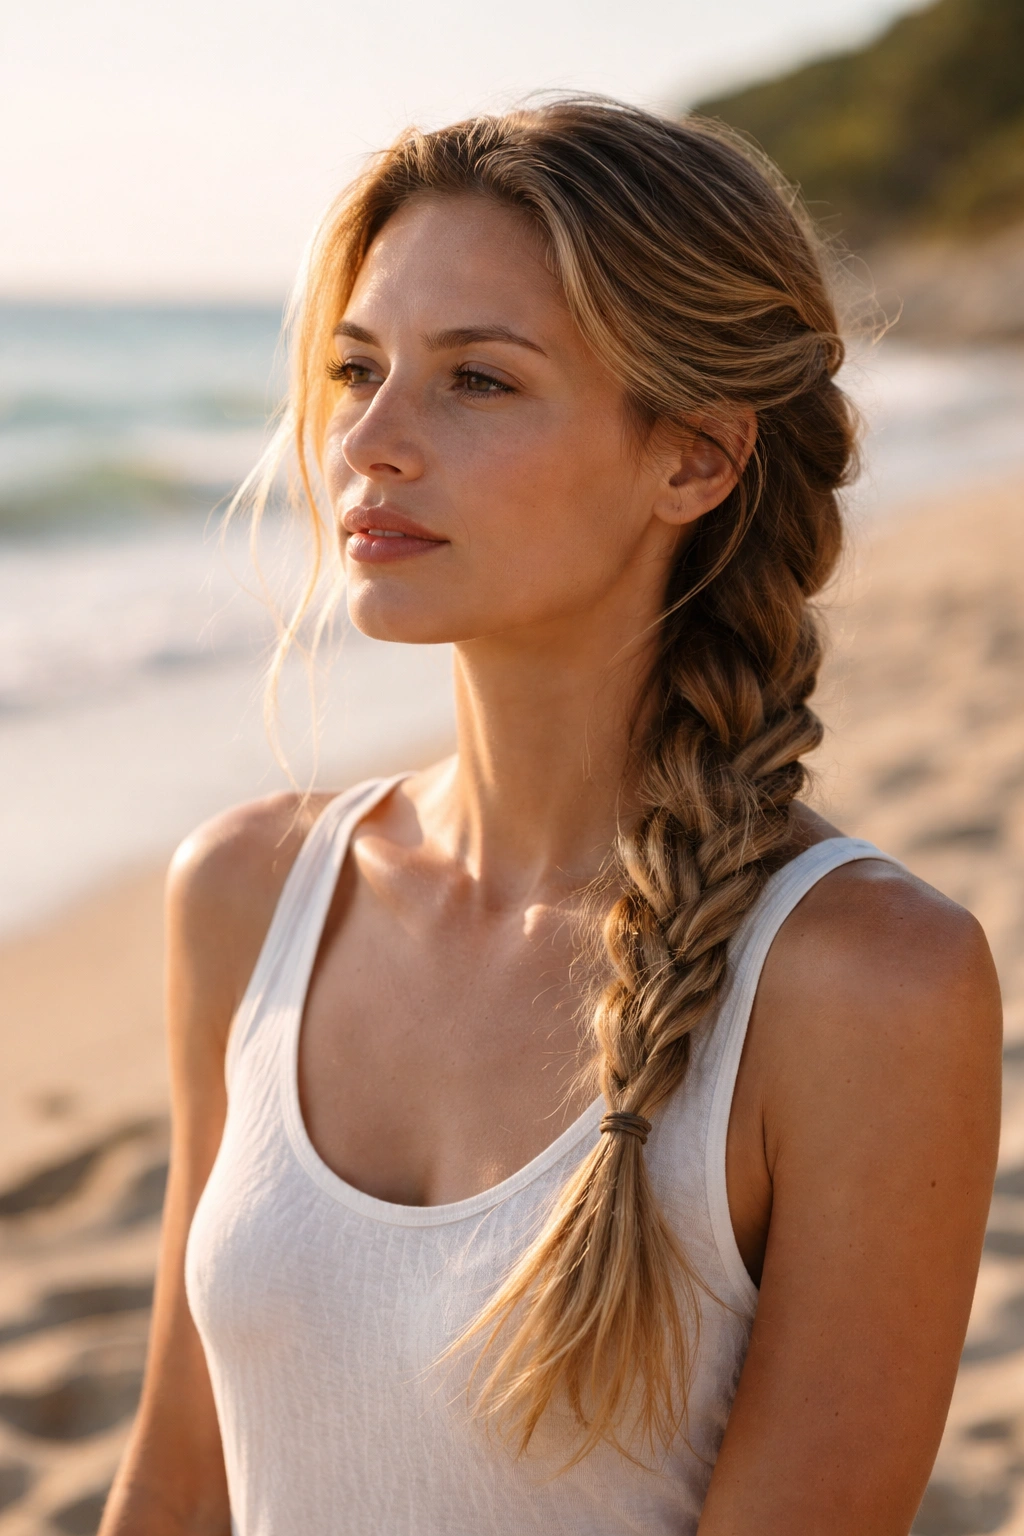
6. The Fishtail French Hybrid
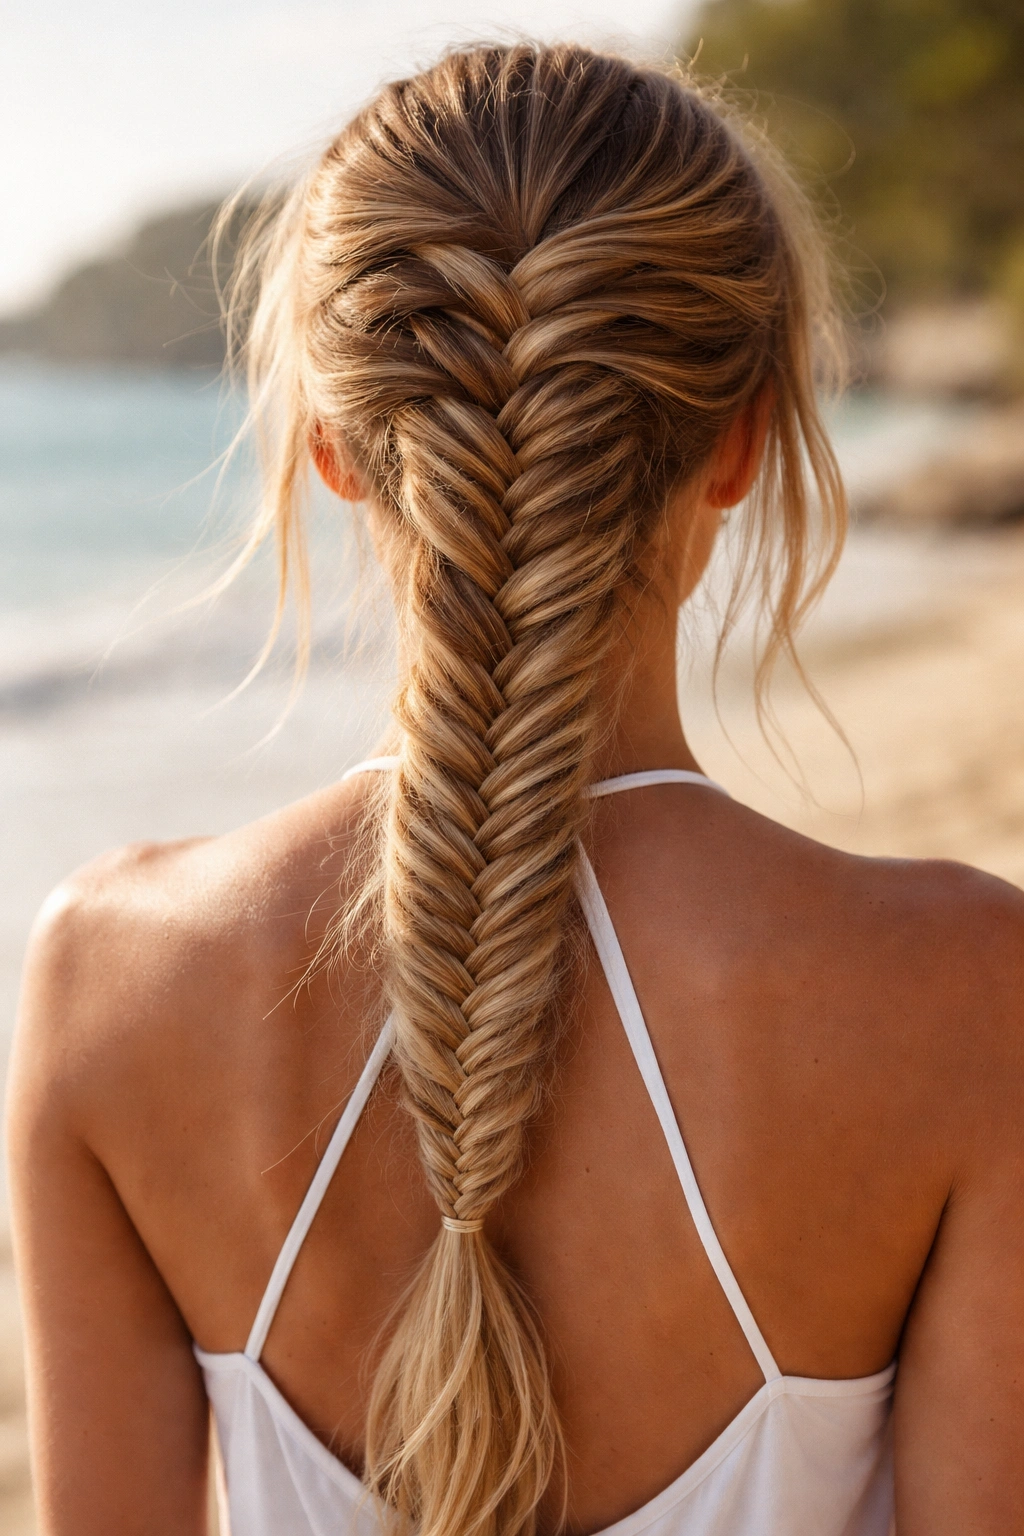
The fishtail French hybrid combines the fishtail braid technique with French braid construction, creating a style that’s visually more intricate than a standard French braid. A fishtail braid uses only two sections of hair instead of three, creating a finer, more delicate-looking final result that photographs beautifully.
Why It Works for Beach Days
The fishtail French hybrid is thinner and more elegant-looking than a classic French braid, which means it takes up less visual space on your head and feels lighter. The two-strand technique also creates a naturally textured finish without needing to pull and loosen the braid—it looks piece-y and romantic immediately. This style shows off your hair’s texture and color dimension beautifully, making it a excellent choice if you’ve highlighted your hair or if you have naturally textured hair.
How to Create It
Start with a three-strand section at the crown to kick off the French component. Cross right over middle, then left over middle—just as you would with a regular French braid. Once you’ve incorporated hair once from each side, switch to the two-strand fishtail technique. Divide the braid into left and right sections. Take a small piece from the outer right edge and cross it over to the left side, then take a small piece from the outer left edge and cross it to the right. Continue this pattern while still adding small sections of new hair from the sides of your head.
Beach Styling Tips
This style is naturally more forgiving about loose pieces and irregularities because the fishtail technique creates texture as part of the design. You can wear it tight for a polished look or loose for something softer. The hybrid approach means you’ll have a braid that combines the security of a French braid with the delicate appearance of a fishtail—the best of both worlds for a beach setting. This braid looks stunning with a few piece-y face-framing strands.
Pro tip: Take your time with this one and practice on a day when you’re not going anywhere—the two-strand fishtail technique feels awkward at first, but it becomes meditative once you get the rhythm down.
7. The Half-Up French Braid
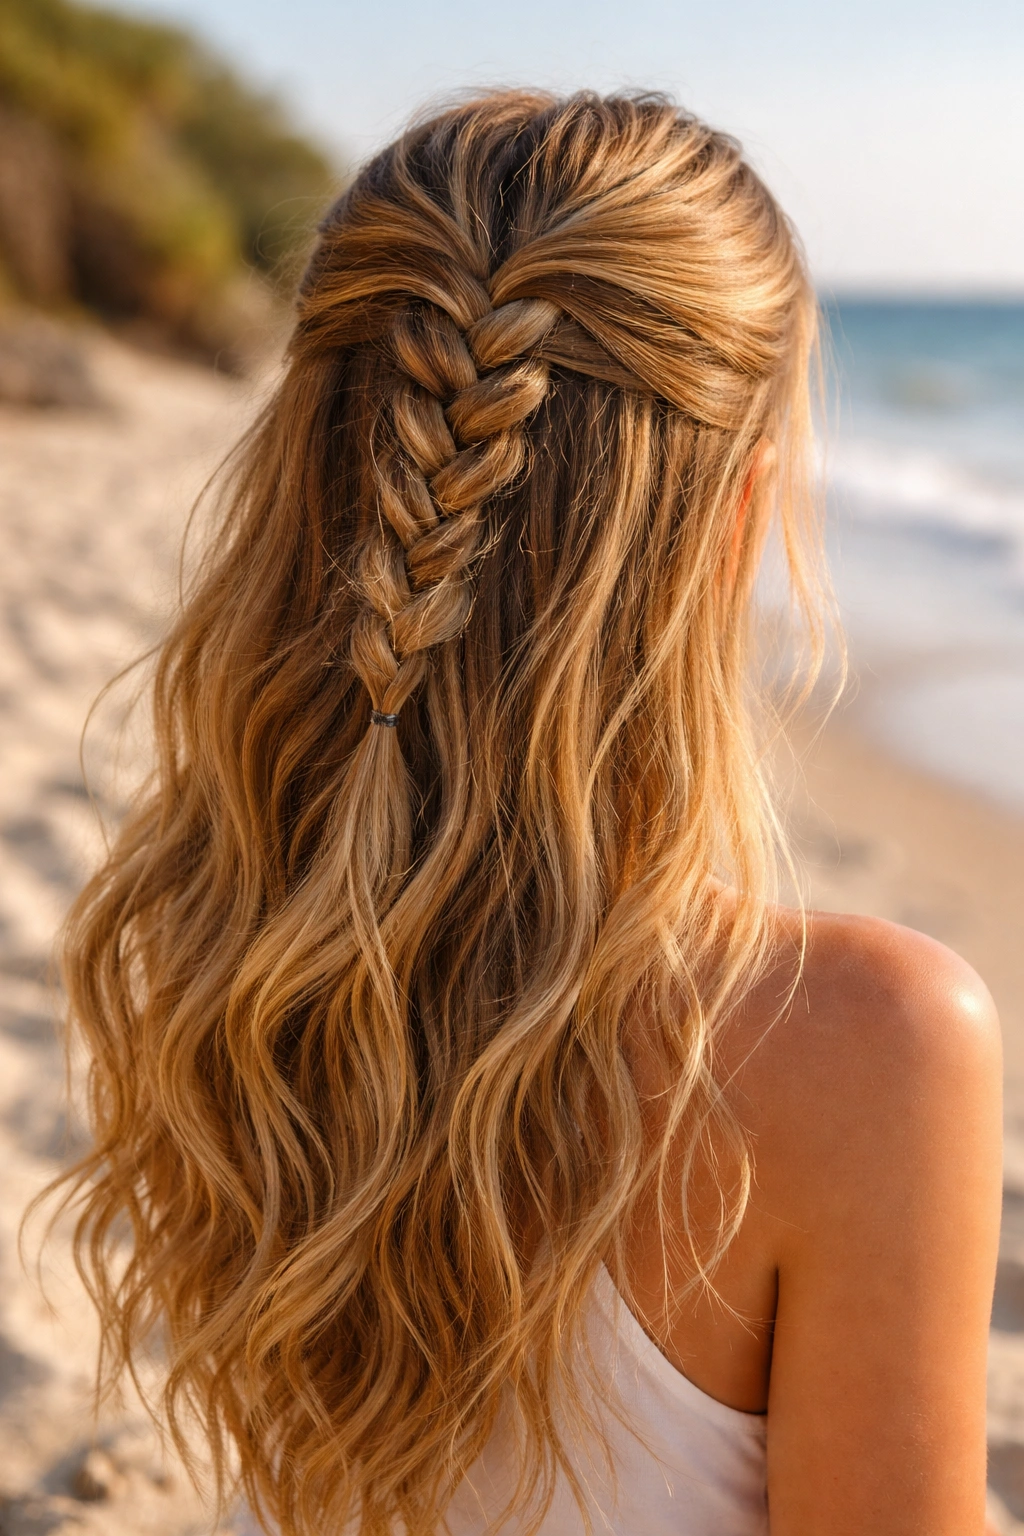
The half-up French braid takes only the top section of your hair and braids it, leaving the bottom half down and loose. This hybrid style gives you the best of both worlds—the polished, pulled-together look of a braid with the freedom and movement of wearing your hair down.
Why It Works for Beach Days
A half-up braid keeps hair off your face and neck without the commitment of a full braid. It’s perfect for a beach day where you want to look intentional without feeling overly styled or heavy. The half-up approach also means less hair is involved in the braid structure, so the style feels less tight and more comfortable for extended wear. You can easily undo the braid later without having loosened waves throughout your entire length—just the top section will have texture.
How to Create It
Start by taking a horizontal section of hair from about temple to temple across the crown of your head. Create a French braid using only this upper section, incorporating hair as you braid from the sides. Stop the braid around the middle back of your head and secure it with a hair tie. Leave all the hair below this line completely loose. For a softer look, pull the braid slightly loose once you’ve secured it.
Beach Styling Tips
This style works beautifully with the bottom half of your hair either straight, wavy, or curled. If you’re planning to get in the water, the half-up braid keeps the top section contained and secure while the bottom half can dry naturally into whatever texture the saltwater gives it. You can add a decorative clip or hair stick at the base of the braid to make the style feel more finished and intentional. This braid also looks great with a summer cover-up or a beach dress that shows off the back of your neck.
Pro tip: Use a hair tie that matches your hair color and is on the smaller side—it will be less noticeable and won’t distract from the braid itself.
8. The Crown French Braid
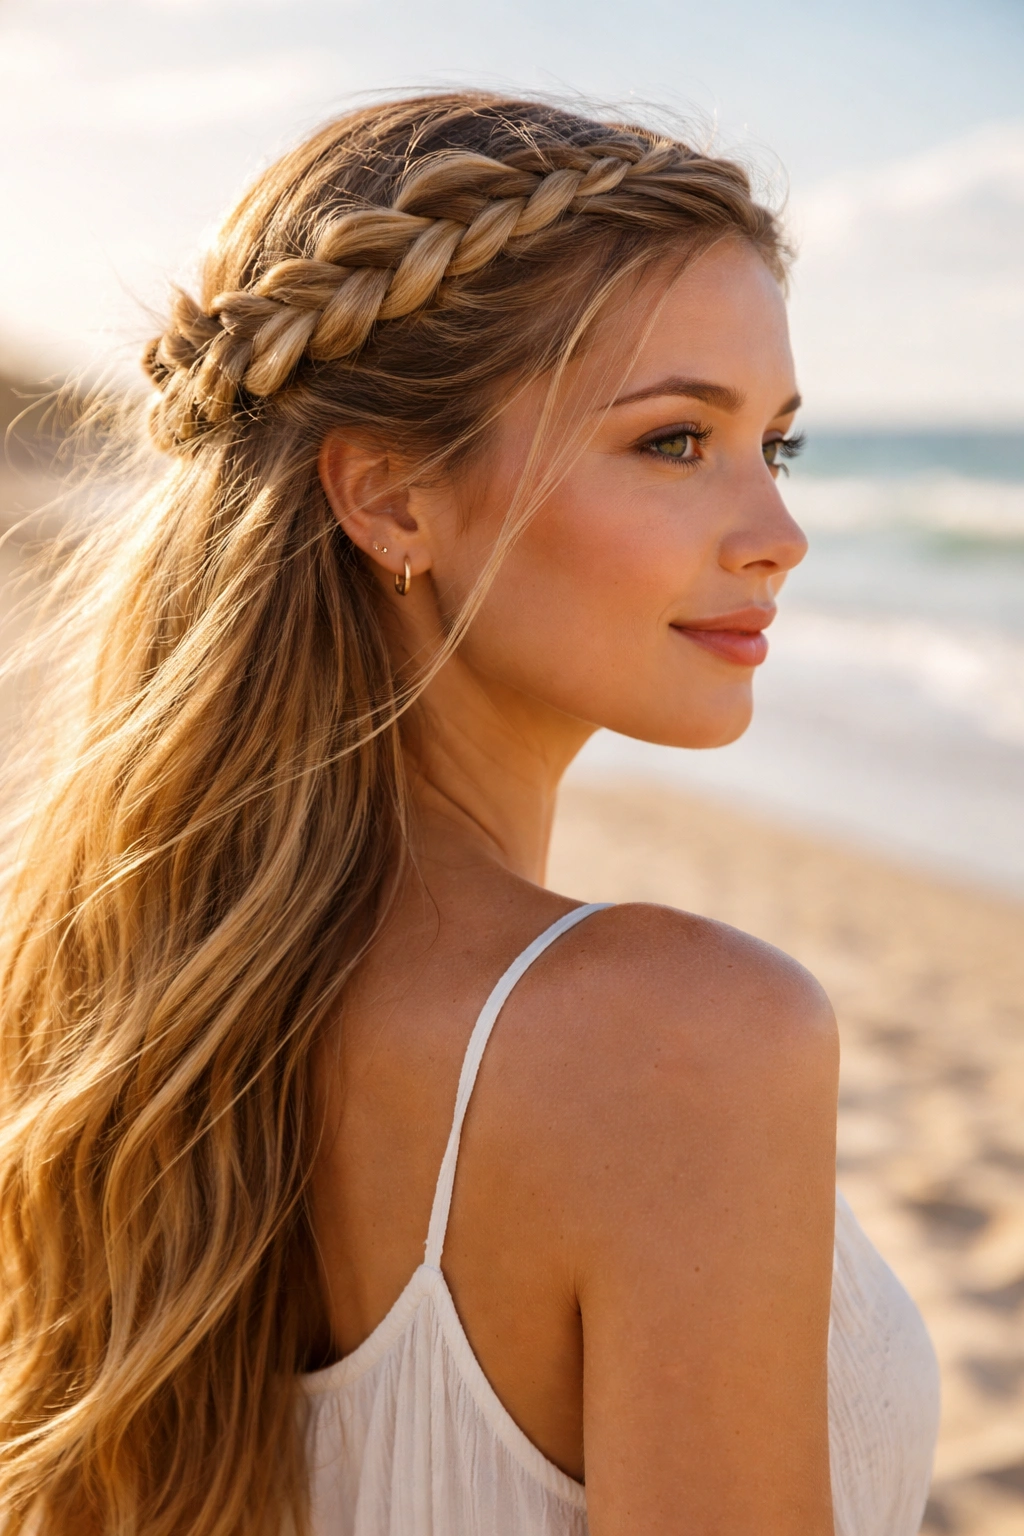
The crown French braid wraps around the crown of your head like a halo, creating a style that’s both romantic and practical. This braid starts at one ear, travels across the back of your head, and ends at the opposite ear, leaving your hair down below the braid line.
Why It Works for Beach Days
The crown braid keeps hair completely off your face and neck, which is ideal for a sunny beach day where you want maximum face exposure and airflow. The halo effect is incredibly flattering and photographs beautifully from every angle. This style also keeps your hair protected from sun damage because it’s pulled up and away from your shoulders, where UV exposure is most intense. It’s one of the most elegant French braid variations, making it perfect if your beach day includes a nice dinner or casual evening plans.
How to Create It
Start at your right ear with a small three-strand section. Create a French braid traveling from right ear to left ear, crossing the crown of your head. Incorporate hair only from the upper sections of your head as you braid—you want the braid to travel across the crown rather than down the back. Once you reach your left ear, secure the end with a hair tie. The hair below the braid line remains completely down and loose.
Beach Styling Tips
Curl or wave the hair below the crown braid for a romantic, feminine look. You can also wear the bottom section straight for a more modern aesthetic. The crown braid looks stunning with a sun hat—place the hat loosely on top of the braid without tucking the bottom section inside, which creates a layered look. Leave a few face-framing pieces loose around your temples to soften the style. This braid works beautifully with minimal jewelry and a simple beach outfit.
Pro tip: If you have finer hair or hair that falls out of braids easily, use a very light texturizing spray and start with slightly damp hair to give the braid better grip.
9. The Braided Bun with French Base
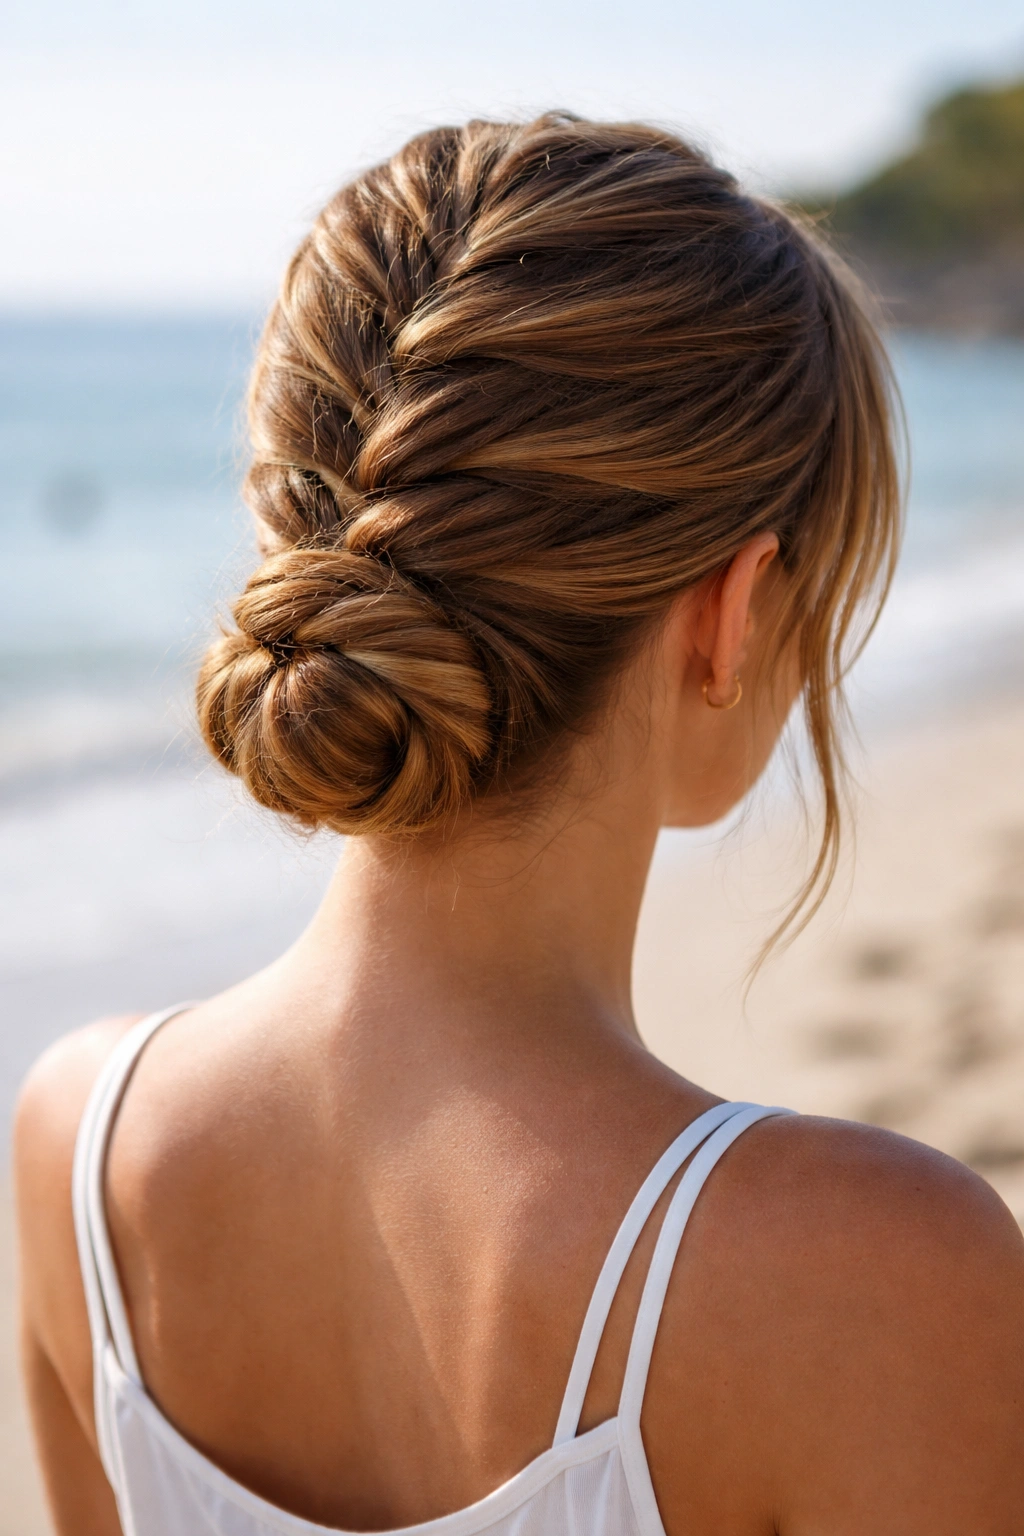
The braided bun with a French base combines a French braid with an updo, creating a style that’s simultaneously polished and relaxed. You braid a French braid from crown to nape, then twist or coil the remaining braid into a low bun at the back of your head.
Why It Works for Beach Days
This style gets all of your hair completely off your neck, face, and shoulders, making it the ultimate beach solution if you’re sensitive to sun or heat. Because everything is secured in both a braid and a bun, it’s incredibly secure and won’t slip or come undone, even if you’re swimming or being active. The updo keeps your hair from getting soaked with saltwater—it will stay mostly contained and dry while you’re in the water. This is the most practical French braid variation for serious water activities.
How to Create It
Create a standard French braid starting at your crown and traveling down to the nape of your neck. Once you reach the bottom, instead of securing it with a hair tie, take the end of the braid and wrap it around itself in a spiral, creating a low bun shape. Secure everything with bobby pins, using several to make sure the bun is completely stable. You can also use a hair stick or decorative fork for a more intentional, polished look.
Beach Styling Tips
Soften this style by pulling the braid slightly loose before you wrap it into the bun, which creates a more romantic updo rather than a strictly sleek one. You can secure the bun with decorative bobby pins or a jeweled hair stick if you’re going for something more dressed up. This style keeps your neck completely free for sunscreen application, and the bun sits low enough that it won’t interfere with a sun hat or beach bag strap. Wear a few pieces loose around your face for softness.
Pro tip: Use a lightweight texturizing spray before you start—the texture gives you better grip, and the bun will be more secure and less likely to slip throughout the day.
10. The Waterfall French Braid
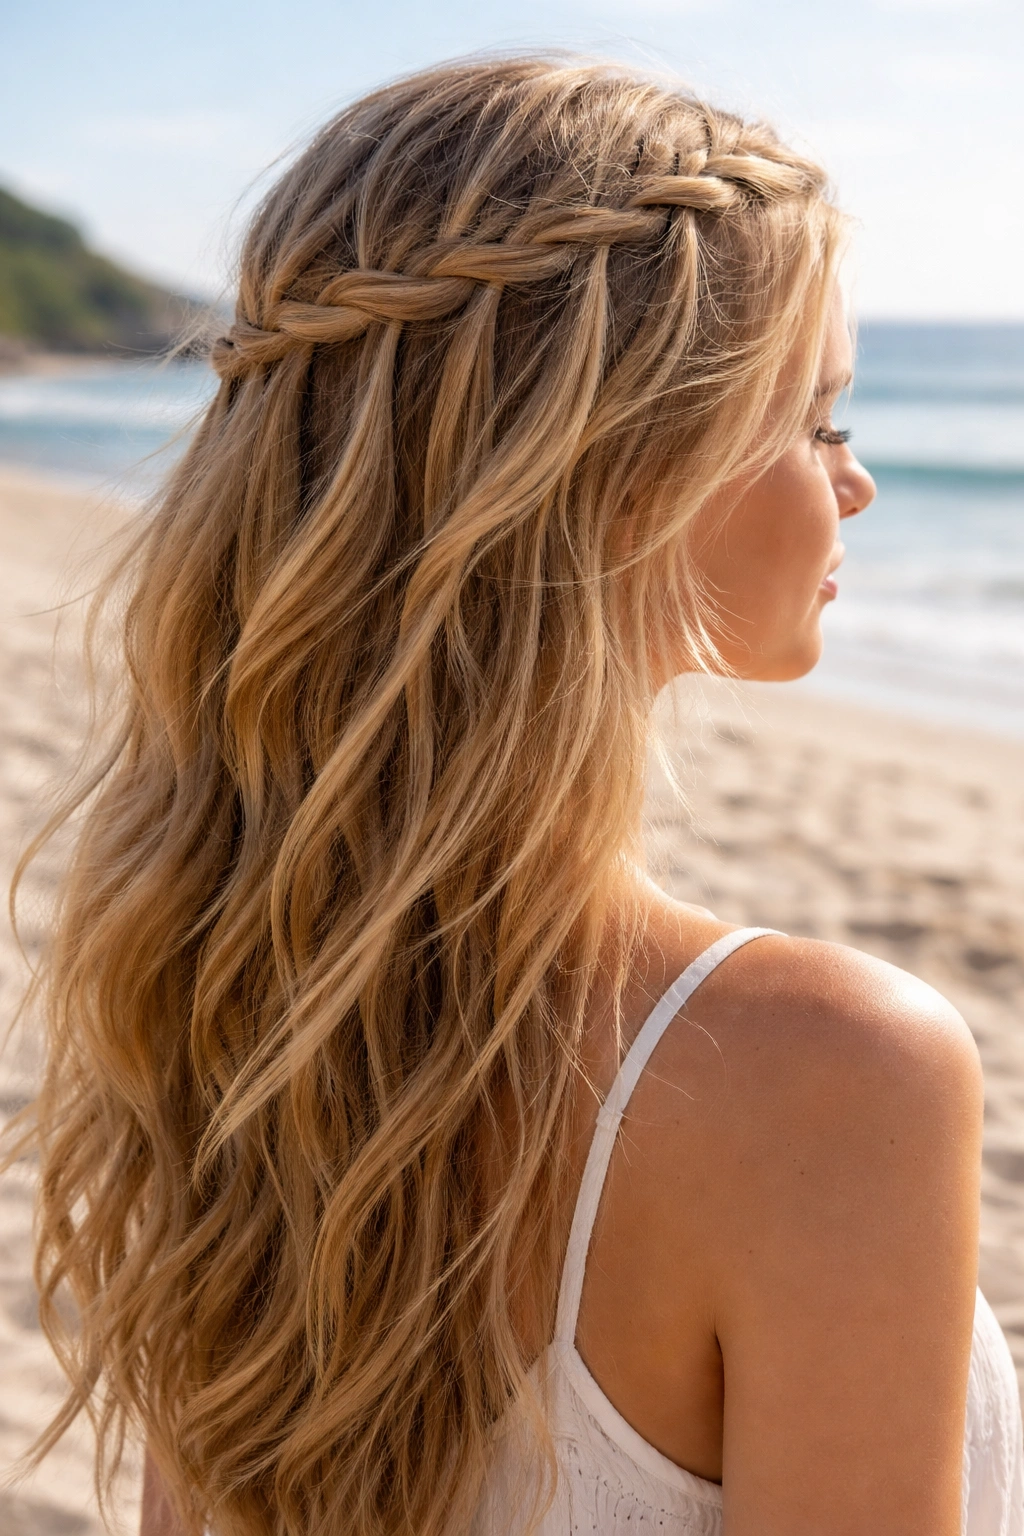
The waterfall French braid is a variation where you drop sections of hair as you braid, allowing some strands to cascade down while others are woven into the braid. This creates a style that looks intricate and special but is actually easier than many other variations.
Why It Works for Beach Days
The waterfall braid has natural texture and visual interest, and the cascading sections work beautifully with movement and wind. Because you’re dropping sections of hair, you’re not incorporating all of your hair into the braid itself, which makes it feel lighter and less heavy than a full French braid. This style shows off highlights, color, or texture beautifully, and the waterfall sections will catch the light in a really flattering way. It’s less practical than a full braid if you’re planning to get completely soaked, but it’s perfect for a beach day with minimal water activity.
How to Create It
Create a French braid starting at the crown. As you would with a regular French braid, incorporate hair from both sides. However, instead of adding the new section to the braid and continuing, drop that section and let it cascade down. Pick up a new section from just below where you dropped the last one and incorporate it instead. Continue this pattern as you braid down. The dropped sections will create a waterfall effect flowing down from the braid line.
Beach Styling Tips
This braid looks most beautiful with slightly wavy or textured hair, so consider curling your hair before braiding if it’s very straight. You can wear it tight and precise for a polished look, or looser for something softer. The cascading sections will wave beautifully throughout the day, especially if they pick up moisture from the ocean air. This style pairs perfectly with a sundress or a flowy beach cover-up. You can also tuck one small waterfall section behind your ear for a detail that shows off the braid’s intricacy.
Pro tip: Do a practice run at home before trying this on beach day—the drop-and-pick-up motion feels counterintuitive at first, but it becomes natural quickly.
Final Thoughts
The right French braid can transform a beach day from good to unforgettable. Whether you choose a classic style that you’ve mastered or you’re trying something new like a waterfall braid or a crown braid, you’re choosing a style that’s practical, beautiful, and designed to work with the beach environment rather than against it.
The saltwater, sun, and breeze that characterize a beach day won’t undo your French braid—they’ll actually enhance it, adding texture and a naturally undone quality that’s impossible to achieve with styling tools at home. That’s the real magic of beach braids: they look better as the day goes on, not worse.
Start with a style that feels manageable and familiar, then branch out as you build confidence. Once you’ve practiced these variations, you’ll be able to choose a braid in the moment based on your mood, your plans, and the specific vibe you want to create. Some days call for the elegance of a crown braid, while others are perfect for the carefree messiness of a loose, piece-y classic braid. The beauty is having options—and now you have ten.