Sleeping with your hair in braids is one of the smartest moves you can make for both hair health and styling ease. A good overnight braid keeps your strands protected, reduces friction and breakage, and wakes you up with gorgeous waves or curls that took zero effort. The key is choosing a braid style tight enough to hold through the night but comfortable enough that you’re not pulling your scalp in your sleep or waking up with a tension headache.
French braids are particularly excellent for sleeping because they’re naturally secure, distribute tension evenly across your scalp, and create stunning texture by morning. Unlike loose styles that unravel or buns that flatten one side of your head, a well-executed French braid stays intact and actually improves your hair’s appearance while you rest. The interlocking pattern also prevents tangling and keeps split ends at bay, making French braids one of the healthiest ways to protect your hair overnight.
The real challenge isn’t finding a French braid you can sleep in—it’s discovering which variations work best for your hair type, length, and sleep style. Some braids work better for fine, delicate hair; others are ideal for thick, textured, or curly strands. Some create beautiful beachy waves by morning, while others give you defined spiral curls. This guide walks you through ten proven French braid styles that are genuinely comfortable to sleep in, plus exactly how to create them, what makes each one special, and the insider tricks that keep them holding strong through a full eight hours of sleep.
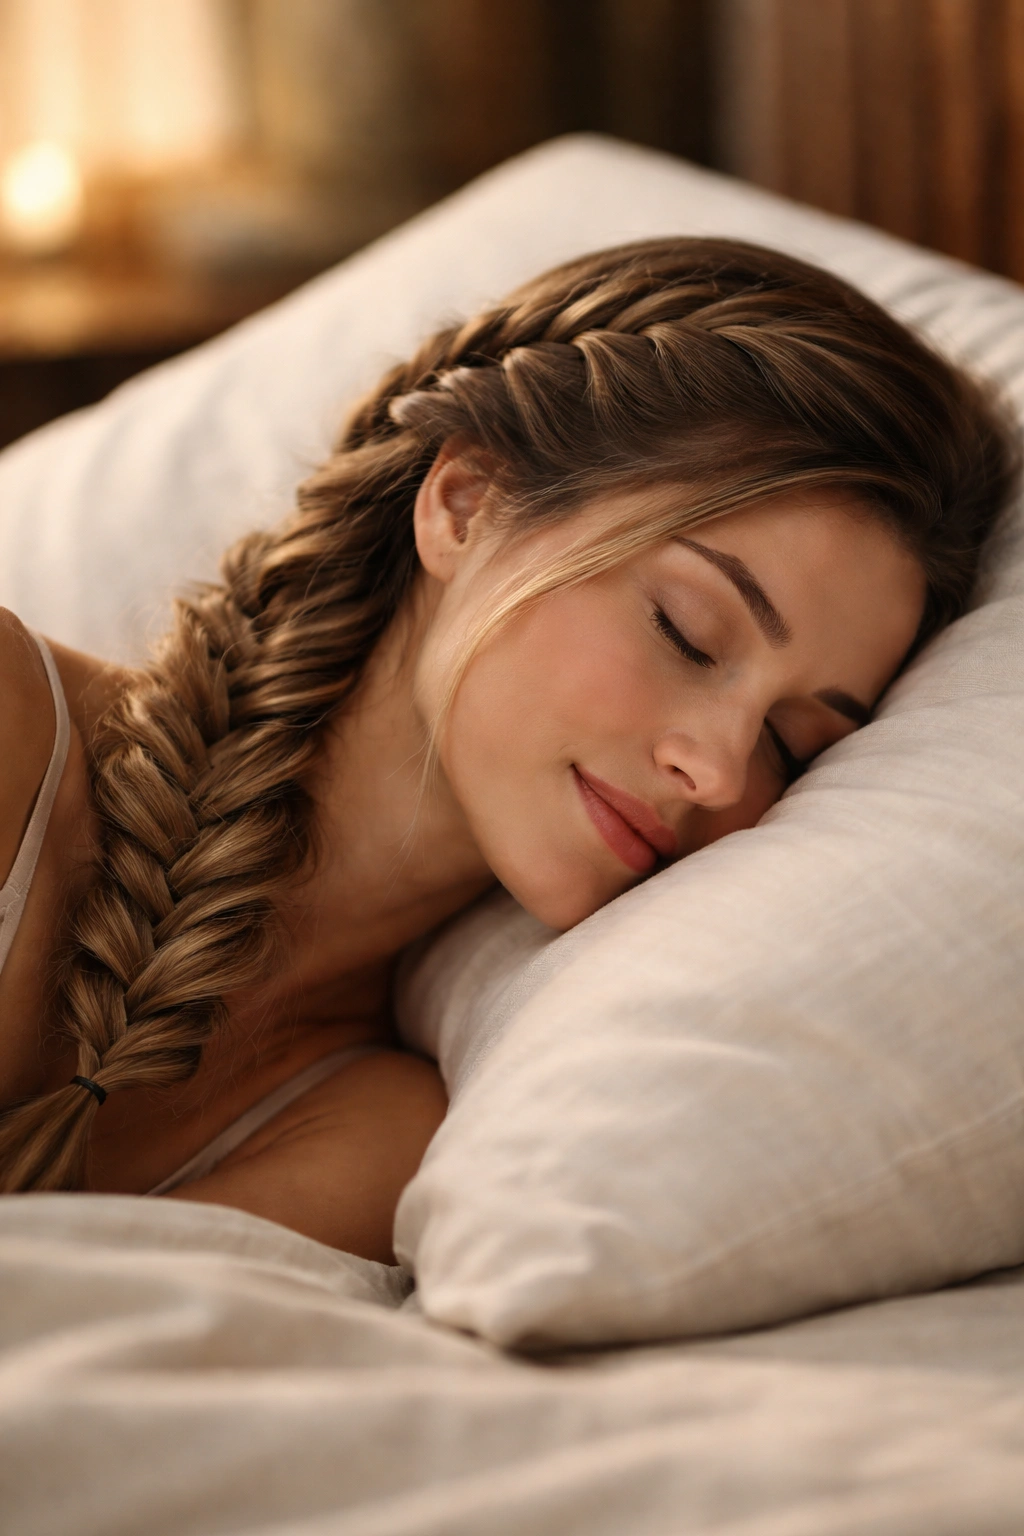
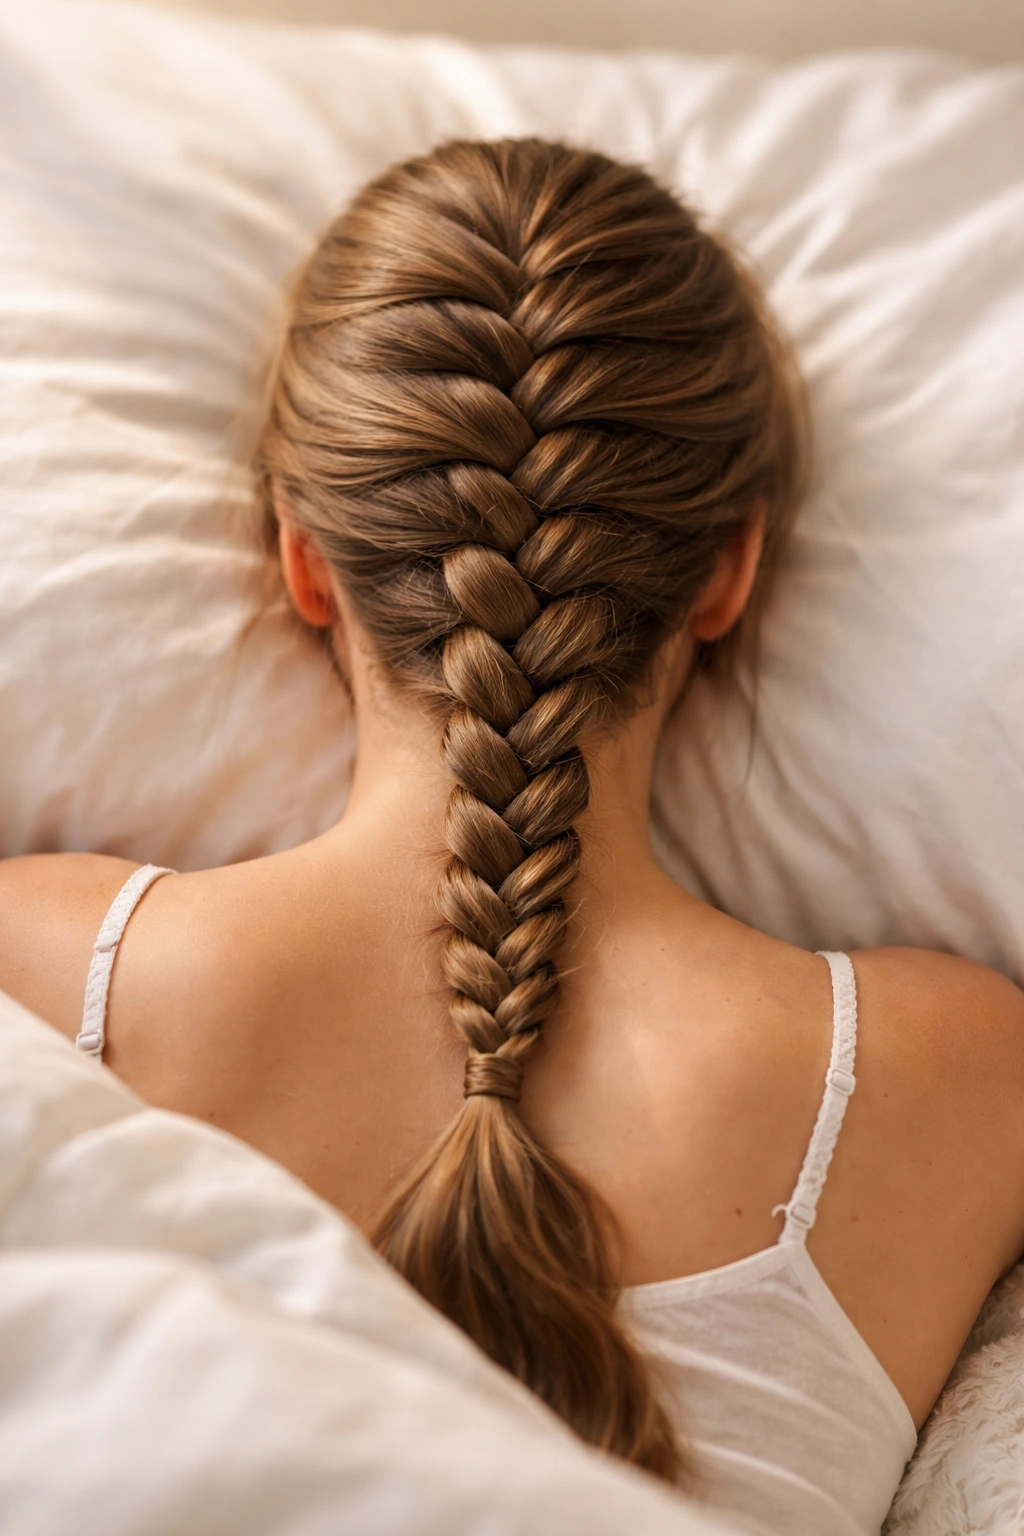
1. Classic Center French Braid
The classic center French braid is the gold standard for sleeping braids—it’s symmetric, balanced, and distributes tension evenly across your entire scalp. This style works beautifully on almost every hair type and length, and it creates soft, romantic waves by morning that look intentional rather than accidental. Many people assume a center braid is boring, but the truth is that simplicity is what makes it so effective. There’s no complicated technique to keep you awake worrying, no vulnerable sections prone to unraveling, and no awkward balance issues when you’re lying on your side.
To create a classic center braid, start at the crown of your head with a small section of hair, approximately three inches wide. Divide this section into three strands and begin the traditional French braiding pattern: cross the right strand over the center, then the left over the center, then add a small section of new hair to the right strand before crossing it over the center again. Continue this pattern all the way down the back of your head, feeding in hair from both sides as you go, until you reach the nape of your neck. Secure the finished braid with a soft elastic band—this step matters far more than most people realize. A tight metal hair clip or elastic can dig into your scalp and create tension that wakes you up, so use a cloth-wrapped elastic, a silk scrunchie, or even a small piece of silk ribbon tied in a bow.
Why It Works for Sleep
A center braid keeps pressure evenly distributed across your entire scalp rather than concentrating weight on one side. This means no numb spots, no weird indentation lines, and no “ouch” moments when you roll over. The even tension also makes it genuinely comfortable to sleep on—your head rests naturally on the pillow without the braid creating a lumpy, uncomfortable ridge.
Tips for the Best Results
- Braid loosely but securely. If you pull too tight, you’ll feel tension even while lying down. Tight braids also cause traction alopecia over time, which is actual hair loss from repeated tension. Aim for a braid that feels secure but not restrictive—you should be able to fit a single finger between the braid and your scalp comfortably.
- Braid when your hair is slightly damp. Dry hair is slippery and tends to slide out of braids overnight. Damp hair (not soaking wet, just lightly misted) grips better and holds the braid shape through eight hours of sleep.
- Sleep on a silk or satin pillowcase. Cotton pillowcases create friction that loosens braids and causes frizz. Silk or satin pillows reduce friction dramatically, helping your braid stay tight and your hair stay smooth.
Pro tip: Spray your finished braid very lightly with a light texture spray or sea salt spray. This adds grip without the crunch and helps the braid hold its shape through sleep. The spray also creates more defined texture by morning—you’ll wake up with more pronounced waves.
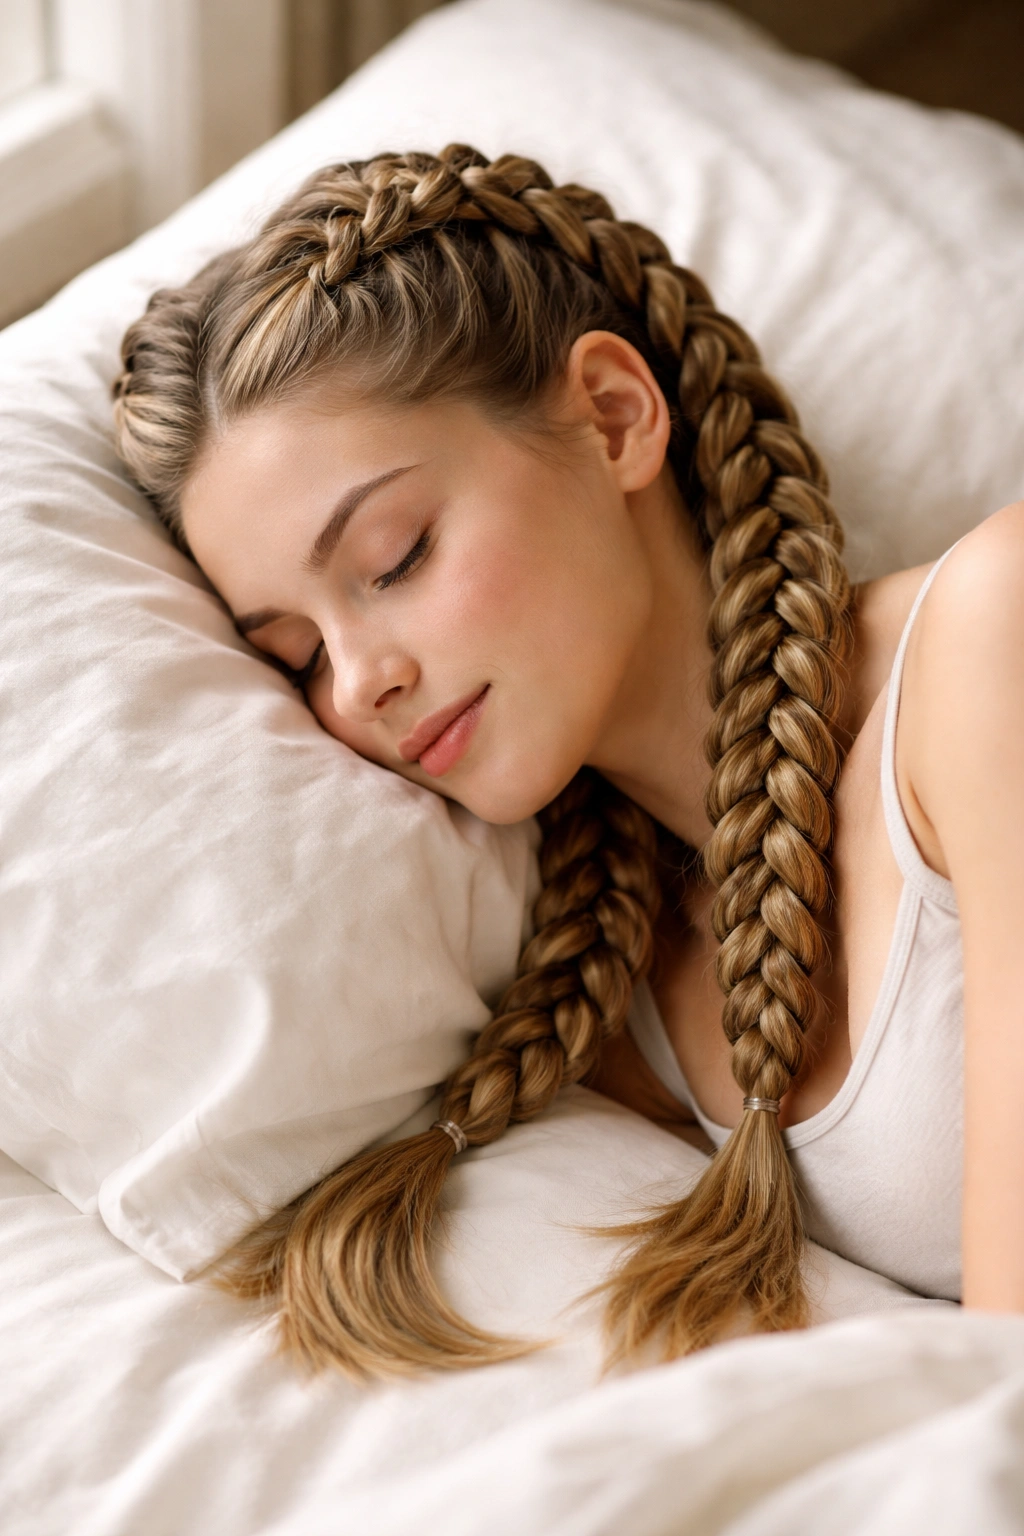
2. Double Dutch Braids (Boxer Braids)

Double Dutch braids, more commonly called boxer braids, are two parallel French braids that run from your forehead to the nape of your neck. These are perhaps the most secure option for sleeping because the dual structure means that even if one section loosens slightly, the other keeps everything in place. Boxer braids also look intentionally sporty and chic, so if you wake up early for a workout or have an active morning, you’re already styled. The twin-braid design is particularly excellent for keeping hair off your face while you sleep, which means no creases, no compression, and no awkward hair in your mouth at three in the morning.
Creating double Dutch braids is similar to a center braid, except you’re working with two separate braids simultaneously. Part your hair down the center from your forehead to the nape of your neck using a fine-tooth comb—take your time here because a clean part makes the finished look polished. Starting on one side, create a French braid along that half of your head, feeding in hair from both the outer edge and the center part line as you braid downward. Once you reach the nape, secure that braid with a soft elastic. Repeat on the other side, mirroring the first braid as closely as possible.
Why This Style is Ideal for Sleep
The dual structure means incredible stability. Even if you toss and turn all night, both braids work together to keep your hair secure and off your face. This style is also perfect if you’re a restless sleeper or sleep with a partner—no flying hair in anyone’s face, and your braids won’t come loose from movement.
Common Mistakes to Avoid
- Feeding hair unevenly from the center part. If you add more hair to one braid than the other as you work down, one braid will be thicker and tighter than the other, creating an imbalanced look and uneven tension. Check in with the center part frequently and aim to add approximately equal amounts to each braid.
- Making the center part crooked. A curved or uneven center part immediately looks sloppy, even though both braids are technically correct. Use a fine comb and take your time creating a perfectly straight line from forehead to nape.
- Braiding too tightly at the temples. The area above your ears is sensitive, and tight braids here can cause headaches or a sore scalp by morning. Braid deliberately loosely in this zone—the rest of the braid can be slightly tighter for security, but the top half should feel gentle.
Pro tip: Spray a light texture spray on your hair before you start, or mist it lightly as you braid. This makes the strands grip better and significantly reduces the chance that your braids will loosen during sleep. You’ll also wake up with more defined waves because the spray helps the braid hold its pattern.
3. Side French Braid
A side French braid is a single braid that starts at one side of your head and angles across toward the opposite shoulder. This style is ideal if you sleep primarily on one side, as it keeps hair completely off that side of your face while you rest. The asymmetrical look is also sophisticated and works beautifully for both casual and polished occasions—you can wear it to bed and then transition directly to a date or a morning event without re-styling. Side braids distribute tension differently than center braids; instead of even pressure across your entire scalp, a side braid concentrates weight on one side, so it’s especially important to braid loosely and ensure the style feels comfortable before you sleep.
Start the side braid by creating a shallow side part, positioning it roughly two inches from one temple. Begin the French braid at the part line and angle the braid downward and across toward your opposite shoulder. As you braid, feed in hair from both above and below the braid line, angling gradually toward the back of your head. Continue until you reach the nape of your neck or your desired end point—some people prefer a short side braid that ends at the collarbone, while others take it all the way down. Secure with a soft elastic and allow a few small face-framing pieces to fall loose for a softer, more romantic look.
Why Side Braids Work Well for Sleep
If you sleep primarily on one side, a side braid keeps hair completely off that side of your face. This means no creasing, no compression, and no weird texture issues on one side by morning. Side braids also create an incredibly flattering asymmetrical look that works for most face shapes, and the angle of the braid naturally creates more dramatic waves or curls by morning compared to a straight braid.
Getting the Angle Right
- Start the braid closer to the part if you want it subtle, or start further forward if you want the braid more noticeable.
- The angle matters for comfort. A braid that angles too sharply pulls tension toward one ear, which can be uncomfortable. Aim for a gentle, gradual angle rather than a dramatic pull to the side.
- Feed hair evenly from both sides. As you braid across, you’re adding hair from the top of your head and the side—keep these proportions balanced so the braid doesn’t twist or distort.
Pro tip: Tease the section of hair at your starting point very lightly before you begin braiding. This creates texture and grip, so the braid holds better and looks fuller and more luxe by morning. Just use a fine brush and gentle motions—you’re creating grip, not a full bouffant.
4. Fishtail French Braid
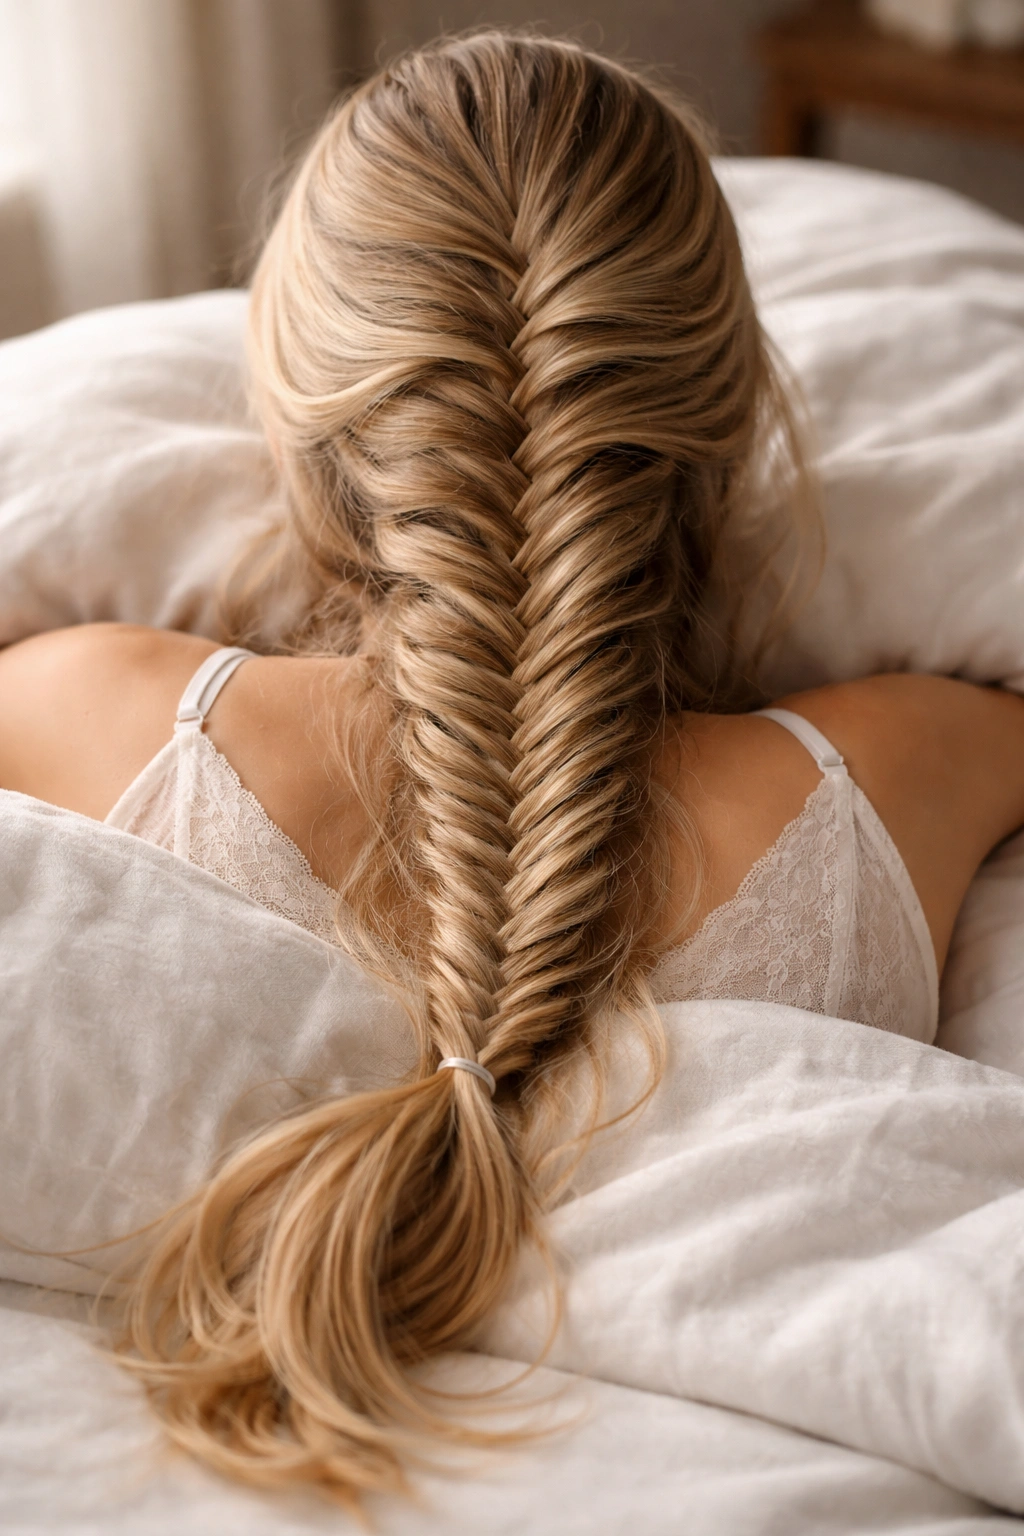
A fishtail braid uses a different braiding technique than a traditional French braid, but the principle of sleeping with it is the same: it’s secure, comfortable, and creates absolutely gorgeous texture by morning. A fishtail braid starts with two strands instead of three, and you create the pattern by taking thin sections from the outside of each strand and crossing them over to the opposite side. The result is a thinner, more intricate-looking braid with delicate interlocking texture that looks far more complicated than it actually is. Fishtail braids work beautifully as a single center braid, and they’re particularly stunning if your hair has layers or varying lengths.
To create a fishtail braid that’s comfortable for sleep, start with a loose, low ponytail at the back of your head—this is your base. Divide this ponytail into two sections. Take a very thin section of hair from the outer edge of the left section and cross it over to the right section. Then take a thin section from the outer edge of the right section and cross it to the left. Continue this alternating pattern, always taking from the outside edges and crossing over. The thinner your outer sections, the more delicate and intricate your fishtail will look. Once you reach the end, secure with a soft elastic.
Why Fishtail Braids Are Great for Sleeping
The thin, woven pattern of a fishtail braid creates incredible definition by morning—your waves or curls will look more intentional and polished than with a traditional French braid. The technique is also surprisingly secure; even if you use thin outer sections for a delicate look, the interlocking pattern means your braid will hold all night. Fishtail braids also work beautifully on textured or curly hair because the pattern shows off texture beautifully.
Mastering the Technique
- Start with a low ponytail base. This gives you a clear work area and makes it much easier to maintain even tension throughout the braid.
- Keep your outer sections very thin. Thick outer sections create a loose, messy look; thin sections create that delicate, intricate fishtail pattern that looks intentional.
- Work slowly and deliberately. Fishtail braids are slightly more finicky than traditional braids because you’re pulling small sections rather than large ones. Take your time, and the braid will be worth it.
- Gently loosen the braid after you’ve finished. Fishtail braids look better slightly undone. Using your fingers, gently pull outward on the sides of the braid to widen it and create a fuller, more textured look. This also makes the braid less tight and more comfortable for sleeping.
Pro tip: A fishtail braid looks even more stunning if you tease your hair very lightly before creating the braid. The texture helps the strands grip and creates a fuller, more luxe-looking final braid.
5. Dutch Braid (Reverse French Braid)
A Dutch braid is essentially a French braid in reverse: instead of crossing strands over the center, you cross strands under the center. The result is a braid that pops out from your head more dramatically and looks thicker and more textured than a traditional French braid. Dutch braids are incredibly sturdy—the underhand braiding technique creates more friction and tension, which means the braid holds its shape beautifully through sleep. If you have fine or slippery hair that tends to loosen from traditional French braids, a Dutch braid might be your solution.
To create a Dutch braid, start at the crown with a small section of hair, approximately three inches wide. Divide this into three strands. Instead of crossing the right strand over the center, cross it under the center strand. Then cross the left strand under the (new) center strand. As you continue down, you’ll add hair to each side strand before crossing it under, just like in a French braid but in reverse. The motion feels slightly awkward at first if you’re used to French braiding, but it becomes intuitive quickly. Continue this pattern all the way down the back of your head, and secure with a soft elastic at the base.
Why Dutch Braids Are Excellent for Sleep
The underhand technique creates more friction between strands, which means your braid simply won’t loosen overnight. This is the style of choice for people with slippery, fine, or short hair that traditional braids won’t hold. Dutch braids are also much thicker-looking than French braids, so they’re particularly flattering if you have fine or thin hair and want to create an illusion of volume.
The Dutch Braid Learning Curve
- The motion takes practice. If you’re used to French braiding, Dutch braiding feels counterintuitive at first because you’re moving your hands differently. Practice with a friend’s hair or a long wig before committing to sleeping with a Dutch braid if you’re new to the technique.
- You can braid slightly tighter than with a French braid. Because of the increased friction, you have a little more wiggle room with tension. A Dutch braid can handle being slightly tighter without feeling uncomfortable, which is helpful if you’re worried about it loosening during sleep.
- Gently loosen the finished braid. Just like with a fishtail, a Dutch braid often looks better slightly undone. Gently pull outward on the sides using your fingers to widen it and create a fuller, more textured appearance.
Pro tip: If you’re struggling with the motion, start a Dutch braid at your nape and work upward toward your crown instead of the traditional top-to-bottom direction. Braiding upward feels more natural for some people and might make the technique click.
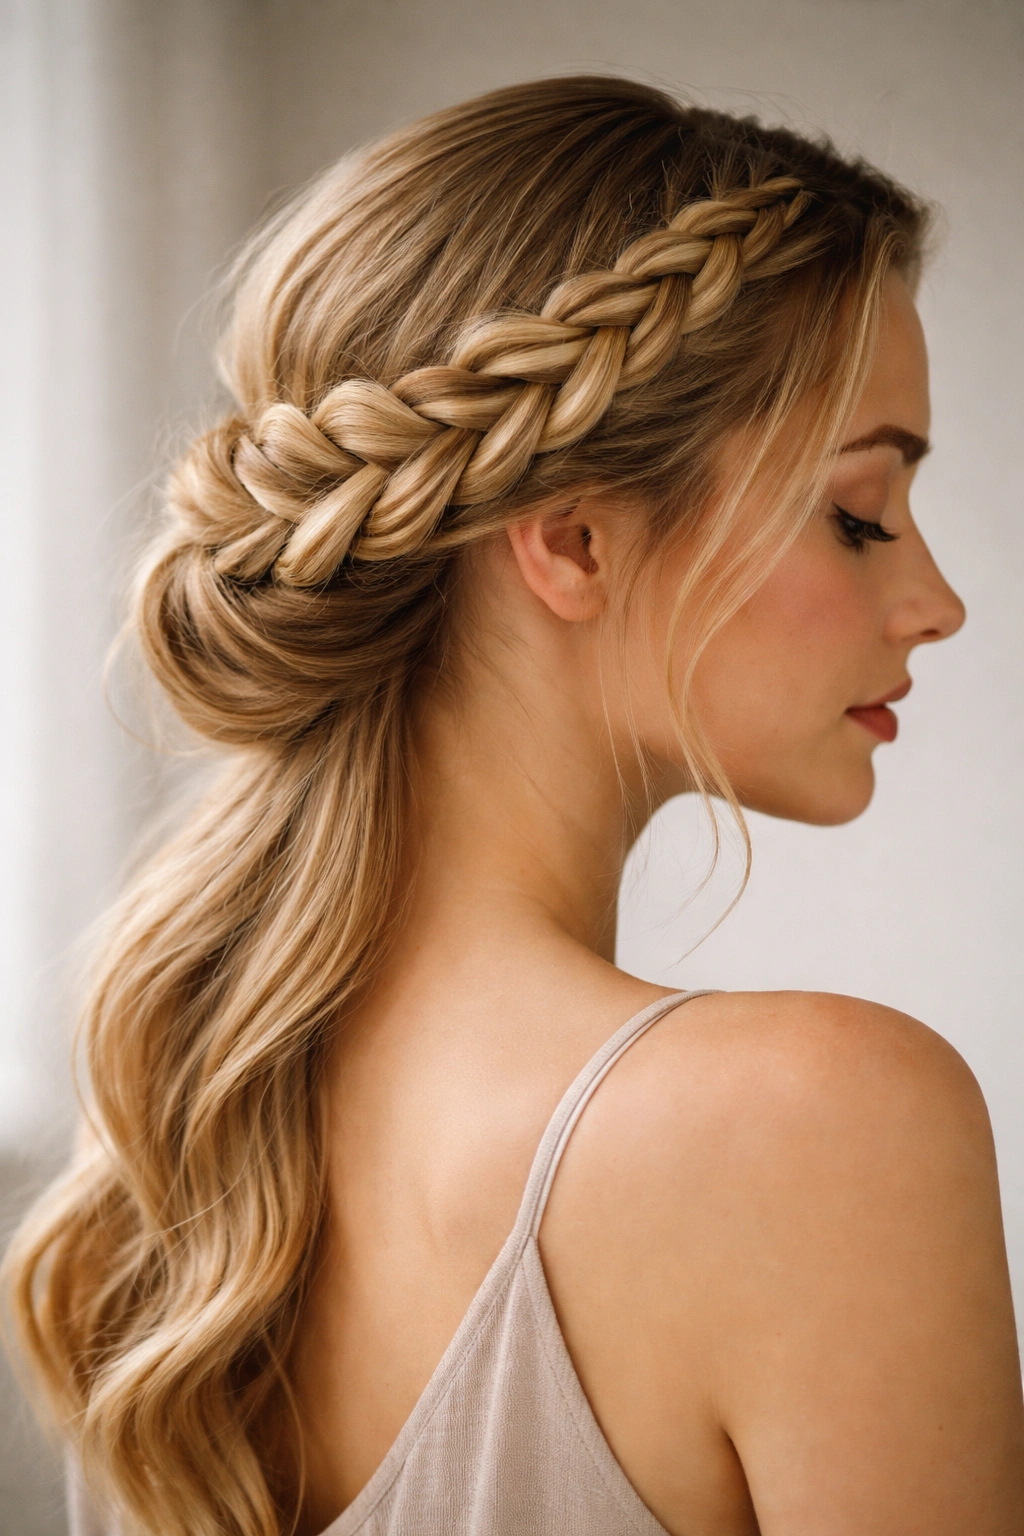
6. Milkmaid Braid
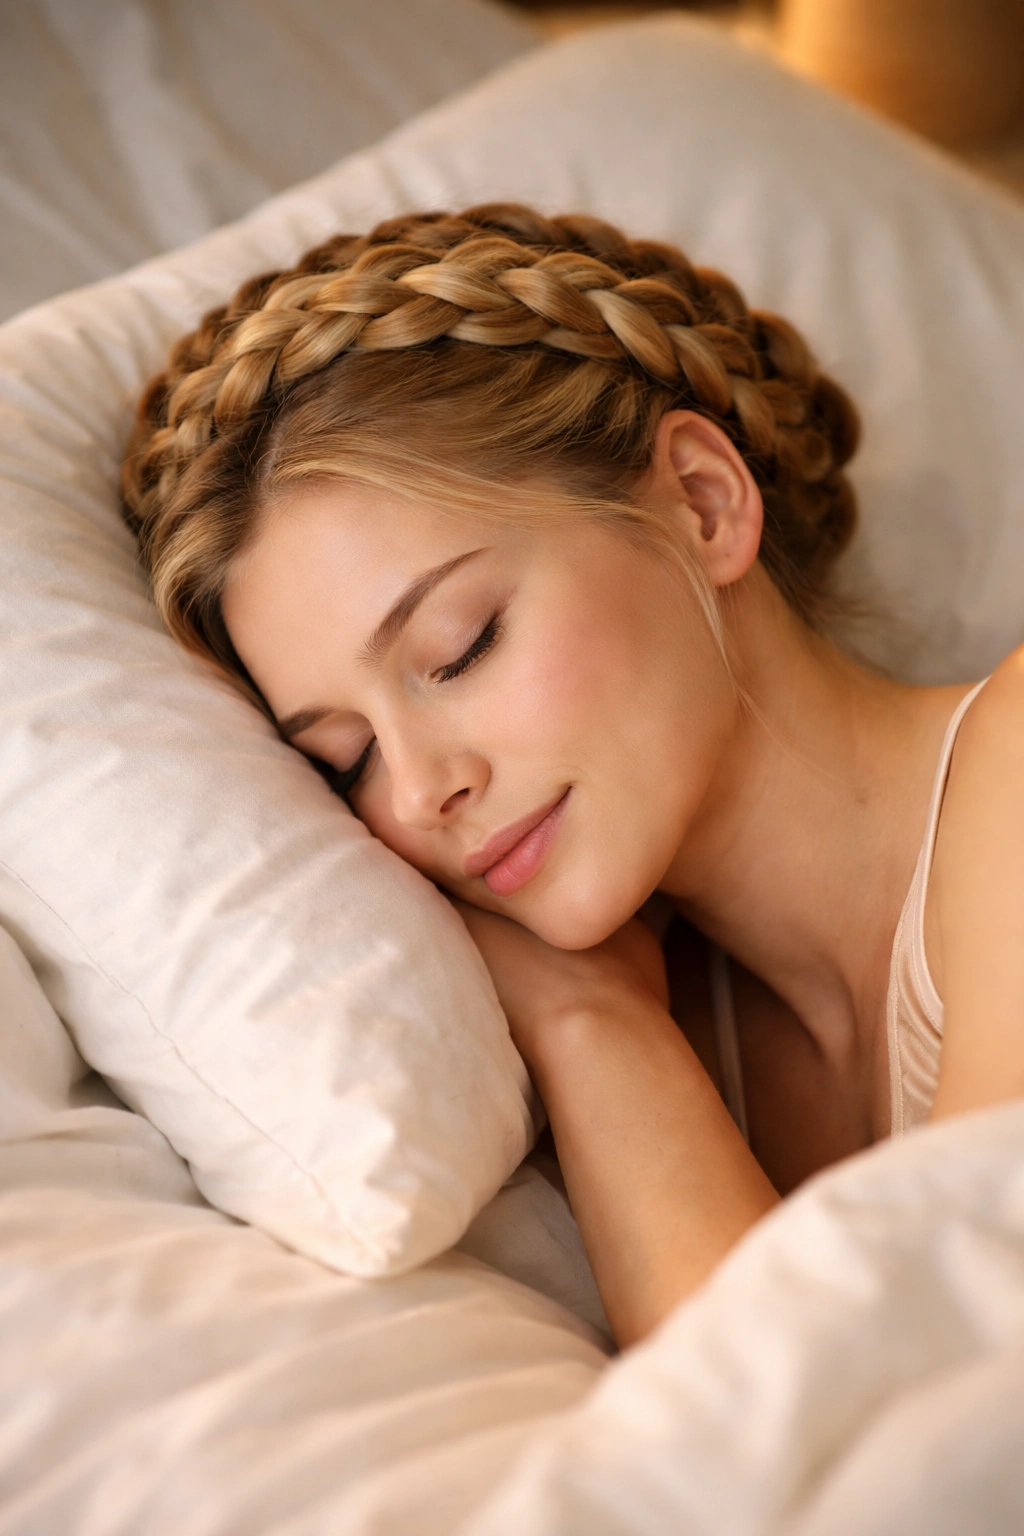
A milkmaid braid is two braids (traditional three-strand braids, not French braids) that wrap around your head like a crown, meeting at the back. It looks incredibly intricate and romantic but is actually one of the easiest overnight styles if you can do a basic three-strand braid. The milkmaid braid is ideal for sleeping because the dual structure means incredible stability—even if you toss and turn all night, both braids work together to keep everything secure. This style also keeps hair completely off your face and neck, which is wonderful if you get hot while sleeping or prefer to wake up with hair out of the way.
To create a milkmaid braid, start with a deep side part on one side of your head. Create a traditional three-strand braid starting at that side, and angle it horizontally across the back of your head toward the opposite ear. Secure the end of this first braid with a small elastic or bobby pin tucked behind your ear. Now create a second braid on the other side of your head, starting at the part and angling across the back to meet the first braid. You can either tuck the end of the second braid into the first braid, or secure both braids with small elastics at the base of your skull where they meet. The effect is a beautiful crown braid that looks far more complicated than it actually is.
Why Milkmaid Braids Work for Sleep
The dual-braid structure provides extraordinary stability, and because the braids wrap around your head rather than hanging down, there’s no weight distribution issue. Your head rests naturally on the pillow with both braids securing your hair completely. The style also works beautifully for all hair types and lengths—even shoulder-length hair can work with a milkmaid braid.
Creating the Perfect Milkmaid Braid
- Use a deep side part for the most flattering look. A deep part (roughly three inches from the natural part line) creates a more dramatic frame and looks intentionally styled rather than accidental.
- Make both braids the same thickness and tension. If one braid is noticeably tighter or looser than the other, the style will look lopsided. Check in with yourself as you create the second braid and adjust tension to match the first.
- Angle the braids gradually. Rather than abruptly pulling the braid across your head, angle it gradually as you braid so the tension feels natural and the final crown looks organic.
Pro tip: You don’t have to use traditional three-strand braids for a milkmaid style. Try using fishtail braids or Dutch braids instead for a more textured, intricate look. The same wrapping principle applies, but the final result will look even more luxe and detailed.
7. Rope Braid (Twisted Braid)

A rope braid, also called a twisted braid, uses a completely different technique than traditional braiding—instead of interlocking strands, you twist two sections of hair around each other. The result is a thinner, more elegant braid that looks sophisticated and works beautifully as a single center braid for sleeping. Rope braids are surprisingly secure despite their delicate appearance, and they create beautiful spiral waves by morning. If you have very curly or textured hair, a rope braid might actually be more comfortable than a traditional French braid because the technique doesn’t require the same amount of tension.
To create a rope braid, start with a small section of hair at the crown of your head and divide it into two sections. Twist the right section clockwise (away from your body), then twist the left section clockwise. Cross the right twisted section over the left, then repeat: twist the right section, twist the left section, cross right over left. Continue this pattern all the way down the back of your head, gradually adding small sections of new hair to both sides as you go. The motion might feel slightly awkward at first, but it becomes rhythmic and meditative once you find the pattern. Secure the finished braid with a soft elastic.
Why Rope Braids Are Ideal for Sleep
The rope braid technique creates a thinner, more elegant braid than traditional French braiding, which means less weight on your scalp and maximum comfort for sleeping. The spiral pattern also creates absolutely stunning waves by morning—more defined than traditional braids because of the twisted texture. Rope braids are also easier on sensitive scalps and work beautifully on curly or textured hair.
Mastering the Rope Braid Technique
- Keep both sections evenly twisted. If you twist one side more than the other, your braid will look lumpy and distorted. Aim for the same number of twists on both sides before you cross them over.
- Cross with intention. As you cross the right section over the left, pull it across cleanly and decisively. This creates a neat, polished appearance rather than a messy, undone look.
- Add hair gradually. Just like in a French braid, you’re adding new hair to both sides as you go. Keep these additions small and proportional so the braid looks even and balanced.
- Loosen slightly after finishing. Rope braids often look better slightly undone. Use your fingers to gently pull outward on the braid, widening it and creating a fuller, more textured appearance.
Pro tip: A rope braid looks absolutely stunning with a slight texture spray applied before you start. The spray helps the strands grip and stay twisted, and creates more dramatic waves by morning.
8. Braided Crown with Center Braid
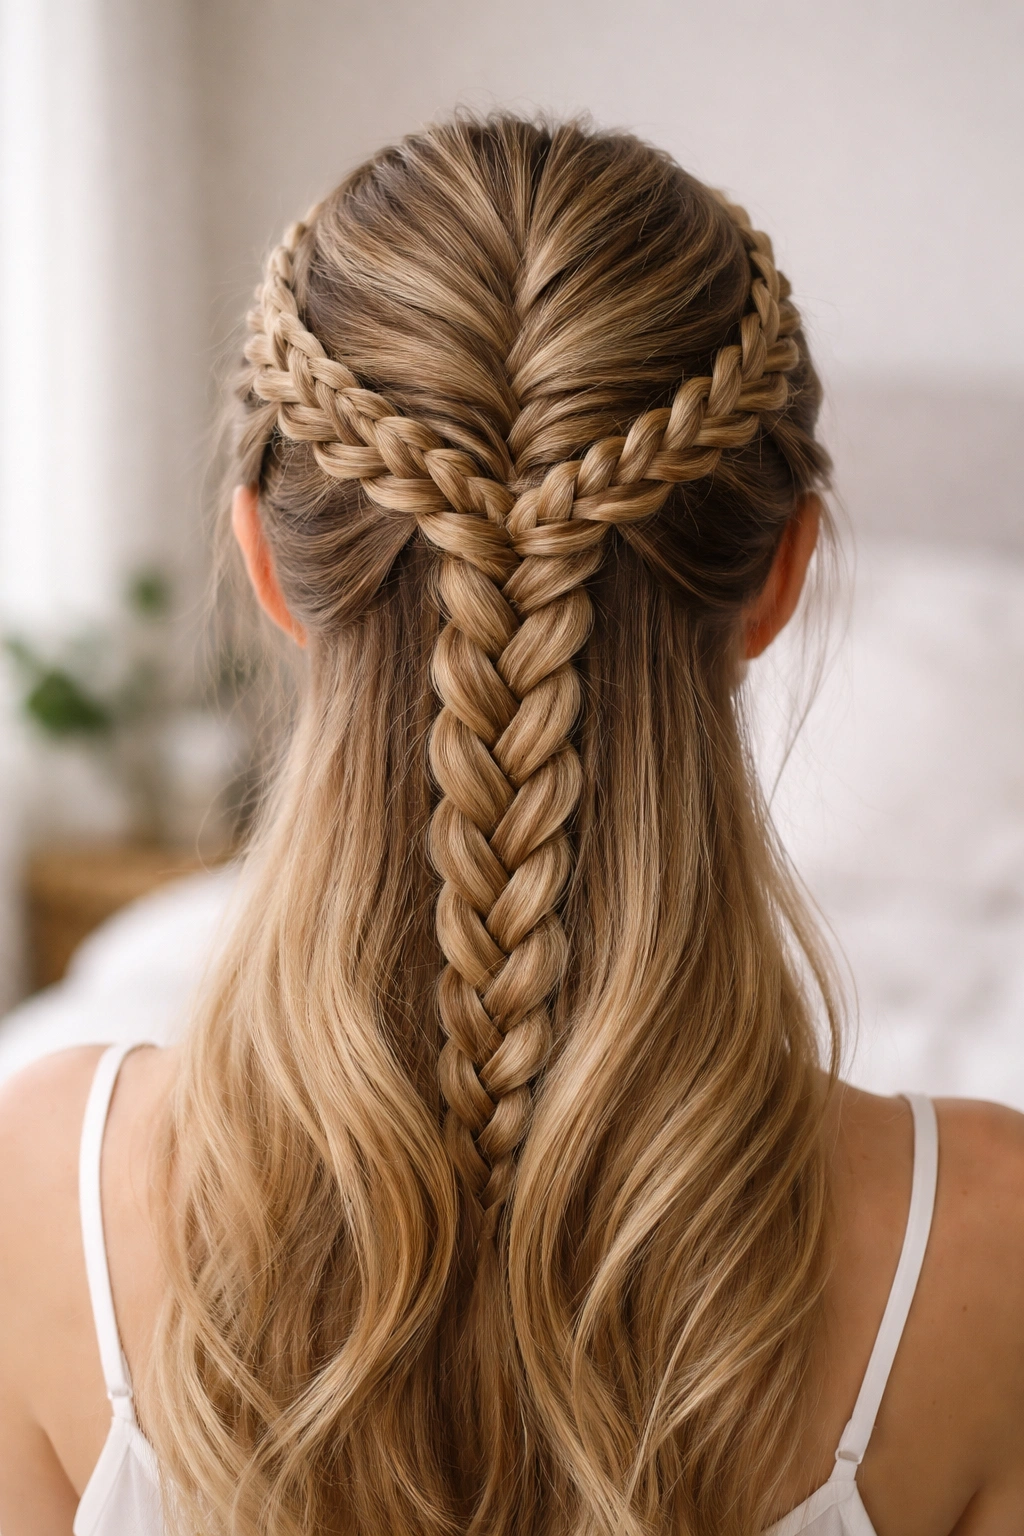
This hybrid style combines two techniques: a single center French braid that runs from the crown down the back of your head, with additional braided sections wrapped around your crown to create a crown-braid effect. It’s more intricate than a simple center braid but not as complex as a full milkmaid, and it creates a beautiful, princess-like look that’s still completely comfortable for sleeping. This style is particularly stunning if you have longer hair and want a polished, intentional look that reads as elegant rather than just “I slept in this.”
To create this hybrid braid, start by creating a traditional French braid down the center back of your head from your crown to your nape. Secure this central braid with a soft elastic. Now, take a small section of hair from behind one ear and create a simple three-strand braid that angles upward and across the side of your head toward the crown. Tuck the end of this side braid into the base of the central braid, securing it with a bobby pin if needed. Repeat on the other side: create a three-strand braid behind the other ear, angle it upward and across toward the crown, and tuck it into the central braid.
Why This Style Works for Sleep
The dual structure of the central braid plus the two side braids creates incredible stability. Your hair is secured at multiple points—the back of your head with the central braid, and both sides with the crown braids—which means even if you move around significantly during sleep, everything stays in place. This style also keeps hair completely off your face and neck, and it creates stunning waves throughout your hair rather than just along one section.
Creating a Balanced Look
- Make the side braids proportional to the central braid. If the side braids are very thick and the central braid is thin, the style will look unbalanced. Aim for consistency across all three braid sections.
- Keep the side braids loose. The side braids should feel gentle and loose as they angle across your head. Tight side braids can create tension headaches or discomfort while sleeping.
- Tuck securely but gently. When you tuck the side braids into the central braid, make sure they’re secure enough that they won’t slip free during sleep, but not so tight that they create tension at the crown.
Pro tip: This style looks even more beautiful if you slightly loosen all three braids after finishing by gently pulling outward on the sides. This creates a fuller, more romantic appearance and makes the style marginally looser for comfort.
9. Reverse Milkmaid Braid (Side-Crown Braid)
A reverse milkmaid braid is a single braid that wraps around the back of your head like a halo, creating the crown-braid effect of a milkmaid but with a single braid rather than two. This style works beautifully if you have longer hair and want a polished, intentional look that’s also completely secure for sleeping. The single-braid variation is actually more comfortable than a traditional milkmaid for some people because there’s less total weight on your head, and it creates a more asymmetrical, modern appearance compared to the symmetrical milkmaid look.
To create a reverse milkmaid braid, start with a deep side part on one side of your head. Create a French braid starting at the temple of the deeper side, angling gradually across the back of your head toward the opposite ear. As you braid, feed in hair from both above and below the braid line, gradually moving the braid from one side of your head to the other. Once you reach the opposite ear, secure the braid with a small elastic tucked behind your ear, or continue the braid all the way around to meet the starting point and secure it there. You can leave some face-framing pieces loose for a softer, more romantic look, or pin all hair back for a more polished appearance.
Why This Style is Perfect for Sleep
A single crown braid keeps hair completely off your face and neck while distributing weight evenly around the back of your head. There’s no lopsided tension, no weird compression on one side, and no hair in your face—just a beautiful, secure style that feels gentle and comfortable throughout sleep. The asymmetrical appearance also looks modern and intentional by morning, rather than the “I slept in this” look of some other overnight braids.
Getting the Angle Right
- Start closer to your temple if you want a more dramatic effect, or further back toward your ear if you prefer a more subtle crown braid.
- Angle gradually and deliberately. Rather than making sharp turns, angle your braid gradually as you move from one side of your head to the other. This creates even tension and a more polished appearance.
- Feed hair proportionally. As you braid across the back of your head, you’re adding hair from both the top and the bottom. Keep these additions balanced so the braid looks even and doesn’t distort.
Pro tip: If you want the braid to wrap all the way around your head and meet at the base, be deliberate about where you start. Starting too far forward or too far back can make it difficult for the braid to reach all the way around. Start roughly three inches back from your temple for a comfortable full-circle wrap.
10. Multiple Mini Braids (Thin Braid Grid)
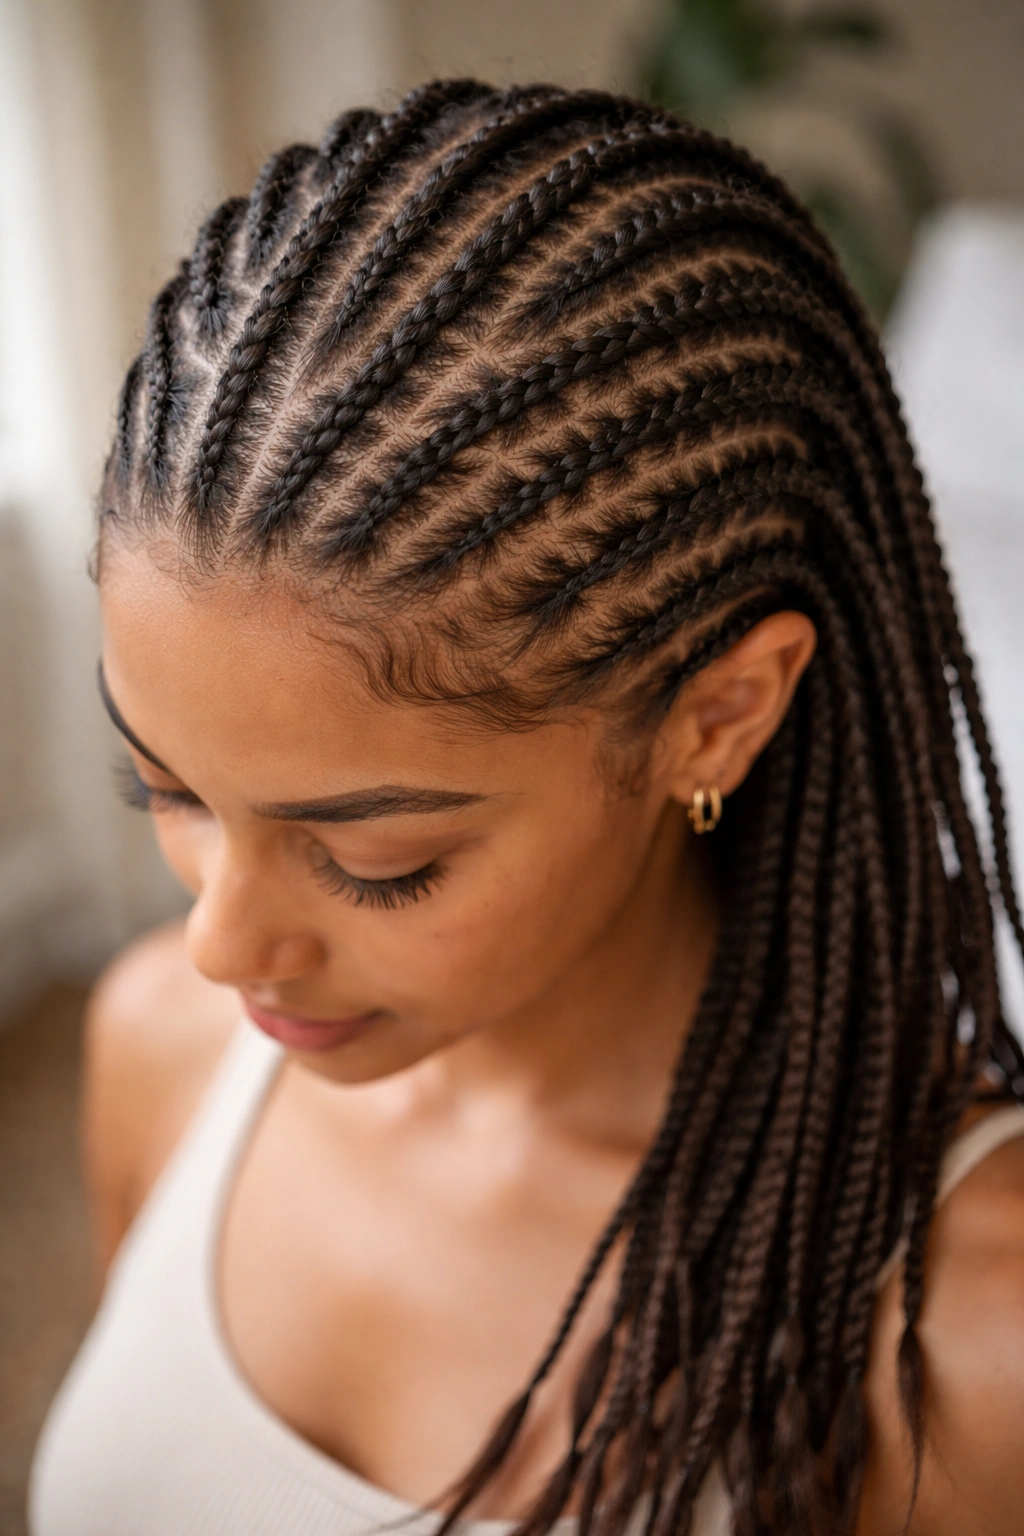
Instead of one or two thick braids, create multiple thin French or Dutch braids throughout your hair, each one independent. This style requires more time to create, but it’s absolutely worth it if you want maximum texture and definition by morning. Multiple thin braids create an incredibly textured, artisanal appearance that looks far more intentional than a single braid. This technique is particularly stunning on curly or textured hair where each thin braid can follow natural curl patterns, and it works beautifully on fine hair because thin braids look delicate and elegant rather than skimpy.
The process is straightforward: create multiple French or Dutch braids throughout your head, starting each one at the crown and working downward. You might create three to five thin braids depending on your hair thickness and length, spacing them evenly across your head. Secure each braid independently with small elastics, and leave small sections of hair unbraided between the braids for a more textured, natural appearance. Some people prefer to space the braids in a grid pattern (three in front, two in back), while others prefer a more random distribution.
Why Mini Braids Create the Best Texture
Multiple thin braids distribute weight across many points on your scalp rather than concentrating it on one or two areas, which means maximum comfort for sleeping. The thin braids also create more defined, tighter waves or curls by morning because the smaller pattern size translates to smaller curl size. If you wake up and gently remove all the braids, your entire head will have uniform texture rather than texture only where the braids were.
Creating a Balanced Look
- Space the braids evenly. If all your braids are clustered on one side, the style will look unbalanced and lopsided. Take time to map out where you want each braid before you start, aiming for even distribution across your head.
- Make the braids approximately the same thickness. If some braids are much thicker or thinner than others, the finished look will appear unpolished. Aim for consistency in thickness across all braids.
- Leave space between braids. Leaving small unbraided sections between each braid creates a more textured, natural appearance and allows the unbraided sections to create loose waves rather than tight curls, which adds dimension.
Pro tip: This technique is much easier if you use a spray bottle to lightly mist your hair before you start. Damp hair grips better and holds thin braids more securely throughout sleep.
Final Thoughts
The best overnight braid is the one you’ll actually stick with, which means it needs to be comfortable enough to sleep in without waking you up and simple enough to create without taking thirty minutes. All ten of these styles check both boxes—they’re secure enough to hold through a full night of sleep, comfortable enough that you’ll forget they’re there, and they all create beautiful waves or curls by morning that make your hair look intentionally styled rather than like you just rolled out of bed.
The real secret to success isn’t about choosing a fancy, complicated braid. It’s about using the right fundamentals: slightly damp hair for better grip, a soft elastic or silk scrunchie to avoid tension, a silk or satin pillowcase to reduce friction, and a light texture spray to help your braid hold its shape. With these basics in place, even the simplest center French braid will hold beautifully and create gorgeous texture by morning. Start with whichever style appeals to you most, practice it a few times during the day when you’re not relying on it to work, and then commit to sleeping with it a few nights in a row. Once you find your favorite, you’ll wonder why you ever went to bed with loose hair.