French braids have a reputation for being time-consuming and complicated, but that’s a myth that deserves debunking. The truth is that with the right technique and a little practice, you can create gorgeous, polished French braids in under five minutes flat. The secret isn’t some magical shortcut—it’s understanding which braid variations are fastest to execute, where you can skip steps without sacrificing the look, and how to build speed through muscle memory rather than rushing.
The misconception usually comes from watching beauty videos where people spend ten minutes setting up products, explaining every single detail, and adding finishing touches. In real life, when you’re getting ready for work or heading out to an event, you need a braid that looks intentional and finished without eating up half your morning routine. Whether you’re running late, trying to breathe new life into second-day hair, or just want a polished option that actually stays put through your day, these eight variations will transform how quickly you can braid.
What you’ll notice about fast French braids is that they work best when you lean into their natural qualities rather than fighting against them. A slightly looser braid actually comes together faster than a tight, precise one. Textured hair grabs the sections better and requires less fussing. And strategic placement—like keeping the braid off-center or to one side—means less tension on your entire head, less time working through thick sections, and paradoxically, a more modern-looking result.
1. Loose Side French Braid
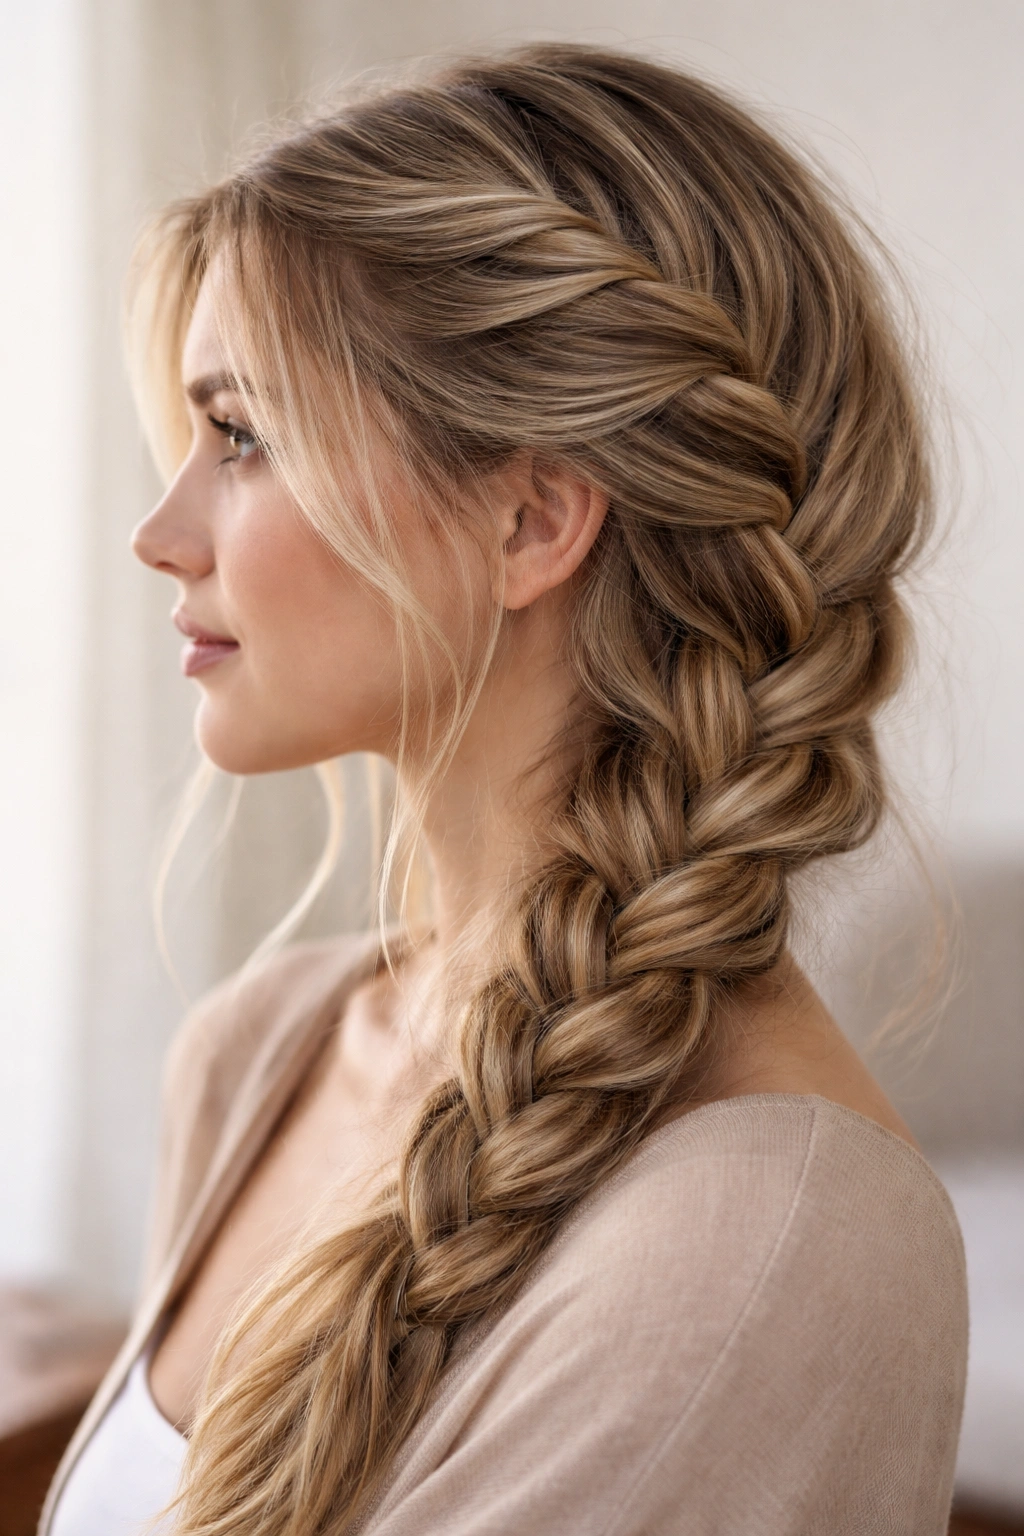
The side French braid is the workhorse of quick styling because off-center braids feel intentional and forgiving. When you’re working from the side rather than dead center, your hand positioning is more natural, the angle is easier to maintain, and any slight imperfections actually read as “effortlessly cool” rather than sloppy.
Why This Braid Is Fast
Starting at the temple rather than the crown means you’re braiding less total hair and hitting a narrower section of your head. Your fingers have natural space to work, you’re not fighting gravity on the back of your head, and the whole process feels smoother and more intuitive.
How to Execute It in Under Four Minutes
Part your hair to one side using your fingers—you don’t need a comb for this, just rake your fingers through and let gravity do the work. Take a three-inch section from your temple (near your part line) and divide it into three equal strands. Cross the outer strand over the middle one, then the back strand over the middle. Add a thin section of new hair to each outer strand before crossing it over the middle, just like a classic French braid. The key to speed here is using thinner sections—thick sections take longer to braid and require more tension to feel secure.
Continue down toward your ear, then angle the braid toward the back of your neck. Don’t worry about keeping it razor-sharp; the slight texture and looseness actually works in your favor. Once you reach the nape of your neck, you can either secure it there with a small elastic or continue it as a regular three-strand braid down the length of your hair.
Pro Tip for Saving Time
Skip the mirror for the first section. Once you’ve started the braid at your temple, you can feel whether it’s pulling evenly without constantly checking your reflection. This mental shift cuts a shocking amount of time from the process.
2. Half-Up French Braid
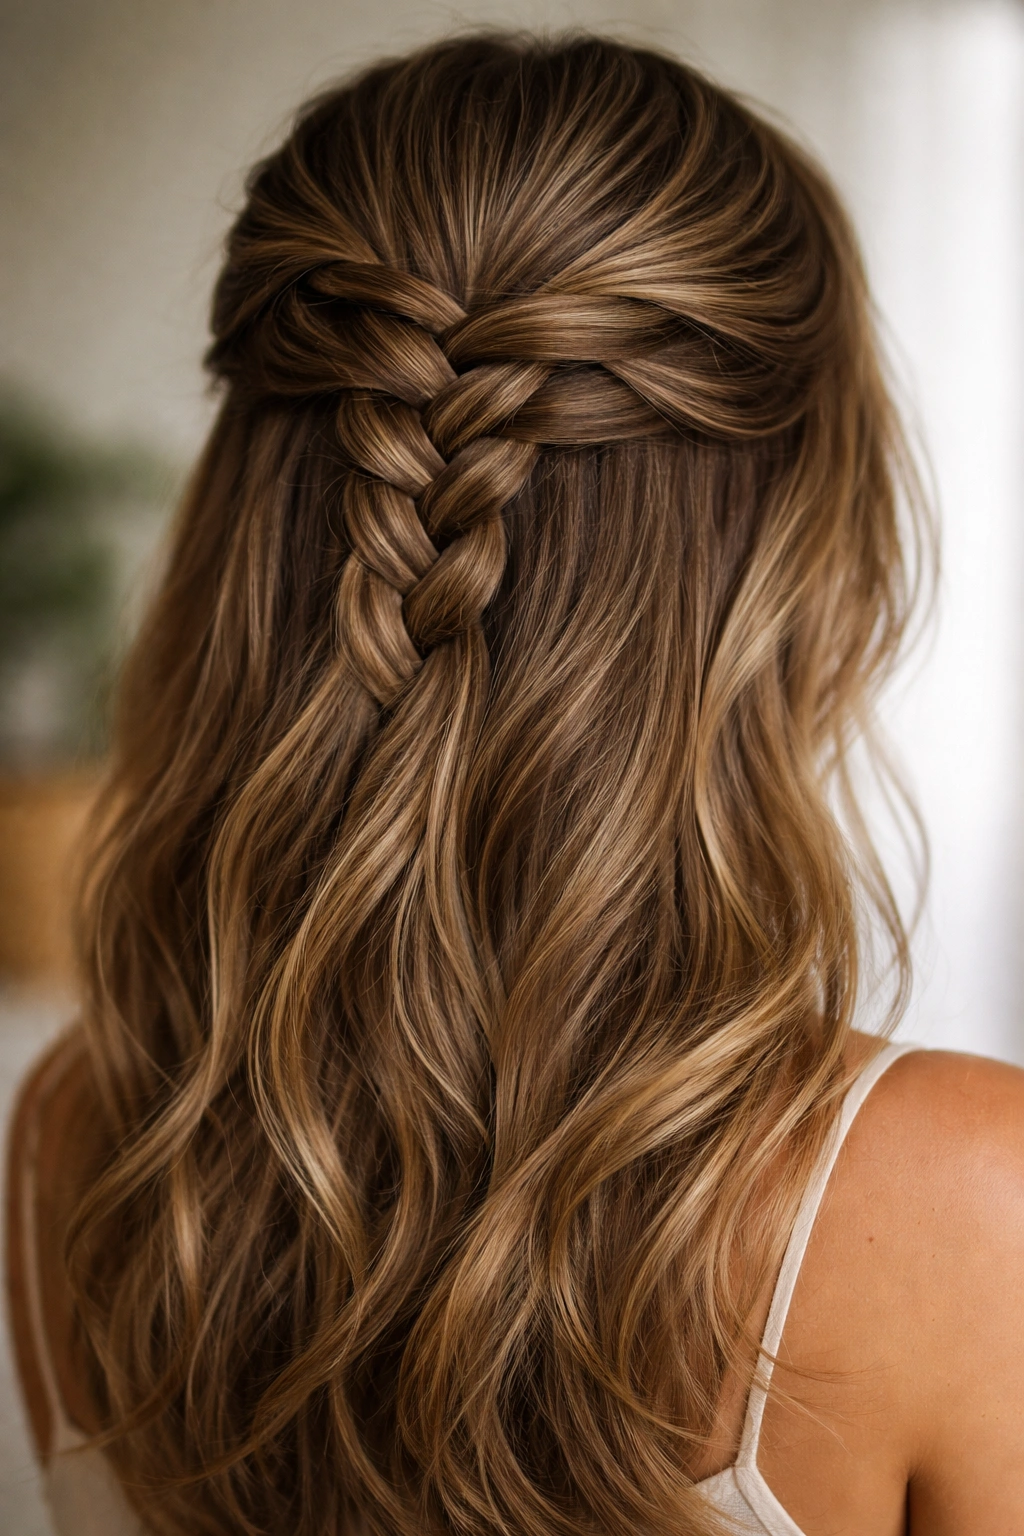
Half-up braids are speed-demons because you’re only working with the upper half of your head. This style hits that sweet spot between “I just threw my hair up” and “I spent actual time on this,” and it’s a lifesaver on days when your hair is partially cooperating.
What Makes It Quicker
You’re braiding roughly half as much hair as a full French braid, which mathematically means you finish in significantly less time. Plus, since the lower half of your hair is down, your bottom sections and hand positioning feel more natural and less awkward—there’s nothing pulling your arms in weird angles.
Step-by-Step Execution
Start at one temple, right at your hairline. Section out about two inches of hair and divide it into three pieces. Begin your French braid using medium-weight sections rather than super-thin ones—medium sections braid faster than tiny ones while still looking intentional. As you move back toward the crown, keep adding hair from the top and sides, but completely ignore the bottom half of your hair.
Once you’ve reached the back of your head (roughly at the crown), secure the braid with a small elastic. You can leave the braided portion loose and textured, or gently pull at the edges to loosen it further for a more relaxed vibe. Leave the rest of your hair down in waves or straight, depending on how much time you want to spend on heat styling.
Insider Trick for Ultra-Speed
Do this braid on hair that’s one day (or two days) unwashed. Second-day hair grips itself better, the braid sits without slipping, and you’ll spend zero time on adjustments. Fresh-from-the-shower hair requires more tension and more re-gripping to feel secure.
3. Sleek Center French Braid
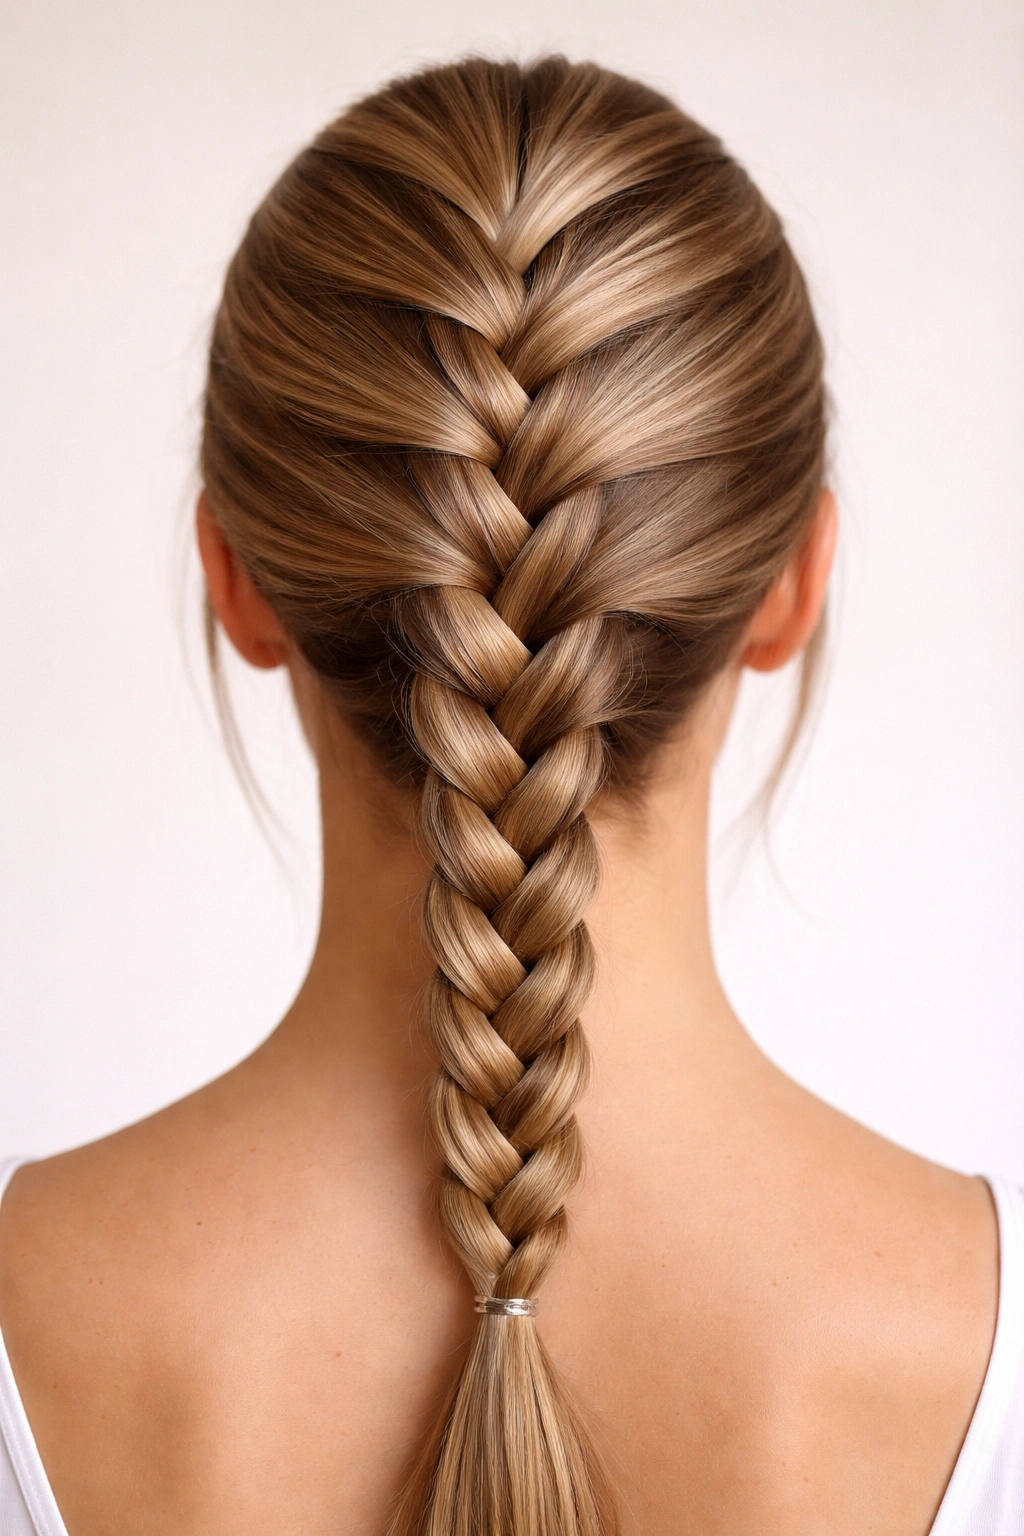
A sleek, center French braid is the definition of polished and put-together, and most people assume it takes forever. In reality, when you use the right technique and accept that “sleek” doesn’t mean “rigid,” you can complete this style in under four minutes.
Why Sleek Actually Moves Faster
Counterintuitively, braiding from the center of your head with intention is actually faster than braiding loosely off to one side. Your hands find a rhythm more easily, your sections stay evenly sized, and you’re not fighting an awkward angle. The sleekness comes from using consistent tension, not from perfection.
The Technique
Use a rattail comb or the sharp end of a comb to create a straight part from your forehead to the nape of your neck. Smooth your hair back as you go using a light smoothing serum or leave-in conditioner—this prevents flyaways and means you’re not fussing with frizz as you braid.
Start at the crown with a small three-inch section and divide it evenly. Use medium sections and maintain steady, even tension as you add hair. The key to speed here is not overthinking the evenness—slight variations aren’t visible once the braid is complete, but hesitation and second-guessing definitely slows you down.
Once you reach the nape, continue as a regular three-strand braid for about four to six inches, then secure it. You can wrap a thin section of hair around the elastic for a finished look, or just tuck it under itself.
Speed Hack
Apply a light mousse or texturizing spray to damp hair before blow-drying. The product gives your strands grip without making them sticky, which means sections stay exactly where you place them and your hands don’t slip. This eliminates time spent re-gripping and re-positioning.
4. Textured Messy French Braid

If “fast” and “polished” seem contradictory in your mind, a textured, intentionally-messy French braid will change everything. This version actually embraces looseness and texture, which means you spend half the time on tension and precision that other braids demand.
Why Messy Is Actually Faster
Messy braids look good even when they’re slightly imperfect, so you’re not redoing sections or obsessing over evenness. You’re intentionally creating a lived-in look, which means less time spent being a perfectionist and more time walking out the door.
How to Create It Quickly
Start with slightly textured hair—either from yesterday’s waves, a texture spray, or a quick run through with a curling iron. The texture means your hair doesn’t slip as much, so you can braid with less tension and still have a secure, finished result.
Braid at your crown or slightly off-center, using thicker sections than you would for a sleek braid. Use looser tension throughout—your hands should feel like they’re guiding the braid rather than pulling it tight. Add hair as you go, following the basic French braid pattern, and don’t stress about evenness.
Once you reach the bottom, deliberately loosen the entire braid by gently pulling at each section. This pulls the braid wider and creates that undone, romantic texture. Secure the ends with a flexible elastic, and you’re done.
The Time-Saving Truth
Embrace the looseness from the start. Trying to loosen a tight braid after the fact takes extra time. Making it loose as you braid means you finish faster and get better results.
5. Reverse French Braid
A reverse French braid (where you cross strands underneath rather than over) looks completely different from a classic French braid while actually being just as fast—sometimes faster, depending on your personal comfort with the technique. The inverted structure catches light differently and photographs beautifully.
Why It’s Not Harder (Just Different)
The hand motions are the same complexity as a regular French braid; they’re just inverted. Once your hands learn the pattern, a reverse braid feels just as natural and flows just as quickly as its classic counterpart. The first time you try it might feel slower, but muscle memory builds fast.
Quick Execution Steps
Part your hair to one side or center, depending on your preference. Take a section at the crown and divide it into three pieces. This time, cross the outer strands underneath the middle strand instead of over it. As you add new sections from the sides and back, continue the underneath motion.
The braid will stack and create a 3D effect that looks more dimensional than a classic French braid. Many people find they can braid faster with the reverse technique because the hand motions feel less constrained, and there’s less chance of accidentally crossing over when you mean to cross under.
Finish at the bottom with a regular three-strand braid or secure it where you like, depending on the length you want. Pull gently to loosen it if you prefer a softer texture.
Pro Tip for Beginners
Practice the hand motion without actually braiding first. Do 30 seconds of cross-underneath motions in the air until your hands memorize the pattern. When you actually start braiding, your hands already know what to do, and the whole thing moves significantly faster.
6. Dutch Braid (Double-Dutch Speed Version)

A Dutch braid is essentially a reverse French braid (crossing underneath), but when you want to go really fast, you can do a double-Dutch version with two braids instead of one thick one. Two thinner braids come together in less total time than one thick braid, and the visual impact is even more interesting.
Why Two Thinner Braids Beat One Thick Braid on Time
This seems counterintuitive, but think about it: two three-inch-wide braids process faster than one six-inch-wide braid because thinner sections braid quicker and require less hand movement. Plus, you can work on them simultaneously with practice, treating them almost like an assembly-line process.
The Technique
Create a center part from your forehead to your nape. On one side, take a three-inch section from your temple and begin a Dutch braid, crossing strands underneath. As you add sections, keep the braid narrow—two inches wide at most. Work your way back toward the center of your head.
Simultaneously (or right after if you’re still building speed), do the same on the other side. The two braids should run parallel, meeting somewhere at the base of your head.
Once both braids reach the nape, you can secure them separately with two small elastics, or you can combine them into a single three-strand braid for the last few inches. The dual-braid look is chic enough to leave as-is, but combining them creates an even more polished finish.
Timing Reality Check
Your first attempt might take six or seven minutes. But after three or four tries, muscle memory sets in and you’ll be able to execute this in under four minutes total. The speed increase is dramatic once your hands stop thinking and start flowing.
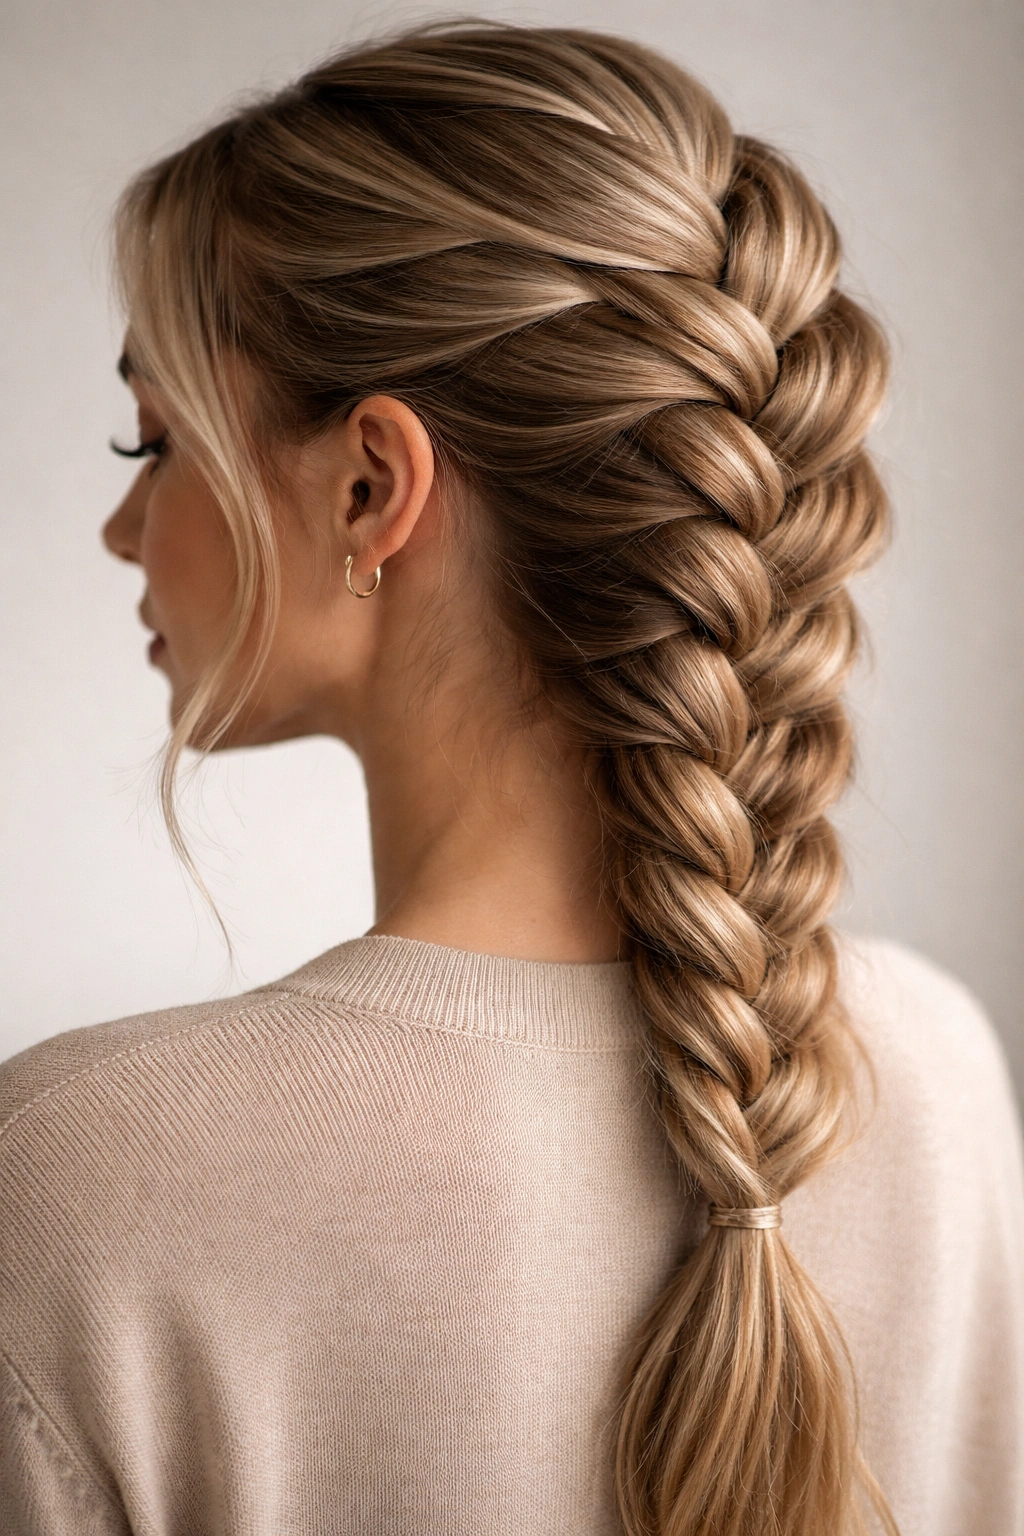
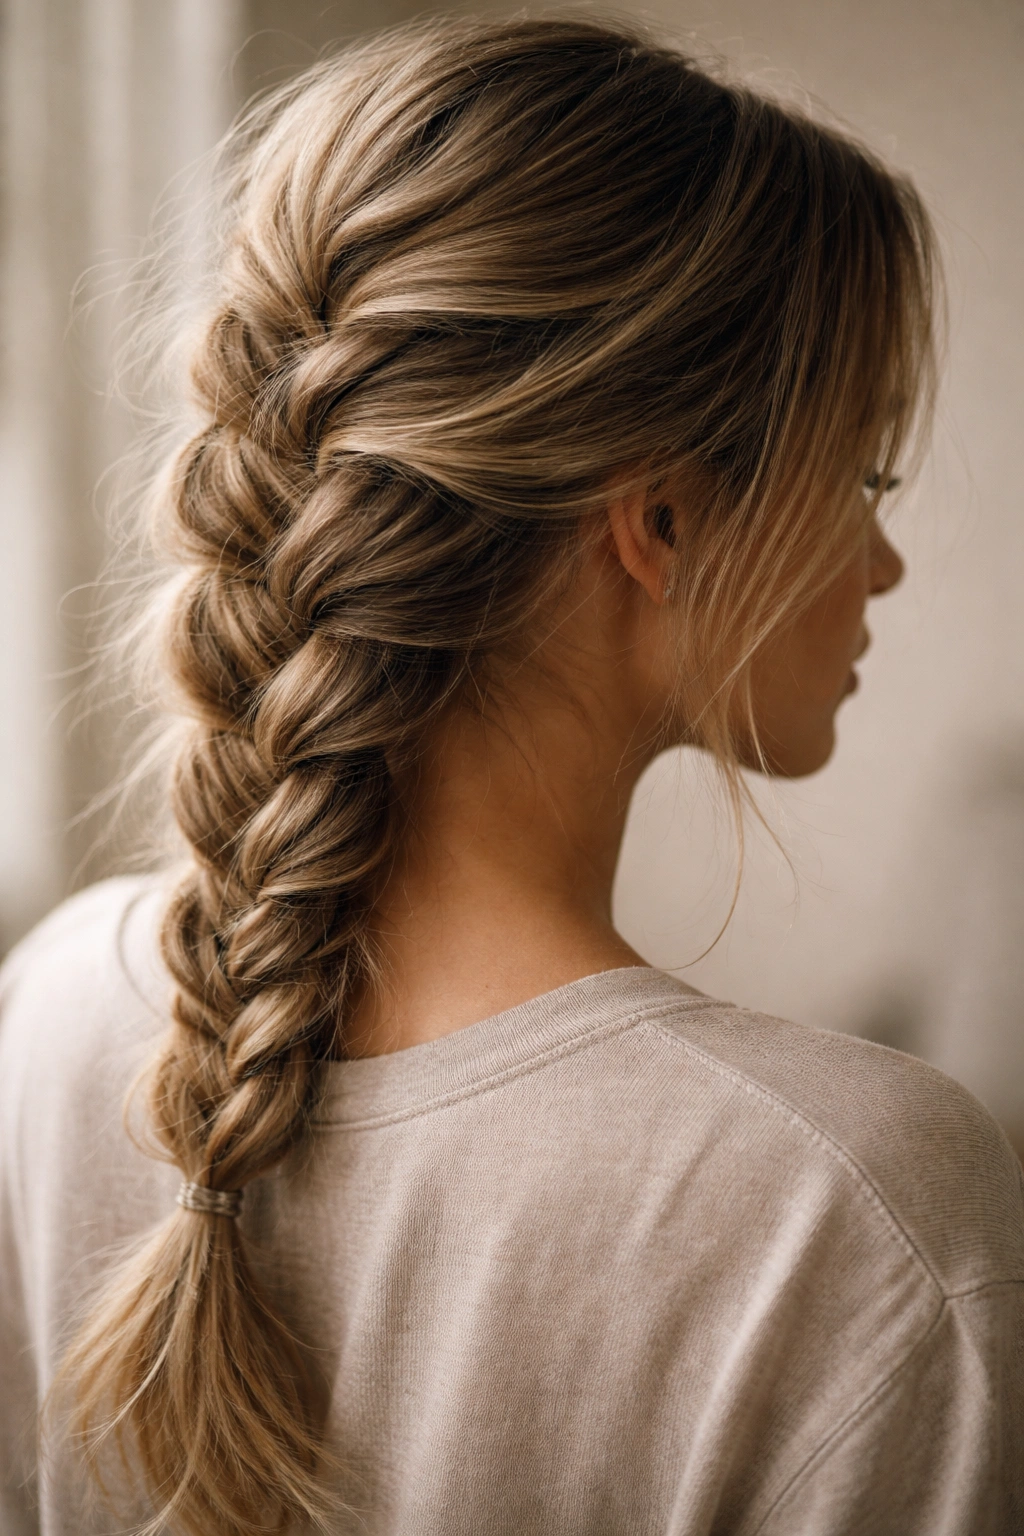
7. French Fishtail Braid
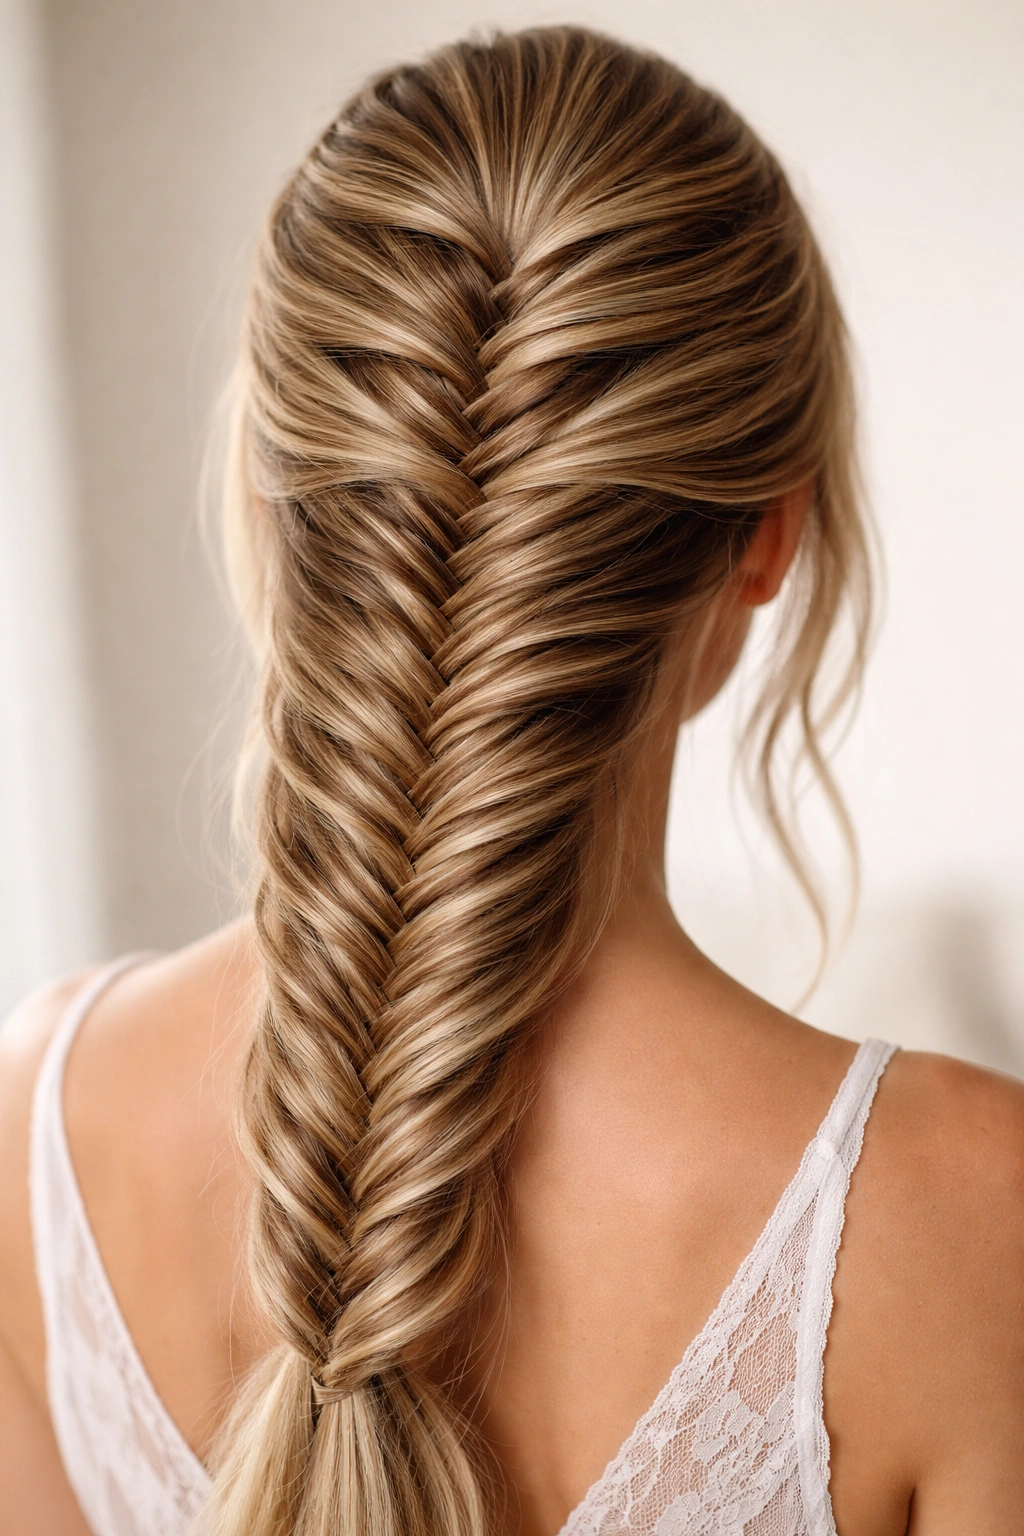
A French fishtail braid combines the structure of a French braid with the texture of a fishtail, creating something that looks complex but actually moves faster than you’d expect. The beauty of this style is that it looks incredible even when it’s slightly loose or imperfect.
Why Fishtail Sections Speed Up the Process
Instead of dividing hair into three sections and crossing them back and forth, you’re working with two larger sections and pulling tiny pieces from the outer edge of each. Fewer hand motions means faster completion, and the inherent texture of a fishtail means precision is less critical.
Quick How-To
Start at your crown with two thick sections (rather than three thin ones). Add a small piece of hair from the outer edge of the right section and cross it into the left section. Then take a tiny piece from the outer edge of the left section and cross it into the right. Continue alternating, adding new hair each time you cross a section.
The beauty here is that each individual motion is fast, and the accumulated effect looks intricate without requiring intricate technique. Continue down your head and finish at the nape, then secure it.
For extra speed, skip the mirror and just feel your way through the motion. Your hands will quickly calibrate where the sections are, and muscle memory means you stop second-guessing yourself.
Reality Check on Speed
This style hits the four-minute mark for most people once they’ve tried it twice. The first time takes longer because your brain is translating the instructions. By the third attempt, your hands know the rhythm and speed naturally increases.
8. Two-Strand Twisted French Braid
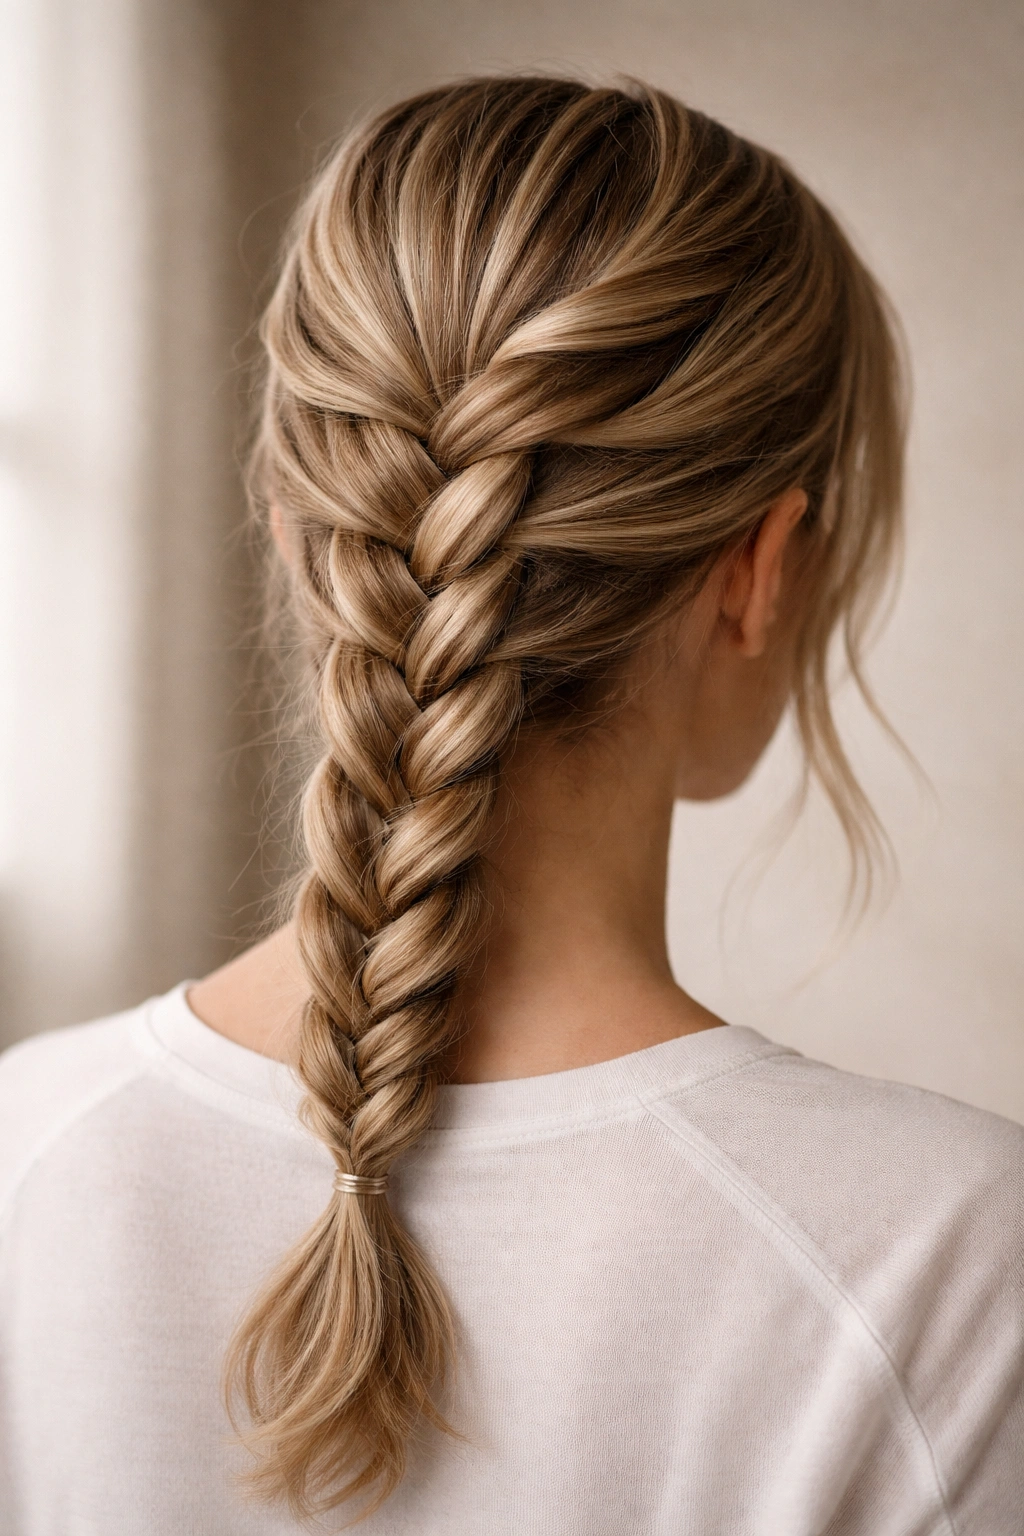
If you want something that looks braided but eliminates one of the three traditional strands, a two-strand twisted version is your answer. It’s fast, forgiving, and surprisingly sophisticated-looking—the kind of style that makes people think you spent more time than you actually did.
Why Two Strands = Less Time
You’re literally doing less: two strands instead of three means fewer crossing motions and faster progression down your head. The twist creates texture and definition without the complexity of managing three separate sections.
The Process
Part your hair to the side or center. Take a section from your crown and divide it into two pieces. Twist them around each other like you’re making a rope, but instead of keeping it simple, add new hair to each strand as you twist downward.
Twist the right strand around the left, add new hair to the right strand, then twist the left around the right, adding new hair to the left. It’s a rhythm: twist-add, twist-add, continuing down your head. The style has the visual complexity of a braid but with simplified mechanics.
Once you reach the nape, continue the two-strand twist without adding hair, secure it, and you’re done. The finished look is sleek and modern, and it genuinely takes three to four minutes.
Pro Tip for Maximum Speed
Do this on damp hair. Damp strands grip each other better and prevent slipping, which eliminates time spent re-twisting and re-adjusting. By the time your hair air-dries, the style is fully set and lasts through your entire day.
Final Thoughts
French braids don’t have to be a time commitment that makes you late or stressed. These eight variations prove that with the right technique, the right hair preparation, and a shift in what you consider “polished,” you can have a beautiful, finished braid in the time it takes to brew your morning coffee. The secret isn’t in getting faster—it’s in getting smarter about which techniques suit your schedule, your hair texture, and the look you’re going for.
The most important realization is that looser, more textured braids actually finish faster than tight, perfect ones. You’re not compromising on style; you’re actually leaning into what looks modern and intentional. Start with the variation that feels most intuitive to your hands, practice it three or four times without overthinking, and watch your speed naturally increase. Within a week of doing any one of these styles daily, you’ll shave another minute off your time. Within a month, you’ll be executing them so automatically that you can braid while having a conversation or listening to a podcast.
The real takeaway is permission to stop holding yourself to an impossible standard of perfection. A slightly loose braid is charming. A braid with a few flyaways is human. A textured, lived-in braid done in four minutes beats a tight, perfect braid that takes fifteen. Choose speed, choose the style that feels natural to your hands, and choose confidence in what you’ve created.