

Bantu knot styles on locs have a way of making even a plain T-shirt look finished. The loc texture gives each knot more body, so the style reads fuller and more sculpted than it does on loose hair. And when the parts are clean, the whole thing looks sharp from every angle.
Locs change the rules a bit. Mature locs hold shape with more weight, starter locs need softer handling at the root, and a heavy hand with gel can leave the hair slippery instead of neat. A small tail comb, a few clips, and a light styling product are usually enough; the real trick is deciding how big each section should be so the knots sit up instead of sagging.
Some versions are tidy and polished. Others are playful, tall, asymmetrical, or built around a bold part pattern that does half the work for you. If you wear locs, that parting choice matters more than people think — it changes the whole mood before the first knot is even twisted.
The styles below range from simple to a little extra, but each one is wearable, practical, and easy to picture on real locs. Some are better for short lengths, some need thicker locs to hold their shape, and some are the sort you throw on when you want your hair to do the talking.
1. Classic Center-Part Bantu Knots on Locs
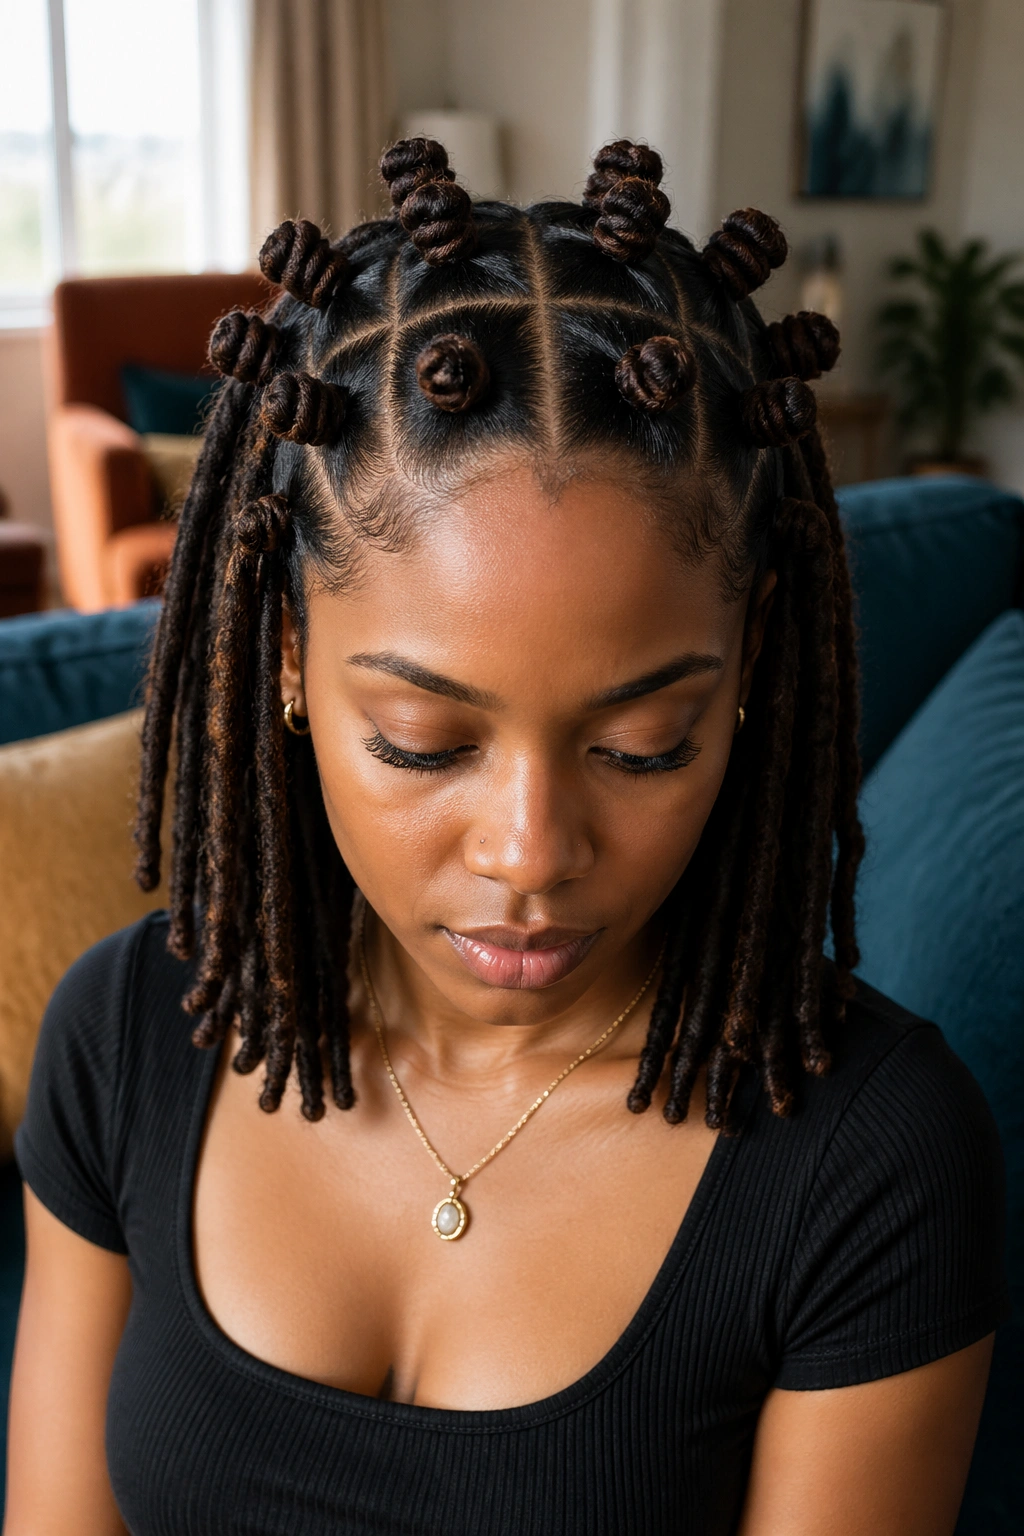
A center part is the cleanest place to start because it gives the style balance right away. On locs, that symmetry looks especially crisp since each knot has a little more structure than it would on looser hair.
This version works well when you want a neat look without a lot of fuss. Make the part straight from forehead to nape, then split each side into even sections. If your locs are shoulder length or longer, keep the sections closer to walnut size; if they’re thicker, go a little wider so the knots don’t feel crowded.
Why It Works
The middle line pulls the eye upward and makes the knots look even, which is handy if your locs grow at different rates or your ends are in the awkward middle stage. A center part also gives you a clean base for makeup, hoops, or a strong brow moment.
- Use a fine-tooth tail comb for the part, not your fingers.
- Clip each section before you start twisting.
- Keep the root snug, but not tight enough to leave a dent when you take the style down.
Tiny tip: if one side starts looking fuller, fix that before the knot is fully wrapped. After that, it’s a pain.
2. Deep Side-Part Bantu Knots with Face-Framing Lift
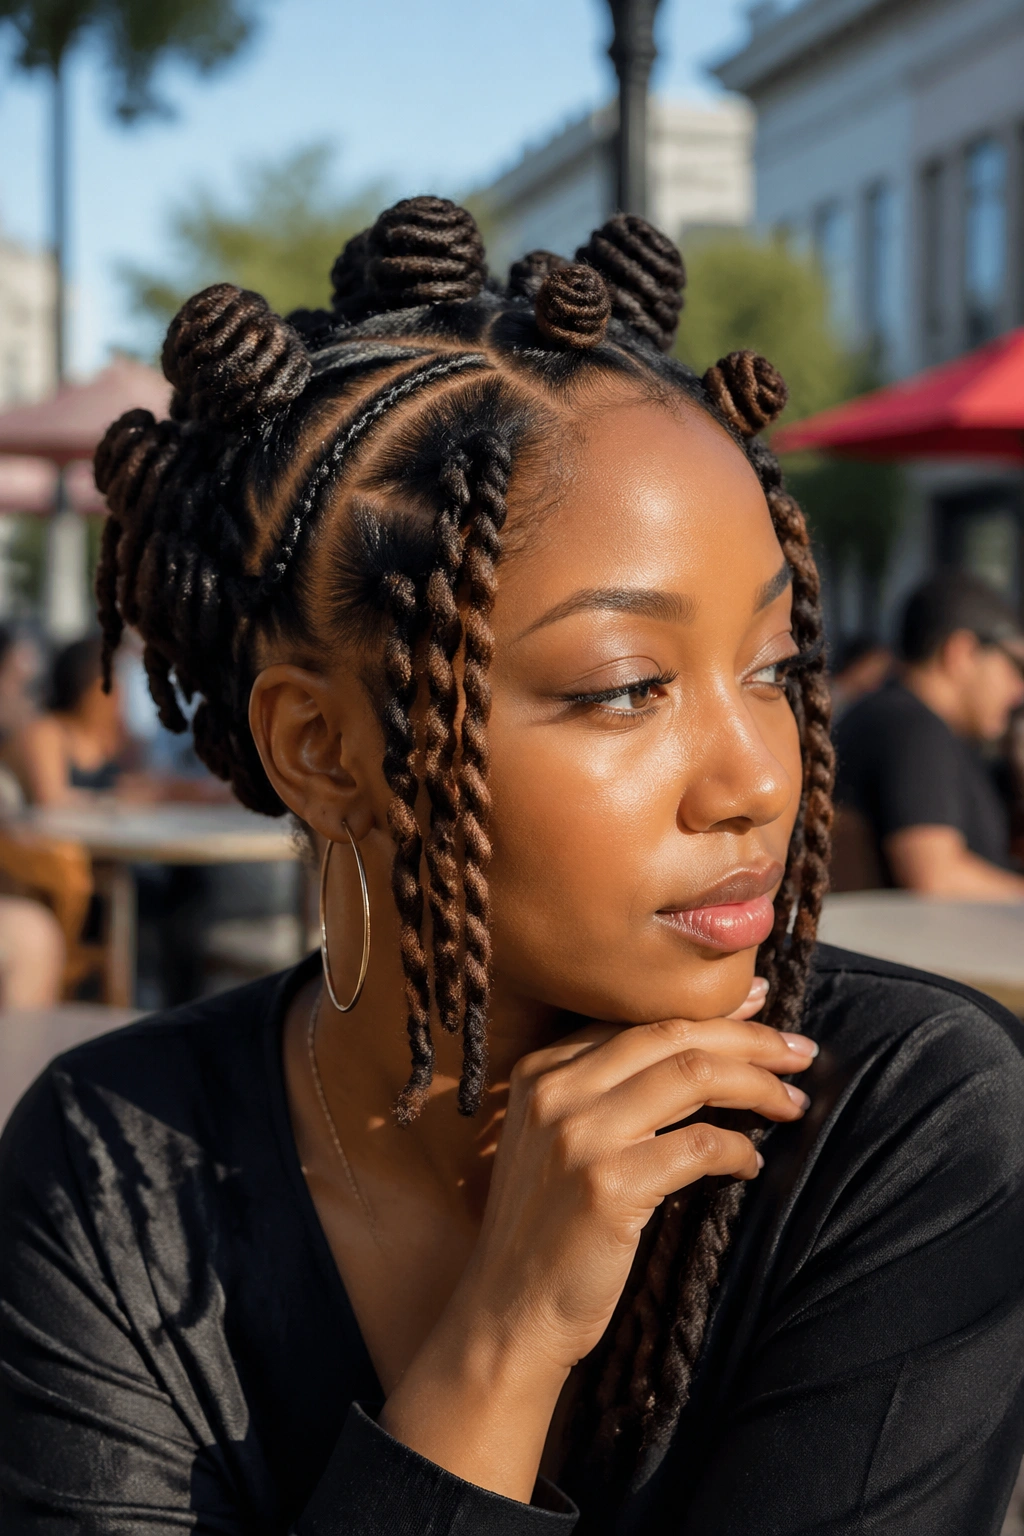
Why does a deep side part look so good with locs? Because it breaks up all that texture in a way that feels intentional, not busy. The side sweep gives the front a little movement before the knots even begin.
This is one of my favorite Bantu knot styles for locs when you want the face to look open and the hairline to feel soft. A side part also works well if your locs are dense, because it shifts some of the weight off the center and keeps the style from looking too blocky.
What Makes It Different
The deeper the part, the more the knots can lean into a slanted shape. That creates a softer frame around the forehead and cheekbone area, which is useful if you wear glasses or prefer earrings that need space to show.
How to Use It
- Start the part about 2 to 3 inches from your natural center line.
- Make the front sections smaller than the back ones.
- If your edges are delicate, smooth them with a little mousse rather than heavy gel.
A side part can feel dressier than a center part without asking for extra work. It’s a good trade.
3. Half-Up Bantu Knot Crown for Locs
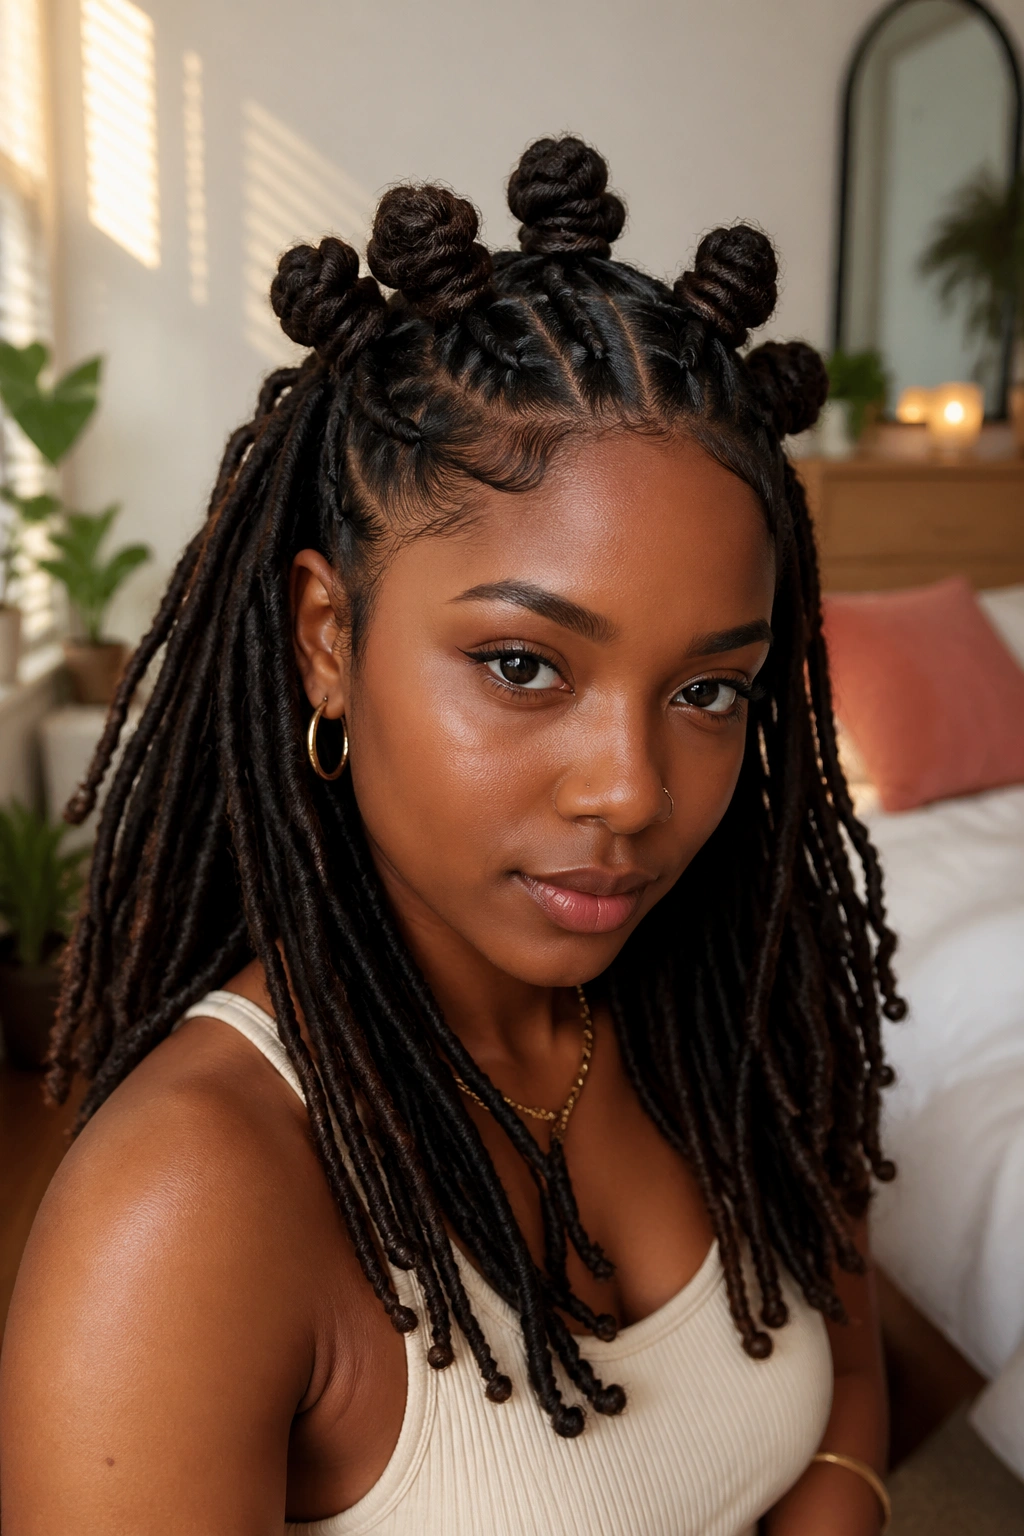
Picture the top half of your locs pinned into a row of knots while the rest stays down. That’s the whole charm of this one. It gives you height at the crown and keeps the length visible, which is nice if you worked hard for those locs.
This version is especially useful when your hair feels in-between lengths. Full Bantu knots can sometimes swallow shorter locs, but a half-up crown keeps the shape airy. The lower section moves, the top section stays polished, and the contrast does a lot of the styling for you.
The look is easy to dress up or down. Wear the loose back section stretched and neat, or leave a little bend in it if you want a softer finish. Either way, the top knots give the style enough structure that it doesn’t read as plain.
4. Jumbo Statement Knots for Thick Locs
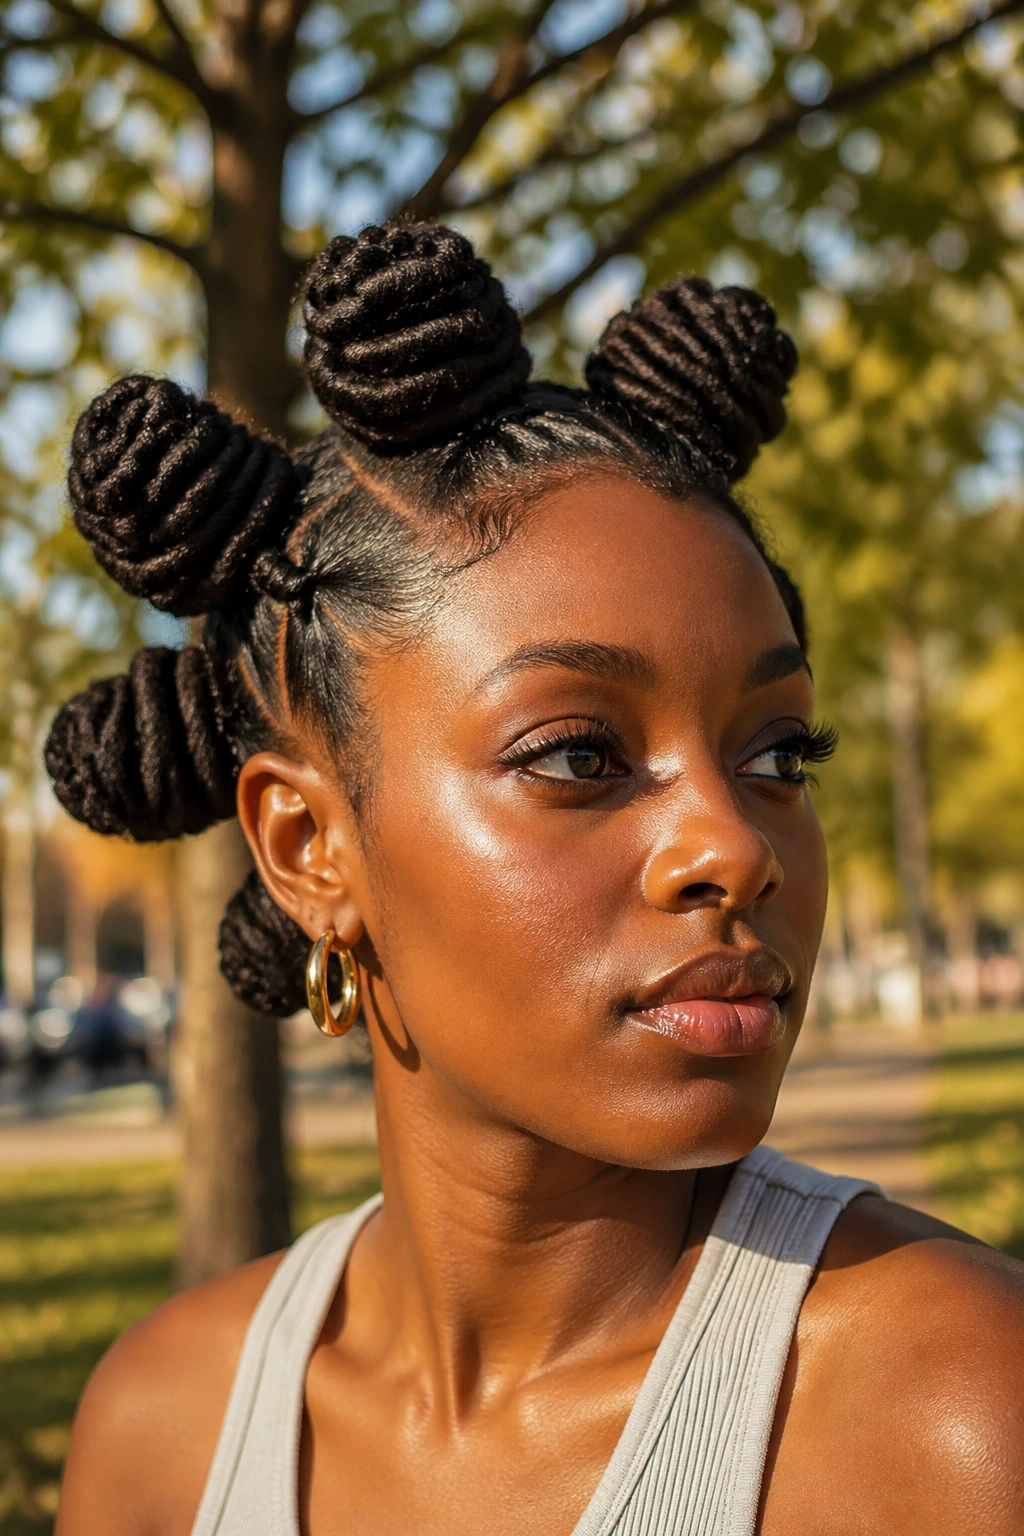
Big knots are not shy, and that is the point. When the locs are thick or long, smaller knots can disappear a little, while jumbo knots hold their shape and look strong from across the room.
This style is best when you want a bold silhouette with fewer sections. Think 4 to 8 knots across the head instead of a tight grid. That smaller knot count also means less time at the mirror, which matters when your locs have some weight to them.
- Keep each section large and even.
- Twist the base firmly, then wrap the length around itself in a smooth coil.
- Use a clip while the knot cools or sets so it doesn’t loosen at the root.
Watch the tension. Jumbo knots can pull hard if you try to force them into tiny sections. If the scalp starts feeling tight, the section is too small.
5. Micro Knots Along the Hairline
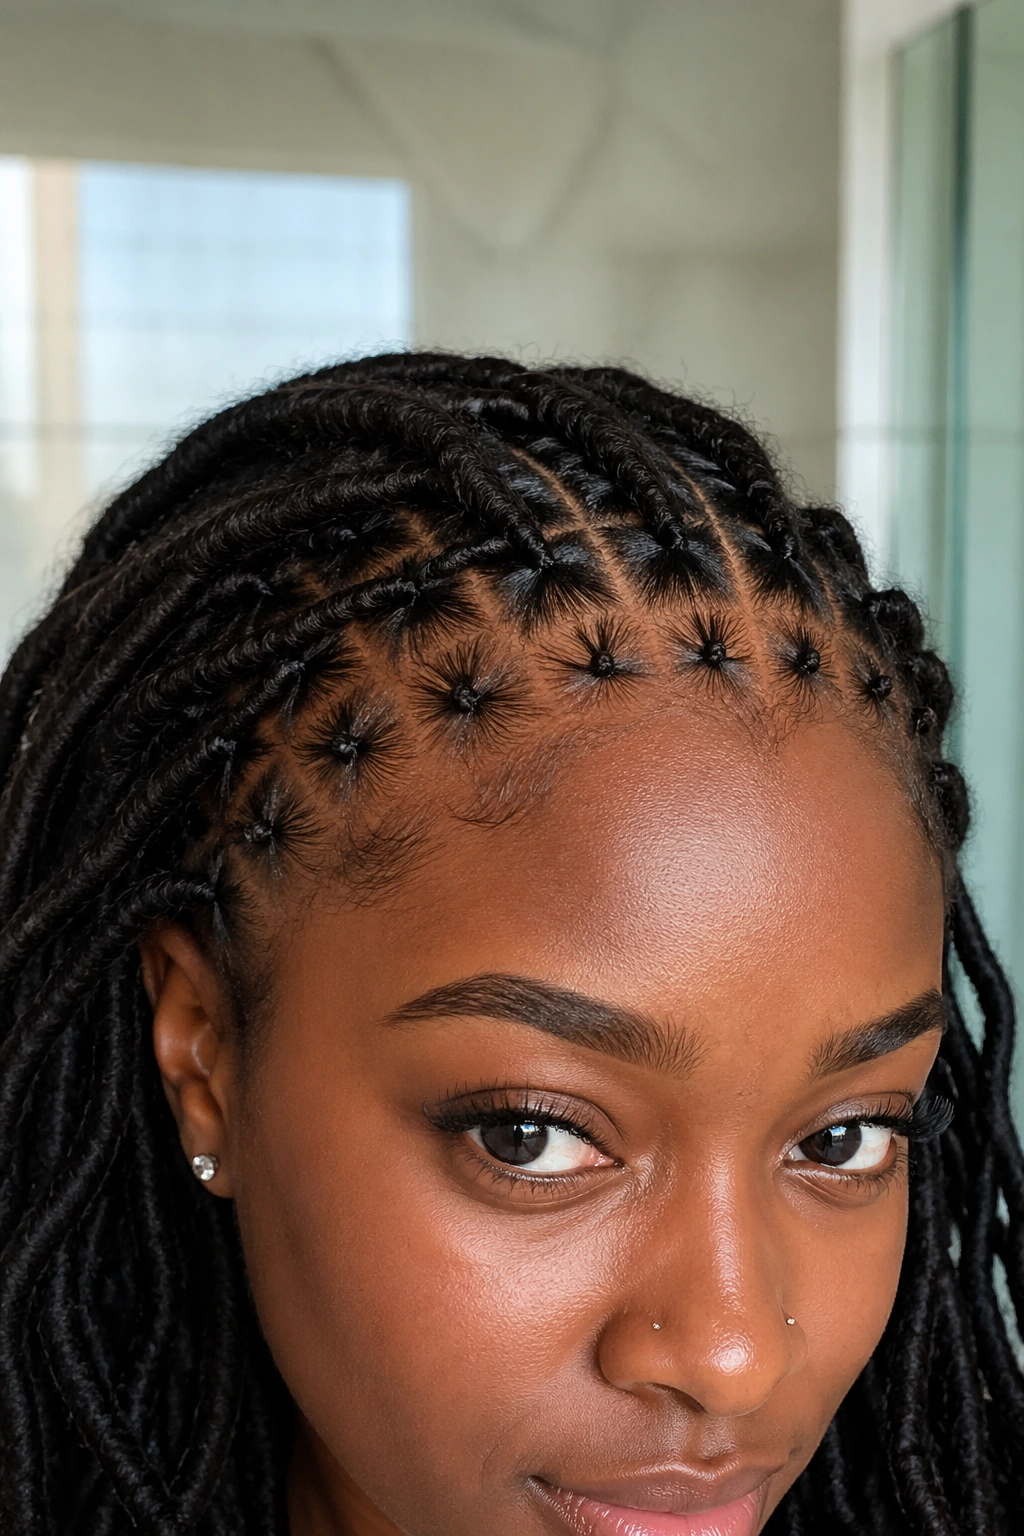
Small knots along the front hairline make a quiet kind of statement. They’re neat, close to the scalp, and handy when you want the front of your locs to stay under control while the rest of the style stays relaxed.
This works especially well if you like wearing your hair forward. A row of tiny knots can sit like a frame across the forehead, then the rest of the locs can fall back or to the side. The effect is clean, and a little unexpected.
The trick is not loading the style with too much product. Micro knots already sit close to the scalp, so heavy wax or thick gel can build up fast. A light mousse or a small amount of styling cream is enough.
One knot at the front can change the whole read of the style. Four or five can do even more.
6. Triangle-Part Bantu Knots
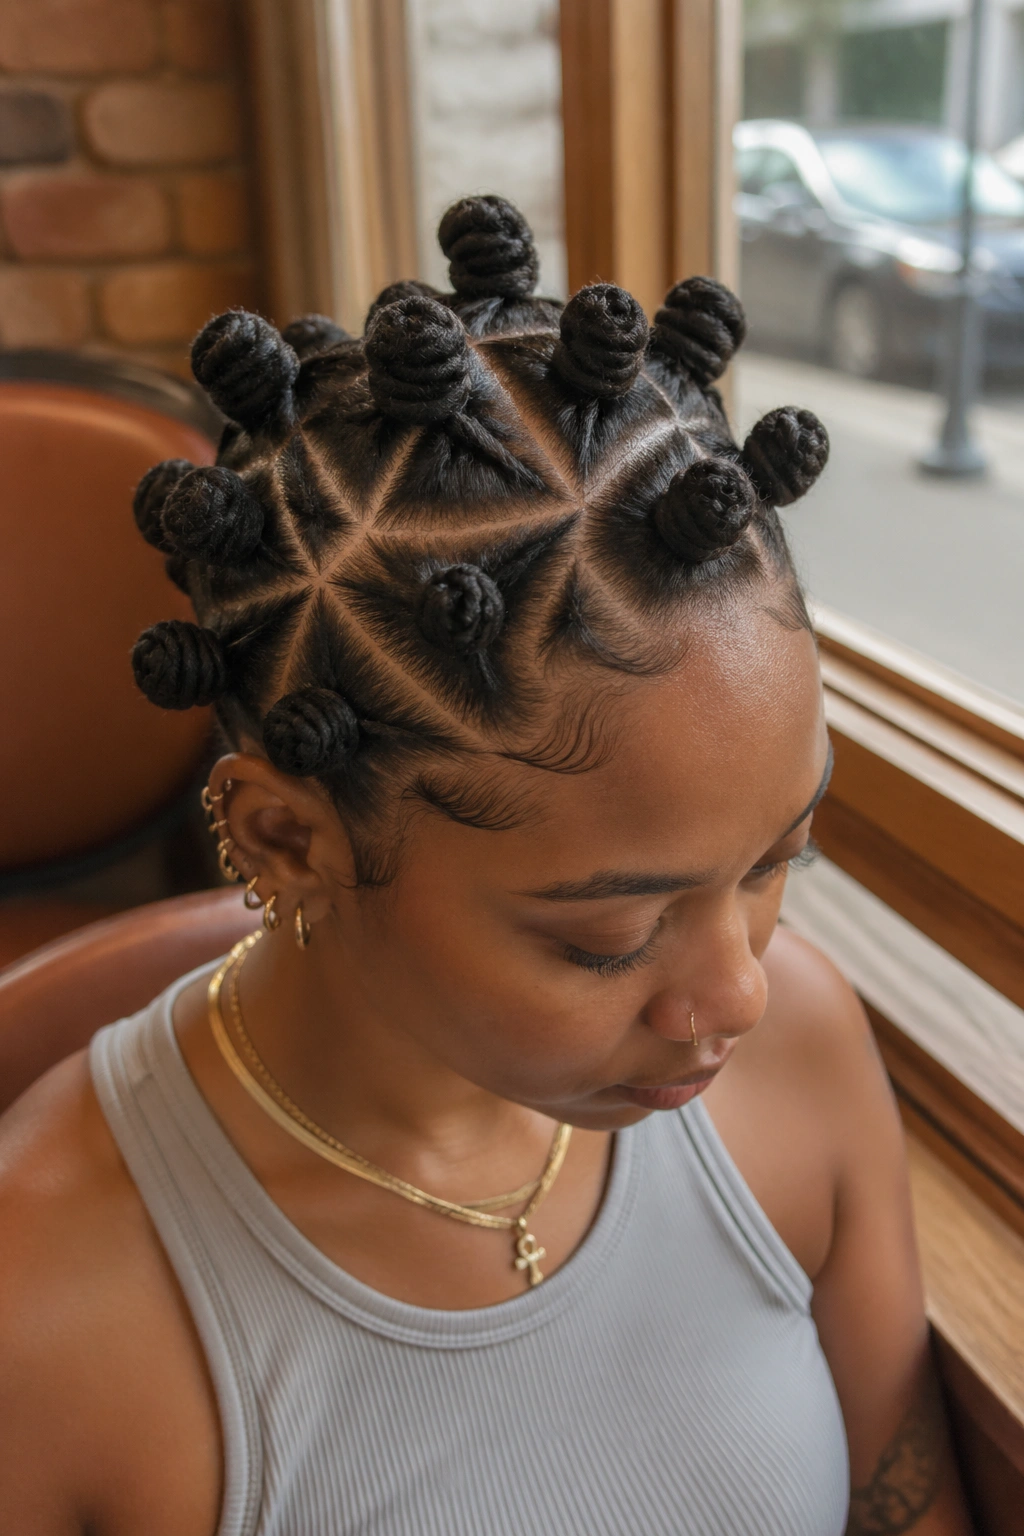
Triangle parts make Bantu knots look sharper without changing the knot shape itself. The geometry does the talking. On locs, those edges show up clearly, so each section looks deliberate and a little more finished.
Why the Parting Pattern Matters
Straight parts are safe. Triangle parts are more interesting. They break the scalp into repeating points, which makes the whole style feel designed instead of just divided.
This pattern shines when you want something neat but not plain. It also flatters locs that are a little different in thickness, because the triangle shape hides small sizing differences better than a strict grid does.
A Small Practical Note
- Use the tip of a tail comb to map the triangles before you touch any loc.
- Keep the points consistent from front to back.
- If the triangles start getting too small, stop and make them larger. Tiny parts plus loc weight can turn fussy fast.
The style looks best when the lines are clear. Muddy parts defeat the point.
7. Zigzag Part Bantu Knots
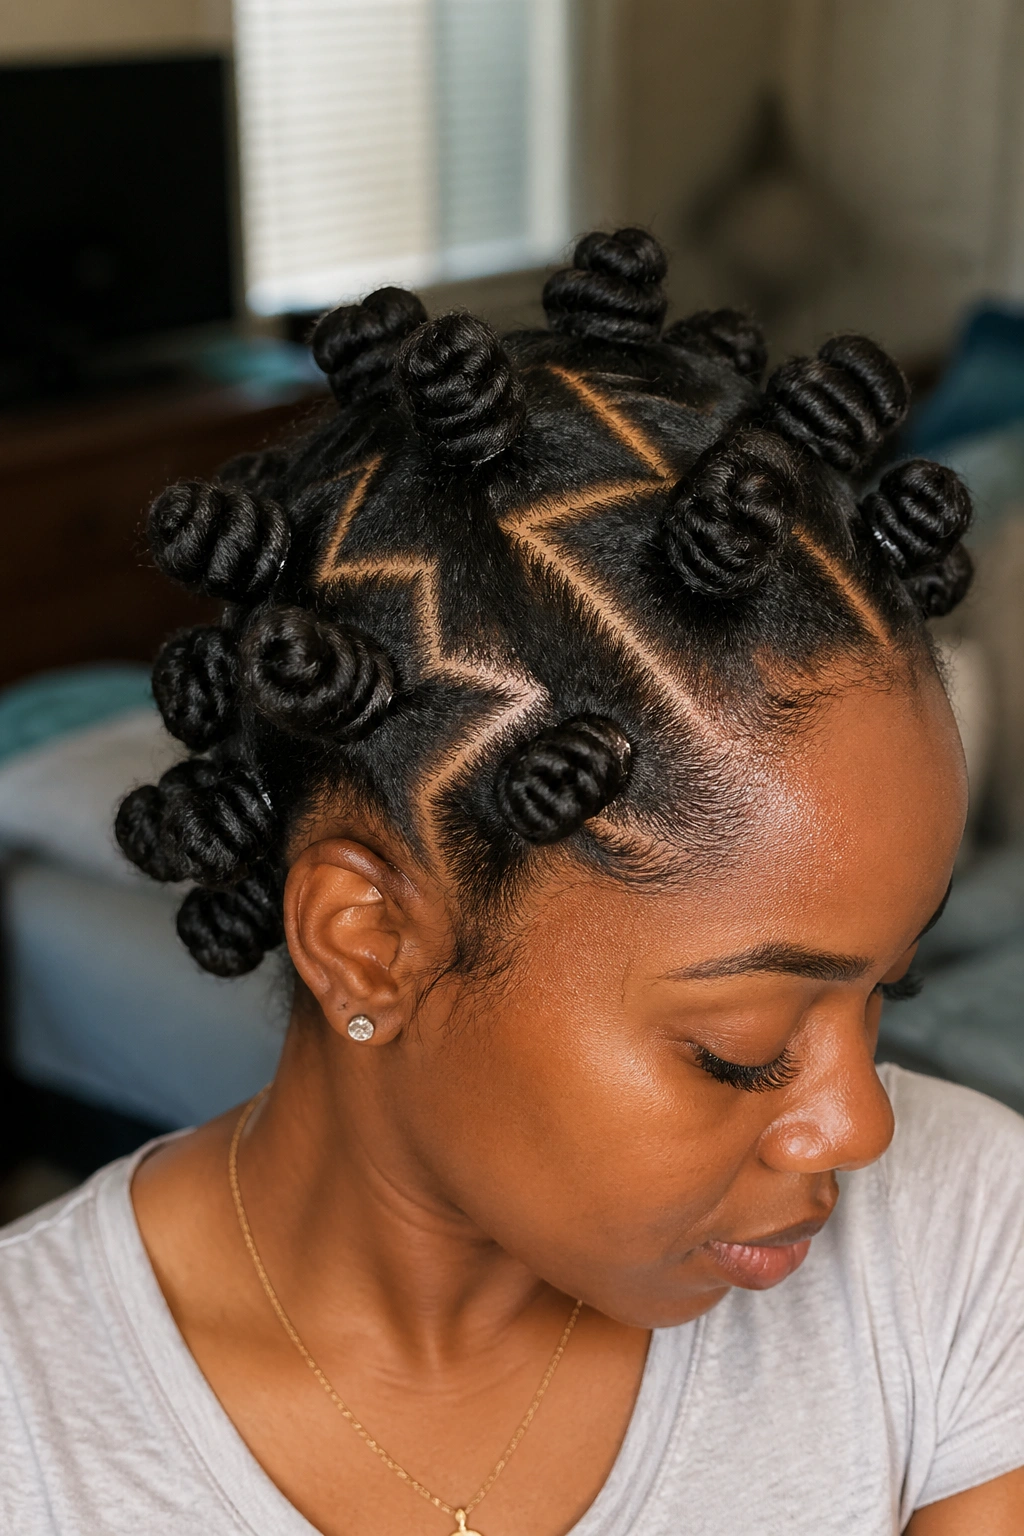
A zigzag part brings some energy into the style without making the knots themselves more complicated. It’s a good move when you want locs to feel playful, especially on days when straight lines feel a little too proper.
The zigzag works because the scalp pattern becomes part of the design. You see the part first, then the knots, and the two shapes keep each other from looking stiff. That contrast is what makes the style pop.
This is not the one I’d pick for a rushed morning. Zigzag parts take a steady hand, and they look best when the lines are crisp. But if you take the time, the payoff is worth it.
Skip the tiny, cramped angles. Wide zigzags are easier to draw, easier to maintain, and far less likely to leave you irritated halfway through styling.
8. Mohawk Row Bantu Knots
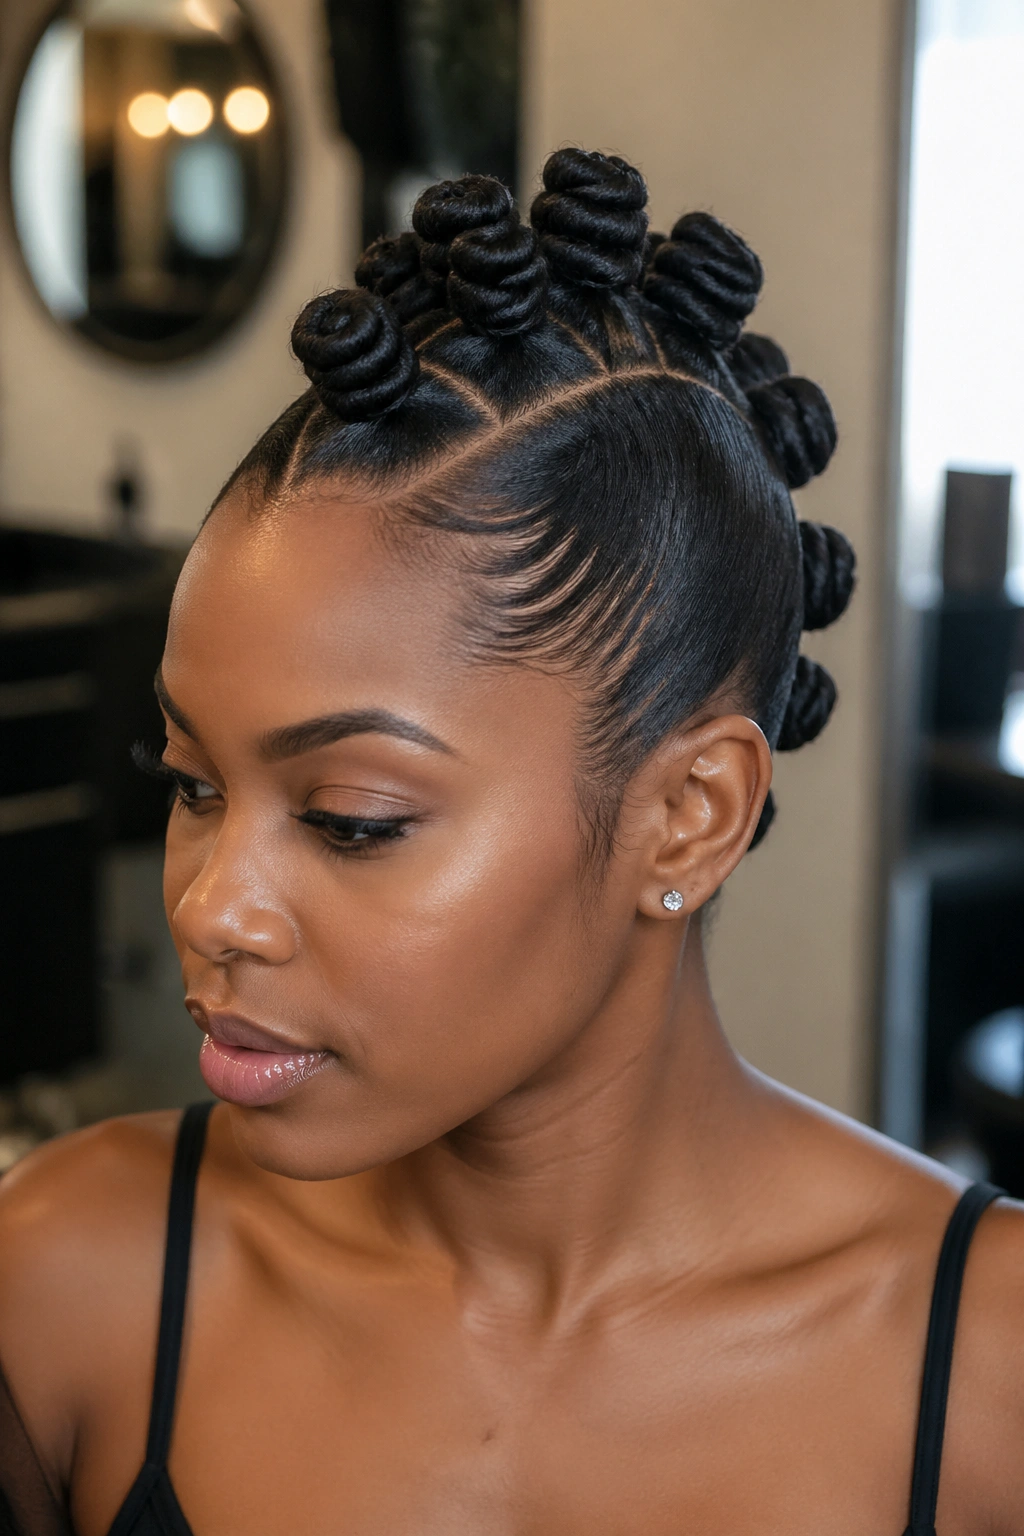
A center row of knots with the sides smoothed back has a lot of attitude. It gives you the height of a mohawk without turning the whole head into a full updo, which is handy if you want locs to stay the main event.
This look works well when your sides are either pinned flat or tucked behind the ears. The knots sit in a line from the front of the scalp to the back, and that strip of volume naturally draws the eye upward. If your locs are medium to long, the style holds its shape nicely. Shorter locs can still do it, but the knots will sit smaller.
Quick Shape Notes
- Keep the middle row narrow if your locs are thick.
- Use clips on the side sections so they stay smooth while you work.
- A little mousse at the root helps the sides stay flat.
It’s bold. It’s tidy. It also photographs from the side better than people expect.
9. Low Nape Bantu Knots
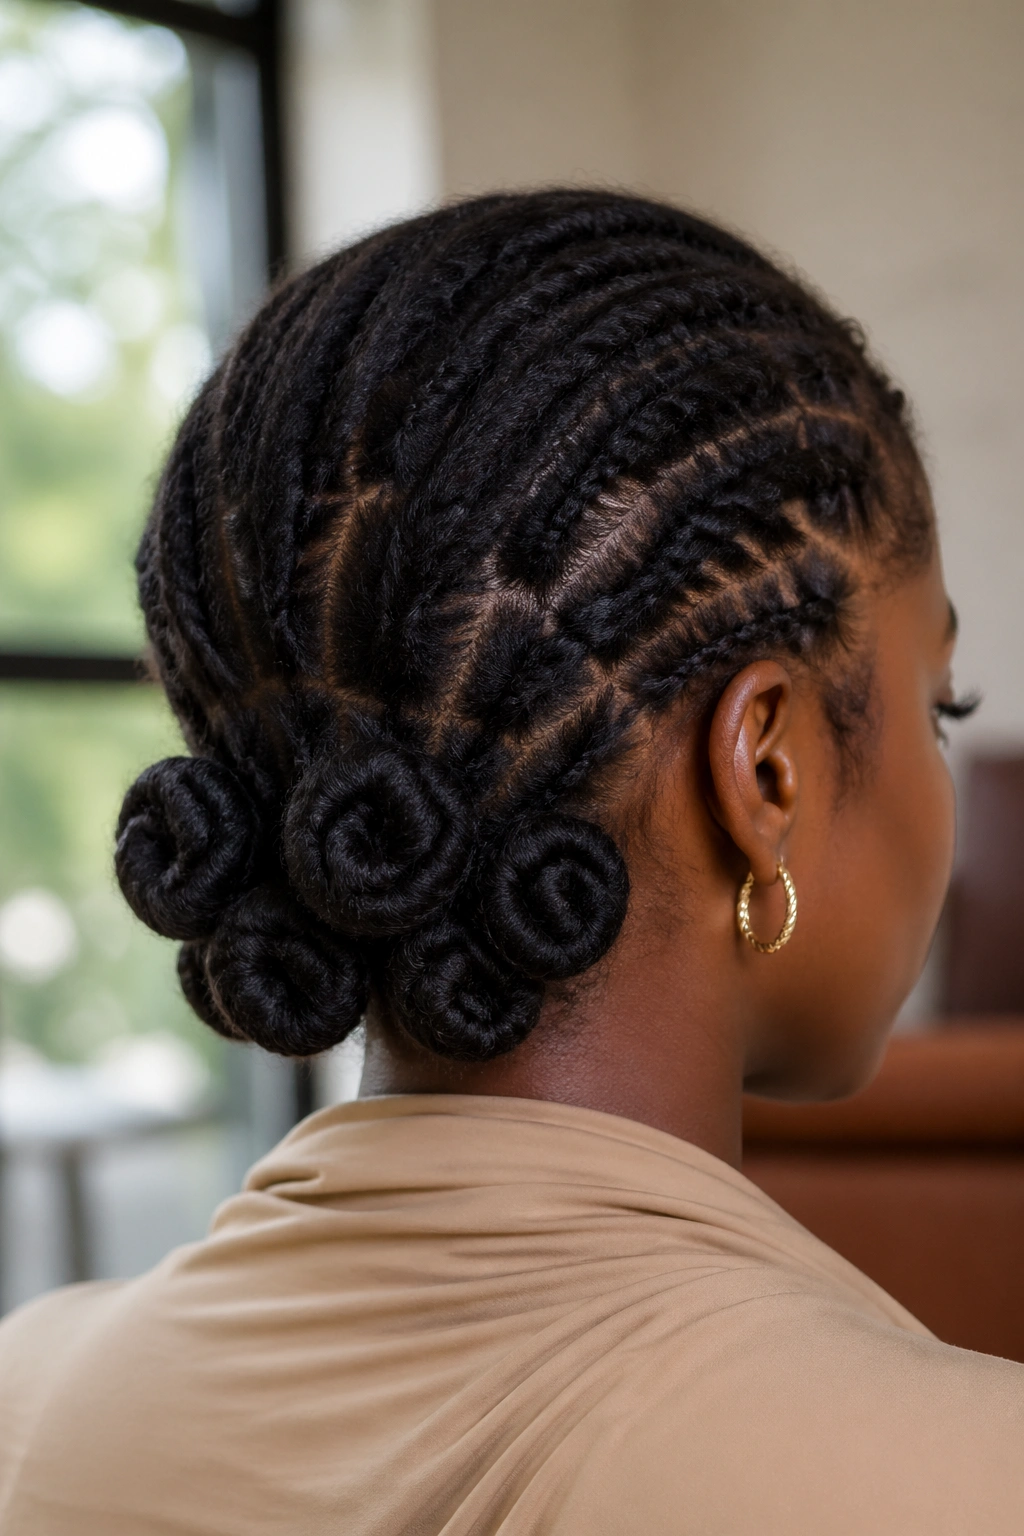
A low nape set feels calmer than a crown set. The knots sit lower on the head, close to the neck, which gives the style a tucked-in shape that works well with collars, scarves, and jackets.
This is one of those styles that quietly looks more expensive than it is. The top stays smooth, the knots cluster near the base, and the whole thing has a low, elegant shape without needing much extra decoration.
If your locs are long, low knots can keep the weight from sitting too high on the scalp. That makes them easier to wear for longer stretches. If your locs are shorter, the low placement also helps the style feel fuller because the knots aren’t trying to stand upright all over the head.
I like this one for days when you want polish but not drama. It settles in nicely.
10. Half-Up, Half-Down with Loc Curtains
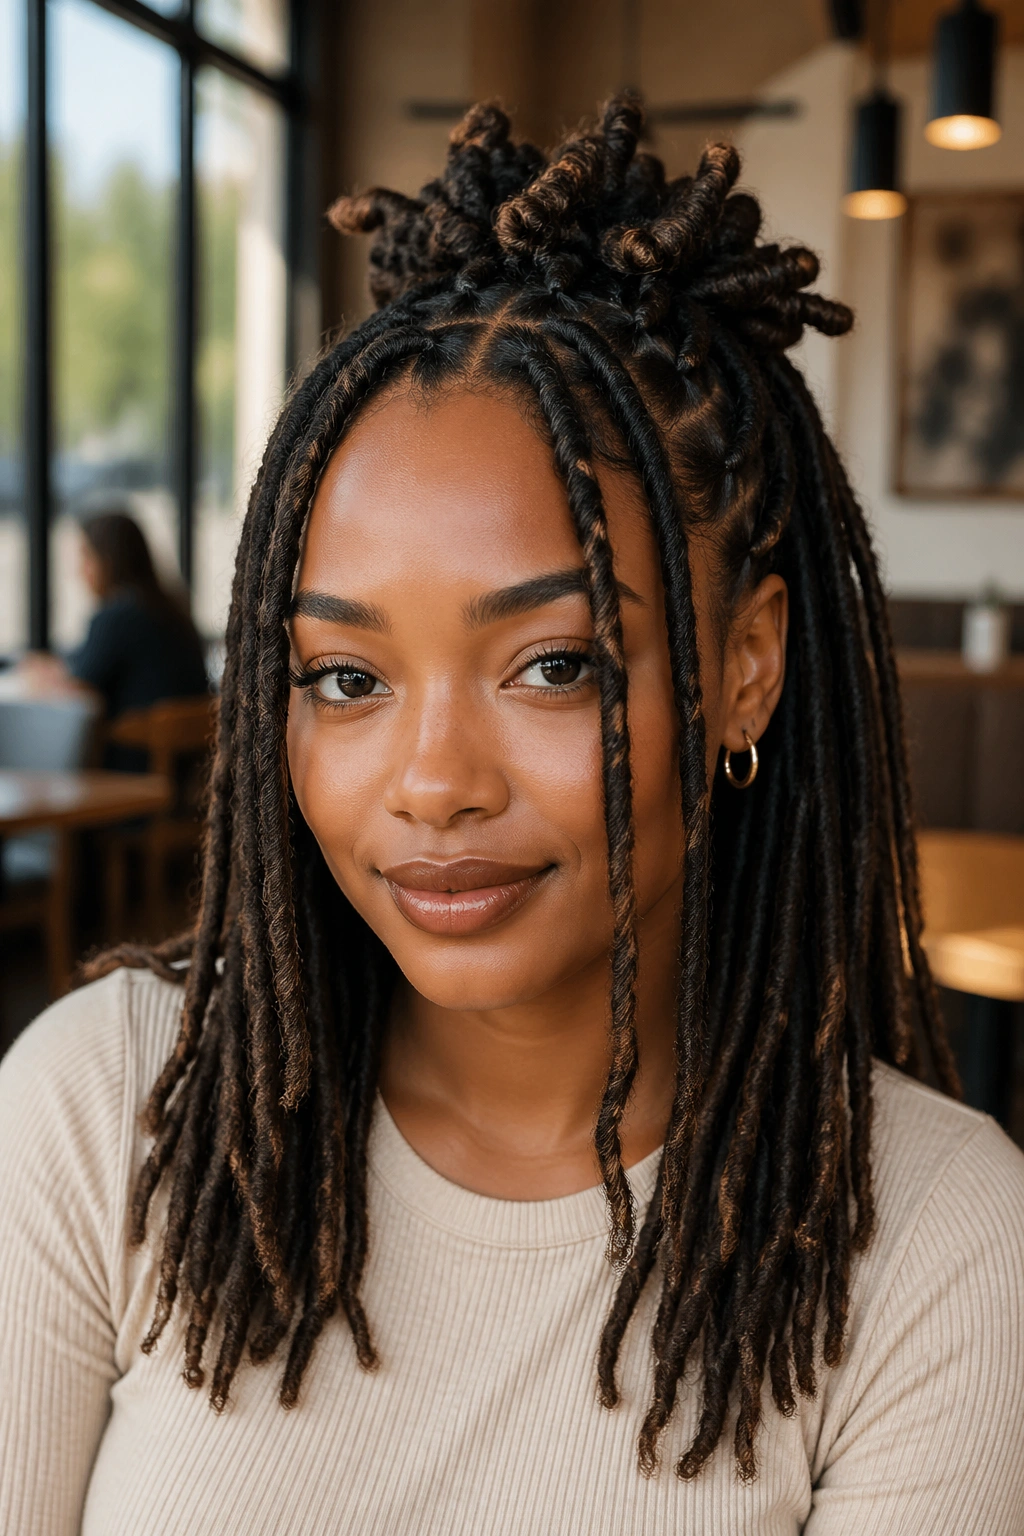
What makes this version different from the half-up crown is the leave-out. Instead of taking all the lower hair free, you can let two front panels or a wider curtain of locs hang beside the knots.
That little change softens the whole style. The top still gives you shape and height, but the loose sections keep it from feeling too tight or formal. If your locs have a nice bend at the ends, this look shows it off.
Best Place to Start
Pick up just the top third of the hair if you want the curtains to feel full. If you want more lift, move the part up slightly and keep the knots smaller. The balance changes fast with locs because they have weight, so even a 1-inch shift can alter the silhouette.
This style is a solid choice for brunch, work, or anywhere you want movement around the face.
11. Accessorized Gold-Cuff Knots
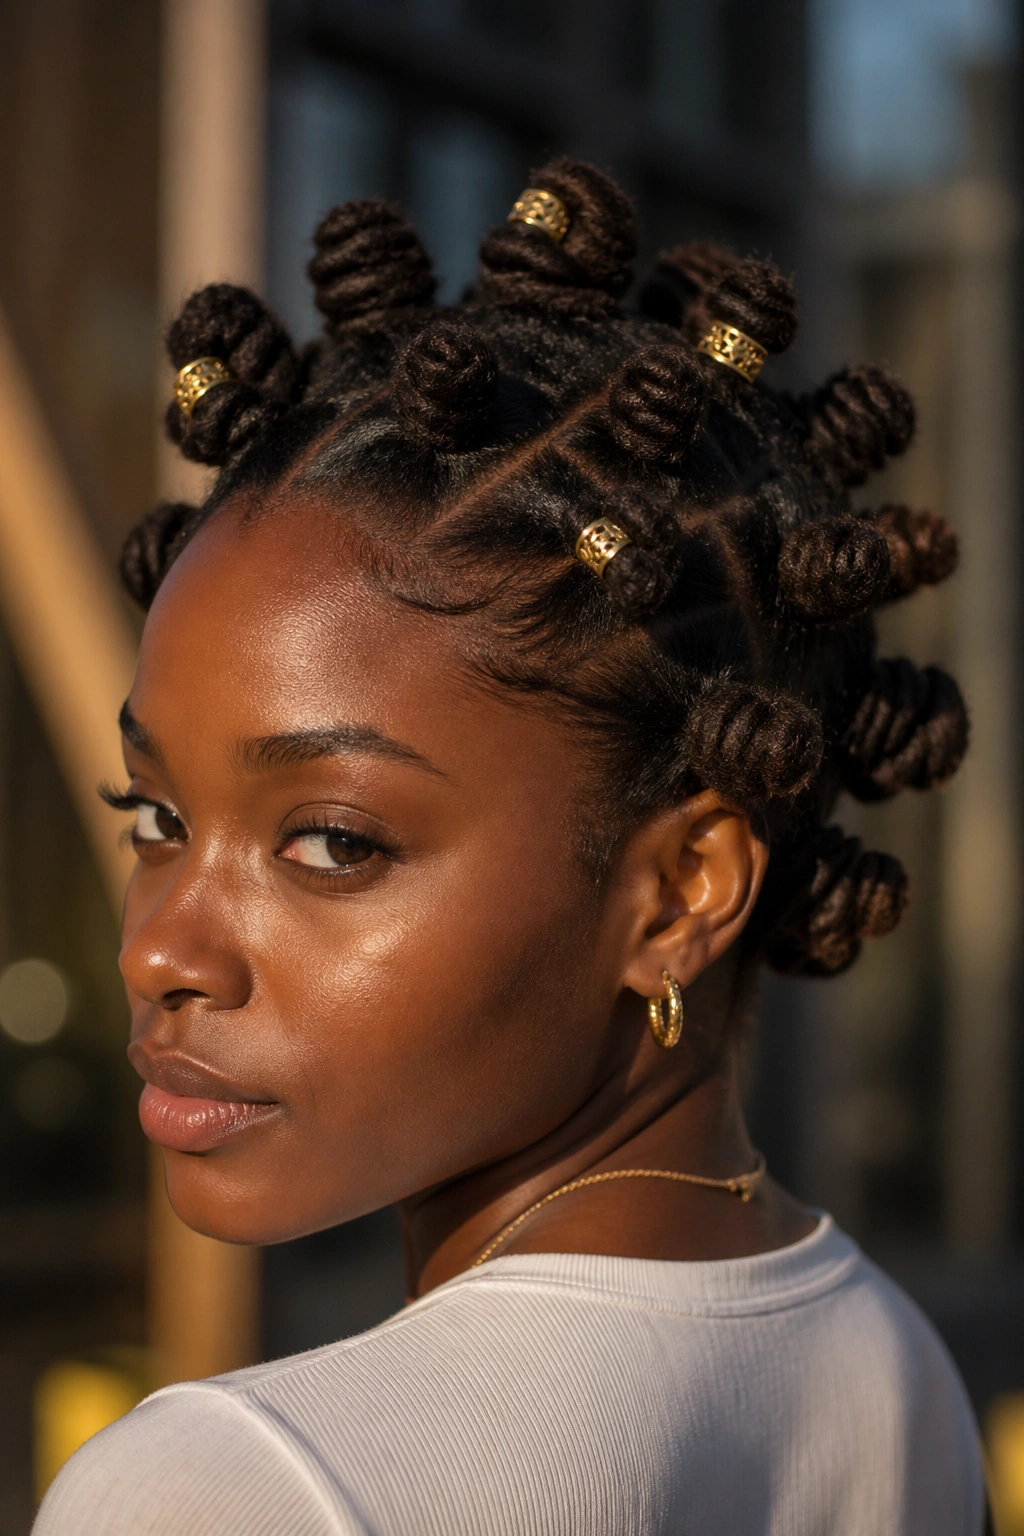
A plain knot set can go from simple to sharp with a few cuffs. Gold cuffs, rings, or small wraps add just enough shine to break up the texture of the locs without taking over the whole style.
This is not about covering every knot with hardware. Too many accessories can make the hair look crowded. One cuff on every second or third knot is usually enough, especially if the locs are thick or already have a lot of visual texture.
Use the accessories to echo the rest of your look. Small hoops, a gold chain, or a metallic lip detail will make the knots feel like part of a full outfit instead of an afterthought.
A quick word: put the cuffs on after the knots are secure. If you add them too early, they can get in the way while you’re wrapping the hair.
12. Two-Row Layered Knots
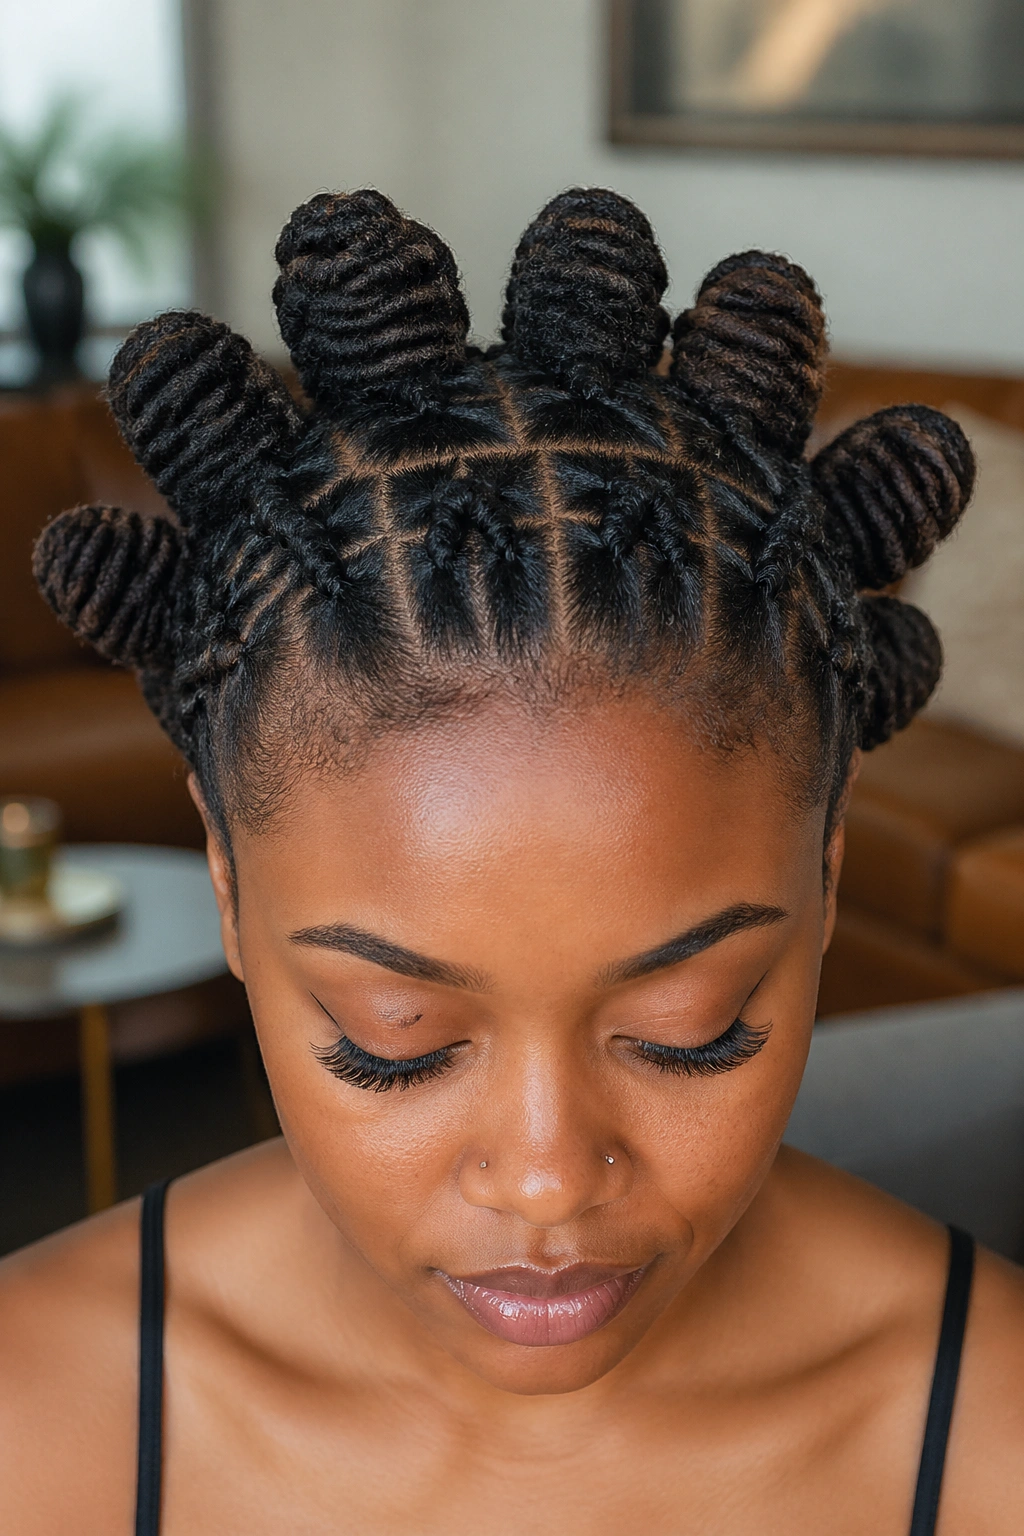
Two rows give the style more depth than a single line of knots. The front row can be smaller, the back row slightly larger, and that difference creates a stacked look that feels fuller on locs.
Why Layering Works
The eye reads the front row first, then catches the second row behind it. That little bit of overlap makes the style look richer, especially on medium-length locs that need a bit of shape to keep from falling flat.
You can also use the layers to work around density. If the crown is thick and the nape is lighter, a two-row setup helps the style feel balanced instead of top-heavy.
Practical Setup
- Keep the front row neat and close together.
- Leave a finger-width of space before starting the second row.
- If the back row starts competing with the front, reduce the knot size.
This is one of those styles that looks more detailed than it is. Good news for a busy morning.
13. Heart-Part Bantu Knots
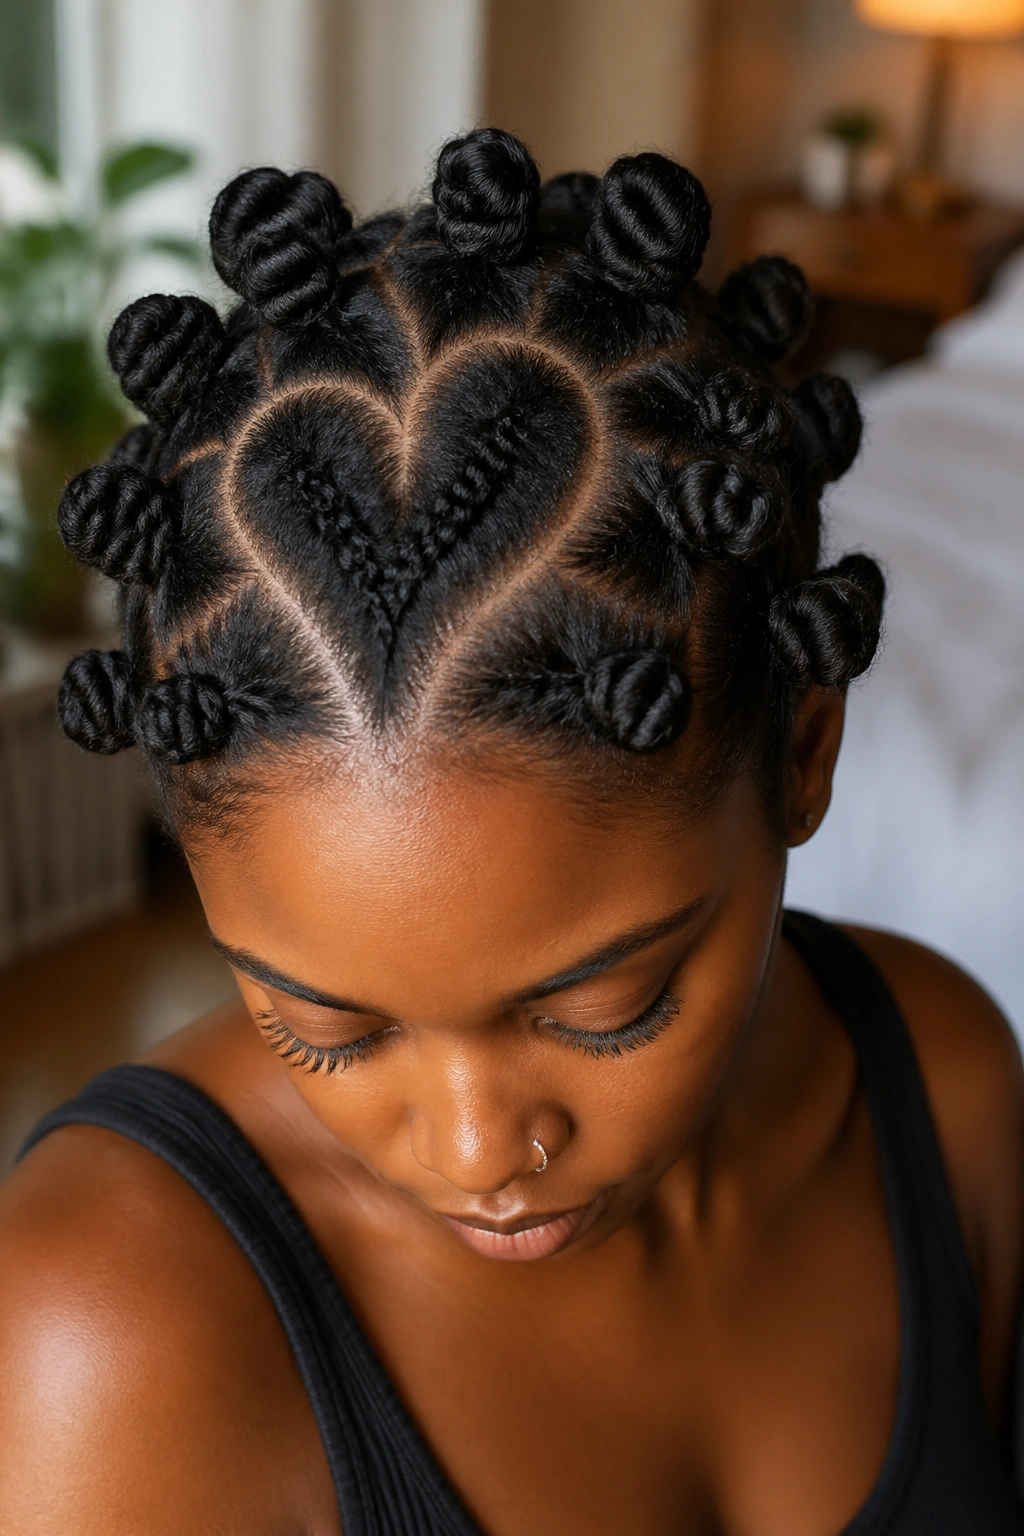
A heart-shaped part at the crown makes the style feel playful before the first knot even goes in. It’s a little extra, sure, but not in a fussy way. On locs, the part shape shows clearly, which makes the whole look more memorable.
The heart part works best when the rest of the sections stay simple. Let the part carry the personality. If you clutter it with too many accessories or tiny sections, the design loses its charm.
How to Keep the Shape Readable
Draw the top of the heart first, then let the point drop into the center part. The edges should be smooth, not jagged. A wide-tooth comb can help soften the lines if the locs are thick and hard to separate cleanly.
I’d reserve this one for days when you want the hair to be the conversation starter. It has that effect.
14. Flat-Twist Base into Knots
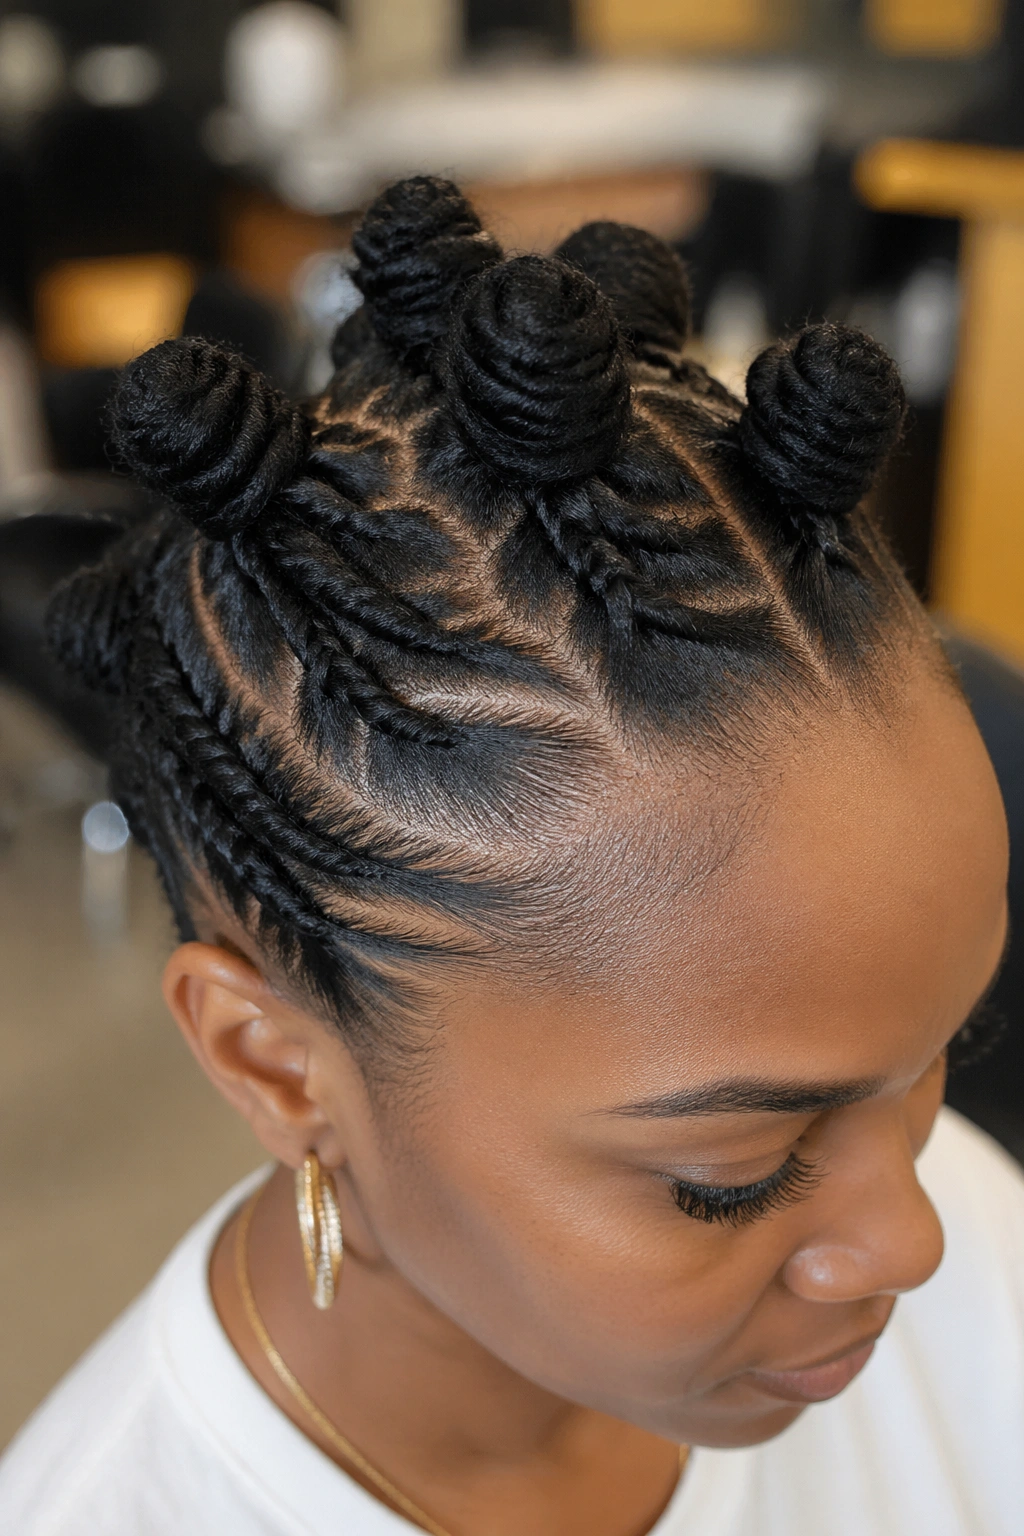
A flat-twist base gives Bantu knots on locs a different kind of grip. Instead of starting each knot from a loose section, you twist the roots close to the scalp first, then coil the length into the knot.
That base makes the style feel more anchored. It also helps if your locs are freshly retwisted or still a little soft near the root, because the flat twist can give the knot a firmer start without needing heavy product.
The look lands somewhere between polished and practical. You get the neatness of a twist pattern at the scalp, then the round knot shape on top of it. It’s a nice move when plain knots feel too simple.
Keep the twists smooth and low-tension. A flat base should support the knot, not strangle the scalp.
15. Stacked Knots for Long Locs
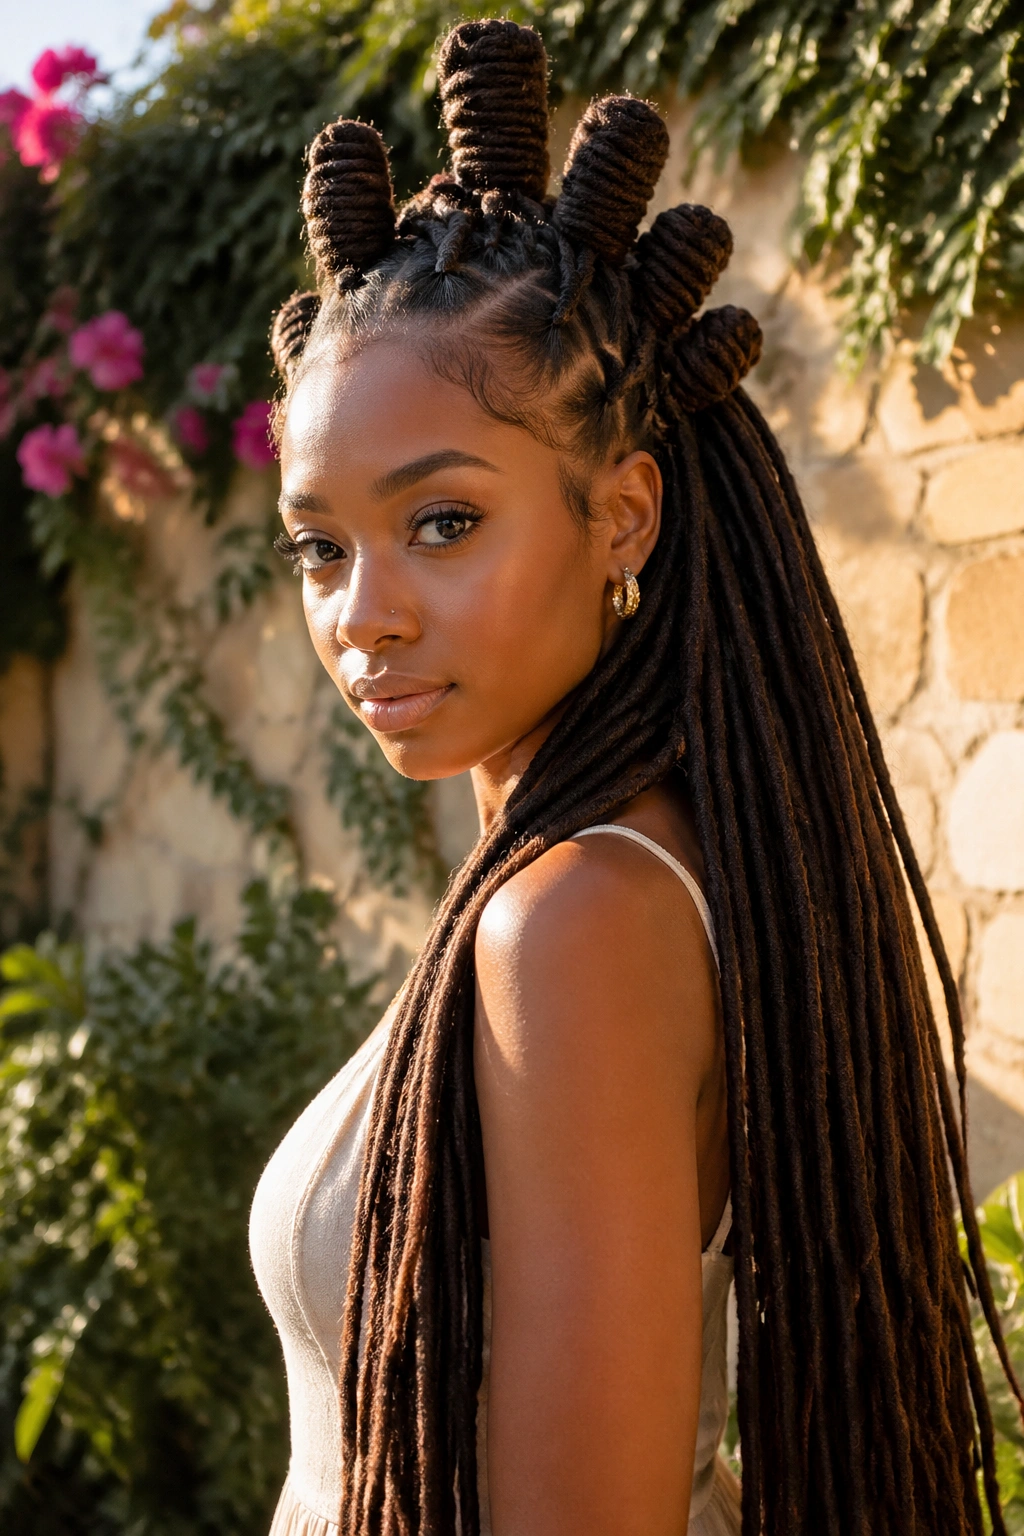
Long locs need room to fold. If you try to cram them into a small knot, the ends can poke out in odd places or create a bulky lump that sits sideways instead of upright.
Stacked knots solve that by wrapping the length around itself in more than one pass. The knot ends up taller, firmer, and easier to shape. On waist-length locs, that extra wrap matters.
What to Expect
- The style usually takes fewer sections.
- Each knot will sit higher than a standard one.
- The finished shape can feel more sculpted, which is useful if you want drama without adding accessories.
This is a good style for long locs that need to stay off the neck. It also holds well under hats or wide scarves, which is not something every knot set can claim.
16. Asymmetrical Knot Set
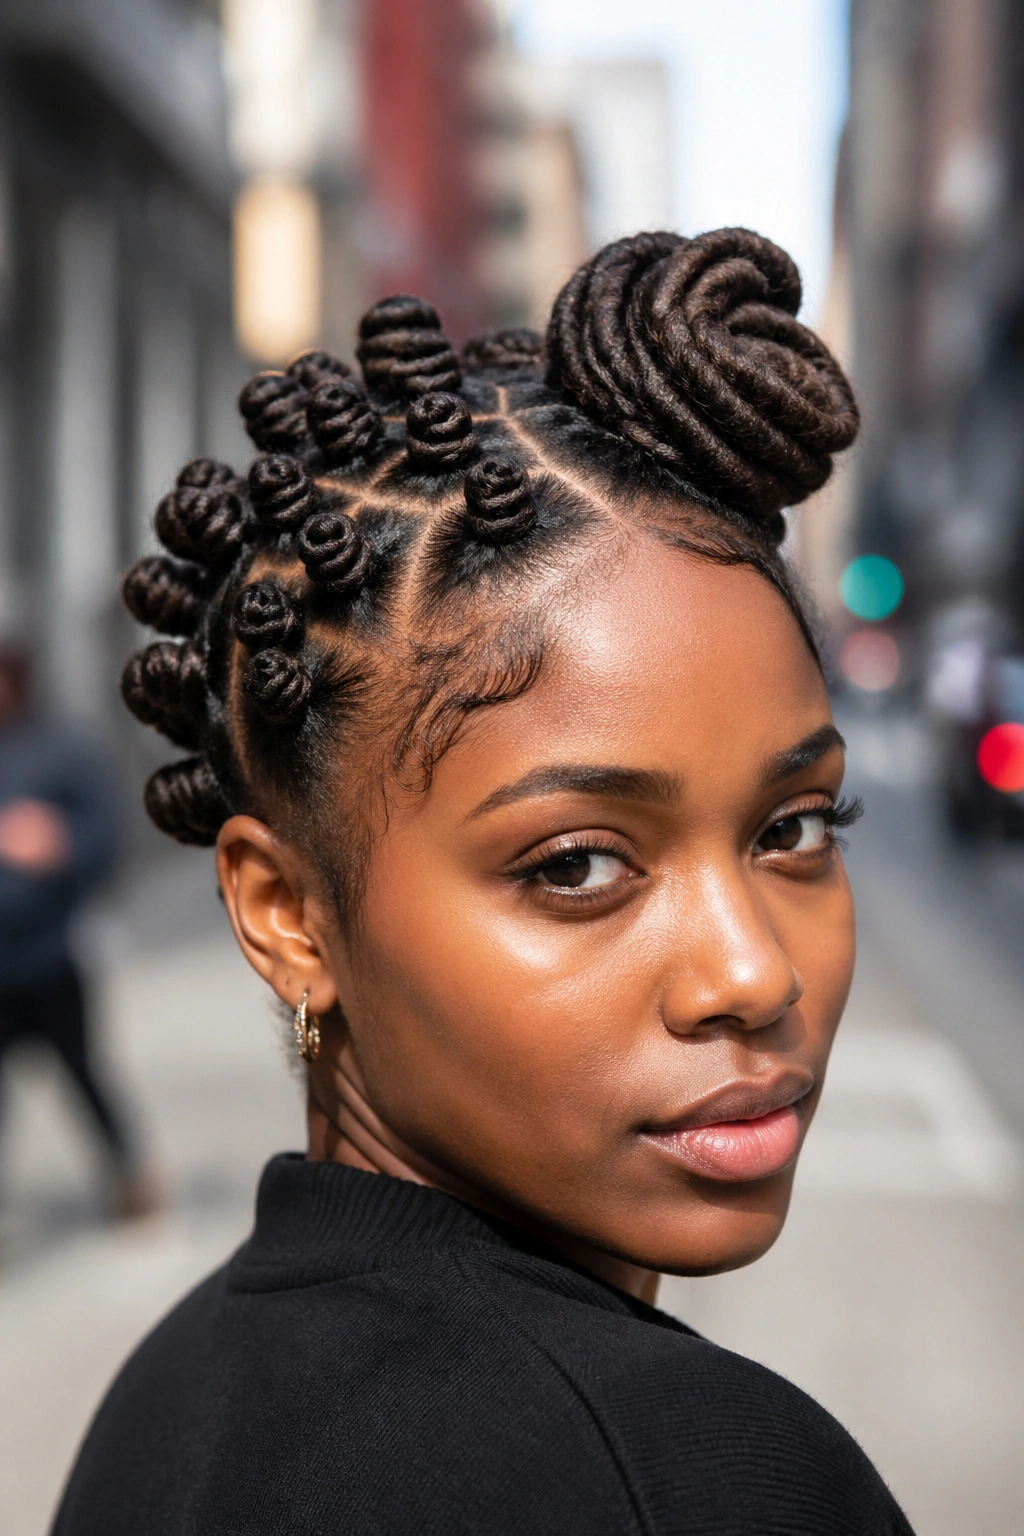
One side slightly fuller than the other can look more modern than a perfectly even layout. Asymmetry gives locs a little movement, even when the knots themselves are still and compact.
The key is making the imbalance look intentional. Maybe the left side has four knots and the right side has three larger ones. Maybe the front has smaller sections and the back has one oversized knot that breaks the pattern. Either way, the eye should feel a clear design choice.
This style is useful when your parting is not perfect. Instead of fighting the natural fall of the locs, you work with it. That often looks better than trying to force a rigid grid.
The only mistake here is making the imbalance too subtle. If the difference is tiny, it can look accidental. Make the contrast noticeable.
17. Space-Bun Inspired Knots
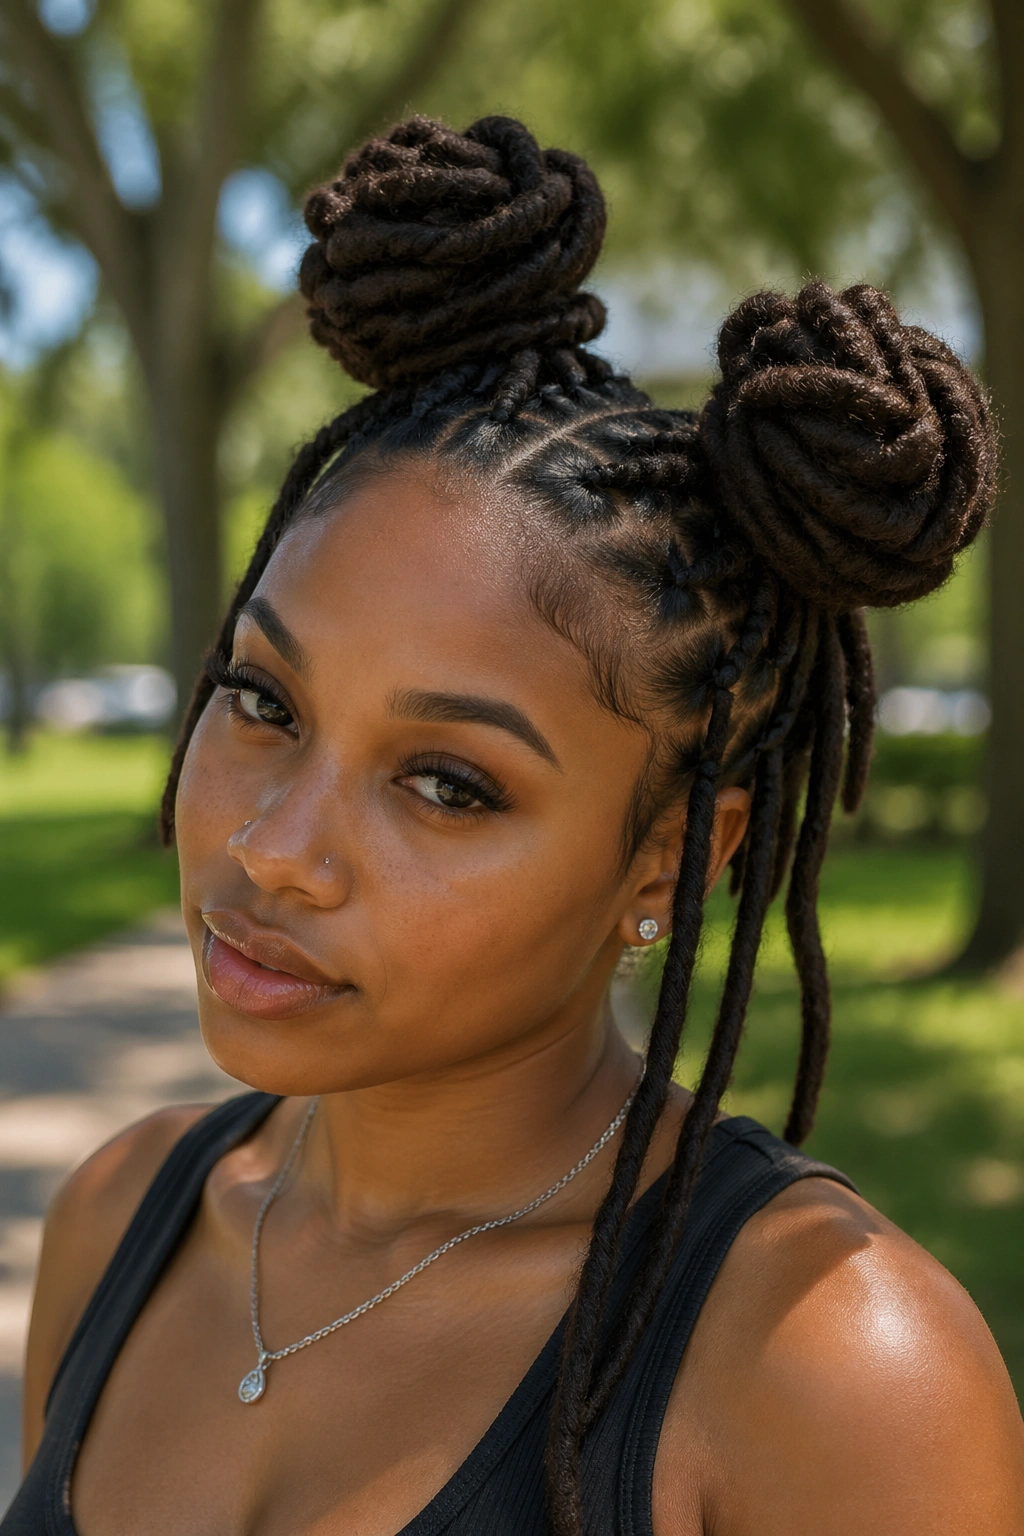
Two high knot clusters can give locs a fun, lifted shape that feels a little like space buns, but with more texture and less shine. The knots sit high and rounded, which gives the face room and keeps the profile lively.
This style lands well on medium and long locs because the length can be wrapped up cleanly without making the head look flat. If your locs are shorter, the buns will sit smaller, but they can still work if you keep the sections tight and centered.
You do not need perfect symmetry for this to read well. In fact, a tiny difference in height can make the style feel softer and less stiff. That said, keep the base even so one side doesn’t collapse by noon.
It’s a cheerful style. Hard to wear it and feel dull.
18. Knots with Curled Ends
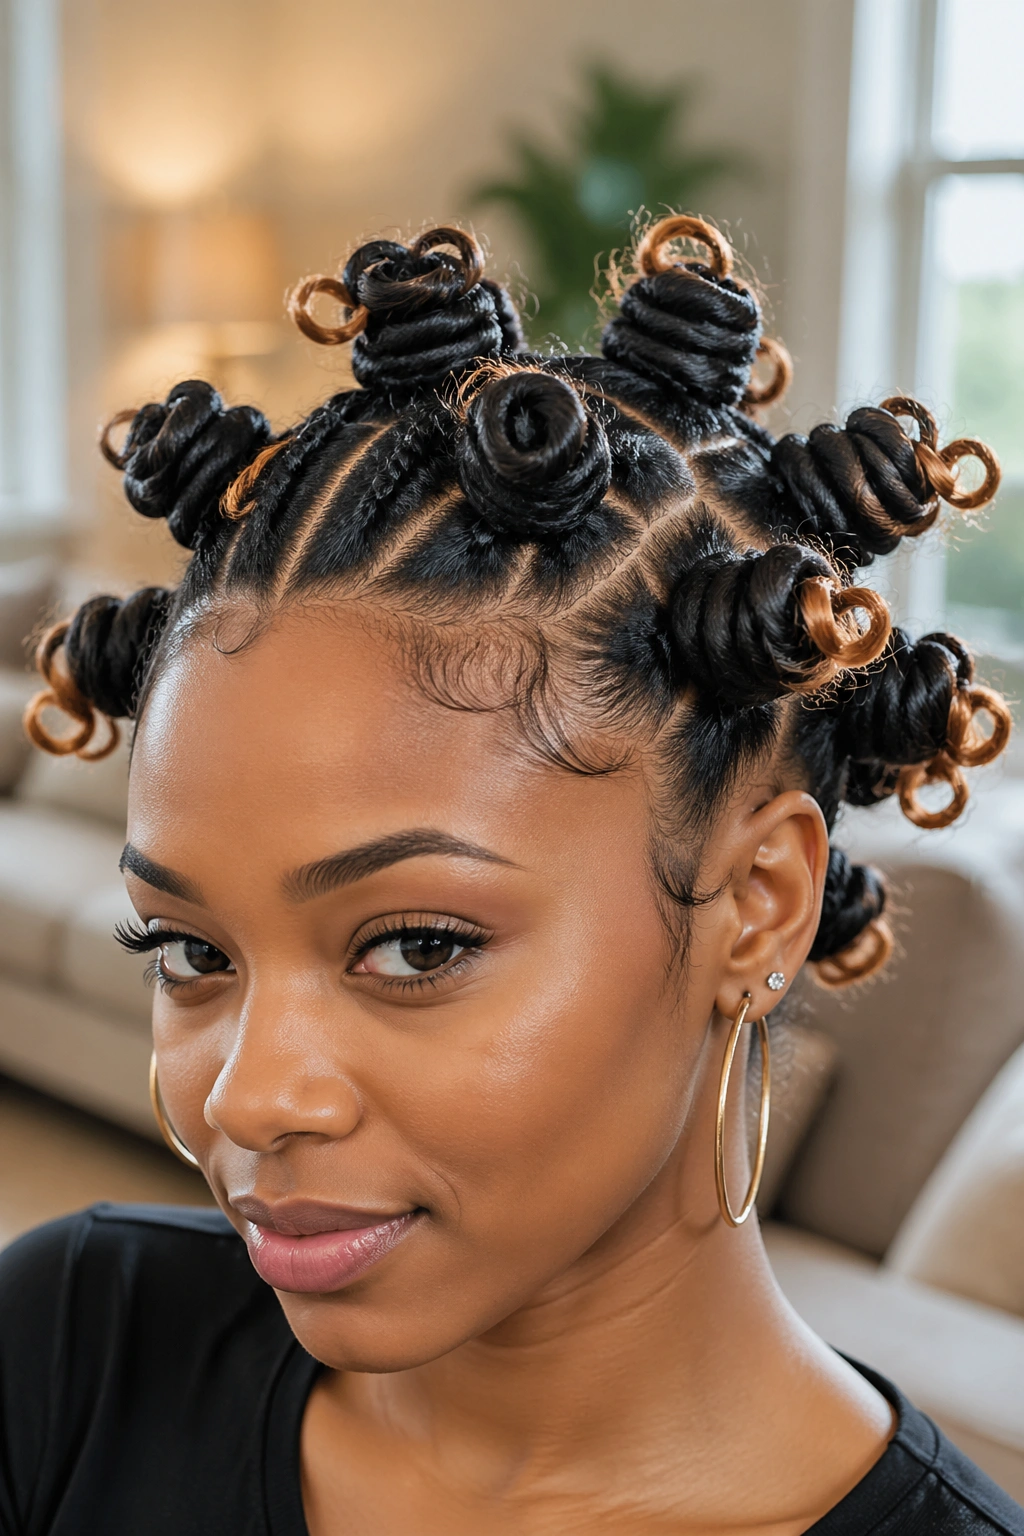
Leaving a few ends visible changes the shape in a nice way. Instead of tucking every last bit of the loc into the knot, let the tips curl outward a little so the style gets a softer finish.
Why the Ends Matter
Loc ends are textured on their own, so they add another layer to the knot shape. That little flare can make the style feel less rigid, especially on thicker locs that might otherwise form a heavy dome.
This works well when you want the knots to feel styled but not overworked. The ends can peek out in a uniform way or sit in uneven little loops. Both can look good if the rest of the parting is clean.
A Small Warning
If the ends are very long, keep them tucked just enough to avoid snagging. You want a curl, not a loose tail that catches on clothes. A bit of mousse on the ends can help them hold their bend.
19. Tapered Crown Bantu Knots
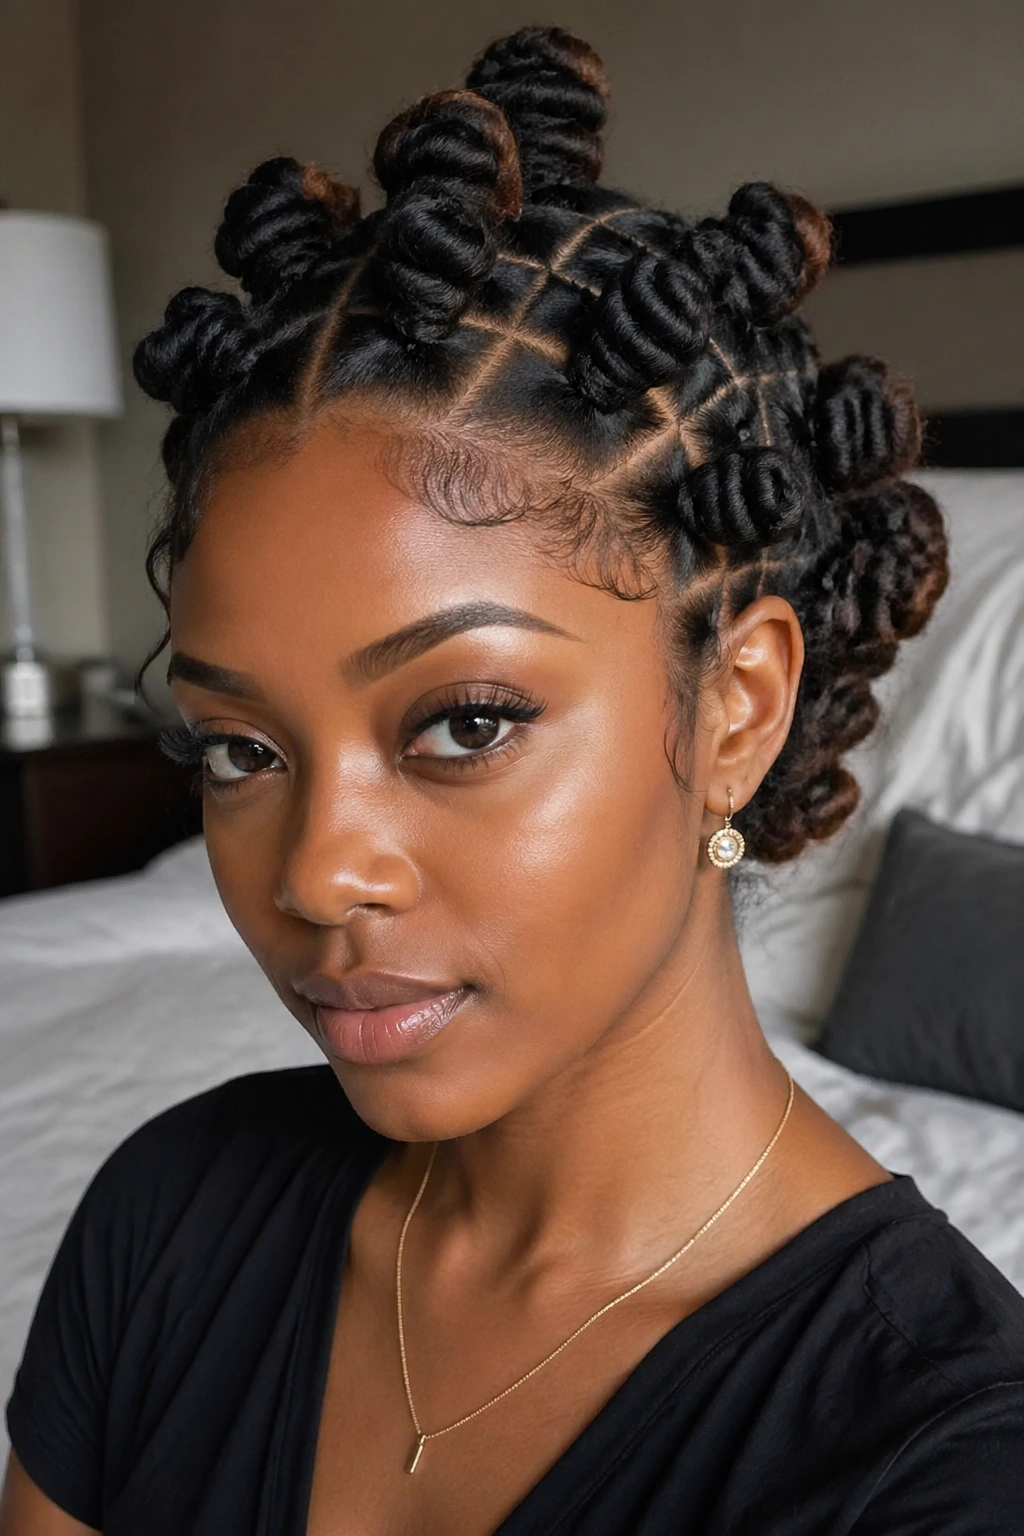
A tapered crown set starts fuller near the front and gradually shifts into slightly larger or more spaced knots at the back. The shape creates a subtle lift, almost like the hair is folding upward before it settles down again.
This is one of the better choices if you want the face framed but not crowded. The front knots sit small enough to keep the hairline open, while the back sections can carry more weight. On locs, that taper keeps the style from looking boxy.
The parting matters here more than the knot shape. If the front is too large, the taper disappears. If the back is too tiny, the style loses its grounding. Aim for a gentle size change, not a dramatic jump.
A tapered crown is the sort of style that looks planned without feeling stiff. That is a nice line to walk.
20. Side-Fringe Knot Set
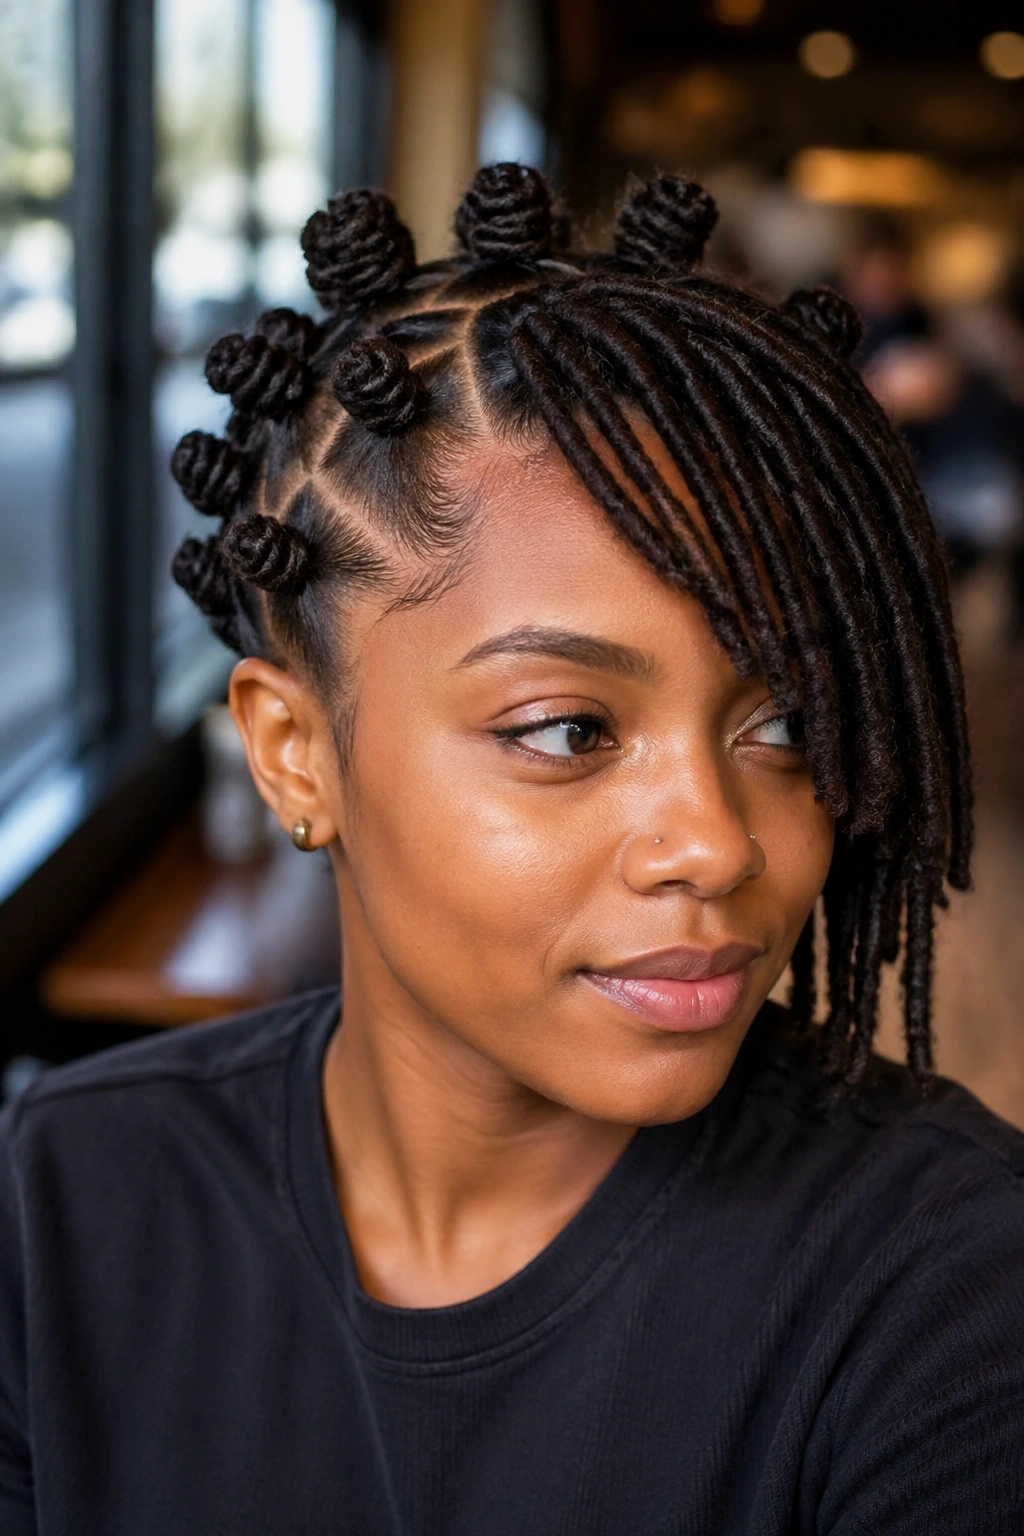
A side fringe softens the hard line that knots can sometimes create. Leave a narrow panel of locs along one side of the forehead, then build the knots on the rest of the head. The fringe adds movement and makes the face look framed rather than boxed in.
This is a smart choice if you wear your part on the same side often. The fringe can blend into your usual pattern instead of fighting it. It also gives you something to tuck behind the ear or sweep across the forehead, depending on the mood.
The style works best when the fringe is deliberate, not random. Pick the section cleanly, clip it aside, and keep its length consistent so it falls as a shape rather than a stray patch.
One loose side can change the whole feeling of the look. It keeps the knots from taking over.
21. Formal Sleek Knots for Locs
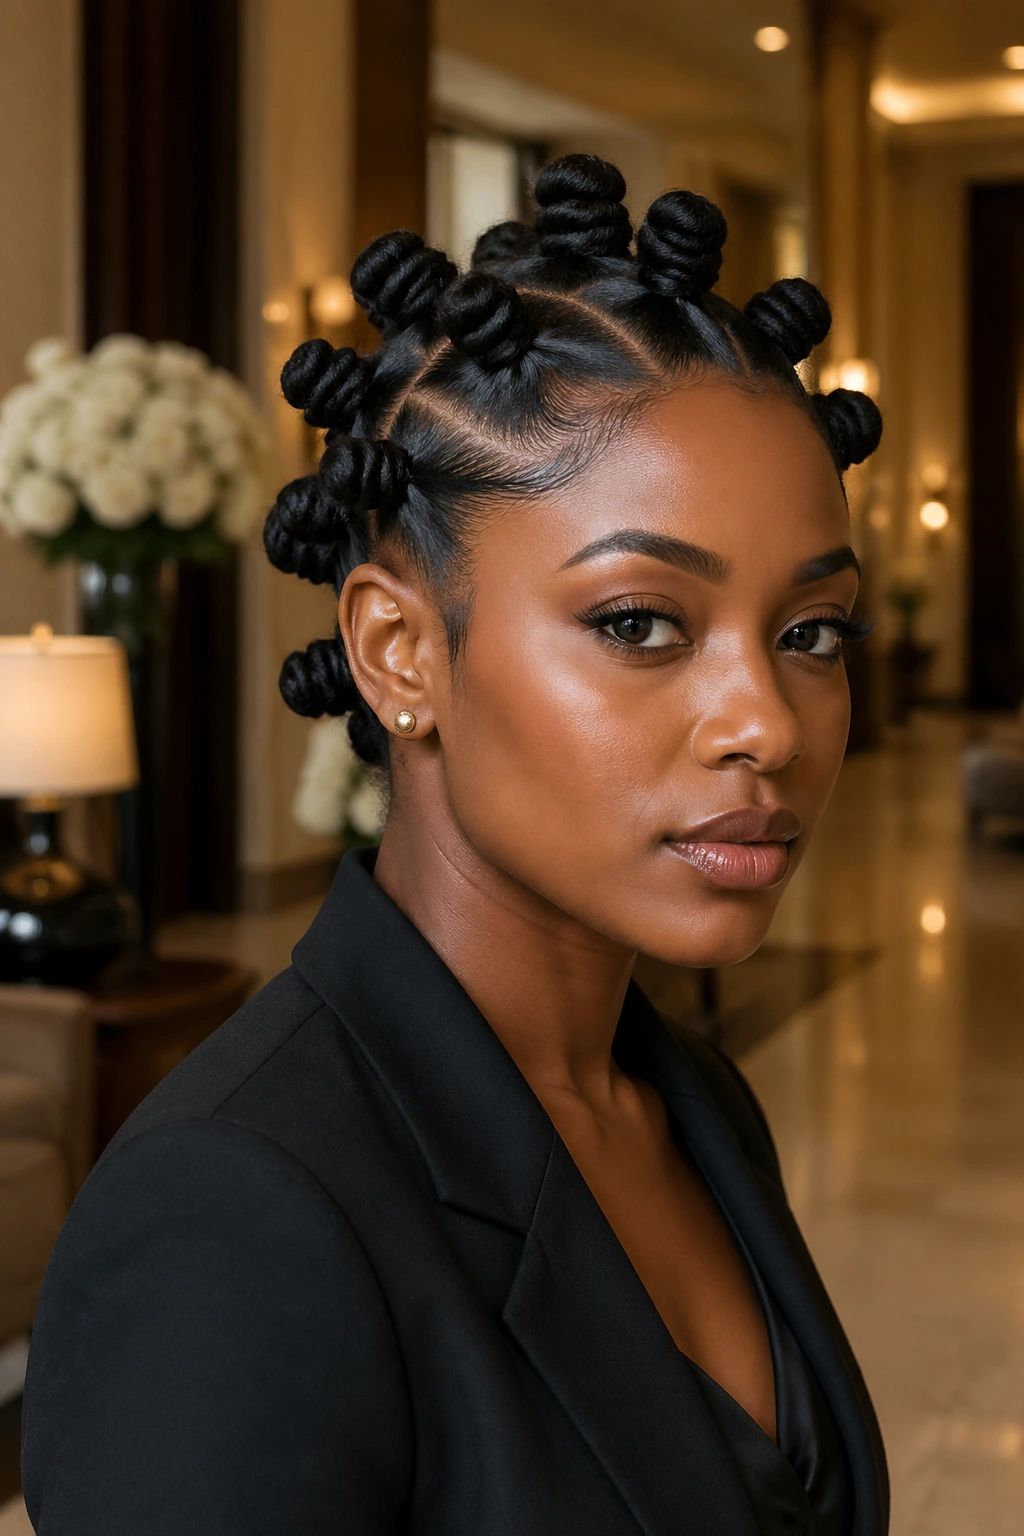
Sleek knots are all about the base. The parts are crisp, the roots are laid down smoothly, and the knots themselves sit clean and firm. When this works, it looks sharp in a way that reads well with a blazer, a satin dress, or even a simple neckline.
The style is at its best when you keep product light and the scalp neat. Too much cream or wax can leave the locs dull, and too much gel can turn the front into a sticky mess by the end of the day. A little mousse and careful brushing usually do the job.
- Use a clean side or center part.
- Smooth the roots before you start wrapping.
- Pin each knot in place until it sets.
This is the version I’d pick for a formal event. It has presence without needing decoration.
22. Undone Soft Knots
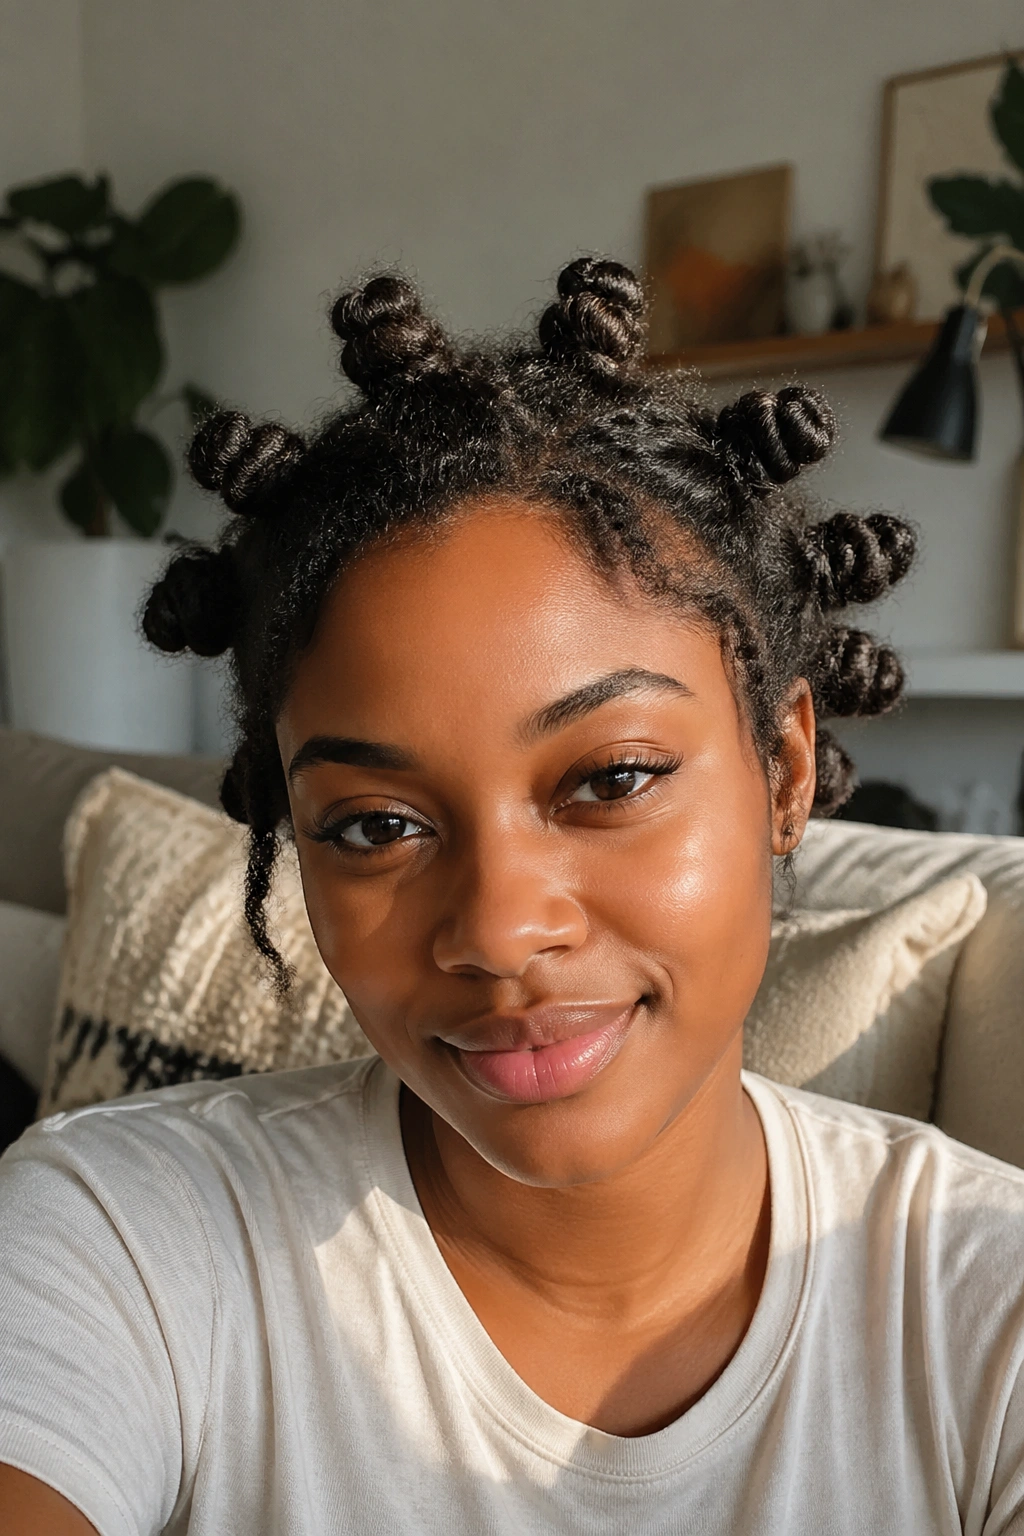
Not every knot set needs to look pressed and polished. Soft knots have a looser finish, with a little fuzz at the base and a less exact wrap around the loc. On the right day, that softness is the point.
This style suits people who want texture to stay visible. The knots don’t look fragile or overcontrolled; they look lived-in, which can be easier to wear for long hours. If your locs already have a bit of frizz at the root, this version leans into it instead of fighting it.
The trick is keeping the looseness intentional. If the knots are sloppy, they’ll fall apart. If they’re soft but secure, they’ll look relaxed in a good way.
I like this one for weekends, errands, and low-key plans. It asks for less, which is refreshing.
23. Knot Halo with Open Center
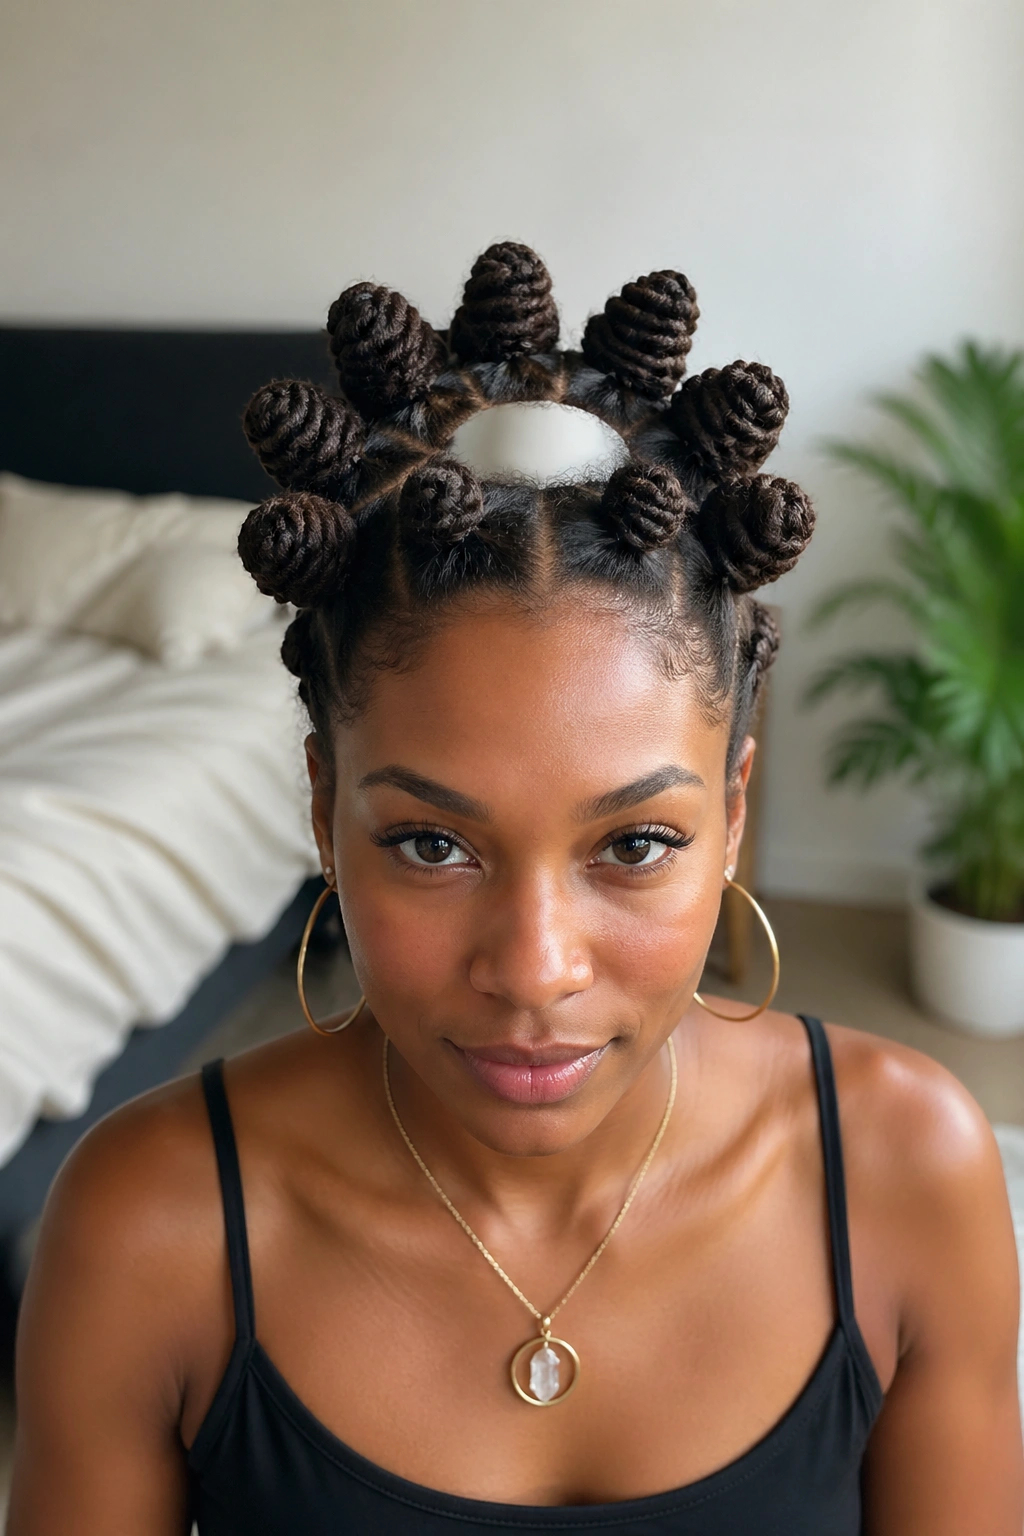
What if the knots form a ring and leave the center of the scalp visible? That’s the halo effect, and on locs it can look striking because the parting becomes part of the design.
This style gives the head a more architectural shape. The knots sit around the perimeter, while the open center keeps the style from feeling heavy. It’s a smart option when your locs are dense and you want to reduce bulk on top.
Shape Tips
- Keep the center opening balanced, not too wide.
- Make the outer ring of knots even in size.
- If the locs are long, wrap the outer knots tighter so the halo stays round.
The open center makes this style feel airy, even when the locs themselves are thick. That contrast is what gives it character.
24. Low Ponytail Knot Hybrid
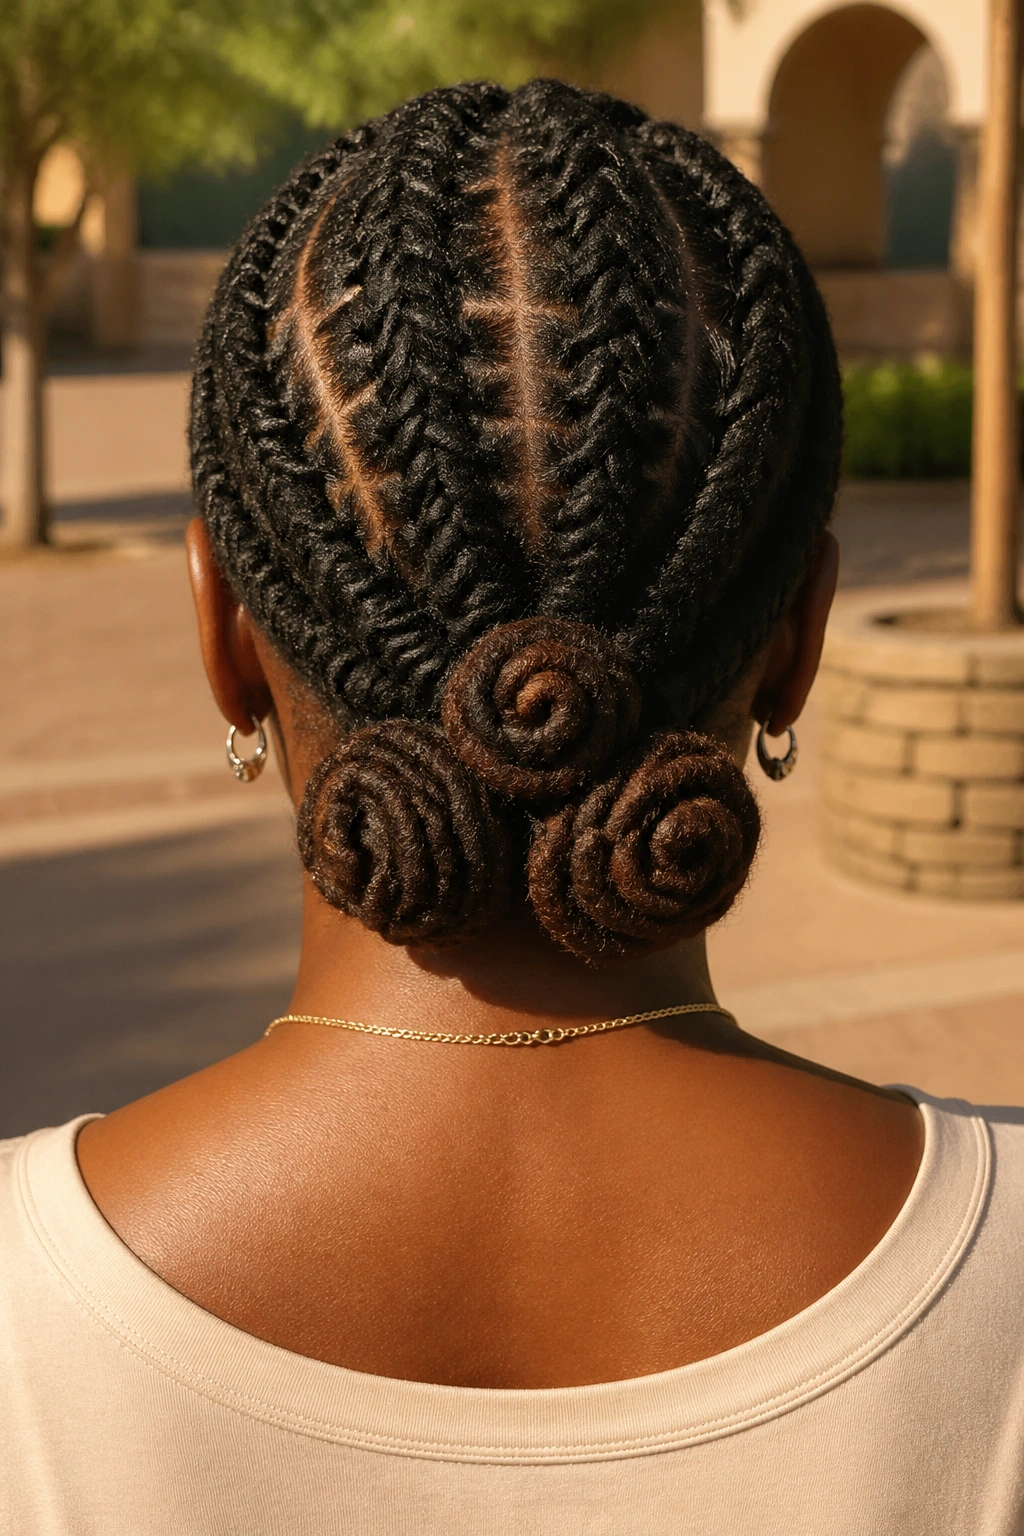
This style starts with a low ponytail base, then turns that ponytail into one or more Bantu knots. It’s a good bridge between an updo and a knot set, especially when you want the nape secured but the rest of the head to stay smooth.
The beauty of the low ponytail base is that it keeps the hairline cleaner. If you’ve got a busy week, a workout, or just a lot of movement planned, this layout tends to stay put better than loose all-over knots.
It also works well with long locs because the ponytail gives the lengths a single starting point. From there, you can make one large knot or split the ponytail into two smaller ones if you want more shape.
The style feels practical without looking plain. That’s a useful line to have in your rotation.
25. Bead-Tipped Knot Styles
Beads at the tips of locs can change the tone of the whole style. They add a little weight, a bit of movement, and a sound you’ll notice when you turn your head. On Bantu knots, they can peek out of the coils or hang from a few loose ends.
This works best when the beads are chosen with restraint. A few wooden beads or a small set of clear ones can add texture without making the style noisy. Too many, and the knots start to compete with the accessories.
How to Keep It Balanced
- Put beads only on the outer knots or a few front pieces.
- Match the bead size to the thickness of the loc.
- Check that the bead hole does not snag the hair when you slide it on.
Beads are the quickest way to shift this style from plain to personal.
26. Starter-Loc Friendly Small Knots
Starter locs need gentler handling, full stop. Small knots can work beautifully here because they keep the tension lower and the shape lighter. You’re not forcing fresh locs into oversized coils that pull at the root.
This style is best when the locs are still short and compact. Tiny knots let the texture show while keeping the scalp from getting overworked. It’s a good way to wear a knot set without asking too much of the hair.
Use the lightest product you can get away with. Fresh locs don’t need a heavy coating to behave. A little mousse or a light setting spray is usually enough to help the sections stay together.
If your roots are tender, skip the style for a day. That’s not weakness. That’s smart.
27. Thick Loc Jumbo Knot Row
A single row of giant knots across the head makes thick locs look dramatic in the best way. Because the row is limited to one band, the style feels focused instead of crowded.
This is a strong pick if your locs are heavy and you want the shape to sit up rather than spread across the whole scalp. The row can run from temple to temple or from front to back, depending on how much length you have to work with.
- Keep the row centered if you want balance.
- Leave enough space between knots so the scalp doesn’t look packed.
- Pin each knot while it sets; heavy locs need the support.
The row format gives the style a clean line. That line is doing more work than it seems.
28. Festival Mix-and-Match Knots
Mixing knot sizes, part shapes, and a few accessories makes the style feel playful without turning it into a costume. One knot might sit higher, another lower. One section might get a cuff, another a bead. The point is contrast.
This style works because locs already have texture, so the different pieces do not fight each other. They stack up visually in a good way. If you want a style that looks like you spent time on it, this is one of the easiest ways to get there.
What to Mix
- Small and medium knots in the same set.
- Two part shapes, like straight and zigzag.
- One or two accent pieces, not ten.
The danger is overdoing it. Two or three contrasts usually look better than five.
29. Protective Loose-Tension Knots
Loose-tension knots are for days when the scalp wants a break. The locs are still shaped into knots, but the base is softer and the wrapping is less tight. That makes the style easier to wear when your roots feel sensitive.
This approach can be useful if you style your locs often or if the hairline needs a calmer week. The knots stay visible, but they don’t sit as aggressively against the scalp. That little bit of give can make a huge difference by the end of the day.
The tradeoff is hold. Loose-tension knots may need a few pins or a scarf while they set so they don’t slouch before they’re ready. A satin wrap overnight usually helps keep the shape intact.
Comfort matters. A style you can actually wear beats one that only looks good for ten minutes.
30. Wraparound Knot Cascade
A wraparound cascade gives the style a sense of movement from top to bottom. The knots start near the crown, then the length of the locs wraps downward in a looser fall, almost like the style is stepping from one level to the next.
It’s a strong finish for long locs because it uses the length instead of hiding it. The knots provide the structure, and the cascade keeps the ends from disappearing into a tight lump. If your locs are heavy, this layout spreads the visual weight in a way that feels balanced.
The best part is how flexible it is. You can keep the cascade neat for a dressier feel, or let a few ends sit loose if you want the style to soften as the day goes on. I like that it does not force the locs into one stiff shape. It lets the hair move a little, which is usually where locs look best.
If you are choosing only one style from this whole set, pick the one that matches your length and your patience. The right Bantu knot look on locs is the one that stays comfortable after the mirror moment passes.