Bantu knots on short natural hair can look razor-sharp, soft, playful, or properly dressed up — and the difference is almost always in the parts. Not the length. Not the texture. The parts.
That surprises people the first time they try them. Short coils can hold a knot beautifully when the sectioning is smart, the tension stays gentle, and the base is prepared with enough slip to let the hair wrap instead of fight back. A tiny knot on a cropped coil can look more deliberate than a giant knot on longer hair, which is one reason this style has stayed such a favorite in Black hair culture for so long.
Short hair also gives you a cleaner finish in a way longer hair often can’t. Less bulk means more control. You can go tiny and neat, lean into a side part, build a mohawk strip, or keep the whole thing low-key and wearable for days when your hair needs to stay off your neck. Small sections. Smart placement. That’s the whole game.
Some of the looks below are polished enough for a special event. Others are the sort of styles you throw together before work and forget about because they just sit there and behave. All of them work best when you respect your hair’s length instead of trying to force it into a shape it doesn’t want.
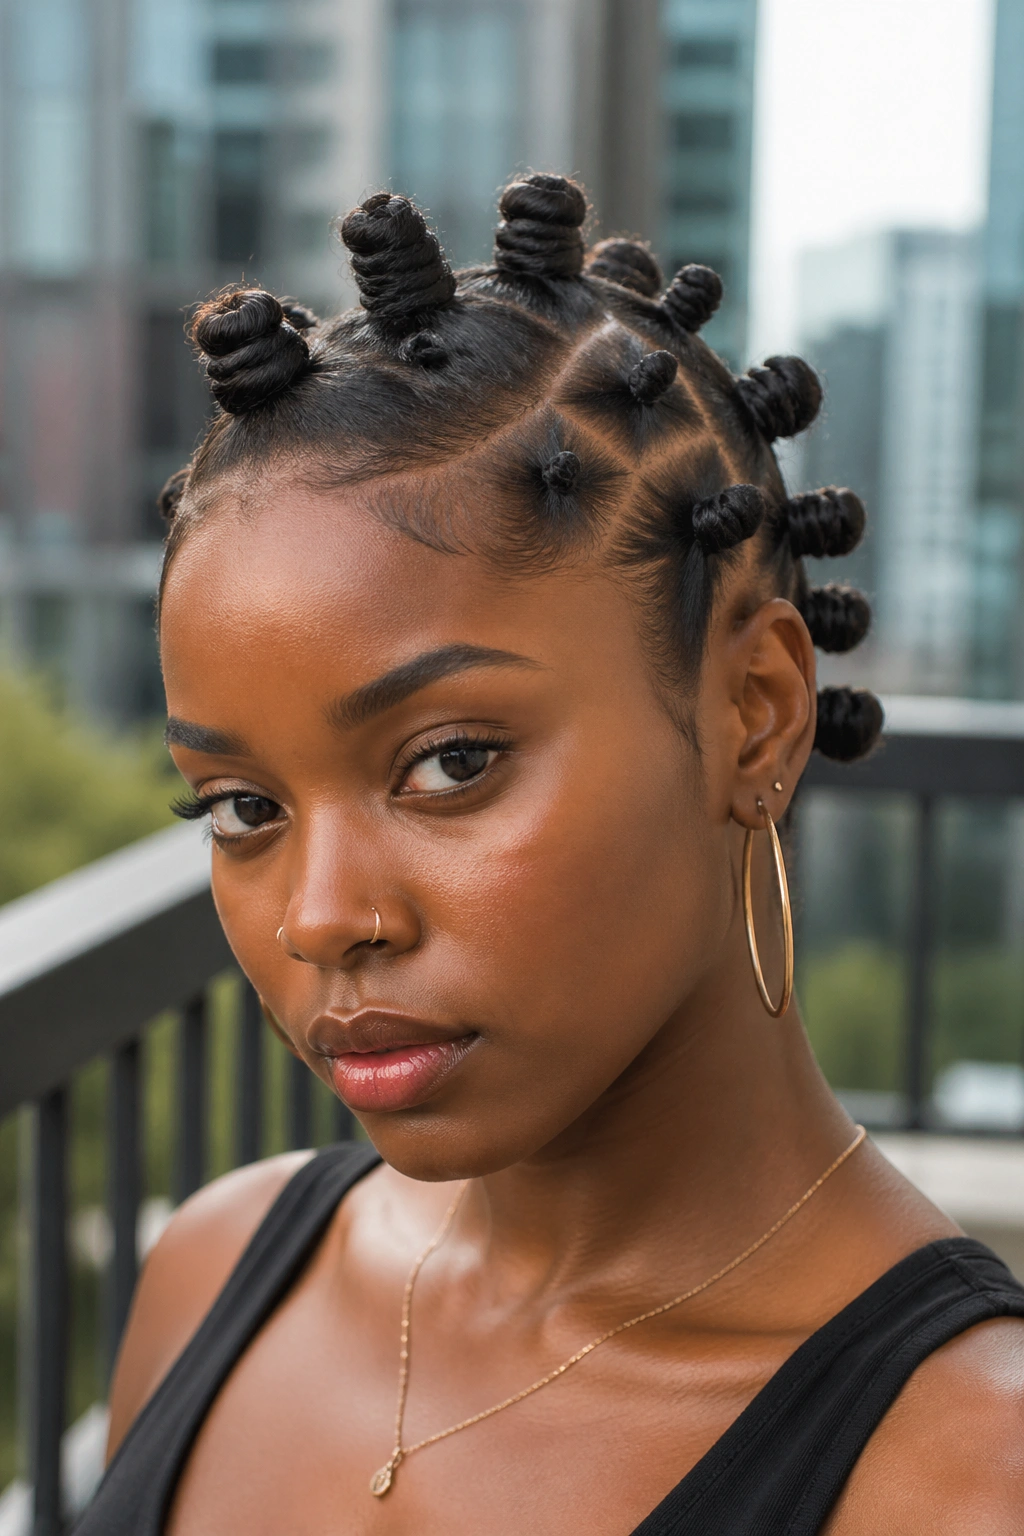
1. Classic Mini Bantu Knots for Short Natural Hair
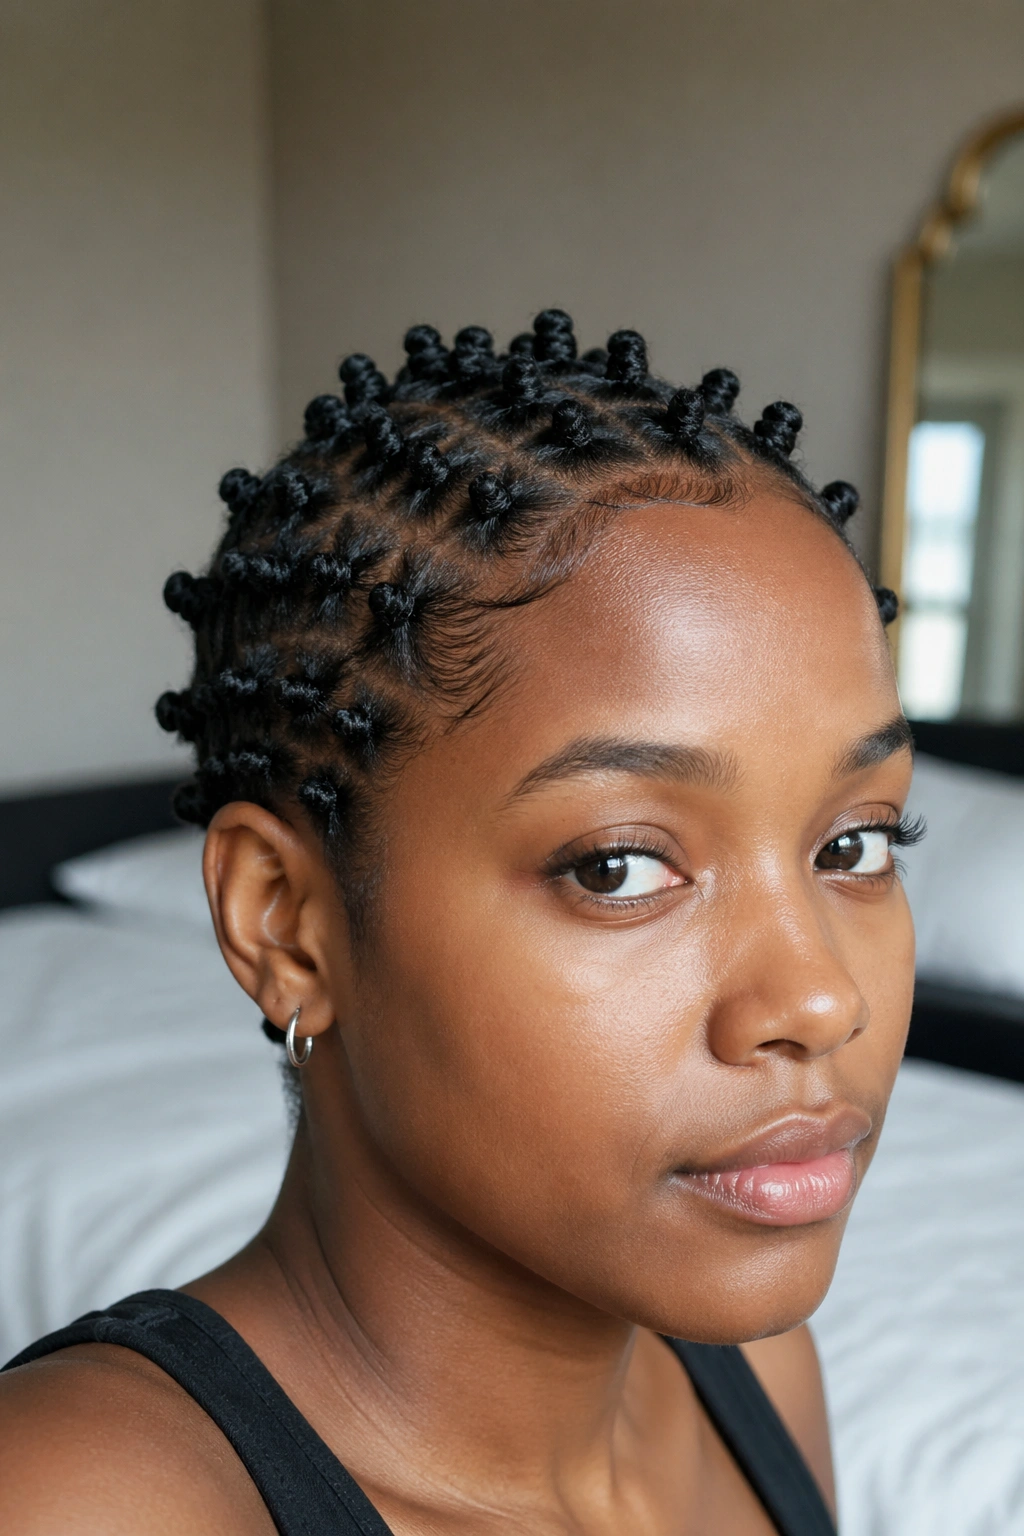
Tiny, tight Bantu knots are the safest place to start when your hair is cropped close and you want the style to hold. The smaller the section, the easier it is to coax the hair into a neat little coil without fighting flyaways at every turn.
Small is the whole point here.
I like sections between half an inch and 1 inch for this look, depending on density. If your hair is soft at the ends, smooth in a light leave-in and a dab of cream first, then twist the base twice before wrapping it into the knot. That little twist gives the ends something to grab onto.
The finish should sit close to the scalp, not float above it. If the knot looks too round and loose, the section is probably too big. If it feels sore at the root, the tension is too high. On short natural hair, those two mistakes show up fast.
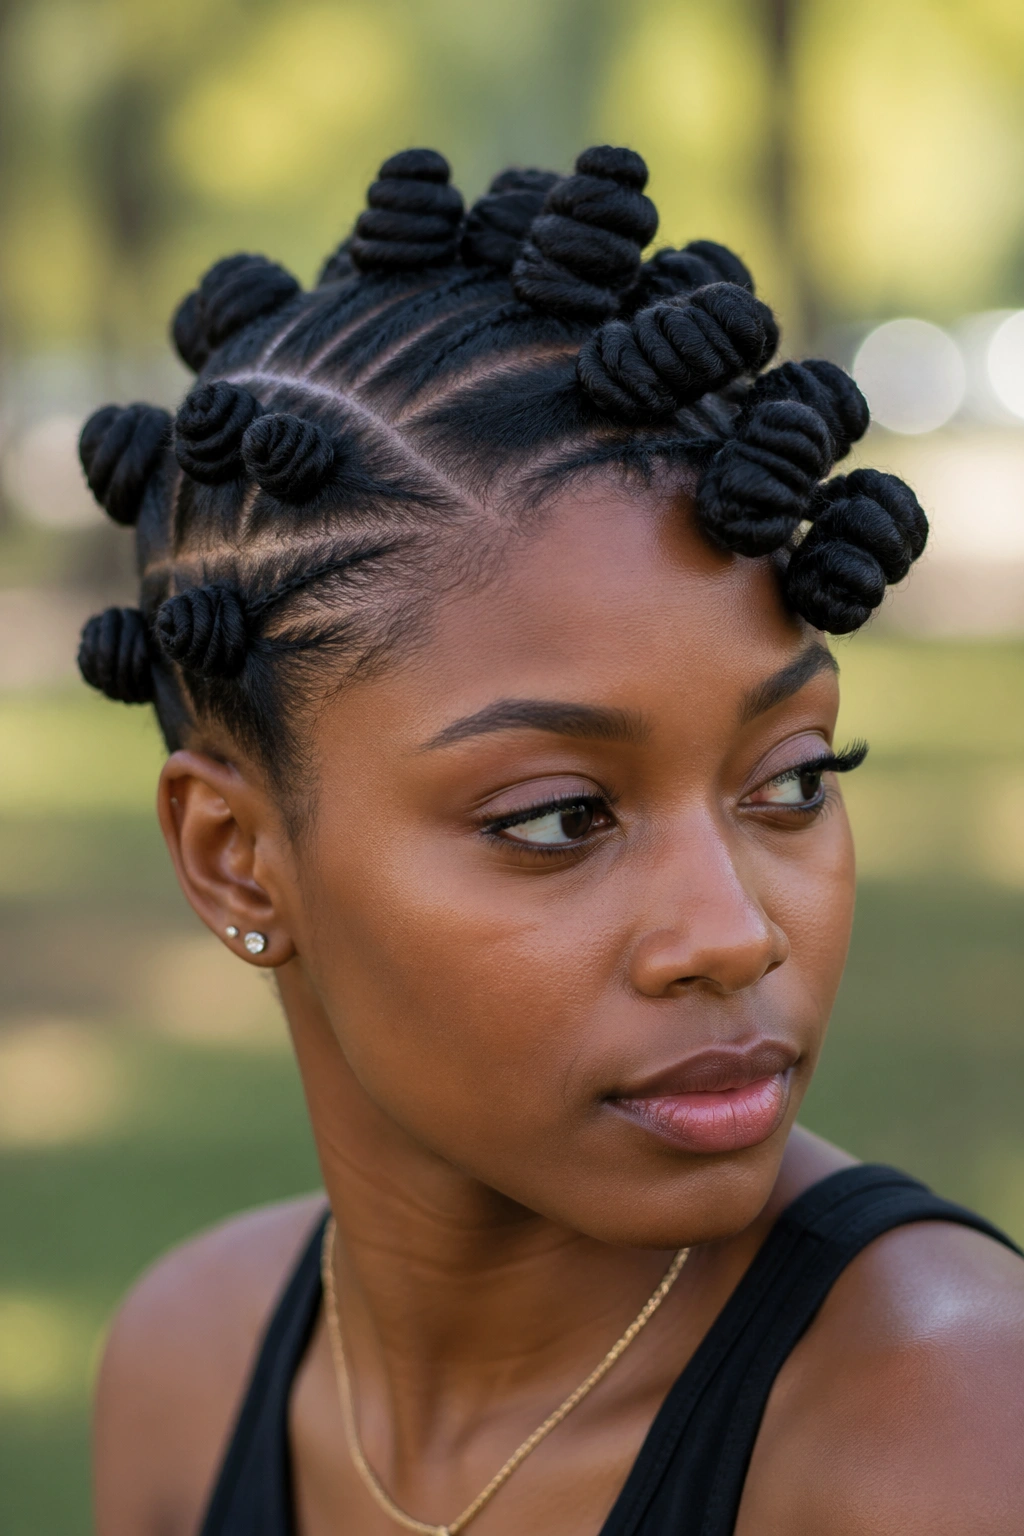
2. Deep Side-Part Bantu Knots That Frame the Face
A side part can make short coils look styled instead of merely gathered. It gives the eye somewhere to go, which matters when your hair isn’t long enough to drape or swing.
Why the Side Part Helps
A clean side part breaks up the symmetry and adds movement without needing extra length. That’s why I reach for this one when the hair is short but the goal is a little more shape around the face.
How I’d Place It
- Start the part at the outer arch of one eyebrow and angle it back toward the crown.
- Keep the heavier side with 3 or 4 knots and the lighter side with 2 or 3 knots.
- Make the first knot sit about 1 inch behind the hairline so the front doesn’t puff.
- Use a light gel only along the part and front edge; too much product makes short hair look stiff.
The best part? This style still looks neat when a little shrinkage happens. That side part keeps the whole set from collapsing into a round shape.
3. Center-Part Symmetry for a Clean, Balanced Finish
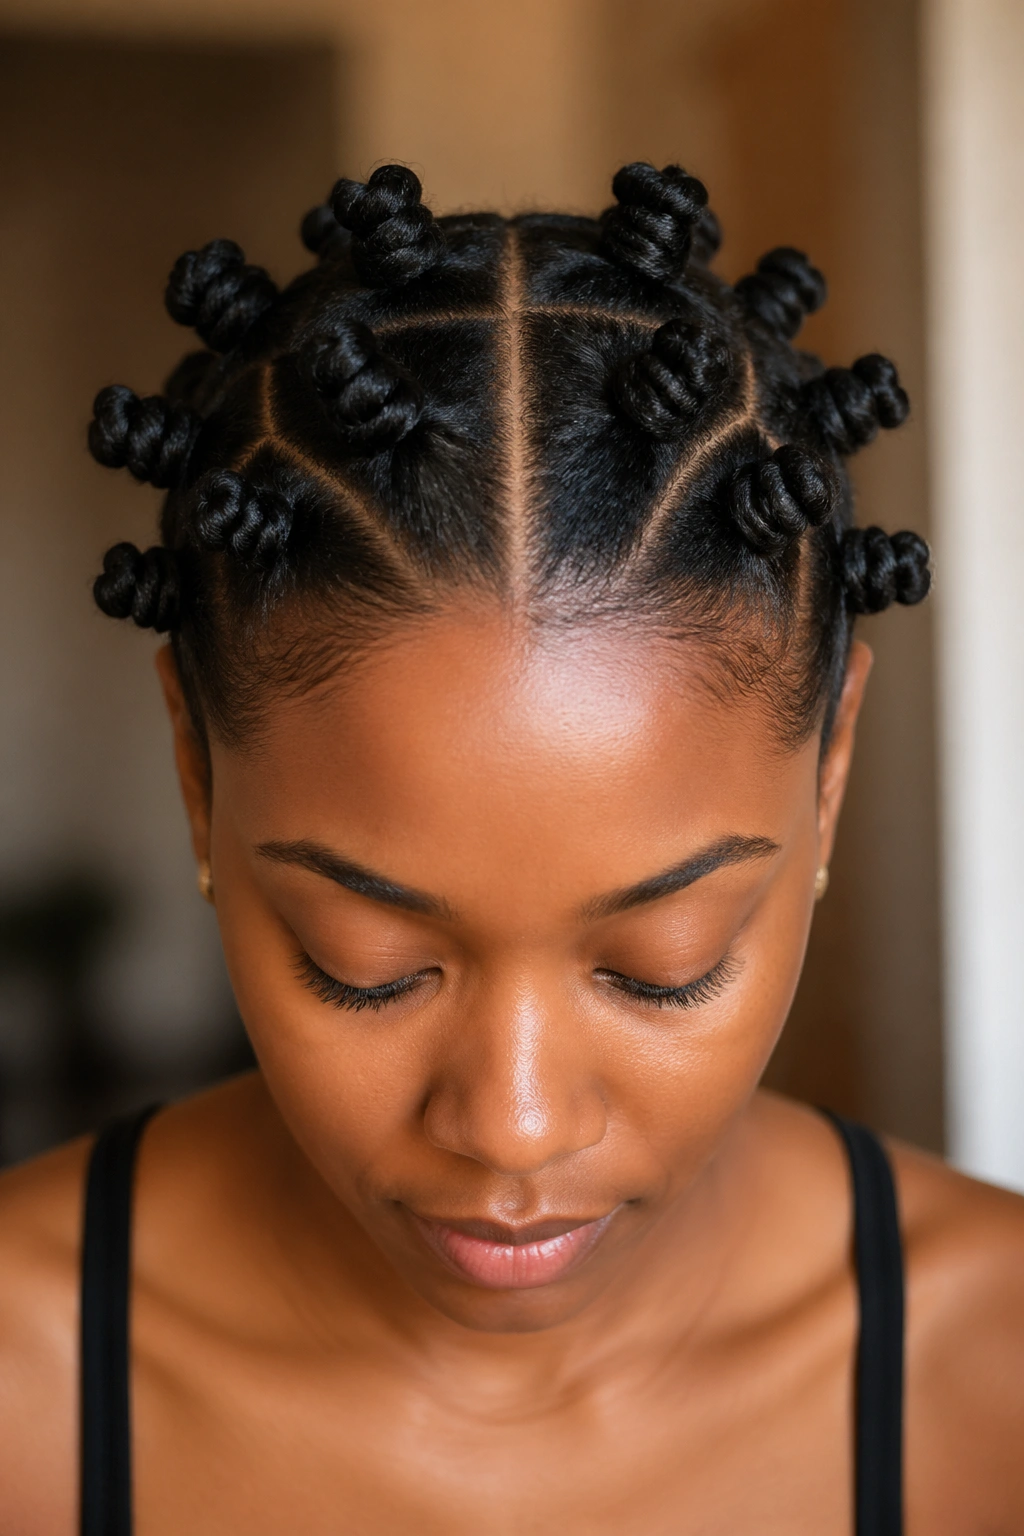
A middle part is blunt in the best way. It makes short Bantu knots look deliberate and tidy, especially when the sections on both sides are matched by feel and not just by eye.
This is the style I’d pick if you like clean lines and do not want the hair to feel busy. The part should run straight from the center of the forehead to the nape. After that, make each knot roughly the same width — about the size of your index finger if your hair is short and dense.
The symmetry matters more than the knot count. Even four knots can look elegant when they’re placed with intention. Oddly enough, the look gets stronger when you resist the urge to cram in extra pieces.
Let the roots stay smooth and the knots stay close. If you’re doing this on freshly stretched hair, it will part easier and sit flatter, which helps the whole style read as crisp instead of fluffy.
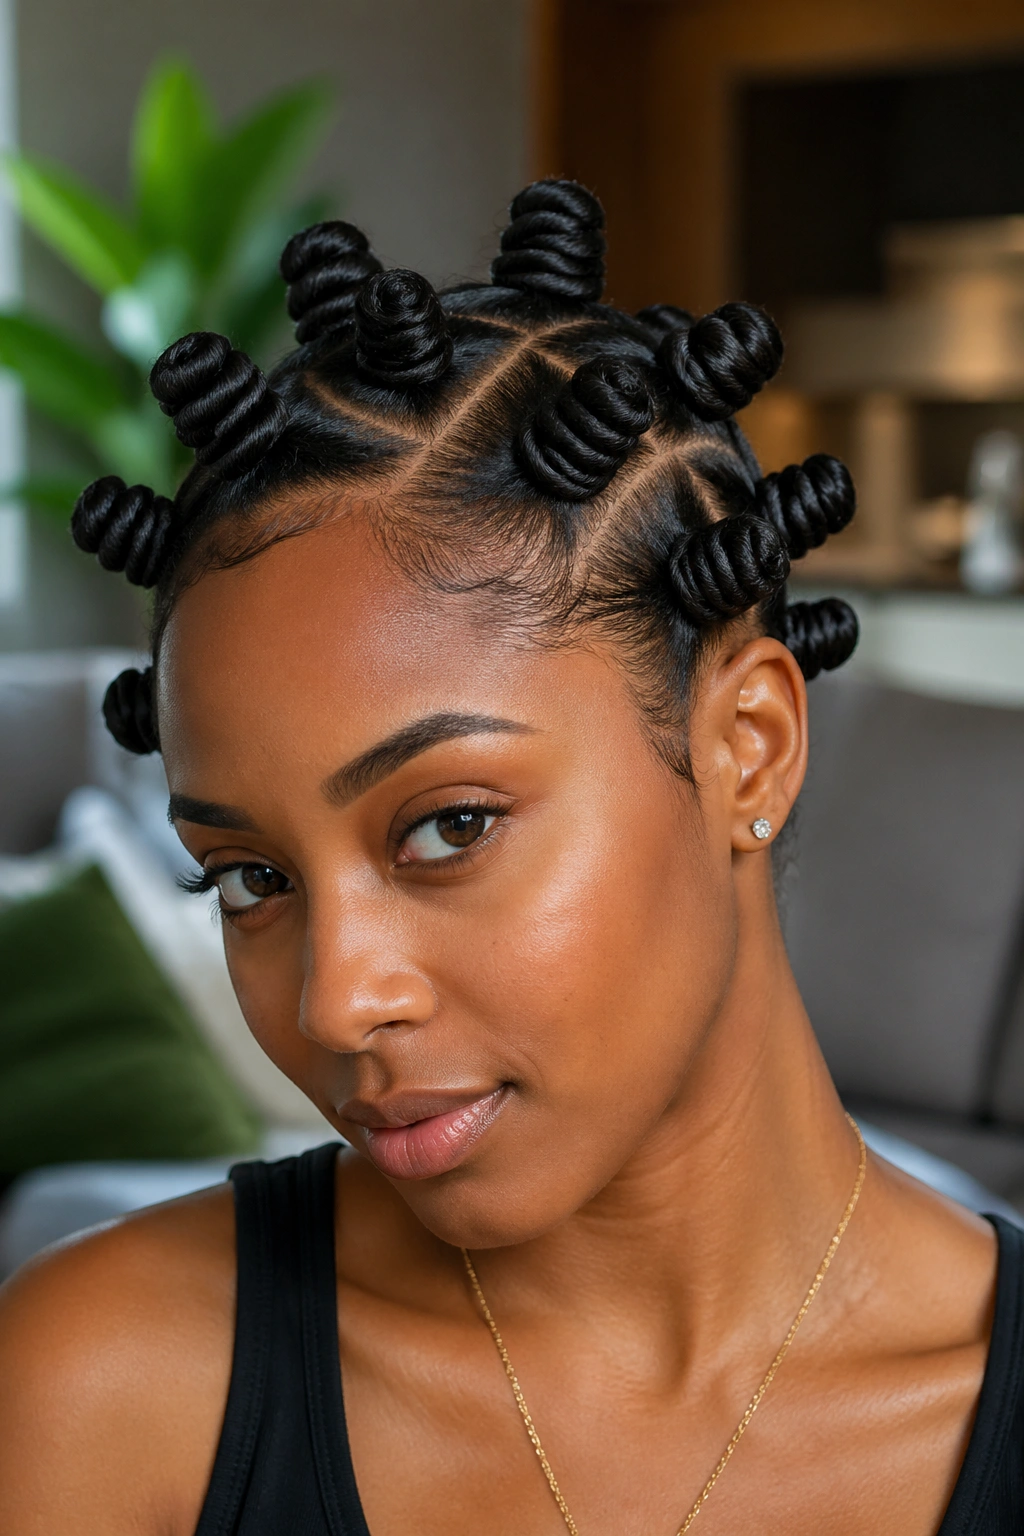
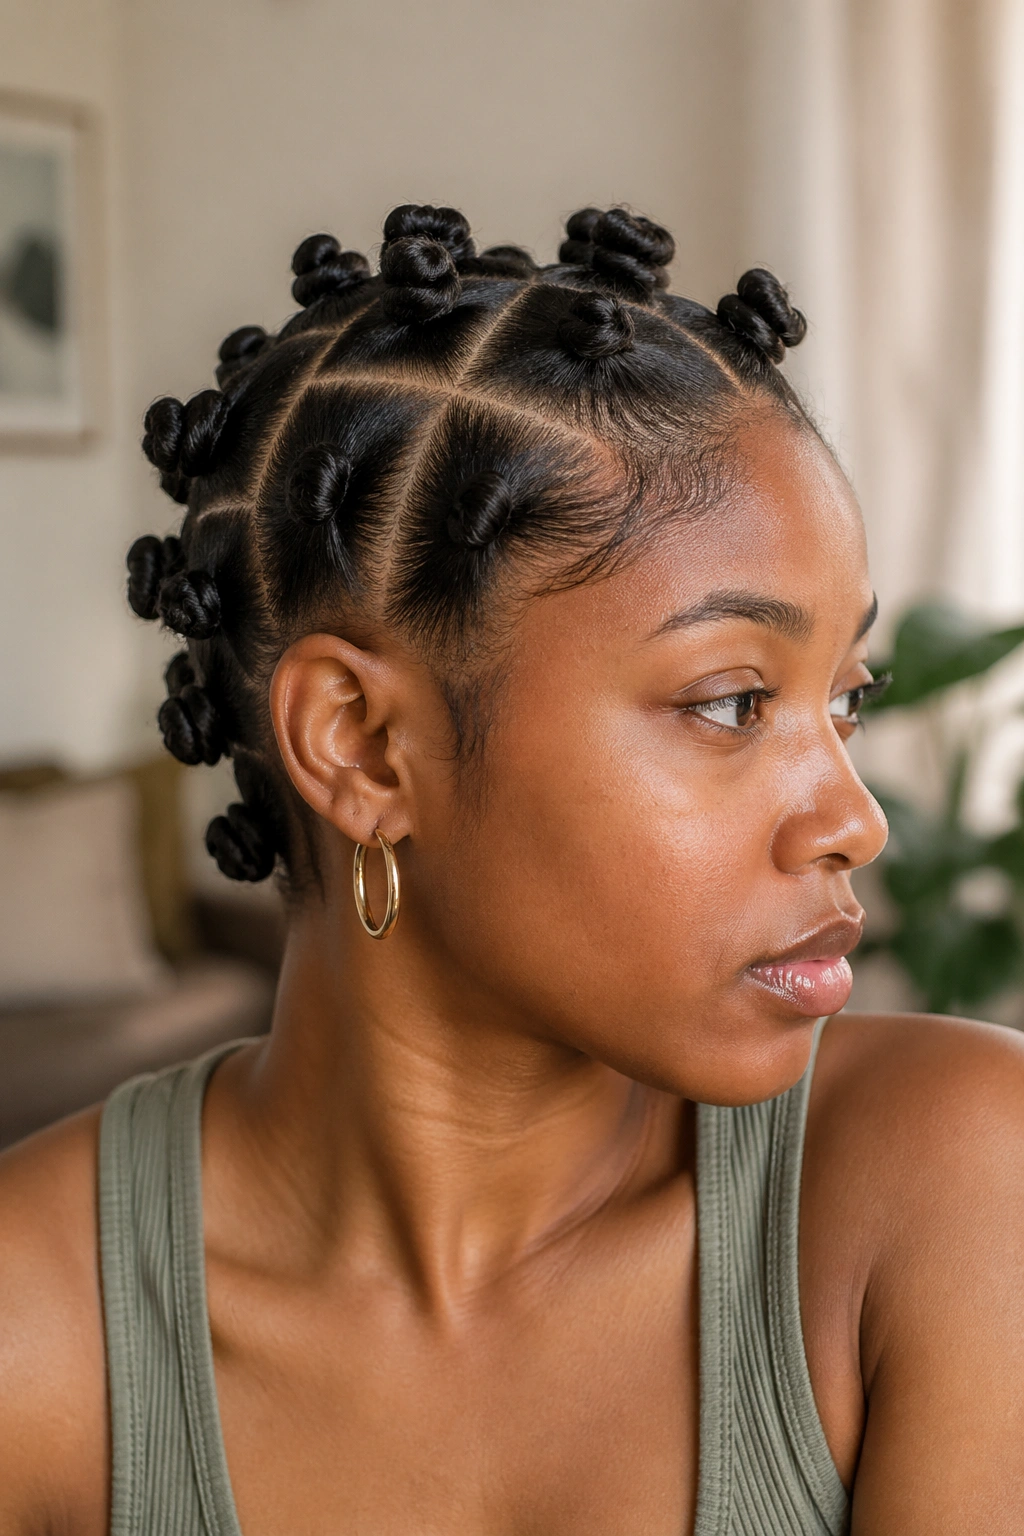
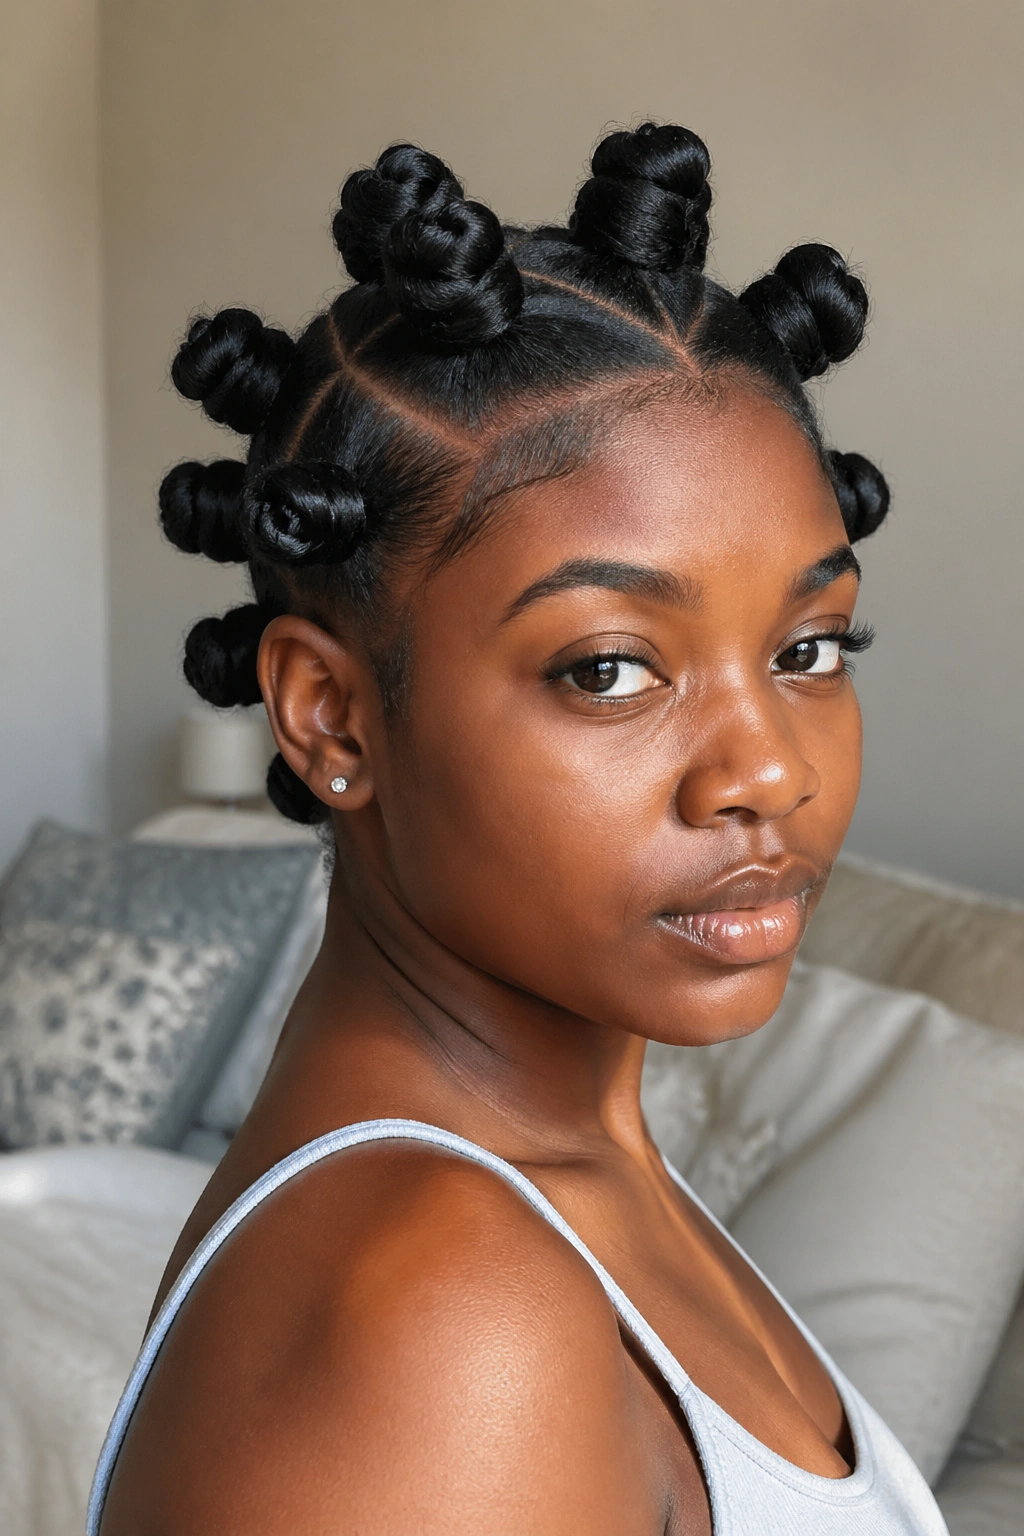
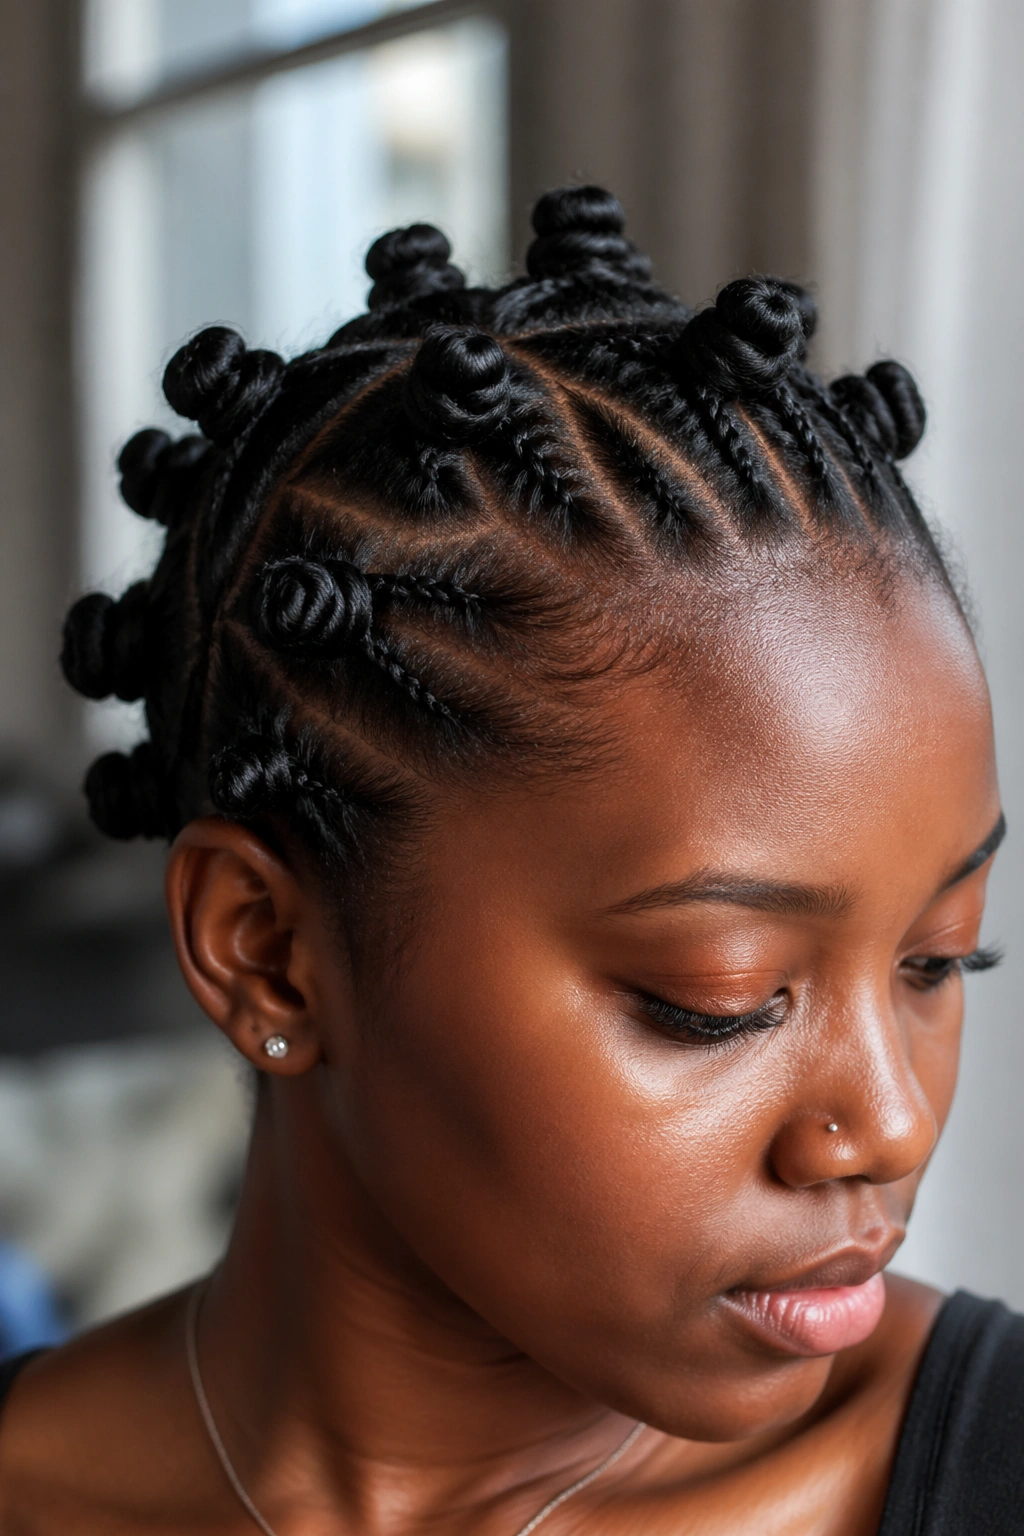
4. Six-Knot Crown Bantu Knots That Sit Like a Halo
Six knots can carry a whole look when the placement is right. On short hair, fewer knots often look better than a crowded grid because the scalp has room to show and the shape feels cleaner.
A crown layout works especially well when the hair is thick or a little stubborn at the roots. Two knots can sit near the front, two at the widest part of the head, and two closer to the nape. That creates a soft arc that reads like a halo without turning into a heavy bun situation.
I’d keep the sections fairly even, but not identical to the millimeter. Hair has a way of telling on you when you over-measure. A slight variation in size looks human; a perfectly copied set can look flat.
Best detail to remember: the front knots should sit low enough to avoid a hard ridge at the hairline. That little adjustment keeps the crown shape polished.
5. Zigzag Parted Bantu Knots With a Little Scalp Art
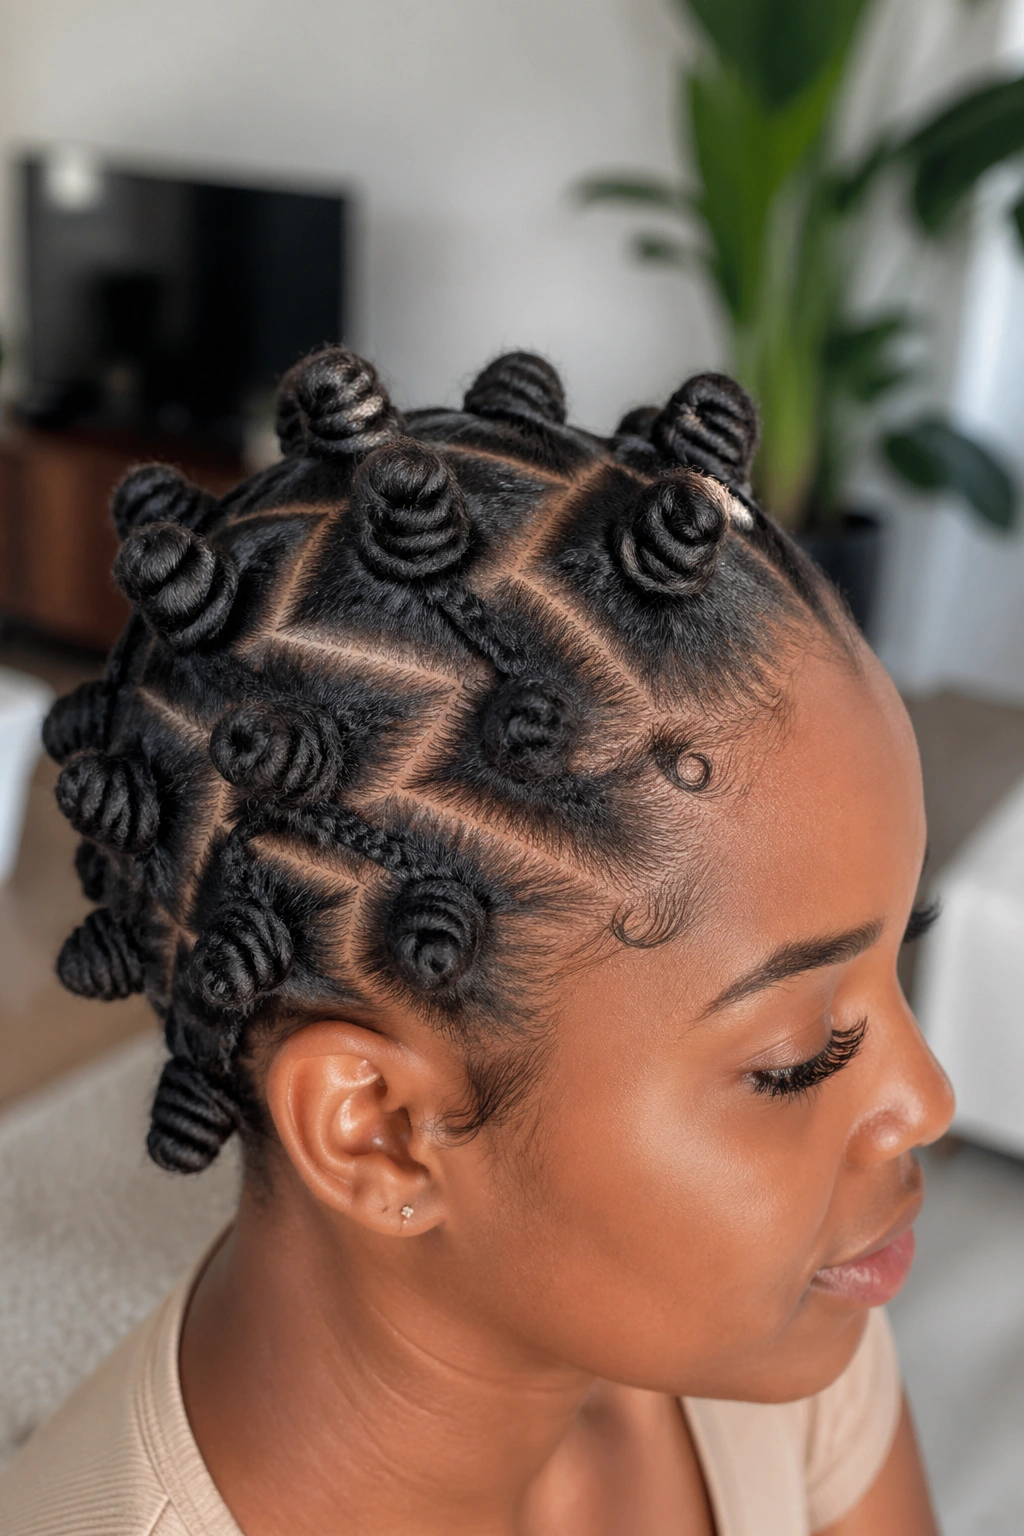
A zigzag part does half the styling work before you even touch the knot. The lines break up the scalp in a way that makes short hair look more designed, more graphic, and frankly more interesting.
You do not need giant knots for this to land. In fact, the knots themselves can stay simple and small while the parting does the talking. Use the tail of a rat-tail comb to draw the zigzag in one clean motion, then keep the part lines crisp with a fingertip of gel or mousse.
The shape looks best when the zigzag moves from one side of the head to the other instead of staying stuck in one tiny corner. That creates rhythm. It also gives the style a bit of edge, which I like on short hair because it stops the look from feeling too sweet.
If your coils shrink a lot, this is a smart choice. The parting stays visible even after the hair settles.
6. Half-Up, Half-Down Bantu Knots for Short Hair With Layers
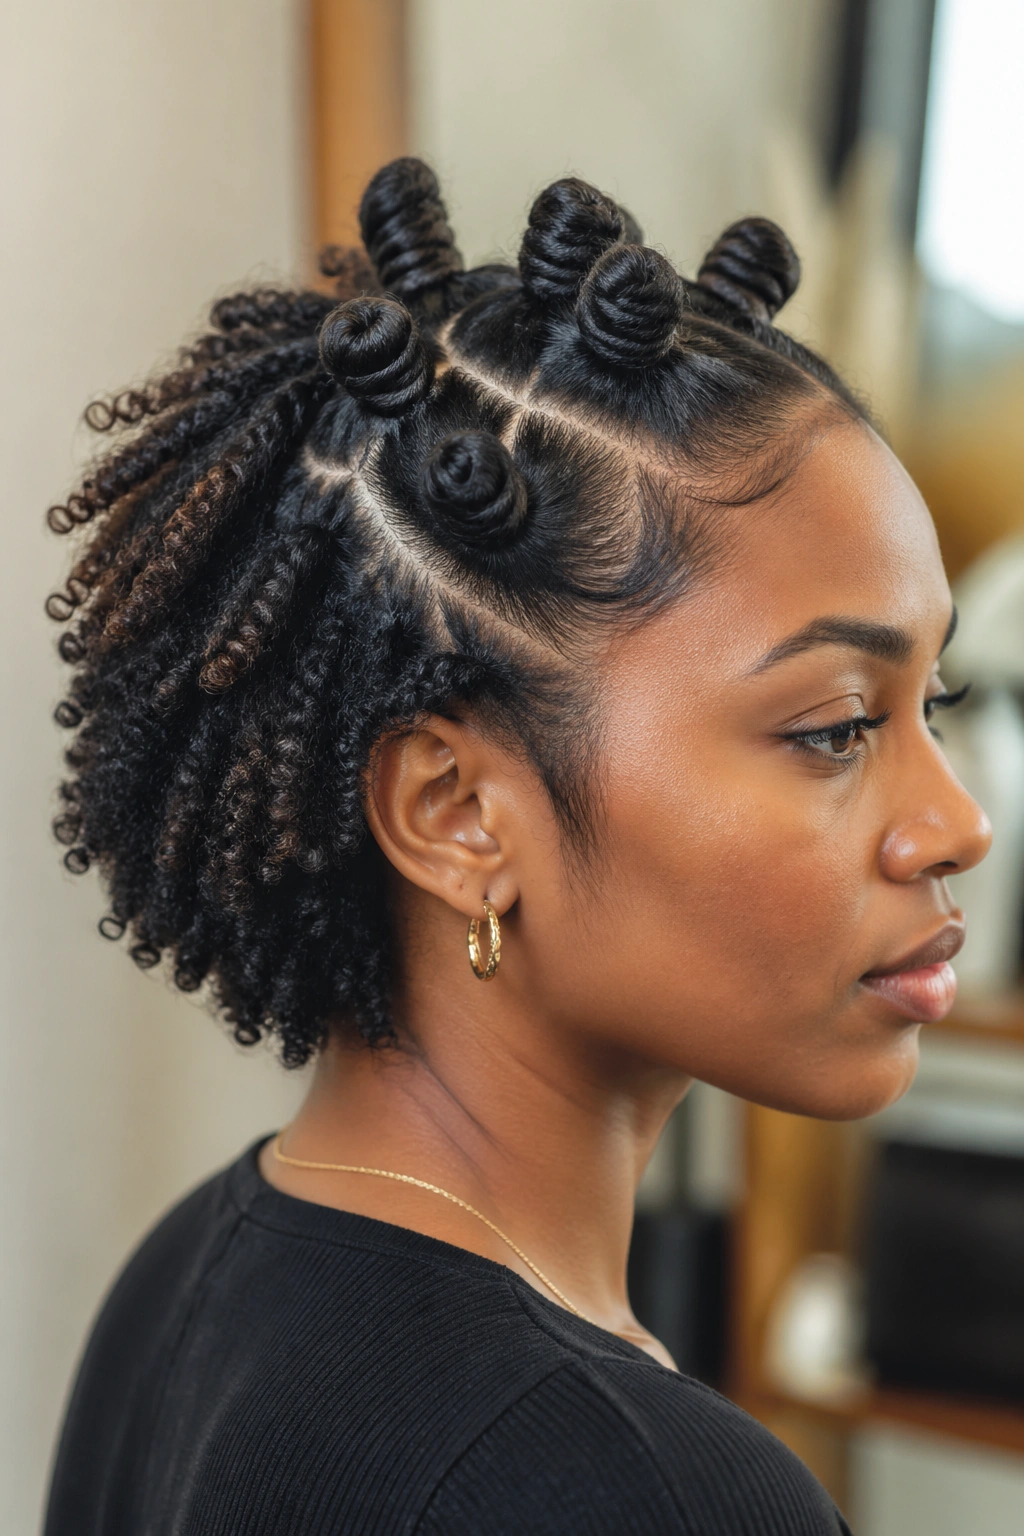
Some short cuts refuse to be contained neatly across the whole head, and that’s fine. A half-up set lets the top section do the decorative work while the back stays loose, coiled, or softly tucked.
This one is especially kind to layered hair. The top knots can sit in a small row from temple to temple, while the back section is left out to show natural texture. If the back is too short to hang, finger coils or a quick two-strand twist pattern solve that fast.
The charm here is contrast. Tight knots on top. Soft movement below. It keeps short hair from looking overworked, which is a mistake I see all the time with styles that try too hard to cover every inch.
I’d keep the top section about 1 to 1.5 inches back from the hairline. That gives the front some softness and leaves room for the shape to breathe.
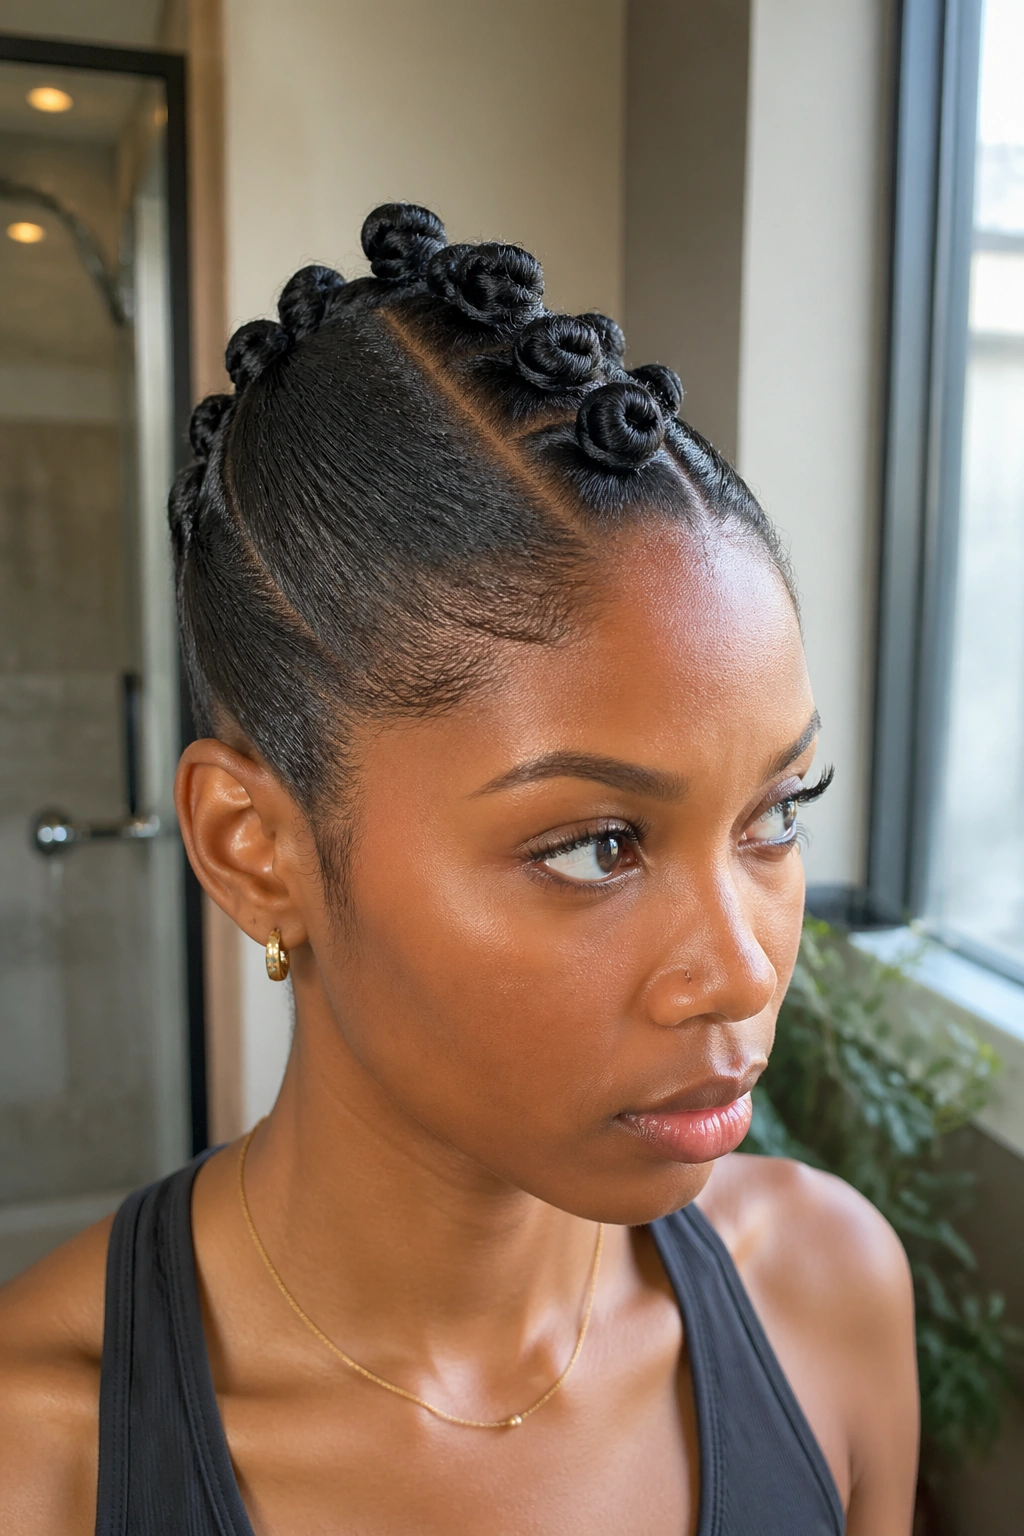
7. Tapered-Side Bantu Knot Mohawk That Sits Cleanly in the Center
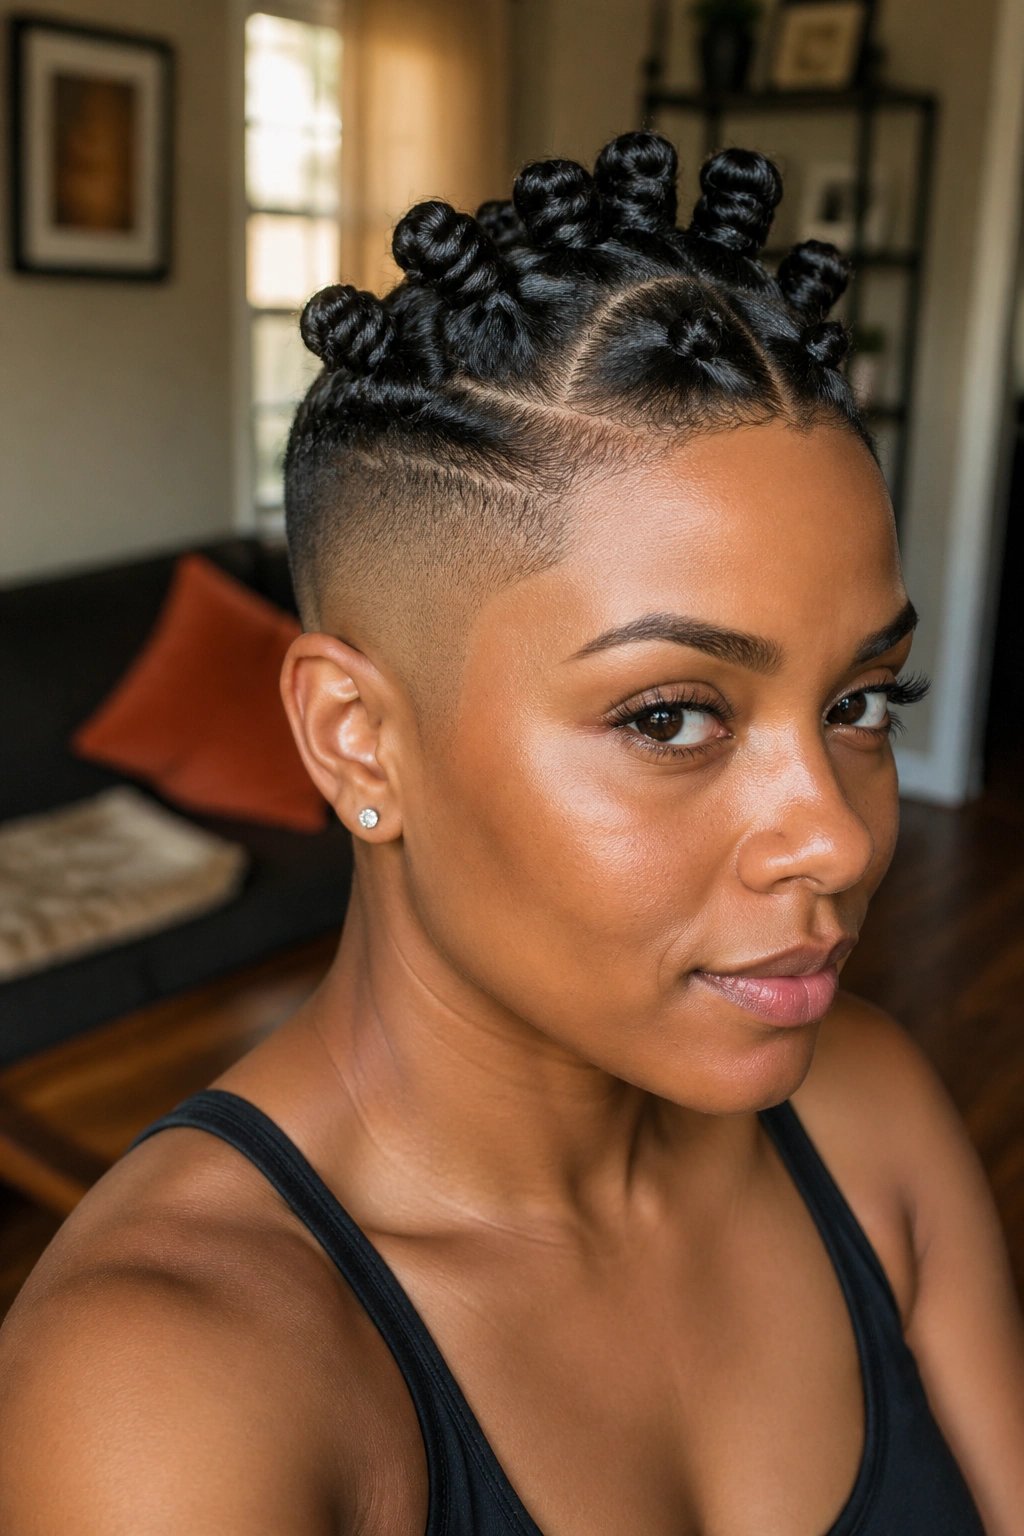
A tapered cut and Bantu knots are a good pair when the center strip does the heavy lifting. The sides stay close, the top gets the shape, and the whole style reads clean without needing much length.
Why Tapered Cuts Love This Shape
The fade or taper gives you a natural frame. That means the knots don’t have to compete with bulky sides. They just sit there and look sharp.
How to Keep the Center Strip Neat
- Make the center section about 1.5 to 2 inches wide.
- Smooth the sides downward with a light gel and a soft brush.
- Set 5 to 7 knots along the middle, depending on how much hair you have up top.
- Keep the knots close enough that the strip feels connected, not scattered.
I like this style because it feels bold without being fussy. Short hair in a mohawk shape can look high-impact with very little actual styling time.
8. Flat Twist-to-Knot Combo for Hair That Needs More Grip
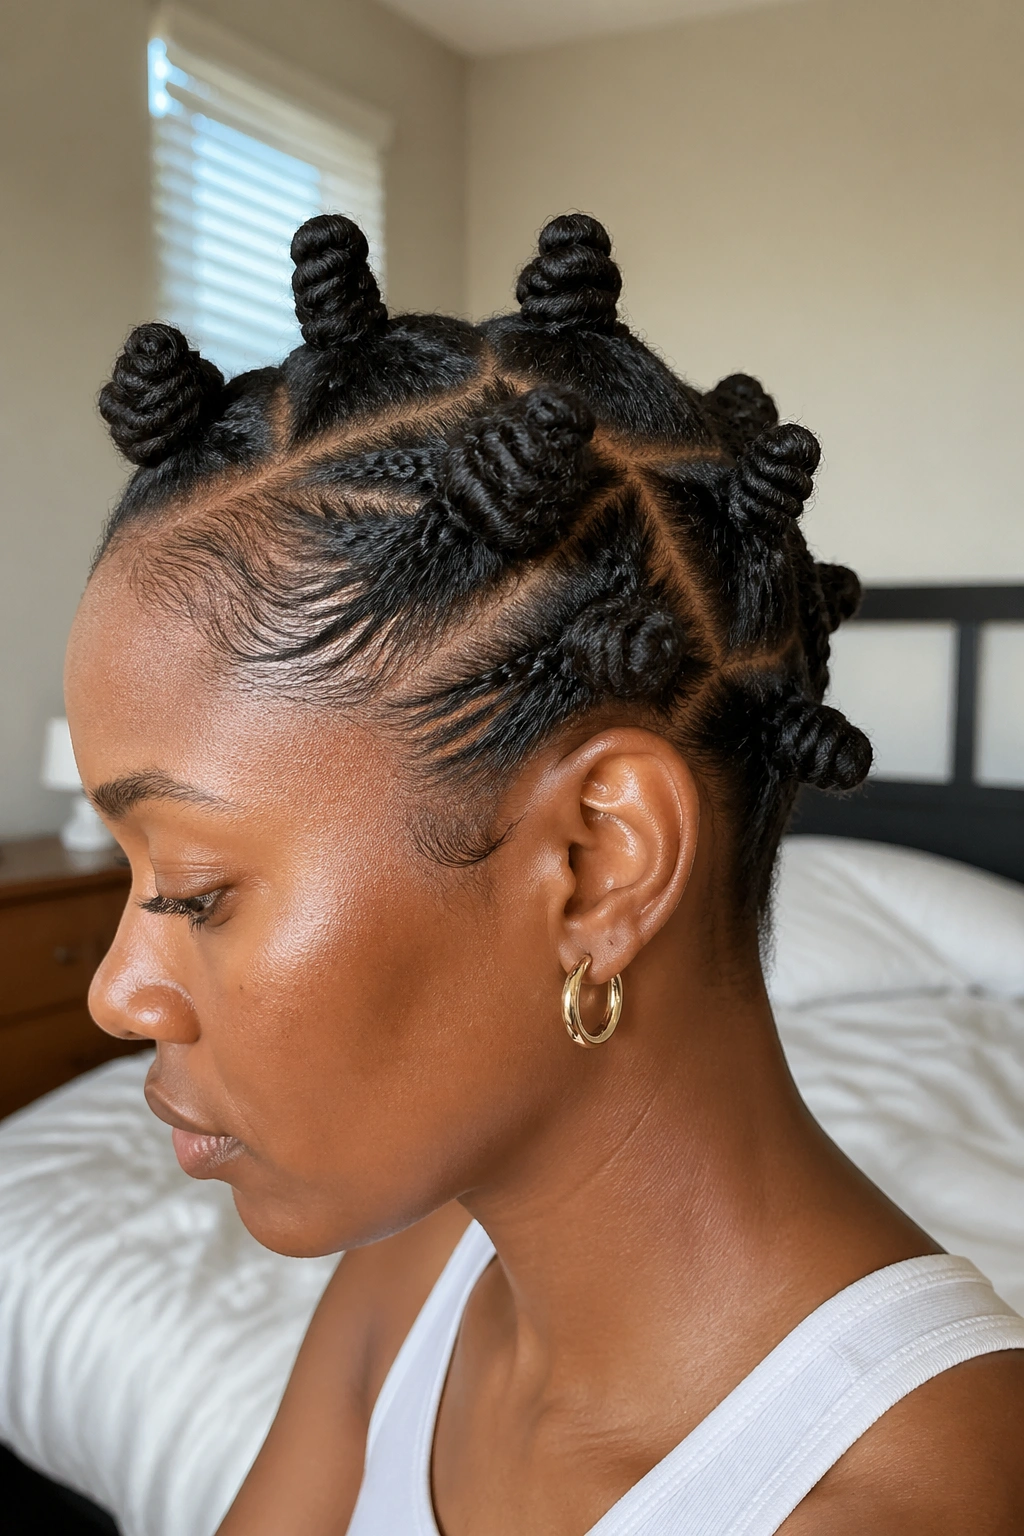
If your hair is too short for a plain knot, start with a flat twist. That one move changes everything.
The twist gives the hair a base to hold onto, which is especially helpful when the ends are short, springy, or just plain slippery. After one or two turns at the root, wrap the rest into a knot and let the texture lock itself in place. The result looks neater than a rushed wrap and usually lasts longer.
I reach for this method when the hair sits somewhere between a TWA and a slightly grown-out crop. It gives you the look of a Bantu knot without asking the ends to do more than they can handle.
The style is also kinder during takedown. The twisted base helps the knot keep its shape, so you get a cleaner curl pattern later if you want to unravel it.
9. Two-Row Bantu Knots for an Easy, Everyday Shape
Two rows are enough. Sometimes more is just noise.
This layout works well when you want the style to look orderly but not fussy. Put one row a little above the ears and another closer to the nape, then let each knot sit evenly spaced, about 1 to 1.5 inches apart. The spacing matters because short hair gets crowded fast.
Where the Two Rows Work Best
- On dense short coils that need room.
- On hair that has been stretched overnight.
- On styles meant to survive school, work, or long errands.
- On heads where a full-grid set feels too busy.
The best thing about two rows is that the shape stays readable even after the hair softens up a bit. It doesn’t turn into a mushy blob, which is more than I can say for some overpacked knot sets.
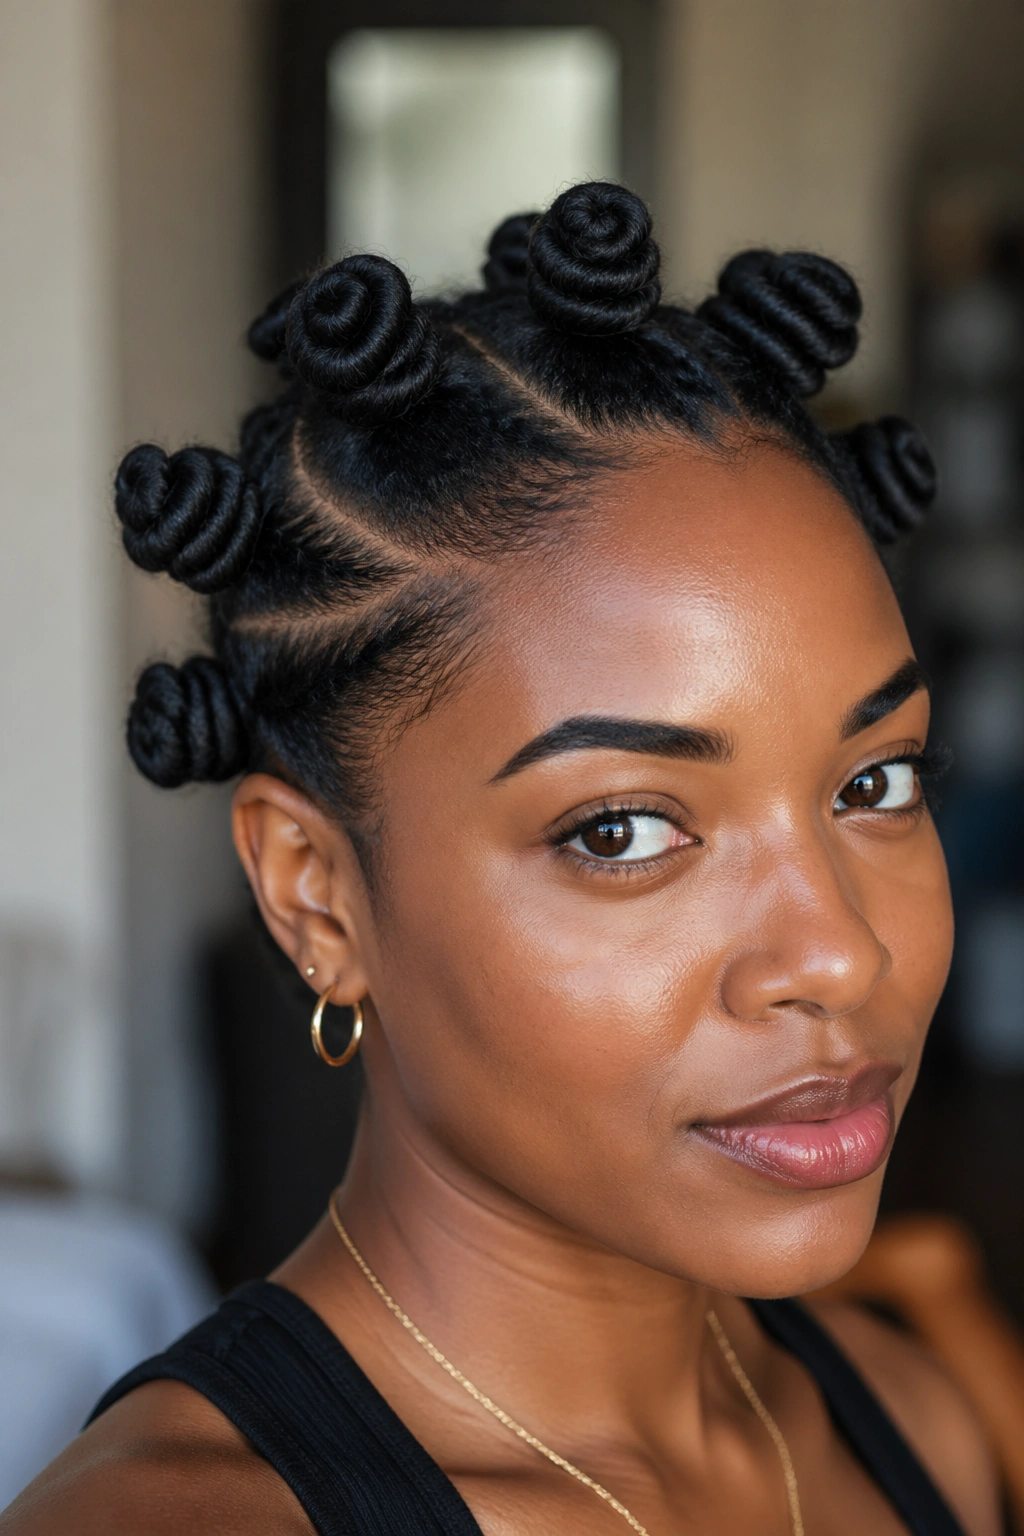
10. Gold-Cuff Accent Bantu Knots With a Little Shine
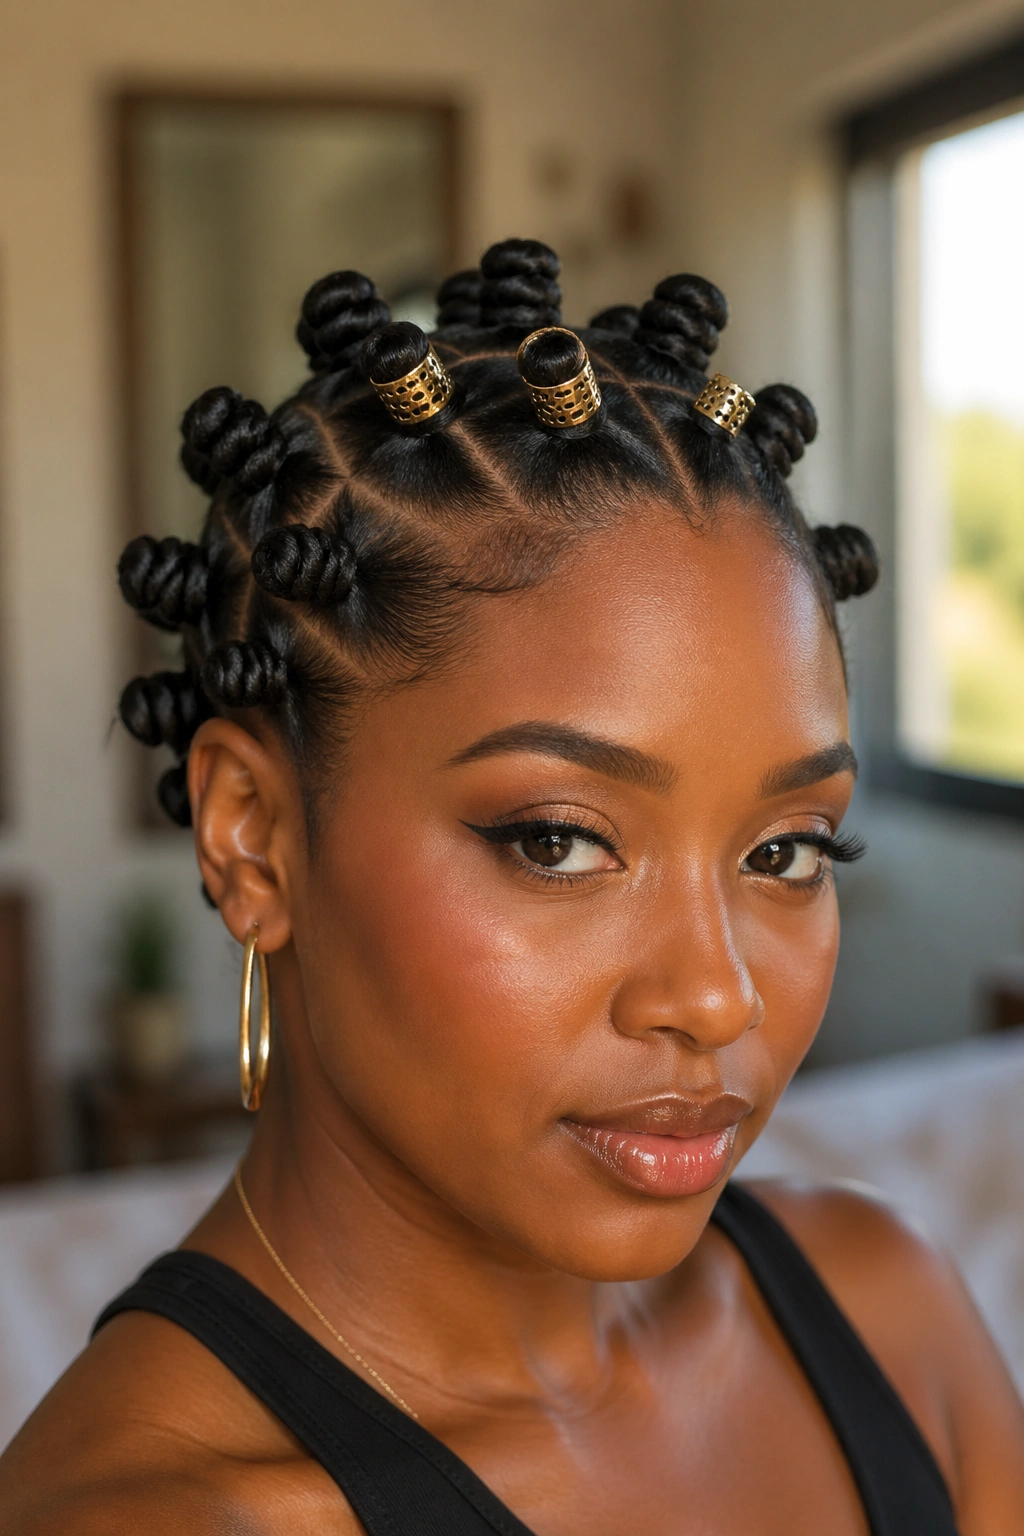
A few gold cuffs can make short Bantu knots look finished in a way plain hair alone sometimes doesn’t. The trick is restraint. Two cuffs on the front knots often do more than eight cuffs spread everywhere.
I like this look when the knots are small and tidy. The accessory should act like punctuation, not a costume. Tiny cuffs, rings, or clip-on charms can sit near the base of a knot or on the parting line, where they catch the eye without taking over the hair.
Short natural hair carries accessories well because the pieces sit close to the scalp. That makes the shine feel neat instead of weighed down.
If you use cuffs, secure the knots first and then slide the metal on gently. Pushing it too hard can pull at the coil and ruin the shape you just spent time building.
11. Mohawk Strip Bantu Knots That Run Down the Center
Who says Bantu knots have to cover the whole head?
A mohawk strip changes the mood fast. Instead of placing knots across every inch, you keep them concentrated in a line from front to back and let the sides stay slicked, brushed down, or softly pinned. It looks sharper than a full-head set and is easier to manage when your hair is short.
The center strip can be as narrow as 2 inches or as wide as 3 inches, depending on how dramatic you want it. Fewer, larger knots feel bold; more, smaller knots feel more playful. I lean toward the smaller route on short hair because it keeps the strip from looking too heavy.
This style works well when the hairline is neat and the sides can stay flat. If the sides puff up, the whole thing loses its shape.
12. Finger-Coiled Bantu Knots That Hold the Base Tight
Finger-coiling each section before you wrap it into a knot gives short hair a little more discipline. The coil gathers the ends, tightens the base, and makes the knot sit cleaner.
This is slower than a plain wrap. No question. But the payoff is real when your hair is very short or has a mix of textures that like to escape. A couple of finger turns at the root can stop the ends from sticking out like little antennae.
I especially like this method for the front sections, where the hair gets looked at the most. The front knot is the one everyone sees first, so giving it a neater base is worth the extra minute.
The finished knot has a more defined shape, and when you take it down, the curl pattern usually looks more organized too. That matters if you’re wearing the knots as a set for later definition.
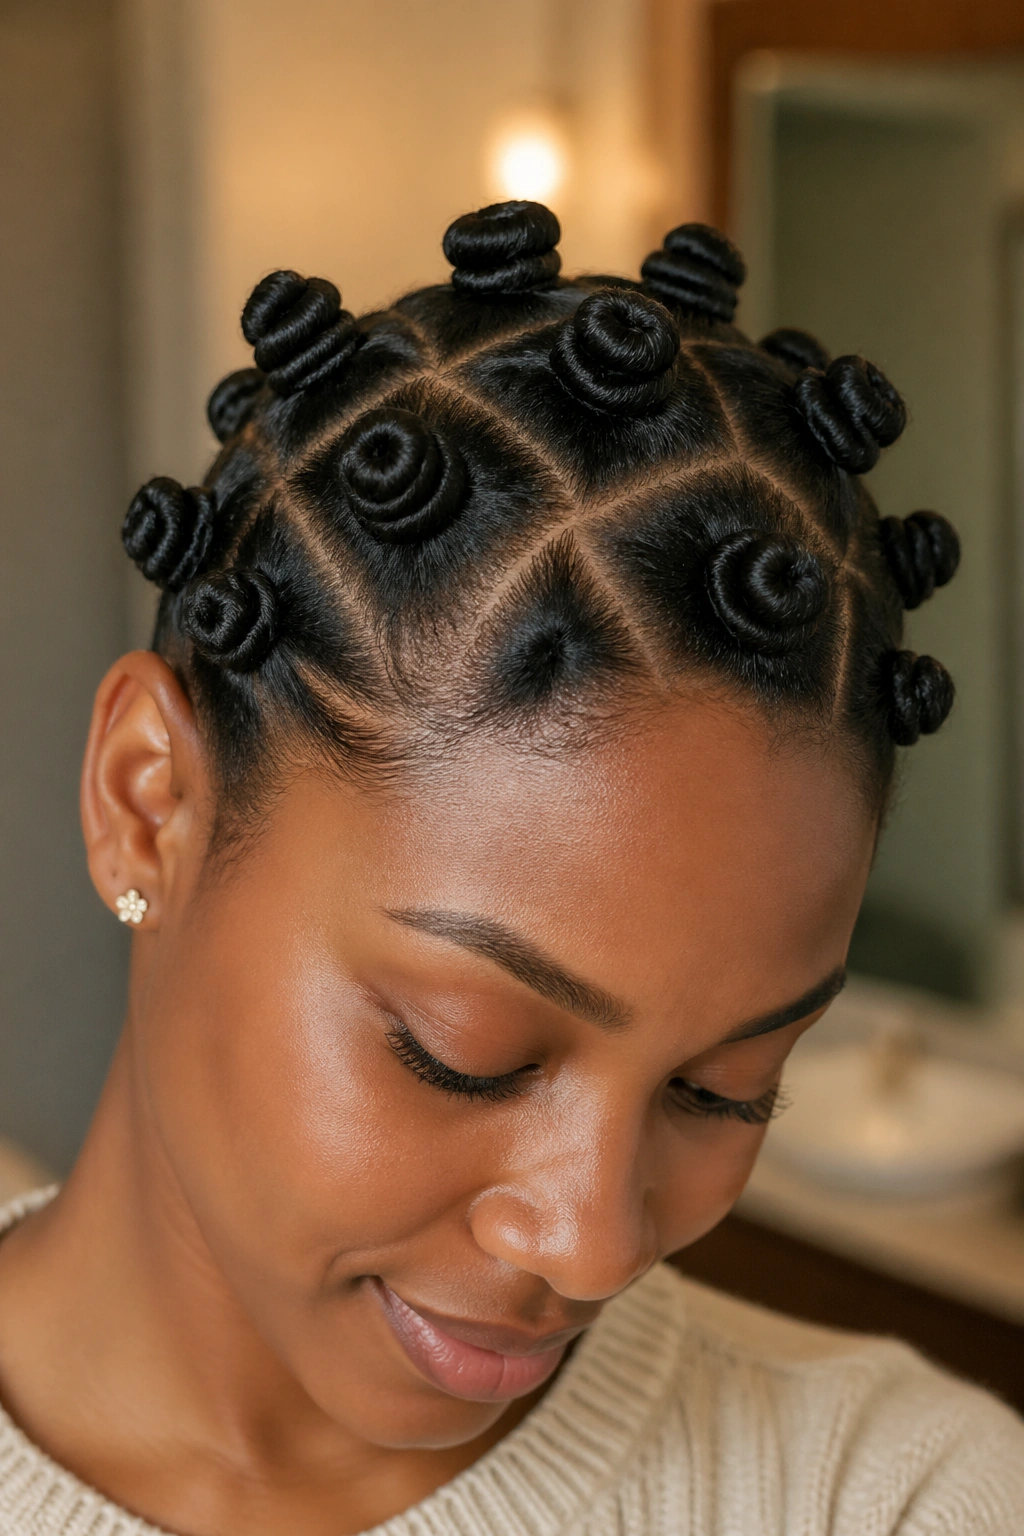
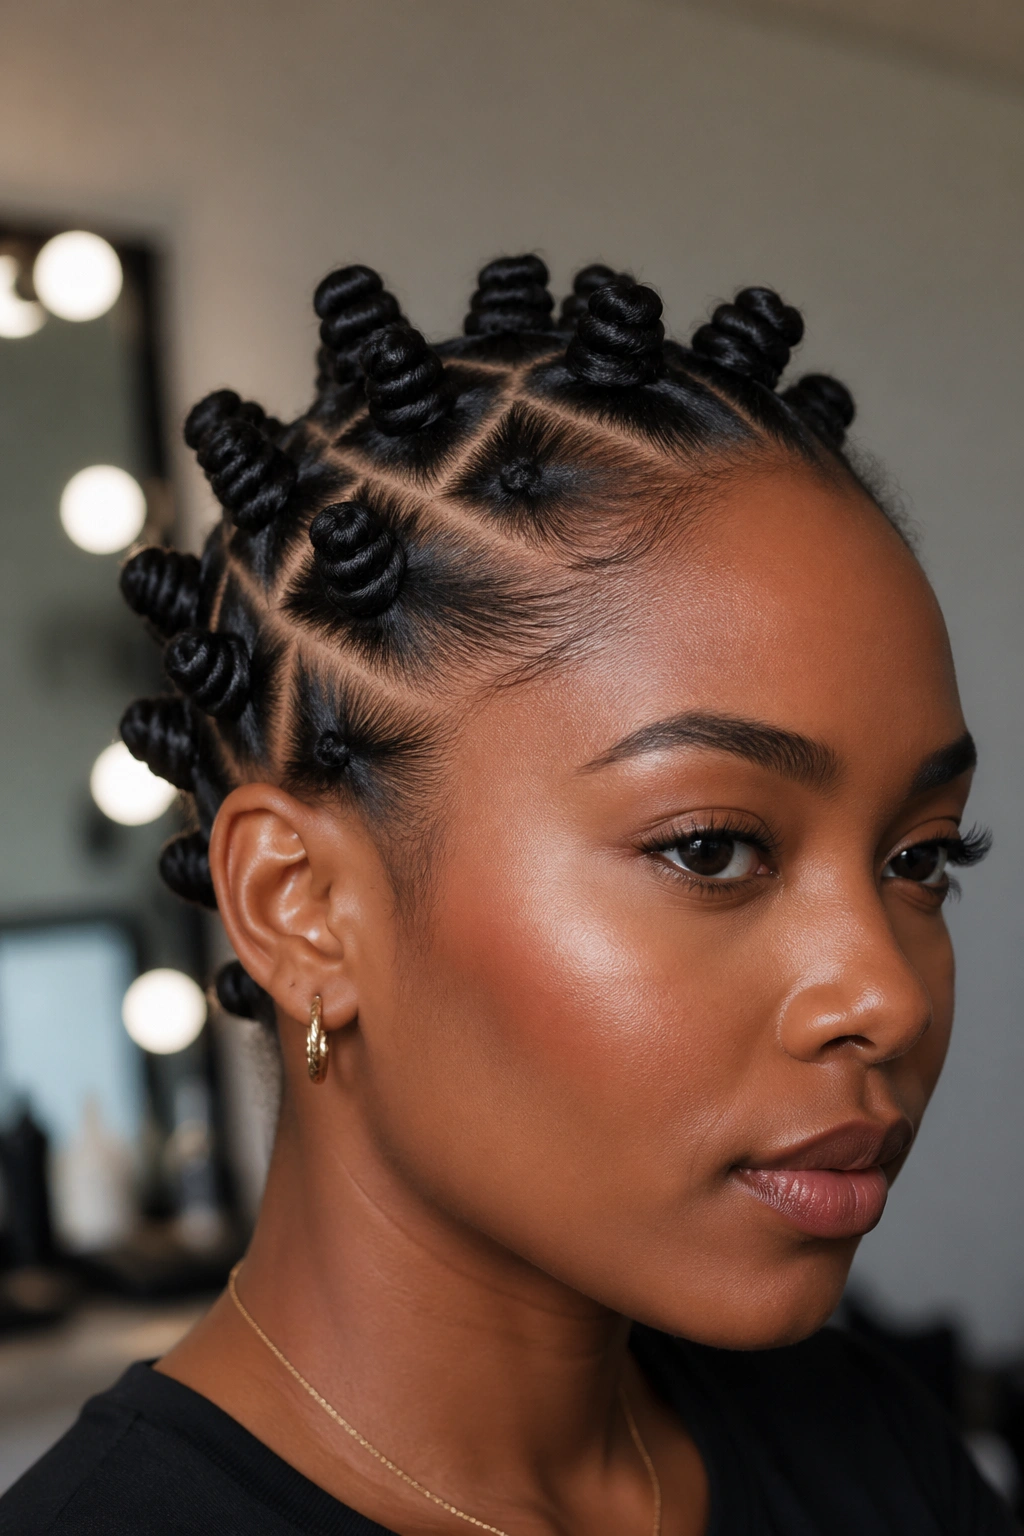
13. Triangle-Part Bantu Knots That Look Drawn In
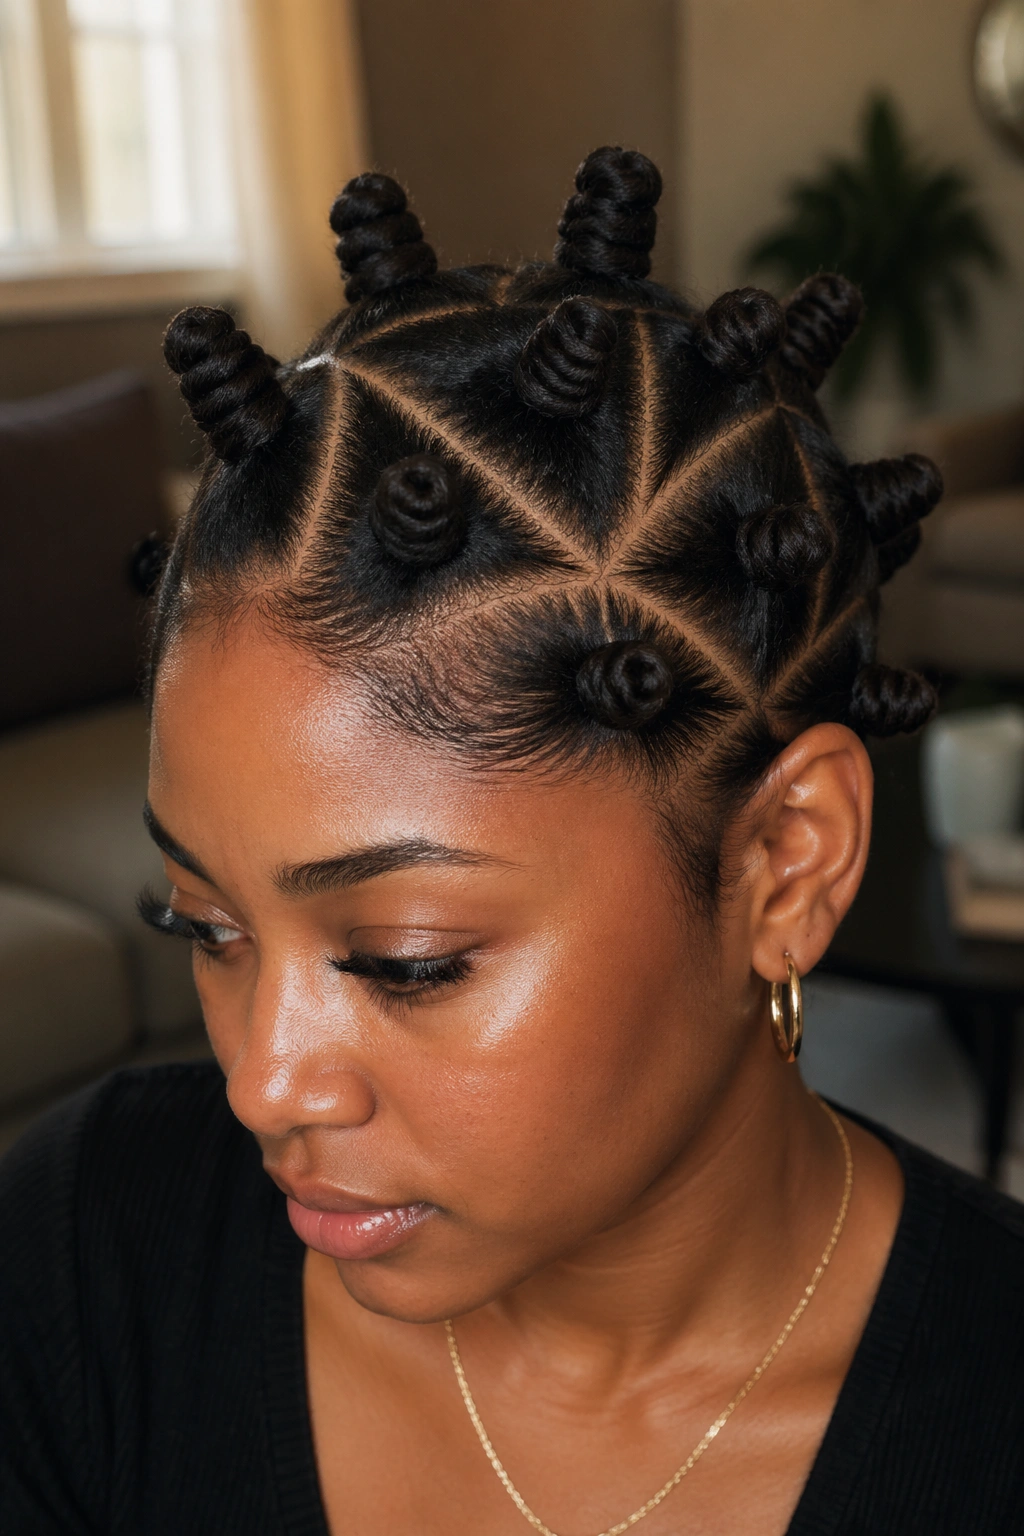
Triangle parts make short Bantu knots feel a little more architectural. The scalp lines stop reading as simple rows and start reading as a pattern.
What Triangle Parts Change
Triangle sections spread the tension more evenly than square parts, which can help on shorter hair that tends to puff at the corners. They also create sharper part lines, so the whole style looks more crafted.
How I’d Use the Shape
- Keep each triangle around 1.5 inches on each side for short coils.
- Use the comb tail to trace each point before you start wrapping.
- Match the triangle direction on both sides of the head so the pattern feels intentional.
- Leave enough room between knots for the scalp line to show.
This is a good choice if you like your hair to look a little more designed. Not loud. Just thoughtful. And on short hair, that small design detail does a lot.
14. Stacked Mini Bantu Knots for Extra Shape on a Cropped Cut
Stacking tiny knots close together can make very short hair look fuller than it is. That’s the entire appeal.
Instead of spreading the knots far apart, you place them in close rows so the silhouette builds upward and outward in a controlled way. The effect is compact, tidy, and surprisingly full. It works especially well when the hair is short enough that a wide layout would leave too much scalp showing.
I like this set on dense coils because the stacked shape keeps the top from looking flat. The rows create a little lift, even before any puffing or shrinkage happens.
This is not the style for giant sections. Smaller knots are the whole reason it works. If the sections get too large, the stack loses its shape and starts to look accidental instead of styled.
The best version feels balanced from the front and side. That balance matters more than perfect spacing.
15. Sleek-Edge Bantu Knots With a Clean Hairline
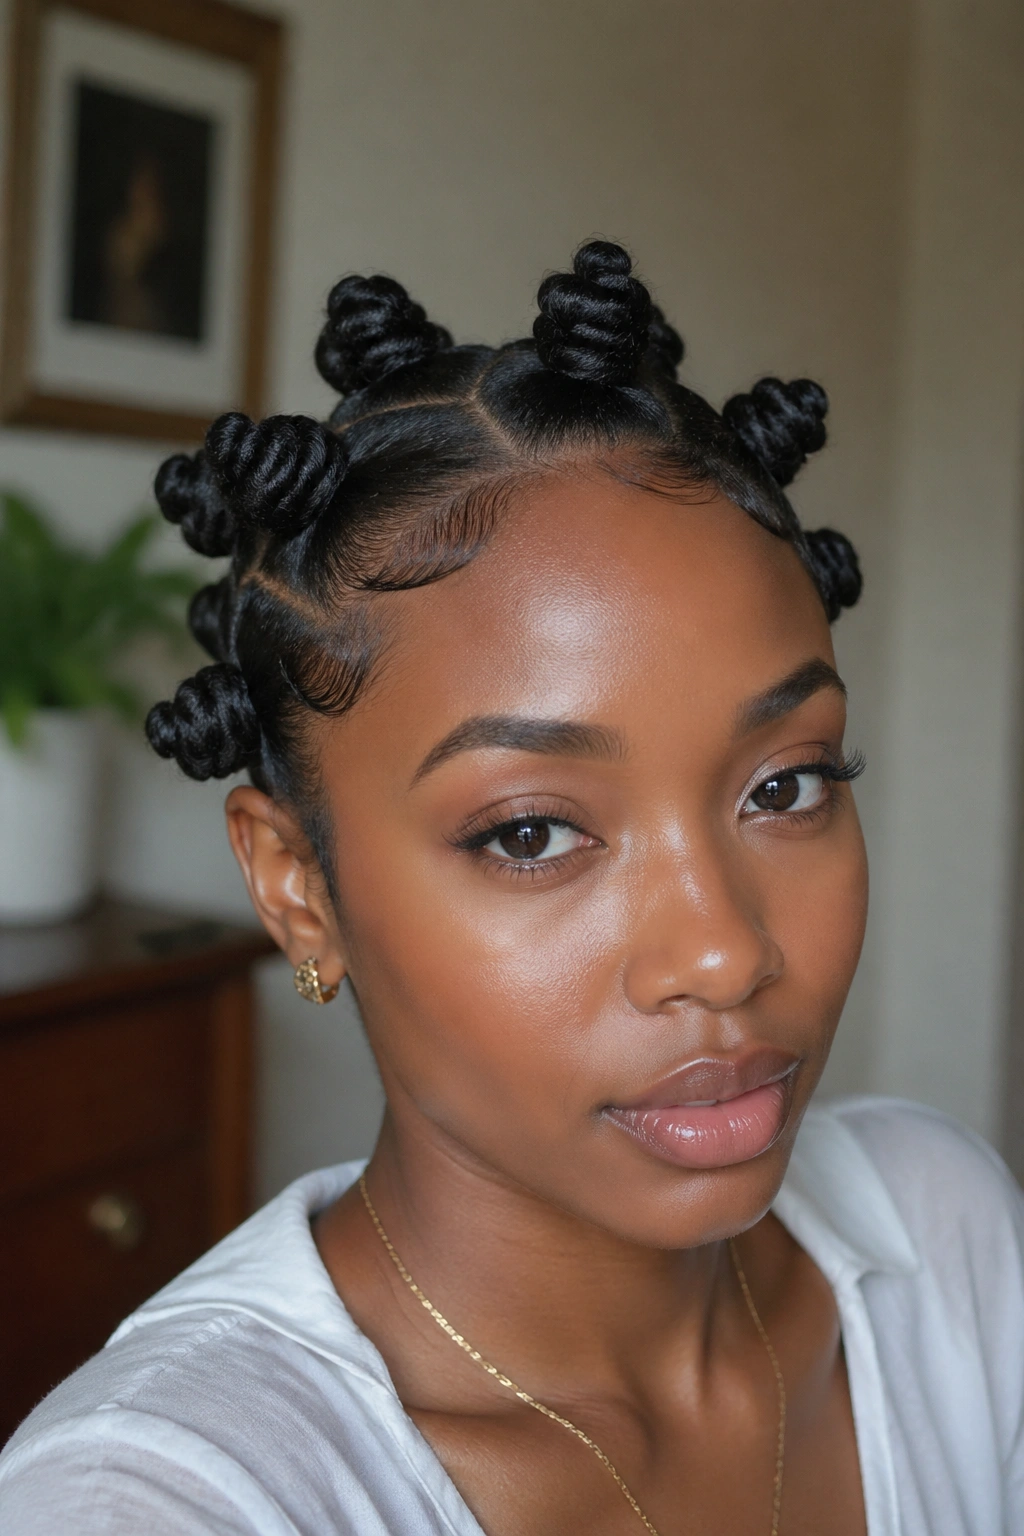
A polished hairline changes the whole mood of short Bantu knots. Without it, the look can read casual. With it, the style feels dressed up fast.
I’m talking about a soft brush, a light edge gel, and a scarf tied down for about 10 minutes so the front actually lays flat. The knots themselves can stay simple. The face-framing effect does the work.
What to Focus On
- Smooth the front hairline before you start the knots.
- Keep baby hairs modest, not sculpted into a separate event.
- Use a scarf or wrap band to press the edges while the rest sets.
- Finish with a small shine mist or a drop of oil on the parts.
This is the version I’d pick for dinner, a ceremony, or any day when you want the style to look a little more finished. Short hair and sleek edges have always been a strong pair.
16. Color-Accent Bantu Knots That Need Only a Little Pop
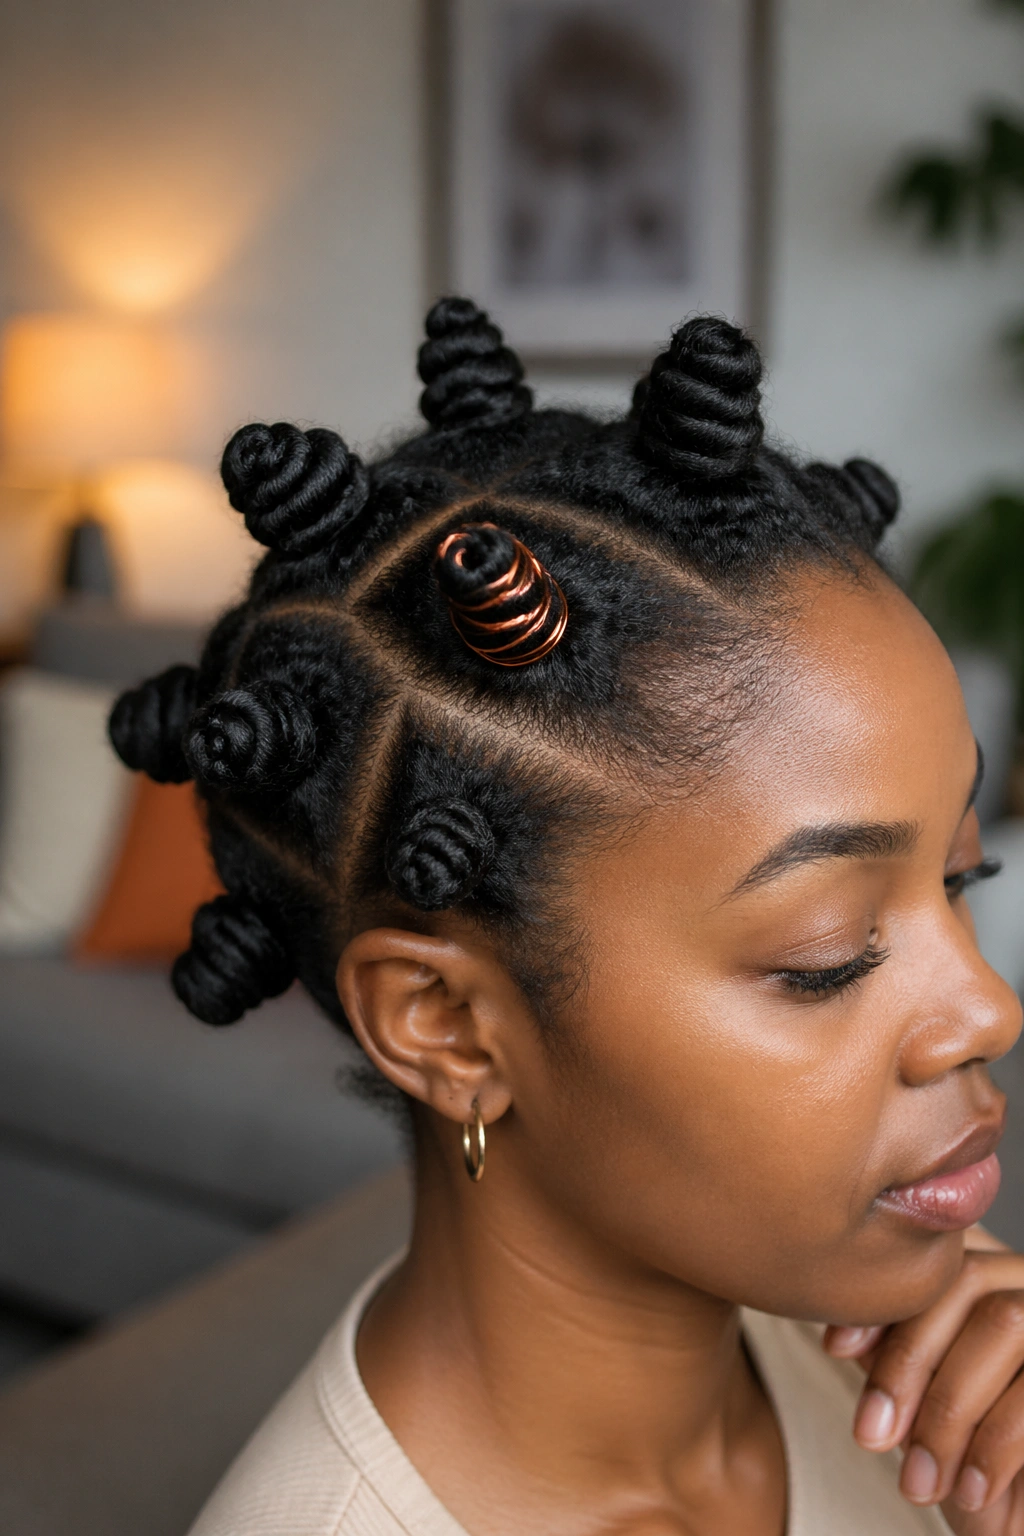
You do not need a full head of color to make short Bantu knots stand out. A small accent can be enough.
Temporary color wax, colored thread wrapped around the knot base, or a few discreet clip-ins can change the mood fast. Since short hair doesn’t give you much surface area, one accent shade often looks stronger than it would on a longer style. That is a good thing. It keeps the look crisp.
I like color accents best when the knots themselves stay simple and dark, because the contrast makes the detail more visible. A copper thread around one side. A muted burgundy at the front. A touch of gold on one knot. Small moves. Big difference.
If you try color wax, apply it after the knots are set, not before. That keeps the product from making the hair slippery while you’re still trying to form the shape.
17. Side-Swept Knot Cluster That Falls Off to One Side
Want something softer than a strict grid? Sweep the whole knot cluster to one side.
A side-heavy layout gives short hair a little motion and breaks the flatness that some center styles can create. Start the first knot near the temple, then keep the rest moving diagonally toward the opposite side of the crown. The shape should feel intentional, not lopsided by accident.
I like this style when the hair has uneven length or one side tends to puff more than the other. The sweep turns that asymmetry into part of the look. That’s the fun of it.
The side cluster also works well if you want one ear more exposed, which can help the style feel lighter around the face. You get shape, but you still keep the tight, compact feel that makes Bantu knots so useful on short natural hair.
18. Protective Tuck-In Bantu Knots for Fragile Ends
Short hair can have ends that fray faster than the rest of the strand. A tuck-in knot keeps those ends out of the air and out of the friction zone.
This version is all about folding the ends inward before the knot is finished. After the hair is wrapped, the tip disappears under the coil instead of sticking out. That sounds minor, but on short hair it makes a real difference in how the style wears over the day.
The look is cleaner too. No little bits poking out. No ragged tips. Just a neat knot with a smoother outline.
I reach for this method when the hair is in a fragile stretch — maybe after a dry spell, maybe after too many styles back to back. It gives the ends a break while still letting the hair stay styled. That’s a good trade.
19. Chunky Knots on Stretched Hair That Feel Faster to Build
If your hair has been stretched well, chunkier Bantu knots become possible. And fast.
When to Use Bigger Sections
Bigger sections work best on short hair that has been banded, blow-dried on low heat, or stretched overnight in twists. The added length gives the knot enough body to sit properly, so you’re not forcing tiny pieces to hold too much shape.
What to Watch For
- Keep the sections around 1.5 to 2.5 inches wide.
- Use light product so the hair doesn’t turn gummy.
- Wrap each knot firmly, but stop once the coil looks smooth.
- Leave enough space between knots so the sections don’t merge at the roots.
I like this version on busy mornings. It’s faster than making a dozen tiny knots, and it can still look polished if the parts are clean. On short natural hair, that stretch makes a huge difference.
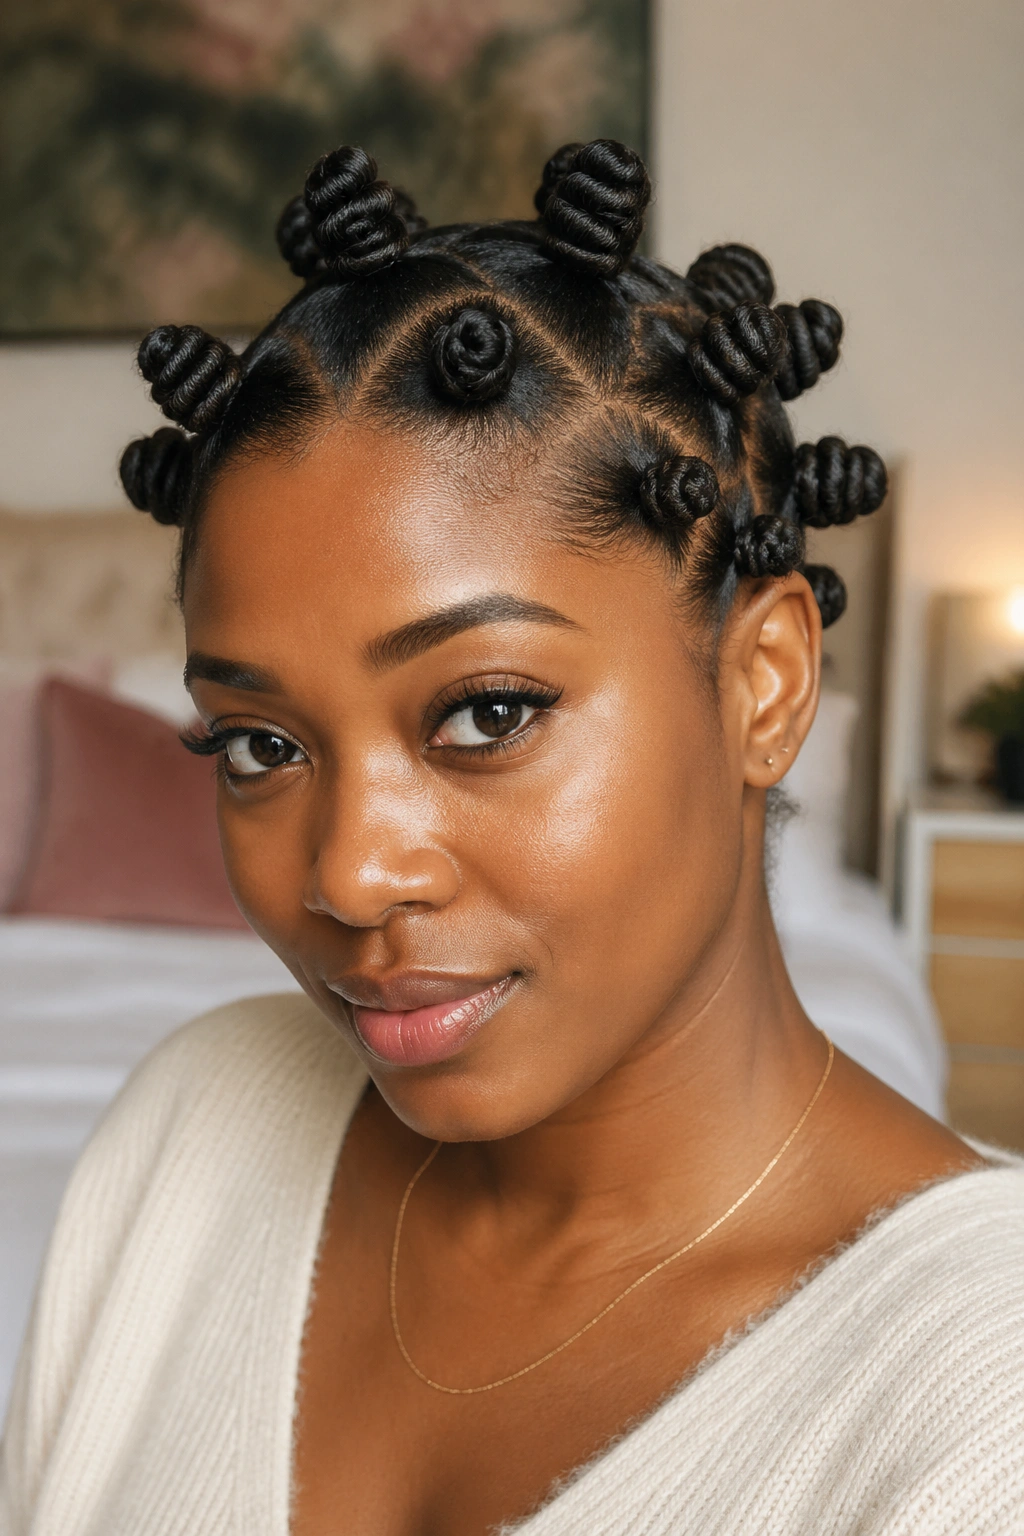
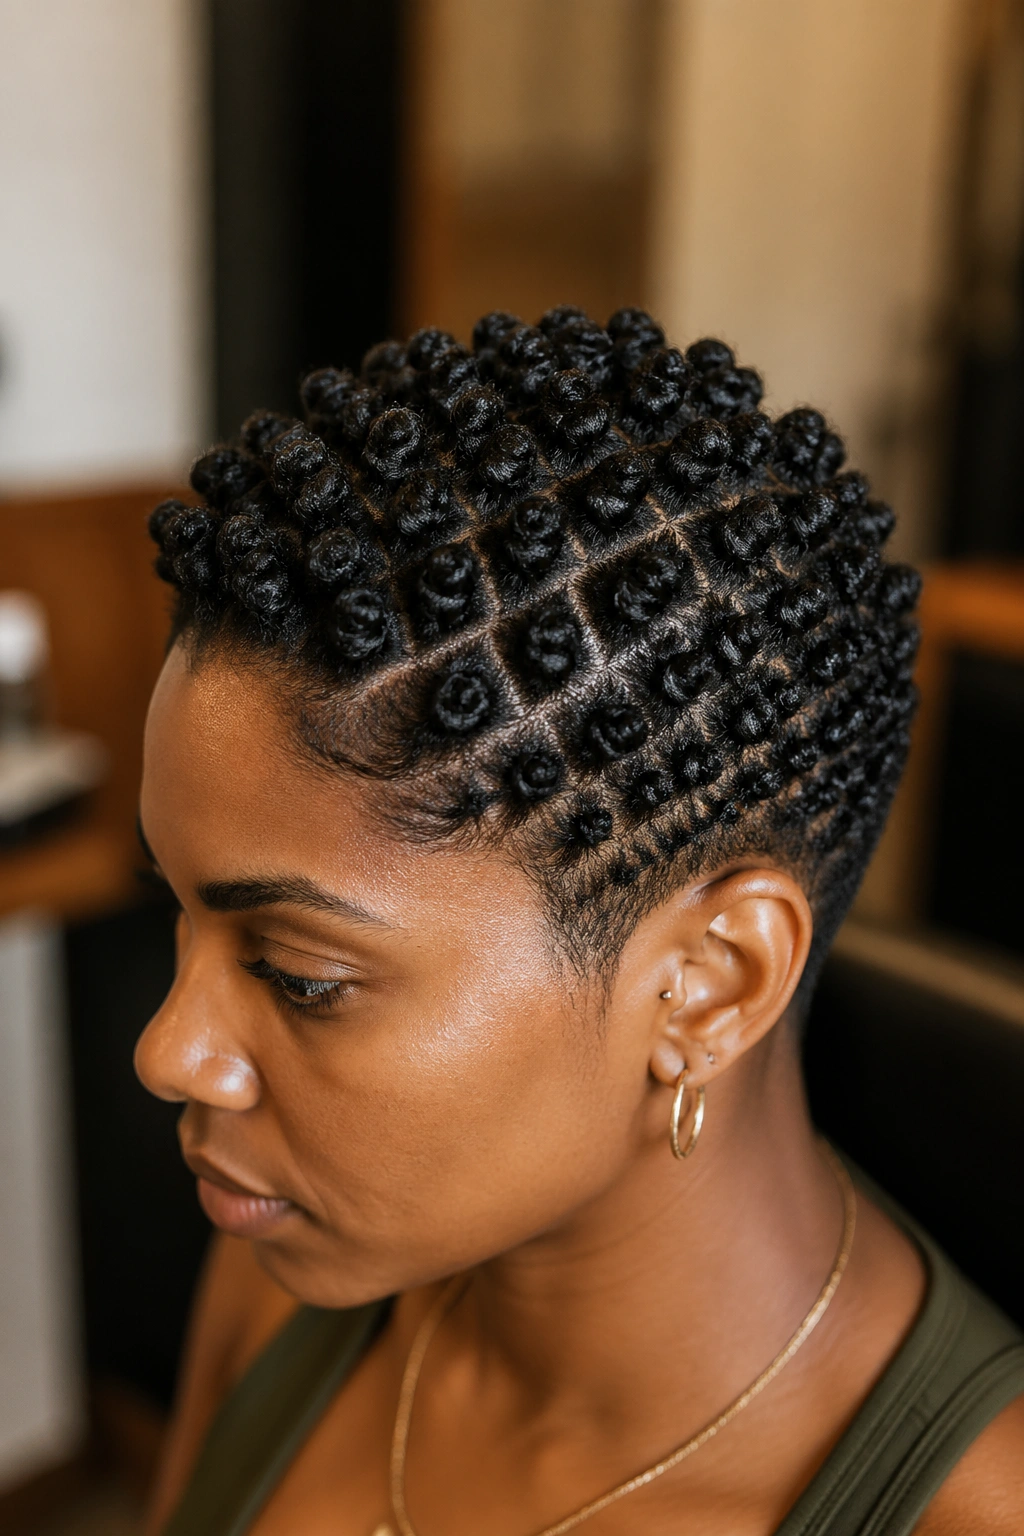
20. Micro Bantu Knots for a Defined Set
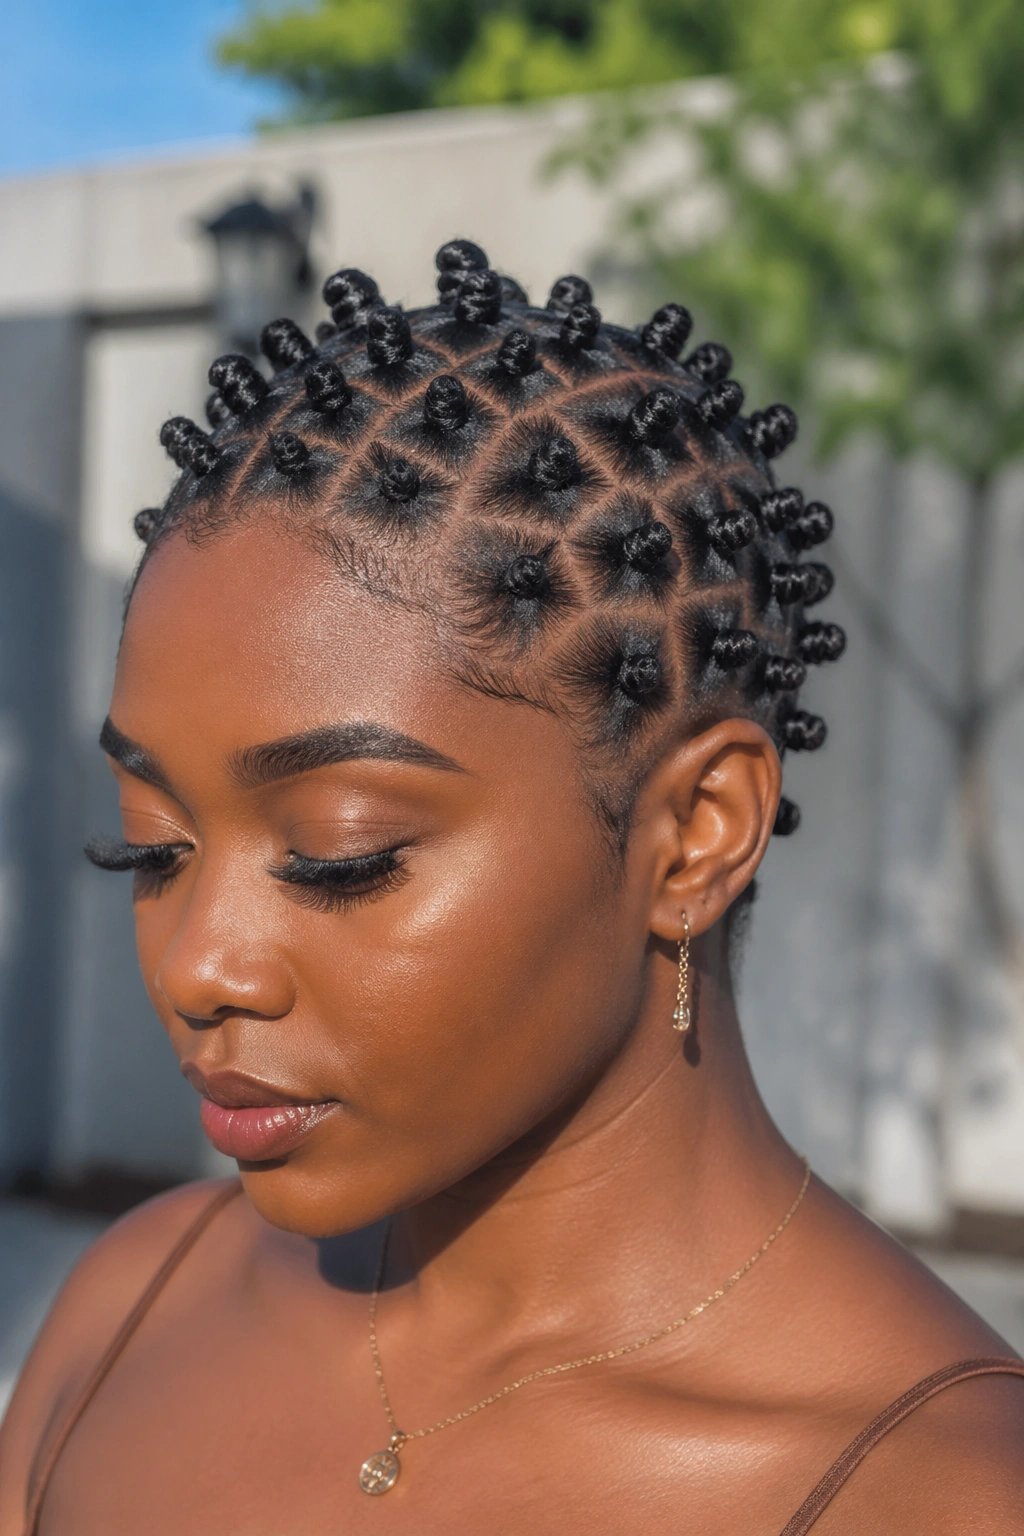
Micro knots are tiny for a reason. They give short hair a tighter shape and, if you take them down carefully, a more defined curl set later.
This style takes patience. No pretending otherwise. Each section should be small enough that the hair can wrap around itself comfortably, usually under half an inch if the texture is dense and springy. The payoff is a really neat finish that sits close to the scalp and looks almost patterned.
I like micro knots when the goal is definition more than volume. They’re also handy for people who want to wear the knots for a bit, then unravel them for a second style. That dual use matters on short hair because you get more mileage from one styling session.
Use a light cream and a touch of gel, not a heavy paste. Heavy products can make tiny knots collapse or flake at the roots.
21. Knots With a Braided Base for Very Short Hair
A tiny braid at the root can save a style that would otherwise slide apart.
This is the move for hair that sits too short or too slippery to hold a knot from the start. Braid the first few stitches — three or four is often enough — and then coil the remaining length into a knot. That little braided anchor keeps the section together and gives the knot a more secure base.
What the Braid Does
- It holds the shortest strands in place.
- It reduces slip at the root.
- It helps the knot stay neat through the day.
- It makes the style feel sturdier on softer textures.
I reach for this whenever I’m styling short natural hair after wash day and the strands still feel too soft to cooperate. It’s a bit more work up front, but the hold is worth it.
22. Scarf-Framed Bantu Knots With a Soft Border
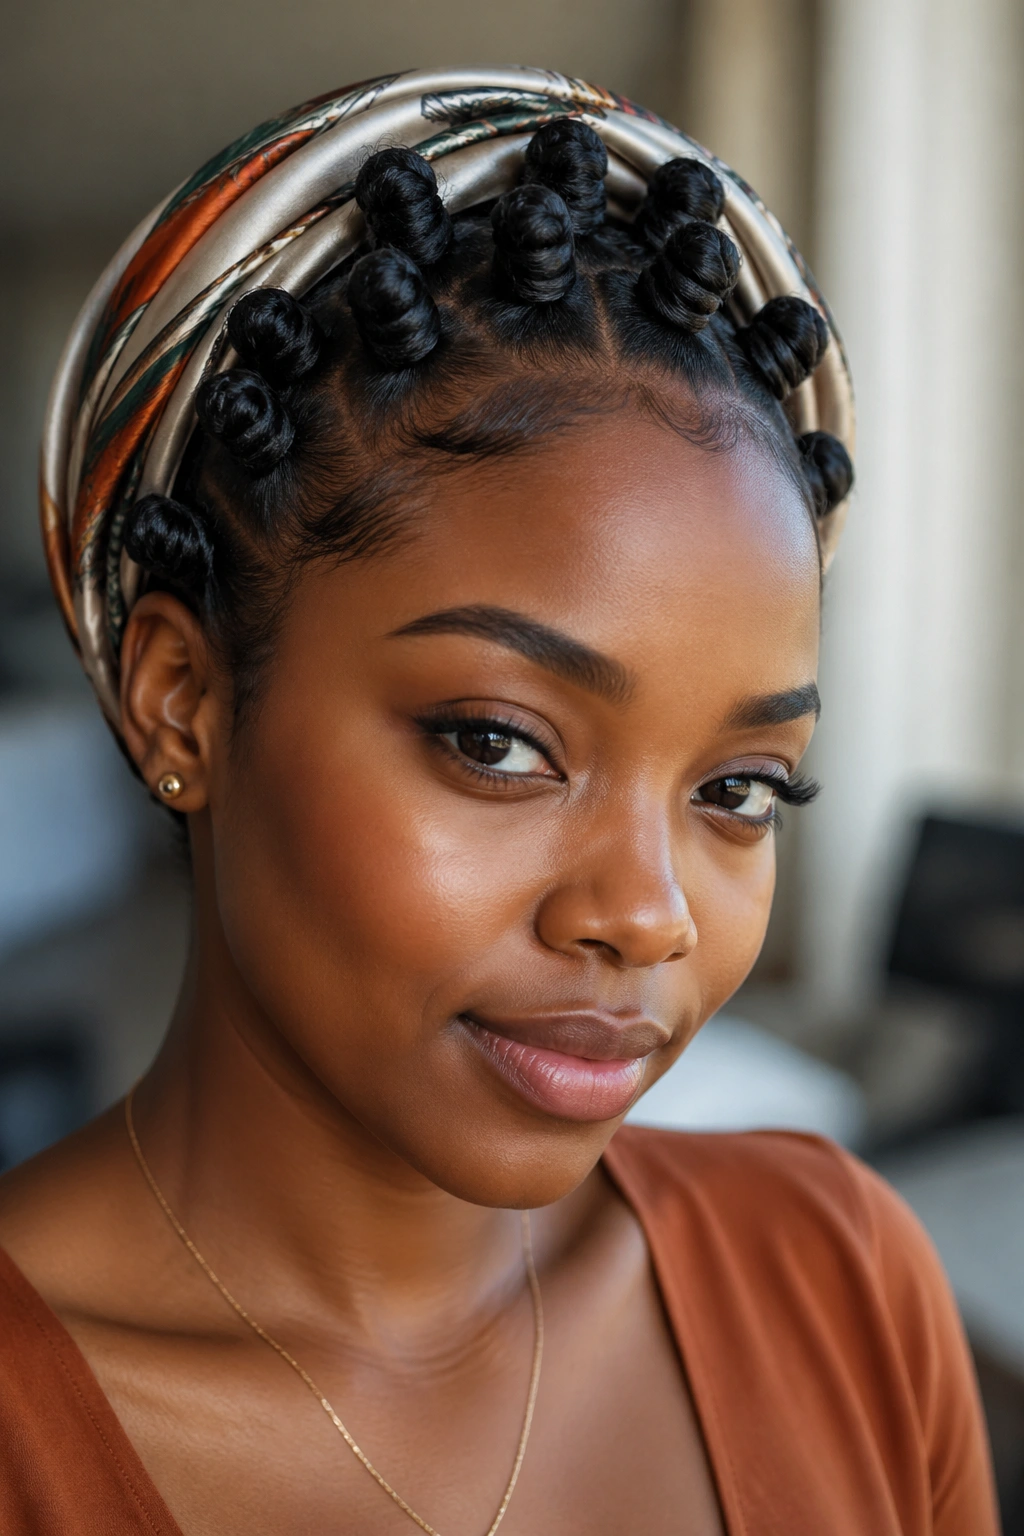
A scarf can change a knot set from casual to styled in two seconds.
A folded silk or satin scarf wrapped around the perimeter of the head frames the knots and keeps the front smooth. It also makes short hair look more intentional if the parting is simple and the knots themselves are tiny. The scarf gives the eye a boundary, which helps the whole style feel finished.
I prefer a scarf band that’s about 2 to 3 inches wide. Too thin, and it disappears. Too wide, and it starts competing with the knots. The sweet spot is enough fabric to frame the face while letting the hair stay visible.
This is one of those looks that reads calm and put together without needing much extra work. A few knots. A clean band. Done.
23. Asymmetrical Bantu Knots That Lean Into Uneven Placement
Why pretend the head has to be perfectly even? Sometimes the better move is to lean into asymmetry.
An asymmetrical set can place more knots on one side, or it can make the knots on one side slightly larger than the other. That shift gives short hair movement and a little attitude. It also solves the problem of one side looking flatter than the other, which happens more often than people admit.
The look works best when there’s one clear point of balance — a strong part, a cuff on the heavier side, or a knot placed near the temple to anchor the shape. Without that, the style can drift into messy territory.
I like asymmetry on short hair because it feels modern without needing a lot of length. A small crop can take this shape and look purposefully styled, which is half the battle.
24. Formal Tight-Set Bantu Knots for a Sharper Finish
When you want the knots to look dressy, make the set tighter and more uniform. Not painful. Tighter. There’s a difference.
This version relies on clean section sizes, smooth roots, and a consistent knot shape from front to back. The sections should match closely — around 1 inch or slightly under — so the style reads as orderly. A little shine serum on the parts helps, but don’t drench the hair. Too much product makes short coils limp.
Compared with a fluffier knot set, this one feels more refined. The shape sits closer to the scalp, the profile stays neat, and the style holds up better under a hat or wrap.
It’s a strong pick for ceremonies, photographs, or any setting where you want the hair to look deliberate from every angle. Short hair can do that. It just likes discipline.
25. Low-Tension Everyday Bantu Knots for Short Natural Hair
Some days, the best Bantu knots are the ones that do their job quietly. No drama. No scalp strain. No overthinking.
This is the set I’d choose when the hair needs to stay off the neck, the parts need to be quick, and the style has to survive a full day without getting touched every ten minutes. Keep the sections slightly bigger than your smallest knots, soften the roots with a little leave-in, and stop as soon as the coil is secure. That is enough.
A low-tension set is also the easiest one to wear again and again, which matters more than people think. Styles that pull too hard get old fast. Styles that sit comfortably tend to stay in rotation. And on short natural hair, rotation is everything.
If the hair feels tender at the root, loosen the section size before you tighten the wrap. That one adjustment can make the difference between a style you enjoy and a style you can’t wait to take down.