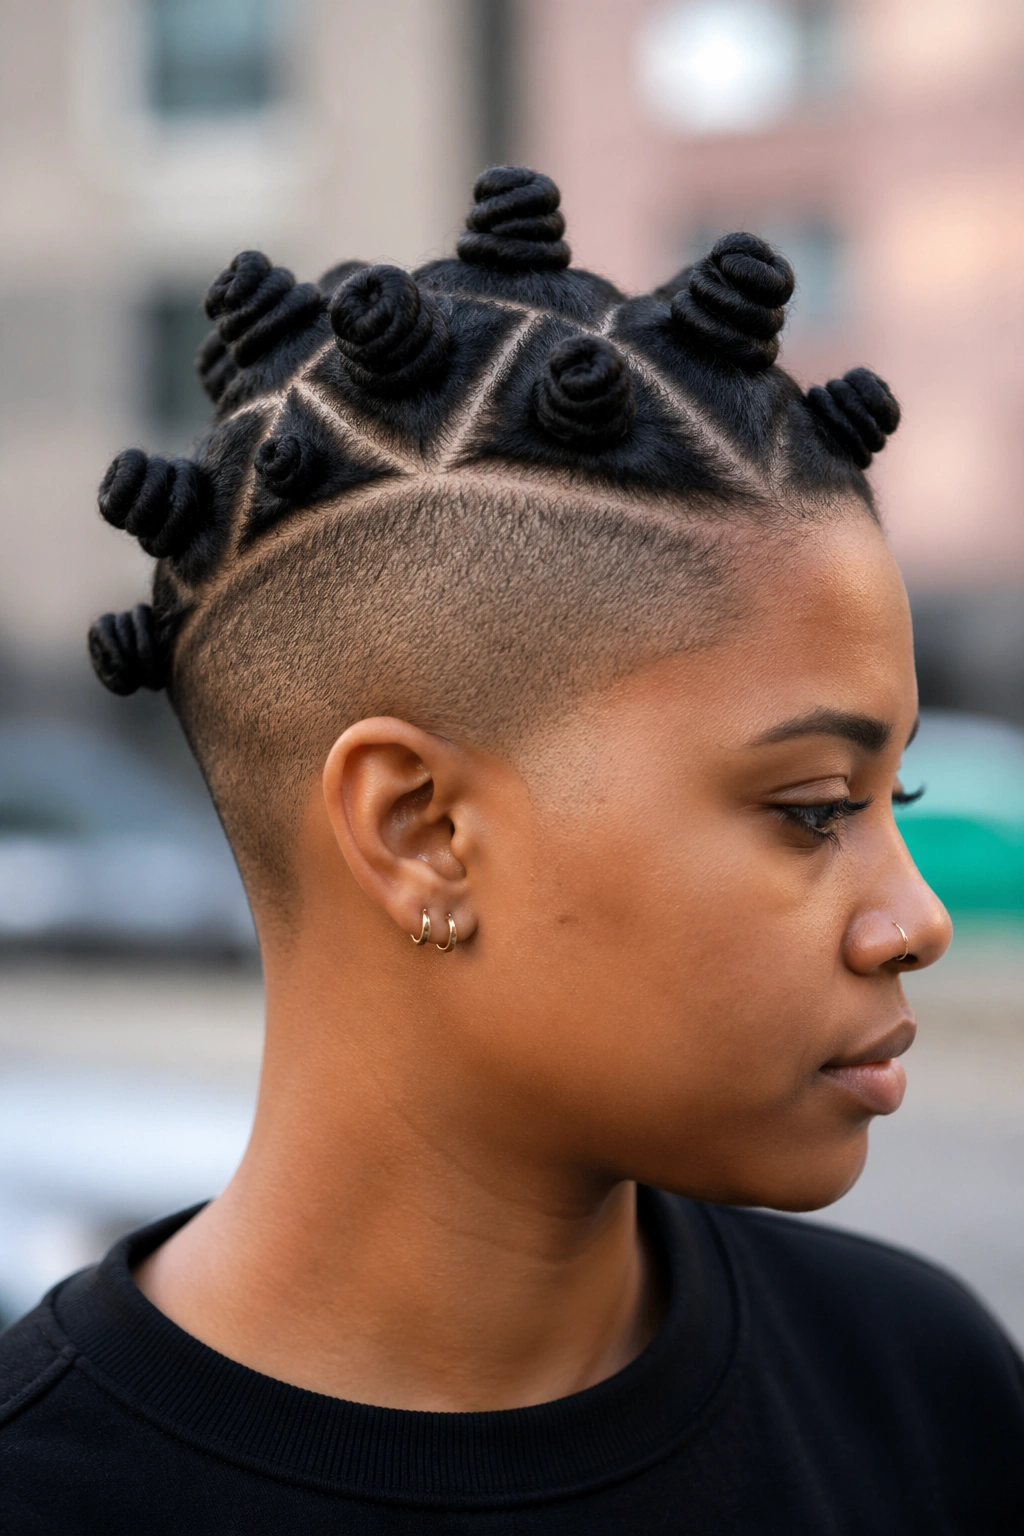
A clean side shave changes the whole mood of a hairstyle in about ten seconds. That’s why Bantu knots with shaved sides hit so hard: the top has shape, texture, and history, while the sides bring in that close, sharp barbershop finish that makes the knots stand out even more. You’re not hiding anything with this look. You’re framing it.
There’s also a technical side to it that gets missed. Bantu knots come from African styling traditions, and when they’re done well, the details matter — section size, scalp tension, knot placement, clipper length, even where the fade drops behind the ear. A skin fade can make six small knots look twice as bold. A softer taper can calm down a bigger set of knots and make the style easier to wear every day.
I’ll say this bluntly: bad parting ruins good knots. So does too much tension. If the roots are pulled so tight that your scalp feels hot an hour later, that style is headed for breakage, not compliments. The shaved sides also need thought. A #0 bald fade gives a different result than a #2 guard, and you should choose on purpose, not by accident.
Some looks lean clean and graphic. Others go playful with color, beads, razor lines, or nape art. The 25 ideas below all use the same core contrast — knots up top, shaved sides around them — but they land in very different ways.
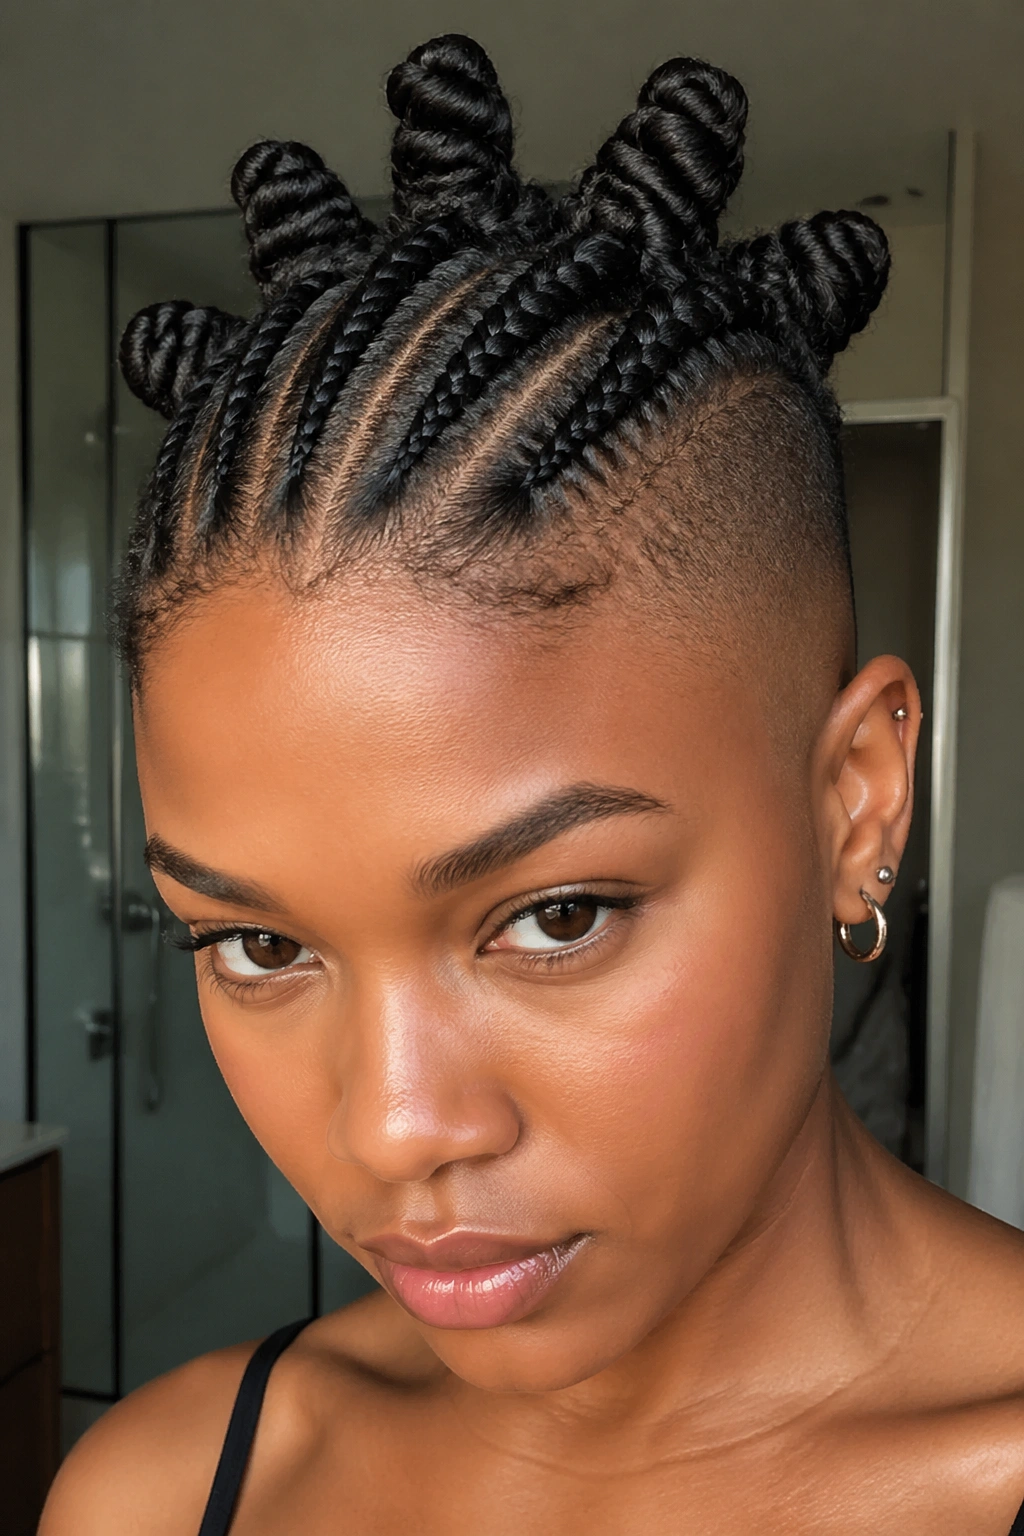
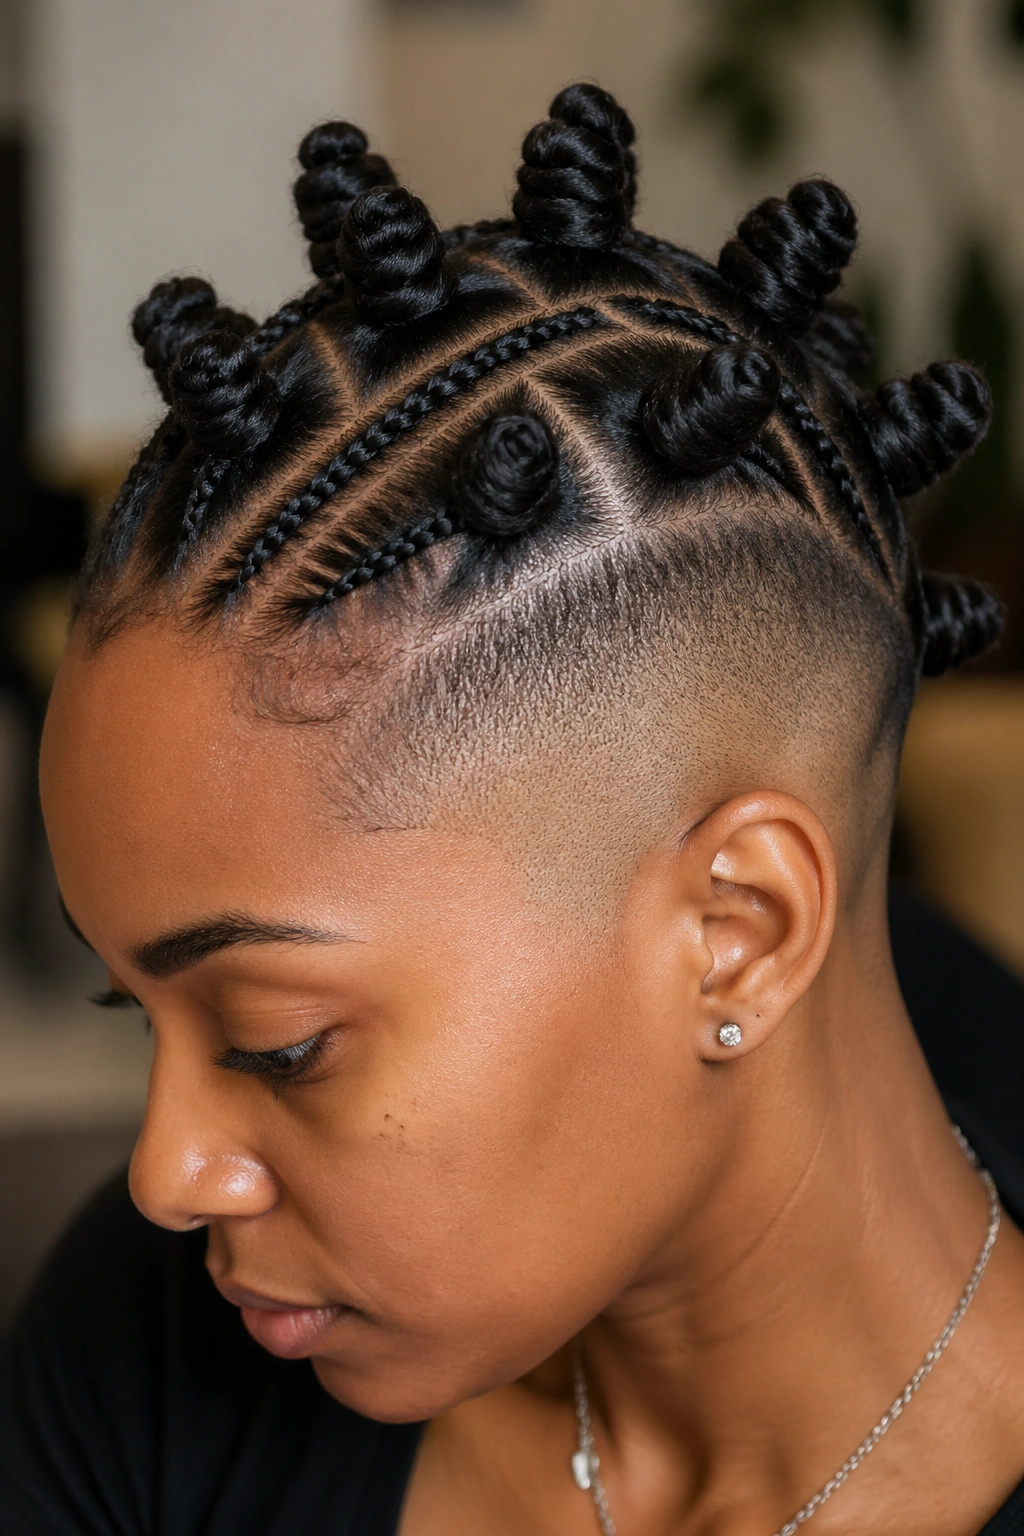
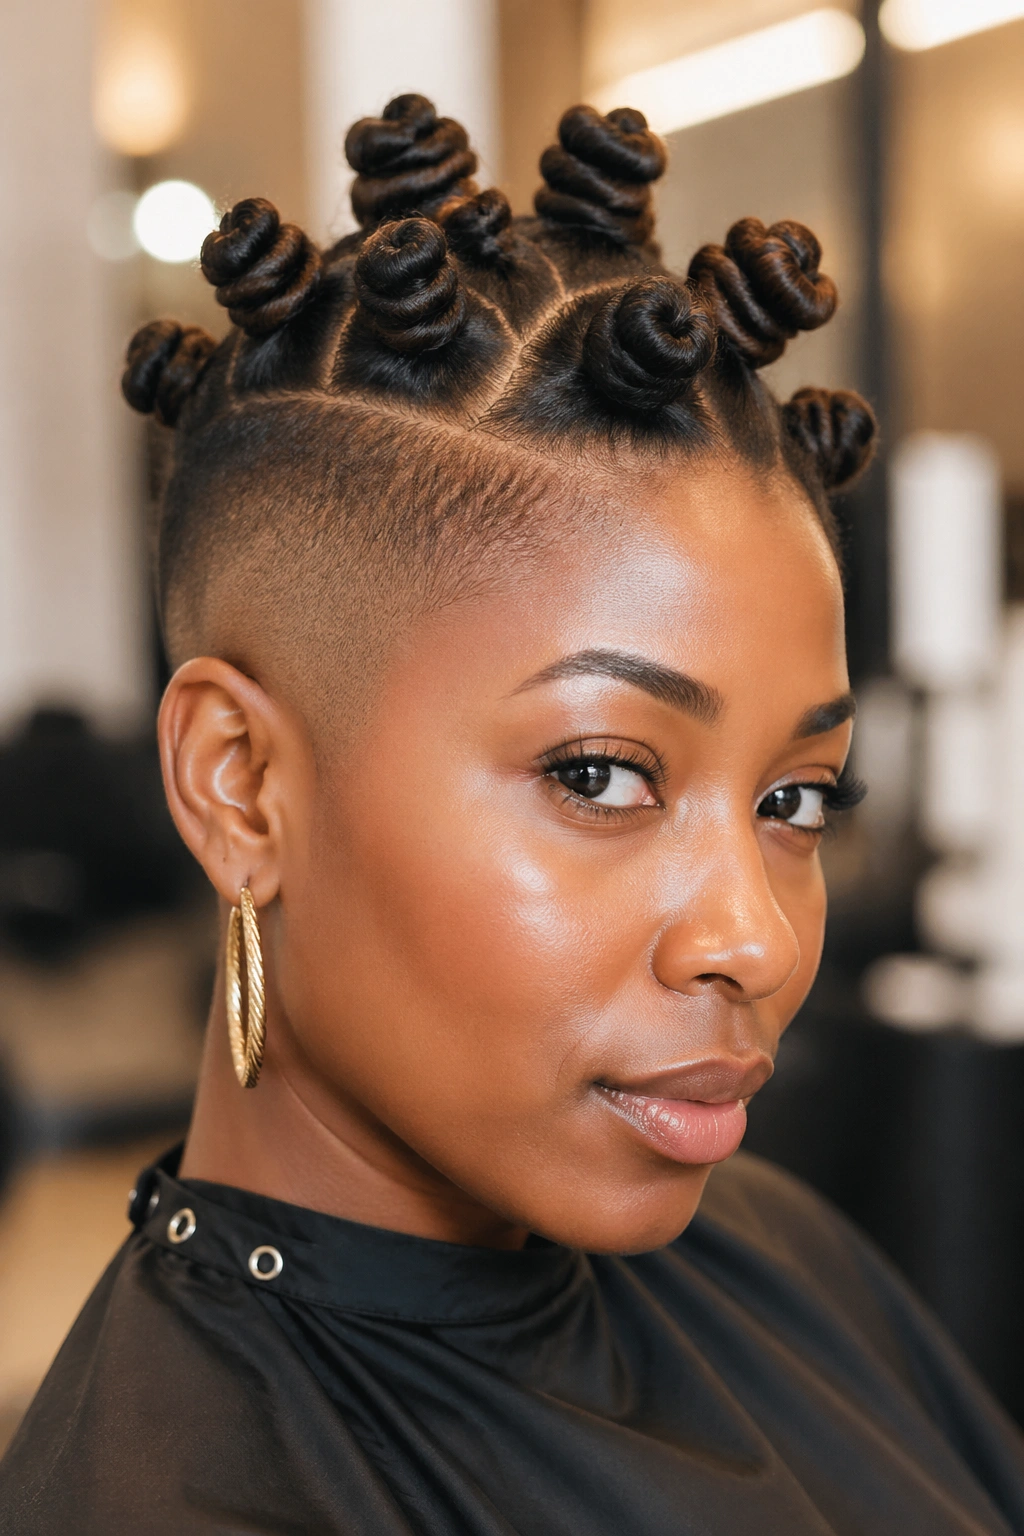
1. Classic Bantu Knots With Shaved Sides and a Crisp Center Part

This is the one I’d show first to anyone trying the style for the first time. It’s balanced, easy to read, and sharp without needing color, cuffs, or scalp art to carry it.
The layout is simple: a clean center part, three or four knots on each side of the crown, and shaved sides that sit low and even around the temples and above the ears. That symmetry matters. When the knots are medium-sized — usually sections around 1 to 1.5 inches wide — the whole shape feels deliberate instead of crowded.
Why this layout stays strong
A center part gives the eye a straight path from hairline to crown. On a shaved-side style, that kind of order helps. You already have contrast from the clippered sides, so the top should not feel messy unless messy is the actual point.
- Best knot count: 6 to 8 knots
- Best side finish: low fade or clean shave with a soft grow-out line
- Hair type sweet spot: stretched 4A to 4C hair holds this shape well
- Upkeep: refresh the line-up and side shave every 7 to 10 days
Ask for the shave to sit slightly below the parietal ridge — that upper curve of the head — so the knots still have enough top section to look full.
2. Jumbo Center-Row Knots Over a Low Skin Fade
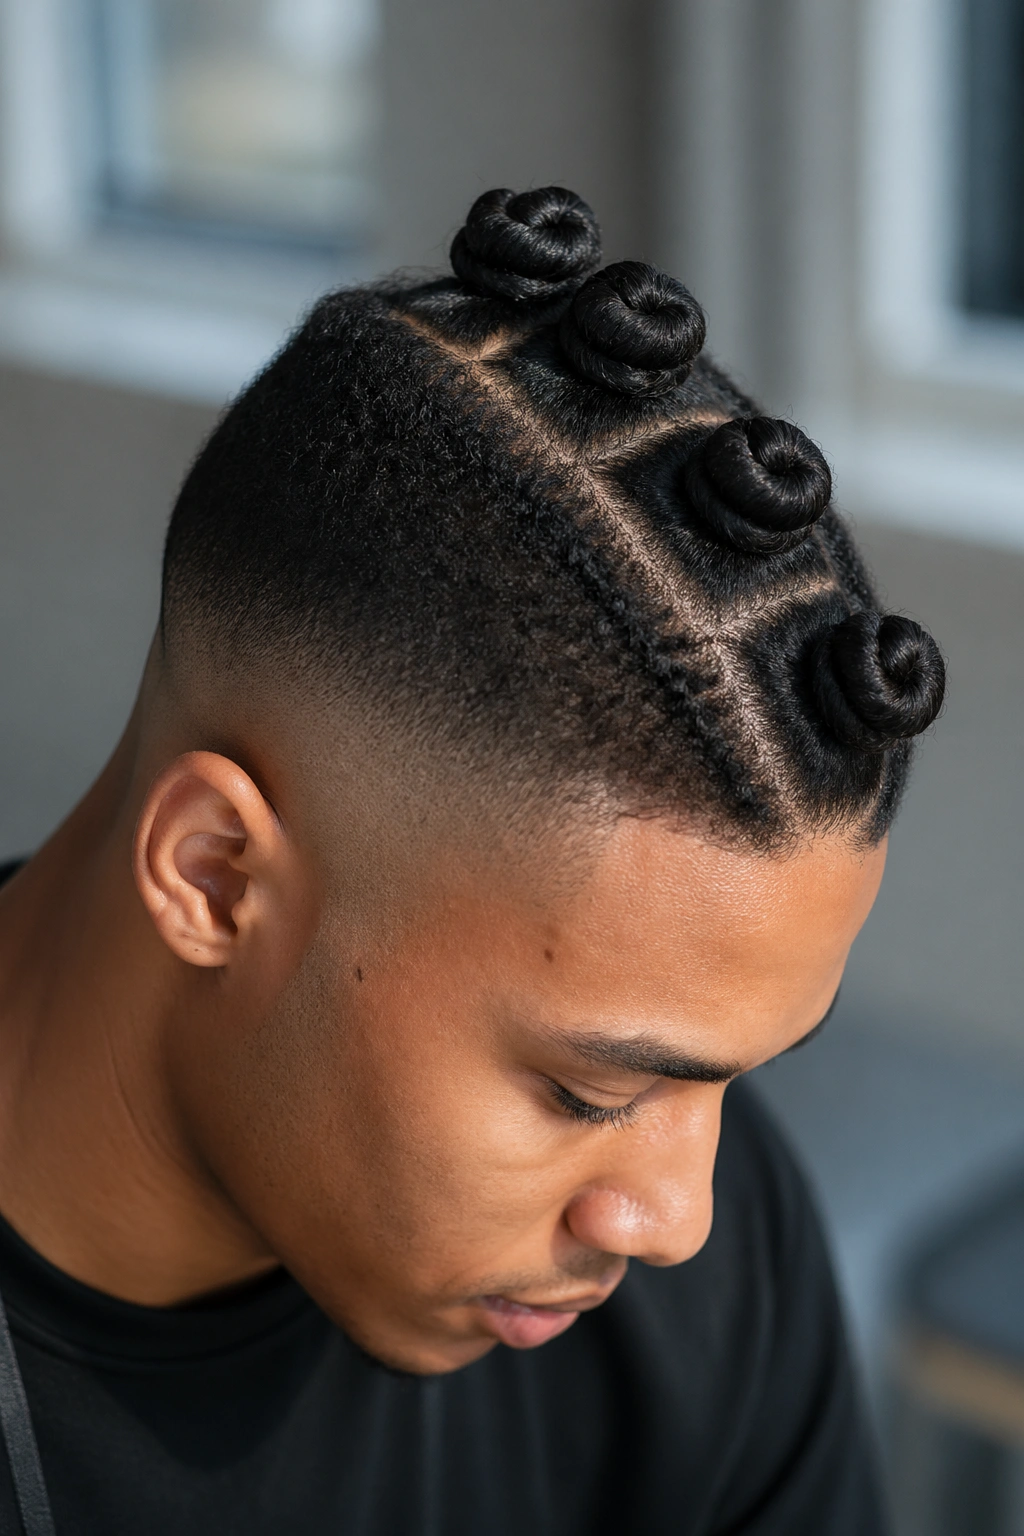
Bigger knots change the whole rhythm of the style. Instead of eight or ten small spirals across the top, you might wear only three, four, or five oversized knots running down the center like a soft mohawk.
That low skin fade is doing quiet work here. Because the fade starts low, the haircut doesn’t fight the size of the knots. It leaves a little shadow at the upper sides, which keeps the look from turning too stark. I like this choice on thicker natural hair because it cuts styling time. Fewer sections. Fewer wraps. Less fiddling.
You do need enough length to make jumbo knots look full rather than tight and stubby. Around 5 to 7 inches on top usually gives you better shape, though added hair can help if your natural length is shorter. Use mousse before wrapping so the surface of each knot dries smooth instead of fuzzy.
This one suits long necks and strong cheekbones especially well, though I’ve seen it work on round faces too when the center row is lifted high enough.
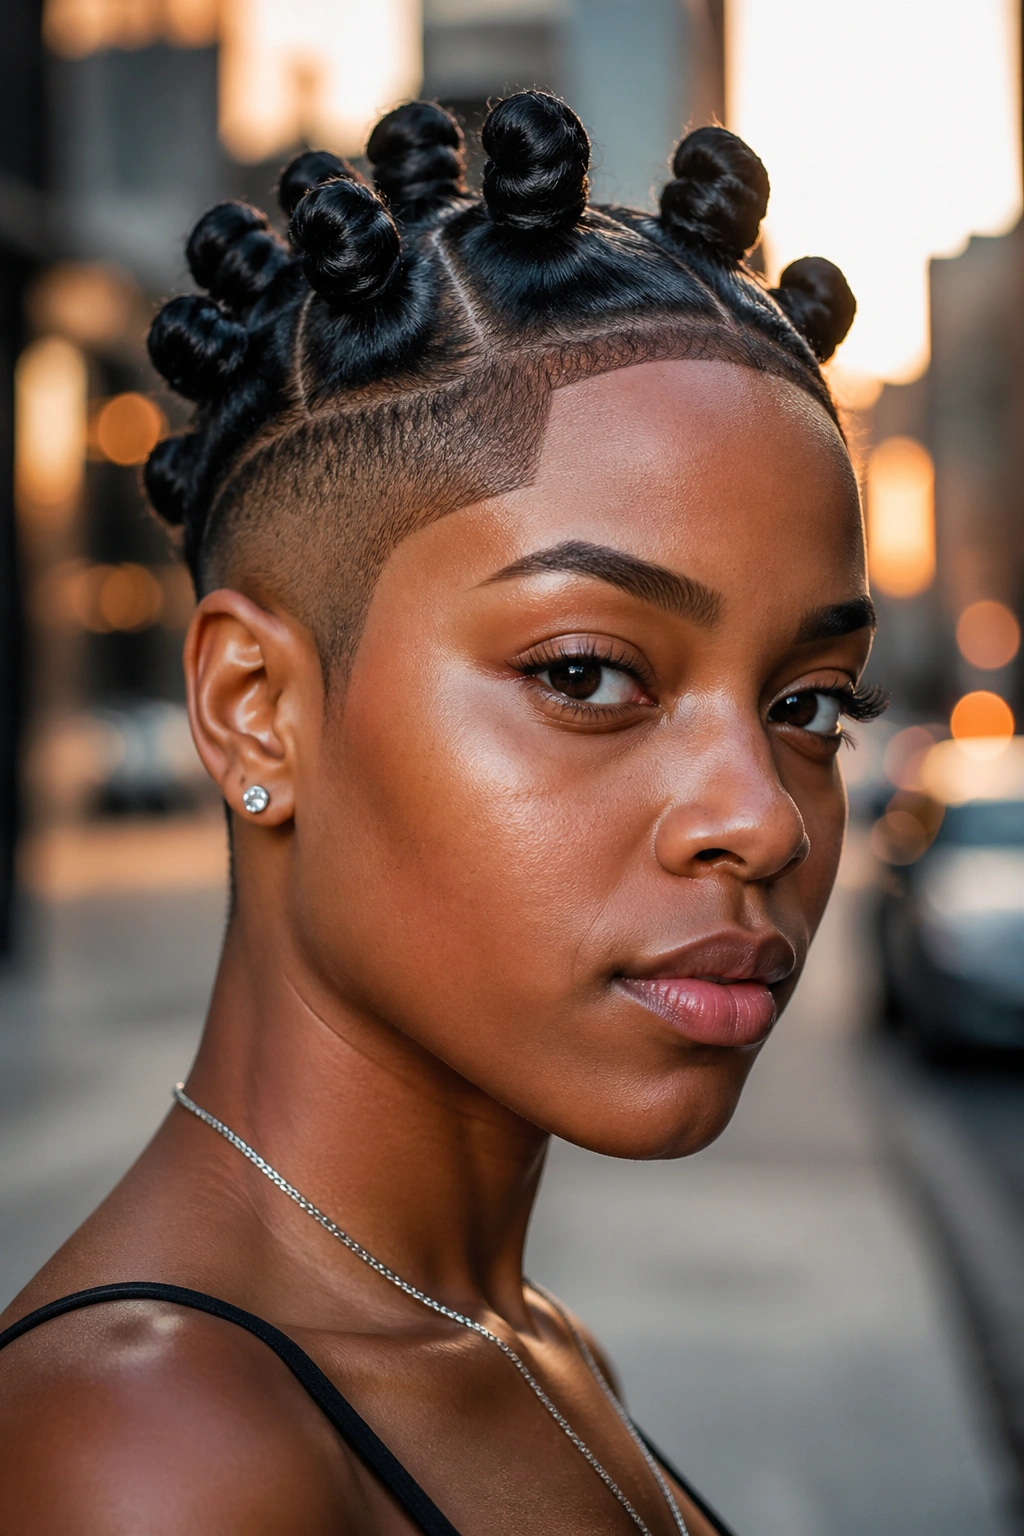
3. Tiny Grid Knots With a Sharp Temple Fade
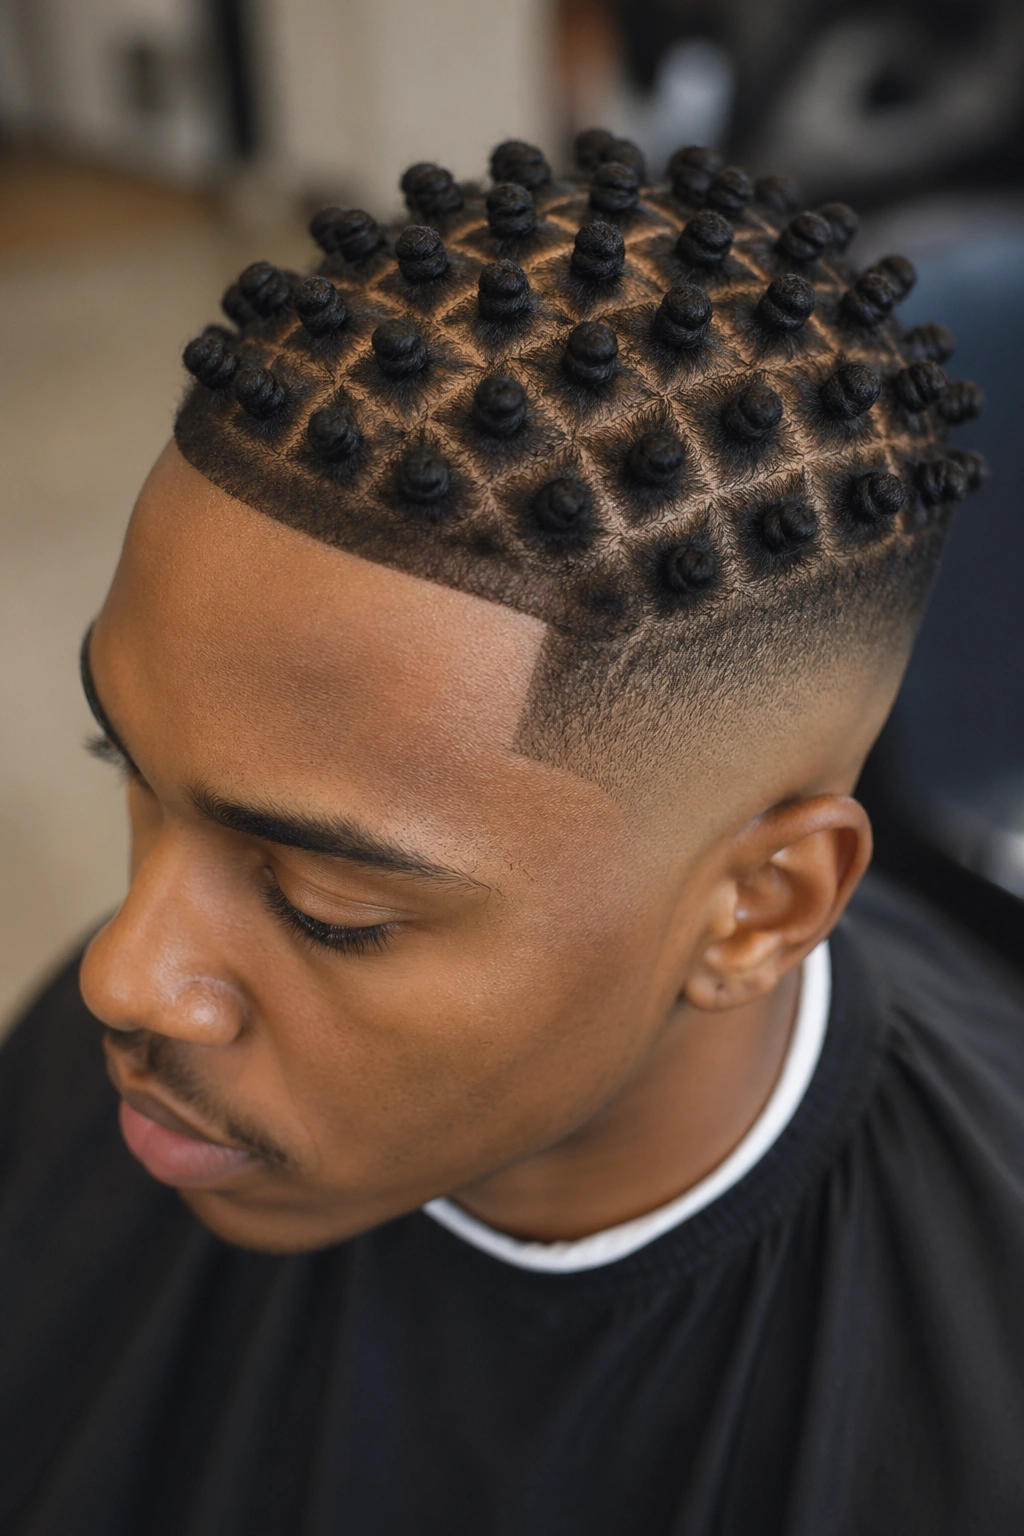
Why do tiny Bantu knots feel so much louder than jumbo ones?
Because precision reads as bold. When the top is divided into neat square sections — think 12, 16, or even 20 little boxes — every part line shows. Add a sharp temple fade and the style starts to look almost architectural.
Small knots aren’t quick. That’s the trade. The sectioning takes time, and your stylist has to keep the grid clean from front hairline to crown. Still, when they’re done right, they hold their shape well, and the grow-out can look better than you’d expect because the knots are anchored with tighter, smaller bases.
Keeping the grid neat
Use a rat-tail comb, styling foam, and clips before you wrap a single knot. Don’t part as you go unless you enjoy fixing crooked rows later.
Micro knots also benefit from a slightly drier finish. Too much oil on top can blur the scalp pattern. I’d rather see a soft sheen than a greasy shine here. Let the lines do the work.
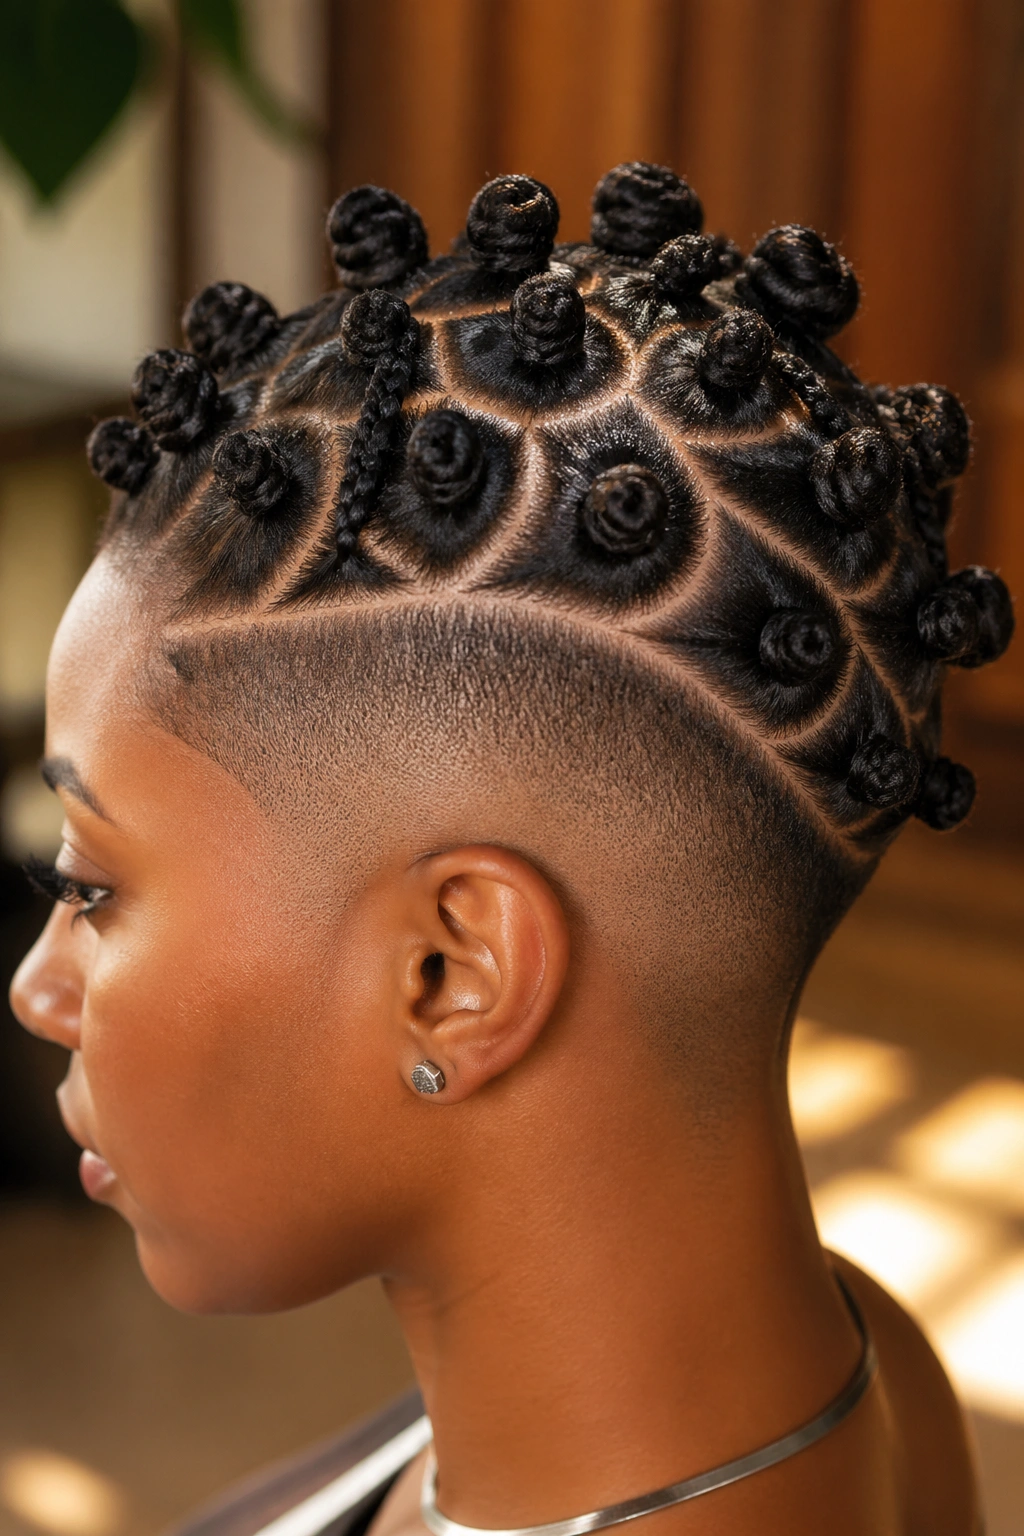
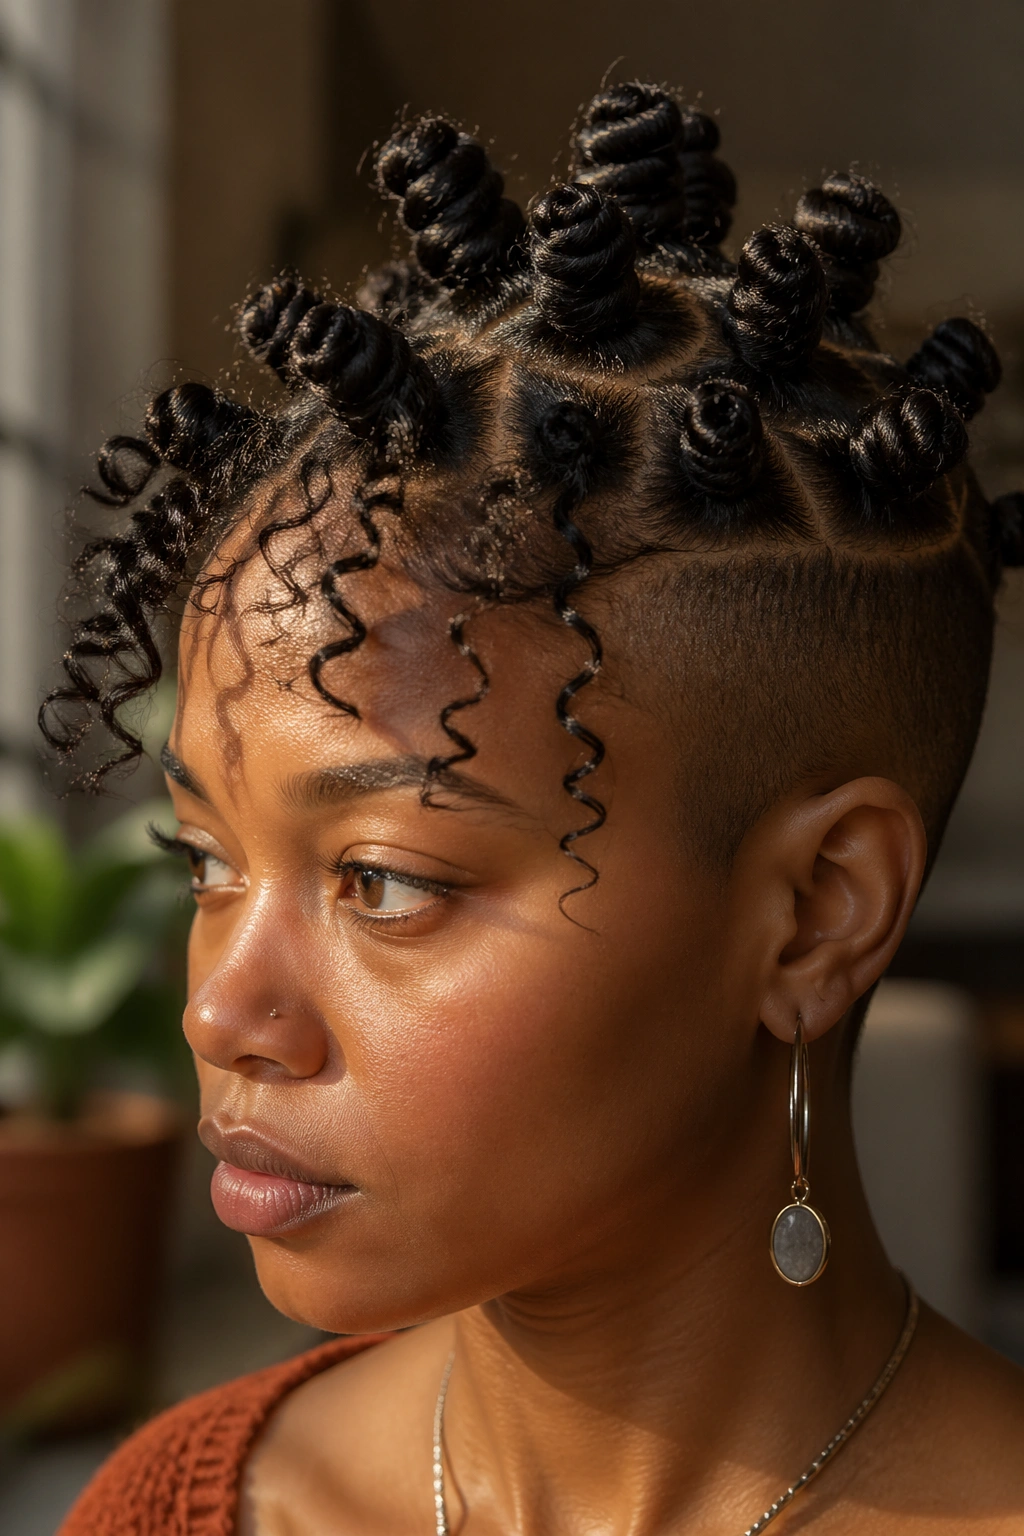
4. Triangle-Part Knots With Bare Sides
The first thing you notice with this style is the scalp pattern. Instead of square boxes, each knot starts from a triangle, and those pointed sections shift the whole look upward.
That matters more than people think. Square parts feel orderly. Triangle parts feel alive. They create movement across the crown, even when the knots themselves are neat and uniform. On shaved sides, that extra motion keeps the top from looking too blocky.
Picture six to nine medium knots, each sitting on a triangular base, with the sides shaved close and clean. A #1 guard or a bald shave both work, though I lean toward a faint shadow on the sides because the top already has enough drama.
A few details make this one easier to wear:
- Face shape bonus: the upward points can help elongate rounder faces
- Best knot size: medium, not tiny
- Parting note: uneven triangles stand out fast, so section carefully
- Finish: edge control only at the front; too much product makes the scalp look pasted down
There’s something a little more relaxed about this pattern, even though it still looks planned.
5. Stacked Mohawk Knots With a High Fade
Skip the wide top section. Push the hair into a narrow center strip and let the fade do the rest.
A stacked mohawk version gives you height first and width second, which is why it hits so well on people who want their style to read strong from across the room. The knots usually run from the forehead to the back crown in a single line or a tight double line, and the high fade lifts everything visually.
This is not the softest take on Bantu knots with shaved sides. It’s more angular, more assertive, more barbershop than braid shop. That’s the appeal.
Where it shines
High fades work best when the knots sit high enough to keep a clear profile. If the center strip is too wide, the haircut loses that mohawk effect and drifts into a regular undercut.
What can go wrong
Too-small knots can get swallowed by the cut. Too-big knots can flop outward and flatten the silhouette. I’d stay in the middle: 5 to 7 knots, each wrapped firmly, then pinned if needed from the back side so the pins stay hidden.
This one has presence. No extra decoration needed.
6. Half-Moon Knot Pattern With a Drop Fade
Curved parting changes the mood fast. A half-moon layout uses crescent-shaped sections across the top, and that curve pairs beautifully with a drop fade that dips behind the ear instead of staying flat around the head.
I keep coming back to this style because it respects the shape of the skull instead of fighting it. Straight rows can look rigid. These curved sections feel softer, almost fluid, and the fade echoes that same arc.
The trick is mapping the pattern before you start wrapping. Your first curved line sets the whole hairstyle. If it’s off-center by even a little, every knot after it will drift. I’d part it dry or lightly stretched, mark the curve with the tip of the comb, clip away each section, then build the knots.
This design suits medium knot sizes better than tiny ones. Tiny half-moons can read messy from a distance. Medium knots let people actually see the pattern.
And yes, it takes patience. Worth it.
7. Zigzag-Parted Knots With a Shaved Lightning Line
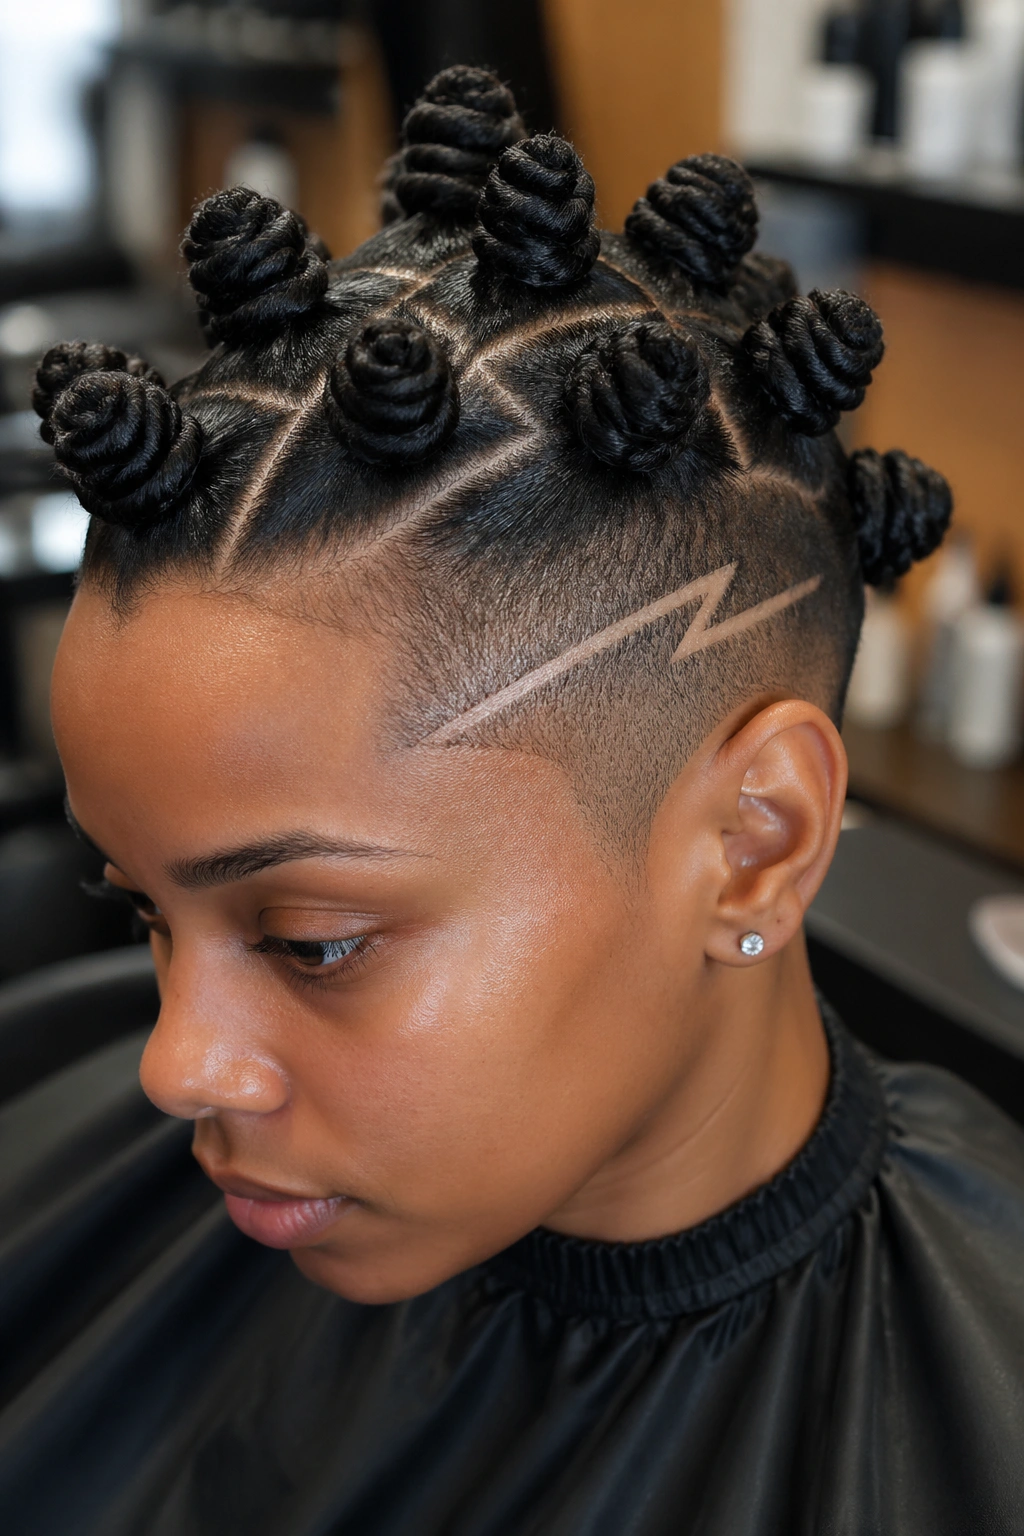
A razor line can go wrong fast. Too many carved details and the haircut starts to compete with the knots instead of framing them.
That’s why I like this version: one clean shaved line on the side, then let the top handle the rest. Up top, the knots sit on zigzag parts rather than straight rows, which gives the crown a little electric movement. The side design echoes that energy without turning the whole thing into clipper art class.
You want the zigzags to look intentional, not random. Wide, clean angles work better than tiny jagged ones.
- Best top layout: 6 to 10 knots on staggered zigzag parts
- Side design: one diagonal or slightly curved razor line
- Fade choice: mid fade keeps the line visible longer
- Maintenance: the etched line usually needs a refresh sooner than the knots do
If I had to edit one thing people often overdo, it’s this. Keep the side line single and sharp. A second or third line usually adds clutter, not style.
8. Blonde-Tipped Knots Over Dark Shaved Sides
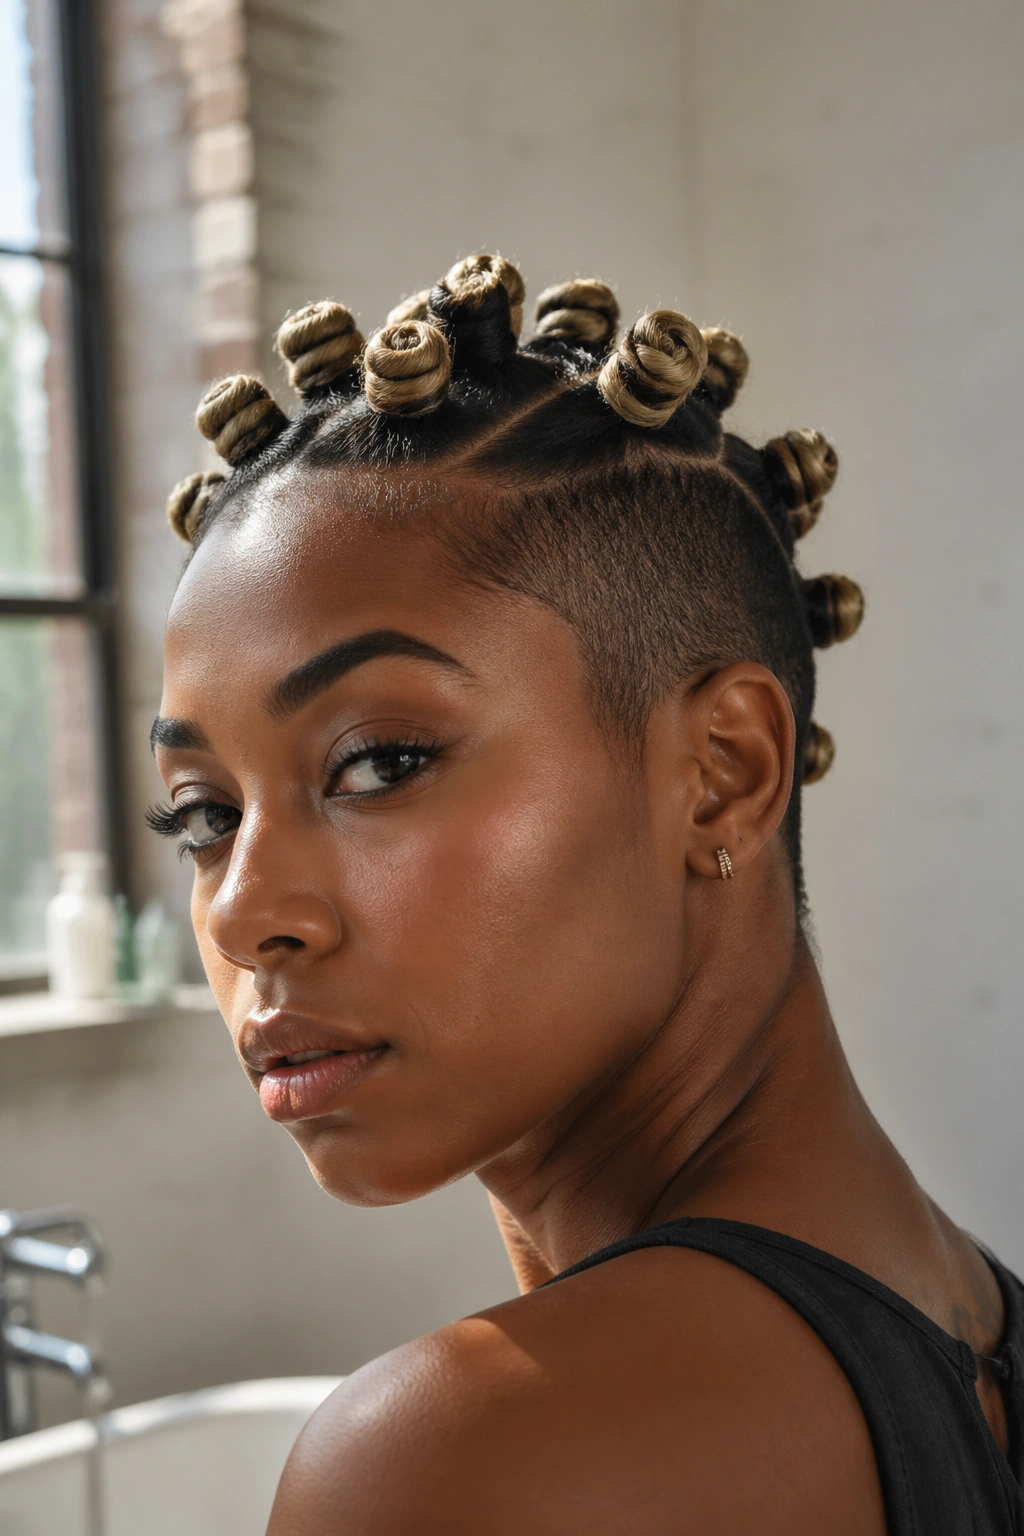
Color changes how the knots read before anyone even notices the parting. When only the ends are lightened — honey blonde, wheat, soft gold — each knot gets a highlighted ring or tip, while the shaved sides stay dark and clean.
That contrast is strong. Dark scalp and dark fade on the sides; lighter loops and coils on top. It gives even a basic knot pattern more dimension. I know that word gets tossed around too casually, but here it earns its keep because the lighter ends show the wrap of each knot.
Choosing the tone
Warm blondes tend to look richer on deep brown and red-toned skin. Cooler beige blondes can work too, though they need a cleaner lift to avoid brassiness.
Care is not optional
Lightened ends dry out faster. Use a leave-in that has some slip, then seal lightly so the tips don’t feel rough by day three or four. If the ends are brittle, the knots start to fray, and a shaved-side style has nowhere to hide that.
This look doesn’t need a fancy pattern. Even straight rows can look striking when the color is placed well.
9. Burgundy Knots With a Shaved Star at the Nape
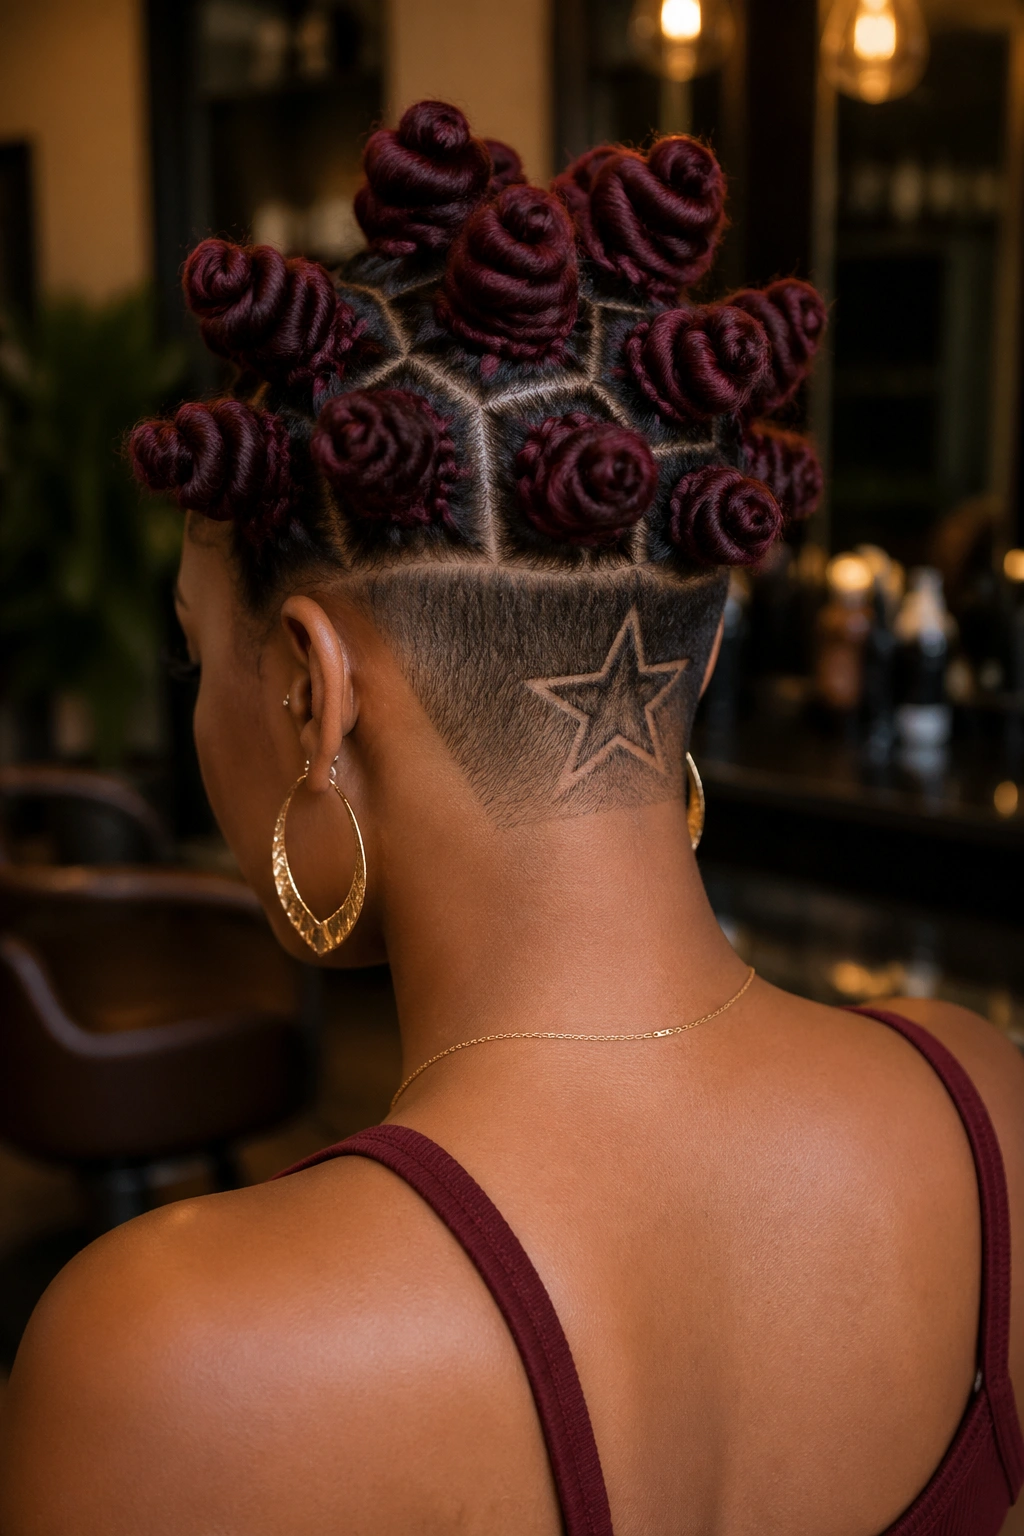
This one is playful, but it’s not childish if the execution stays clean. Deep burgundy on the knots adds warmth, and a shaved star low at the nape gives you a detail that peeks out only when the head turns or the chin lifts.
That’s a smart place for scalp art. The nape gives you something extra without crowding the temples, which are already busy with the shaved sides. You keep the main focus on the top, and the little surprise lives in the back.
I’d keep the knots medium-sized and round rather than pointy here. Burgundy already adds richness, so the shape should stay neat and controlled. A red-violet tone reads softer than fire-engine red, which can make the haircut feel harsher than it needs to.
If you wear high collars a lot, be aware that nape designs blur faster from friction. Hoodies, coat collars, scarf knots — all of that rubs. Still, when it’s fresh, it’s a fun detail that doesn’t scream for attention.
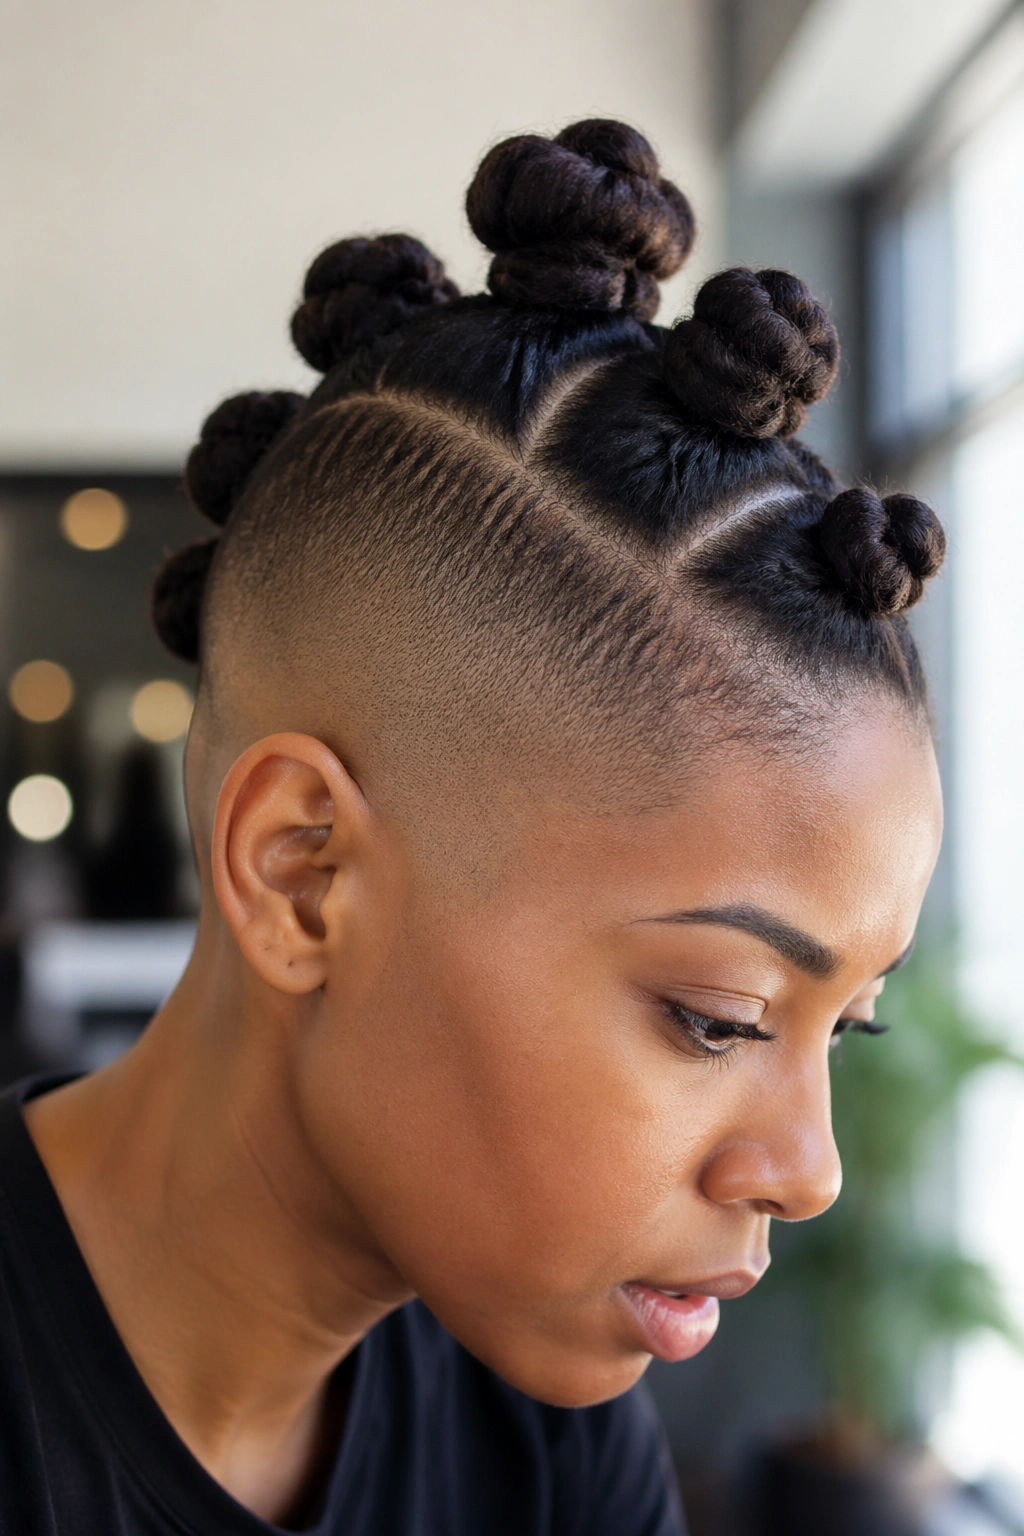
10. Flat-Twisted Front Panels Feeding Into Crown Knots
Some hairlines do better with a little help. If your edges are fragile or you just hate the look of tightly wound knots sitting right at the forehead, flat-twisted front panels are a smart workaround.
The idea is simple: create 4 to 6 flat twists from the hairline back, then gather those ends into Bantu knots on the crown. The sides are shaved or undercut, so the front still looks clean and open, but the hairline isn’t carrying the full stress of a direct knot base.
That matters. A lot.
I recommend this style for anyone growing back temple thinning or postpartum shedding because it spreads tension across the twist rather than locking it into one small root point. Keep the twists snug but not hard. You should feel secure, not sore.
The contrast is nice too. The front has that braided texture, the crown has round knots, and the sides keep everything crisp. Mixed-technique styles can look overworked, yet this one stays coherent because every part of it serves a purpose.
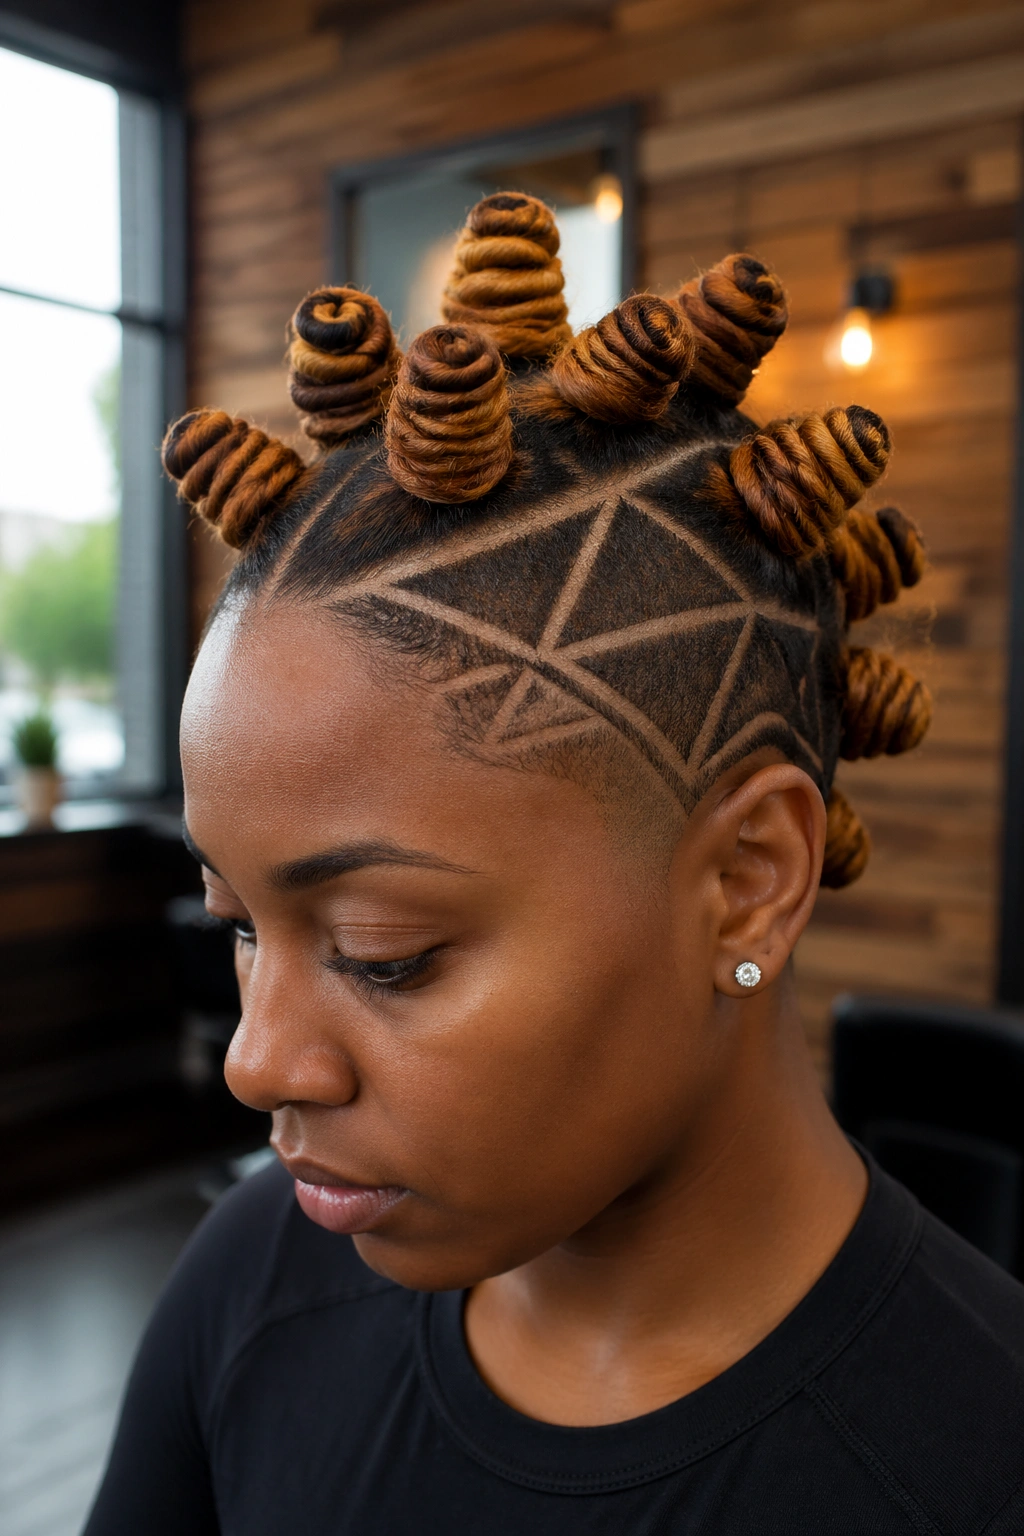
11. Copper Bantu Knots With Shaved Sides and Curved Parts
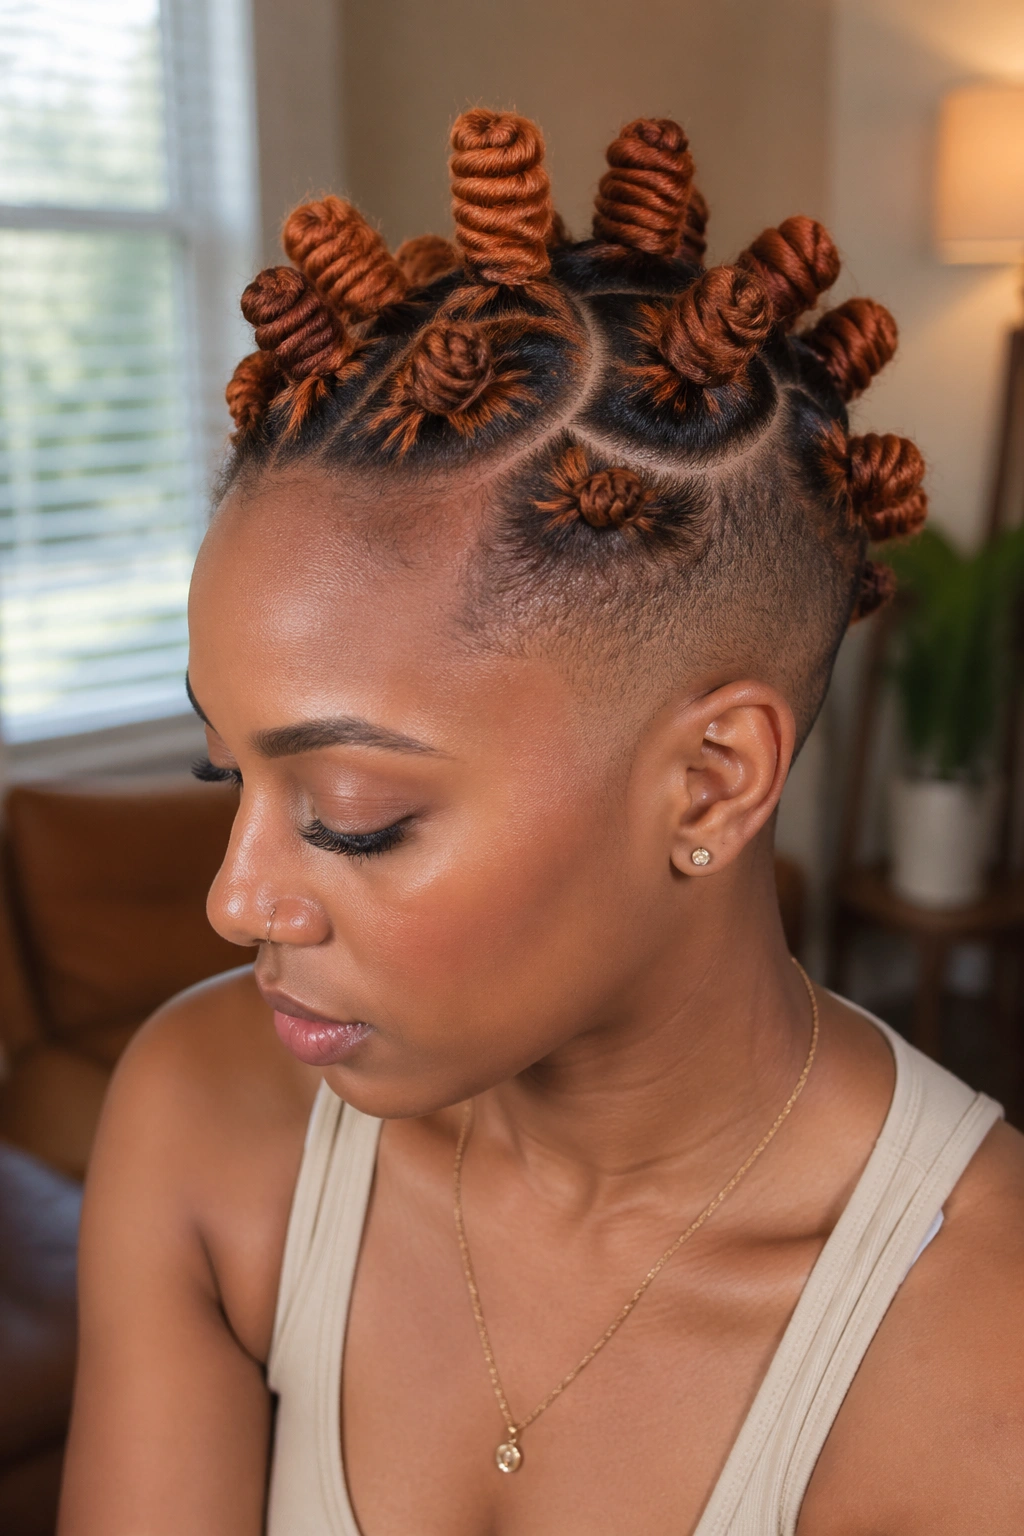
Copper does something special on Bantu knots. It picks up the ridges and turns of each wrap, especially when the hair is smoothed well before knotting, and on shaved sides it throws even more heat into the style.
I prefer copper when the parting is curved rather than square. Straight boxes with warm metallic color can feel too rigid. Curved parts loosen the feel a bit and keep the whole look from turning hard-edged.
The small choices that matter
- Color depth: medium copper or burnt orange-copper tends to look richer than bright penny orange
- Side finish: a soft taper or low fade keeps the warmth centered on top
- Product pick: use foam first, then a tiny bit of pomade only at the roots
- Knot size: medium to small shows off the color shifts better than jumbo knots
If you’re nervous about the shade, try a demi-permanent or colored extension wrap first. Copper can be glorious. It can also look flat if the tone fights your skin instead of working with it.
12. Mini Knots With a Heart-Shaped Nape Design
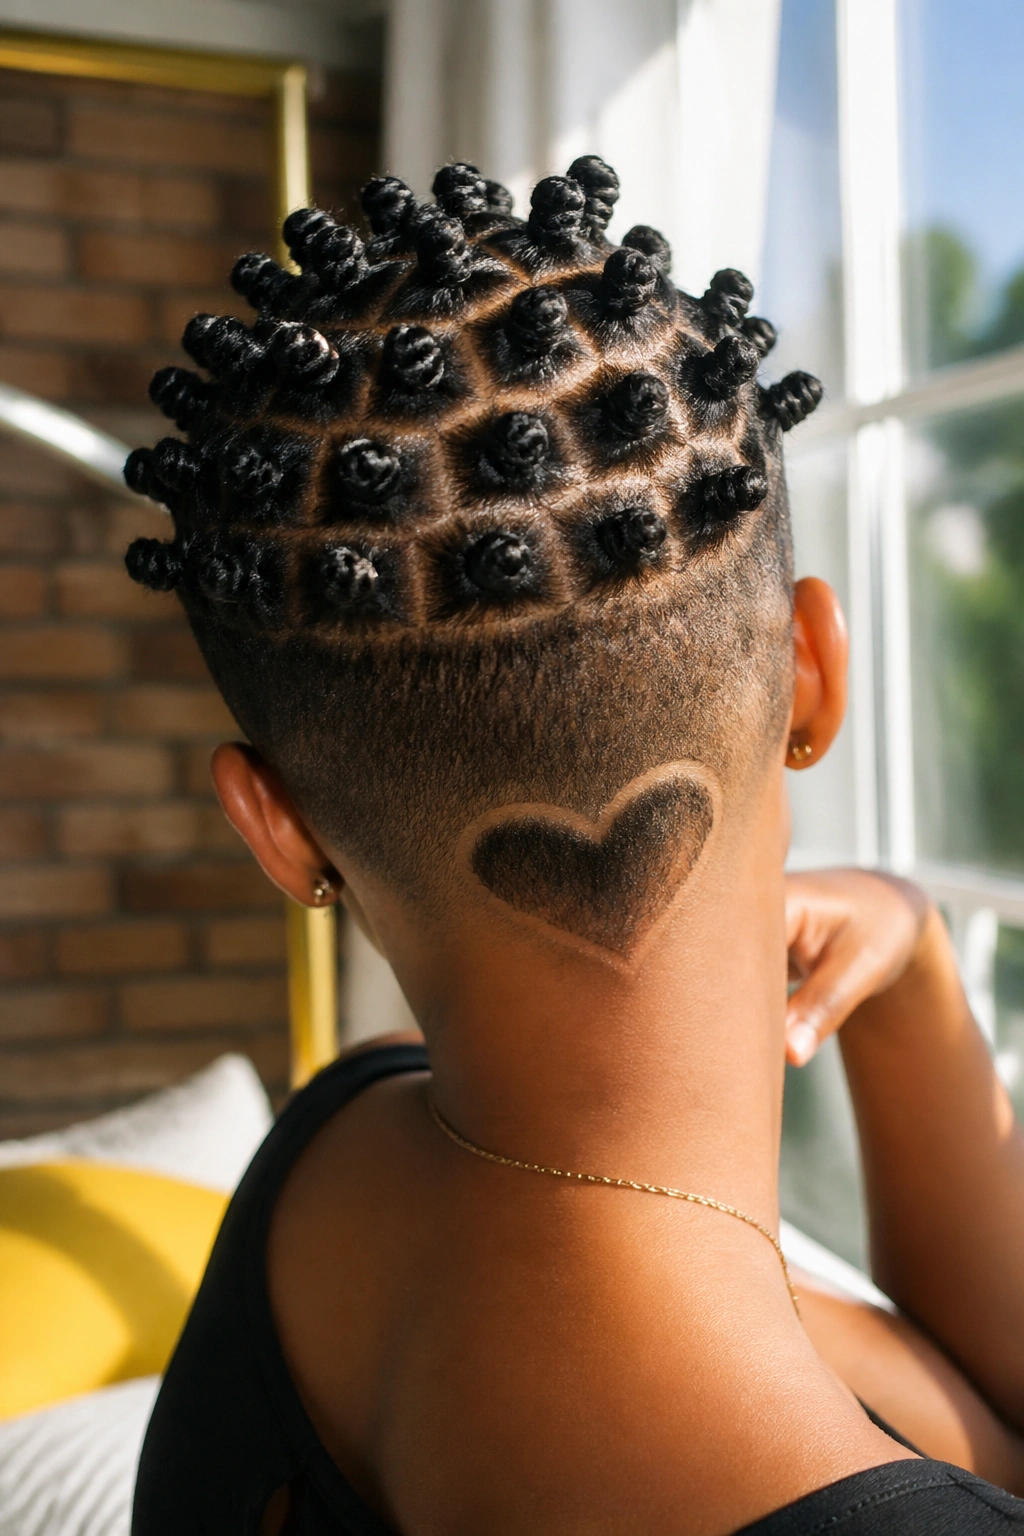
Yes, a heart at the nape sounds sweet. It can also look sharp if the rest of the style stays disciplined.
Mini knots on top give you that tight, detailed finish — think 12 or more small knots — and the shaved sides keep the head shape clean. Then the nape carries one small heart design, tucked low so it shows when you lift your chin or pin a collar down.
I would not make the heart huge. That’s where this goes sideways. Keep it compact, centered, and lined up with the spine or with the center part above. A tiny bit of precision beats a big obvious shape every time.
This is one of those styles that works better when the neckline is fresh. Let the nape grow out too much and the heart blurs into fuzz. If you like detailed undercut art, plan on touch-ups sooner than you would for plain shaved sides.
Cute, yes. Still clean.
13. Side-Swept Knot Row With One Deeper Shave
Symmetry isn’t mandatory. A side-swept row of knots, angled from one temple across the crown, gives the style motion before color or accessories ever show up.
The key is contrast between the two sides. One side can be shaved closer — skin or near-skin — while the other side keeps a little more shadow. That uneven cut makes the knot row feel intentional instead of off-center by mistake. You’re building direction into the whole hairstyle.
Who this shape flatters
Faces with strong brows, angular jaws, or one side people naturally like to photograph tend to wear this well. And yes, that last part matters. Some cuts have a “good side” built into them.
What to ask for
Keep the knot row narrow enough that the sweep is obvious. If the top section gets too wide, the asymmetry disappears.
This one is harder to grow out than a balanced undercut, so don’t choose it casually. But if you like sharp side-part energy and want Bantu knots that don’t look too centered or too expected, it’s a strong pick.
14. Braided-Base Knots Over a Bald Fade
Not every knot needs to start from loose hair. A braided base — one short plait or two-strand twist at the root before the hair is wrapped into the knot — gives extra grip and can make the style last longer on silkier textures or freshly blown-out hair.
That bald fade around the sides creates a strong border. You’ve got bare scalp at the perimeter, then a tidy braid, then the knot. The structure is obvious, and that’s why it works.
I like this build for active weeks when you need the style to hold through sweat, scarves, head wraps, or a few rushed mornings.
- Best for: stretched natural hair that tends to slip loose
- Base length: braid or twist the first 1 to 2 inches only
- Drying tip: set with mousse, then dry under a hooded dryer or diffuser
- Watch out for: making the base too thick, which can create a bulky lump under the knot
There’s a firmness to this style I enjoy. It feels engineered in the best way.
15. Spiral-Part Knots With Twin Razor Lines
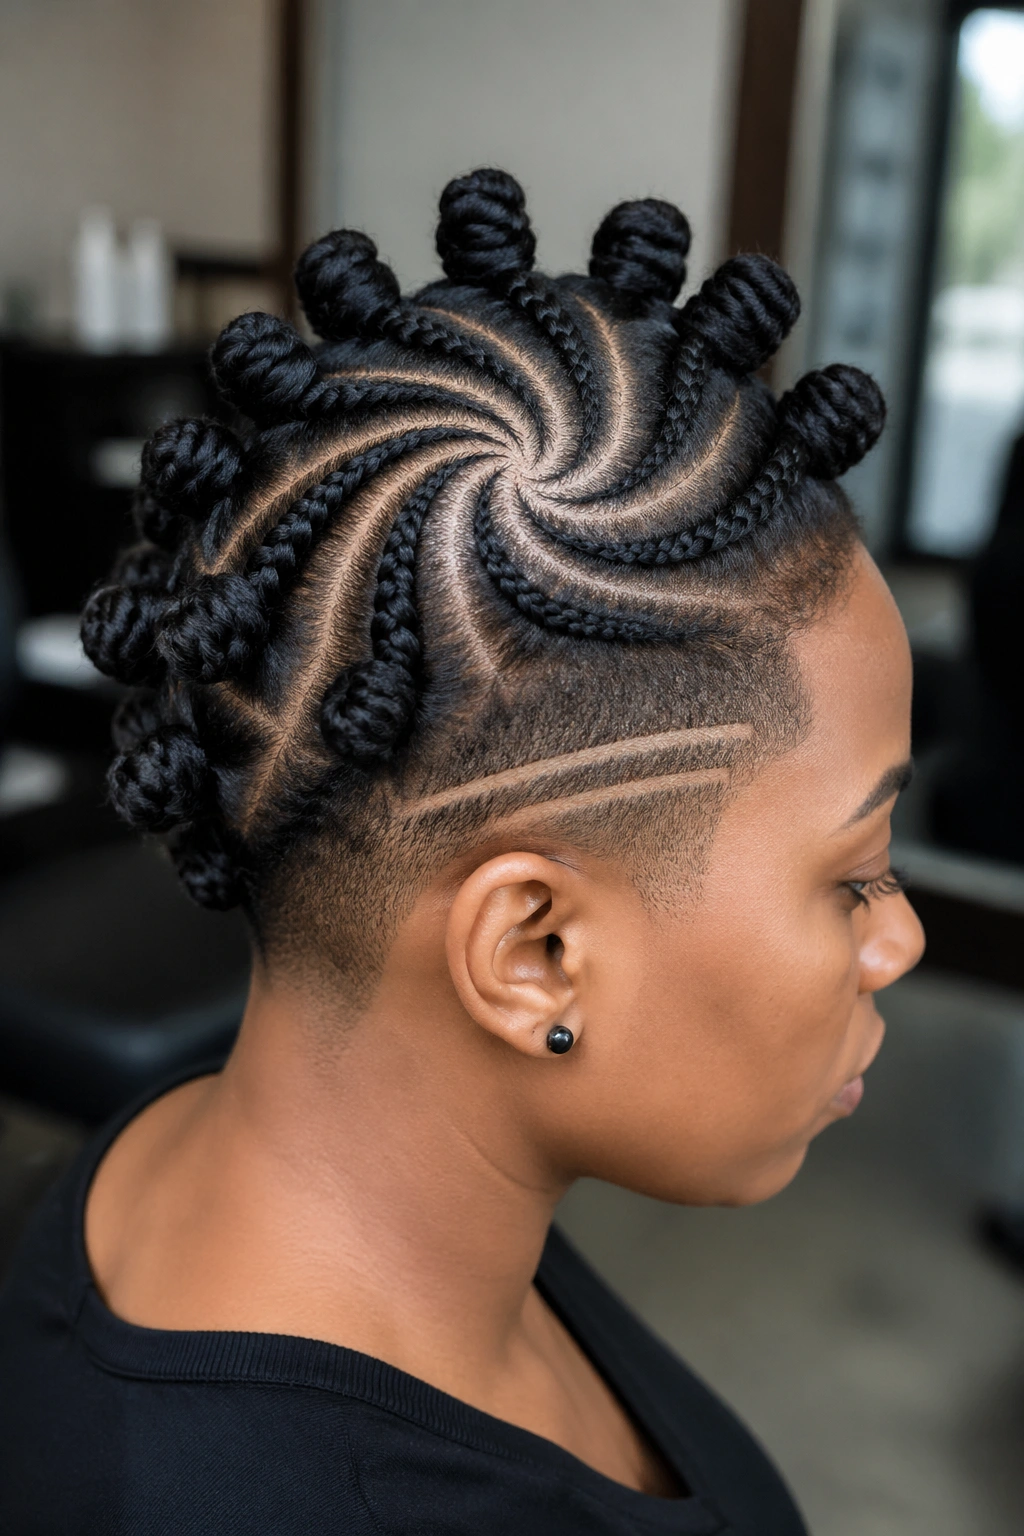
Want the scalp pattern to do half the talking? Spiral parts will do that.
Instead of rows or triangles, the sections turn in a circular motion from the crown outward, and the knots follow that visual flow. Add two razor lines on one shaved side — placed clean and parallel — and the cut takes on a little extra speed.
Barber notes that matter
Those razor lines should sit where the head curves least, usually above the ear moving slightly back. Put them too high and they crash into the top section. Too low and they disappear in a week.
Spiral parts are not for a rushed appointment. The stylist has to build the map carefully or the pattern collapses by knot number four or five. Medium knots usually show the spiral best. Tiny ones can make the top look too busy, and jumbo ones cover the design.
When it lands, it lands hard. This is one of the more graphic ways to wear Bantu knots with shaved sides without relying on bold color.
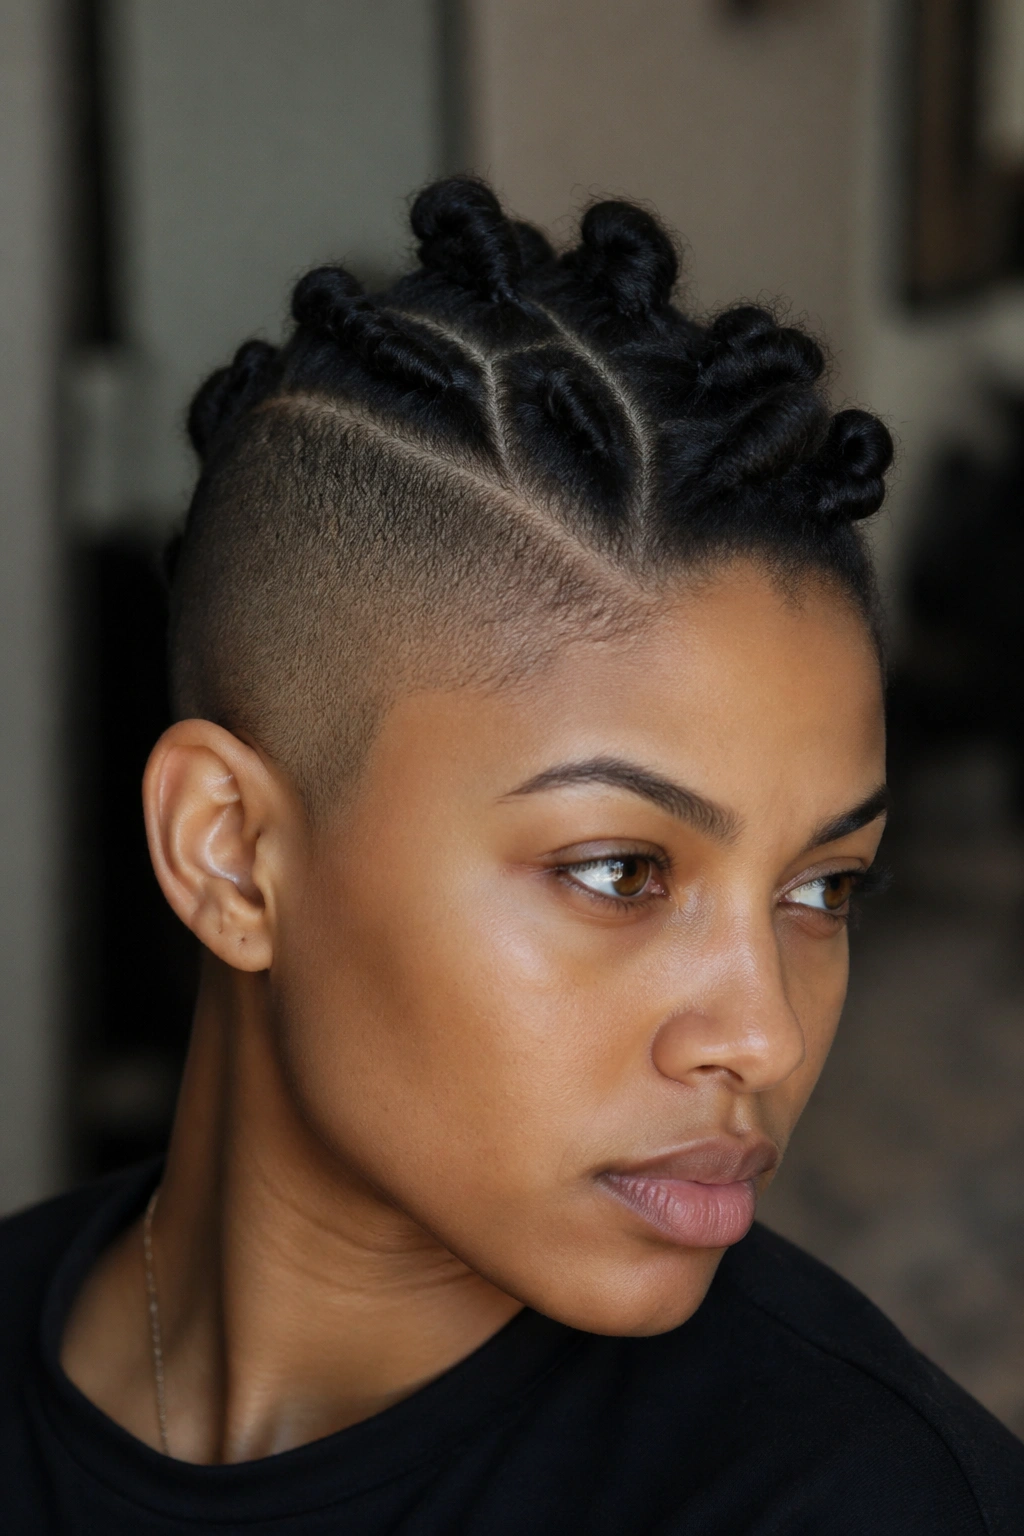
16. Four Oversized Knots With a Soft Shadow Fade
Less can say more here. Four large knots — two in front, two in back, or one clean square across the top — give you a stripped-down version of the look that feels easy but not lazy.
I’d pair those big knots with a shadow fade, not a bald fade. A little darkness left on the sides keeps the hairstyle grounded and makes the oversized shape on top feel calmer. If the sides go fully bare, the knots can start to look too isolated unless your face can really carry that much contrast.
This style is also one of the friendlier home-styling options. If you can part four clean sections, smooth the roots, and wrap steadily, you can do this yourself in a mirror without losing an afternoon. Added hair helps if you want rounder knots, though thick natural hair alone is enough for many people.
I’m fond of this one because it doesn’t beg for attention. It just looks sure of itself.
17. Beaded Knot Ends Above Shaved Temples
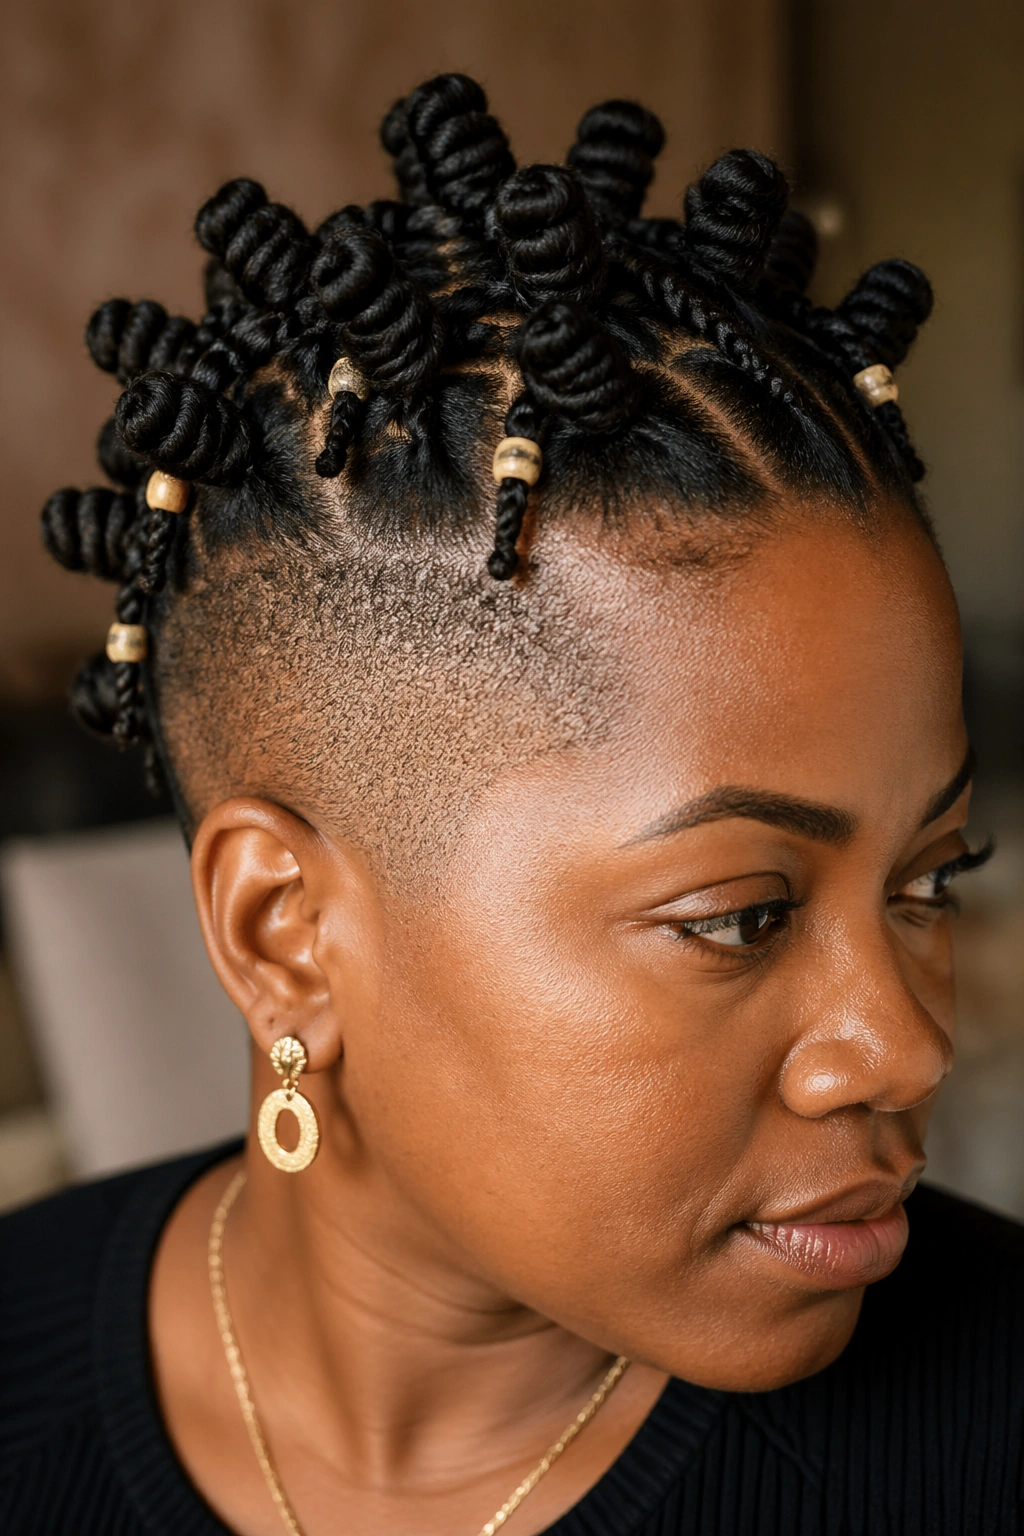
Beads can go wrong fast. Too many, too heavy, too loud — and the hairstyle stops being about the knots.
Used sparingly, though, beaded ends can give shaved-side Bantu knots a little rhythm. The trick is placing beads on the tails of select knots, not every knot on the head. Leave a small tail after wrapping, add one light bead or a slim metal ring, and secure it so it doesn’t knock against your scalp all day.
That shaved temple area helps a lot because it opens space around the face. The beads get room to move, and the style doesn’t feel crowded.
A few rules keep this from turning messy:
- Use light beads: wood, acrylic, or hollow metal
- Keep it selective: 3 or 4 accents are enough
- Check balance: front-heavy bead placement can drag the look down
- Sleep prep: wrap the style well so the beads don’t snag your satin scarf
I like this approach when the knot pattern itself is plain. Straight rows, clean sides, one small detail. Done.
18. Crown Knots With a Loose Curly Fringe and Shaved Panels
Not everyone wants the whole hairline exposed. A curly fringe fixes that without losing the bite of shaved sides.
This style places the Bantu knots mostly on the crown and upper top, leaves shaved panels at the sides, and allows a small section at the front to stay curly and loose. That fringe can be finger-coiled, rod set, or defined with curl cream depending on your texture and how much bounce you want.
The result is softer around the forehead, but it doesn’t read timid. The shaved panels keep enough edge in the cut that the fringe feels intentional rather than unfinished. I’d keep the curls short — eyebrow to upper cheek length at most — because a long fringe can start fighting the knots.
You’ll need two product strategies here: hold and smoothness for the knots, moisture and definition for the curls. That split routine is mildly annoying, I won’t pretend otherwise. Still, for anyone who wants shaved-side contrast without a fully exposed front, this version solves a real problem.
19. Ombre Bantu Knots Over a Geometric Undercut
An ombre top and a geometric undercut can look incredible together. They can also look crowded if both are trying to be the star.
So pick one lead element. My preference? Let the ombre color be the first thing people notice, then keep the undercut design clean — one geometric panel, one angular carve, no extra clutter.
Medium knots show ombre best because you can actually see the shift from dark roots to lighter ends as the hair wraps around itself. Tiny knots break the color up too much. Jumbo knots can hide the transition. Right in the middle is where it sings.
Keeping the pattern readable
A triangular or diamond-shaped undercut panel works better than a stack of little lines. You want shape, not noise.
Touch-ups matter here. The shaved design blurs faster than the ombre fades, which means the haircut can look tired even when the knots still look good. If you choose this style, you’re choosing maintenance too. Good trade, if you ask me.
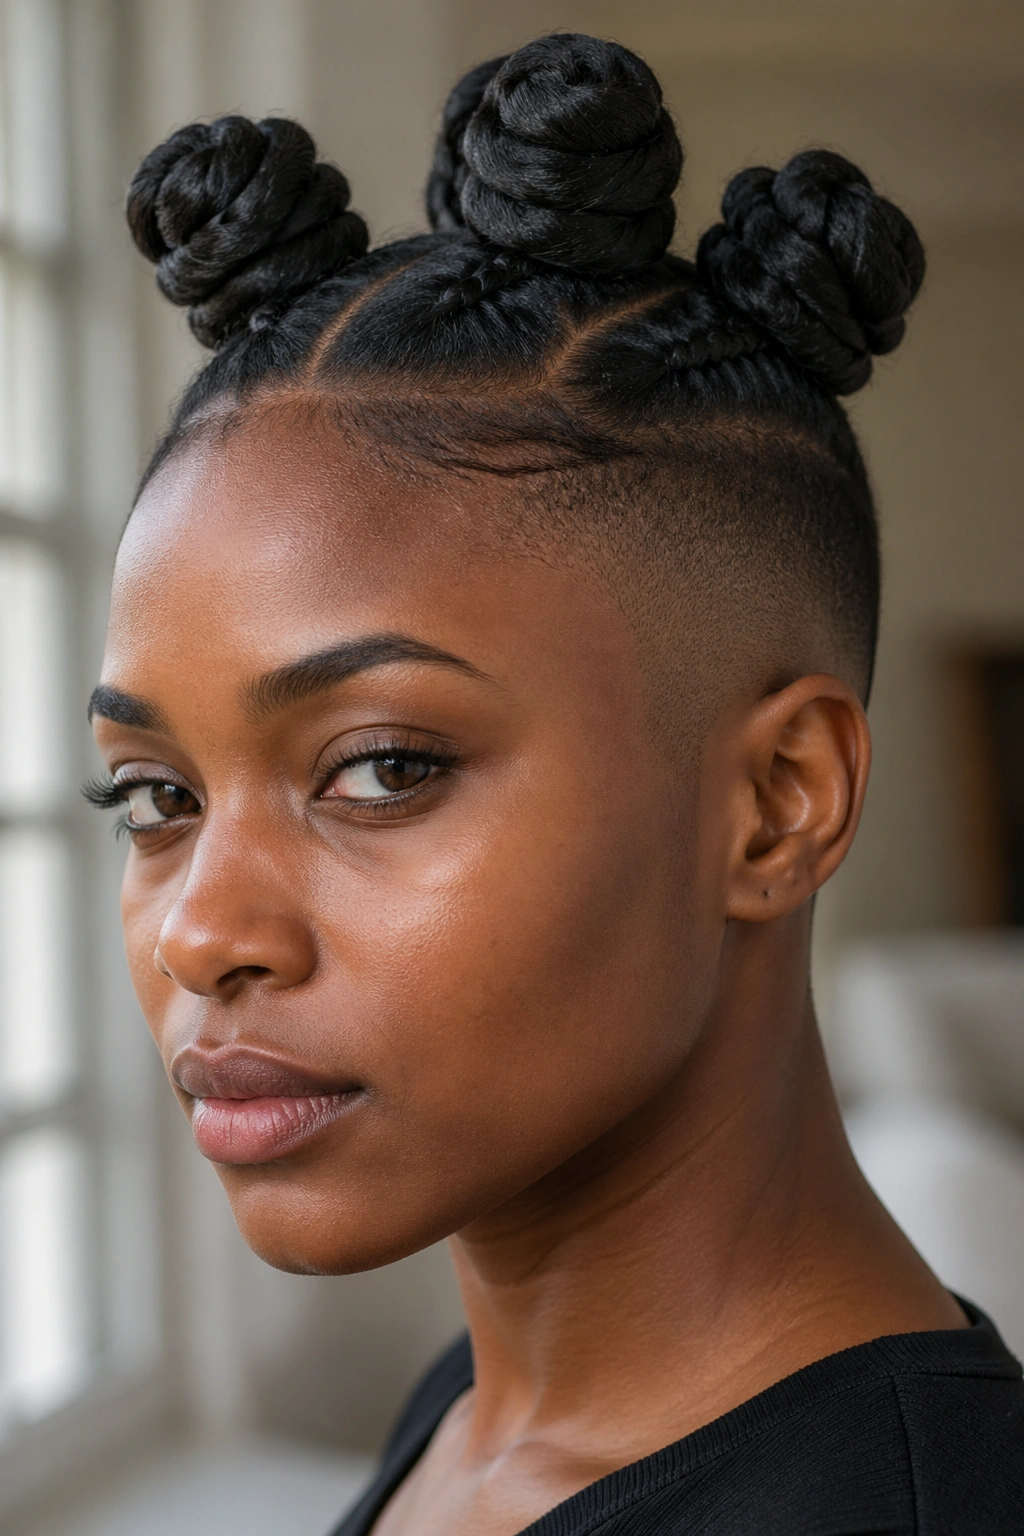
20. Low Knot Cluster With a V-Shaped Nape Shave

Not every shaved-side knot style has to sit high and loud on the crown. A low cluster gathers the knots toward the back upper head, almost where a compact bun would sit, while the nape is shaved into a clean V shape.
From the front, this is one of the more restrained versions on the list. From the side and back, it opens up. That can be appealing if you want the haircut to reveal itself as you move rather than announcing itself head-on.
The V at the nape gives a tidy point that echoes the shape of the neck. It also helps the grow-out look cleaner than a straight horizontal shave line.
- Knot placement: low crown, not middle back of head
- Best count: 4 to 6 knots
- Good for: people easing into shaved sides for the first time
- Extra note: this shape sits comfortably under many hats and helmet straps
There’s an elegance to the back view here — not in a vague way, in a clear line-and-shape way.
21. Wedding-Ready Bantu Knots With Shaved Sides and Pearl Pins
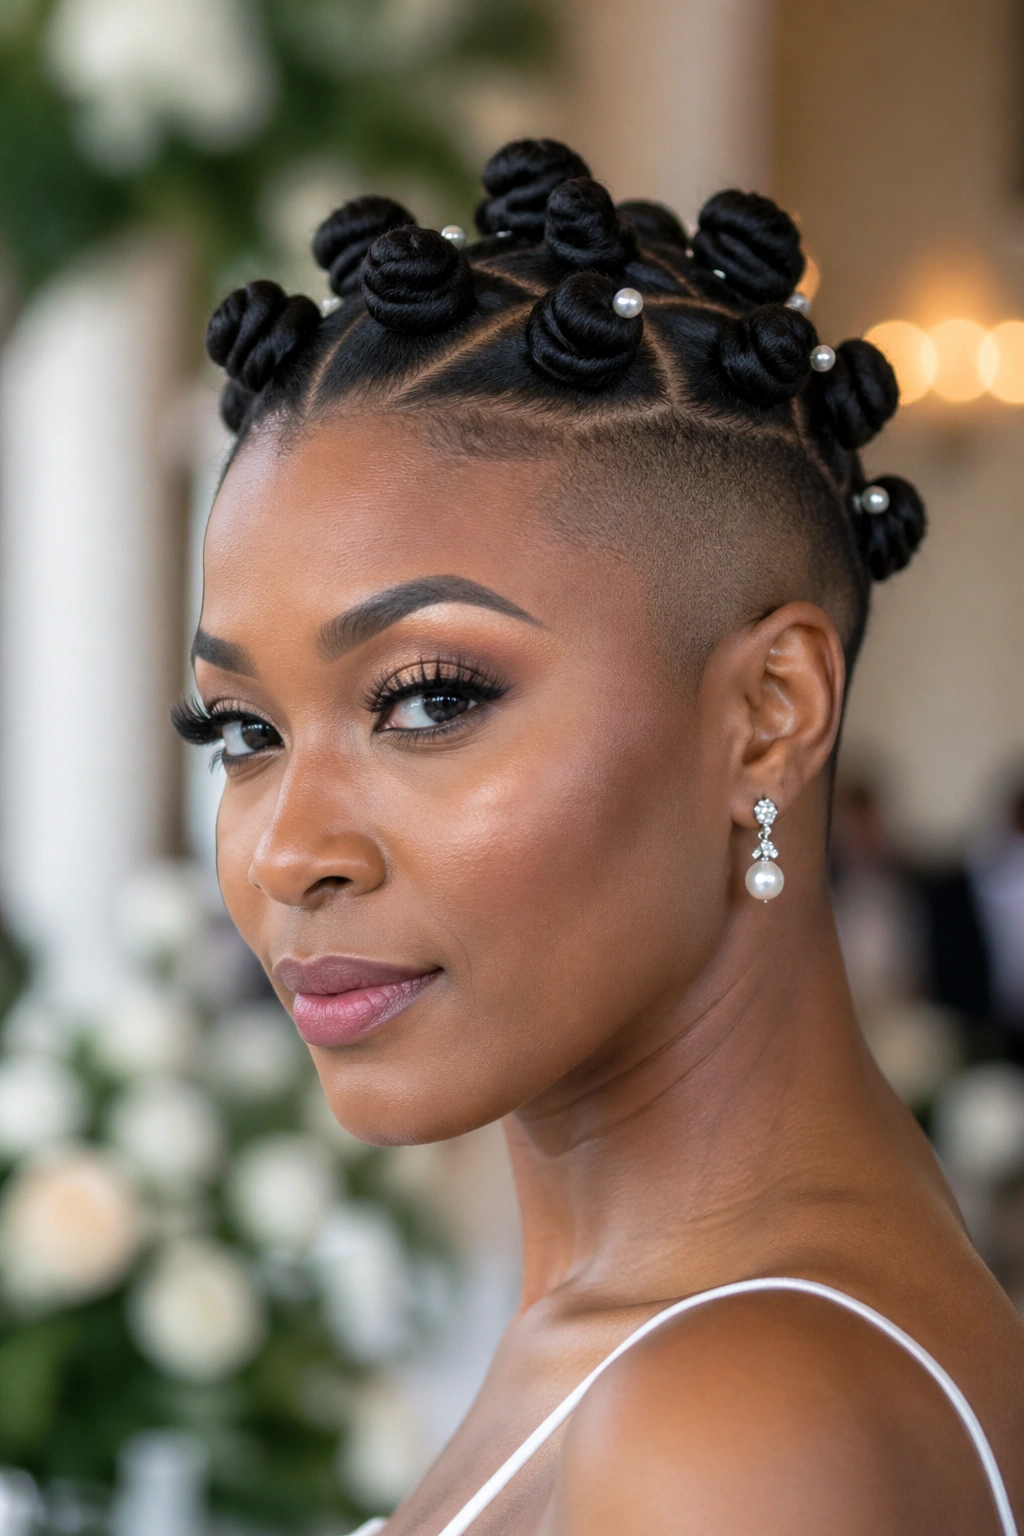
Dressy hair doesn’t have to mean loose curls or a giant bun. Clean Bantu knots with shaved sides can look formal enough for a wedding, engagement party, or any event where you want structure instead of softness.
The version I like uses medium knots arranged neatly across the crown, shaved sides that are faded rather than fully bald, and a few pearl pins tucked near the base of selected knots. Not all of them. Maybe three, maybe five. Any more than that and the pins start reading crafty instead of polished.
Pearls work well here because they add light without overpowering the knot shape. A veil can sit behind the crown if needed, and the shaved sides keep the profile from looking bulky in photos from the side. If the event includes a long day, have the knots wrapped securely and sprayed lightly so the surface stays smooth.
This one proves a point people miss: sharp and formal can live on the same head.
22. Festival Knots With Metallic Cuffs and Faded Sides
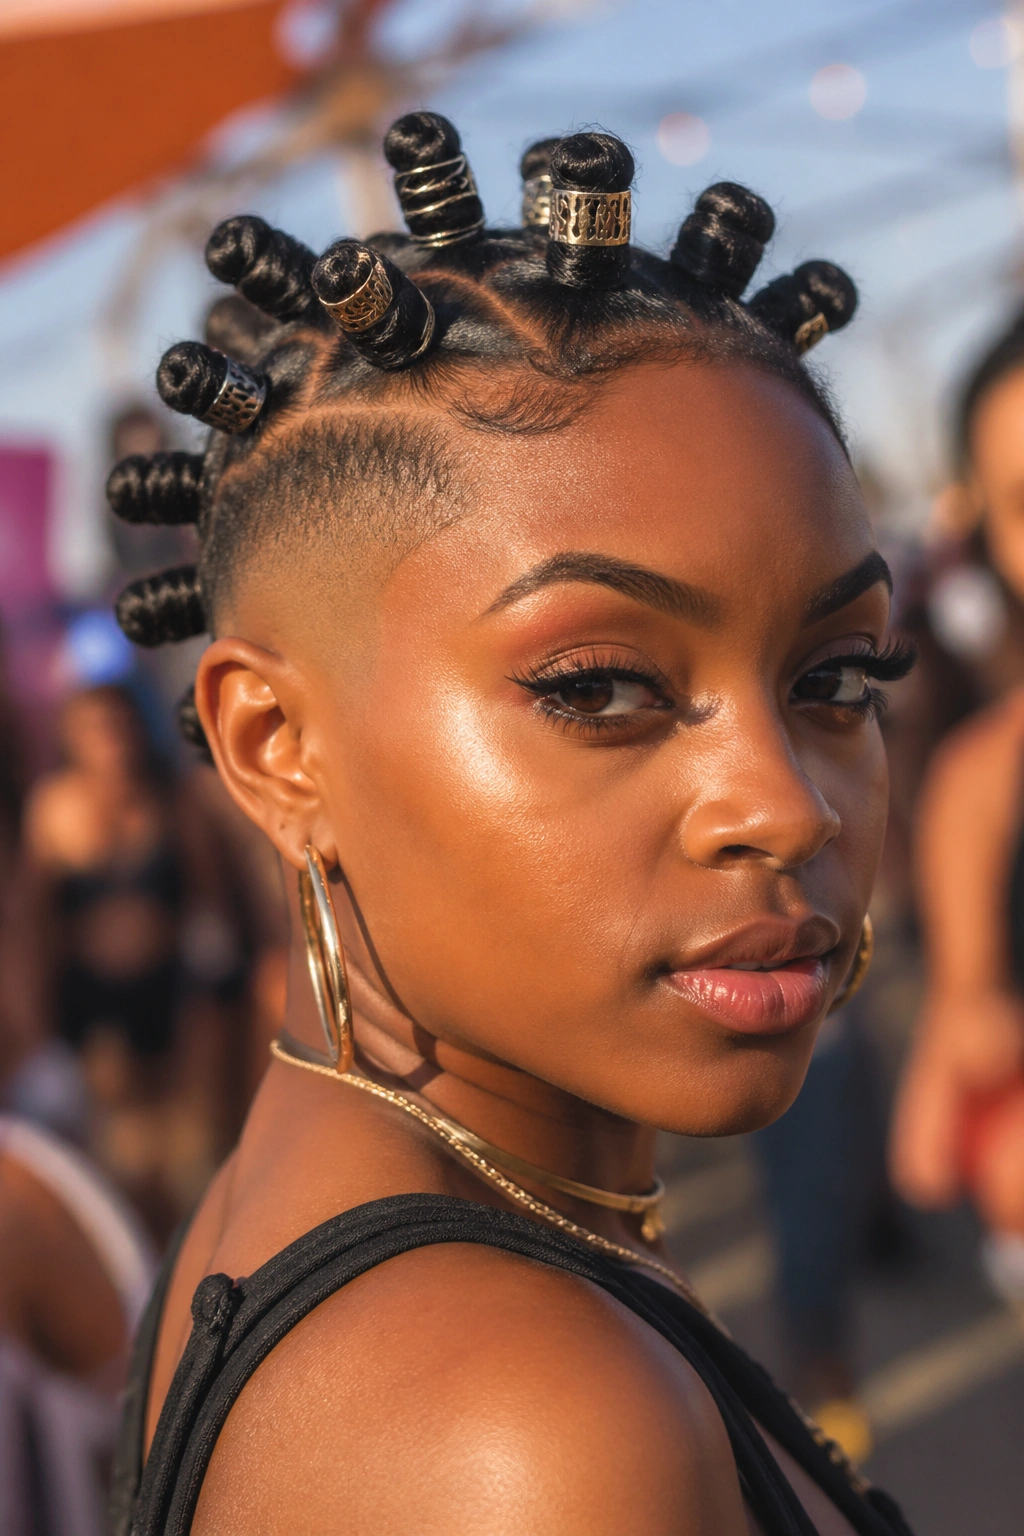
Sweat changes hair. Wind changes hair. Long hours outside change hair. If you’re building a shaved-side Bantu knot style for concerts, street fairs, or all-day outdoor events, you need details that still look good after movement and heat.
That’s why metallic cuffs work better than delicate pins here. Slide a few cuffs onto small braid bases or onto knot tails, keep the sides faded clean, and the style still has its shape when the day gets messy. The cuffs add flash, but they’re tougher than tiny gems or glued-on extras.
If you’ll be outdoors for hours
Use foam or setting lotion before knotting, then dry the style fully. Half-dried roots frizz fast once you start sweating. A little grip gel around the hairline helps too, though I’d skip heavy grease because it can break down under heat.
Bright thread wraps can work with this look as well, but edit yourself. Cuffs, thread, color, shaved designs, beads — all at once is too much for one head.
23. Extension-Wrapped Bantu Knots Over a Clean Undercut
Short top length is not a deal breaker. If your natural hair on top isn’t long enough to make the knot size you want, extension-wrapped knots can fill that gap without losing the crisp feel of shaved sides.
The cleanest version uses lightweight braiding hair or Marley hair wrapped into your own sections rather than huge bundles piled on top. You want support, not a helmet. Match the extension texture to your natural hair as closely as you can, or blend with mousse so the join doesn’t show.
A clean undercut helps here because added hair already increases visual weight. Keeping the sides bare or closely faded stops the style from becoming too heavy.
- Best use: creating fuller medium or jumbo knots on shorter top hair
- Weight check: if the added hair feels tuggy when you turn your head, there’s too much
- Blend trick: smooth your own hair first, then wrap extension hair around the base
- Comfort note: sleep on it one night before deciding it’s right; tension tells the truth later
Extensions can save a look. They can also ruin your scalp if overdone.
24. Glossy Knots With a Razor-Sharp Lineup
Shine tells on you. When the knots are glossy, every flyaway, dry patch, and flaky bit of product shows up too. Still, when the prep is right, a glossy finish paired with a crisp line-up looks superb.
This style is less about parting tricks and more about finish. The knots are smooth, dense, and slightly reflective, often with a soft oil sheen or finishing spray. Around the forehead and temples, the lineup is clean and exact. The shaved sides don’t need fancy carving because the edge work is already doing enough.
I love this look on shorter natural hair because the knots sit compact and tidy instead of huge and puffy. Use mousse to set the surface, dry it, then add a light sheen. Not heavy pomade. Not dripping oil. Just enough to catch light and show the wrap pattern.
One warning, though: glossy styles expose scalp condition fast. If you have buildup or flaking, fix that first. Sharp hair can’t distract from an unhappy scalp.
25. Salt-and-Pepper Knots With Tapered Shaved Sides
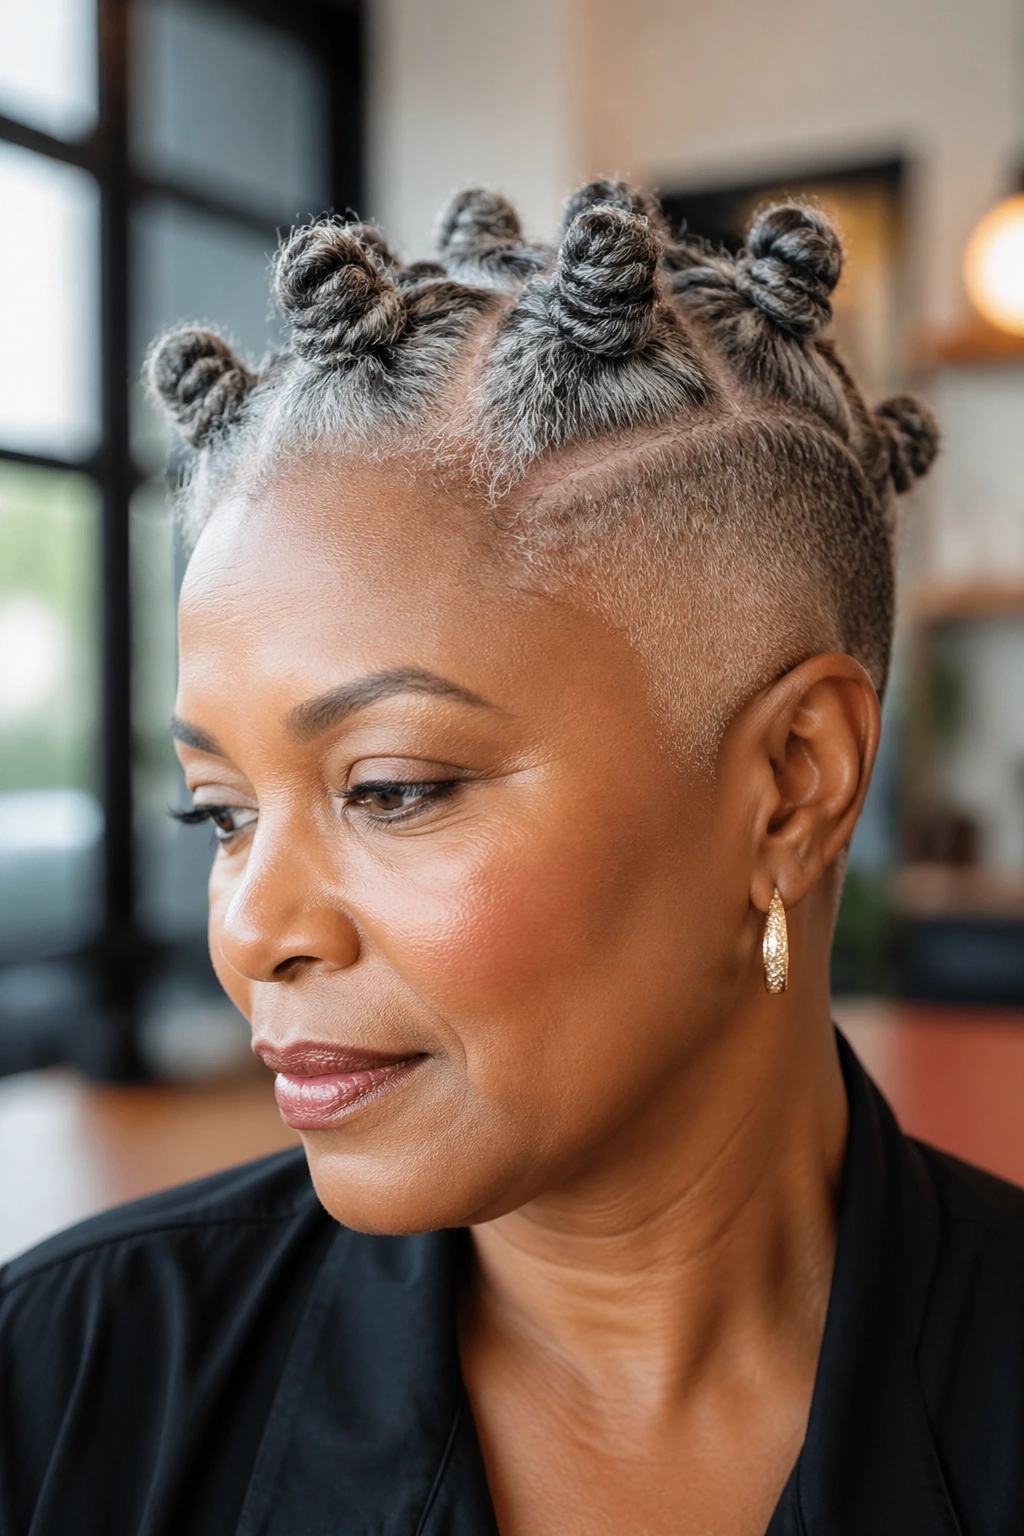
Gray hair deserves better than being hidden under flat dye. A salt-and-pepper mix in Bantu knots can look rich, textured, and intentional, especially when the shaved sides are tapered neatly instead of taken all the way to bare skin.
The contrast here is subtler than platinum-on-black. That’s part of the charm. Each knot shows threads of silver, charcoal, black, maybe soft white at the temples, and the taper keeps the cut clean without turning it severe. Medium knots usually show the color mix best. Tiny knots can blur it. Jumbo knots can make the gray read patchy.
Why I keep recommending this one
Gray hair often feels drier and rougher, so a style that celebrates texture rather than trying to disguise it makes sense. Use a rich leave-in, keep the sections smooth, and avoid yanking the roots. Mature hair and scalp do not enjoy rough handling.
This is one of the smartest Bantu knots with shaved sides options for anyone who wants edge and grace in the same style.
Final Thoughts
The smartest way to choose among these looks is to decide what you want people to notice first. The knot size? The fade? The color? The scalp pattern? Pick one lead idea, then build around it. The strongest shaved-side styles usually have one clear star and one supporting detail.
Bring two or three reference photos when you sit down with a stylist or barber. One photo for the knot pattern, one for the fade or undercut shape, one for color or accessories if you want them. That makes the conversation sharper, and it cuts down on the vague “something like this” problem that leads to hair regret.
And don’t ignore comfort. If the knots are clean but your scalp feels like it’s being pinched all day, the style is wrong. Good Bantu knots should feel secure, not punishing. When the tension is right and the shaved sides are placed with intention, the whole look snaps into focus.