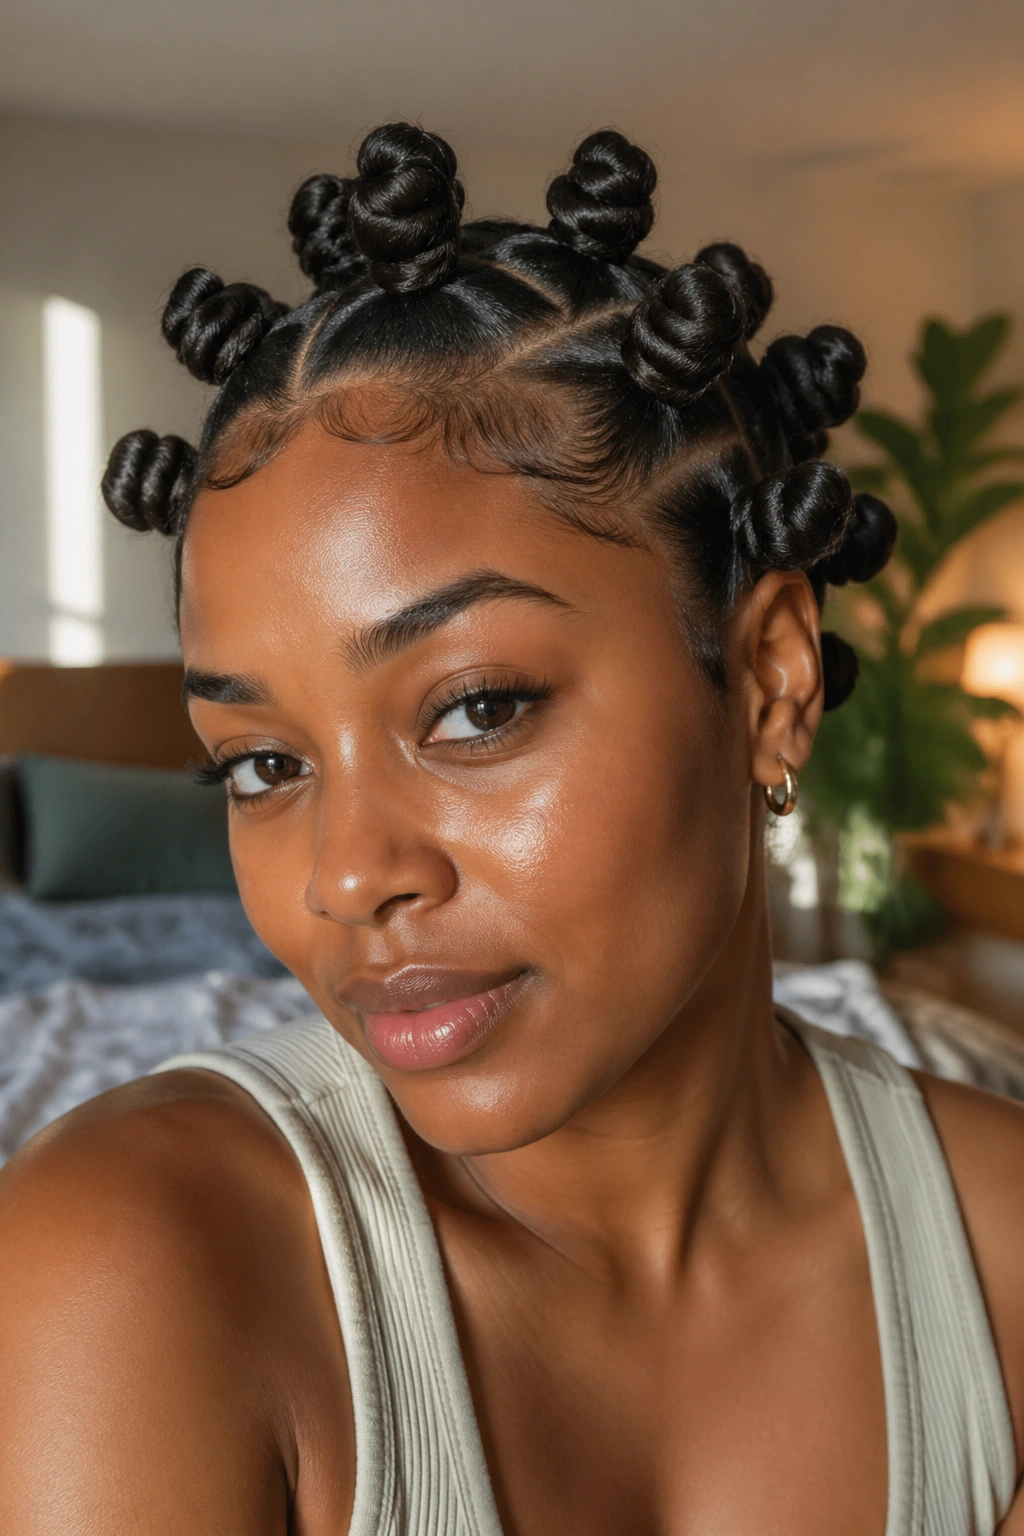
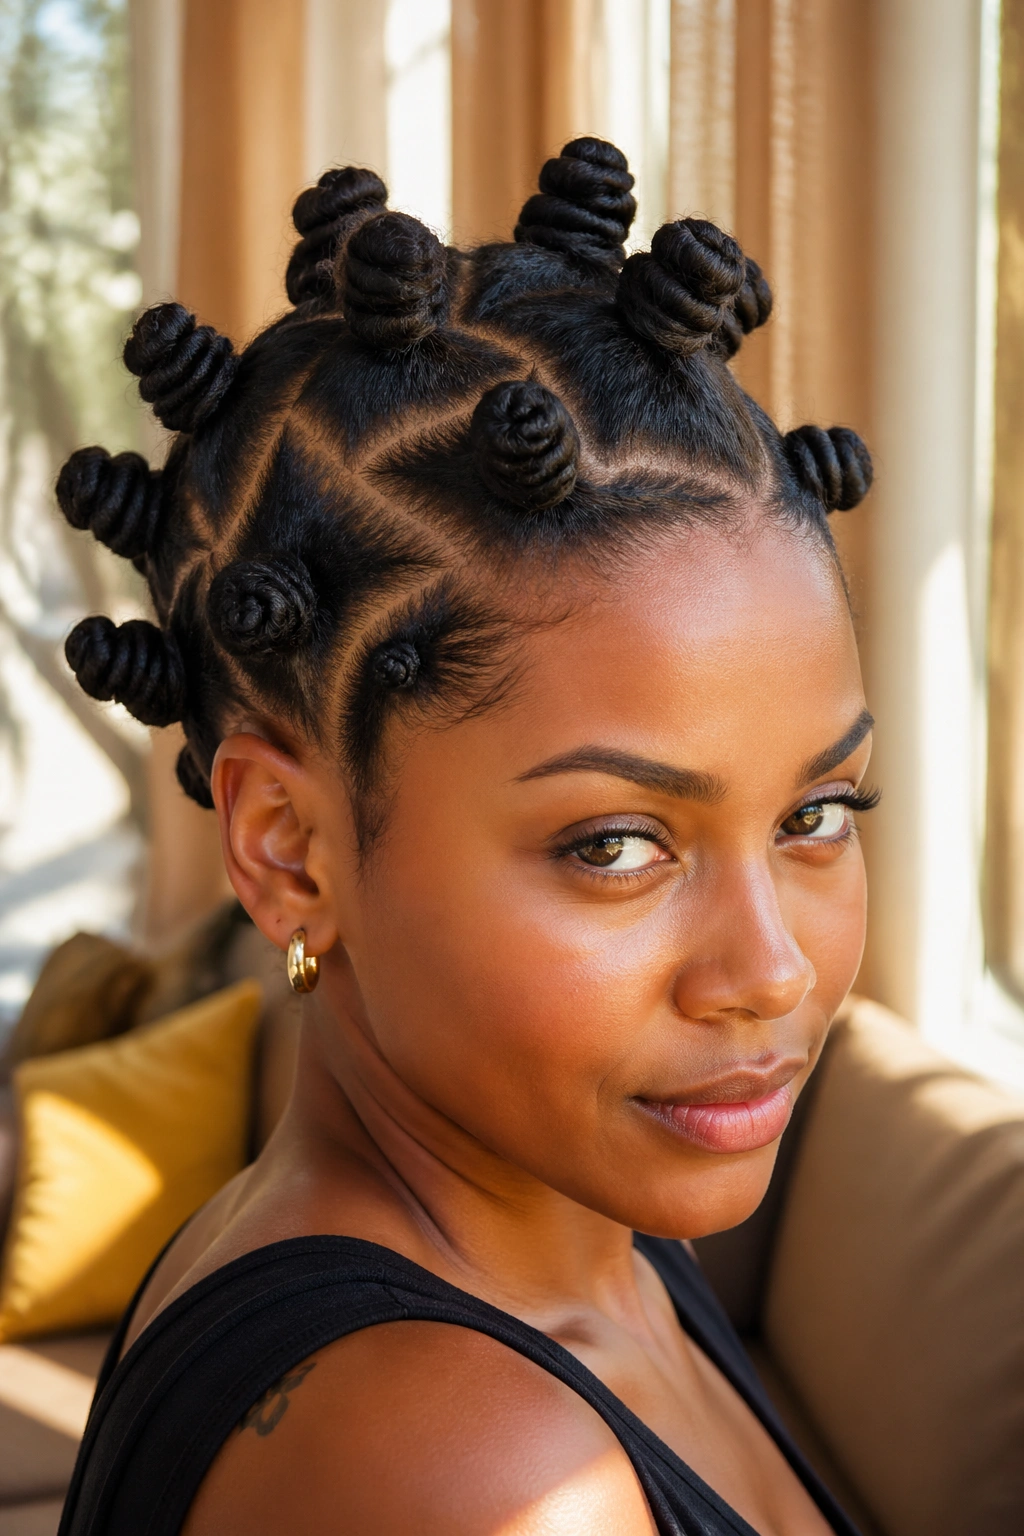
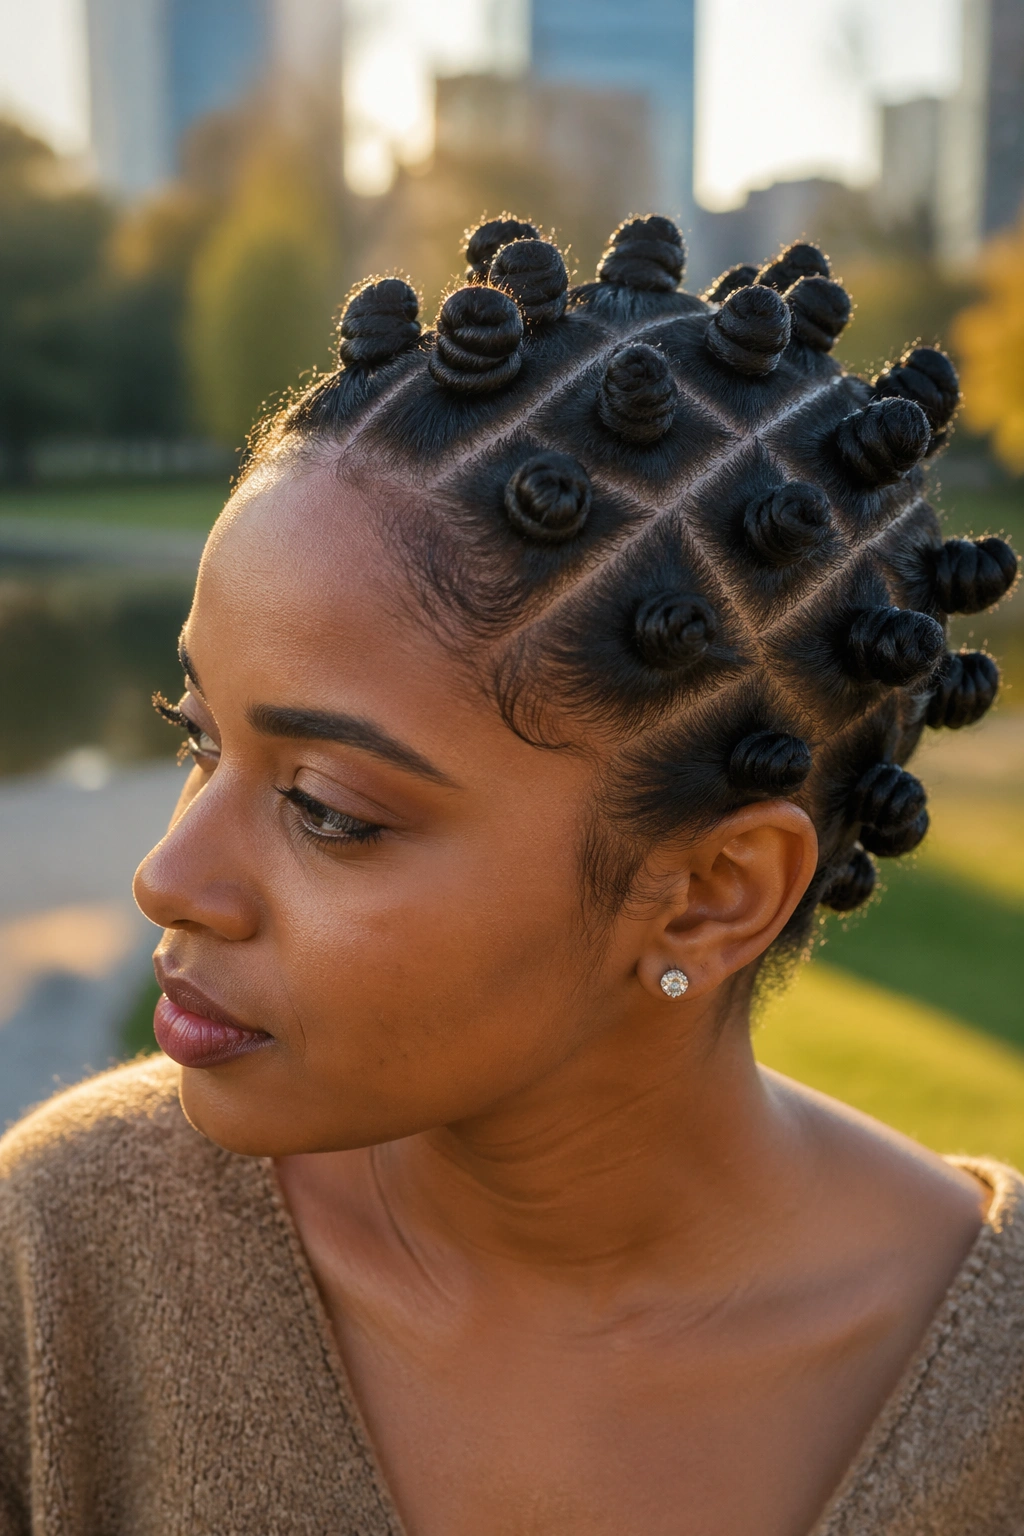
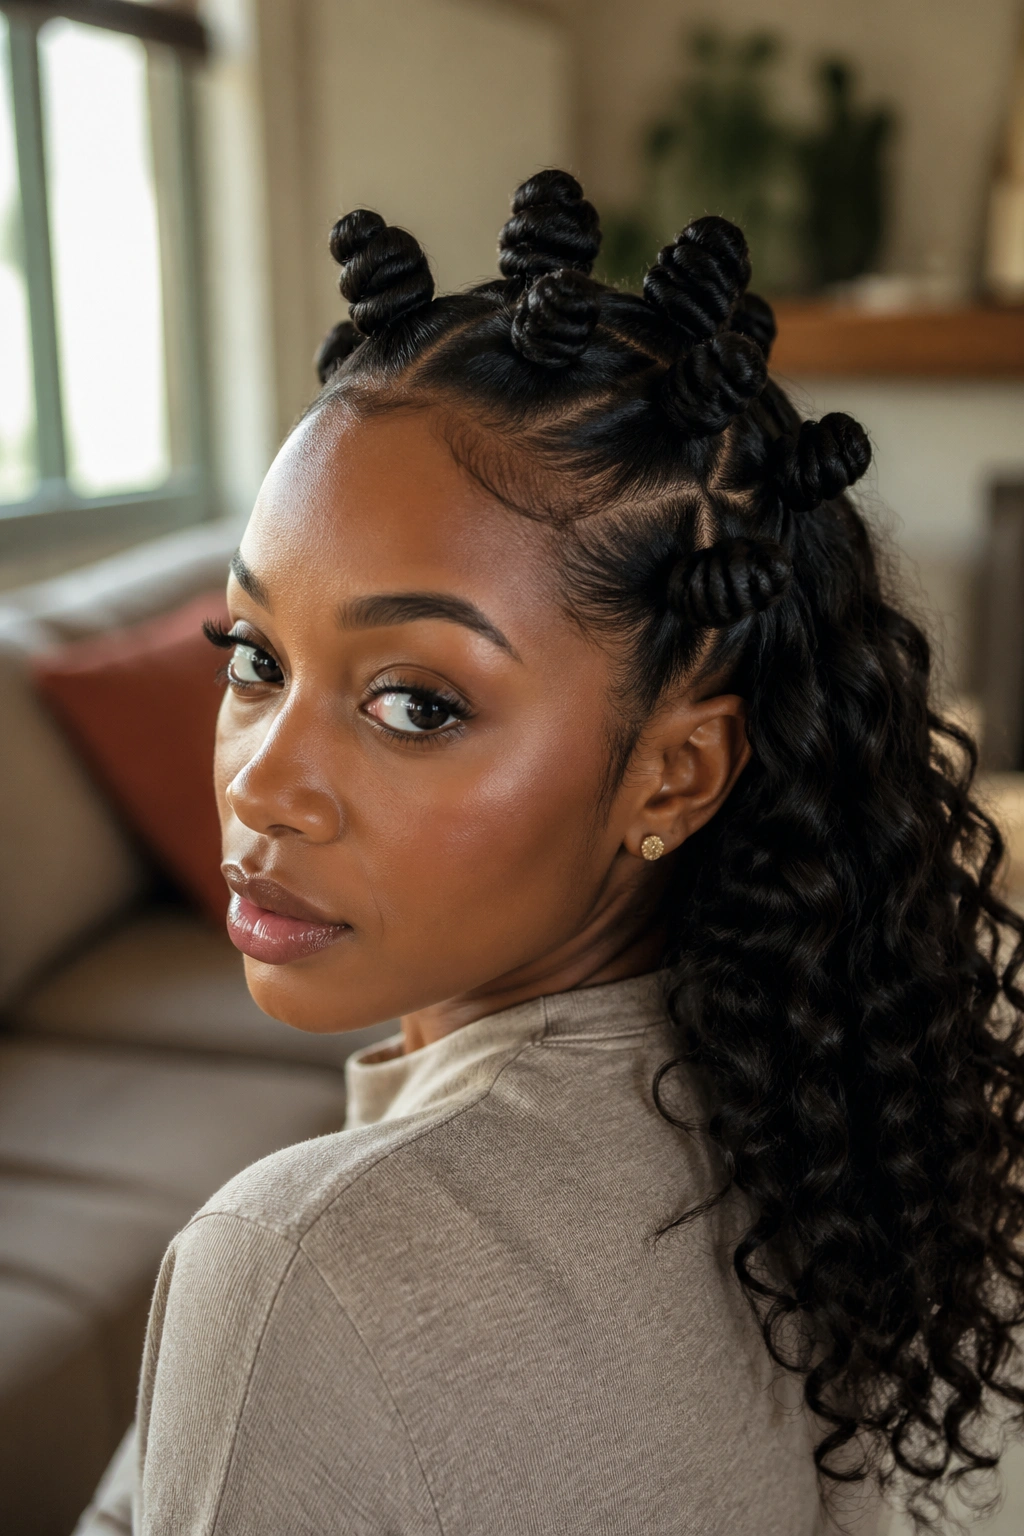
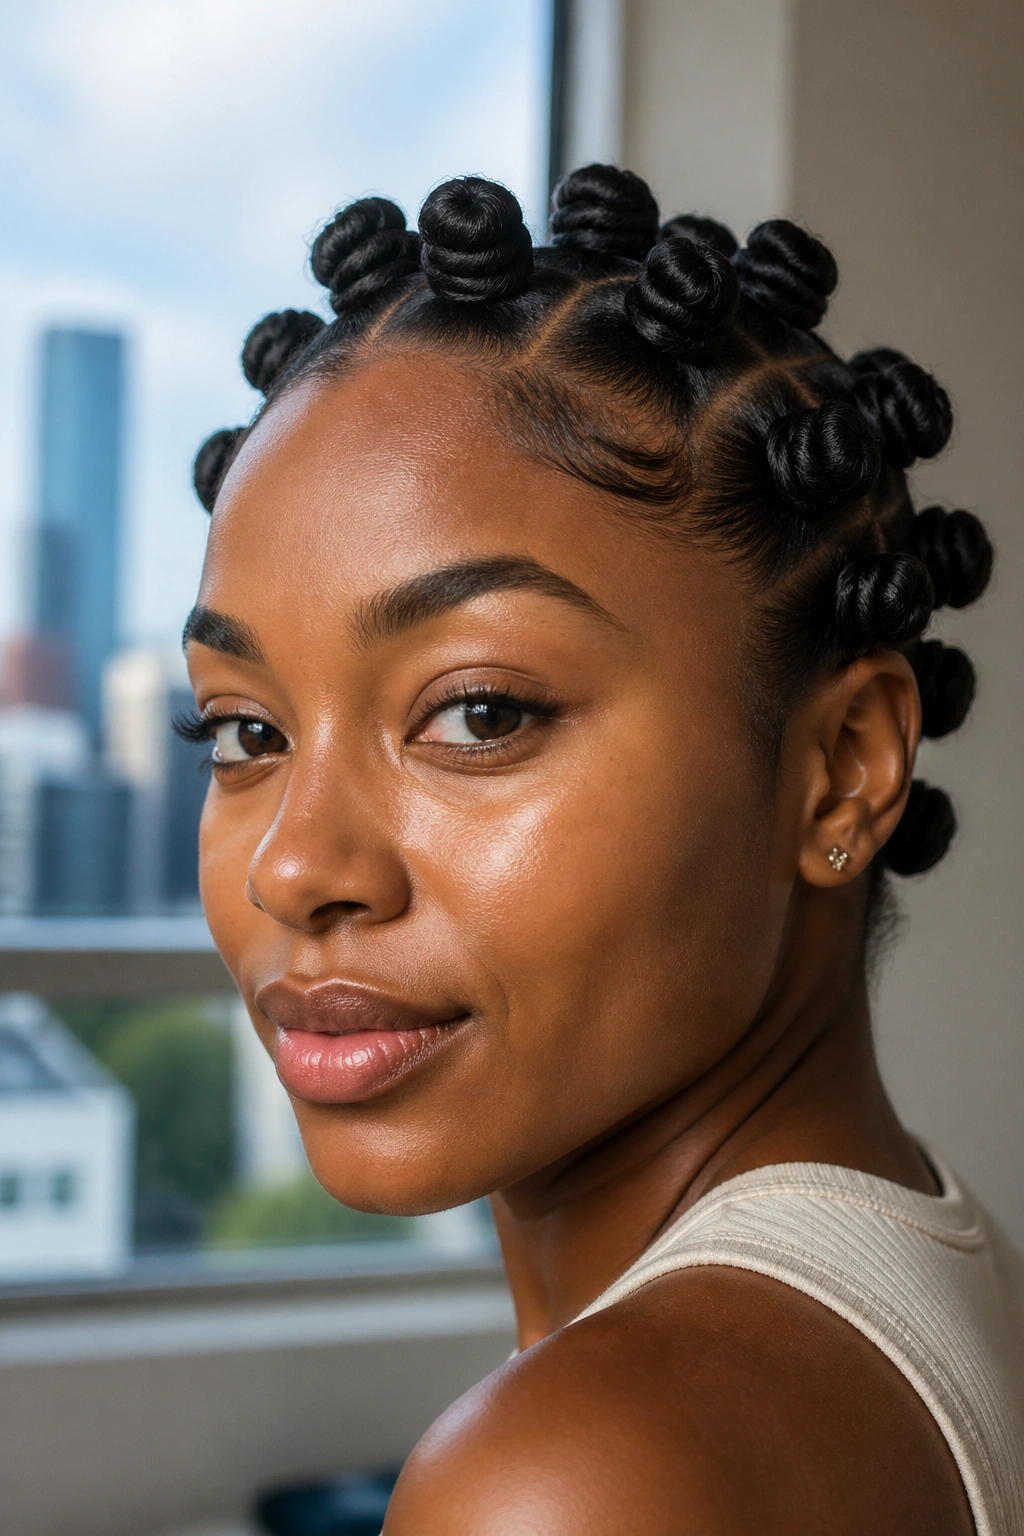
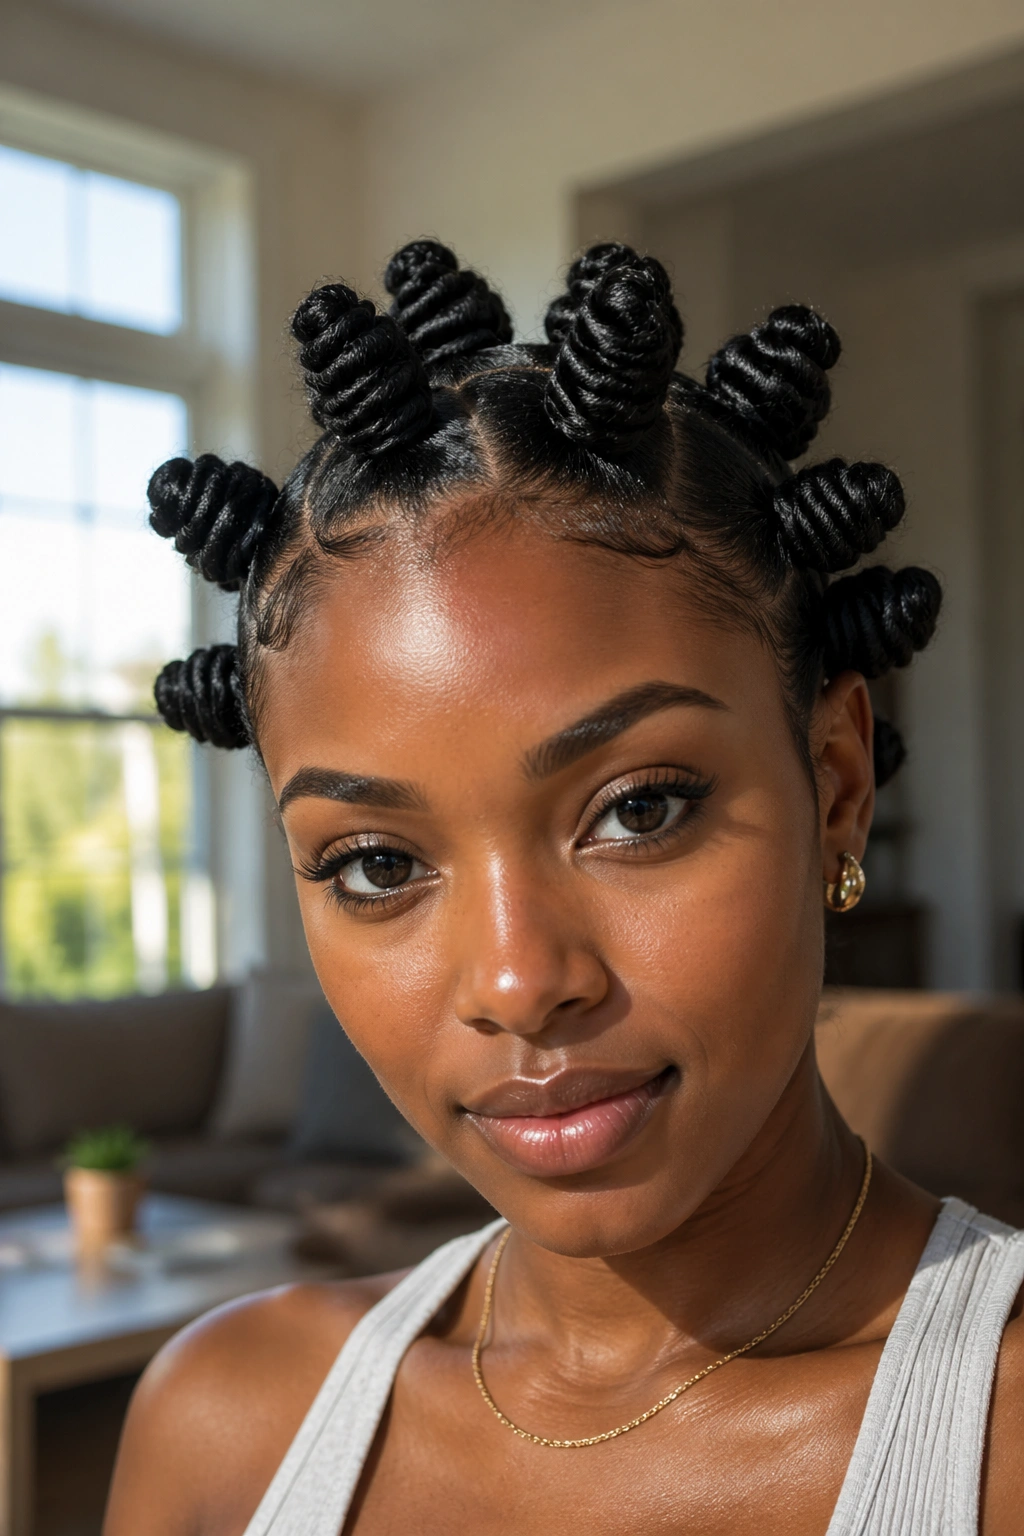
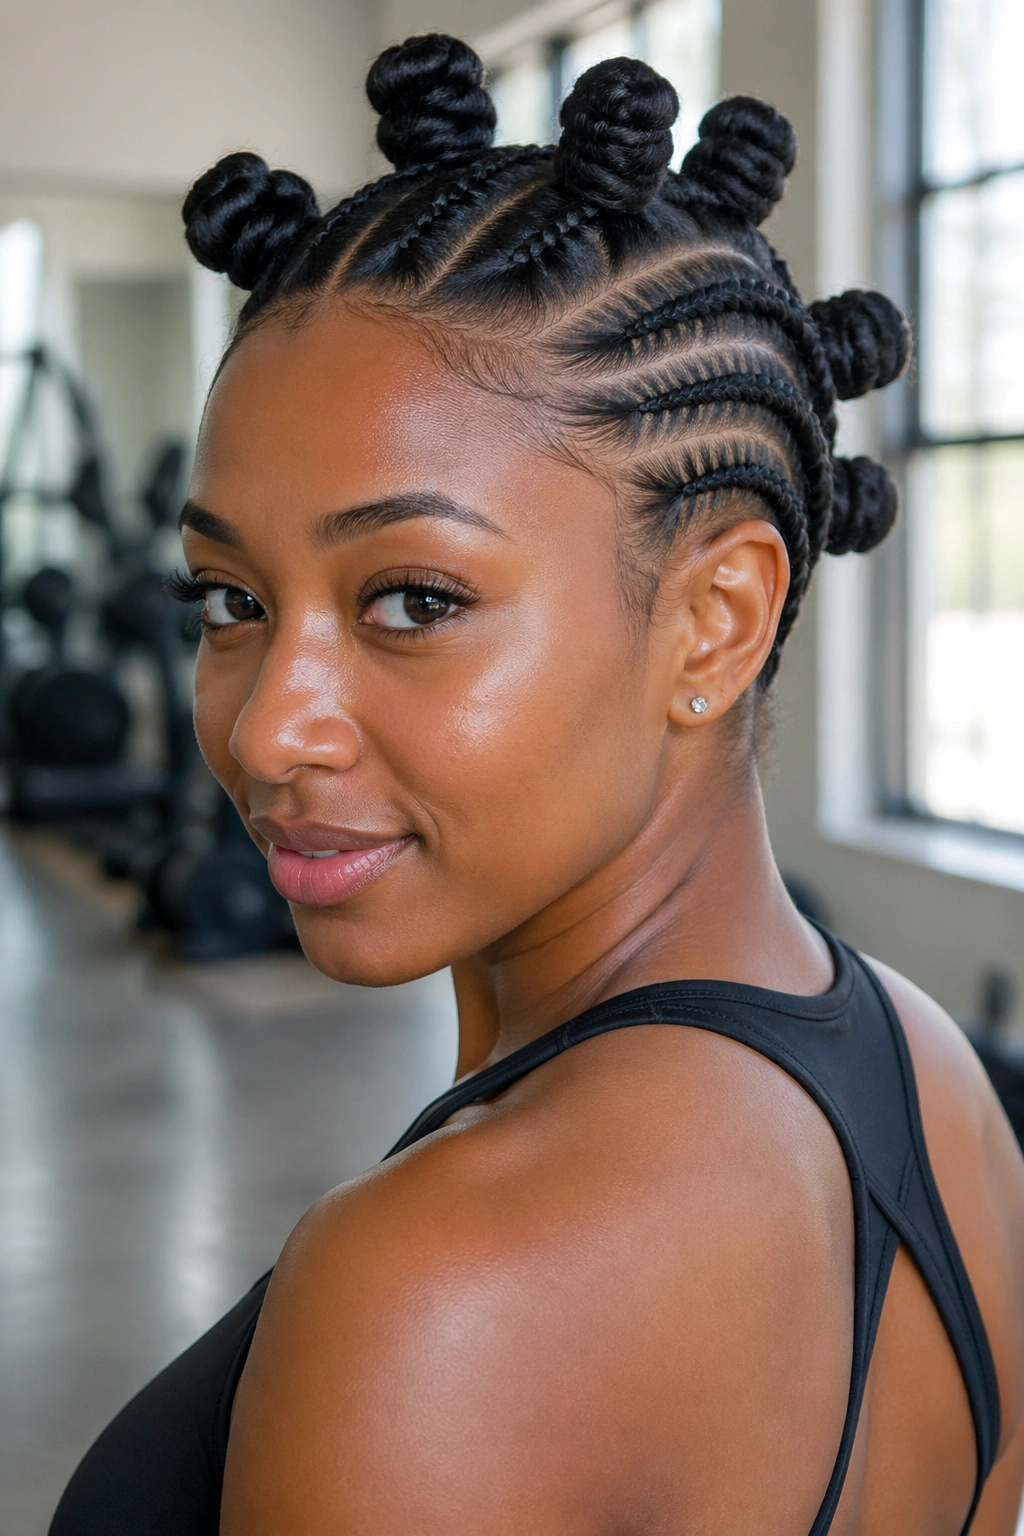
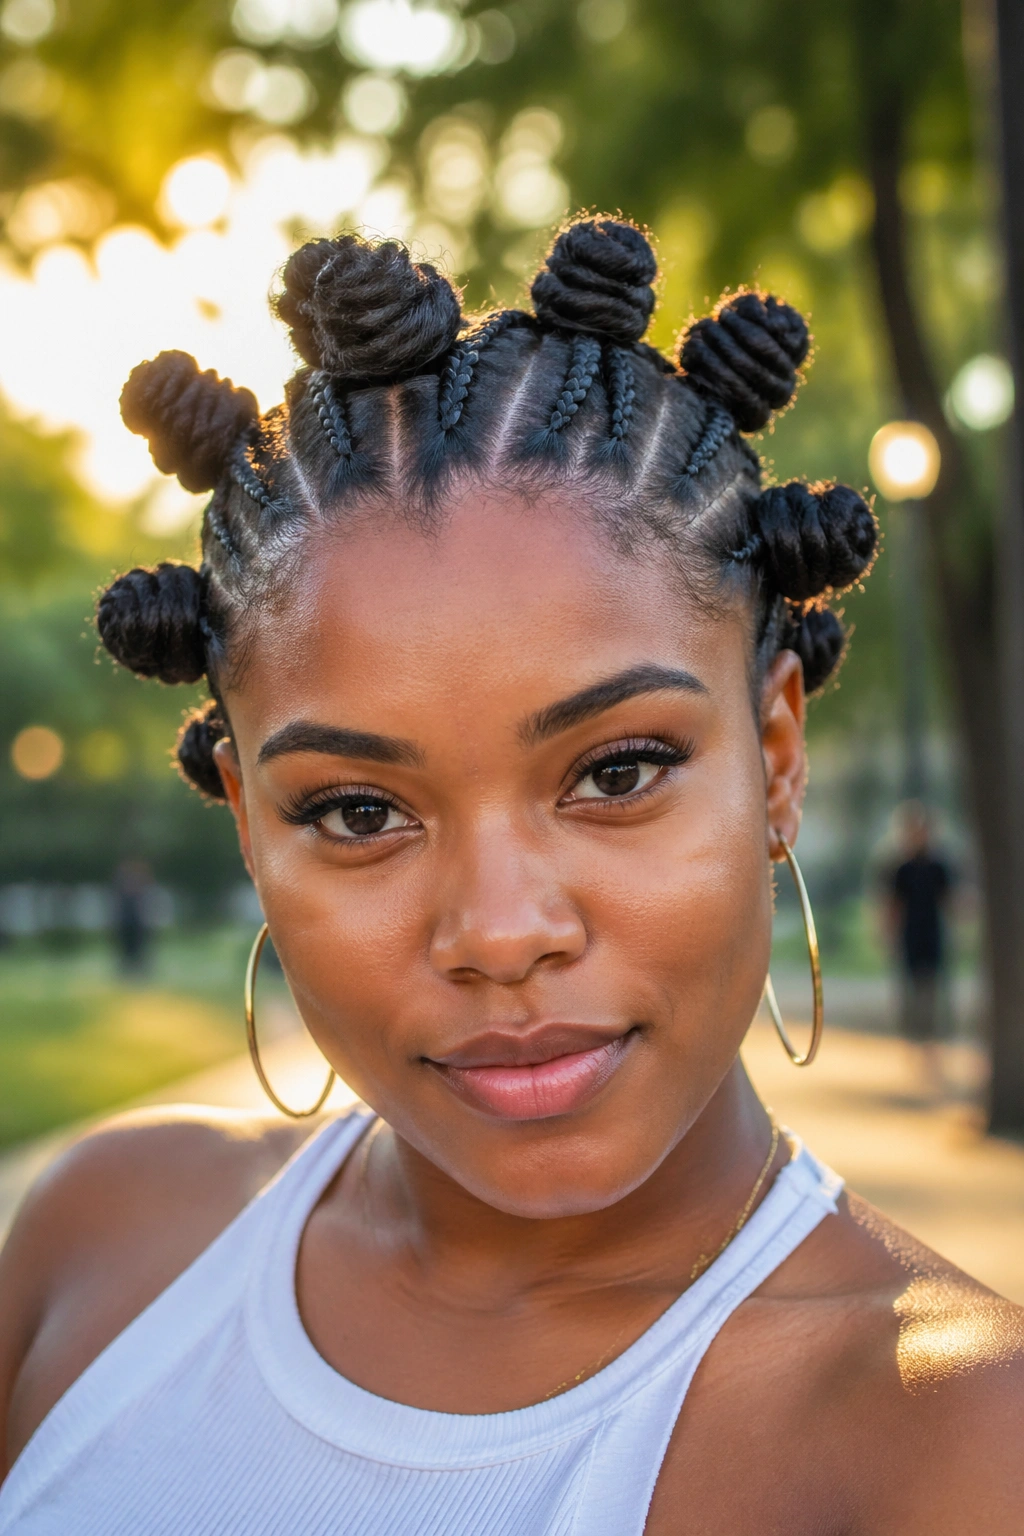
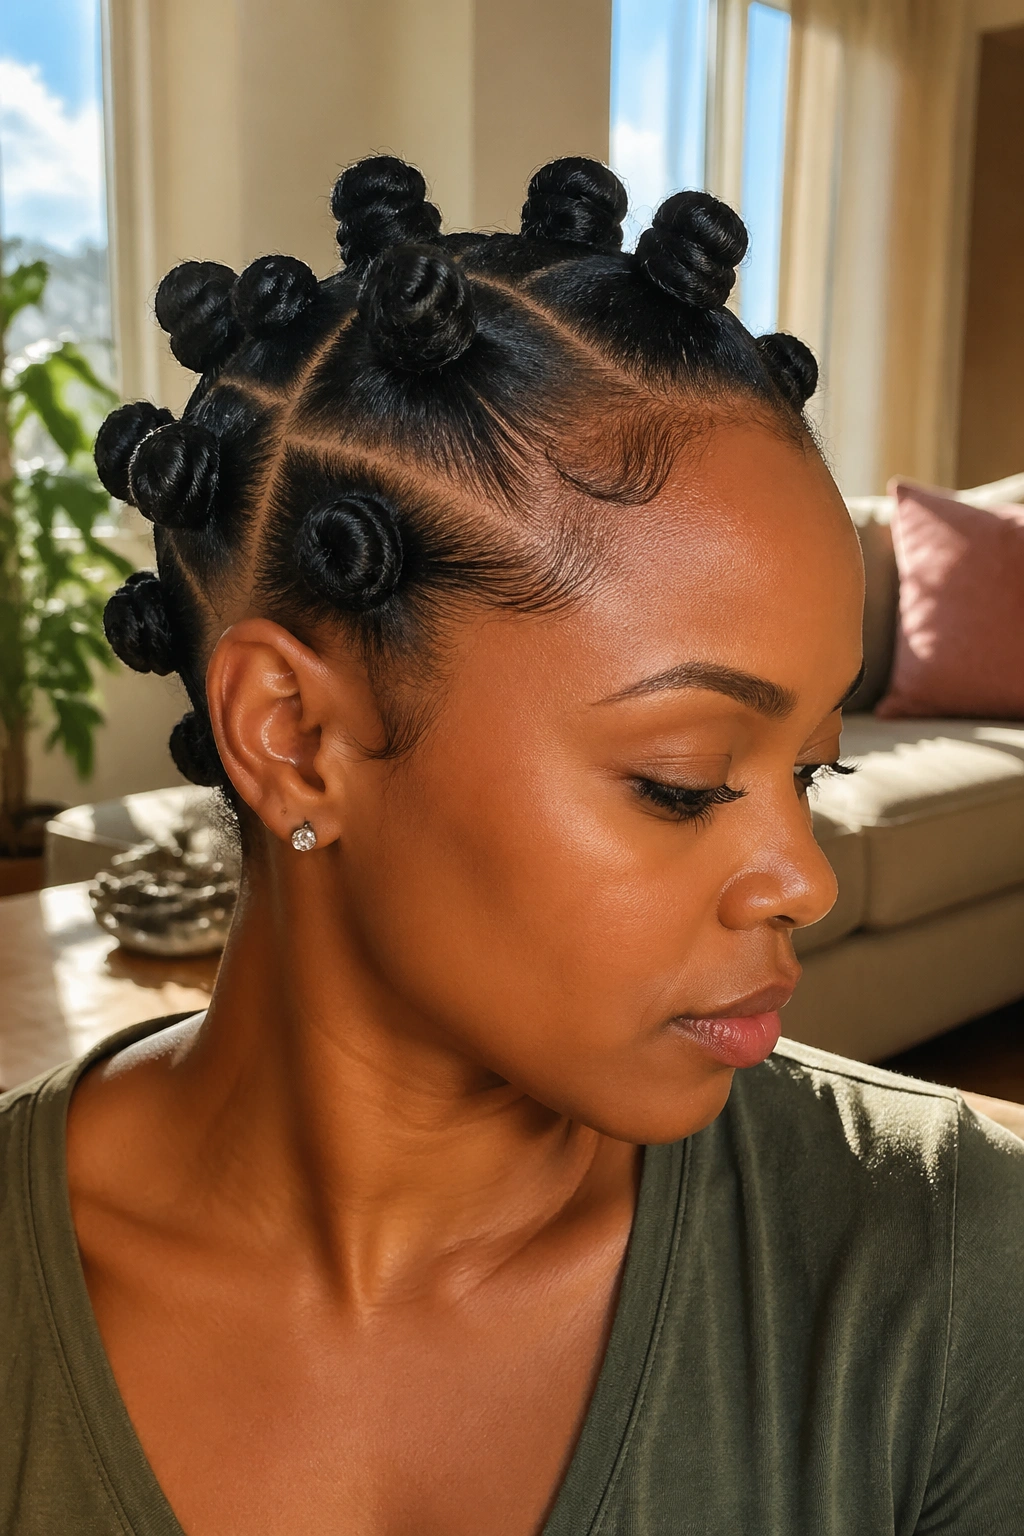
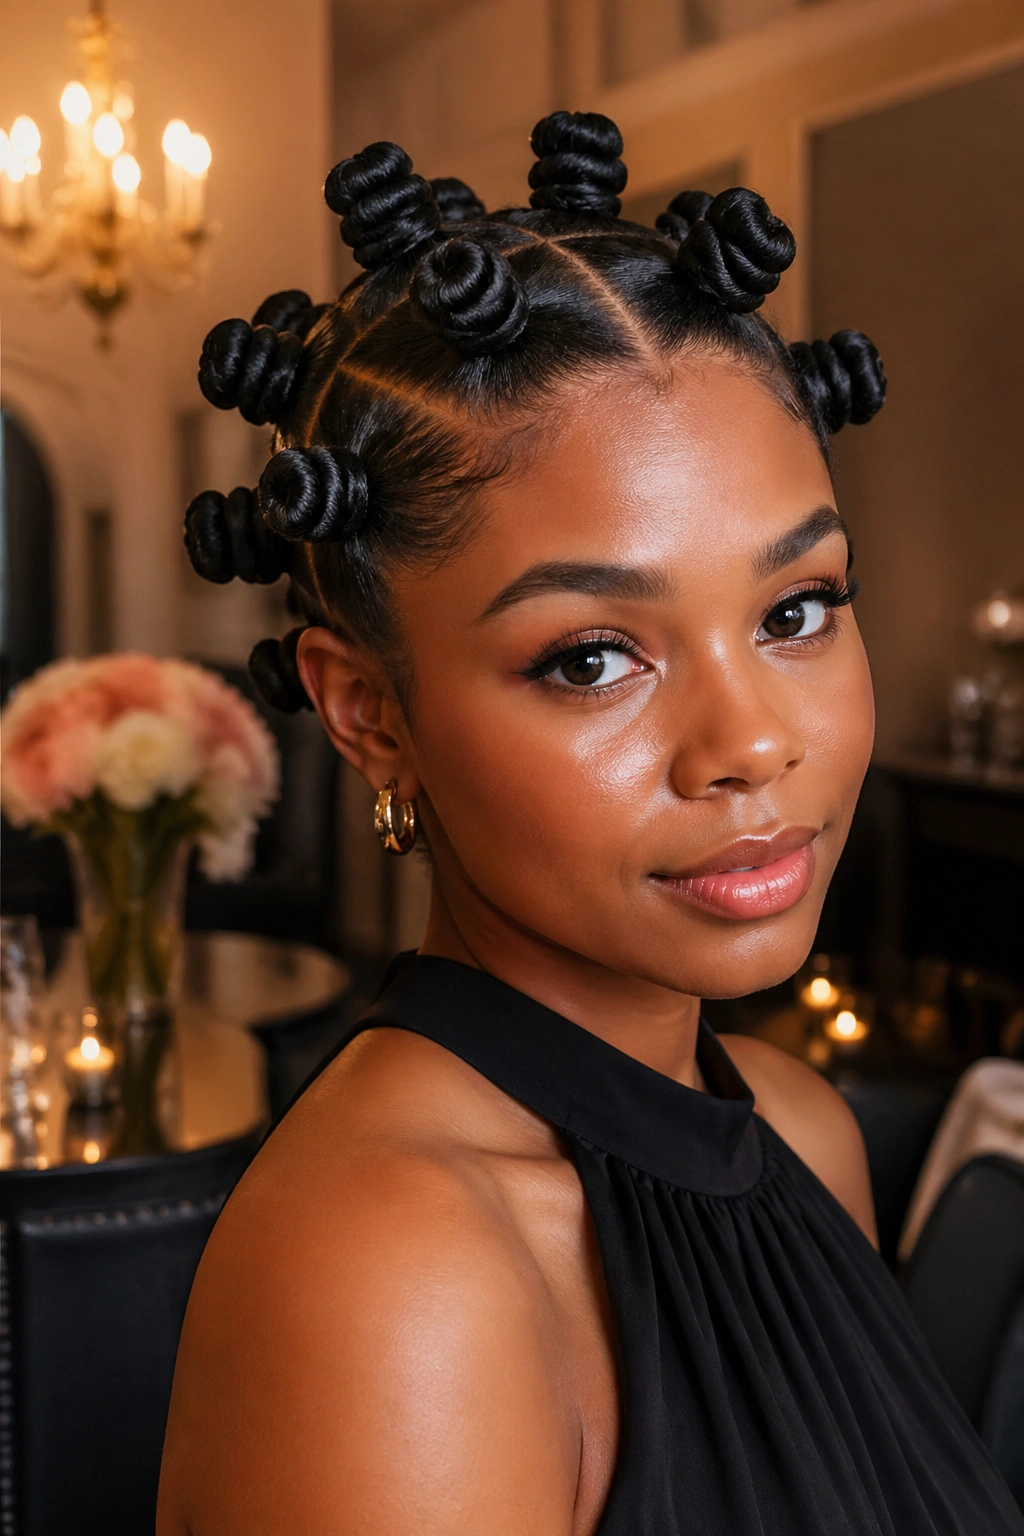
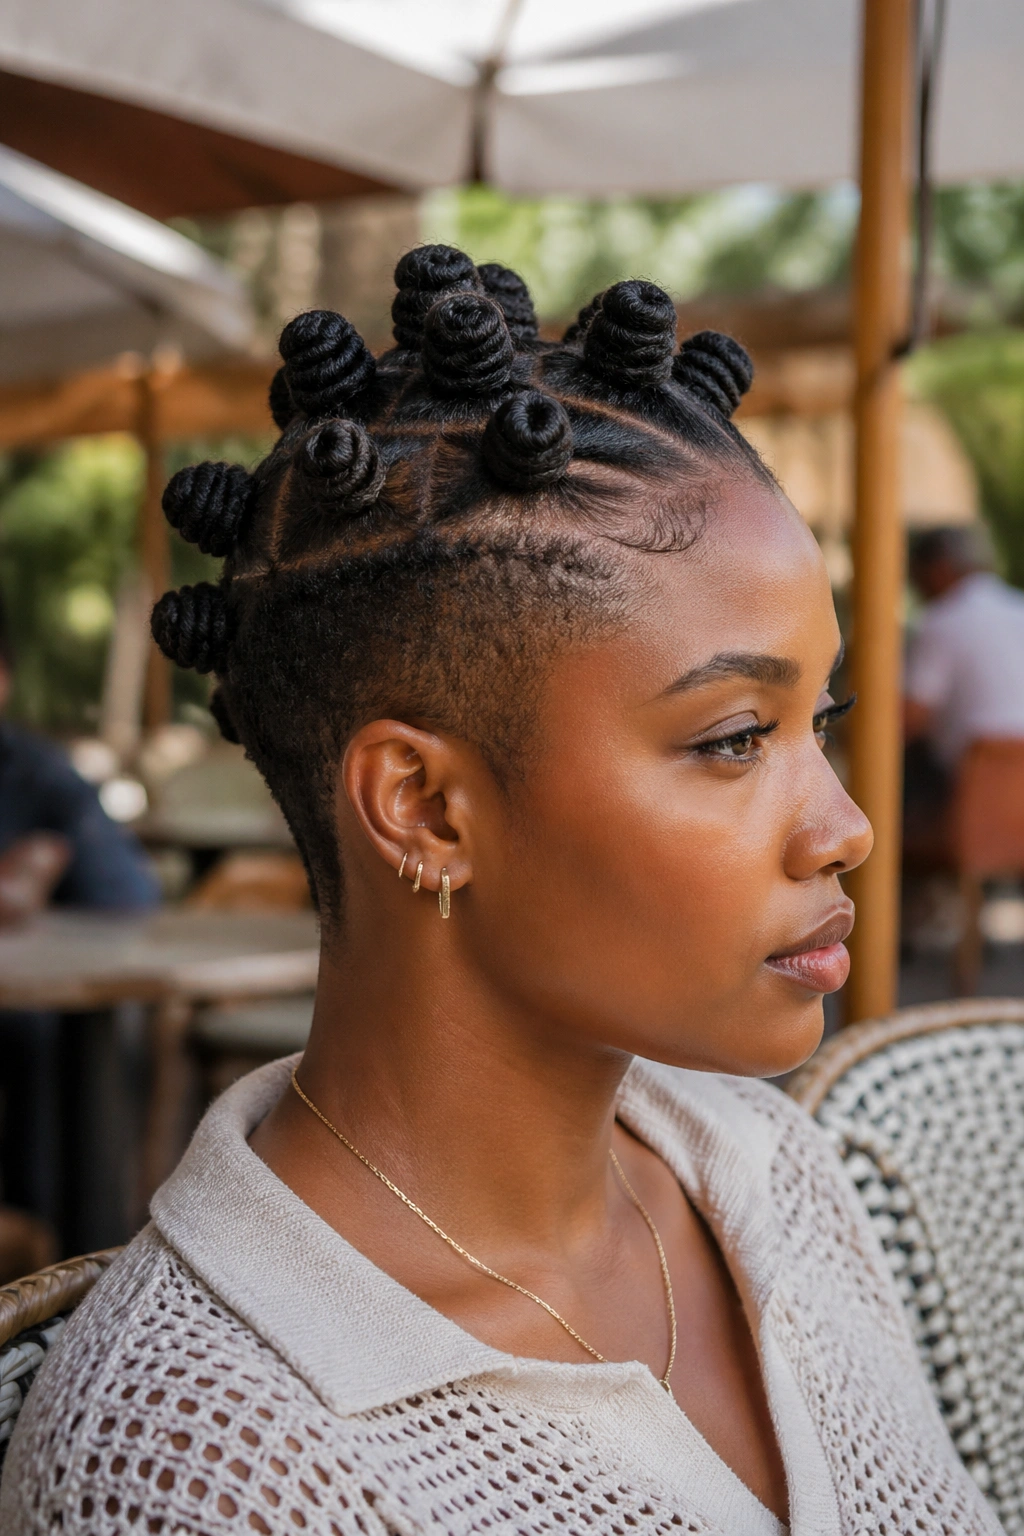
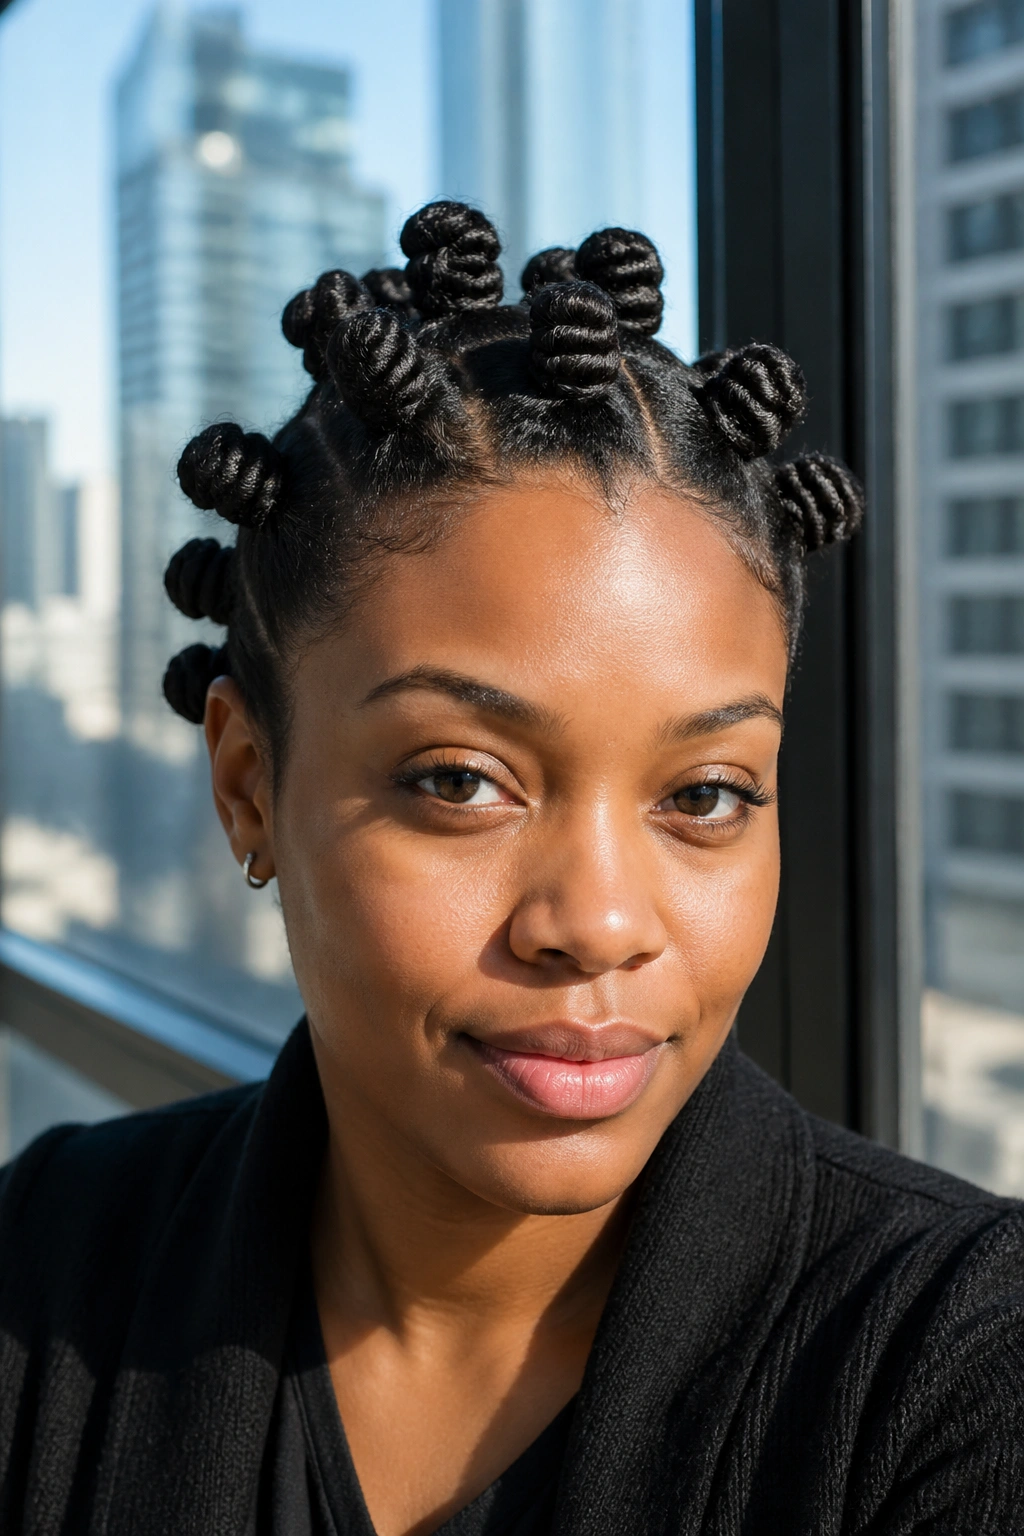
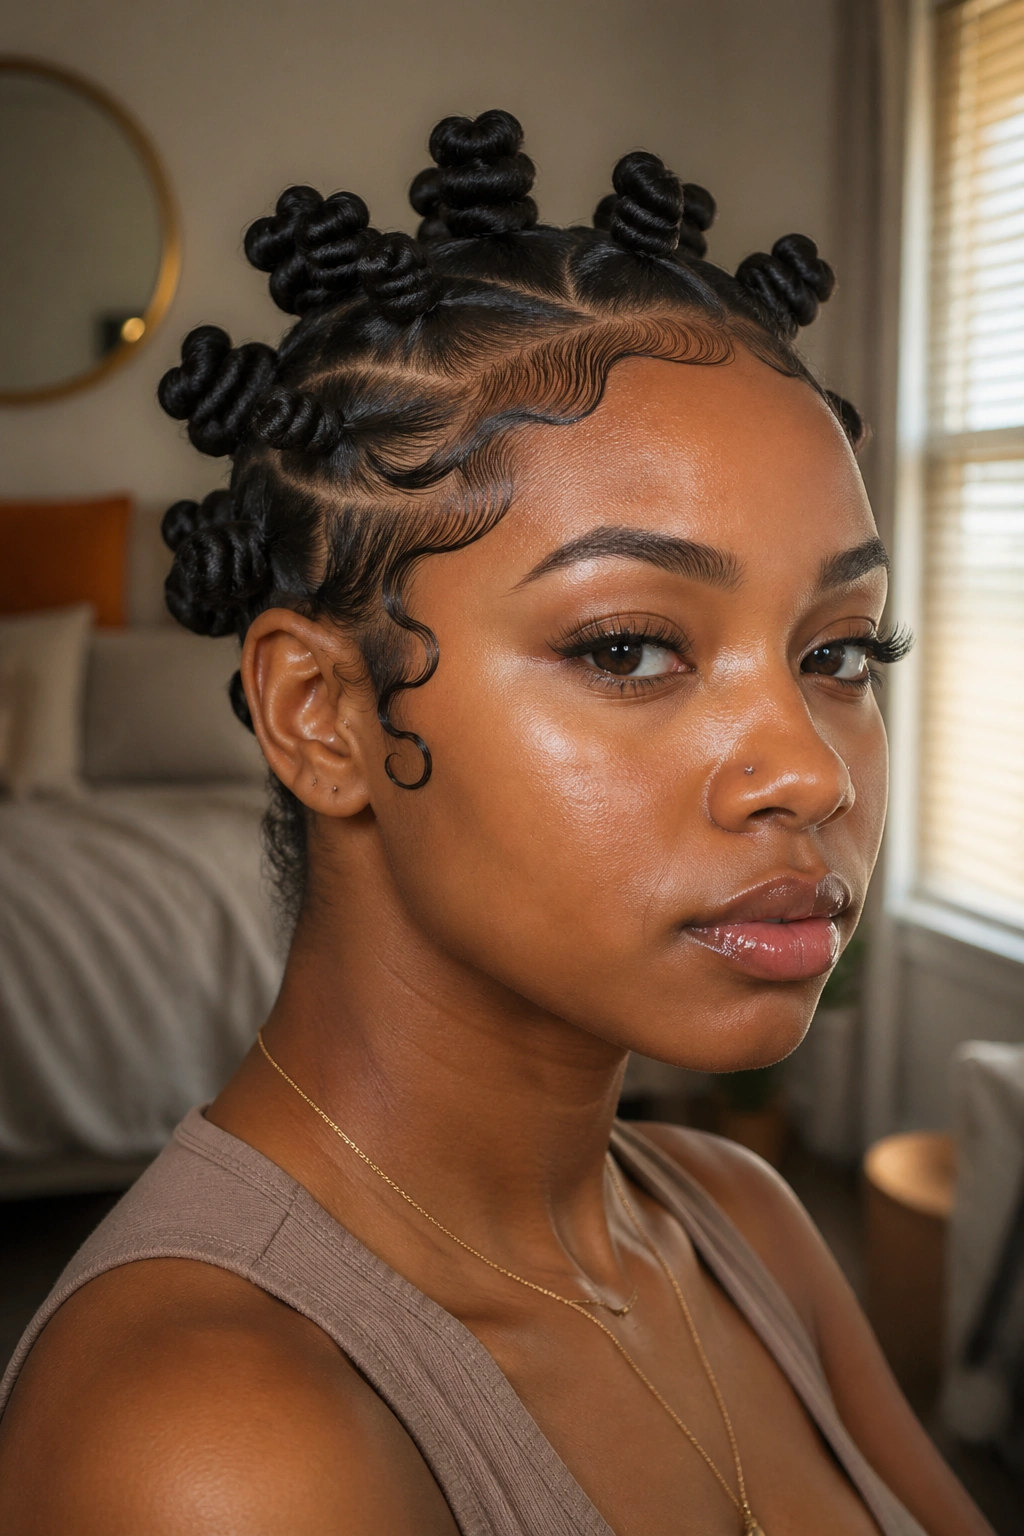
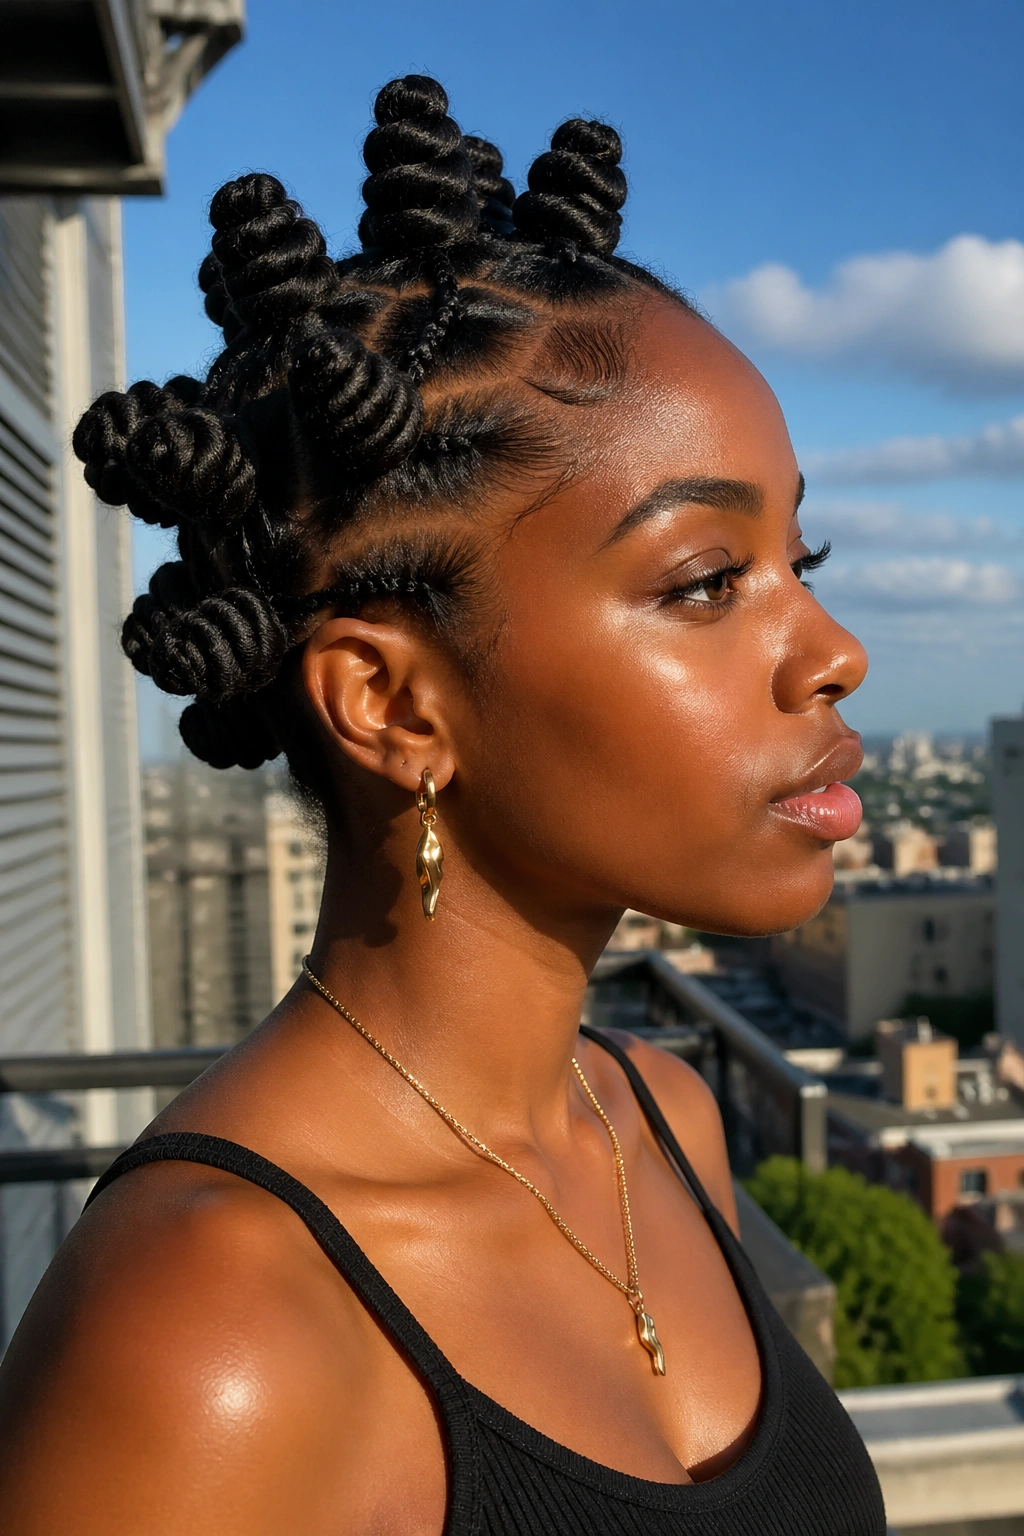
Medium Bantu knots live in the sweet spot: large enough to show shape, small enough to wear on an ordinary Tuesday. That’s why they keep showing up in real life, not only in photo shoots or special-event mood boards. When the sections are too tiny, the style can take forever. When the knots get too big, they start to feel bulky at bedtime and can throw off the balance of your face. Medium is where a lot of people land and stay.
I’ve always liked Bantu knots most when they look intentional but not fussy. Clean parts. Smooth roots. Ends tucked in a way that stays put after a commute, a gym session, or a long afternoon of touching your own hair while thinking. That middle size also gives you room to play with pattern, height, and accessories without making the whole look feel heavy.
There’s another reason this matters. Bantu knots come from African hairstyling traditions, and they make the most sense when we treat them like what they are: a style with history, technique, and purpose—not a costume, not a one-night experiment. Everyday wear suits them because daily life is where functional Black hairstyles have always had their power.
A good medium set starts with section size that’s close to 1 to 1½ inches wide, enough product for grip, and tension that feels secure but never sore. Once those basics are right, the fun part starts.
Why Medium Knots Earn a Spot in a Weekly Rotation
Size matters here.
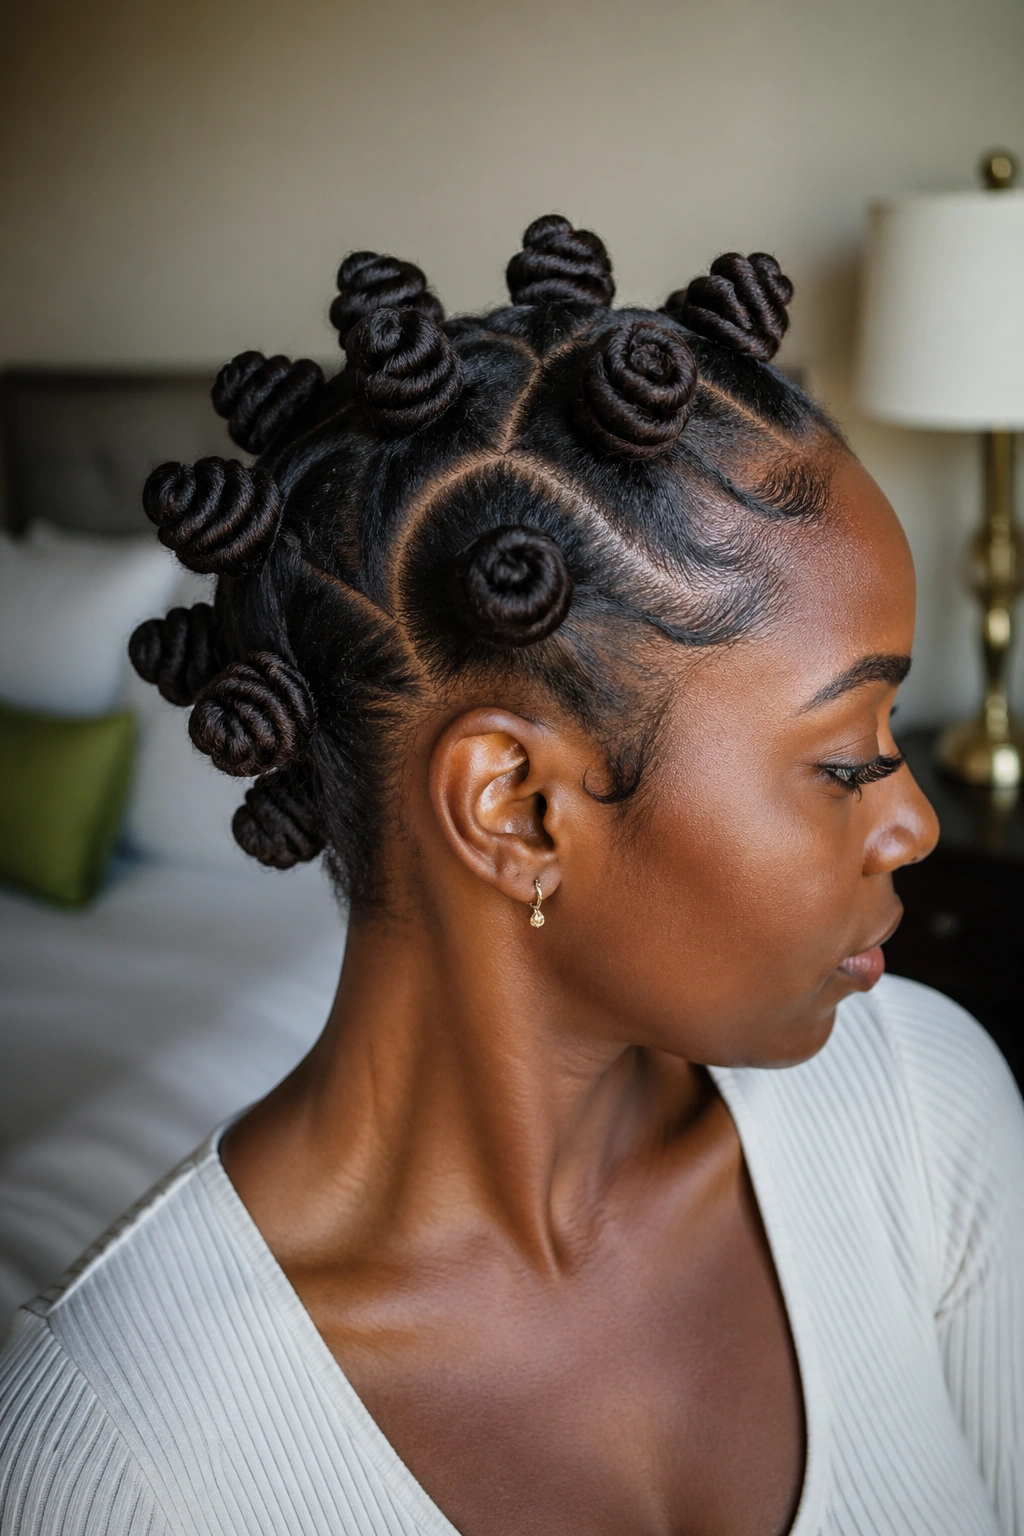
Medium knots sit between two common problems. Tiny knots can look sharp, but they ask for patience, neat parting, and more time at night if you want them to stay crisp. Jumbo knots are fast, though they can feel tall, tip backward under a bonnet, and leave less room for shape variation. Medium Bantu knots give you styling range without asking for a full afternoon.
I keep coming back to the same prep routine because it works. Start on clean hair or hair that’s only lightly stretched from an old twist-out. Use a water-based leave-in, then a setting foam or mousse for grip. Save the thick butters for the ends only if your hair runs dry. Heavy cream all over the section sounds helpful, yet it often makes the knot swell and frizz by day two.
Dermatologists make the same warning again and again: if a protective style hurts, it is too tight. The American Academy of Dermatology has long warned that repeated tension can lead to traction alopecia, which is hair loss caused by constant pulling. Your scalp should feel held, not punished. If your temples throb or the hairline looks shiny and stretched, redo that section.
A small prep kit helps:
- Rat-tail comb for sharp parts and cleaner rows
- Setting foam or mousse for hold without hard buildup
- Light gel at the roots if you want part lines to stay crisp
- Small elastic bands or none at all, depending on your preference and hair type
- Bobby pins for stubborn ends
- Satin scarf and bonnet for nighttime compression
Sleep changes the look more than people admit. Tie a satin scarf around the sides first, then put on a bonnet. That two-layer method keeps the roots flatter and stops the front row from puffing up. If you want a set that still looks neat on day four, that part is not optional.
1. Center-Part Medium Bantu Knots
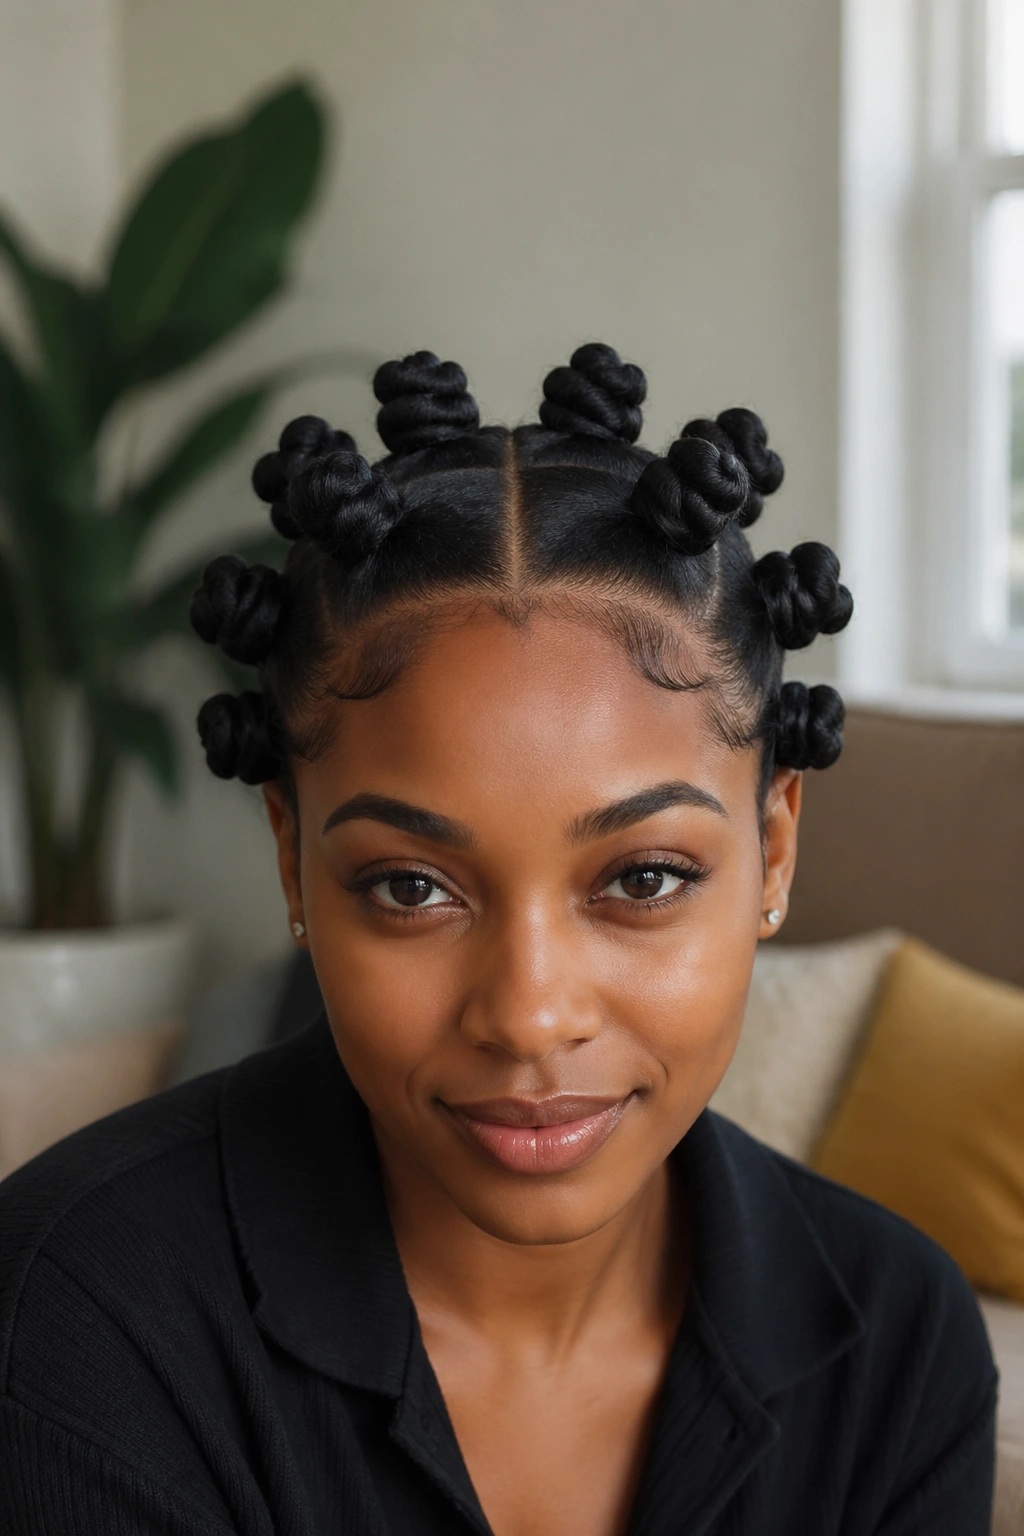
A straight middle part gives medium Bantu knots a calm, balanced look that never feels overworked. If you wear glasses, bold earrings, or a sharp collar a lot, this layout plays nicely with all of them because the face reads clean and even from both sides.
Why it keeps looking good
The symmetry does half the styling for you. Even if the knots loosen a touch after a day or two, the center line still gives the style structure. That matters more than people think.
Quick setup notes
- Aim for 8 to 12 knots total if you want the size to stay in the medium range.
- Keep the front two sections slightly smaller than the crown sections so the hairline does not look blocky.
- Use a dab of gel only on the part itself, not on the whole section.
- Tuck the ends under the base with one pin if your hair slips.
Best tip: make the center part first, then step back from the mirror before sectioning anything else. A crooked part at the start throws off the whole head.
2. Medium Bantu Knots with a Deep Side Part
This is the version I’d pick for anyone who thinks Bantu knots make their face look too round. A deep side part shifts the weight, lifts one side, and gives the style a little edge without asking for extra effort.
The trick is placement. Move the part about 2 to 3 inches off center, then keep the larger side slightly fuller through the front. You do not need more knots on that side; you need smarter spacing. Spread them so the crown looks intentional instead of crowded.
There’s also a nice everyday benefit here: side-part knots age well. When the style loosens, it starts to look softer rather than messy. That’s useful if you want a set you can wear to work, then out to dinner, without standing in the bathroom doing repairs under bad lighting.
I would skip a deep part only if your hairline is thinner on one side. In that case, the asymmetry can draw attention to the sparse area instead of away from it.
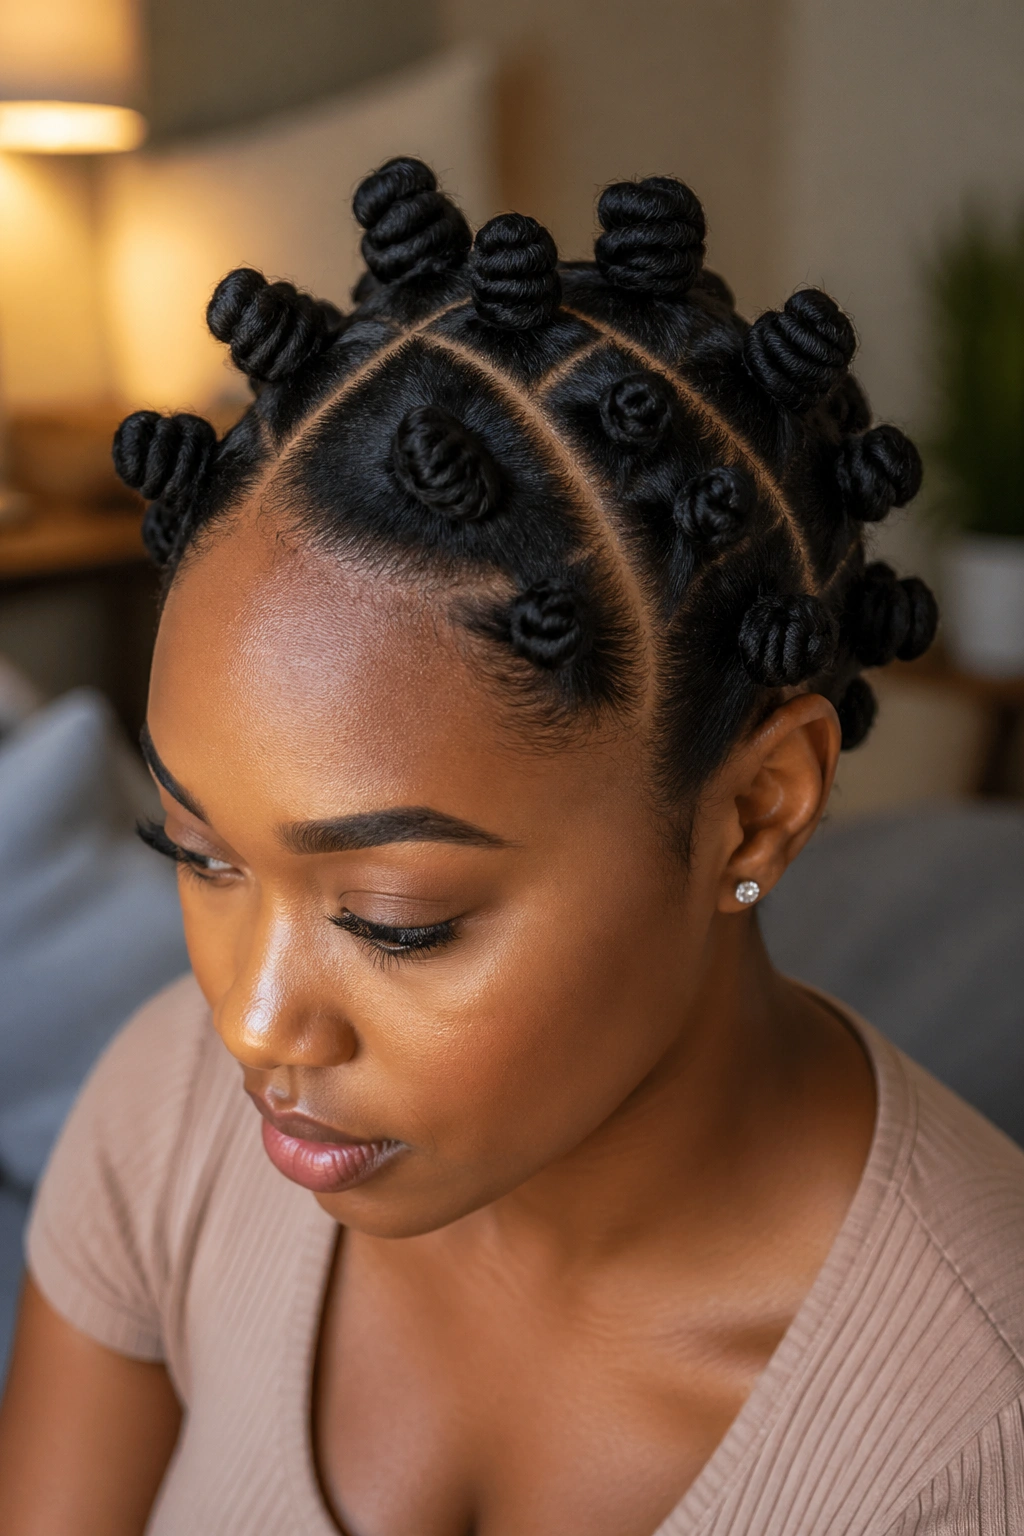
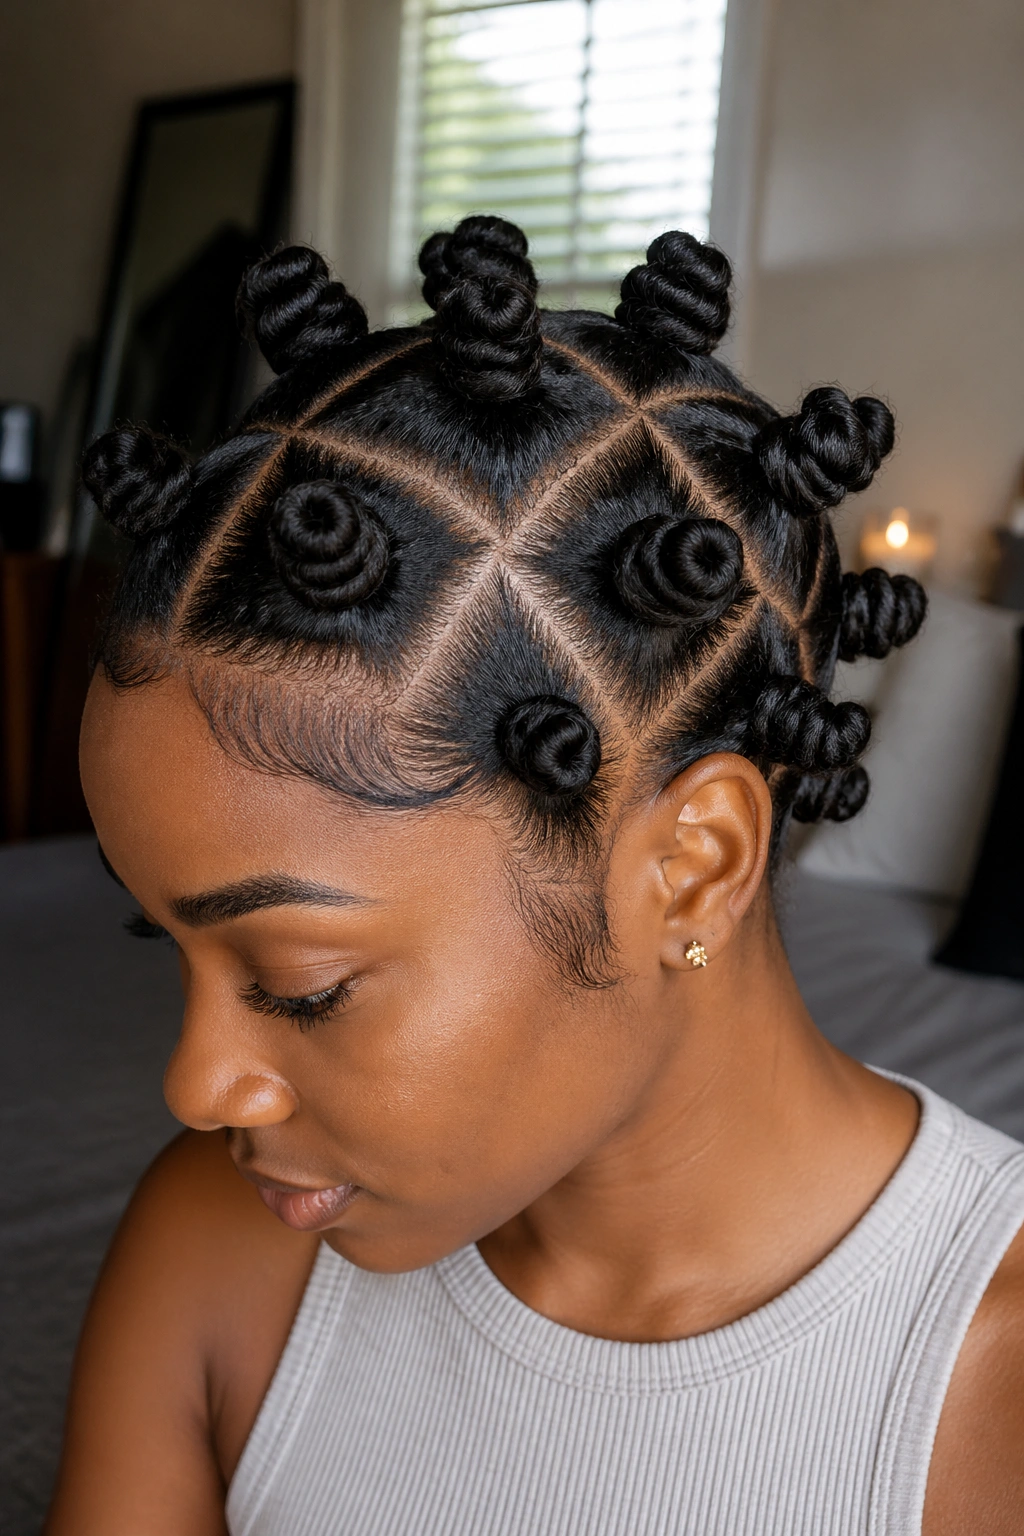
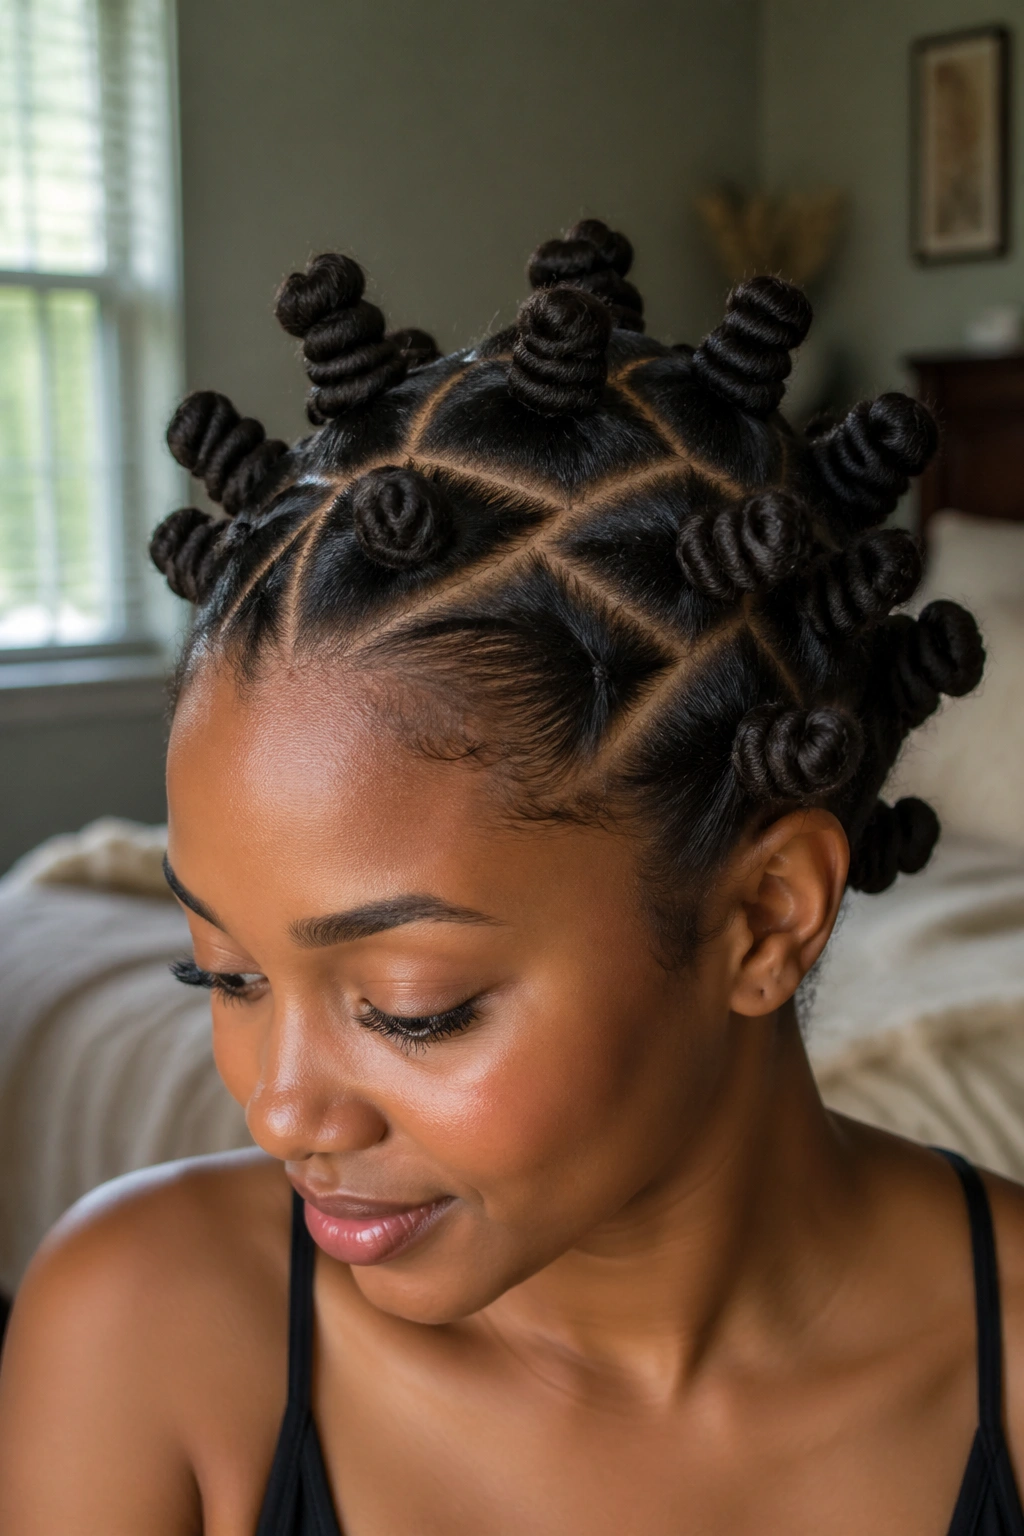
3. Checkerboard Sections for Medium Bantu Knots

Why does a checkerboard layout look so tidy even when the knots themselves are soft? Because the eyes catch the parting pattern first. The grid creates order, and that clean geometry makes the whole style feel sharper.
This one shines on dense hair. Straight rows can get bulky when every knot sits directly behind another knot. A checkerboard pattern staggers the placement, which spreads the weight across the head and gives each knot breathing room. Your scalp shows in neat squares instead of narrow tracks.
Wear it this way
If you want the pattern to read clearly, keep the sections as even as possible and smooth each root before twisting. I like this style with 10 to 14 medium knots and no extra jewelry. The parting is already the statement. Piling on cuffs, beads, and bold edges can make it look busy.
And yes, this takes longer to part. It’s worth it if clean geometry is your thing.
4. Triangle-Part Medium Bantu Knots
Picture a standard knot set from the front, then swap square bases for pointed triangles. The difference is immediate. Triangle parts break up the strict grid, so the style feels a bit more fluid while still looking polished enough for daily wear.
I like triangle sections when someone wants a playful shape but doesn’t want a high-maintenance finish. They grow out nicely. By day three, the roots may not be salon-sharp anymore, though the pointed sections still keep the style looking intentional.
A few things make this version cleaner:
- Keep the triangle points facing the same direction in each row
- Use smaller triangles at the front hairline
- Twist the section tightly at the base first, then loosen a touch as you wrap upward
- Pin any stubborn ends underneath instead of wrapping over them again and again
That last step matters. Overwrapping makes medium knots swell into jumbo ones.
5. Zigzag-Part Medium Bantu Knots
Not every everyday style needs to be quiet. A zigzag part adds movement before anyone even notices the knots themselves, and on medium Bantu knots the effect lands in a sweet, wearable place instead of drifting into costume territory.
You’ll need a steady hand or a comb with a sharp tail. Each bend in the part should be crisp, not wobbly. If the line looks accidental, the whole style loses punch. I’d keep the rest of the layout simple—same knot size, same spacing, clean finish—so the part stays the hero.
This one also helps if you hate the way a straight line slices the face into two equal halves. A zigzag breaks that up. It softens the look around the forehead and gives your scalp pattern from top view, which is nice if you wear your hair as the first thing people see when you walk into a room.
You do have to refresh the front line sooner. Sweat and edge product blur those turns faster than a plain center part.
6. Curved Parts That Soften Medium Knots
Unlike square or triangular sections, curved parts take the strictness out of the style. They pull the eye in an arc, which can make the whole set feel softer around the face and crown.
I reach for this layout on fuller cheeks or a strong jawline because it keeps the style from looking too architectural. That’s the word for it. Some parting patterns give a head shape that feels almost sculpted. Curved sections relax that effect.
There’s a catch, though. Curved parts only look good when they are deliberate. Random bends read messy fast. Map out your front row first, then mirror the curve on the opposite side if you want balance, or let the line flow across one side if you want more shape.
This is also a smart choice if you like satin scarves tied low across the forehead. The peek of a curved part under the scarf looks thoughtful, not accidental.
7. Diagonal Rows of Medium Bantu Knots
Diagonal rows have motion built in. Even before you add cuffs or edge work, the lines lead the eye from one side of the head to the other, and that makes medium Bantu knots look a little quicker, a little lighter, a little less boxy.
Where this one wins
Straight rows stack visual weight from front to back. Diagonal rows shift that weight across the head, which helps on dense hair or on anyone who feels standard rows make the crown look wide.
A few practical details
- Keep the row angle consistent, around 30 to 45 degrees
- Make the knots at the nape a hair smaller so the back doesn’t bunch against collars
- Use clips as you section, or the diagonal lines can drift
- Check the style from above with a hand mirror before you finish
Wear note: this layout looks sharp under baseball caps and loose hoodies because the angle still shows even when part of the head is covered.
8. Honeycomb Medium Bantu Knots
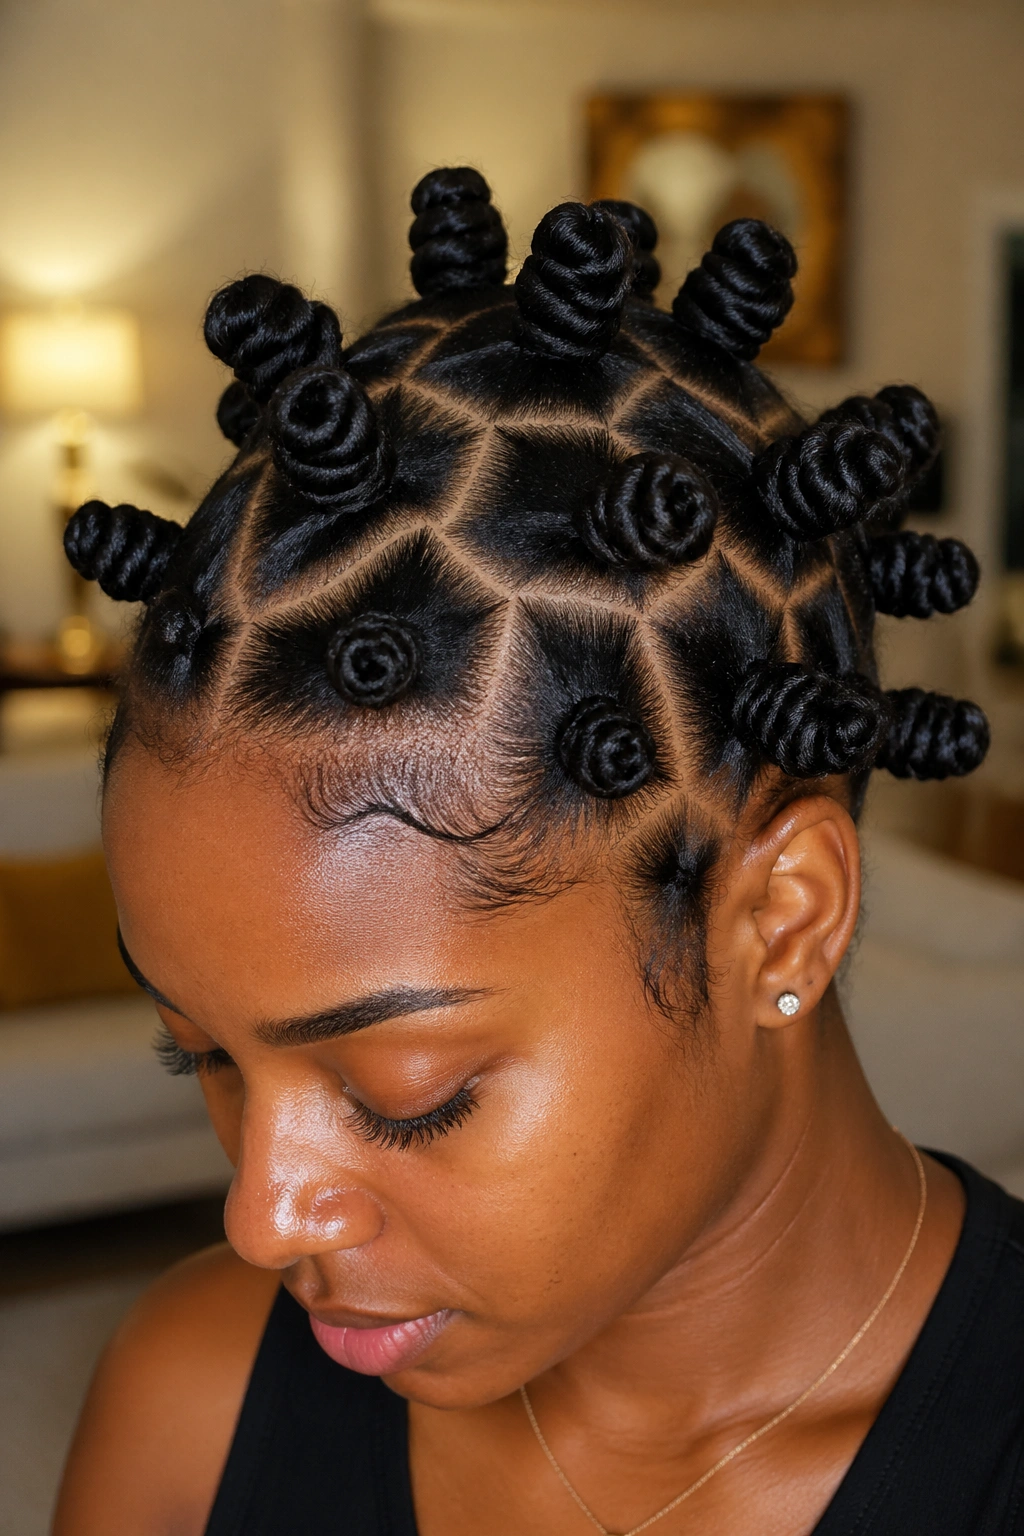
Honeycomb parting is one of those styles that looks harder than it feels once you get the first few sections right. The hexagon effect gives the scalp pattern depth and makes the knots appear more custom, even if the knot size stays plain and uniform.
This is not the speed option. I would never pretend otherwise. You’ll spend more time on the parting than on the twisting. Still, if you wear Bantu knots often, the honeycomb version breaks you out of the usual row routine without changing the daily feel of the style.
The best result comes from medium-density placement. Pack the sections too tightly and the pattern disappears. Space them too far apart and the scalp dominates. On coily hair, the sweet spot is often 9 to 12 hexagon sections across the head, though head size and hair density change that a bit.
Skip heavy edge styling here. The parting already gives you enough detail.
9. Half-Up Medium Bantu Knots
Want the look of Bantu knots without committing your whole head to them? Half-up medium knots are the answer. Put 4 to 6 medium knots through the top and crown, then leave the back in stretched curls, a braid-out, or even a low puff.
That contrast gives you the shape and culture of the knots while keeping some movement through the length. It also cuts styling time. Good news if your Sunday evening got away from you.
How to keep it balanced
The front half should hold enough volume to look deliberate. If the top row is too sparse, it starts to look like a style that stopped halfway. Make the knots sit a little closer together at the crown, then let the back hair fill out the silhouette.
I like this option on shorter shoulder-length natural hair because a full-head knot set can eat up a lot of visible length. Half-up styling gives some of that back.
10. Crown-Line Medium Bantu Knots
This one reads clean from every angle. Instead of covering the whole head, you build a ring or line of medium knots around the crown and keep the center lower, either with flatter knots or hair slicked close underneath. The effect has shape without bulk.
Take a rushed morning: coffee in one hand, scarf in the other, ten minutes left. A crown-line set still looks composed because the outer ring gives definition right where people notice it first. Face. Top. Profile.
A few details matter here:
- Place the crown knots slightly above the parietal ridge, not too low
- Keep the center flatter so the style does not peak in the middle
- Use pins under the back crown knots if your hair is thick
- Pair it with medium hoops or a clean lip color and stop there
Too many add-ons can crowd this look. The shape is enough.
11. Low-Profile Medium Bantu Knots
Some knot sets are hard to live in. They look good standing up, then press into the headrest in the car, catch on hoodies, and turn bedtime into a negotiation. Low-profile medium Bantu knots fix that problem.
You get the look by wrapping each section flatter and closer to the scalp rather than building height. Think wider spiral, lower mound. The knot still reads clearly, though it sits closer to the head and feels more stable under scarves, hats, and bonnets.
I like this style for travel, long commutes, and colder months when collars and jackets start fighting with the nape. It also works on hair that has been stretched first, because stretched hair wants to lie flatter anyway.
Do not overtwist. That mistake makes the knot rope-like and stiff. Twist enough for control, then wrap with a lighter hand so the knot spreads instead of stacking upward.
12. Forward-Swept Medium Bantu Knots
Unlike centered or evenly stacked knots, forward-swept placement pushes the visual weight toward the forehead, almost like a sculptural fringe made of knots. It gives the face a more editorial shape, though the daily upkeep stays reasonable if the parts are clean.
This is a good pick when you want your cheekbones or brows to stand out. Put the front row a touch lower and angle the wraps so they tilt forward. The back rows can stay plain. Nobody needs the entire head competing for attention.
Who suits it best? Anyone with longer forehead space or anyone who feels their knots disappear when all the volume sits at the crown. A forward tilt brings the style into view from the front, which matters in real life because most people see you head-on, not from above.
I would skip this one for intense workouts. That forward placement can frizz first if you sweat along the hairline.
13. Medium Bantu Knots with Flat Twist Sides
Flat twist sides change the whole mood. Instead of knotting every section around the temples, you lay two to four flat twists on each side, then gather the remaining hair into medium knots through the top and back. The style looks cleaner, more directed, and a touch more protective along the edges.
Why this combo works
Twists reduce the number of knots, which means less tension right around the hairline. That can be a relief if your temples are sensitive or your baby hairs are thin.
Best uses
- Good for gym days, since the sides stay anchored
- Handy on hair with uneven density near the temples
- Strong choice if you want the front to read sleek while the crown keeps shape
- Easier to refresh than a full-head knot set, because you can retwist only the sides
Small warning: make the flat twists firm, not tight. There’s a difference, and your hairline knows it.
14. Medium Bantu Knots with Braided Roots
Braided roots buy you time. That is the appeal. Start each section with a short braid—about 1 to 2 inches long—then twist the loose length into the knot. The braid anchors the base, keeps the roots neater longer, and helps slippery textures hold shape.
This version earns its keep on stretched hair, silk-pressed hair growing out, or softer curl patterns that tend to puff at the root by midday. The braid does not have to be long. Too much braid and the knot loses its round shape.
There’s also a visual difference. Braided roots give each knot more definition at the base, almost like a stem under the spiral. I like that on larger heads or fuller hair because it separates the knots from one another and stops the top from looking like one thick mass.
It takes more time, yes. The payoff is day-four hair that still looks intentional.
15. Medium Bantu Knots on Stretched Hair
Can medium Bantu knots look cleaner on stretched hair? Often, yes. Stretching—whether by banding, African threading, braid stretching, or a low-heat blow-dry—makes the sections easier to part and the knots easier to shape. You see the architecture of the style more clearly.
The downside is slippage. Stretched hair does not grip itself the way damp coily hair does. You may need a touch more mousse, a small amount of gel at the base, or one discreet pin hidden inside the knot.
What to aim for
If you stretch first, stop before the hair gets bone straight. Leave some texture. Hair that still has a bit of grip wraps better, holds better, and does not spring loose the second you pull on a hoodie.
I like this route when I want a flatter, sleeker set or when I plan to release the knots later for a fuller knot-out.
16. Medium Bantu Knots on Freshly Defined Curls
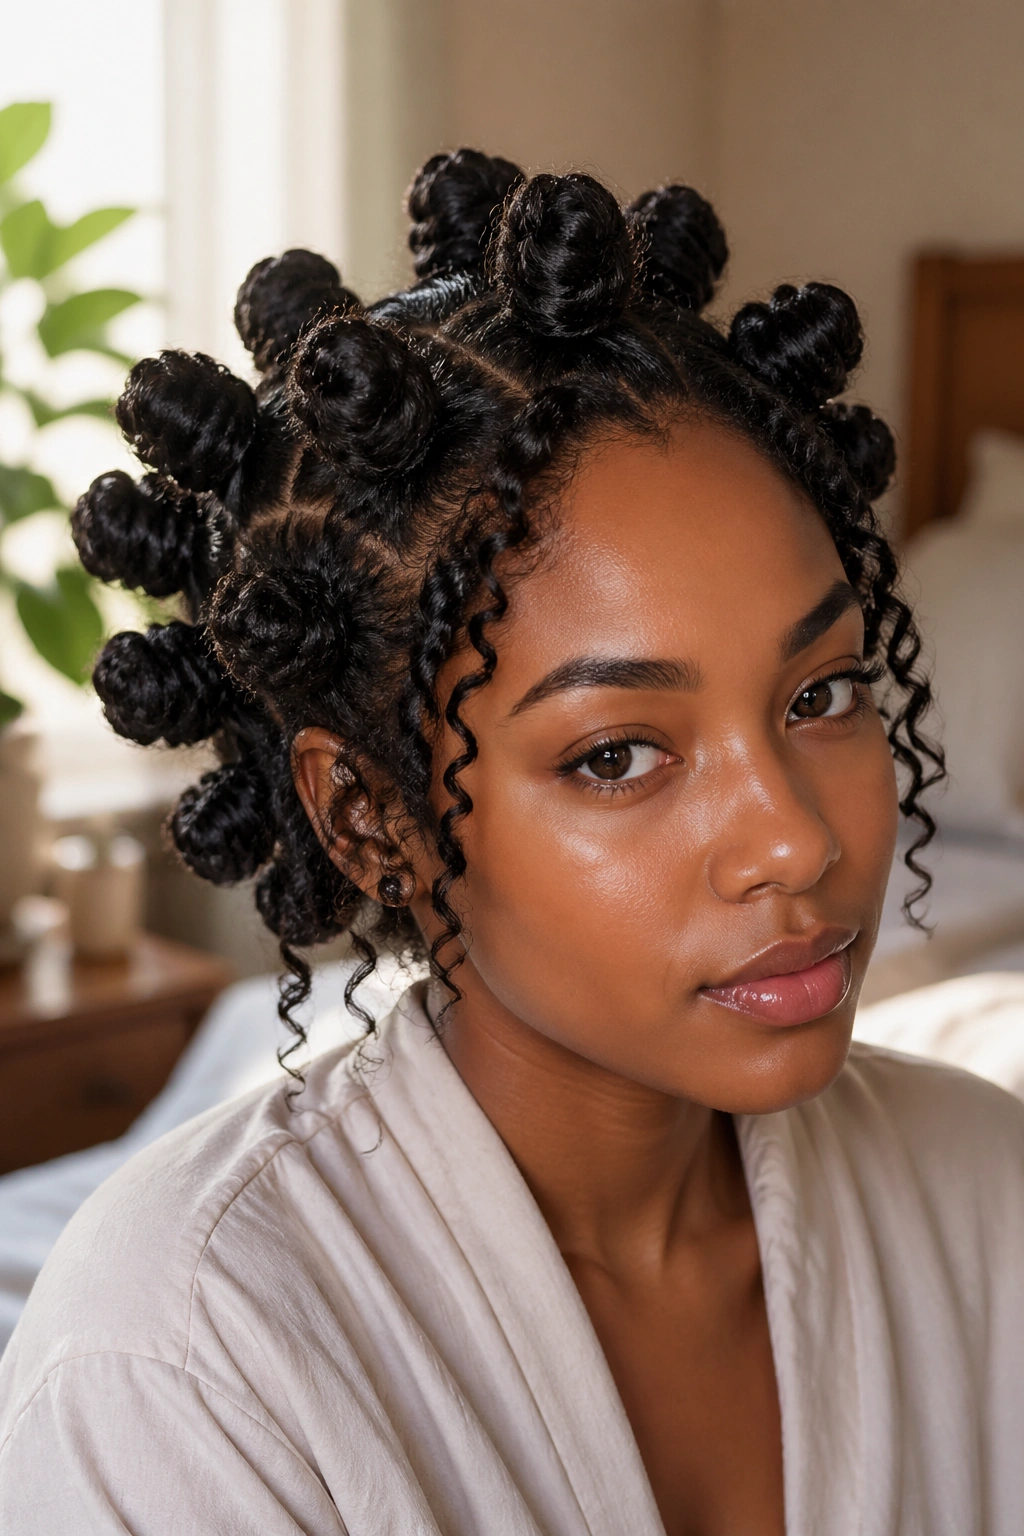
There’s a softer look that comes from building Bantu knots on hair that still has its curl definition from a wash-and-go. The roots stay neat, though the body of the knot looks puffier, springier, and more textured. It feels less sculpted and more lived-in.
Take care with product layering. If your wash-and-go already has custard, gel, and oil sitting on it, adding thick styling product for the knots can cause flaking. I’ve seen more white residue ruin a good knot set than bad parting. A little foam over already-defined curls is usually enough.
Bullet points because this style has quirks:
- Best on hair that is 70 to 80 percent dry, not soaking wet
- Keep the knot wraps loose enough for the curl pattern to show
- Use fingers to smooth the section before twisting, not a hard brush
- Expect a softer silhouette by day two
If you like Bantu knots that look a bit cloud-like instead of sharply wound, this is the one.
17. Medium Bantu Knots with Wrapped Bases
Wrapped-base knots have a small detail that changes the finish a lot. Before you build the main knot, take a thin strip from the section and wrap it around the base like a collar. Then pin or tuck it before forming the rest of the knot. The result looks tidier and more finished.
I love this technique on event days, though it still passes easily for everyday wear. The wrapped base hides frizz at the root and gives each knot a cleaner outline, especially if your hairline texture is mixed and some sections puff faster than others.
This is also a smart trick when your parting is not your finest work. The wrapped collar draws the eye to the knot itself instead of the exact line of the section.
Keep the strip thin. Too thick, and the base gets bulky fast.
18. Medium Bantu Knots with Gold Cuffs
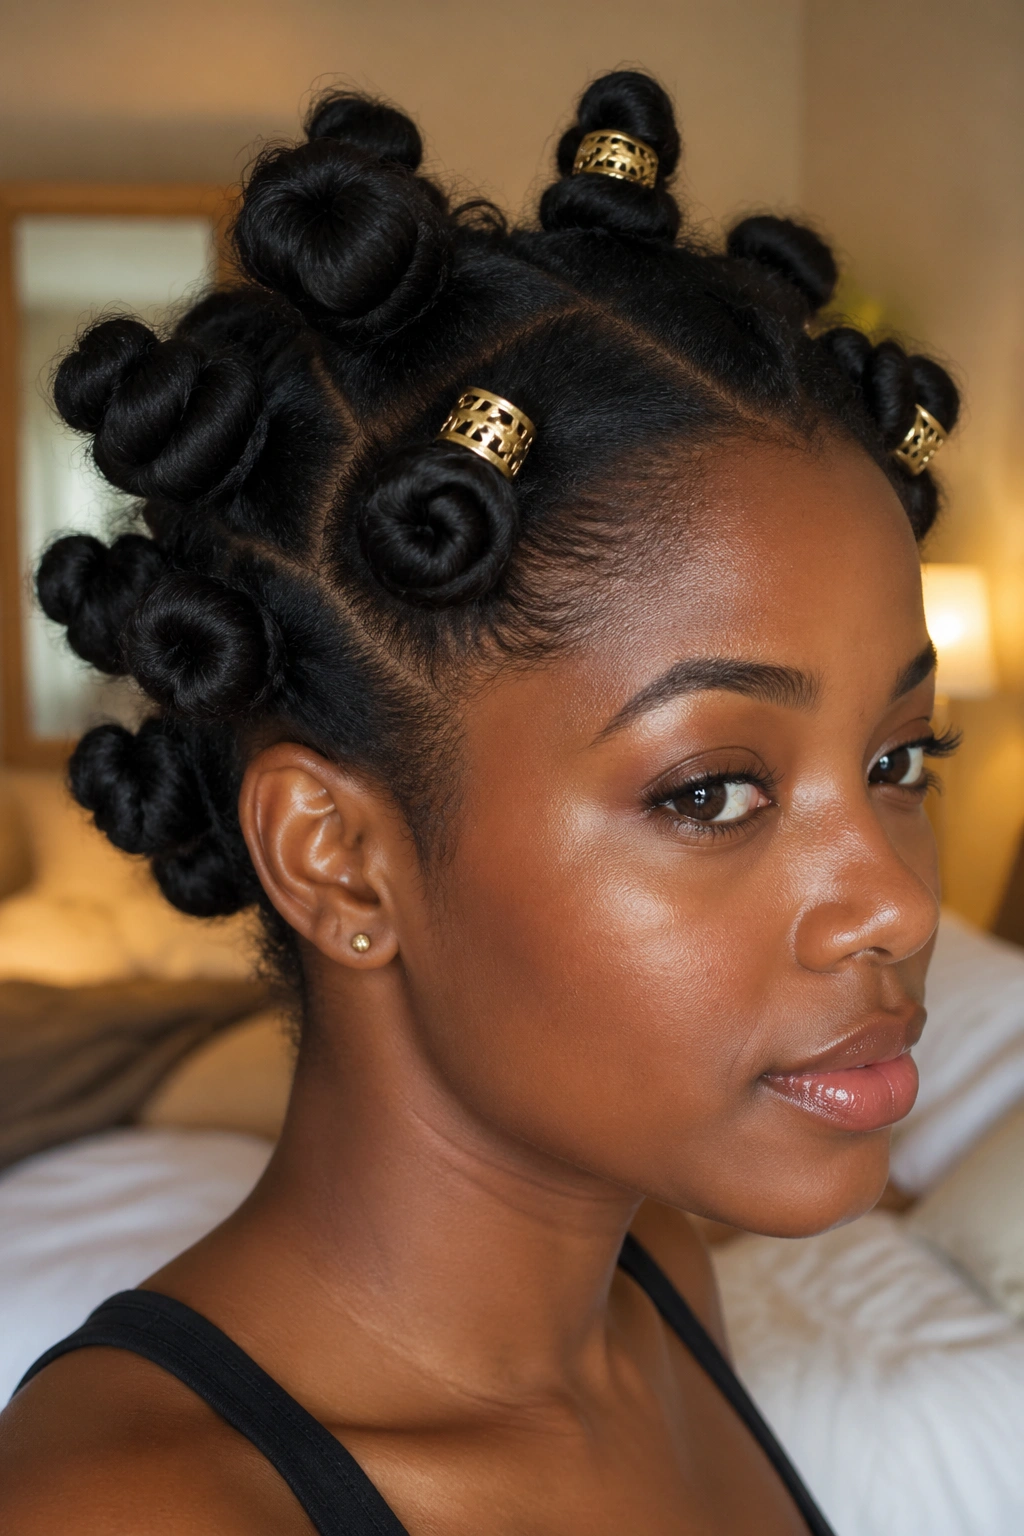
Unlike thread or beads, gold cuffs change the look in about thirty seconds. Clip one onto two front knots, maybe add another at the crown, and the hairstyle shifts from plain daily wear to something more dressed.
I do not think every knot set needs jewelry. Most don’t. Cuffs work best when you show restraint. Two or three placed with intention beat a whole head of metal every time.
Who should try it? Anyone whose usual wardrobe leans clean—black, white, denim, earth tones, gold hoops, a crisp button-up. The metal echoes those lines. On the practical side, cuffs also help draw attention upward if the back row of knots started frizzing before the front.
Skip heavy cuffs on fine strands. They can pull the knot shape off-center by the end of the day.
19. Medium Bantu Knots with Beads at the Back
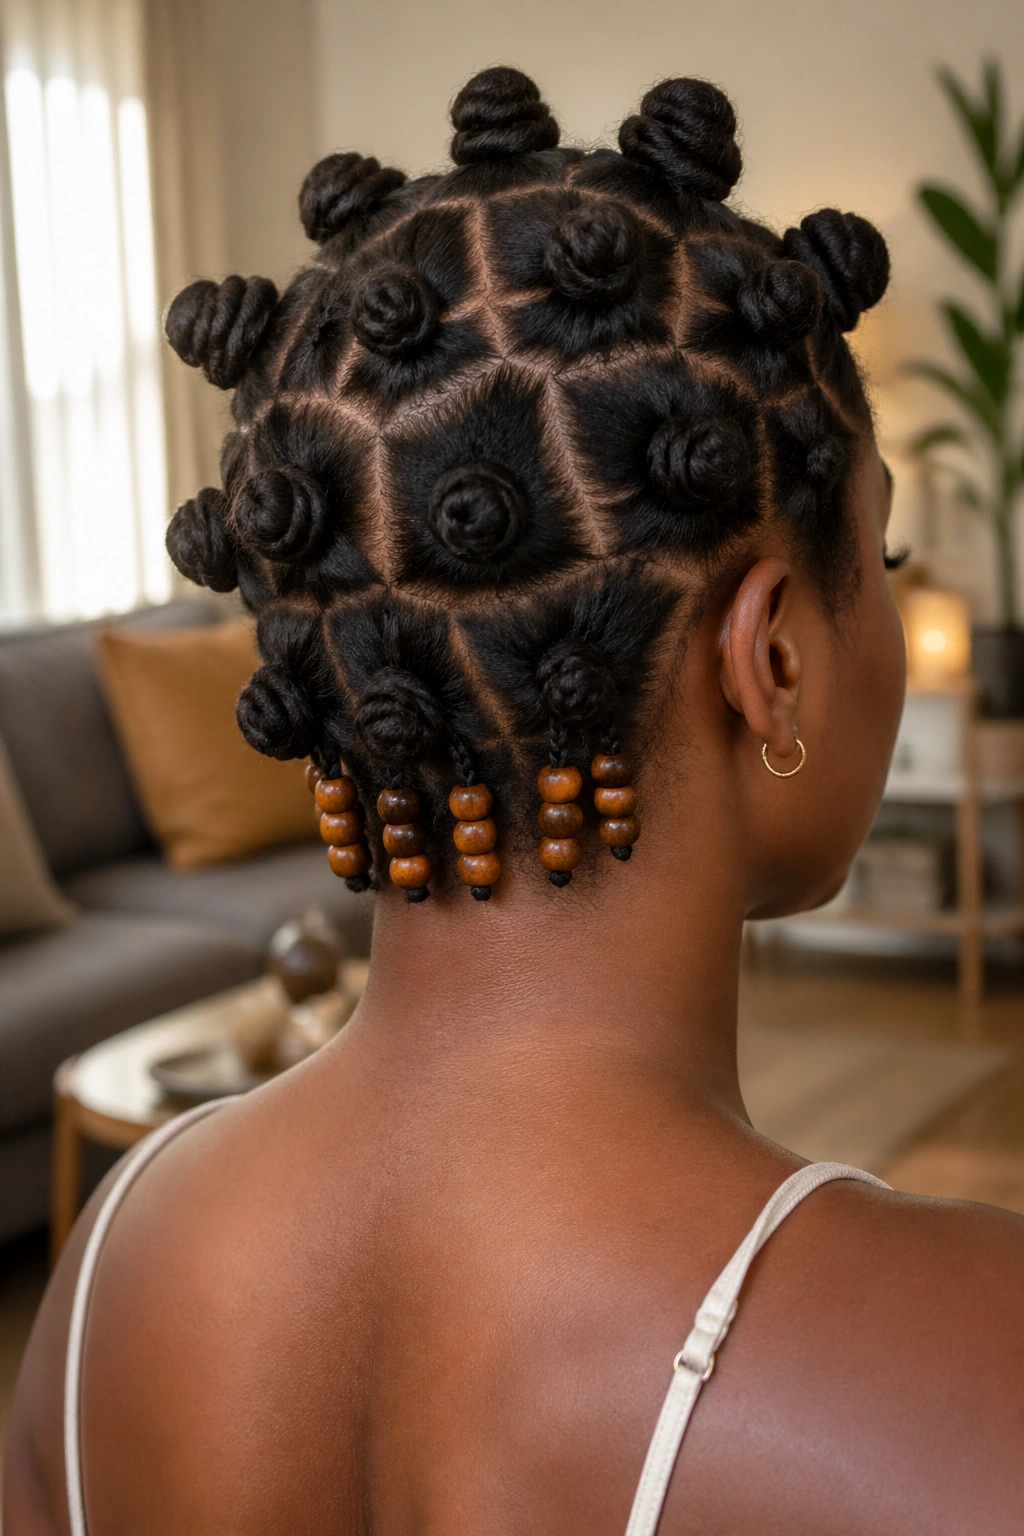
Beads at the back are smart. Front-facing beads can crowd the face, hit your cheeks, or tug on smaller knots. Placing them on the back row or the lower sides gives you movement and sound without turning the whole style into an obstacle.
A better way to wear beads daily
Choose small to medium beads and use them on only the last two or three knots near the nape or behind the ears. That keeps the front clean and stops the style from feeling childlike if that is not the look you want.
Watch the weight
- Wooden beads feel lighter than many glass beads
- A single bead per knot usually does the job
- Secure the end first, then add the bead
- Sleep in a bonnet with more room so the beads are not pressed into the scalp
There’s something fun about hearing a faint click from the back row when you turn your head. Small detail. Strong effect.
20. Medium Bantu Knots for a Tapered Cut
A tapered cut changes the math. You’ve got more length at the crown, less at the nape, and often a tighter silhouette around the sides. That does not rule out medium Bantu knots at all. It means you need to place them where the hair actually lives.
Crown-heavy knot placement usually works best. Put 5 to 8 medium knots through the top and upper sides, then use tiny coils, flat twists, or slicked-down texture through the shortest areas. Trying to force equal-size knots onto a short nape can lead to tension and a lumpy shape.
This style looks sharp because the haircut helps it. The taper gives you built-in contour, which keeps the knot cluster from looking too round. If your cut has a crisp line-up or faded side area, keep the edges clean and let that structure show.
And if the back is too short for any knot at all, leave it. Forcing hair to do something it cannot do is where breakage starts.
21. Medium Bantu Knots with a Clean Hairline
Want Bantu knots that feel grown, sharp, and low-drama? Skip the laid edges and keep the hairline clean. Brush the front gently into place, use a light touch of foam or serum, and stop. A bare hairline can look stronger than elaborate edge art, especially with crisp parting.
Some people assume a knot set needs baby hairs to look finished. I disagree. A clean front lets the geometry of the parts and knots carry the style. It also saves time and cuts the risk of flaking around the forehead.
Best moment for this finish
This one shines in office settings, on school runs, and during weeks when you know you will sweat more than usual. No swoops means less maintenance. No edge glue means easier takedown.
If your hairline is softer or less dense, use a soft toothbrush with water and a pea-size amount of mousse—no hard pulling, no combing the life out of your edges.
22. Medium Bantu Knots with Sculpted Baby Hairs
Then again, if you love edge work, lean into it. Sculpted baby hairs change the whole mood of medium Bantu knots. The knots hold structure up top, while the front gets curves, loops, or short swoops that frame the face.
This works best when the edge design matches the scale of the knots. Medium knots call for medium edge work. A giant dramatic swoop next to compact knots can look out of proportion. Two controlled swoops at the temples and one small curve near the sideburn are often enough.
A few practical notes:
- Use edge control on dry hair, not damp hair
- Press with a silk scarf for 5 to 10 minutes
- Avoid dragging out long pieces from the hairline
- Refresh with water and a touch of mousse before adding more product
The style lands hardest when the edges look soft, not shellacked.
23. Two-Tier Medium Bantu Knots
Two-tier knots break the head into levels. You might have one row high at the crown and another lower around the back, or a top cluster sitting above flatter knots underneath. Either way, the point is shape. This layout gives dimension without changing knot size.
I like it on thick hair because it stops the style from reading as one dense cap of knots. The upper layer lifts. The lower layer anchors. From the side, the silhouette looks more intentional than a single row pattern that ended wherever the hair happened to fall.
This one needs mirror checks. Look from both profiles before you finish pinning the back. If the top tier sits too high, the style can start to resemble stacked buns rather than Bantu knots.
Still, when the spacing is right, it has a sculptural quality I enjoy a lot.
24. Scarf-Framed Medium Bantu Knots
Unlike full head wraps, a scarf-framed knot set leaves the knots visible while giving the front or sides a border. Fold a satin or lightweight cotton scarf into a band, tie it around the base of the style, and let the knots rise above it. You get color, pattern, and a cleaner perimeter.
This is one of the easiest ways to stretch a set into another day. Slight frizz at the hairline? The scarf hides it. Parts not as crisp as they were? The scarf draws the eye elsewhere. I’ve salvaged many day-four Bantu knots this way.
Who gets the most from it? Anyone who likes wardrobe coordination. A rust scarf with gold jewelry, a black band with denim, a wax-print strip against an all-white outfit—those pairings do a lot of work with almost no effort.
Use a fabric that grips a bit. Slippery satin can slide unless you anchor it with two bobby pins above the ears.
25. Medium Bantu Knots That Become a Knot-Out
Here’s the practical closer: wear the knots for a day or two, then take them down for a knot-out. You get two hairstyles from one sectioning job, which is part of why medium knots make sense in a weekly routine.
The best medium set for this purpose is smooth at the root, not too much product, and wrapped evenly from base to tip. If the sections vary wildly in size, the knot-out will vary too. Some curls will drop, others will spring tight, and the shape can get awkward fast.
How to set it up
Use a light leave-in and foam, seal the ends with a small amount of cream, and make sure each knot dries fully before you undo it. If any section still feels cool or damp in the center, leave it alone. Opening half-dry knots is a short route to frizz.
I like this option for busy weeks because it cuts styling decisions in half. Day one and day two: knots. Day three through five: soft, stretched curls with the same parting underneath.
Final Thoughts
Medium Bantu knots are not one hairstyle. They’re a whole category of shapes, finishes, and parting choices, and that’s exactly why they stay useful. Change the rows, alter the front, add one accessory, flatten the wrap, or plan for a knot-out later—the base idea still holds.
If you’re deciding where to start, pick one clean parting pattern and one finish choice. Maybe center part plus clean hairline. Maybe deep side part plus cuffs. Maybe half-up knots if you want less commitment. You do not need all the extras at once.
The best sets I’ve seen in real life shared the same bones: neat sections, gentle tension, tucked ends, and a style plan that matched the person wearing it. Once that clicks, medium Bantu knots stop feeling like a special look and start feeling like part of your regular rotation.