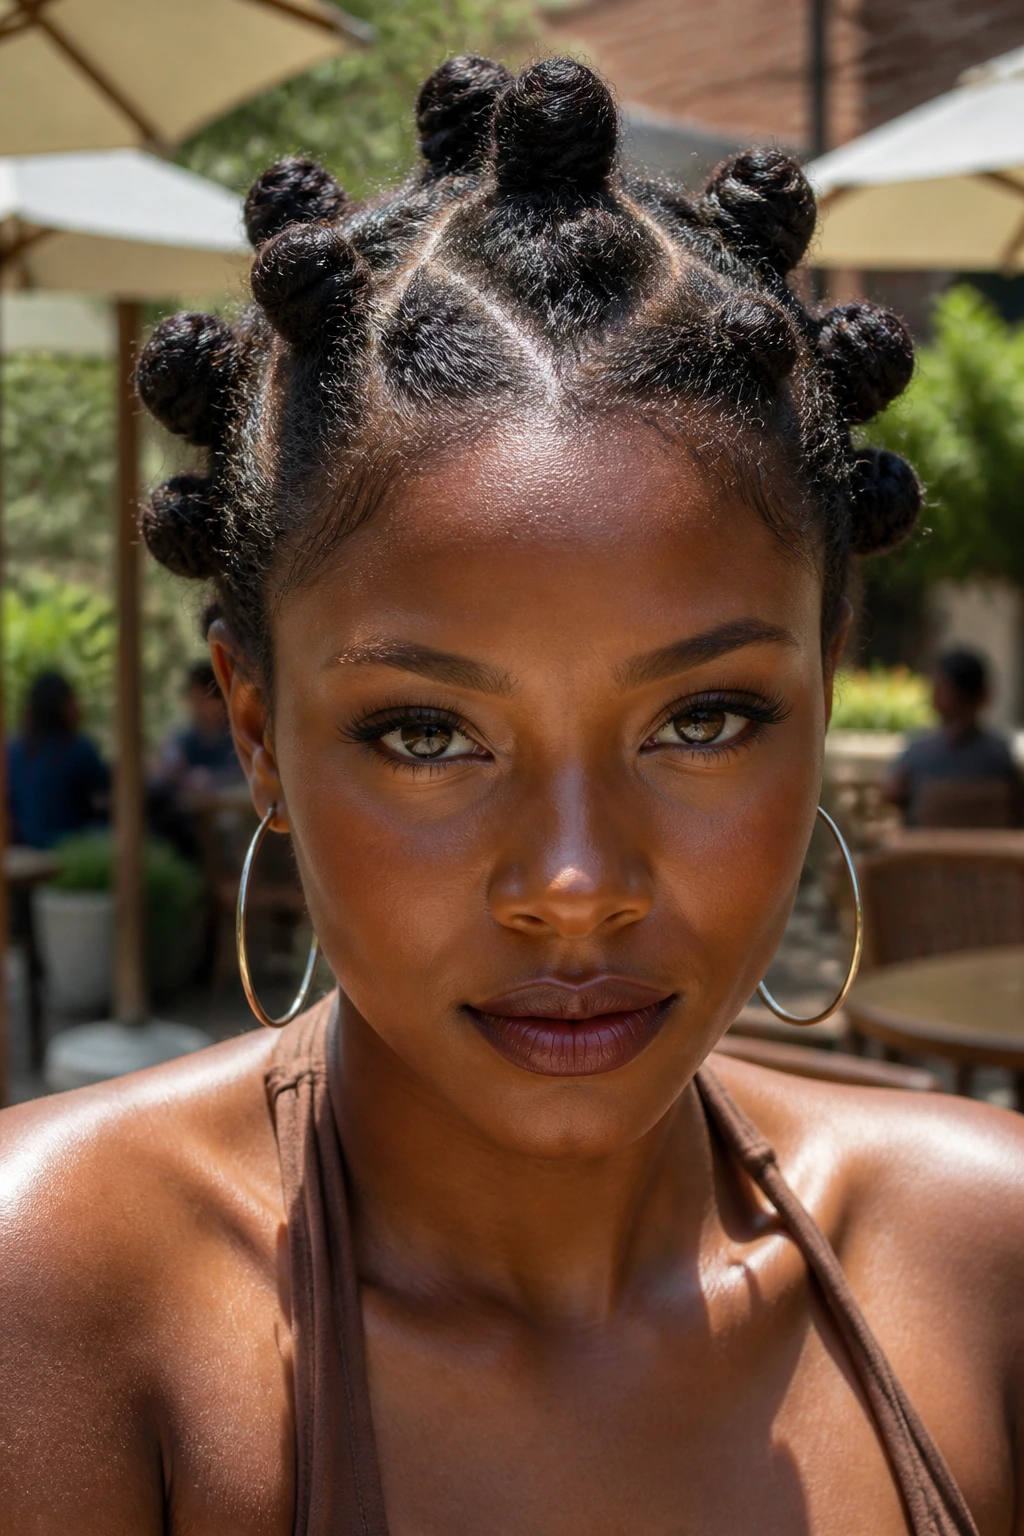
You can spot bad crochet Bantu knots from across the room. The fiber shines too hard, the knots are all the size of limes, and the parting looks like someone drew a checkerboard onto the scalp with a ruler. Good crochet Bantu knot styles do the opposite. They sit closer to the head, use texture that reads like stretched natural hair, and break up that stiff “pack hair” finish that gives synthetic installs away.
Three things decide whether the style passes up close: fiber texture, section size, and hairline work. A soft kinky blend beats slick fiber nearly every time. Slightly uneven parting looks more convincing than perfect little boxes. And the front matters more than people think; if the temples are packed too full, the whole style starts looking helmet-like.
Bantu knots also deserve more respect than they often get in trend cycles. They come out of African hair traditions, and when you do a crochet version, the goal should not be to flatten that history into a costume. The shape, the scale, and the way the knots sit on the head all matter.
Some people want tiny knots that mimic a full hand-done set. Others want a bob, a mohawk, a color melt, or a softer front with curls. The styles here are the ones I’d point to first when the brief is short and clear: make it look like real Bantu knots, not a shortcut pretending to be one.
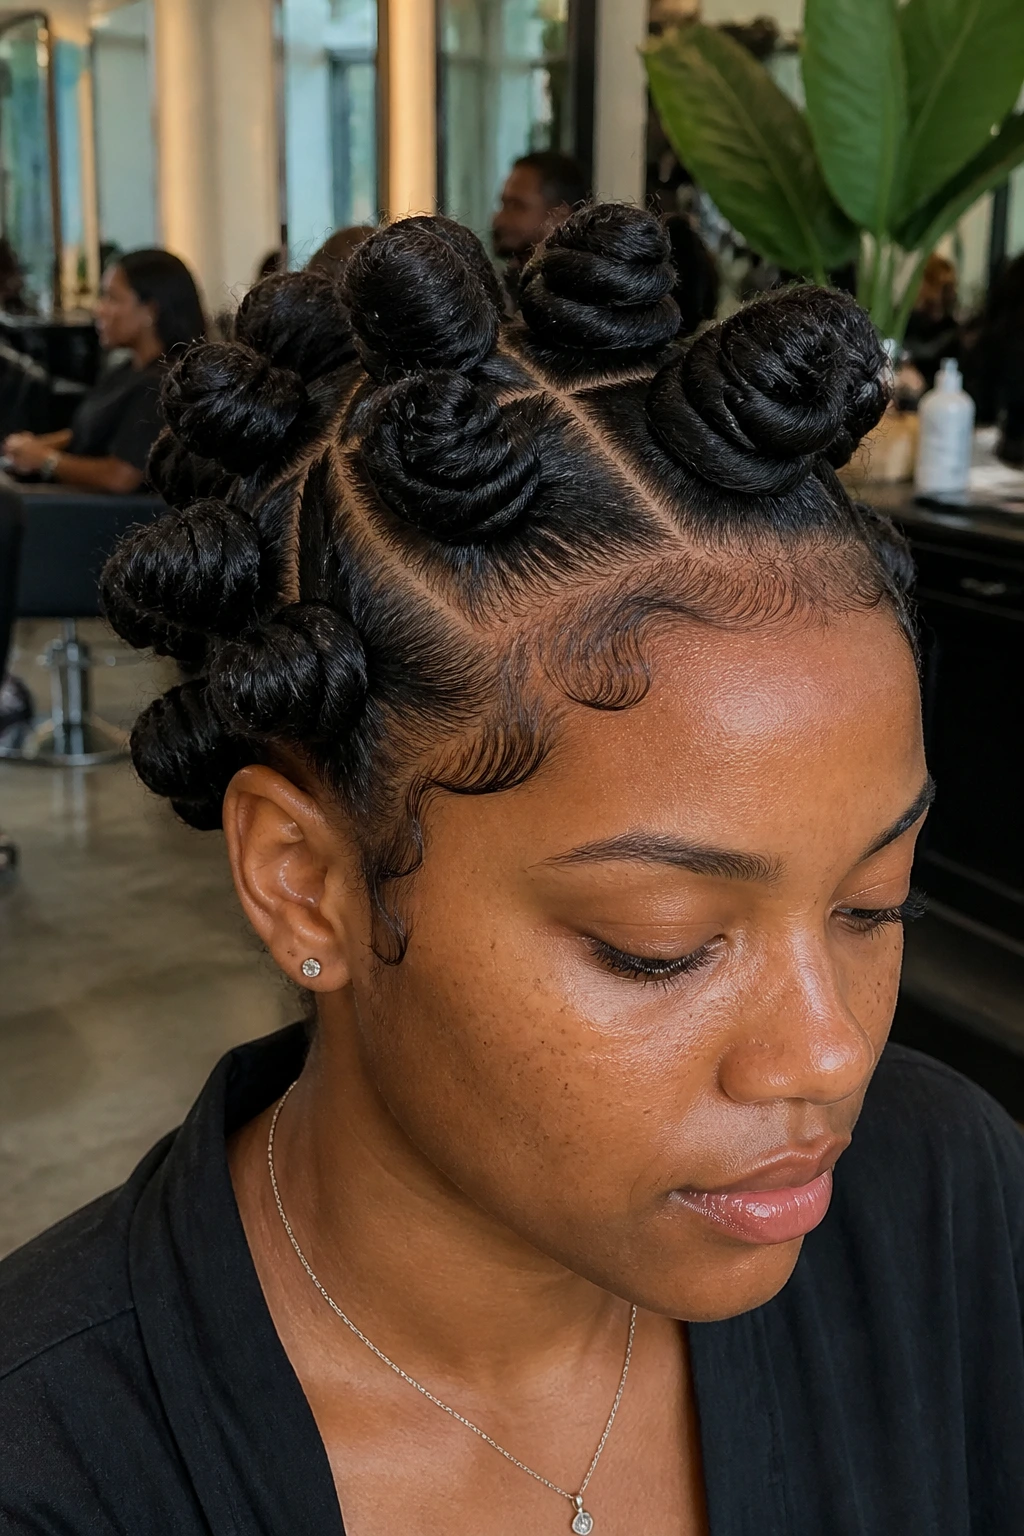
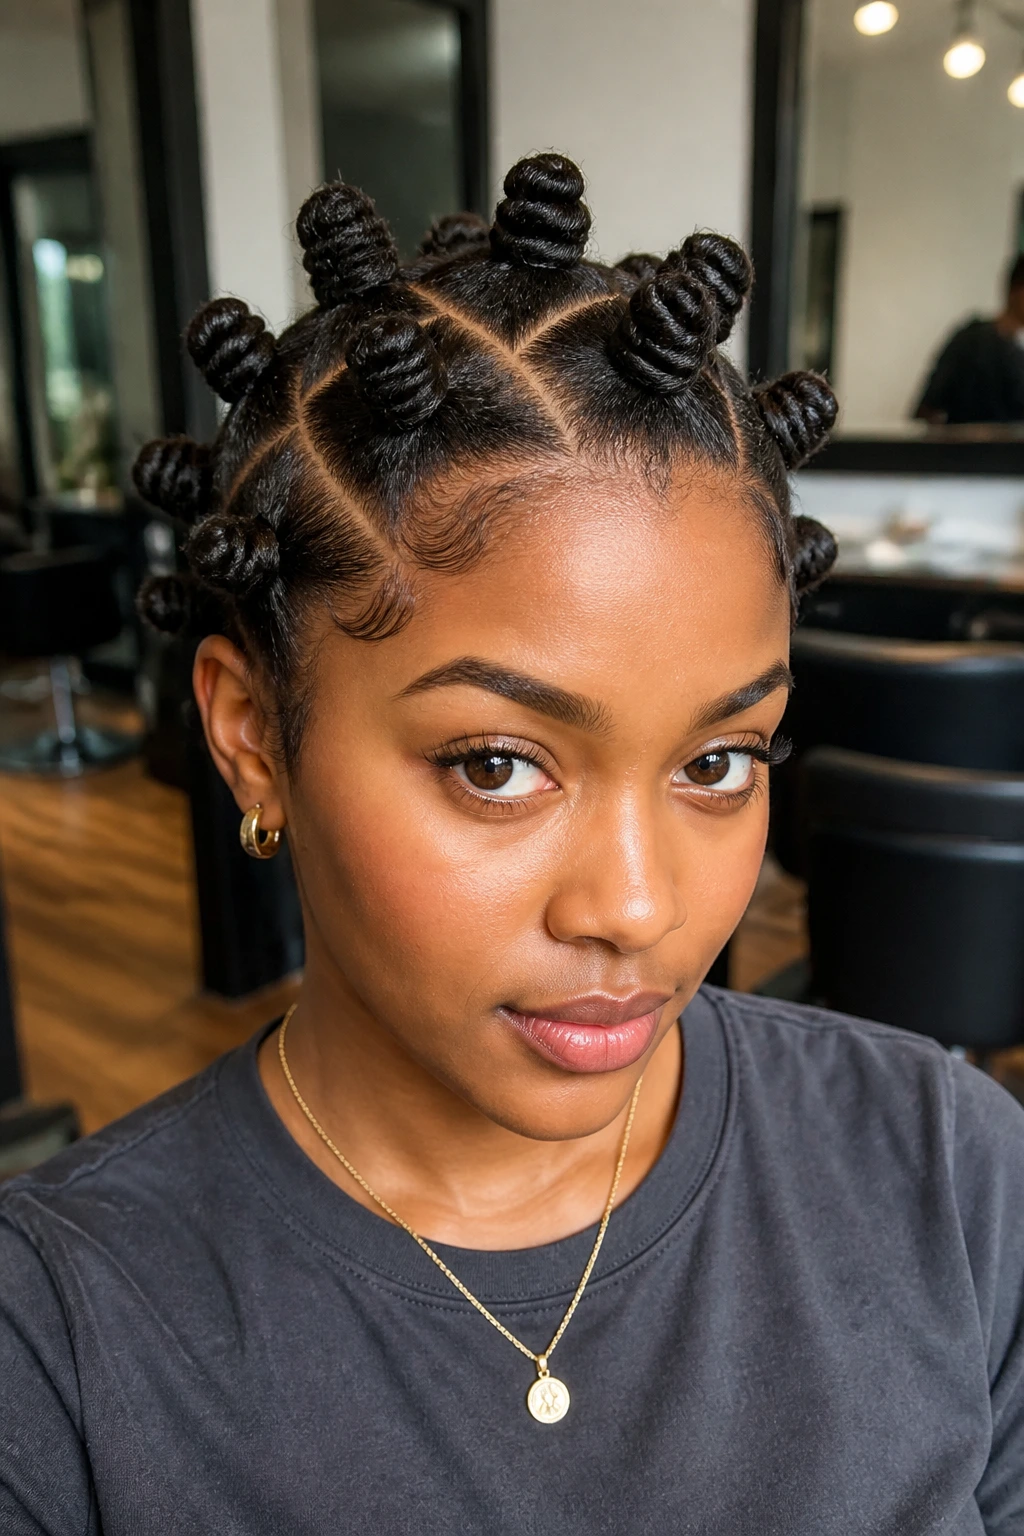
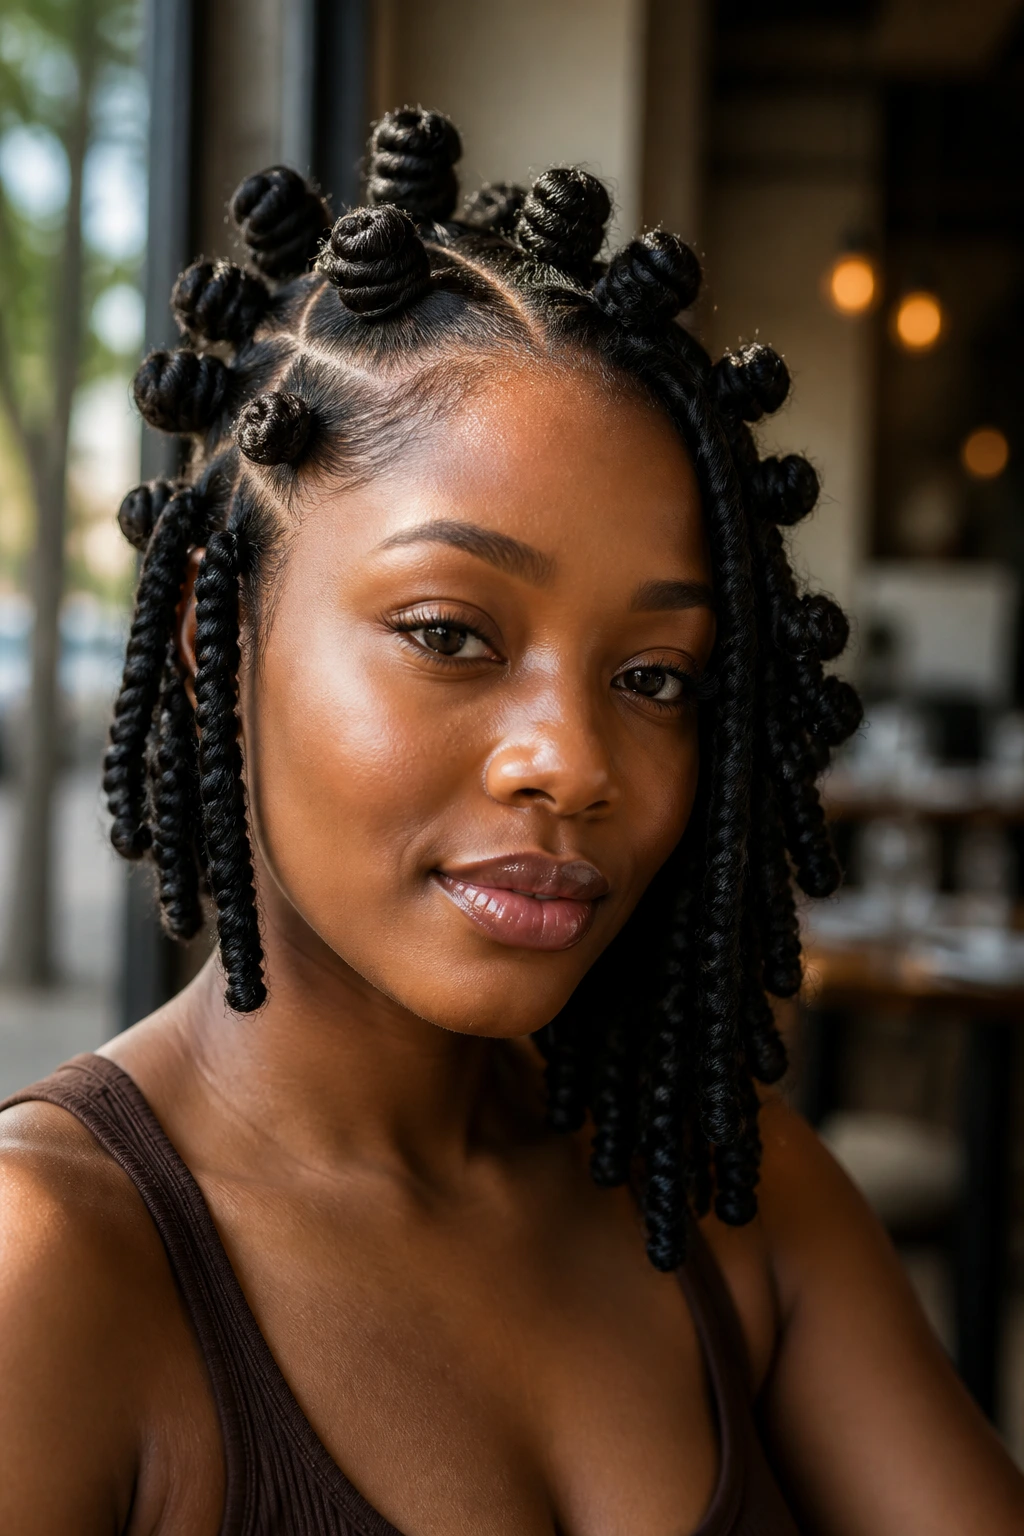
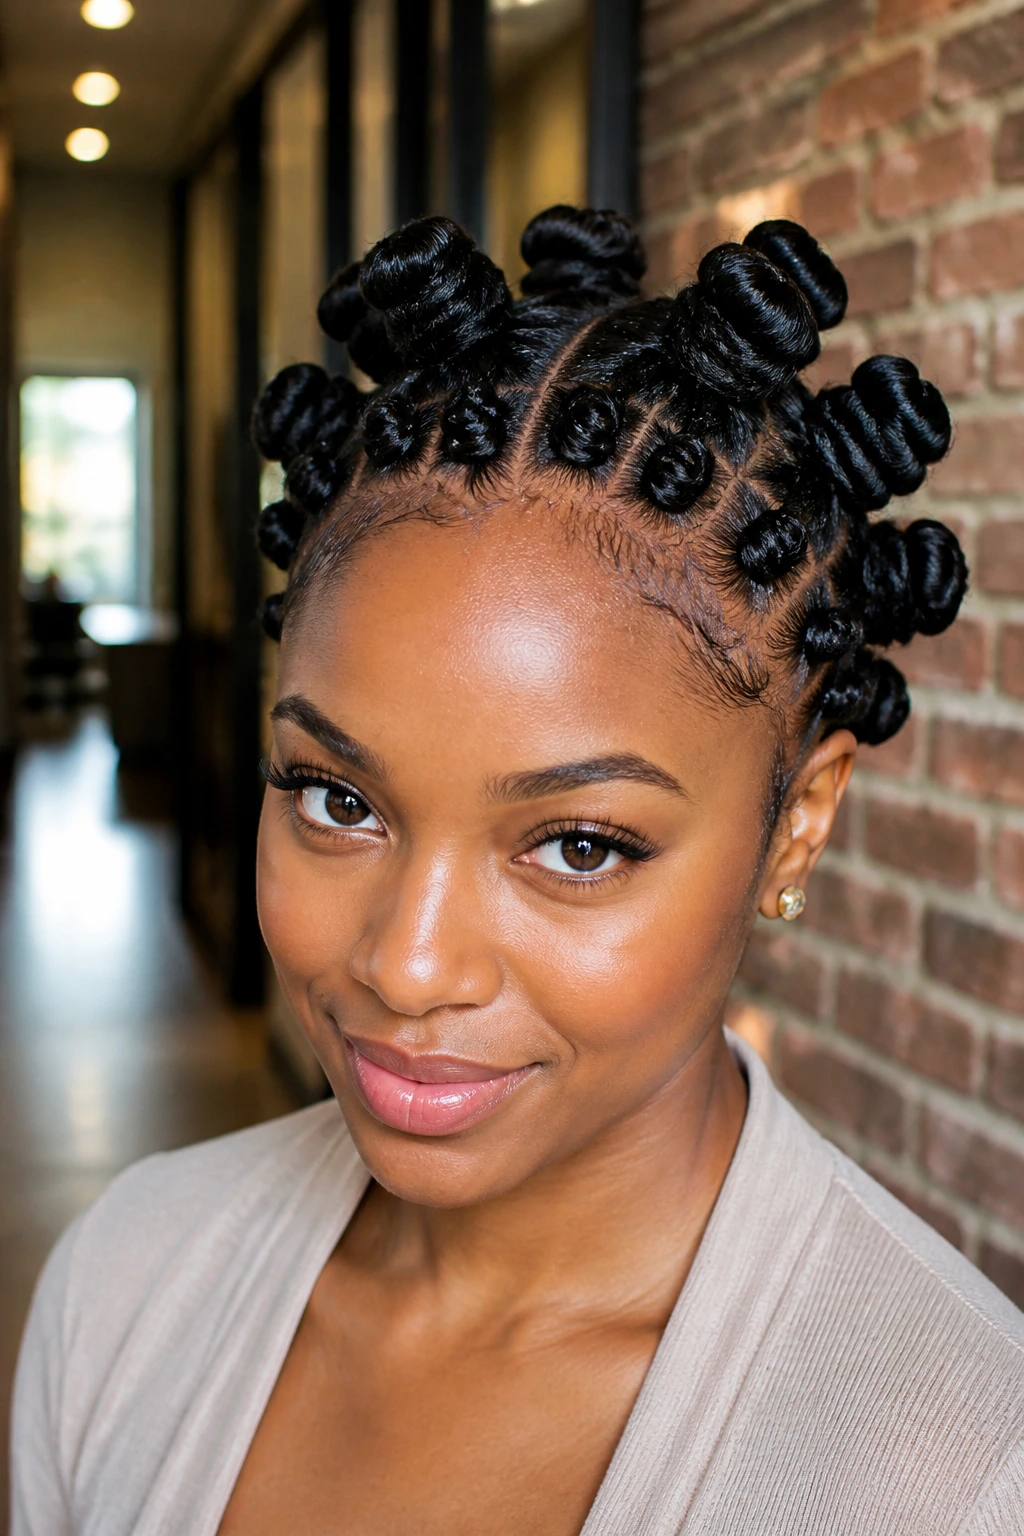
1. Mini Center-Part Crochet Bantu Knots
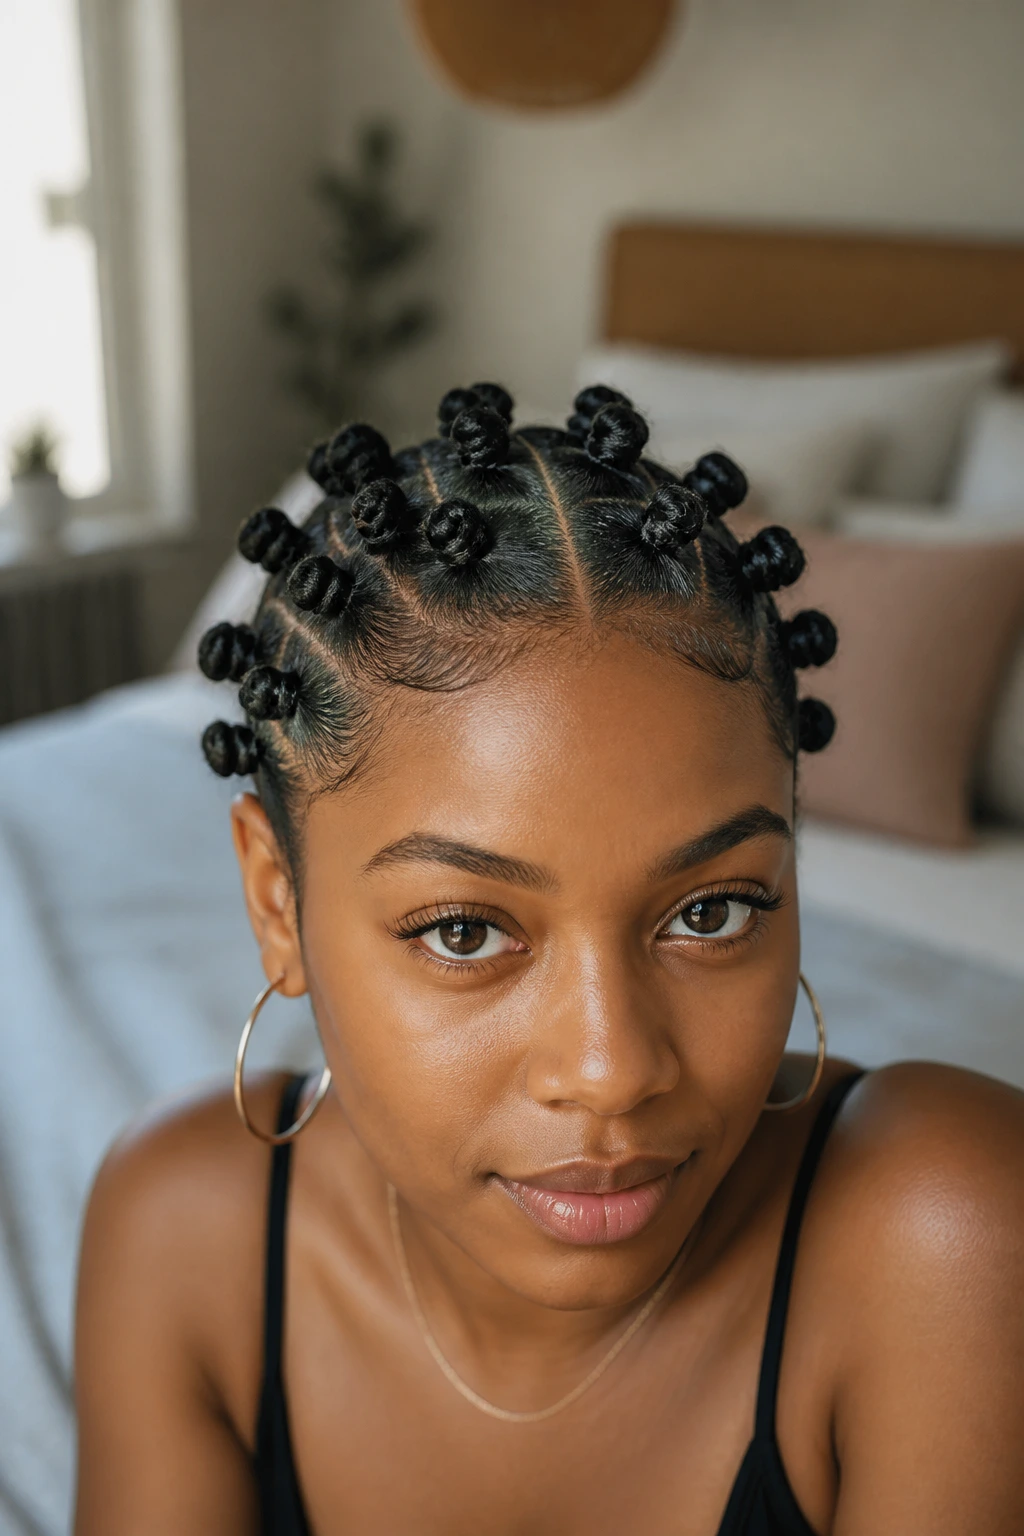
A center part can look sharp or harsh, and the difference usually comes down to knot size. When the knots are mini to small—about marble size rather than golf-ball big—the style lands in a much more believable place. On a braided base with 10 to 12 slim cornrows, those little knots sit close enough to the scalp that the whole install feels intentional instead of bulky.
Why the smaller scale reads as natural
Hand-wrapped Bantu knots on natural hair rarely come out like factory clones. A stylist who alternates 3/8-inch and 1/2-inch sections near the front creates the kind of small irregularity that real hair has. You do not want chaos. You do want a little life.
Quick details that help
- Ask for slightly staggered front rows instead of one hard straight line from temple to temple.
- Choose 1B, soft black, or a 1B/2 mix if you want the finish to feel less wiggy.
- Keep the part line clean, though not carved too wide. A thin scalp line usually looks more believable than a dramatic part.
- Set the finished knots with mousse and a satin scarf for 10 minutes so they flatten at the roots.
A middle part like this suits oval, heart-shaped, and long faces especially well. If you’re trying crochet Bantu knots for the first time, this is a smart place to start.
2. Side-Part Bantu Knot Bob
A side part does half the realism work for you. The minute you push the visual weight to one side, the style stops reading like a mannequin sample and starts reading like hair someone chose for her own face.
The bob length helps too. When the knots end around the jaw or a little below it, they frame the cheeks instead of stacking all their bulk at the crown. That balance matters. A crochet install can look fake fast when every knot sits high and wide.
A side-part Bantu knot bob usually works best with 8-inch to 10-inch crochet hair, wrapped into medium knots and placed a touch lower near the ear on the fuller side. The smaller side should not be empty, though. You still need enough density to keep the scalp from peeking through in odd spots.
I like this one for work settings because it feels tidy without looking stiff. You can wear it with a sharp part, no extra curls, and a restrained hairline, and it still has shape. No noise. No costume energy.
3. Warm Brown Ombre Crochet Bantu Knots
Why do warm brown ends often look more convincing than flat jet black synthetic hair? Because tone breaks up shine. When the hair shifts from 1B or dark brown at the root into #4 or #30 through the outer wrap, light hits the knots in a softer way, and the plastic finish most crochet hair carries becomes less obvious.
Color placement matters more than the color itself. If the lighter shade starts too close to the scalp, the knots can look dipped rather than wrapped. A cleaner approach is to keep the first inch dark, then let the brown show on the outer half of each knot. That gives dimension without turning the whole set into a stripe pattern.
How to wear the color without it looking loud
Medium knots do this shade shift best. Tiny knots can make the ombre disappear, while jumbo knots can make the color bands look chunky. Aim for 12 to 16 knots across the full head if you want an easy balance between fullness and scalp visibility.
Brown ombre crochet Bantu knots also age well. Day one looks crisp; day eight often looks even better because the wrap relaxes a bit and the colors blend more naturally.
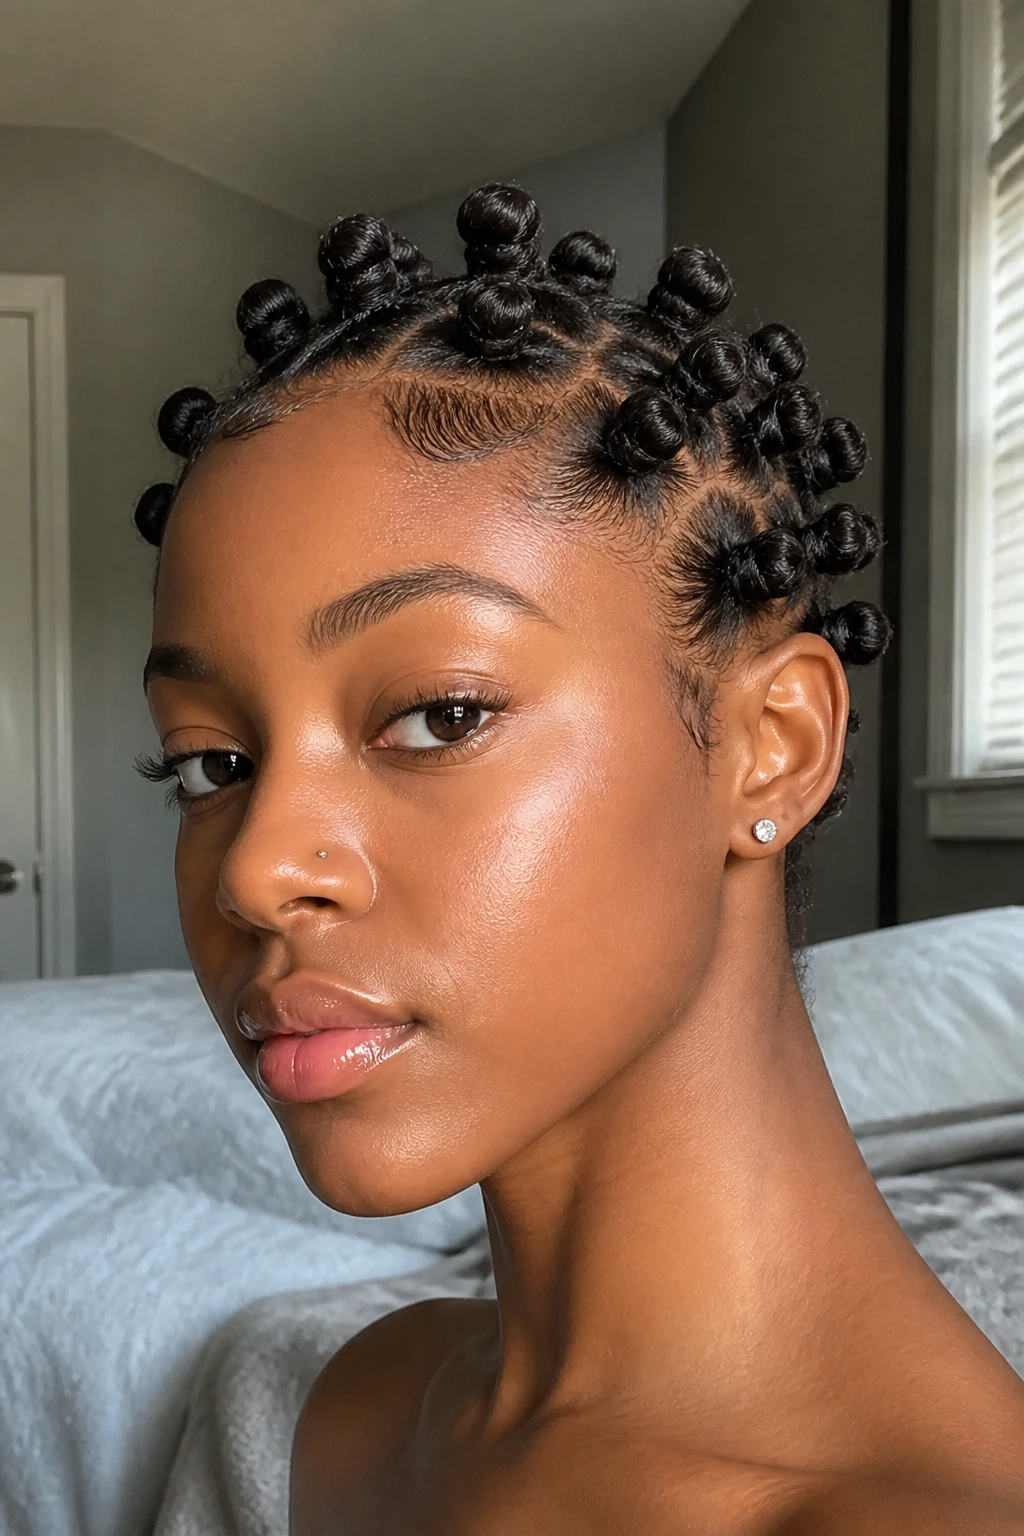
4. Scalp-Showing Micro Bantu Knots
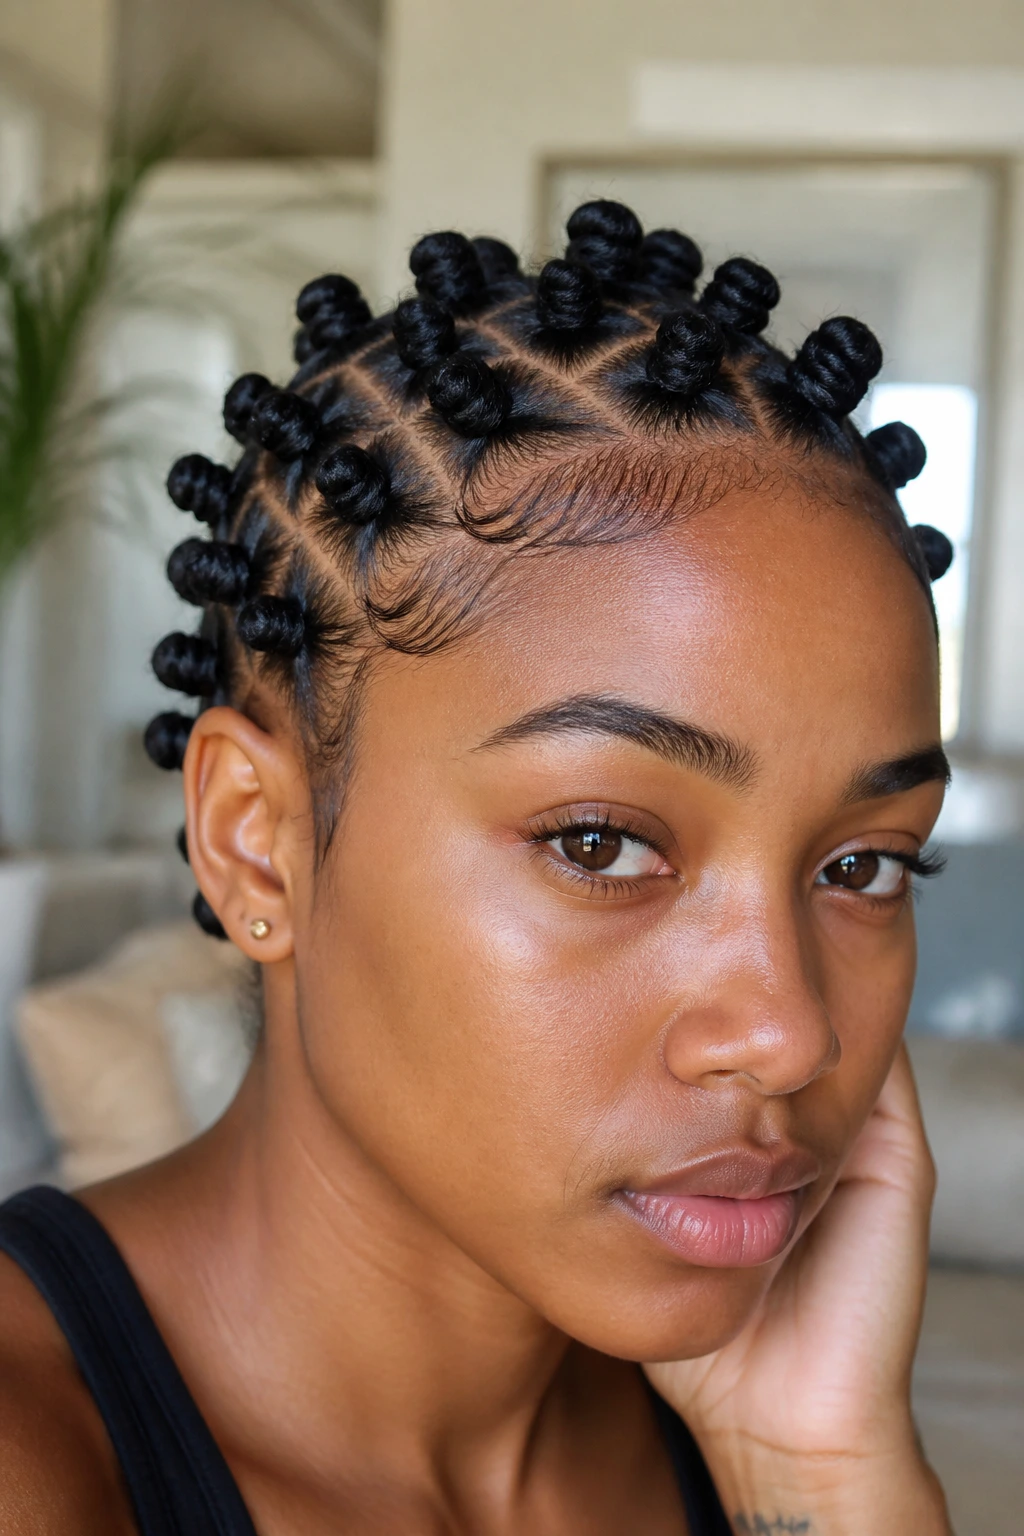
Picture the front row lifting when the wind hits. If you can see a little scalp between tiny knots, that is usually a good sign. A dense wall of fiber right at the hairline rarely passes for real, especially under daylight.
Micro crochet Bantu knots can look close to hand-done knots when the install is built on small feed-in braids or narrow cornrows and the knots are no bigger than large blueberries. They take more patience, and yes, they can test a stylist’s wrists, but the payoff is strong.
Here’s what makes this version work:
- Visible scalp channels between front sections
- A softer temple area with fewer pieces packed in
- Knots wrapped tight enough to hold shape, though not so tight they look like hard buttons
- A light trim of fuzzy ends instead of cutting every stray fiber flat
These are camera-friendly too. Close-up photos tend to expose bulky crochet work, while micro knots hide the base better. If you like the look of a full natural Bantu knot set and want a crochet version that gets close, this one earns its seat.
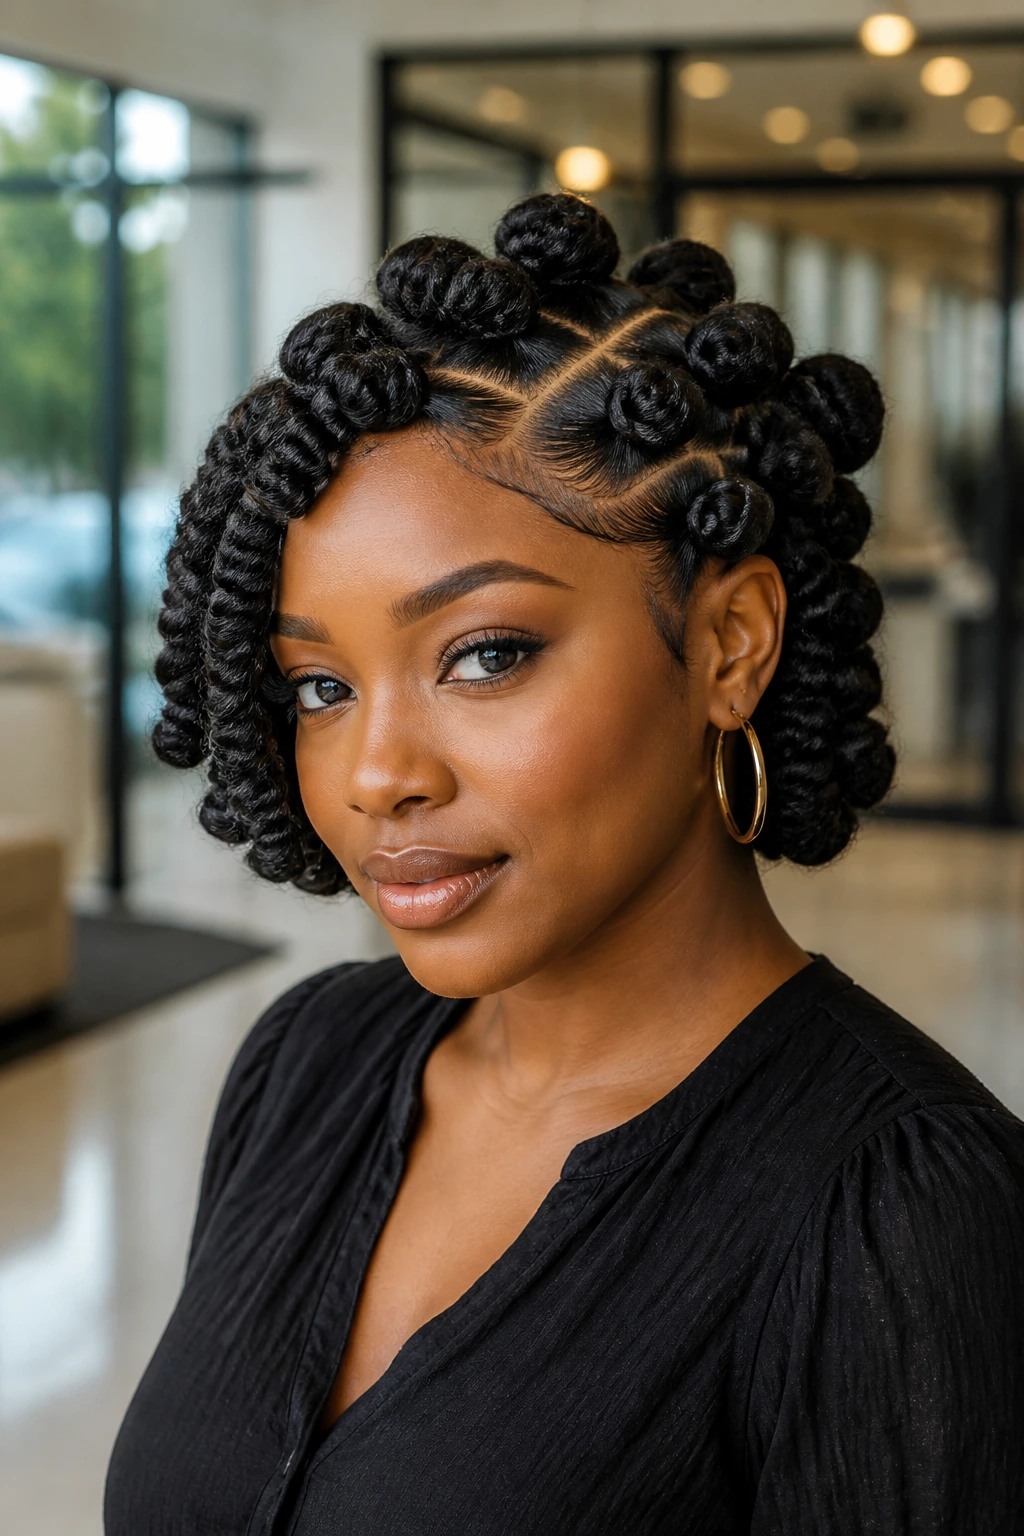
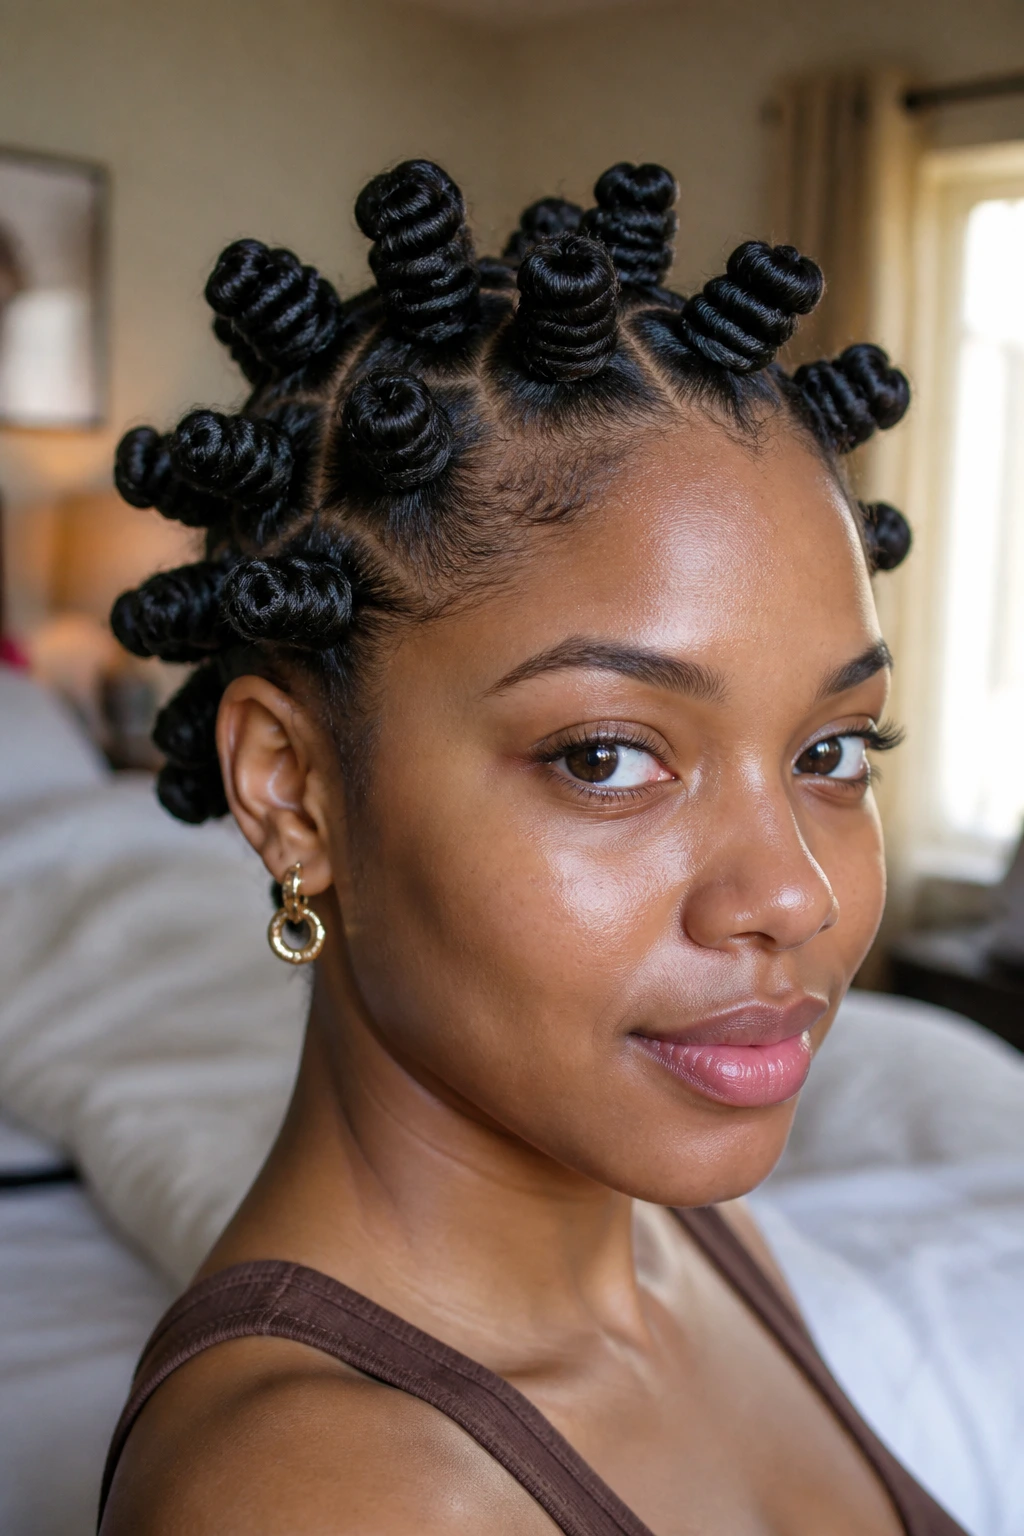
5. Jumbo Crown Bantu Knots with Soft Edges
Jumbo knots can go wrong in a hurry. Make every knot large, place them in even rows, and the style starts looking theatrical. Shift the scale, though, and the whole mood changes.
The trick is to keep the largest knots on the crown, where volume makes sense, and shrink the perimeter. Six or eight fuller knots up top paired with smaller side knots create a silhouette that feels grounded. Your eye reads shape first, and that crown-heavy shape is closer to how many people actually style oversized Bantu knots on stretched hair.
A softer edge line helps. I am not talking about carved baby hairs looping across the forehead like frosting. I mean leaving the hairline lighter, using edge control sparingly, and letting the front look like skin and hair rather than art project precision.
Long faces and angular cheekbones carry this style especially well because the wider crown balances them out. If your head runs small, tell your stylist to stop the knot width around 1.5 inches max. Bigger than that, and the style starts wearing you.
6. Boho Bantu Knots with Curly Wisps
Unlike a sealed, tight crochet knot set, a boho version leaves room for a little softness. A few curly tendrils at the nape, sideburn area, or front corners can make the style look less rigid and more lived in.
The key word there is few. Once every knot has loose curly hair spilling out of it, the style drifts away from Bantu knots and into novelty territory. Two face-framing wisps and maybe four or five small curls around the back do enough.
Curly accents also help if your crochet fiber feels too uniform. Mixing a kinky base with a deep-wave or water-wave accent hair in the same shade breaks up the finish and keeps the eye moving. That small texture change can do more than a bold color ever will.
This is the version I’d choose for someone who likes softness around the face and hates a severe hairline. It still reads as a protective style. It just has a little breath in it.
7. Crochet Bantu Knot Mohawk
Not every realistic Bantu knot style has to sit low and neat. A mohawk layout can still look grounded if the sides are clean and the center line follows the shape of the head instead of perching on top like an add-on.
The shape that sells it
The sides should be flat braided or slicked down close to the scalp, with the center section holding 9 to 12 knots that get fuller toward the crown and smaller again near the nape. That rise-and-fall shape matters. If every knot in the strip is the same size, the silhouette looks too manufactured.
Fast notes for a better finish
- Use tapered side braids rather than one thick cornrow on each side.
- Leave a little scalp showing near the ears.
- Choose medium knots, not jumbo. Height comes from placement more than width.
- Pin the center knots inward if they flare too far out after day three.
A mohawk version gives you airflow, keeps the neck open, and still respects the knot shape. It’s bold, though not messy. That distinction counts.
8. Half-Up Half-Down Crochet Bantu Knots

This style works because it feels like something someone might do on day five of wearing knots, not something built only for a photo. The top half is gathered into five to seven Bantu knots, while the lower half stays in loose crochet coils, twists, or stretched textured hair.
That split makes the style easier to wear if a full head of knots feels like too much height for your face. It also softens the finish around the neck and shoulders. Full knot sets can look dense from the side; this one keeps movement in the lower section.
I would not pair the top knots with bone-straight loose hair. The contrast is too sharp. A better match is kinky curly, coily, or brushed-out Marley texture so the whole set feels connected.
There’s also a practical upside. If the lower half starts to frizz, it often still reads as part of the look. That kind of wear pattern is rare in crochet styles, and I appreciate it.
9. Chin-Length Tucked Bantu Knot Bob
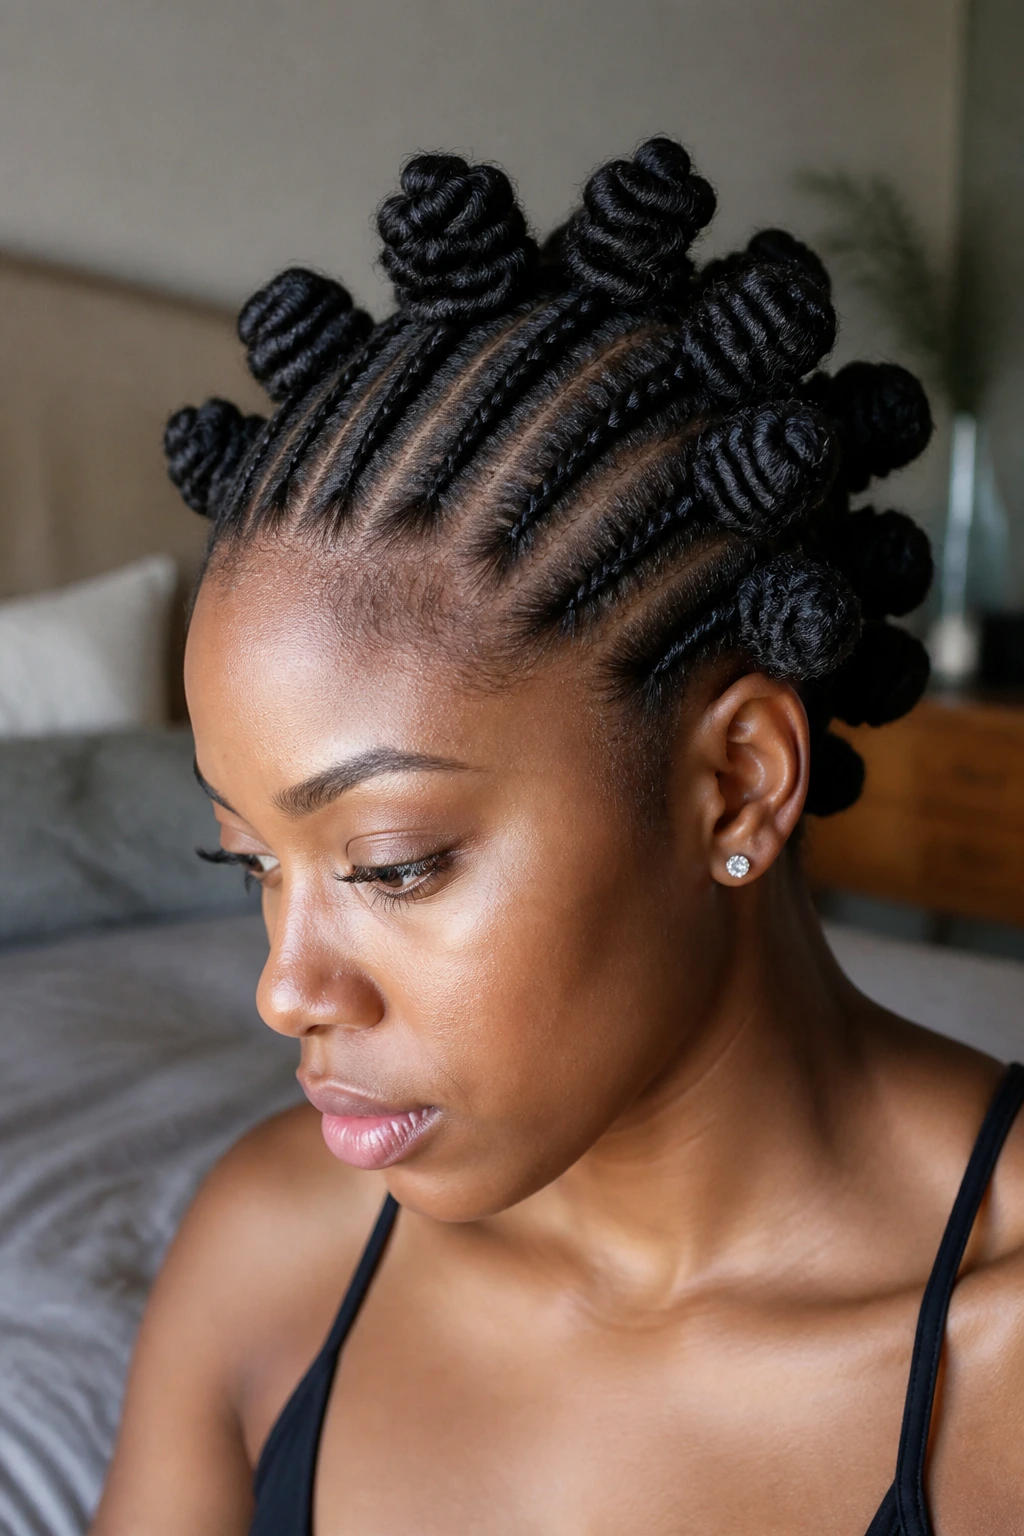
Can Bantu knots read like a bob? Yes, though only if the nape is short and snug and the side knots sit low enough to shape the jawline. Once the back gets too long, the style loses that tucked bob effect.
The hair used here should not be too long before wrapping. A lot of stylists grab longer crochet hair and force it into a bob length, which can create bulky knots because too much fiber is being folded into each section. Starting with 6-inch to 8-inch hair gives you cleaner, lighter knots.
Placement that keeps it neat
Ask for the lowest row at the nape to be made from the smallest sections. That keeps the back from puffing out under collars and scarves. Around the chin, a few slightly larger knots can add width where you want the bob shape to show.
This style has a polished feel, but it doesn’t look stiff. That’s why I like it. It gives bob energy without trying to fake loose hair.
10. Triangle-Part Crochet Bantu Knots
Square parts can look salon-fresh. They can also look like a wig cap map. Triangle parts break that pattern and make the scalp view less predictable, which often reads as more natural from normal conversation distance.
A good triangle-part set uses small to medium front triangles and slightly wider shapes through the crown, where the scalp gets less direct attention. You do not need huge dramatic triangles. Subtle geometry does more.
Try this layout if you like a little edge without adding color or extra accessories:
- Front triangles around 1/2 inch wide
- Medium knots through the top
- Smaller knots at the nape and temples
- A restrained parting line at the hairline so the style does not start with a giant zigzag
Triangle parting also helps when your stylist wants to hide the crochet base more effectively. The eye follows angles and shapes rather than looking for rows. Smart trick. Small detail. Big payoff.
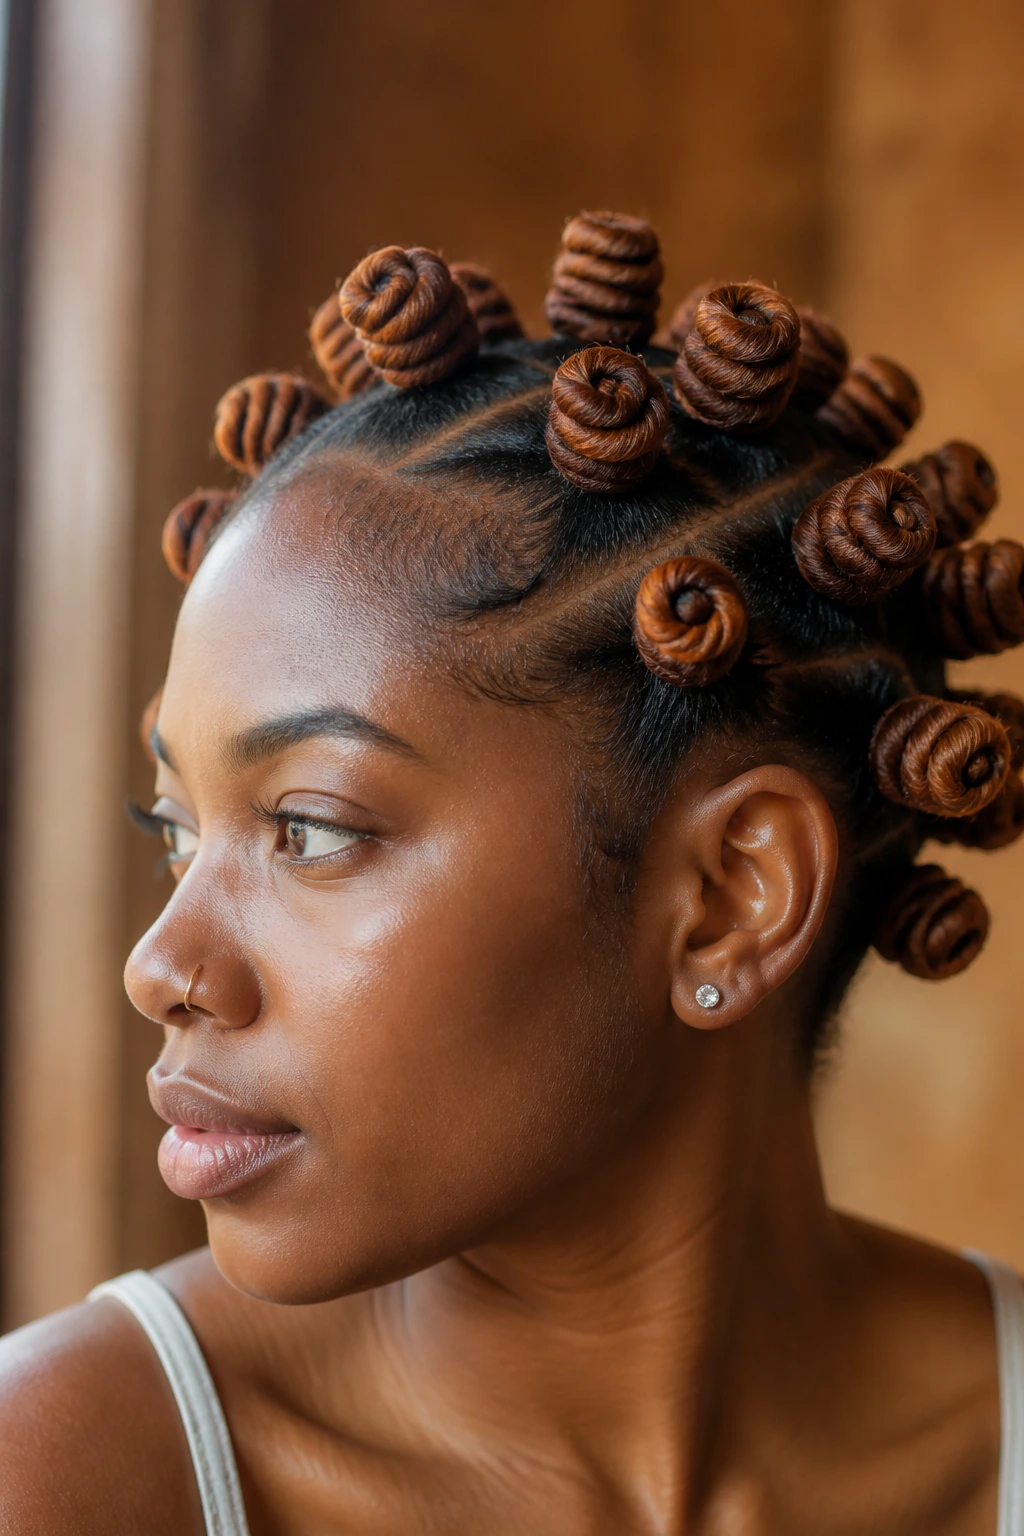
11. Espresso-to-Caramel Bantu Knots
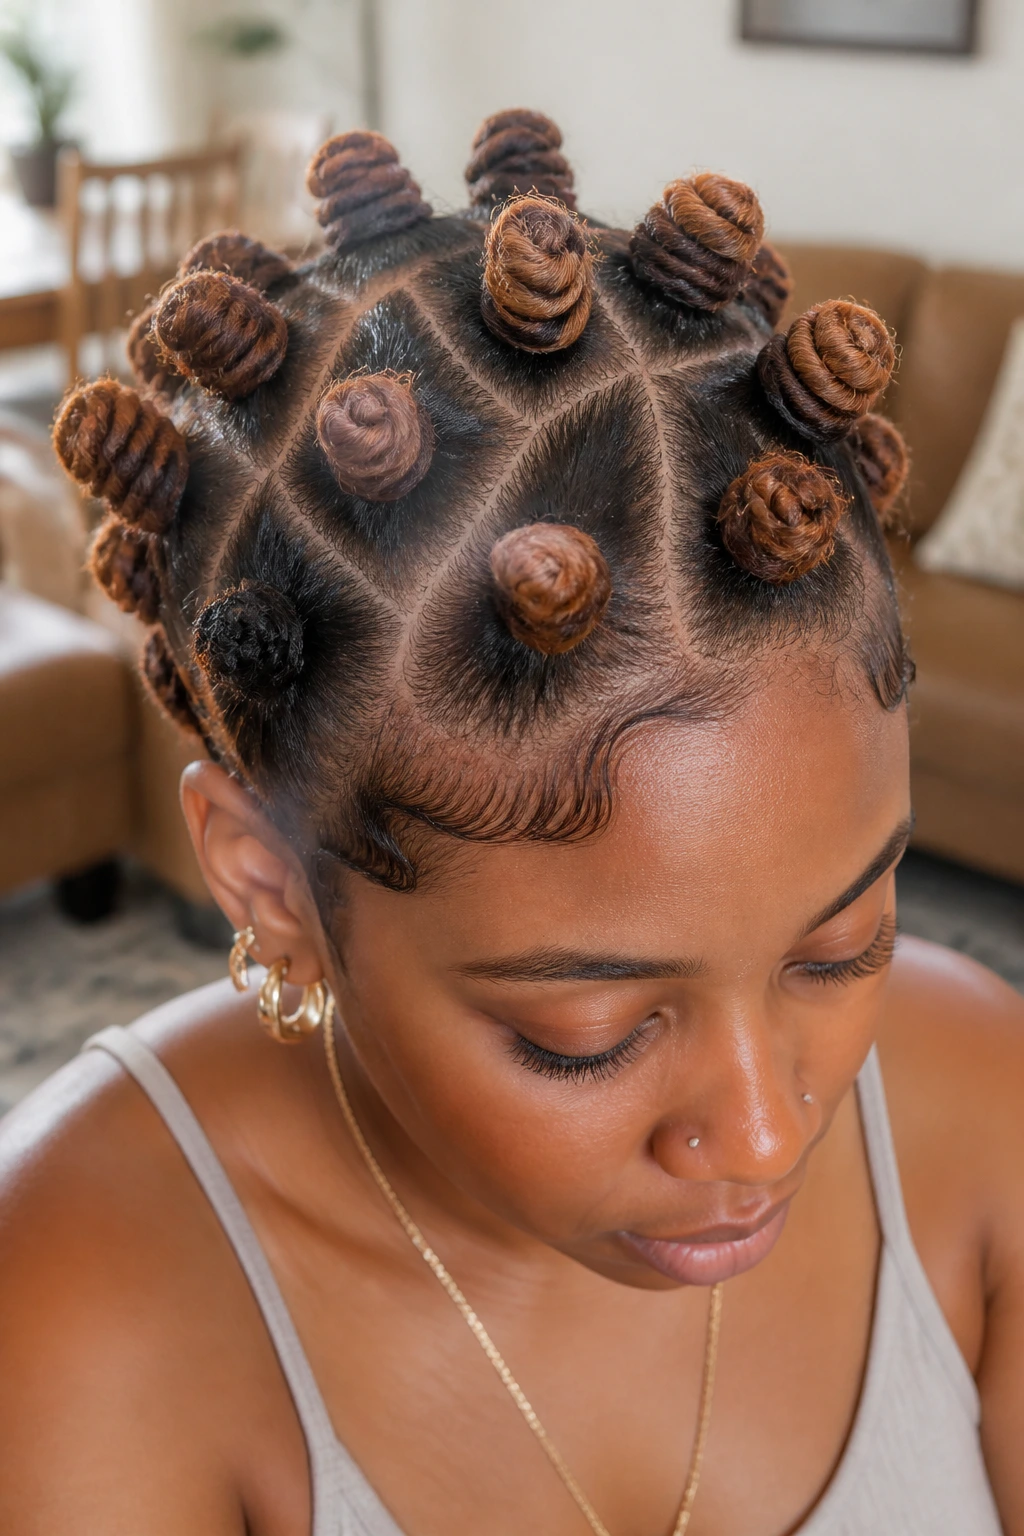
If blonde tips feel like too much, an espresso root fading into caramel-brown outer wraps lands in a calmer, richer place. It gives depth without pulling all the attention away from the knots themselves.
This blend works best when the caramel is scattered, not repeated in every single knot. I’d place lighter pieces around the outer layers of maybe one-third of the knots, mostly around the crown and front side where light hits first. That creates dimension across the head instead of turning each knot into its own striped object.
There’s also a skin-tone advantage here. Deep brown next to caramel tends to flatter more complexions than a stark black-and-blonde contrast, which can look abrupt. You do not need the entire pack of color to show. A little color on the outer curve of the knot is enough.
Wear this with gold hoops, warm makeup, or bare skin and it still holds its own. The shade story is quiet, though it is not boring.
12. Matte Kinky-Texture Bantu Knots
Unlike smooth, slick crochet fiber, a matte kinky texture gives the knots a faint softness around the edges. That tiny fuzz is what often makes the style believable. Real hair is not polished like ribbon.
This is the texture choice I argue for most often when someone says she wants crochet Bantu knots that could pass for hand-wrapped knots. Kinky braiding hair, brushed-out Marley hair, or a textured human-hair blend can all do the job better than shiny pre-looped hair that reflects light from every angle.
There is a tradeoff. The style may frizz a little faster. I’d take that deal every time. Controlled frizz on a textured install often looks more natural than a hard, glossy knot that never moves and never softens.
A satin scarf at night and a little foam in the morning are usually enough. No need to lacquer the whole head down.
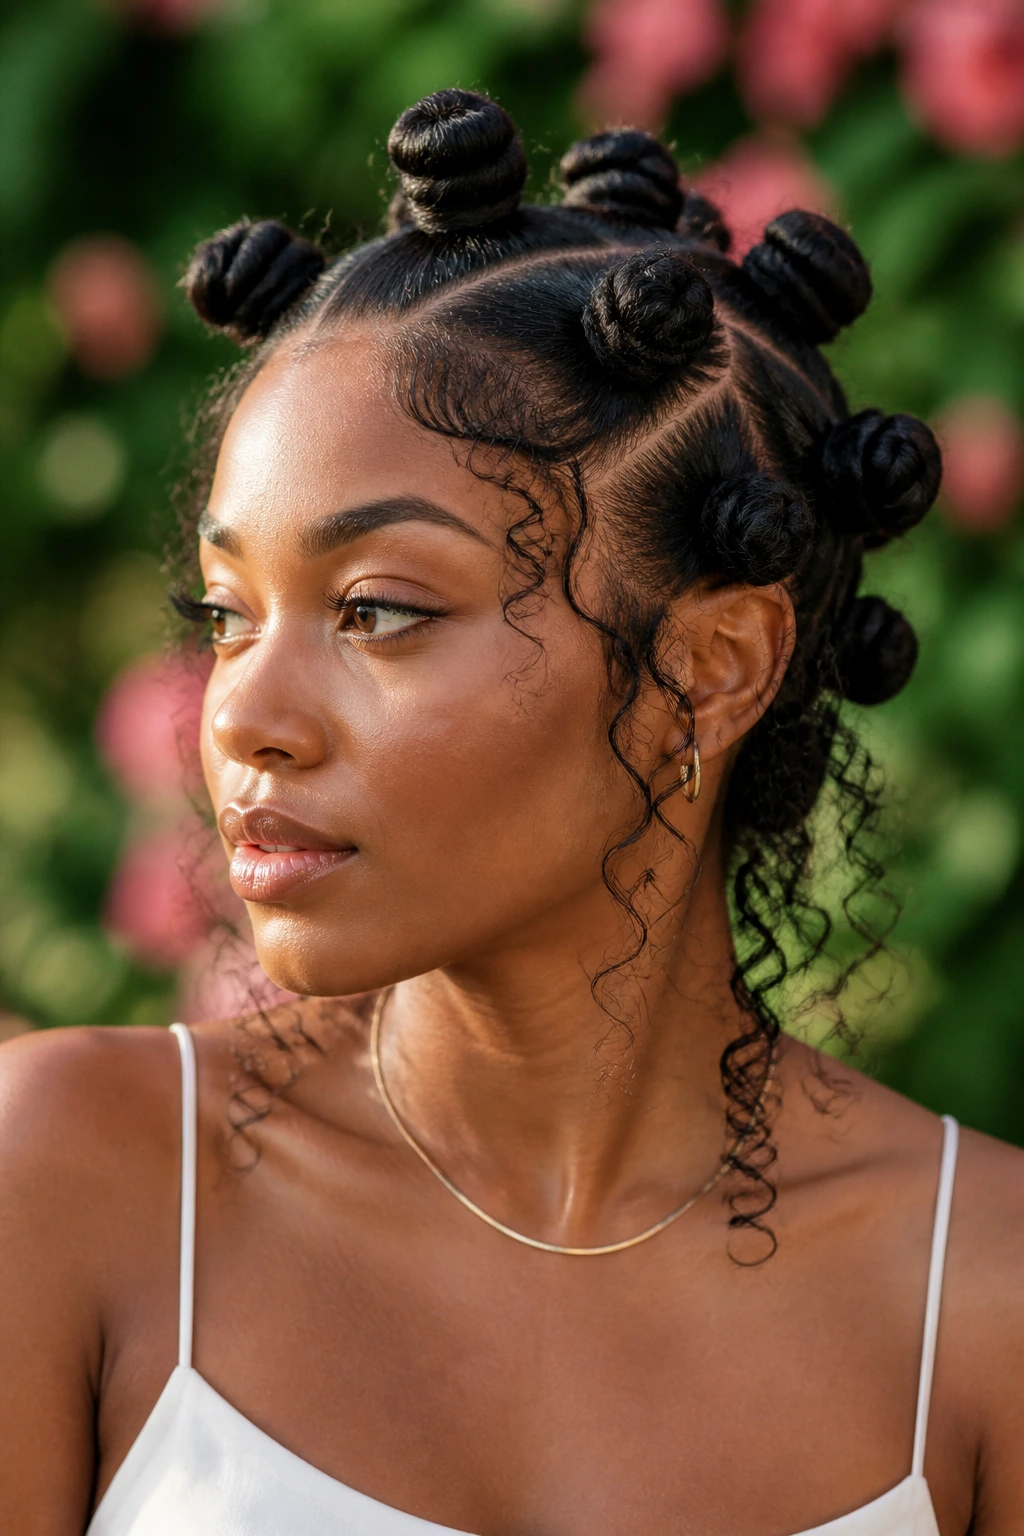
13. Face-Framing Curl Bantu Knots
A few curls around the face can rescue a knot set that feels too strict. Not a curtain of spirals. Not a whole boho explosion. Two slim curls or coils near the temples and maybe one by the ear is often enough to change the mood.
Where to place the curls
The strongest placement is right where the front knots would otherwise make the forehead look boxed in. That softens the line and makes the style feel less dense at the perimeter. It’s a small move, though your mirror will notice it fast.
Quick placement notes
- Match the curl texture to the knot hair as closely as you can.
- Use curls that hang 3 to 5 inches, not shoulder length.
- Keep the curls narrow so the knots stay the main feature.
- Skip thick baby hairs if you add curls; both together can crowd the front.
This version works well on round faces because it adds a little vertical line beside the cheeks. And it photographs nicely from the side because you get shape plus movement.
14. Asymmetrical Bantu Knot Lob
A slight drop on one side can make crochet knots feel fashion-forward without making them feel fake. That’s a narrow line, and this style walks it well when the asymmetry is subtle.
One side should hit around the jaw or upper neck, while the other falls 1 to 2 inches lower. More than that, and the haircut effect can start fighting the knot shape. Less than that, and you lose the point.
The placement has to be planned before the install begins. You cannot fake this at the end by moving a few knots around. The cornrow base needs to support that diagonal weight so the lower side does not sag after a week.
I like asymmetrical knot lobs on fuller cheeks and softer jawlines because the uneven line sharpens the outline of the face. It adds structure without needing color, beads, or side shaves. Clean idea. Strong payoff.
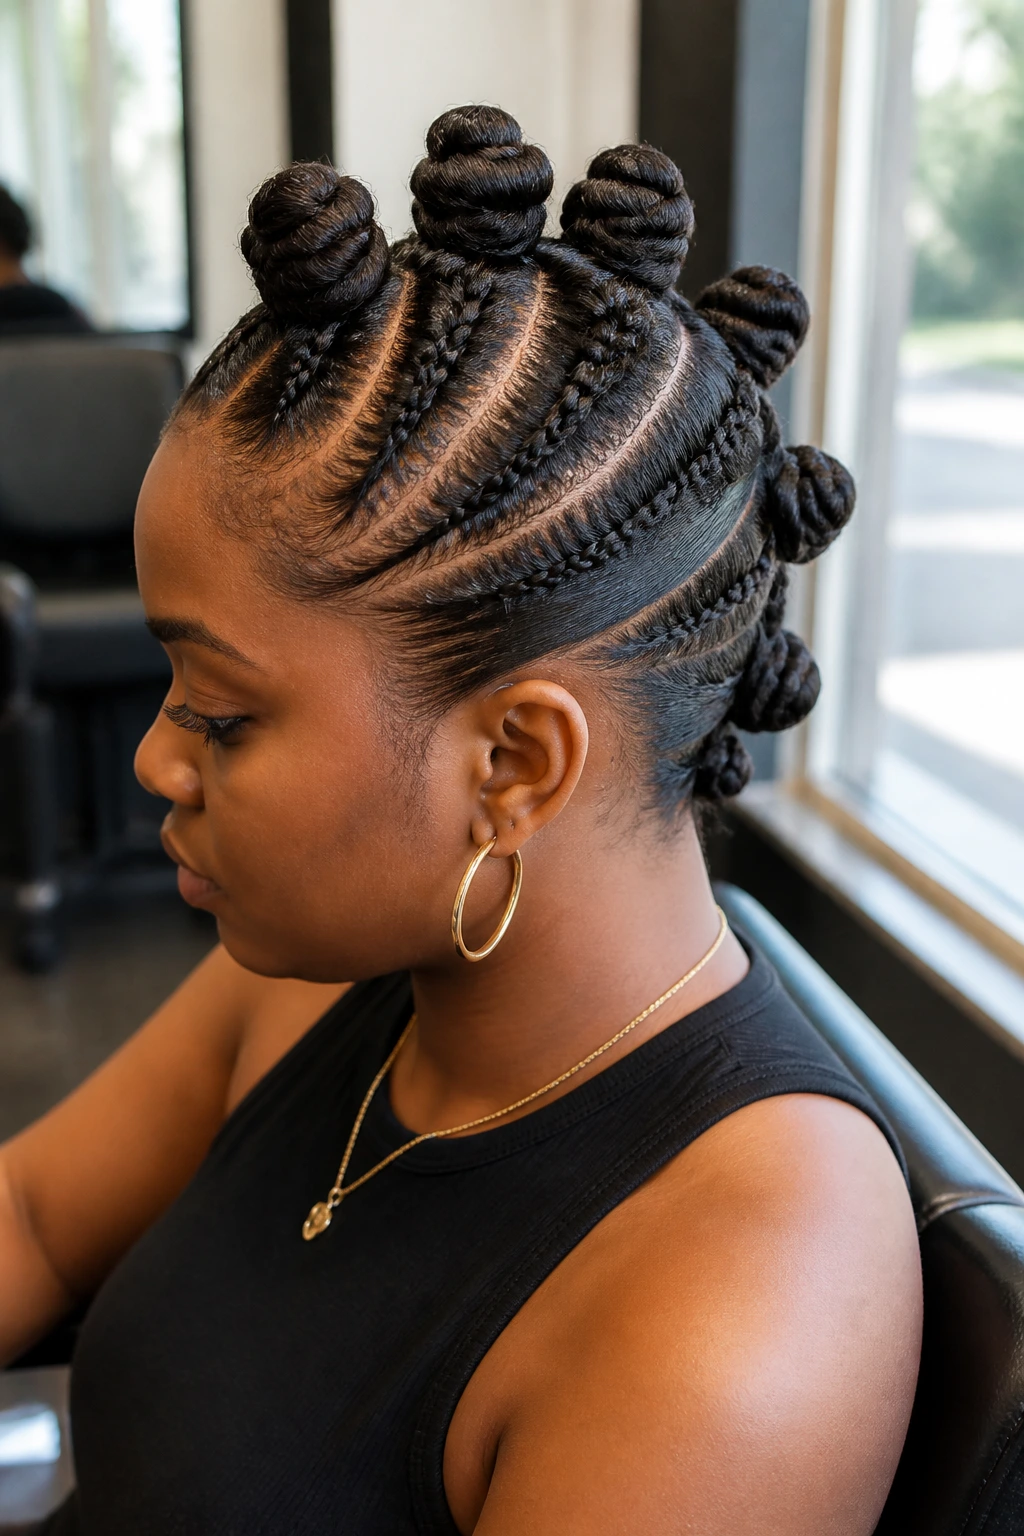
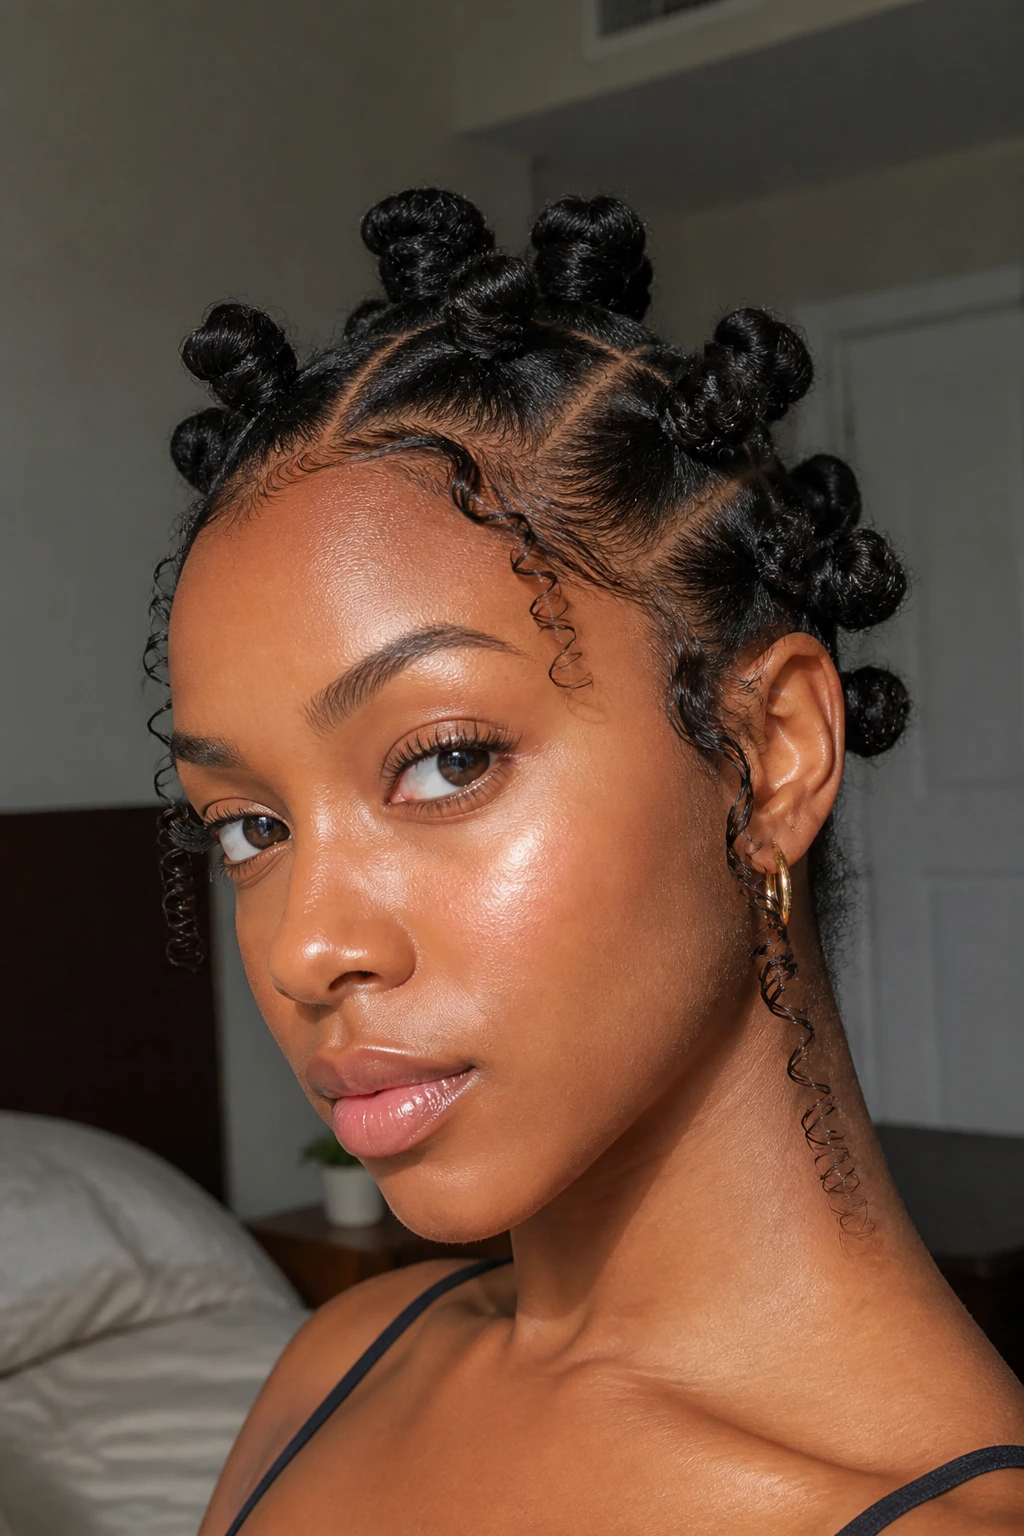
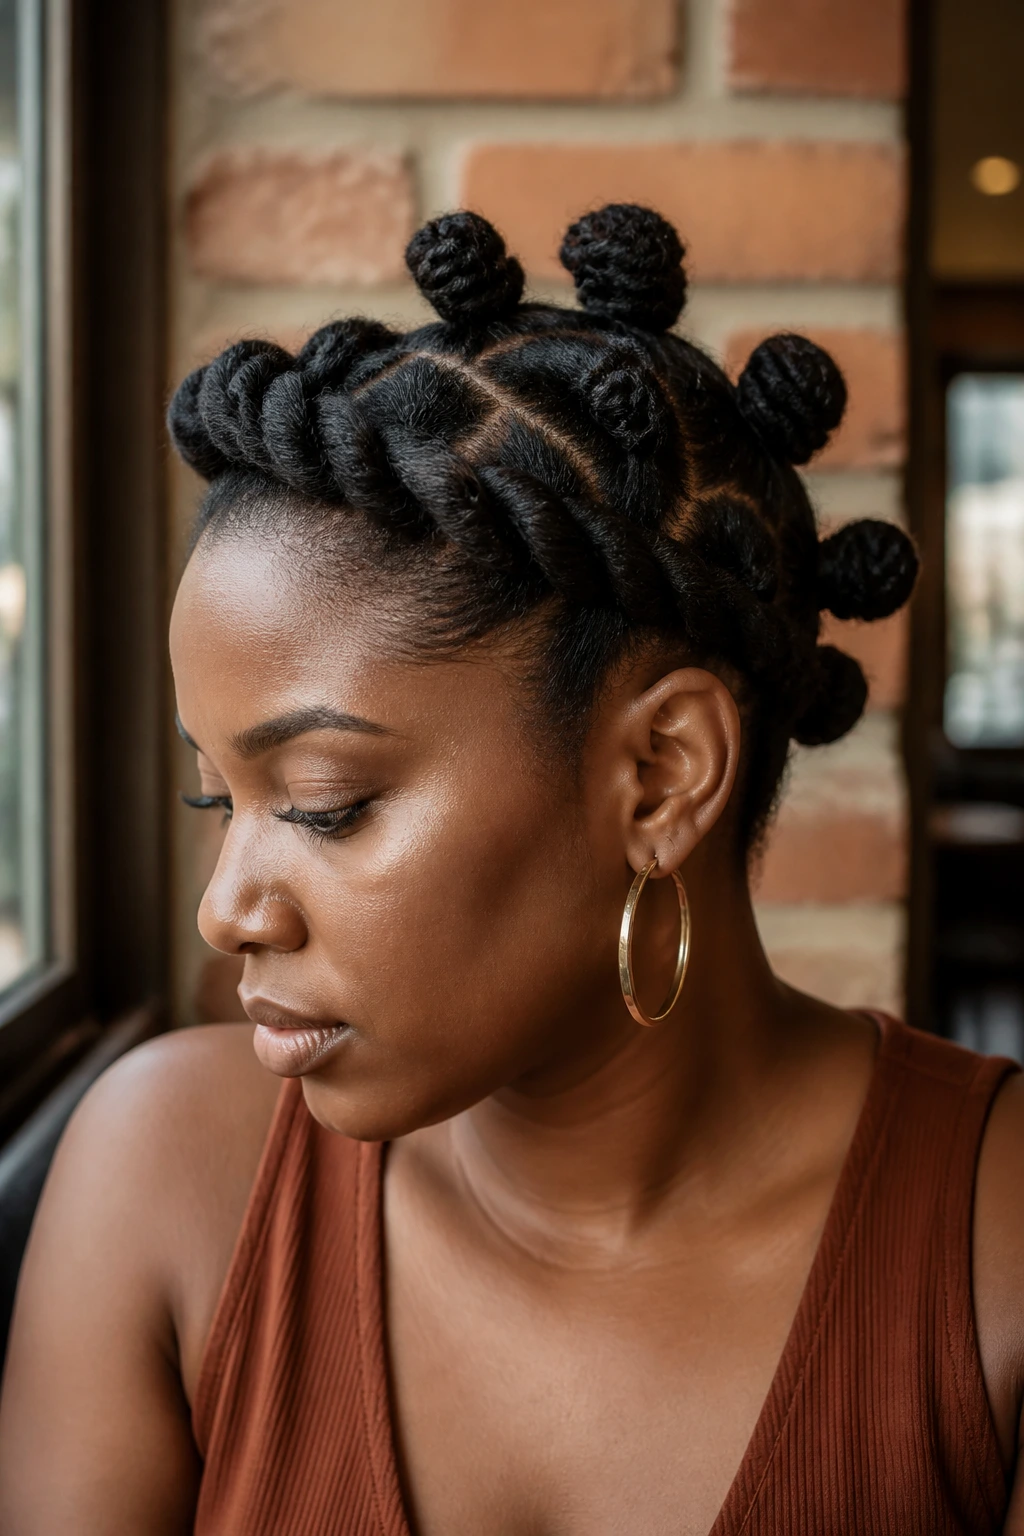
15. Front Cornrows into Crochet Bantu Knots
Want the hairline to read more like your own scalp? Start with front-facing cornrows or feed-in braids before the knots begin. That braid-to-knot transition often looks more convincing than placing crochet knots right from the front edge.
You can run four to six slim cornrows from the forehead back about 2 or 3 inches, then begin the knots behind them. That gives the front some stretch and shape, and it removes that blunt wall of fiber many crochet installs struggle with.
A layout that tends to work
Keep the front braids neat and narrow. Once they reach the crown area, place small to medium knots on the ends or between the braid rows. The result feels like a styled set rather than a single repeated unit.
This one is also practical if you exercise a lot. The braided front lies flatter under wraps and caps, and the knots in back keep the style from feeling plain.
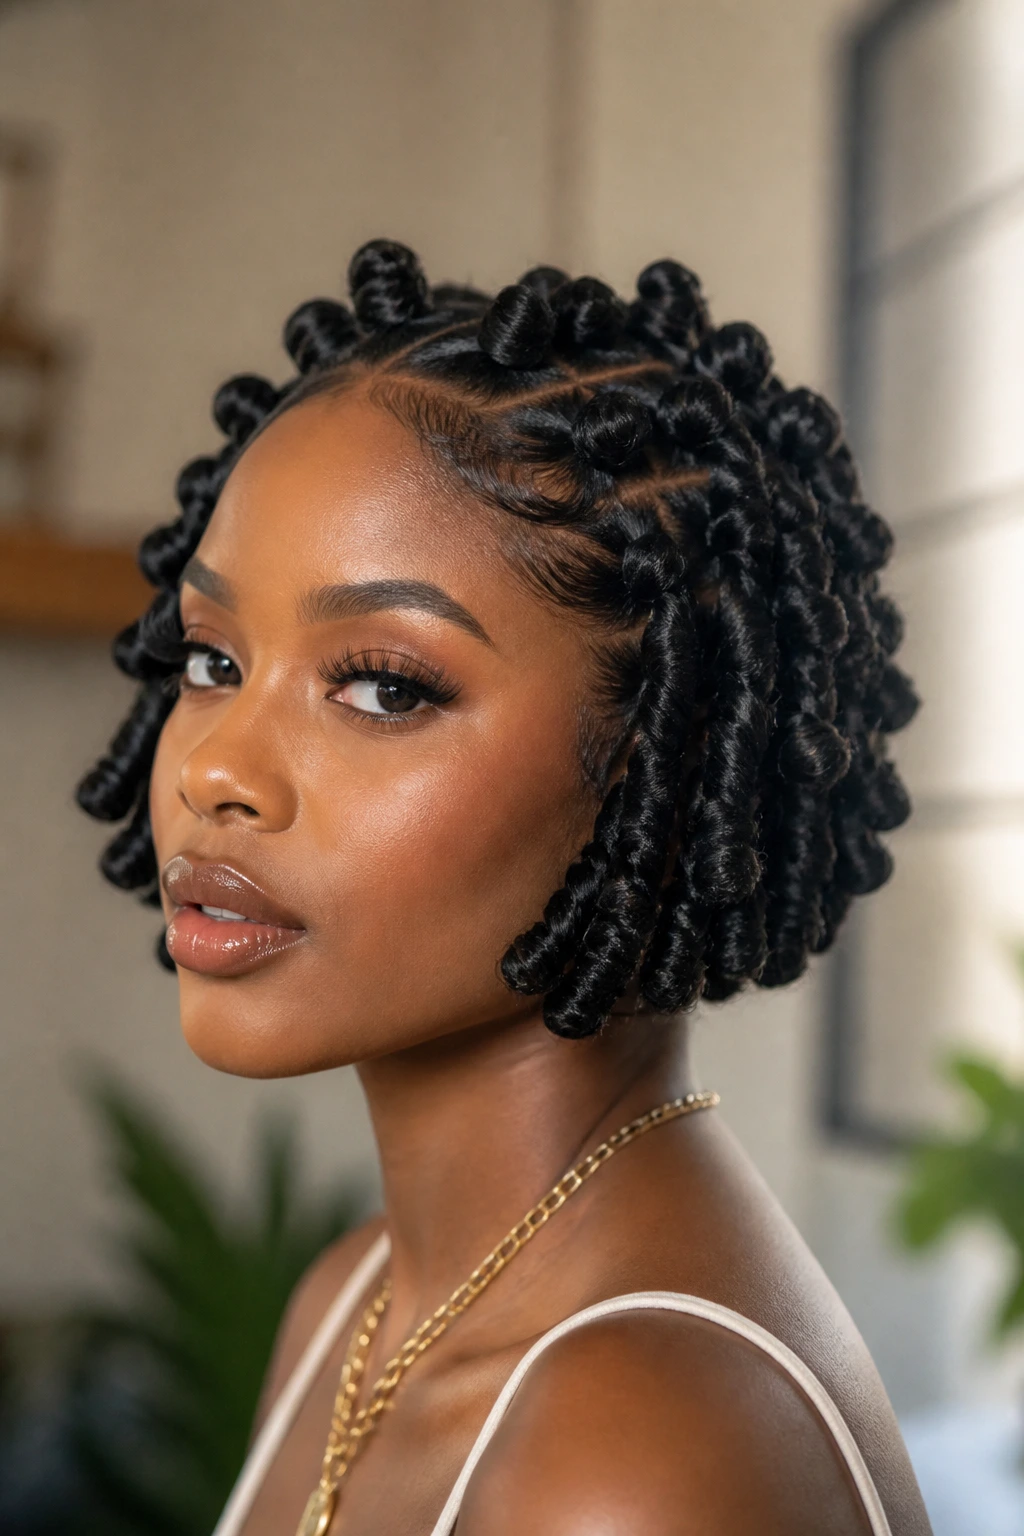
16. Dense Micro-Knot Crochet Set
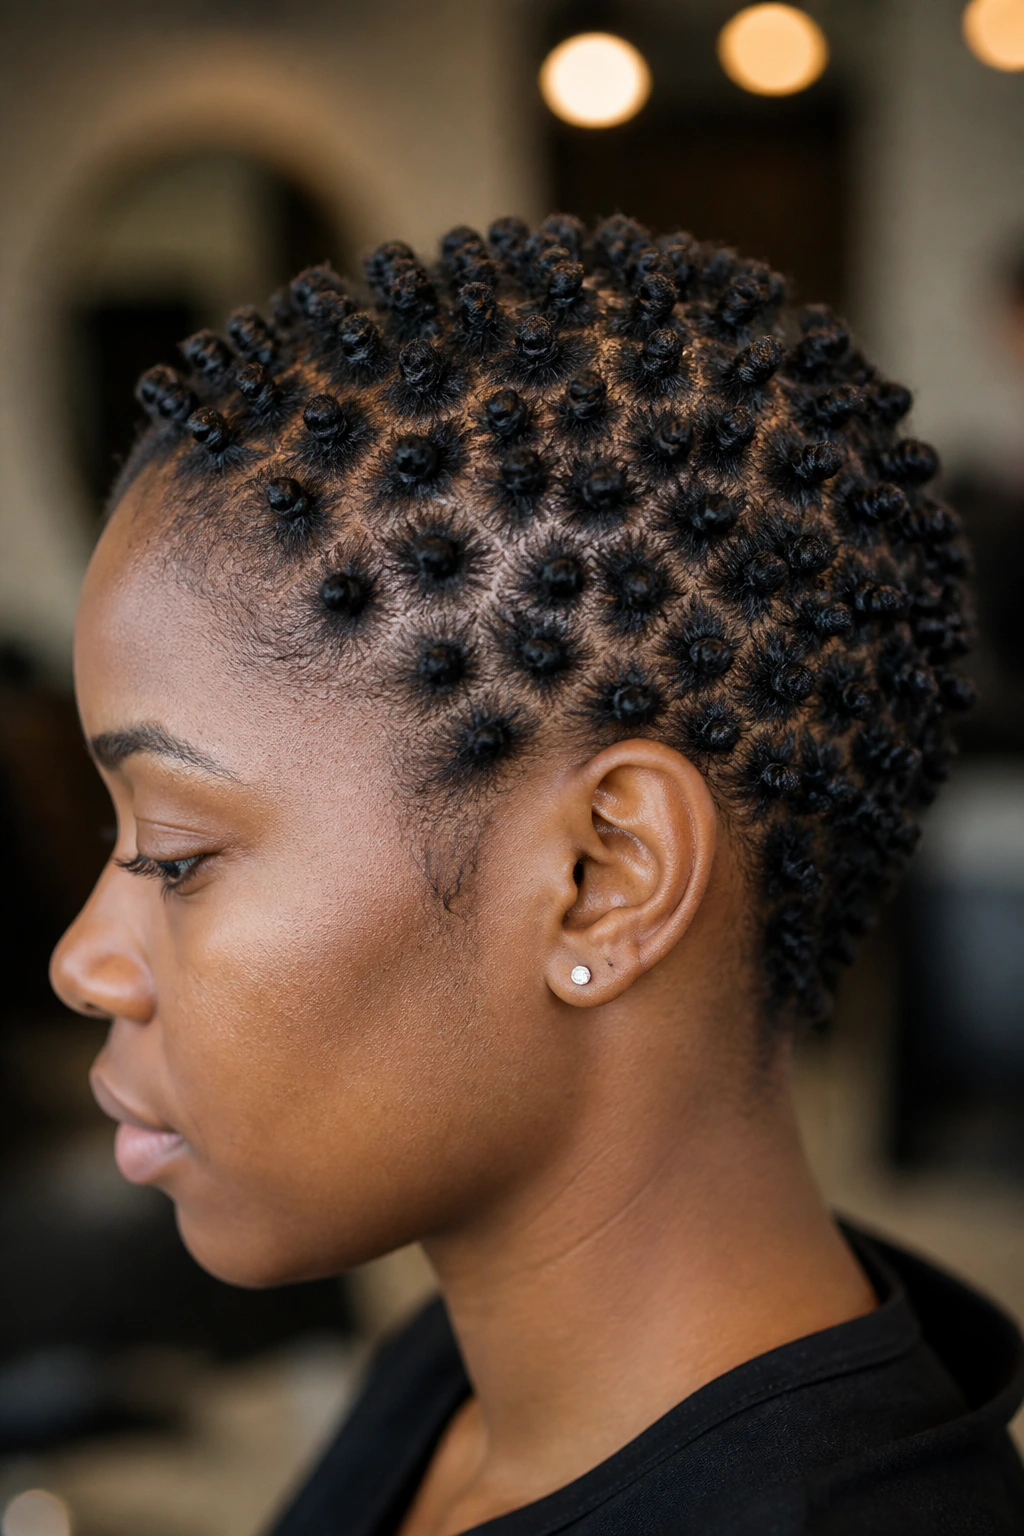
Up close, dense micro knots can be hard to clock as crochet. That is the whole appeal. They mimic the texture of a full natural Bantu knot set, especially when the knots are wrapped a little loosely instead of wound into perfect hard beads.
The install is detail-heavy. A full head may need 40 to 60 tiny knots, depending on head size and how much scalp you want showing. That means chair time, and it also means the stylist has to be careful with weight. Too much fiber in small sections makes the style heavier than it looks.
A dense micro set usually works best with:
- Shorter crochet hair lengths, often 6 to 10 inches
- A low-sheen texture
- Small braids underneath instead of thick cornrows
- A crown area that is full, though not packed shut
If you want that “did she wrap those herself?” reaction, this is one of the closest crochet versions I know. It asks more from the install, though it gives plenty back.
17. Shaved-Side Illusion Bantu Knots
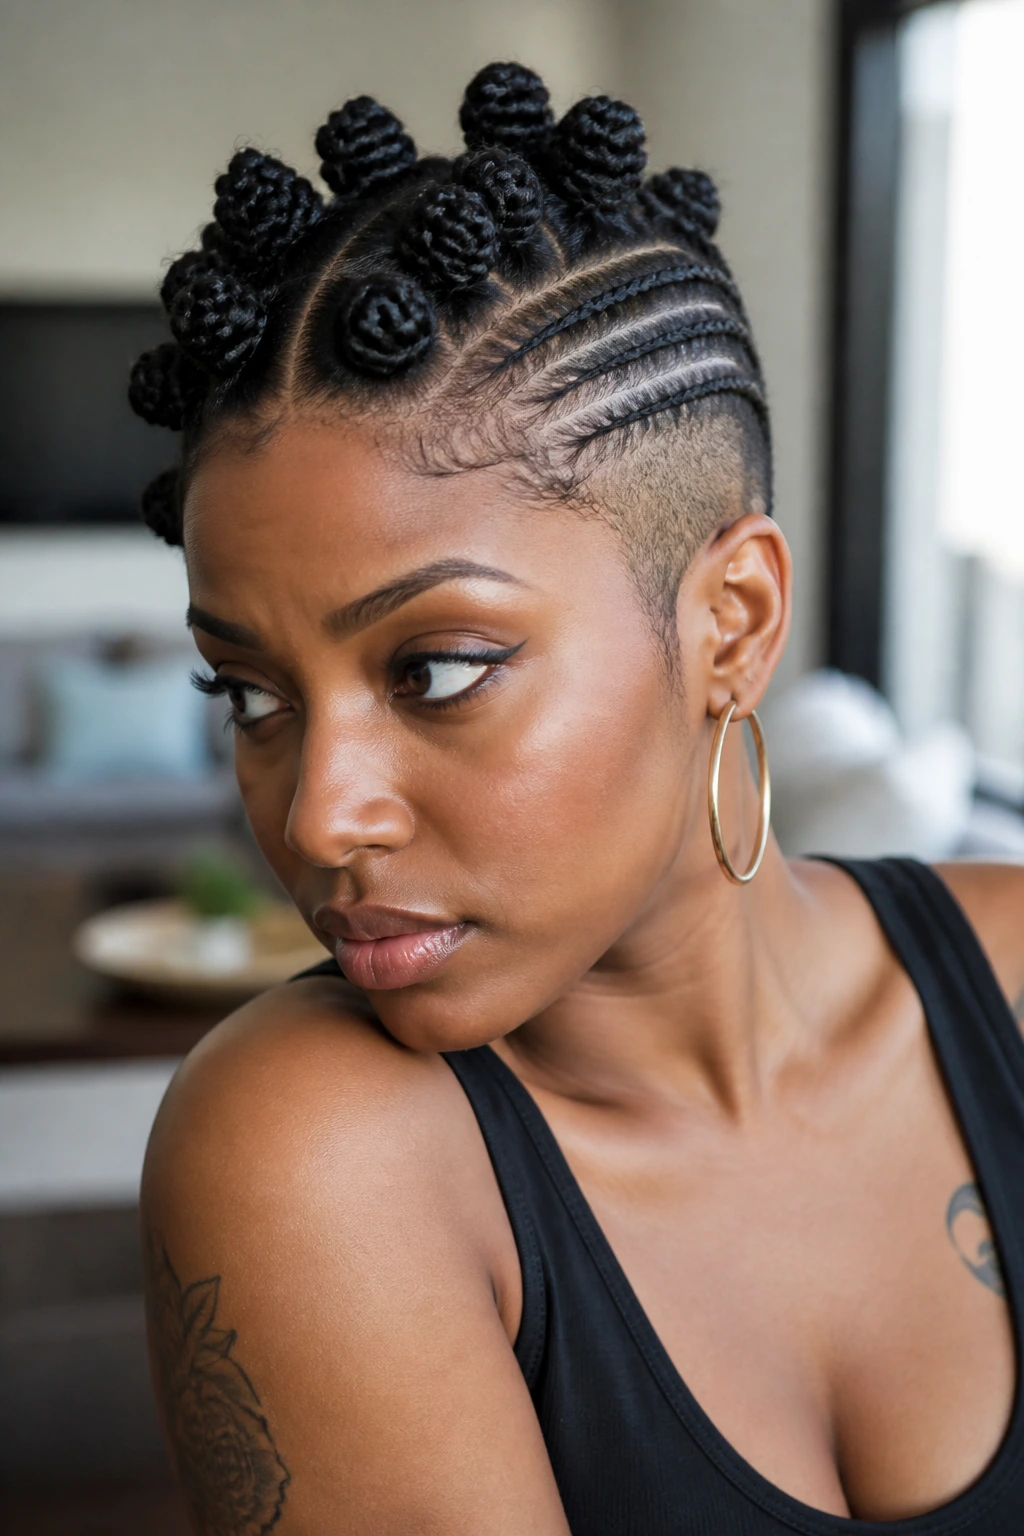
You do not need clippers to get that side-shaved look. A tight braided panel on one side and a cluster of knots on the other creates the same contrast, and it does it without committing you to an actual undercut.
The illusion works best when the braided side is flat, narrow, and exposed on purpose. Trying to hide it halfway ruins the point. The knot side should start near the part line and build from small front knots into fuller crown knots so the head shape stays balanced.
This look has attitude, which I mean as praise. It also solves a common crochet problem: bulk on both sides of the head. By removing volume from one side, the style feels lighter and the knots get more room to stand out.
I’d skip big accessories here. The cut effect is already doing enough.
18. Deep Burgundy Blend Bantu Knots
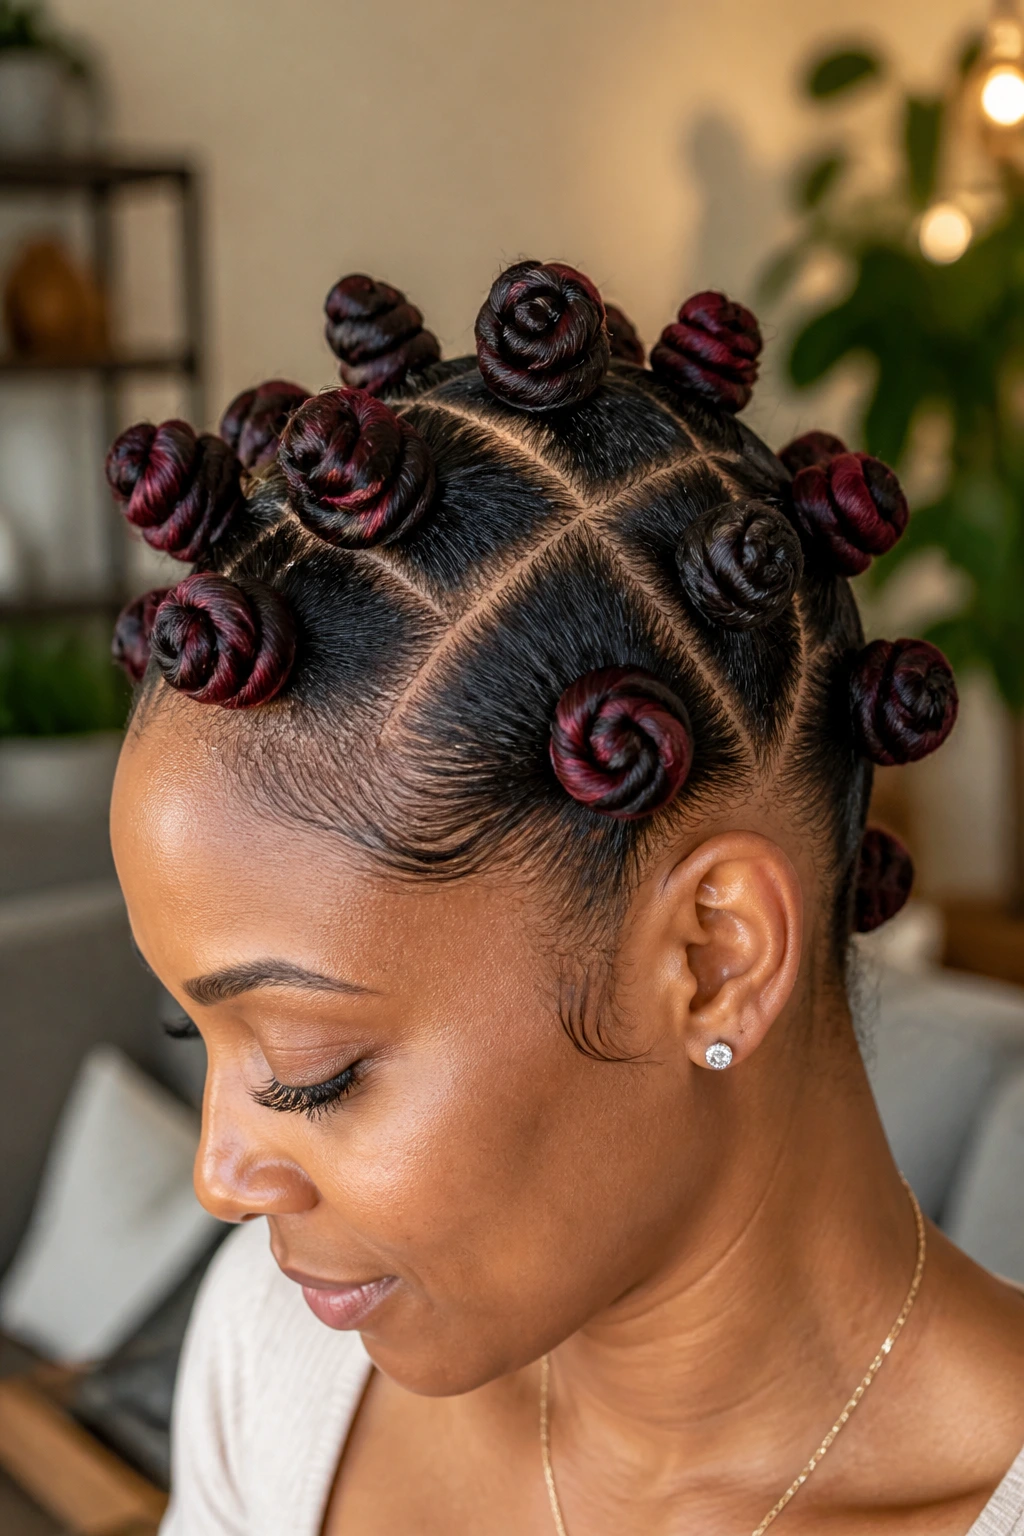
Unlike single-tone burgundy crochet hair, which can look flat and costume-like, a 1B-and-burgundy mix gives the knots shadows. Those shadows matter. They keep the color from sitting on top of the head like a solid helmet.
My favorite ratio is roughly 60 percent dark hair to 40 percent burgundy, with the color concentrated in the outer wraps and a few front-corner knots. That way the red shows when light hits it, though the roots still look grounded.
This shade also wears better over time than brighter reds. As the knots loosen a little, the blend tends to look softer instead of louder. If you dress in black, cream, denim, olive, or gray, the color slips into your wardrobe without demanding a whole new makeup plan.
Choose medium knot size here. Tiny knots can hide the color, while jumbo knots can make the blend look patchy.
19. High-Bun Cluster with Nape Knots
A high-bun version of Bantu knots should not be one giant top knot. That rarely looks believable, and it often feels heavy by the second day. A cluster of smaller knots at the crown, paired with a few at the nape, gives you that lifted shape without turning the style into a single bulky mass.
How to place the cluster
Think five to eight knots around the upper crown, close enough to read as one shape, then four to six smaller knots lower in back. Those nape knots stop the style from looking unfinished when viewed from the side.
Helpful details
- Build the crown on a secure braided base so the cluster does not lean back.
- Keep the front hairline lighter in density.
- Use pins only if one knot starts tilting; do not over-pin the whole top.
- Wrap the largest knot fibers around the center of the cluster, not at the edges.
This is one of the easier ways to get height without a full head of bulk. Good gym hair. Good event hair. Good neck-baring hair.
20. Flat-Twist Halo with Bantu Knots
The front should feel flat under your fingers. That’s the whole charm of a flat-twist halo leading into knots at the back and crown. You get shape around the face, scalp visibility where you want it, and then the knot detail where it counts.
Flat twists can replace front cornrows if you want a softer line. They sit wider, curve more naturally around the forehead, and put less visual pressure on delicate edges. I’ve seen this style look especially strong when the twists run from ear to ear like a crown band, feeding into six to ten medium knots behind them.
There’s something dressy about this one, though not stiff. It works for weddings, dinners, photo days, church, anything where you want the hairstyle to look thought through. And because the front is twisted rather than packed with knots, the scalp gets a little breathing room.
Do not oversize the back knots. The halo needs contrast, not competition.
21. Chunky Coily-Wrap Medium Knots
What if you want fuller knots but do not want the style drifting into costume? Use medium sections wrapped with coily hair that has some spring, rather than stuffing extra fiber into each knot.
That difference matters. Bulk from texture looks softer than bulk from sheer amount. A knot that measures around 1 to 1.25 inches wide can still look grounded if the hair has a natural coil and the wrap is not pulled too tight.
The wrapping trick that helps
Let the outer layer of the knot stay a little looser than the center. Not sloppy. Looser. That gives the knot a more hair-like finish, and it stops the surface from looking hard and plastic under direct light.
This version suits people who think mini knots disappear on their features. If you have a longer face, broader forehead, or you simply like more visual presence, chunky medium knots can hit the sweet spot.
22. Headband Row Crochet Bantu Knots
If you like your face open, a headband row of knots can be a strong choice. The front perimeter gets a clean band of small Bantu knots from temple to temple, while the rest of the head is filled with mini or medium knots placed farther back.
The effect is part hairstyle, part built-in accessory. It works because the front row gives shape without asking for loose curls, beads, or a scarf.
A few details matter here:
- The front row should sit about 1/2 inch behind the hairline, not on top of it.
- Use smaller knots in the band than in the back.
- Leave the temples slightly lighter so the front does not feel boxed in.
- Match the row to the curve of the forehead instead of drawing a straight line across.
I like this one on square and heart-shaped faces. It frames the forehead neatly and keeps the style from feeling crowded around the cheeks.
23. Short Pixie Bantu Knots
Short works. In fact, short crochet Bantu knots often look more believable than longer sets because there is less weight, less swinging fiber, and fewer chances for the base to show.
A pixie-style version keeps the knots tight, small, and close to the scalp, usually around the sides and crown with the nape trimmed down or left in tiny tucked knots. The ears show. The neck is open. The whole silhouette feels crisp.
This is also one of the easiest versions to maintain. Sleeping in a satin bonnet is usually enough, and morning touch-ups rarely take more than a little foam pressed over the top with your palms. No elaborate reshaping. No endless tugging.
And the look has personality. It is neat, but not meek. If you love short natural cuts and want a crochet protective style that keeps that same clean outline, this one deserves more attention than it gets.
24. Stacked Ponytail Bantu Knot Columns

Unlike a single top bun, stacked ponytail knots create movement down the center of the head. The sides stay braided or sleek, while the knots sit in two or three vertical columns from crown toward the nape, almost like a sculpted ponytail broken into sections.
This style needs a strong base. I would not try it on a loose crochet cap setup. The anchor braids should direct the weight upward first, then back, so the stacked knots sit where they belong instead of drooping after a few days.
Who does this suit? Anyone who wants the neck clear, likes profile-heavy styles, and does not want a full field of knots across the whole scalp. It feels athletic and dressed up at the same time, which is rare. The best versions use medium knots with a little spacing between each column so the scalp remains part of the design.
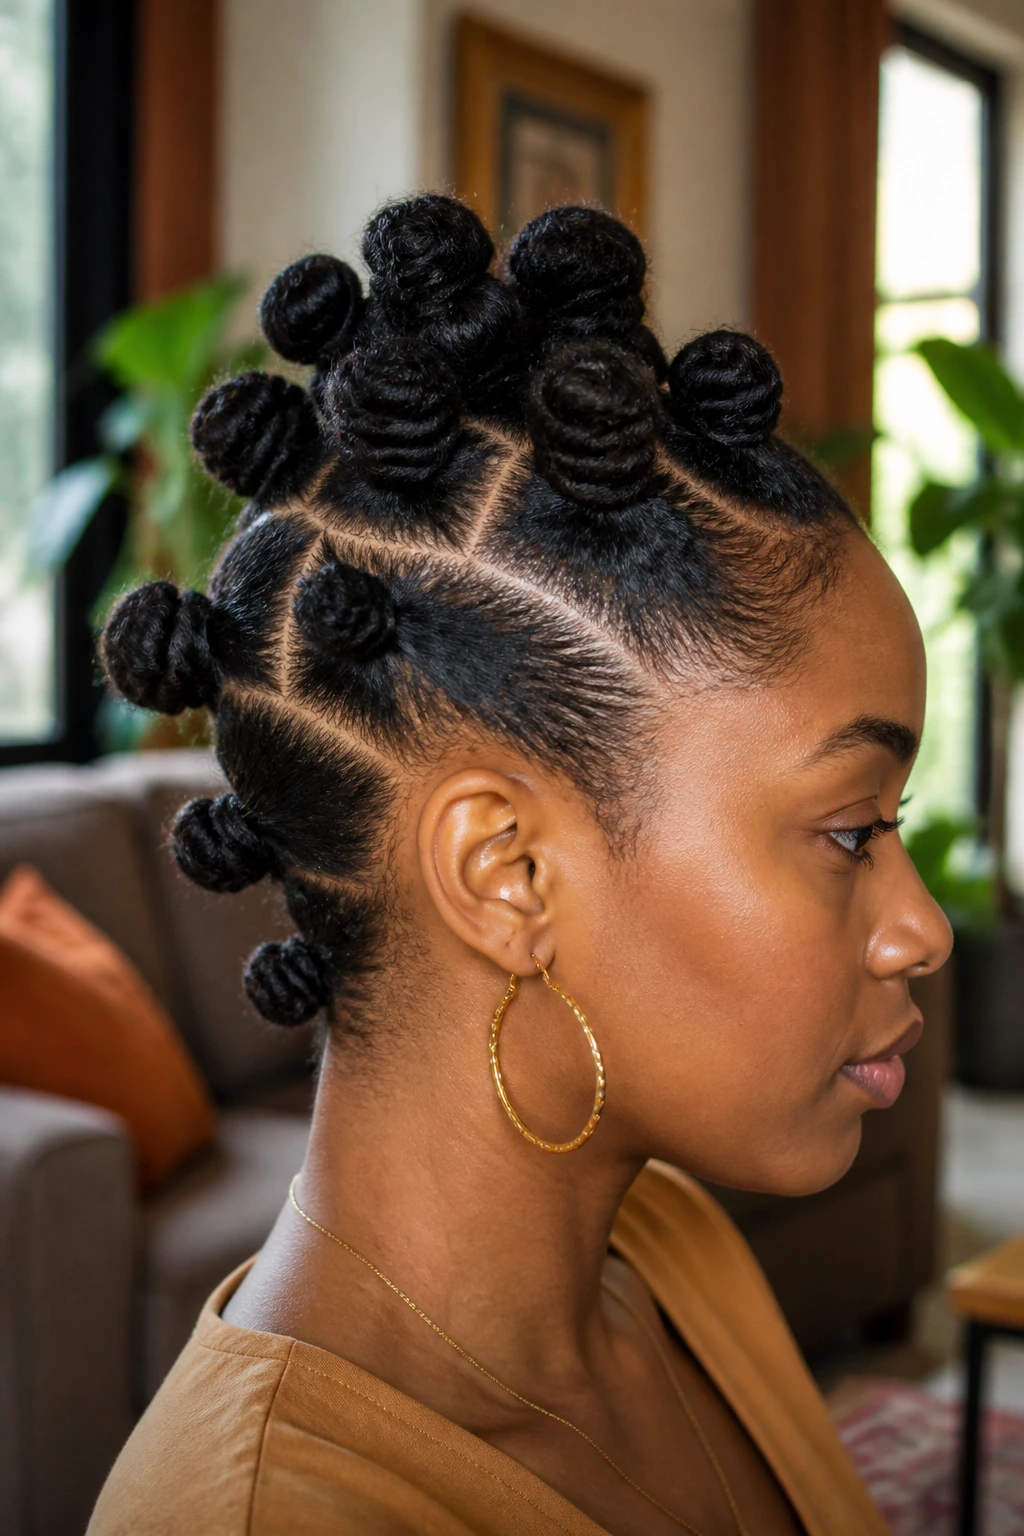
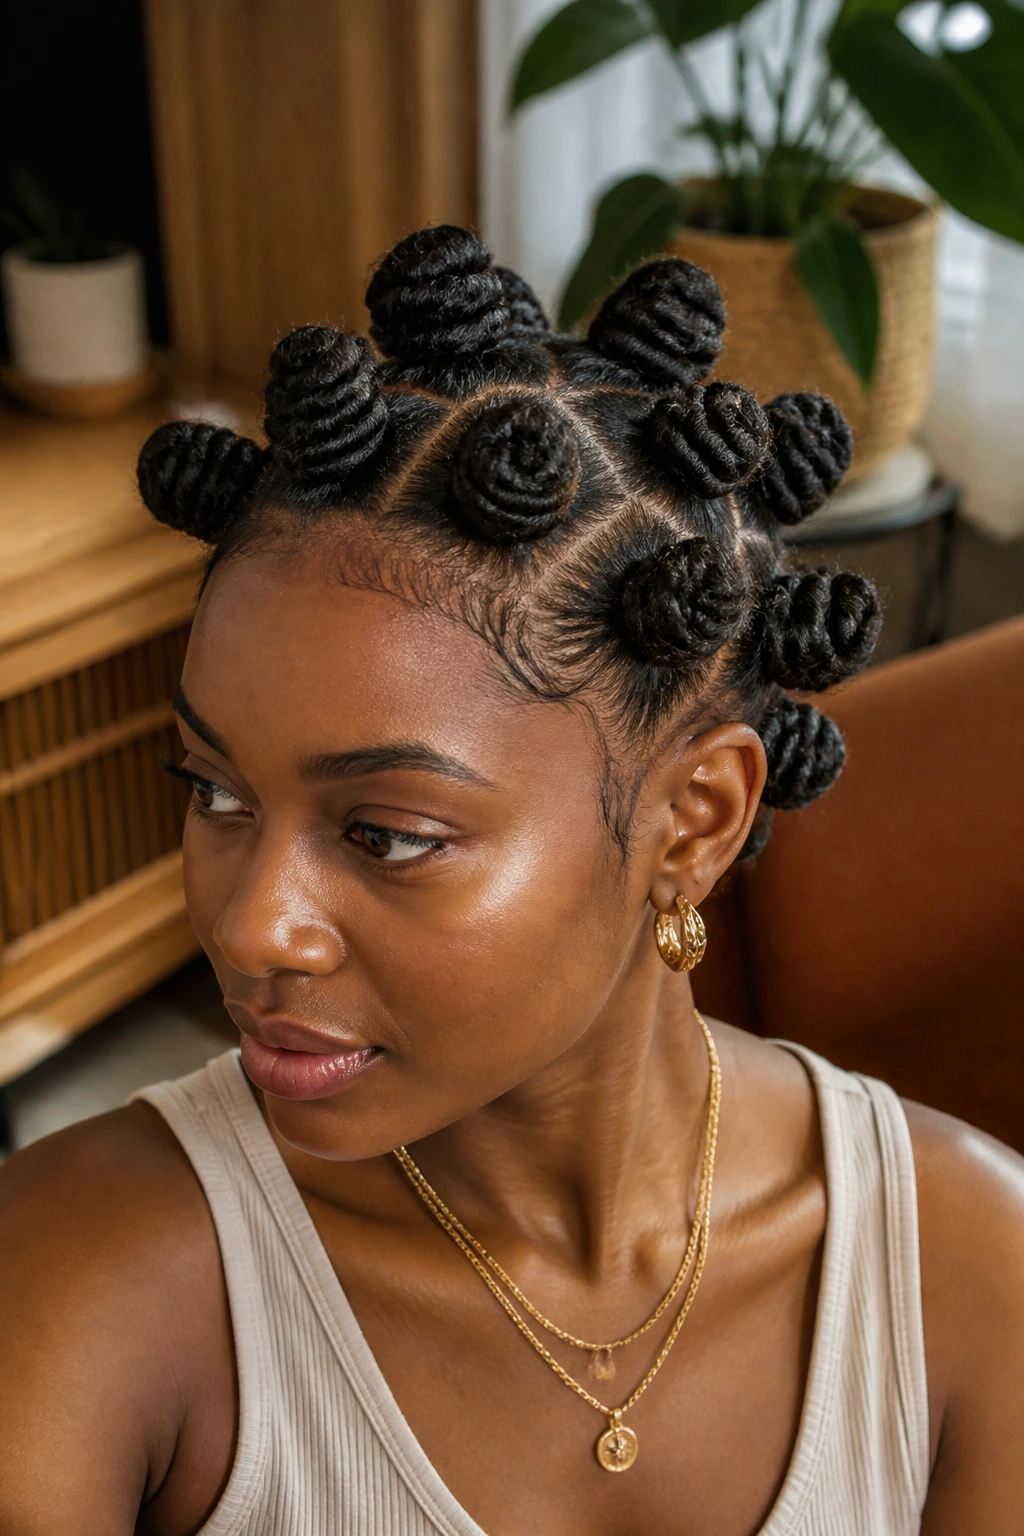
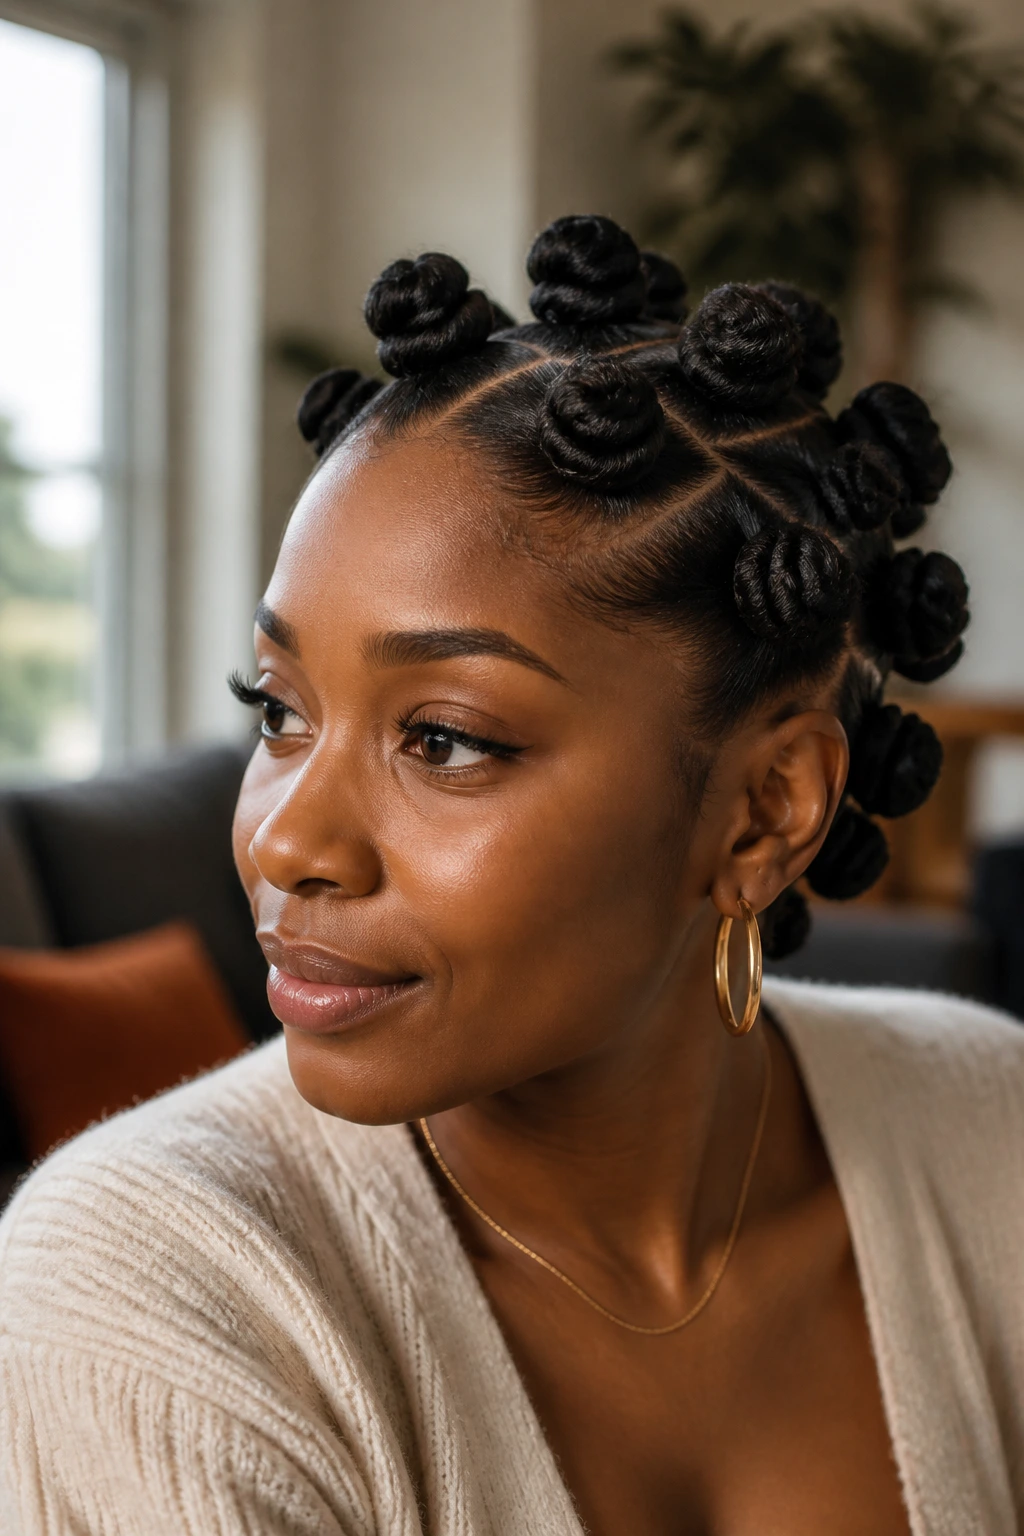
25. Classic Natural-Black Medium Bantu Knots
Some styles shout. This one does not need to. A head of medium natural-black crochet Bantu knots with restrained parting and a soft hairline still beats most flashy versions when the goal is realism.
Why this one keeps winning
There is nothing competing for attention: no ombre, no curls, no dramatic part shapes. That makes every little choice count more. The knot size should stay consistent through most of the head, though I still prefer slightly smaller sections near the front and nape so the outline feels more natural.
A clean setup
- Use 12 to 18 medium knots, depending on head size
- Stick to 1B, off-black, or a 1B/2 blend
- Keep shine low and the wrap firm, though not rock hard
- Let one or two tiny flyaways stay after setting; a little texture helps
If you ask me which crochet Bantu knot style has the highest chance of reading as real in daily life, this is the one I’d bet on first.
Final Thoughts
When crochet Bantu knots look fake, the problem usually is not the idea. It’s the execution. Knots that are too large, fiber that shines too hard, and a front hairline packed like a wall will undo the style fast.
The styles that read best tend to share the same bones: smart scale, visible scalp where it belongs, and texture that behaves like hair instead of plastic ribbon. After that, you can go classic, colorful, edgy, soft, cropped, or crown-heavy.
If you’re choosing between two looks, pick the one your stylist can place well rather than the one that only looks good in a filtered photo. Good crochet work should disappear into the design. When the base fades and the knots sit like they belong on your head, the whole style changes.