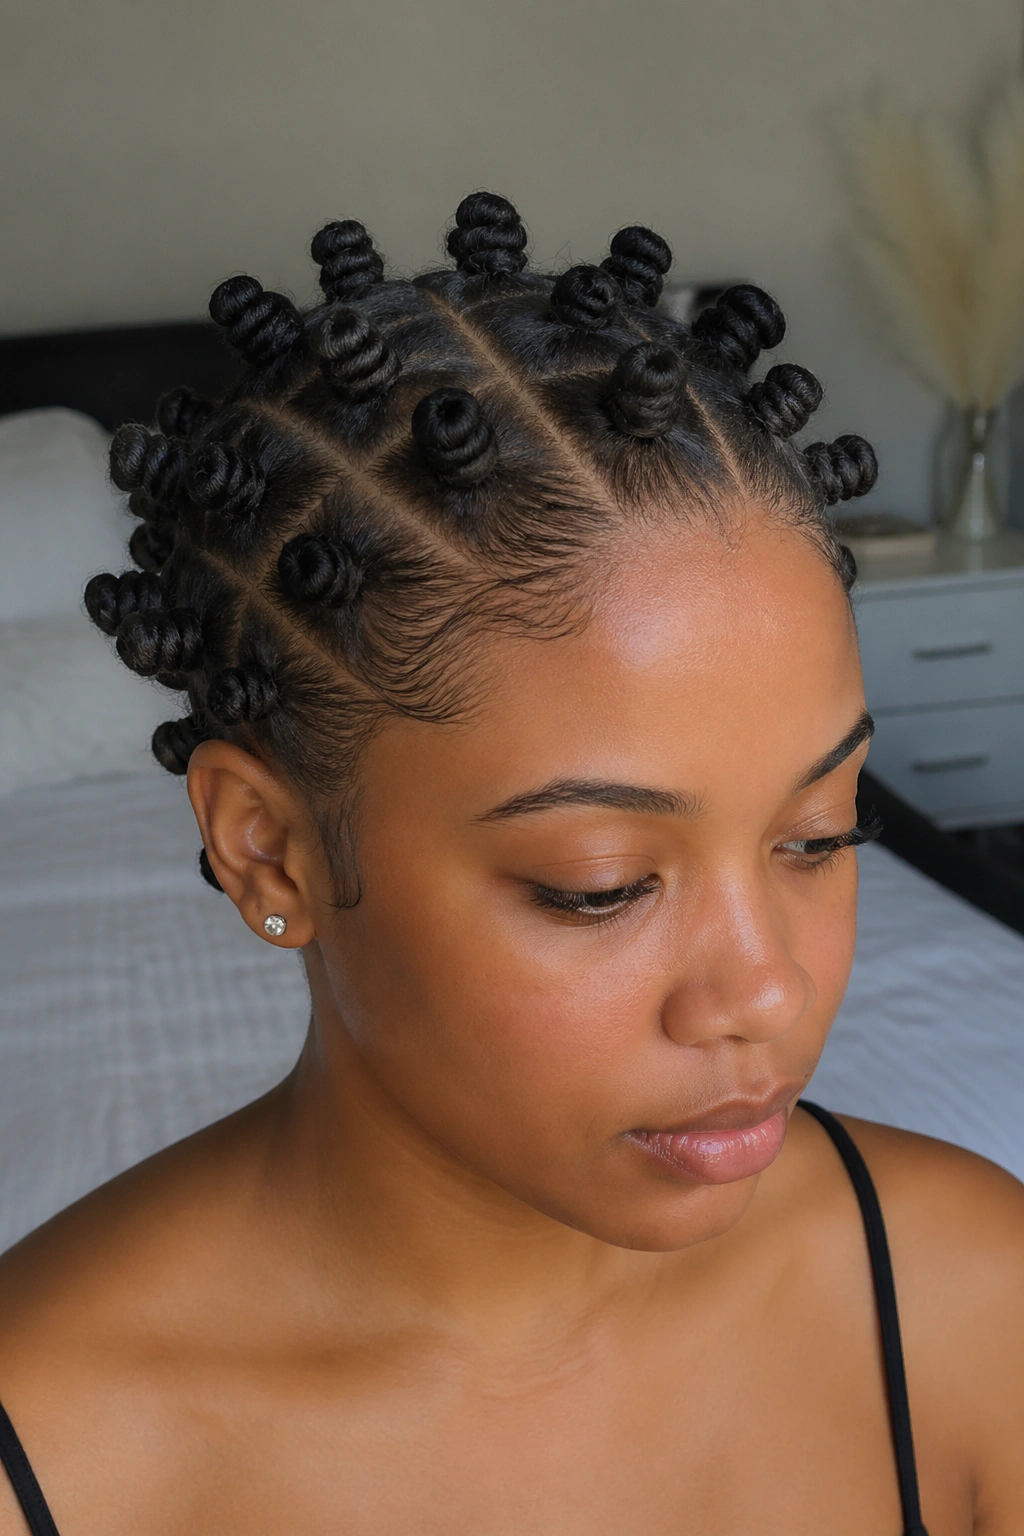
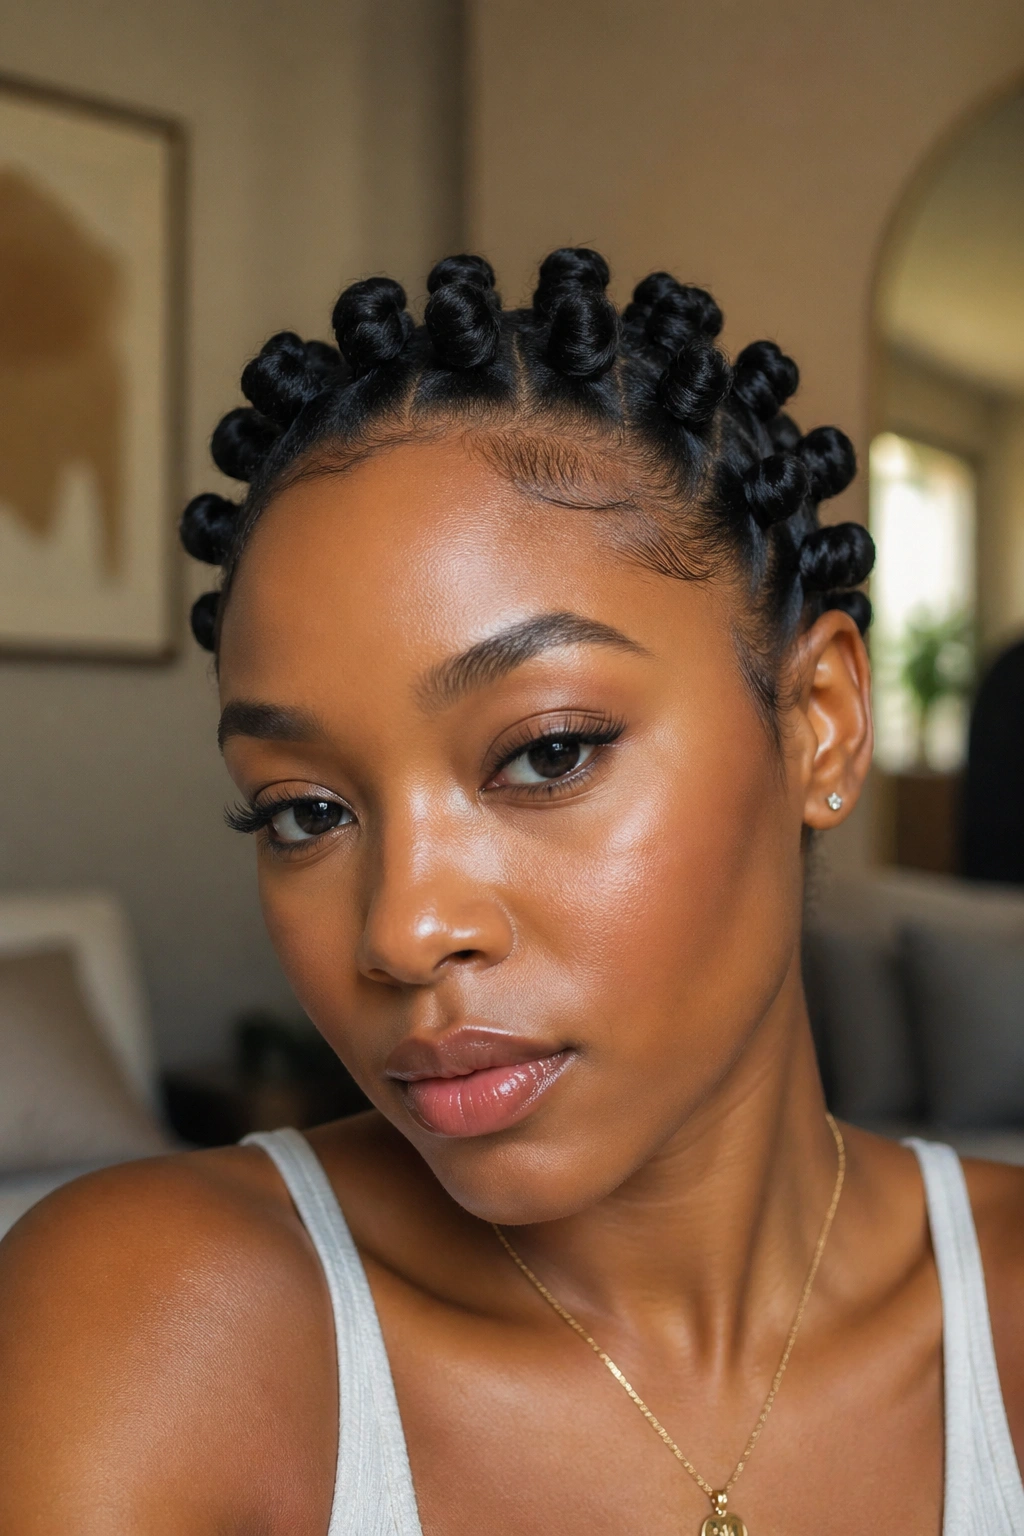
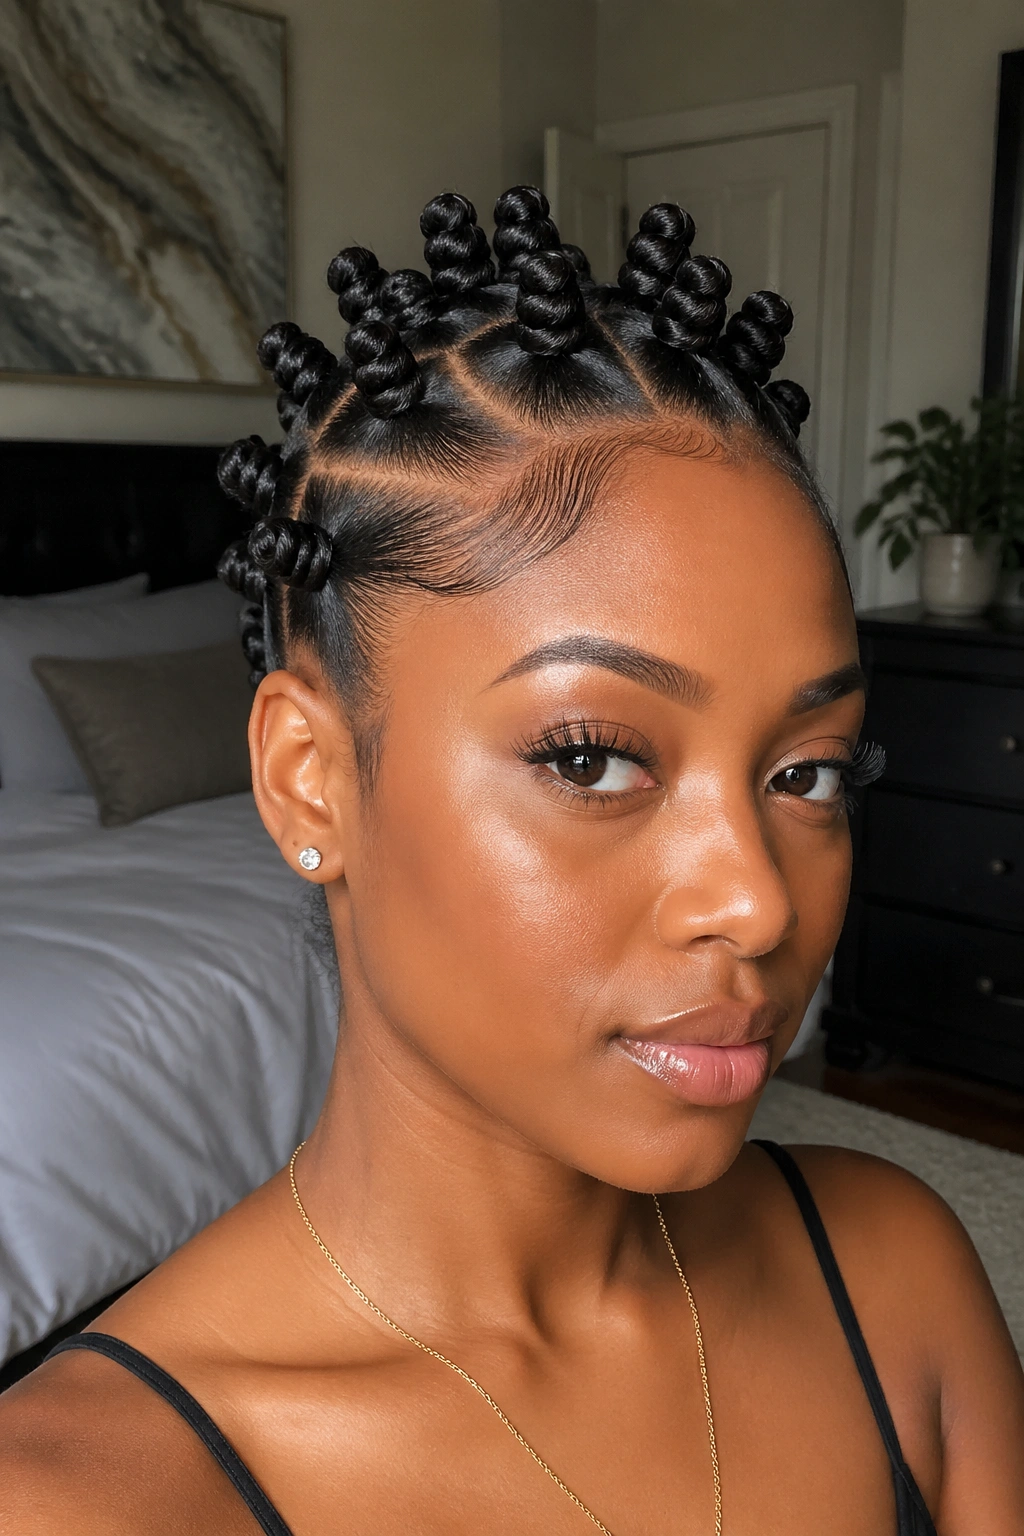
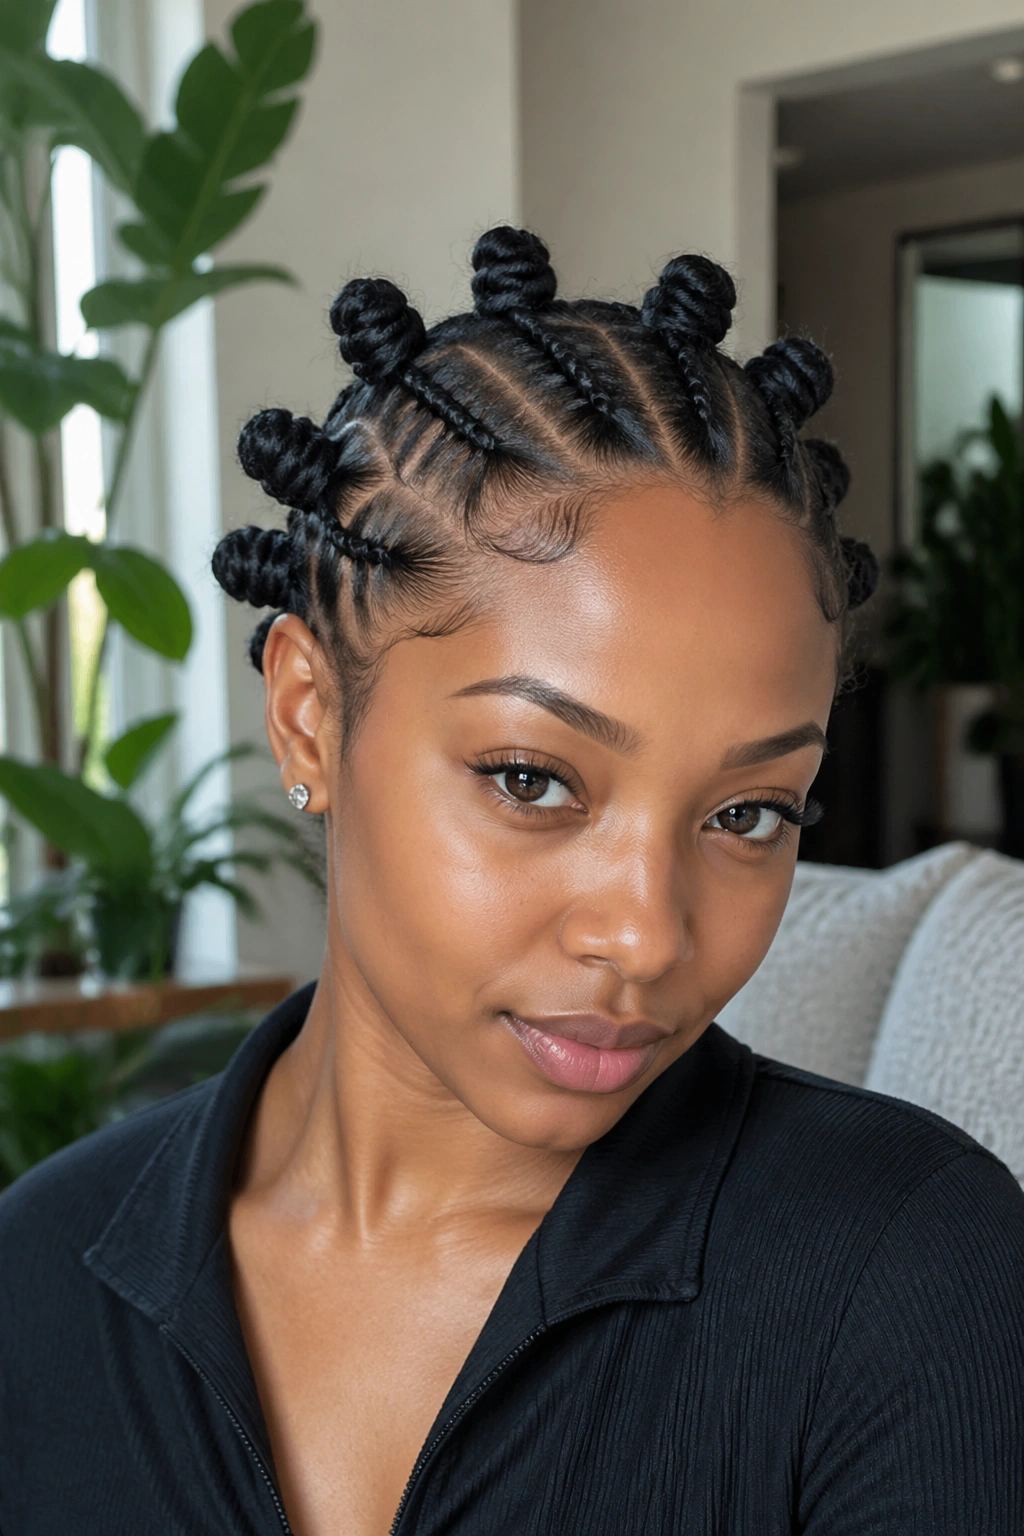
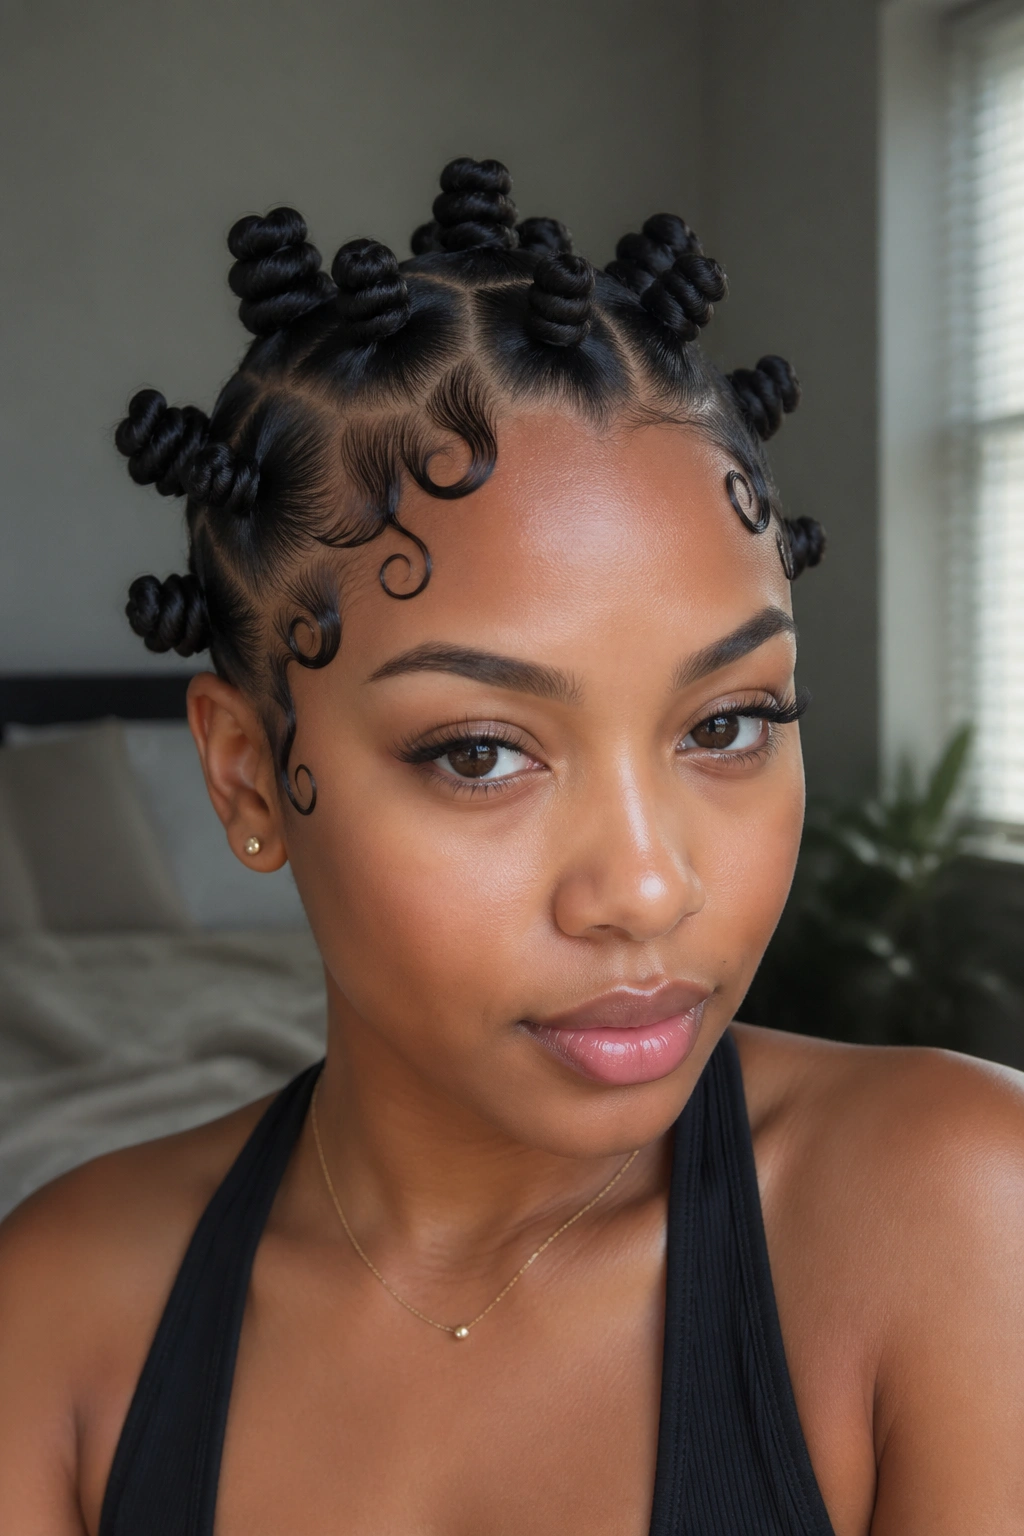
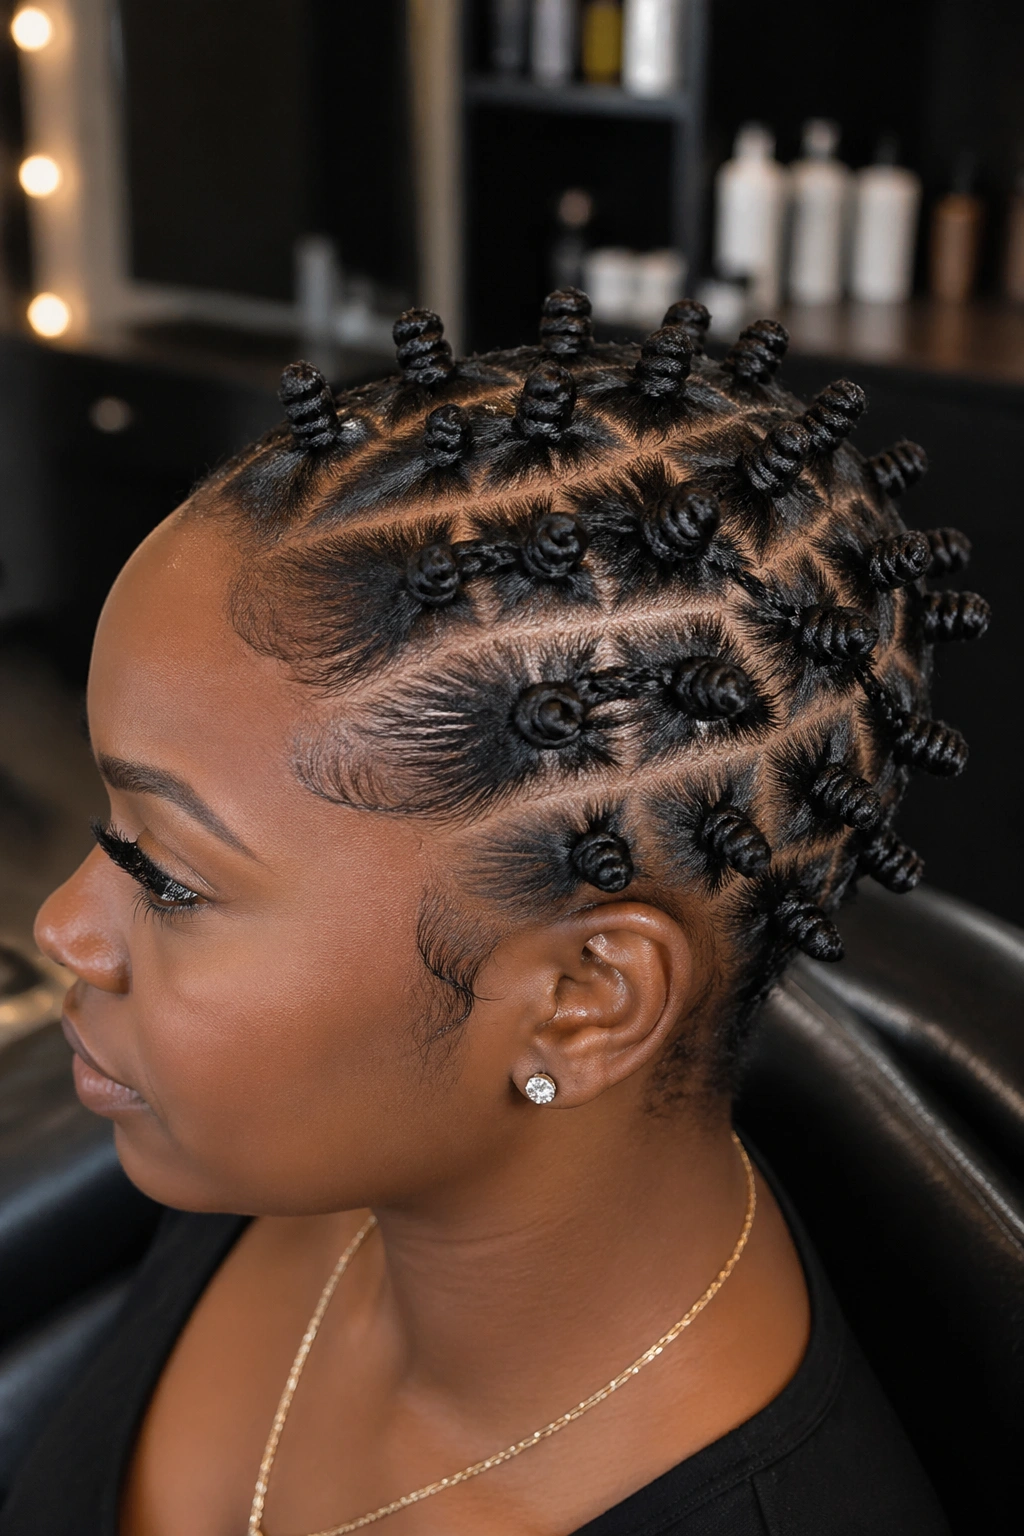
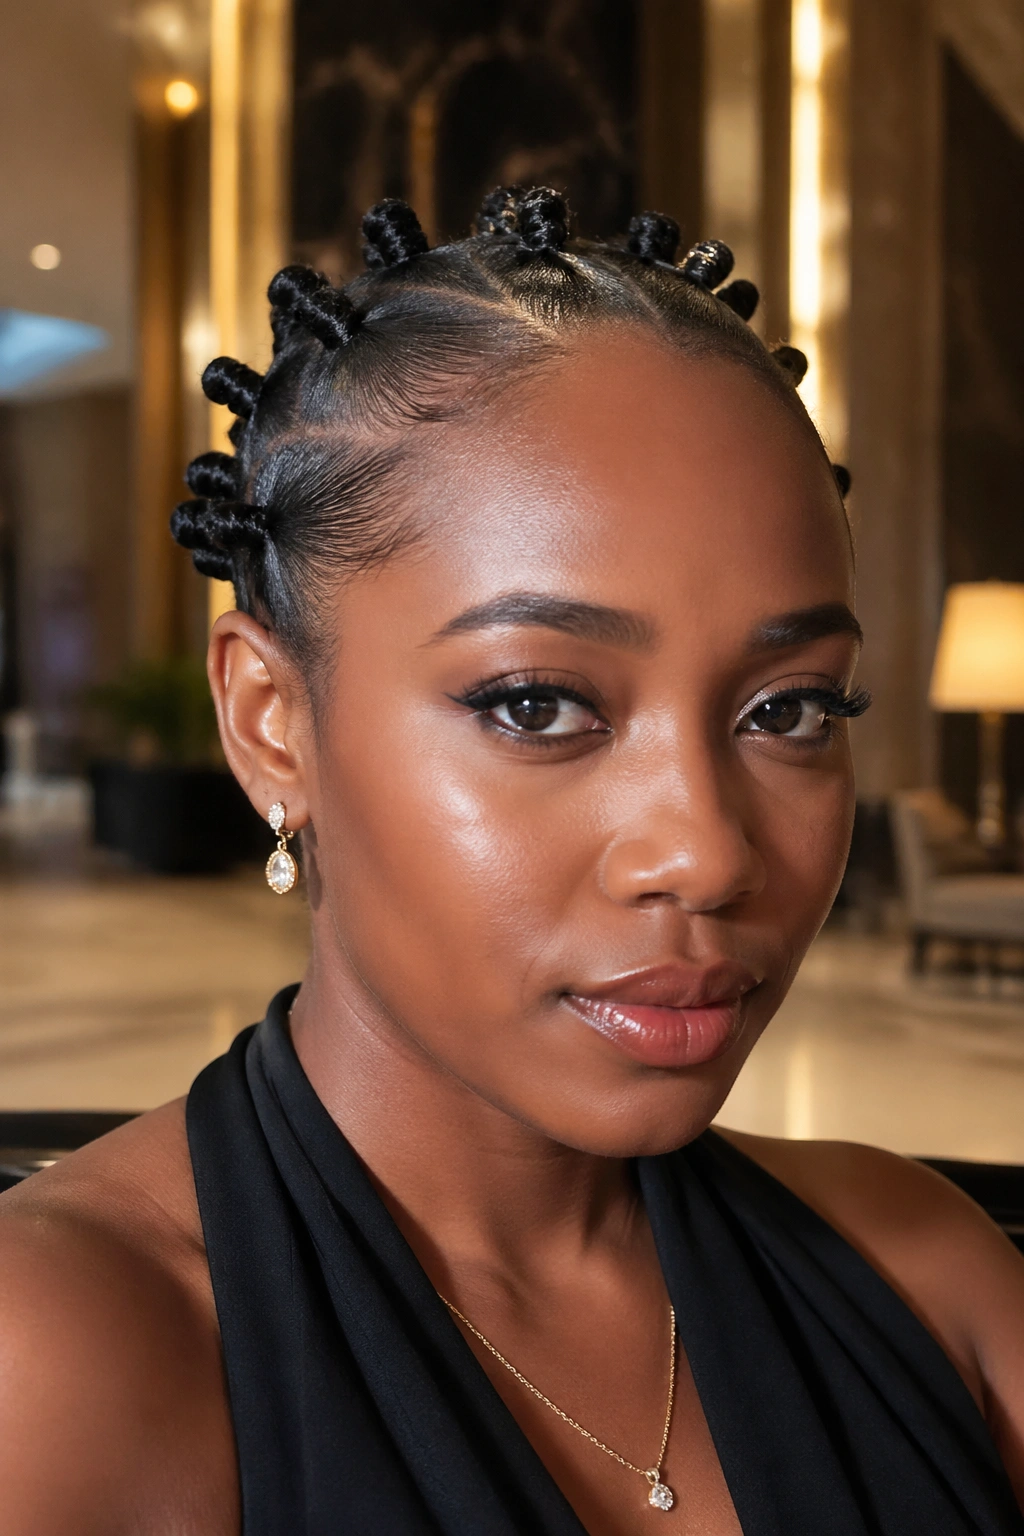
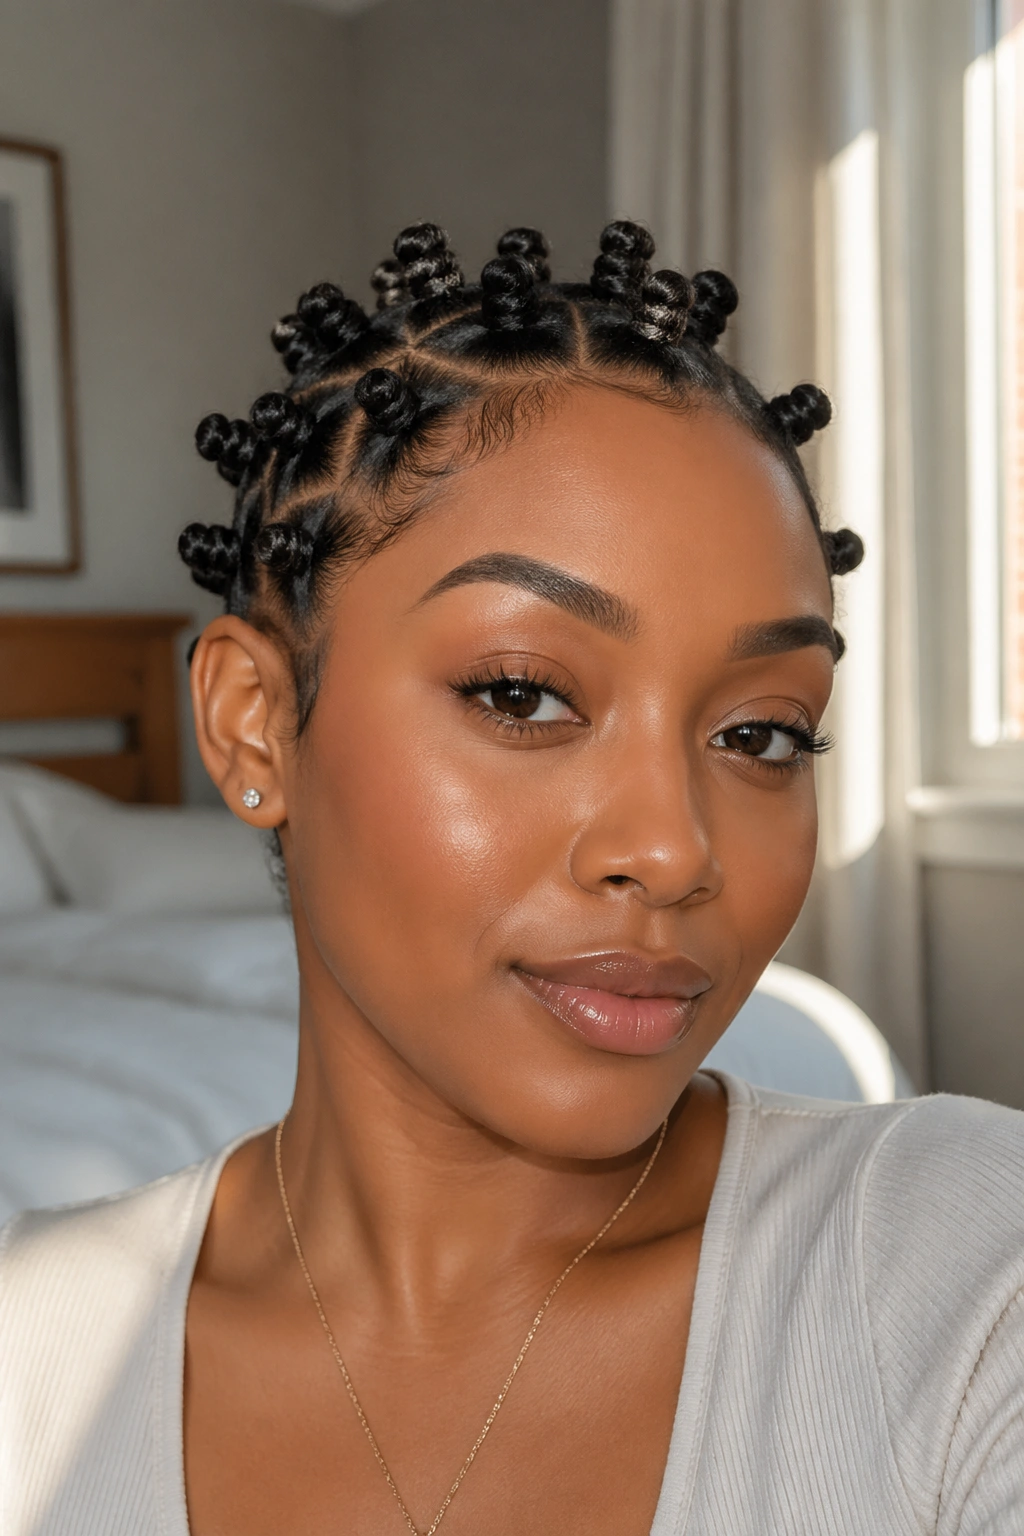
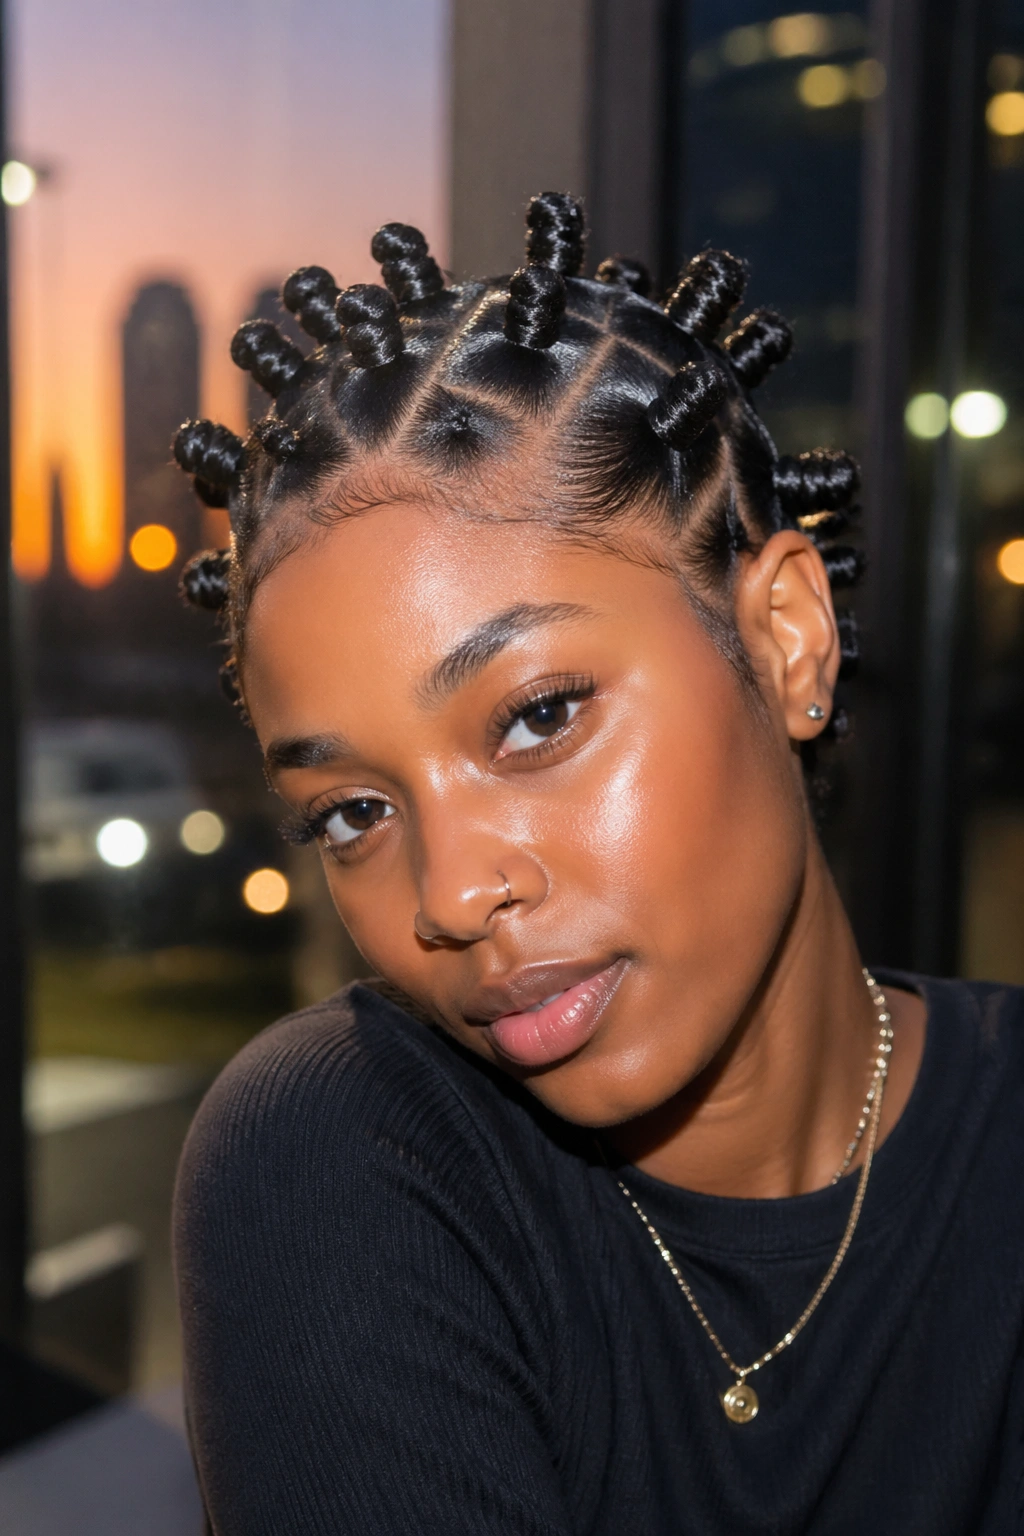
A sleek set of small Bantu knots can look sharp, controlled, and expensive-looking when the roots are laid flat and the parts are clean. If the sections are too wide, the whole style starts to puff out, and the shape goes from crisp to bulky fast.
The trick is not loading the hair with product. It is smoothing the base, wrapping each section tightly enough to hold, and letting every knot dry all the way before you touch it.
Small Bantu knots also give you room to play. A middle part reads neat, a side part softens the face, and a grid of tiny sections turns the style into something almost architectural.
These knots sit in that sweet spot between protective styling and set styling, which is why they work on coils, curls, stretched textures, and hair that needs a clean next-day knot-out. The details matter more than people think. Straight parts, controlled tension, and a scarf pressed over the hairline for a few minutes can make the difference between polished and lumpy.
1. Classic Middle-Part Small Bantu Knots
Symmetry carries this style. A straight middle part gives small Bantu knots a clean backbone, and that clean line is what makes the finish feel sleek instead of busy.
Why the center line matters
A middle part gives your eye a place to land, so the knots read as intentional. It also helps you keep both sides even while you section, which matters more than people admit. If one side is slightly larger, the difference shows fast because the knots are small and close together.
Use a rat-tail comb and keep the part as straight as you can from forehead to nape. Sections around 1 inch wide usually stay neat without creating too much bulk, though dense hair may need a touch smaller. A light layer of gel at the roots helps the hair lie flat before you start twisting.
- Keep the first two front sections exact. They frame everything.
- Smooth each section with your fingers before you coil it.
- Wrap the knot in the same direction across the whole head.
- Finish with a scarf for 10 to 15 minutes so the roots set flat.
Tiny tip: if the part looks off in the mirror, it will look even more off in daylight. Fix it before you knot anything.
2. Deep Side-Part Small Bantu Knots That Frame the Face
Why does a side part make small Bantu knots feel softer? Because it breaks the symmetry in a way that flatters the face without losing the neatness of the style.
A deep side part works well when you want the knots to feel polished but not severe. The larger side creates a sweep across the forehead, and that little shift changes the mood right away. It also helps if you like one side of your face more than the other. Most people do.
Keep the part clean and deliberate. I’d start the side part about 2 inches off center, then let the larger side hold more knots so the shape feels balanced instead of accidental. If your hairline gets frizzy fast, brush the roots toward the part with a soft brush before each knot.
The key here is restraint. Don’t try to make the side part dramatic and the knots dramatic at the same time. Pick one hero move. Let the rest stay neat.
3. Zigzag Part Small Bantu Knots for Extra Movement
A zigzag part looks fussy only if the lines are sloppy. When the points are shallow and the spacing stays even, it gives small Bantu knots a little edge without turning the style into a costume.
Use the tail of a comb and keep the zigzag subtle across the crown. I like to think of it as a shallow “W” repeated across the head rather than a jagged lightning bolt. That softer shape keeps the look sleek. Sharp parts on dry hair can snap and frizz, so a tiny touch of leave-in on the comb helps it glide.
Keeping the zigzag crisp
The cleanest zigzags are made on stretched hair. Not bone-dry, not soaking wet. Just smooth enough that the comb doesn’t snag. Once the part is in, clip away the next section so the line doesn’t get lost while you work.
This style shines when the knots themselves stay uniform. If the parts are playful, keep the coils tidy. That contrast is what makes the whole thing work.
4. Small Bantu Knots with Tapered Face-Framing Pieces
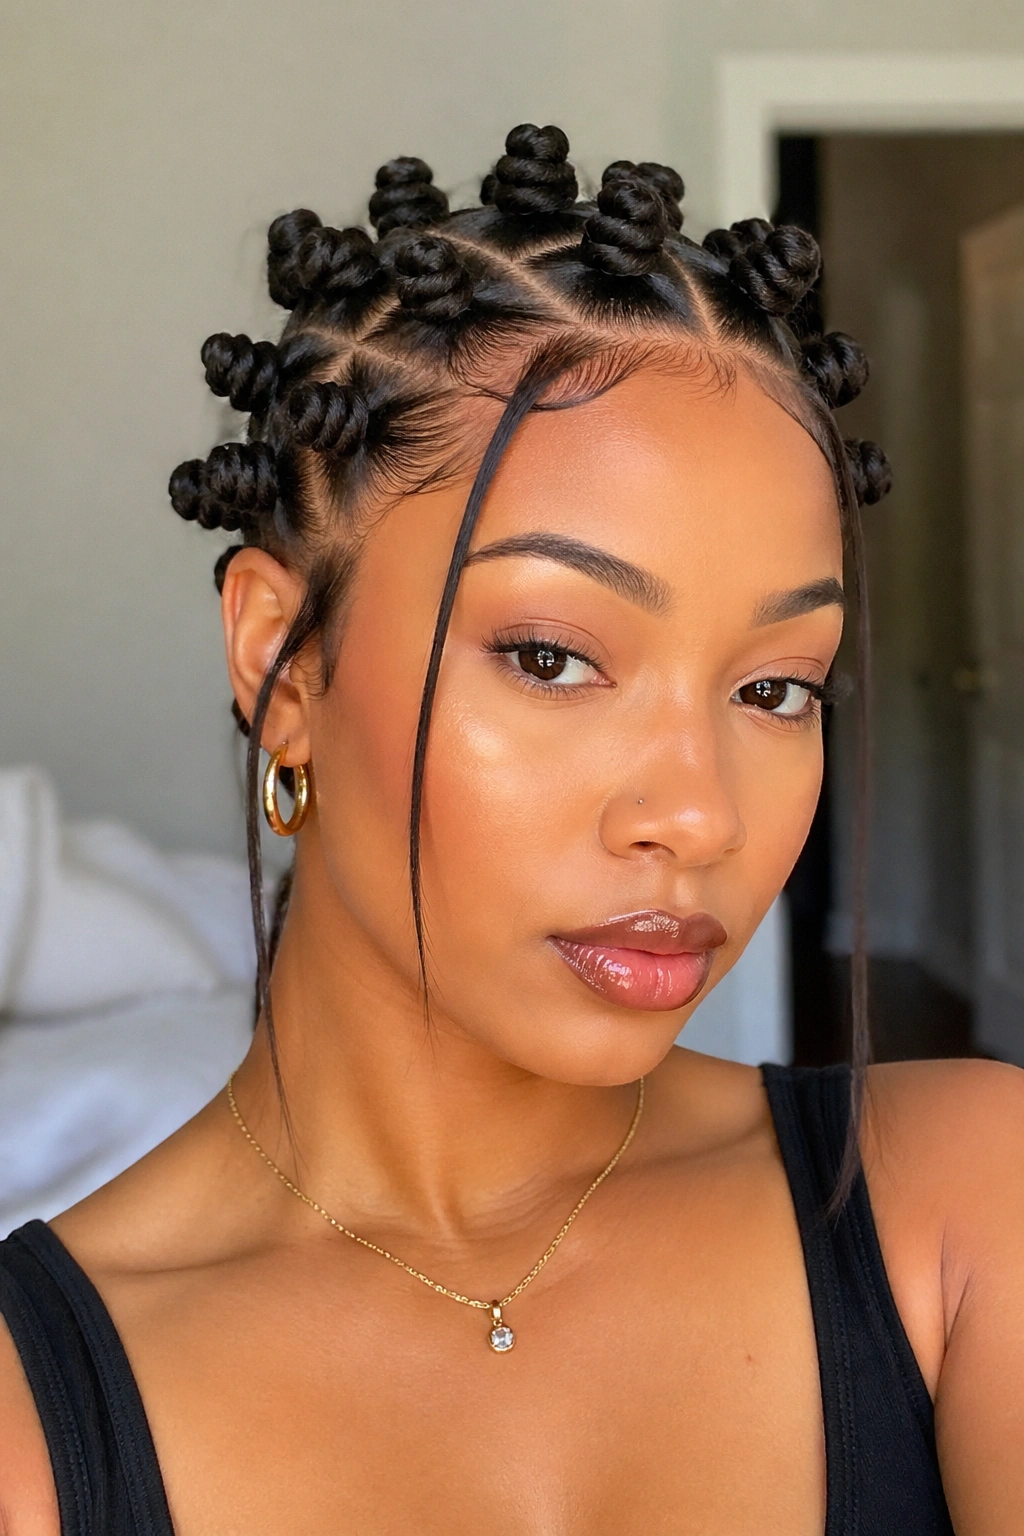
Leave two slim front pieces out and the whole style changes. The knots still do the heavy lifting, but those face-framing strands soften the front and keep the look from feeling too rigid.
A good rule is to keep each front piece about the width of a pencil, maybe a little thicker if your hair is dense. Smooth them with a bit of gel or mousse, then let them fall lightly against the cheeks. If they’re too thick, they start competing with the knots instead of helping them.
This version looks especially good when the hairline is laid flat and the front pieces are tucked just enough to show the parting. It gives the style movement without messing up the sleek finish. The rest of the head can stay tightly sectioned and compact.
One small thing matters here: don’t curl the front pieces too much. A soft bend is enough. Tight curls can make the front look busier than the knots.
5. Halo-Style Small Bantu Knots Around the Hairline
The halo version sits right at the edge of elegant and playful. The knots trace the perimeter of the head, and that ring-like placement gives the style a polished outline before you even notice the individual coils.
This works best when the center stays calm. You can keep the middle flatter, gather it low, or leave a small open crown depending on hair density. The important part is that the outer row stays even. If the front knots are taller than the side knots, the halo shape gets lost.
A halo set also plays nicely with earrings. That sounds like a small detail, but it matters. When the knots sit near the temples and around the crown line, your face stays open and the style reads cleaner from the front.
Short version: this is the set for days when you want the hair to look finished from every angle, not just straight on.
6. Low Nape Small Bantu Knots with a Tight, Sleek Base
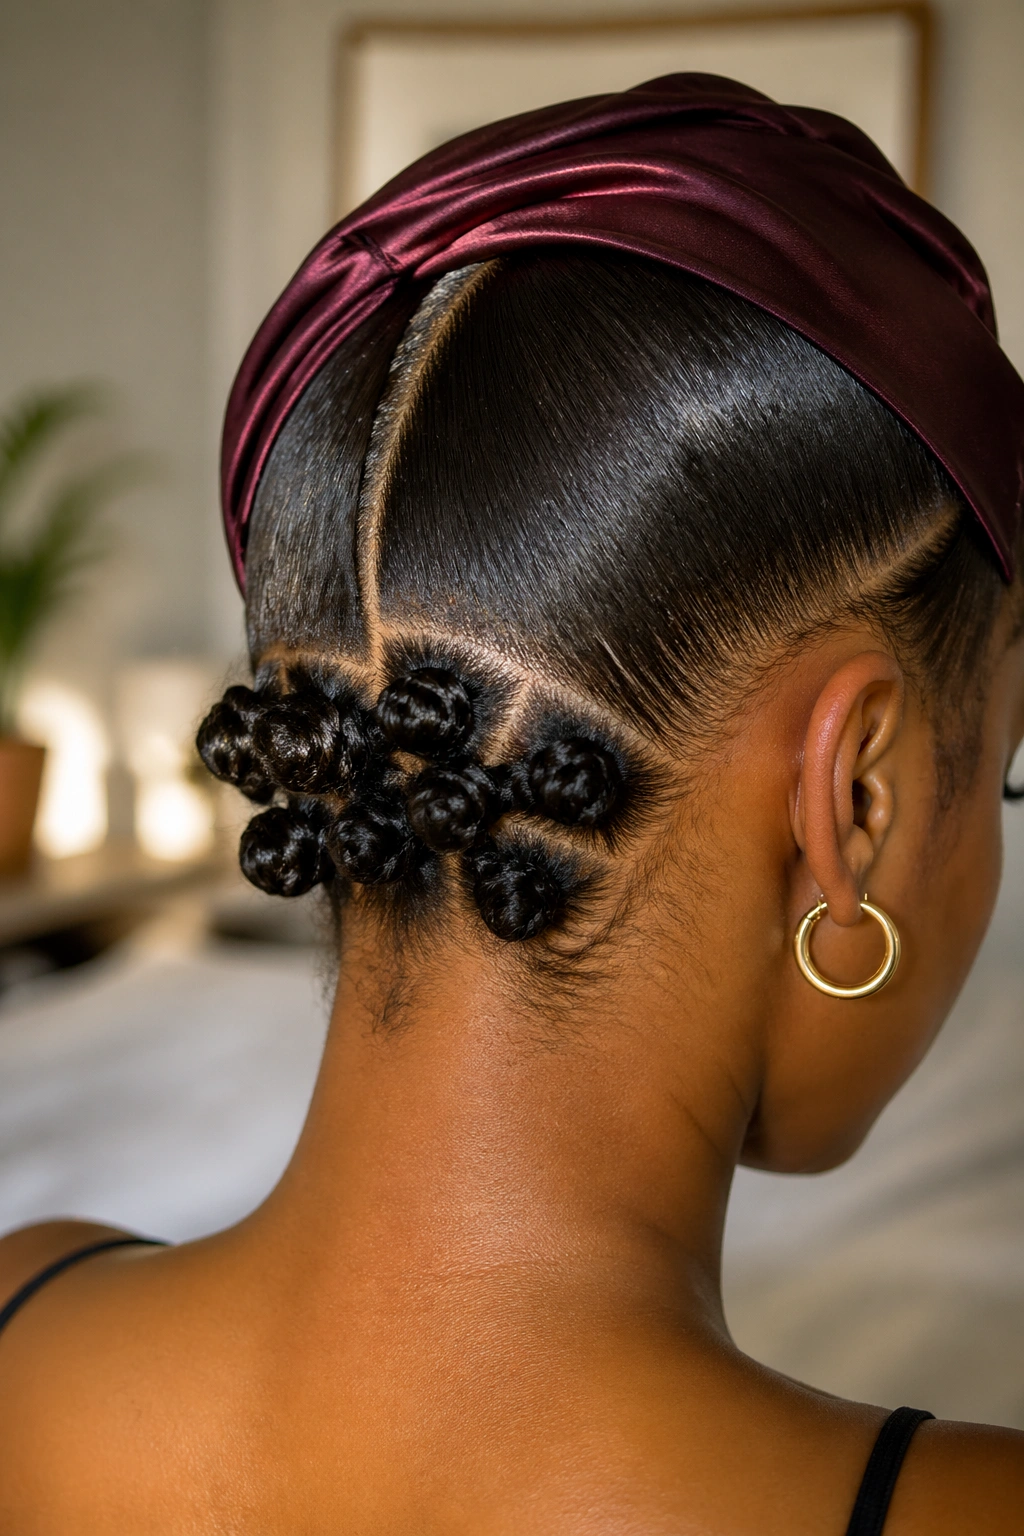
Low placements are underrated. A cluster of small Bantu knots sitting close to the nape gives the style a neat, tucked-in look that works under collars, scarves, and jackets without catching on everything.
Why the neck stays neat
A low nape set keeps the visual weight down. That makes it easier to wear if your hair is thick or if you want the top of the head to stay smooth. It also helps the style hold better overnight because the knots rest on a flatter base.
- Part the hair into small, even sections from the crown down.
- Smooth the roots toward the nape before you coil.
- Keep the bottom row tight so it sits close to the neck.
- Use a satin scarf while the hair sets, especially around the hairline.
This version looks especially good with a low neckline or a plain tee. There’s something clean about it. Not flashy. Just tidy in the best way.
7. High-Crown Small Bantu Knots with Built-In Lift
If you want height, start higher than you think. Small Bantu knots placed closer to the crown create lift right away, and that lift can make the face look longer and the style feel more dramatic without adding more hair.
The trick is to keep the top row compact. Big top knots defeat the point. Use smaller sections near the crown and let the size stay consistent as you move back. If the top knot is larger than the others, the eye goes there first and the shape can look lopsided.
This style has a clean silhouette when the sides are brushed close to the head. A soft hold gel or mousse at the roots helps the lift stay controlled instead of fluffy. You want height, not a halo of flyaways.
It’s a good pick when you want the knots to feel a little dressier. Not stiff. Just lifted.
8. Half-Up, Half-Down Small Bantu Knots

Half-up small Bantu knots solve the “too much hair on my neck” problem without making the whole head feel pinned down. The top or front section gets the knots, while the lower section stays loose, stretched, or tucked into a soft puff.
This version works because it gives contrast. The knots bring structure, and the loose back keeps the style from feeling too formal. If your hair is long, a half-up set also keeps the length from overwhelming the face.
Keep the dividing line clean. A messy half-up line ruins the sleek finish fast. I’d section from temple to temple in a soft arc rather than a hard straight line; that small curve looks better from the side and gives the style a bit of shape.
If you want the back to blend in, smooth it with mousse and a brush before pinning or tying it. Loose does not have to mean unfinished.
9. Small Bantu Knots with Flat-Twist Front Sections
Flat twists and small knots belong together. The twists keep the front smooth, and the knots take over once the eye moves back across the head.
Two flat twists about 1 to 1.5 inches wide are usually enough at the front. Feed them toward the crown, then turn each end into a small knot. That gives you a neat transition instead of a hard break between styles. It also helps the front stay flat longer, which is handy if your hairline gets fuzzy early.
This version feels thoughtful without looking overworked. That is the balance. The front reads sleek, the middle stays sculpted, and the knots at the back keep the whole set from looking too plain.
If your hair is thick, this style also cuts down on bulk near the temples, which makes the finish smoother under a scarf.
10. Small Bantu Knots with Carved Baby Hair Swirls
Baby hair can rescue a plain knot set. The trick is not making the edges louder than the style. Keep the swirls slim, smooth, and close to the hairline.
A small toothbrush or edge brush works best here. Use a tiny amount of edge control, then shape one or two curves at the temples. That’s enough. When people go too heavy on the edges, the look gets sticky and can flake under the knots later. Less really does work better here.
The knots themselves should stay simple if the edges are detailed. That contrast keeps the style from looking cluttered. A clean middle or side part plus one controlled swirl at each temple is usually enough to make the whole set feel finished.
One caution: if your edges are delicate, skip hard sculpting. Smooth, not stretched. The hairline will thank you.
11. Two-Tone or Ombre Small Bantu Knots
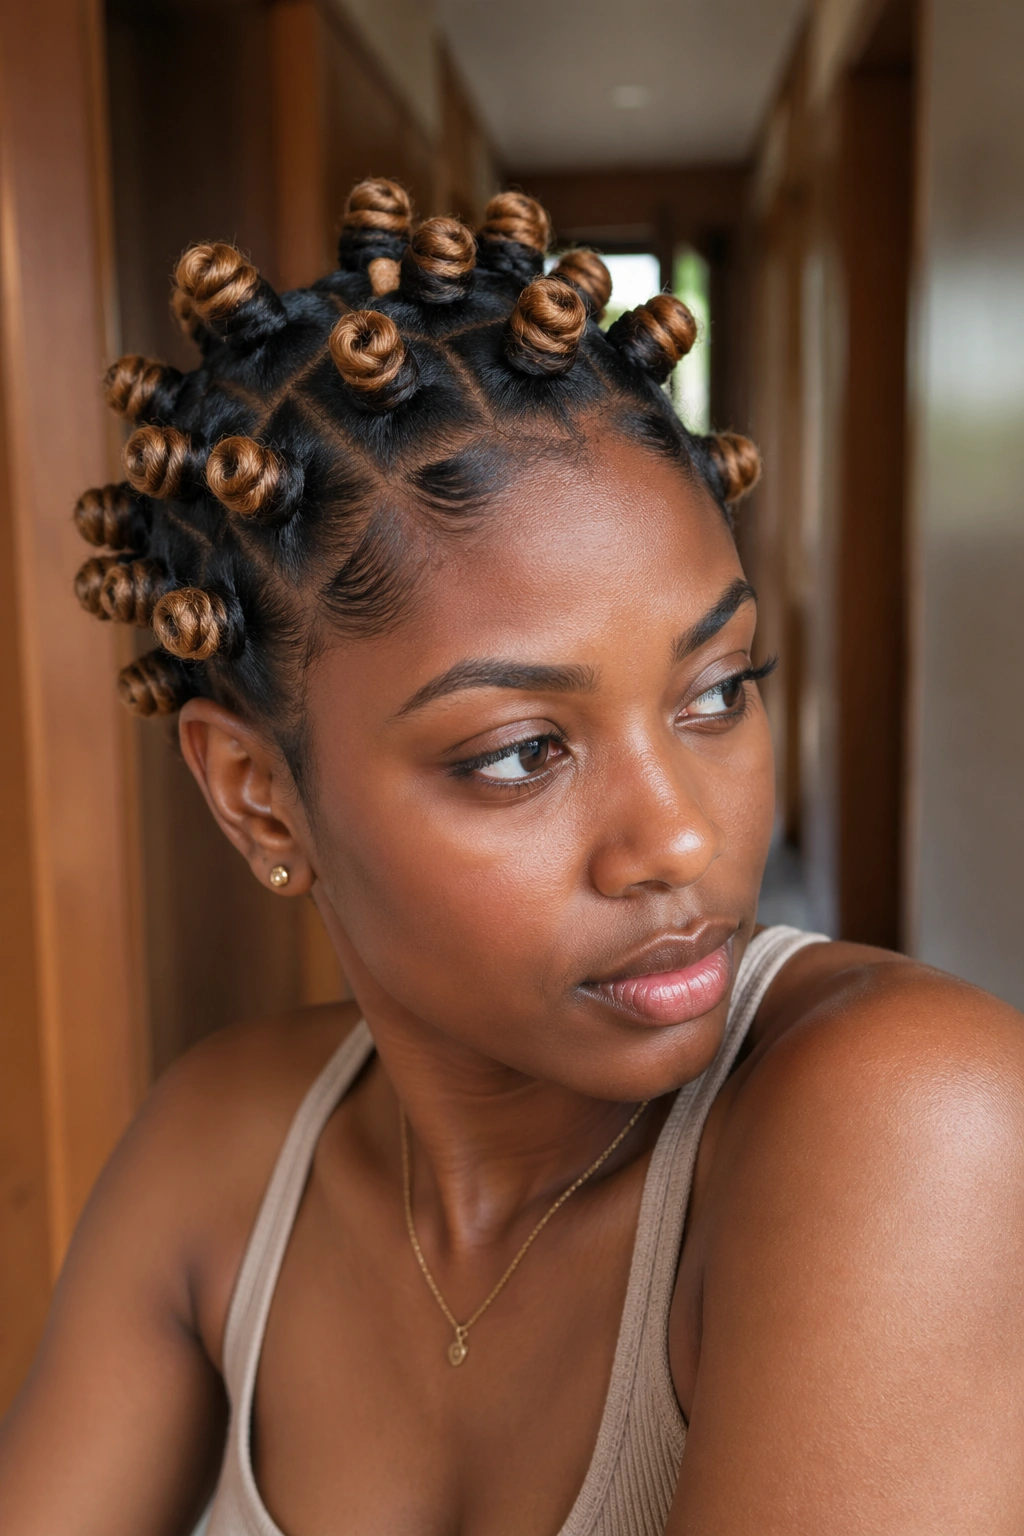
Color changes how small knots read from across the room. A darker root with lighter ends makes every coil look a little more defined, and an ombré fade gives the style movement even when the sections stay tiny.
Color placement changes the whole mood
Place the lighter shade where you want the eye to go first. Front row? The face gets framed. Crown only? The top gains lift. If the color sits all over, the knots feel louder. If it sits in one zone, the style stays sleeker and more controlled.
- Dark roots make the parting look sharper.
- Lighter tips show off the twist in each knot.
- Temporary color wax works for one-day wear.
- Toner or semi-permanent color lasts longer, but it needs upkeep.
This is one of those looks that can go from subtle to bold with a small change. A few color accents do more than a full head sometimes. Funny how that works.
12. Small Bantu Knots with Beads and Cuffs
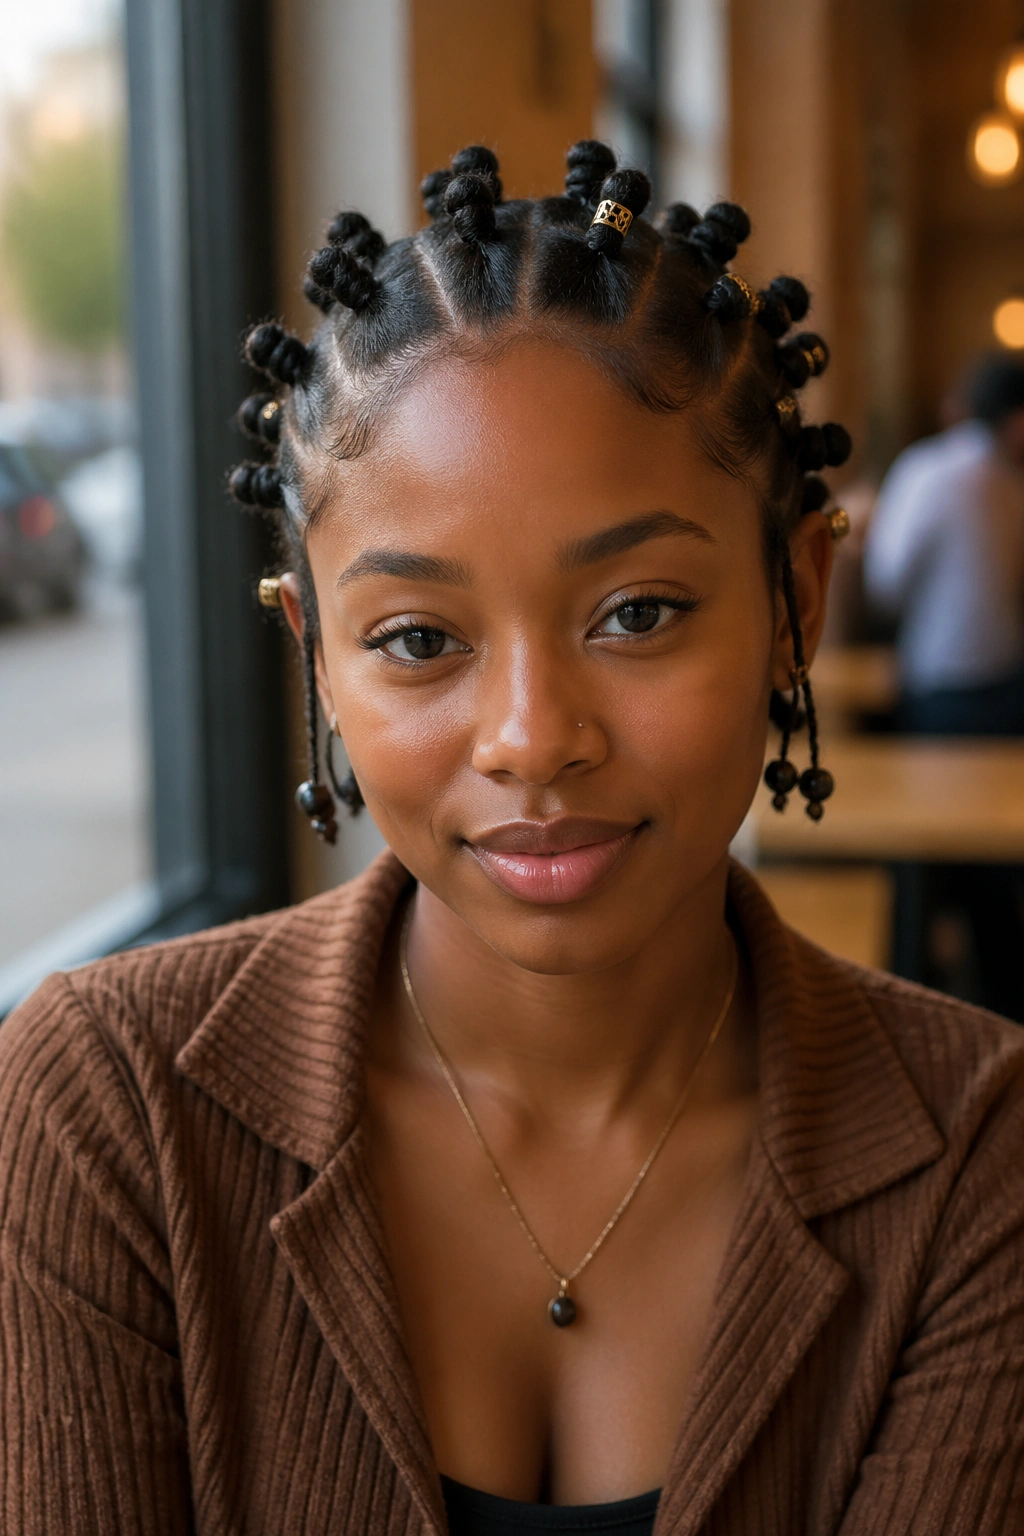
Beads are not decoration after the fact; they change the rhythm of the whole style. A few placed at the ends or beside the front knots can make small Bantu knots feel dressed up without crowding the head.
The safest approach is restraint. Two or three beads on the front row usually give enough detail. If you add cuffs, keep them on the same side or the same row so the style still looks clean. Too many shiny pieces can fight the sleek finish and make the knots feel cluttered.
Wood beads read warmer and more earthy. Metal cuffs feel sharper. Clear or matte pieces sit somewhere in between. Pick one lane and stay there. Mixing all three usually looks less polished than people expect.
If your hair is fine, keep the ornaments light. Heavy beads pull on the section and can stretch the knot out of shape by the end of the day.
13. Small Bantu Knots Wrapped with a Satin Scarf Accent
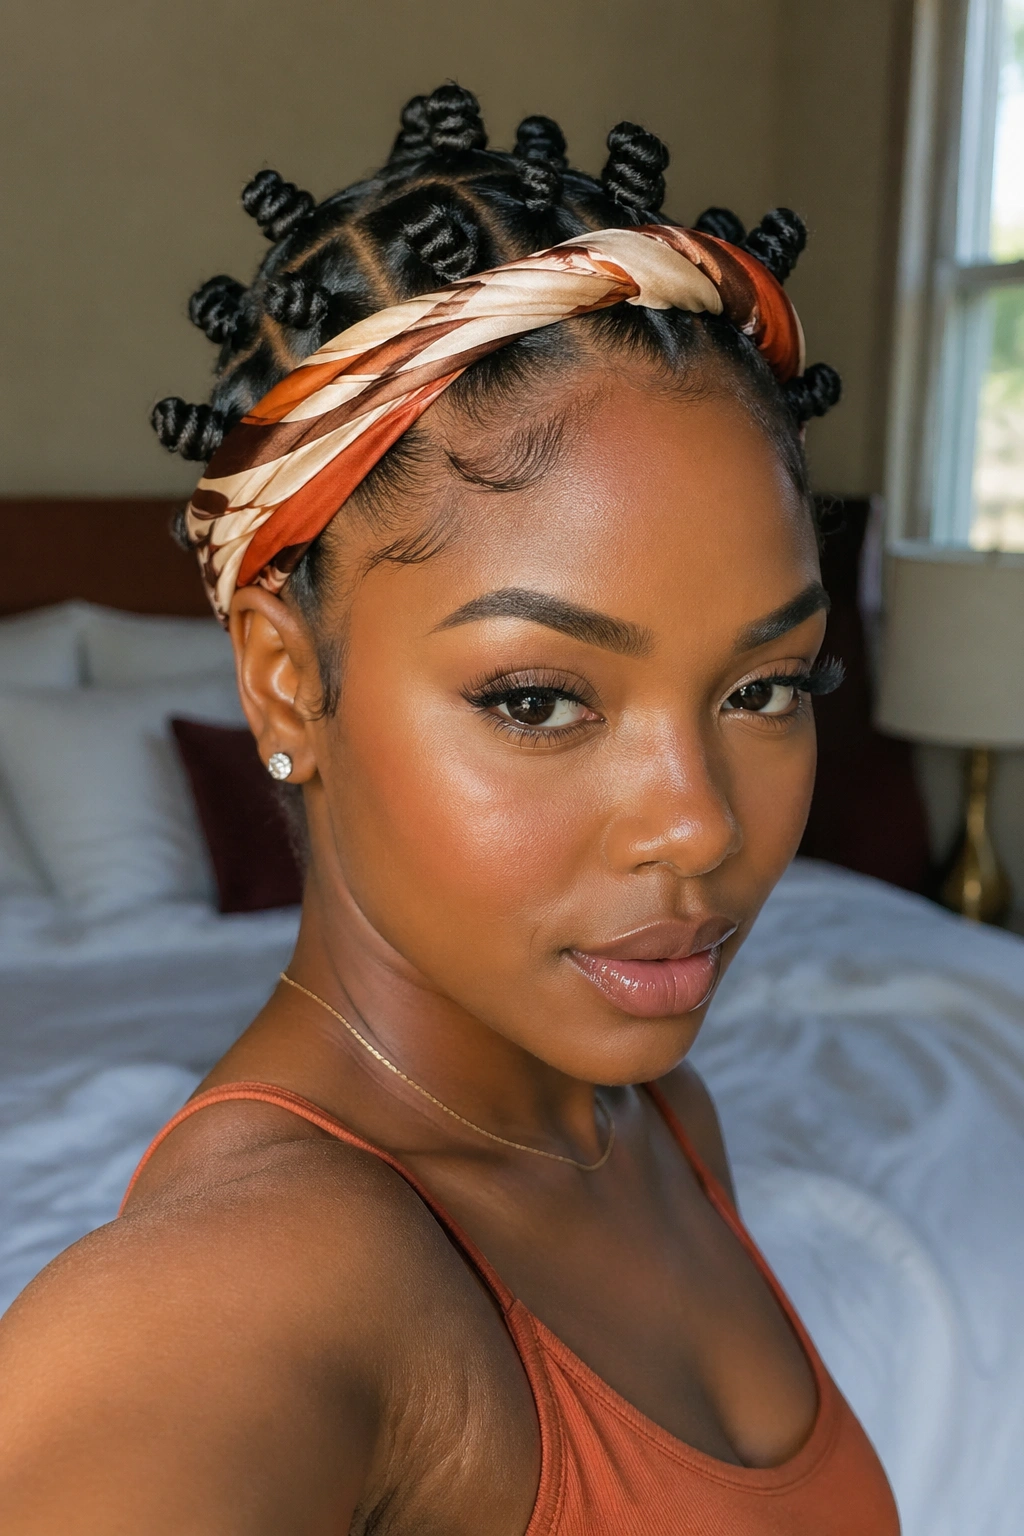
A satin scarf can be part of the style, not just a bedtime tool. Wrapped around the hairline or tied into the front of the set, it adds color and keeps the roots pressed flat at the same time.
The easiest version is a narrow scarf tied low across the forehead or just behind the hairline. Leave it on for 10 to 15 minutes after styling so the roots settle. That short window helps the hair dry in place and cuts down on lift at the perimeter.
If you want the scarf to look intentional, match it to one of the knot colors or to your outfit. Loud prints can work, but only if the knots stay simple. When the hair is already detailed, the scarf should support it, not compete with it.
This is also a smart choice for humid days. The scarf buys you a little more control. That matters more than fancy finishing products.
14. Small Bantu Knots on a Flat-Twist Foundation
A flat-twist base keeps the roots calmer. That is the whole point here. Instead of starting every knot on loose hair, you build a smooth path first, then coil the ends into small knots.
Best for thick or dense hair
This method can cut down on puff at the base, especially if your hair tends to swell at the roots. The flat twists help distribute tension more evenly, which makes the finish look neater and keeps the scalp from feeling overloaded.
You do not need a lot of twists. Four to six across the head can be enough if the sections are placed well. Let the twists travel back toward the knot area, then coil the ends tightly. The result feels structured, not bulky.
It’s a clean option when you want the knots to last more than one wear. The flat-twist foundation gives the hair a better shape to hold onto, and the whole style tends to stay flatter at the crown.
15. Small Bantu Knots on Stretched, Blow-Dried Hair
Blow-dried hair changes the whole mood. The knots sit more neatly, the sections look cleaner, and the finish usually comes out smoother because the hair isn’t fighting itself.
Use low to medium heat and keep the dryer moving. You want the hair stretched and soft, not fried or crunchy. A nozzle helps direct the airflow, which matters if the roots puff up easily. Once the hair feels dry but still has a little give, section it and start knotting.
This version is especially handy when you want the style to go in faster. Detangling is easier, the parts stay visible, and the knots tend to hold a neater shape. That said, stretched hair shows bad sectioning just as fast as it shows good sectioning. No hiding.
If you like a smooth finish without piling on product, this is a smart base to start from.
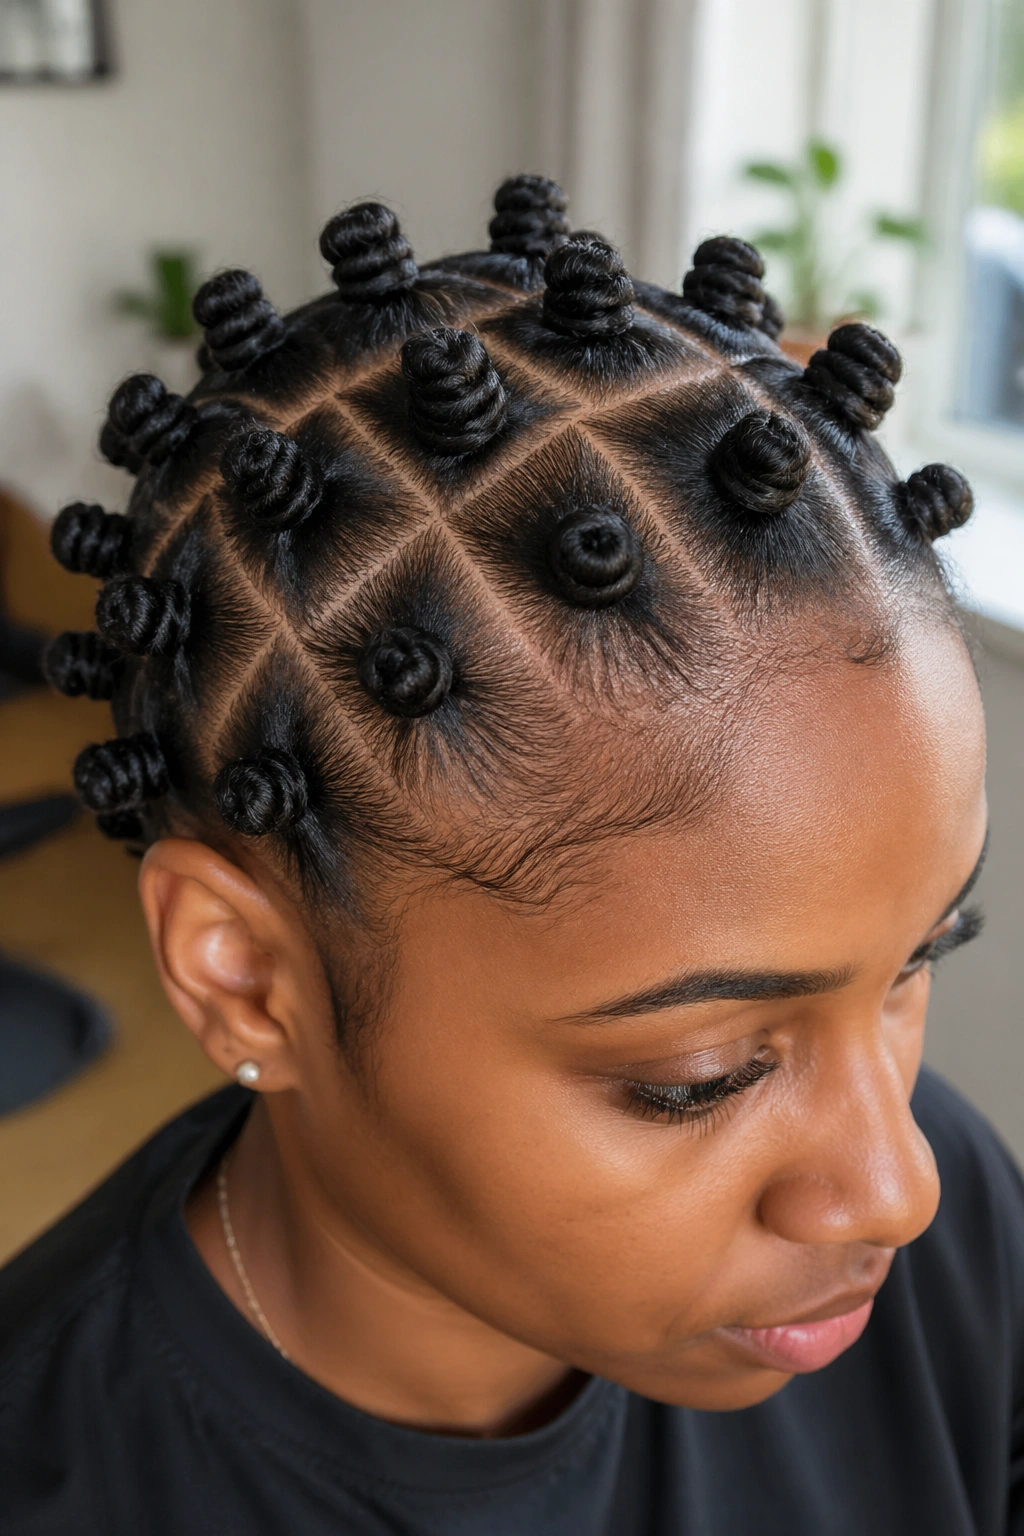
16. Small Bantu Knots in a Clean Box-Part Grid
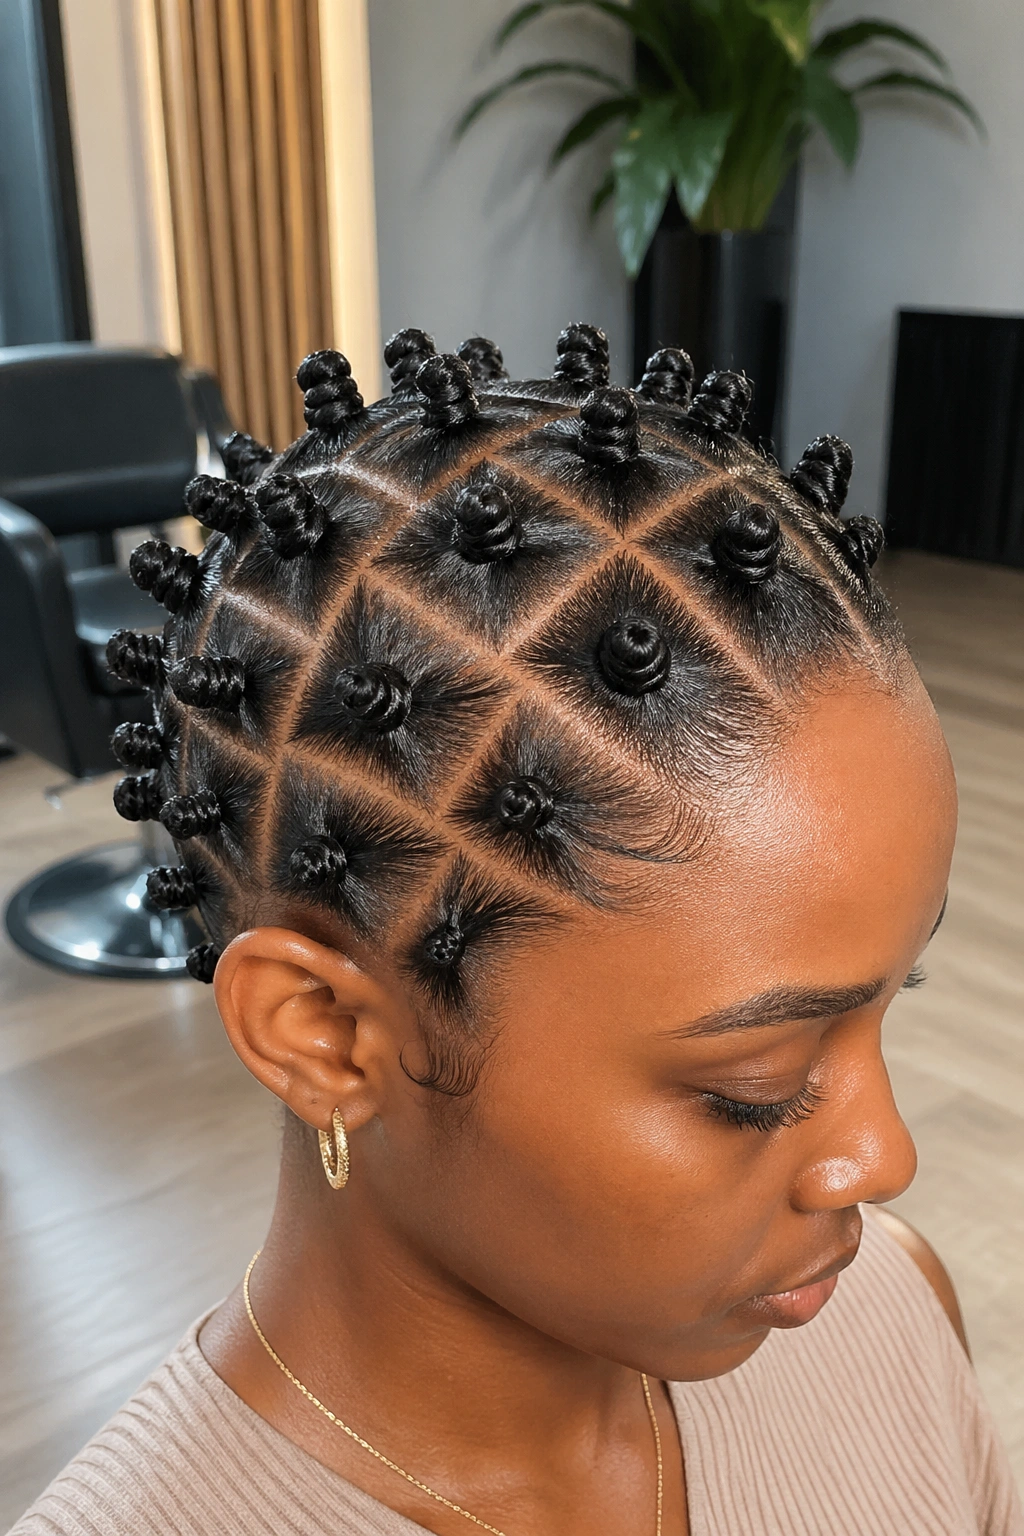
Box parts make the style look deliberate fast. Each knot gets its own little square, and that geometry gives the set a crisp, almost graphic feel.
The grid works best when the parts are the same width from front to back. A clean box pattern can make even a simple knot set look sharp. It also makes redoing the style easier, because you can see where each section belongs. If you’re the kind of person who likes order, this one is satisfying in a very practical way.
Keep the boxes small. A section that is about 1 inch by 1 inch usually holds shape well without turning bulky. If your hair is denser, make the boxes a touch narrower near the front so the hairline stays neat.
This is one of the best choices for pictures. The pattern reads immediately, even from a distance.
17. Small Bantu Knots Set on an Asymmetrical Part
Asymmetry is the quiet cheat here. A part that angles off to one side can make the whole style feel more modern without adding any extra pieces or accessories.
Start the part at one temple and let it travel diagonally toward the opposite side of the crown. That tilt changes the balance of the knots and gives the eye a natural path to follow. It also helps if one side of your face is more open or if you want to soften a strong jawline.
The key is keeping the asymmetry clean. Sloppy diagonal parts can look accidental. A sharp tail comb and a smooth base matter more than fancy product here. If the line is good, the knots can stay simple.
This is a nice option when you’re tired of straight center parts but still want the style to feel neat. It has a little personality without getting noisy.
18. Small Bantu Knots with Metallic Rings for a Dressy Finish
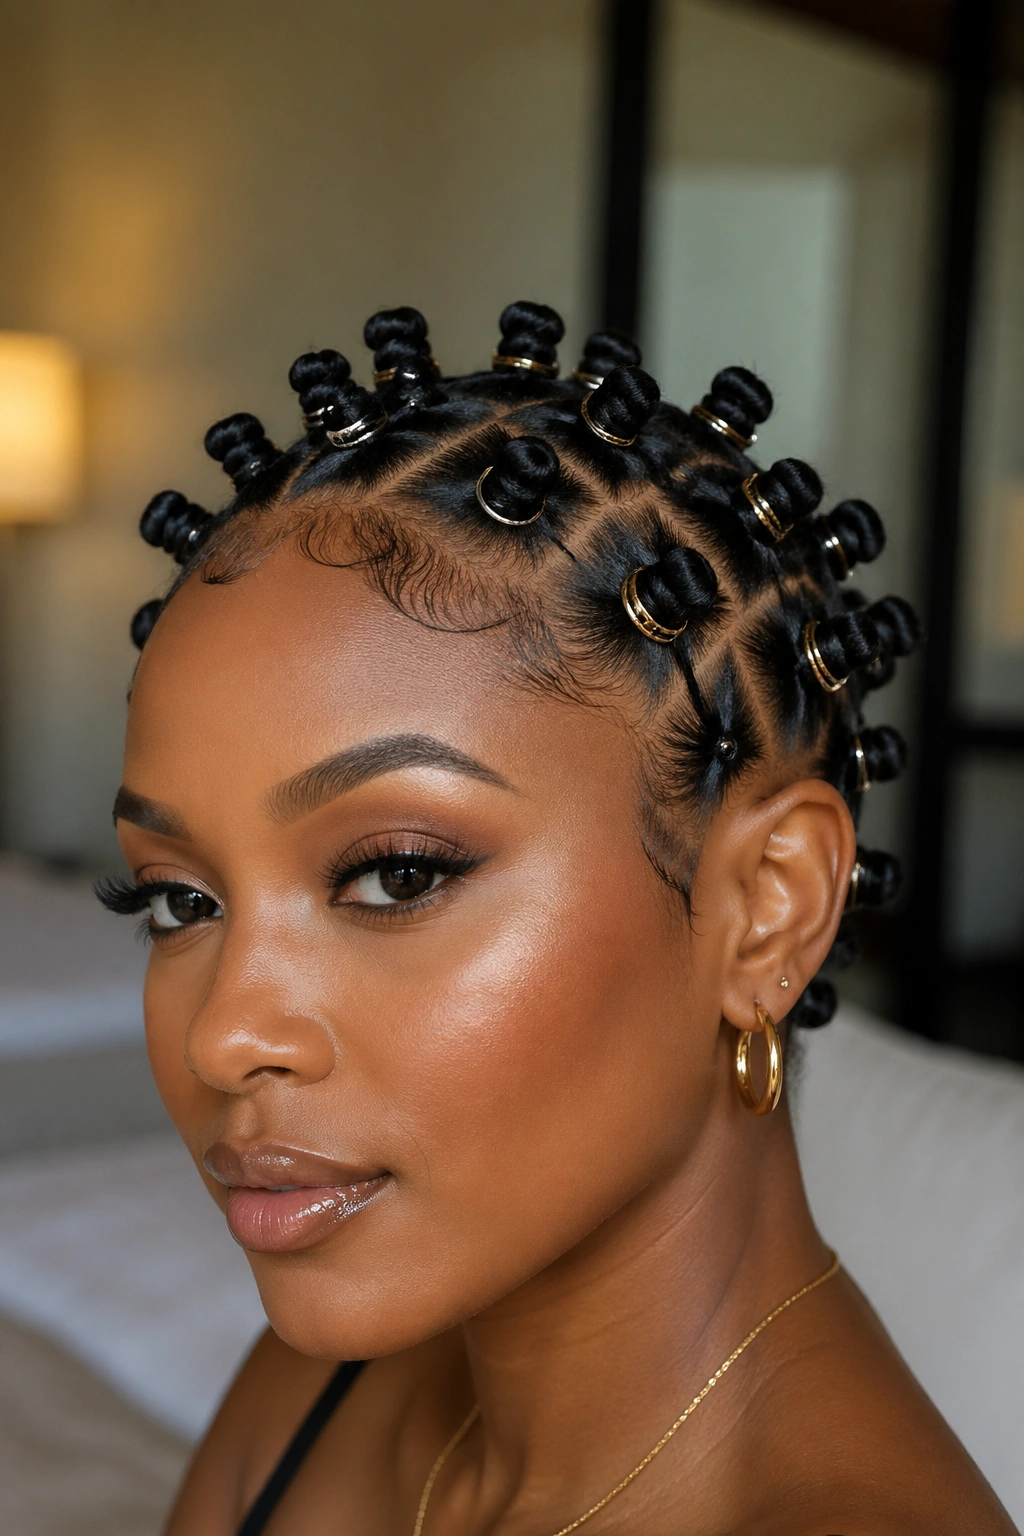
Metal rings work because they catch the eye in tiny hits. One ring near the front or a few spaced along the outer row can make small Bantu knots feel dressed up without turning them into costume hair.
Keep the metal accents close to the scalp or tucked into the knot base. That way they sit flat and do not poke out at odd angles. Gold reads warm. Silver looks sharper. Rose-gold lands somewhere in the middle. Pick one finish and keep the rest of the look quiet.
Three or four rings are usually enough. More than that and the style starts to fight itself. The knots already bring texture; the metal should be punctuation, not the whole sentence.
This version works well with earrings and a plain neckline. Let the accessories speak to each other instead of all shouting at once.
19. Slicked-Back Small Bantu Knots for Formal Wear
Slicked-back small Bantu knots are the cleanest option on this list. No part has to do the talking. The hair is brushed straight back, the roots are flattened, and the knots rise from a smooth base.
A soft brush and a medium-hold gel do most of the work. Brush in short strokes from the hairline toward the crown, then stop once the roots lie flat and shiny, not wet-looking. If the gel starts clumping, you’ve gone too far. Clean slicking should look smooth, not crusty.
This version is good for dressier outfits, simple makeup, or anywhere you want the hair to look controlled and elegant. It also photographs well because the line from forehead to crown stays open.
If your edges are fragile, be gentle here. A slicked-back style should still feel calm at the scalp. Tight is not the same thing as neat.
20. Side-Swept Small Bantu Knots with a Cascade Shape
Diagonal placement gives the eye somewhere to travel. A side-swept knot set can look softer than a straight row because the knots follow a curve instead of a rigid line.
How the curve works
Think of the head in three bands. The top row starts higher on one side, then drops gradually as it moves across the crown. The side row stays a little lower, which creates that cascade effect. It sounds fussy, but the shape is easier to see than to explain.
The style works especially well when you want movement without loose hair. It has flow, but it still feels tidy. Keep the sections small enough that the drop in height looks graceful rather than uneven.
This is one of those styles that can make a plain outfit look finished. The line of the knots does the visual work, so you do not need much else.
21. Small Bantu Knots Pulled Into a Low Bun Accent
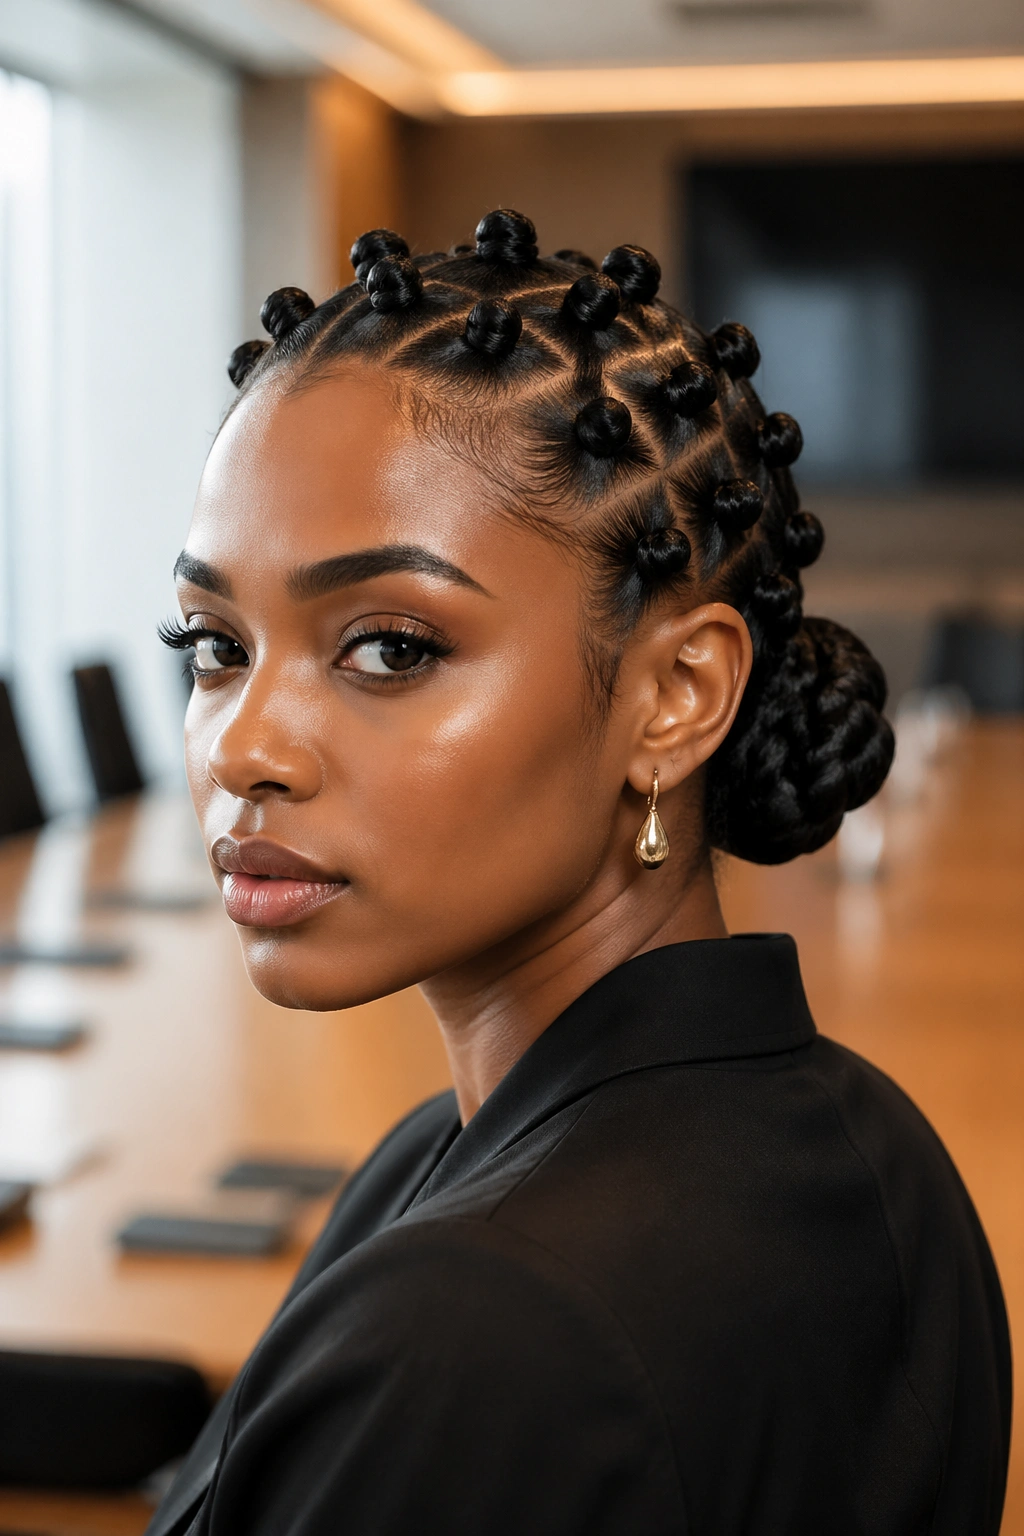
A ring of tiny knots feeding into a low bun sounds busy, but it can look refined when the base stays tight and the bun stays compact.
The easiest way to wear it is to keep the front and crown in small knots, then gather the back into a low bun at the nape. That keeps the silhouette long and neat instead of puffy. The bun should sit close to the head, almost like an anchor. If it sticks out too far, the whole shape gets heavier.
This style is useful when you want the knots but also need the neck clear. It works for formal settings, office days, and any time you want hair off your shoulders without losing detail.
A low bun accent is also kinder to collars. Little thing. Big difference.
22. Small Bantu Knots for Short Natural Hair
Short natural hair and small knots are a better match than people expect. The smaller the section, the cleaner the knot will sit, and short hair usually benefits from that kind of control.
What short hair needs
The biggest mistake is trying to make each knot too large. On hair that sits around 2 to 4 inches stretched, smaller sections hold better and stay closer to the scalp. That gives the style shape instead of a puffed-up lump.
- Use a light cream, not a heavy butter.
- Keep tension even from root to tip.
- Secure the end by wrapping tightly, not by piling hair on top of itself.
- Choose parts that stay visible from the front.
This is one of the most practical versions if you like quick styles that still look done. The silhouette stays neat, and the shorter length keeps the knots from drooping by the end of the day.
23. Small Bantu Knots on Twists or Locs for a Textured Finish
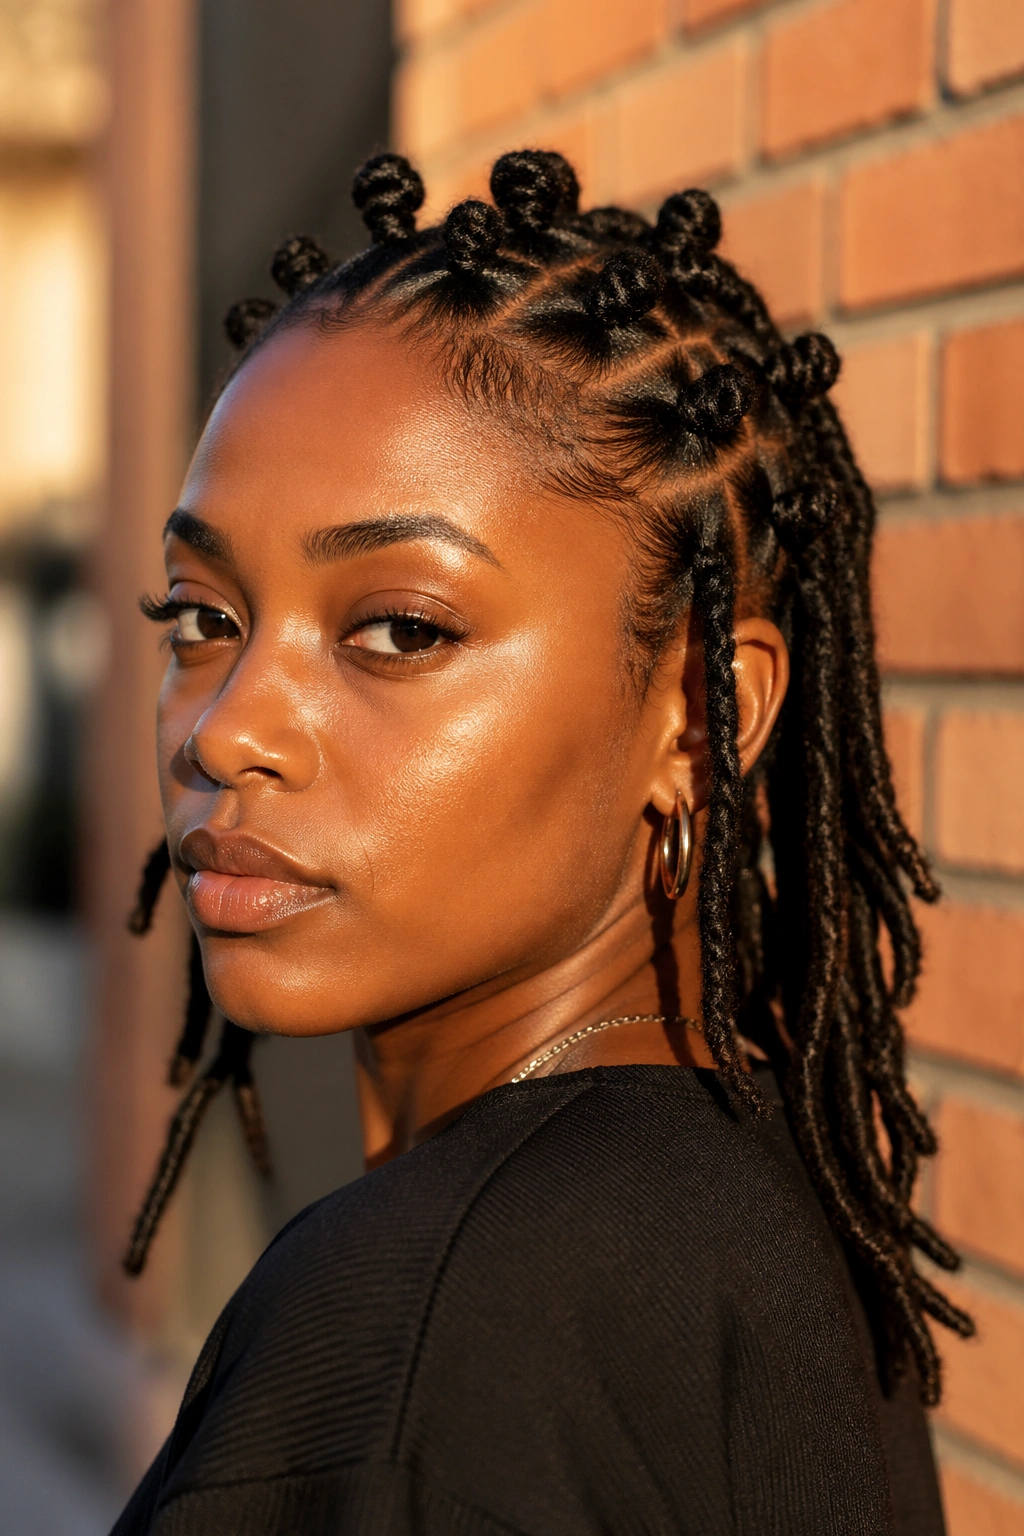
Twists and locs change the silhouette in a good way. The knots read a little fuller, the texture shows more clearly, and the style gets a heavier, more dimensional look without losing its structure.
This works best on stretched twists or mature locs that can bend without snapping at the base. Keep the sectioning clean and the roots smooth. If you have locs, go light on any product near the scalp. Buildup shows fast, and it is not worth chasing shine if the roots start looking dusty later.
The look sits somewhere between sculpted and natural. That is why people like it. It gives the knot shape more body, which can be a plus if your hair is very soft or if you want the style to hold its round shape longer.
Not every knot set needs to look identical. This one leans into texture, and that is the appeal.
24. Glossy Small Bantu Knots for Photos and Long Wear
Gloss is not the same as grease. A glossy knot set has shine at the surface, but the roots still look clean and the sections still move. Heavy oil near the scalp kills that effect fast.
Use a light shine spray or a few drops of oil rubbed between your palms, then smooth only the outside of the knots. Leave the roots alone if they already hold well. The shine should sit on top of the style, not soak into it. Too much product can make the knots slip before they set.
This version is useful when you want the style to hold up through a long day. A smooth surface can hide a little frizz, and that buys you time. It also gives the hair a neat finish in photos because the light hits the knots evenly.
The trick is moderation. A little sheen, a clean part, and no sticky residue. That’s enough.
25. Small Bantu Knots That Turn Into a Knot-Out Later
The best small Bantu knot set is the one that gives you a second wear. Set the knots neatly enough to look polished on day one, and then take them down later for a defined knot-out with shape and movement.
This is where section size matters most. If the knots are too small, the unraveling can get tangled. If they’re too large, the knot-out loses definition. A middle-ground section, usually around 3/4 inch to 1 inch, tends to work well for both looks. Let the hair dry completely before you take anything down. Damp hair will frizz and collapse the pattern.
When it’s time to unravel, use a drop of oil on your fingertips and separate slowly. No rushing. No tugging. The hair should slip apart in clear coils, not explode into fuzz.
That double life is what makes small Bantu knots worth the time. They look finished as knots, and they can still become something else the next day.