Bantu knot styles on straight hair can look razor-sharp, but the strands fight back if you treat them like textured hair. Silky hair slips. Fine hair collapses at the base. Extra-long hair gets heavy in a hurry. That means the prettiest version of the style is rarely the fastest one, and honestly, that is part of the charm.
What makes the look work is not magic. It is grip, section size, and tension control. A little mousse goes a long way. So does dry shampoo, a rat-tail comb, and the patience to redo a knot that feels loose before you walk out the door. On straight hair, the difference between “sculpted” and “messy in a bad way” can be one bobby pin.
There is also the cultural piece, and it deserves a plain sentence instead of a lecture. Bantu knots come from Black hair traditions, so if you wear them on straight hair, wear them with respect, not as a throwaway trend. The style can be playful, elegant, or tough-edged, but it should never feel like a costume.
The good part? Straight hair opens up a lot of visual possibilities. You can make the knots tiny and neat, big and dramatic, parted in a clean grid, or tucked into a half-up crown with loose lengths left down. The first few looks below are the ones I reach for most often because they stay put and actually look intentional.
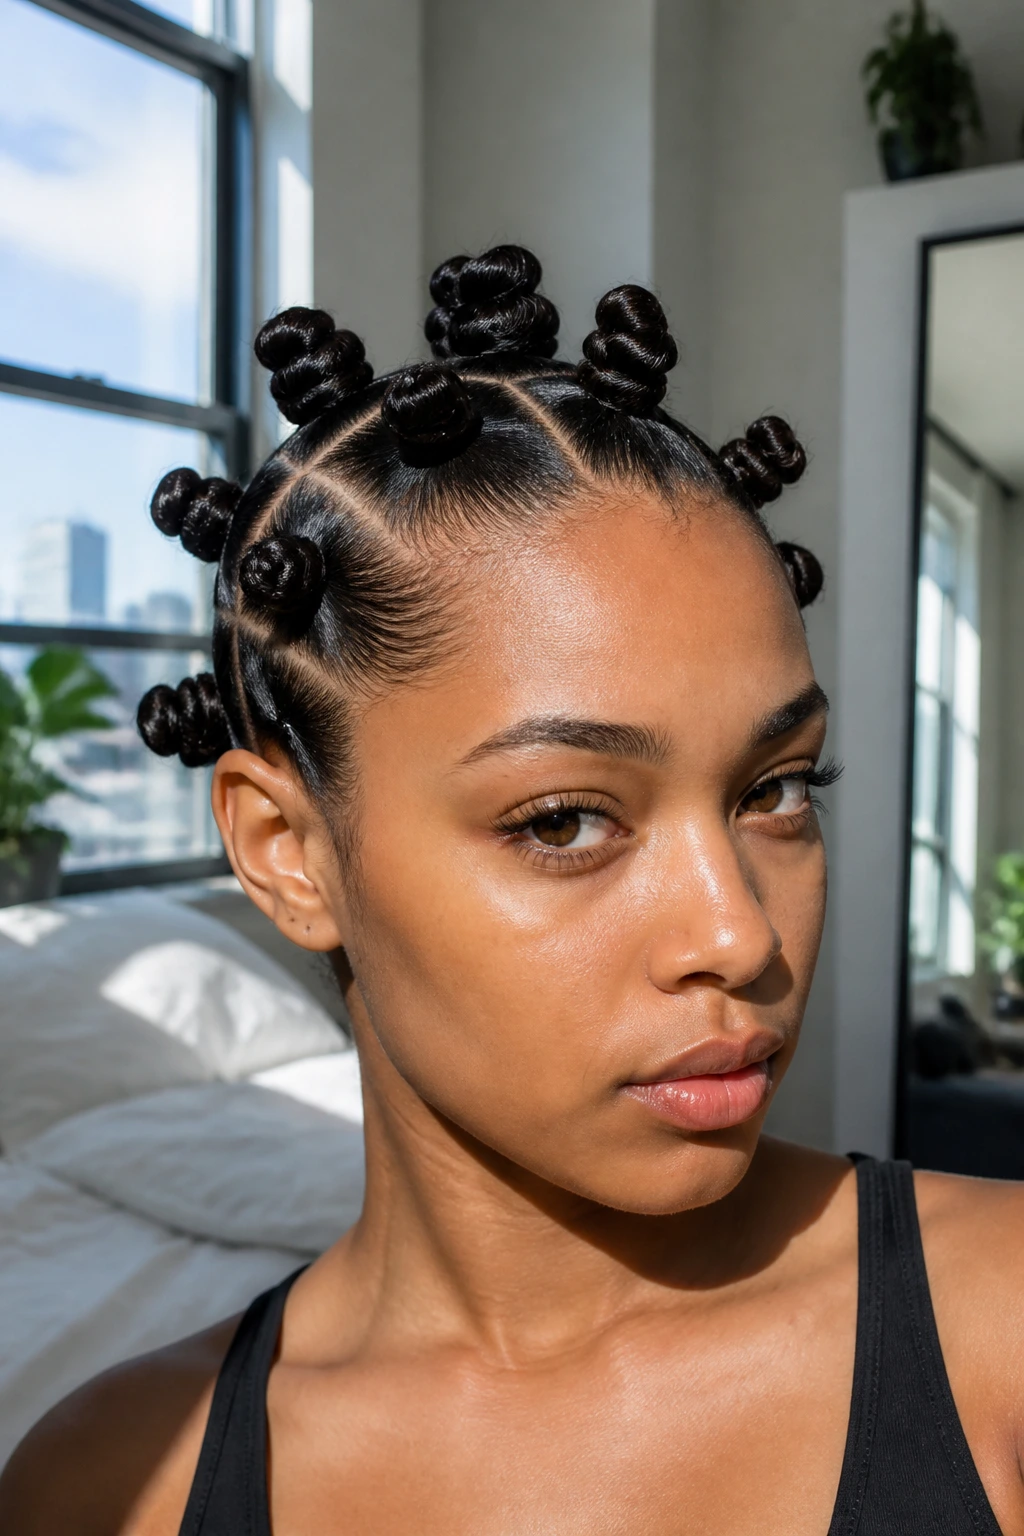
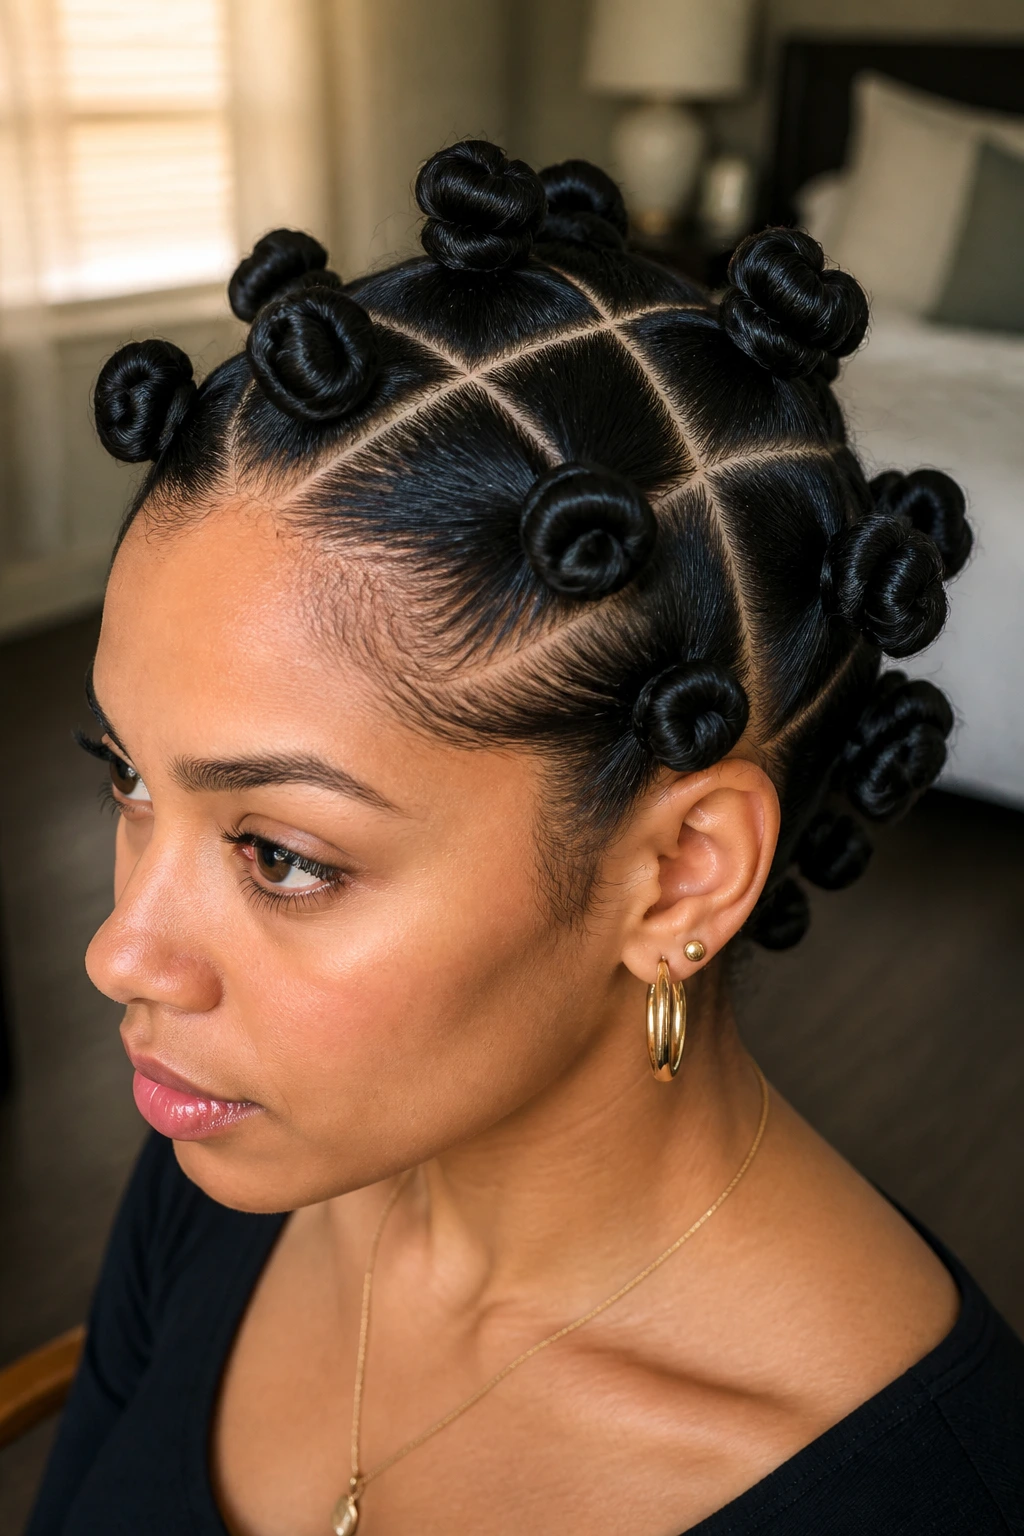
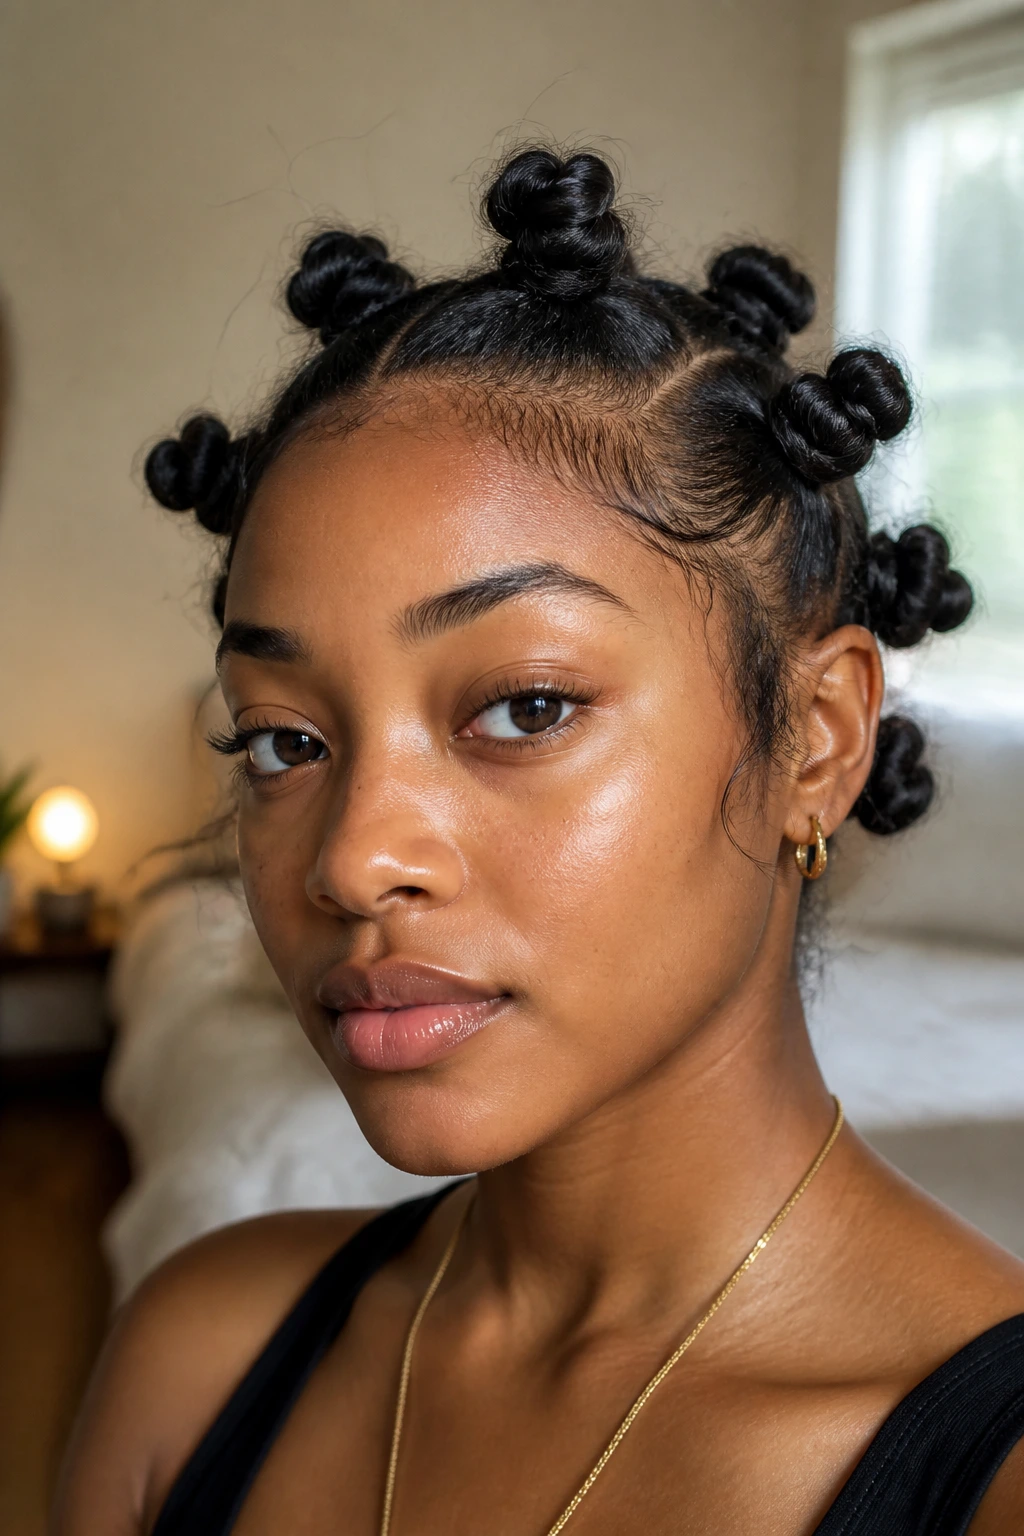
1. Classic Center-Part Knots for Straight Hair

A clean center part gives Bantu knots a calm, balanced shape that works especially well on pin-straight hair. The symmetry makes the style look deliberate instead of improvised, which matters when your strands don’t naturally hold much bend.
Why It Works
I like this version because it gives you a neat frame without needing a pile of product. A center part also helps you match knot size from left to right, and that matters more than people think. When the sections are even, the whole set looks expensive, even if you did it with a small comb and three clips.
Use 1-inch to 1.5-inch sections and prep with a light mousse or texturizing spray before twisting. If the roots still feel slippery, add a touch of edge control only at the base, not through the full length.
- Best for shoulder-length to long straight hair
- Works well for school, events, or a sharp everyday look
- Keeps the face open and tidy
- Looks especially good with a middle part and slicked edges
Tip: If the knots keep loosening, twist the section tighter at the roots and anchor the first coil with a bobby pin before tucking the end.
2. Deep Side-Part Knots
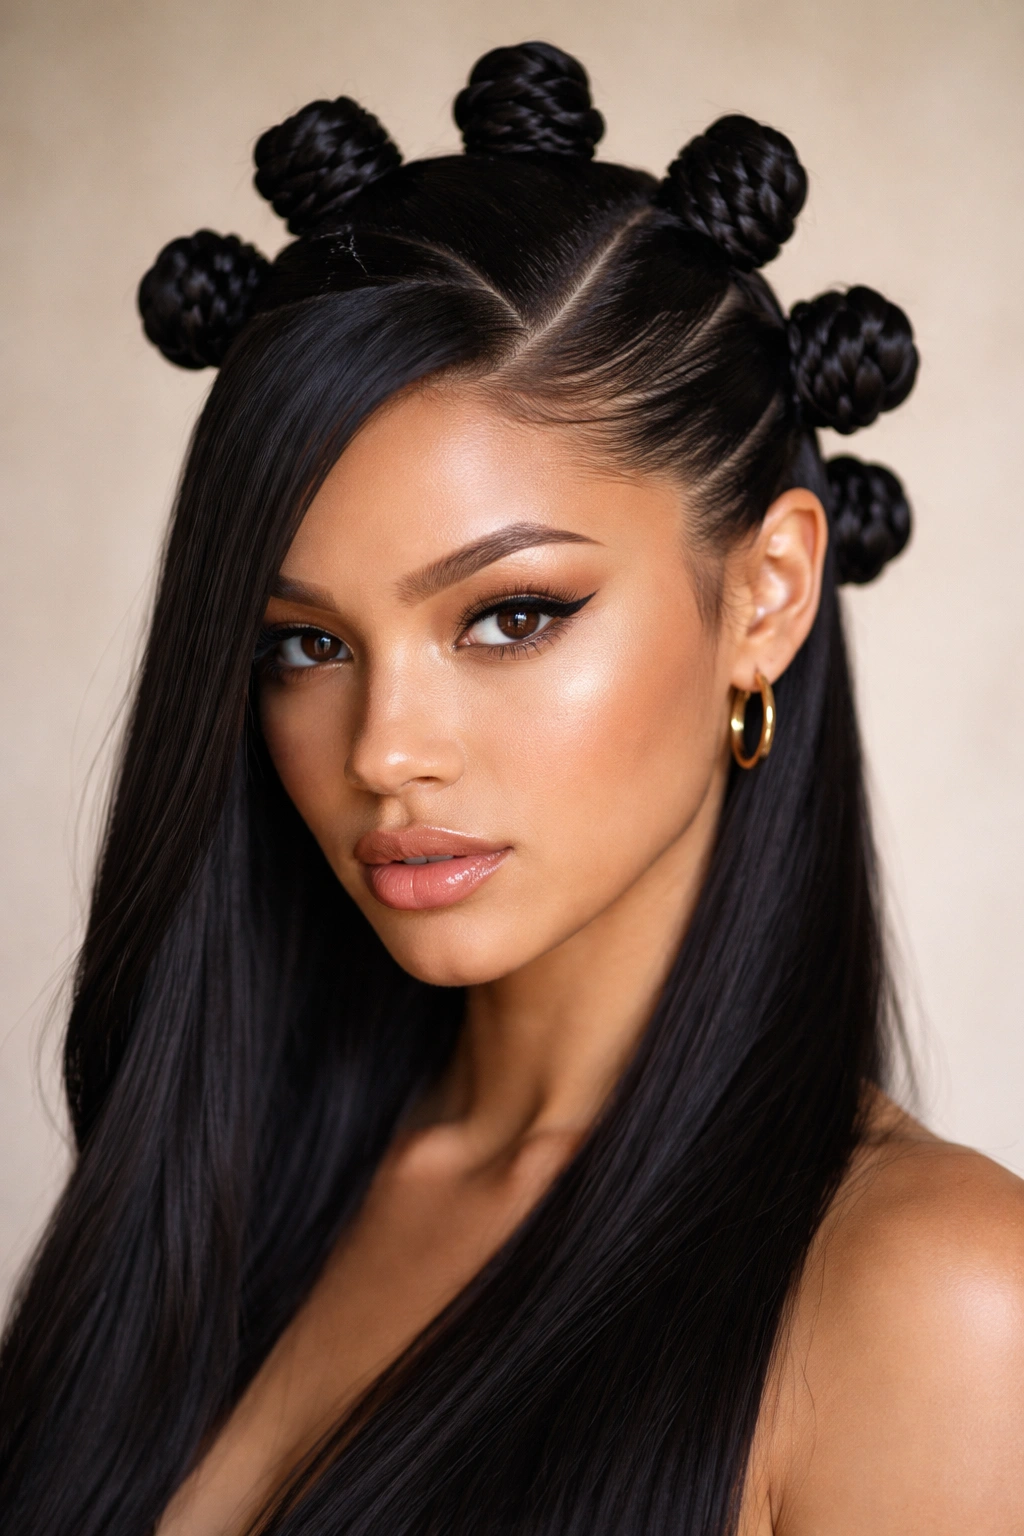
A deep side part gives straight hair a little attitude, and that one change can make Bantu knots feel less sweet and more fashion-forward. The part line itself becomes part of the design, so the eye goes straight there first.
A side part is also useful if your hair falls flat at the crown. The heavier side gives the style some visual weight, while the smaller side keeps the face from getting swallowed by too much symmetry. I reach for this version when the hair has a blunt cut or a long layer that needs some shape.
Keep the part crisp with the tail of a comb and don’t let it drift once you start sectioning. If you want a cleaner finish, smooth the part line with a tiny bit of gel and press it down with your finger before the knots go in.
The result is sharp, a little dramatic, and much easier to wear than it sounds. That’s the fun part.
3. Half-Up Bantu Knots with Loose Ends
Want the knot look without committing every strand to the style? Half-up Bantu knots are the easy answer, and on straight hair they often feel the most wearable. You get the sculpted crown up top and a softer curtain of hair underneath.
This is the version I’d suggest to anyone nervous about full-set knots on sleek hair. The loose ends help disguise a section that starts to slip, and they keep the style from feeling too severe. It also works if your hair is long enough to look heavy once everything is twisted up.
How to Wear It
Start by sectioning off the top half from temple to temple. Make the knots slightly smaller than you think you need, because straight hair looks fuller once the top is secured and the rest is left down. Curl the loose bottom section with a flat iron wave or leave it poker-straight if you want a cleaner contrast.
A half-up knot set is great for brunch, concerts, or any day when you want the style to look finished but not overdone. It plays nicely with long earrings, too.
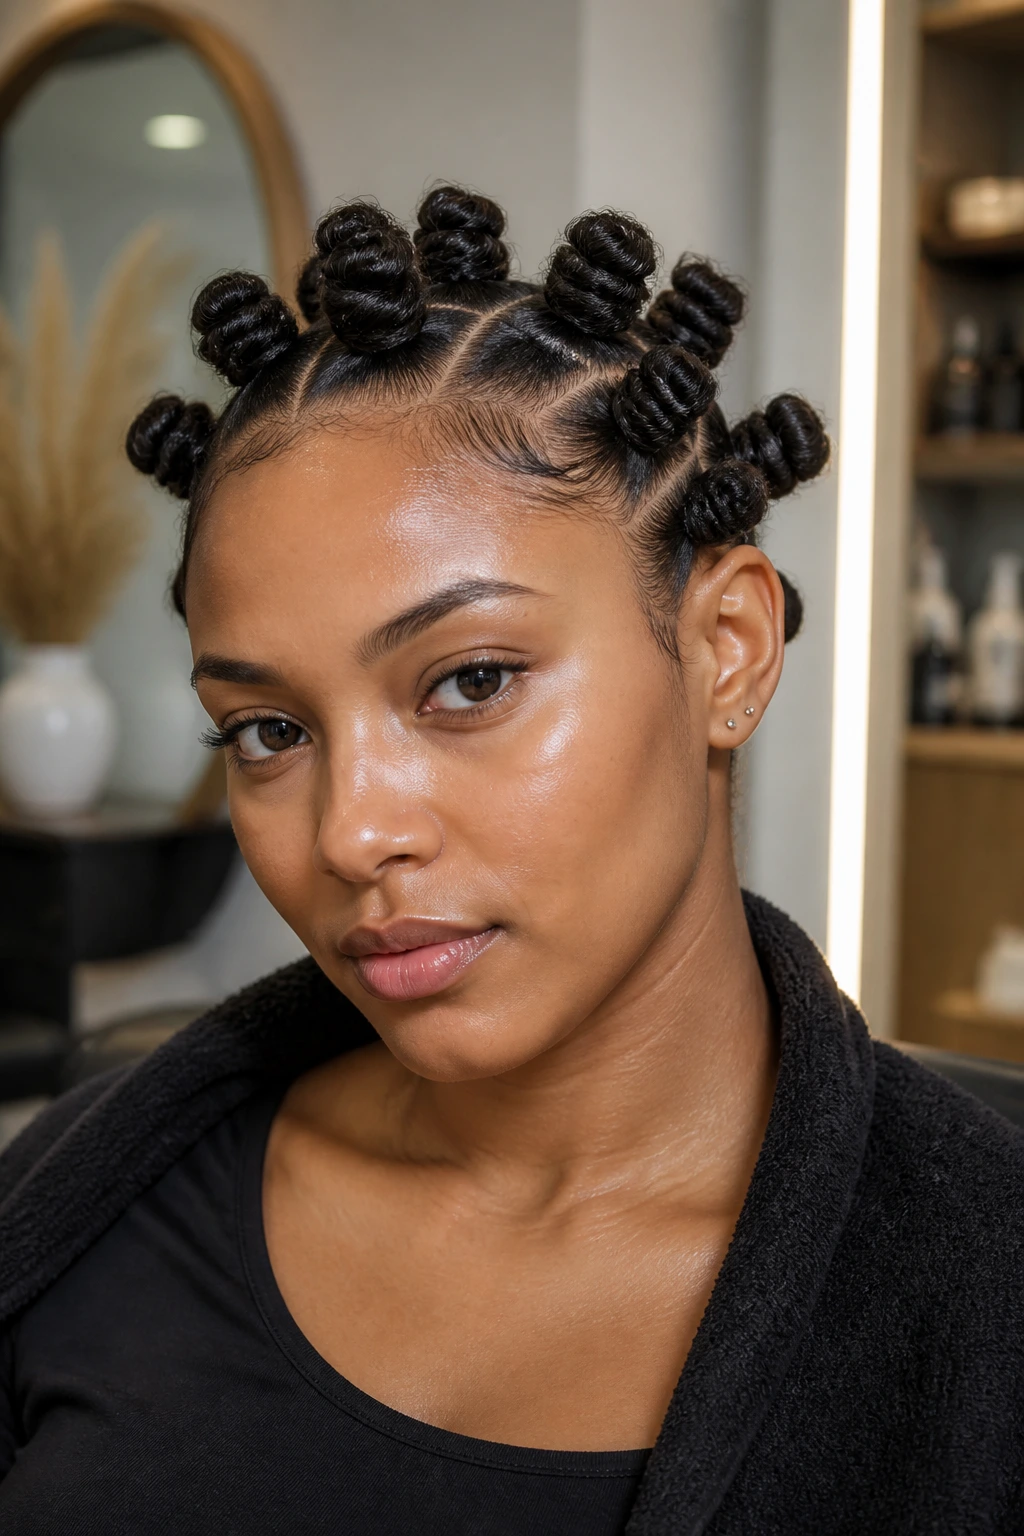
4. Mini Knots for Fine, Slippery Hair
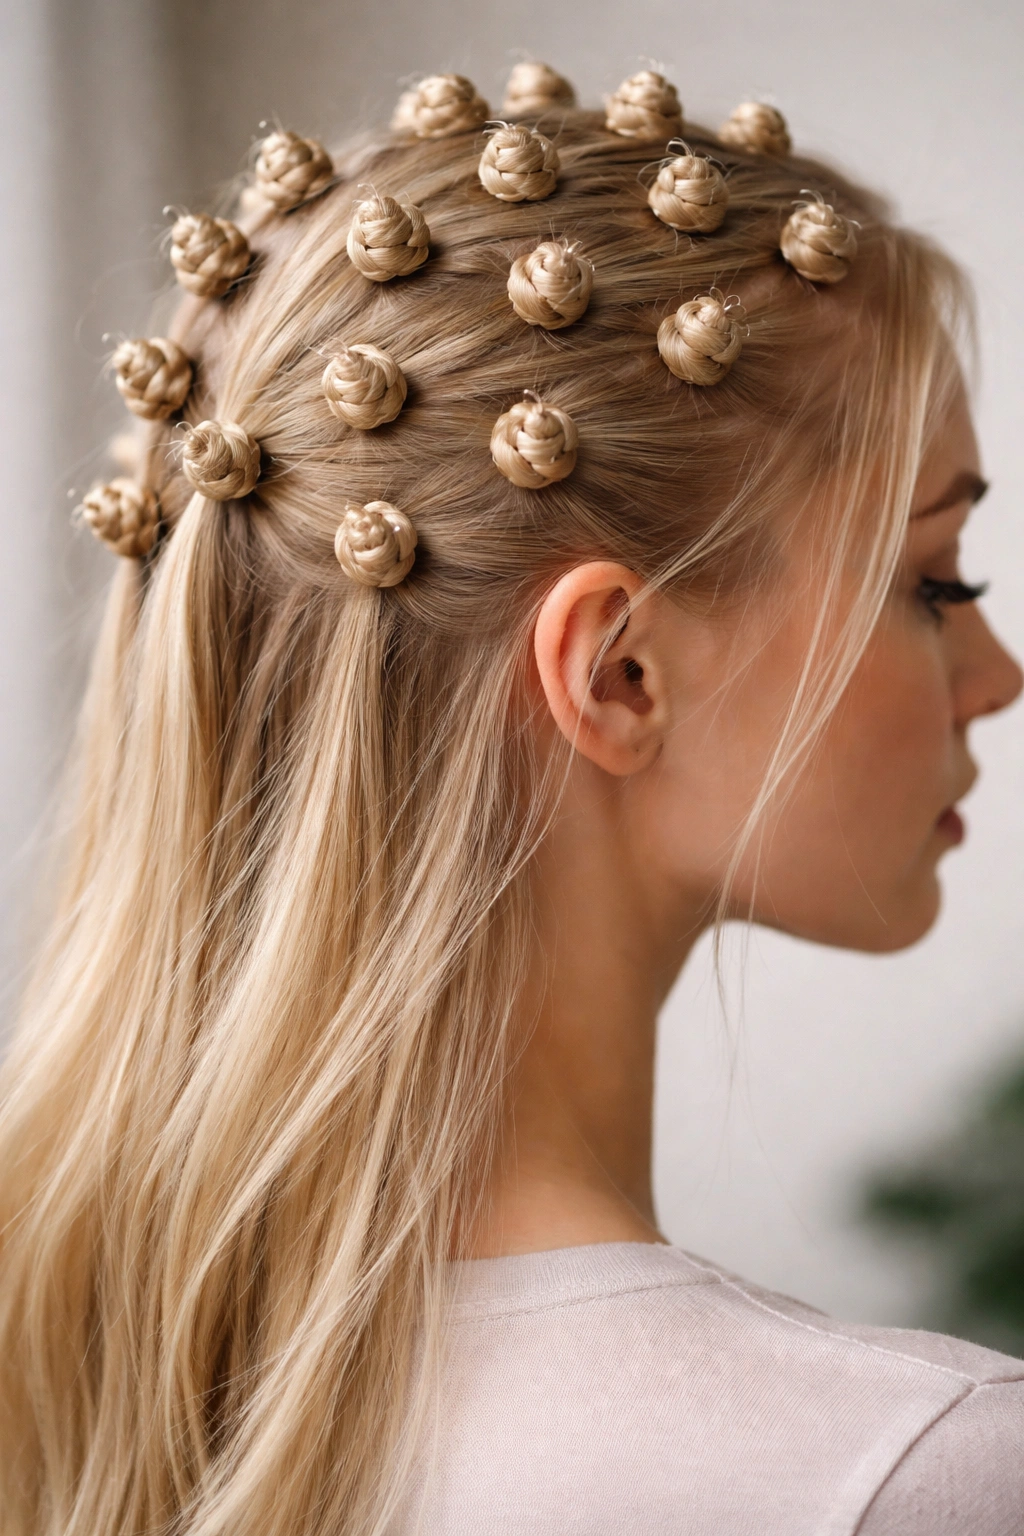
Fine straight hair can make you feel like every knot has a countdown timer on it. Mini knots fix that better than oversized ones because the smaller sections are easier to control and less likely to sag.
The look is neat, almost bead-like, and it gives thin hair more presence without needing a ton of teasing. I prefer this approach when the hair has just enough length for a full set but not enough density to support heavy, round knots. Small sections distribute the weight better, and that matters.
Quick Build
- Section hair into ½-inch to ¾-inch squares
- Mist each section with mousse or salt spray
- Twist from root to tip, then wrap the coil flat against the scalp
- Secure with a pin if the end keeps popping free
- Finish with a light mist of flexible-hold spray
The style reads delicate up close and polished from a distance. That balance is hard to fake with straight hair, which is why this one earns a spot.
5. Jumbo Statement Knots
Big knots are for days when you want the style to be seen from across the room. They look bold, sculptural, and a little daring, especially on long straight hair where the sections can hold enough bulk to make the shape feel intentional instead of floppy.
I’ll be blunt: jumbo knots are not the easiest option. They need more grip, more section control, and more patience while you secure the base. But when they work, they look expensive in the best sense of the word. One chunky knot can do the work of three small ones.
Straight hair benefits from a thickening product here. Use volumizing mousse at the roots, then build each knot from a clean, even section about 2 inches wide. If the hair is extra silky, a tiny braid at the base gives the knot something to cling to.
The style makes sense for parties, photos, or any outfit that needs one strong hair shape instead of a busy one.
6. Knot-Out Curls Set from Small Sections
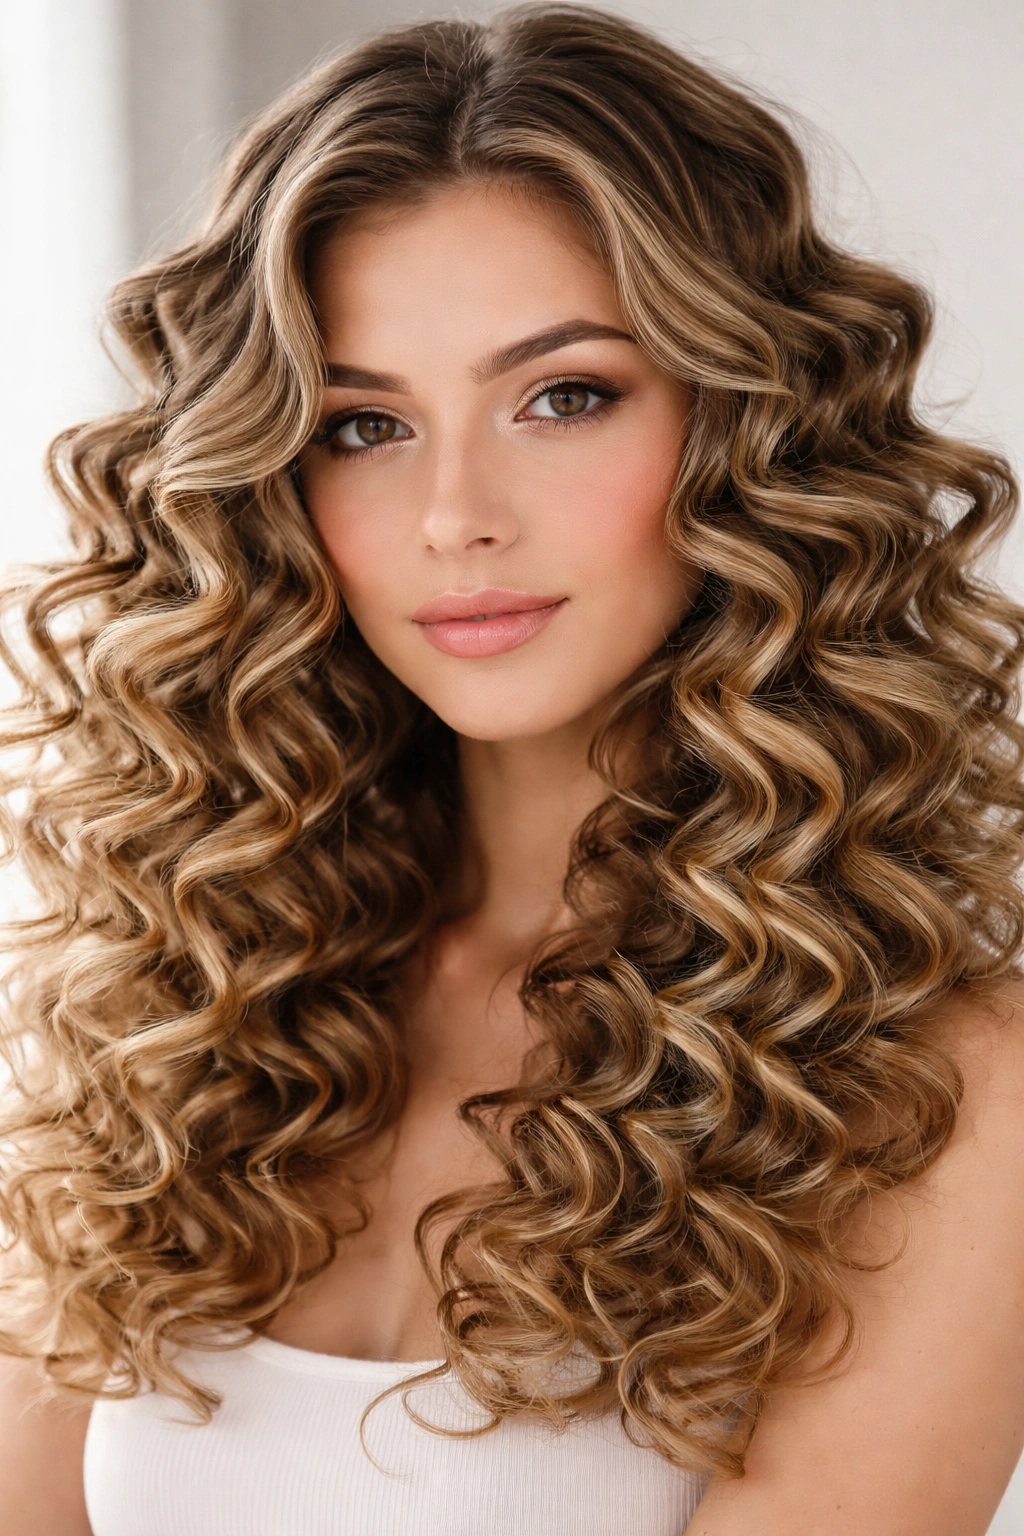
Some Bantu knot styles are really two looks in one. A knot-out set on straight hair is the one I’d call the most practical if you want a second-day style with a prettier finish than a plain braid-out.
Unlike a style built to stay knotted for days, this one is all about the release. You twist the sections into small, tight knots, let them dry fully, then take them down for springy curls with a clearer spiral pattern. Straight hair usually needs more drying time than people expect, so don’t rush the takedown. Damp roots equal limp curls.
The smaller the section, the tighter the curl. That’s the whole game. If you want a softer wave, use slightly larger sections and less tension. If you want tight, bouncy curls, keep the parts clean and the knots compact.
This works best on hair that holds a bend once warmed up or set with product. A little mousse, a little patience, and a lot of drying time. That’s the formula.
7. Braided-Base Knots
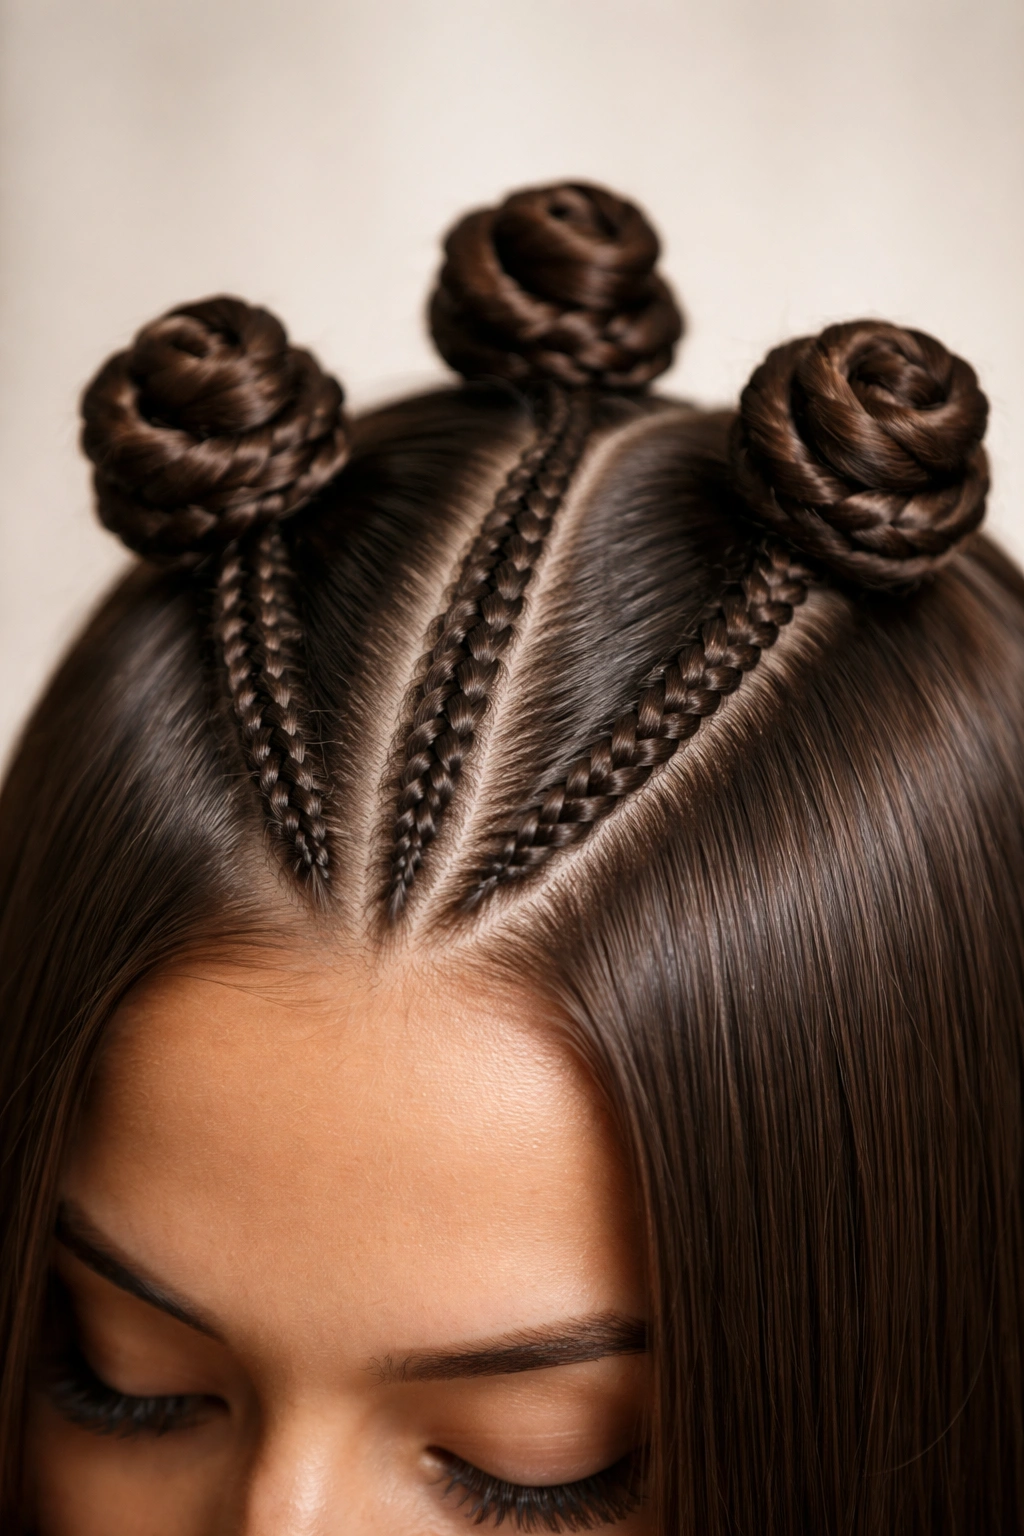
Braided-base Bantu knots are the style I reach for when straight hair refuses to stay put. The braid gives the knot a built-in anchor, which means fewer loose ends and less fuss at the scalp.
What Makes It Different
The braid changes the shape from the root down. Instead of starting with a soft twist that can slide, you create a firmer base first, then coil the rest into the knot. That helps a lot on fresh, slippery hair or hair that has been silk-pressed and feels extra smooth.
It also gives the style more visual texture. You see the braid, then the knot, and that small contrast makes the whole thing look more detailed. I like this on medium-length hair because the braid can still show without disappearing into the coil.
How to Use It
Braid the first 1.5 to 2 inches at the root, then wrap the rest into a tight knot and tuck the end under. Use a discreet pin or mini elastic if the section is stubborn.
This version looks especially good when the parts are clean and the braids are all the same thickness. Messy bases show fast.
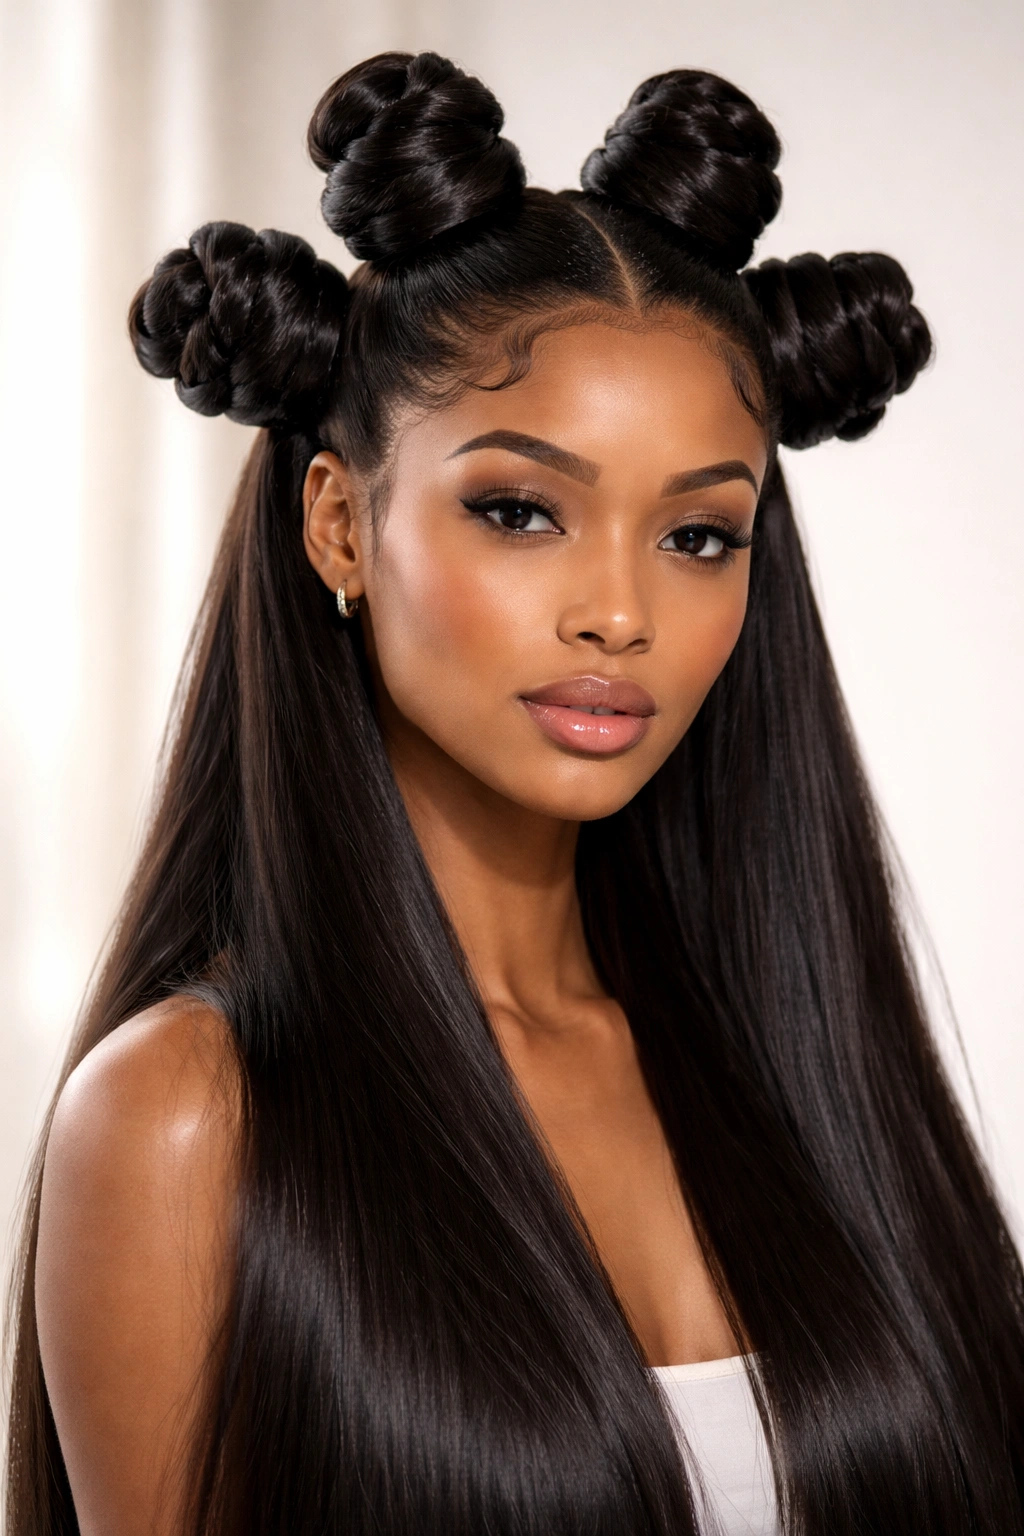
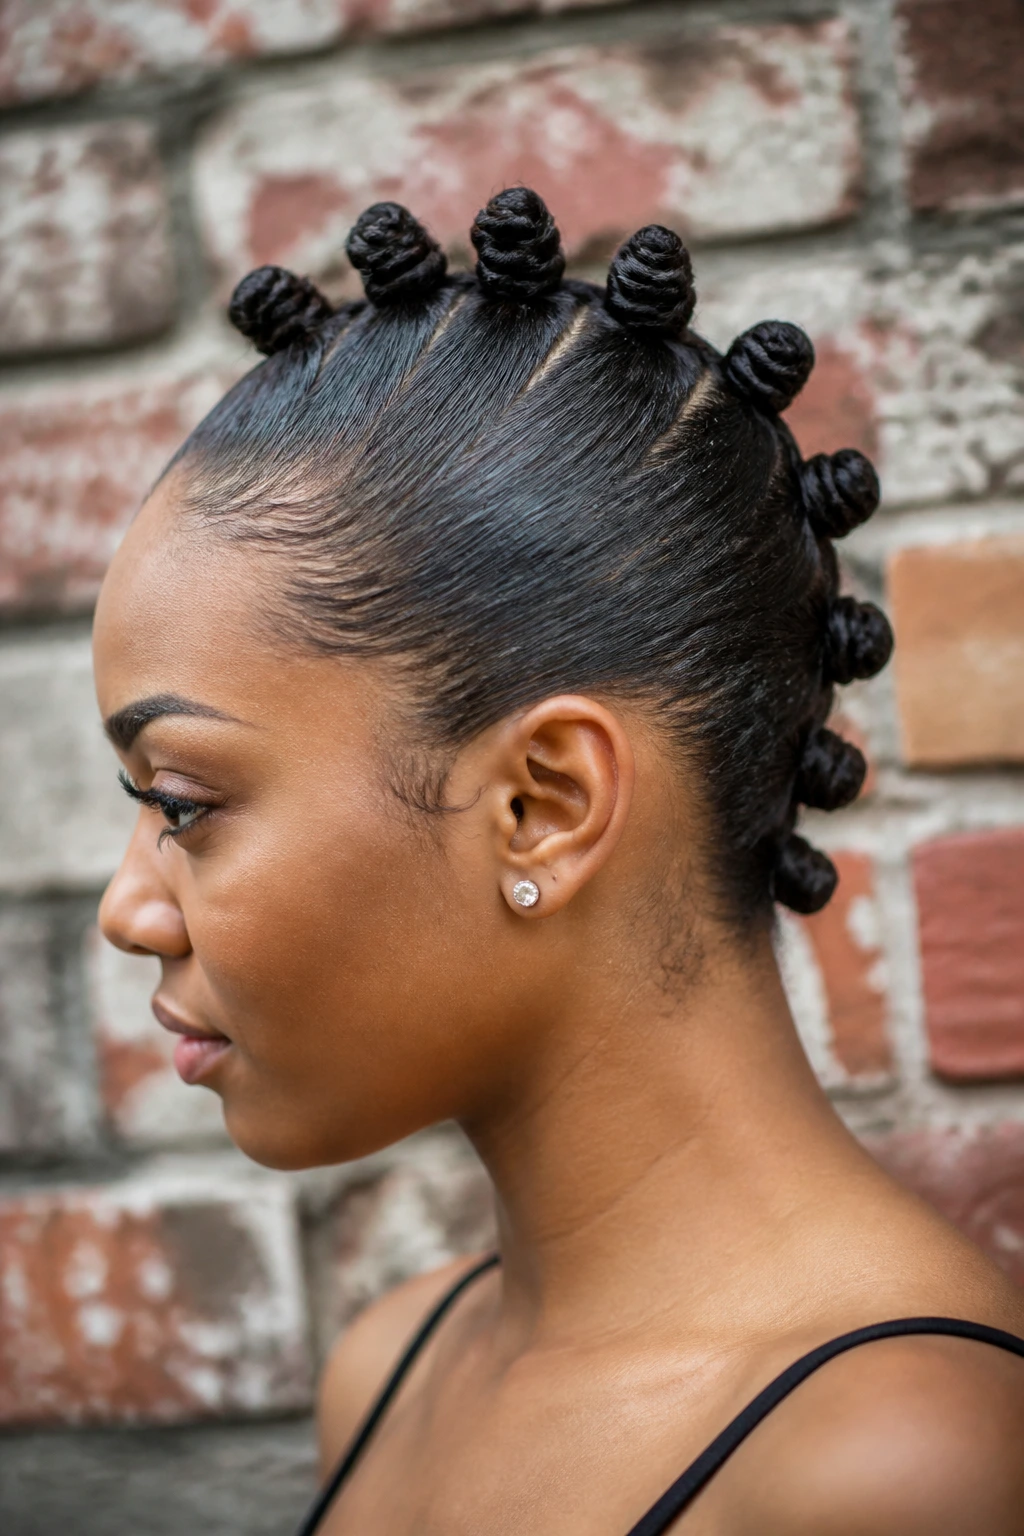
8. High Crown Knots
A high crown placement gives straight hair a lifted shape that reads fresh and a little dramatic. Instead of spreading the knots evenly all over the head, you cluster them higher on the top and sides so the style feels taller.
That height changes everything. The face opens up. The cheekbones show more. And the whole style stops sitting flat against the scalp, which is a common problem when straight hair doesn’t have enough natural texture to puff up the knots on its own.
I like this look with a few tighter sections at the temple and larger knots at the crown. It keeps the silhouette from turning too boxy. If you want a sleeker finish, smooth the sides down and leave the knots themselves a little fuller.
This one suits long earrings, off-the-shoulder tops, and outfits that need a strong head shape. It is not subtle. That’s the point.
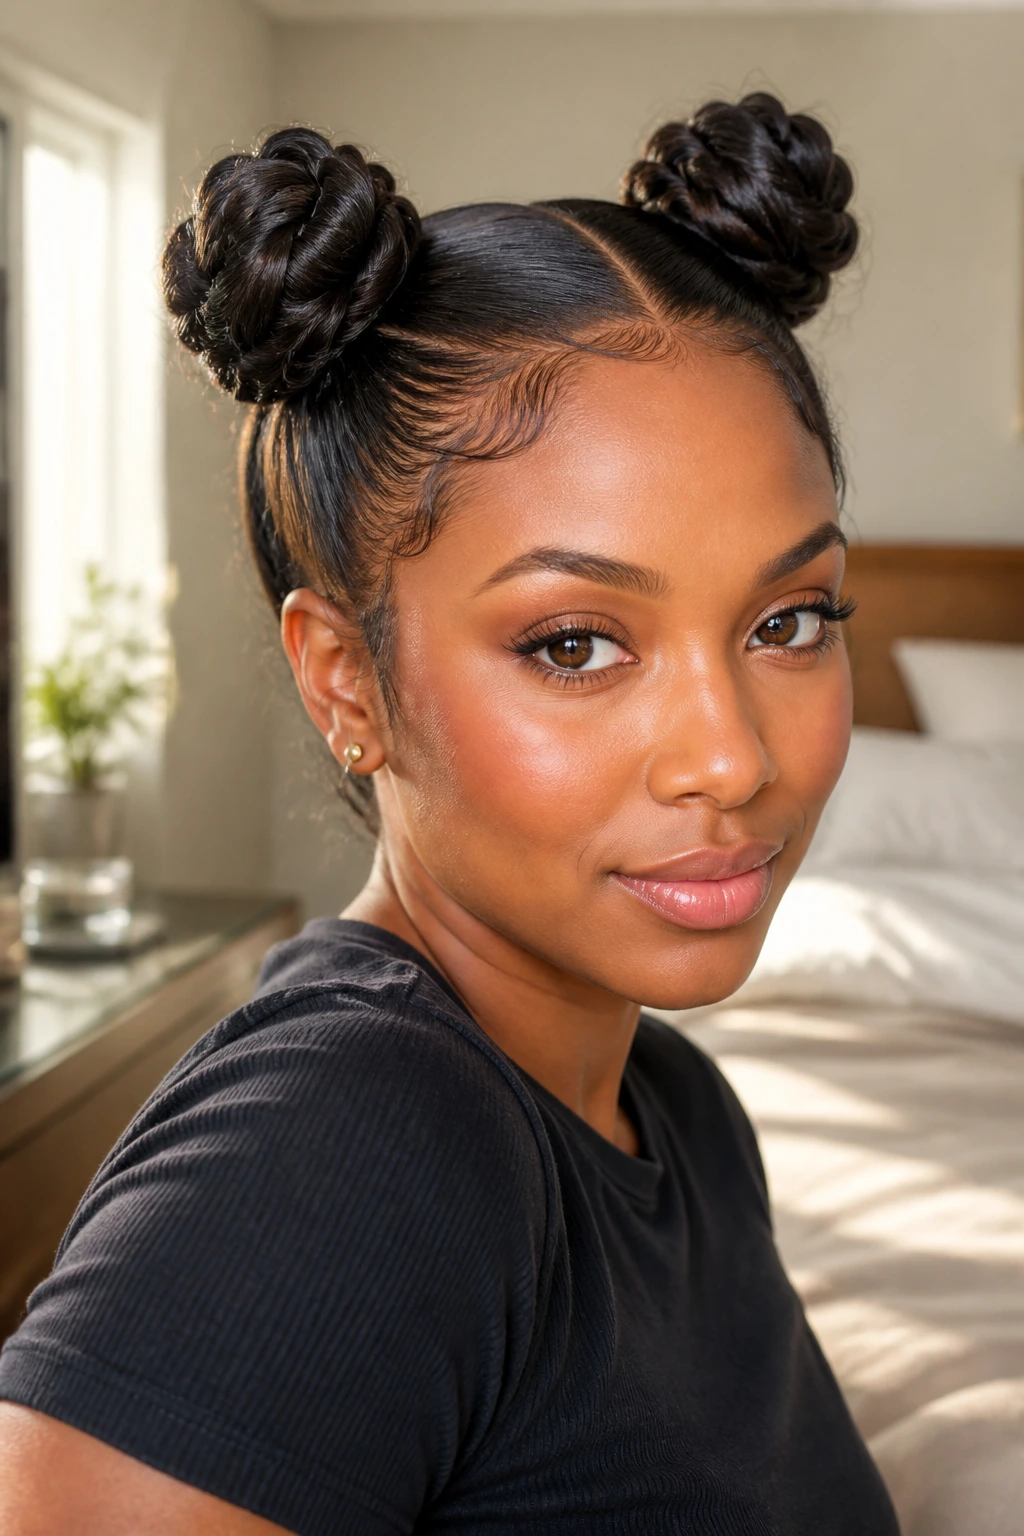
9. Low Nape Knots
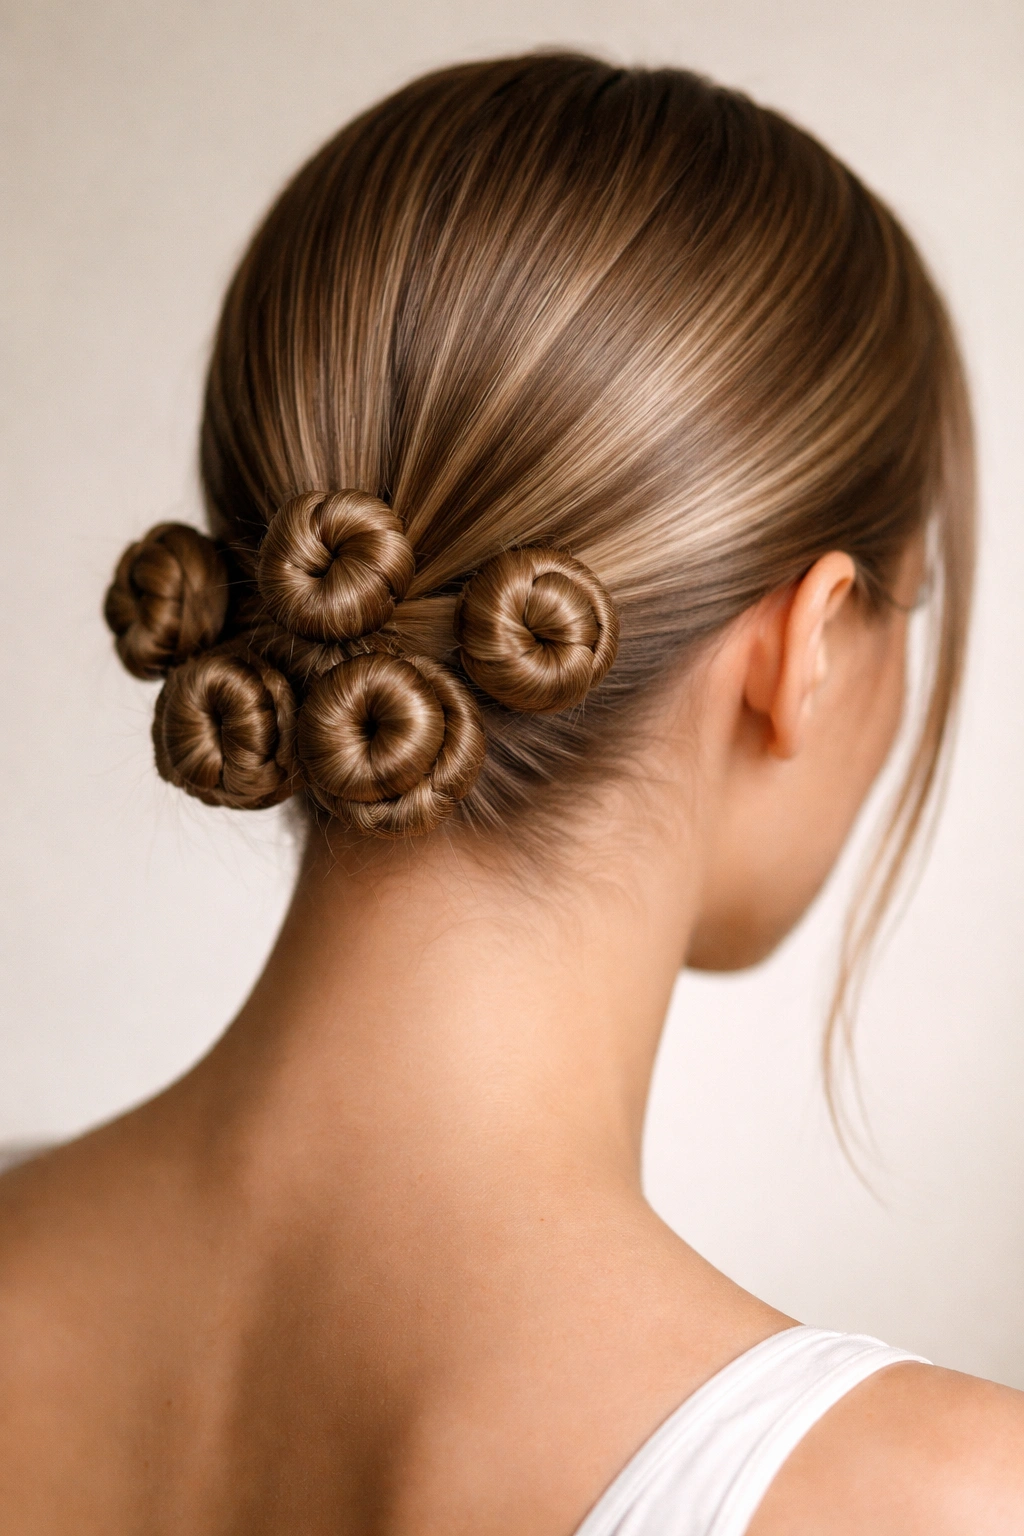
Low Bantu knots sit closer to the neckline and feel quieter than crown-heavy versions. On straight hair, that lower placement can be a blessing because the weight is easier to manage and the shape tends to stay put longer.
A low set gives the style a more refined edge. It works with dressy looks, yes, but it also looks good with a plain tee and sharp eyeliner. The knots don’t fight the rest of the outfit. They sit back and let the line of the neck do some of the work.
A Small Detail That Matters
Keep the sections smaller near the nape and a touch larger near the crown. That keeps the silhouette from collapsing at the back, which can happen when straight hair is too smooth to hold volume low down.
A low set is also easier to sleep in if you wrap it with a silk scarf. Less pulling. Less flattening. Better morning shape.
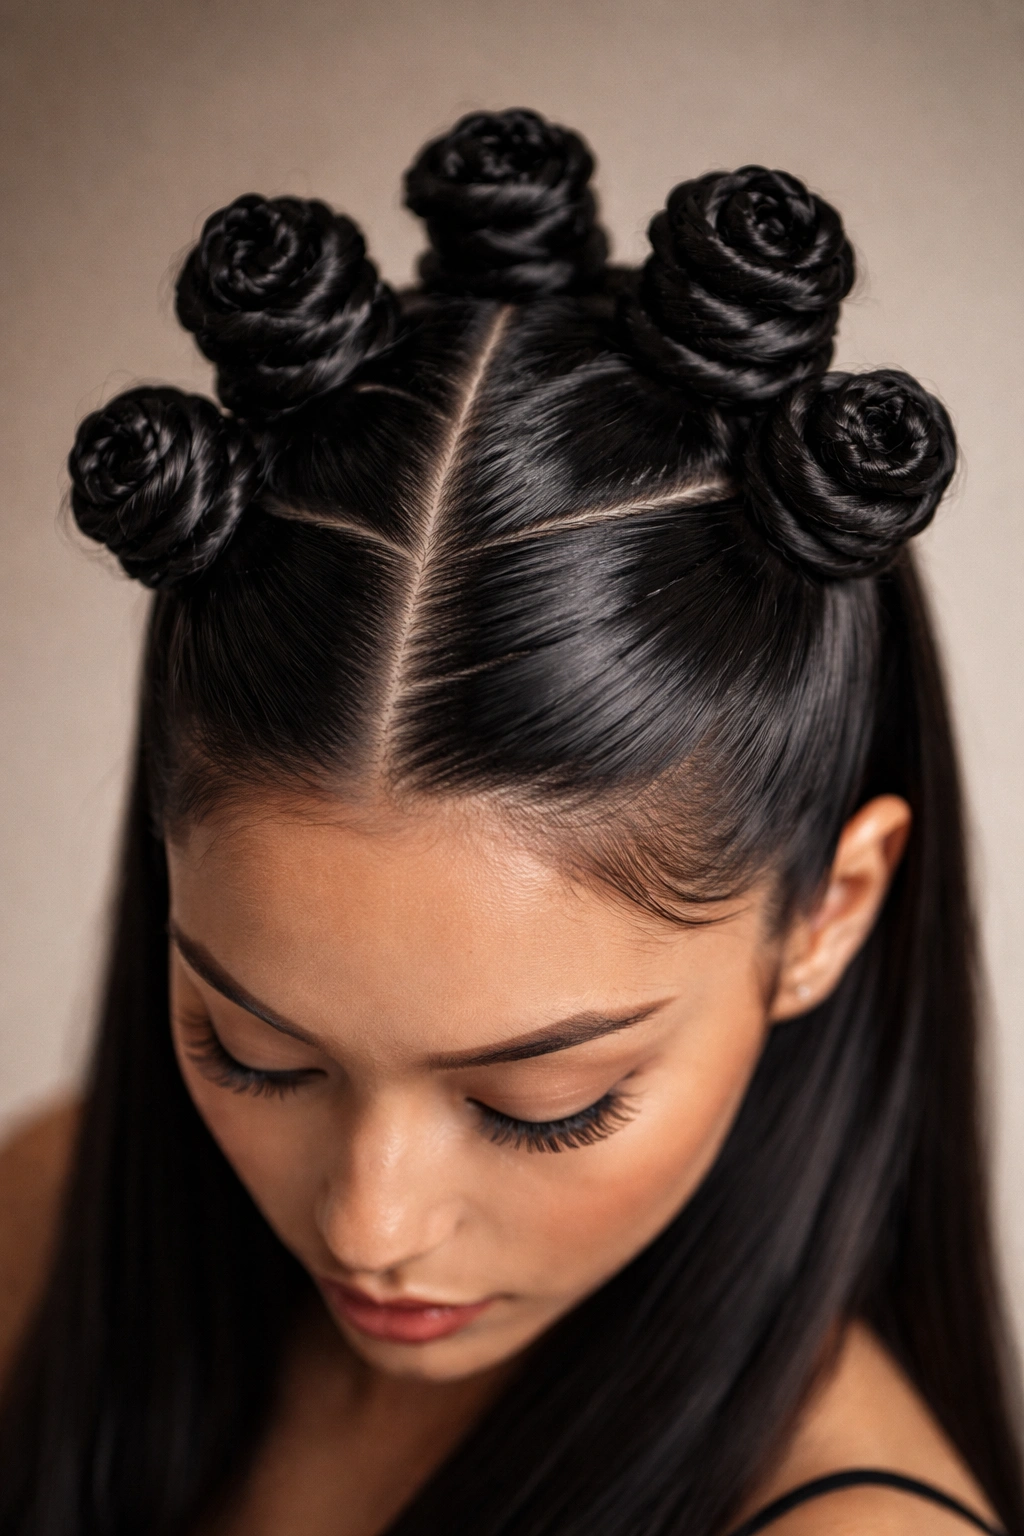
10. Zigzag Part Knots

A zigzag part turns the scalp into part of the design, and straight hair gives you the clean surface you need to make that pattern pop. It looks playful, but there is real control behind it.
The reason I like zigzag parts on straight hair is simple: straight strands show every line clearly. A jagged part doesn’t blur the way it can on denser textures, so the pattern stays visible from the front. That makes the whole style feel more inventive without changing the knot technique itself.
You will need a sharp tail comb and a steady hand. Draw the zigzag first, then clip each section before you start twisting. If you skip the clips, the part can drift and you’ll end up with one side that looks more crowded than the other.
This style is especially good when you want the knots to feel a little youthful, a little graphic, and not too polished.
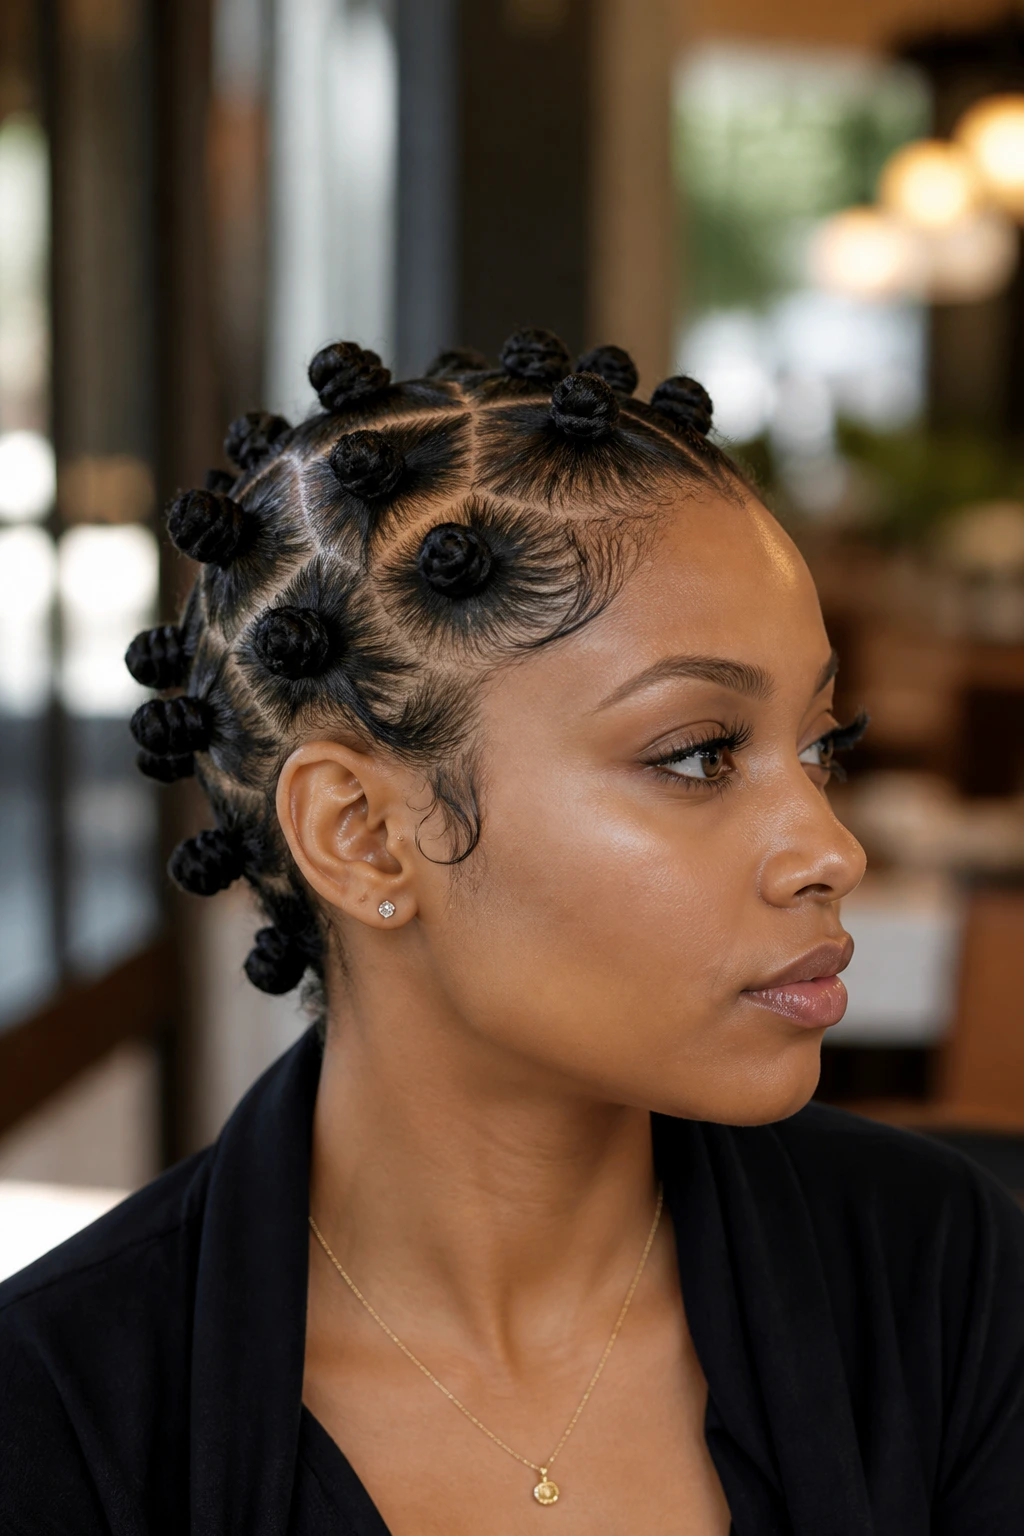
11. Triangle-Part Knots
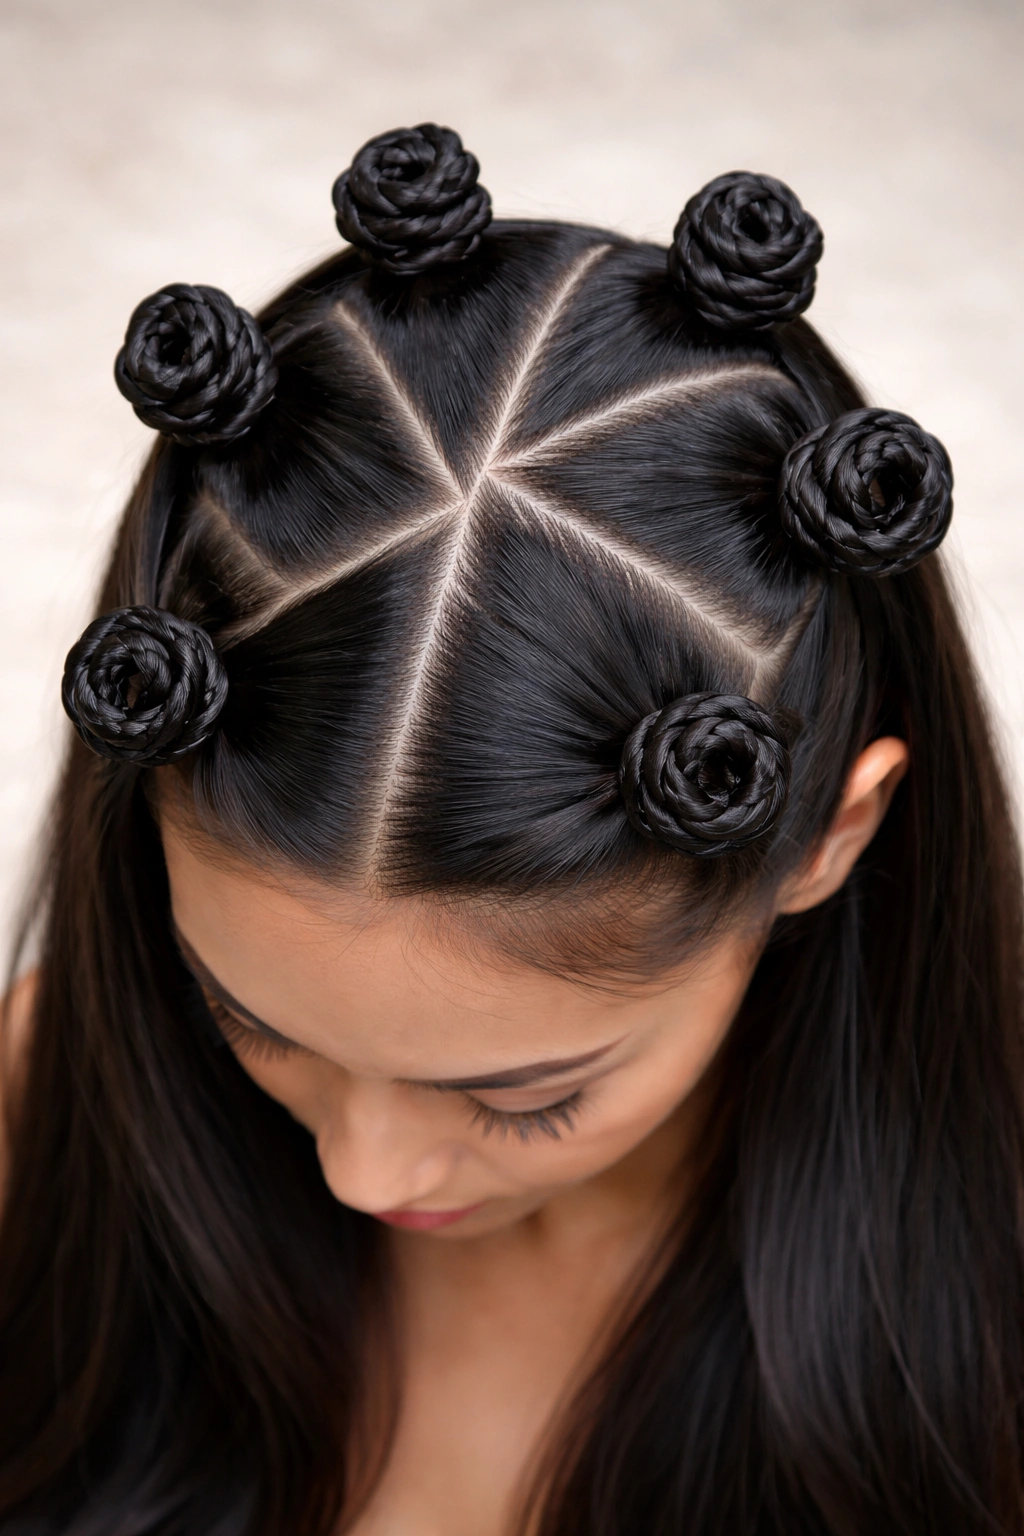
Triangle parts are one of those small touches that make a big difference. Instead of the usual square grid, you get angular sections that make the knots look sharper and less predictable on straight hair.
I love triangle parts when the hair is all one length. The shape adds movement before you even start twisting, which helps a style built on smooth strands avoid looking flat or uniform. It is a smart choice if you like detail but do not want the style to become fussy.
The sections can be tiny or medium, but consistency matters. If one triangle is too wide, it sticks out like a mistake. Keep each point clean, use your comb to define the lines, and work methodically from front to back.
The look is clean, slightly architectural, and more interesting than a basic grid. Sometimes that tiny change is the whole reason a style works.
12. Face-Framing Knots with Loose Front Pieces
Leaving a few front pieces out softens Bantu knots fast, and on straight hair it keeps the style from feeling too severe. Those loose pieces act like a frame, especially if you want the knots but not the full scalp-tight look.
Why It Works
Straight hair can make fully pinned-back knot styles feel sharp to the point of being harsh. A few loose front strands break that line. They move a bit when you turn your head, which makes the style look less rigid and more lived-in.
Keep the face-framing pieces slim, not chunky. About ½ inch on each side is enough for most faces. You can wave them slightly with a small iron, or leave them sleek if you want contrast between the loose sections and the coiled knots.
How to Style It
- Part out the front pieces before sectioning the knots
- Smooth them with a light serum only on the ends
- Decide if you want a center part, side part, or no visible part at all
- Pin the remaining hair into neat knots behind the face-framing pieces
This version works for everyday wear and for anyone who likes a little softness around the face.
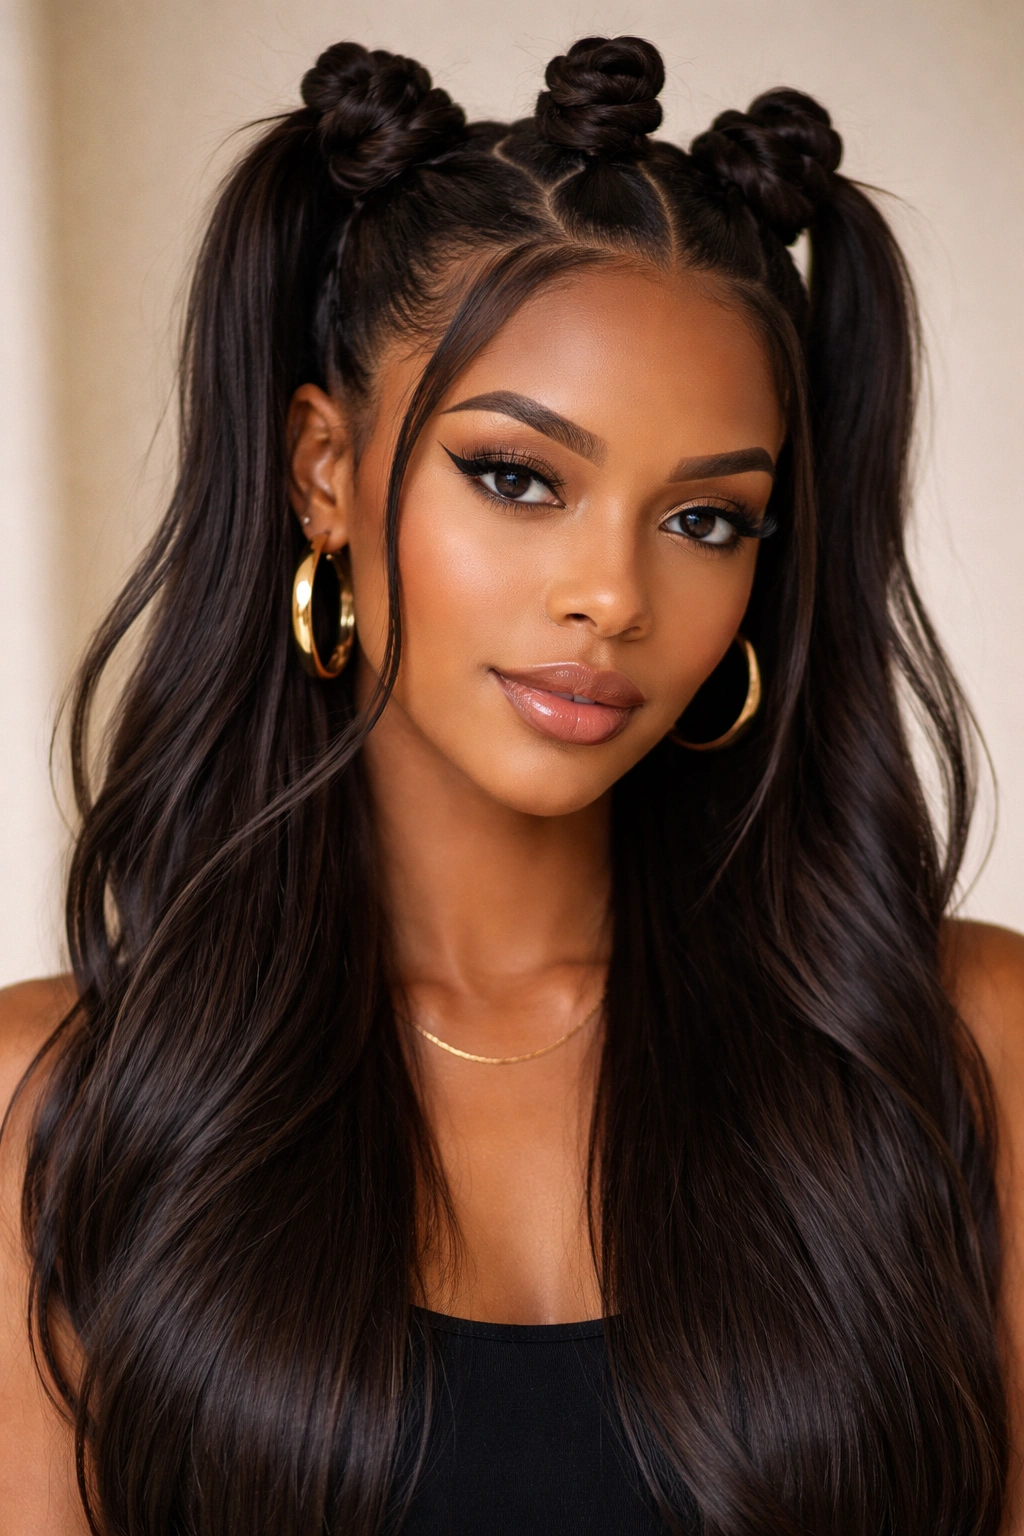
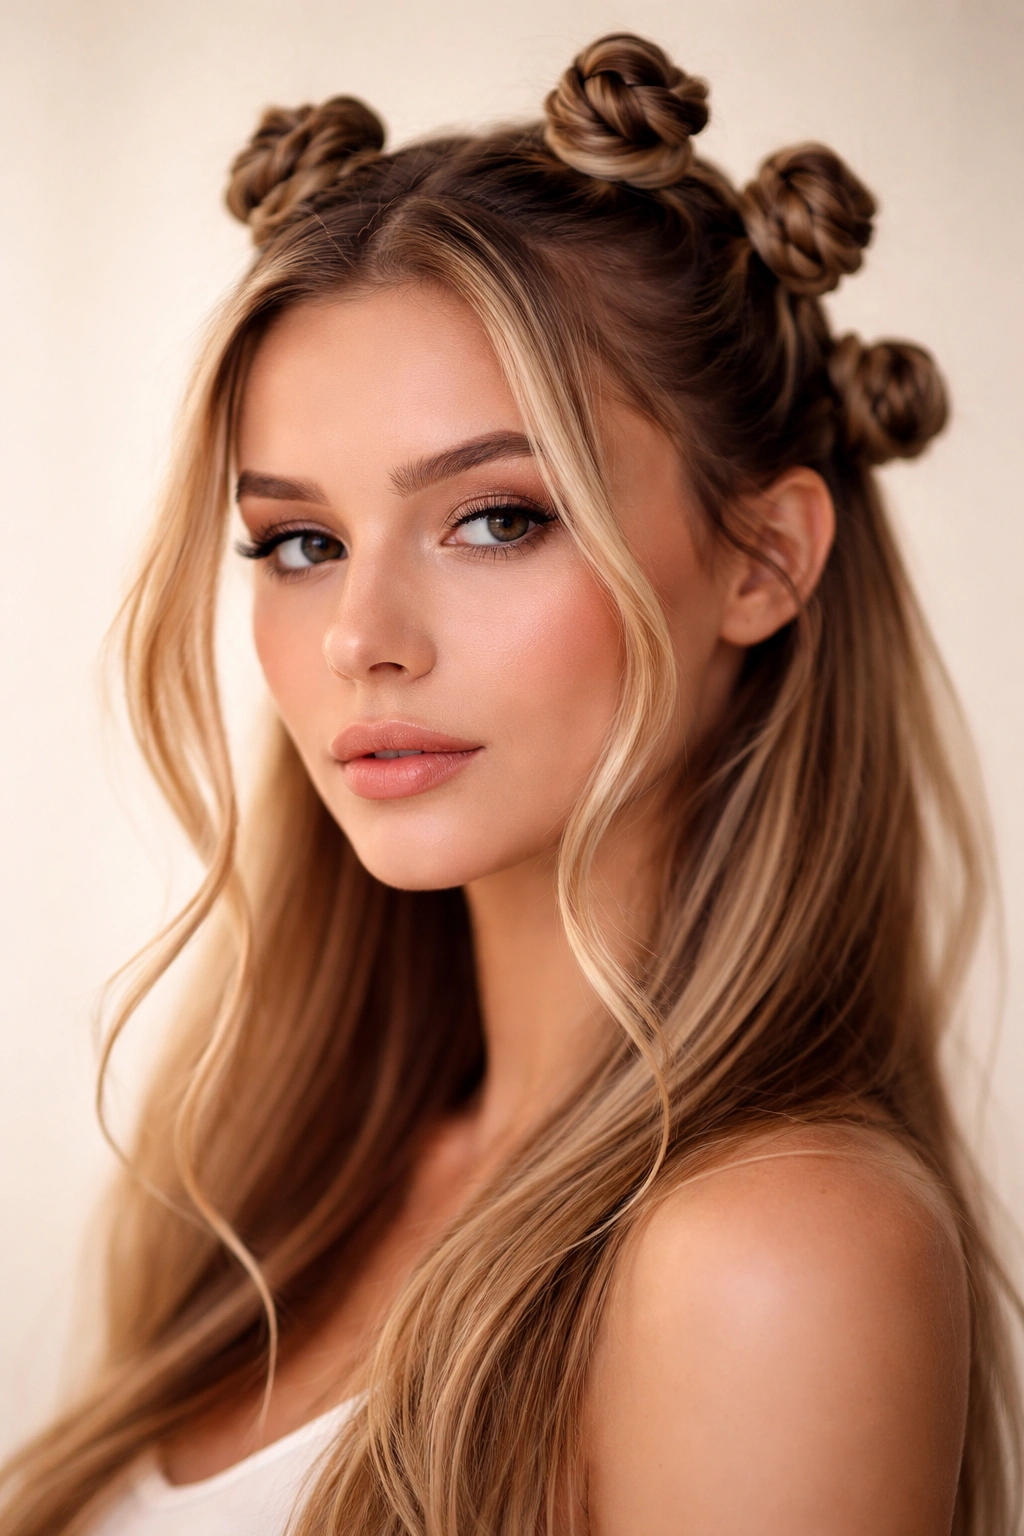
13. Space-Bun Bantu Hybrid
A space-bun Bantu hybrid gives you two shapes at once: the rounded knot shape and the fun, lifted placement of space buns. On straight hair, that hybrid is useful because it adds volume where the hair usually wants to lie flat.
The easiest way to get the look is to split the hair into two main sections, then create several small knots within each side rather than one big bun per side. That keeps the Bantu feel while giving you the symmetry people usually want from space buns. It sounds extra. It is. That’s why it works.
I prefer this on medium to long hair, because shorter lengths can struggle to create enough fullness in the bun shape. If the knots feel too tiny, they disappear into the bun and the whole thing loses the point.
The result is playful, a little retro, and very photo-friendly without trying too hard.
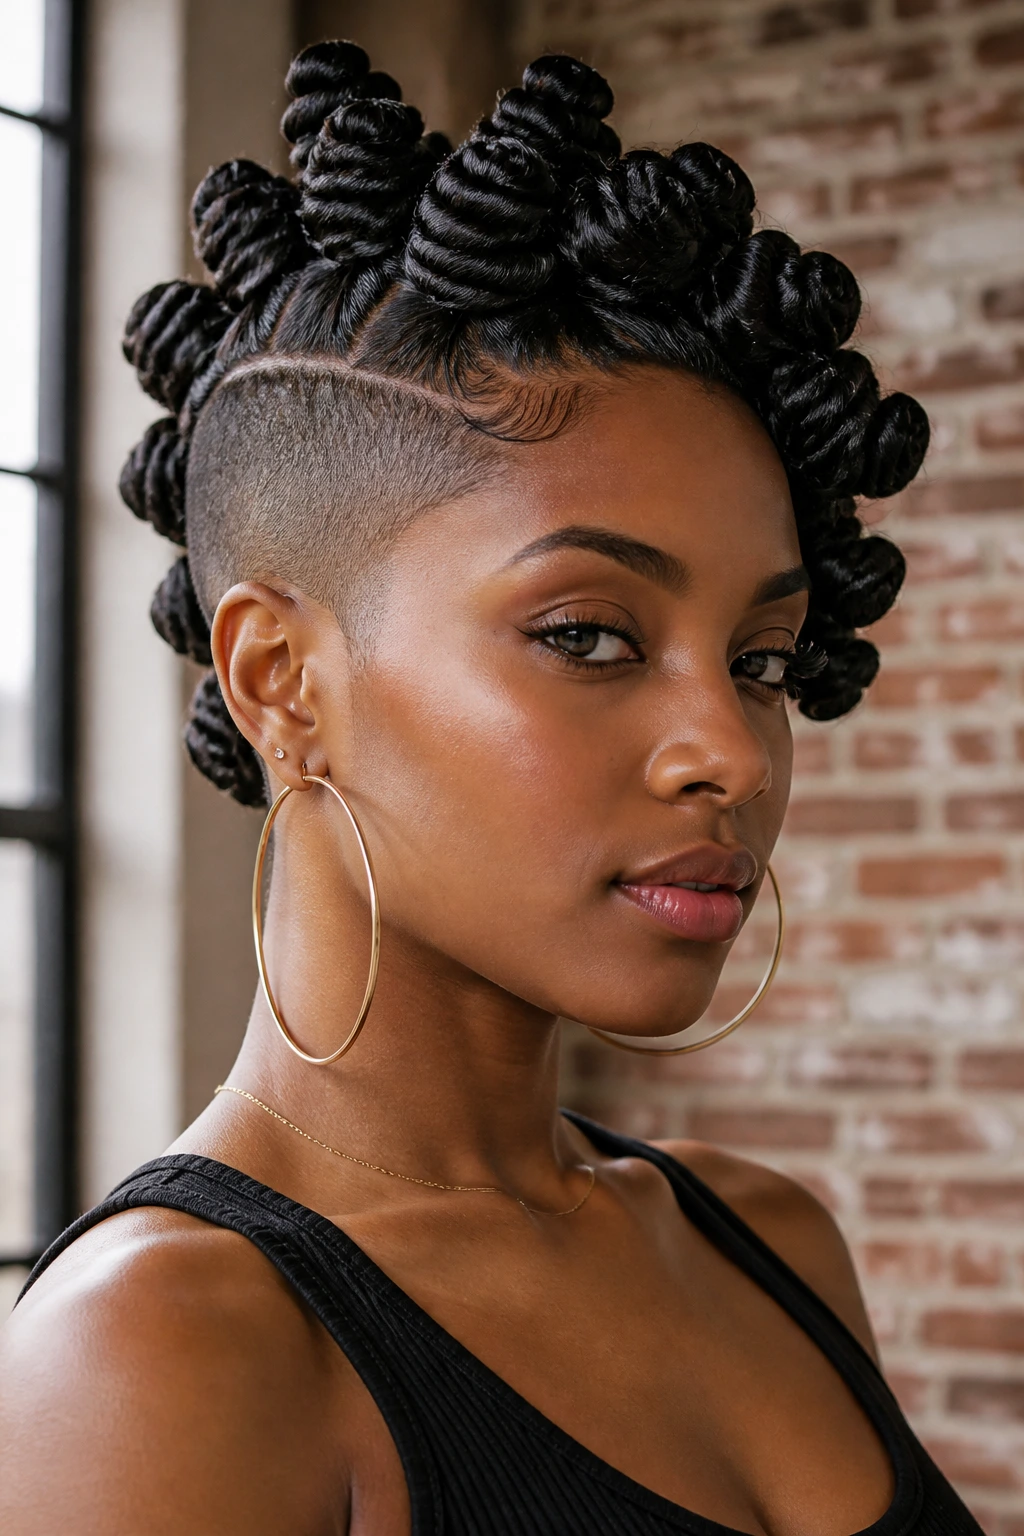
14. Mohawk Line of Knots
A mohawk line of knots is one of the best ways to make straight hair look sharper. Instead of distributing the knots evenly over the head, you create a central strip from the hairline to the nape and leave the sides sleek or pinned tight.
That side contrast does a lot of visual work. The knots become a ridge down the center, which gives the style height and motion. If your hair is slippery, the shaved-sides illusion also helps because the sleek sides keep the eye from noticing a slightly softer knot base.
Use smaller sections through the center and keep the side hair firmly brushed down with gel or mousse. You want the mohawk line to feel intentional, not like you ran out of hair on the sides.
This version has attitude. It looks good with a leather jacket, sure, but it also works with a plain shirt and hoop earrings. Clean styling can carry the whole thing.
15. Scarf-Wrapped Knots
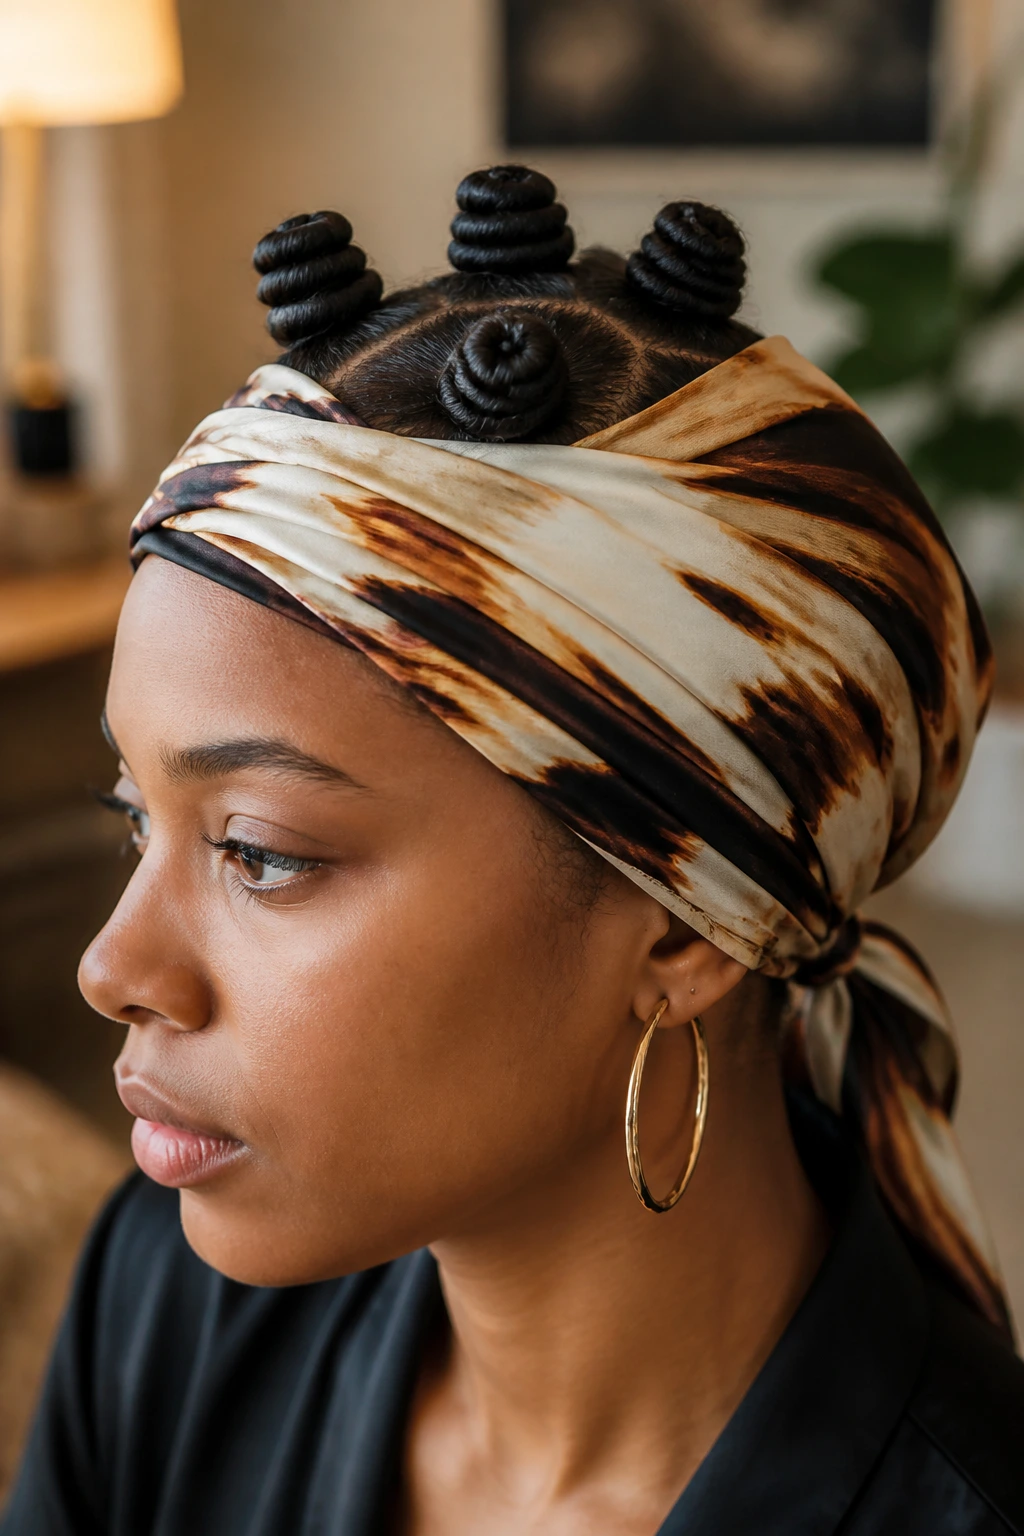
A scarf-wrapped knot style is practical first and pretty second, which is exactly why I like it. On straight hair, a scarf can flatten flyaways, protect the set, and add color without making you redo the whole look.
The trick is to wrap the scarf after the knots are finished, not before. You want the knots to hold their shape first. Then you tie a silk or satin scarf around the head, leaving the knots visible or half-covered depending on the effect you want. A printed scarf can turn a simple knot set into something much more styled.
Best Use Cases
- Protecting knots overnight
- Hiding a few loose strands at the crown
- Adding a bright color near the face
- Making a day-two style look fresh again
This is one of those small styling moves that saves time. It also helps straight hair keep its polish longer, which is never a bad thing.
16. Beaded-End Accent Knots
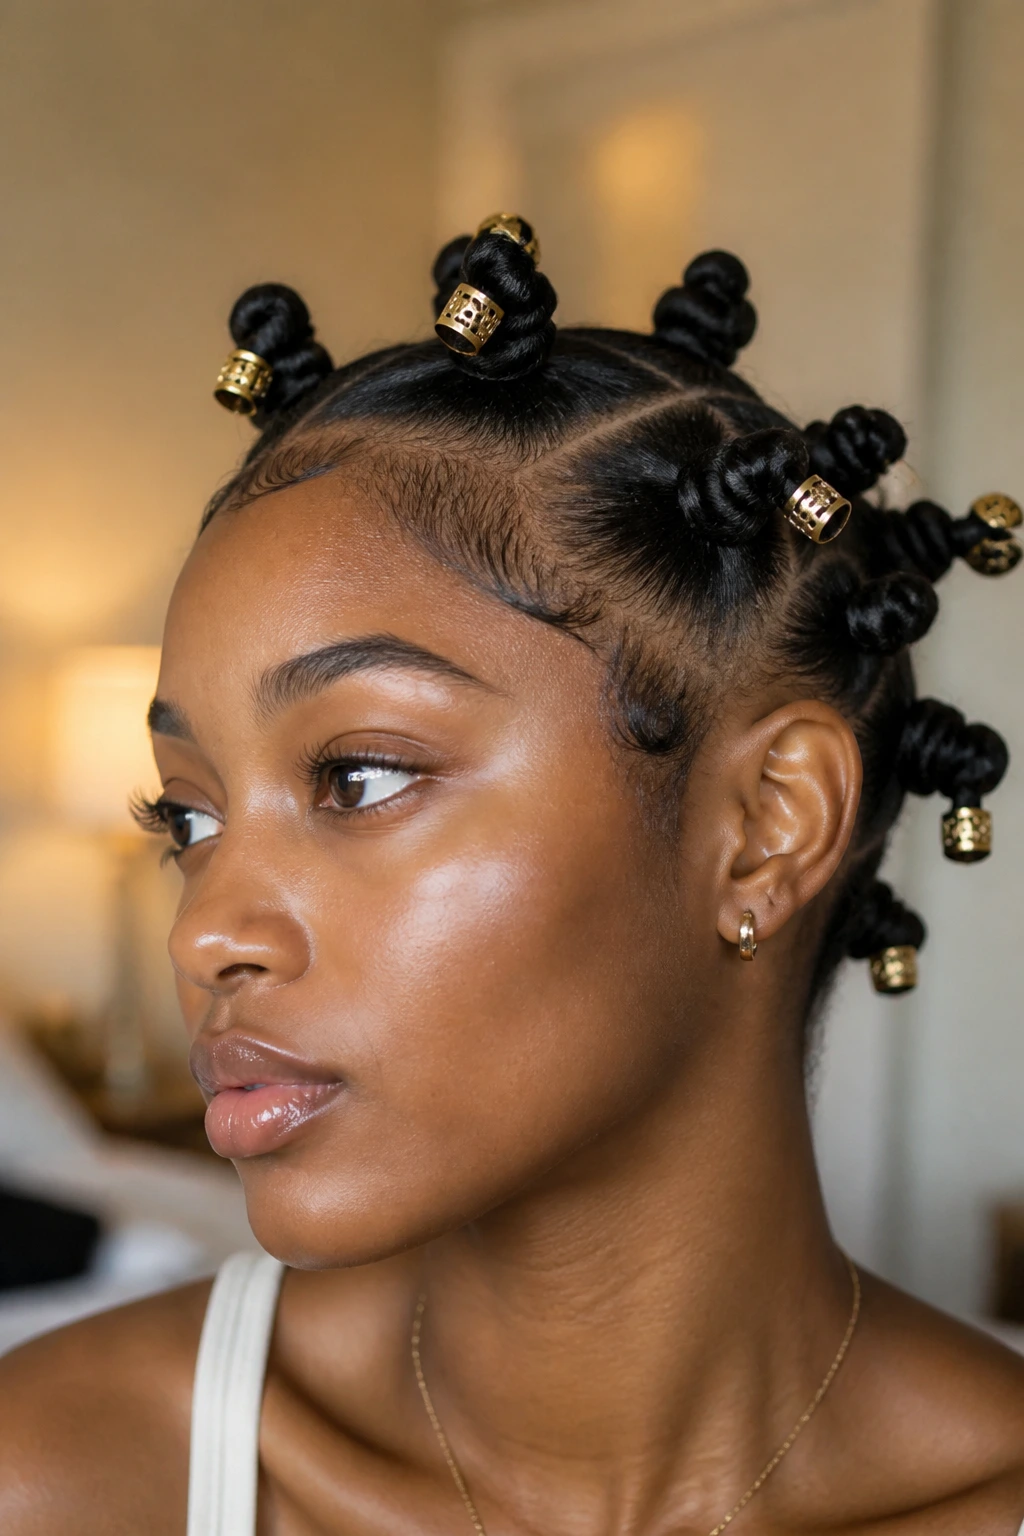
Beads bring weight and a little movement to Bantu knots, and on straight hair they can help the style feel finished instead of floating. You do not need many. Two or three beads on a few front sections can do more than a full head of them.
The best place for beads is near the ends of longer sections before you coil them into the knot, or on a few loose braided ends if your style includes braid-to-knot hybrids. Use lightweight beads so the hair does not pull down at the root. That matters more on straight hair because the strands already have less natural grip.
Beaded accents are a good choice if you want the style to lean playful, youthful, or festival-ready. Just keep the rest of the set clean. Too many extras and the look turns cluttered fast.
A little shine on the beads, a clean part, and a neat coil. That’s enough.
17. Bob-Length Knot Set for Short Hair
Short straight hair can still do Bantu knots, and sometimes the bob-length version is the cutest one. The knots sit closer to the scalp, so they look compact and tidy rather than oversized.
What to Expect
You will not get the same dramatic coil size you’d see on longer hair. That is fine. Shorter lengths give you a crisp, almost button-like finish that feels polished and easy to wear. If your bob hits the chin or just below, the knots can sit at a very flattering point around the head.
How to Make It Work
Keep the parts small and the product light. Too much cream or oil will weigh the sections down and make them slide. A pea-sized amount of mousse per section is enough for most short cuts.
Short hair also benefits from a touch of setting spray once the knots are in place. Not a soaking spray. Just enough to help the roots stay aligned while they dry.
This style is neat, practical, and proof that you do not need long hair to make the shape work.
18. Sleek Glossy Knots for Even-Length Hair
Even-length straight hair can make Bantu knots look especially tidy because the sections are easier to match. Every knot lands in the same visual rhythm, which gives the style that clean, glossy finish people chase in salon photos.
The key here is restraint. Do not overload the hair with product or the knots start to look greasy rather than polished. A light serum on the outside only, plus mousse at the roots, is enough. I like this version when the hair is one length and blunt at the ends because the knot shape becomes the main texture in the style.
The smooth surface also shows off precise parting. If your sections are tidy, the whole thing looks expensive. If they’re not, the style tells on you fast.
This is one of the simplest Bantu knot styles on straight hair, but it is also one of the most unforgiving. Clean work pays off here.
19. Crisscross Part Knots
Crisscross parts give straight hair a little puzzle-box energy, and I mean that in a good way. Instead of rows and columns, the sections overlap visually before they even become knots, which makes the final style feel more detailed.
This is one of the best choices if you like the knot shape but want the scalp design to do more of the talking. The crisscross pattern gives the hair movement from the start, and on sleek strands that movement is easy to see.
What Makes It Stand Out
The parting is the star. Keep your lines thin and deliberate, and use clips to hold each crossed section in place while you work. If the part lines wander, the whole pattern loses definition.
Crisscross knots work well with medium sections and a moderate amount of hold product. Too much gel flattens the design. Too little and the lines blur.
The look feels styled, not accidental. That is the whole appeal.
20. Tucked-In, Pin-Secured Knots
Sometimes straight hair needs a little extra help at the end of the knot, and pin-secured knots solve that problem neatly. Instead of relying on the coil alone, you tuck the tail under and anchor it with a hidden pin.
The Practical Bit
This style is not the flashiest one in the set. It is the workhorse. If your hair is heavy, extra silky, or freshly washed, a pin can keep the knot from sagging by the second hour. Use a pin that matches your hair color if you want it to disappear.
Why It’s Worth Doing
- Better hold on slippery strands
- Cleaner finish at the ends
- Less unraveling overnight
- Useful for long hair that puts weight on the knot base
A pinned finish can look just as neat as a knotted tuck, and sometimes neater. The trick is placing the pin under the coil where it won’t poke the scalp. Nobody wants a pretty style that hurts.
21. Two-Tone or Clip-In Accent Knots
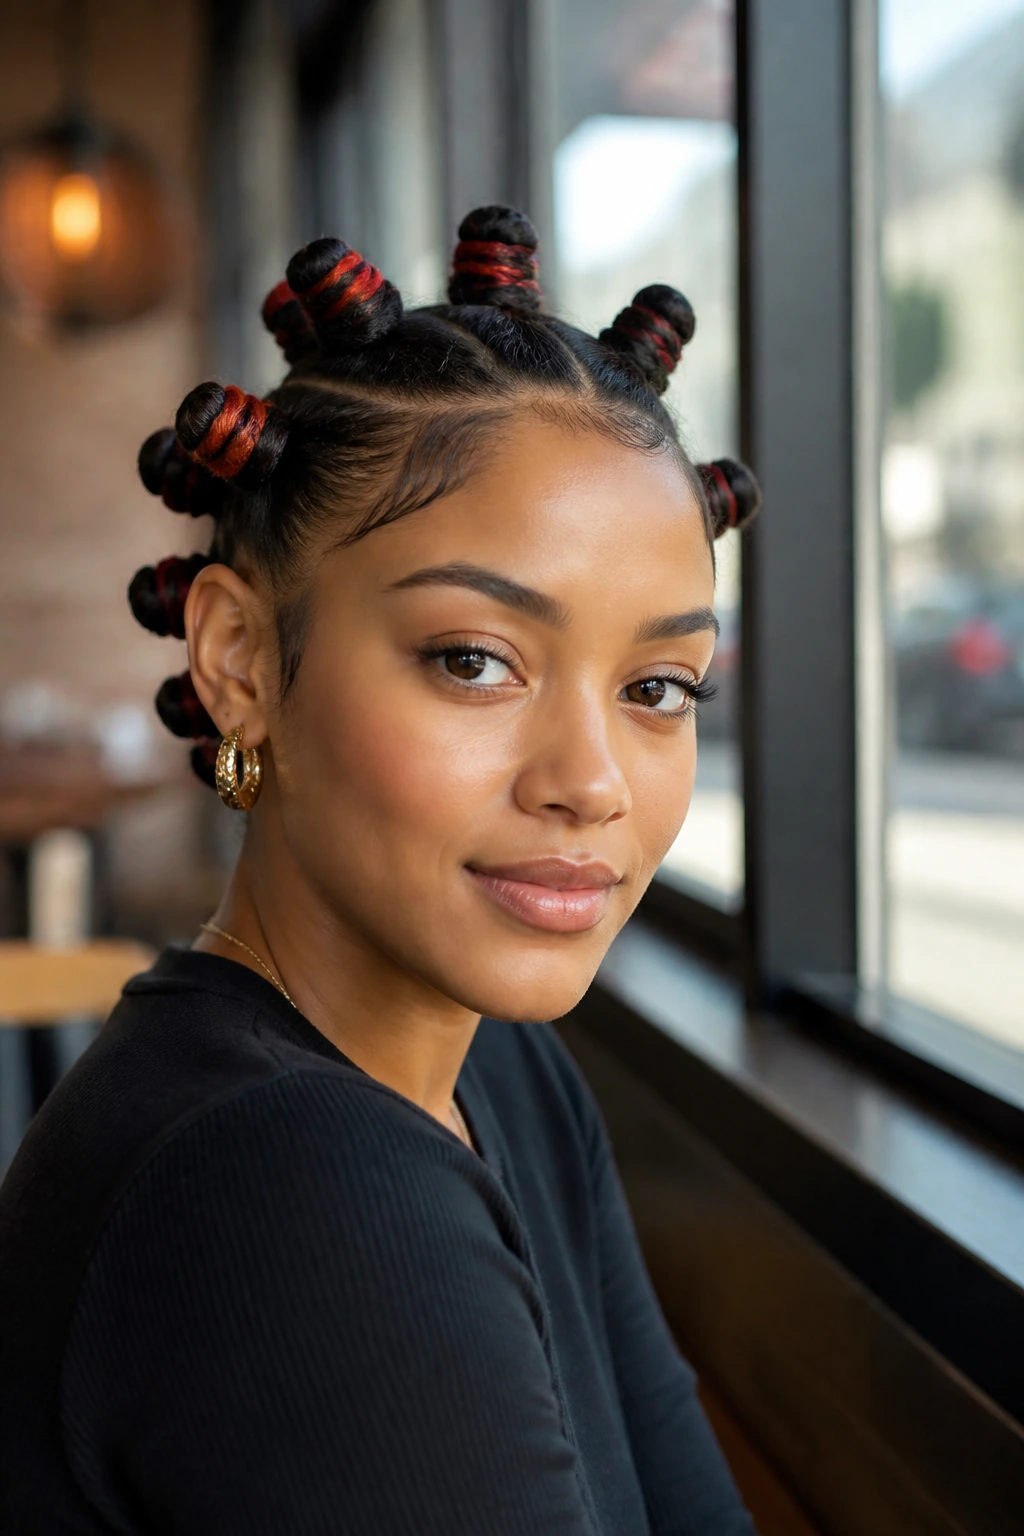
Straight hair gives colored accents a clean backdrop, which makes two-tone Bantu knots easy to wear without the look becoming chaotic. A few clip-in highlights, colored extensions, or even a temporary shade on the knot ends can give the style a lot more punch.
The best versions use color sparingly. One bright accent near the front or a few lighter knot ends can be enough. If every section is loud, the eye loses the shape. You want the color to support the knot design, not drown it.
This works especially well on straight hair because the smooth texture shows off contrast so clearly. Dark knots against light pieces, or vice versa, look crisp from a distance. If you want a playful style without changing your base color, clip-ins are the safest route.
The style is fun, but keep the parts clean. Color and messy sectioning do not mix well.
22. Wet-Set Knots for Big Curl Results
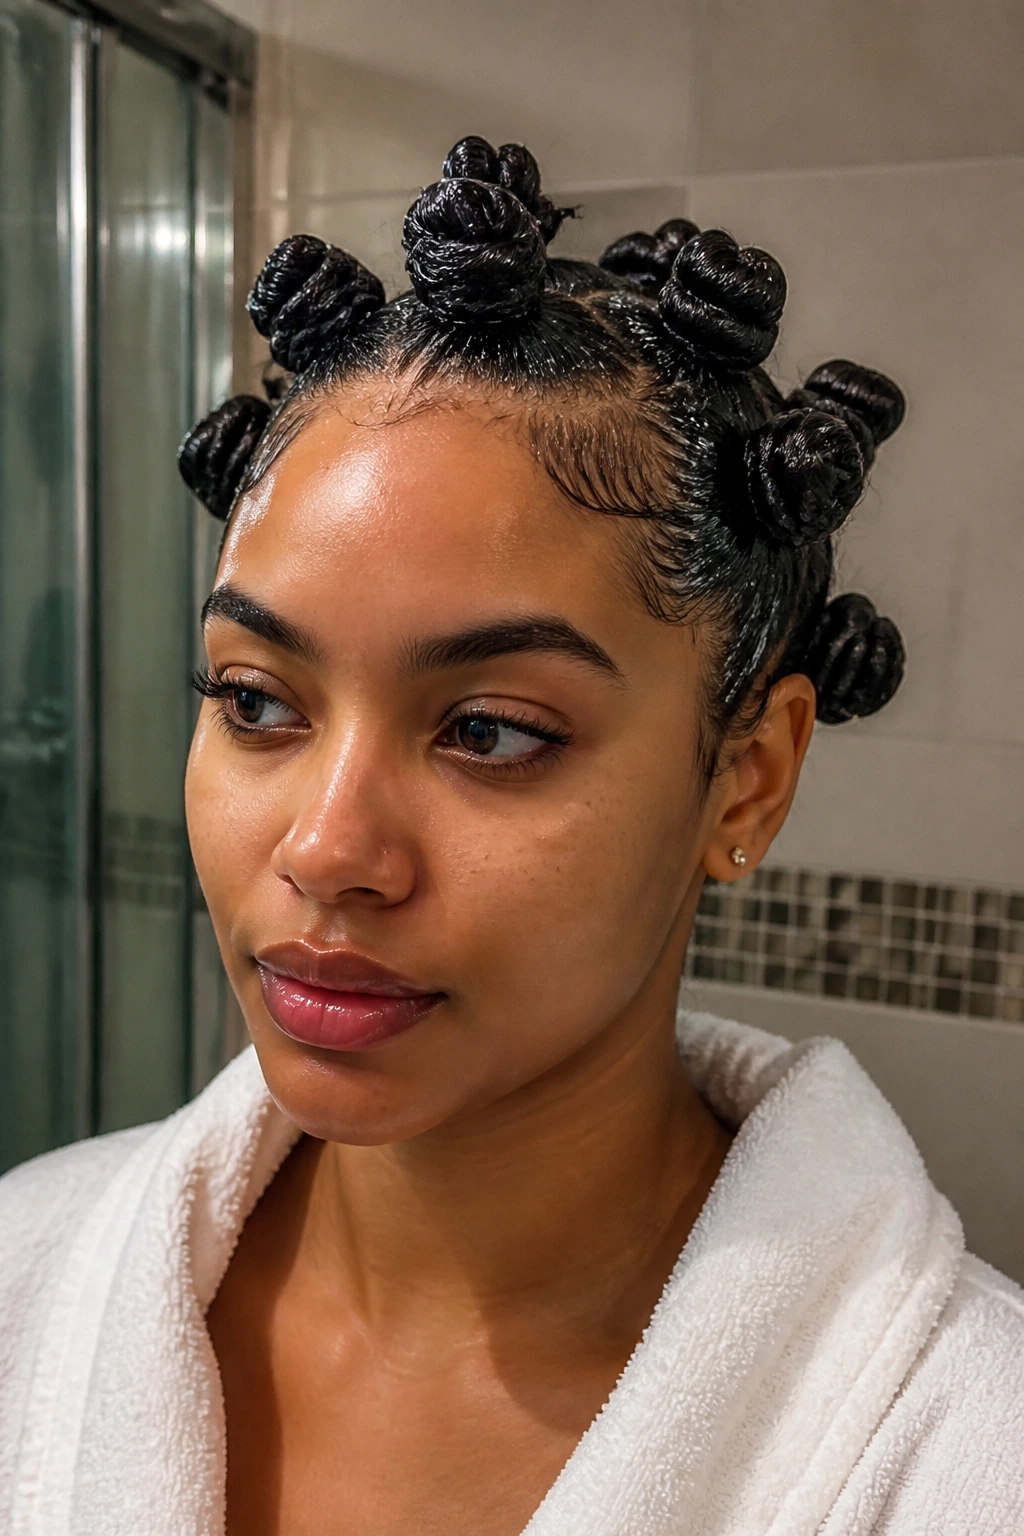
Wet-set knots are the version people underestimate, and then they get the curl result they wanted all along. On straight hair, this method needs full drying time, but the payoff is better hold and a more defined pattern when the knots come down.
Use damp hair, not dripping hair. That distinction matters. If the strands are too wet, the roots stay soft for too long and the style can flatten overnight. Lightly mist the hair, work in mousse, then set the knots tight enough to hold their shape without stretching the hair.
This is the style I’d pick if you want the knots for an event on one day and the curls the next. It gives you a built-in transition from sculpted to soft. And yes, the curls tend to hold better when the set is done carefully. That part is not glamorous, but it is true.
A diffuser can help if you’re in a hurry. A patient air-dry is better.
23. Undercut-Style Side Sweep Knots
An undercut-style side sweep uses sleekness as part of the design. Instead of covering the whole head with knots, you sweep most of the hair to one side and stack the knots along the opposite line so the shape feels sharp and asymmetrical.
It looks a little edgy, a little tailored, and much more modern than a centered layout. Straight hair is useful here because the smooth side sweep stays neat longer and gives the knots a clean contrast. If you want drama without adding more knots, this is the move.
I like this style for medium to long lengths, especially when the hair has a blunt side part already. Keep the swept side polished with a light gel, then build the knots where the hair naturally wants to sit. For a stronger effect, pin the tucked side very flat.
The shape feels deliberate from every angle. That’s hard to get right, and fun when it works.
24. All-Over Micro Knots for Long Wear
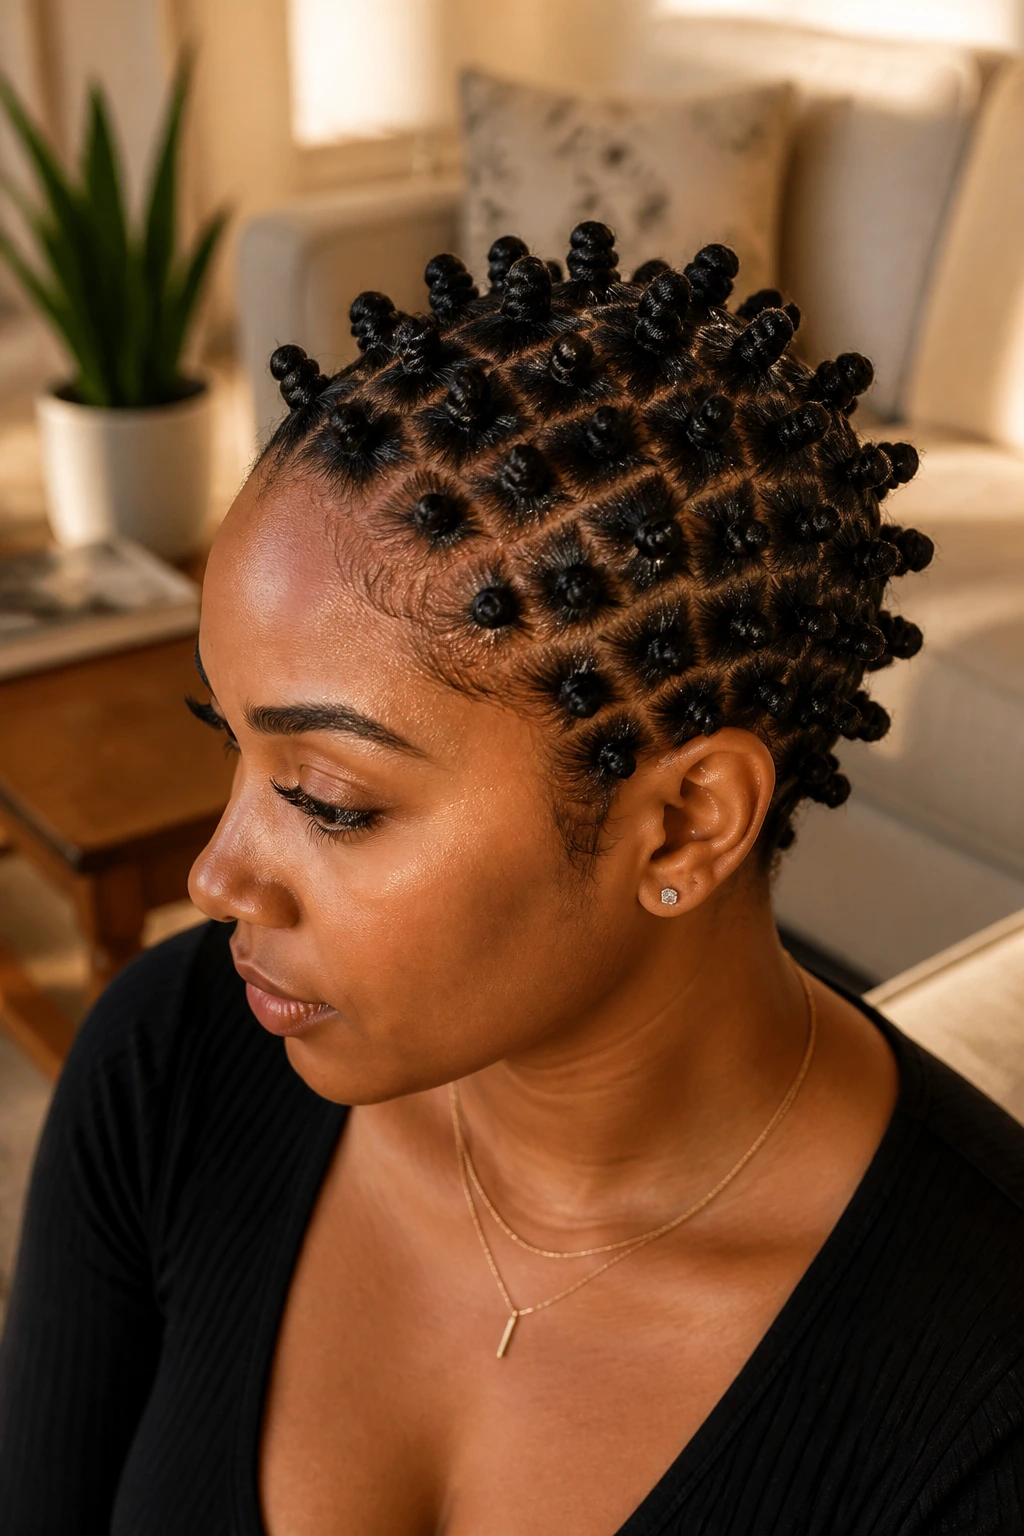
Micro knots are the long-wear version of the style, and straight hair often benefits from their smaller footprint. Because each knot is tiny, the set tends to stay secure longer and the overall look feels detailed without needing much volume.
The downside is time. Lots of it. This is the style you choose when you want endurance and do not mind sitting with a comb, clips, and a patient hand. But the result can be worth the effort because the tiny knots hold their shape well and create a dense, textured pattern across the head.
Use consistent section sizes, around ½ inch, and keep the tension even from root to tip. If some knots are tighter than others, the style starts looking uneven after a day or two. Straight hair shows inconsistency fast.
This is not the easiest option. It is one of the sturdiest, though, and sometimes that matters more.
25. Soft, Undone Finish Knots
A softer finish keeps Bantu knots from looking too rigid on straight hair, and that is often the most flattering choice if you want the style to feel relaxed. The knots are still defined, but they are not slicked so tightly that every part line screams for attention.
I like this version when the hair has a little lived-in texture already, maybe from a day old wash or a light mist of dry shampoo. You still make neat sections, but you leave a whisper of softness around the edges so the style breathes. A few tiny flyaways are not the enemy here. Too much polish can make the look feel stiff.
This is the most forgiving style in the set. If a knot is slightly larger than the rest, it reads as part of the softness instead of a mistake. That makes it a smart pick for anyone who wants the look without the pressure of perfect geometry.
Soft does not mean sloppy. It means the style has room to move.
Every one of these looks depends on the same quiet truth: straight hair needs structure before it will hold shape. Once you respect that, the style opens up fast. Clean sections, enough grip, and a little patience make almost any Bantu knot set look better than it has any right to.
And the best part is that you do not have to pick one forever. Try a crisp center part one day, then a scarf-wrapped half-up set the next. Straight hair is not a limitation here. It is just a different starting point.