A plain ponytail can be done in five minutes and still feel like it gave you nothing. Bantu knot ponytail styles fix that problem fast: you keep the lift, swing, and face-framing shape of a ponytail, then add knots that make the whole look feel built instead of thrown together.
Done well, this is not random decoration clipped onto a basic style. Bantu knots come from African hair culture, and when they’re paired with a ponytail, the result can lean sleek, playful, sharp, soft, or dressy depending on where the knots sit and how large you make them. The same idea works on dense natural hair, braided bases, added curly hair, and even locs if the sectioning is clean and the anchor point is solid.
The base matters more than people think.
If the ponytail shifts, the knots start to look uneven by midday. If the knots are too tiny for the amount of hair you’re using, they read like scattered bumps instead of design. And when your scalp feels sore two hours later, the style was pulled too tight. A firm hold is good; a throbbing hairline is not.
Start with moisturized hair, a grip product at the roots, and 10 minutes under a satin scarf after smoothing the base. Then pick the version that matches your length, your outfit, and how much drama you want from the side view.
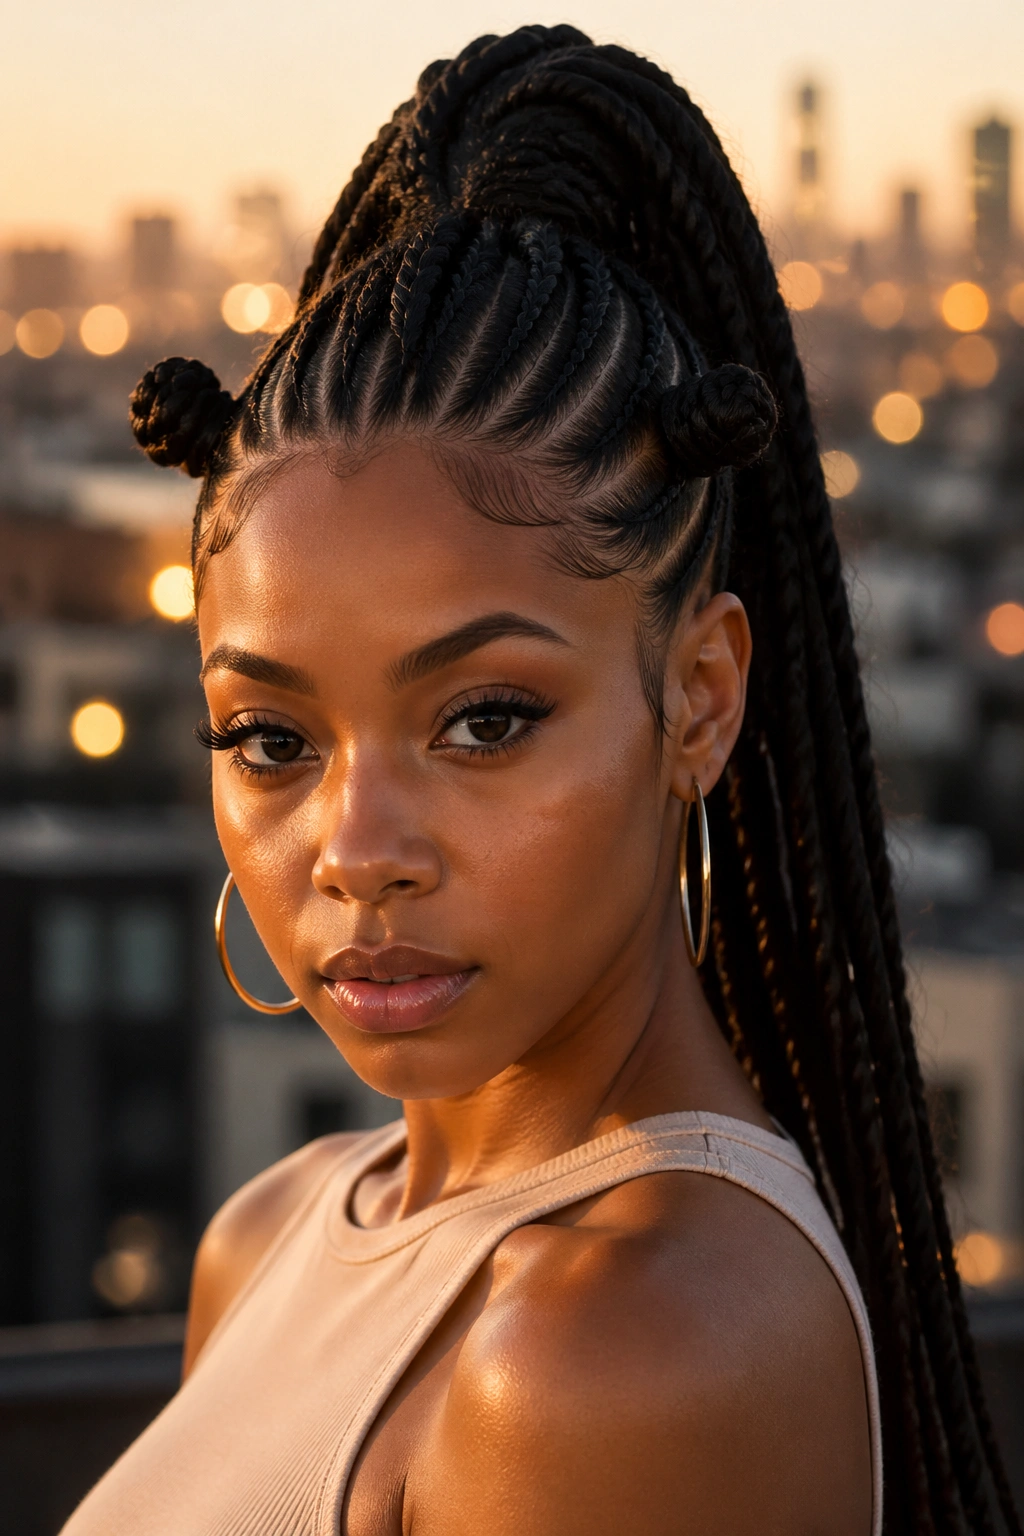
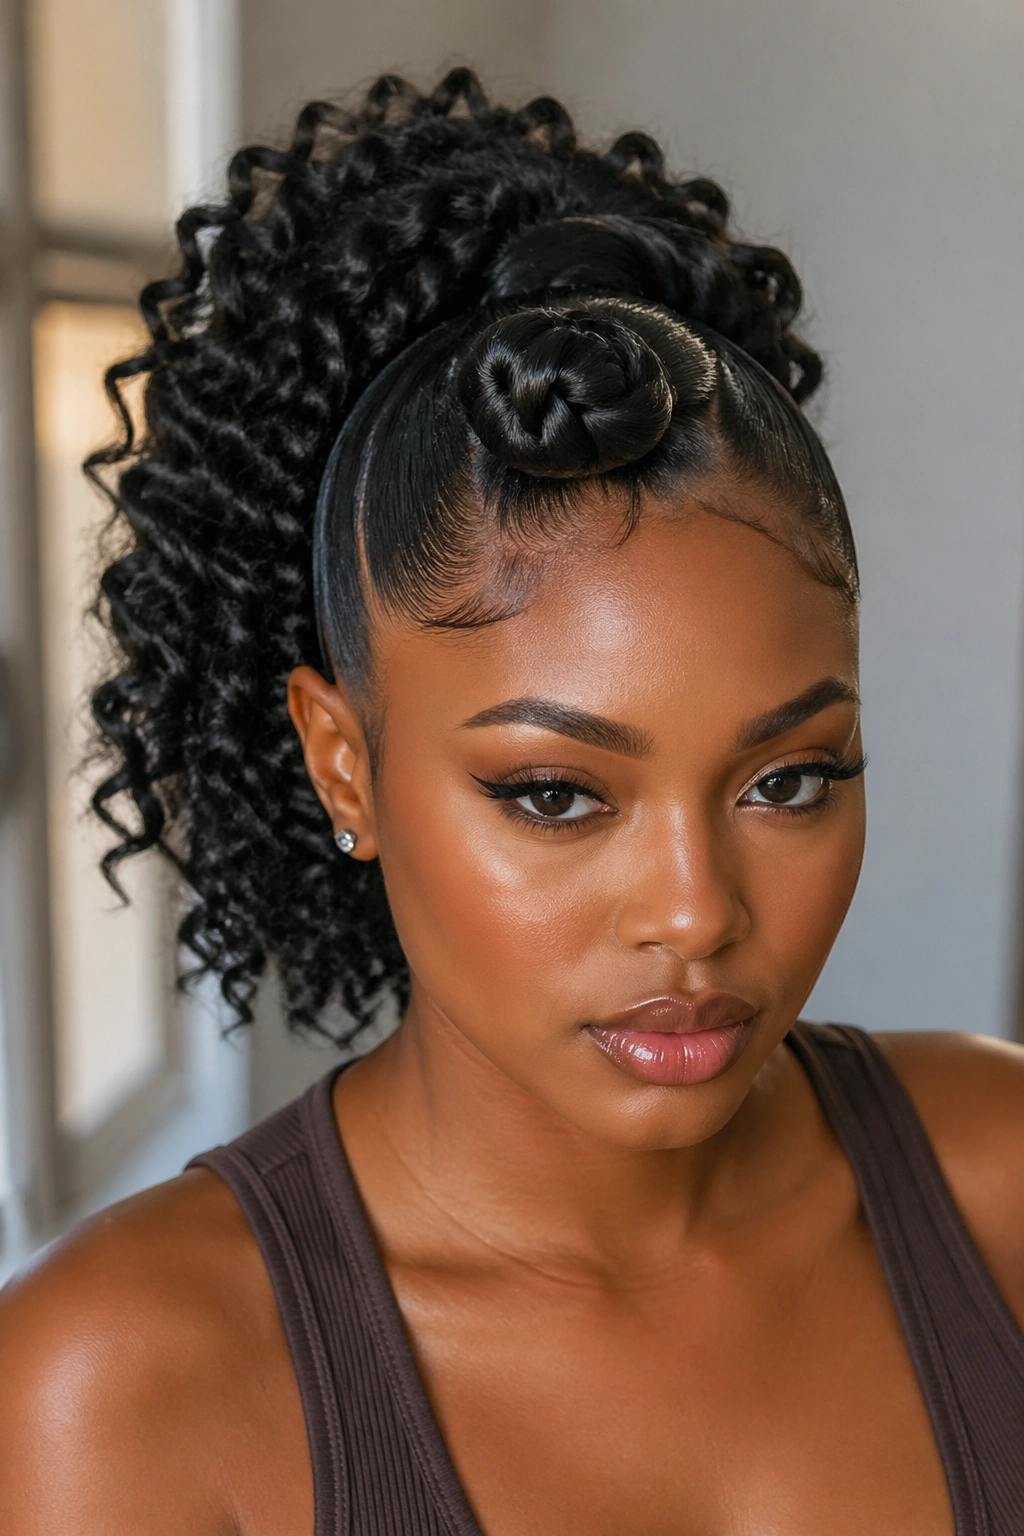
1. High Bantu Knot Ponytail With One Jumbo Knot
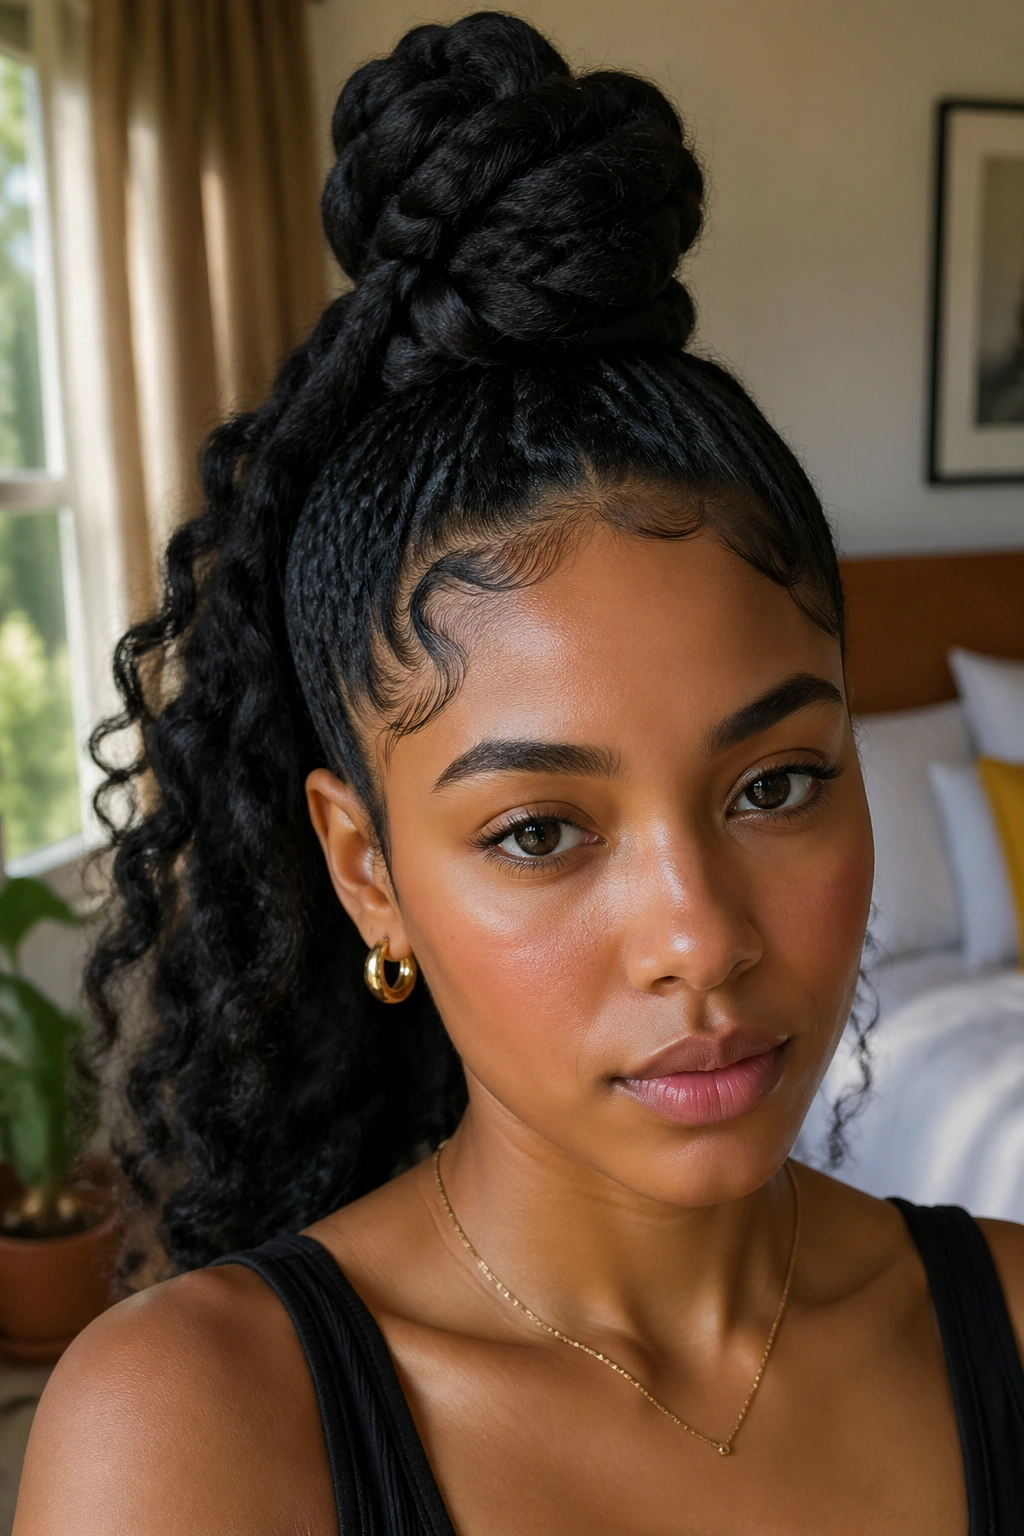
If you want one style that never looks confused, start here. A high ponytail with one jumbo Bantu knot gives you a strong silhouette without crowding your head with too many details. It works best when the ponytail sits at the crown, not too far forward and not pulled back toward the top center of the skull.
The knot should be large enough to read from a distance. On most heads, a section about 2 to 2½ inches wide creates the right amount of visual weight. If your natural hair is short or fine, braid in a small amount of extension hair first, then wrap the section around itself so the knot stays round instead of collapsing flat.
Why the Shape Works
One oversized knot keeps the eye moving upward, which makes the style look taller and cleaner. The ponytail gives movement in the back; the knot gives structure up top. You get both.
- Best on: medium to long natural hair, silk-pressed hair, or a braided base with added ponytail hair.
- What to use: edge control, mousse, a firm ponytail band, and 6 to 8 bobby pins.
- What to watch: if the knot leans backward, the section was not twisted tightly enough before wrapping.
Tip: build the knot around a small twisted or braided core. It holds its shape longer than wrapping loose hair alone.
2. Low Ponytail With Two Front Bantu Knots
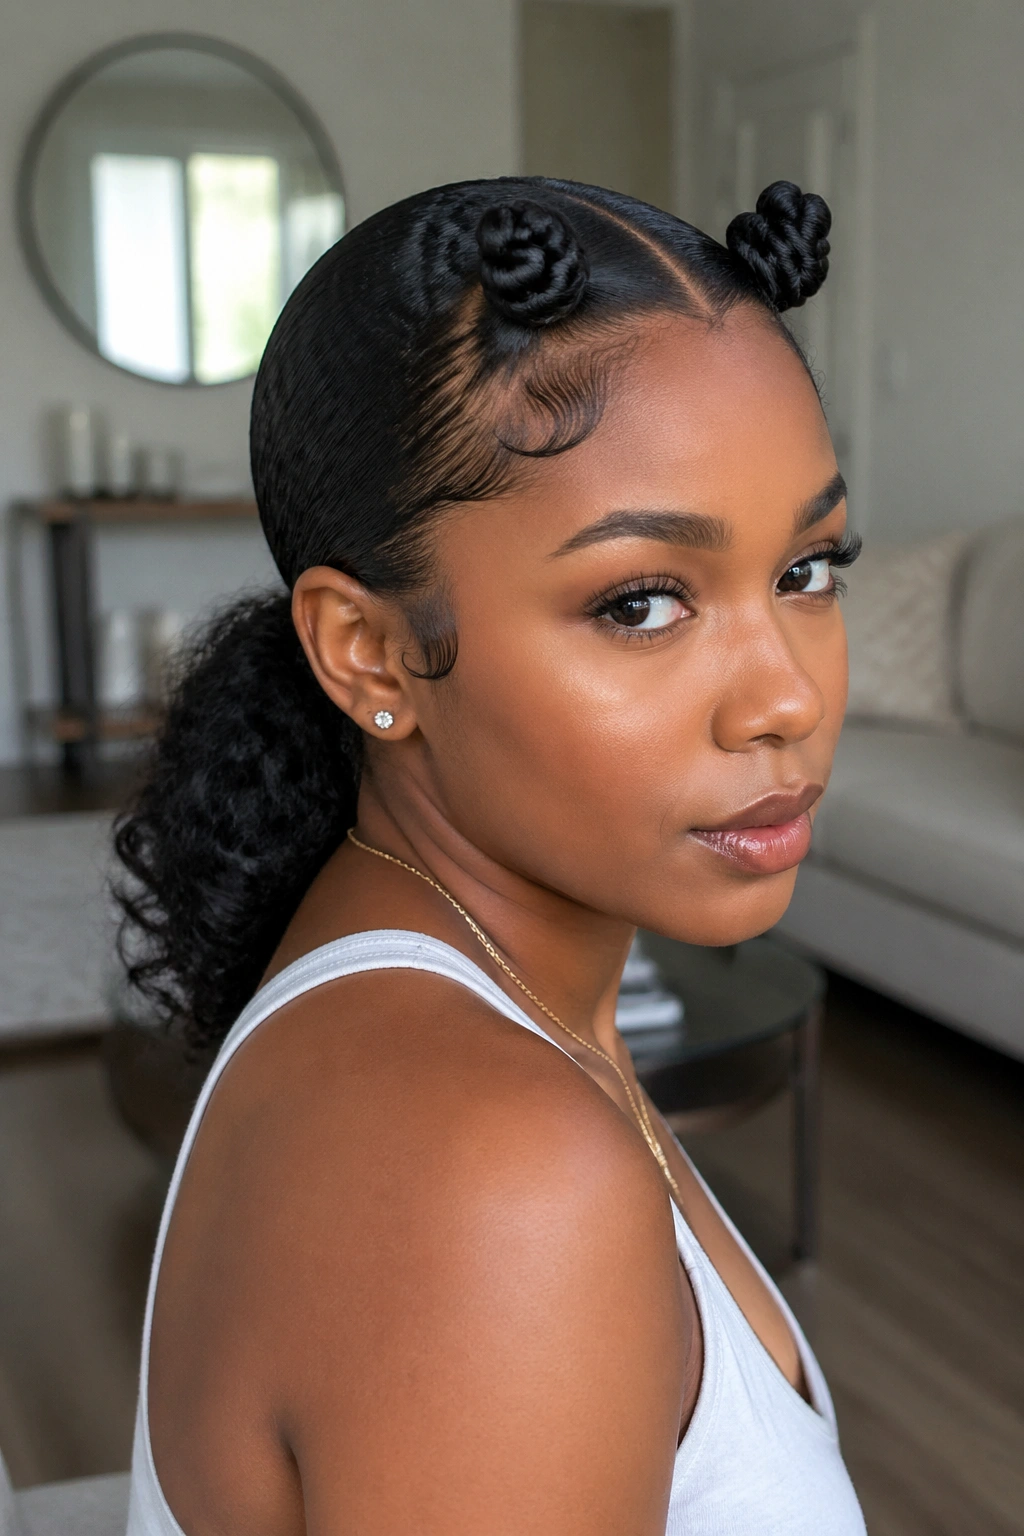
Want something quieter than a high ponytail but still sharp? A low ponytail with two front knots near the hairline lands in that sweet spot.
The cleanest version starts with a center part. From there, take a section above each temple—usually 1 to 1½ inches wide—and form two matching knots while the rest of the hair gathers into a low ponytail at the nape. That low placement changes the mood of the style right away. It feels calmer, less sporty, and a little more dressed.
This shape flatters people who do not love volume stacked high on the crown. It also helps if you wear glasses, statement earrings, or collars that already add shape around your face. The front knots frame the forehead and cheekbones without adding too much width in back.
Keep the ponytail smooth, not bulky. A sleek low tail, braided tail, or soft curly extension ponytail all work, though I like a narrow braided ponytail most here because it lets the front knots stay the focus. Tie a scarf around the front hairline for 8 to 10 minutes after styling. Those front sections need to lie flat or the whole look loses its edge.
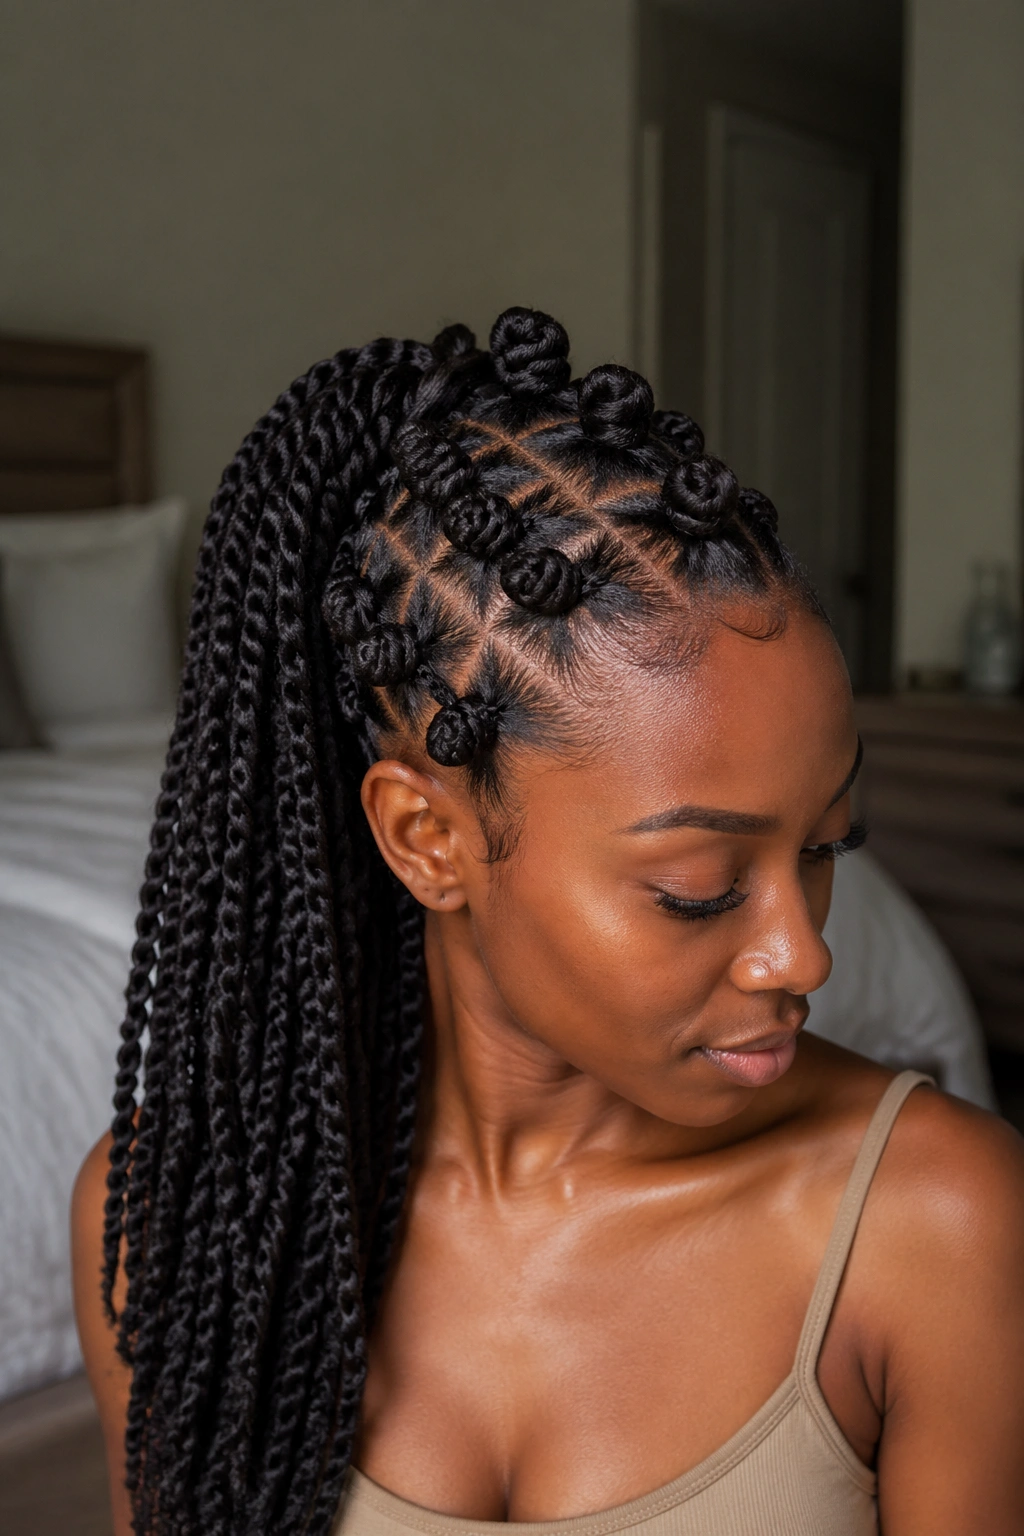
3. Half-Up Ponytail With Crown Knots
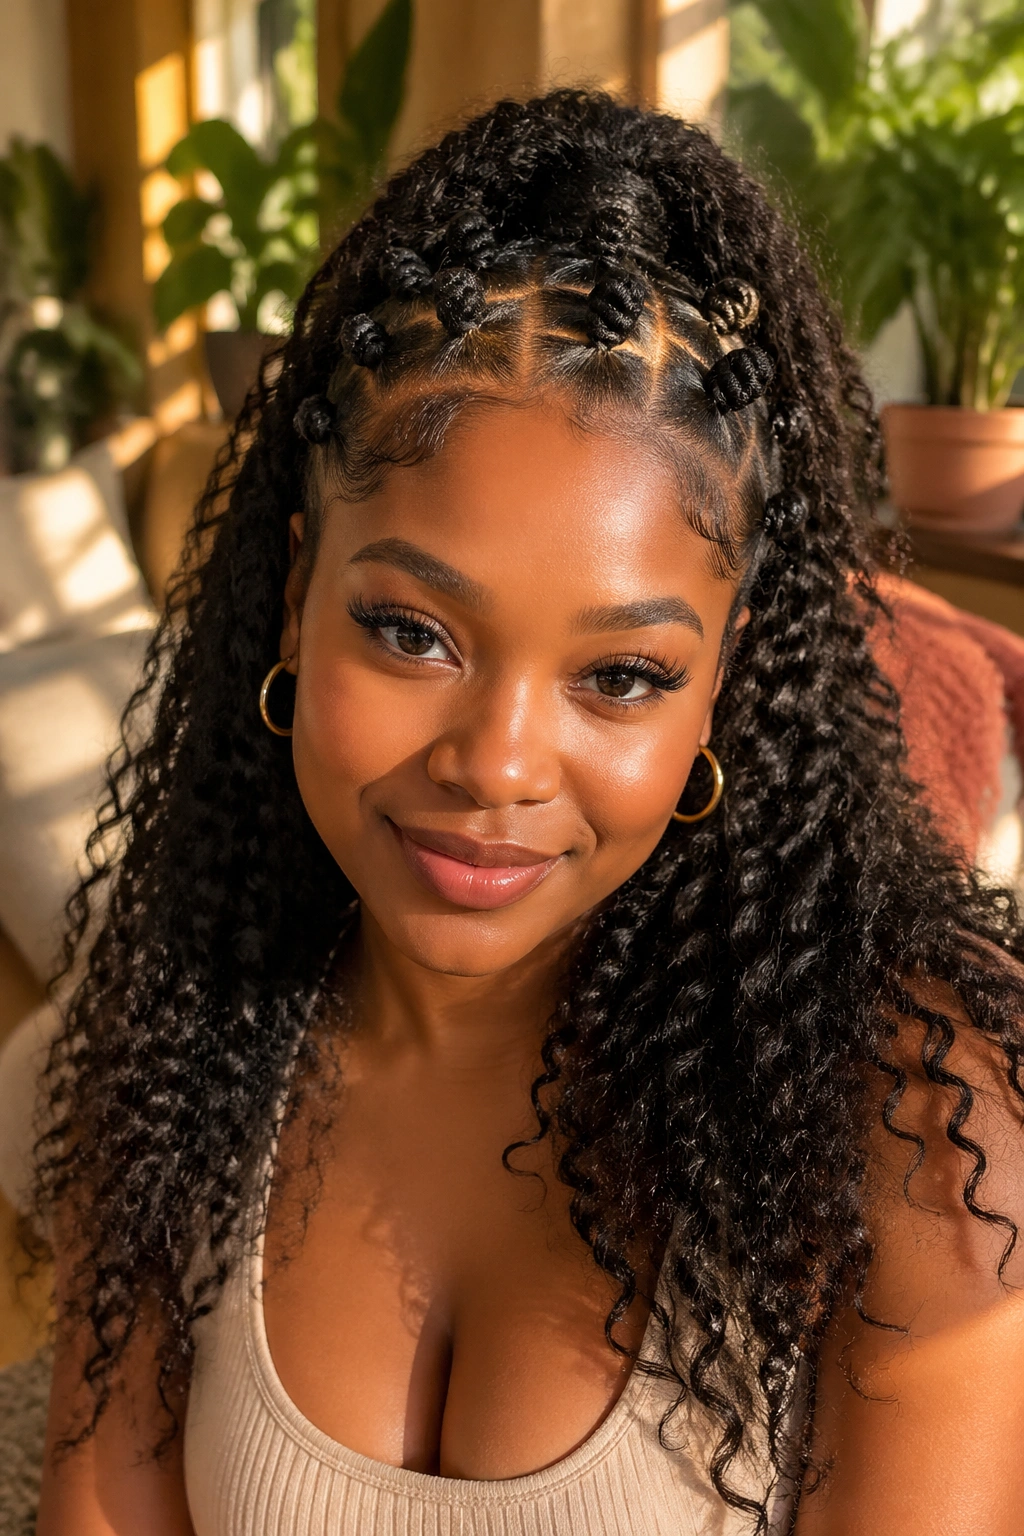
Picture a style that still lets your curls show but gives the top half more shape. That’s where the half-up ponytail with crown knots wins.
You section the hair from temple to temple, pull the top portion into a ponytail, and turn one or two sections on that upper panel into Bantu knots. The bottom half stays loose—curly, stretched, blown out, or braided into hanging plaits. Because half the hair is left down, the style feels lighter than a full ponytail and usually puts less strain on the edges.
Where This One Looks Strongest
This version shines on medium-length natural hair that already has texture and body. If your curls shrink hard, use a light stretch method the night before—banding, chunky twists, or a low-heat blowout—so the ponytail portion sits with more length and the lower half does not bunch into a tight triangle.
One knot gives a cleaner look. Two crown knots feel more playful. Three can work, though once you pass that point on a half-up style, the top can start to feel crowded. Leave a little air between the knots and the ponytail base so each shape reads on its own.
4. Braided High Ponytail With Stacked Knots Around the Base
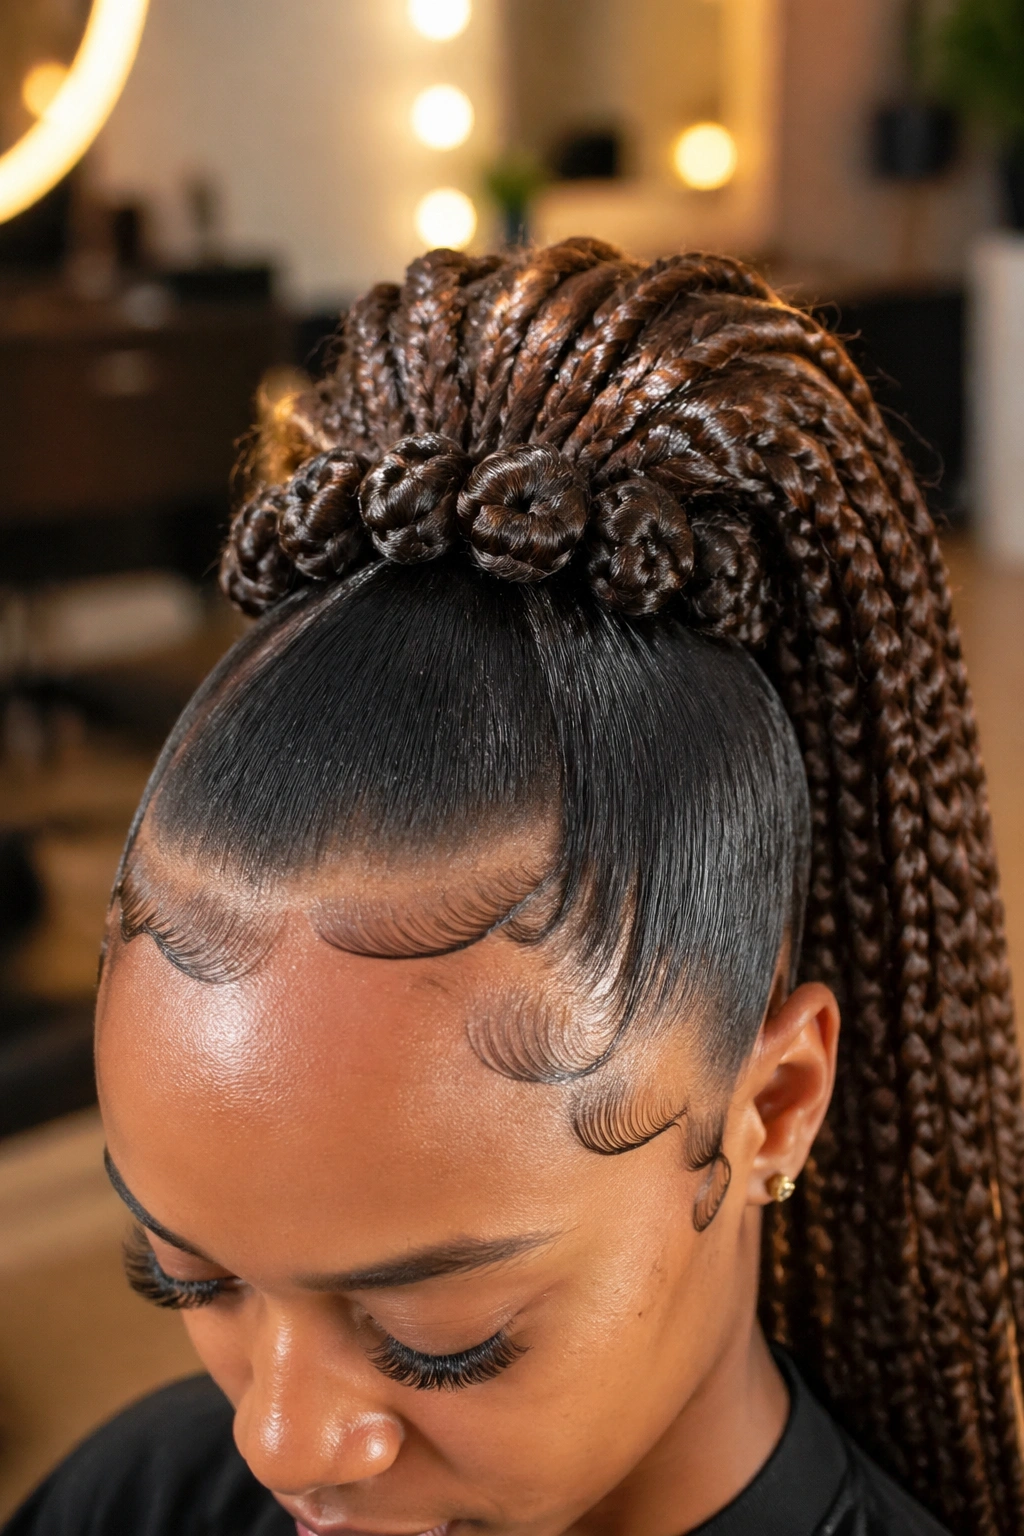
You do not always need to hide the ponytail base. Sometimes the base should be the whole point.
In this style, the ponytail itself is braided—one long braid, two plaits, or a thick feed-in braid extension—and the Bantu knots sit around the base like a crown ring. Instead of one center knot, you use three, four, or even five smaller knots placed in a circle around the ponytail holder. The braid rises from the middle.
That placement gives the style a strong, sculpted look. It also solves a common problem: thick added ponytail hair can leave the base looking bulky and unfinished. Stacked knots make that bulk look planned.
Quick Styling Notes
- Use 1-inch sections for the surrounding knots if you want four or five of them.
- Wrap the ponytail base with extension hair first, then place the knots around it so the holder disappears.
- A braid longer than 24 inches looks strongest here because the top has enough design to support the extra length.
This style has bite. Wear it when you want the side profile to carry the look, not only the front.
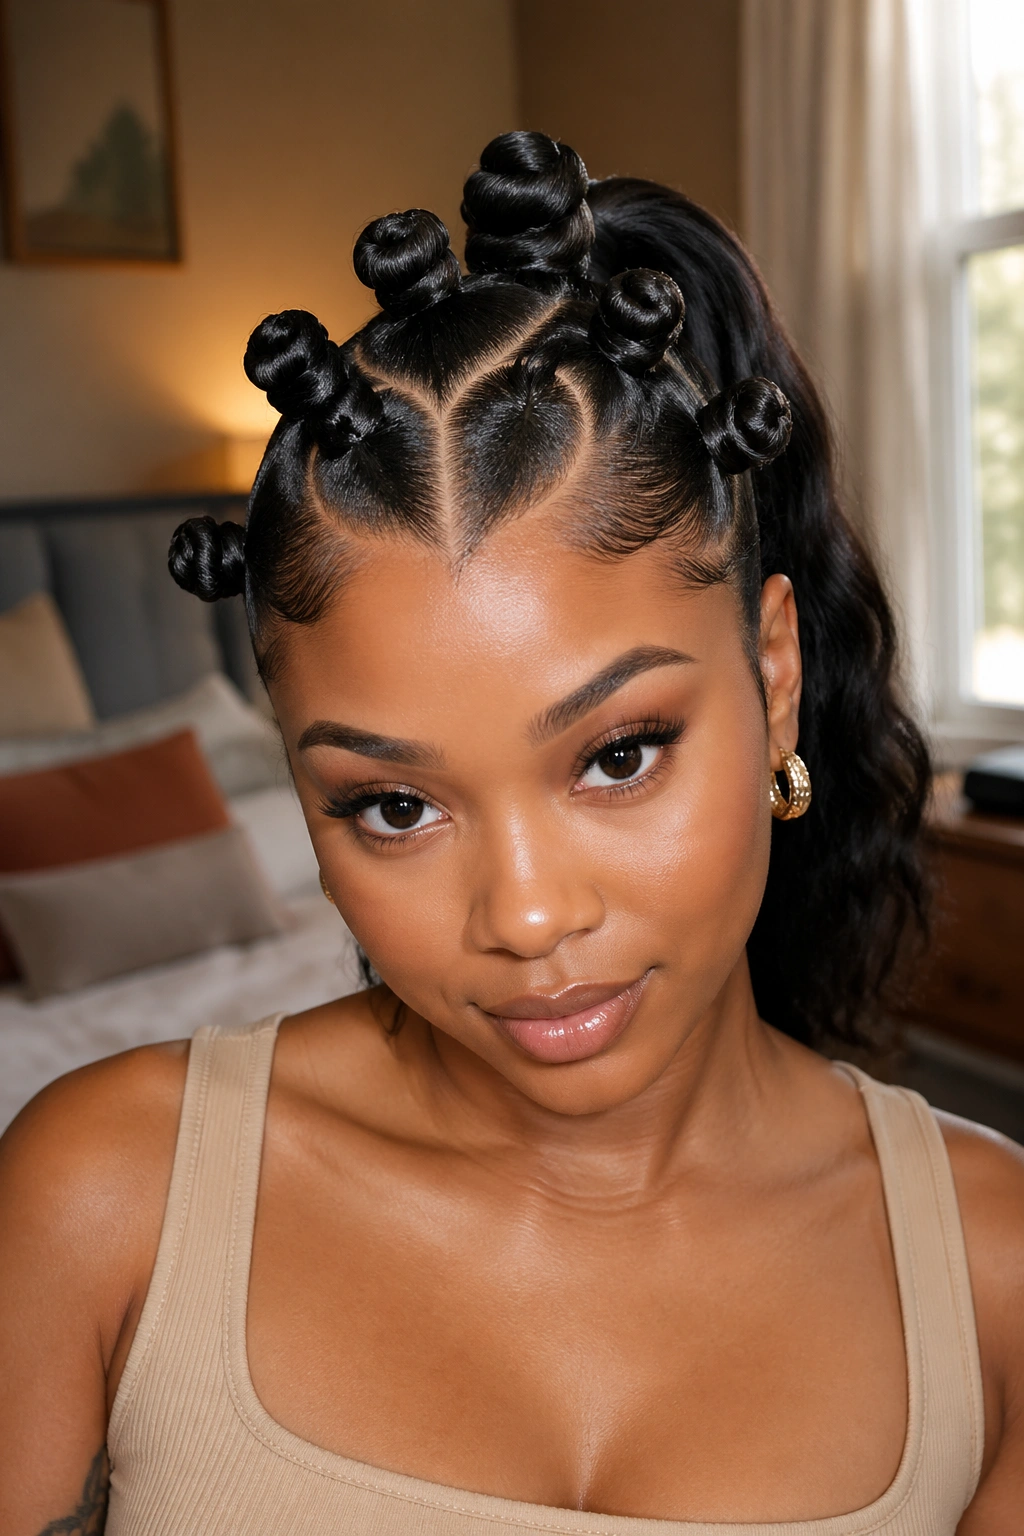
5. Curly Puff Ponytail With Mini Bantu Knots
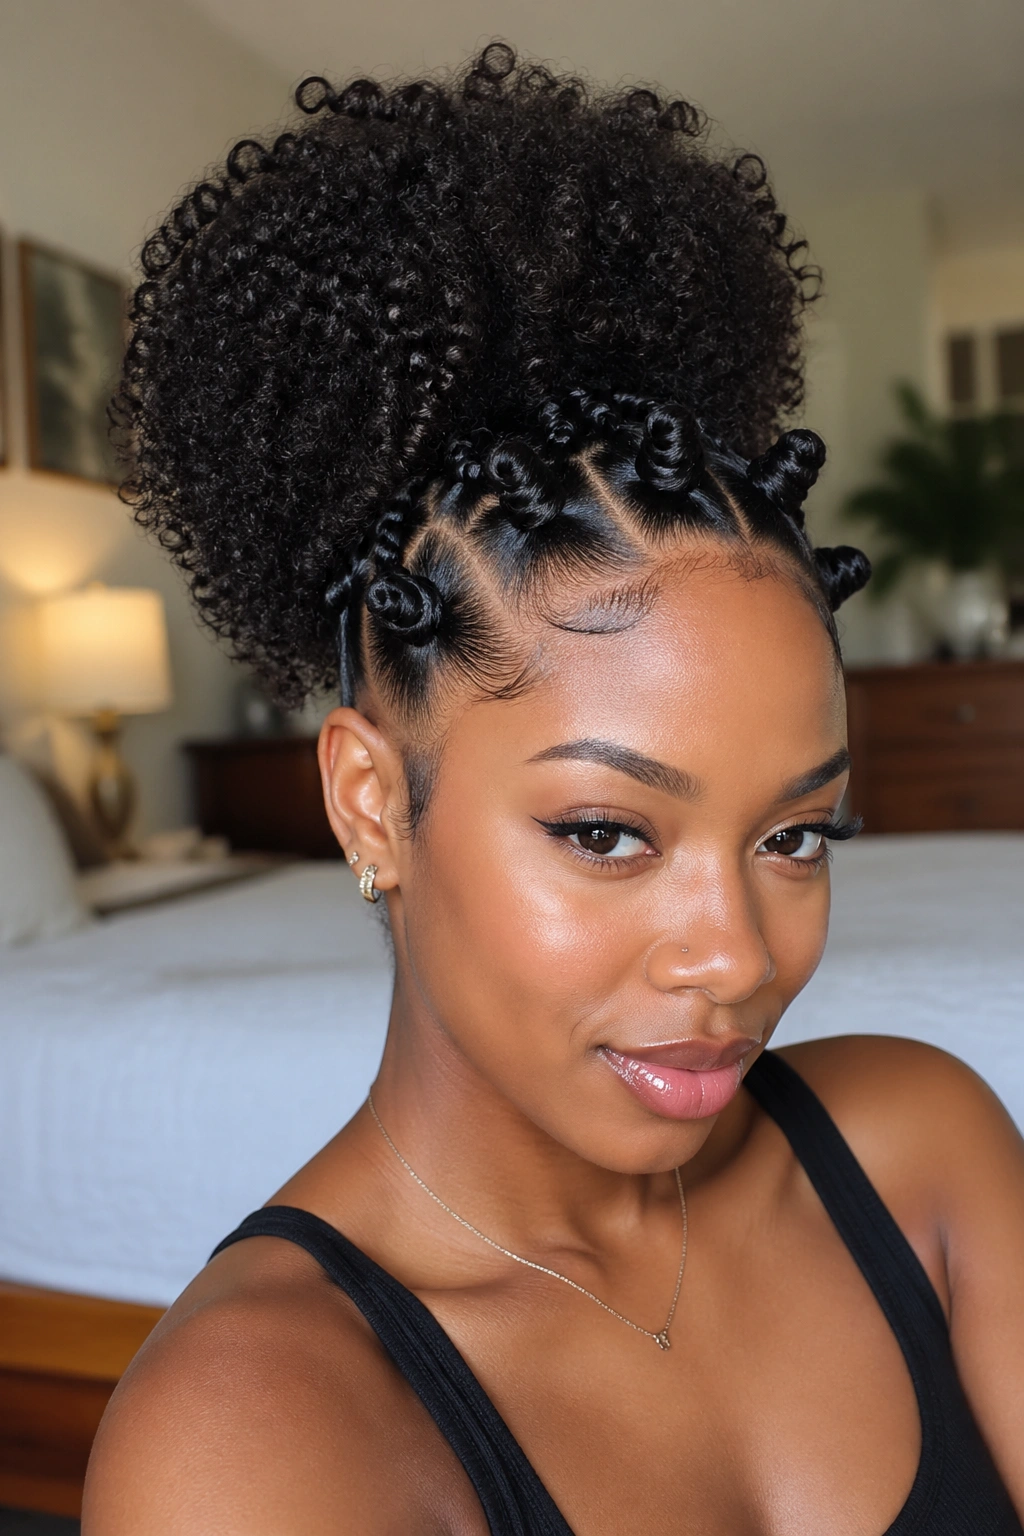
Not every Bantu knot ponytail needs a glass-slick finish. A curly puff paired with mini knots has more softness, and on tightly coiled hair it can look lively without losing shape.
The puff works best when the roots are smoothed but the ponytail itself stays airy. Think defined texture, not packed stiffness. Four to six mini knots across the front third of the head usually gives enough detail. Make them too small and they disappear; make them too large and they fight the puff.
This is one of the easiest versions for shorter natural hair because the back does not need to gather into a long hanging ponytail. A puff at the crown or slightly above it is enough. If your hair is between 4 and 7 inches stretched, this style is often more realistic than trying to force a long sleek tail from hair that does not want to behave that way.
Use mousse on the puff after picking it out so the curls clump without turning crunchy. Sleep with the puff loosely banded and the front covered with satin. The mini knots usually last longer than the puff itself, which means a quick refresh in the morning can bring the whole look back.
6. Side-Swept Ponytail With Three Asymmetrical Knots
Centered styles look neat. Side-swept styles look intentional in a different way—they move.
A side ponytail with three asymmetrical knots gives you that movement before the hair even swings. Place the ponytail low behind one ear or high above one ear, then offset the knots so they travel diagonally across the head rather than sitting in a straight row. One larger knot near the front and two smaller knots trailing back usually creates the cleanest line.
Placement Tips That Matter
The diagonal should follow the shape of your part. A deep side part on the fuller side paired with a ponytail on the opposite side creates a stronger visual pull than matching both on the same side. That little choice changes the whole style.
If you’re using extensions, pick a ponytail texture that contrasts with the knots a bit. Sleek knots plus a curled side ponytail make the design easier to see. Sleek knots plus a sleek tail can still work, though the style reads more formal and a little stricter.
This one shines in motion—walking, turning, dancing, any moment where the ponytail swings across the back of your shoulder.
7. Bubble Ponytail With a Bantu Knot Base
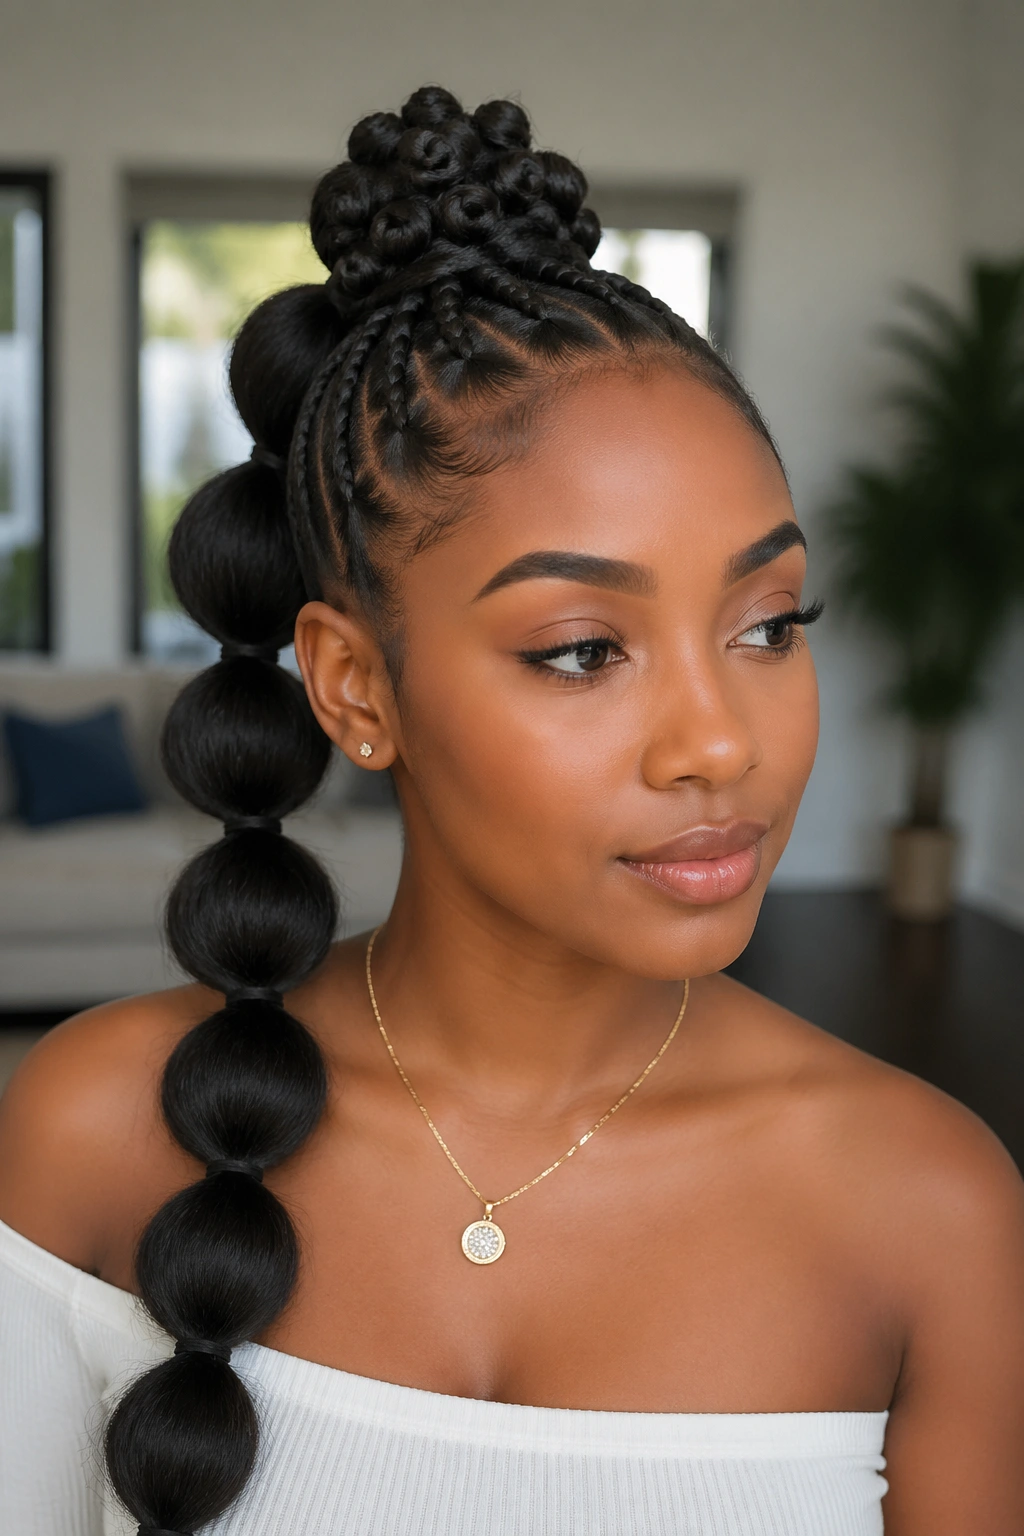
A bubble ponytail already has built-in rhythm. Add a Bantu knot at the base and the style suddenly looks finished from top to bottom.
The trick is proportion. If you’re creating three to five bubbles down the length of the ponytail, keep the knot at the top medium-sized, not jumbo. Too large, and the first bubble starts too low and the whole ponytail gets crowded.
You can build this on a sleek high ponytail with extension hair, then add clear elastics every 3 to 4 inches down the length. Gently tug each section outward so the bubbles look round instead of flat. The single knot at the base acts like a cap over the ponytail holder.
- Good match for: long extension ponytails, braid-ins, or stretched natural hair.
- Skip it if: your ponytail is short. Bubble sections need visible length or they look accidental.
- Finishing move: smooth mousse over the bubbles and tie the ponytail lightly with a scarf for 5 minutes so the sections stay clean.
This is one of those styles that reads well in photos because the shape stays visible from far back.
8. Sleek Ponytail With Zigzag Parts and Tiny Knots
What if the ponytail itself is simple, but the parting does the talking? That’s the appeal here.
A slick ponytail with zigzag part lines and tiny Bantu knots gives you a style that feels graphic without needing a mountain of hair. The knots can sit along the zigzag path—three or four of them—or cluster at one side while the parts create the rest of the design. Tiny means tiny: think sections smaller than 1 inch, especially if you want the line work to stay crisp.
The parting needs patience. There is no shortcut around that. Use the pointed tail of a rat-tail comb, apply a bit of shining jam along each line, and clip finished sections out of the way before moving on. If one zigzag goes crooked, it shows. Fast.
This version works well when you want a style that reads clean under studio lights, at events, or with a blunt outfit that does not need extra volume. The shine matters. Wrap the finished style with a satin strip over the parting for 10 minutes so the lines settle and the scalp looks polished instead of puffy.
9. Braided Ponytail With Triangle-Part Bantu Knots
Triangle parts can change the whole tone of a style. A square part says structure; a triangle part says movement.
That shape becomes even stronger when the triangles each feed into a Bantu knot before the rest of the hair pulls into a braided ponytail. The angles keep the scalp design from looking flat, and the braid in back gives the eye somewhere to land after all the geometry.
Why Triangle Parts Hit Differently
Sharp parts point the eye in a direction. If the triangle tips angle toward the ponytail base, the whole style feels connected. If they point away, the knots can look scattered. Direction matters here more than people expect.
- Use three large triangles for a cleaner style.
- Use five or six small triangles if you want heavier scalp detail.
- A thick braided ponytail works better than a loose one because the back needs enough weight to match the front design.
I like this look most with medium shine, not dripping gloss. Too much product can blur the part lines and make the scalp pattern vanish.
10. Mohawk Bantu Knot Ponytail With Braided Sides
This one has attitude.
The center strip of hair runs from forehead to crown like a mohawk panel, while the sides are braided or slicked tightly upward. One to four Bantu knots sit along that center strip, and the final section becomes the ponytail. On natural hair, this shape can look bold without needing shaved sides because the cornrows create the same narrow visual lane.
You can make it soft or hard-edged depending on the size of the knots. Smaller knots along the center line give a more intricate finish. Two bigger knots and a high ponytail read stronger and cleaner. If you add curly ponytail hair at the back, the style loosens up. If you finish with a long braided tail, it looks stricter.
The key is width. Keep the mohawk panel around 3 to 4 inches wide on most heads. Wider than that and the sides lose their slimming effect. Narrower than that and the knots can start to feel crowded. This is a smart choice for people who want a statement style without covering the entire head in knots.
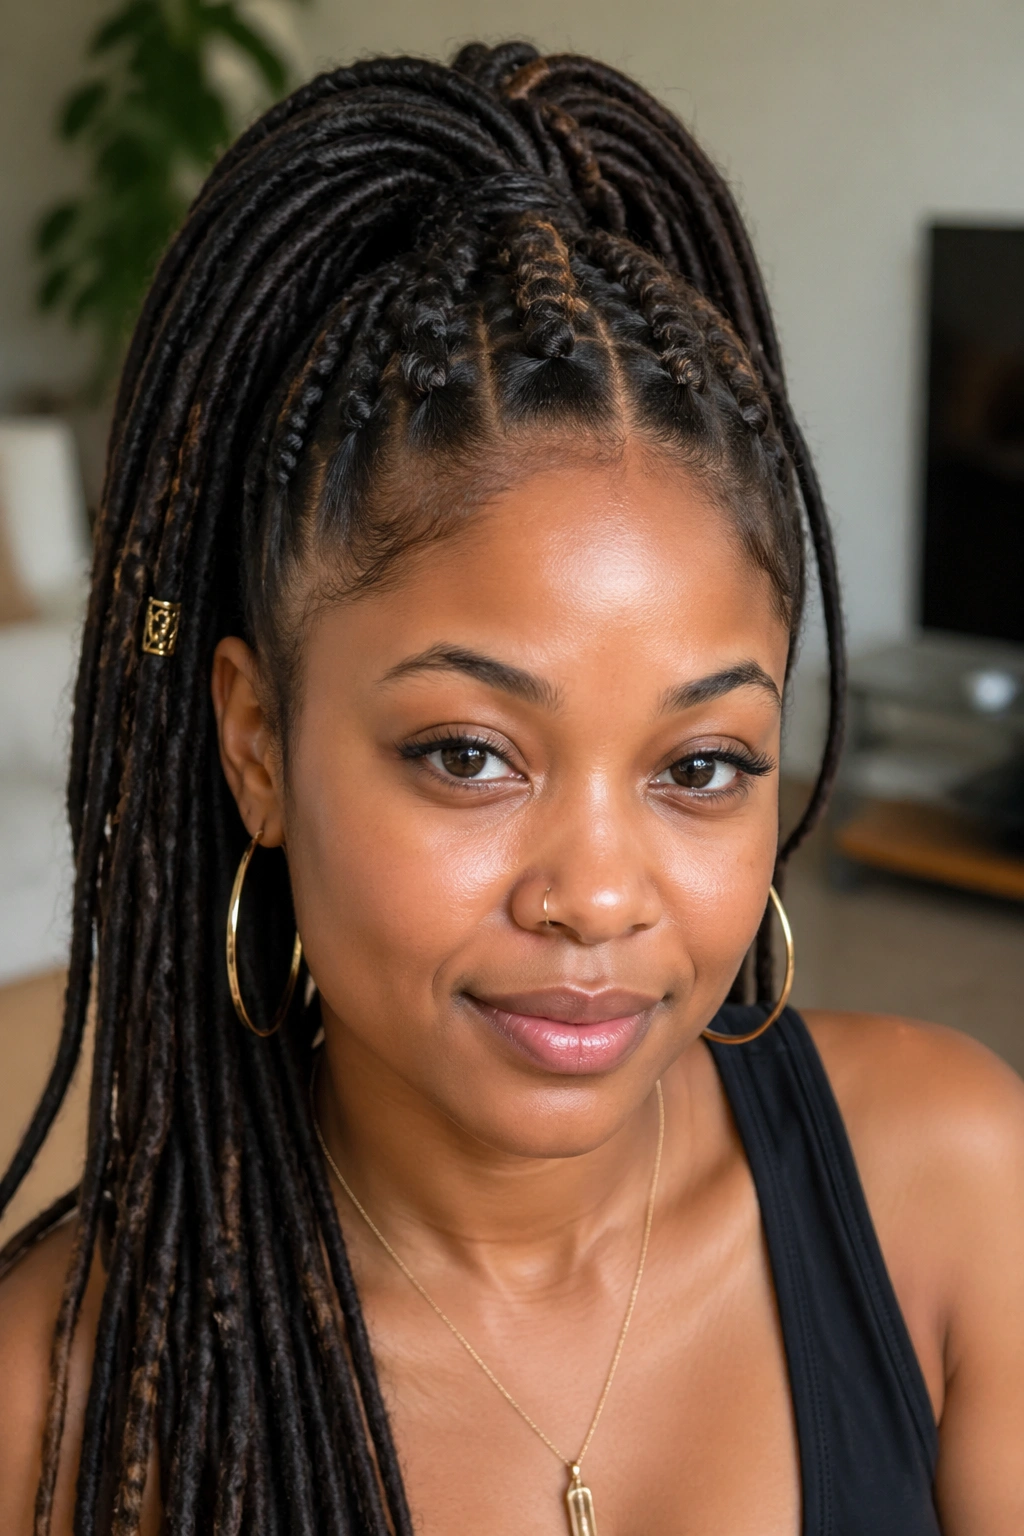
11. Low Braided Ponytail With Gold Cuffs and a Knot Cluster
Metal changes hair. A few small gold cuffs near a low braided ponytail catch light at the nape and make the style feel more dressed without asking much from the hair itself.
Here, the Bantu knots sit in a small cluster above the low ponytail base—two, three, or four depending on your density. The braid drops from underneath them. That vertical arrangement works especially well if you wear collars, tailored jackets, or open-back tops because the neck stays visible.
- Use fewer cuffs than you think. Three to five placed near the top of the braid is usually enough.
- Keep the knot cluster compact, with each knot about 1 inch across, so the low placement still feels neat.
- If your hair is fine, add cuffed braid jewelry to the ponytail instead of trying to make oversized knots from too little hair.
A style like this does not need dramatic edges. A smooth hairline and one clean braid carry it.
12. Pony Puff With Four Mini Knots for Short Natural Hair
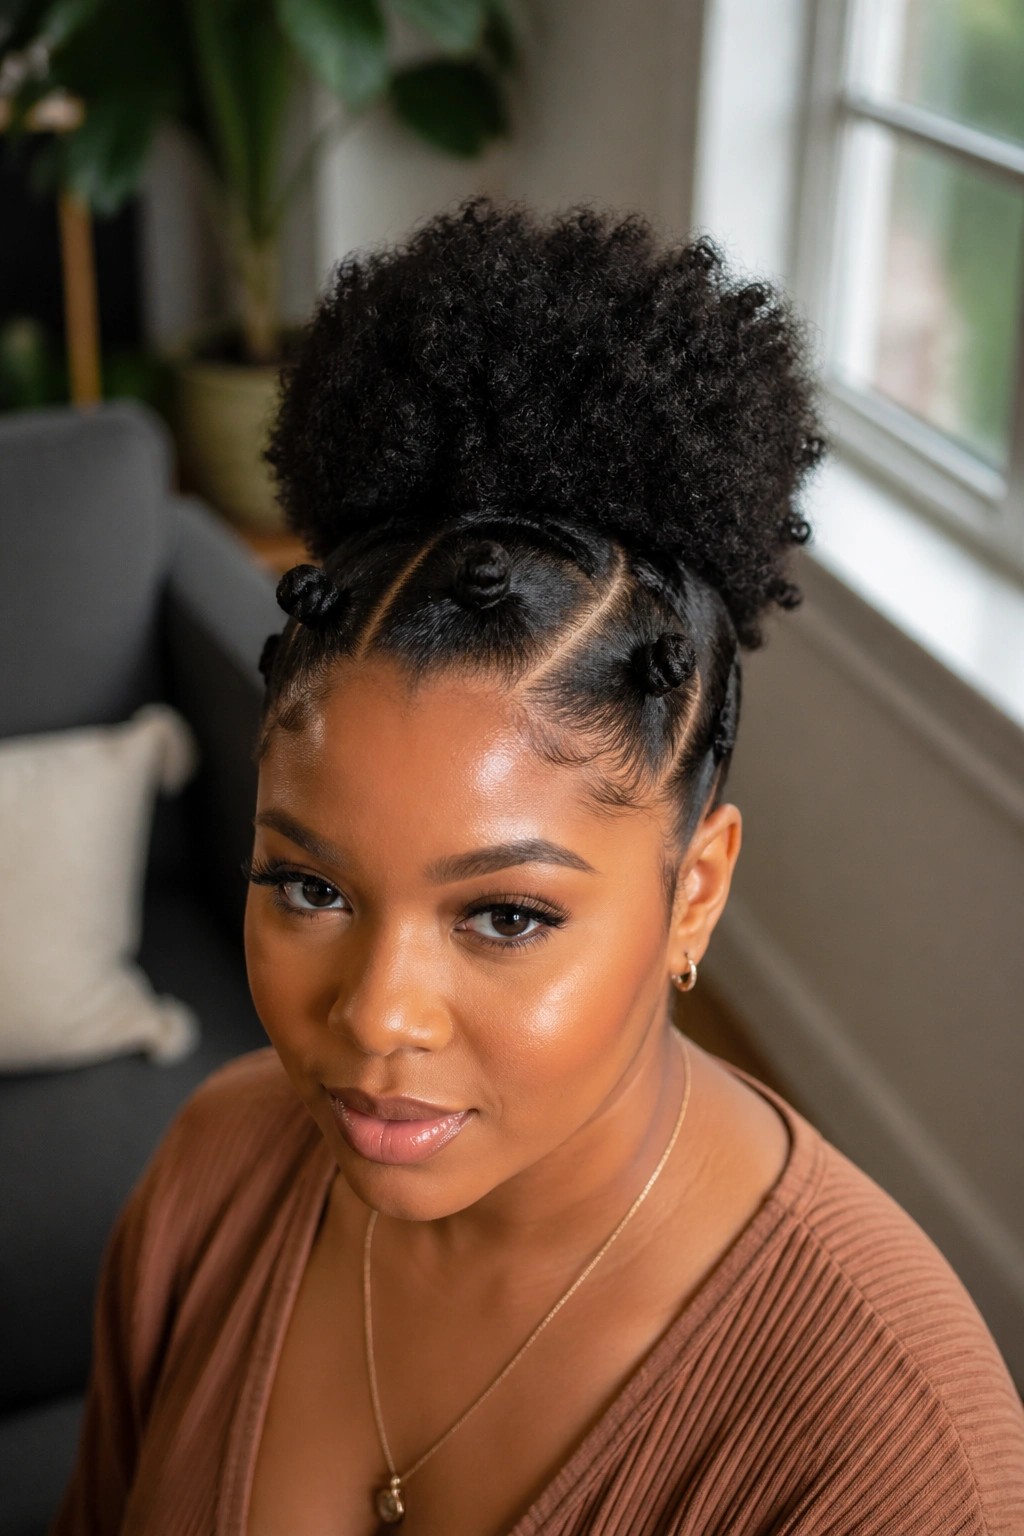
Short natural hair gets left out of too many style conversations, which is annoying because some of the sharpest Bantu knot ponytail looks happen on hair that is not long at all.
A pony puff with four mini knots proves it. Put the puff at the crown, section the front into four equal boxes or soft rectangles, and twist each into a small knot. You are not trying to fake length here. You’re building shape from what the hair already wants to do.
What Makes This One Work on Short Hair
The knots use the front sections efficiently, and the puff keeps the back from needing to hang. That means hair in the 3- to 5-inch stretched range can still create a style that looks complete. Add a little braided filler under the puff if you want more height, though the style does not depend on it.
Do not overload the roots with thick gel. A lighter foam plus a touch of edge control at the perimeter keeps the style from hardening into a helmet. Short hair can look crisp and soft at the same time, and this style proves it.
13. Fulani-Inspired Ponytail With Center Knots and Beads
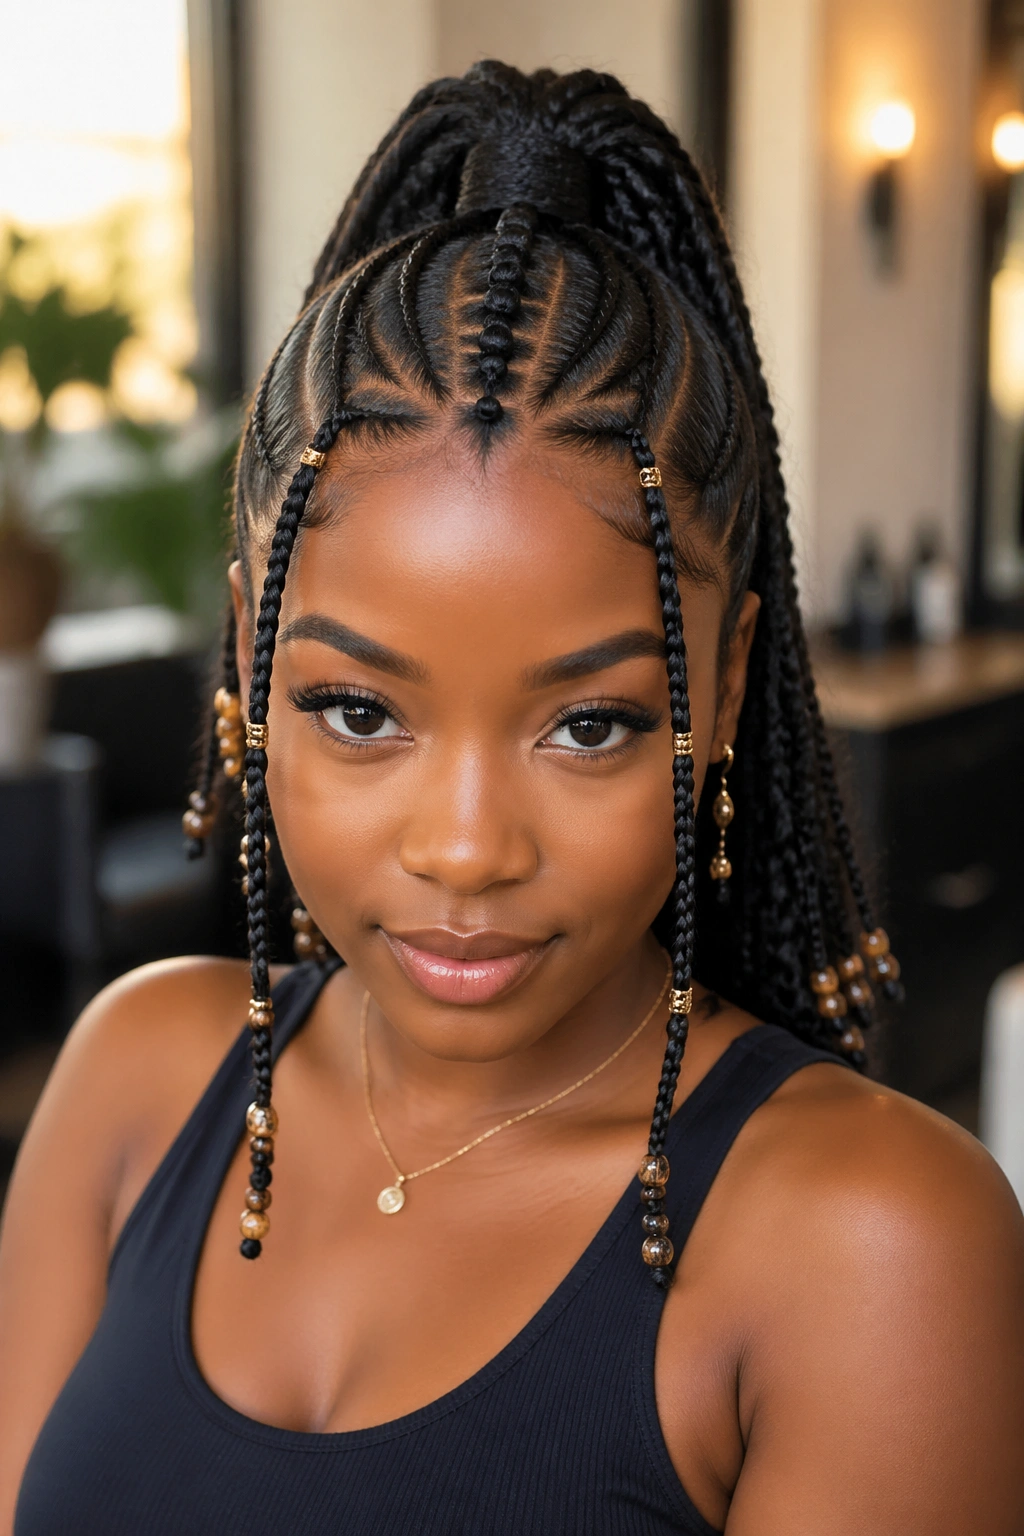
A center-part ponytail with front braids, beads, and small Bantu knots can look stunning when it is done with care and respect for where the references come from. This is not the style to treat like random festival hair.
The usual build starts with a clean middle part, one or two thin braids dropping near the face, and two or three small knots placed along the center line before the rest of the hair gathers into a ponytail. Beads go on the front braids or the ponytail ends, not everywhere at once. Too many and the style gets noisy.
If you want the look to stay balanced, match the bead size to the knot size. Small wooden or metallic beads pair better with mini knots than oversized acrylic beads do. And keep the ponytail texture controlled. A sleek braided tail or a defined curly tail both work; a frizzy, expanded tail can make the beadwork feel disconnected.
This style rewards restraint. Leave space between the design elements so each one can breathe.
14. Long Extension Ponytail With Spiral-Wrapped Knots
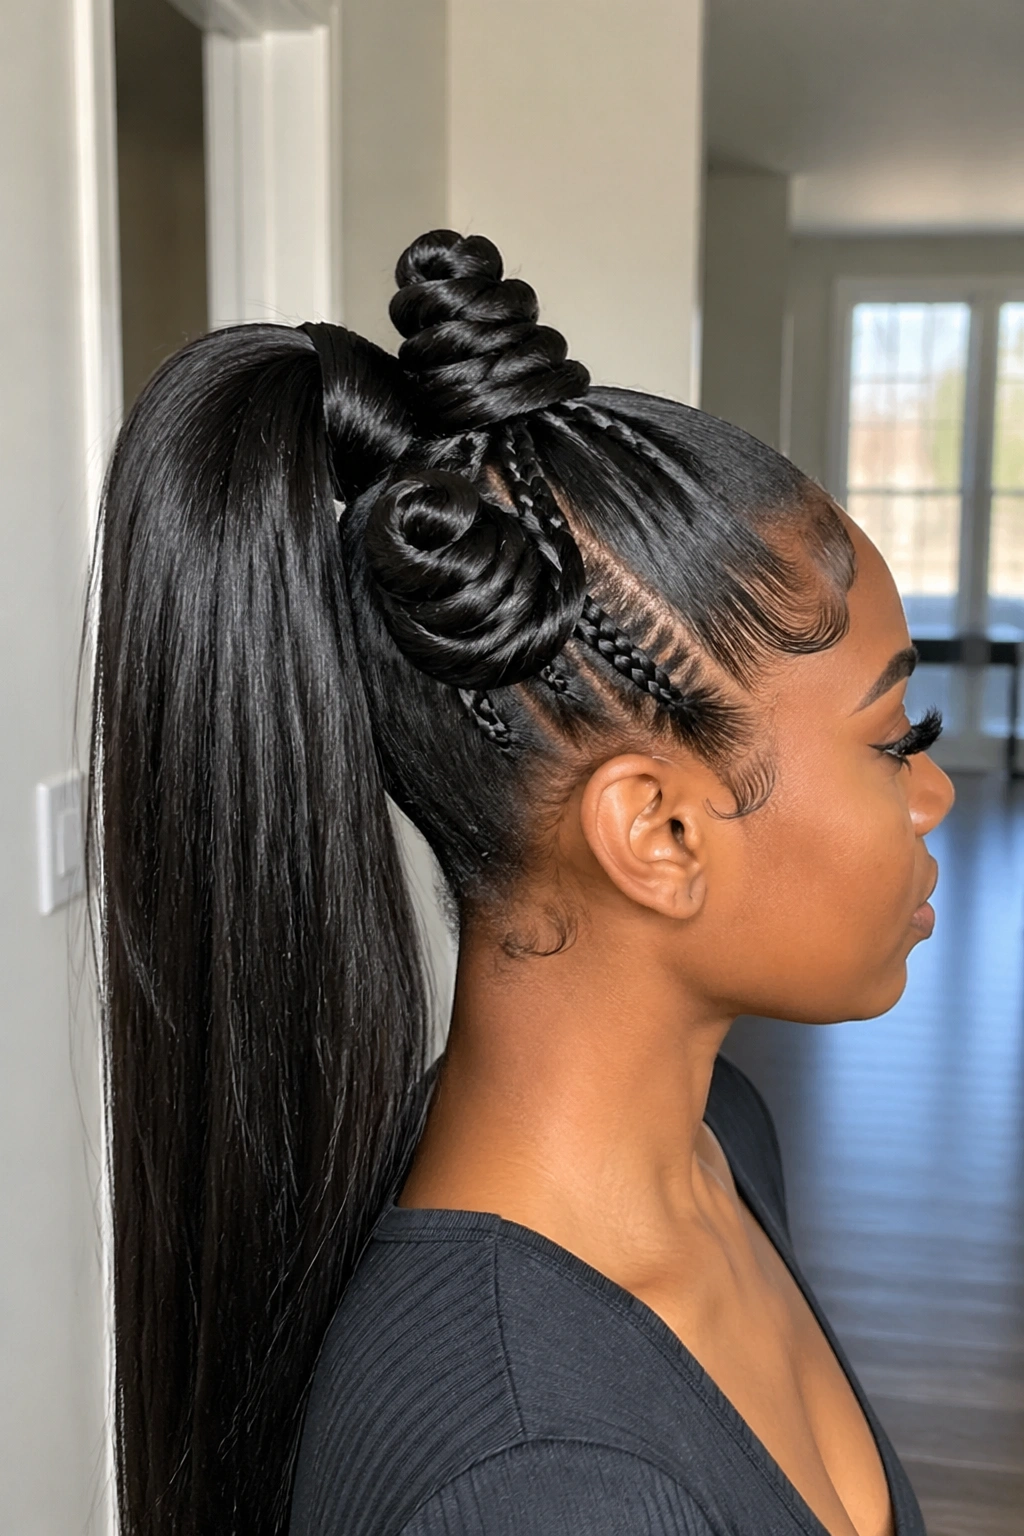
Unlike a plain long extension ponytail, this version gives the top of the style enough detail to support all that length. Without that detail, a 30-inch ponytail can start to feel like hair attached to a basic bun and not much more.
The spiral-wrapped knot is the point here. Instead of wrapping the hair into a flat round knot, you twist the section tightly and coil it so the ridges stay visible. That spiral texture reads well from the side and works especially well with a sleek extra-long ponytail.
Building the Shape
Use a firm braided anchor under each knot. Then twist the section until it starts to rope around itself. Pin as you go instead of wrapping the whole piece first and hoping it sits right. That usually ends in a lopsided knot.
- Keep the ponytail length between 22 and 30 inches so the style still feels wearable.
- Two spiral knots above a high ponytail give enough drama. More than three can feel heavy.
- Finish with a shine spray on the ponytail, not the knots. Too much slip on the knots can make the coils loosen.
This style looks especially sharp with a middle part and sharply laid sides.
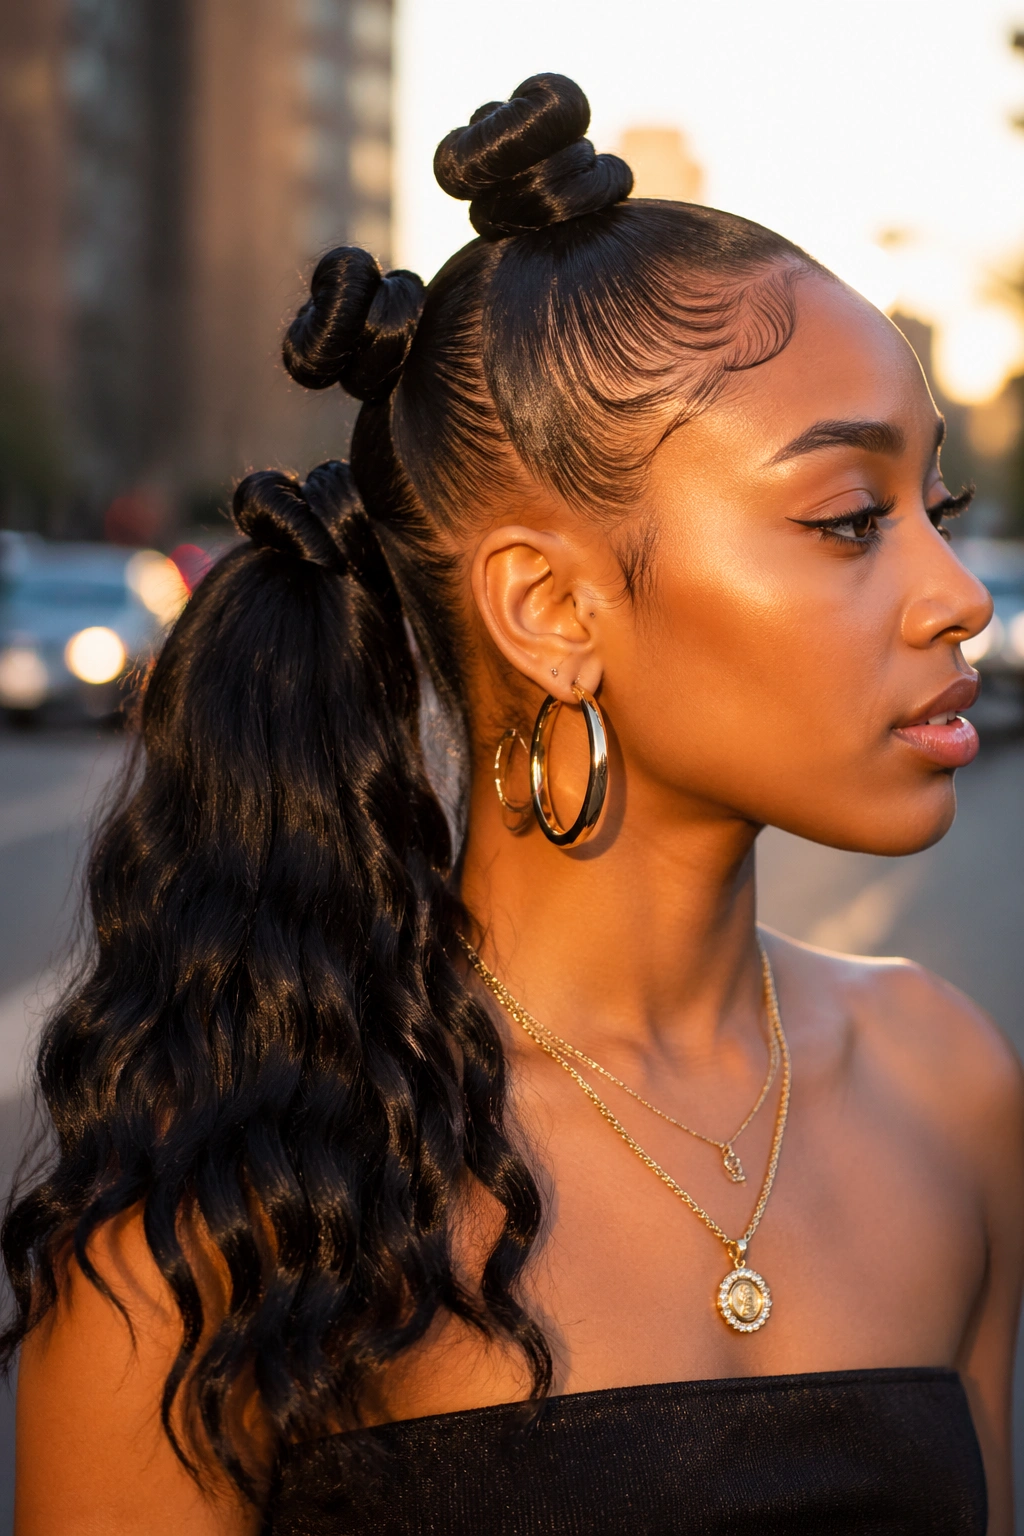
15. Half-Braided, Half-Curly Ponytail With Two Top Knots
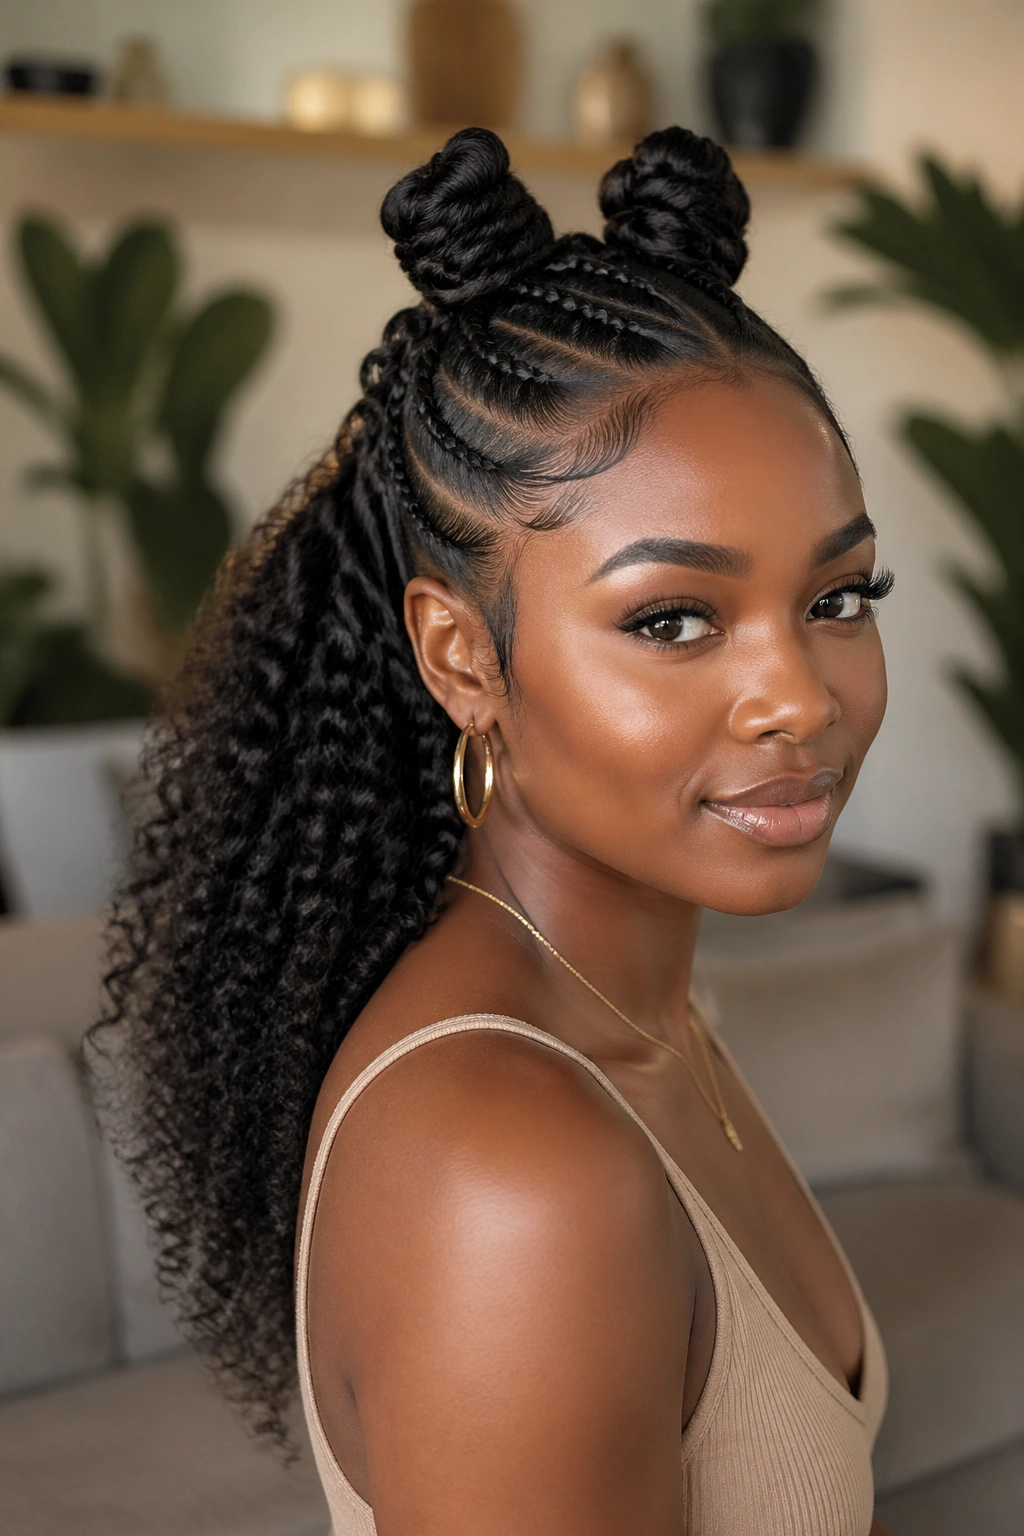
Some styles look good from the front and do nothing from the back. This is not one of them.
A half-braided, half-curly ponytail gives you texture contrast the whole way down. You might use a braided section at the top of the ponytail for structure, then let the lower half open into curls, or reverse it with curls near the base and a braid at the end. Add two Bantu knots on top and the style starts to feel layered instead of flat.
This is a smart choice if you like details but do not want intense scalp design. The two knots give the head shape. The mixed ponytail textures do the rest. Keep the knots even and place them either side by side above the ponytail base or slightly forward on the crown for more lift.
The best version uses curl sizes that match the scale of the knots. Tight little curls paired with large knots can look mismatched. Soft wand-style curls or defined spiral curls usually pair better with medium knots around 1½ inches wide.
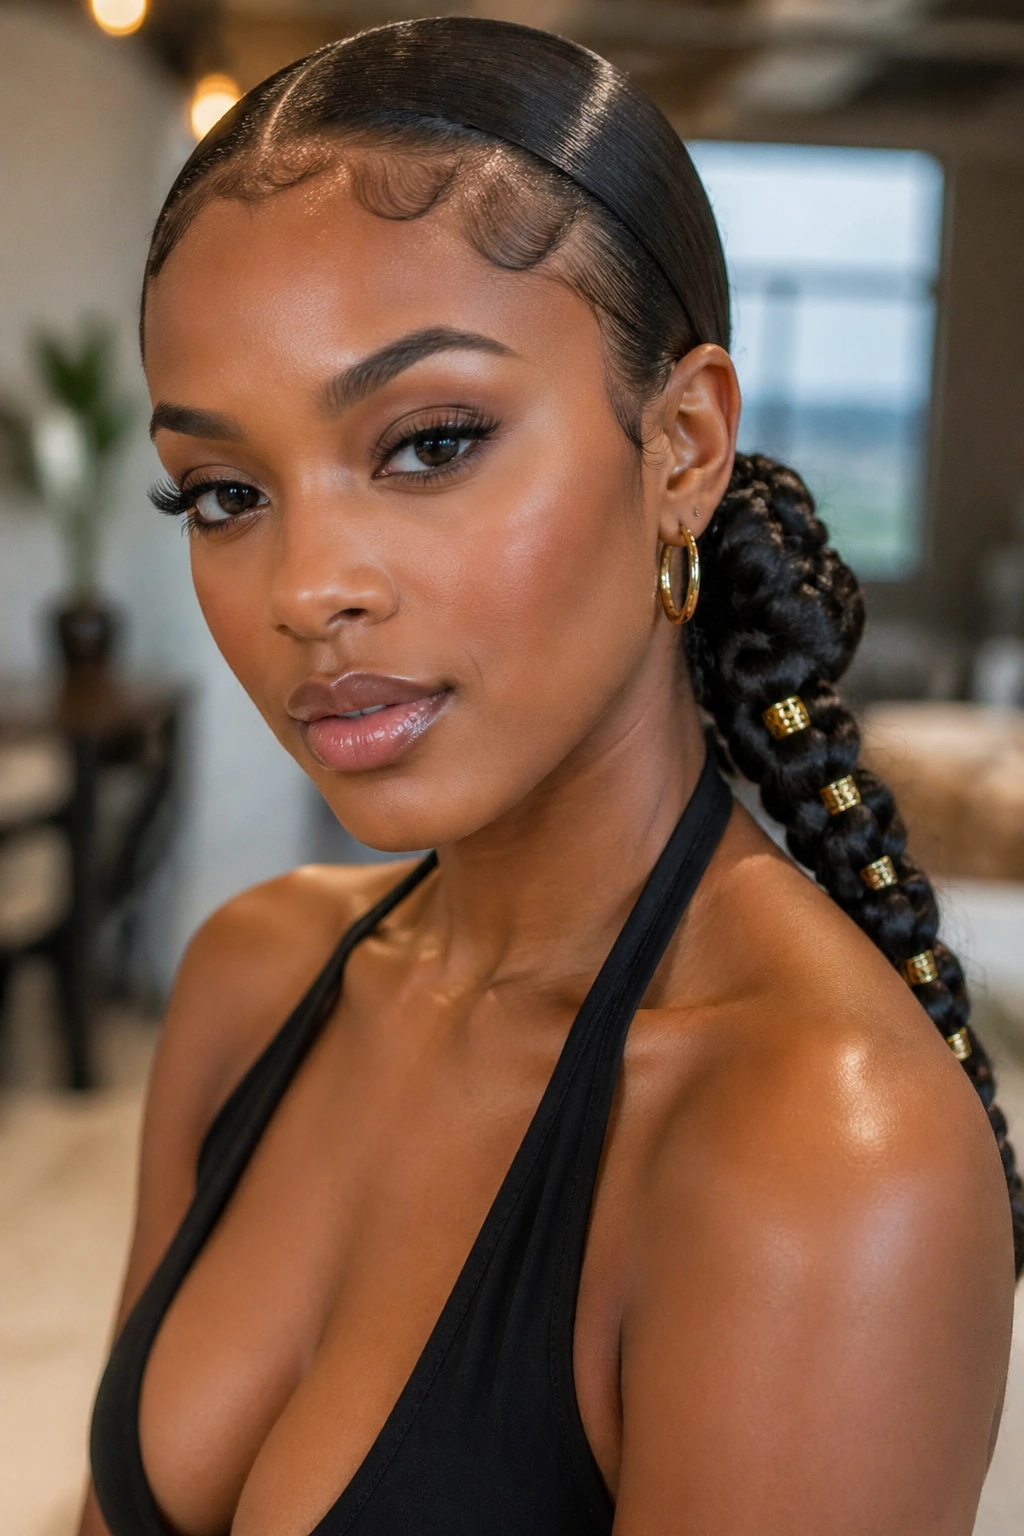
16. Sleek Low Ponytail With Nape Bantu Knots
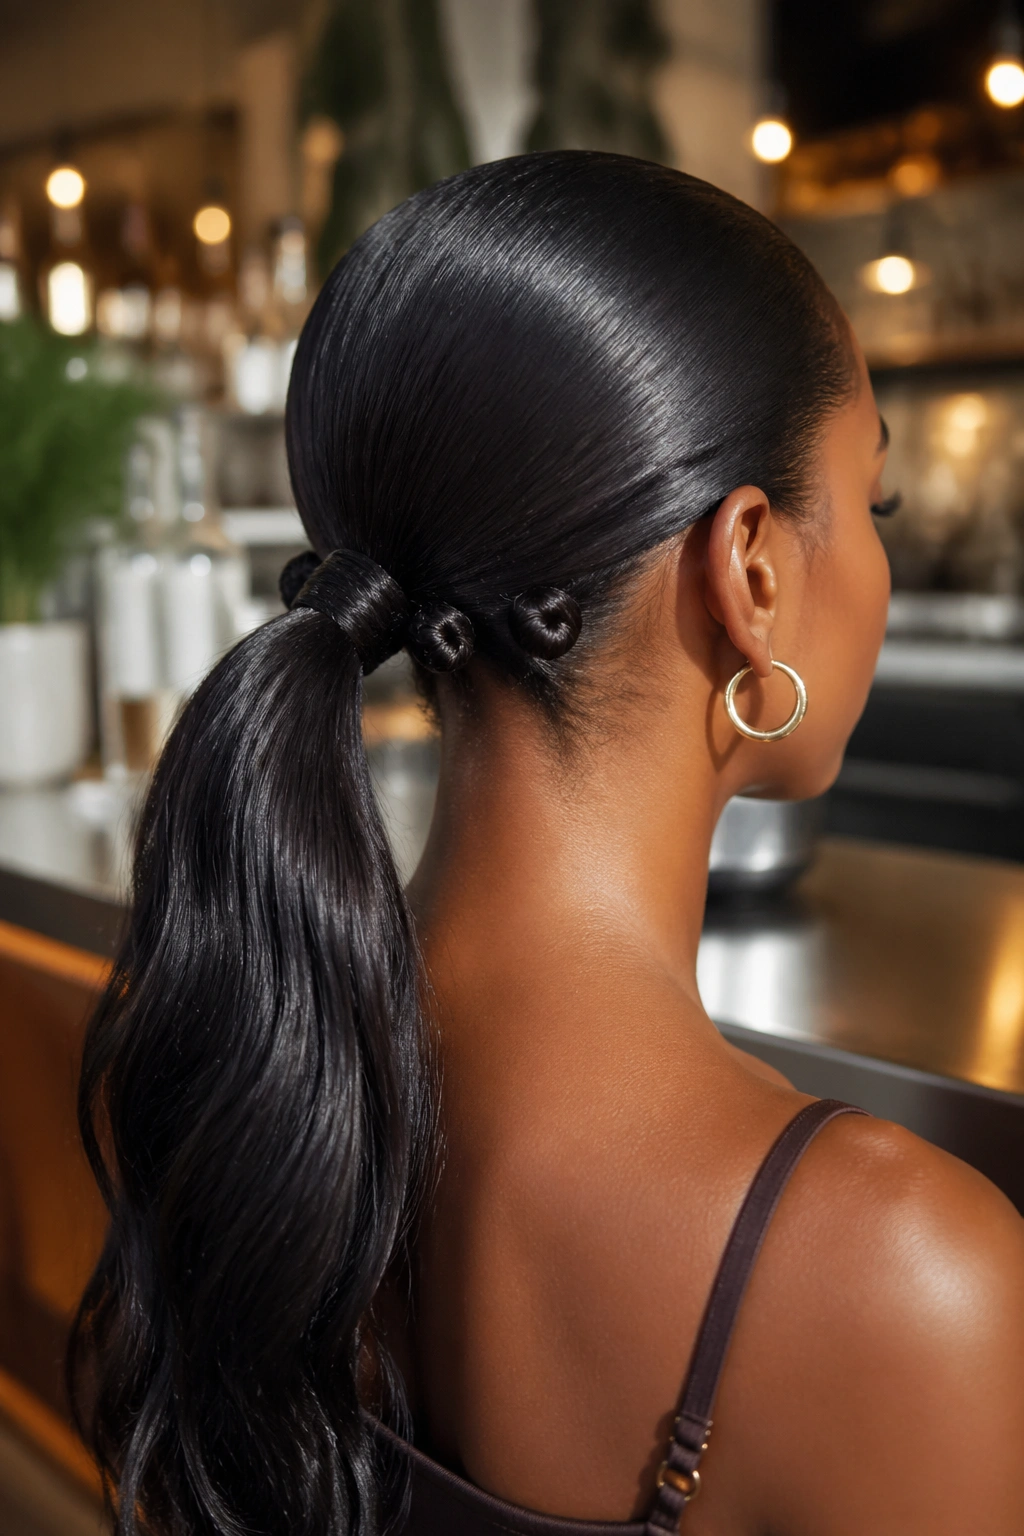
Most people place the knots near the crown and stop there. Moving them to the nape changes everything.
With this style, the ponytail sits low and sleek while two or three small Bantu knots sit just above or beside the nape base. That location creates a design detail you catch when the wearer turns, not a shape shouting from the front. It feels quieter, but not boring.
Why Nape Placement Works
The neck becomes part of the style. Open collars, halter tops, and drop earrings all get more breathing room because the design is concentrated lower down. If you like polished hair that still has a surprise angle, this one is hard to beat.
Keep the knots small. Large nape knots can press awkwardly against collars, headrests, and scarves. A size close to three-quarters of an inch to 1 inch is usually enough. Use strong pins and a light mist of holding spray because nape placement rubs more during the day. Friction is the enemy here, not the style itself.
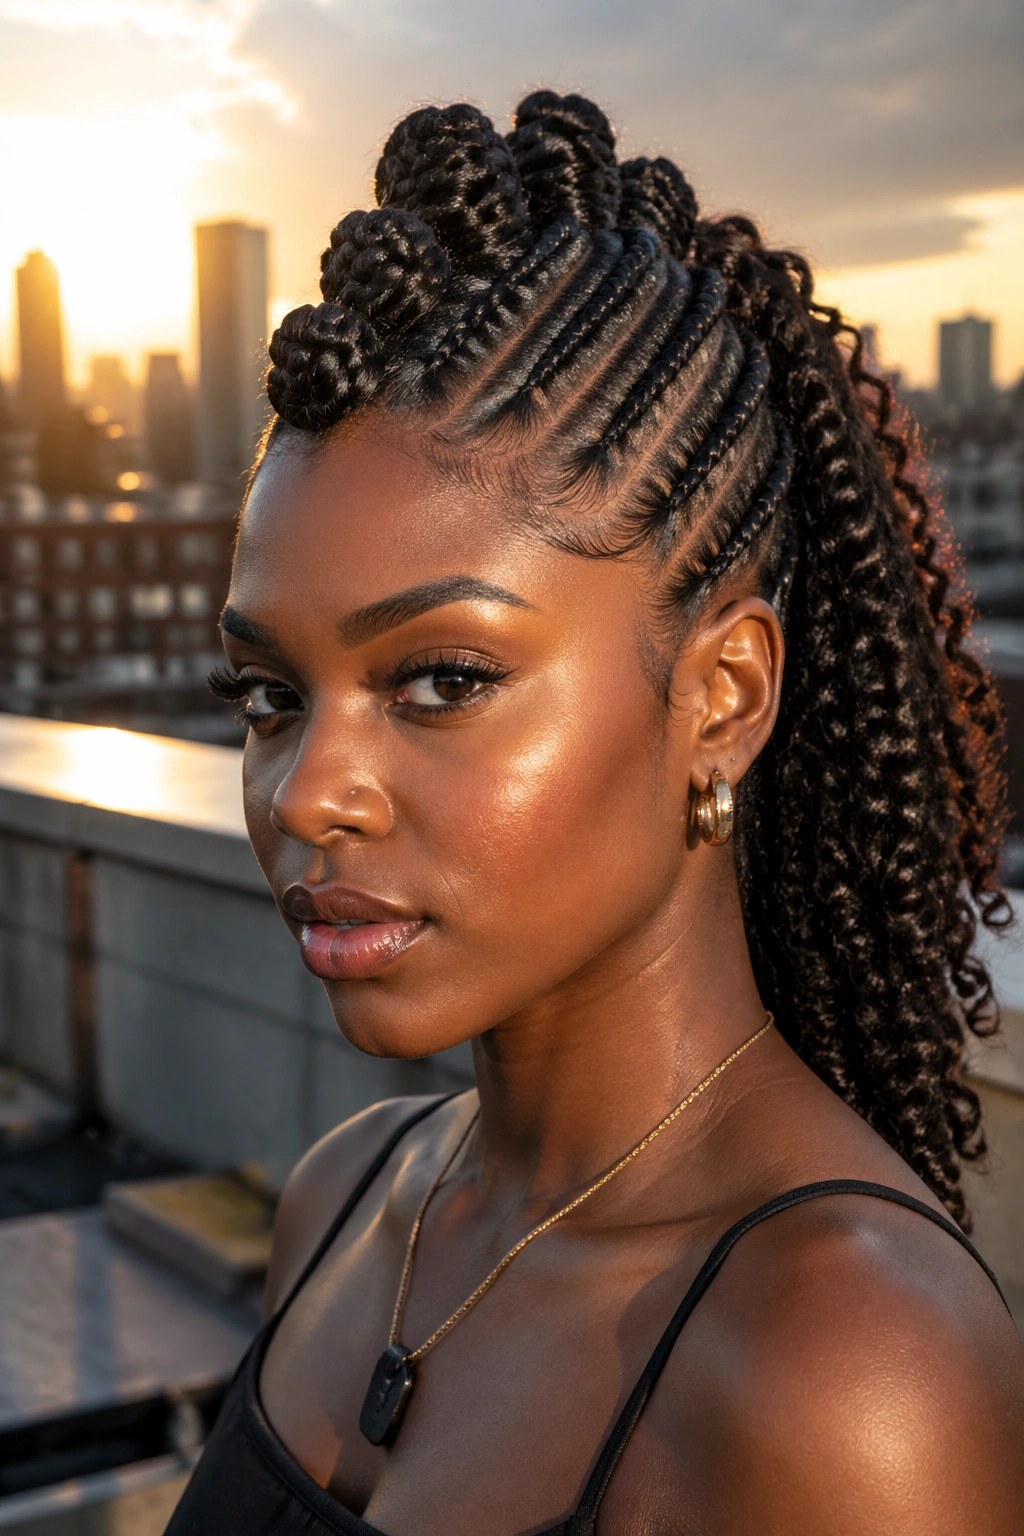
17. Cornrowed High Ponytail With Side Bantu Knots
Cornrows give direction. Side knots give punctuation.
That combination makes this style look sharp even before the ponytail enters the picture. Braid the hair upward into a high ponytail base, then leave one or two side panels free to twist into Bantu knots near the temples or above one ear. The contrast between flat rows and raised knots is what makes this work.
- Try five to seven straight-back or curved cornrows feeding into the crown.
- Place two medium knots on one side if you want an asymmetrical look.
- Use a braided ponytail or a curled extension tail depending on whether you want the finish to feel stricter or softer.
Do not let the side knots sit too low. If they start falling into the ear zone, they look like an afterthought. Keep them high enough to relate to the cornrow pattern, and the whole style snaps into place.
18. Heart-Part Ponytail With Sculpted Knots
If you enjoy detailed parting, this one earns the extra comb work.
A heart part framed by sculpted Bantu knots gives the ponytail a playful shape without turning it childish. The part itself can sit at the front hairline, off to one side, or on the upper crown depending on how visible you want it. Once that heart is clean, the surrounding sections become small knots that outline or balance it.
This look asks for patience and a steady hand. The heart needs symmetry, and that means checking it in the mirror before you commit with gel. I would not rush this style before work at 7 a.m. Save it for a day when you can section calmly and pin with care.
The ponytail in back should stay simple. A slick straight tail, a single braid, or a compact curly ponytail all work. The parting is already doing a lot. If you stack too many details behind it, the design loses clarity.
19. Rope-Twist Ponytail With Bantu Knots Along the Center
Braids are not the only option for a textured ponytail. A rope-twist ponytail brings a tighter, more twisted finish that pairs well with center-placed knots.
Use two-strand rope twists for the ponytail itself, either one thick twist or several medium twists gathered together. Then line two to four Bantu knots along the center path from the forehead toward the ponytail base. The repeating spiral of the twists echoes the wrapped shape of the knots, which makes the style feel connected without needing matching sizes.
Who This Style Suits
This one works well on people who like texture but do not want the visual heaviness of a thick braid. Rope twists tend to look narrower and more defined, especially when the hair is stretched and lightly coated with twisting cream.
- Use medium hold cream, not heavy grease, or the twists can separate.
- Keep center knots spaced about 1½ inches apart so they do not merge into one bulky strip.
- If the ponytail includes six or more twists, gather them tightly at the base so the center knots still stand out.
This style holds up well for a few days if you rewrap the roots nightly.
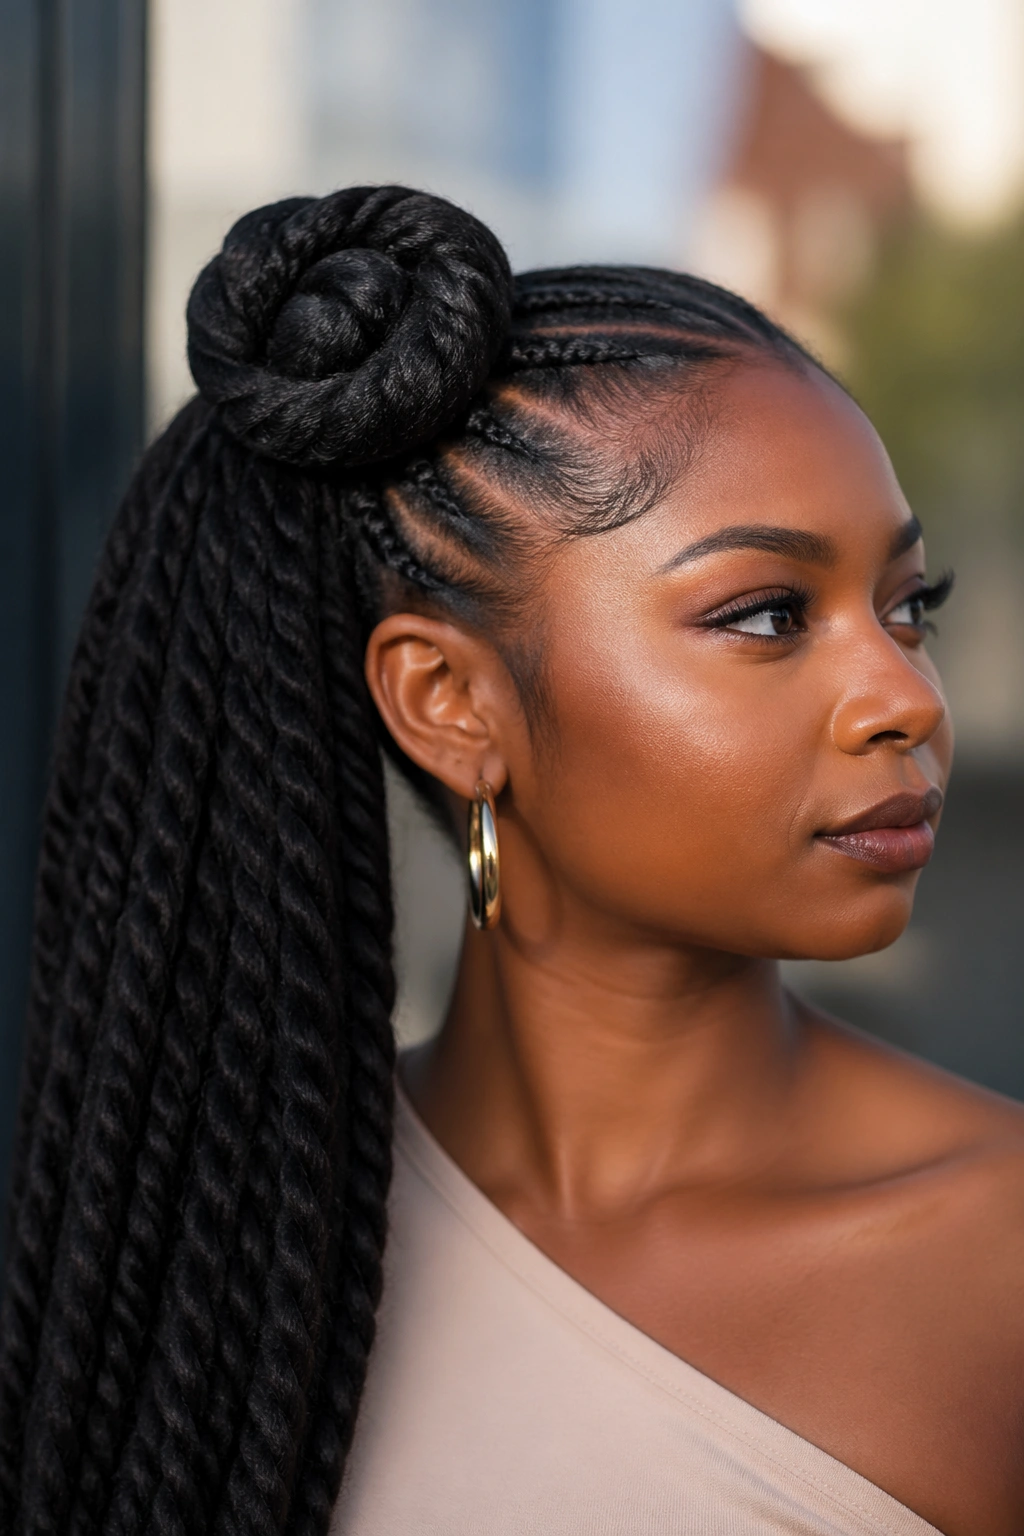
20. Loc Ponytail With an Accent Bantu Knot Cluster
Yes, locs can do this too.
A loc ponytail with an accent knot cluster uses a small section of locs—or faux locs—wrapped into Bantu-knot shapes while the rest gathers into a ponytail or loc tail. The key is scale. Locs already have texture and thickness, so the knots should be used as accents, not piled everywhere.
Two or three knots near the front or around the ponytail base usually look strongest. More than that can feel bulky fast, especially with mature locs. If your locs are thick, choose the slimmest ones for the knot sections or combine only two to three locs per knot so the shapes do not stick out too far.
This style has a sculptural quality that smooth hair cannot fake. You see each wrapped line of the loc. You feel the weight shift slightly when you turn your head. Use long U-pins instead of small bobby pins, and do not yank the roots trying to force the knot tight. Loc styles need secure placement, not hard pulling.
21. Curled Drawstring Ponytail With One Front Statement Knot
A drawstring ponytail can save time, and there is no shame in that. When the install is clean, it looks polished and gets you to the finish line faster than building a full extension ponytail from scratch.
Add one front statement knot near the hairline or just behind a side part, and the quick install stops looking basic. The contrast between the smooth base, the sculpted knot, and the curled drawstring tail gives the style shape with minimal effort.
- Place the knot on the fuller side of the part so it reads as part of the design.
- Use a drawstring ponytail with curls that start 2 to 3 inches below the base. Too much bulk at the top competes with the knot.
- Wrap a small strip of hair around the drawstring base before pinning the knot into place.
This is one of the smartest styles for events when time is tight but you still want the hair to look considered.
22. Jumbo Side Ponytail With an Oversized Bantu Knot
This one is not subtle, and that is exactly why it works.
A jumbo side ponytail paired with one oversized Bantu knot gives you a bold diagonal silhouette. Put the ponytail high on one side and place the knot either directly above it or slightly forward toward the temple. The shape pulls the eye across the face and up, which can be striking with one-shoulder tops or strong cheekbone makeup.
The oversized knot needs enough stuffing to hold form. If your own hair is not dense enough, use a small amount of extension hair wrapped around a braided core. Aim for a finished knot around 2½ to 3 inches wide. Any larger and it can start to tip outward.
Skip extra beads, cuffs, or complicated parting here. They are not needed. The weight, the angle, and the scale are already doing the work. Tie the whole style down with a scarf after styling and check the profile in a side mirror before you call it done. This style lives or dies in profile.
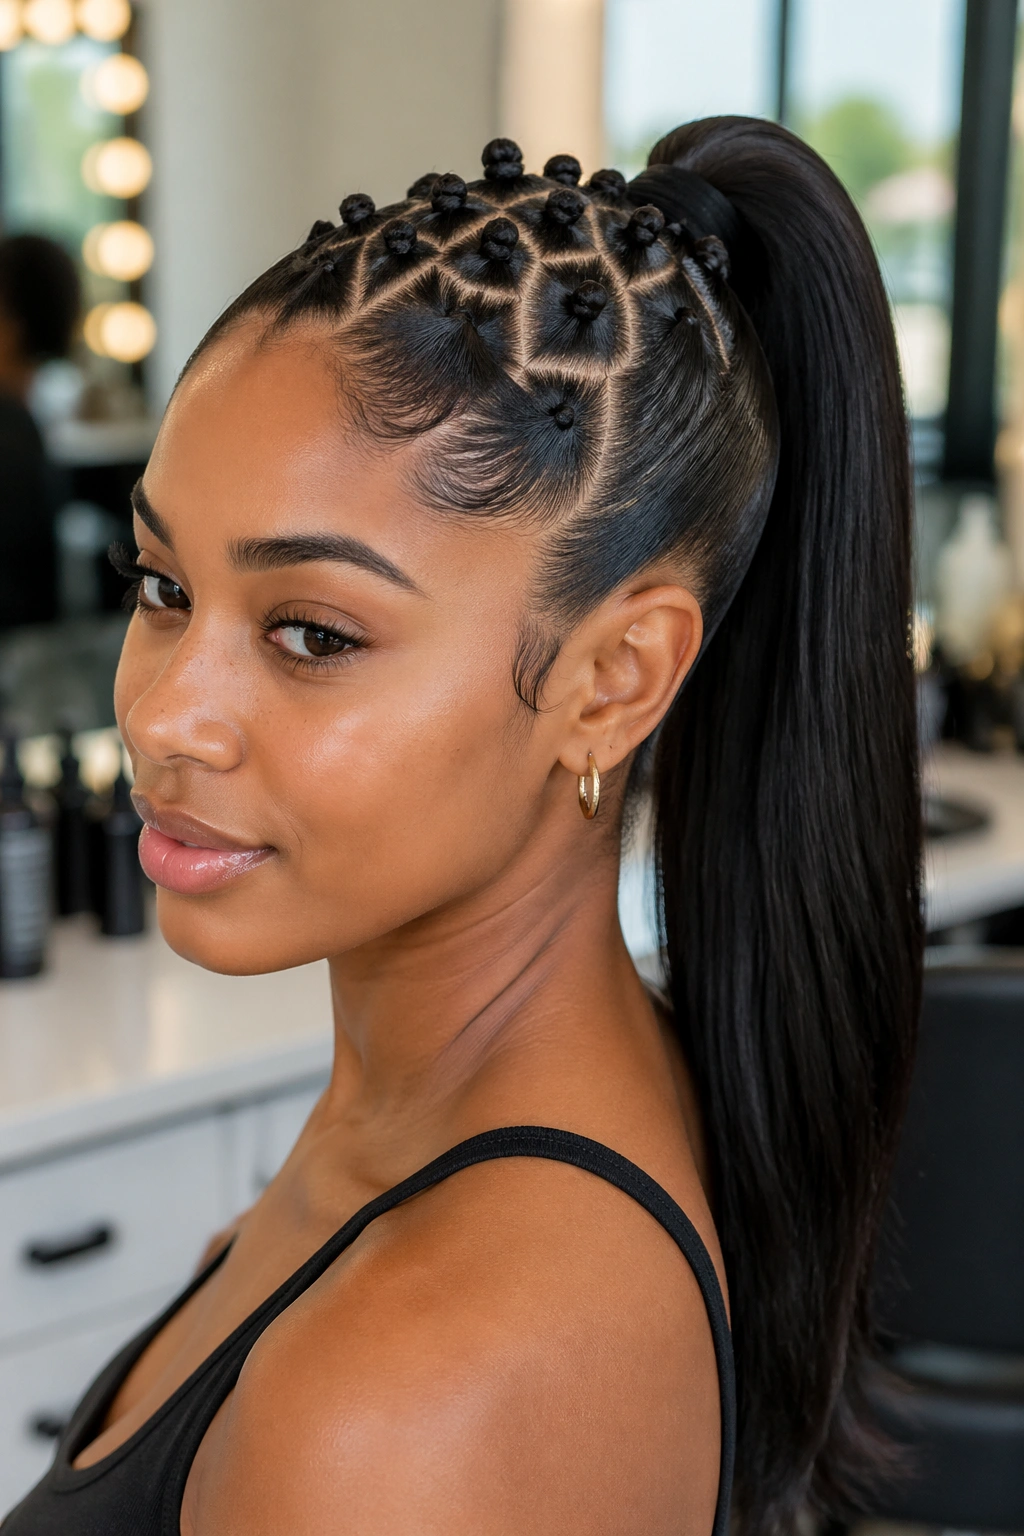
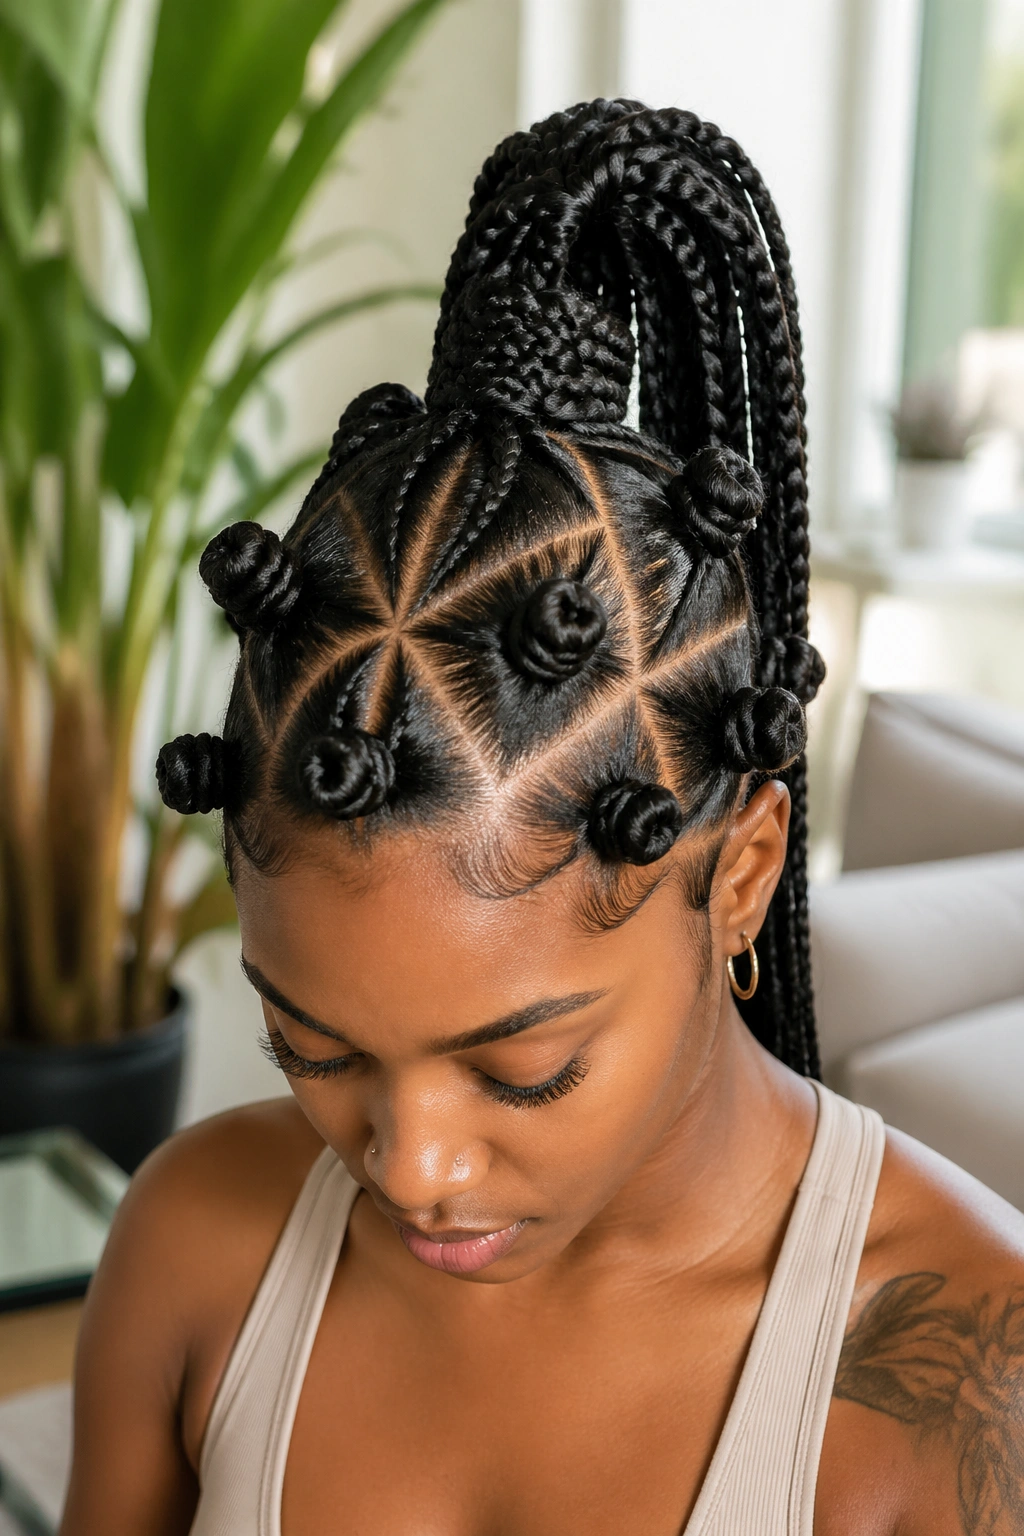
23. Ponytail With a Mini Knot Halo Around the Crown
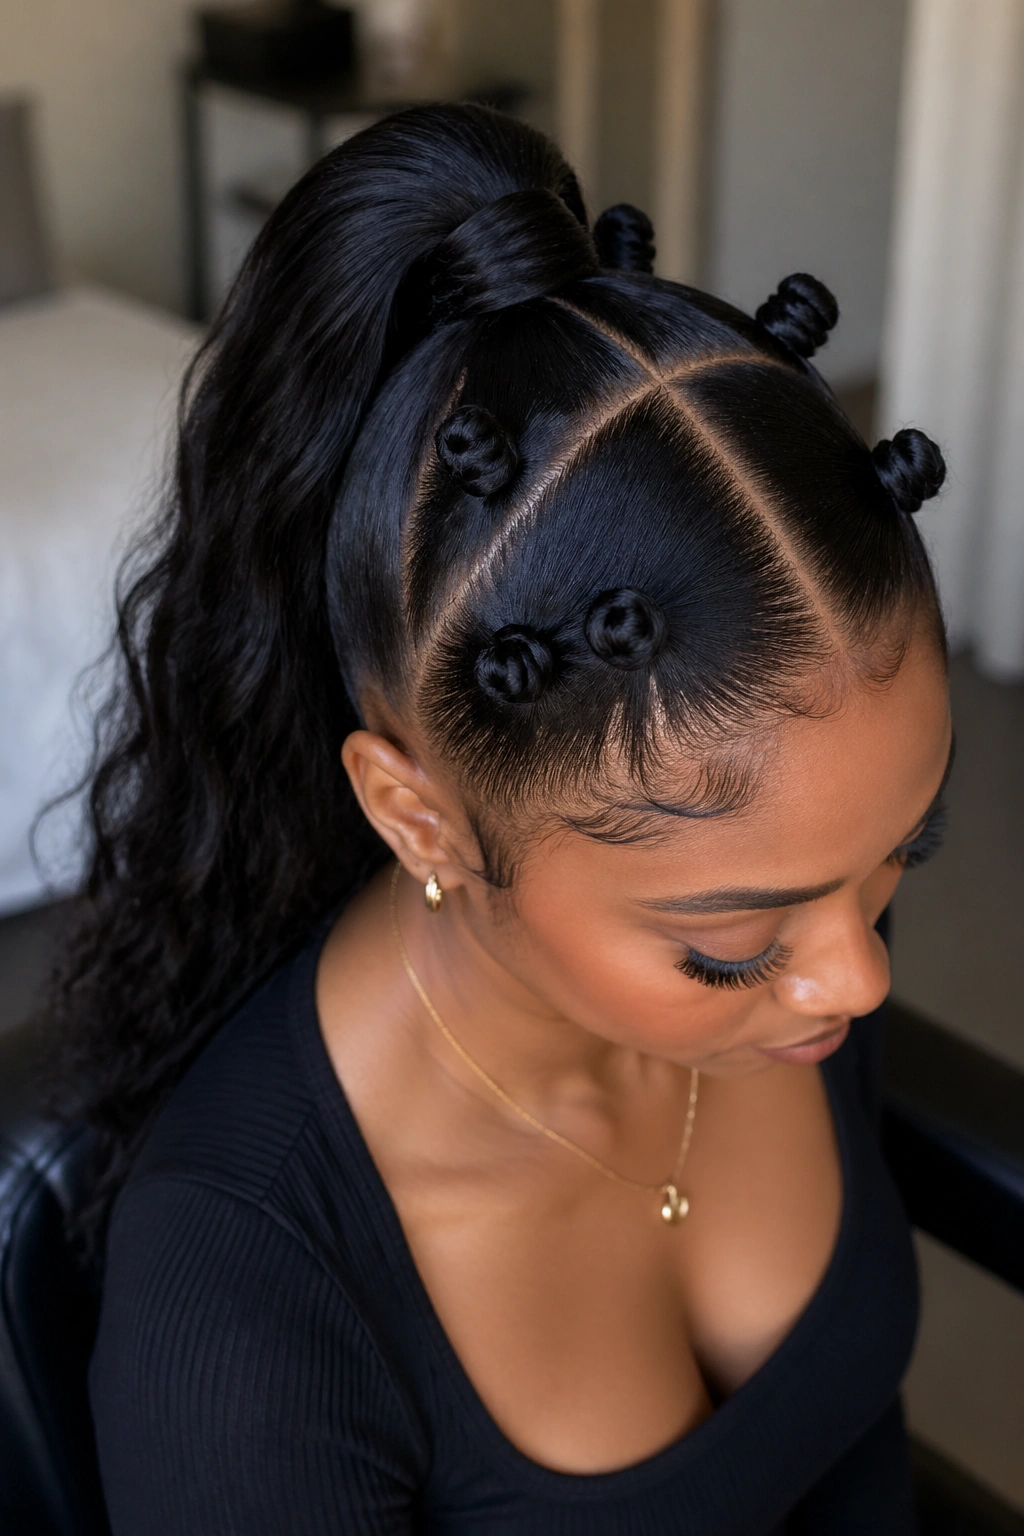
A ring of mini knots around the crown can make a simple ponytail look almost architectural. The trick is spacing.
Instead of clustering the knots in front, place six to eight small knots in a loose halo around the ponytail base. Think of them as a circle framing the anchor point, not a packed mound. You want separation between each knot so the ring shape stays readable.
How to Keep the Halo Clean
Start by making the ponytail first. Then divide the surrounding crown hair into evenly sized pie-slice sections. Twist each section tightly, wrap, and pin toward the center without covering the base completely. If the knots overlap too much, the halo effect disappears.
- Mini means about three-quarters of an inch across.
- This style looks strongest with a sleek straight ponytail or one narrow braided tail.
- Use a toothbrush or edge brush to clean product buildup around the base before laying the final baby hairs. The close-up area needs to stay neat.
The result looks more detailed than it is. That is always a good trade.
24. Bridal Bantu Knot Ponytail With Soft Curls
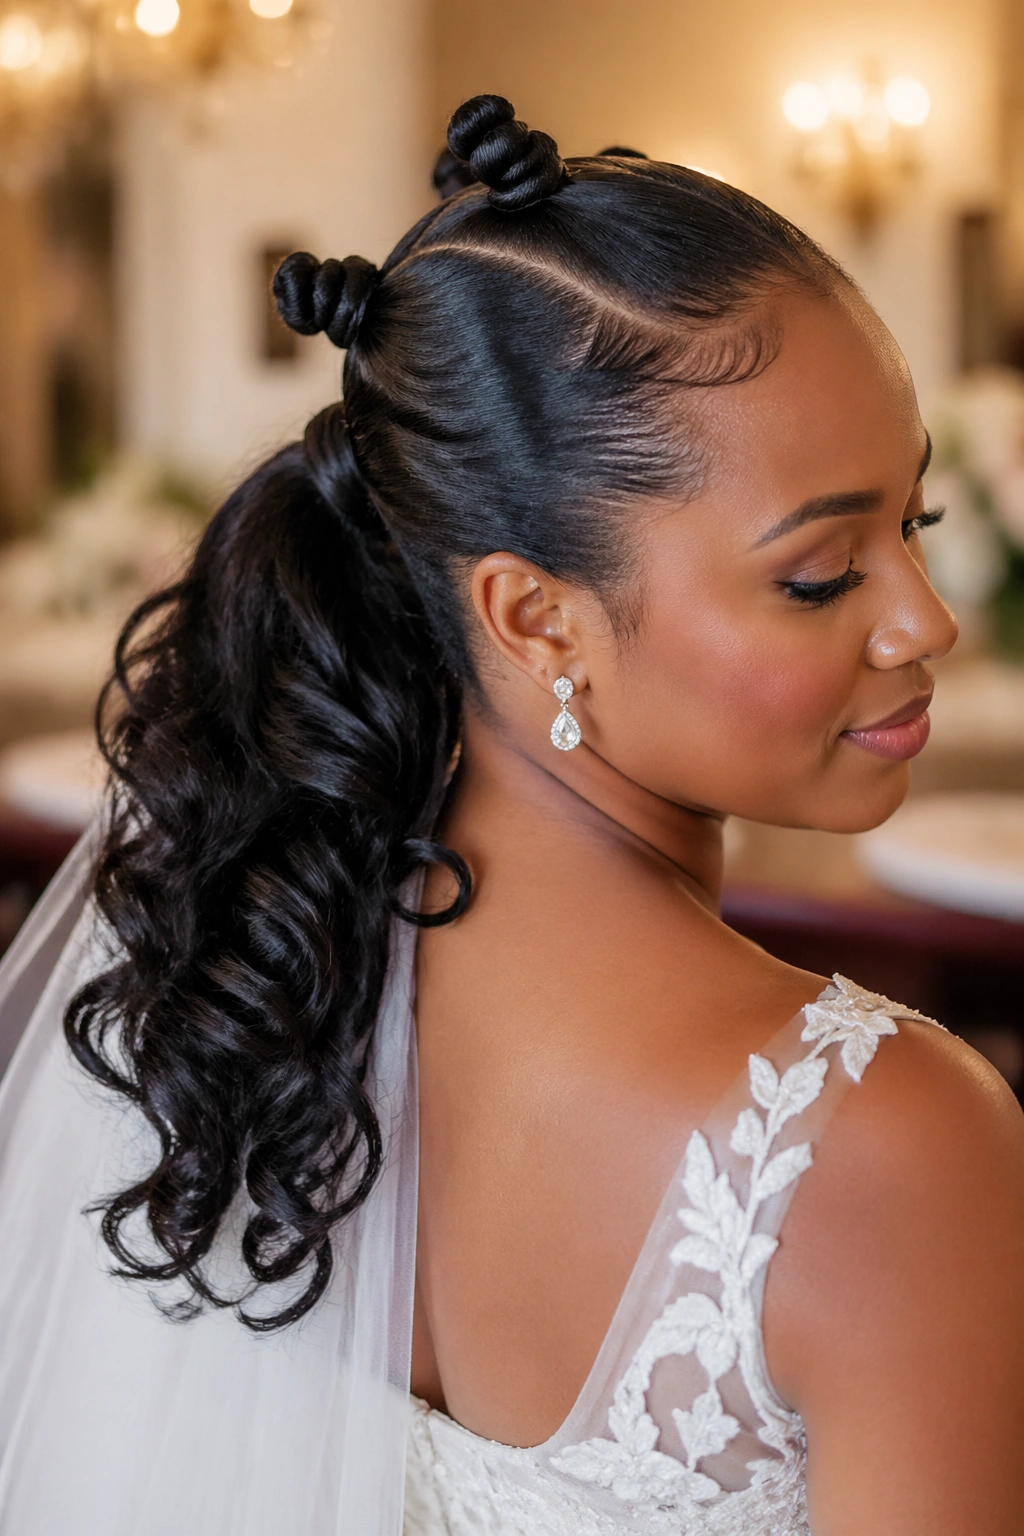
Wedding hair can go wrong when it tries too hard to be timeless and ends up looking bland. A bridal Bantu knot ponytail avoids that by giving the hair shape, heritage, and softness all at once.
The cleanest version uses a smooth mid-height or low ponytail, two or three polished knots near the crown or side, and soft brushed curls falling from the ponytail. The knots should be precise, not casual. Every pin needs to disappear. Every part line needs to look deliberate. Bridal styling is less forgiving because photos catch everything.
This is also the style where product texture matters most. Heavy grease kills bounce. Too much gel can flake under flash. A lightweight setting foam, edge control at the perimeter, and a soft shine mist on the curls usually gets the finish right. If the curls are heat styled, pin them to cool before brushing them open so they last through the ceremony and the dancing after.
And one opinion, because it needs saying: leave the knot count low. One strong knot or two balanced ones usually beat a whole head of tiny spirals on a wedding day.
25. Beaded Low Ponytail With Mixed-Size Bantu Knots

Mixed-size knots can look messy when there is no plan. Add structure—beads, low placement, and a controlled part pattern—and the style suddenly makes sense.
This version pairs a low ponytail with two medium knots and two smaller knots, usually arranged from front to back or side to side so the sizes taper on purpose. The beadwork goes on the ponytail ends, the face-framing braids, or one accent braid near the nape. Keep the beads grouped rather than scattered all over.
- Use medium knots around 1½ inches wide and small knots close to 1 inch.
- Match bead color to one hardware tone—gold, silver, wood, or clear acrylic—so the style does not feel busy.
- A low braided ponytail works better than a loose curly one if you want the knot sizes to stay the main feature.
This is a strong choice when you want detail but not height. It also wears well under a headwrap tied above the nape, which makes it handy if you like switching your look across the week.
Final Thoughts
The Bantu knot ponytail styles that land best all share the same bones: clean parting, a secure base, knot sizes that match the amount of hair, and tension that does not punish your scalp. Get those four things right and even a simple version looks sharp.
If you are picking one to try first, I would start with either the high ponytail with one jumbo knot or the low ponytail with two front knots. Both give a strong result without asking you to master advanced parting on the first attempt. After that, move into triangle parts, halos, mohawk panels, or mixed textures.
Respect the roots of the style, take your time with the shape, and check the profile before you finish. That extra minute in the mirror is often the difference between hair that looks fine and hair that looks memorable.