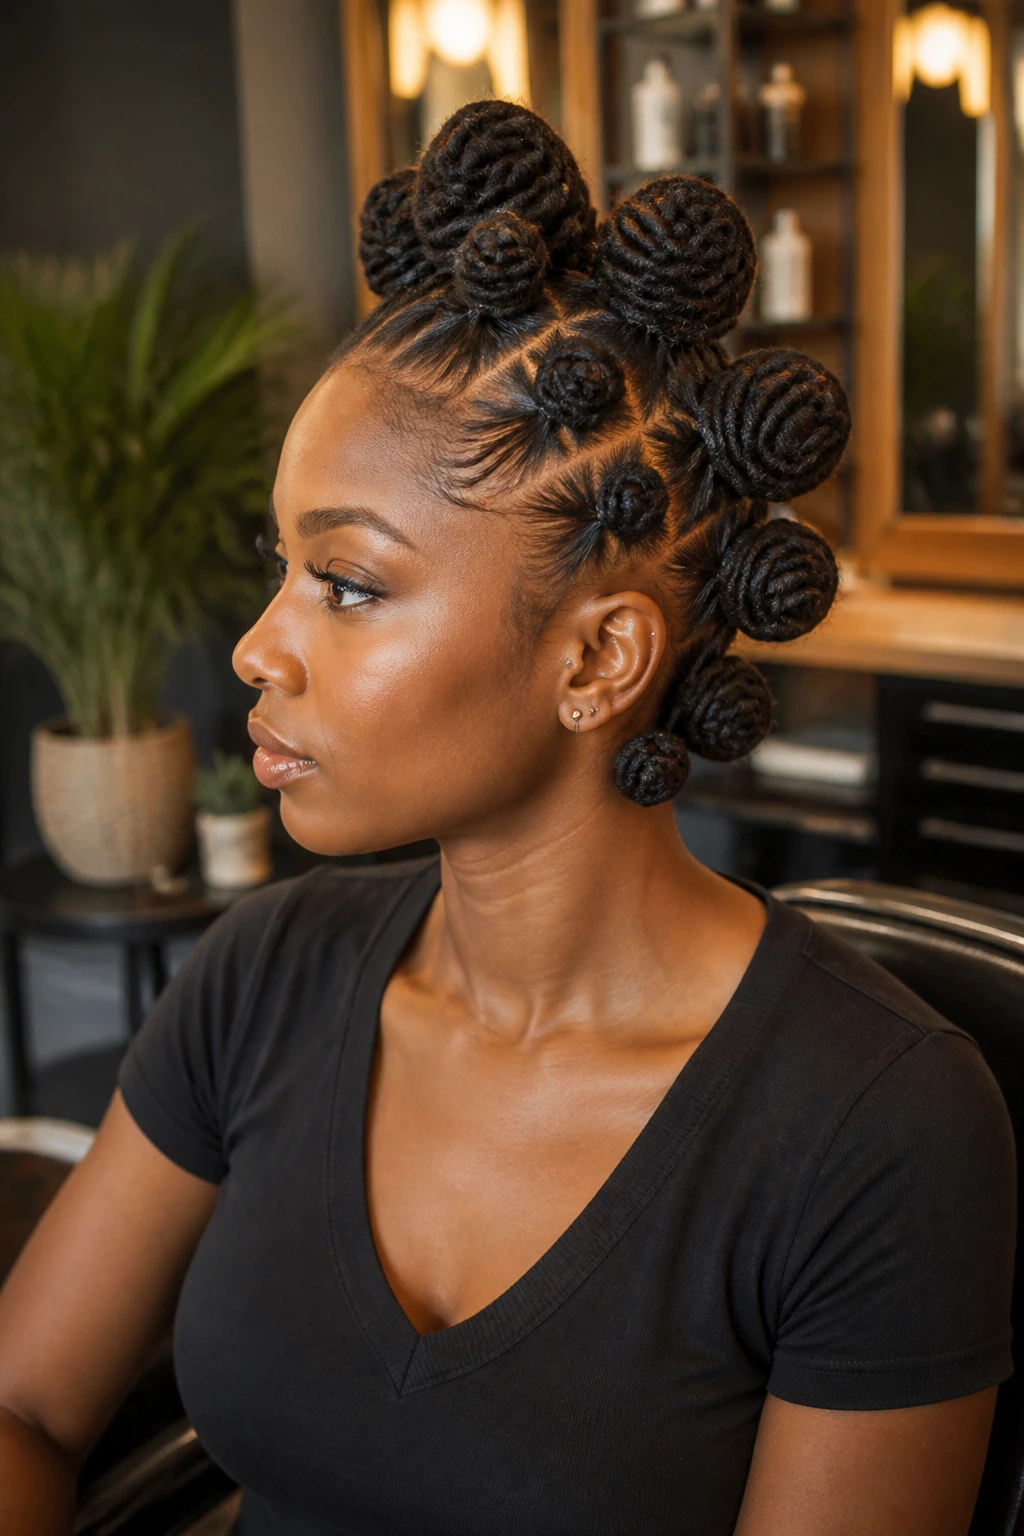
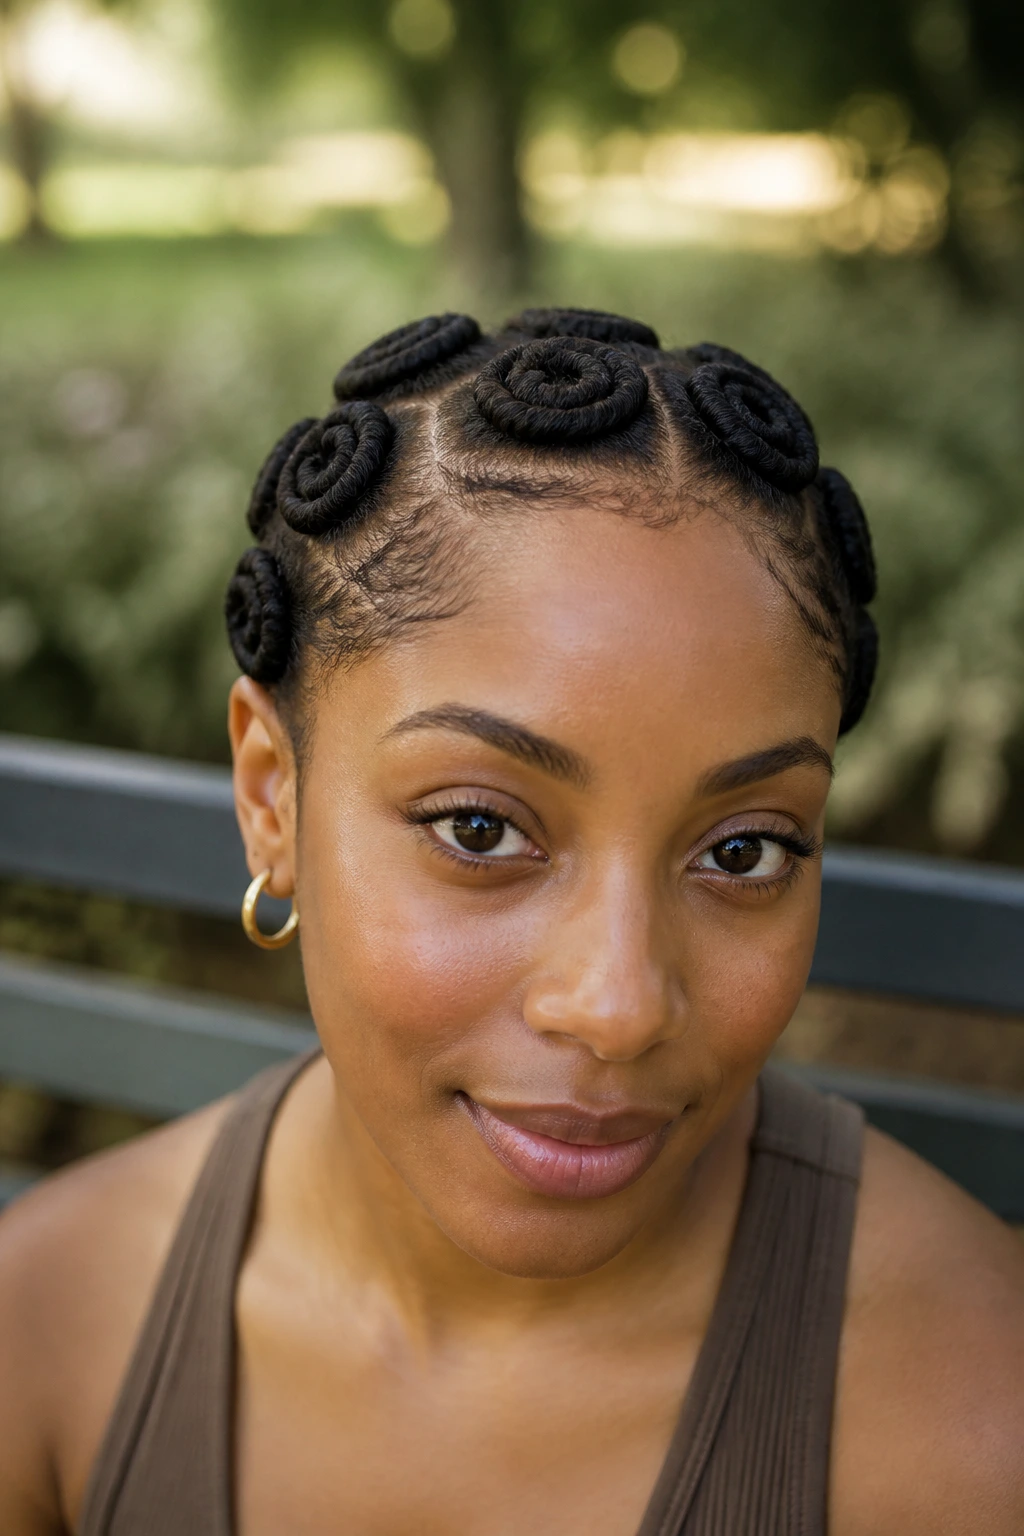
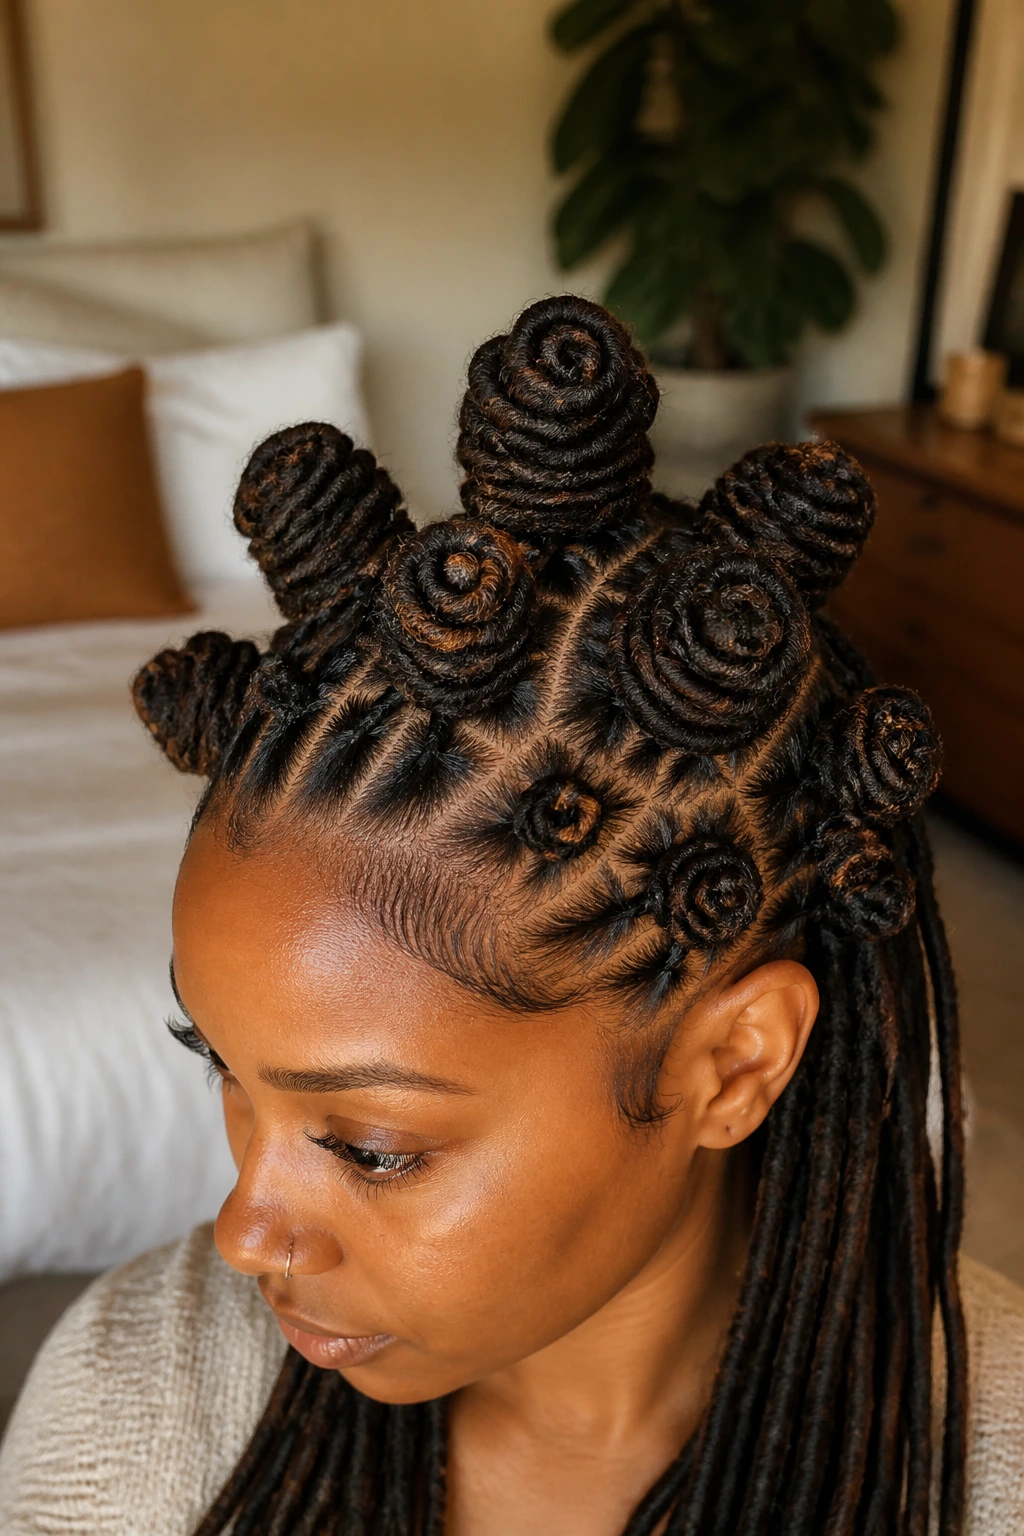
Long locs can turn a neat Bantu knot into a heavy little weight if the sectioning is off by even an inch. That’s why the best Bantu knot styles for long locs aren’t about piling hair into circles and hoping for the best. They’re about balance, scalp comfort, and making each knot look intentional from the front, side, and back.
There’s also a cultural piece here that matters. Bantu knots come from African hairstyling traditions, and on locs they feel less like a novelty look and more like sculptural hair design—coiled, stacked, and placed with purpose. When the style is done well, it protects your ends, keeps your length controlled, and still gives you room to play with beads, cuffs, color, and parting patterns.
Long locs change the math. A knot made from 6 thick locs can pull harder than one made from 12 slimmer locs, and waist-length locs usually need a sturdier anchor than shoulder-length ones. Heavy gel can make the roots look sleek at first, then let the knot slide once the weight settles. A light mousse, a touch of hold cream, and pins pushed through the base tend to behave better.
Placement changes everything.
The Prep Work That Keeps Long Loc Bantu Knots From Sliding
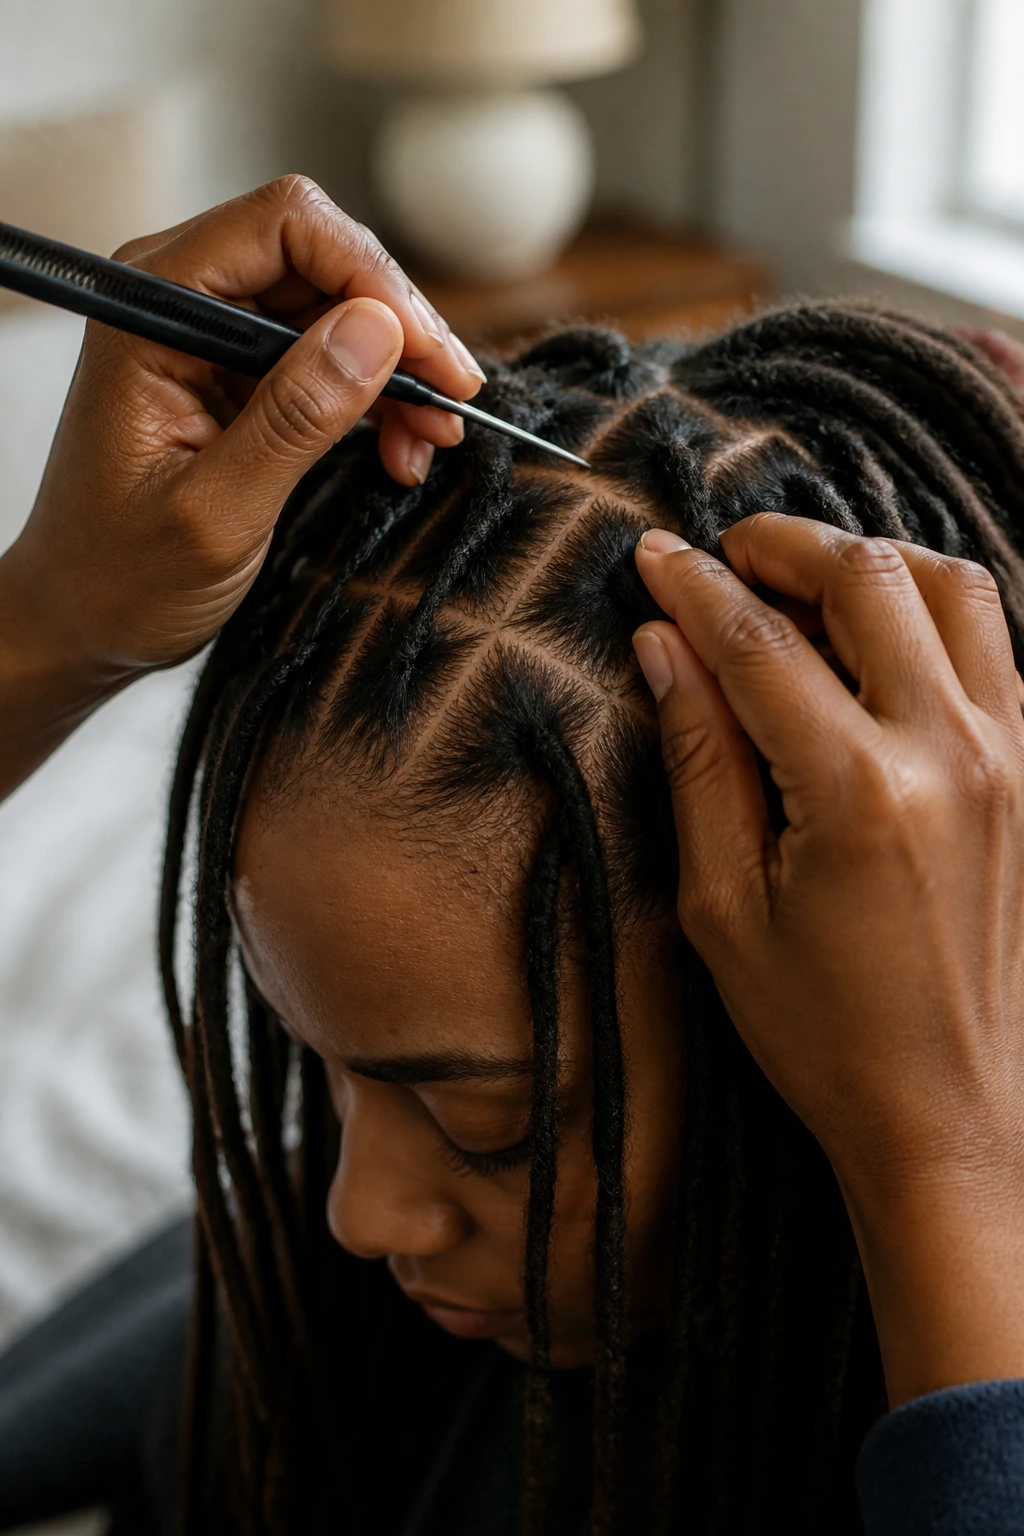
Before you pick a style, start with dry or lightly stretched locs. Damp locs can work, though long ones often shrink unevenly and make one knot sit higher than the next. If your locs are dense, blow them on cool or low heat for 3 to 5 minutes after misting so the roots are not slick when you begin.
Section size matters more than people think. A medium knot on traditional locs usually holds well with 4 to 8 locs per section. On microlocs, you might need 10 to 20 per knot to get the same fullness. Small sections look sharp, though they can feel tight if you force thick, heavy locs into them.
An elastic at the base is not cheating. On long locs, it’s smart. Use a snag-free band that matches your hair color, wrap the loc bundle once or twice, then coil the length around it and pin through the knot’s center—not only along the outside.
A few habits make every style last longer:
- Part on clean roots so buildup does not make the sections fuzzy.
- Use a rat-tail comb and clips before you start wrapping. Freehand sectioning shows fast on the scalp.
- Pin inward and downward so the knot grips the base instead of sitting on top like a loose bun.
- Sleep in a satin bonnet or wrap and press the knots flat with your palms before bed.
- Skip fresh, painful retwists if your scalp already feels tender. Long locs add enough tension on their own.
Get that foundation right, and the style choices open up fast.
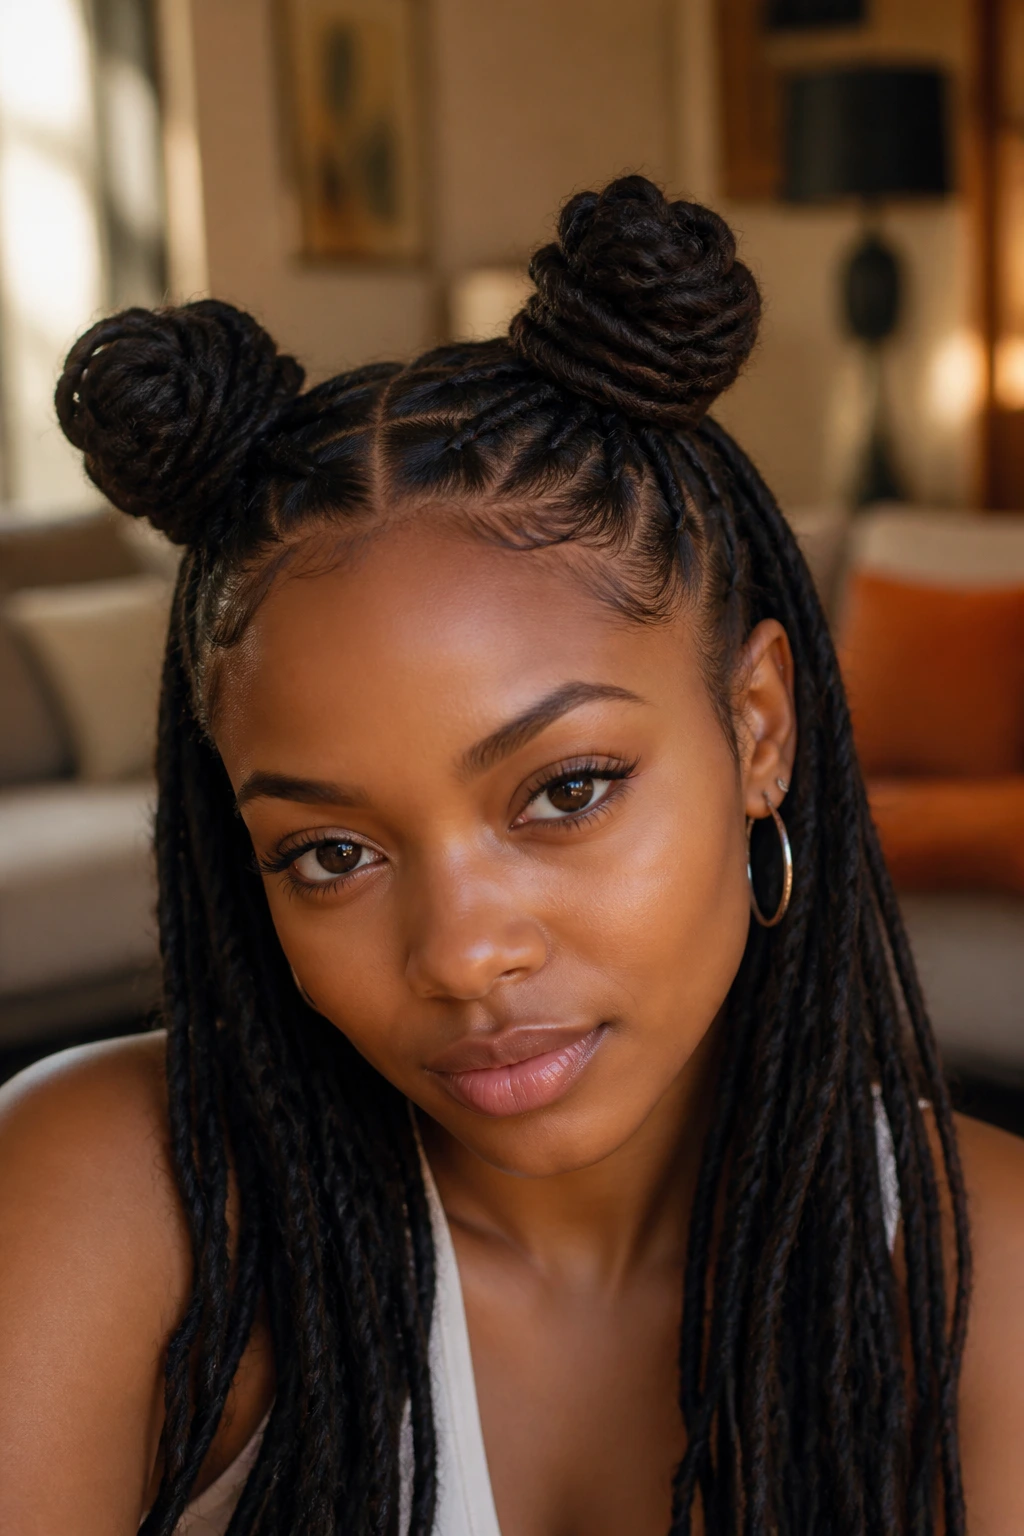
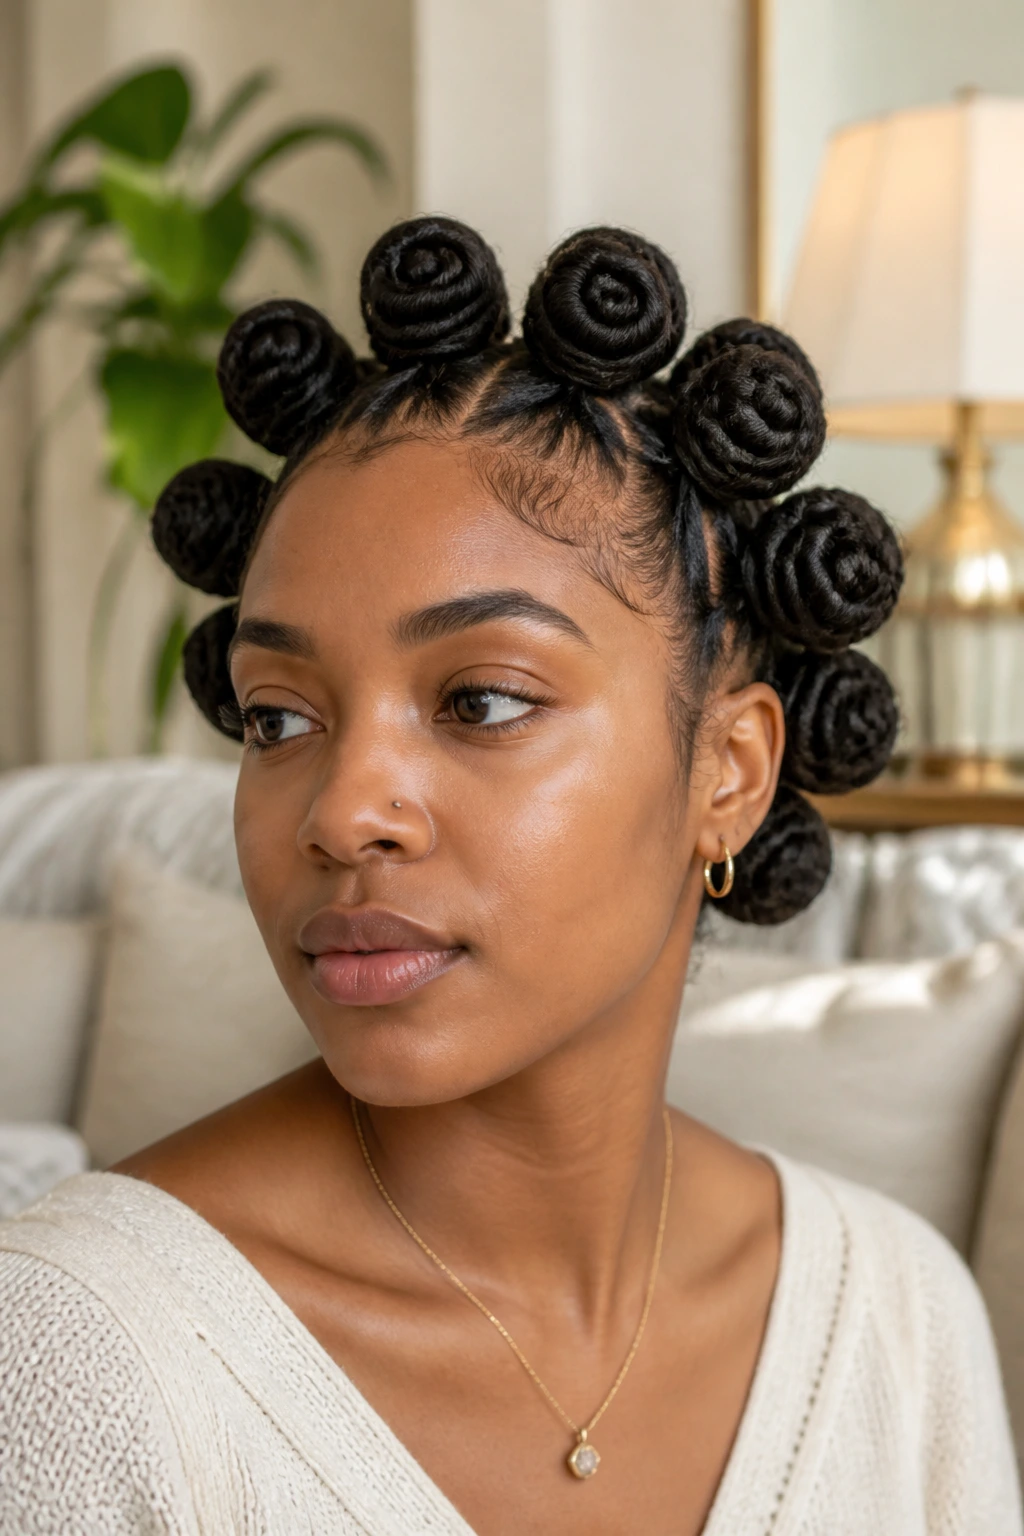
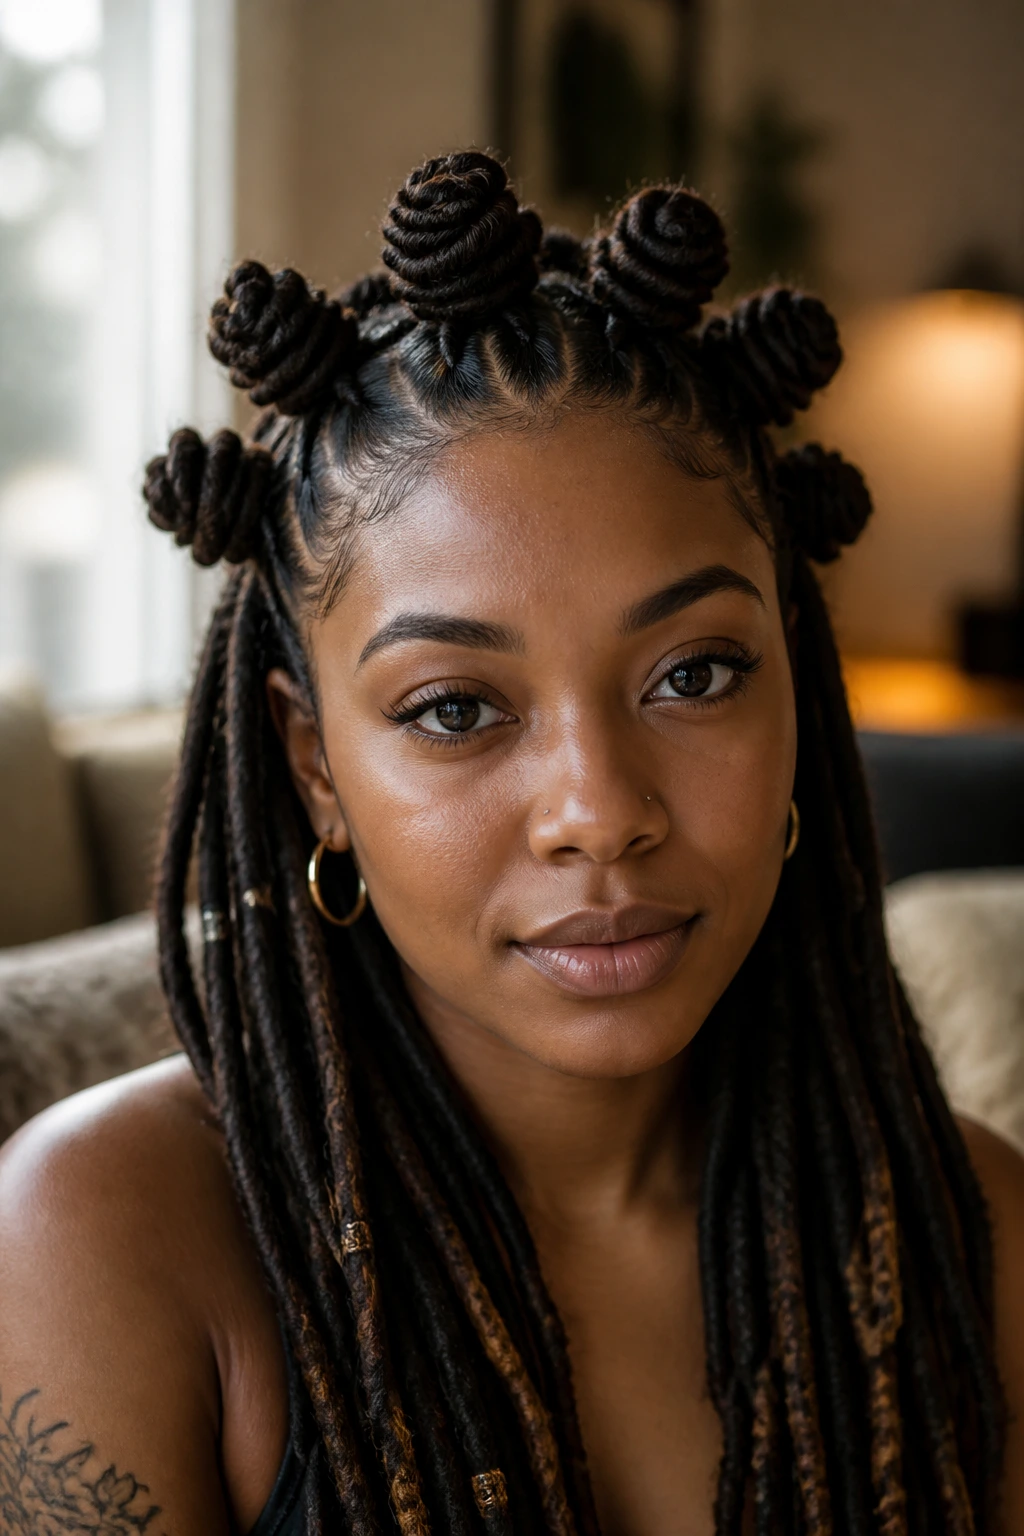
1. High Crown Cluster
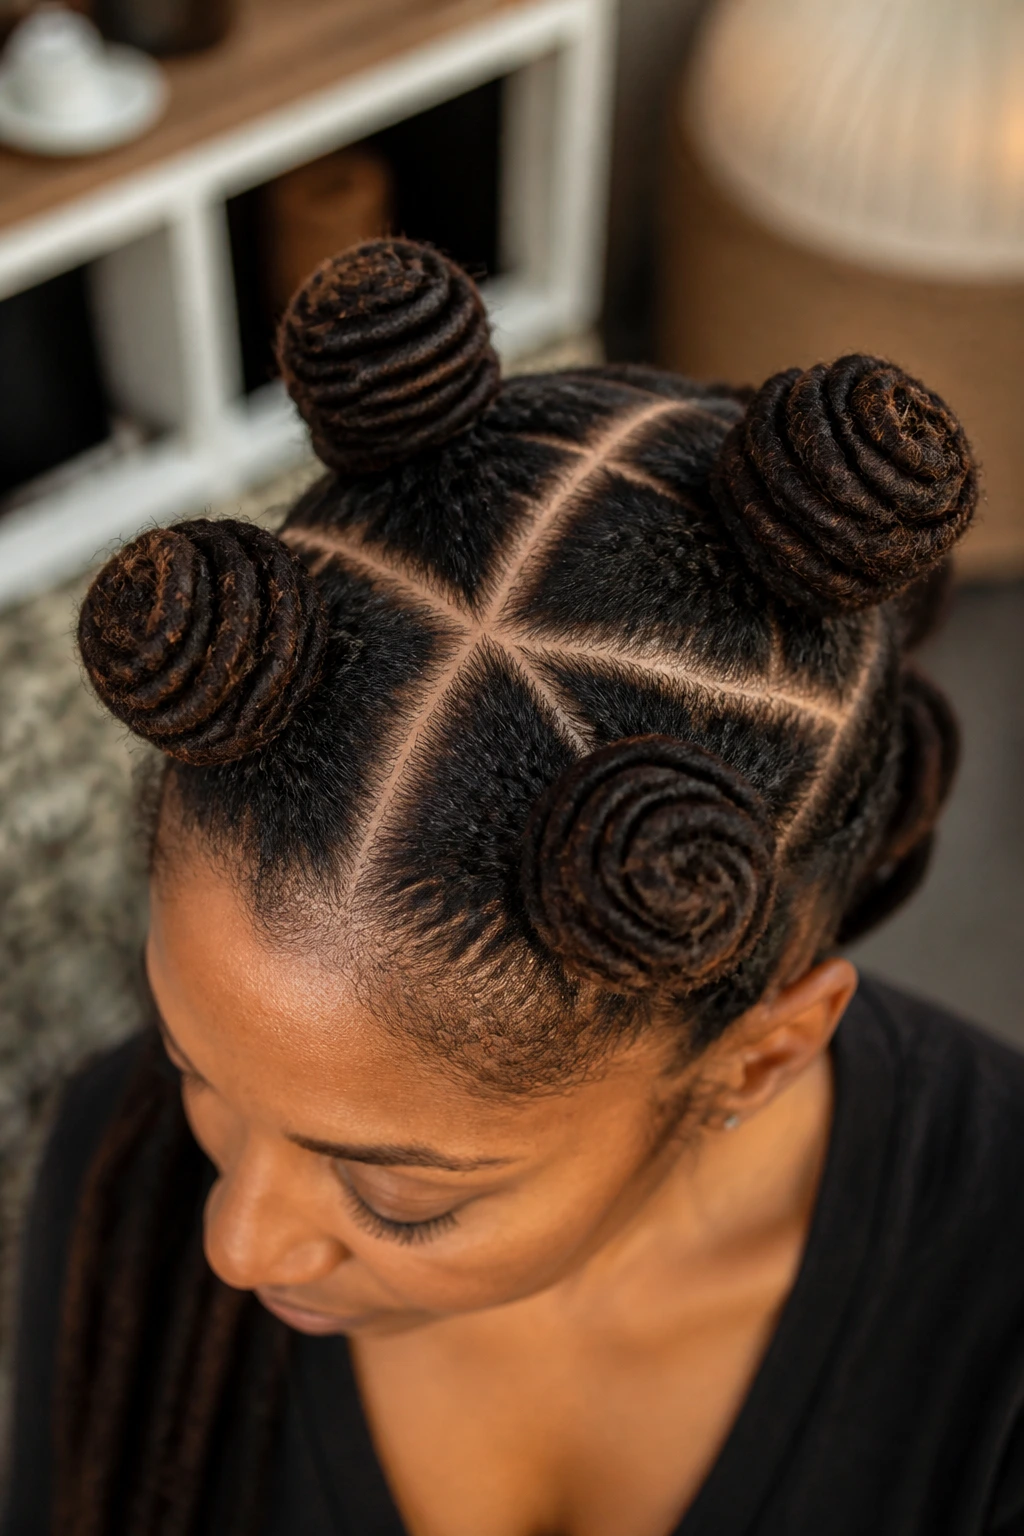
If you want one Bantu knot look that reads sharp from every angle, this is the one. A high crown cluster places 5 to 9 medium knots on the top third of the head, which keeps the weight centered instead of dragging backward.
Why the placement holds
When knots sit too far behind the crown, long locs pull toward the nape and flatten the front. A crown cluster fixes that. The base sits over the strongest part of the head, so the shape stays upright longer and your profile looks cleaner.
Quick styling notes
- Use square or soft-rectangle parts about 1½ inches wide.
- Wrap 4 to 6 medium locs per knot for a balanced size.
- Tuck the ends underneath if your locs are mid-back length or longer.
- Leave ¾ inch between parts so the scalp pattern stays visible.
Wear this one when you want a full updo without a lot of extra fuss. It suits workdays, dinners, photo days—anything where you want your locs off your shoulders but still styled with structure.
2. Half-Up Bantu Knot Style for Long Locs
Some days you want the lift of Bantu knots and the movement of loose locs at the same time. A half-up knot set gives you both. Section the top half of your locs into 3 to 5 knots, then let the back length hang free or fall over one shoulder.
The big win here is comfort. Because you are only wrapping the top sections, you are not asking your entire head of locs to sit in knots all day. That matters if your locs are long, thick, or heavy enough to make a full knot set feel like a workout by hour four.
It also gives you contrast. The top reads sculpted, the back reads soft and fluid, and that difference keeps the look from feeling too uniform. On layered locs, it’s even better because the back length fans out instead of hanging in one solid sheet.
Use this style when you want to show off length, color, curls on the ends, or beads threaded through the lower half. It has a lighter mood than a full updo, though it still looks finished.
3. Center Mohawk Row
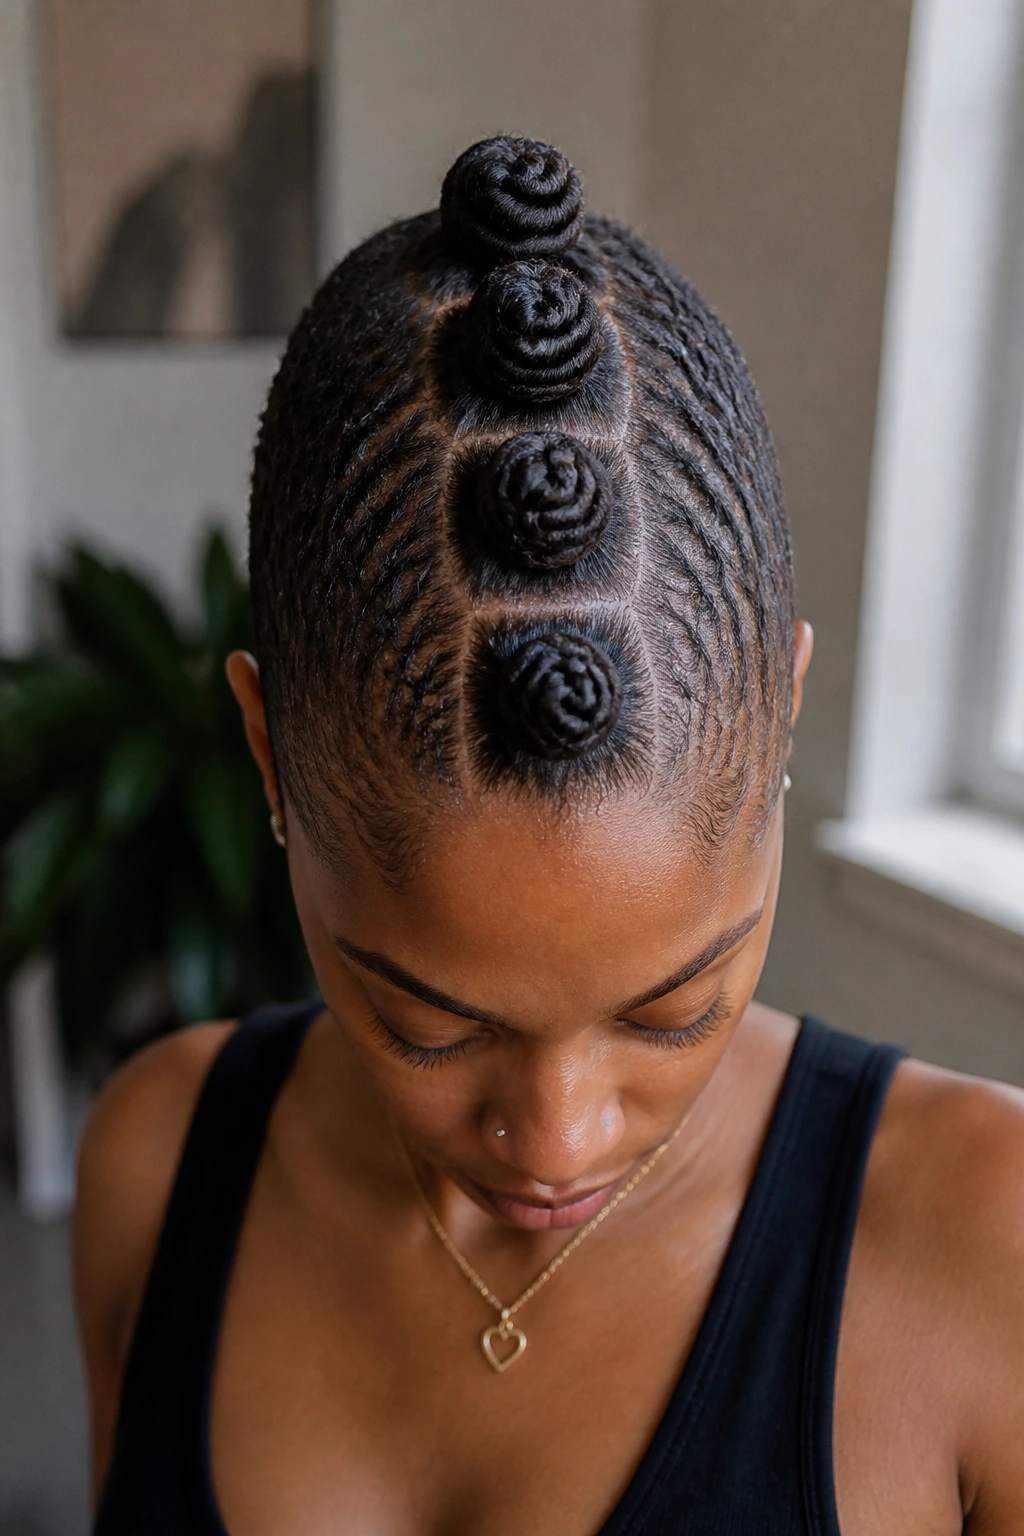
Why does a center row hit so hard on long locs? Because it uses height without asking the whole head to cooperate. You place 3 to 7 knots straight down the middle, then smooth, twist, or pin the sides close to the scalp.
That narrow line creates instant shape. Your eye follows the row from hairline to crown to nape, and the knots look taller because the side panels are controlled. On long locs, that contrast does half the styling work for you.
How to place the row
Part two side sections first, each about 2 to 3 inches wide. Keep the center strip even from front to back. If the strip widens near the crown, the last knots will look bulky and the silhouette gets clumsy.
This style is a strong pick for anyone who likes a bolder updo but does not want 10 or 12 individual knots. It also plays well with shaved sides, undercuts, or tapered edges because the center line becomes the whole statement.
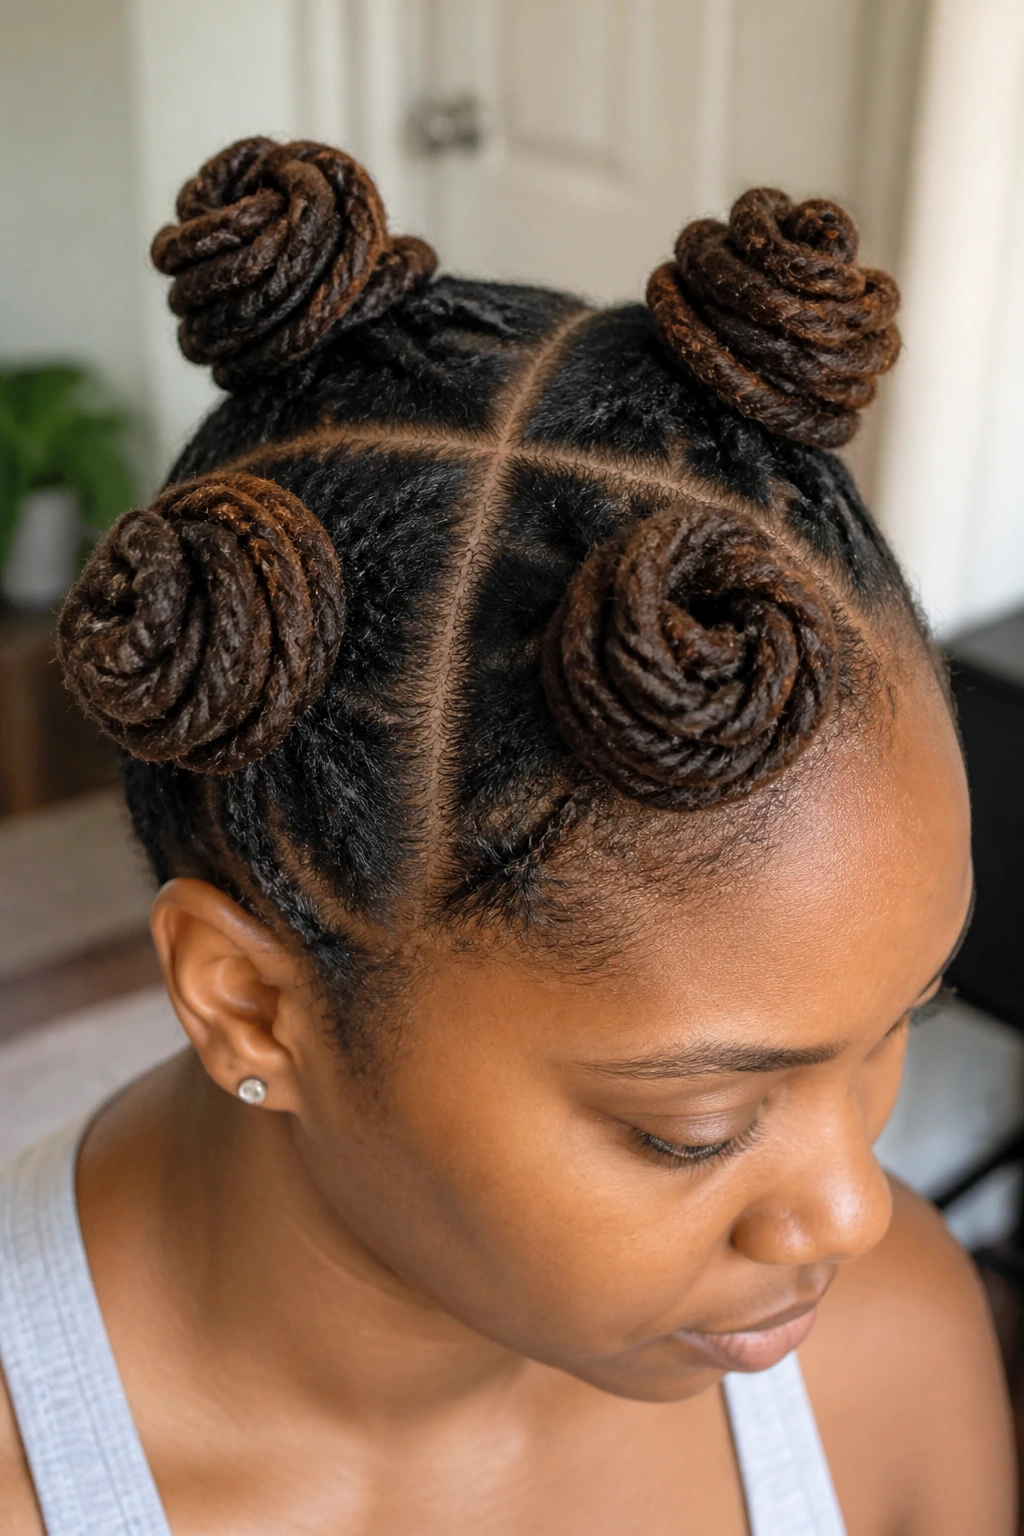
4. Four-Corner Grid
Clean. Graphic. Hard to mess up.
A four-corner grid breaks the head into four large square sections—front left, front right, back left, back right—then wraps each section into one substantial knot. On thick locs, that simple layout makes more sense than trying to cram the hair into 8 or 10 smaller sections that feel too tight.
The style has symmetry, and symmetry is forgiving. If one knot sits a touch lower, the whole look still reads balanced because the parting pattern is doing so much visual work.
A few details keep it neat:
- Place the front parts slightly behind the hairline so the knots do not crowd your forehead.
- Use two pins per knot at minimum, crossed through the base.
- Keep the back knots lower than the front by about ½ inch so the shape follows the curve of the head.
If your locs are thick, full, and hard to persuade into tiny coils, this is one of the smartest starting points.
5. Low Nape Knots
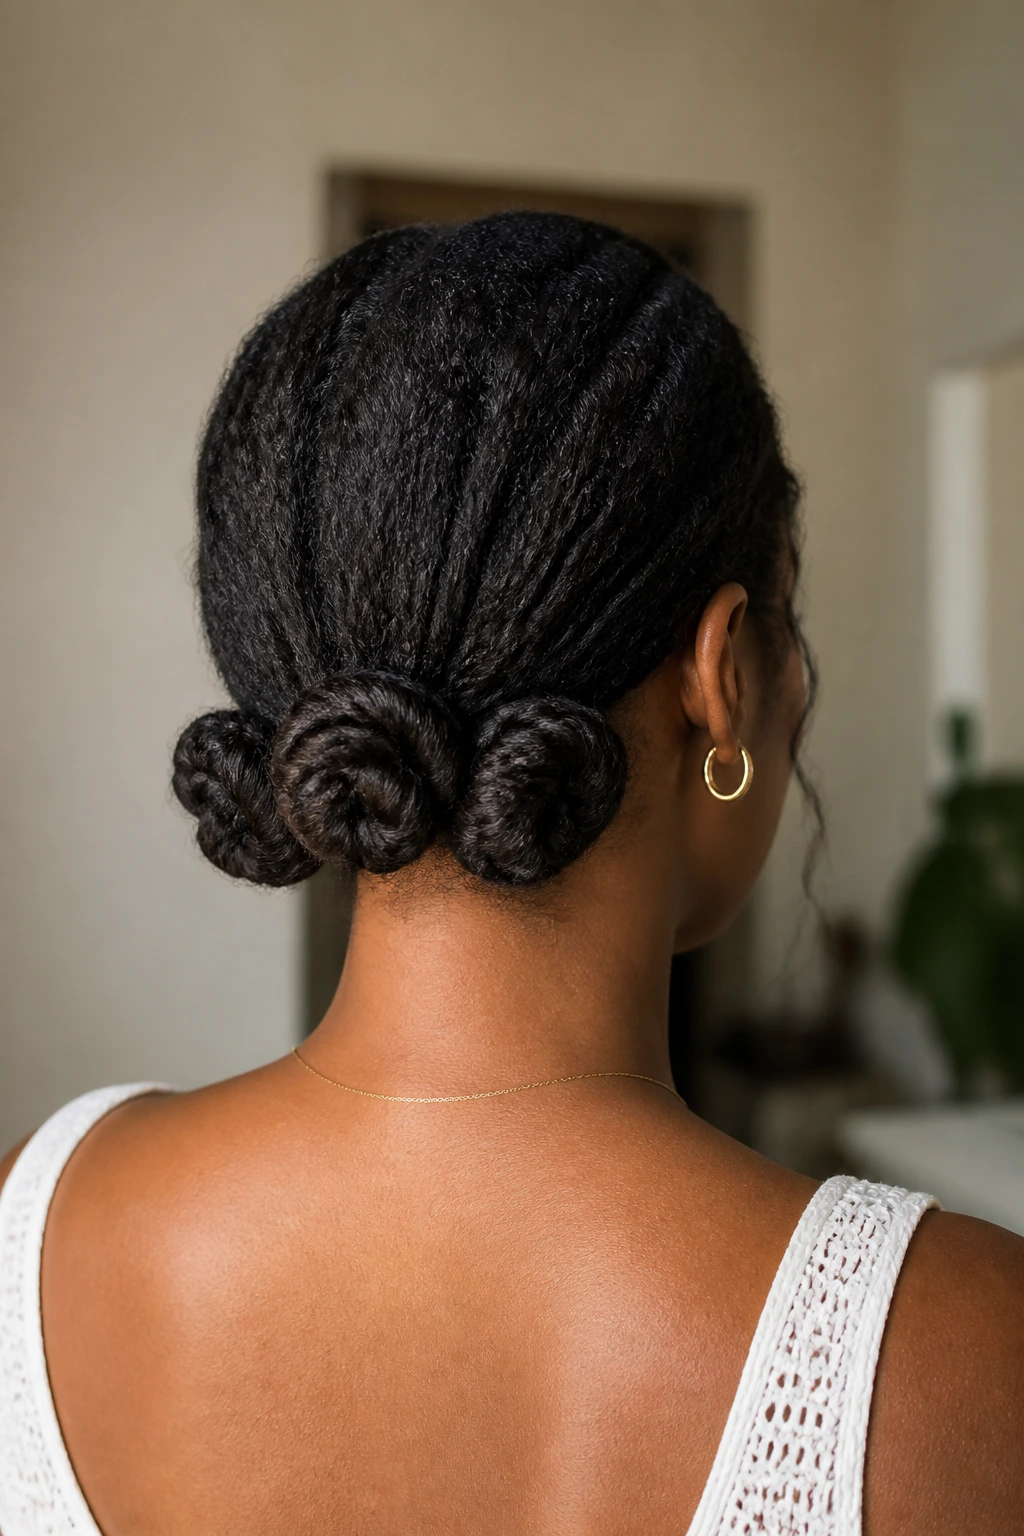
Not every Bantu knot style needs height.
Low nape knots sit close to the back of the head, usually in 3 to 5 sections, with the crown smoothed above them. From the front, you get a cleaner, calmer hairline. From the side, the knots show up as compact little coils near the base of the skull.
This look has a quieter feel than crown knots. It works well when you want Bantu knots without the full stacked silhouette, and it can be easier on the scalp because the weight sits lower. Long locs are still heavy, though, so wide, flat knots tend to behave better here than tall, tight ones.
Clothing matters with this one. High collars and stiff jacket necklines can rub the knots and loosen them by the end of the day. Open necklines, scoop neck tops, and softer knits tend to let the shape stay intact longer.
It’s a strong option for formal settings where you want locs controlled but not towering.
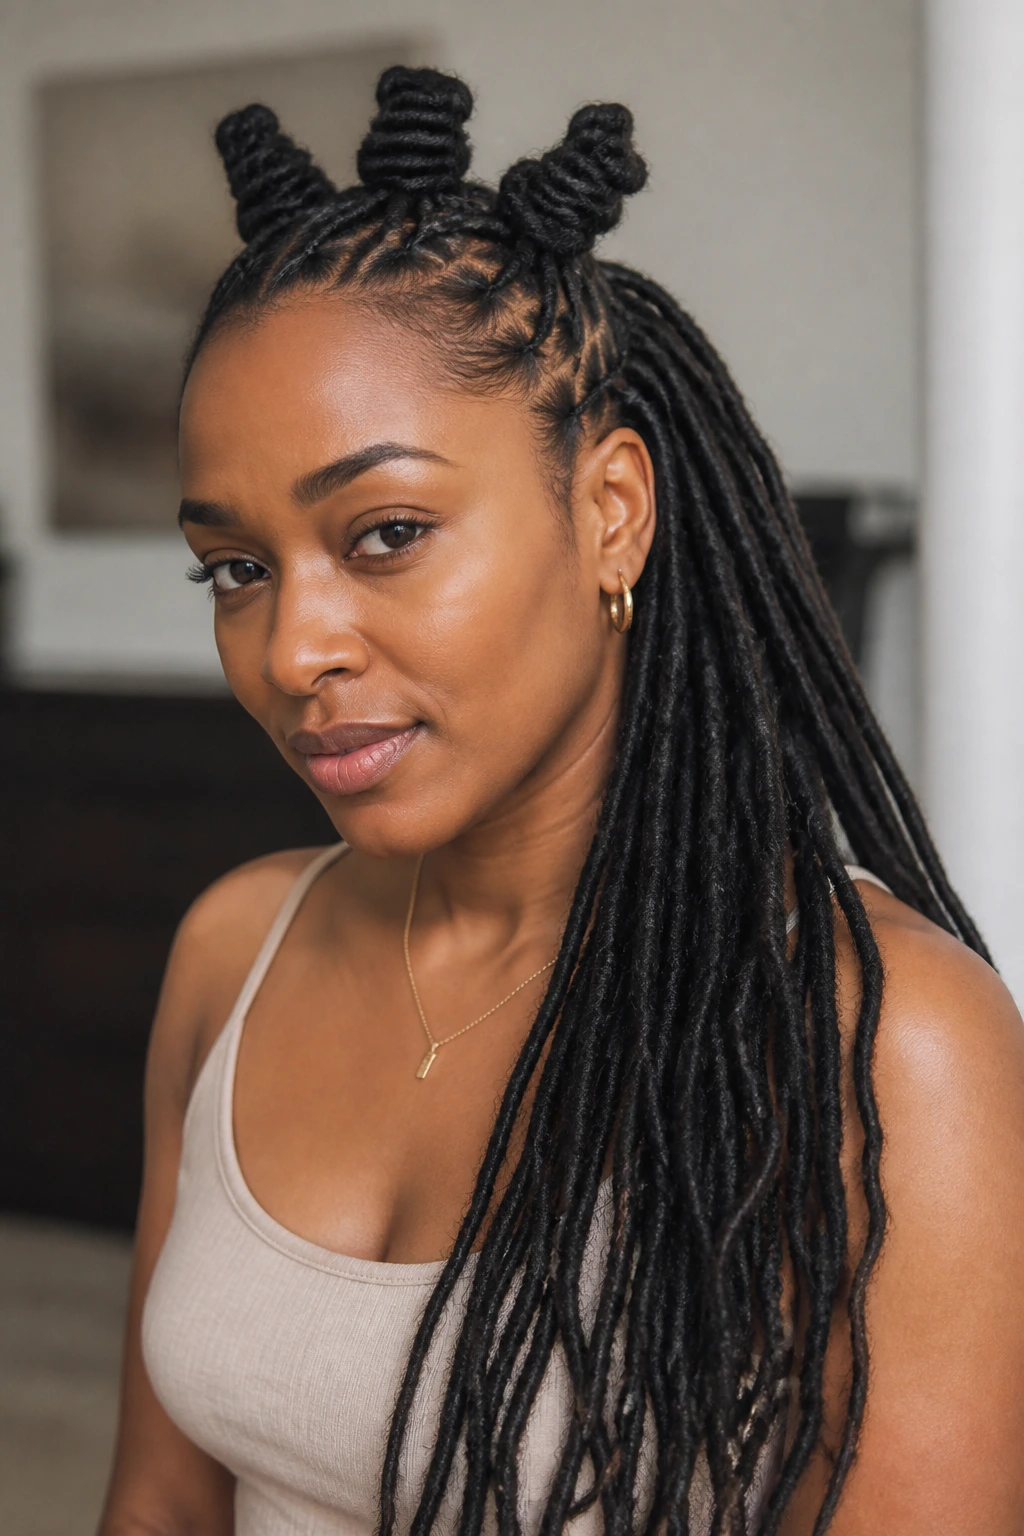
6. Oversized Jumbo Top Knots
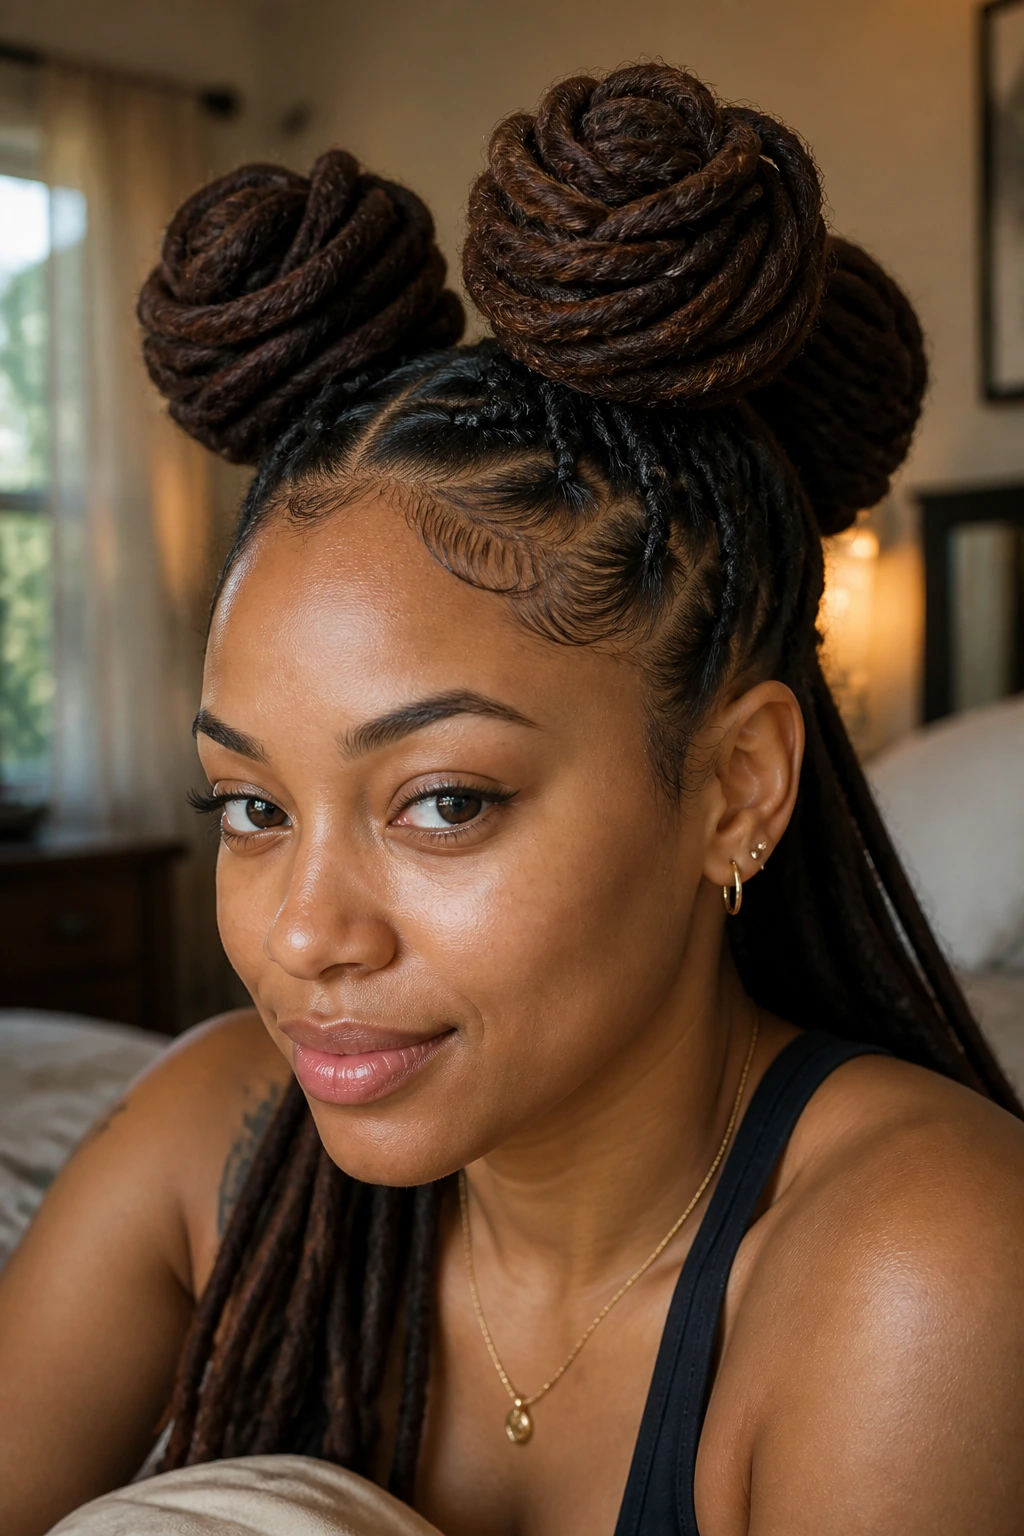
Unlike small knot sets, jumbo top knots turn the volume down on parting and turn the shape up on silhouette. You are working with 2 or 3 large sections placed high—often two in the front and one at the back crown, or one centered at the top with two slightly behind it.
That layout makes sense for long locs because each knot has enough hair to feel intentional. Tiny knots made from thick, waist-length locs can look stuffed. Jumbo knots avoid that crowded look.
There is a catch. If your roots are sore, skip this one. Large high sections can feel heavy during the first few hours, especially on fresh retwists or interlocked roots that already feel tight.
Choose jumbo knots when you want the hairstyle to read from across the room. They work best on medium-density or thick locs that can form a big round coil without turning into a lopsided lump.
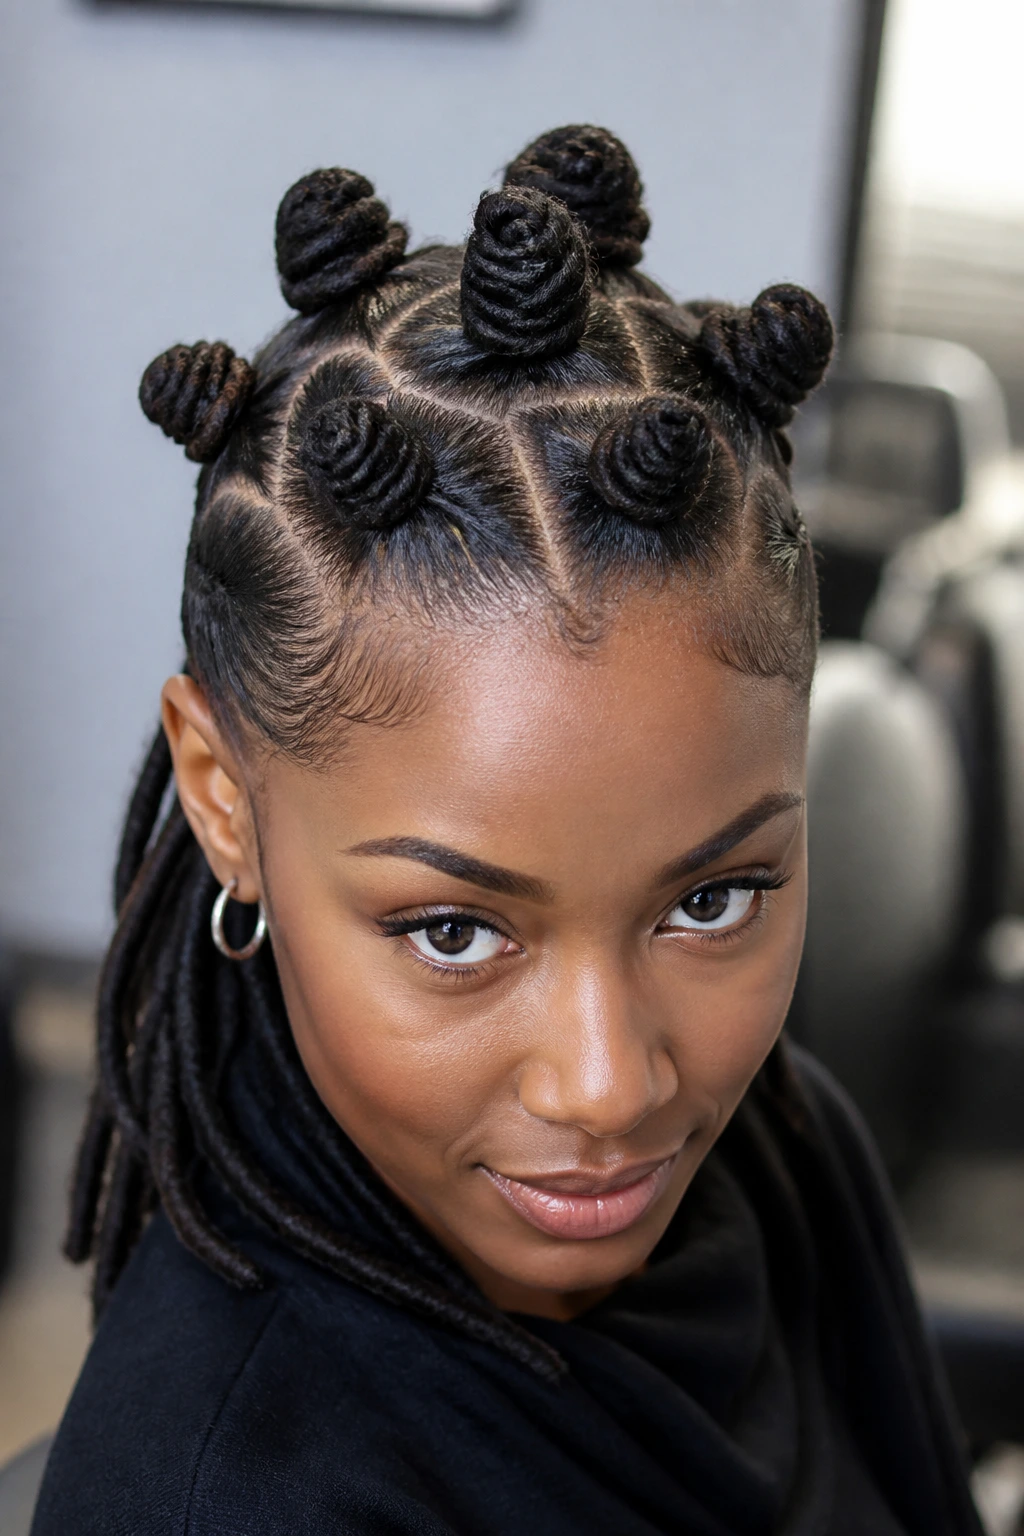
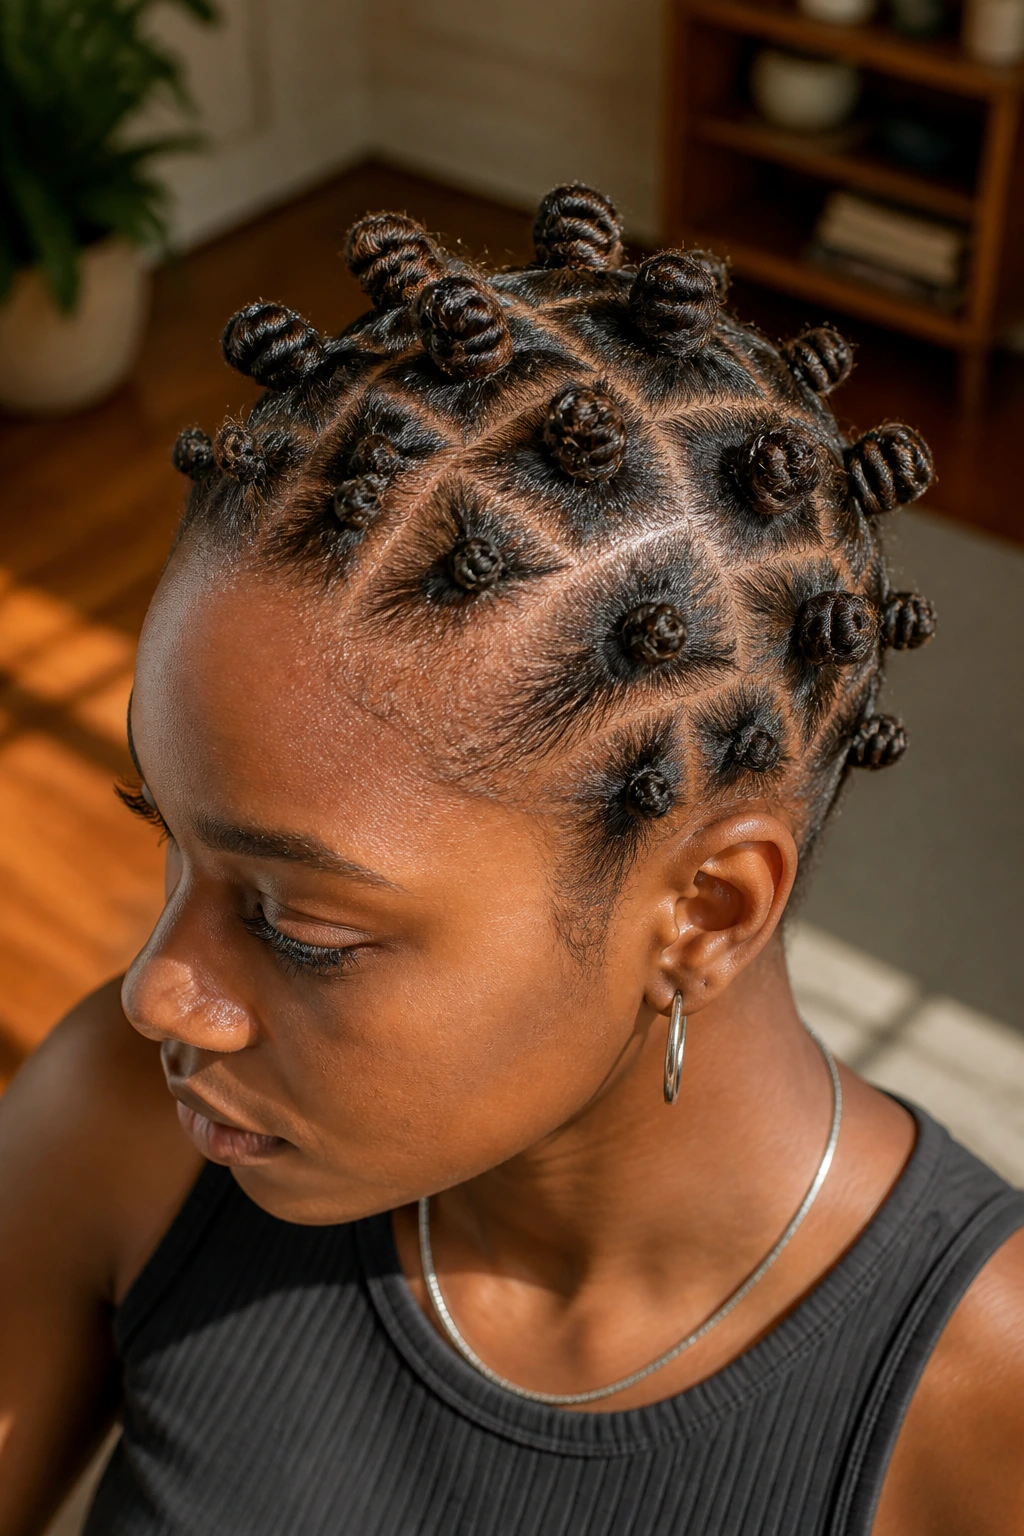
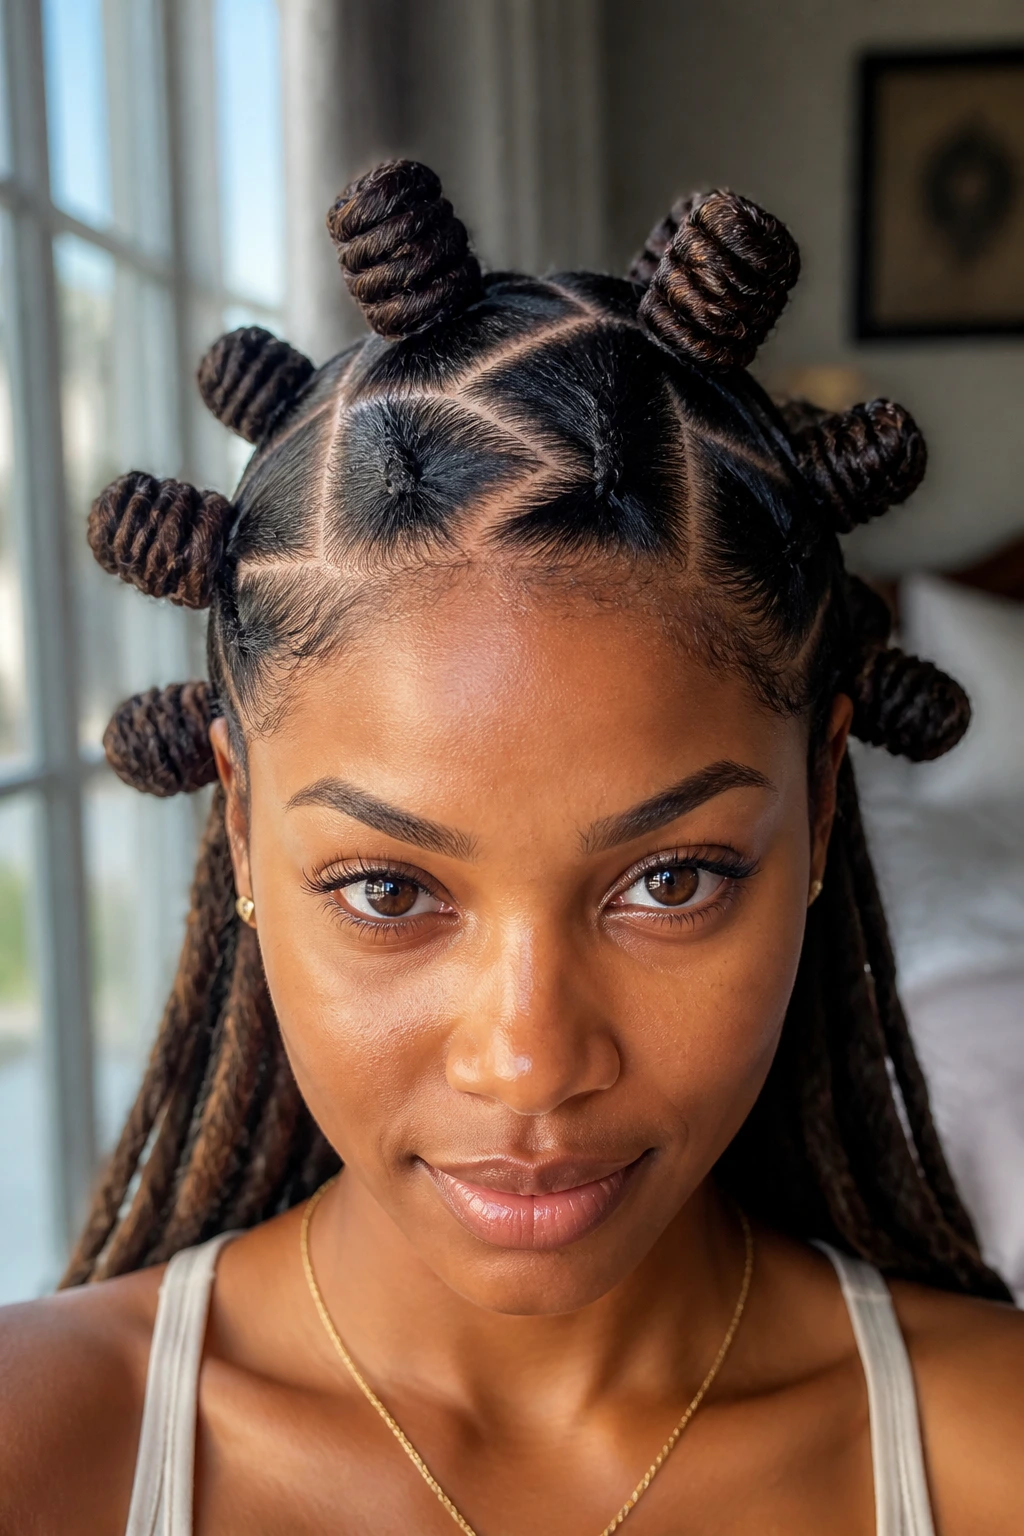
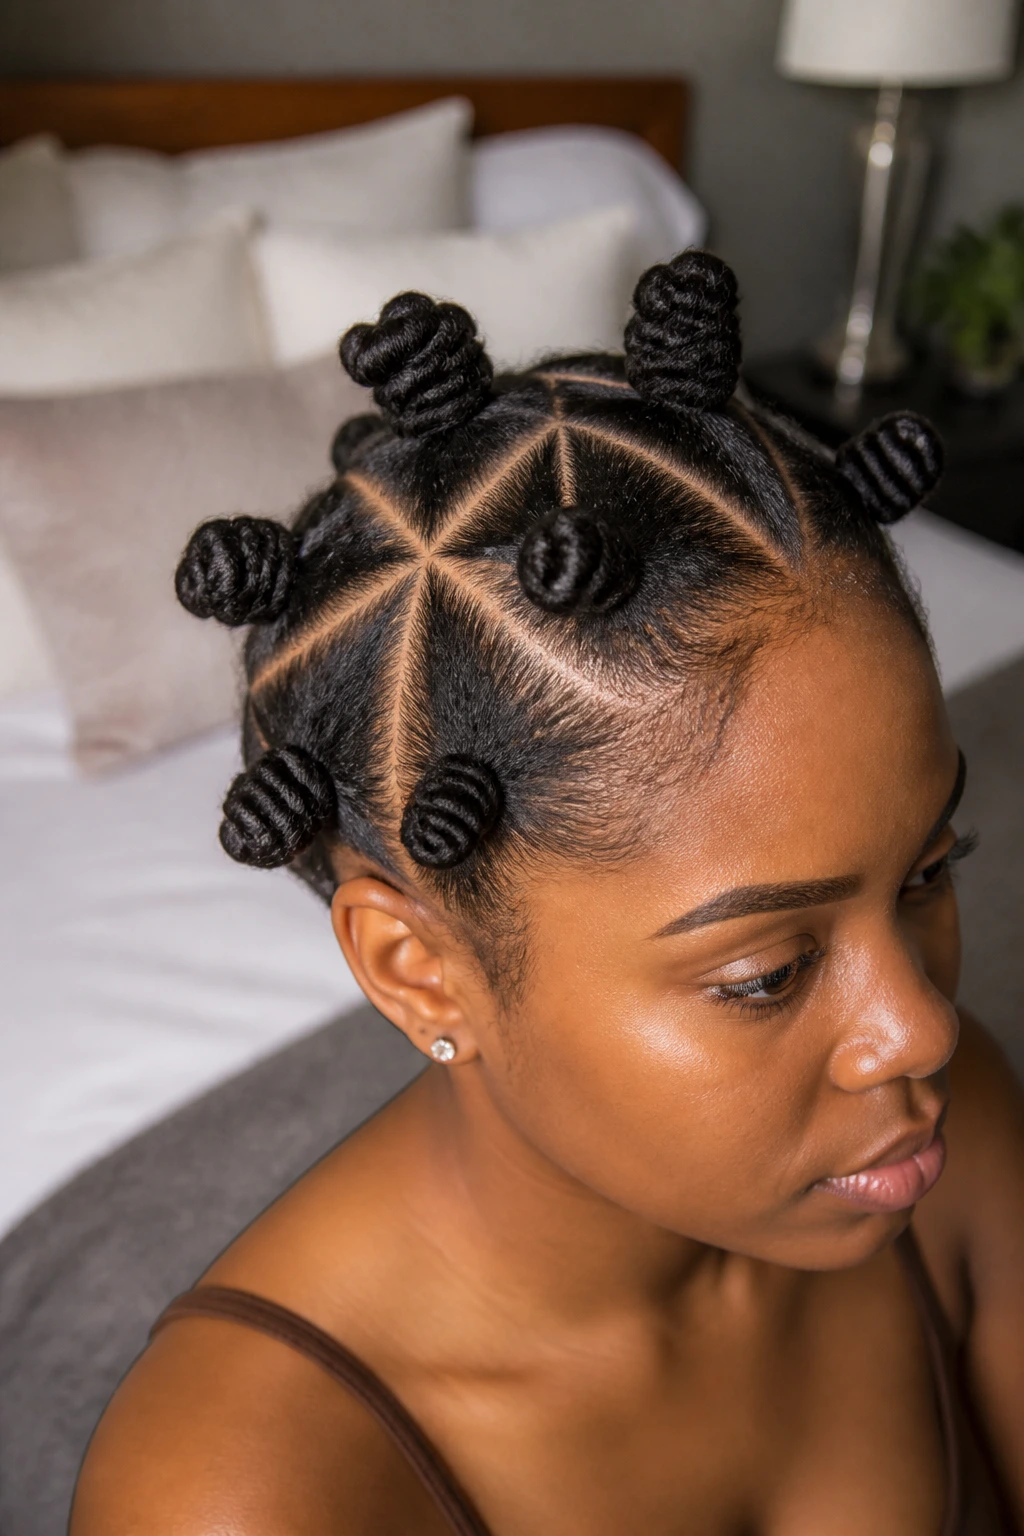
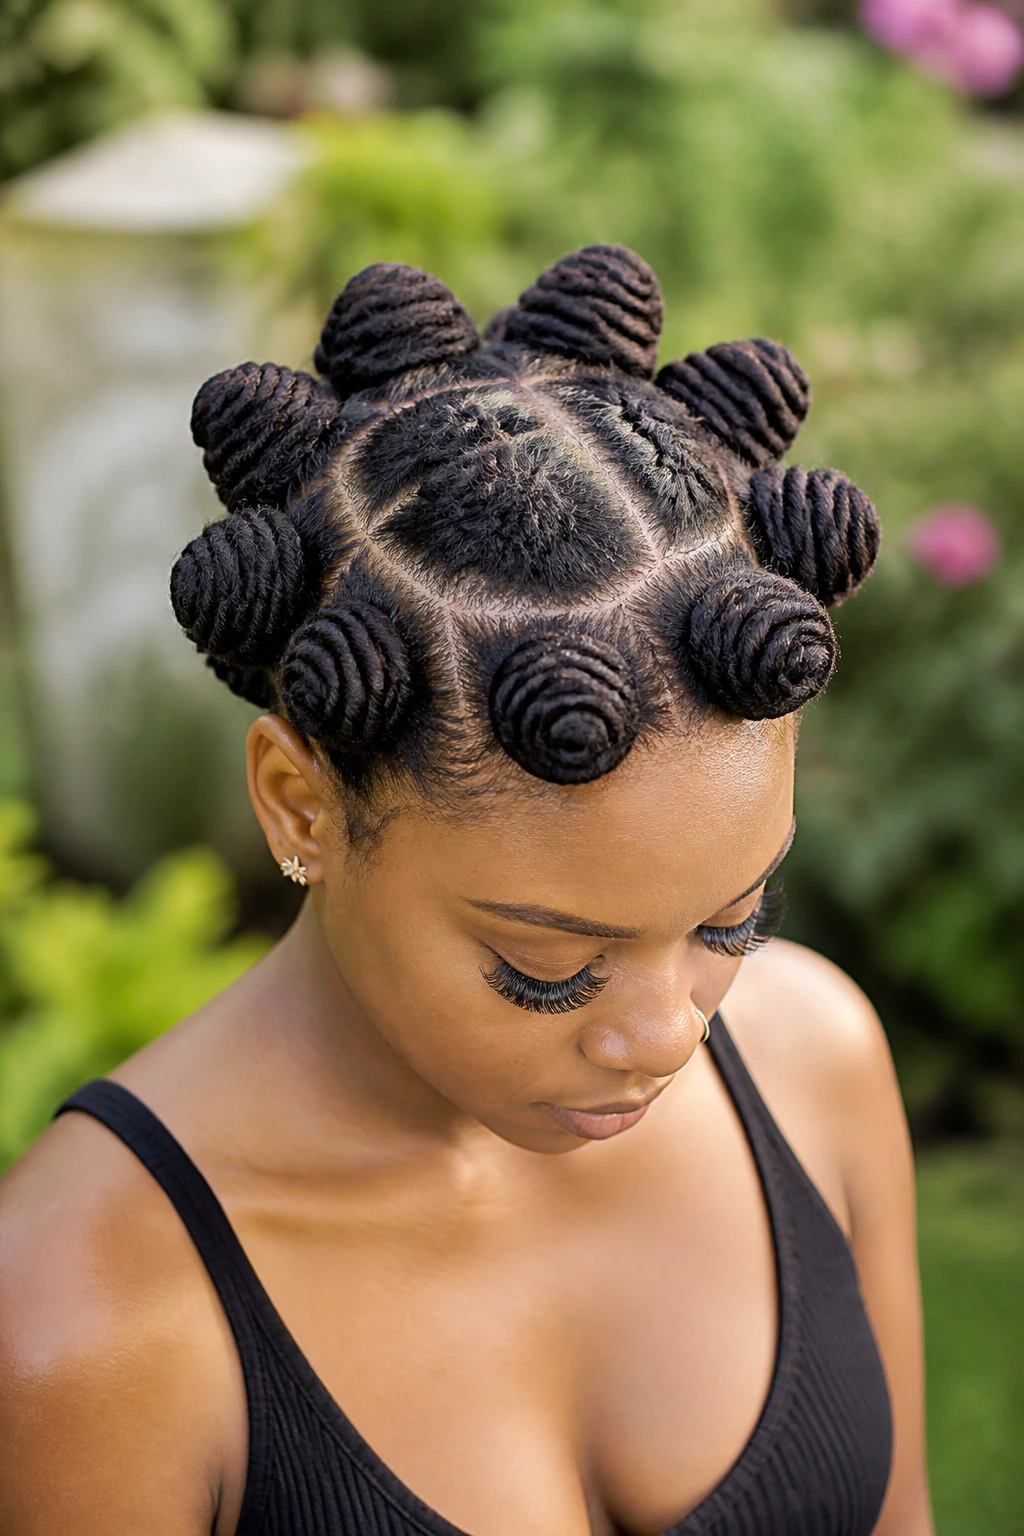
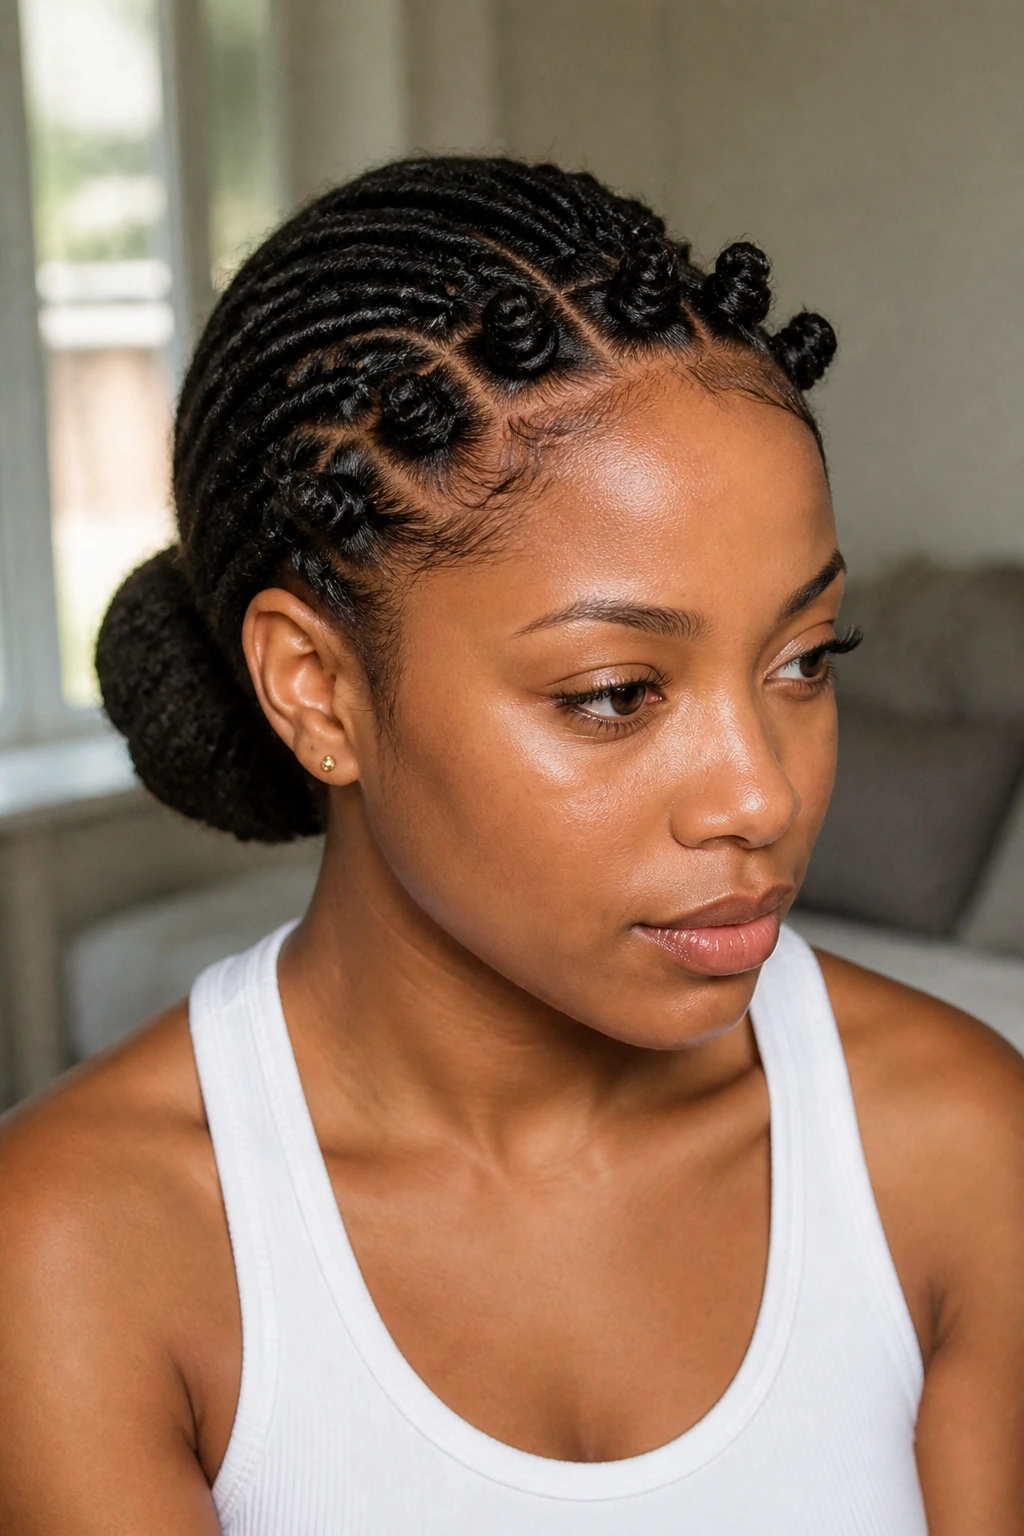
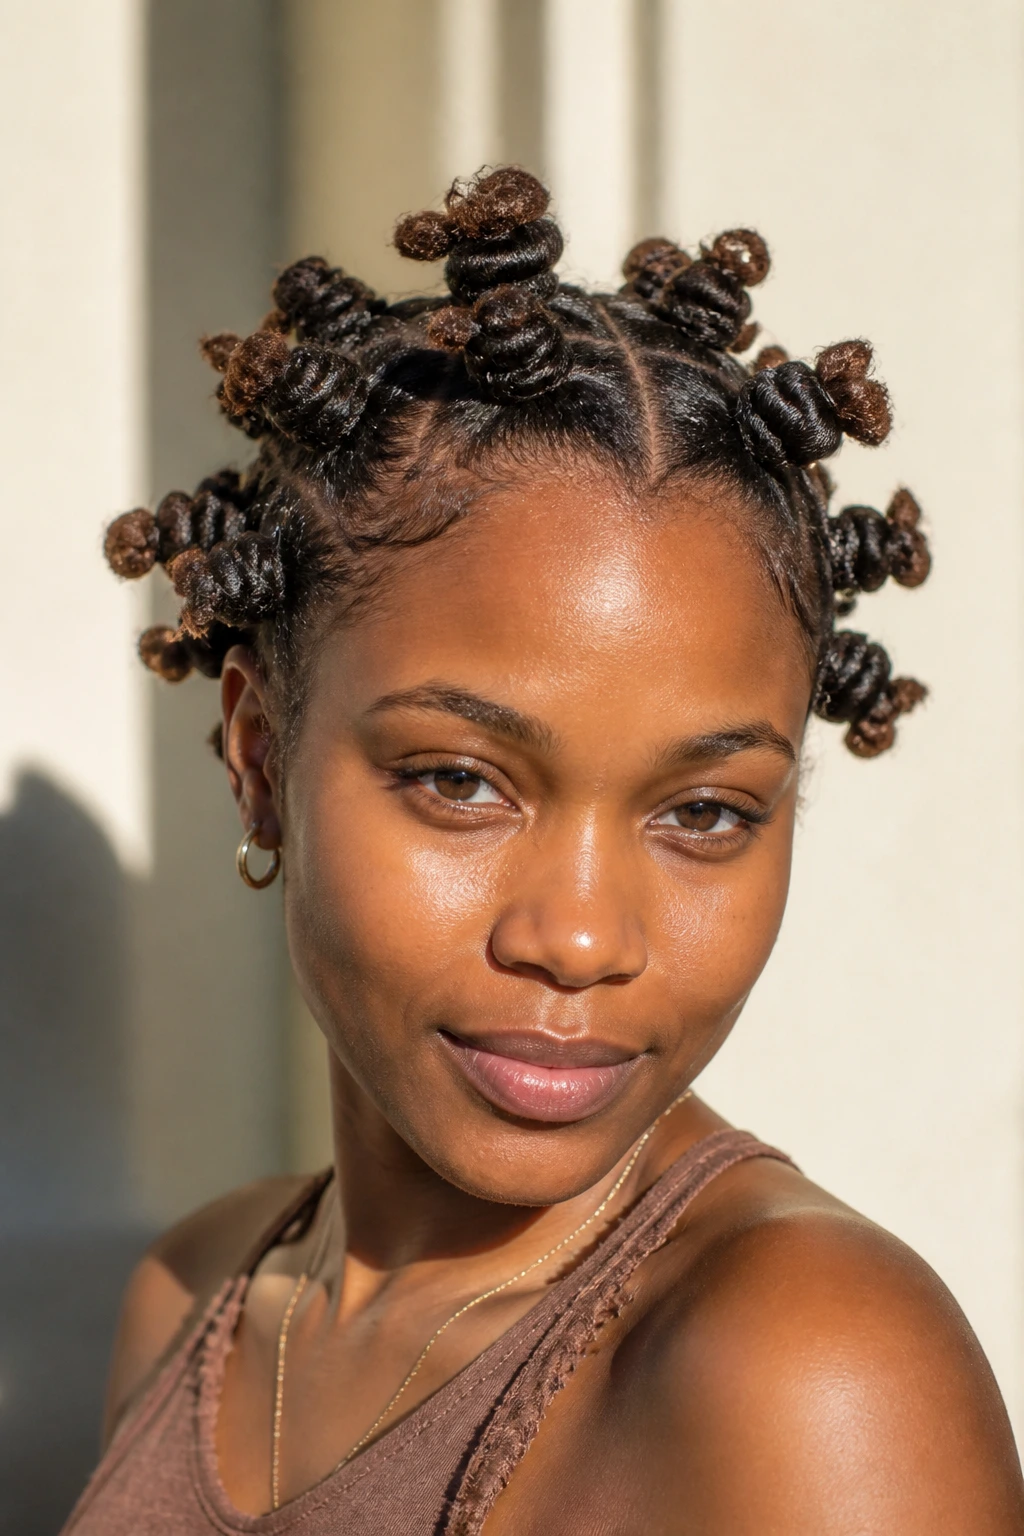
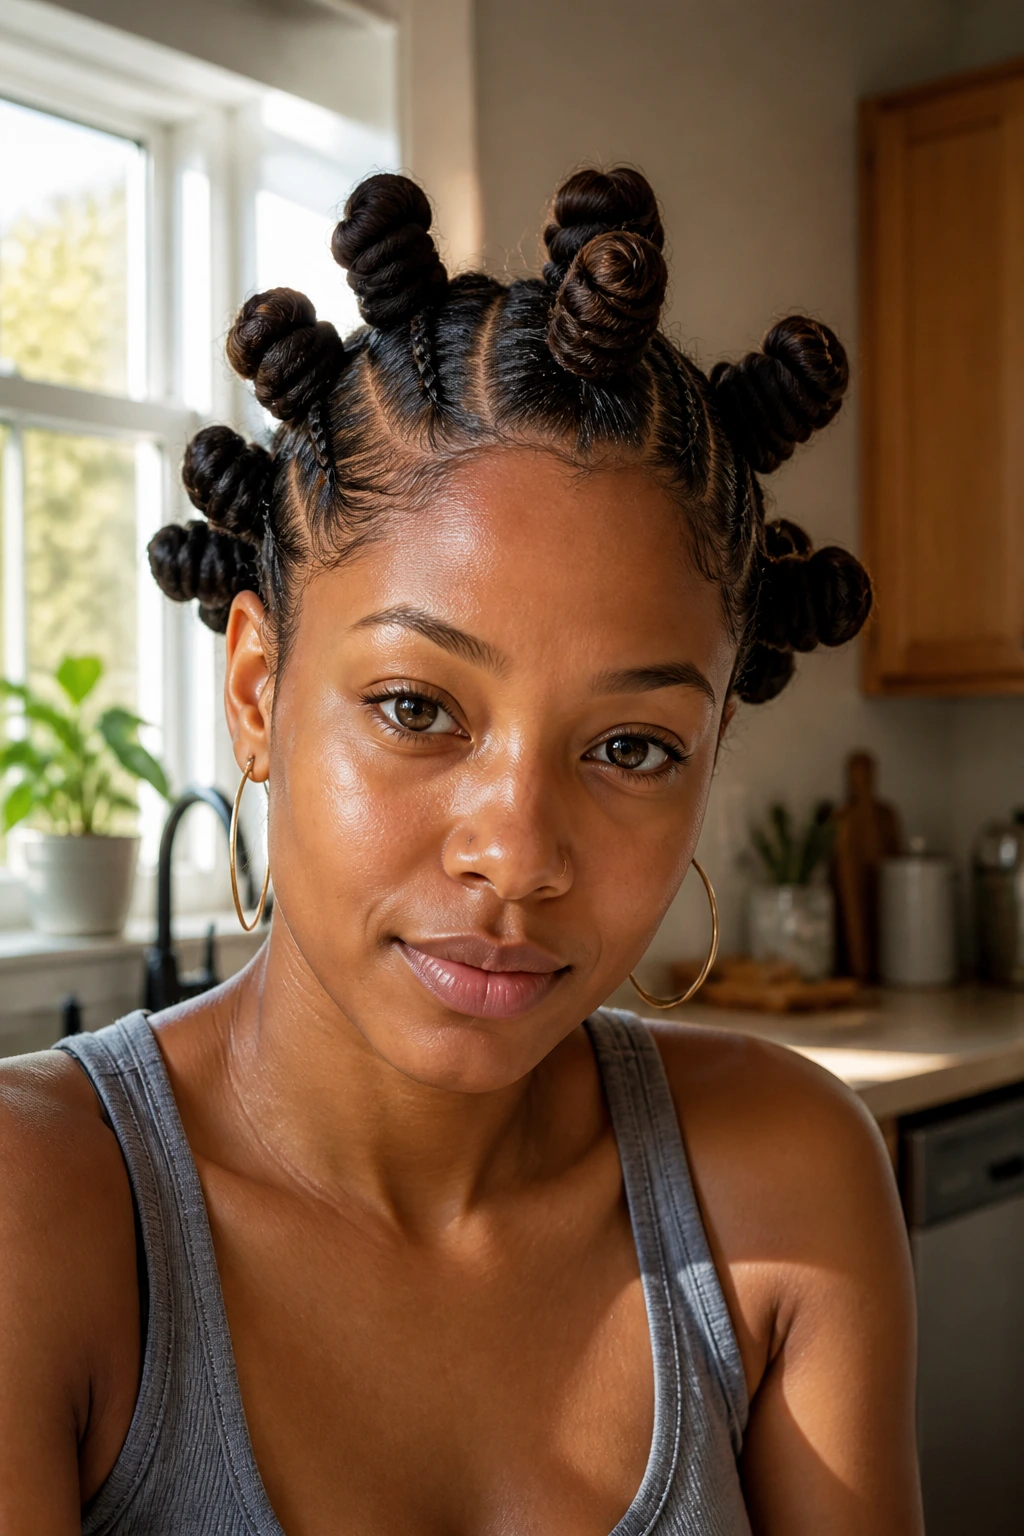
7. Mini Knot Constellation
Small knots scattered across the head create one of the most detailed looks in the whole bunch. A mini knot constellation usually uses 10 to 16 small sections, which makes it a better match for microlocs, sisterlocks, or traditional locs on the slimmer side.
What makes it different
The magic here sits at the scalp. With more sections, the parting pattern becomes part of the style, and the knots look like little buttons placed across the crown. If your locs have color variation—dark roots, lighter mids, curled ends—you’ll see more of that patterning too.
Good numbers to work with
- Aim for 1 to 1¼ inch parts.
- Use 1 to 3 traditional locs per knot if they are slim.
- Keep the knot bases snug, then fan the outer wrap a touch for fullness.
- Plan on 20 to 35 extra minutes for sectioning.
This is not the fastest option. It may be the sharpest, though, when precision is the whole point.
8. Side-Swept Knot Bank
A side-swept knot bank puts most of the action on one side of the head, usually starting near the temple and moving diagonally toward the opposite crown. Asymmetry gives long locs energy without needing beads, shaved panels, or extra accessories.
The trick is weight control. Do not stack all the heaviest sections on one side and hope your scalp forgives you. Build the larger knots near the crown where the head can support them, then use smaller knots as the line travels downward.
This shape flatters long faces and strong cheekbones because the diagonal line breaks up vertical length. It also frames earrings well, especially if you leave the lighter side cleaner around the ear.
Skip a razor-straight center part here. A deep side part, about 2 to 3 inches off center, gives the sweep a starting point and makes the whole style look planned instead of accidental.
9. Zigzag Parted Knots
Why bother with zigzag parts when the knots already do the talking? Because on locs, parting lines stay visible, and a zigzag scalp pattern can make even a plain 6-knot set look far more deliberate.
The knots themselves can stay medium and simple. The shape comes from the scalp design. That is useful if you want something detailed but do not want to wrestle your length into complicated wraps.
How to keep the zigzags crisp
Use the point of a rat-tail comb and make each zig about 1 inch deep. Clip each finished section right away. If you try to clean up the lines after the locs are loose and mixed together, the pattern gets muddy fast.
This style rewards patience. The wrapping part is ordinary. The sectioning is where you earn the final look.
10. Triangle-Part Bantu Knot Style for Long Locs
Say you want a knot set that shows off your scalp pattern almost as much as your locs. Triangle parts do that better than square ones. Each knot grows out of a pointed section, so the base looks sharper and the whole head gets a more geometric finish.
The shape also helps when your locs vary in thickness. A triangle can borrow a little more width on one side and a little less on the other, which gives you a cleaner knot size than a rigid square grid would.
A few things make it land:
- Start with a fresh part line and a touch of mousse near the roots.
- Use 6 to 8 medium knots for the best balance between detail and comfort.
- Let the triangle points face different directions so the layout does not look too stiff.
This is one of the strongest Bantu knot styles for long locs when the scalp design matters as much as the knot shape.
11. Crown Halo Knots
A crown halo places the knots in a ring around the upper head instead of packing them into the center. The effect is softer than a mohawk row and less dense than a full crown cluster. You see shape all the way around, with more breathing room in the middle.
That spacing does something useful on long locs: it prevents the top from looking overloaded. If every knot sits in one central patch, the hairstyle can turn into a single bulky mound. A halo spreads the eye outward and keeps the profile round.
This look also handles accessories well. Small gold cuffs, pearl pins, slim wire, or a single ribbon woven through two or three knots can sit along the ring without crowding the whole head. You do not need decoration, though. Clean parting is enough.
Use halo placement when you want a ceremonial feel without making the style rigid. It looks polished, though it still reads like locs—not a shellacked formal updo.
12. Double Space Bun Bantu Knots
Unlike loose double buns, double Bantu knots on locs need slightly more back placement. Put them too close to the hairline and the weight can tip forward. Set them about 1 inch behind where you think they should go, and the shape sits better.
This style shines when the knots are matched in diameter. Measure with your eyes before you wrap. If one section has 9 thick locs and the other has 6, the difference will show.
There’s a playful edge to this one, and that is part of the appeal. It has a lighter mood than a full knot set, though it still keeps your hair off your neck. On longer locs, two large knots often look cleaner than four medium ones because the silhouette stays readable.
If you wear glasses, leave a little room above the ears so the arms of the frames are not fighting the knot bases all day.
13. Half-Moon Front Row
A half-moon front row curves 4 to 6 smaller knots across the front half of the head, from one temple to the other, then gathers the remaining locs into a low bun, tuck, or hidden back knot arrangement.
Why the curve matters
Straight rows can feel hard. A curved row follows the hairline and softens the whole look without making it loose. On long locs, that curve also helps spread the front weight across the forehead area instead of concentrating it in one center point.
Best ways to finish the back
- Tuck the back locs into one low flat bun for a cleaner profile.
- Make two hidden low knots if your locs are dense and need more support.
- Wrap a scarf around the back base for a mixed-texture look.
- Leave a few shorter locs out near the nape if they refuse to stay pinned.
This style frames the face well and keeps the statement up front, which is sometimes exactly where you want it.
14. Layered High-to-Low Cascade
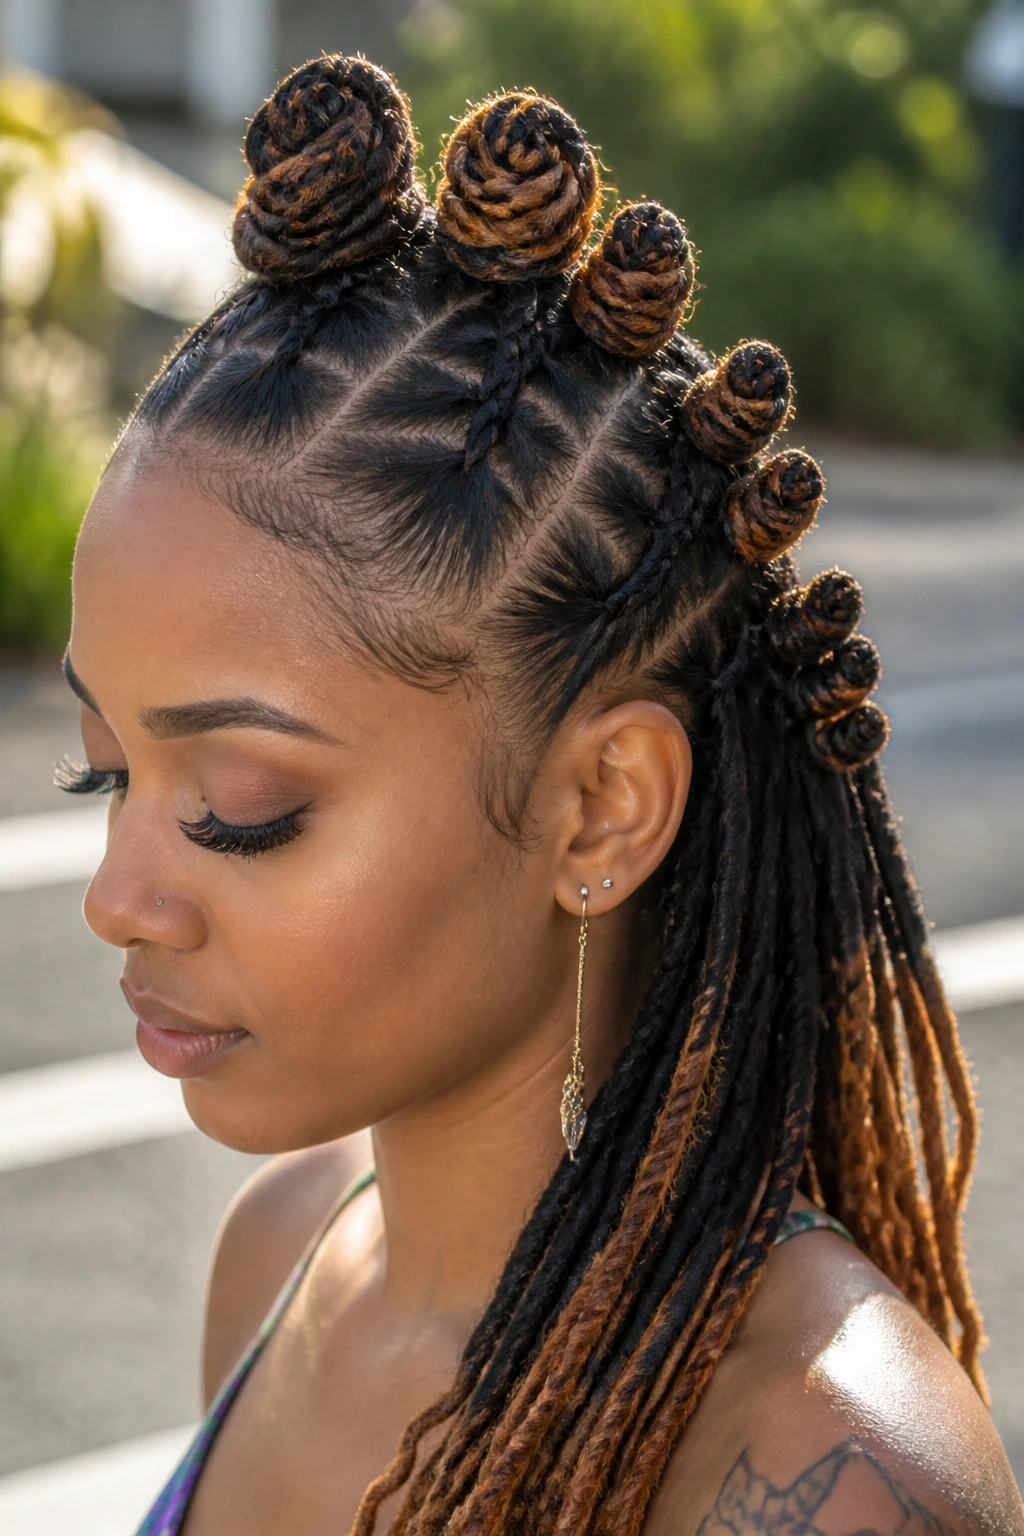
A cascade makes long locs look like they are moving even when they are pinned still. You place the knots in a descending line, high near one temple or the crown, then lower and smaller as they travel across the head.
That shift in height is what makes the style. Keep the first knot as the anchor, then reduce each next section by a little—say one or two locs less per knot—so the drop looks intentional. If all the knots are the same size, the cascade idea disappears.
Color shows up well here. Ombre locs, sun-lightened tips, wrapped thread, and cuffs all catch the eye as the knots step downward. You do not need much scalp design because the placement is doing enough.
This is one of those styles that looks harder than it is. The planning matters more than the wrapping.
15. Barrel-End Bantu Knots
What if you do not tuck every end away? Then you get a barrel-end knot, which leaves the last 2 to 4 inches of the locs visible around the outside or top of the knot. On locs with curled ends, sealed tips, or beads near the bottom, that detail adds texture fast.
The shape sits somewhere between a classic Bantu knot and a sculpted loc bun. It feels less severe because the visible ends break up the roundness of the coil. That can be useful if your locs are thick and tend to create dense, solid knots.
How to keep it neat
Wrap the main body first, then guide the loose ends in the same direction. If they flare outward randomly, the knot looks unfinished instead of textured.
This style suits locs with a bit of character at the ends—curled, dyed, wrapped, or beaded. If your tips are frizzy in a way you do not love, tuck them and pick another style.
16. Crisscross Parted Knot Set
The first thing people notice in this style is not the knots. It’s the X-shaped parting between them. Each section angles against the next so the scalp pattern forms a crisscross map under medium-size knots.
That structure gives the style an edge without forcing the knots themselves to become oversized or odd-shaped. On long locs, that balance matters. Too much drama in both the parting and the knot size can turn the head into visual traffic.
Here’s where this layout pays off:
- It makes 6 medium knots look more detailed than they are.
- It helps break up a round head shape with diagonal lines.
- It photographs well from above and from a side angle.
- It gives you a clean excuse to wear no accessories at all.
If you like architectural styles, this one scratches that itch fast.
17. Spiral Placement Bantu Knot Style for Long Locs
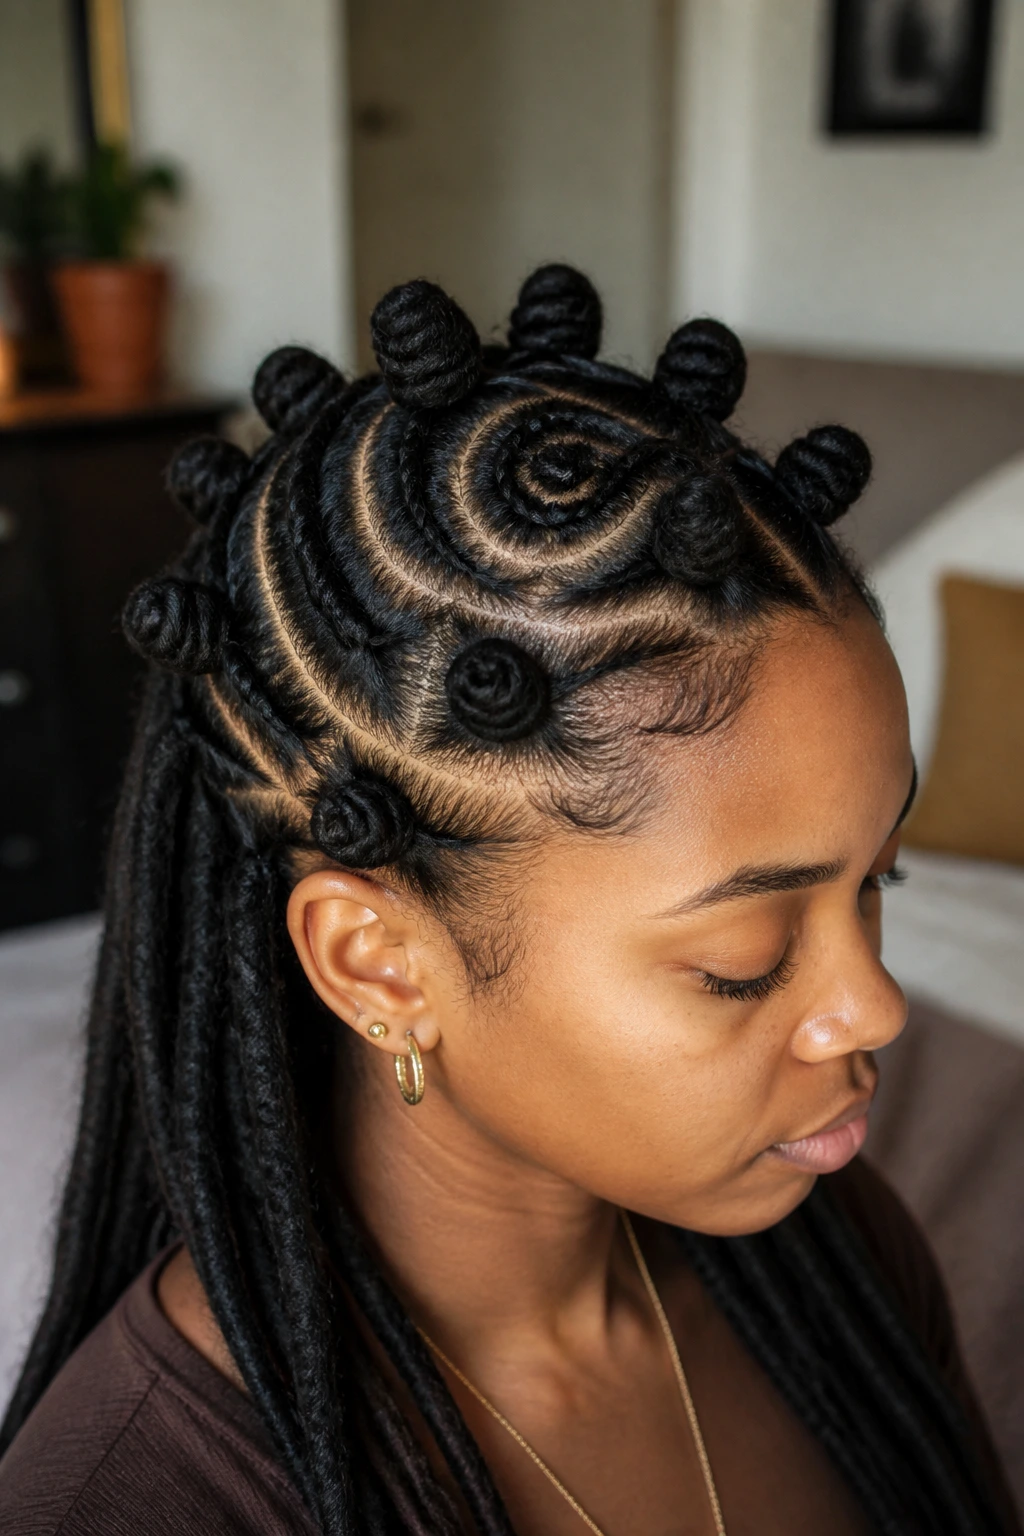
A spiral placement starts with one knot near the crown, then places each next knot in a curved path that circles outward. The finished look feels almost hypnotic because your eye keeps following the line around the head.
This works well on long locs because the arrangement spreads weight in a natural circle. Each knot has its own lane. You do not get that jammed-together look that can happen when every section fights for space at the top.
The style also gives you more freedom with knot size. The center knot can be a touch smaller, the middle ring a touch fuller, and the outer spiral a little flatter. That size shift actually helps the pattern read more clearly.
Among Bantu knot styles for long locs, this one has a strong editorial feel without becoming impractical. It still wears like a real hairstyle, not a one-hour photo set.
18. Two Jumbo Front Knots With Loose Back Length
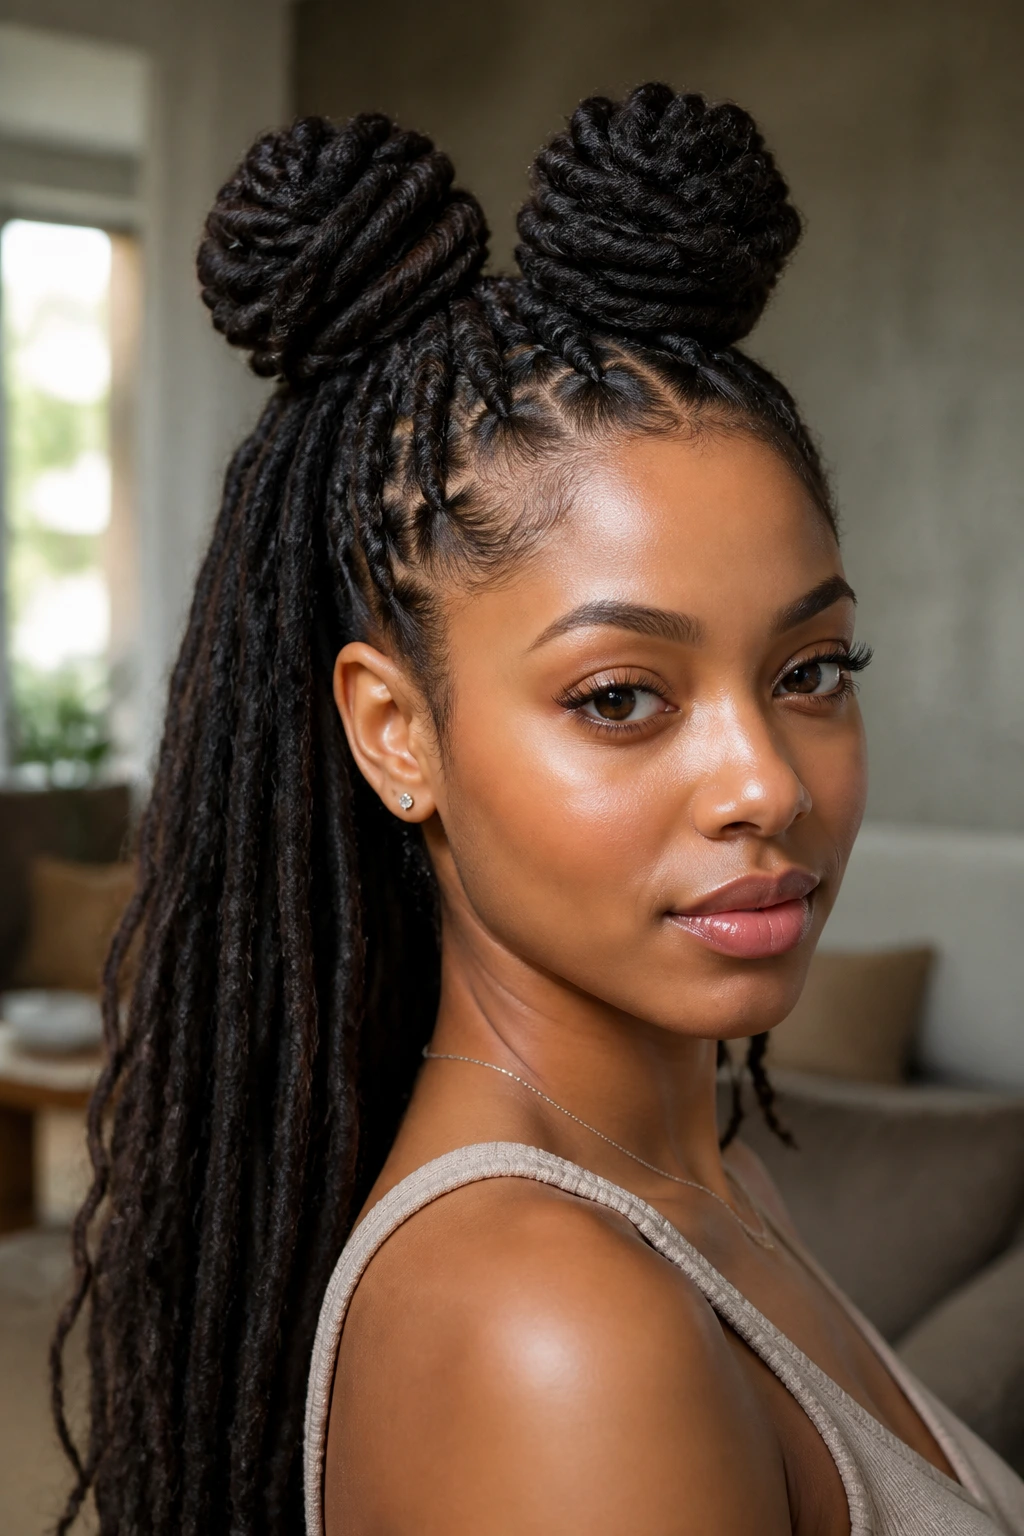
Compared with a full half-up knot set, two jumbo front knots keep the top clean and leave most of your length free. Part the front into left and right sections, wrap one knot on each side, and let the back fall loose.
The shape is easy to wear. You get lift around the face, your ears stay visible, and the loose locs at the back soften the whole style. If you have layers or curled ends, that contrast looks especially good.
This style also handles second- or third-day locs well. The front sections can hide fuzzier roots, while the back length still looks natural and lived-in. That makes it a practical choice when you want something styled but do not want to do a full reset.
Keep the knots wide rather than tall. Flat, round front knots are easier on the scalp and less likely to bump into sunglasses or hat brims.
19. Beaded Bantu Knot Towers
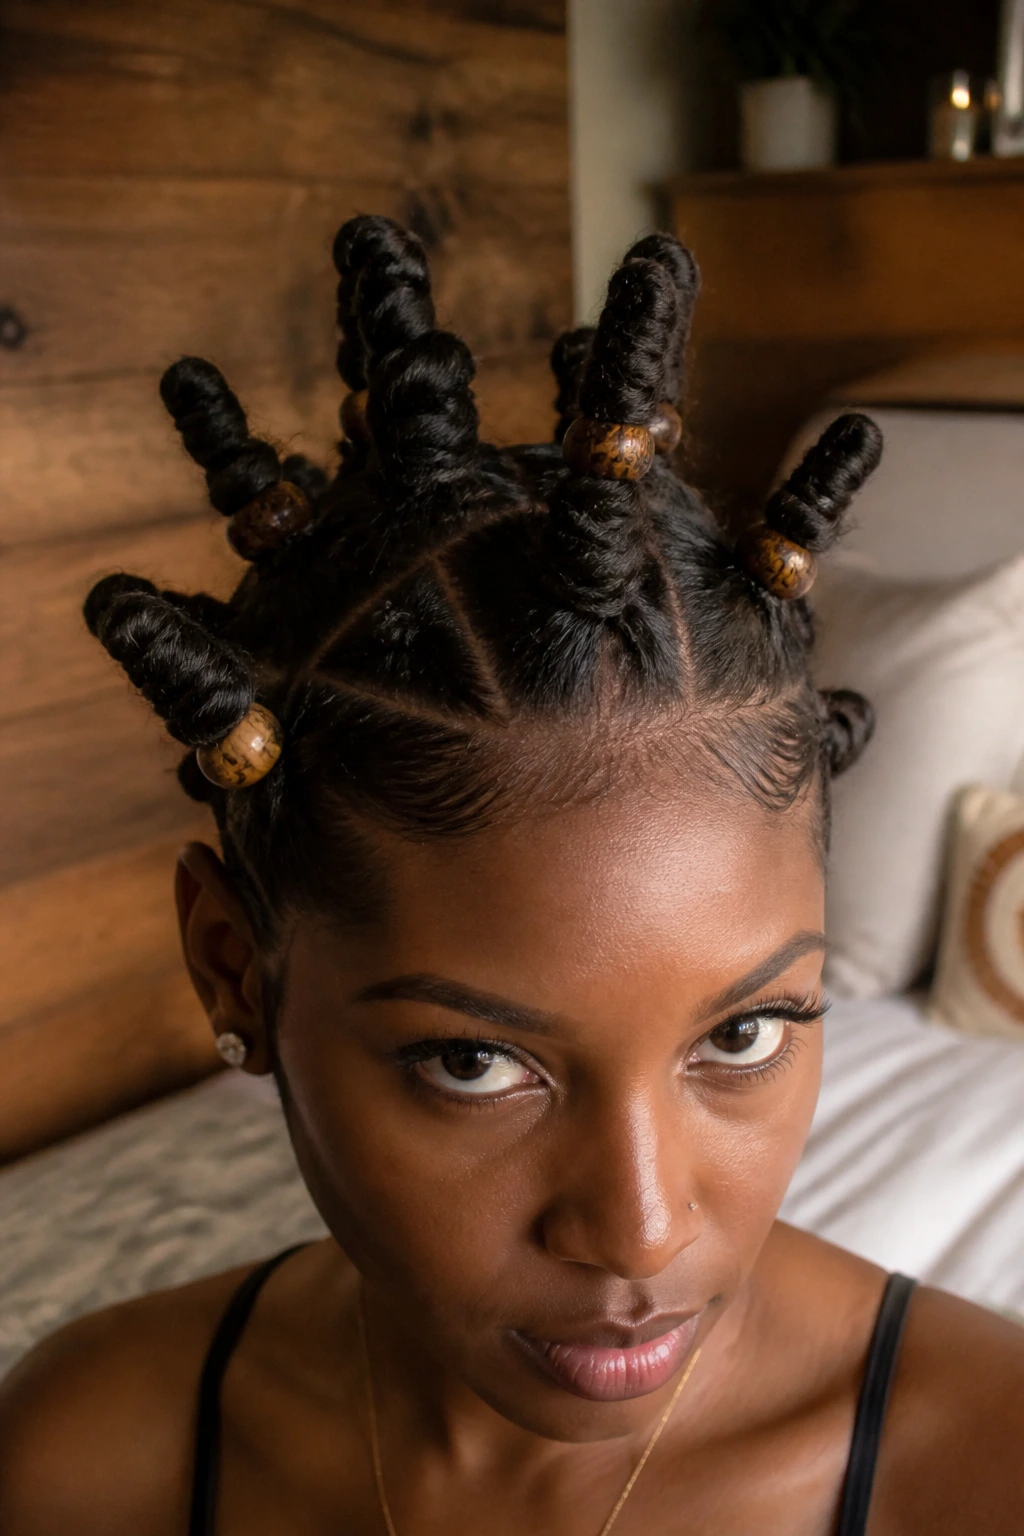
Beads change the weight of a knot fast, so this look needs restraint. A beaded knot tower uses taller knots with a few beads threaded near the ends before wrapping, which lets the embellishment peek out along the coil or sit at the top like small accents.
Where beads help most
Use them on 2 to 4 selected knots, not every knot on your head. Long locs already bring plenty of visual texture. A full set of heavy beads can turn a sharp style into a headache by lunchtime.
Keep the load light
- Pick wood, resin, or hollow metal beads instead of thick glass.
- Place beads near the last 1 to 2 inches of the locs so they show after wrapping.
- Test one knot first to see how the bead changes the shape.
- Add the heaviest beads near the crown, not the nape.
When it hits, it feels ceremonial and expressive. When it misses, it feels heavy. Small edit, big difference.
20. Flat-Profile Knots for Hats and Headwraps
Some Bantu knots are too tall for daily life. That is the blunt truth.
A flat-profile version spreads each knot wider and lower against the head, almost like a coiled loc pad instead of a raised bun. If you wear hats, helmets, loose beanies, or headwraps, this shape makes sense in a way tall knots do not.
The technique shifts a bit. Instead of winding upward, you wrap the locs around the base in a flatter circle and pin close to the scalp. Think disk, not tower. It looks cleaner under fabric and creates less pressure when you lean back in a car seat or rest your head against a chair.
This style is also good for sleeping one night in the same look. Tall knots collapse. Flat knots usually survive with less drama.
If function matters as much as appearance, put this one high on your list.
21. Diamond Grid Knots
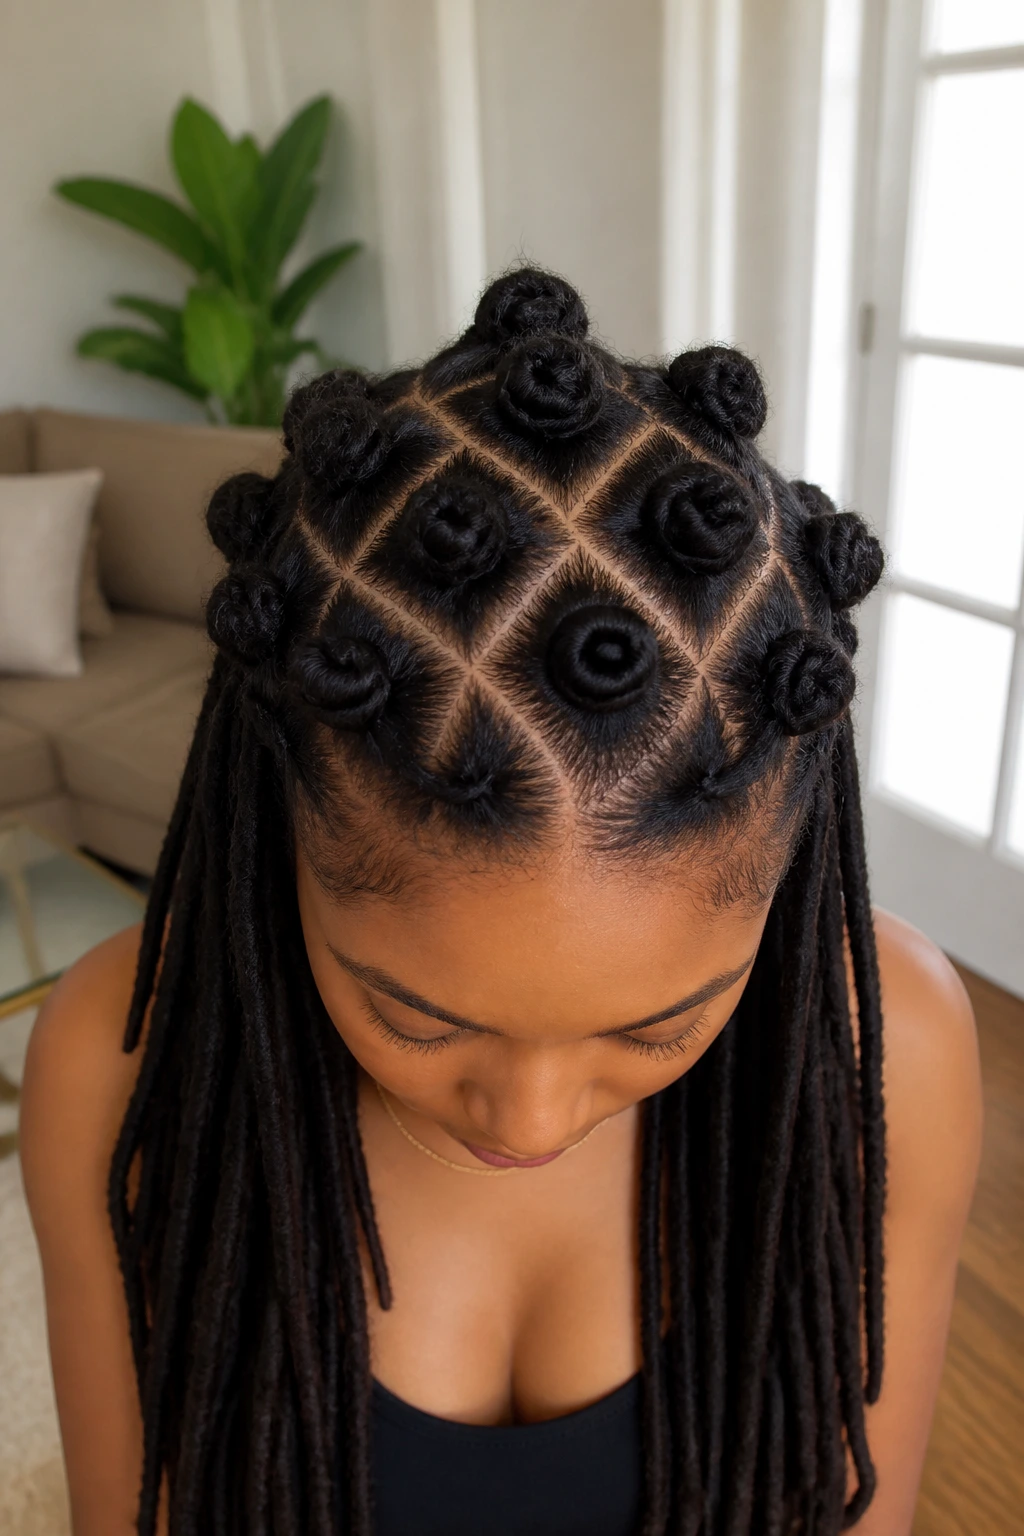
Why do diamond parts make a knot set look sharper even when the knot shape stays plain? Because diagonal lines stretch the eye. Squares read stable. Diamonds read active, and that tiny shift changes the whole mood of the style.
The grid works best with medium knots placed in the center of each diamond section. You want the parting to stay visible, so avoid sections that are too large. Around 1½ inches corner to corner tends to give a clean result without crowding the scalp.
When this pattern shines
Choose it after a neat retwist or a tidy interlock appointment, when your roots are already defined. The scalp pattern is part of the look, so blurred roots steal some of the effect.
This is one of the crispest styles in the group. It feels orderly, though not stiff.
22. Braided-Base Bantu Knots
Say your locs are uneven in length, or the roots slip when you start wrapping. A braided-base knot fixes that by starting each section with a short 1 to 2 inch braid or rope twist at the root before the locs are coiled into the knot.
That extra anchor changes the hold. Newer locs, softer roots, and freshly moisturized hair often behave better when the section has a braided start instead of going straight into the wrap.
A few smart uses for it:
- Use it on the front hairline where slipping shows fastest.
- Add it to only the heaviest sections if you do not want extra work everywhere.
- Keep the braid short so the knot still reads as a knot, not a braided bun.
- Pin through the braided base for extra grip.
It’s a practical style, maybe not the flashiest in the bunch, though it solves a real problem that long-loc wearers run into all the time.
23. Rosette Knots With Wrapped Ends
Rosette knots are softer in outline than classic Bantu knots. Instead of one tight, compact coil, you fan the locs slightly as you wrap so the knot looks more like a flower shape with layered edges.
On long locs, that softness matters. Standard knots can turn dense and blunt when the locs are thick or plentiful. A rosette lets the texture breathe. You still get a contained updo, though the silhouette has more movement.
This is a strong formal option because it looks dressed up without relying on sparkle or extra pieces. If your locs have color at the tips, the rosette shape also lets those lighter ends show around the outer edge, which gives the knot more depth.
Take your time with pinning. Rosette shapes look loose by design, but the center still needs a firm anchor or the whole thing starts to sag after a few hours.
24. Mixed-Size Knot Map
Uniform knots can look clean. They can also look flat. A mixed-size knot map fixes that by combining 2 or 3 jumbo knots with 4 to 6 medium or mini ones placed around them.
The key is hierarchy. Put the largest knots where the head can support them—usually crown, upper side, or upper back. Use the smaller knots to fill space, frame the face, or finish the line of the style. If the biggest knots sit low at the nape, the design can feel bottom-heavy.
This style gives you room to use odd loc counts too. If one section naturally holds 8 locs and another only 4, the variation stops looking like a mistake and starts looking like the plan.
Done carelessly, it feels messy. Mapped well, it reads editorial, sharp, and far more custom than a standard grid.
25. Bridal-Style Crown Knots With Accessories
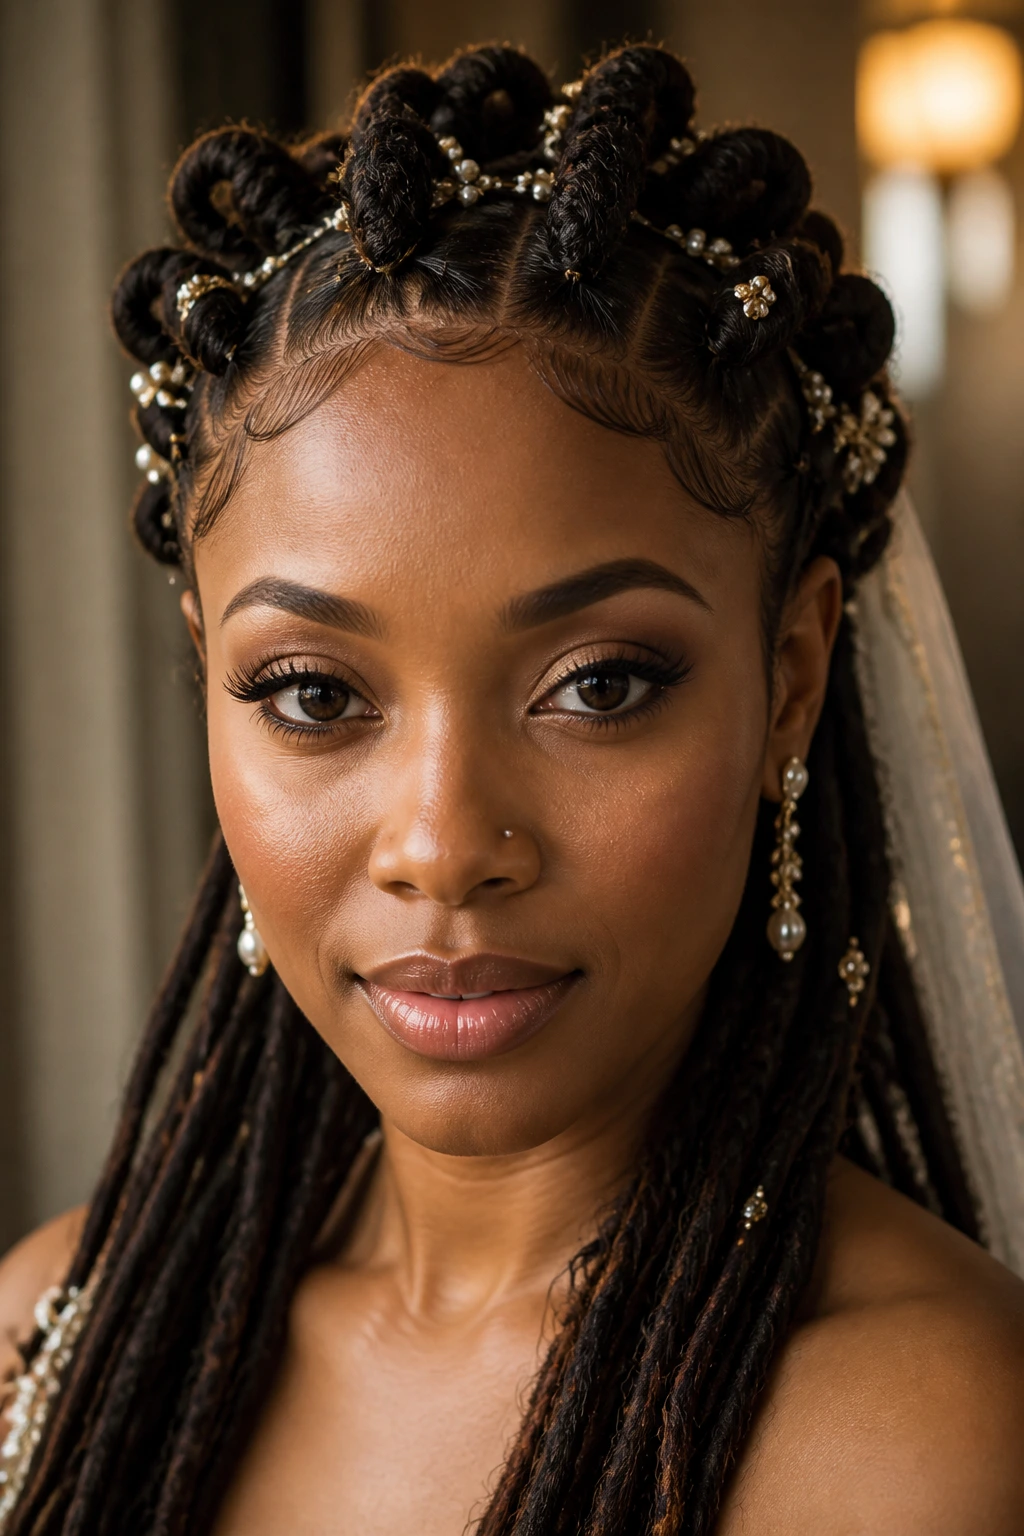
This is the dressier end of the spectrum: small-to-medium crown knots arranged with clean spacing, then finished with restrained accessories placed where the light catches them at the hairline and upper crown.
Accessories that help instead of crowding
You do not need a full tiara effect. A few slim pins, pearl accents, tiny shells, or metallic cuffs on 3 to 5 knots is usually enough. Long locs already give the style texture and body. More decoration is not always more impact.
Placement rules worth following
- Keep the best pieces near the front third of the head where they can actually be seen.
- Match metals if you are wearing earrings or a necklace.
- Avoid bulky clips that press awkwardly into the knot base.
- Test the full look for 15 minutes at home before an event so you can catch any sagging.
When this style lands, it feels polished and ceremonial without hiding the fact that you are wearing locs. That balance is the whole point.
Final Thoughts
The smartest Bantu knot look for long locs is the one that respects weight, spacing, and scalp comfort before anything else. Fancy parting helps. Accessories help. None of that saves a style built on sections that are too heavy, too tight, or placed in the wrong spot.
If you are choosing between two ideas, start with the one that matches your loc density and your day. Crown clusters, flat-profile knots, and half-up sets usually earn their keep because they wear well outside a mirror. Rosettes, spiral placements, and accessory-heavy crown knots shine when the style itself is part of the outfit.
One last practical note: take photos from the side and the back after you finish. Bantu knots on long locs can feel balanced from the front and still lean, drag, or sit unevenly once you turn your head. Catching that early saves you from redoing the whole thing later.