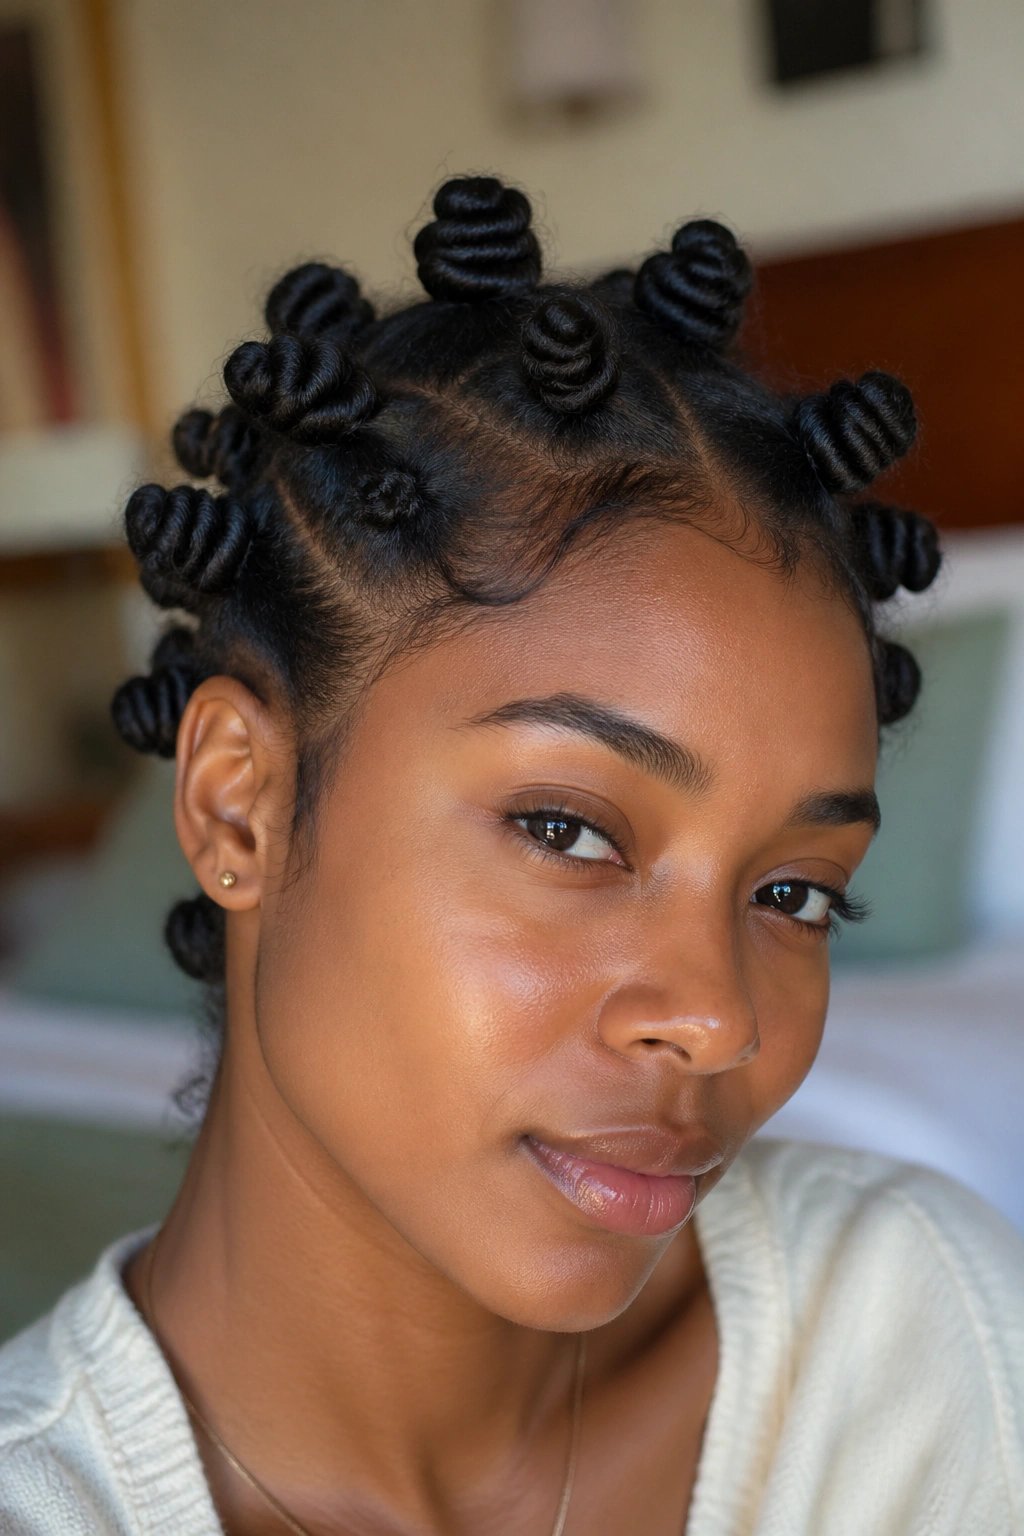
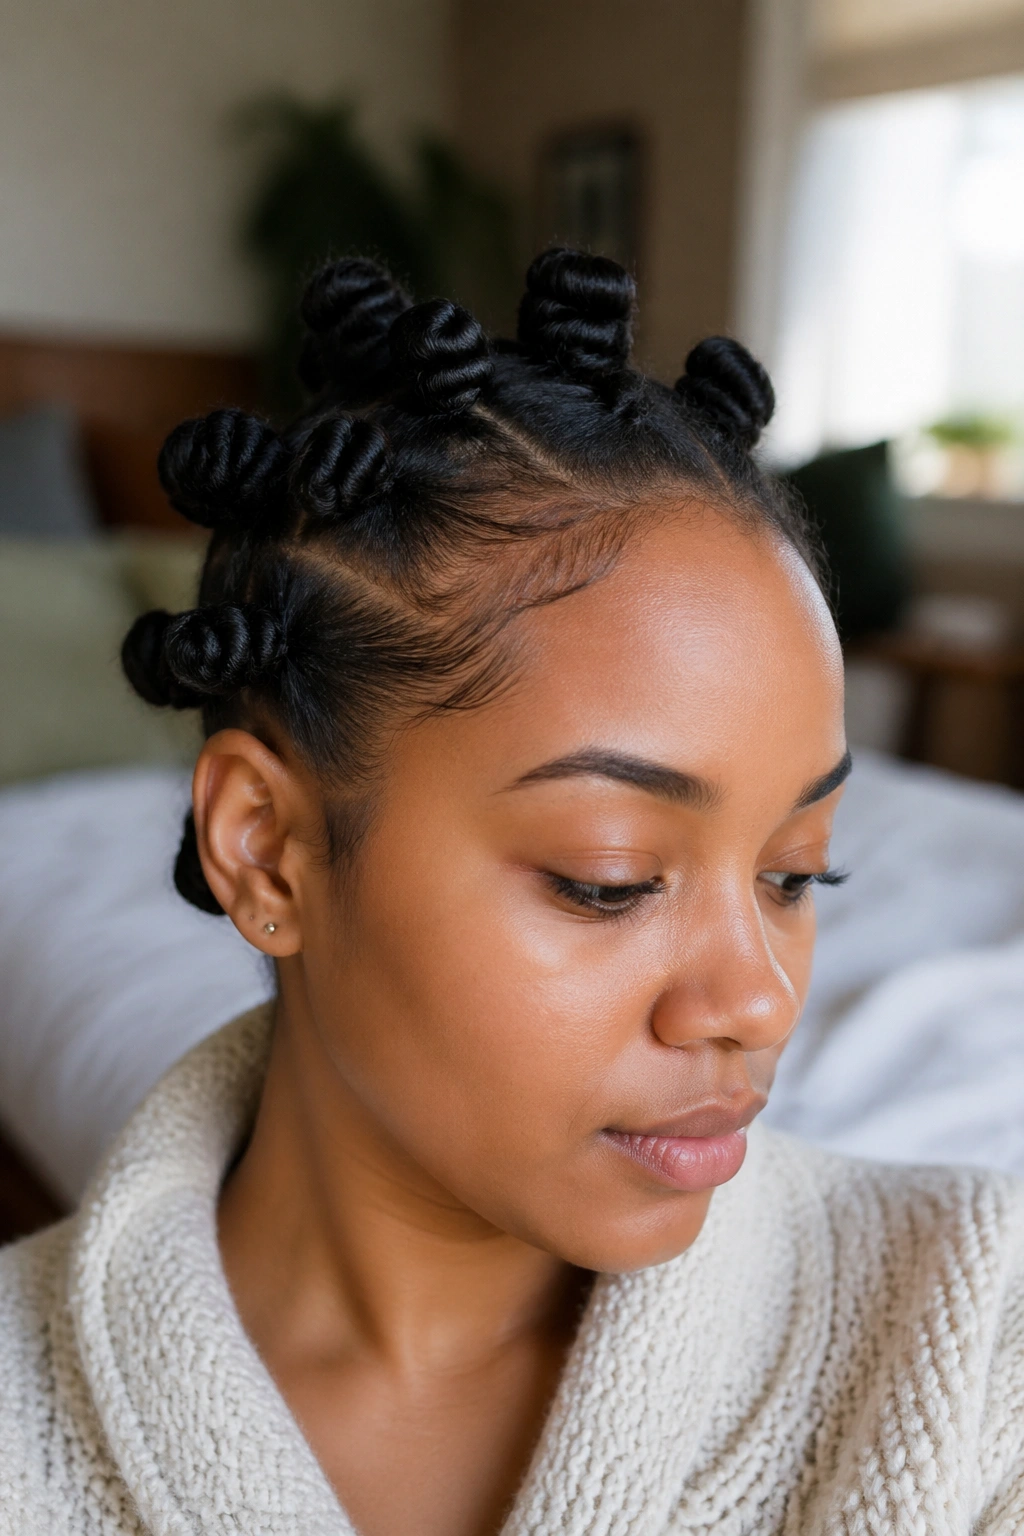
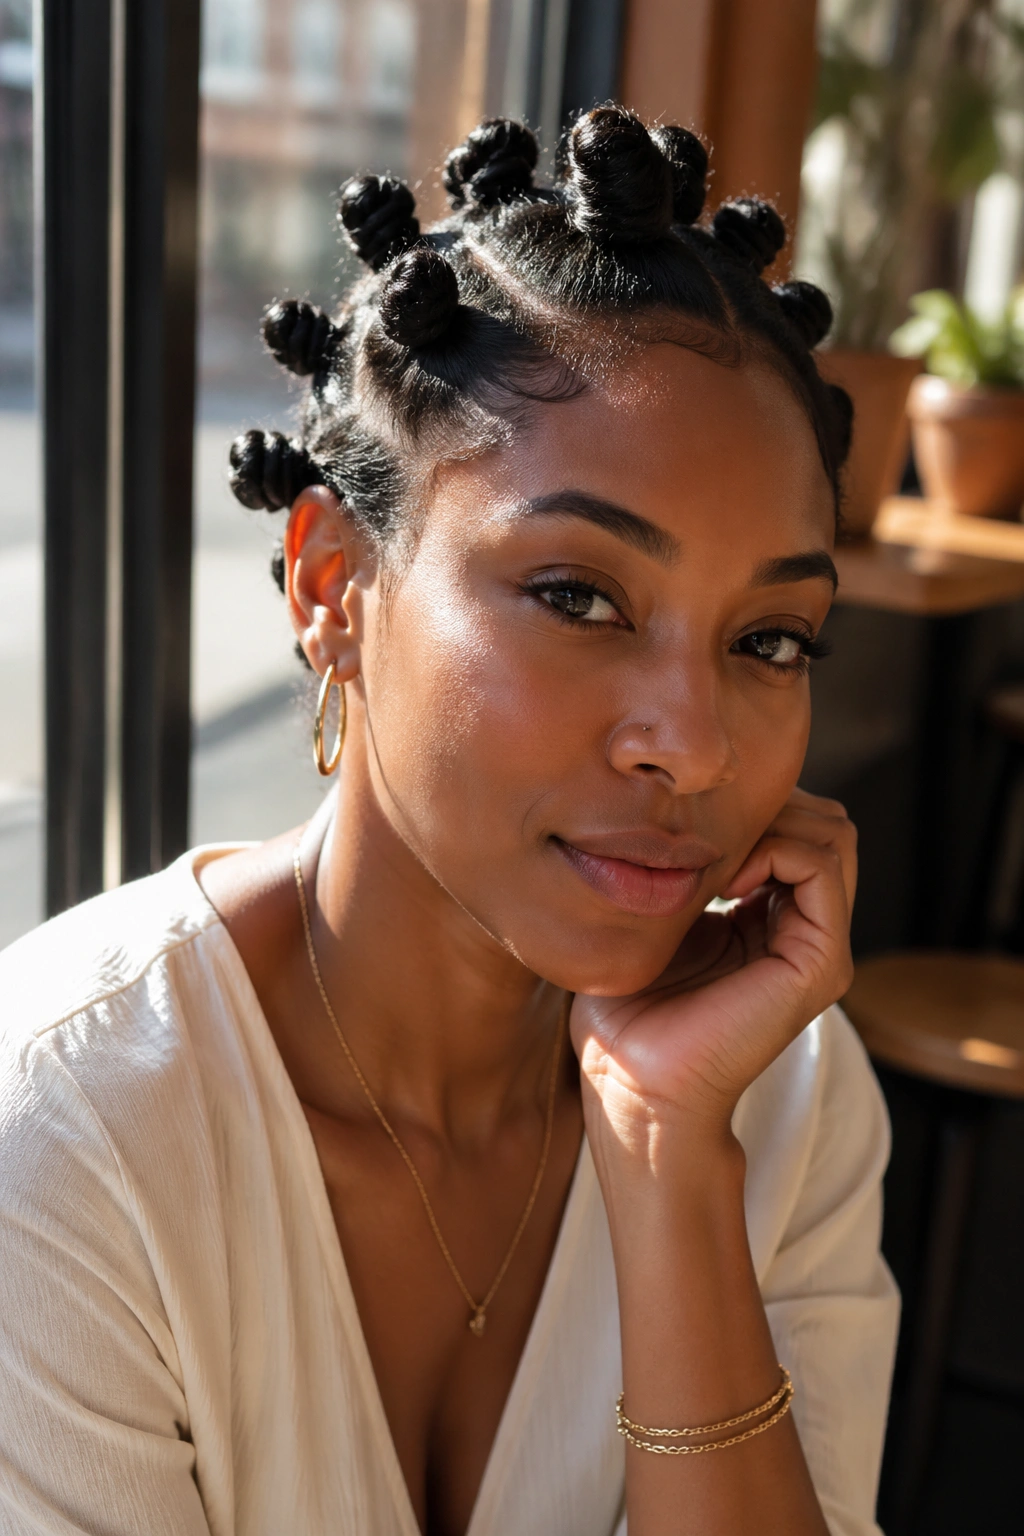
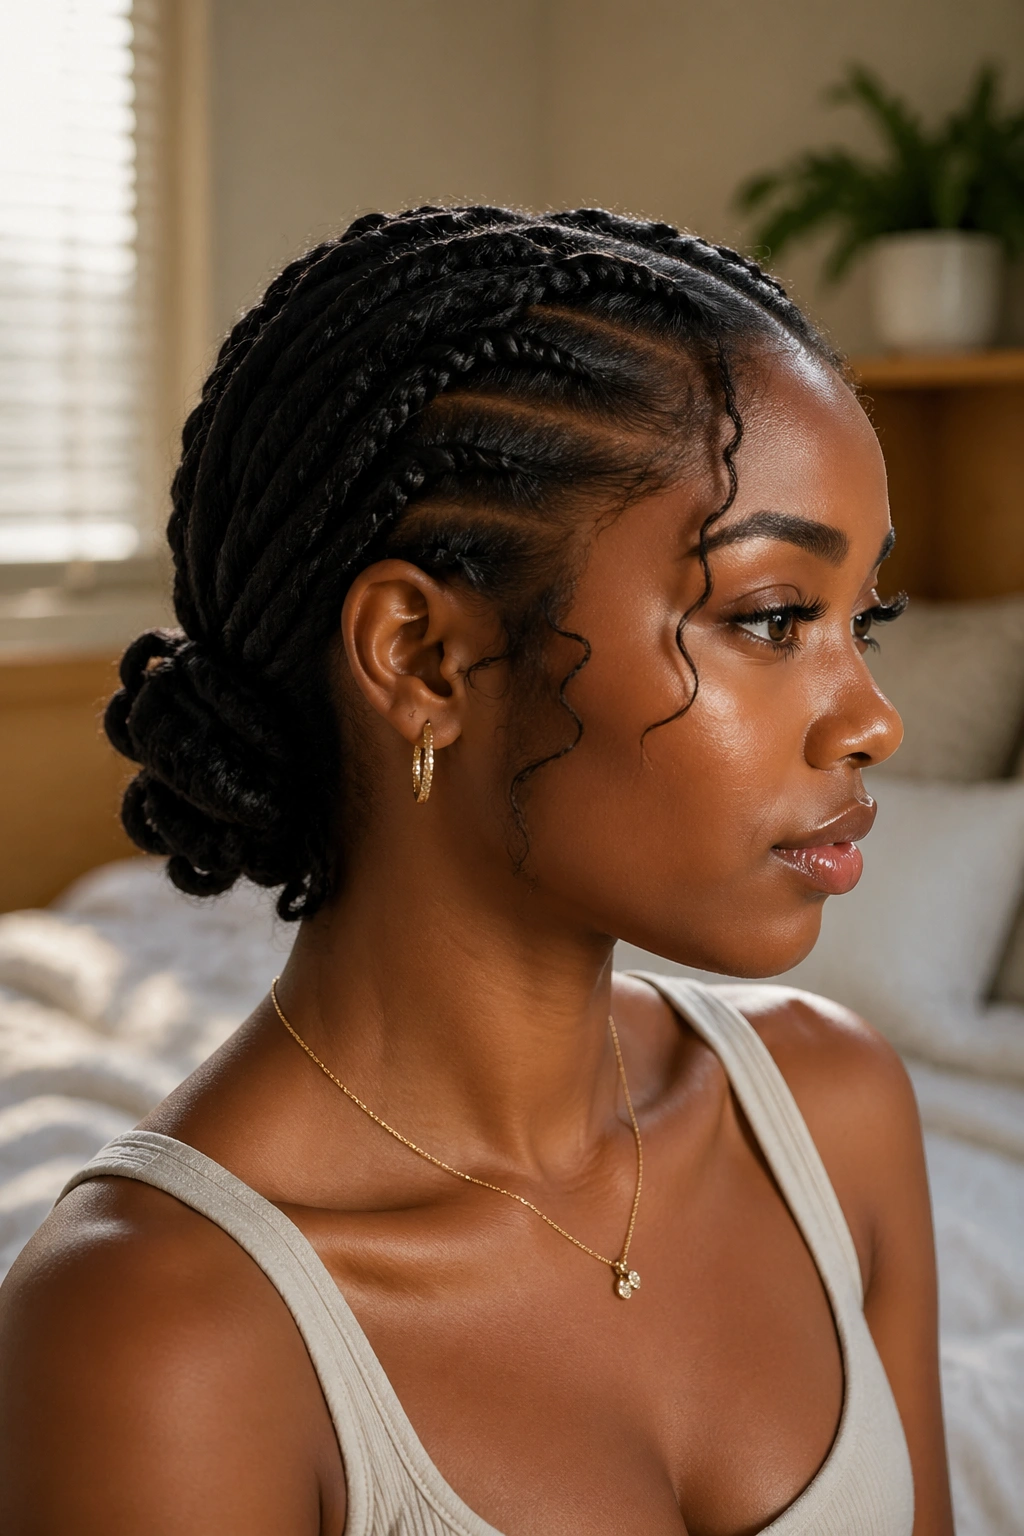
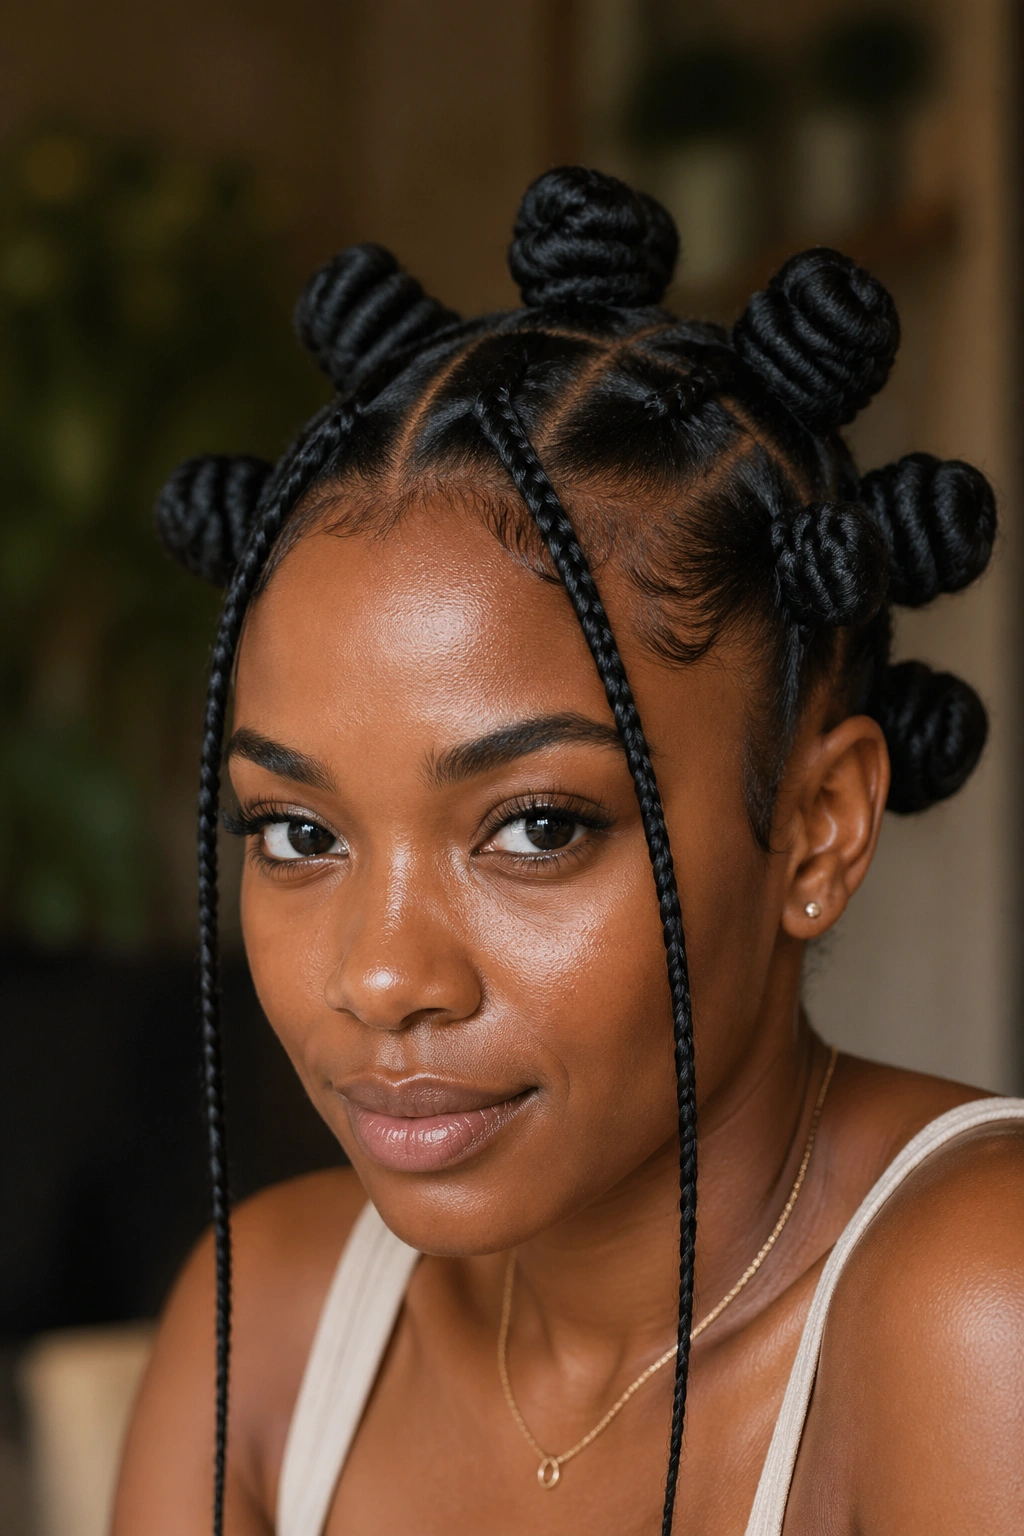
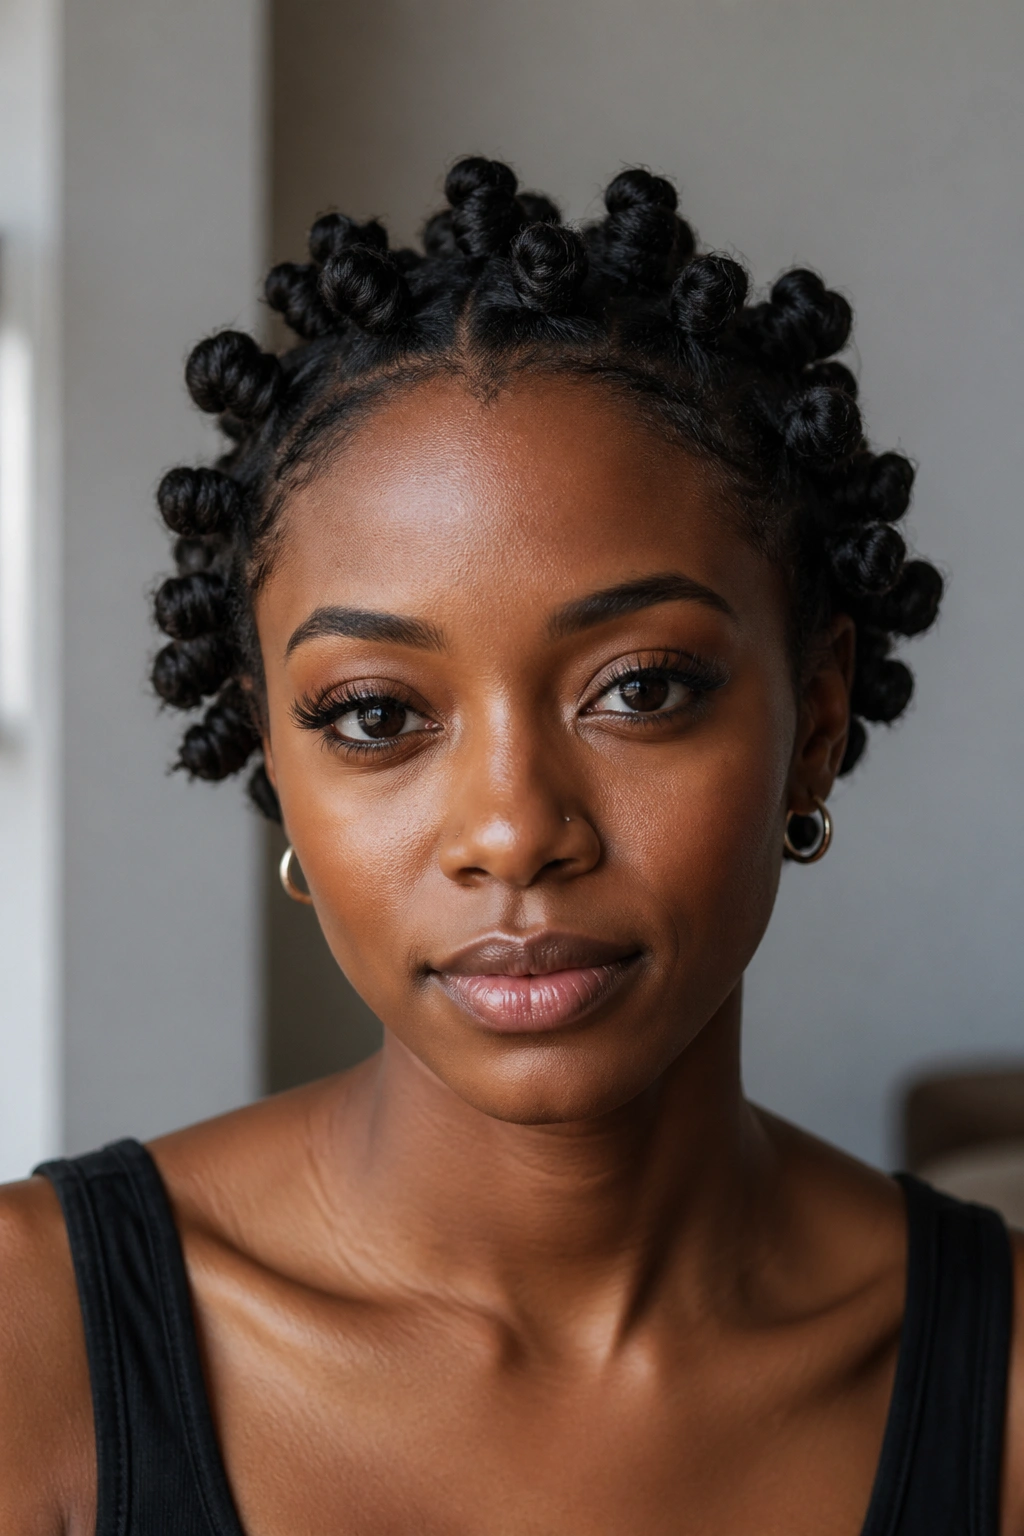
Loose Bantu knots can change the whole mood of the style.
Wrap them too tight and the look turns sharp, sculpted, and tense around the hairline. Wrap them with a lighter hand, leave a little air at the roots, and suddenly the knots look rounder, fuller, and a lot easier on the face. That softer finish is what many people are after, especially when they want the style to feel protective without looking severe.
There’s also a practical reason to care about that difference. Bantu knots sit right at the meeting point between beauty and tension, and that line matters. When the base is pulled too hard, your temples tell on you fast — soreness, tiny bumps, a headache before lunch, sometimes that shiny stretched look around the edges that never means anything good.
Bantu knots also deserve respect beyond trend cycles. The style has roots in Southern African traditions among Bantu-speaking peoples, and it carries history with it. So when I talk about making them looser, I do not mean messy, lazy, or half-done. I mean controlled softness: clean sections, comfortable roots, rounded knots, and a finish that still honors the shape.
A good set of loose knots should feel secure, look polished, and let your scalp breathe a bit. That balance is where the style gets good.
What Makes Loose Bantu Knots Look Soft
Softness starts at the scalp, not the knot.
Most people look at the final twist and forget the base. That’s the mistake. If the section is pulled flat before you even start wrapping, the knot will read tight no matter how fluffy the ends are. A softer version keeps a little give at the root, so the hair rises from the scalp instead of being pasted onto it.
Root tension changes the whole shape
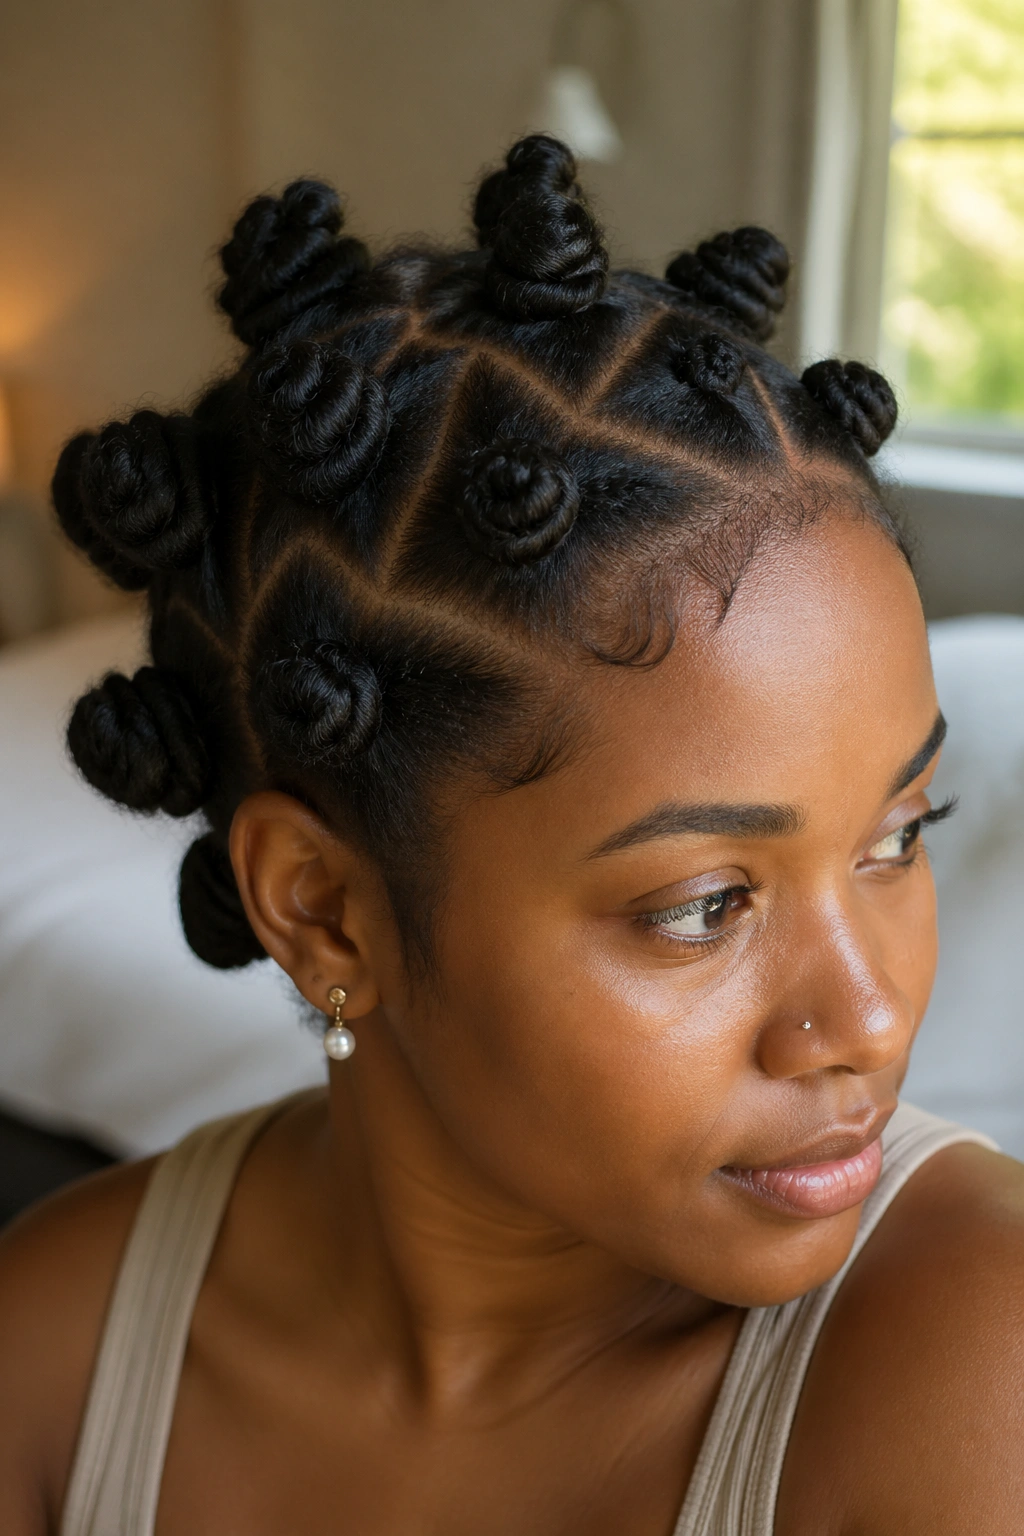
When the base has light tension, the knot sits up with a fuller, almost cushioned shape. You can usually see a bit more texture around the root, especially on coily hair, and that texture helps. Flat roots make the style look strict. Slightly lifted roots make it look lived-in and gentler.
Product choice matters here too. A heavy gel from roots to ends can turn the whole set hard and shiny in a way that reads stiff. For softer Bantu knots, I lean toward leave-in conditioner + mousse + a tiny dab of pomade on the ends. You still get hold, but the hair can move.
Rounded knots beat tiny hard coils
The knot itself should look rounded, not wound down like a screw. If you twist the section until it gets rope-tight before wrapping, the finished bun shrinks into a small hard button. If you twist with less force — especially through the middle of the strand — the knot keeps more width and gives that softer profile people usually mean when they save the style to a mood board.
Partings can soften or harden the look
Straight square parts are classic, but they also look more graphic. Nothing wrong with that. If you want a lighter feel, try triangles, offset bricks, or a side part in front. Those small changes stop the style from looking too rigid, and you notice it right away around the forehead and crown.
Prep Hair So the Knots Stay Full
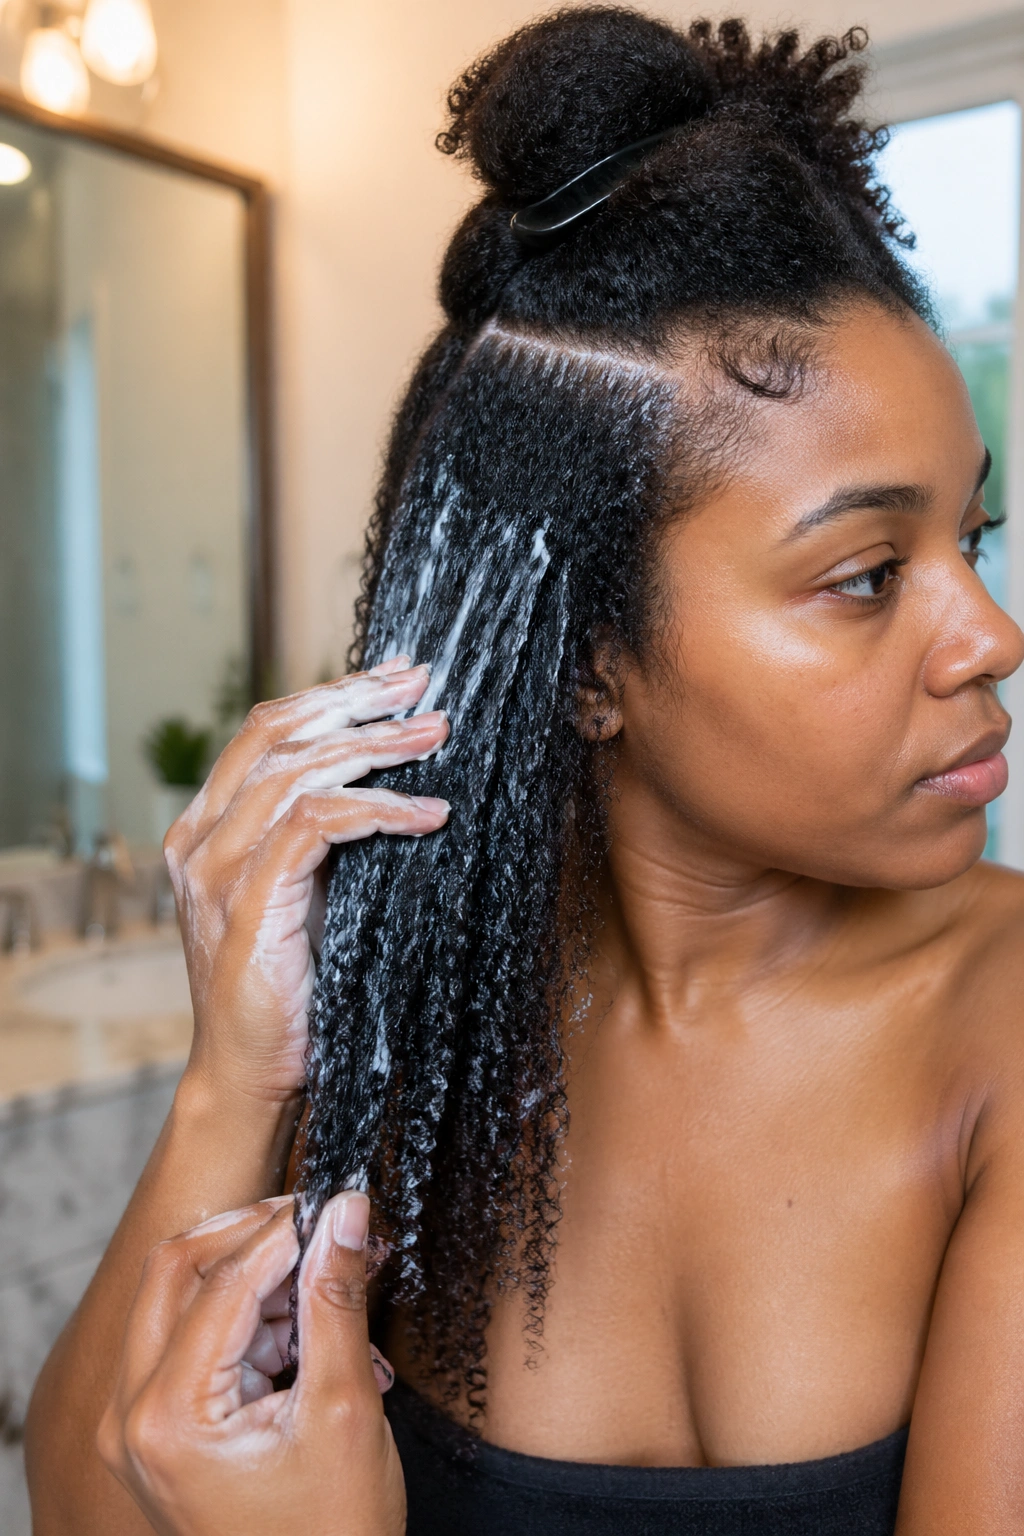
Freshly washed hair helps, but not in the way people think.
The goal is not squeaky-clean, fluffy hair with no grip. You want hair that is clean, moisturized, detangled, and stretched enough that each section wraps smoothly. On soaking wet hair, loose knots can puff up before they dry and lose their shape. On bone-dry, crunchy hair, they can fray fast. The sweet spot is about 80 to 90 percent dry if you want fullness with decent hold.
Here’s the prep order I trust most:
- Cleanse the scalp well, especially if you plan to keep the knots in for more than two days.
- Use a slip-heavy conditioner so sectioning does not turn into a fight.
- Stretch the hair first with braids, banding, twists, or a low-heat blow-dry.
- Layer products lightly: leave-in first, then mousse or setting foam, then a pin-head amount of pomade on the ends if they tend to unravel.
- Let the hair set a bit before wrapping. Ten minutes under a hooded dryer or air-drying in sections helps.
One thing I keep circling back to: skip thick grease at the roots. It makes parting harder, dulls the finish, and can leave the scalp looking cloudy by day two. If your hair runs dry, put richer product through the mid-lengths and ends instead.
And section clips. Use them. Loose Bantu knots go sideways fast when unparted hair keeps wandering into the next section.
How to Keep the Hairline Comfortable and the Style Neat
A sore hairline is not the price of a neat style.
Dermatologists have warned for years that repeated tension can lead to traction alopecia, especially at the temples and nape where the hair is finer. Bantu knots are not automatically harmful, but they can become a problem when every section is pulled tight and worn that way again and again. If you feel throbbing, see tiny bumps, or notice the skin around your edges looking stretched and shiny, loosen the style.
The front sections need the gentlest hand. That’s where people often overdo edge control, overbrush, then twist the knot hard to make it “last longer.” I’ve never thought that tradeoff was worth it. A knot that lasts an extra day but puts stress on your edges is a bad bargain.
Signs your knots are too tight
- You get a headache within an hour or two.
- Your eyebrows feel lifted when you smile or talk.
- The roots look glassy and overexposed instead of softly defined.
- You cannot sleep on them comfortably even with a satin scarf.
- The temples burn or itch, which is often the first warning.
Small fixes that help
If you already installed the knots, undo the front two or three and rewrap them with less tension. You can also swap hard-hold gel for mousse at the hairline, then tie a satin scarf around the front for 10 to 15 minutes. That gives a neat finish without forcing the roots flat.
Comfort first. The style will still look good.
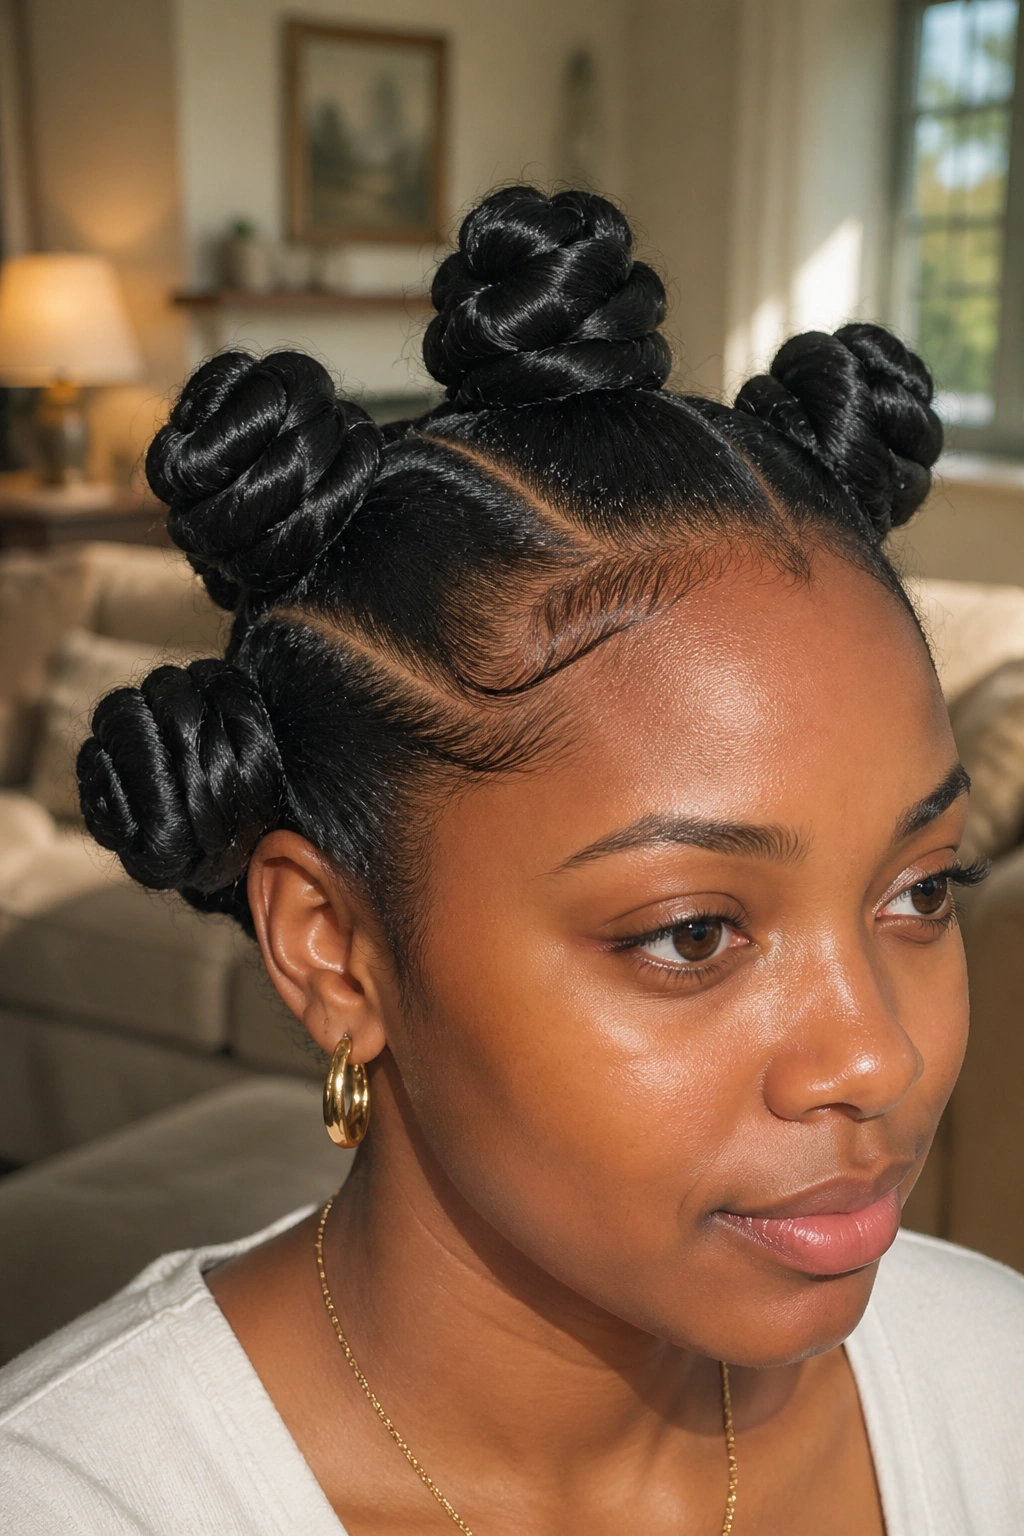
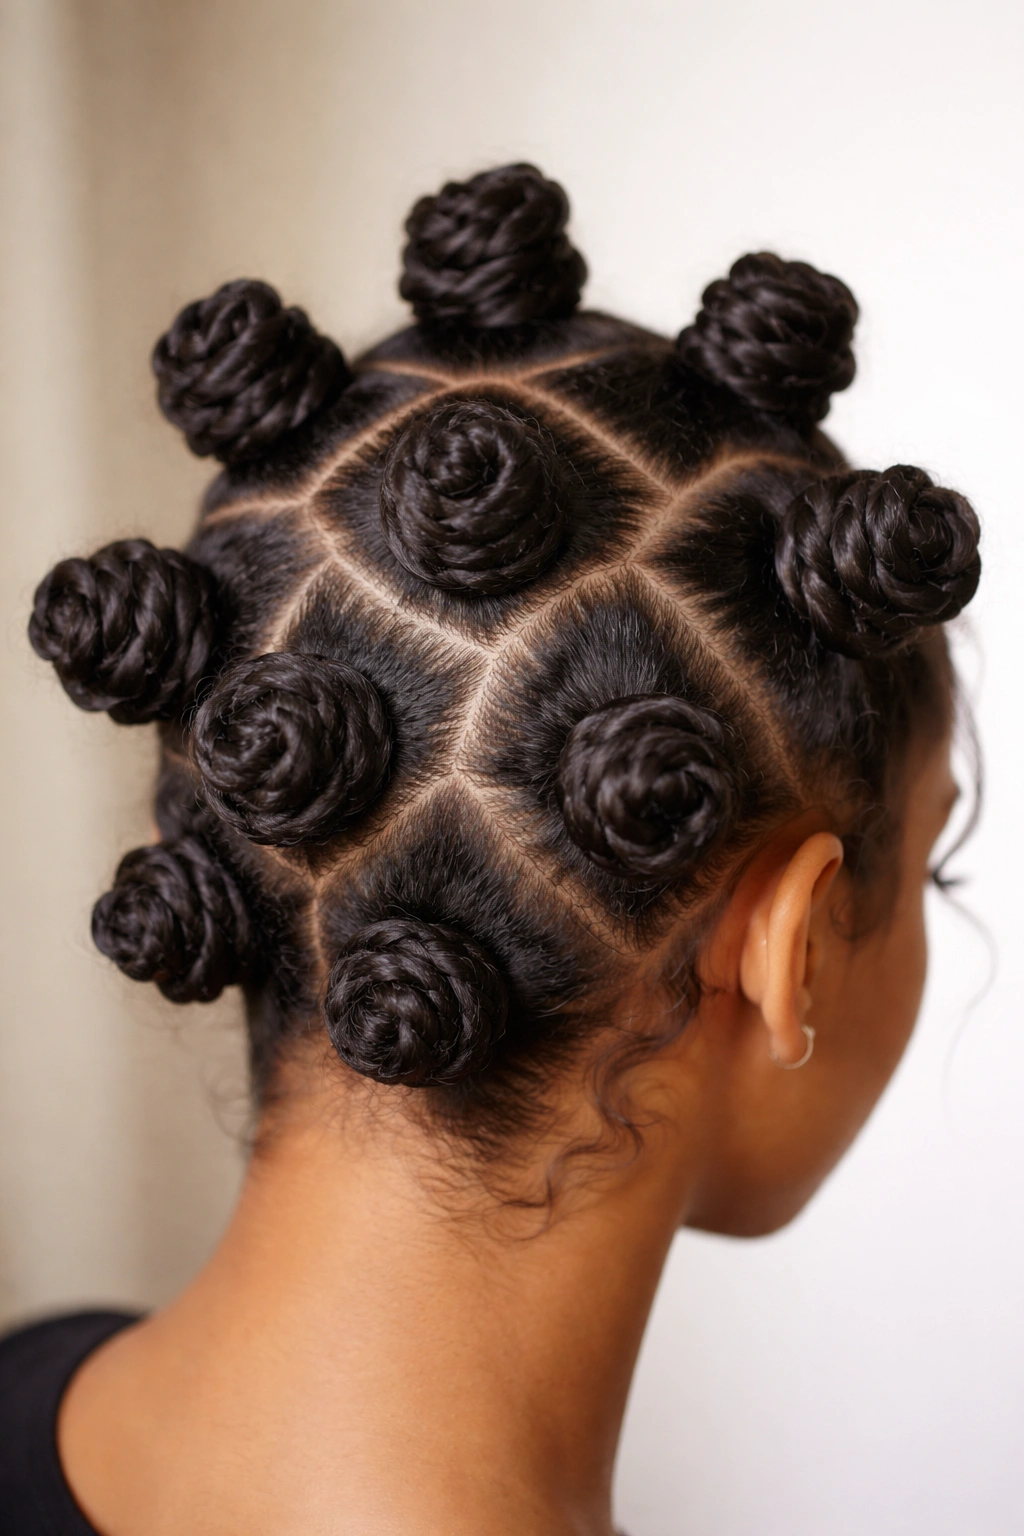
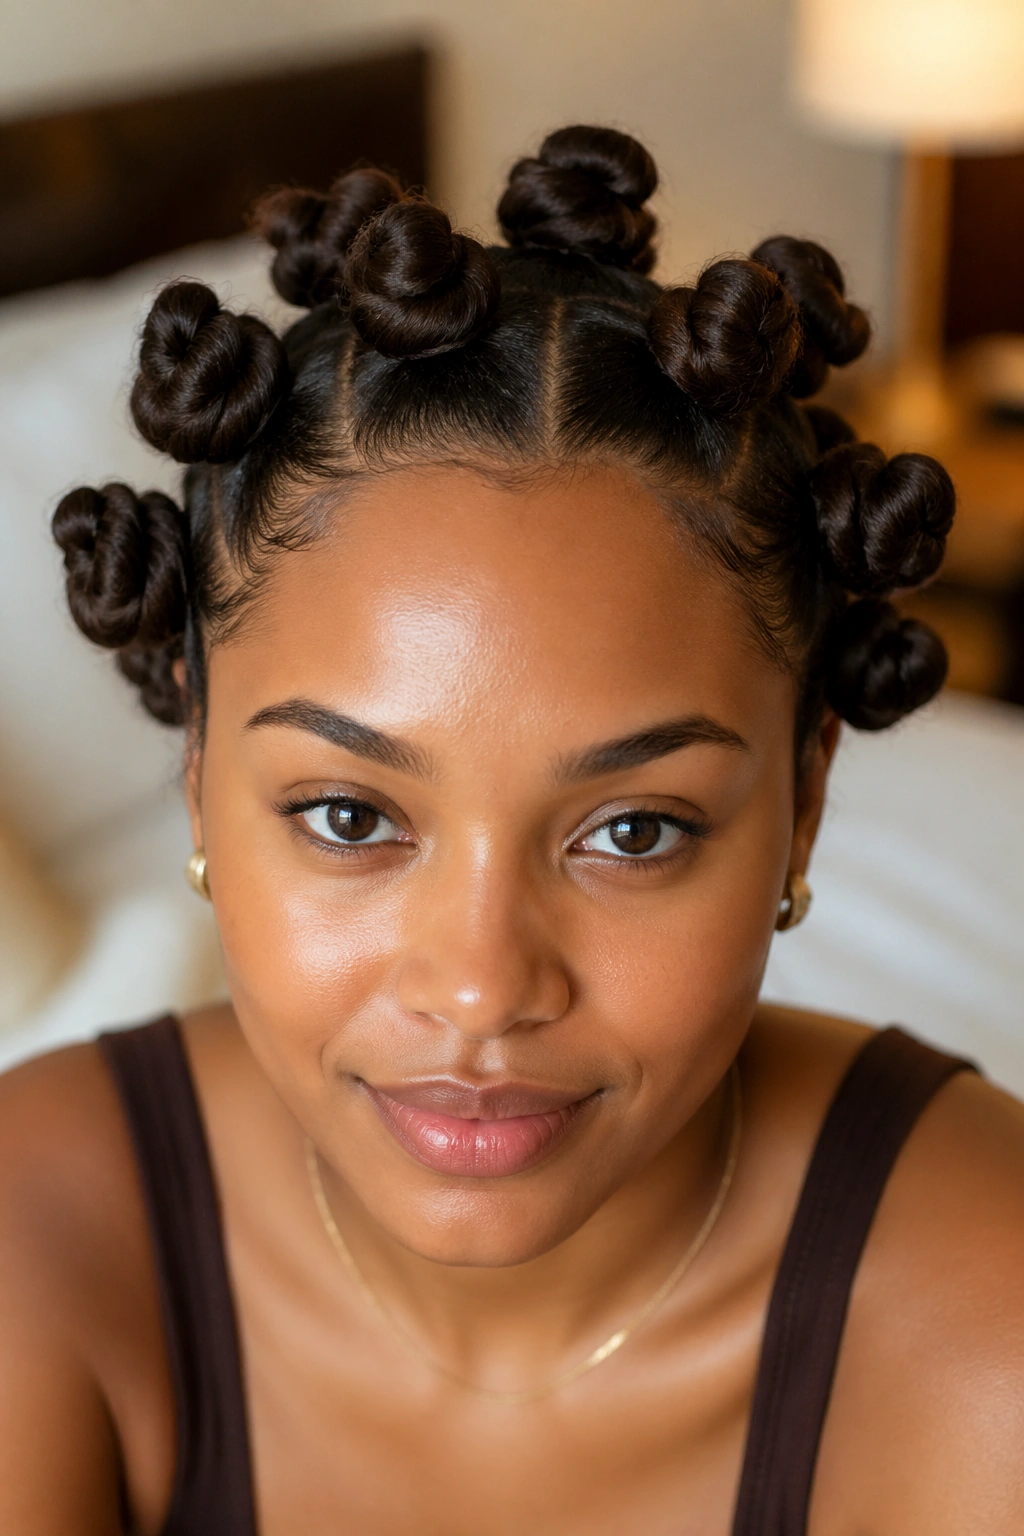
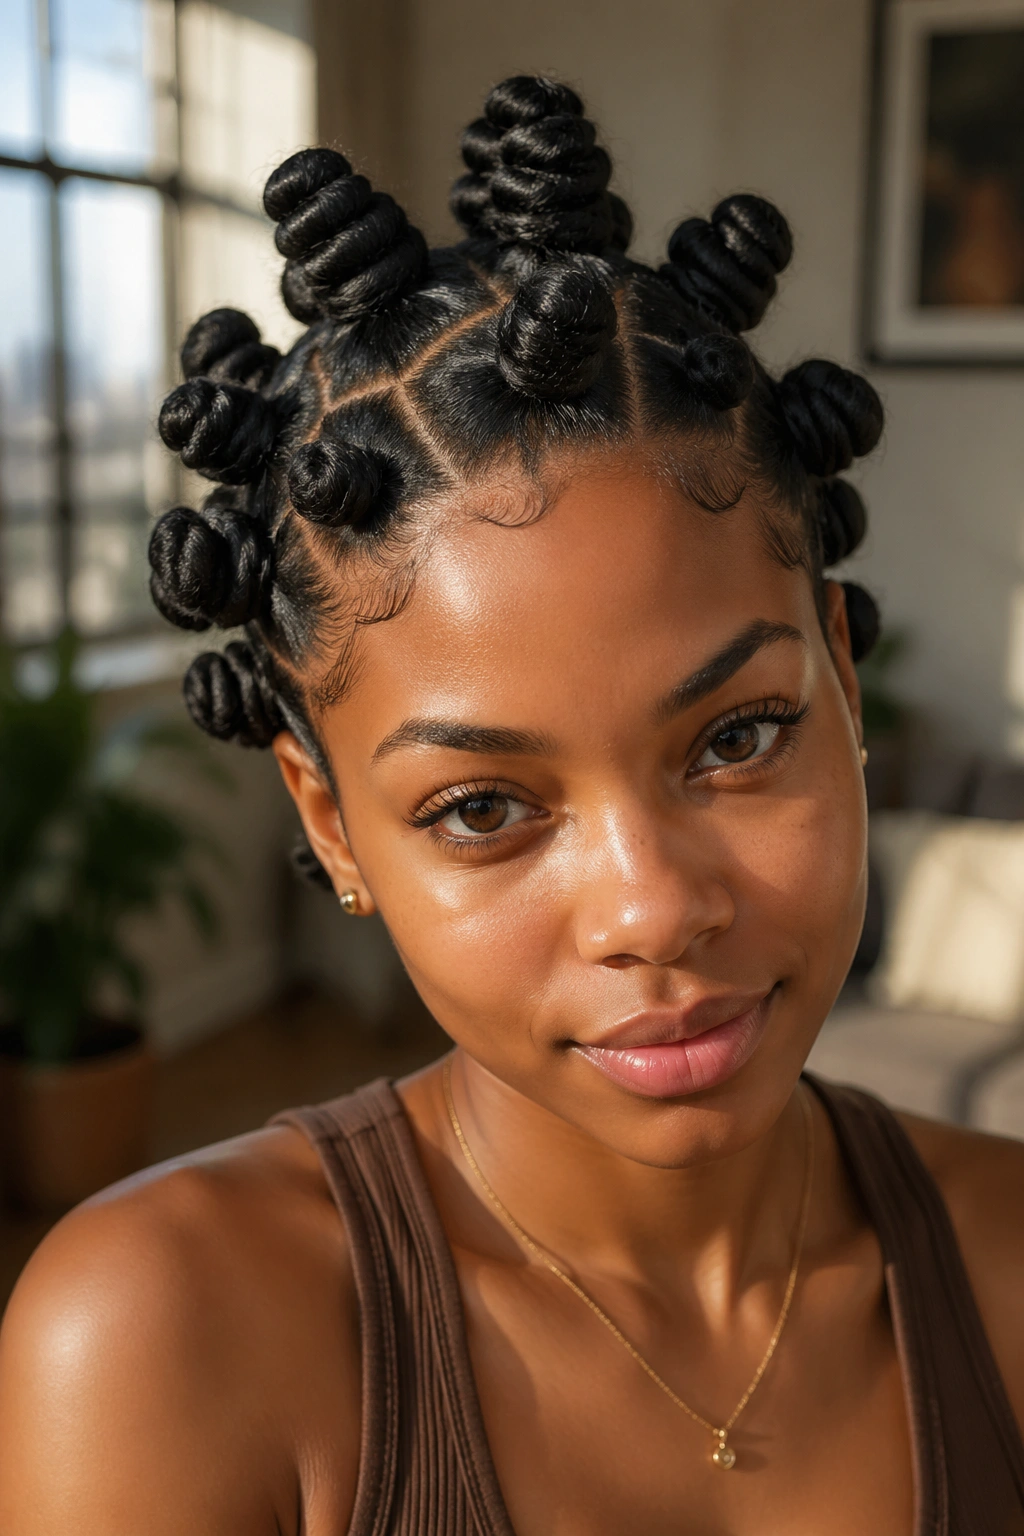
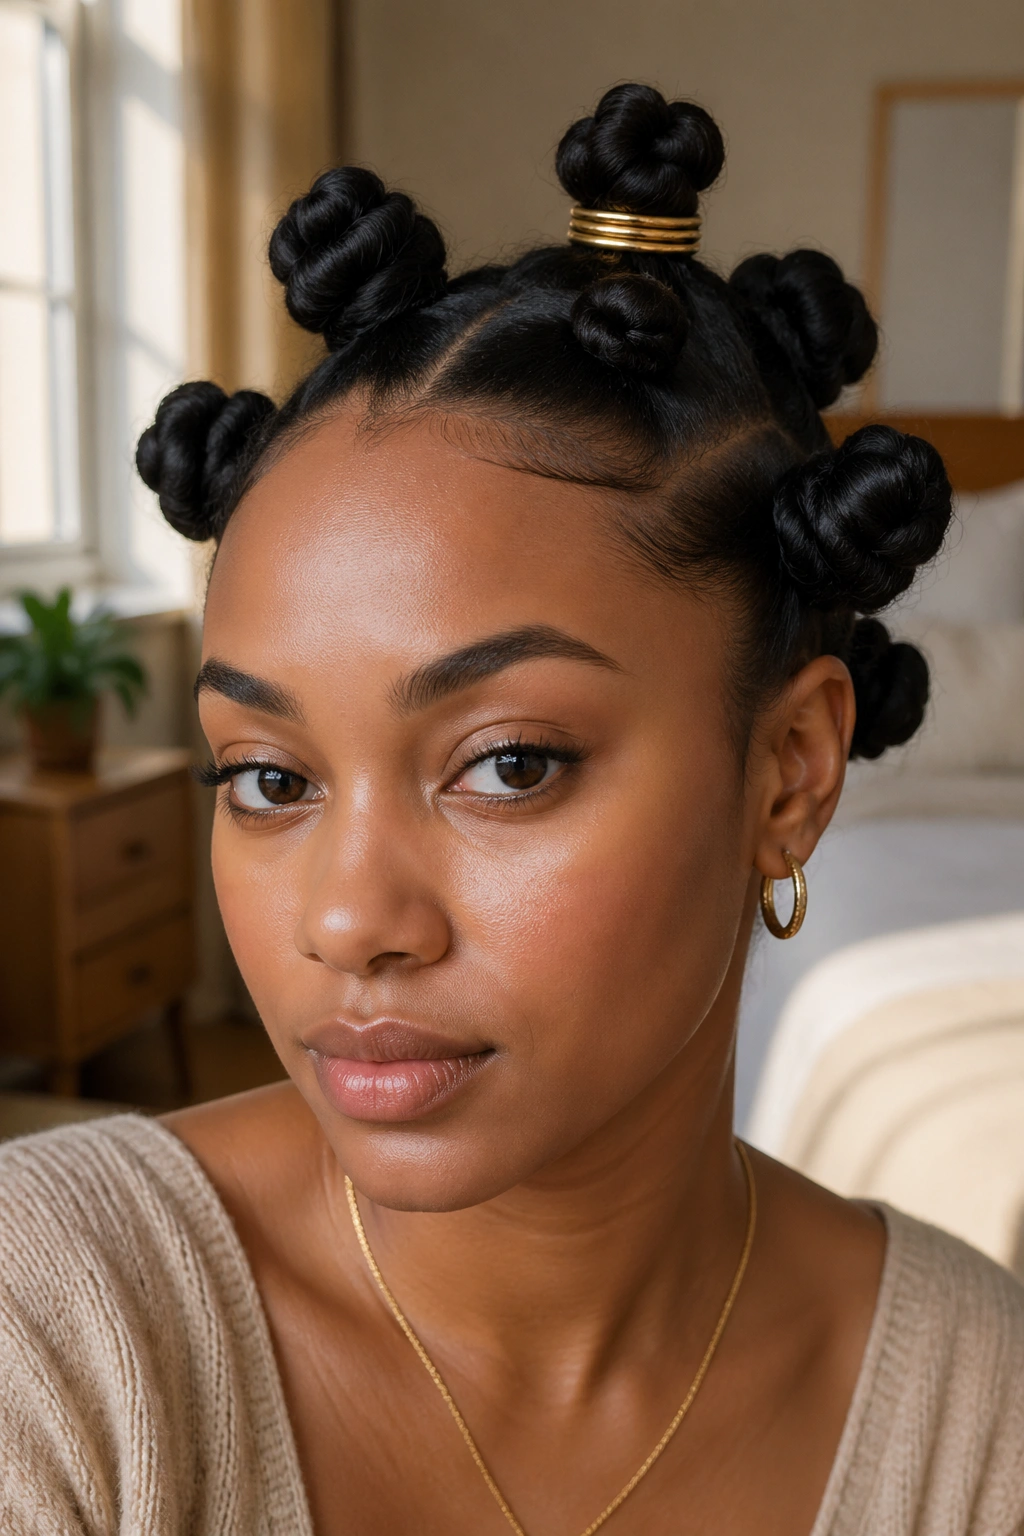
1. Center-Parted Loose Bantu Knots
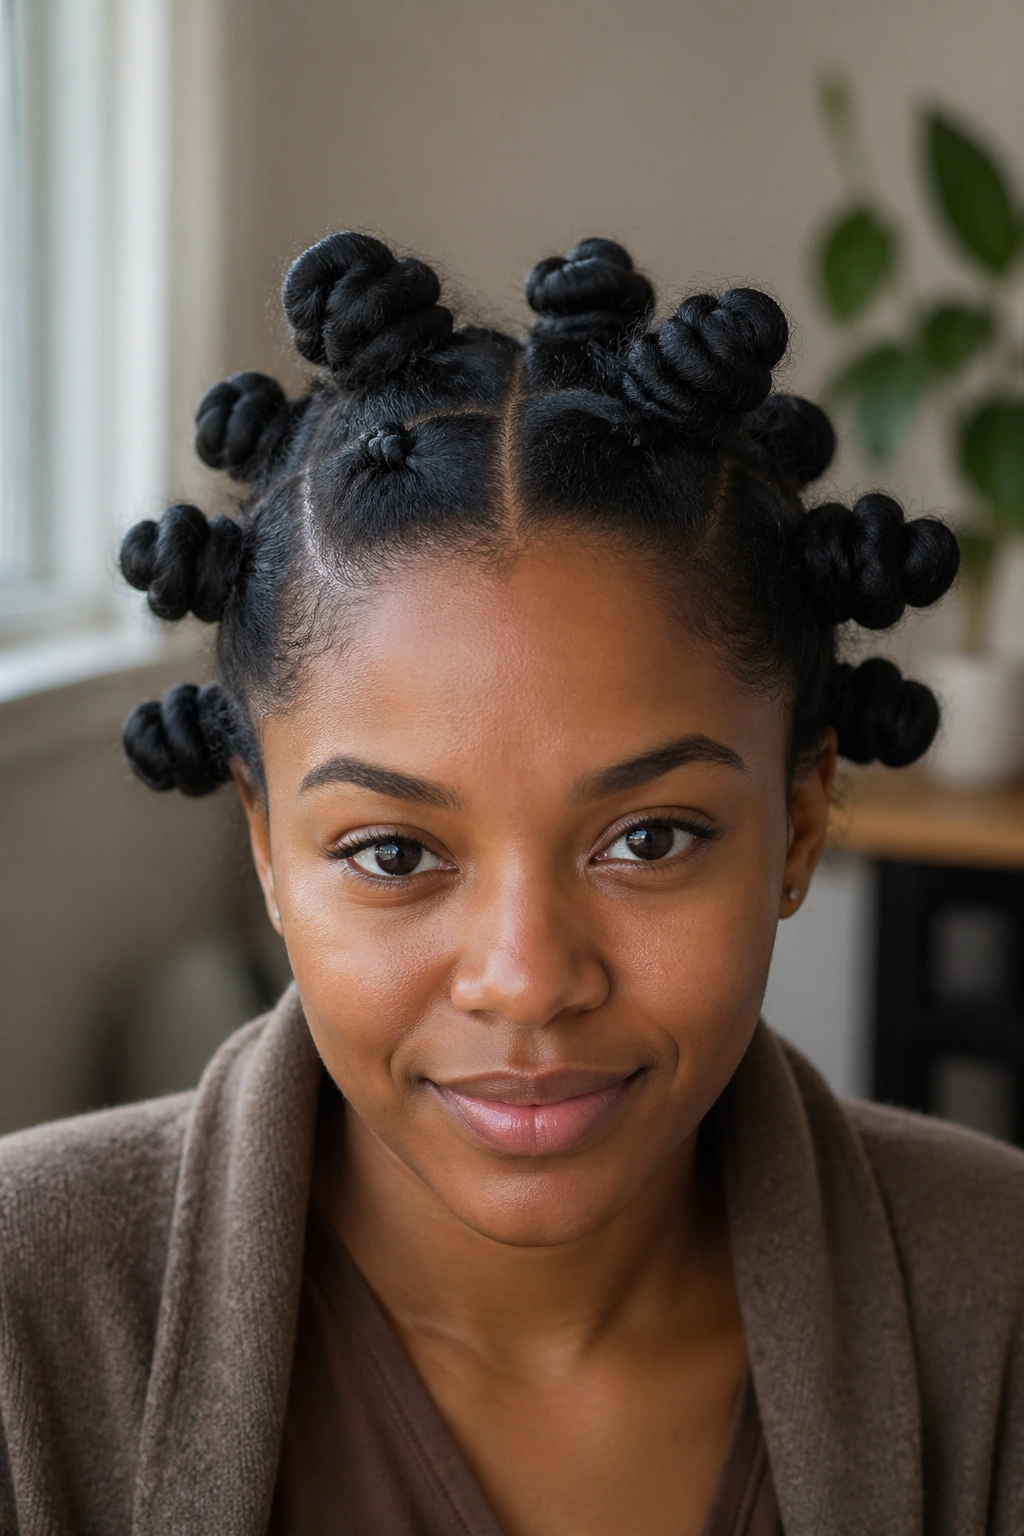
A clean center part gives loose knots structure, which is useful when the rest of the style is soft. You get balance down the face, but the knots themselves can stay full and rounded instead of crisp and tiny.
I like this version with six to eight medium knots, split evenly on both sides. The symmetry keeps the style from drifting into “unfinished” territory, which can happen when loose roots meet random placement. On oval, heart, and longer face shapes, that middle line also creates a calm frame.
Why it lands softly
The softness comes from contrast. The part is precise. The knots are not. That mix works.
Try leaving the first quarter-inch at the root less compressed than you would in a sleeker set. Twist the section only until it starts to hold, then wrap. If you want a little polish, smooth the part lines with the tail of a rat-tail comb and a thin swipe of foam rather than packing the scalp with gel.
- Section size: about 1.5 inches wide
- Best on: stretched shoulder-length hair and up
- Hold trick: pin the knot at the base instead of twisting tighter
- Finish: satin scarf for 10 minutes across the front only
Tip: If the center part looks too harsh on you, widen it by a hair — barely a few millimeters — and the whole style softens.
2. Side-Part Knots with a Softer Sweep
A side part can make Bantu knots look less formal in seconds. That’s the whole charm here.
Instead of splitting the face right down the middle, the part pushes attention to one side and gives the front a bit of movement. On fuller cheeks or a rounder face, that slight diagonal line can be more forgiving than straight symmetry. It breaks up the scalp space and keeps the look relaxed.
Placement matters. Put the heavier side where your hair is naturally denser, then make the first knot on that side a touch larger than the matching knot on the other side. Not huge. Maybe a quarter-inch more width in the section. That tiny imbalance keeps the side part looking intentional.
I would not pair this with stiff laid edges. The side sweep already does enough. Use a toothbrush or edge brush with mousse, shape one small curve at the temple if you want, and leave it there. Too much detail at the front competes with the part and makes the style feel busier than it needs to.
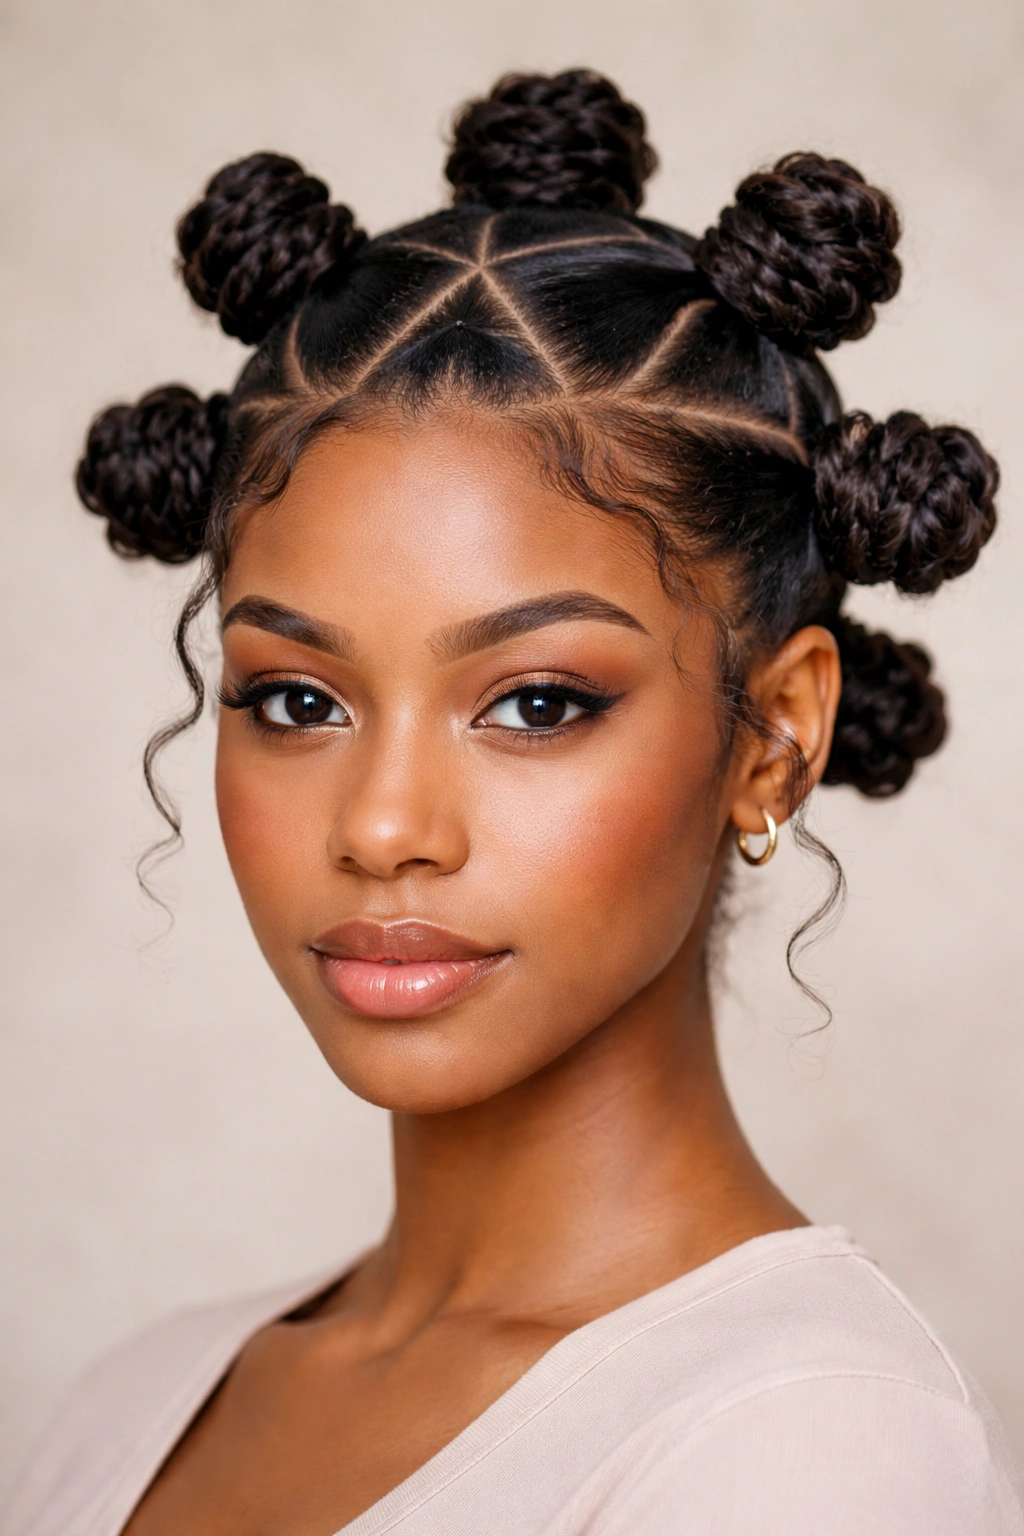
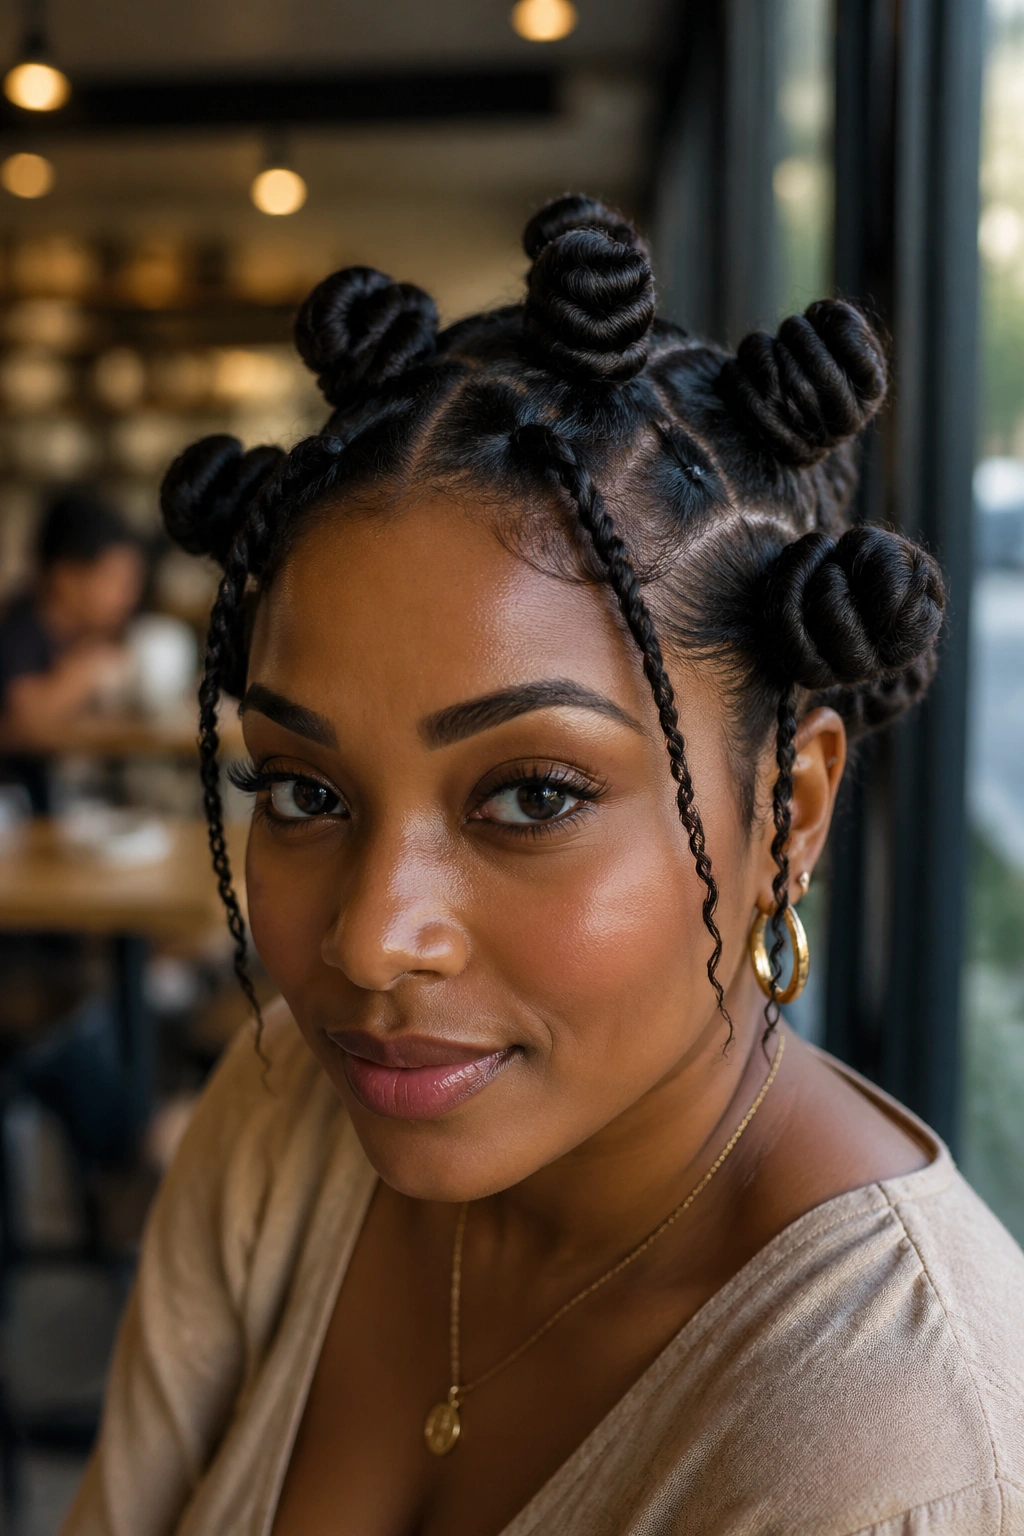
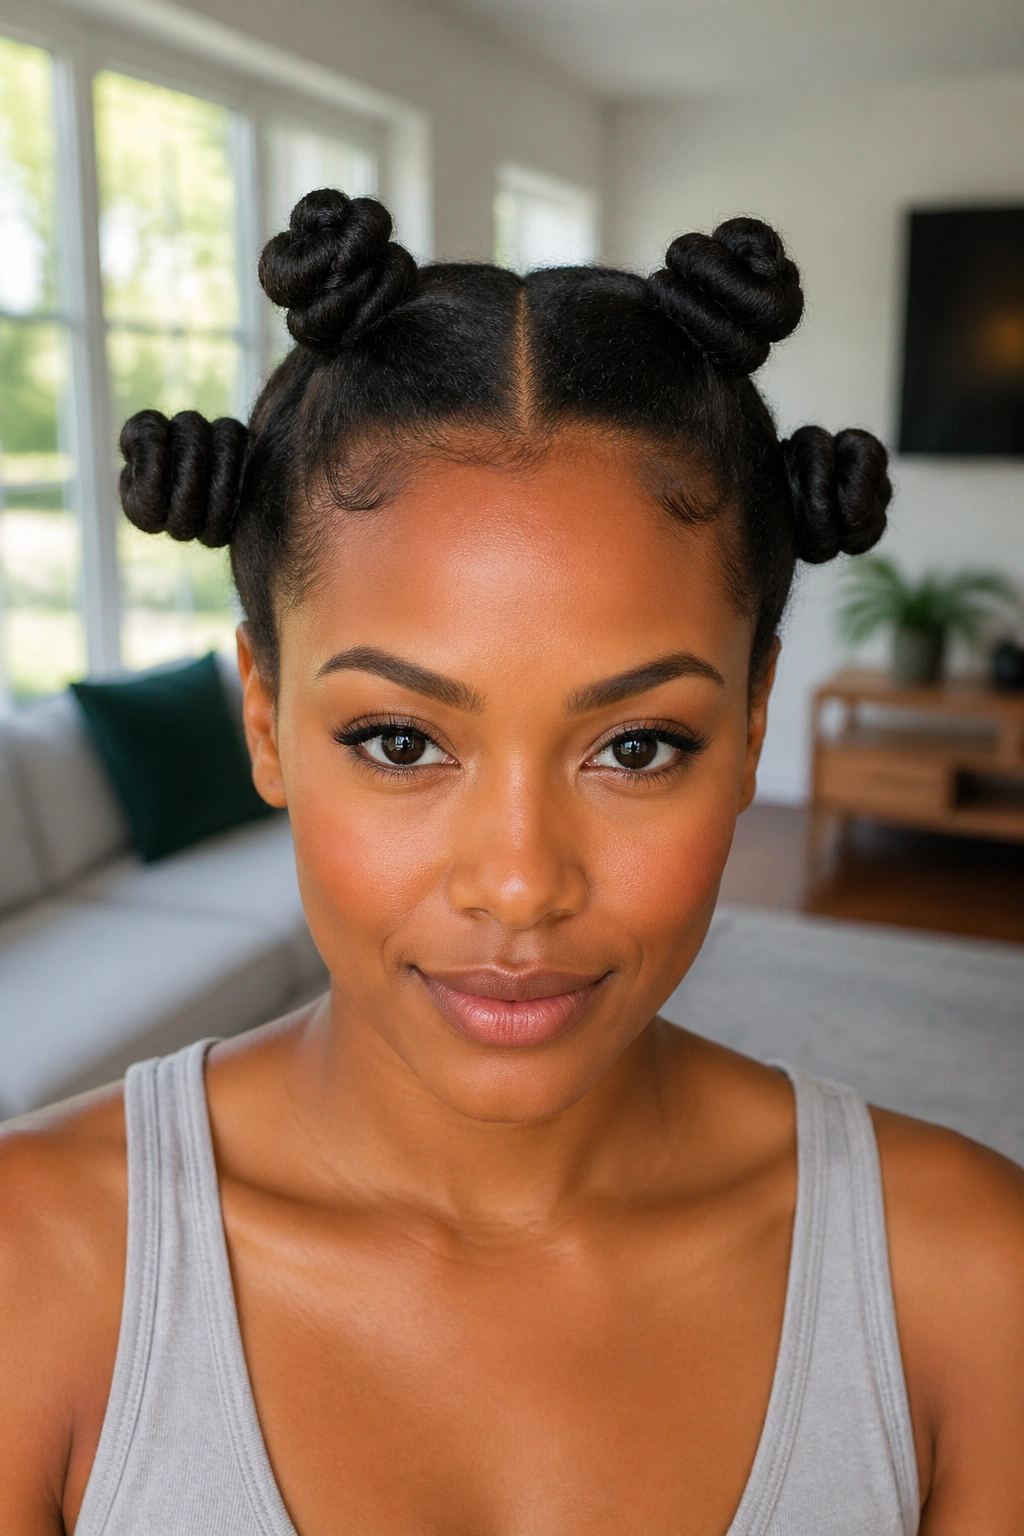
3. Jumbo Crown Knots
Want the style to read soft from across the room? Go bigger.
Jumbo knots on the crown have a pillowy shape that small knots cannot fake. Because each knot has more width, you do less winding and more folding, and that naturally keeps the finish fuller. On thick 4A to 4C hair, this is one of the easiest ways to get a gentle look without losing the sculptural feel that makes Bantu knots what they are.
Placement that keeps them from looking top-heavy
Keep the biggest knots slightly behind the hairline rather than right on it. If the front row sits too far forward, the style can crowd the forehead. I like five knots total here: two front, two behind, one centered near the crown.
Product note
This is one style where I use less product than you’d expect. Too much foam or gel weighs jumbo knots down and makes them collapse. A leave-in, light mousse, and a little oil on the fingertips is enough for most textures.
On finer hair, tuck a small hairpin inside the knot rather than adding more twist tension. Same hold, better comfort.
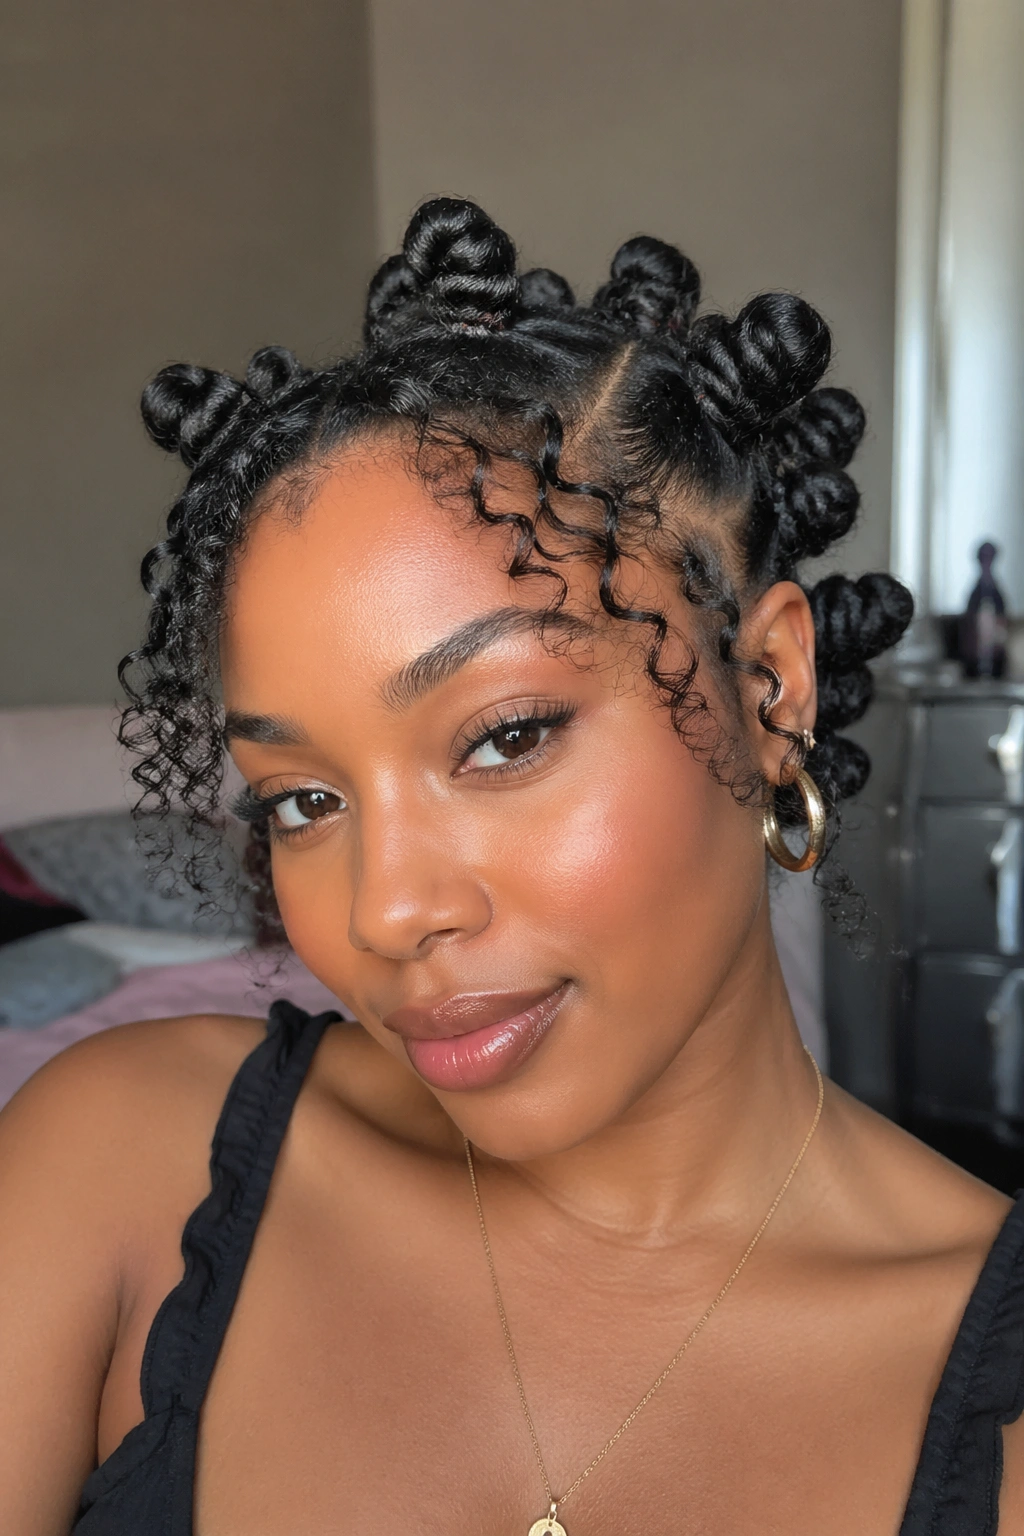
4. Mini Knots with Fluffy Roots
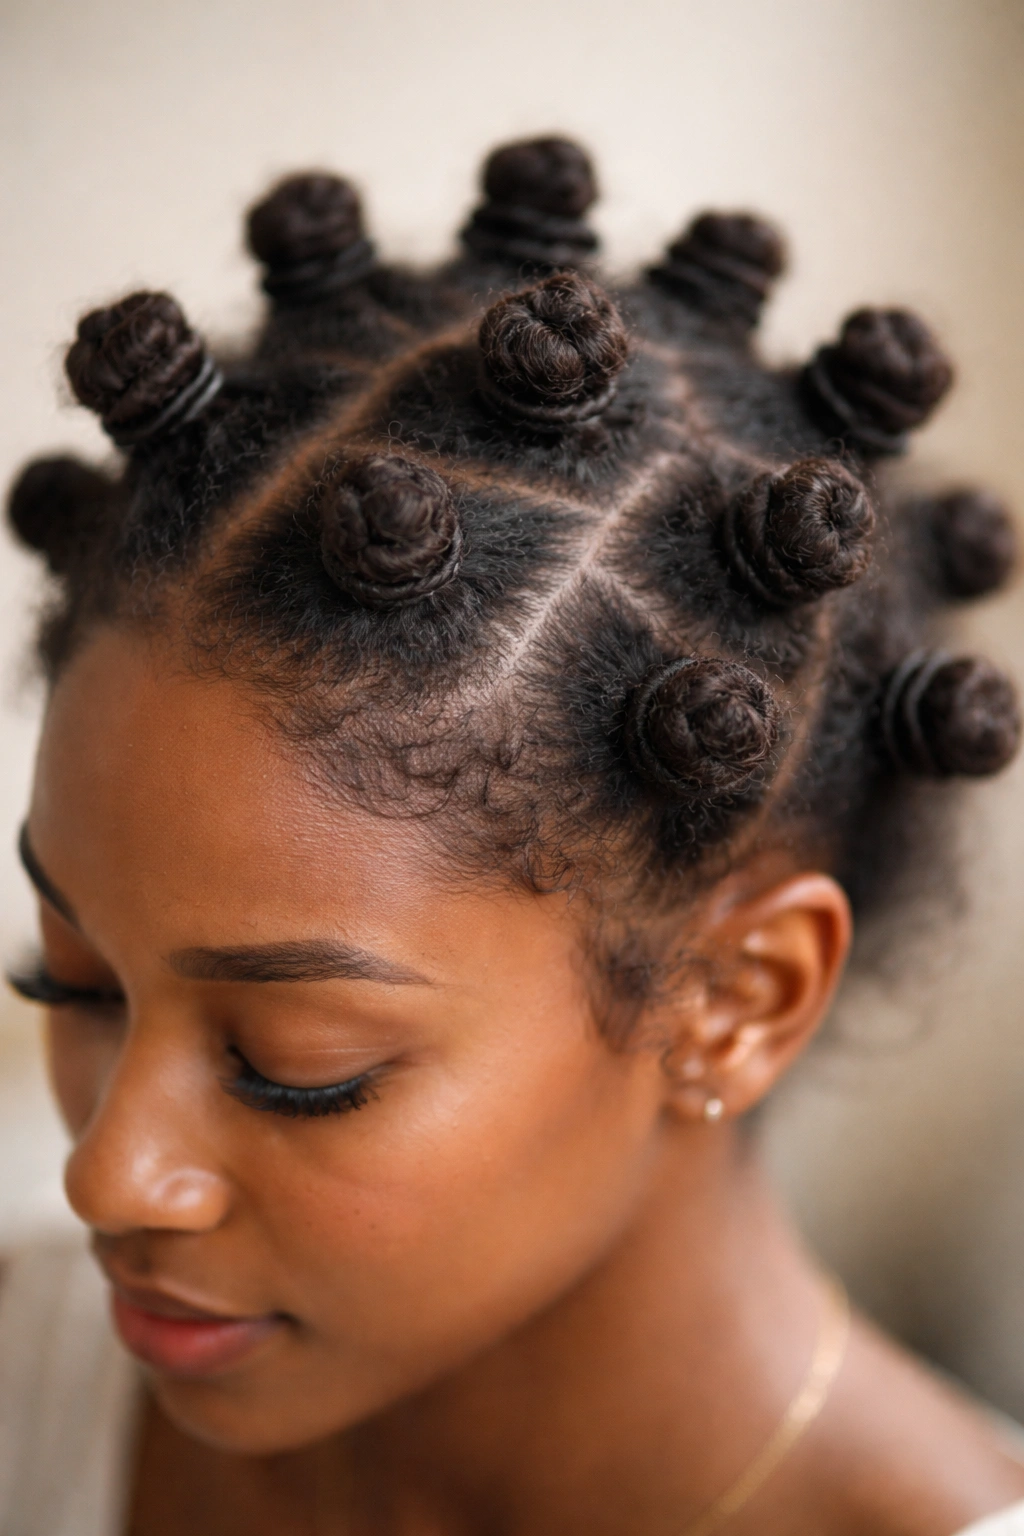
Mini knots can look sharp. They can also look soft, but only if you stop chasing perfect flatness.
I’ve seen this version look best when the roots keep a faint halo of texture around each section. Not frizz taking over the style — that’s different — but a touch of fullness where the knot meets the scalp. It gives the whole set an airy finish and stops the tiny knots from looking like hard little studs.
Use 10 to 14 sections depending on your density. More than that, and you risk turning the style too busy unless your hair is short.
Quick details that help:
- Part size: 1 inch or a bit under
- Best tool: a small edge brush for cleanup around parts
- Good hold choice: setting foam over gel
- Best length: short to medium stretched hair
- Good sleep setup: satin bonnet plus a loose scarf around the perimeter
Mini knots also dry faster, which is no small thing if you hate going to bed with damp roots.
5. Triangle-Part Bantu Knots
Triangles change the entire mood of the scalp pattern. Squares look graphic and neat; triangles look looser even when the knots are tidy. That angled base breaks up the grid and gives your eye more to follow, which helps the style feel less strict.
This is one of my favorite ways to soften a full-head set without making the knots themselves huge. Medium knots work best here because the parting is already doing some visual work. If the knots are too small, the whole style can start to look fussy. If they’re too large, the nice geometry of the triangles gets lost.
There’s a trick to sectioning this one: create the front triangle first, then use that point to guide the rest of the row. If you freehand every part without an anchor, you usually end up with strange gaps near the crown. A rat-tail comb, two clips, and patience save the day.
This version looks especially strong when the parts are clean and the roots are moisturized. Dry, flaky scalp ruins geometric parting faster than anything.
6. Brick-Pattern Knots
Unlike straight stacked rows, a brick pattern shifts each knot into the gap below the row above it. That staggered layout softens the look before you even touch product.
The scalp shows in shorter, offset lines instead of long runway parts. Good move if you like order but do not want the style to feel severe.
A brick set also helps with density distribution. On thick hair, stacked rows can pile too much weight in one lane and leave the sides looking sparse by comparison. Offsetting the sections spreads the bulk around more evenly, so the whole head reads balanced.
- Good section count: 8 to 12
- Best for: medium to dense hair
- Use this if: your square-part sets always look too rigid
- Skip it if: you hate sectioning; this layout takes a little planning
My advice here is to keep the knots medium, not tiny. The parting is already doing the detailed work. Let the knots stay round and simple.
7. Four Oversized Knots
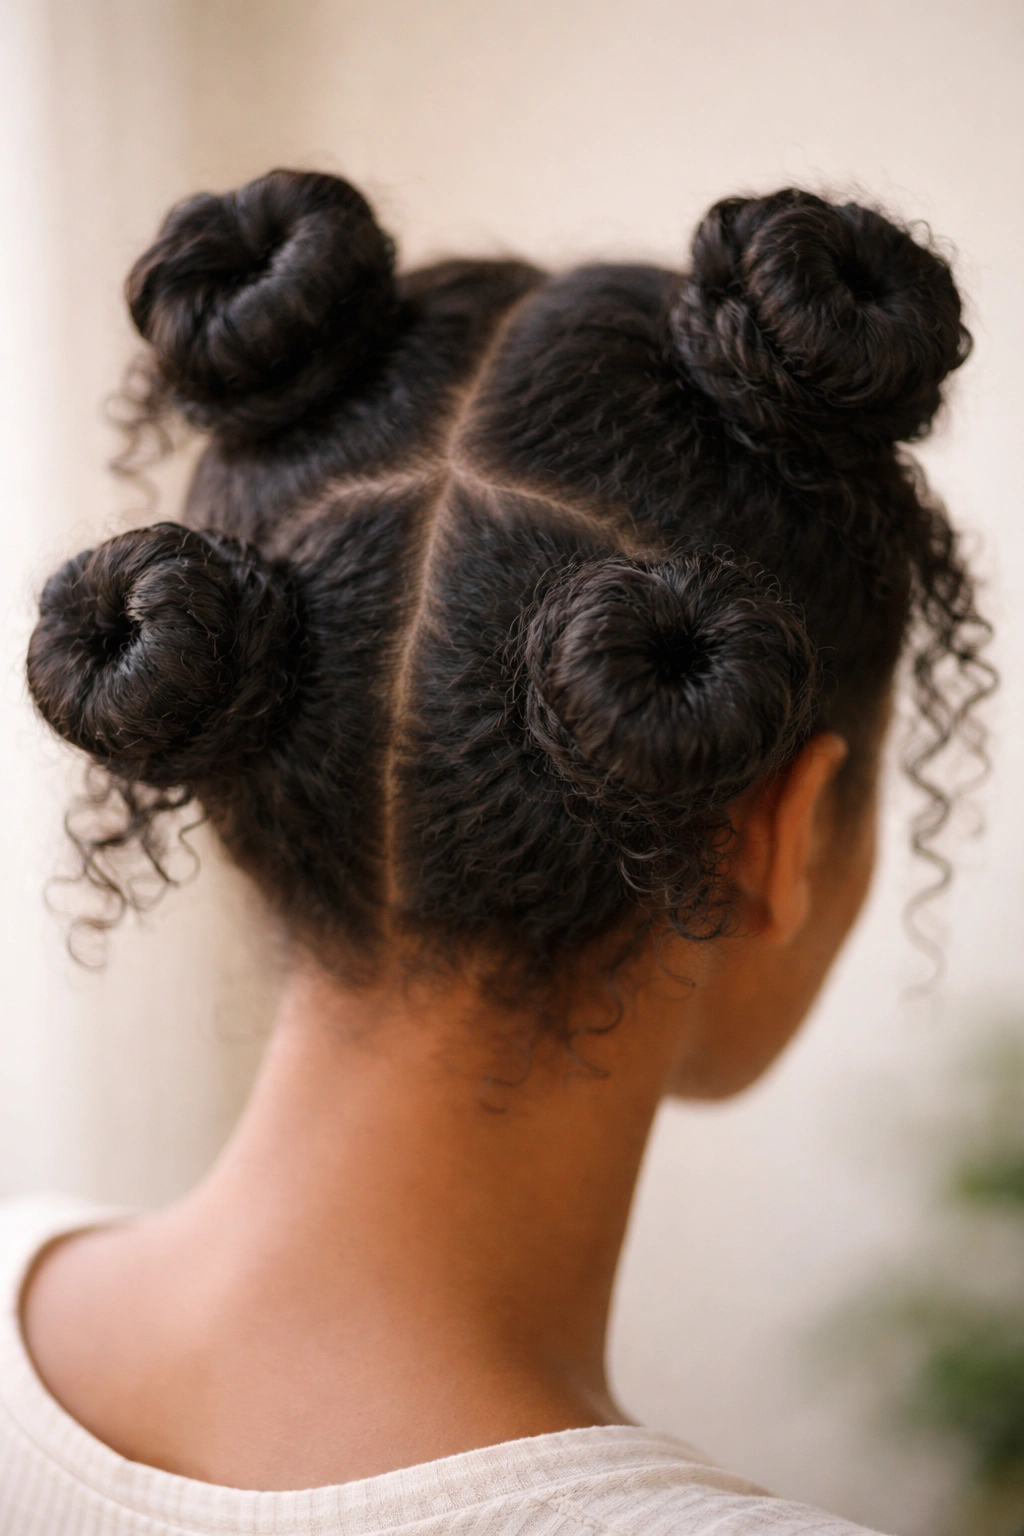
Four knots. That’s it.
If your hair is dense, long, or both, this stripped-back version has a softness that crowded styles sometimes lose. Two knots in front, two in back, each one large enough to show the full coil of the wrap. It feels calm on the eye and kind on the scalp because you are not slicing the head into ten or twelve tension points.
The trick is stretch. Hair that has been banded, twisted, or lightly blown out gives oversized knots a cleaner shape and stops them from shrinking into themselves. I also like using my palms instead of a comb to smooth each section. A comb can make you chase flatness. Hands leave a little more texture, which is the point here.
Wear this set with a clean middle or slight off-center part. Tiny decorative parts do not belong here. Four oversized knots need breathing room or they lose their impact.
8. Half-Up Loose Bantu Knots
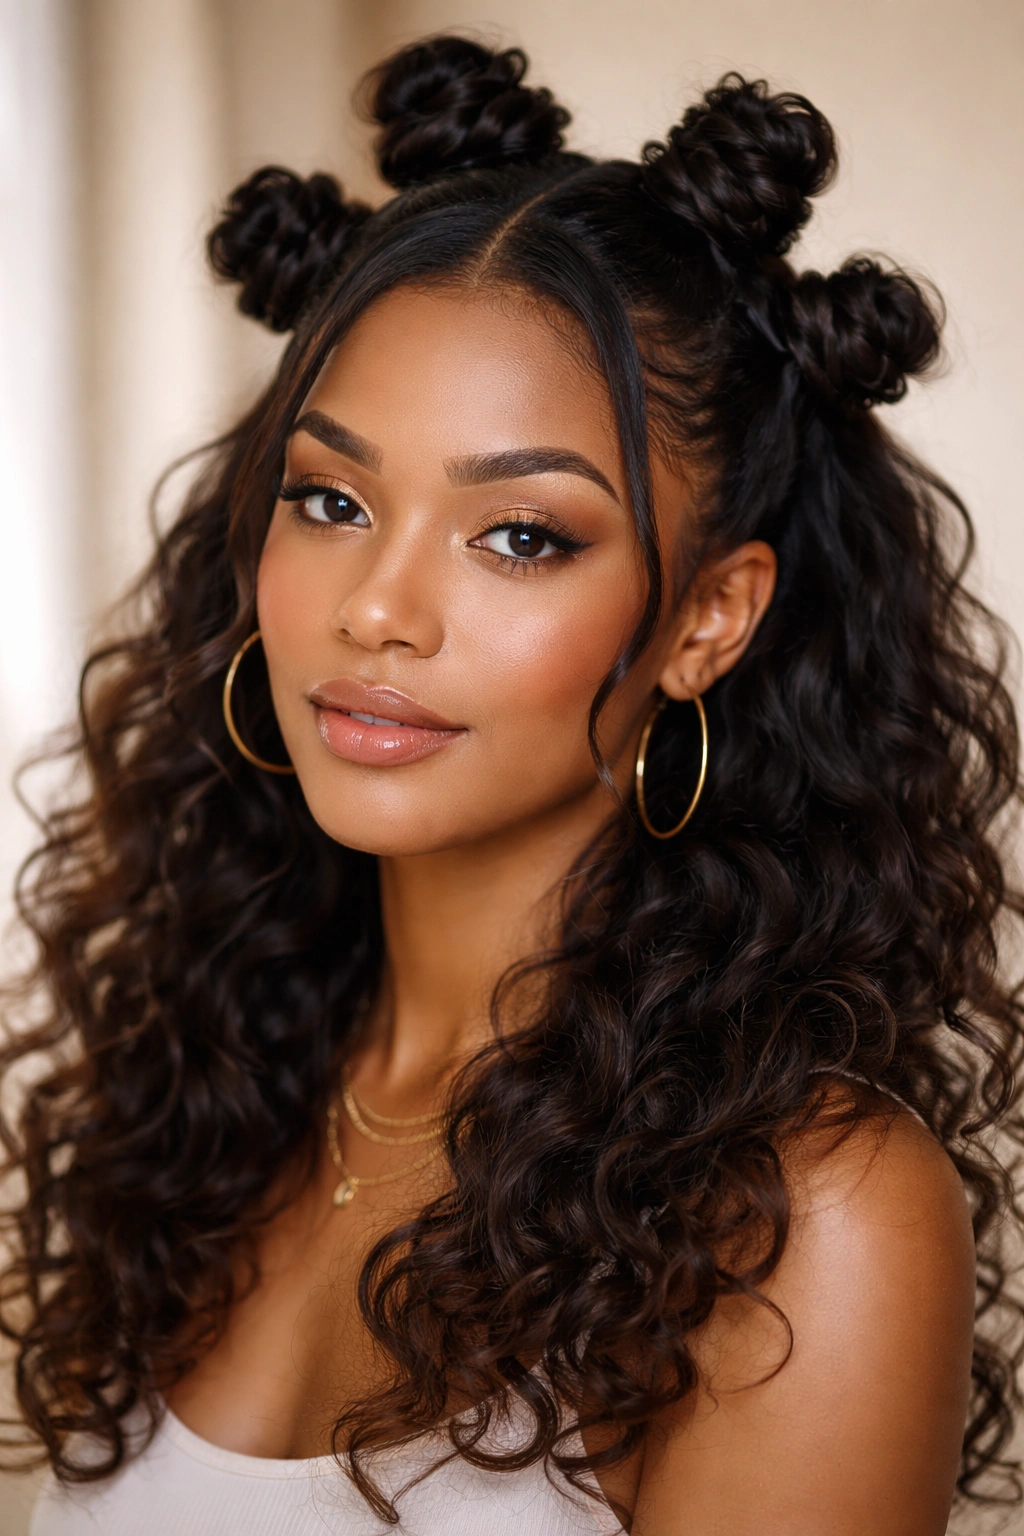
This is the version I point people to when they want knots but still want movement through the length. The top half gets the sculpted shape; the bottom half stays out in curls, a stretched puff, or a twist-out cloud.
Why it feels softer right away
You’ve got loose hair at the back breaking up the shape. That changes everything. A full-head knot set puts all the attention on the scalp and sectioning. A half-up style gives the eye somewhere else to rest, so the front can look neat without feeling hard.
I like three to five knots in the top section. Any more than that, and the top starts to compete with the loose hair. If the back is worn curly, use a cream there and keep the knot sections lighter with foam so the textures do not fight.
This style also helps if you’re easing into Bantu knots and do not want your whole head up. There’s less commitment, less tension, and less time with the rat-tail comb.
9. Mohawk Row Knots
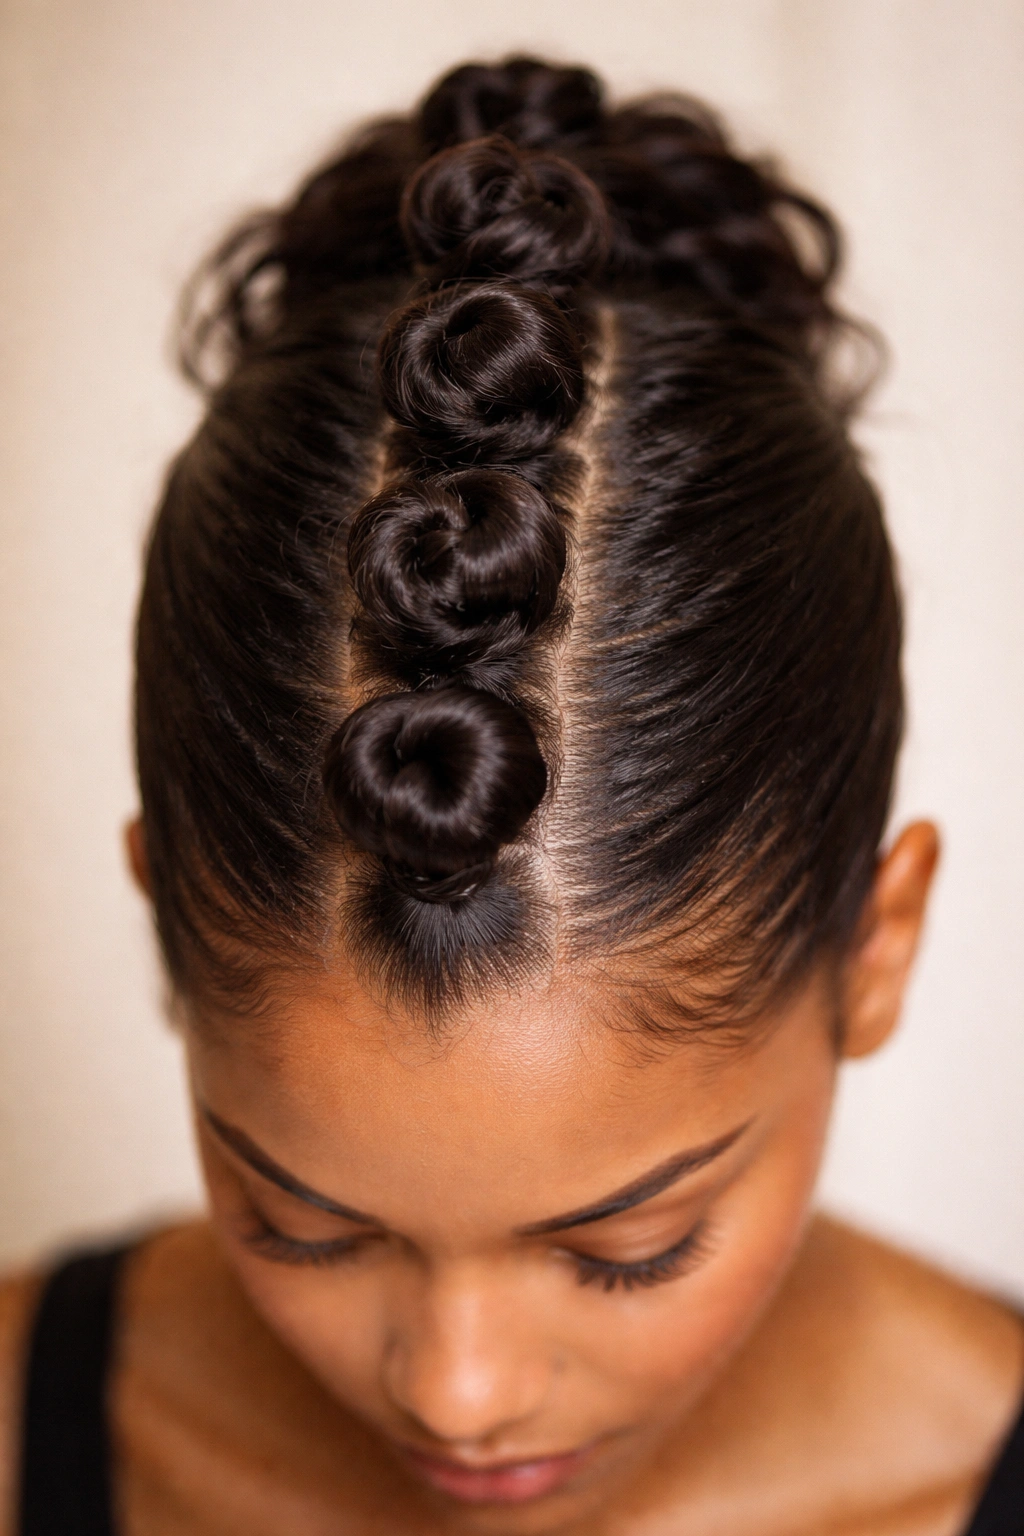
A mohawk row sounds sharp, and sometimes it is. Loosen the wrap, widen the center sections, and it takes on a softer edge that still has shape.
Run three to six knots straight through the middle from forehead to crown or nape, depending on your length. Keep the side hair brushed upward but not shellacked flat. That distinction matters. Over-slick sides make the center row look harder than it needs to.
This version suits people who want to show cheekbones, earrings, or a strong neckline. It also works well on undercuts and tapered cuts because the center knots carry the style on their own. If your hair is dense in the middle and lighter on the sides, even better.
A little caution, though. The temptation here is to pull the side panels tight so the mohawk line pops. Resist that urge. Use mousse, a soft bristle brush, and scarf pressure instead of muscle.
10. Low Nape Knots
Most Bantu knot looks sit high or mid-head. Knots gathered lower, closer to the nape, feel quieter and less rigid. The profile softens because the height drops, and the head shape reads longer.
I like this on medium-length hair that can wrap without bunching. Make the front sections slightly diagonal so the eye travels down into the lower knots. If you go straight back with the parts, the look can flatten.
This style often pairs well with a few loose curls near the ears or a soft side part in front. Not because it needs decoration — it does not — but because the lower placement already feels easier, and those small details support that mood.
If you wear collars, scarves, or hoodies often, keep the nape knots compact enough that they do not rub all day. Constant friction roughs up the ends fast.
11. Knots with Face-Framing Tendrils
Not every loose Bantu knot set needs tendrils. Some do.
A couple of thin curls left out at the temples or in front of the ears can soften the whole style, especially if your knot placement is neat and centered. The key is restraint. Two tendrils usually beat six. Once too much hair stays out, the style starts looking undecided.
How to leave them out without making the style flimsy
Take those pieces from the hairline before you part the main sections. Make each one no wider than a pencil unless you want a chunkier curl. Apply cream or mousse, finger-coil, and leave them alone while you build the knots.
This works well on layered hair because the shorter front pieces already want to spring free. On blunt cuts, you may need a small perm rod or flexi rod on the tendrils to help them curve with intention instead of sticking out.
Skip hard edge control here. You already have softness framing the face; a lacquered hairline clashes with it.
12. Bantu Knots with Curly Ends Left Out
Tucking every end is neat. Leaving some ends out can be better.
This version takes the classic knot and loosens the final wrap so the tips spring out as small curls or coils. The effect is lighter and more textured, especially on tighter curl patterns where the ends naturally bloom.
A few practical notes:
- Use this on well-moisturized ends. Dry tips will make the look rough.
- Coil the ends with your finger before pinning the knot if they need more definition.
- Do not leave too much out. A half-inch to one inch is usually enough.
- Use less pomade on the last wrap so the ends can keep their texture.
I like this style most on medium knots, not jumbo ones. With giant knots, loose ends can look accidental. With medium knots, they read deliberate and give the style a little motion.
13. Knots on Stretched Blowout Hair

If you want round, smooth loose knots with clear shape, a stretched blowout base is hard to beat. Not a pin-straight silk press. Just a low-heat blowout that lengthens the hair and takes some shrinkage out.
The payoff is control. Each section wraps faster, the knot sits wider, and the final shape has that plush look many people want from a softer set. You also use fewer pins because the hair lays where you guide it instead of snapping back into a smaller coil.
There is a catch. Blow-dried hair can look too polished if you pair it with heavy gel and razor-sharp edges. That’s when the softness disappears. I prefer a cream leave-in, a tiny amount of mousse, and fingers more than a brush. Let the texture stay visible.
This option is also good for people who find Bantu knots hard to install on freshly shrunken hair. If sectioning always turns into a battle, stretch first and save yourself the frustration.
14. Knots on a Twist-Out Base
Texture under the knot changes the style more than people expect.
When the hair has already been twist-out stretched, the sections carry a gentle wave and a bit of bulk. Wrap that into Bantu knots and the shape gets fuller, less slick, and more relaxed around the edges. It is one of the easiest ways to avoid the hard, tightly wound finish that some first-time sets end up with.
Why this base works so well
A twist-out gives you grip without stiffness. The hair is already stretched, but not flattened. That means the knot can build width fast, and the root keeps a touch of lift.
This is especially nice on medium-density hair, where a straight blowout base can sometimes make the knots look too small. Keep the twist-out separated but not fluffed to the point of frizz. Think defined texture, not a giant halo.
If your old twist-out has dry ends, trim or moisturize before wrapping. Loose knot styles are forgiving, but rough ends still show.
15. Braided-Part Loose Bantu Knots
This style adds tiny braids along one or two part lines before the knots go in. The little braids act like built-in detail, so the knots themselves can stay simple and full.
I like using this in the front only — maybe one braid tracing the side part or two thin braids framing the first row. Cover the whole head in braided partings and it can get busy fast. A small amount does the job.
Helpful details:
- Braid size: keep them skinny, around a quarter-inch
- Placement: front row or one side only
- Best knot size: medium
- Good finish: matte to soft sheen, not high-shine gel everywhere
This is a smart choice if you want a dressed-up set for an event but still want the knots to feel easy on the scalp. The braids supply detail; the loose wrapping supplies comfort.
16. Zigzag-Part Knots
Straight parts bring order. Zigzag parts bring softness through movement.
The broken line keeps the scalp from looking too exposed in long stripes, which changes the mood of the style more than you might think. I like zigzags best in the front half of the head, where they catch the eye first. In the back, simple rows are easier and usually enough.
There’s also a practical upside: zigzags can hide minor parting mistakes better than dead-straight lines. If your hand is not surgeon-steady with a rat-tail comb, this option gives you a little grace. That does not mean sloppy. It just means less pressure to make every line ruler-clean.
Use medium knots here. Tiny knots plus zigzag parts can turn into visual noise. The style looks better when the broken parts are balanced by fuller, rounder shapes on top.
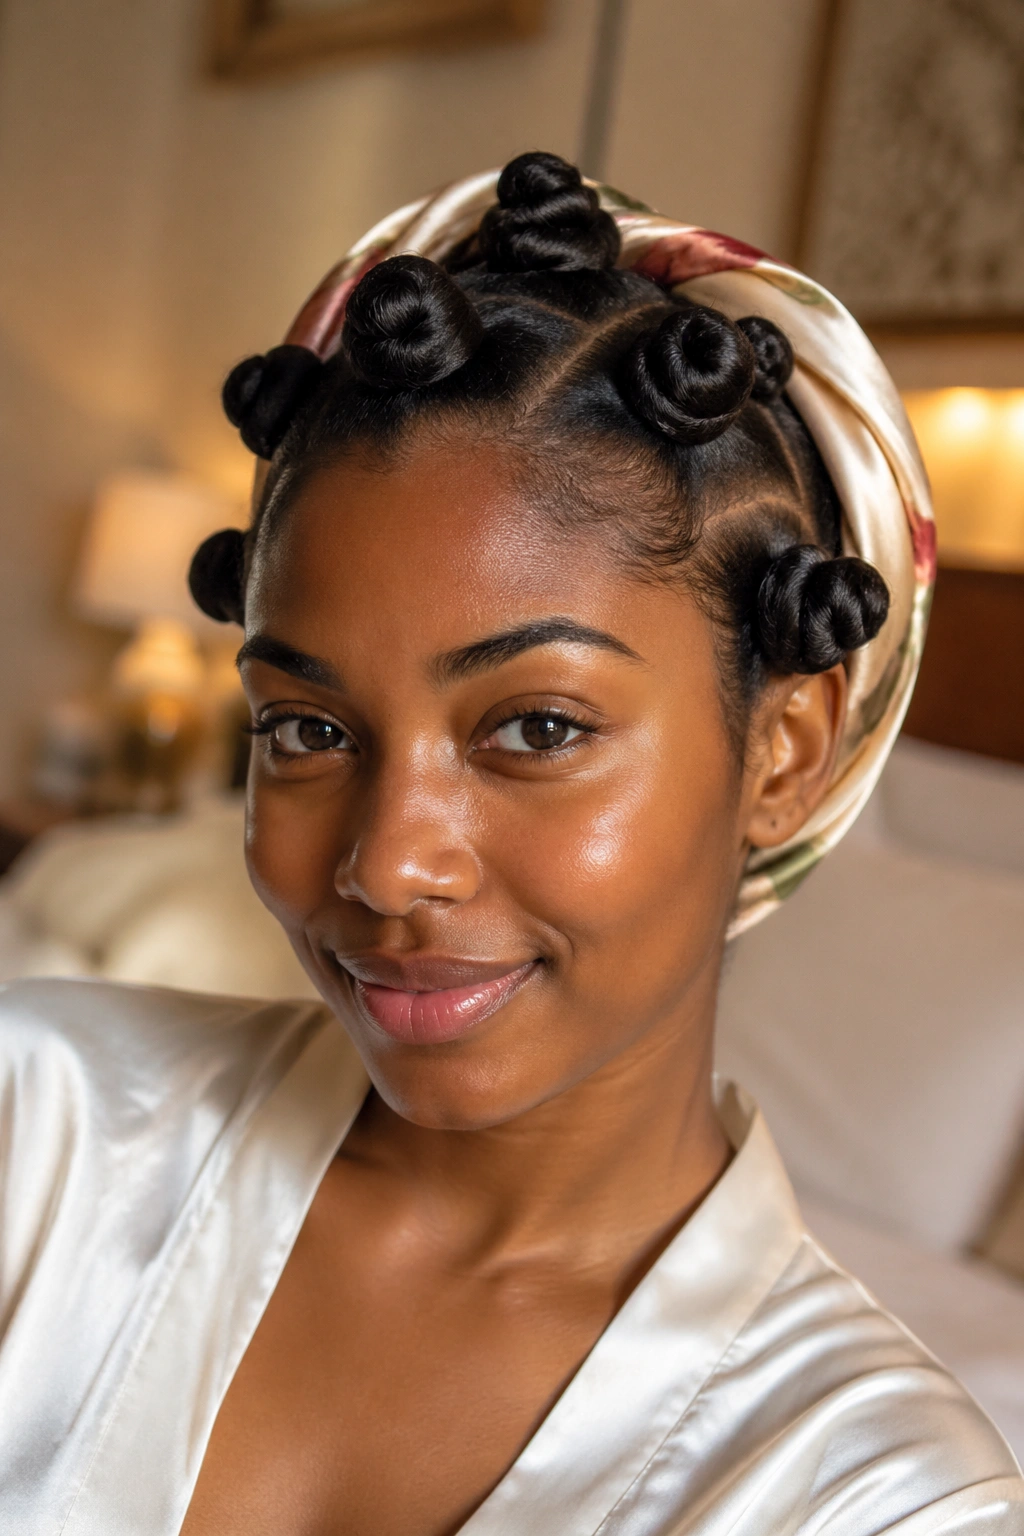
17. Satin-Finish Knots
Some loose Bantu knot sets look soft because of size. This one does it through surface.
A satin finish means the hair has sheen, but not the wet, hard shine that comes from packing on gel. Think smooth, touchable, softly reflective hair — the kind of finish you get from mousse, a little oil, and scarf setting, not from coating every strand.
I usually use one pump of lightweight serum or 3 to 4 drops of oil per quadrant after the leave-in has settled. More than that, and the knots can slip or look greasy by evening. A satin scarf tied for 10 minutes at the front helps flatten flyaways while keeping the body of the knot intact.
This look is strong on color-treated hair because the sheen shows tone differences well. Copper, soft brown, honey ends — they all stand out more when the finish is smooth.
18. Loose Knots with Soft Baby Hairs
I’ll say it plainly: overworked baby hairs can ruin a soft knot set.
If you want edges with this style, keep them light. One temple swoop, maybe a small curve near the sideburn, and stop. Thick lines of edge control stamped onto the forehead pull the eye away from the rounded knots and make the front look harder.
This version works best when the knots themselves are medium to large and the hairline details are small. Use mousse or a light edge product on a brush, then set it under a scarf for a few minutes. The hold comes from drying the shape, not from smearing on more product.
People with naturally sparse edges may want to skip this step altogether, and that is fine. A clean brushed hairline with no swirls at all can look fresher than forced baby hairs.
19. Short-Hair Knot Bob
Short hair changes the geometry of Bantu knots. The sections are smaller, the wraps are tighter by necessity, and the placement has to do more work. That’s why a knot bob looks best when the knots sit in a rounded line that follows the shape of the head, almost like the outline of a bob cut built from coils.
Use smaller to medium knots and keep them slightly lower on the sides rather than stacking everything high. That placement helps mimic the shape of a bob and stops short hair from looking top-heavy. Tapered ends can be tucked with a small bobby pin instead of extra twisting.
This is one of those styles where I care less about dramatic parting and more about silhouette. If the head shape looks balanced from the front and side, you’ve won. On short hair, that matters more than a fancy section map.
20. Halo-Shaped Knots
A halo arrangement circles the head with knots and leaves the crown a little cleaner or slightly lower in volume. The result feels open around the center and soft around the edges, almost wreath-like in layout.
This style works nicely when you do not want a lot of height. Place the front and side knots first, then mirror that curve toward the back. The center should not be empty-empty, unless you are blending into a puff or braided middle, but it should feel less crowded than a full grid.
I like this for fuller faces because the eye moves around the head rather than straight up. Medium knots usually look better here than jumbo ones. Too big, and the halo turns bulky. Too small, and you lose the round framing effect that makes the layout special.
21. Offset-Part Loose Bantu Knots
A center part can be strong. A side part can be dramatic. An offset part — sitting a little off center, not all the way to the side — gives you a middle ground that feels easy and natural.
This is one of those small choices that changes the look more than people expect. The face gets structure, but not strict symmetry. The knots can stay evenly sized, or you can make the heavier side one section fuller for a little more swing in front.
I’d use this when you want a soft set that still looks deliberate in photos, at work, or anywhere you do not want the style reading too edgy or too dressed up. Pair it with medium knots, clean parts in the first row, and lighter detailing toward the back. It does not need much more than that.
22. Knots Wrapped with Gold Cuffs or String
Accessories can push Bantu knots into costume fast if you go too hard. A little gold, though, can look sharp in a grounded way when the rest of the style stays simple.
Use thin cuff rings on one or two knots, or wrap a strand of metallic string around the base of a single front knot. Keep the rest bare. That restraint lets the loose shape of the knots stay the focus.
A few rules help:
- Put metal on larger knots, where it can sit without warping the shape
- Avoid heavy cuffs that drag the knot downward
- Match the hardware to your jewelry tone if you care about cohesion
- Do not decorate every knot unless you want a much louder look
This version shines on medium to long hair because the knot has enough size to hold the accessory cleanly.
23. Beaded Loose-End Knots
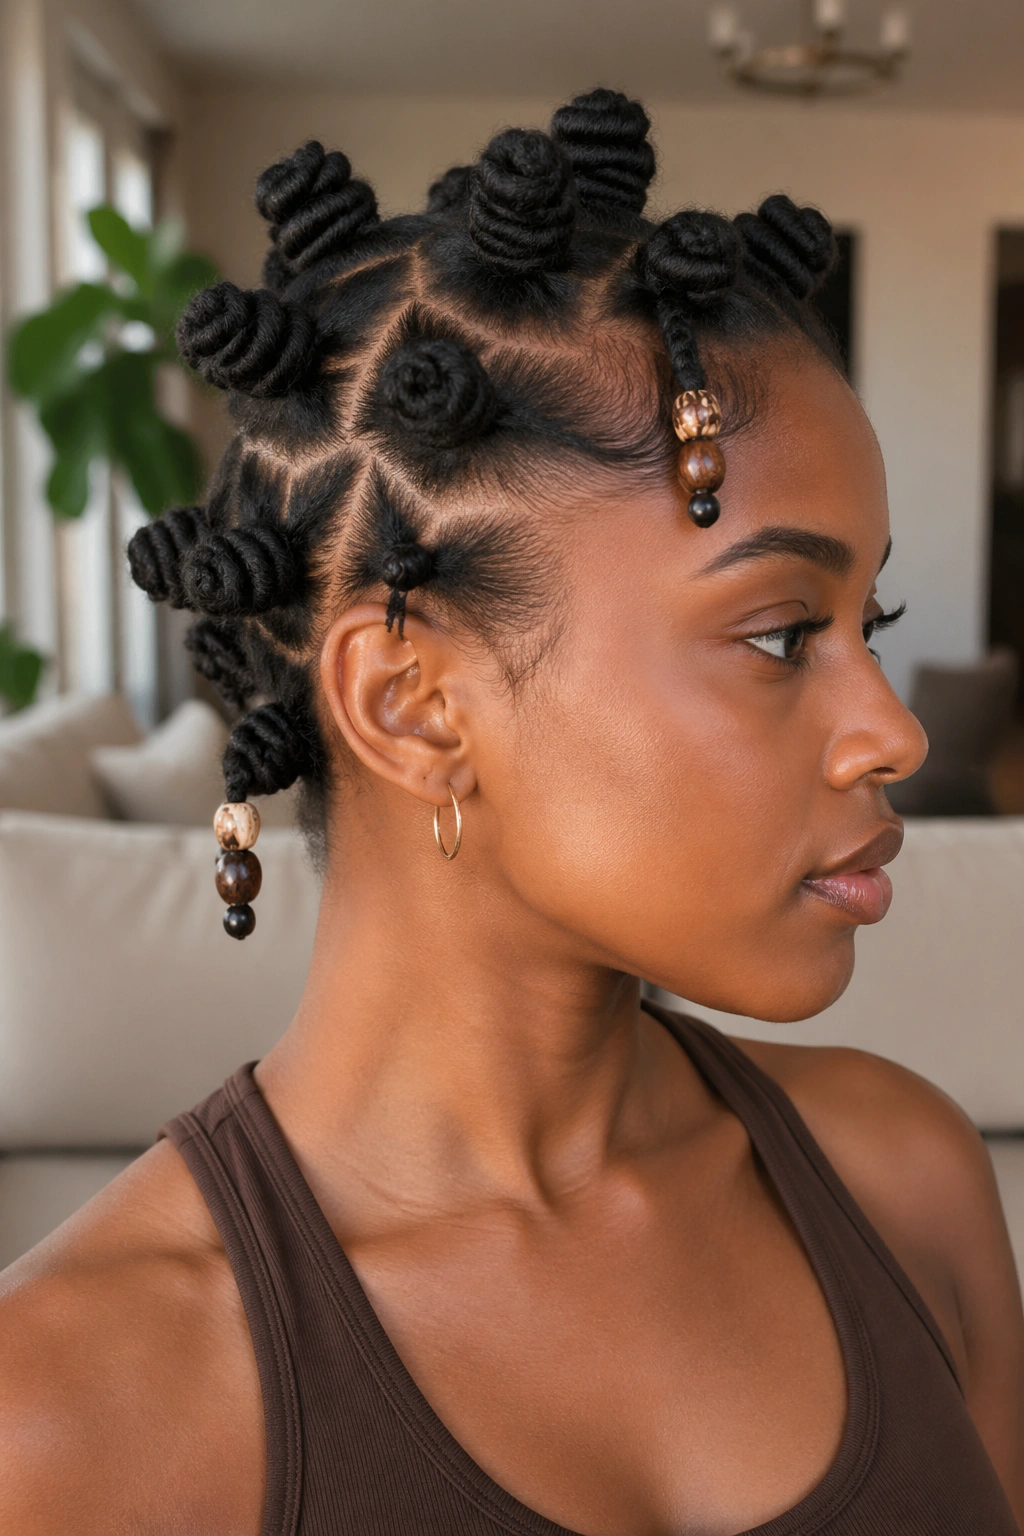
Beads and Bantu knots can work together, but weight is the issue. Too many beads on too small a section and the knot droops, especially by the second day.
The cleanest way to do it is to leave a thin tendril or loose end from selected knots and bead that piece only. Two or four beads across the whole style is often enough. Wooden beads, clear beads, or small metal cuffs all change the mood, so pick one lane and stay in it.
This style is better on medium or longer stretched hair. Short sections do not give the bead enough room to hang well. I also avoid placing beads at the very front if the hairline is delicate; side or back knots carry the weight better.
Softness here comes from movement. The bead should swing a little, not pull the knot down.
24. Color-Showing Knots
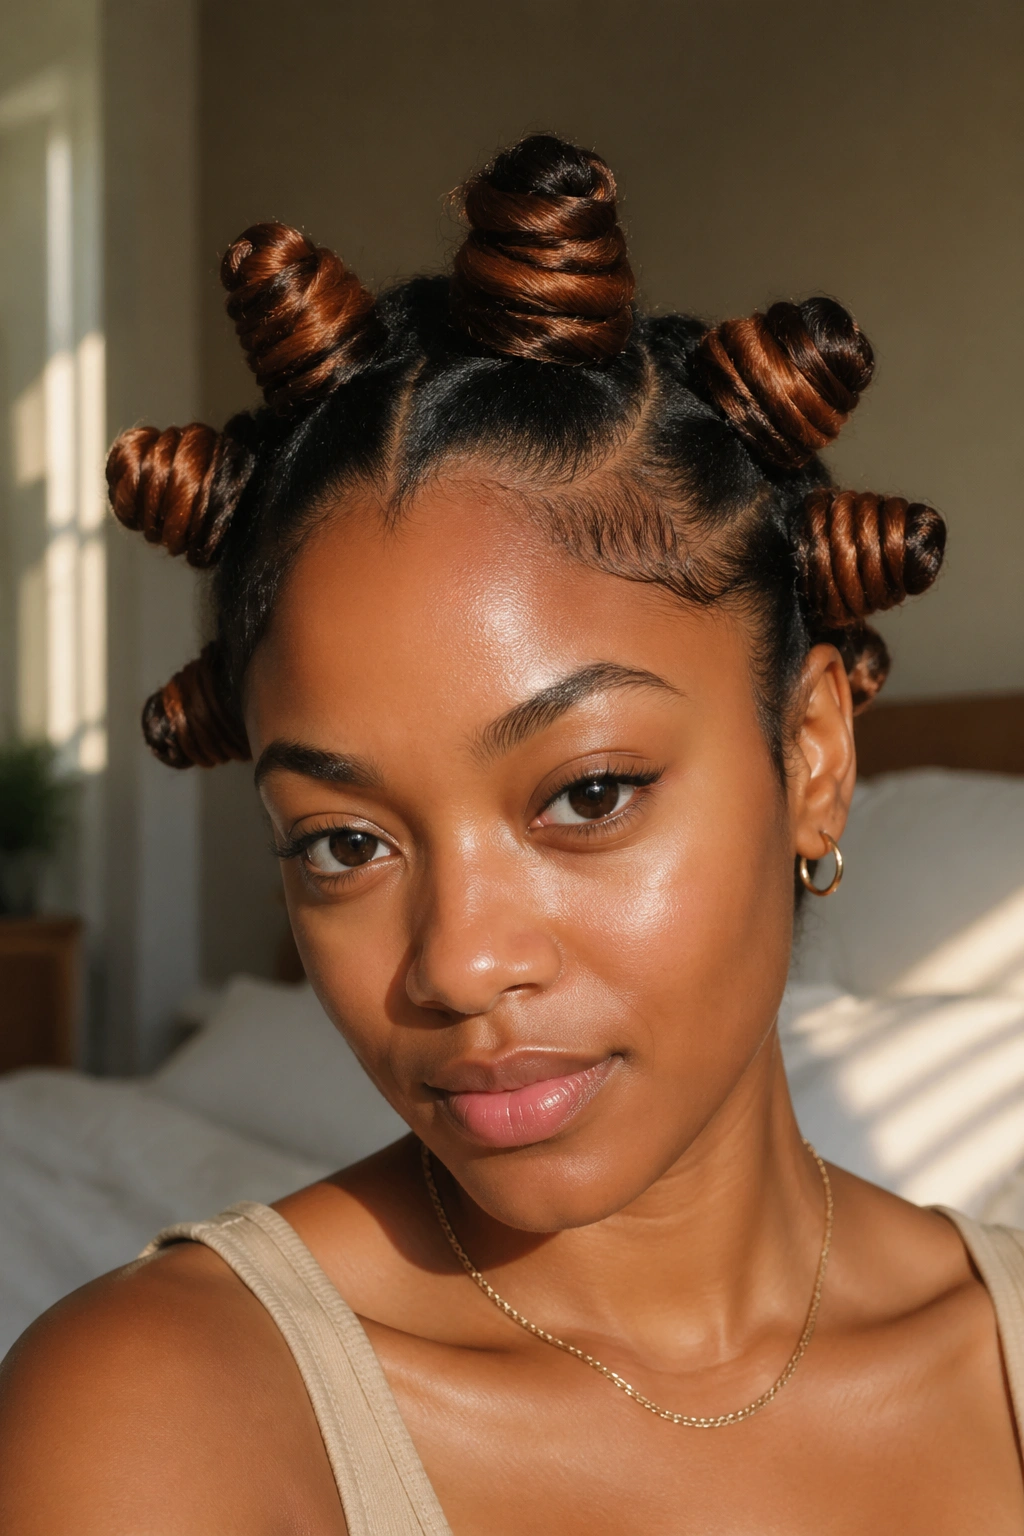
Loose Bantu knots look especially good when they let color peek through the wraps. Honey ends, copper ribbons, soft burgundy, even a lighter brown at the tips — all of that shows up more when the knot is not wound into a tiny tight ball.
I like this effect best when the color sits on the last third of the hair shaft. As you wrap, those lighter ends spiral across the outer edge of the knot and create contrast without needing accessories. If your hair is highlighted in chunks, make sure the sections are distributed with some thought, or you can end up with one side carrying all the brightness.
This is one style where a satin finish helps. A bit of sheen makes the color shift easier to see. No need for wet-looking product. Just enough smoothness so the tones read cleanly.
25. Sleep-In Loose Bantu Knots for Tomorrow’s Knot-Out
Some loose Bantu knots are the style. Some are the setup for what comes next. This version does both.
Wear the knots during the day, sleep in them, then unravel for a soft knot-out the next morning. The trick is to make the knots secure enough to set the curl pattern but loose enough that the base stays comfortable overnight. Medium sections work best because jumbo knots do not dry as evenly and tiny ones can produce a tighter curl than many people want.
A simple overnight method
- Start on stretched, almost-dry hair. Damp roots by morning can leave the knot-out frizzy.
- Apply mousse through each section and a dab of cream on the ends.
- Wrap loosely and pin once instead of twisting tighter for hold.
- Tie a satin scarf around the perimeter and wear a bonnet on top if you toss around in sleep.
- Unravel with oiled fingers and separate each section two or three times, no more if you want a fuller pattern.
This is a smart two-for-one style, and I cannot blame anyone for loving that.
Picking the Right Loose Bantu Knot Style for Your Hair Length and Density
Length changes what counts as “loose.”
On short hair, softness comes more from placement, parting, and root tension because the hair itself does not have much length to create a plump knot. On medium and long hair, size becomes a bigger factor, since larger wraps can hold that fuller rounded shape more easily. Dense hair usually handles jumbo knots or halo layouts well. Finer hair often does better with medium knots, a stretched base, and pin support instead of more twisting.
Scalp density matters too. If your hairline is finer than the crown — which is common — do not force the front sections to match the back. Make them a bit smaller or looser. The style looks better when it follows the reality of your hair rather than fighting it.
If you are unsure where to start, try six medium loose knots on stretched hair with a clean center or offset part. That setup tells you a lot fast: whether you like more height, fewer knots, sharper parts, or more softness around the hairline.
Final Thoughts
Loose Bantu knots work when the shape is intentional and the tension is not. That’s the balance worth chasing: clean sections, soft roots, rounded wraps, and a comfortable hairline.
If I had to narrow the whole thing down to a few takeaways, I’d say this: stretch the hair first, use less gel than you think, and never pull the front tighter than the back. Those three choices fix a lot.
Start simple if you need to. A center part, six medium knots, mousse, one scarf set, done. Once that feels easy, the triangle parts, beads, tendrils, and halo layouts get a lot more fun.
And when the style feels good on your scalp, you tend to wear it with more ease. That shows.