
Bantu knot hairstyles can look crisp, playful, and polished in the same breath, which is part of why they keep coming back on natural hair of every length. The style has range. A clean, tight set reads sharp and graphic; a looser set with a deep part feels softer; a chunky version can feel bold without trying too hard.
What most people miss is that the parting does half the work. A Bantu knot is not only a coil sitting on top of the head. It is the map underneath it — square, triangle, diagonal, or curved — and that map decides whether the final look feels neat, edgy, face-framing, or sculptural. On coily hair, especially 4B and 4C textures, that parting pattern matters even more because shrinkage can hide a lot of detail if the sections are sloppy.
I also think Bantu knots get underestimated because people talk about them as if they are one look. They are not. The same head of hair can wear a tiny grid, a half-up set, a crown, a faux hawk, or a knot-out prep style and look like five different hairstyles. That flexibility is the real appeal.
If your natural hair tends to puff at the roots or frizz around the edges, the right section size, a light hold product, and a clean base can make the difference between a style that looks done and one that looks rushed. And that is where the fun starts.
1. Classic All-Over Bantu Knots
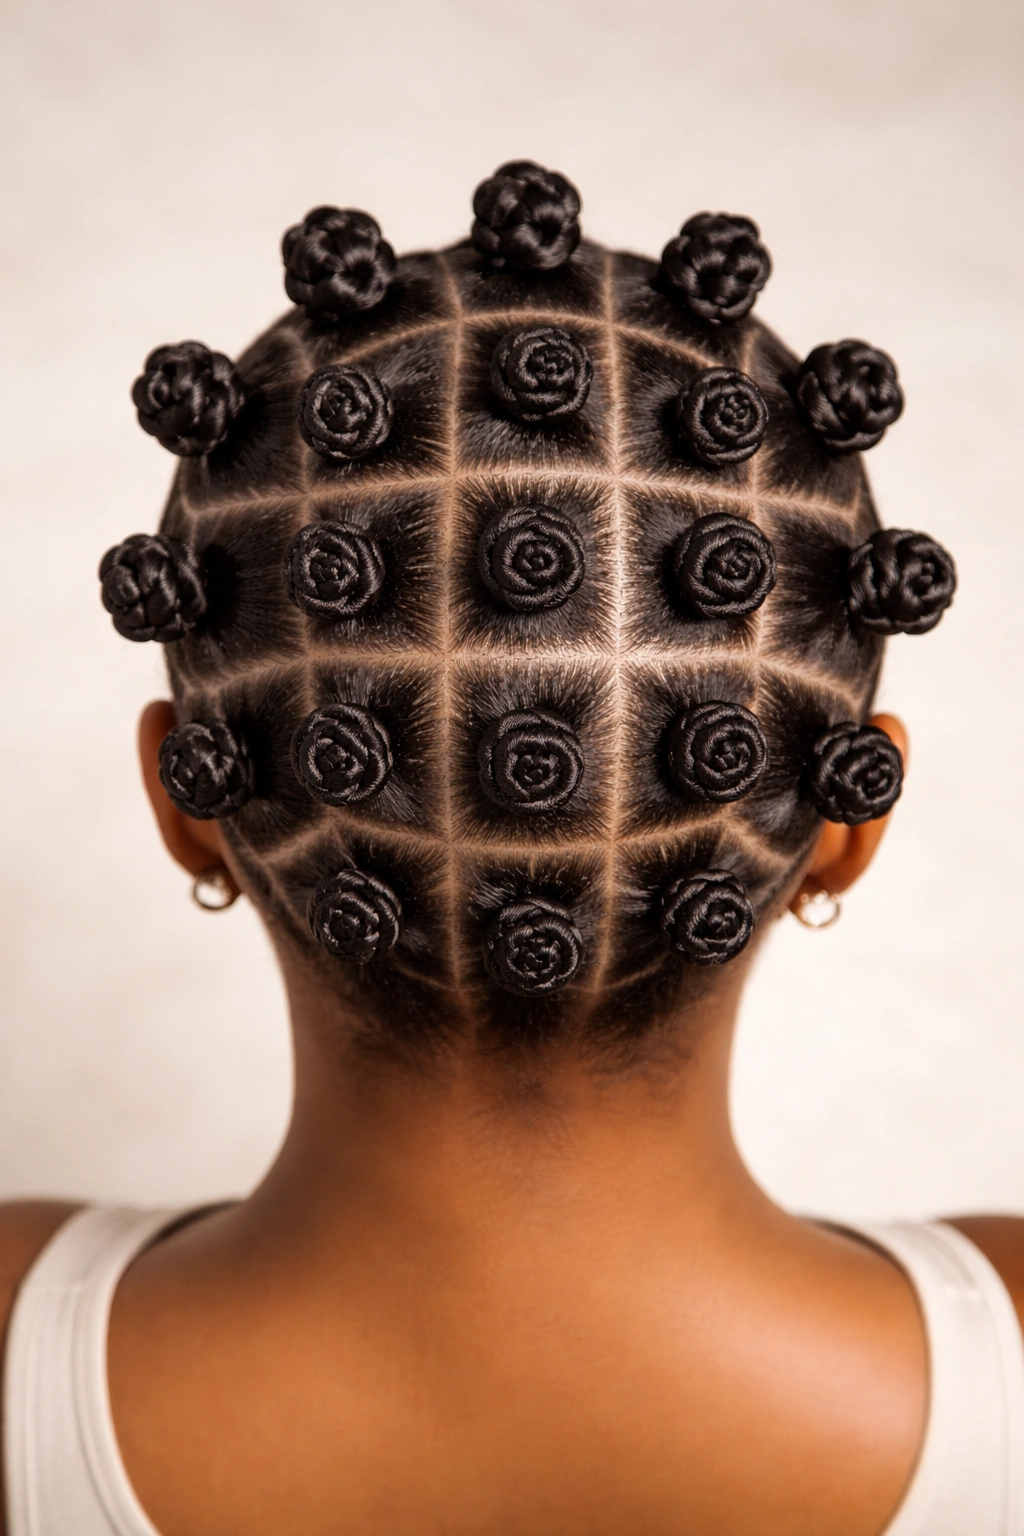
This is the version most people picture first, and honestly, it still works because it gives natural hair a clean, balanced shape. The all-over set is neat, symmetrical, and easy to read from every angle. On medium to thick hair, it creates a tidy little grid of knots that looks deliberate instead of crowded.
Why the Grid Matters
A square or slightly rectangular part keeps the style even, which matters more than people think. If the sections are too uneven, the knots pull in different directions and the whole head starts to look messy in a way that is hard to fix later.
- Use sections about 1 to 1.5 inches wide for a classic look.
- Keep the part lines straight if you want a sharp finish.
- Add a small amount of leave-in and a light cream to each section before coiling.
- Smooth the roots with your fingers or a fine-tooth comb before you twist.
A clean base beats heavy product every time. Too much gel can leave flakes around the part line, and that shows more than people expect.
This style is also a smart starting point if you want a Bantu knot out later. The smaller and more even the sections, the more consistent the curls tend to be when you take the knots down. Not perfect. But close enough to make the effort worth it.
2. Deep Side-Part Bantu Knots
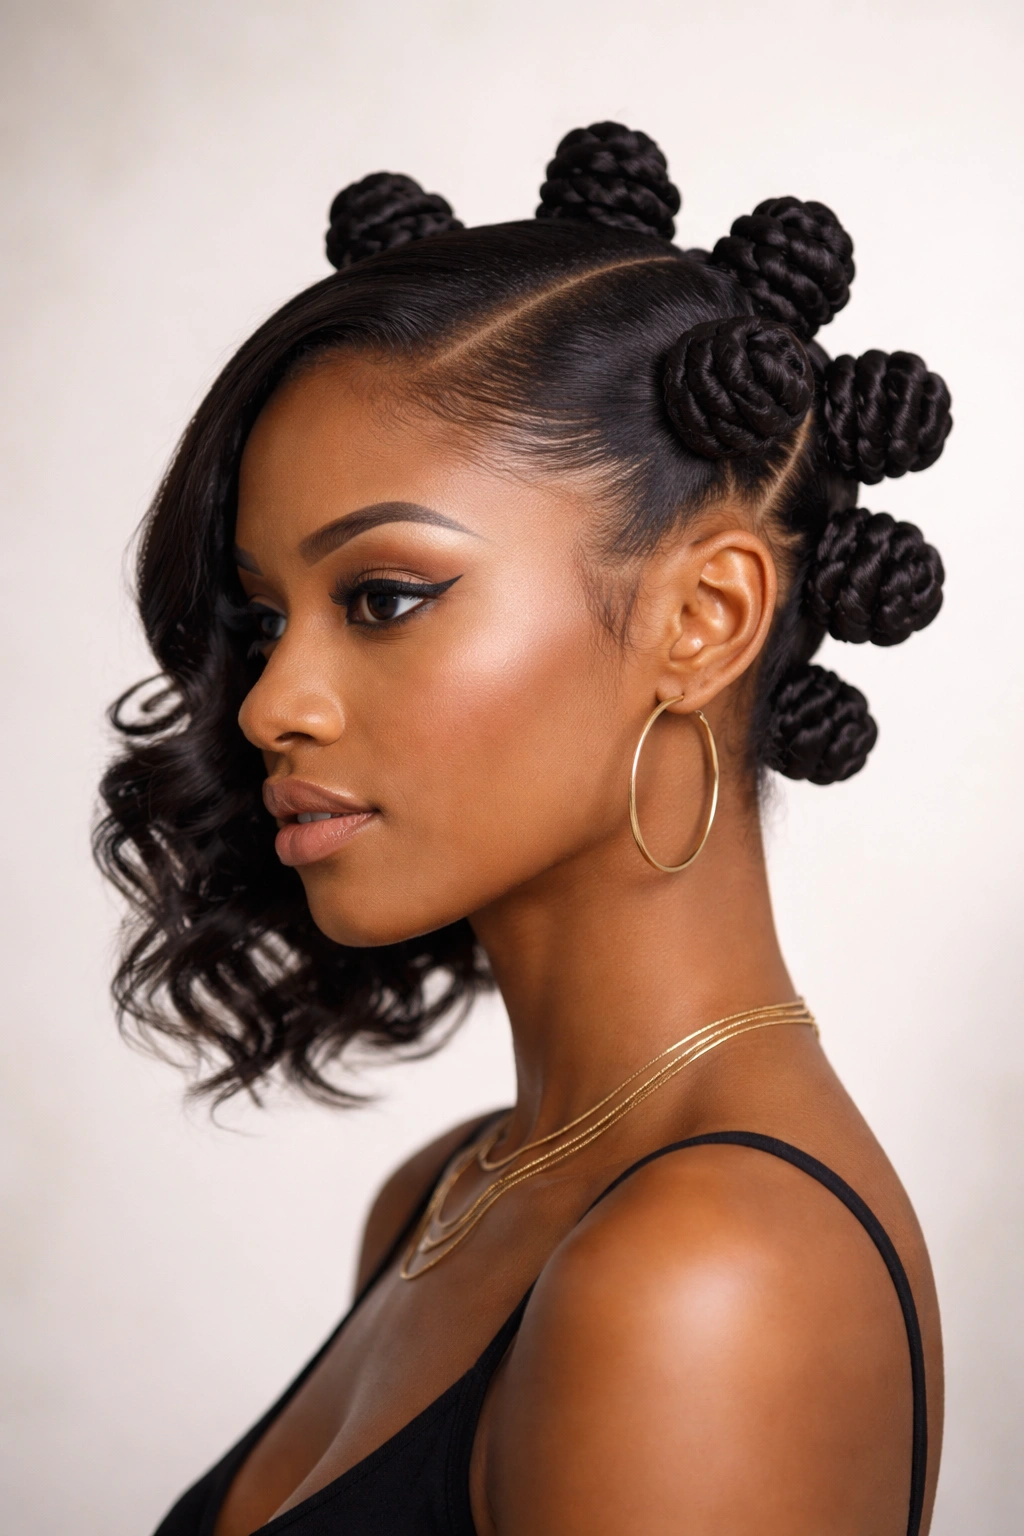
Why does a side part change the whole mood? Because it shifts the weight of the hairstyle away from the middle of the face and gives the knots a little movement. A deep side-part set feels softer than a centered grid, even when the knots themselves are tight and sculpted.
The trick is keeping the heavy side from becoming too dense. If one side holds too many knots, the shape starts to lean in a way that looks accidental. I like to keep the part deep, then distribute the knots so the heavier side still has breathing room.
A side part also helps if your hairline is uneven or if one temple frizzes faster than the other. That little offset can hide a lot. It can also make a simple set feel more grown-up without adding extra work, which is about as good as styling gets.
On longer natural hair, the side part gives the knots a kind of sweep. They do not sit there like little identical domes. They angle. That small shift makes the style feel less rigid, and that matters if you wear Bantu knots to work, brunch, or anywhere you do not want your hair to look overly set.
3. Jumbo Bantu Knots on Stretched Hair
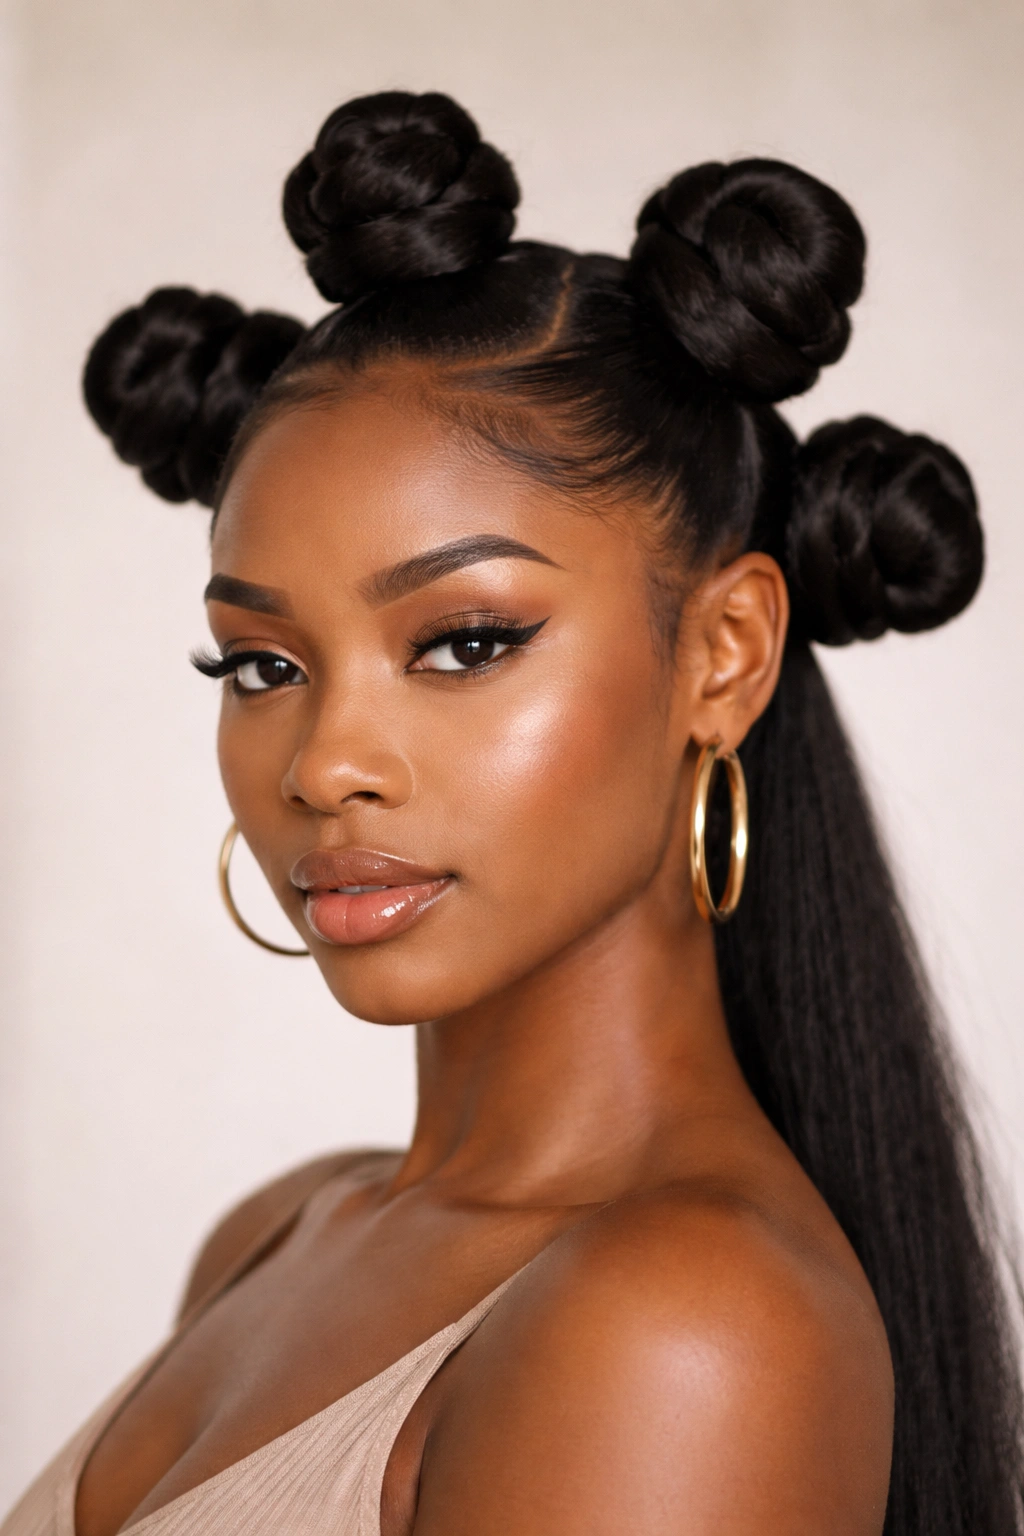
A jumbo set is the move when you want shape fast. Fewer knots mean less parting, less twisting, and less time staring into the mirror deciding whether a section is too big. The result is bold, visible, and easy to style on stretched natural hair.
What Makes It Work
Jumbo knots are easiest when the hair has been lightly stretched first. A low-heat blow-dry, braids taken down after a stretch, or even a twist-out that has been worn for a day or two all help the sections sit flatter.
- Choose sections closer to 2 inches wide.
- Keep the base smooth so the knot does not swell at the root.
- Use a cream with slip, not a sticky gel that gums up the coil.
- Expect the knots to read as sculptural, not tiny or delicate.
These are the knots I reach for when I want a style with confidence but not a full afternoon of parting. They also work well on thicker hair because the volume supports the shape. Thin hair can do them too, but the sections need a little more care so the scalp does not show too much between parts.
Do not twist them too tight. That is the part people get wrong. A jumbo knot should feel secure, not like a tiny knot is being forced to carry three times its own weight.
4. Mini Bantu Knots for a Dense Grid
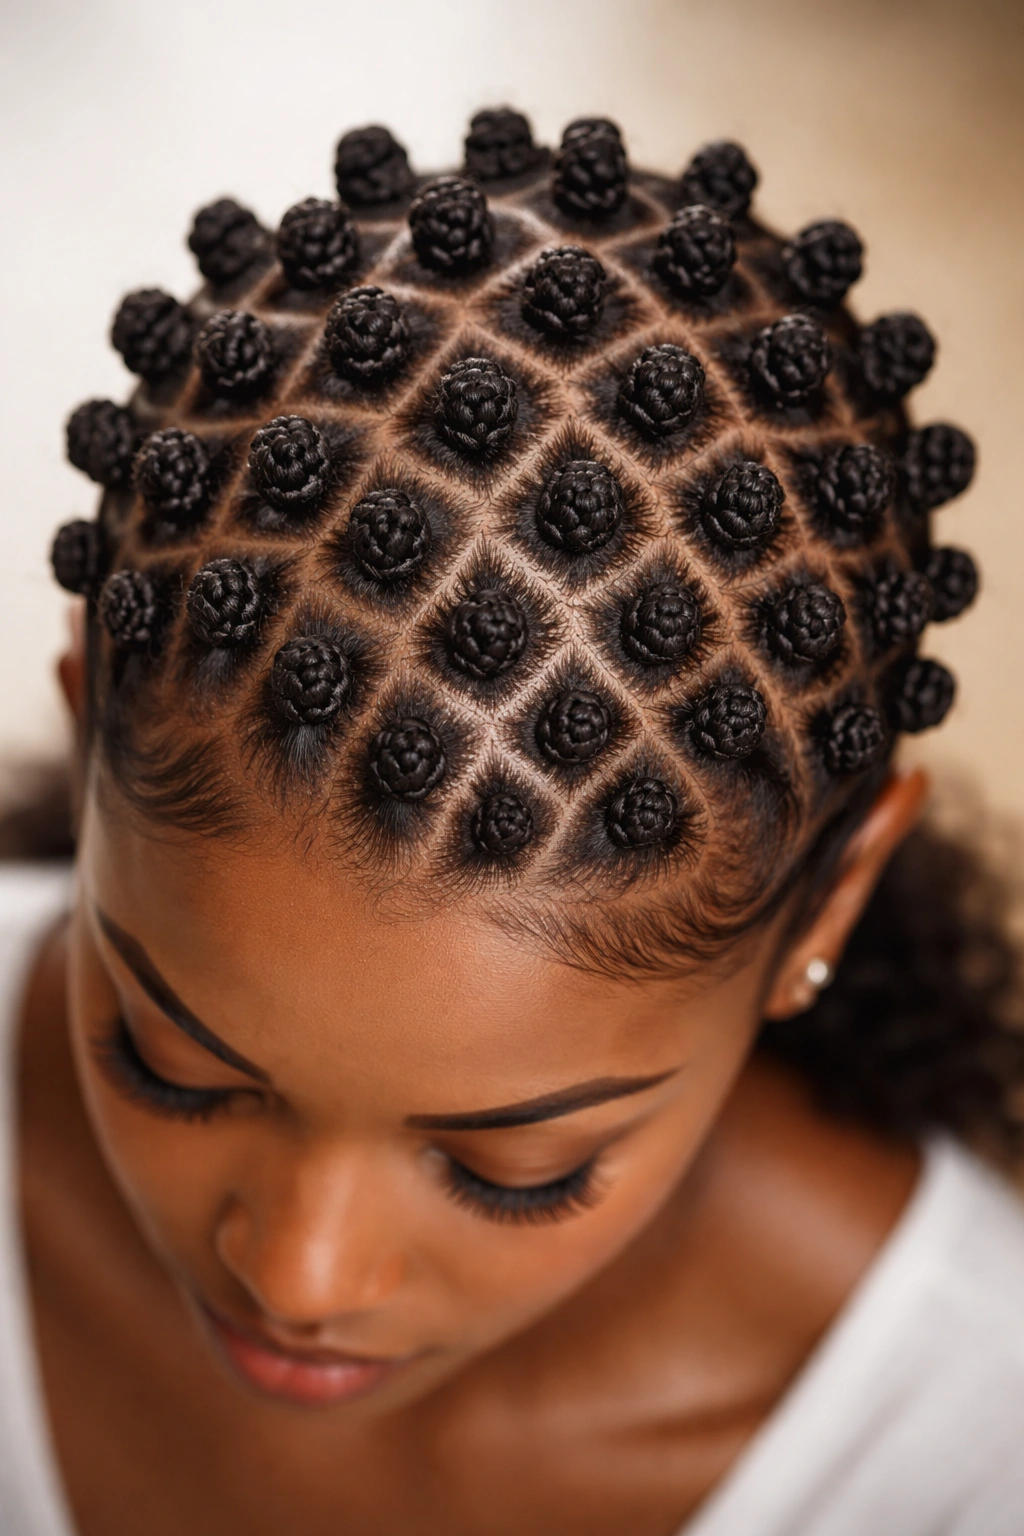
Mini knots are for the person who likes detail. A dense grid of small Bantu knots has a crisp, almost bead-like feel, and on natural hair it can look incredibly tidy when the parts are clean. It is also one of the best choices if you care about a later knot-out, because more knots usually mean tighter, more defined curls.
The downside is obvious: time. Mini sections ask for patience, and your arms will know it by the end. Still, the result can be worth it if you want a style that sits close to the scalp and stays neat for days.
A dense grid works especially well on thick, coily textures because the small sections keep each knot from getting bulky. On fine hair, though, it can look sparse if the parts are too large or if the knots are pulled apart while styling. Keep the sections small and the smoothing gentle.
The roots matter more here than the knot itself. If the base is frizzy, the style loses that clean, patterned look. A little mousse on damp hair before you start can help the sections stay together without making them stiff.
5. Half-Up Bantu Knot Hairstyles for Everyday Wear
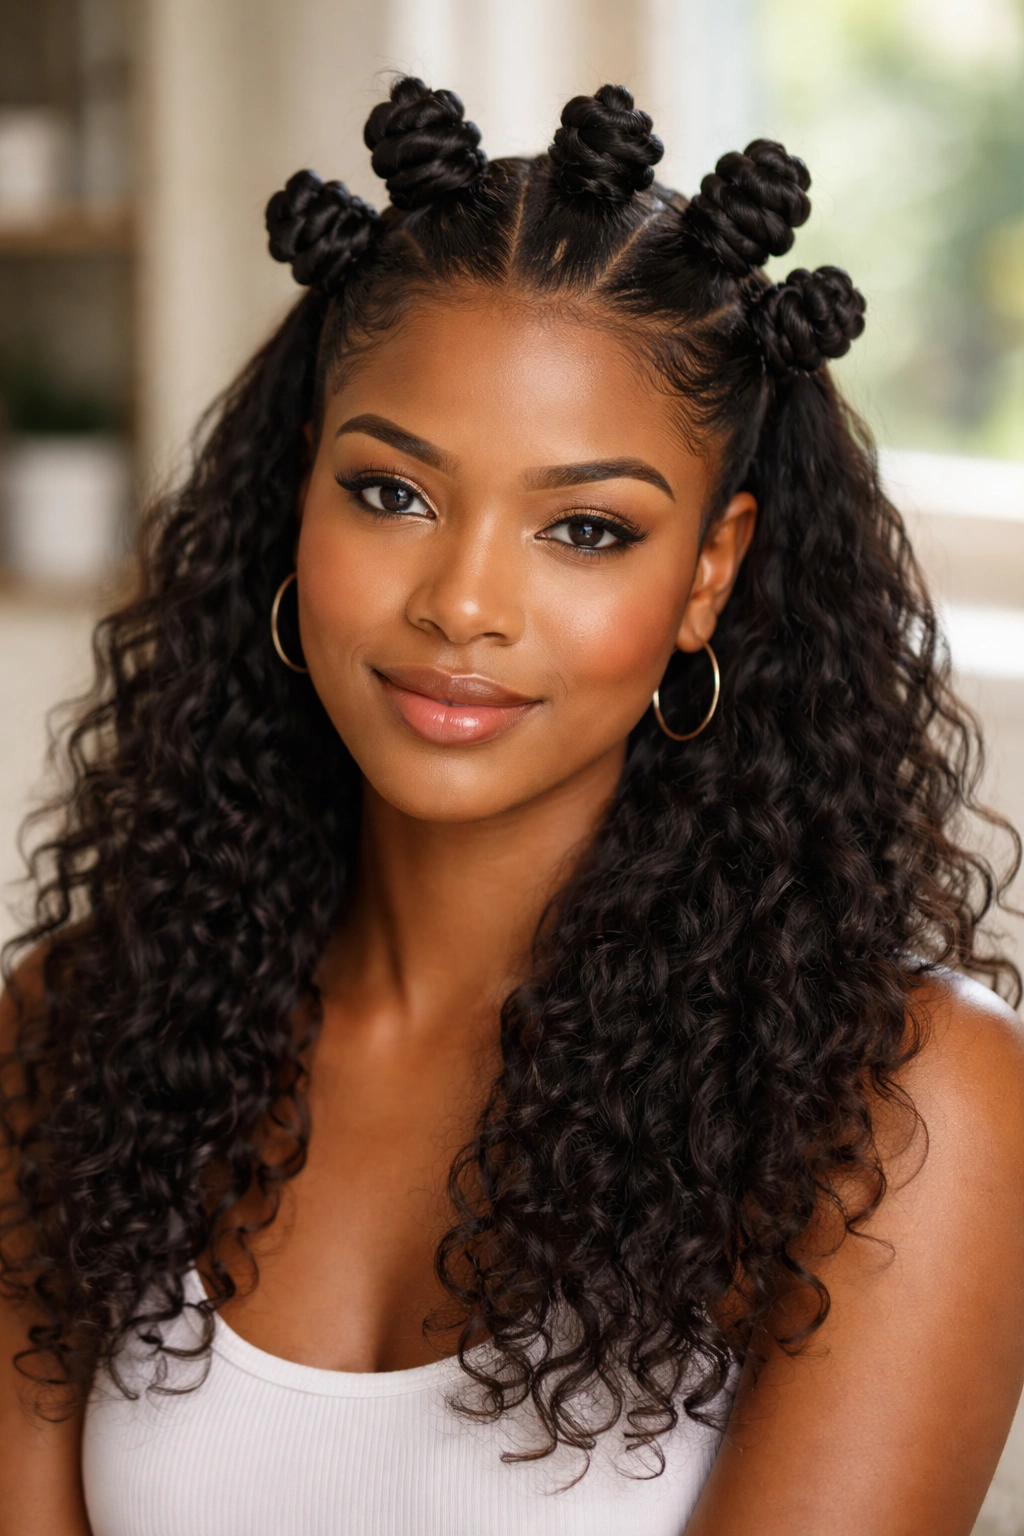
Half-up Bantu knot hairstyles have a casual ease that full sets do not always have. You get the structure of the knots on top or around the crown, but the lower hair stays loose, twisted, or braided. That contrast is the whole point. It keeps the style from feeling too formal and gives you some movement at the back.
Why It Saves Time
A half-up set is useful when your hair is long enough to feel heavy, but you still want the style to stay off your face. It also works when your ends are not cooperating. Hide the part that is puffier, keep the front crisp, and let the rest fall in a way that feels relaxed on purpose.
The key is balance. If the top section has too many knots, the style can look top-heavy. I like to keep the upper knots slightly larger than the bottom section’s loose texture so the eye moves down the head naturally.
This is one of those styles that looks good in regular life, not only on special occasions. It handles errands, office days, school runs, and all the messy middle places where you want your hair to be done without being precious about it. And if you later take the knots down, the front pieces can give you a soft frame while the lower hair keeps its own shape.
6. Bantu Knot Crown Around the Hairline
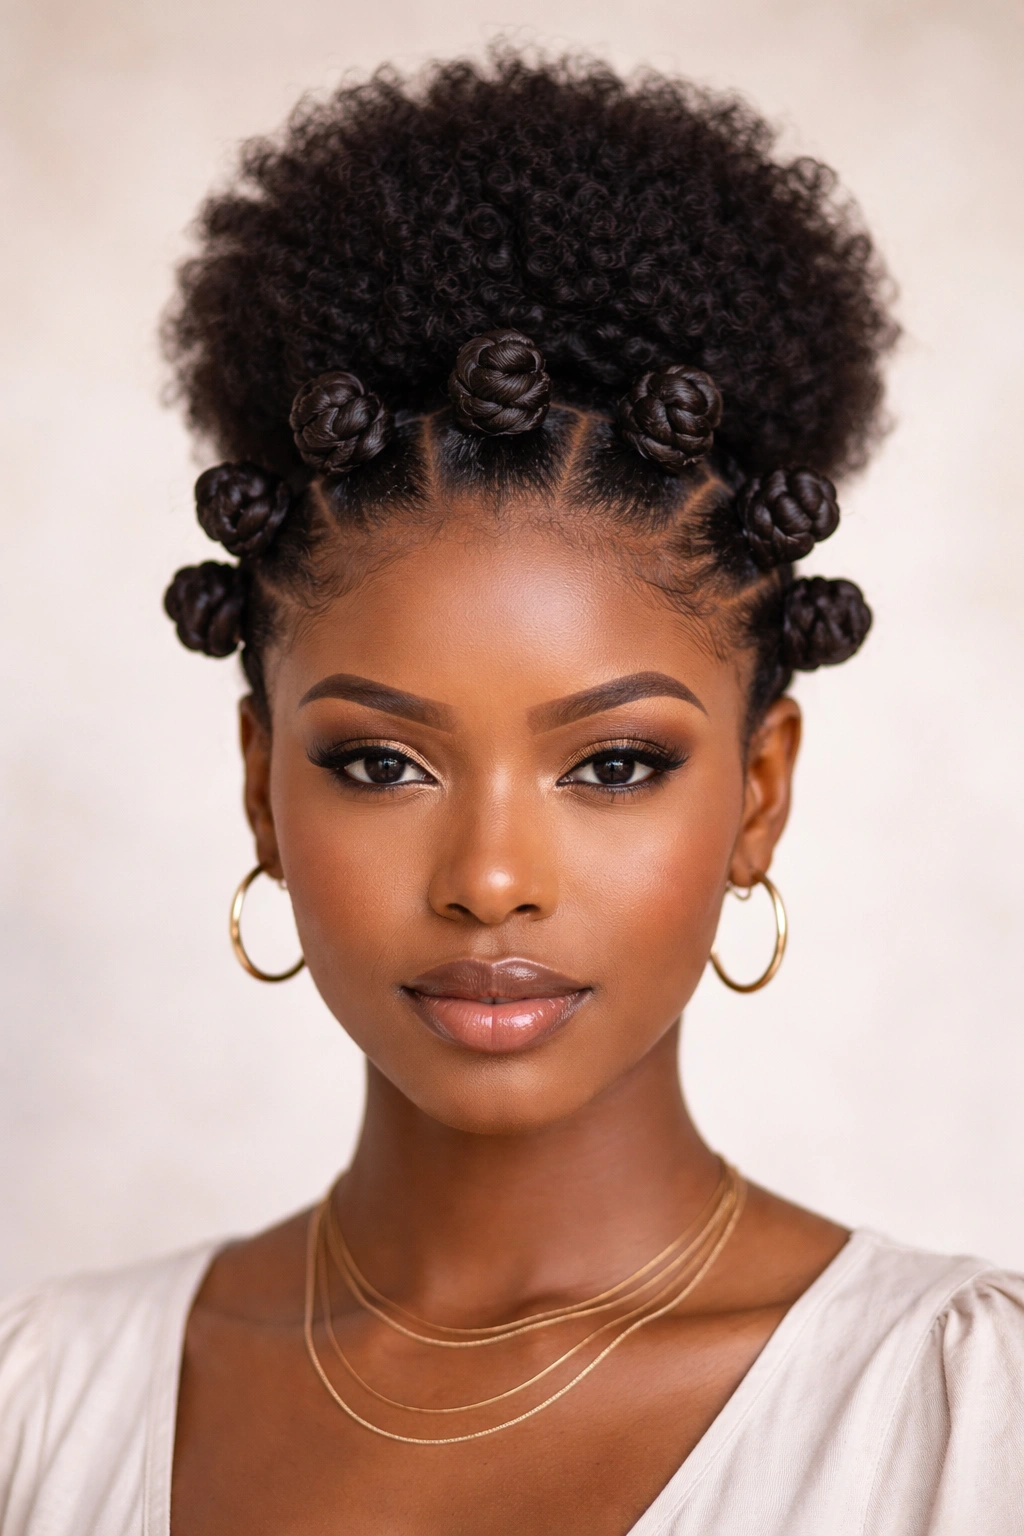
A crown set changes the whole vibe because the knots sit around the perimeter instead of covering the entire head. That leaves the center open for a puff, a bun, or even a smooth stretched section, which makes the style feel more styled than busy.
Picture hair swept away from the face, with the knots tracing the forehead and temples like a frame. That is the shape here. It has a regal feel without needing a lot of extra accessories, and it is especially kind to days when you want your hair out of your eyes.
Where to Place the Knots
The perimeter matters. Keep the knots close enough to the hairline that the shape reads as a crown, but not so close that they pull at the edges. That line is delicate on natural hair, and it pays to be careful.
- Leave the center section loose, puffed, or twisted into a bun.
- Keep the front knots a little smaller so the shape does not crowd the forehead.
- Use satin at night to stop the edge knots from puffing up first.
- Pin the back only if the center shape needs more lift.
This style gets even better when the center hair has a different texture from the knots. A soft puff in the middle and neat knots around it can look far richer than a full head of identical sections. It is one of my favorites when I want shape without a lot of visual noise.
7. Faux Hawk Bantu Knots
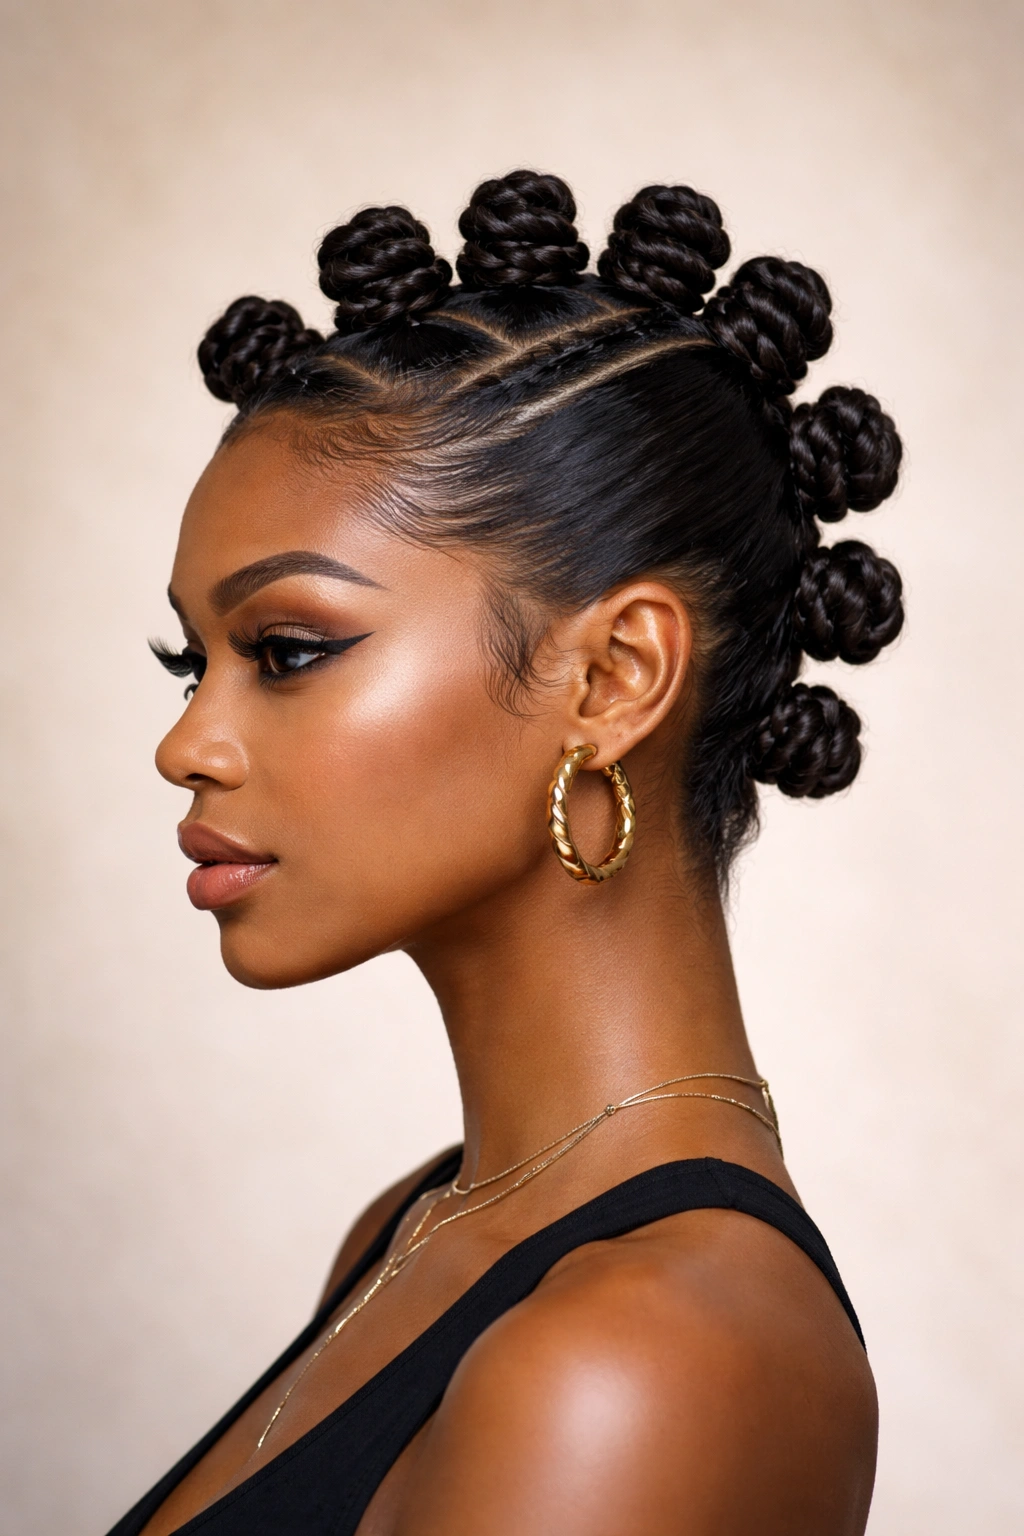
A faux hawk set brings attitude fast. The knots run down the center of the head in one strong line, while the sides get slicked, flat-twisted, or pinned tight. That long middle strip makes the face look lifted, and it gives natural hair a sharper profile than a full grid does.
What Makes It Different
Unlike an all-over set, this one uses negative space on purpose. The sides are not an afterthought; they are part of the design. That is why the style can look clean instead of crowded even when the knots are medium-sized.
The center row can be uniform or slightly staggered. I prefer slightly staggered, because it avoids that helmet look that sometimes happens when every knot is the exact same size. Keep the side sections smooth but not crunchy. Crunchy edges make the whole style feel old-fashioned in a bad way.
This set works best when the hair has enough length to hold the center shape without collapsing. On very short natural hair, the middle knots may sit close to the scalp, which can still be cute, but the faux hawk line will read less dramatically. On longer hair, the effect is much stronger and a little more dramatic, which is exactly why people wear it when they want a bit of edge.
8. Braided-Base Bantu Knots
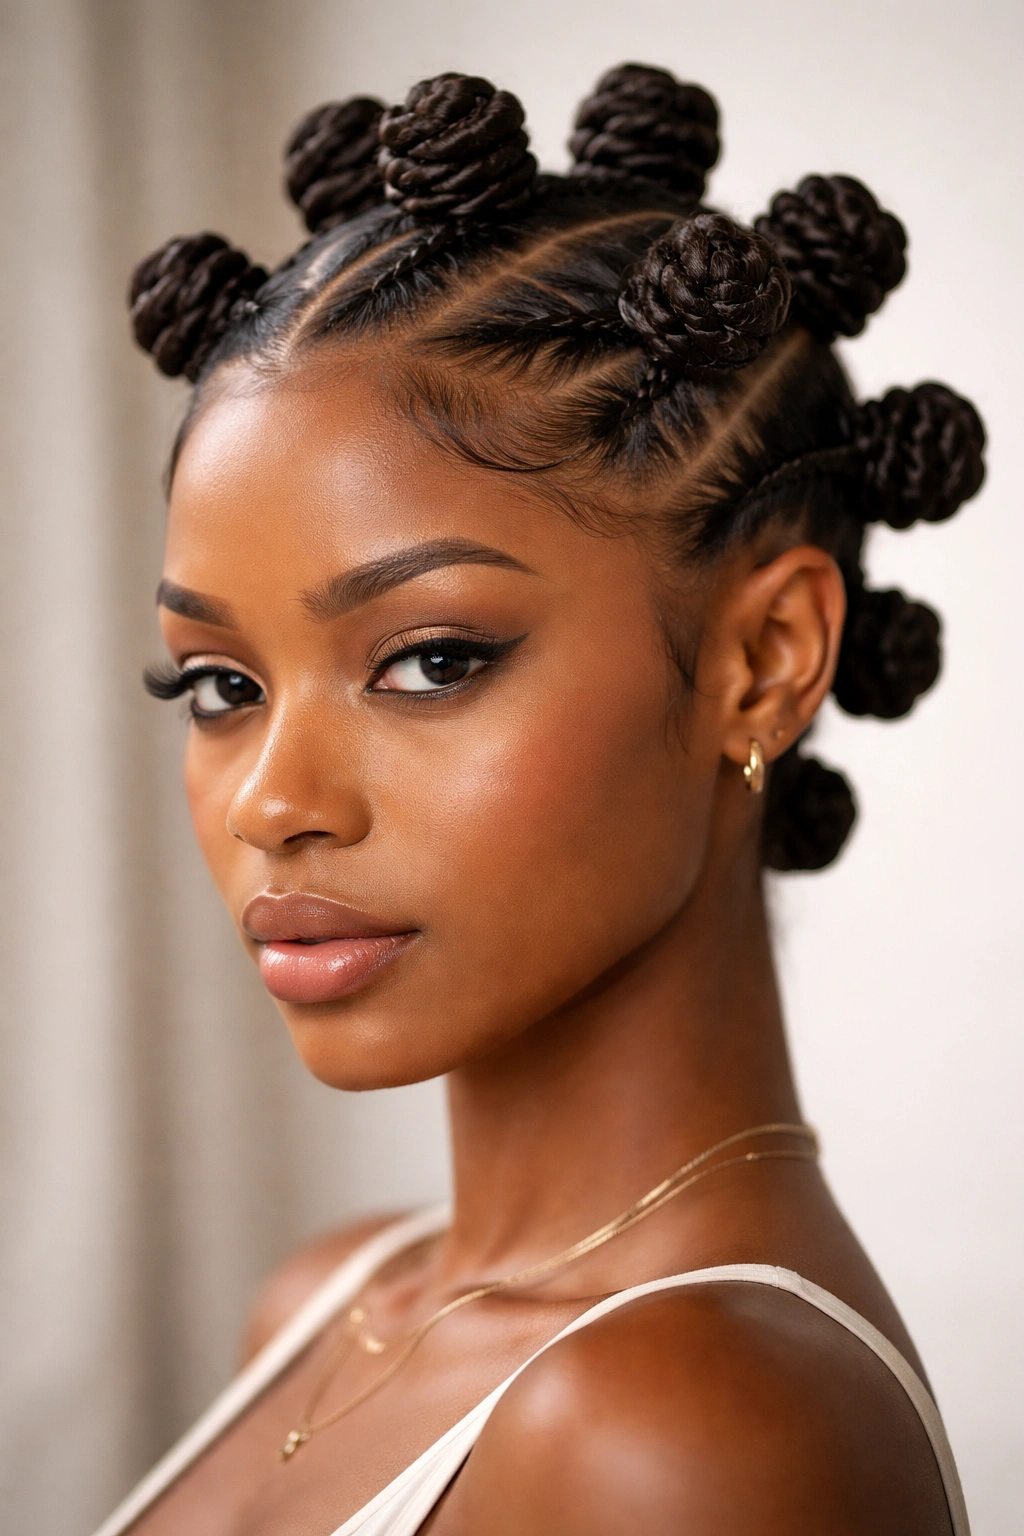
Why braid before you knot? Because the braid gives the section more grip and a firmer base, especially on slippery hair or layered cuts. A braided-base knot can sit flatter at the root and hold its shape longer than a plain twist in some textures.
This approach is useful when the hair is soft, freshly washed, or not stretched much. The braid keeps the lower half controlled, and then the remaining length can coil into a knot with less puff at the root. It is a tidy trick, and a practical one.
The tradeoff is weight. A braid adds a little bulk before the knot even starts, so the final shape can feel heavier. If the sections are too large, the knots may sit lopsided. Keep the braids slim and the knot compact.
This style also plays nicely with layered hair because the braided base helps keep shorter pieces from slipping out before the knot takes. If your hair tends to unravel the second you stop looking at it, this version usually behaves better than a plain coil.
9. Triangle-Part Bantu Knots
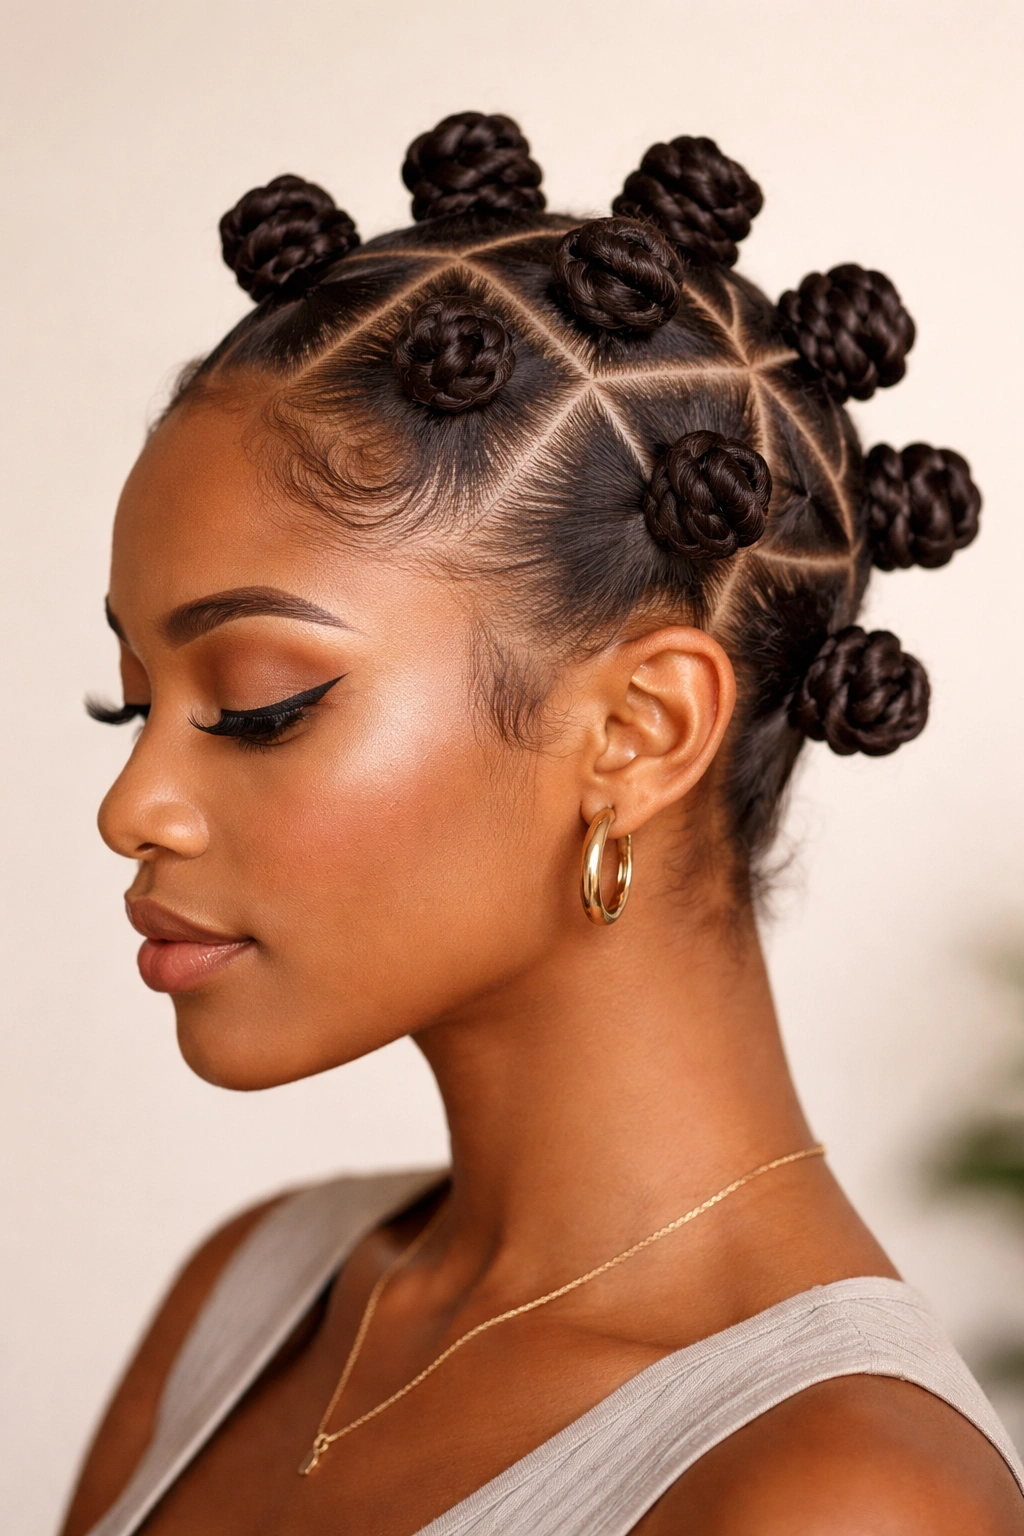
Triangle parts give Bantu knots a softer geometry than square sections do. The shape looks a little more organic, a little less uniform, and that can be useful when you want the set to feel intentional without looking rigid. On natural hair, especially thick coils, the triangle pattern helps break up the head shape in a nice way.
The best part? Triangle sections make the style feel more modern without changing the basic knot technique at all. The knot stays the same. The map underneath is what shifts.
If you have a wider forehead or a long face, triangle parts can help the eye move around the head instead of locking onto straight lines. On round faces, the angled parts create a bit more lift. It is a small thing, but hair is full of small things.
- Use a rat-tail comb to draw the points cleanly.
- Keep the triangles the same size if you want a neat finish.
- Let a few sections shift slightly if you want a softer, less formal look.
- Pair this pattern with medium knots so the parting still shows.
The final look tends to feel more crafted than predictable. That alone makes it worth trying.
10. Square-Part Bantu Knots
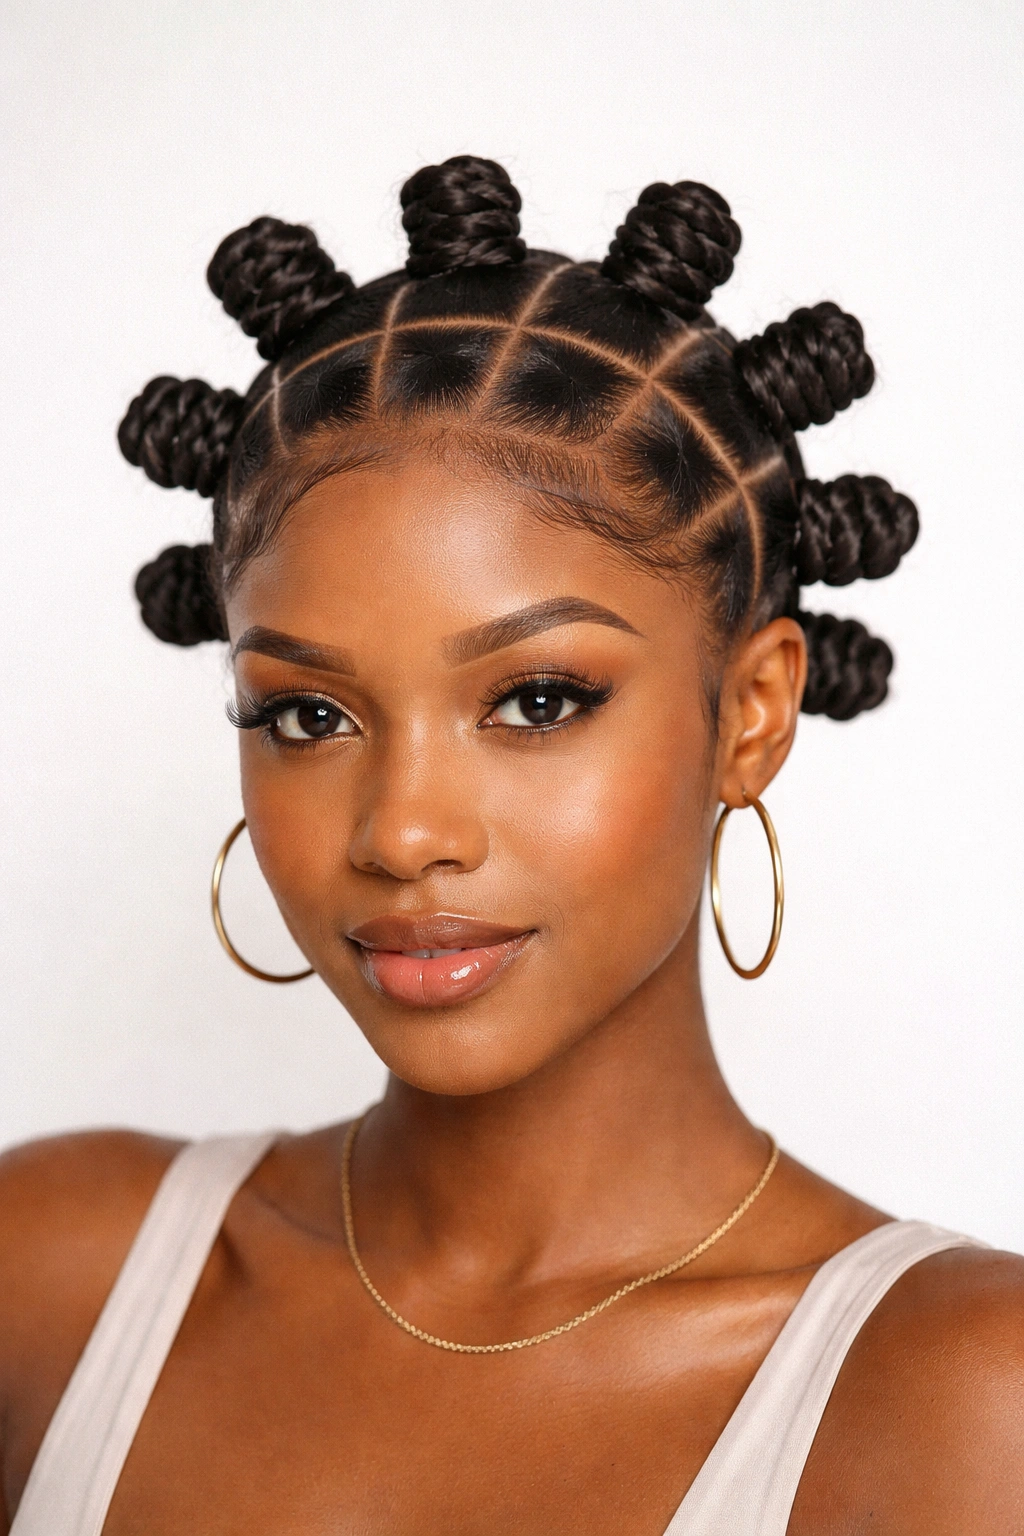
Square parts are the straight-shooter version of this style. Nothing fancy, nothing fussy. Just a neat grid that shows off how controlled natural hair can look when the sections are even and the parts are crisp.
There is a reason square-part sets stay popular. The shape is easy to follow, easy to touch up, and easy to keep symmetrical across the whole head. If you like order in your hair, this is probably your comfort zone.
The style is especially clean on medium-length hair because the knots sit at a consistent height. On very long hair, the squares can still work, but the knots may start to pile higher than you want unless the sections are carefully managed. On short hair, they can look compact and tidy, which is a nice side effect if you want something low-key.
What I like most is how honest the set looks. There is nowhere for sloppy parting to hide, so the final style forces you to slow down a little. That sounds boring, but boring can be good when the result is a smooth, even grid that lasts.
11. Bantu Knots with Gold Cuffs
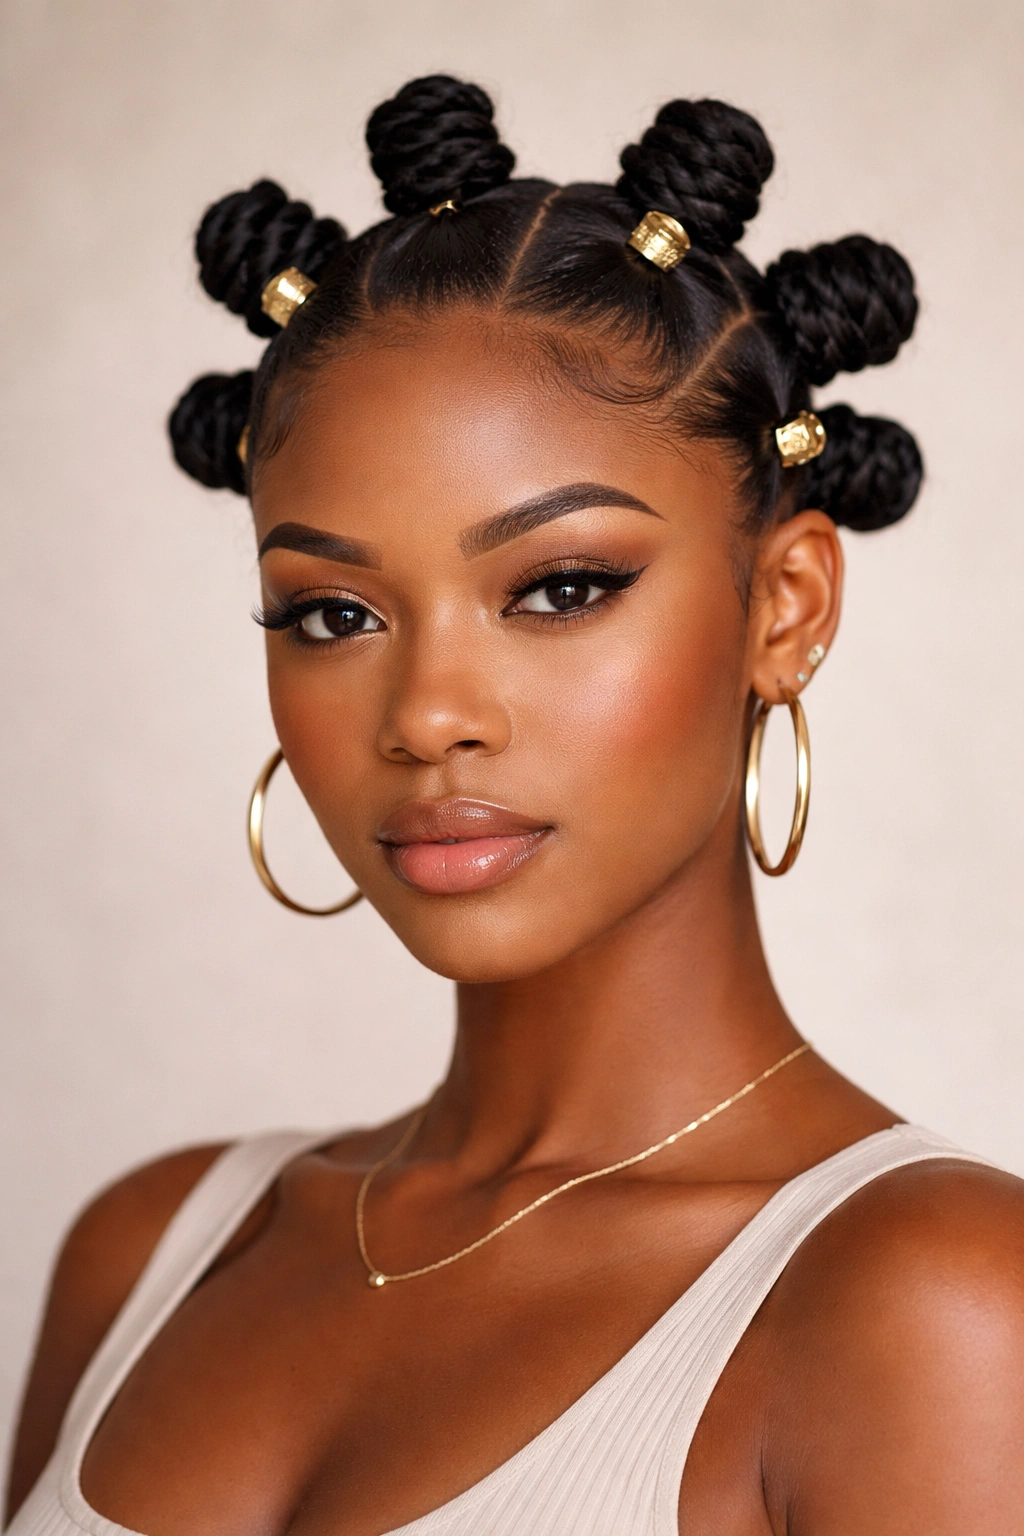
Accessories can either improve a knot set or make it look overcrowded. Gold cuffs usually fall on the better side of that line because they add small flashes of shine without swallowing the hairstyle. A few cuffs at the base or along select sections can turn plain knots into something with rhythm.
How to Place the Hardware
The trick is restraint. One cuff on every knot can look busy fast, especially on mini knots. A few cuffs placed at the front, at the temples, or along the center row usually look cleaner.
- Put cuffs on selected knots only, not every section.
- Choose sizes that fit the knot without squeezing it.
- Mix plain cuffs with textured thread if you want contrast.
- Keep the rest of the hairstyle neat so the accessories stay the focus.
This style works well for festivals, dinners, photos, or any day when you want the knots to look a little more dressed up. It also gives you an easy way to refresh an older set. Add cuffs, smooth the parts, and the style feels different even if the base knots have been in place for a day or two.
Do not overload the hair with metal. A few clean accents go farther than a pile of pieces that tug at the roots.
12. Bantu Knots on a Blowout
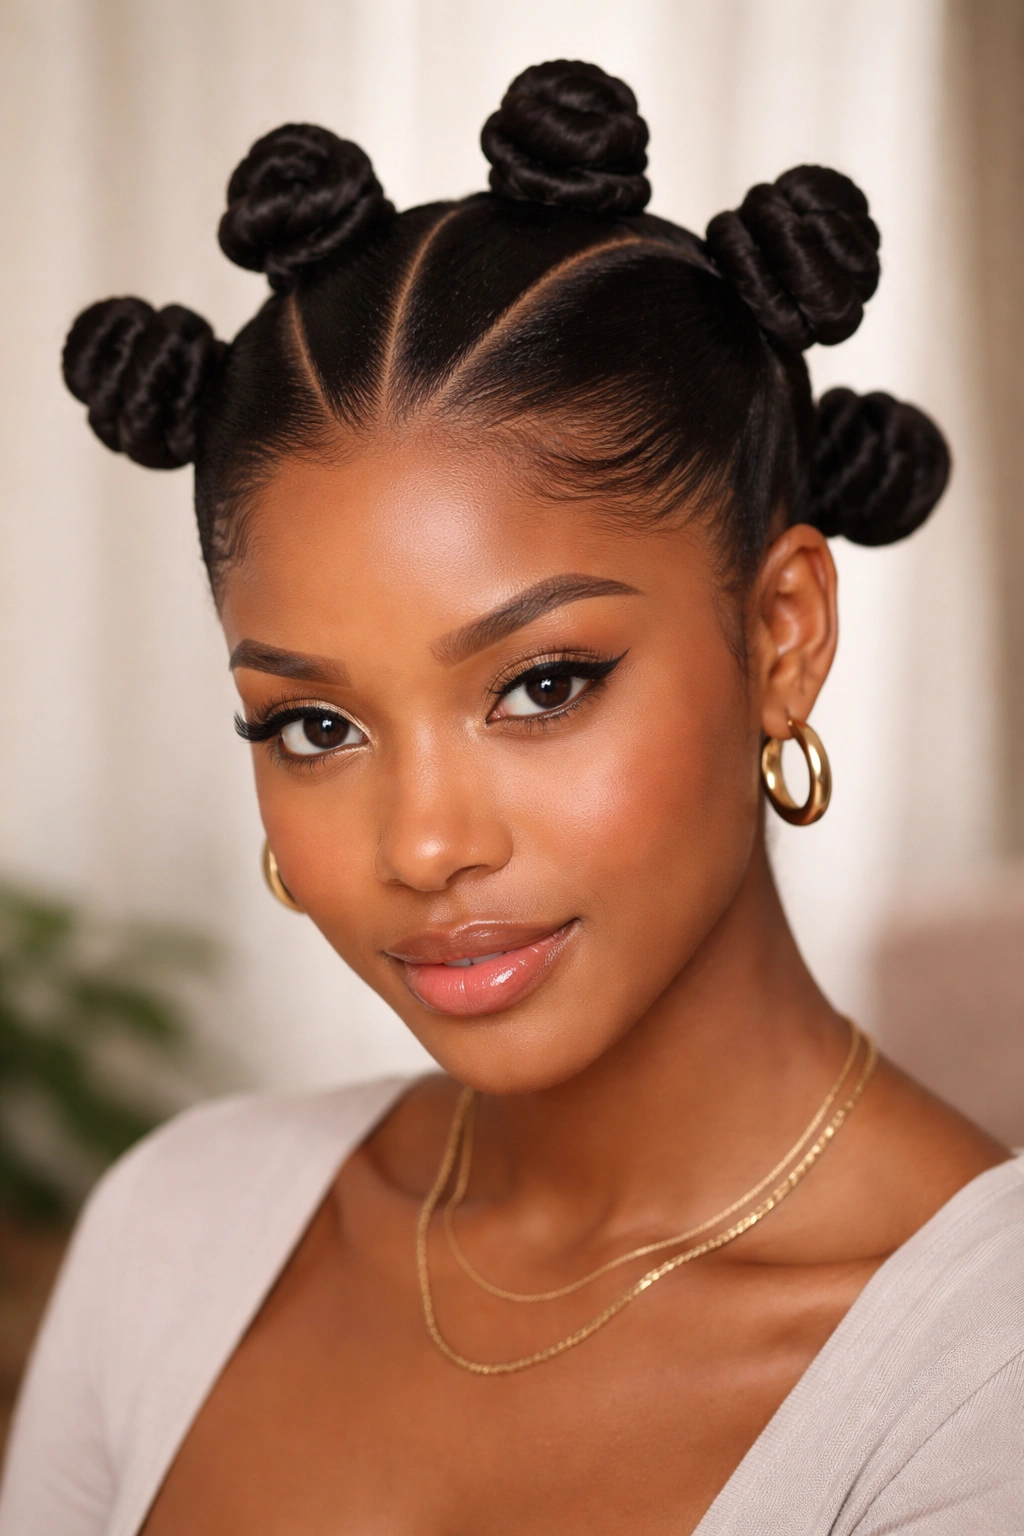
A blowout base changes the silhouette of Bantu knots in a big way. The hair stretches, the parts sit flatter, and the knots tend to look smoother and less bulky at the root. If your natural hair is dense or tight, this version can save time and help the style lie close to the head.
The tradeoff is heat. If you use a blow-dryer, keep it on low or medium with a nozzle attachment and use a heat protectant first. You do not need the hair bone straight. You just need enough stretch that the knots are easier to form and the part lines stay visible.
This set is one of the best choices when you want a cleaner outline. The coils still have texture, but the knot shape reads more clearly because the stretched base removes some of the puff that can hide the design. That is useful on longer natural hair, where extra volume can make the knots feel heavier than they need to.
I like this version when the goal is polish. It is not the fastest route, and it is not the gentlest if you overdo the heat. Still, when done lightly, it gives a very neat finish.
13. Bantu Knot-Out Prep Set
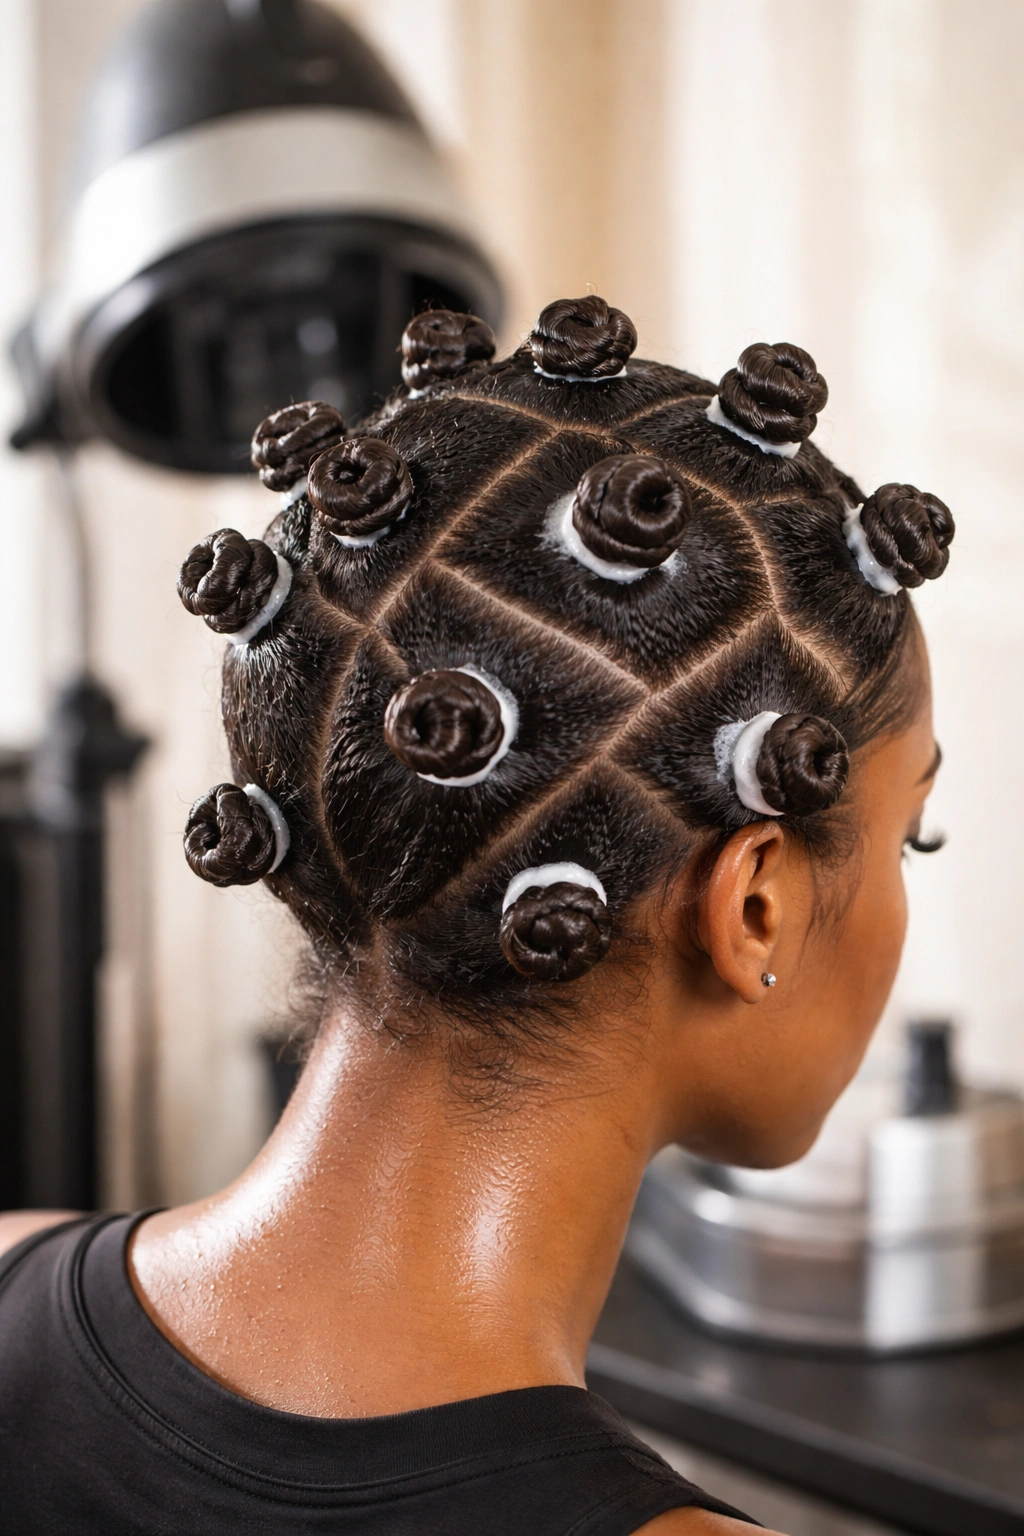
Sometimes the goal is not the knot itself. Sometimes the whole point is the curl pattern you get after you take it down. A knot-out prep set is all about that finish, and it changes the way you think about section size, product, and drying time.
Why does this matter? Because the tighter and more uniform the knots, the more even the curl pattern tends to be. If you want a softer wave, use bigger sections. If you want a smaller, springier knot-out, keep the parts tighter and the coils firm.
How to Shape the Future Curl
The hair has to be dry before you unravel it. Damp knots lead to frizz, and frizz is not a cute surprise after hours of drying.
- Use a light mousse or setting lotion on each section.
- Keep the ends tucked well so they do not fray.
- Let the knots dry fully under air or a hooded dryer.
- Separate each curl with oiled fingertips, not dry hands.
This style is a little different from a wear-it-as-is knot set, because the takedown matters just as much as the installation. If you want definition, patience wins. Rush it and the whole look turns fuzzy before it has a chance to shine.
14. Face-Framing Bantu Knots
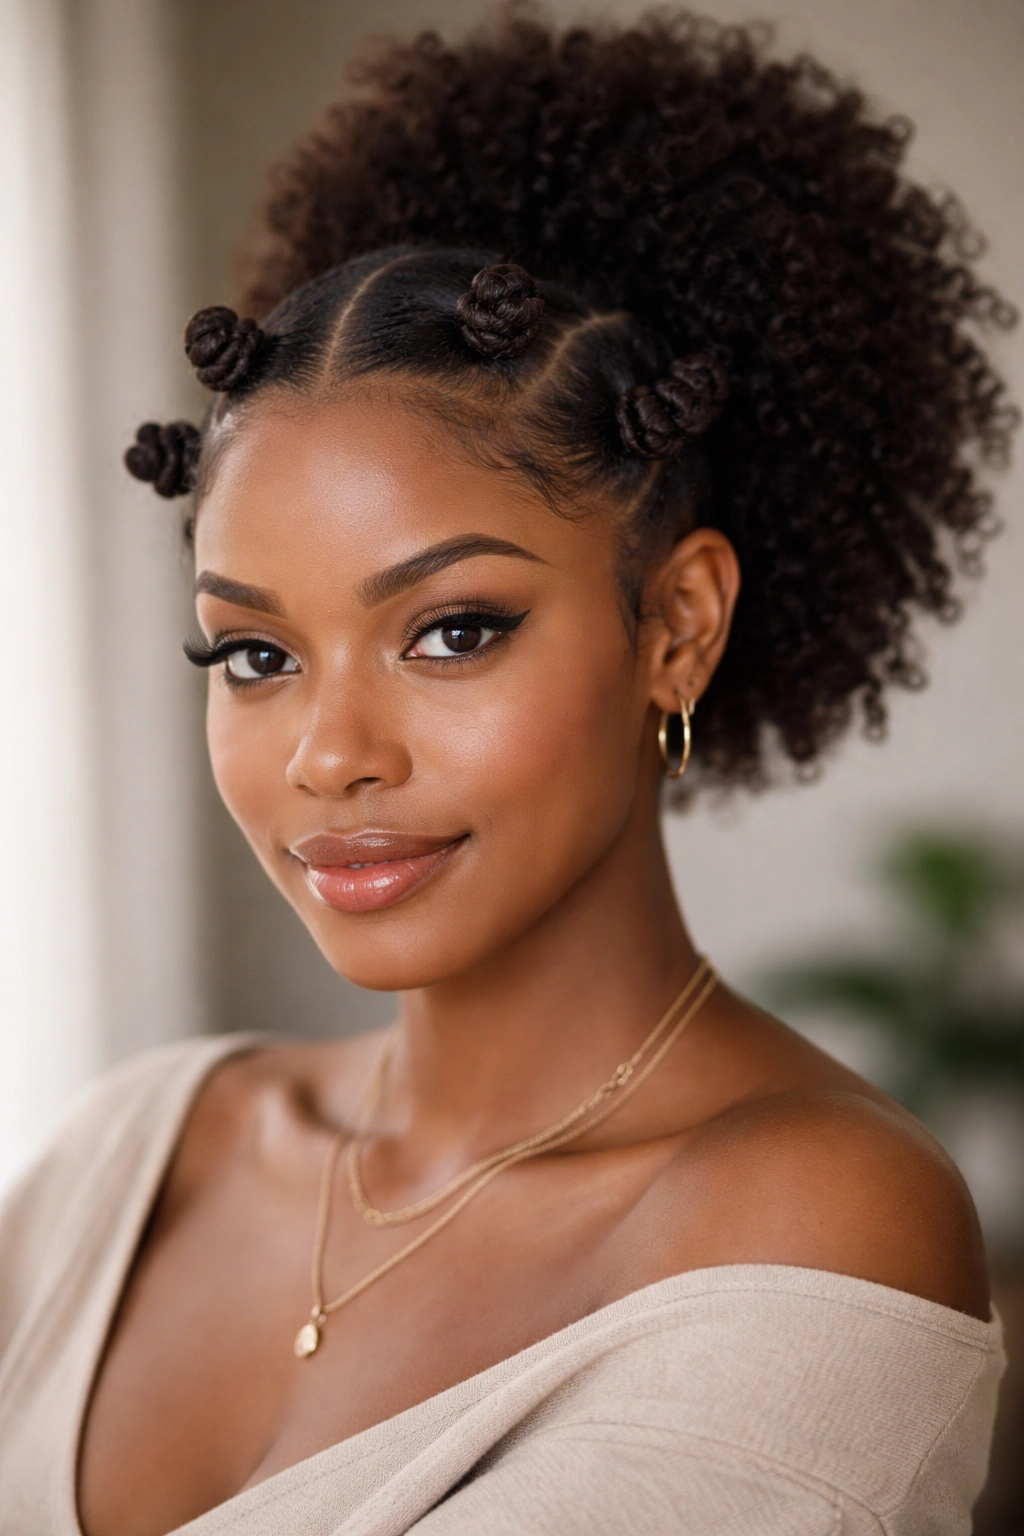
Face-framing knots are one of the easiest ways to make the style feel softer. Instead of wrapping the entire head in identical sections, you place smaller or more deliberate knots around the temples, hairline, and cheekbone area. The eye goes straight there.
That matters more than people think. Hair around the face can either sharpen your features or soften them, depending on where the knots sit. If you want a style that does not crowd the forehead, this version gives you that breathing room.
I like this look when the back of the hair is left in a puff, low bun, or loose stretch. The front knots do the visual work, and the rest just supports the shape. It saves time too, which is never a bad thing.
- Keep the front sections slightly smaller than the back sections.
- Angle the parting to follow the face instead of cutting straight across it.
- Use a little more smoothing product at the temples, where frizz shows first.
- Leave a tiny bit of curl at the edges if you want a softer frame.
The style is subtle, but not boring. That is the sweet spot.
15. High Ponytail Bantu Knot Cluster
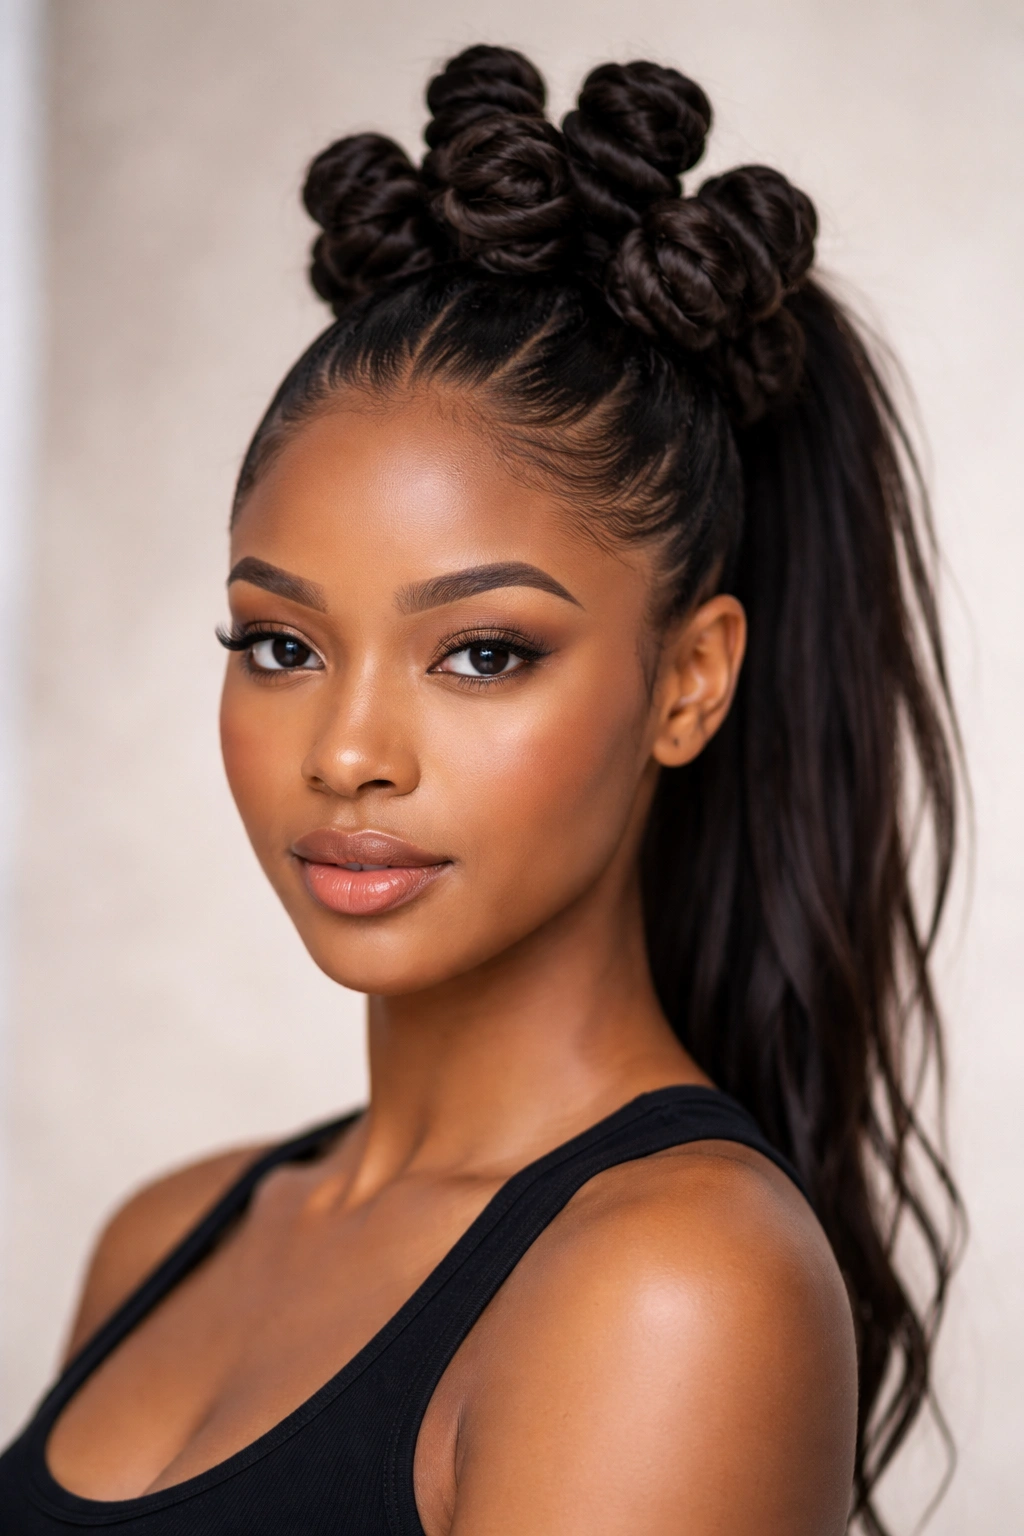
A high ponytail version changes the balance completely. Instead of spreading the knots across the head, you gather them into a lifted cluster near the crown, which gives the style height and a little bounce. The look feels energetic and clean at the same time.
Unlike a flat all-over set, this one keeps the hair away from the neck and gives the face more openness. That makes it a strong choice for long natural hair, especially when you want the style to feel neat without sitting heavy at the sides.
The ponytail base needs to be secure, but not yanked tight. A snug band, a few pins, and a little smoothing at the root go a long way. If the base is too tight, the whole style starts to pull in a way that feels harsh by the end of the day.
This is also one of those styles that looks better when the knots are not too tiny. Medium to jumbo pieces give the ponytail some weight and stop the cluster from looking like a small pile of pins. It should look lifted, not crowded.
16. Low Nape Bantu Knot Updo
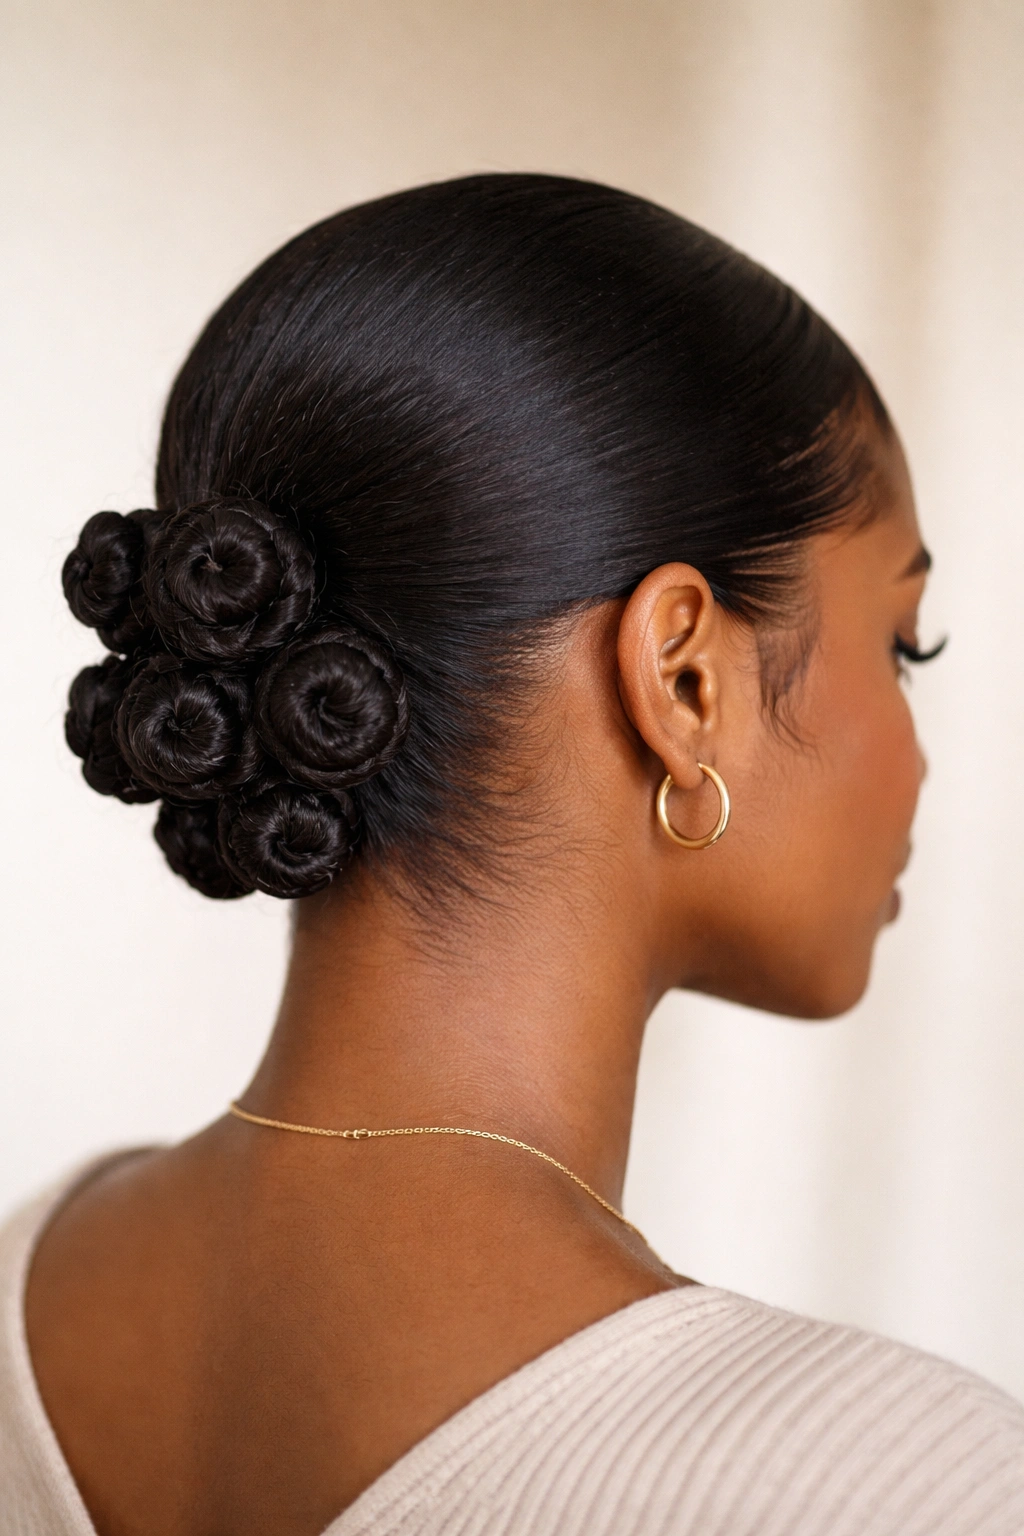
A low nape set is calmer, quieter, and easier to wear when you want your hair tucked close to the head. The knots sit near the back of the neck, sometimes with the front smoothed or side-parted, which gives the whole style a compact shape.
Why the Nape Area Matters
The nape is where a lot of hair gets rubbed by collars, scarves, and the back of chairs. Keeping the knots low can help the style feel more contained, but it also means the roots need to be neat or the back starts to frizz first.
If you want the style to stay clean, smooth the nape with a little cream before you part. Then pin any loose ends under the knots if they are longer than the section can comfortably hold.
This version works for dressier days because it sits close to the head and leaves the face free. It also holds up nicely under a satin wrap at night. The next morning, you are not fighting a mountain of hair. You are mostly touching up the edges and maybe refreshing one or two knots that loosened at the back.
It is not flashy. That is the point.
17. Sleek Center-Part Bantu Knot Hairstyles for Formal Moments
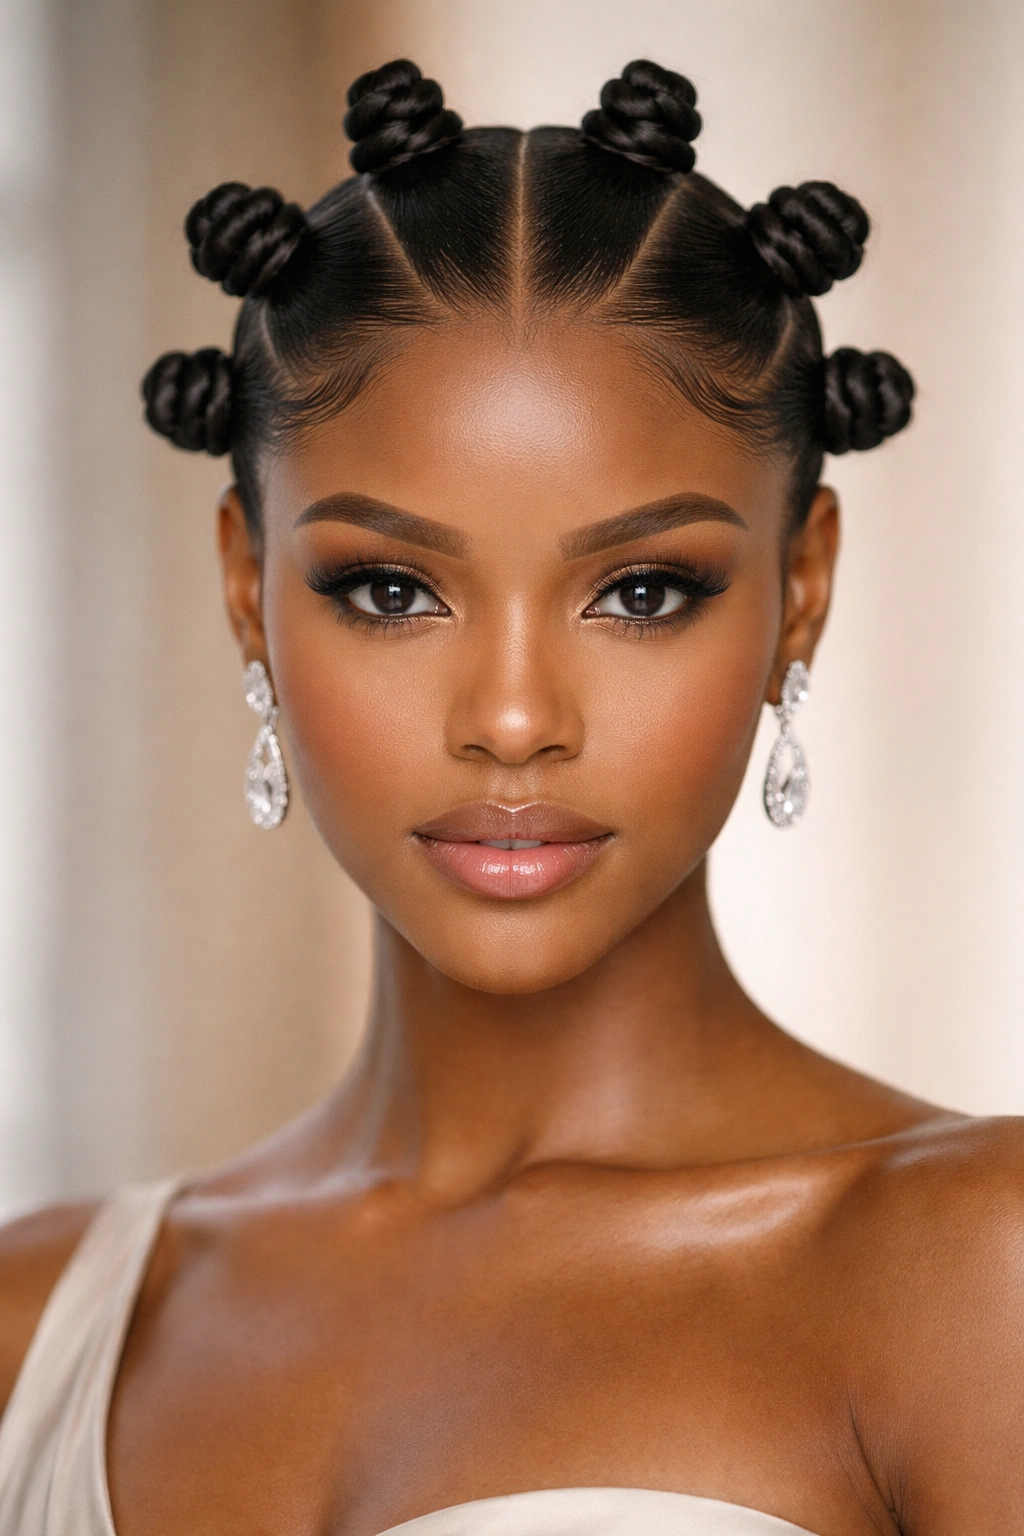
A center part gives Bantu knot hairstyles a very clean line, and when the parts are sharp, the whole style reads formal without trying to be dramatic. I like this version when the hair needs to look controlled and symmetrical, because the center line acts like a spine for the whole set.
Keep the part straight from forehead to crown. That line is the star. If it wavers, the style loses some of its polish, and you can see the wobble immediately. That is why a rat-tail comb and a calm hand matter more here than a heavy product load.
The knots themselves can be medium or small. Medium knots feel balanced. Smaller knots feel more detailed. Either way, the center part gives the set a dressed-up look that works for weddings, ceremonies, or any event where you want the hair to say “I paid attention.”
Do not drown the roots in edge control. A little shine is enough. Too much product makes the part look greasy and can leave the style sticky around the hairline. Clean, not slicked to death, is the better target.
18. Thread-Wrapped Bantu Knots
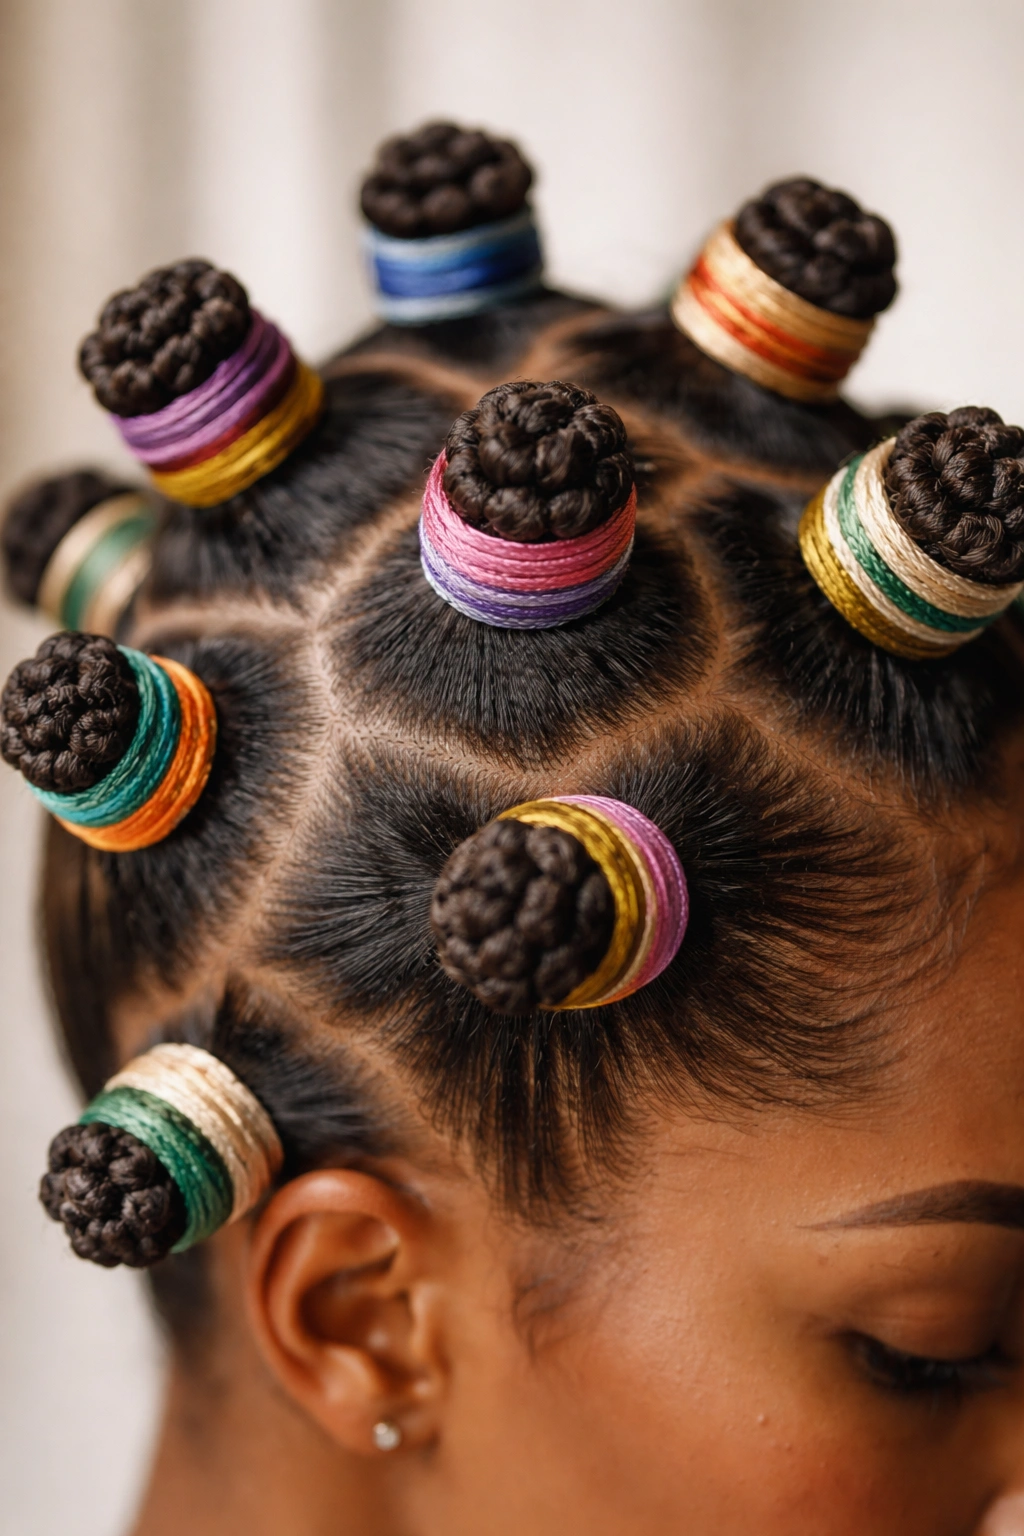
Thread-wrapped knots are for the person who likes a little pattern without adding beads or metal. Wrapping the section with thread or yarn changes the color story and gives the knots more texture. It can look neat, artsy, or playful depending on the colors you pick.
A thread wrap works best when the hair underneath is smooth and the thread is not pulled so tight that it dents the section. That kind of tension can leave a line in the hair, and it is not worth it. Keep the wrap snug enough to stay in place, but never tight enough to pinch.
This style is nice because it lets you play with contrast. Black thread against dark hair can look subtle and sharp. Bright thread on deep coils can feel bold and very clear from a distance. You can also keep the rest of the hair plain and let the wrapped knots carry the design.
What to Watch For
- Use soft thread that will not snag when you remove it.
- Cut each wrap cleanly instead of yanking it free.
- Keep the wrapped sections slightly larger so the thread has room to sit.
- Stop if the scalp feels sore. That is not a sign to push through.
There is a difference between decorative and overdone. This style knows where that line is, if you do.
19. Diagonal Part Bantu Knots
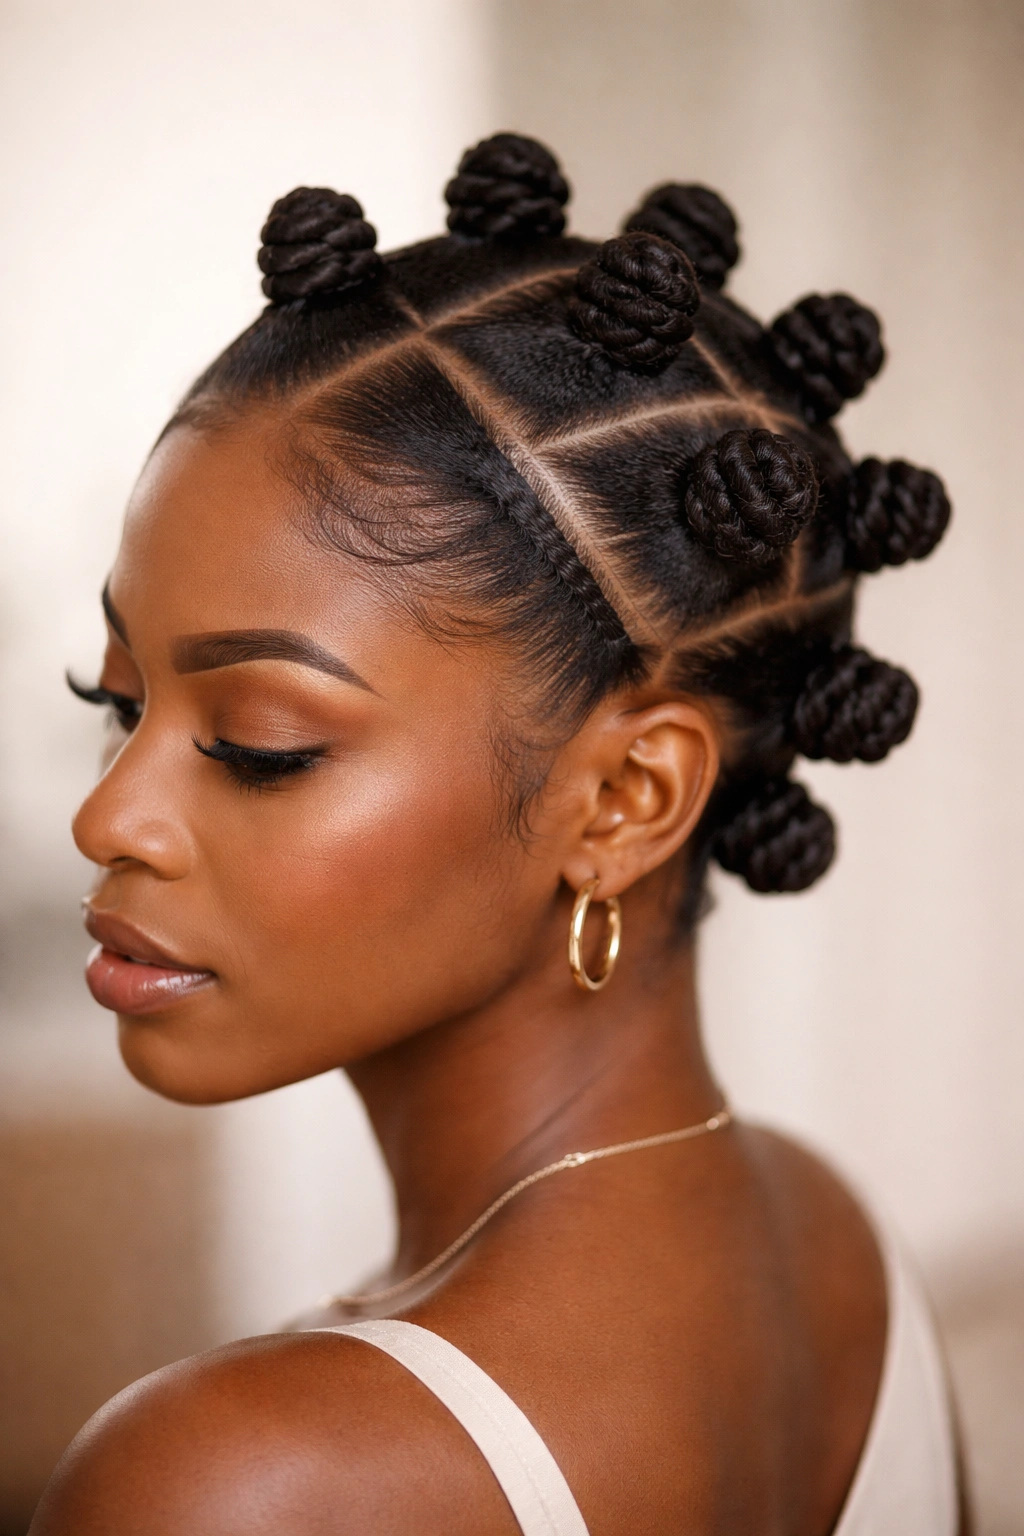
Diagonal parts give the hairstyle a sense of movement before the knots even begin. The lines travel from one corner of the head to another instead of sitting in a straight row, which makes the whole set feel less rigid and more directional.
That diagonal flow can be useful if you want to soften a stronger jawline or create the illusion of lift at one side of the face. It is subtle, but not invisible. People notice the shape even if they cannot explain why it feels different from a plain grid.
I also like diagonal parts on hair that has uneven density from front to back. The angle can disguise those differences better than square sections can. Hair has quirks. This pattern works with them instead of fighting them.
You do need a clean parting hand, though. Diagonal lines can go crooked fast if you rush. Once one row is off, the rest of the set tends to echo that error. Slow down on the first few sections and the finish will look far more intentional.
20. Pinned-Under Bantu Knot Updo
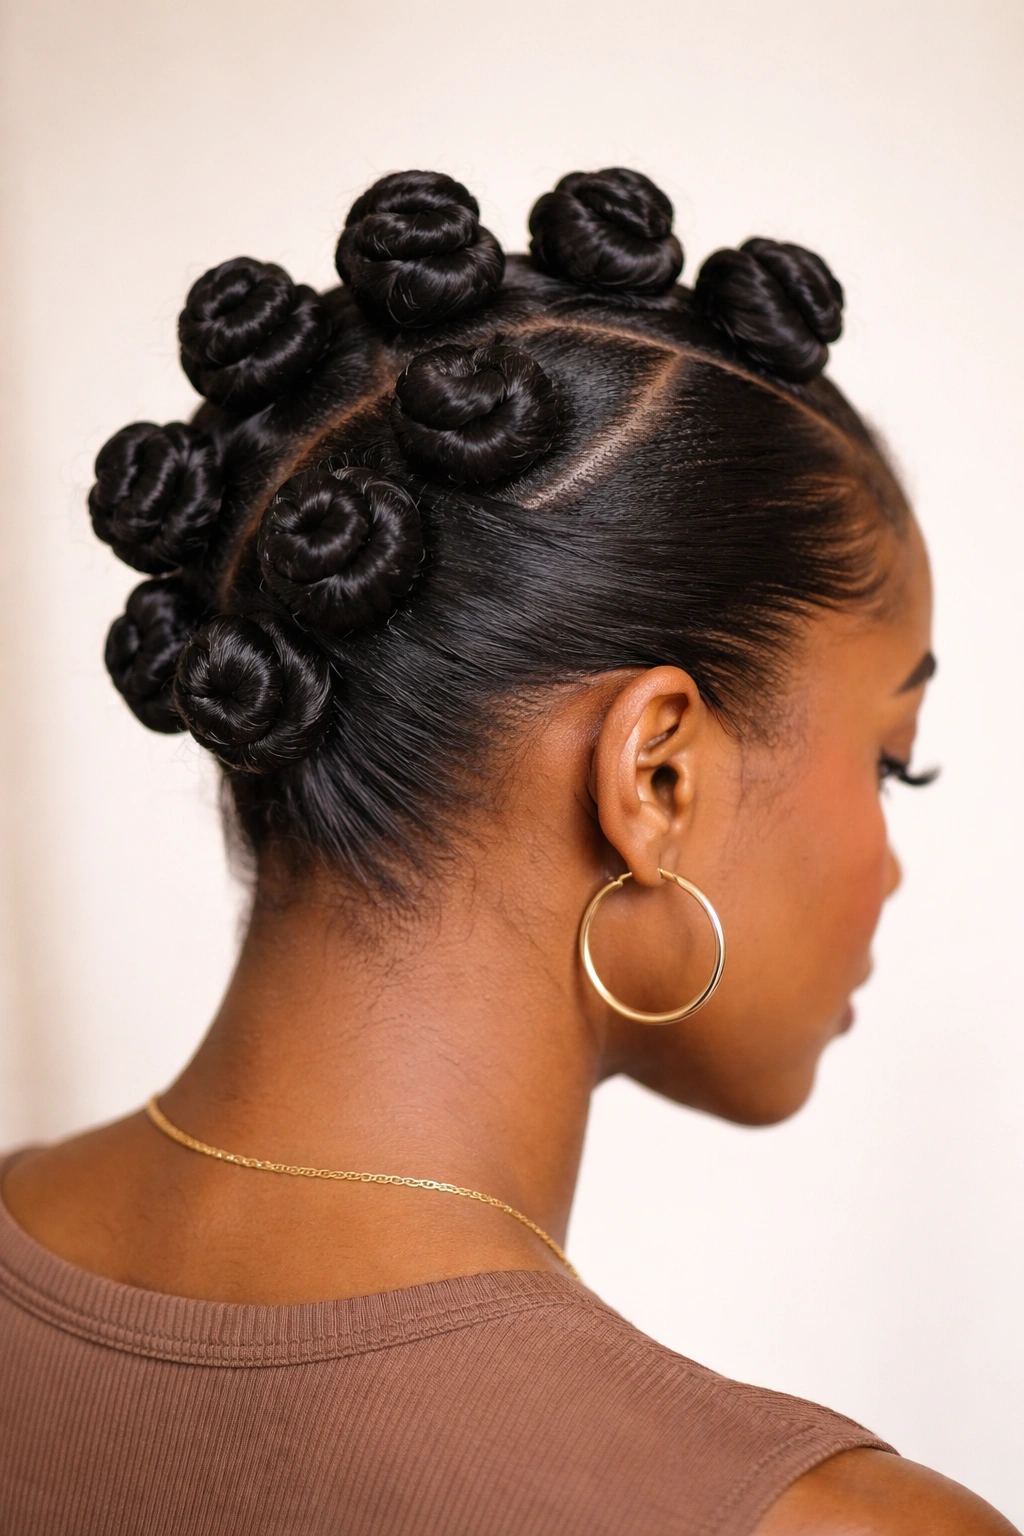
Not every knot set needs to sit high and visible. A pinned-under updo tucks the ends away and lets the knots sit close to the scalp or nestle into an updo shape, which makes the style feel compact and tidy.
This is the version I would choose for a dressier event when I want the hair to stay out of the way. It also works well if you dislike pieces poking outward. Hidden pins can turn a simple set into something much smoother, especially on longer natural hair where the ends sometimes want to swing or stick out.
When to Hide the Ends
If the hair is layered, the ends are often the first part to loosen. Tucking them under keeps the shape neat.
- Use small bobby pins that match your hair color.
- Pin from underneath so the hardware does not show.
- Smooth the outer surface with a tiny bit of cream before pinning.
- Check the back in a mirror before you leave the house.
The style should feel secure, not armored. If the pins start pulling, remove one and reposition. Hair should not hurt just because it is being cooperative.
21. Flat-Twist and Bantu Knot Combo
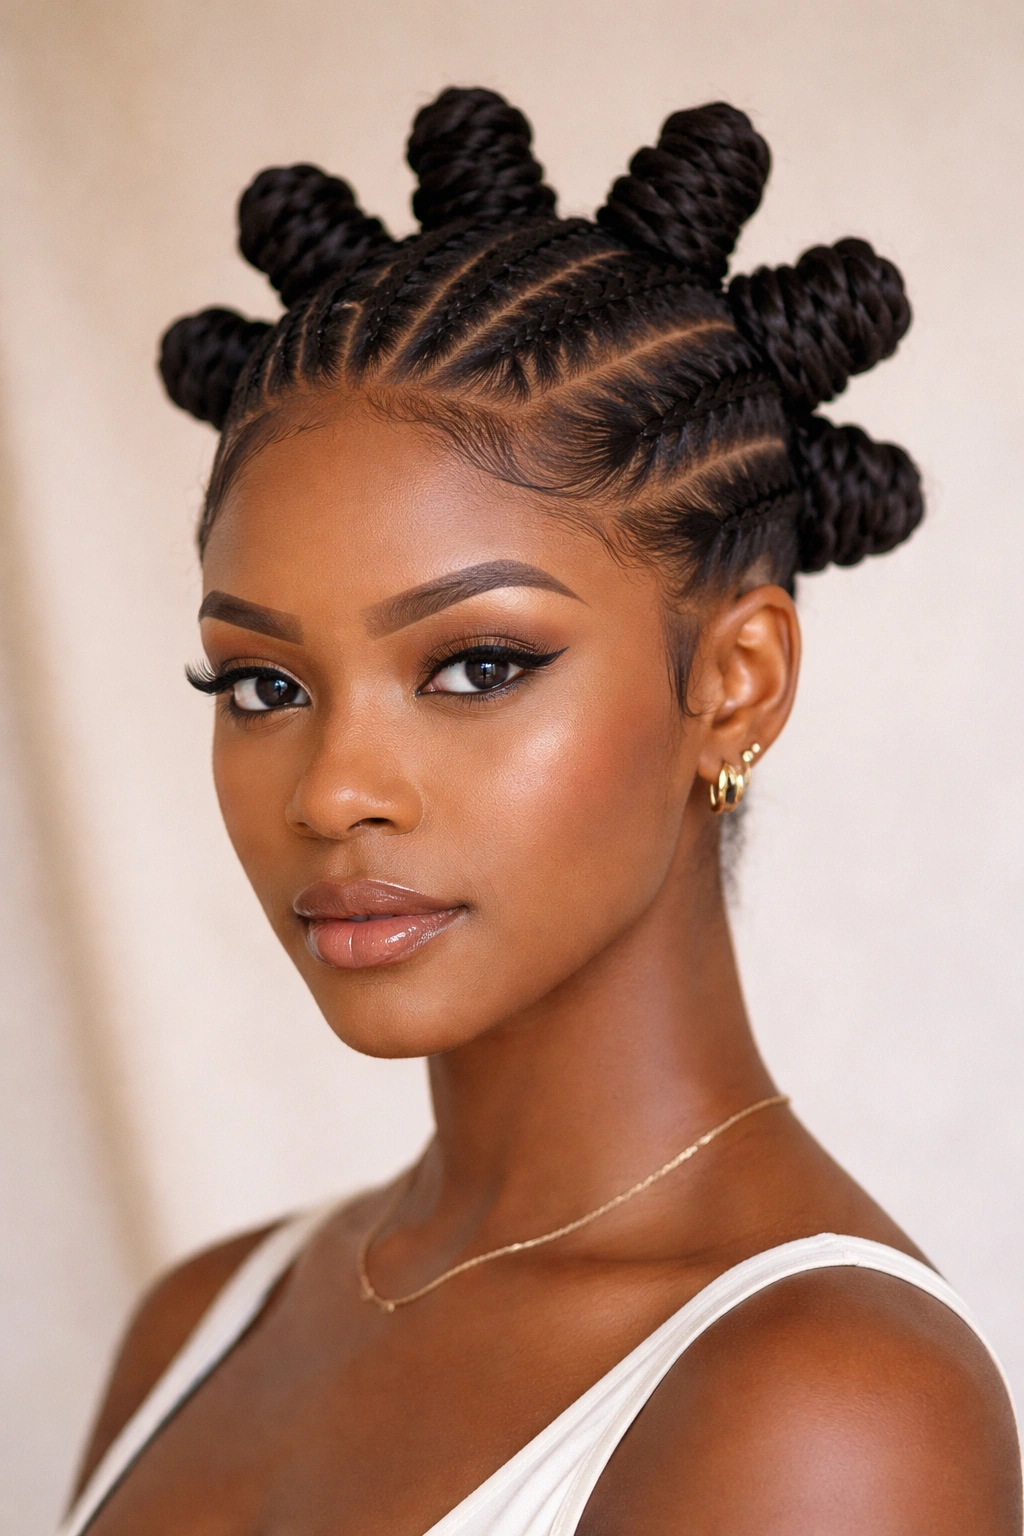
A flat-twist and knot mix gives you more control over thick or layered natural hair. The front or sides can be flat-twisted toward the scalp, while the back or crown turns into knots. That mix breaks up the head shape in a way that feels practical and stylish at the same time.
The combo is useful when one technique alone feels too bulky. Flat twists lie flatter, which helps if you want some areas smoothed down. Knots, on the other hand, give more height and texture. Put them together and the style gets dimension without extra noise.
Why the Mix Helps
Flat twists control the base. Knots give the statement. That is the whole deal.
If your hair is thick at the crown but softer at the sides, this combo balances the difference instead of exposing it. It also wears well for a few days because the twisted sections tend to stay neater than loose coils do.
The parting needs to be clean where the two techniques meet. A sloppy join is easy to spot. Keep the transition line clear, and do not overload the twist section with product. Once it flakes, the whole front of the style loses its polish.
22. Halo Braid with Knot Accents
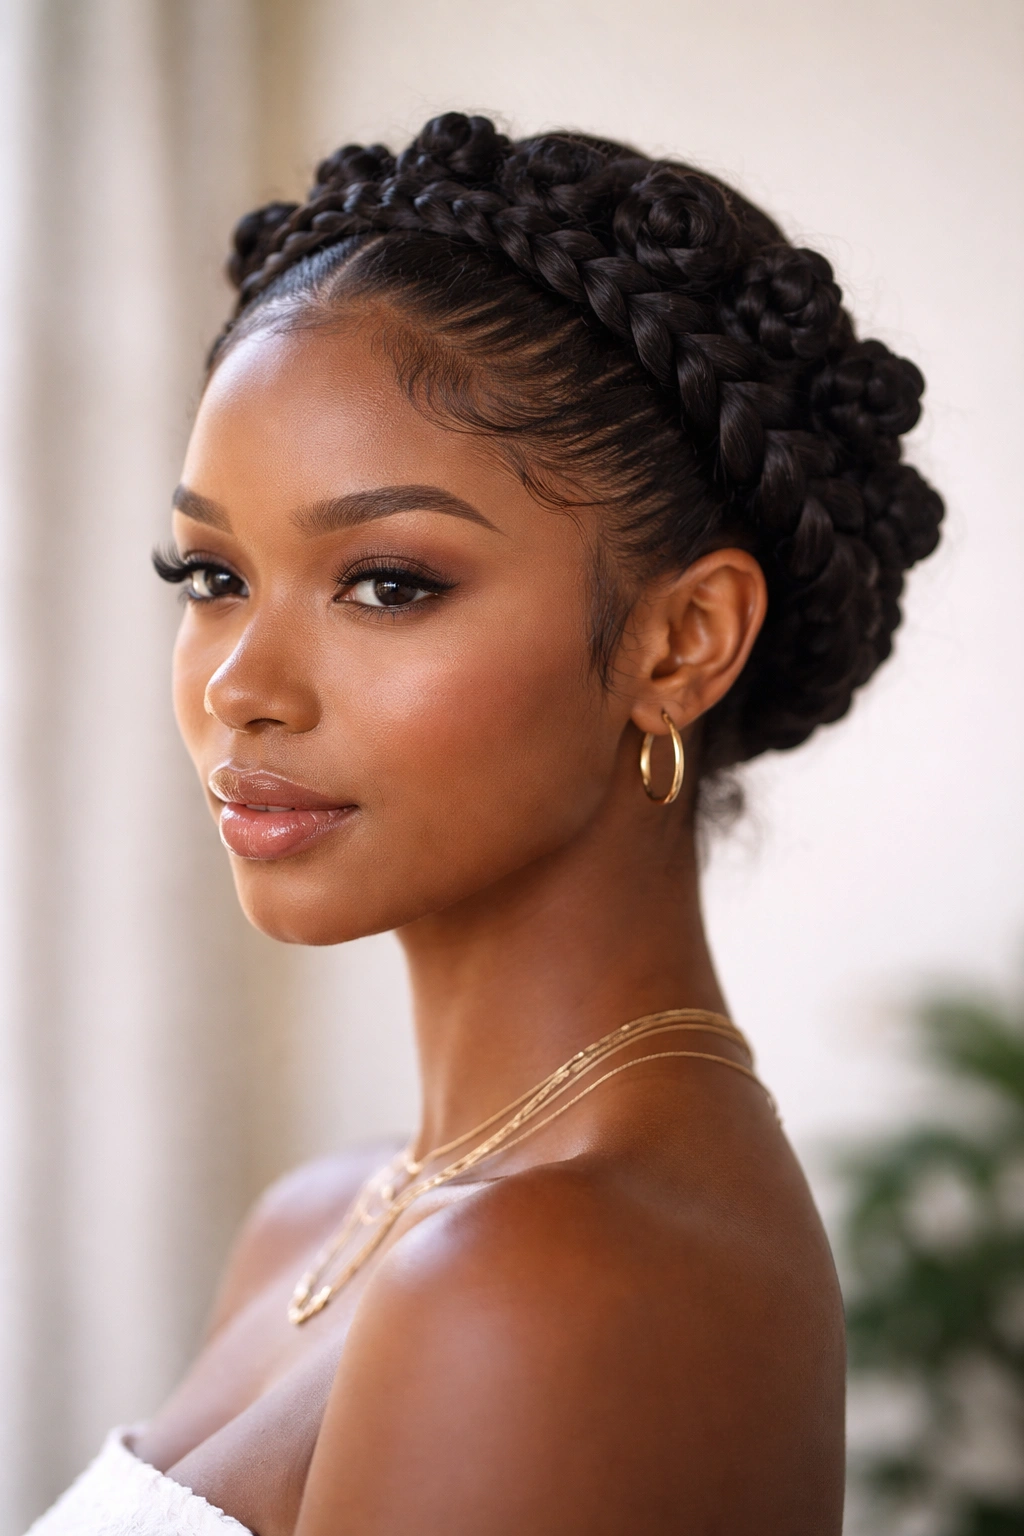
A halo braid with knot accents feels almost ceremonial. The braid circles the head, and the knots sit inside or beside it like small anchors, giving the whole style a crown-like shape. It is one of the more dressy Bantu knot hairstyles, but it still feels grounded because the texture stays natural.
This works especially well when you want the hair completely off the face. The halo shape does that job while the knots stop the style from looking plain. Without the knots, a halo braid can feel too smooth and too expected. Add a few knots and it changes character.
I like this look on hair that has some length but not so much that the braid becomes heavy. If the hair is very long, the braid can get bulky fast, and the knots need to be placed carefully so they do not fight the braid for attention.
The best versions keep the braid neat and the knots compact. If both parts are oversized, the style starts to compete with itself. One strong shape is enough.
23. Two-Strand Twist Bantu Knots
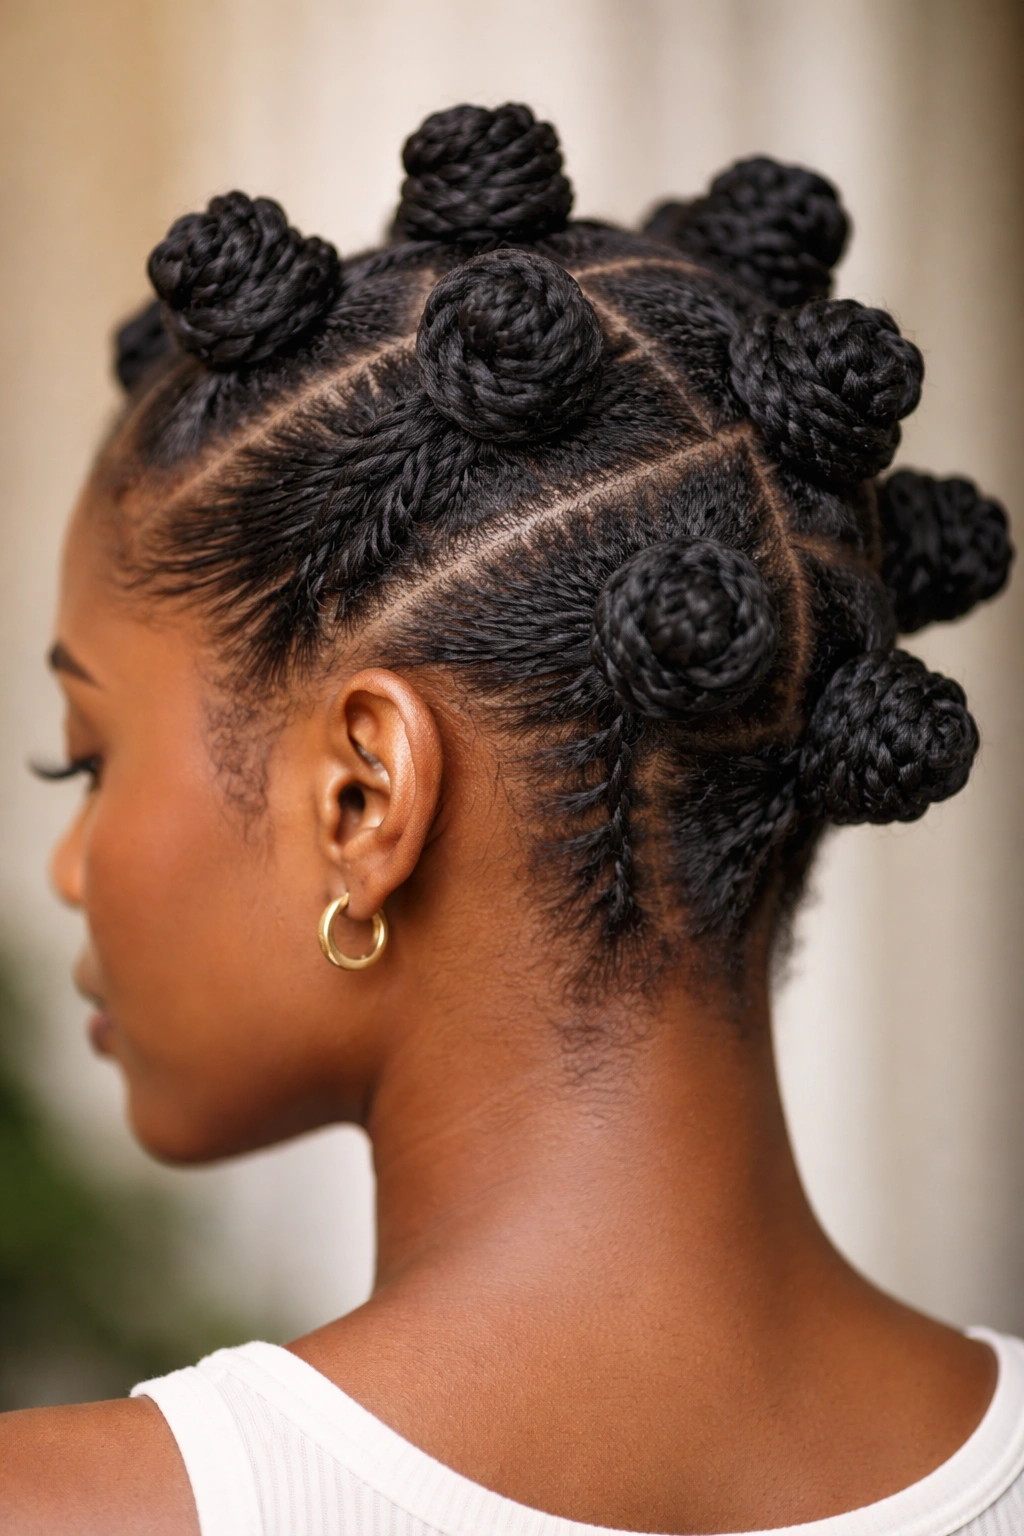
A two-strand twist base gives Bantu knots a softer, rope-like texture. Instead of starting from a plain section, you twist the hair first, then coil it into the knot. That extra texture can help hold slippery ends and makes the finished knot look a little more textured around the edges.
Why bother with the extra step? Because some hair types respond better to a twist than a straight coil. Fine, soft, or freshly conditioned strands can slip apart if they are not given a little grip. A twist helps.
Why the Mixed Texture Helps
The twist adds structure before the knot starts. That means less unraveling and usually a neater base.
- Keep each twist tight enough to hold, but not so tight that it shrinks the section into a tiny rope.
- Stop the twist just before the ends if you want the knot to stay rounded.
- Use a cream with slip so the twist does not catch.
- Let the hair dry fully if you plan to take the style down later.
This version also makes the knot-out more varied. The curls tend to have a slightly more textured look, which is nice if you do not want perfectly uniform ringlets. Some people prefer that. I do too, when the hair has a bit of natural swing.
24. Short Natural Hair Mini Knots
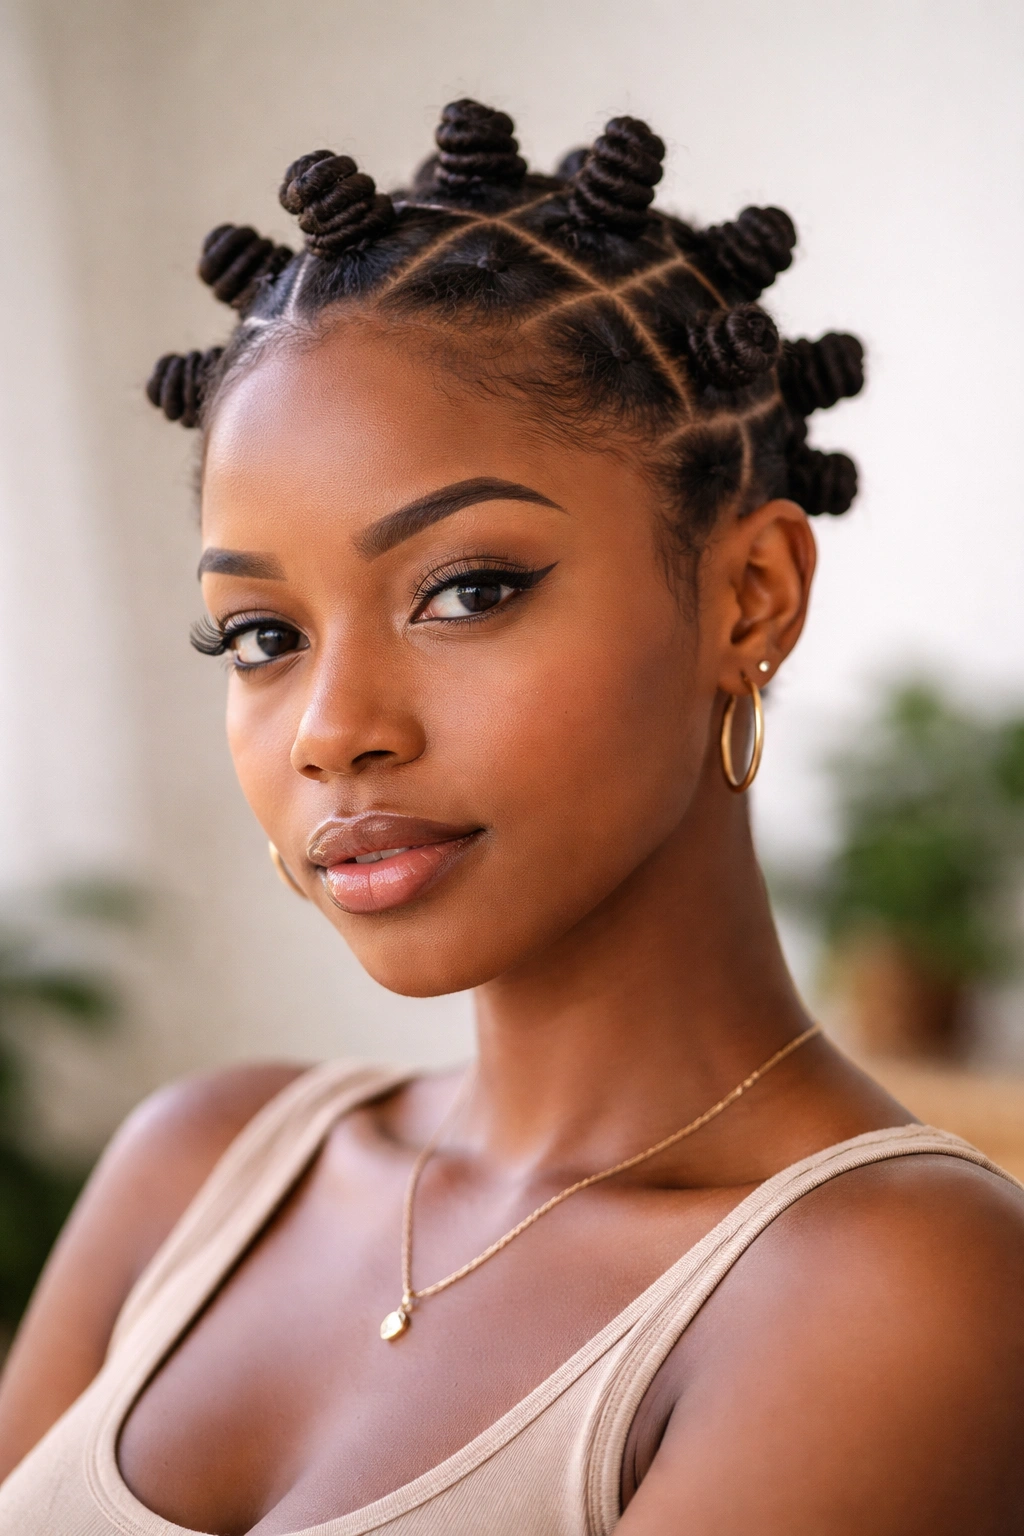
Short natural hair can wear Bantu knots with a lot more personality than people expect. The trick is choosing the right size. If the sections are too large, the knots may not have enough length to hold their shape. If they are too tiny, the style can start to look sparse or overworked.
For a TWA or cropped coil, mini knots usually make the most sense. They sit close to the scalp, the parts stay readable, and the style looks neat instead of forced. A little mousse can help the ends gather, but you do not need a heavy product layer. In fact, too much product on short hair tends to make the knots soggy and limp.
This is where precision matters more than volume. Clean sections, gentle tension, and a little patience go farther than trying to fake length. If one section keeps slipping, make it smaller instead of fighting it. That is the honest fix.
Short hair also lets the scalp pattern show through, which can look very cool with a crisp parting design. The style reads almost graphic, and that is part of its charm.
25. Long Hair Stacked Bantu Knots
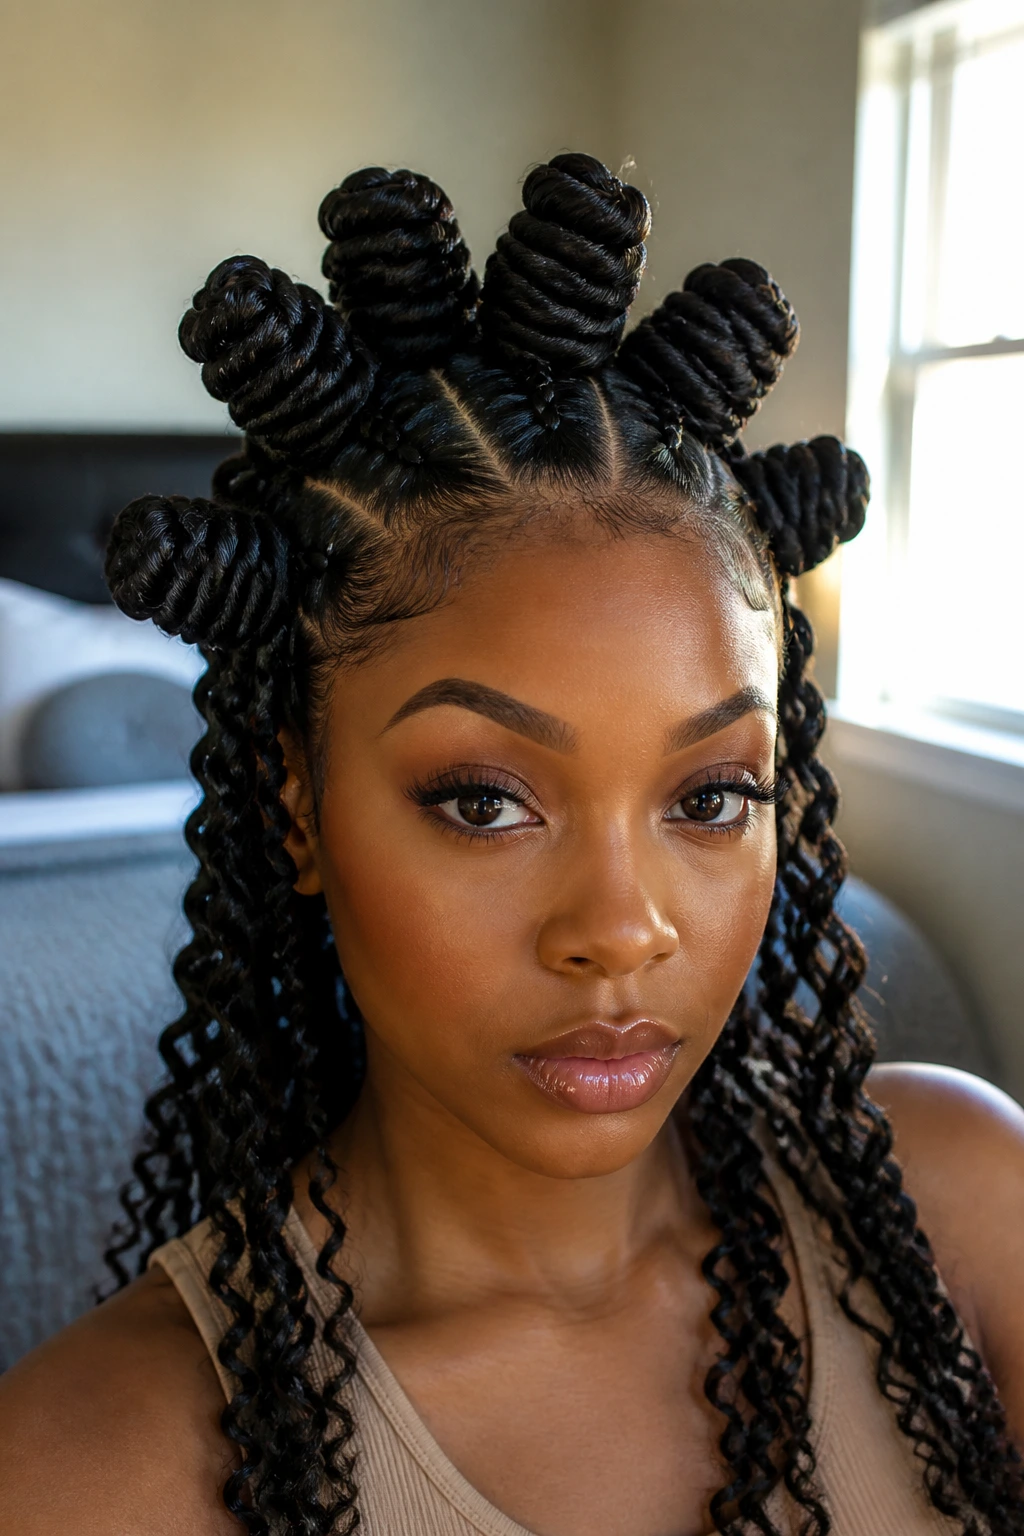
Long hair gives Bantu knots a different kind of drama. The length lets you stack the coils upward so they sit like sculpted rolls instead of tiny bumps, and the finished style can feel full without looking bulky if the sections are managed well.
The main thing to watch is weight. Long strands want to drag the knot down, especially if the hair is damp or overloaded with cream. Keep the sections controlled, smooth the base before you coil, and support the knot with a firm wrap around the root so it does not sag by midday.
I like this version when the goal is to show off length without leaving the hair loose. The knots turn the hair into a shape you can actually see from across the room. Not subtle. That is fine. Hair does not have to whisper all the time.
If you want the set to stay neat longer, stretch the hair first and avoid piling on product at the ends. Long natural hair already brings its own texture and movement. Let that do some work. The best long-hair knot sets look shaped, not stuffed.
The nicest part is how adaptable this style is. Wear it with a center part for symmetry, a side part for softness, or a lifted crown for height, and the same basic knot technique starts telling a different story each time.