The first time most people try half-up Bantu knots on straight hair, the same thing happens: the parts look sharp, the knots look clean for about ten minutes, and then one of them starts to loosen and lean sideways. Smooth hair slips. That is the whole challenge.
Still, Bantu knot half up styles on straight hair can look striking in a way loose curls or a standard half ponytail just do not. You get shape at the crown, length through the back, and a finish that can swing from soft and playful to sleek and almost architectural, depending on how you part the hair and how tightly you coil each section.
Straight hair changes the mechanics more than people expect. The root needs grip. The sections need clean boundaries. And the pin placement matters more than the knot itself, because if you pin around the outside instead of anchoring through the base, the whole thing can spin loose by lunch.
One more thing belongs up front. Bantu knots have cultural roots in African styling traditions, and that history should not get erased because the hair texture changes. Wearing the look on straight hair does not change where it came from; it only changes how you build it so it stays put.
The Cultural Roots Behind Bantu Knots Still Matter
Before the rat-tail comb comes out, the origin of the style deserves a sentence or two of respect. Bantu knots trace back to Bantu-speaking peoples of southern Africa, and the style carries cultural meaning beyond the version that shows up on mood boards and red carpets. It is not a random “festival bun” with a cooler name.
That matters because language shapes how we wear things. If you know the roots, you are less likely to flatten the look into a costume or treat it like a novelty. You also start to notice the details that separate an actual knot from a generic mini bun.
On straight hair, the finished look tends to read sleeker and more sculpted because the strands wrap tighter and reflect light differently. The heritage remains the same. The method shifts a bit.
Why Bantu Knot Half Up Styles on Straight Hair Need More Grip
Smooth hair slides. Coily or textured hair has built-in friction that helps a twisted section hold its shape. Straight hair, especially freshly washed hair with a slippery conditioner or too much shine serum near the roots, does the opposite.
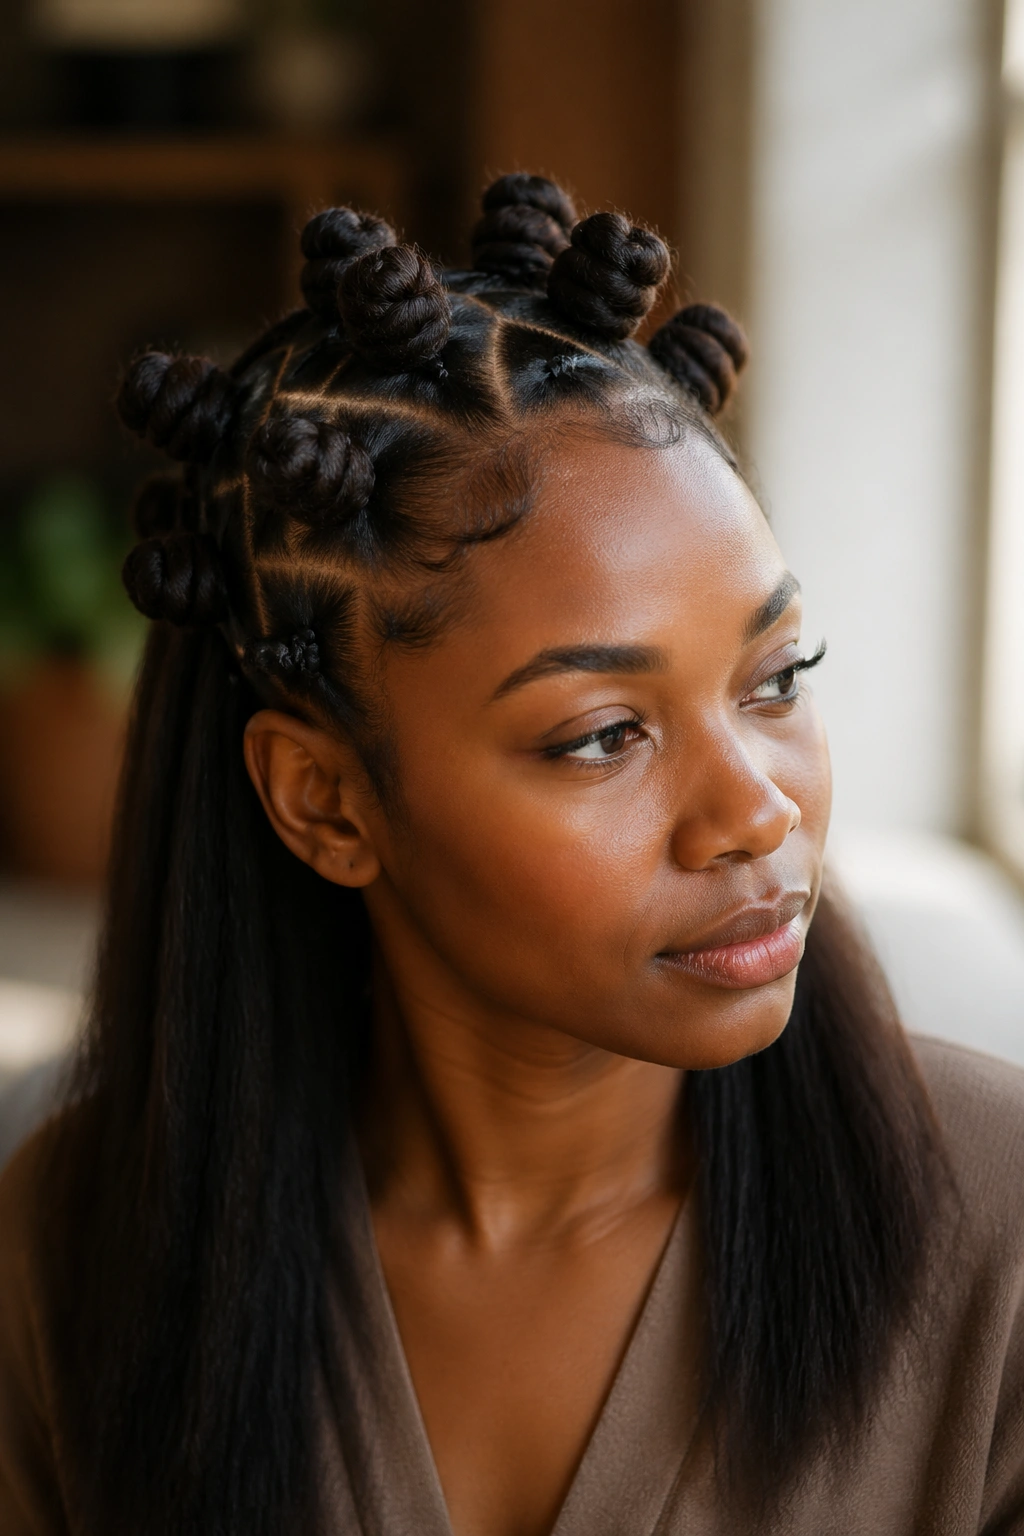
There is also a shape issue. A Bantu knot is not meant to puff out like a round space bun. It should coil inward and sit with intention, often tighter and flatter to the head than people expect. On straight hair, if you skip tension at the base, the knot can balloon outward and start looking like a tiny cinnamon roll pinned on top.
What makes the hold better
A few things help right away:
- Day-two hair often behaves better than hair washed an hour ago.
- A light layer of mousse, styling foam, or dry texture spray at the roots gives smooth strands something to grab.
- Wax stick or pomade belongs on the part lines and base, not all over the loose lengths.
- U-pins anchor better than one lonely bobby pin when the knot is more than 1 inch wide.
Another small correction—because it matters—straight hair does not mean you need to crank the style painfully tight. Snug is enough. If your temples ache, you have gone too far.
How to Prep Straight Hair for Clean Parts and Firm Knots
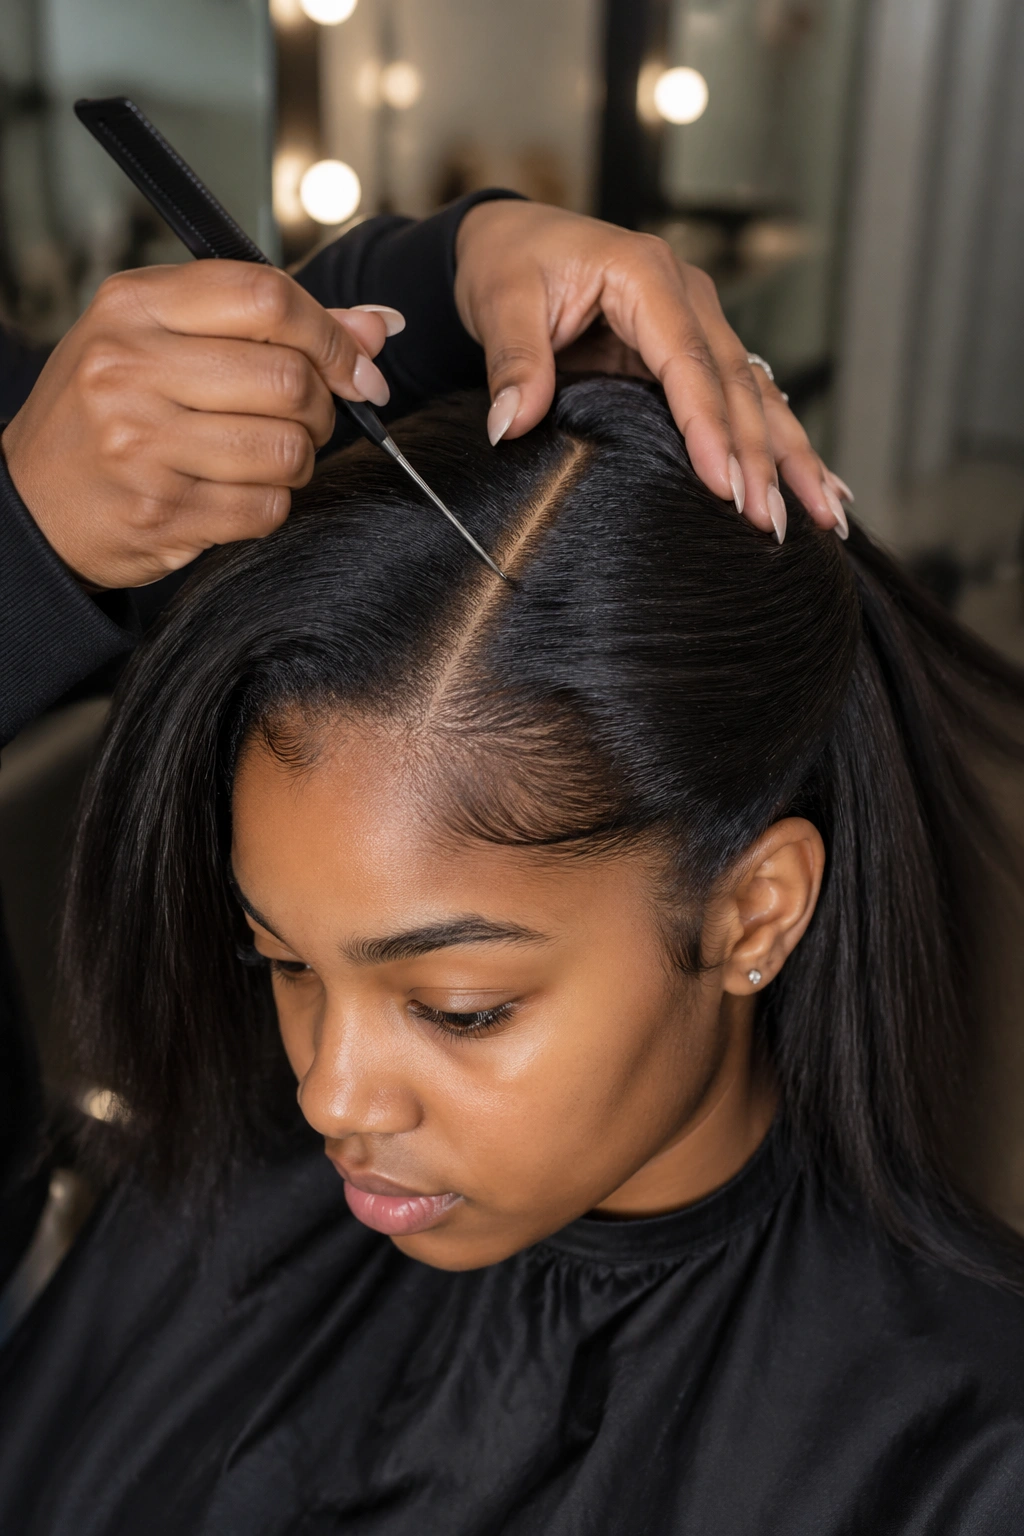
A messy base ruins the look before the first twist. Half-up Bantu knots depend on sectioning, and straight hair shows every crooked line, every puffed root, every frayed end that got caught where it should not be.
Start with dry hair that has been brushed smooth and protected from heat. If you want a sleek finish, run a flat iron through the lengths on a low to medium setting after applying heat protectant. Then mist the roots with texture spray or work in a golf-ball-size amount of mousse, keeping the product concentrated in the top half where the knots will sit.
My favorite tool mix for this style is not glamorous, but it works:
- Rat-tail comb for parts
- Duckbill clips for holding sections out of the way
- Mini clear elastics or snag-free bands
- Wax stick for the roots and part lines
- U-pins and bobby pins
- Edge brush or clean toothbrush for the hairline
If your hair is layered, tuck the short ends into the base as you wrap. Then pin through the knot and into the elastic underneath. That one move saves a lot of frustration.
1. Single Crown Knot With Sleek Straight Lengths
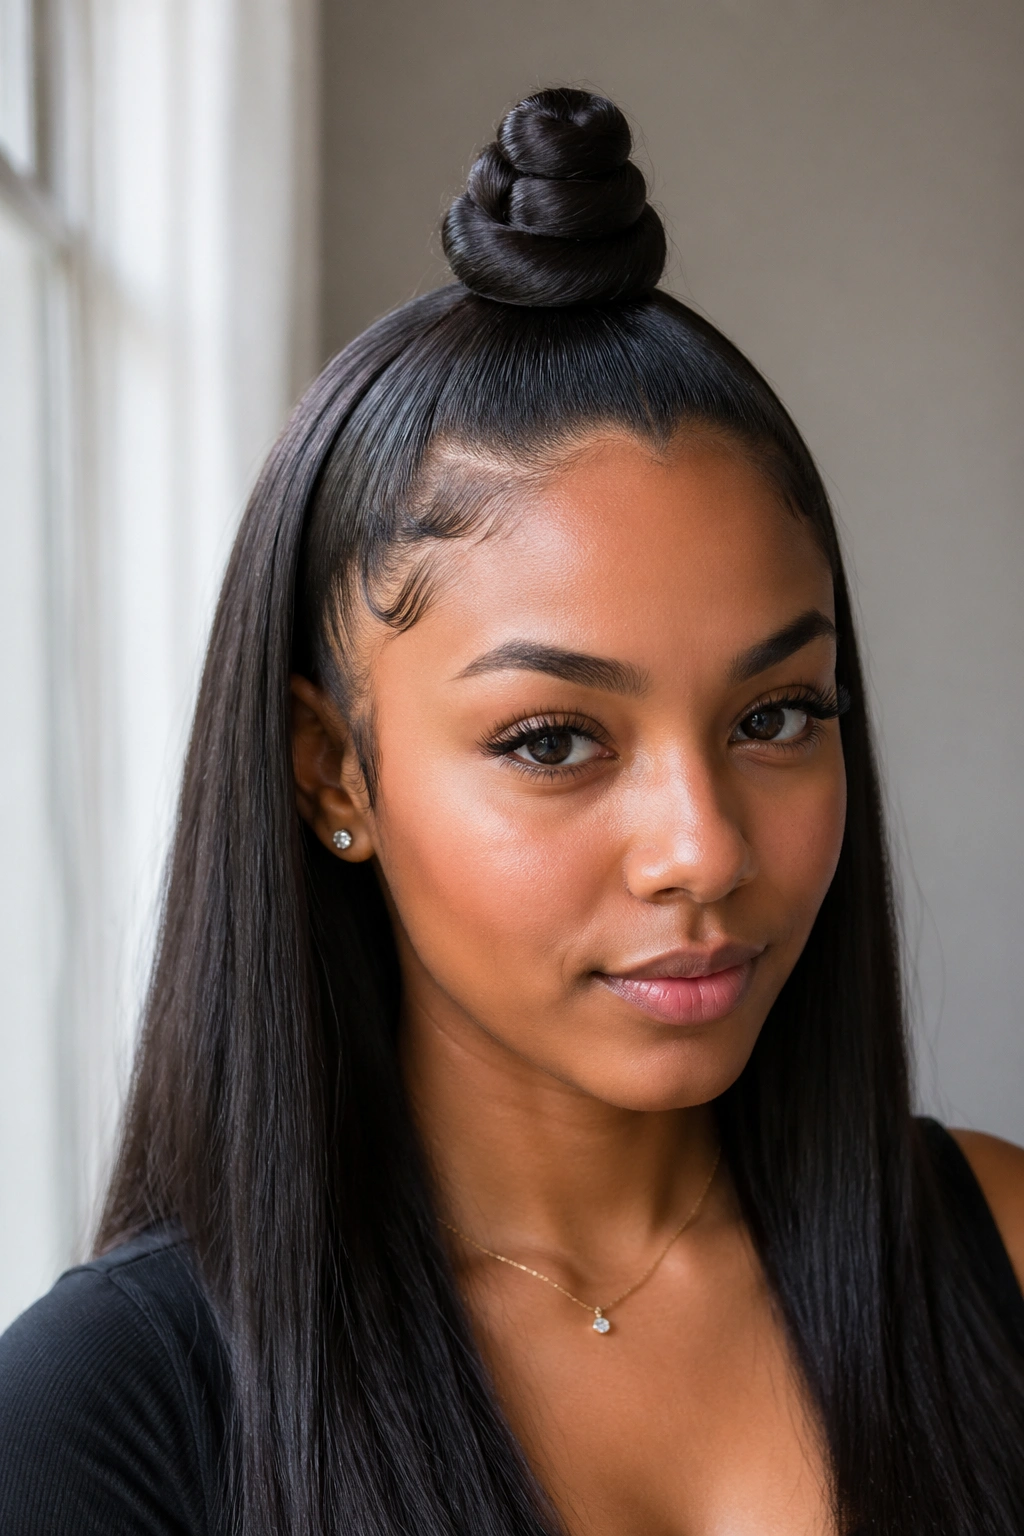
If you want the cleanest entry point into this look, start here. One knot centered at the crown gives you the shape of a Bantu style without forcing you to balance two matching sections, which is where people usually lose patience.
Take a horseshoe section from temple to temple, stopping about 2 inches behind the hairline. Gather it into a half-up ponytail, twist the ponytail until it coils around itself, then wrap it into one compact knot. Pin through the base, not the outer edge, so it sits flat instead of wobbling.
Why it works on straight hair
A single knot has less visual pressure. If one side sits a touch higher, nobody notices, and the loose hair underneath keeps the whole look soft.
Quick details
- Best on: shoulder-length hair and longer
- Parting: soft center or no visible part
- Hold trick: texture spray at the base before twisting
- Finish: shine serum only on the hanging lengths
Wear this when you want the style to feel polished without looking overbuilt.
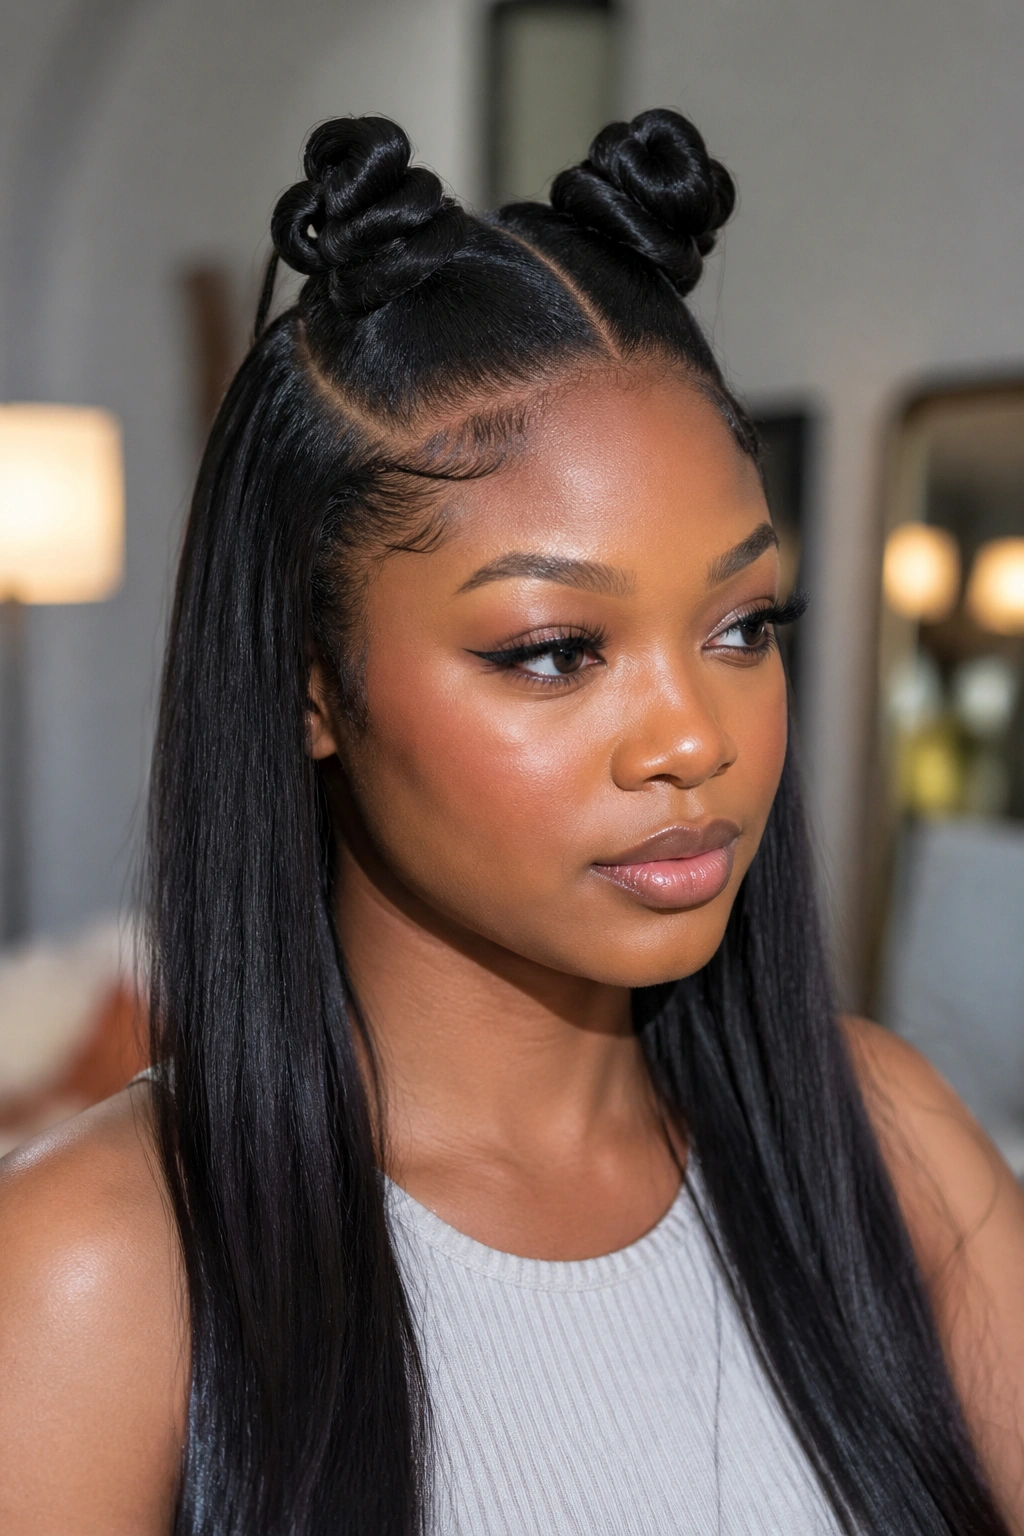
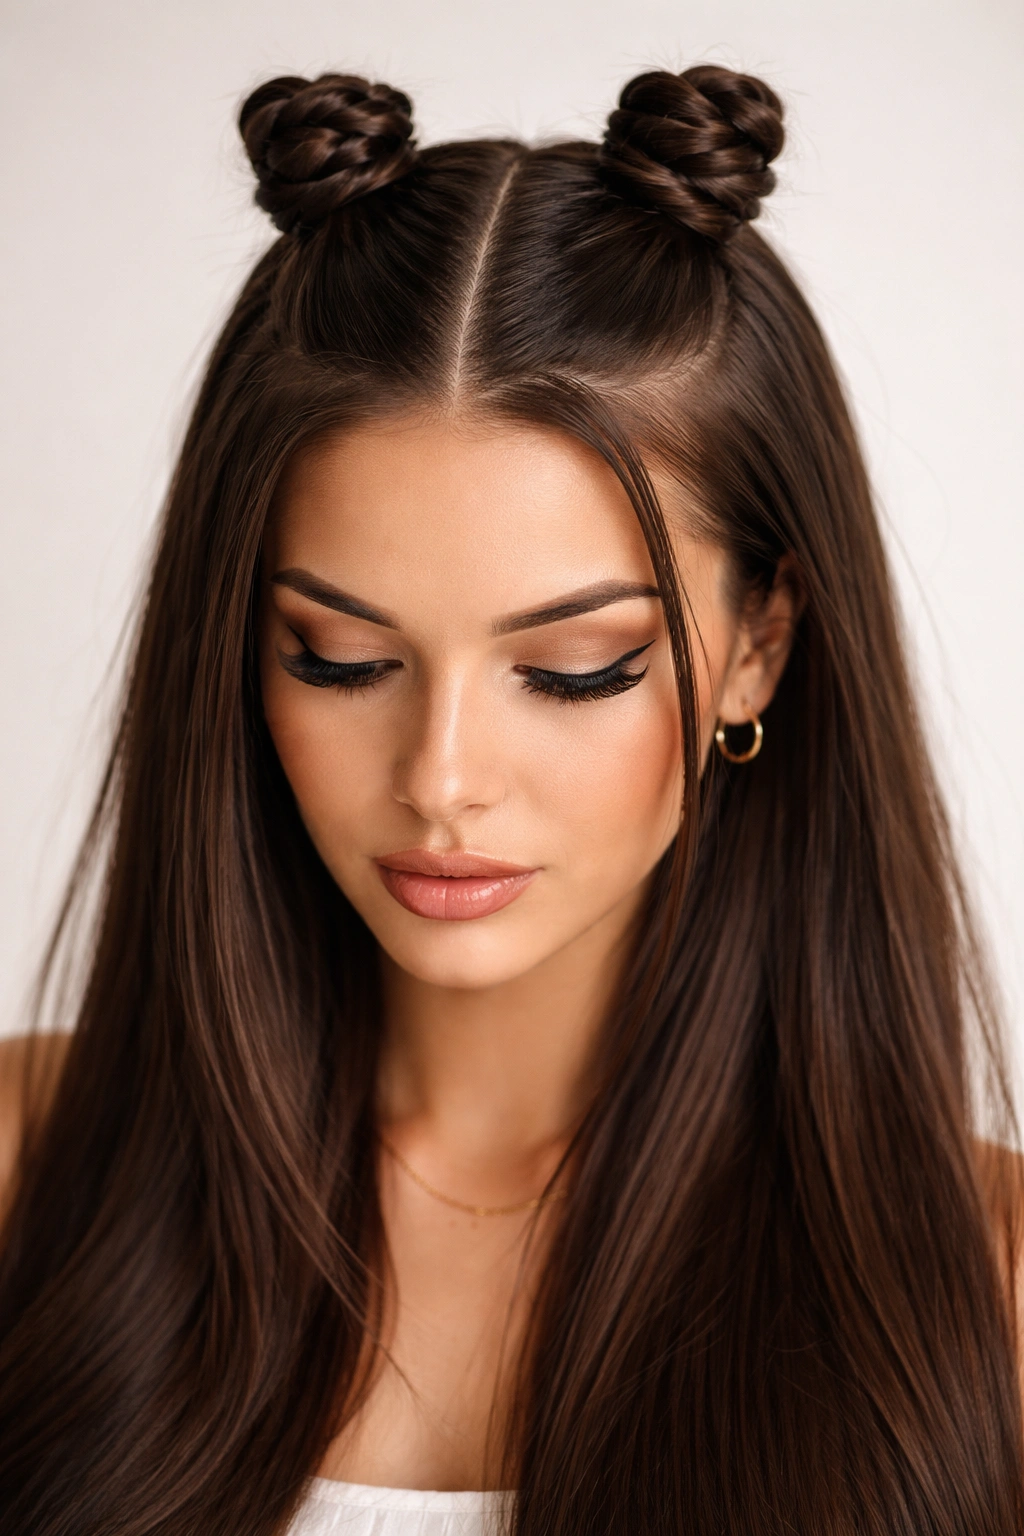
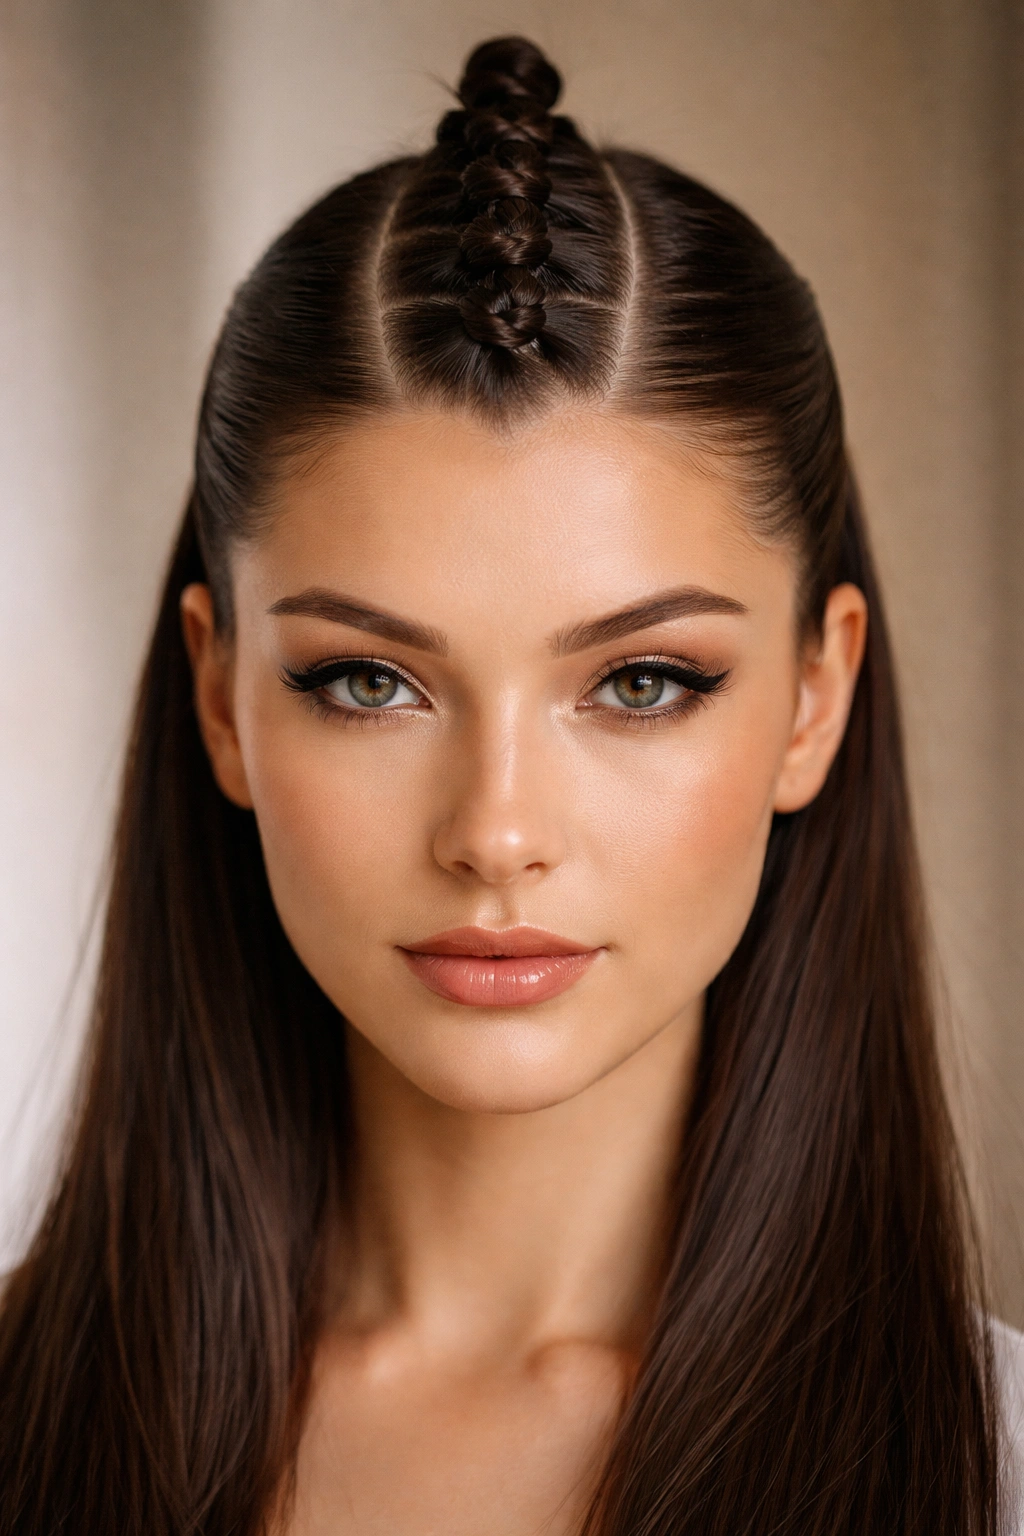
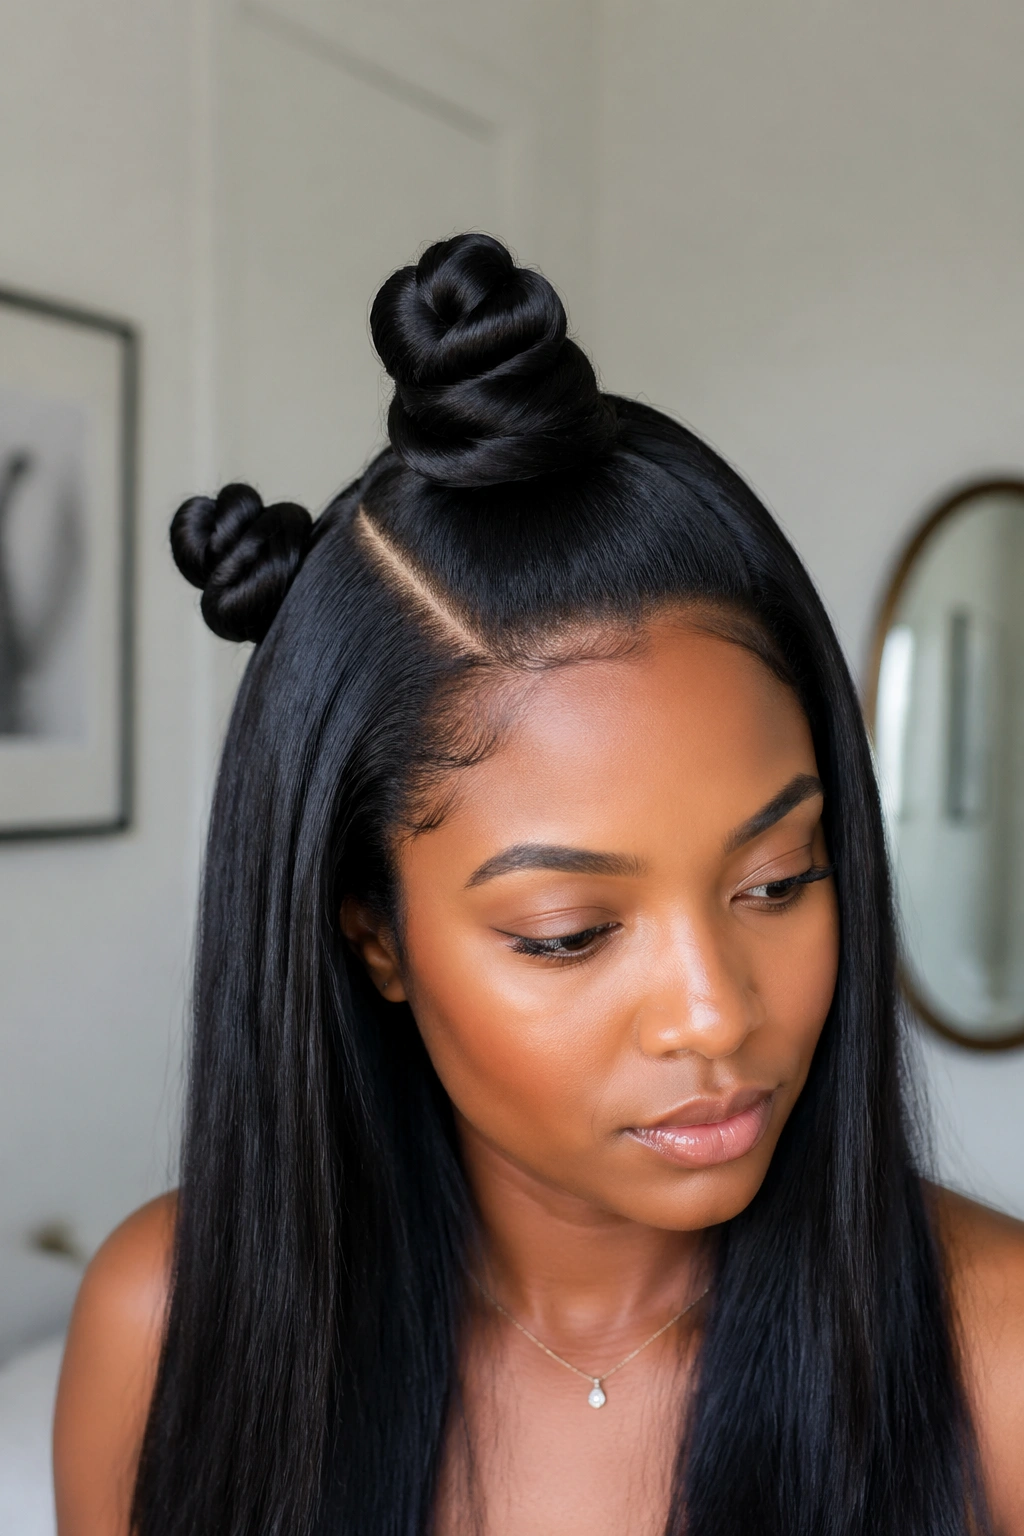
2. Twin Center-Part Knots With a Sharp Middle Part
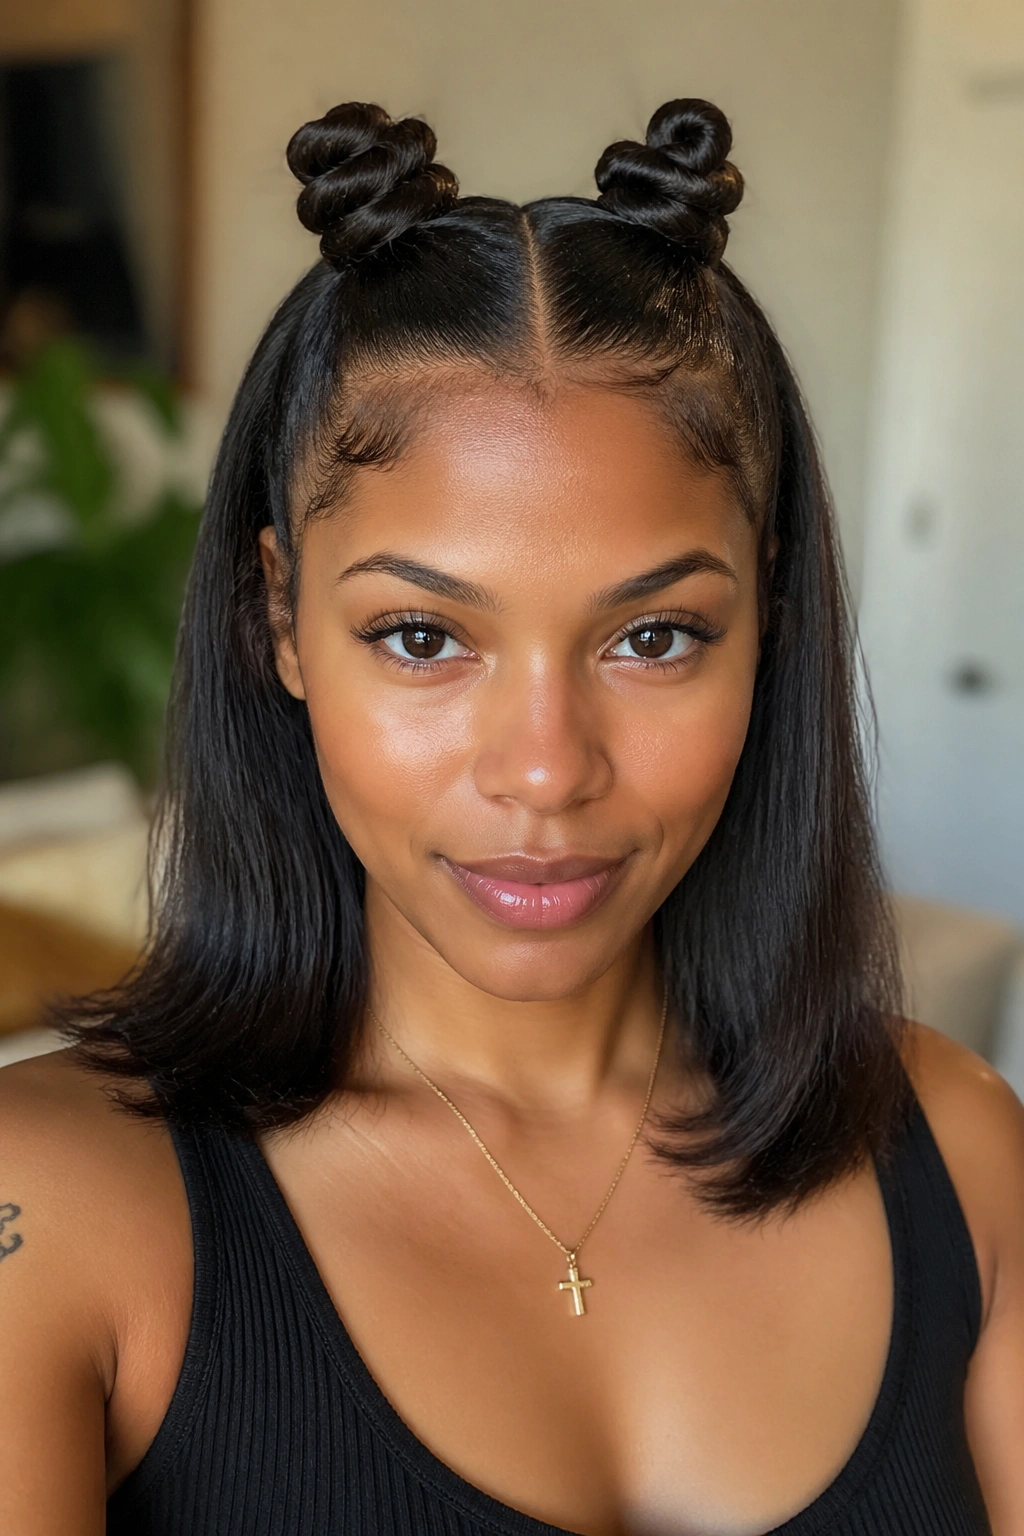
A crisp middle part changes the mood immediately. Suddenly the style looks deliberate, balanced, and a bit dressier, even if the rest of the hair is left plain and straight.
Section the front half into two even rectangles, one on each side of the part. Keep each ponytail small enough that the knots do not crowd each other. On straight hair, smaller sections make neater knots; if you grab too much hair, the coils get wide and start reading like buns.
The loose lengths matter here. Flat-iron them straight with a slight bend at the ends, not poker-flat from root to tip. That tiny curve keeps the back from looking stiff. I also like using a wax stick only along the part and the first inch of the roots, because too much product across the whole top can make the style look greasy under indoor light.
This is one of those looks that rewards patience. Get the part dead center. Check both knot heights in the mirror. Then stop fussing.
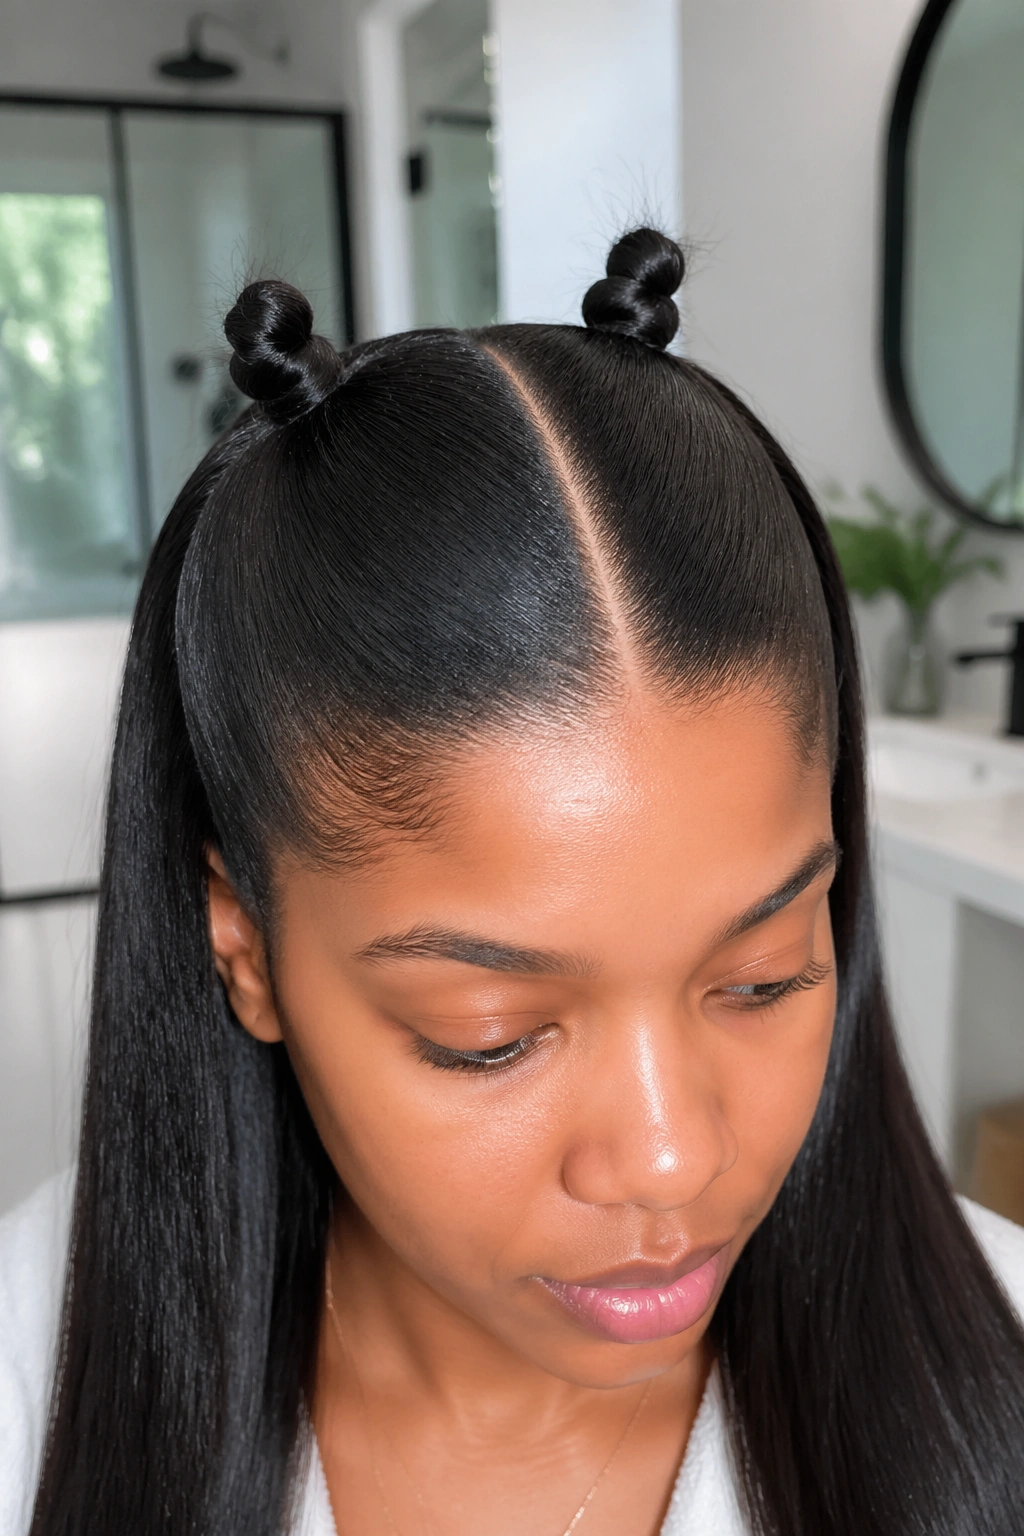
3. Mini Space Knots With Loose Curtain Pieces
Face-framing pieces save this style from feeling hard. That is the appeal. You still get the lifted half-up shape, but the two slim sections left loose near the cheeks soften the front and make the knots feel less strict.
Pull out pieces no thicker than a pencil on each side before you build the knots. Then part the crown down the middle and make two mini Bantu knots slightly behind the hairline, not right at it. That placement matters. Too far forward and the style can crowd your forehead.
The softening trick
Leave the curtain pieces smooth and light. A round brush blow-dry or a quick bend with a 1-inch iron helps them skim the cheekbones instead of hanging straight down like forgotten strands.
A look like this suits layered hair, especially when shorter bits refuse to stay tucked. Instead of fighting them, you make them part of the design. That is often the smarter move.
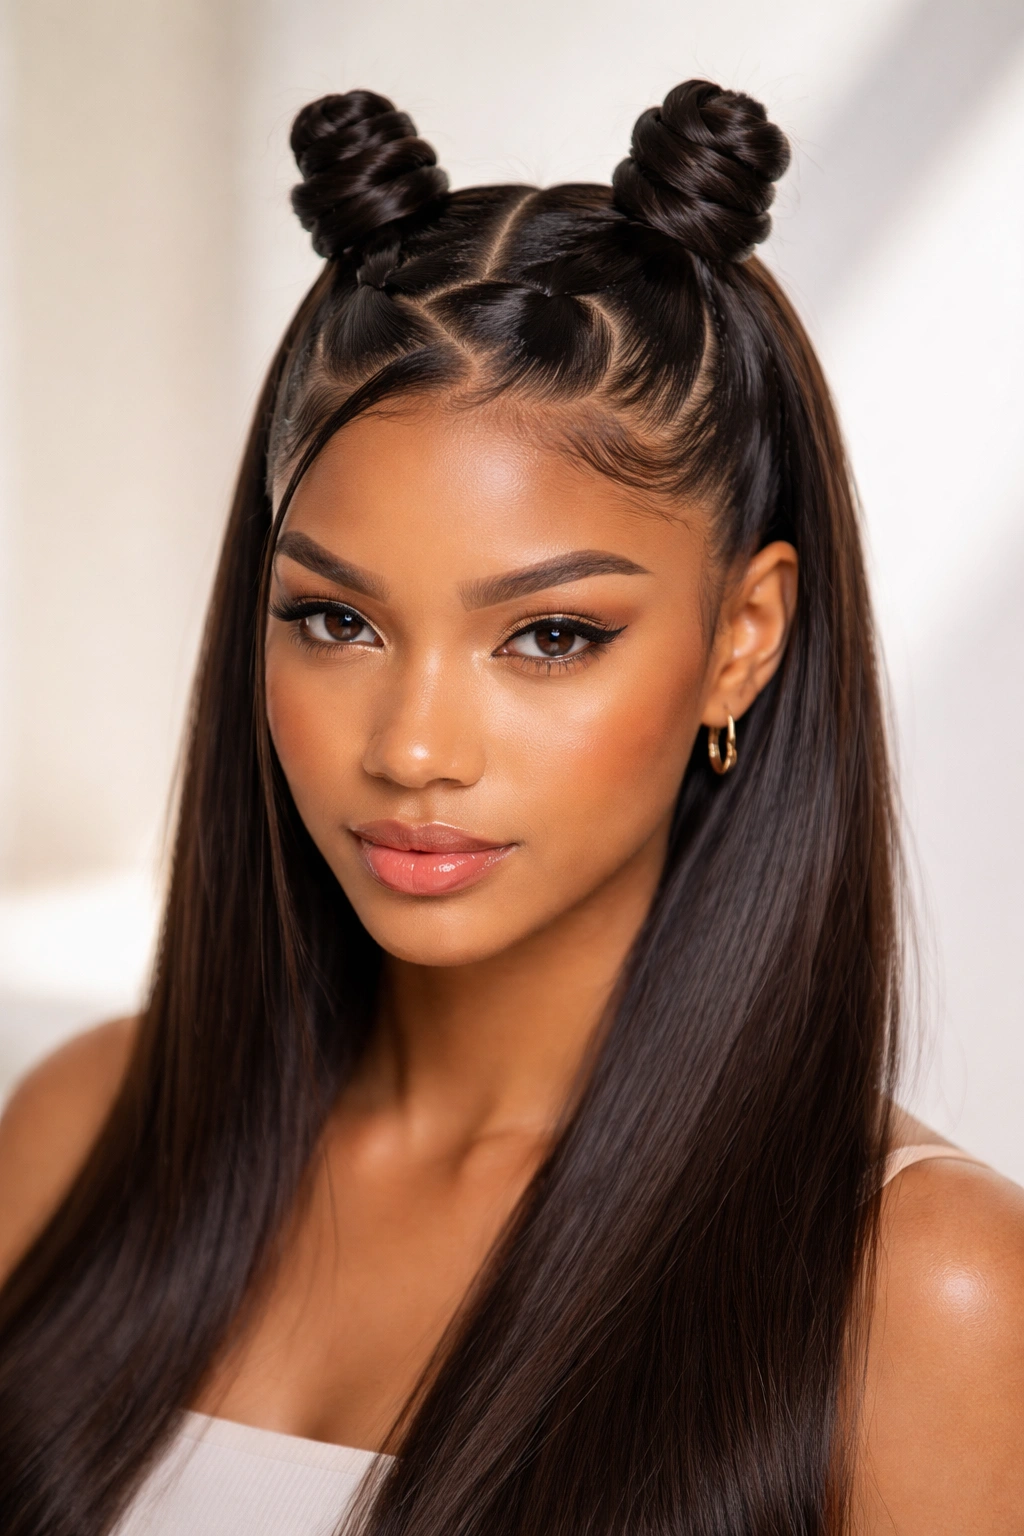
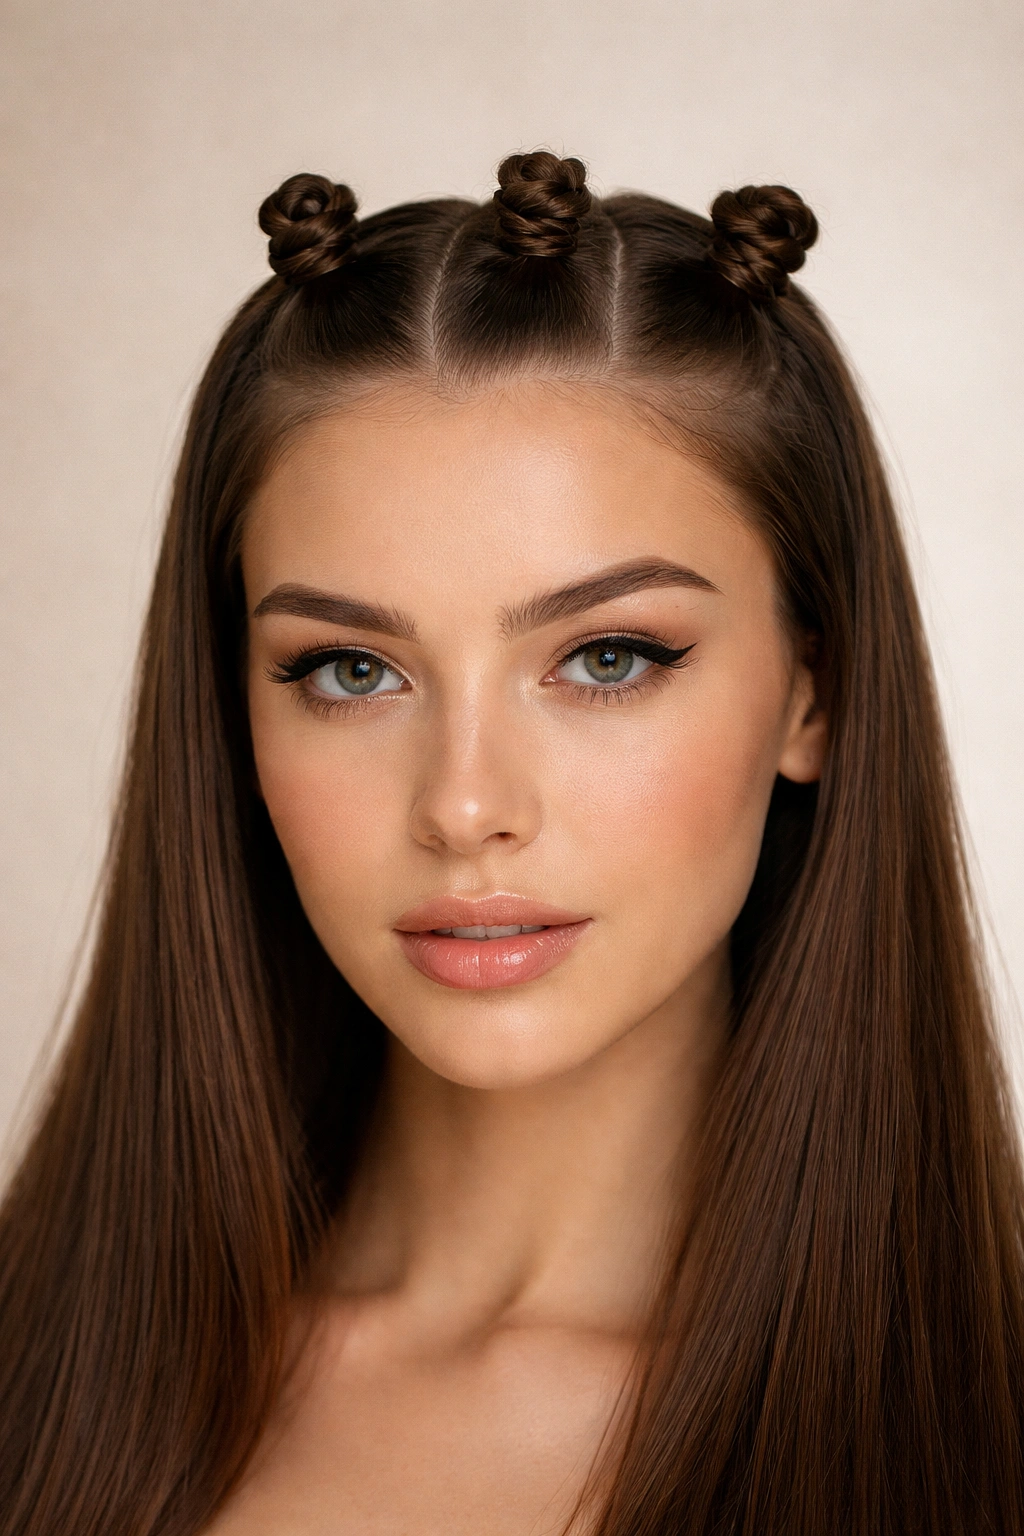
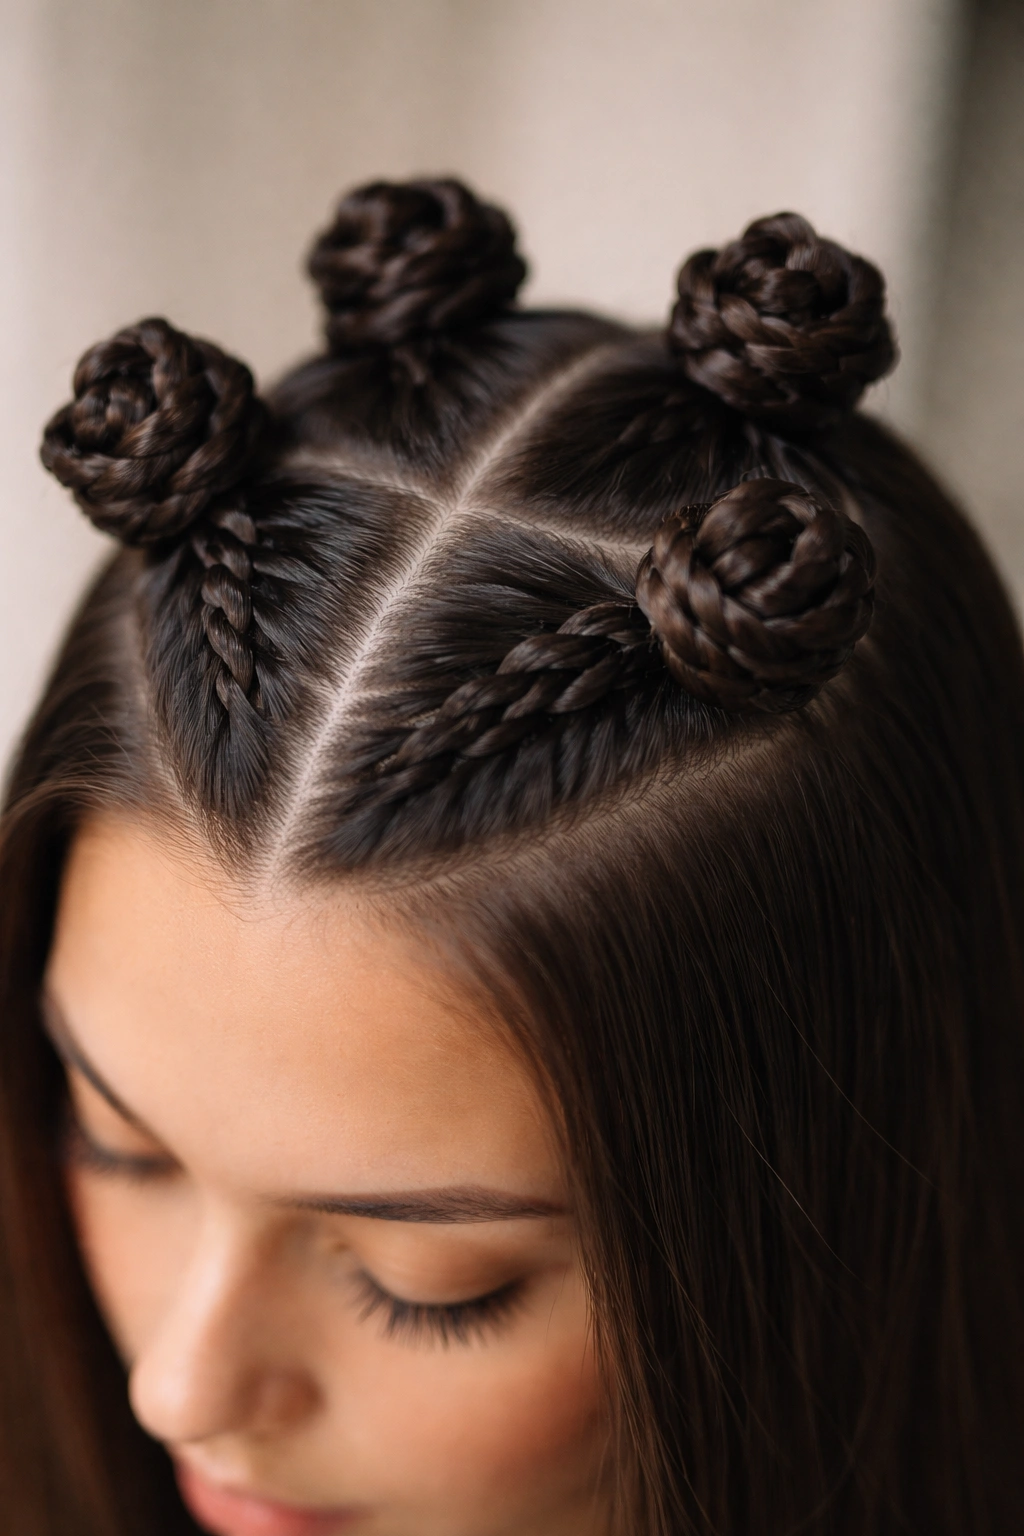
4. Triangle-Part Double Knots at the Crown
Why do some half-up knot styles look sharper than others even when the knots are the same size? The answer is often the parting. A triangle part creates a pointed base that draws the eye upward, which gives the crown more lift.
Use the tail of your comb to carve two mirrored triangles from the front hairline back toward the crown. Tie each section with a small elastic, twist firmly, then wrap each coil into a knot that sits slightly angled inward. That angle gives the pair a tighter, cleaner frame.
How to keep triangle parts crisp
Brush a touch of wax or edge pomade along the edges of the triangle before you twist. On straight hair, that keeps tiny flyaways from fuzzing out the shape after an hour or two.
This one looks especially sharp with long, flat-ironed hair left loose down the back. The contrast does the work: geometric up top, sleek and simple underneath.
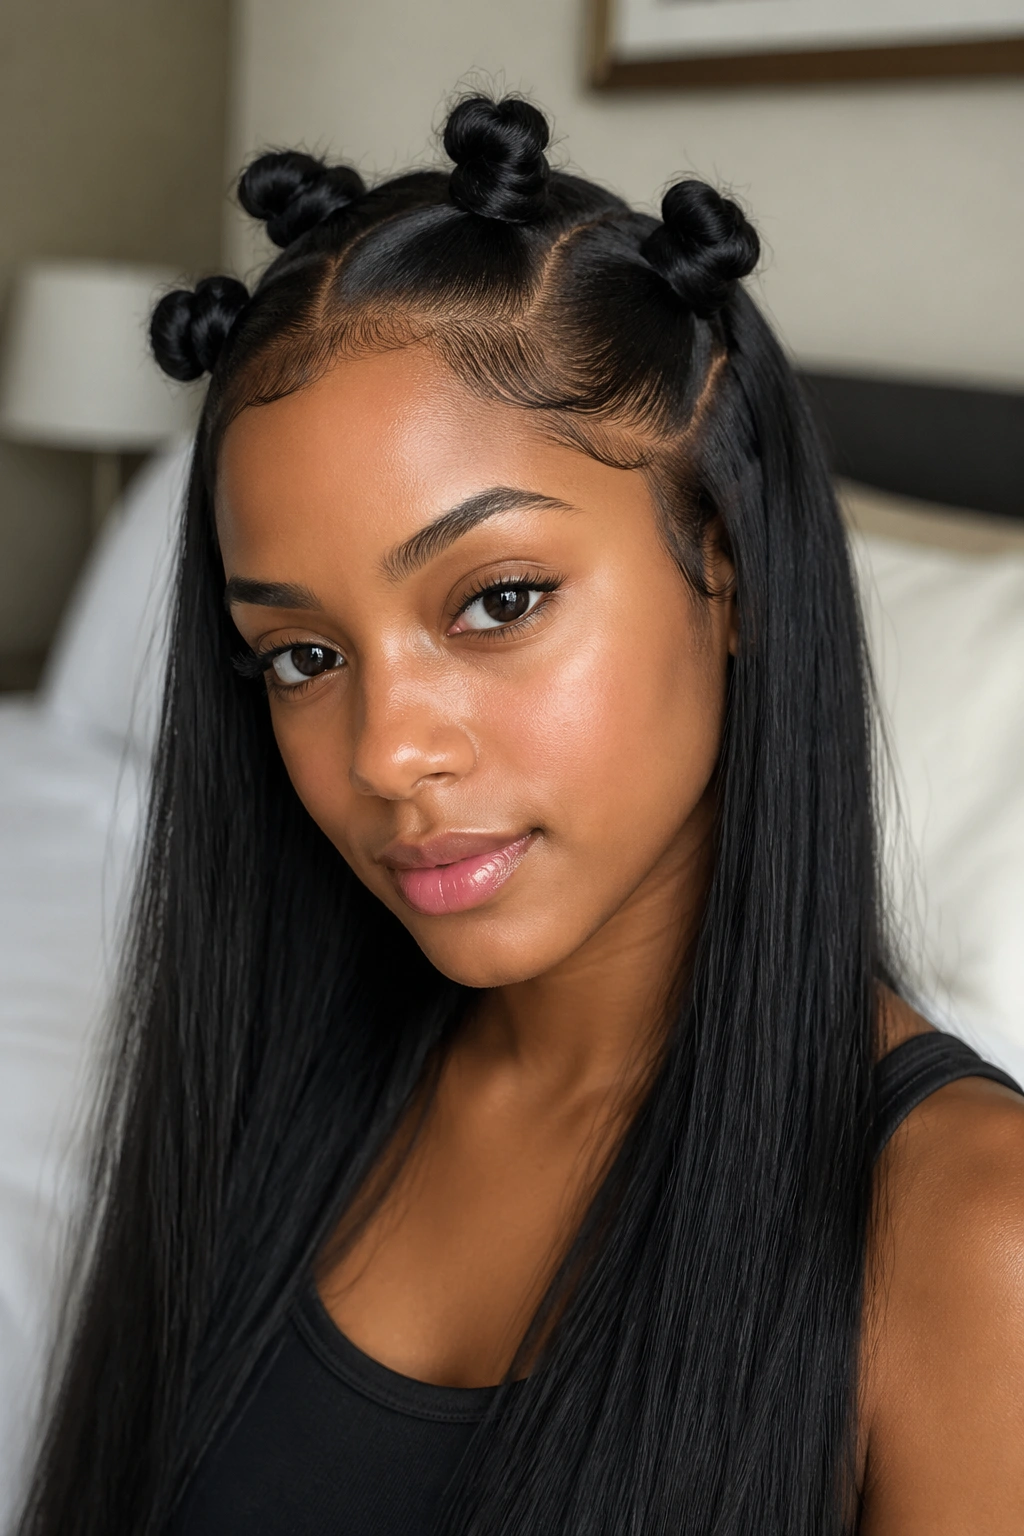
5. Zigzag-Part Knots for Extra Shape
A zigzag part can do more for a basic half-up style than an extra accessory ever will. It adds movement before the knots are even there, and on straight hair, where clean lines read fast, that jagged part looks graphic in the best way.
I like this style when the rest of the outfit is minimal—a black tank, hoops, clean makeup—because the hair already has enough personality. You section the top half into two pieces with a zigzag line, build two knots, and let the lower half fall straight.
A few details make it land:
- Use the pointed end of a comb to create three to five clean peaks
- Keep the zigzag centered, not drifting off to one side
- Make the knots medium-size so they do not hide the part
- Skip heavy shine spray at the roots or the zigzag loses its edge
What I like here is the balance. You get a playful part pattern, though the lengths still keep the whole style grounded.
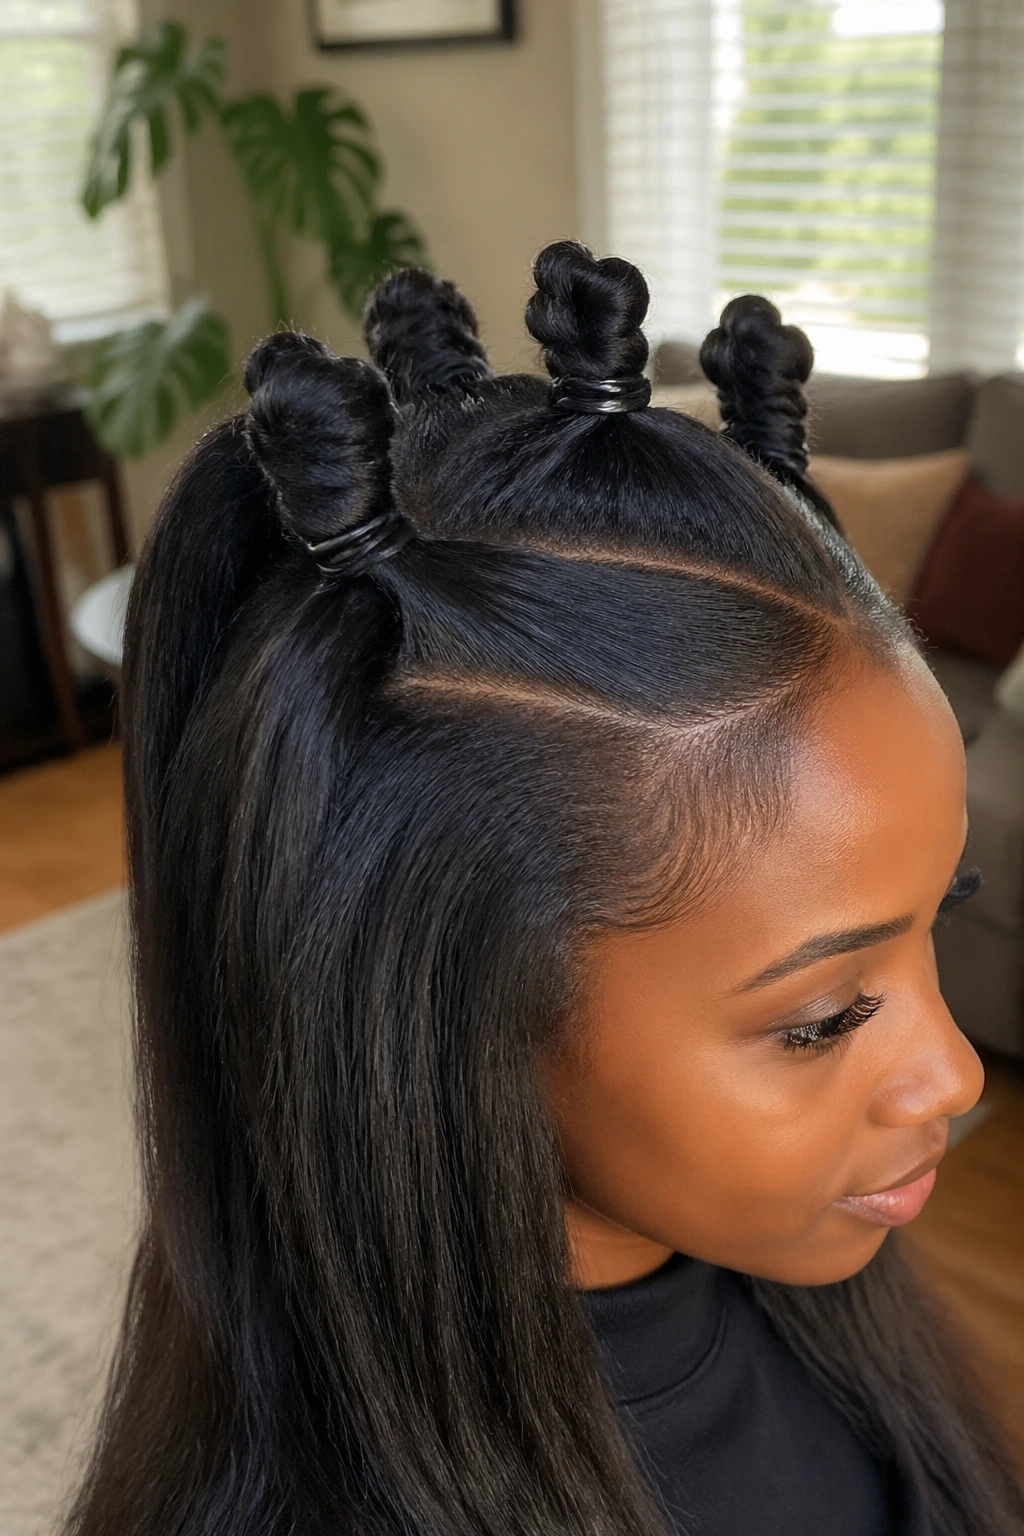
6. Three-Knot Crown Cluster on Long Straight Hair
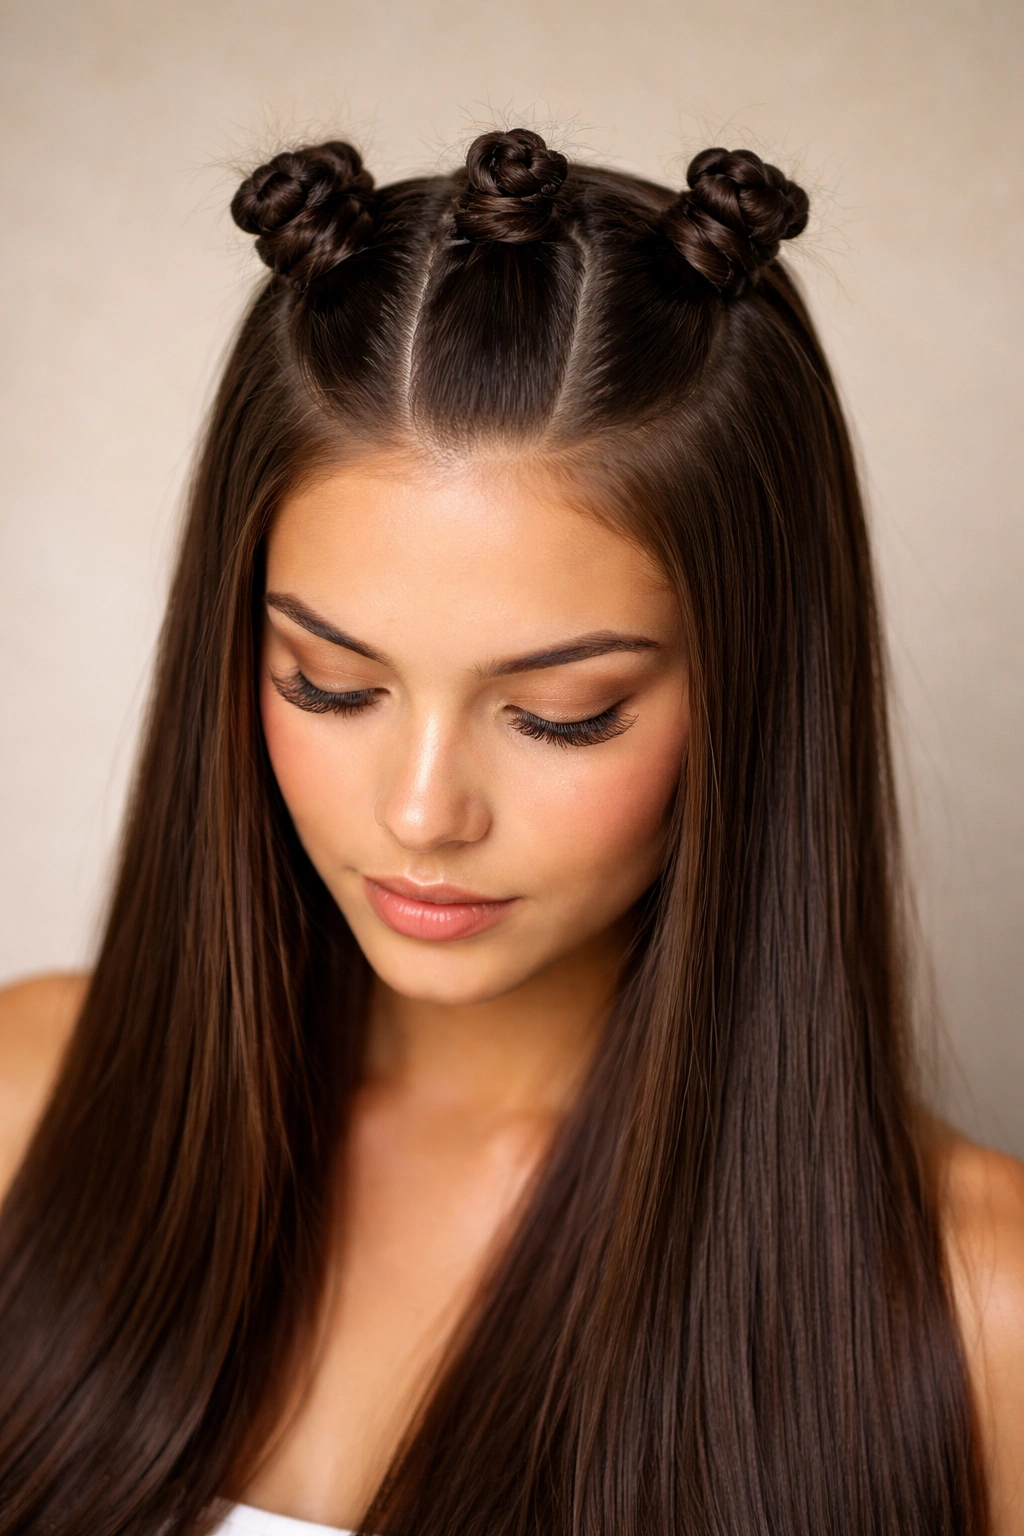
Two knots are the default. Three can look better.
A cluster of three small Bantu knots across the crown gives long straight hair more shape from the front view, which matters because a simple half-up style can disappear when the loose lengths are heavy and dense. Place one knot in the center, then one on each side, keeping about 1 inch between them.
The key is scale. Make each knot smaller than you think you need. Three large knots crowd the head and start reading theatrical. Three compact knots, each built from a 1-inch to 1.5-inch section, look neat and modern.
Leave the back hair smooth with a middle part or no part at all. If your hair is thick, thin a little styling cream through the mid-lengths so the loose section falls in one sheet instead of puffing outward beneath the knots.
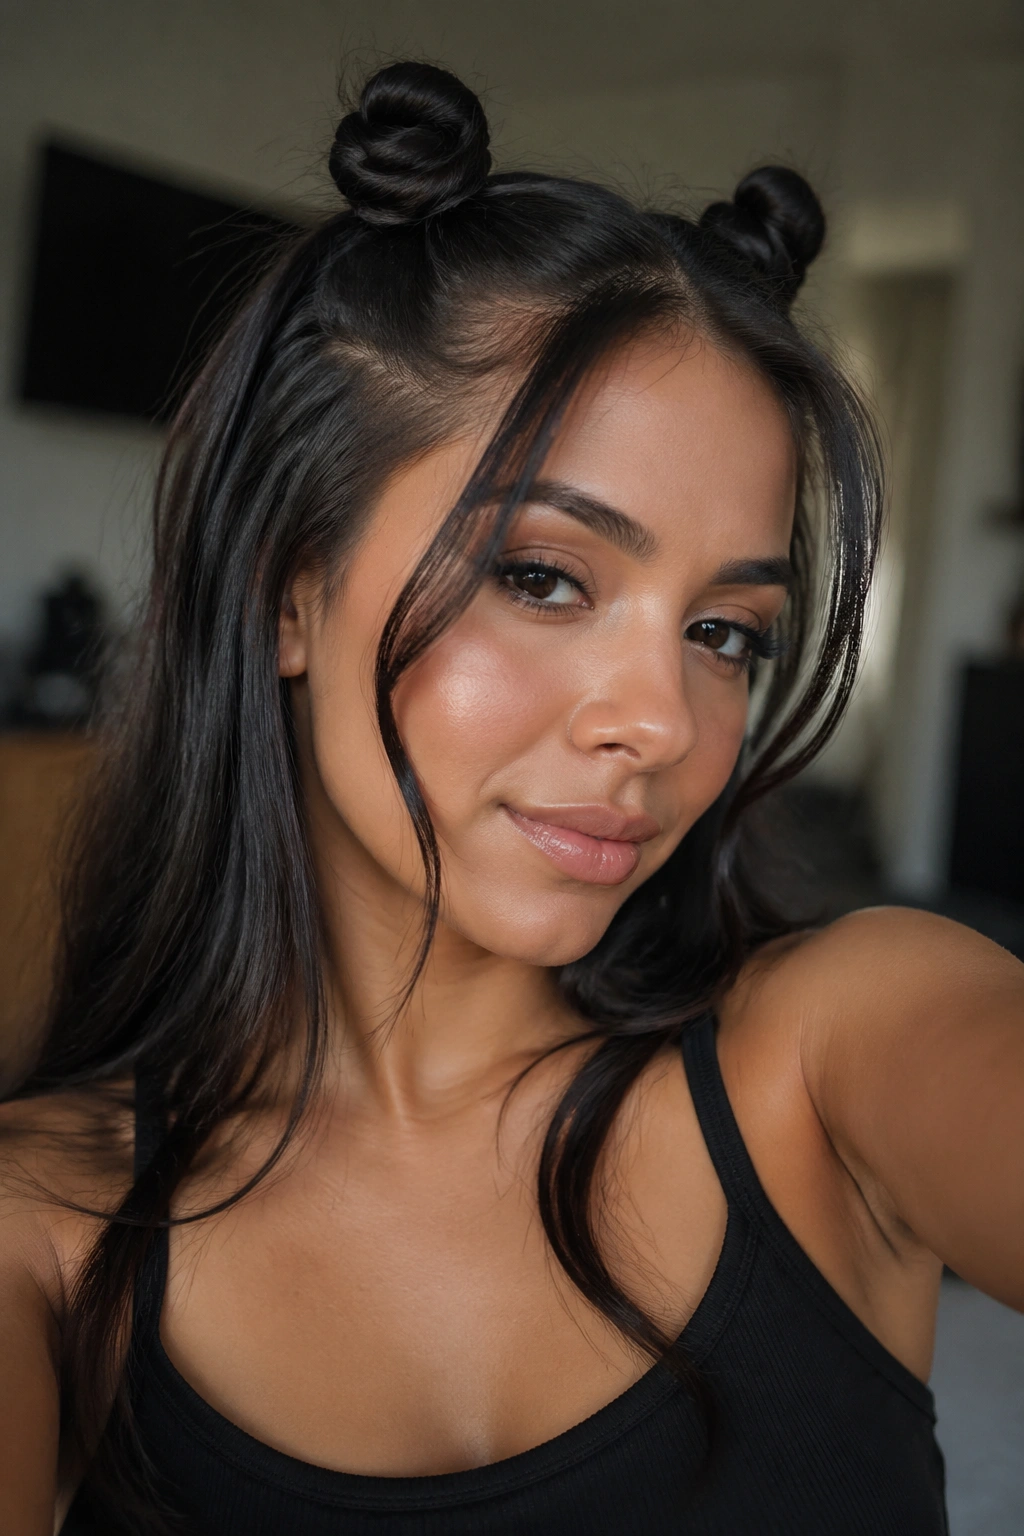
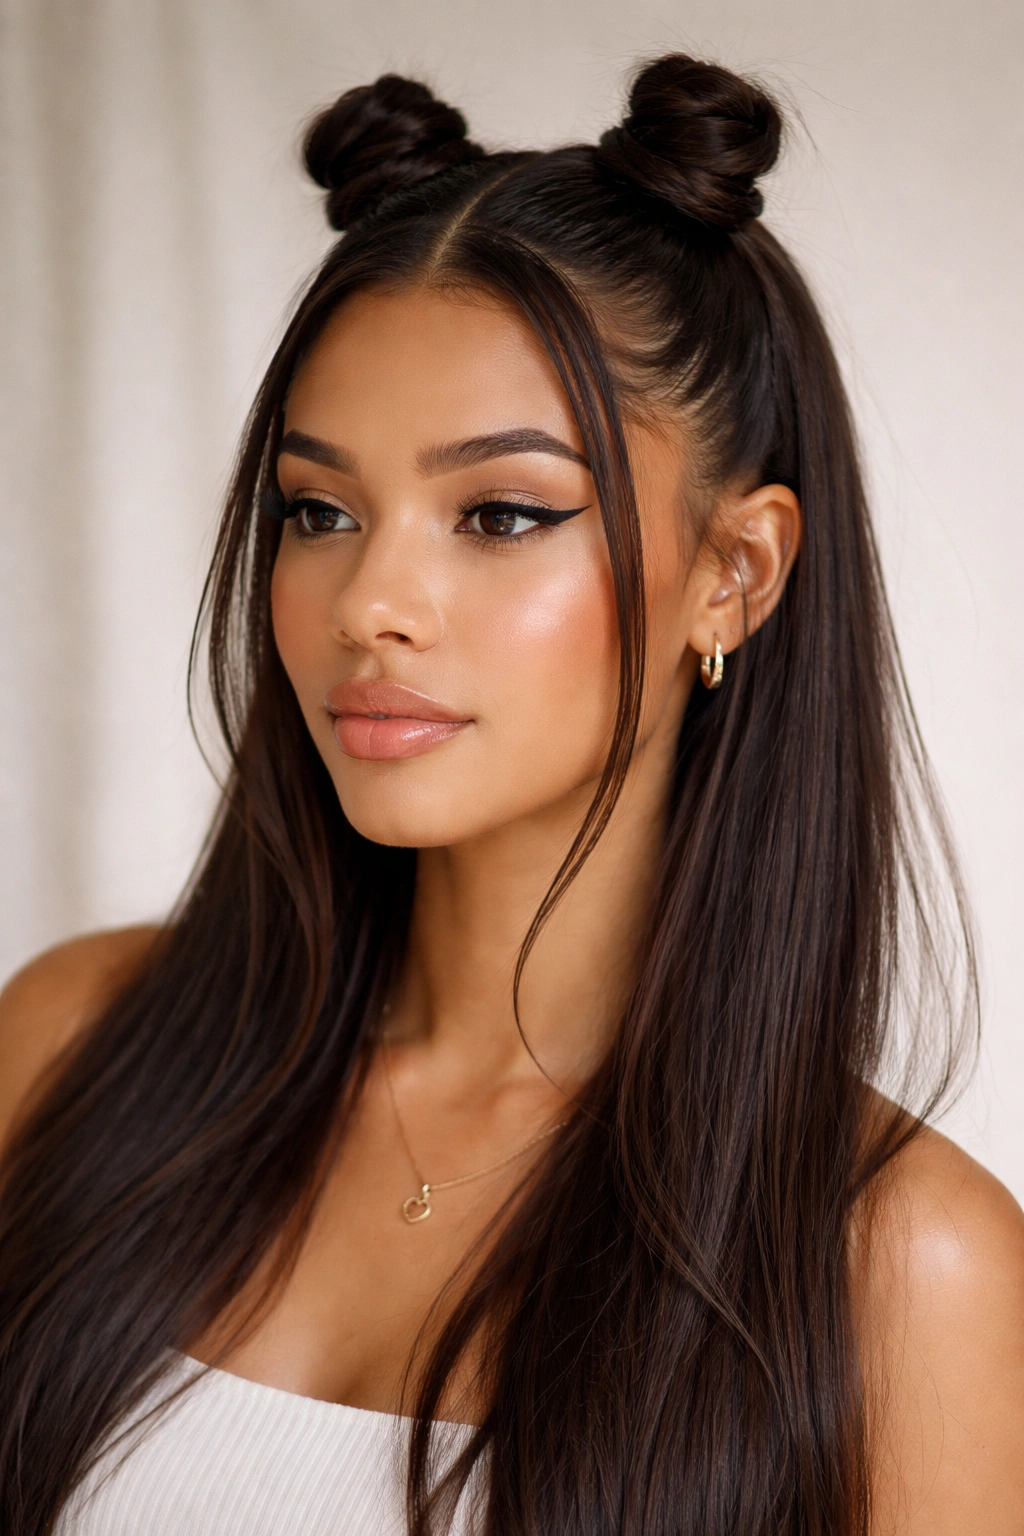
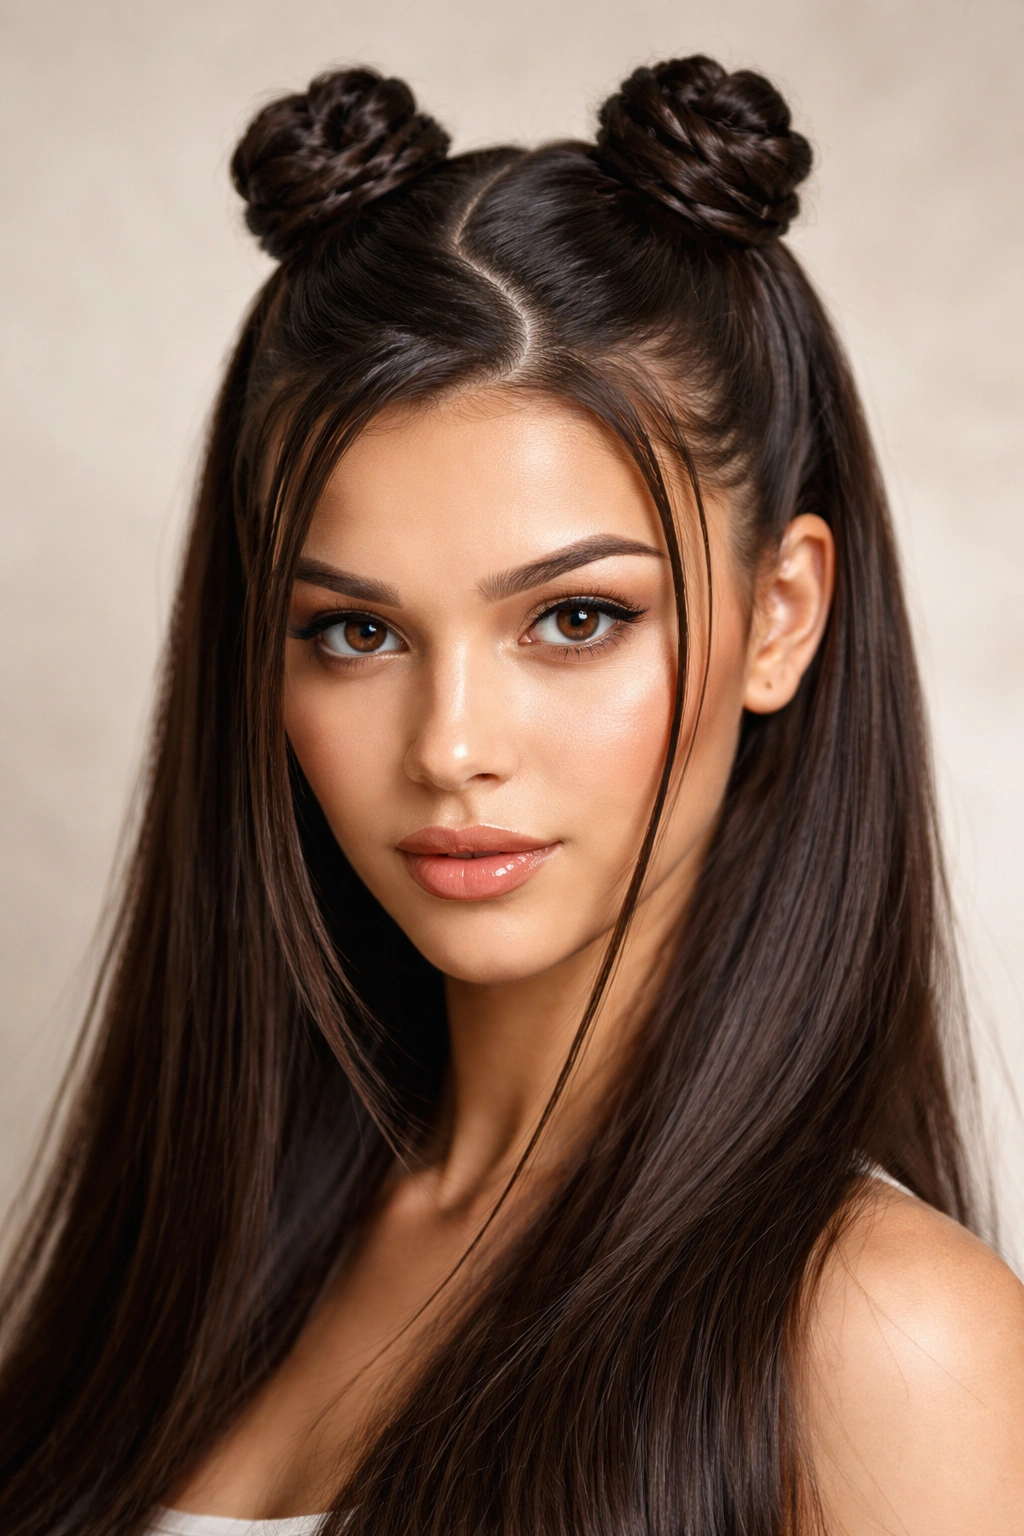
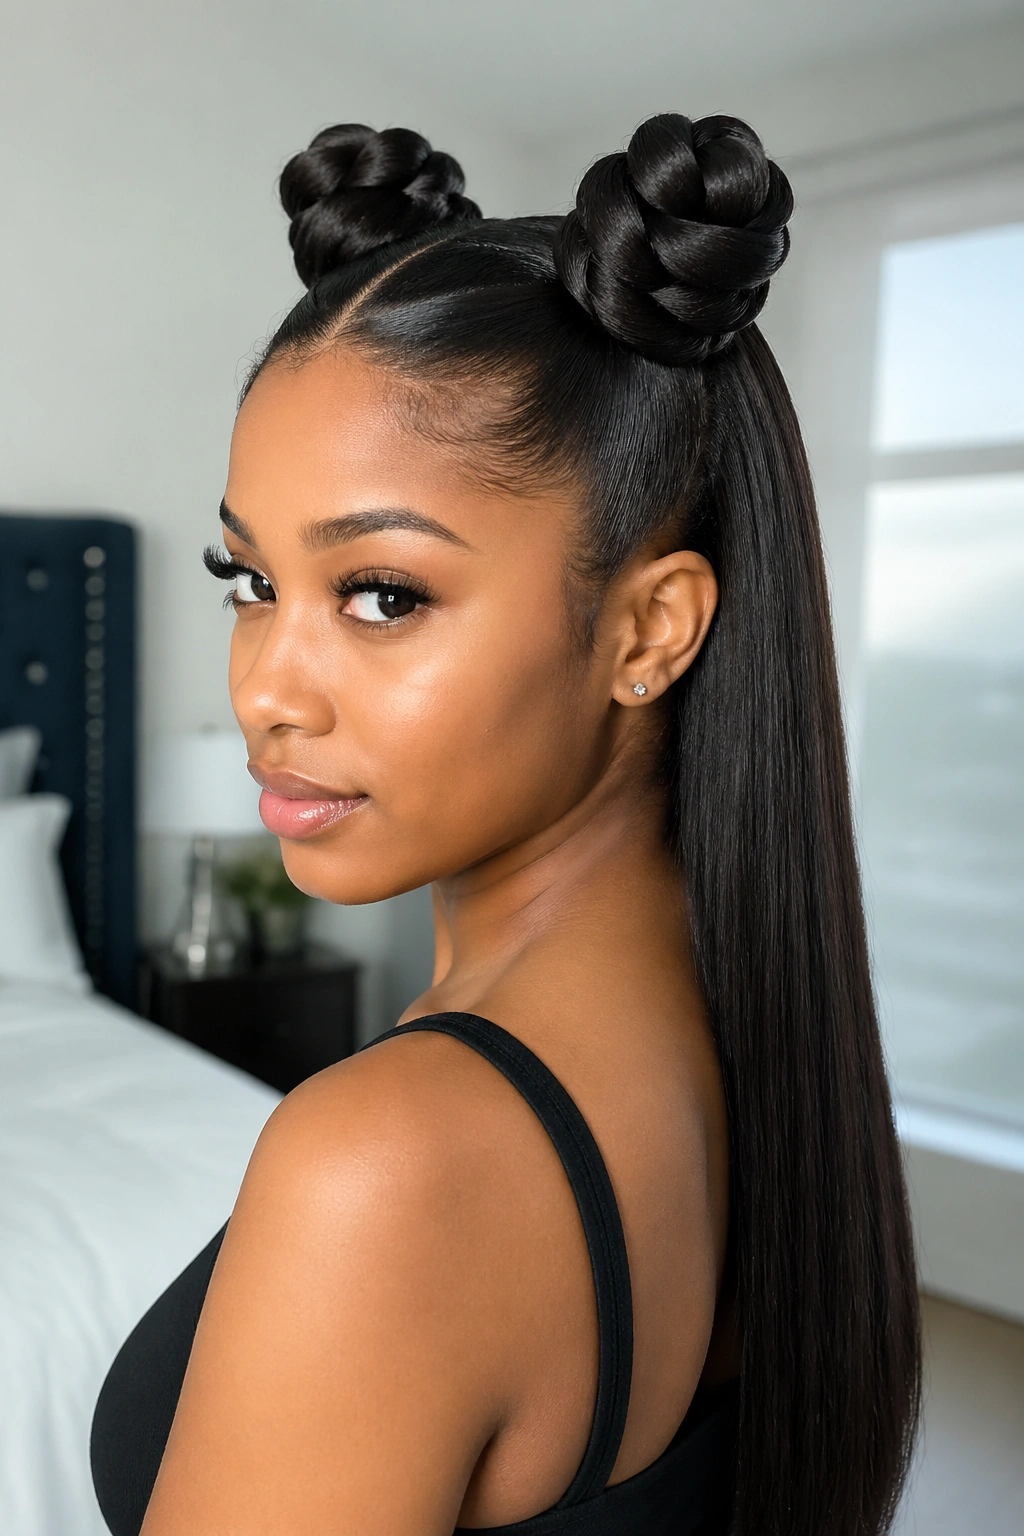
7. High Pony Base With Two Bantu Knots
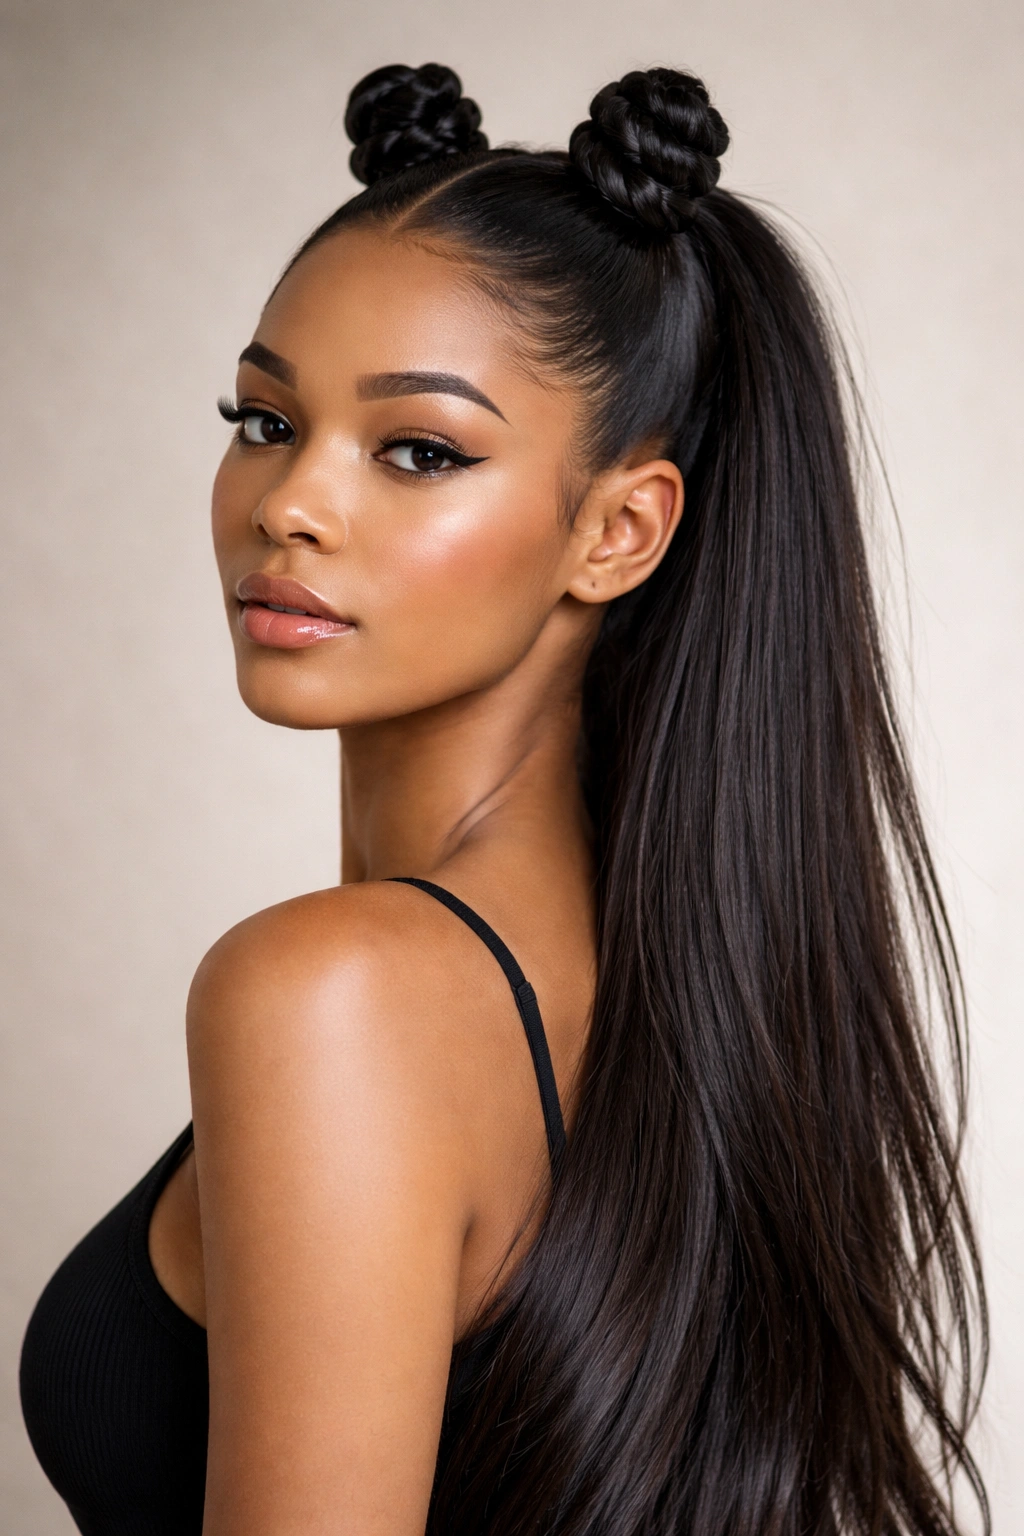
Unlike a standard half-up pair set low on the crown, this version starts with a higher base, almost where a half ponytail would sit. That changes the silhouette right away. You get more lift through the face and a stronger profile from the side.
Gather the upper half of the hair higher than usual, split it into two sections, then secure each with an elastic before twisting into knots. Because the base sits higher, the loose lengths fall from underneath like a ponytail tail, which gives the style some swing.
This one suits fine straight hair that needs help looking fuller at the top. A high base creates height without backcombing the roots into a helmet. I would not make the knots huge here. Keep them compact and let the lifted base create the drama.
If you have a long face and do not want added height, skip this and pick a lower crown style instead. Placement changes everything.
8. Side-Swept Knot Pair With One Dramatic Part
Not every half-up Bantu knot style needs symmetry. A deep side part with two knots shifted toward the heavier side can look sharper than a centered layout, especially on straight hair where asymmetry reads clean instead of messy.
Comb in a deep side part, sweeping the front section across the forehead. Build one knot near the high point of the part and the other slightly behind it. The second knot should not sit directly beside the first. Stagger it back by about 1 inch for a more natural line.
What makes this style work is the tension between control and looseness. The side part creates movement. The knots hold the structure. Then the lengths fall behind the shoulder in a way that feels less “hair tutorial” and more actual life.
A drop earring or strong liner pairs well here because one side of the face stays more open.
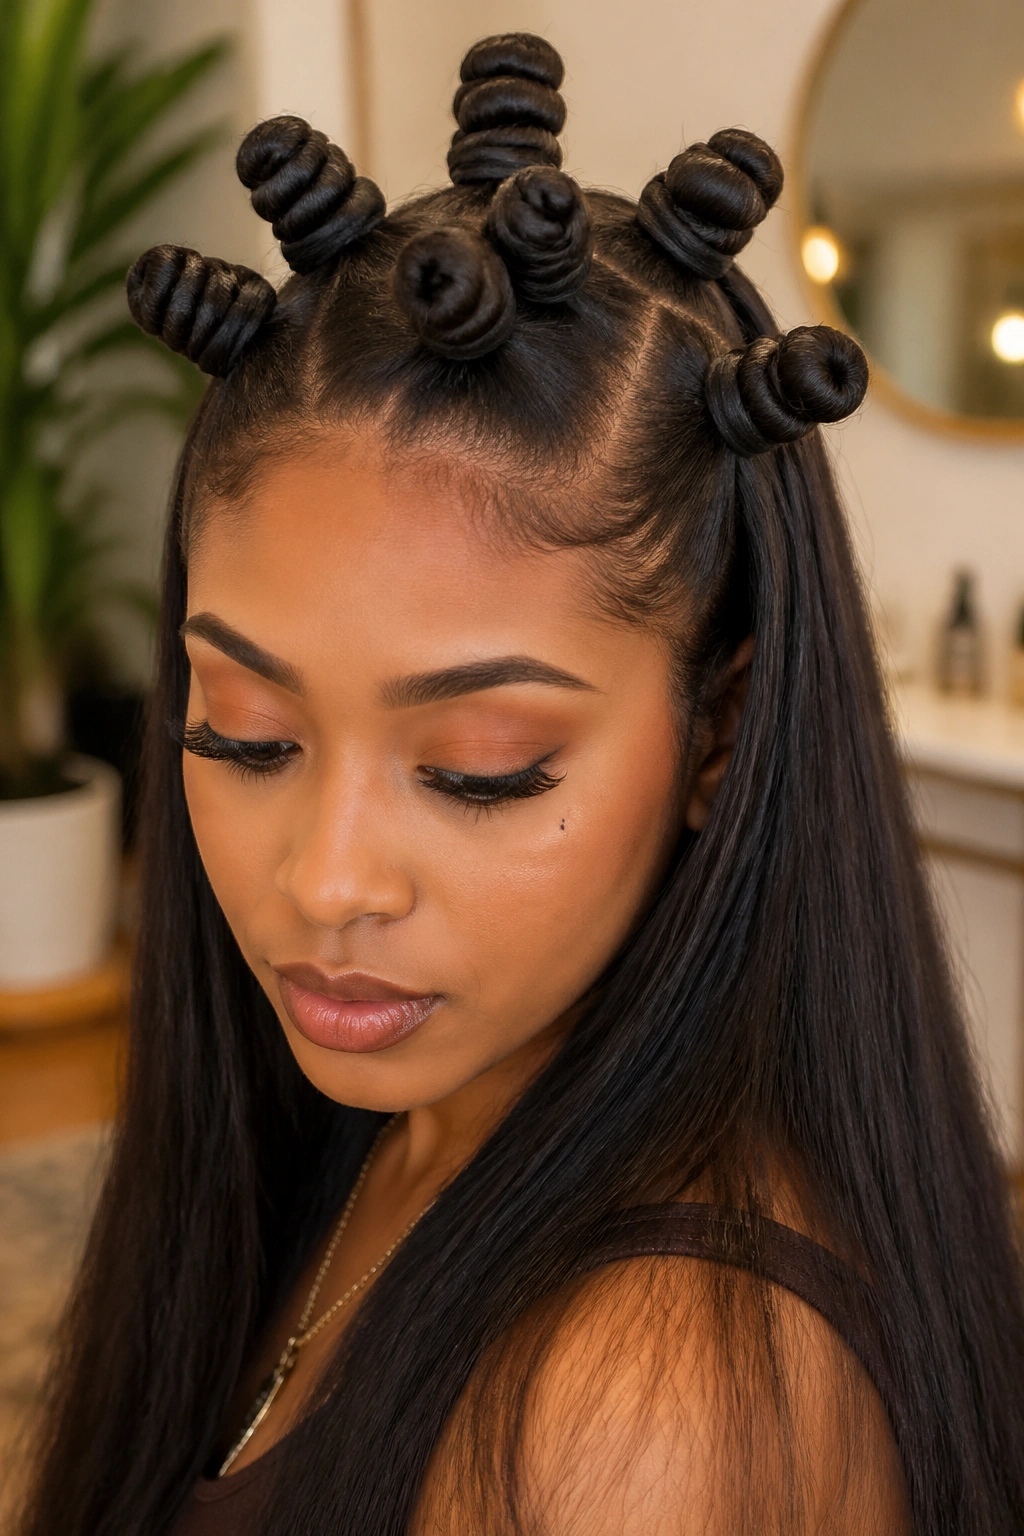
9. Four Mini Knots Across the Hairline
Small knots across the front can look cleaner than two larger ones, especially if your hair is thin or your forehead is shorter. Instead of forcing volume that your hair does not want to give, you lean into precision.
Section the front half into four equal squares from temple to temple. Build each knot from a modest amount of hair—about the width of two fingers. Place them in a line that follows the curve of the hairline, though not right on the edge.
What to watch for
- Keep the first and fourth knots a little smaller than the middle two
- Use matte product near the roots, not glossy pomade
- Tuck ends underneath each knot as you wrap
- Check side profile so the line does not slope downward
This style gives straight hair a clean editorial feel. It also photographs well from the front because all four shapes stay visible.
10. Braided-Base Knots That Stay Put Longer
If your straight hair slips out of knots by midday, braid the section first. No, it will not ruin the look. It usually makes it better.
Take each top section, secure it with a mini elastic, braid it into a simple three-strand braid, then twist that braid into a Bantu knot. The braid gives the smooth hair internal grip, and the finished knot keeps its shape with fewer pins. That is one of the best hold tricks for fine, silky textures.
You do lose a little of the smooth spiral look that comes from wrapping untwisted hair, so the finish is slightly more textured. I think that trade is worth it when longevity matters—workday hair, a party, travel, wind, dancing, any situation where you do not want to keep checking your reflection.
This is the practical version. Less romantic, maybe. Far more dependable.
11. Half Up Knots With a Bubble Ponytail Back
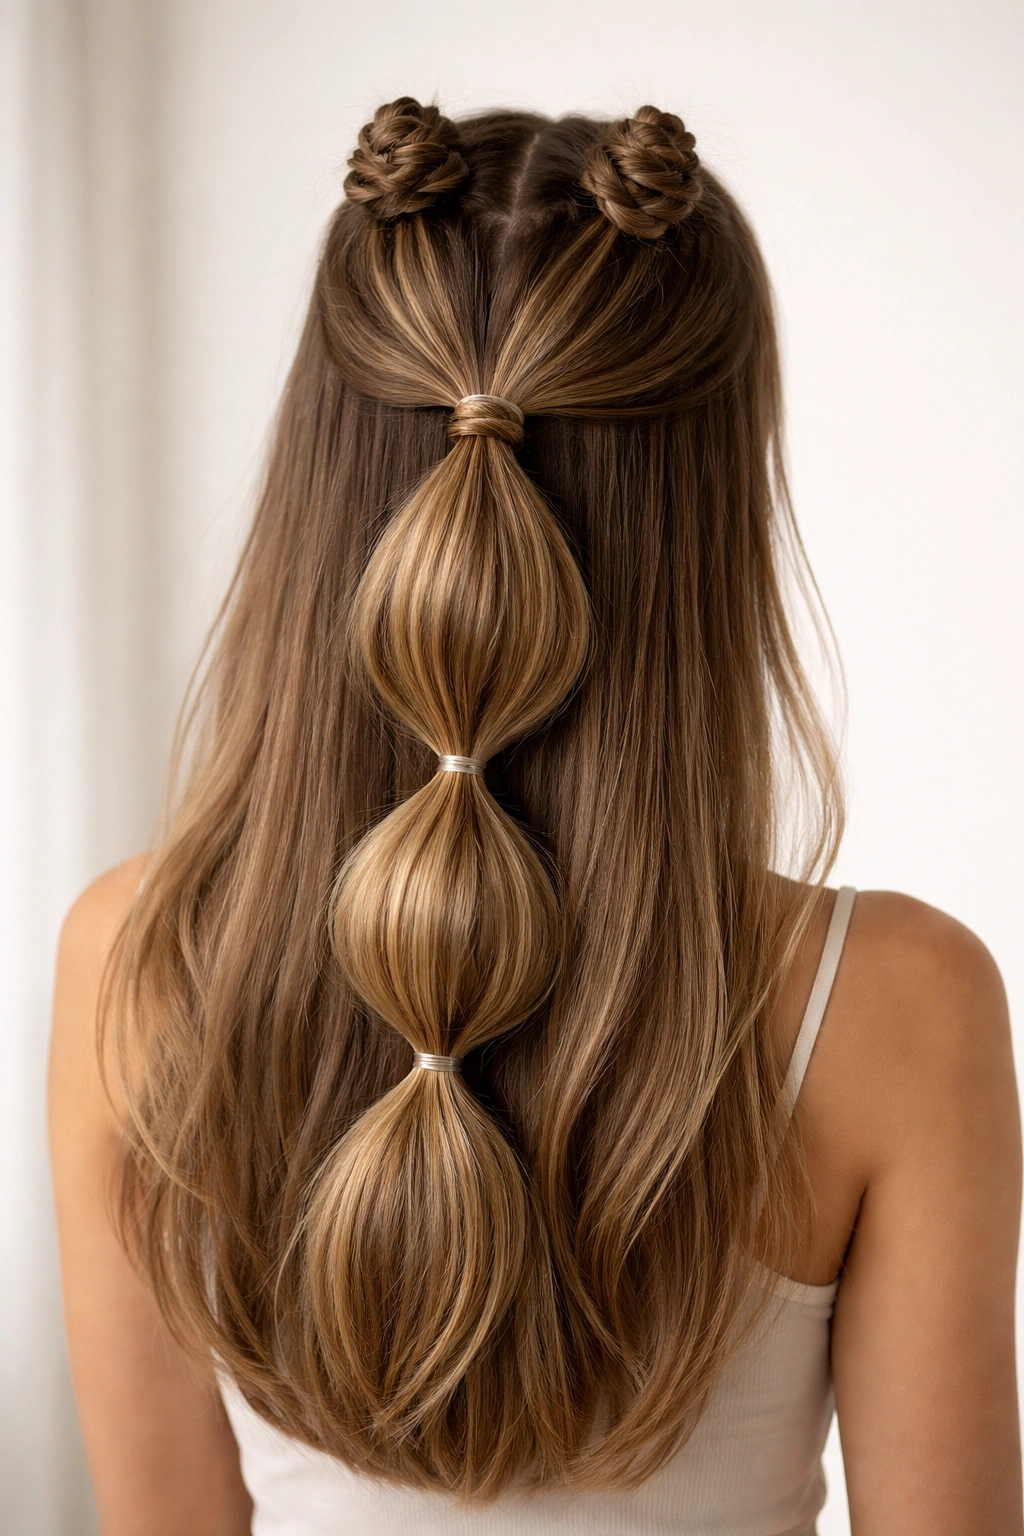
Can the loose half of the style do more than hang straight down? Absolutely. A bubble ponytail back turns the whole look into a styled set instead of a top detail plus plain hair.
Start with two knots at the crown. Gather the remaining loose lengths loosely at the back, about ear level, then add clear elastics every 3 to 4 inches down the ponytail. Gently pull each section outward to create round bubbles. Keep them soft, not huge.
Why this combo works
The knots bring texture and shape up top. The bubble ponytail echoes that structure down the back, so the style feels connected from crown to ends.
I like this on hair that reaches at least the shoulder blades; otherwise the bubbles can crowd together. If your hair is shorter, use two or three bubbles only and leave the bottom ends straight.
12. Low Crown Knots on a Blunt Bob
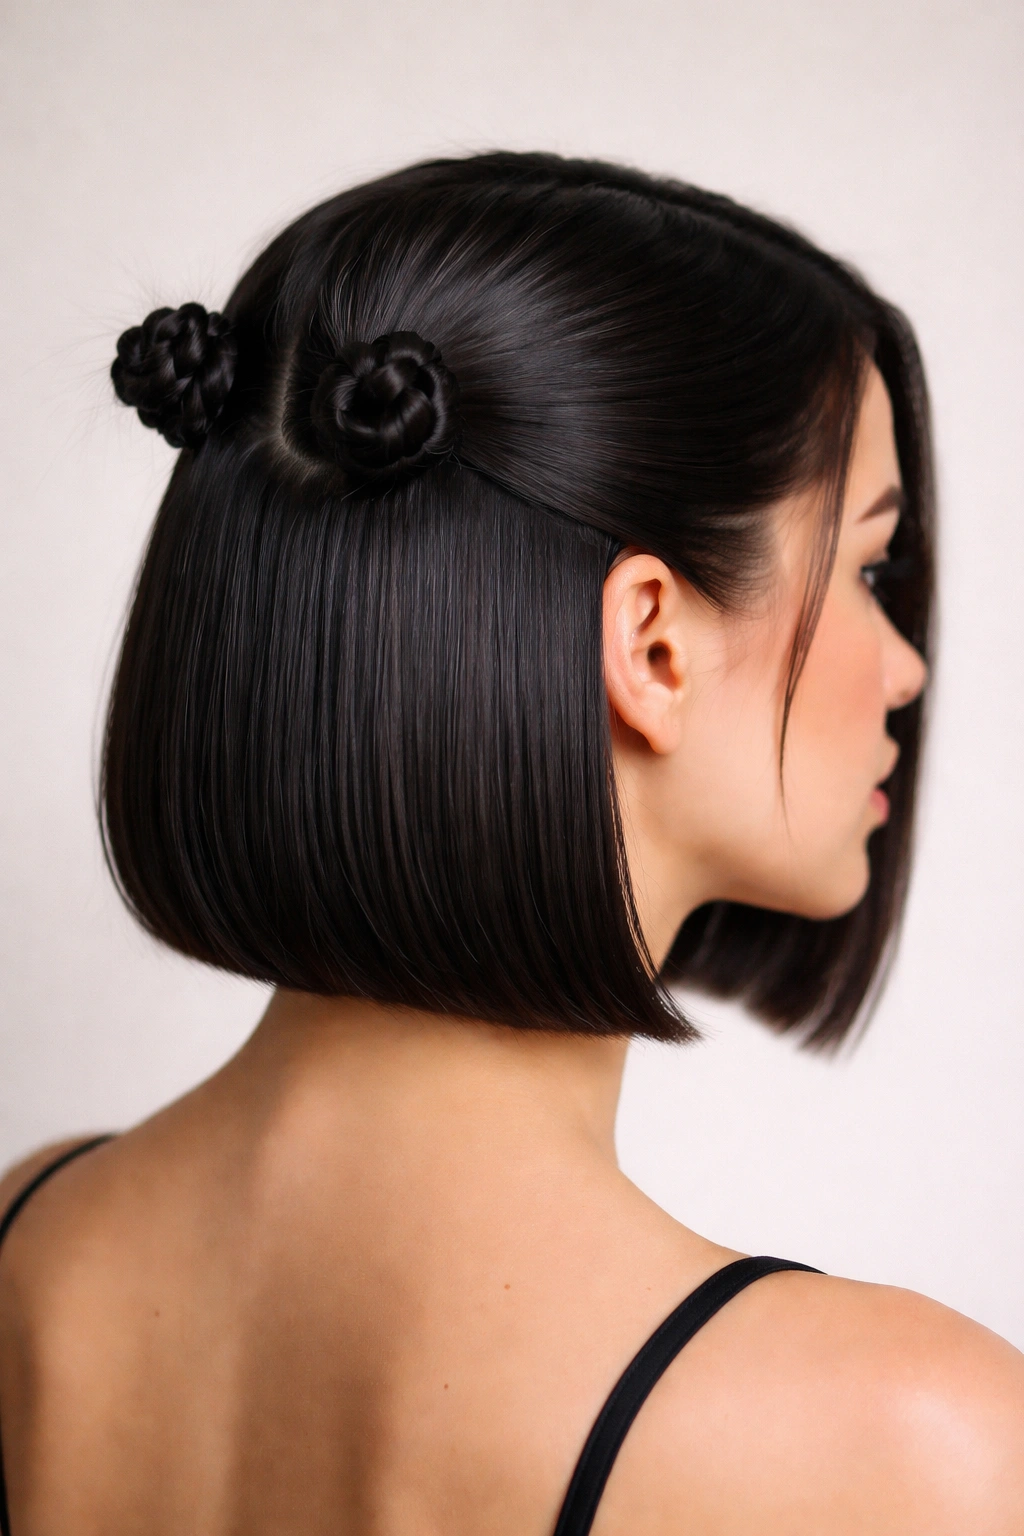
A blunt bob changes the math, and that is a good thing. Because the loose hair already has shape, the knots do not need to do much heavy lifting. Two low crown knots—set just above the occipital bone instead of high at the top—can look sharp on jaw-length and collarbone bobs.
Do not section too high. If you pull half the bob upward, the bottom gets thin and awkward fast. Take a smaller top panel, keep the knots petite, and let the blunt line of the bob stay visible.
This style also benefits from a side or middle part that matches the cut. A graphic French bob with a middle part looks clean with centered knots. A softer, side-parted bob tends to suit offset placement. Tiny details. Big effect.
And yes, bob length hair can wear Bantu knots without looking childish. Placement is the whole secret.
13. Soft Face-Framing Pieces Around Two Knots
Some faces need a little softness near the temples, and straight hair can make that need more obvious because it lays flatter against the head. Pulling out a few light pieces around the ears and cheeks fixes the issue without undoing the style.
Build two medium knots at the crown, then release slim sections near the sideburn area and one or two pieces from the front. Keep them intentional. If the loose strands look accidental, the whole style loses shape.
You can leave those pieces straight, though I prefer giving them the slightest bend away from the face. That one movement catches the light at the cheekbone and keeps the strands from sticking to the skin.
This is a good choice when the outfit or makeup is strong and you want the hair to soften the edge rather than compete with it.
14. Mohawk Row of Small Bantu Knots
A row of four or five small knots from the forehead to the crown changes the half-up idea into something bolder. The sides stay sleek and down. The center line carries the structure.
Section a narrow strip from the front hairline back toward the crown, about 2.5 inches wide. Divide that strip into equal boxes and twist each one into a knot. Leave the side panels loose and smooth, tucked behind the ears if you want the shape to stand out.
A style like this depends on discipline:
- Match the section sizes closely
- Keep each knot low-profile and centered
- Smooth the side panels flat with a light wax pass
- Do not overfill the row; four neat knots beat six crowded ones
This one has attitude. If that is what you want, it delivers.
15. S-Curve Parting With Twin Crown Knots
Straight lines are crisp. Curved lines are softer and a little trickier, which is why they can look so good when you get them right. An S-shaped part between two crown knots gives the top half movement without adding height.
Use the tail of your comb to draw one long S from the front hairline to the crown. Tie off each side, then build two compact knots that sit slightly behind the highest curve. The part should stay visible between them, not buried underneath.
Compared with a zigzag, the S-curve reads less graphic and more fluid. It suits soft glam makeup, silk tops, slip dresses, anything with a smoother line. And on straight hair, the curved part keeps the look from turning too severe.
Take your time on the part. If the curve looks shaky, redo it. Five extra minutes here make the whole style.
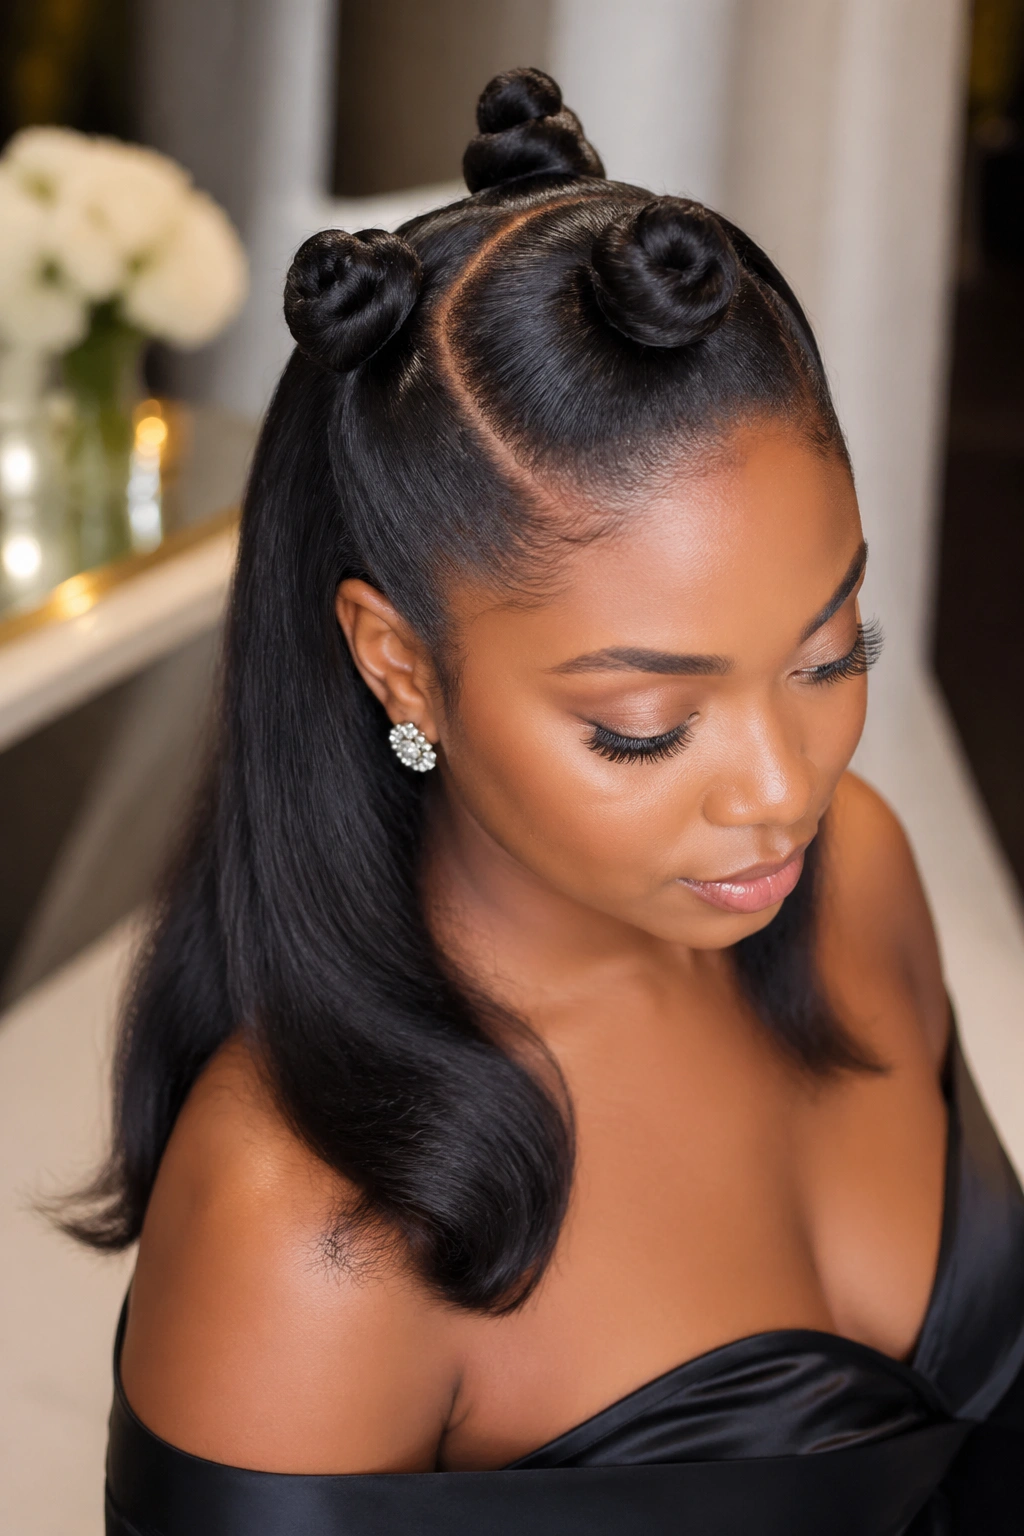
16. Rosette-Style Knots for a Dressier Finish
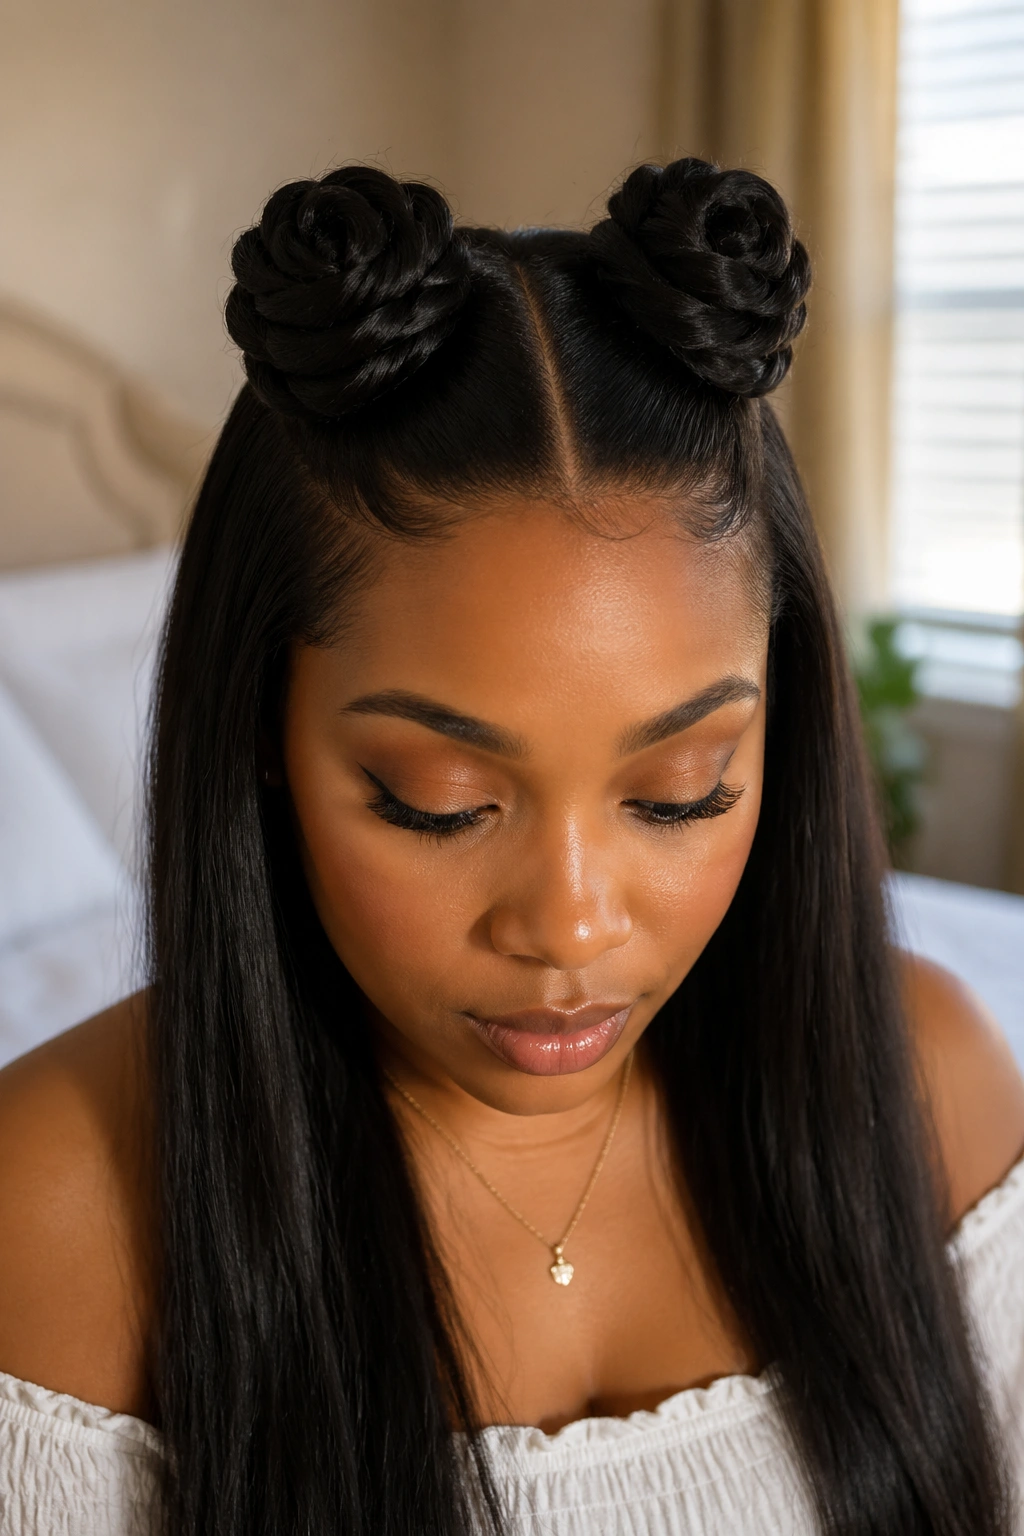
Not every Bantu knot needs to look tight and athletic. A rosette-style wrap, where the twisted section is laid a bit flatter and wider, gives the knot a softer outline that suits dressier hair.
The trick is not to overtwist the section before wrapping. With a classic compact knot, you twist firmly and coil tight. For a rosette effect, twist lightly, then guide the hair around the base in a flatter spiral, pinning as you go so the shape stays open.
The loose lengths should stay smooth and deliberate. A center part and tucked-behind-the-ear finish make this one feel refined enough for a dinner, a wedding guest look, or any event where you want shape without a giant updo. I would skip chunky accessories here. Let the knots be the detail.
This style asks for patience, though it rewards it.
17. Silk-Wrapped Knot Bases With Loose Hair Down
A thin silk ribbon or narrow scarf wrapped around each knot base changes the finish without hiding the structure. Done badly, it looks crafty. Done well, it looks considered and a bit old-school in the best sense.
Use ribbon no wider than 0.5 inch. Build the knots first. Then wrap the ribbon once or twice around the base and tie a small knot underneath or pin the ends discreetly. Keep the color close to the outfit or the hair—black, cream, brown, deep red—so the accent feels placed, not random.
What I like here is that the ribbon can solve a practical problem too. If the base has a stray short layer or a visible elastic, the wrap hides it. That makes it more than decoration, which I always appreciate.
18. Gold Cuffs and Beads Around Mini Knots
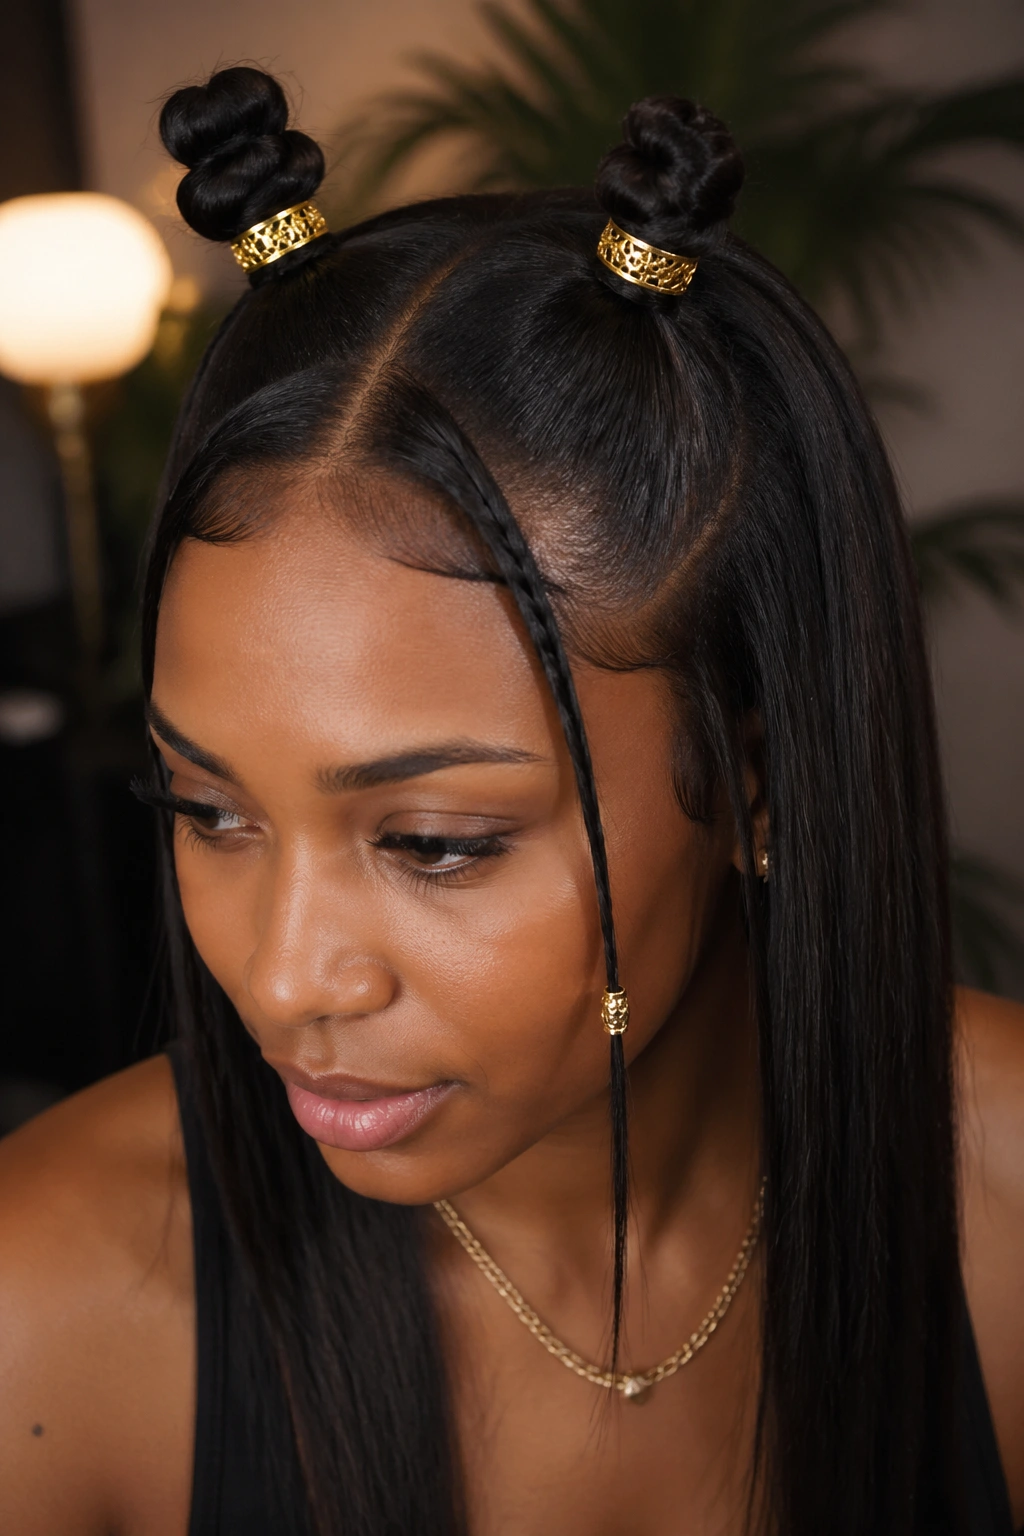
Accessories can help or ruin a style fast. Gold cuffs and small beads work best when they are used sparingly and attached near the base of the knot, not scattered across every visible strand.
Choose two or four mini knots and slide one cuff onto a slim wrapped section near each base. You can also add a single bead to a face-framing strand if the rest of the look is simple. What you want is punctuation, not noise.
A few smart limits
- Keep the metal finish consistent
- Use light accessories so they do not drag the knot down
- Put them near the crown, where they stay visible
- Skip large beads on fine straight hair unless you want them sliding all day
This style has a little flash. It suits nights out, concerts, and outfits with cleaner lines where the hair gets to do some of the styling work.
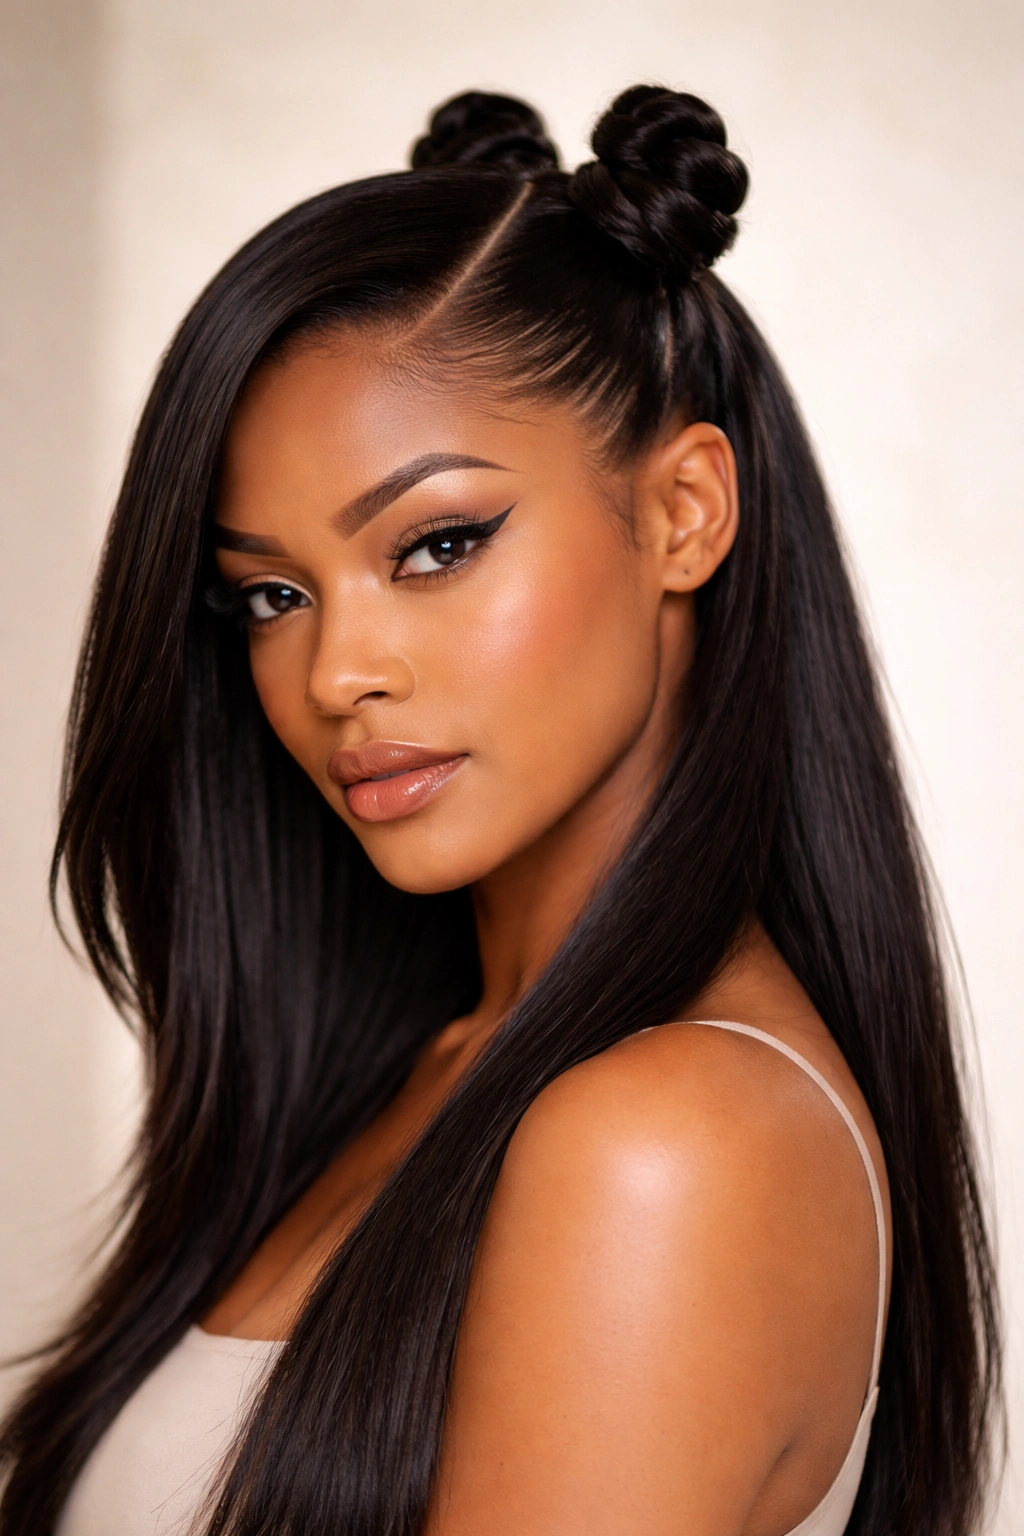
19. Deep Side Part With One Knot Higher Than the Other
Does every pair need to match? No. A staggered pair can flatter the face more than two mirror-image knots, especially with a deep side part and long straight lengths.
Place the first knot on the heavier side of the part, high at the crown. Set the second knot about 1 inch lower and slightly farther back on the lighter side. The difference should be visible, though not cartoonish. Think measured imbalance.
How to keep it intentional
The part must be clean and the height difference must be small enough to look designed. If one knot sits 3 inches lower, the style starts reading like a fix, not a choice.
This one has a fashion-editor feel without needing much else. A strong collar, clean brows, maybe a bold lip, and you are done.
20. Jumbo Twin Bantu Knots With Pin-Straight Ends
Big knots on straight hair can go wrong fast. They either collapse or turn into puffy buns. When they work, though, they look bold and clean, especially with long pin-straight ends left down the back.
Use two larger sections from the top half, though do not grab more than the top third of your total hair volume. Secure each section tightly at the base, twist with firm tension, and wrap wide enough to create size while still pinning flat against the head. U-pins are non-negotiable here.
The lengths should stay sleek and glassy to contrast the scale of the knots. Run a flat iron through the lower half, then add one drop of lightweight serum from mid-length to ends. Not the roots. Never the roots on a style that already needs grip.
This one is bolder than an everyday coffee run style. That is part of the fun.
21. Glass-Hair Center Part and Tiny Knots
A mirror-smooth center part with tiny knots can look almost futuristic on straight hair. The appeal comes from restraint. You are not building volume. You are building precision.
Blow-dry or flat-iron the top until the roots lie smooth, then draw a razor-clean middle part from forehead to crown. Make two tiny knots from narrow sections near the top, each no wider than 1 inch. Keep the lower half straight, glossy, and tucked behind the shoulders.
A few details make the finish better:
- Use a fine-tooth comb after the flat iron for a smoother lay
- Seal the part with a touch of wax stick
- Choose mini elastics that match the hair color
- Press flyaways with the warm side of the iron, not more product
This is a strong choice for straight, healthy-looking hair because the shine becomes part of the style.
22. Five-Knot Half Up Crown on Long Hair
Unlike the three-knot cluster, a five-knot crown spreads the detail across the whole top half, which can look balanced on dense, long straight hair that would swallow smaller styling accents. Think of it as a band of neat, small coils rather than two statement knots.
Section the upper third of the hair into five even boxes across the crown, leaving a little room between each one. Build compact knots and keep them consistent in size. The middle knot should sit at the highest point, with the outer knots slightly smaller for a cleaner line.
Who suits this best? Someone with length, density, and patience. It takes longer, and if one section is off, your eye catches it. Still, when it is done well, the style feels complete from every angle—front, side, and back.
23. Hidden Elastic Lift Under the Knots
Here is a backstage trick that earns its keep: build a small support ponytail under each knot section, then hide it. That hidden elastic lifts the knot, gives it a stronger base, and keeps straight hair from slipping flat against the scalp.
Start each section by tying a mini ponytail. Backcomb the ponytail lightly at the base if your hair is fine. Then twist and wrap the hair into a knot around the elastic, pinning through the wrapped coil and into the band beneath.
This is one of the smartest ways to fake fuller knots on fine straight hair. You get height without teasing the whole crown into a bird’s nest. The loose lengths can stay smooth and simple, which keeps the style from looking overworked.
If your hair is thick, skip the backcombing. The elastic alone will usually do enough.
24. Tucked-End Half Up Knots for Formal Hair
For a cleaner, event-ready finish, tuck every visible end under the knot instead of letting the tail peek out. That small change makes the top half look more polished and controlled, which suits formal styling far better than loose wrapped ends.
Build two or three knots, depending on how much hair you want up. As you wrap, use your fingertip to guide the last 1 to 2 inches underneath the coil, then pin through that tucked end so it stays hidden. The knot should look sealed, almost like it was molded into place.
Leave the lower half softly straight with a bend at the last inch, or wear it smooth and tucked behind one ear with statement earrings. I like this style with clean necklines—halter dresses, structured blazers, strapless tops—because the crown detail stays visible.
It takes a few more pins. Worth it.
25. Scarf-Wrapped Bantu Knot Half Up Style
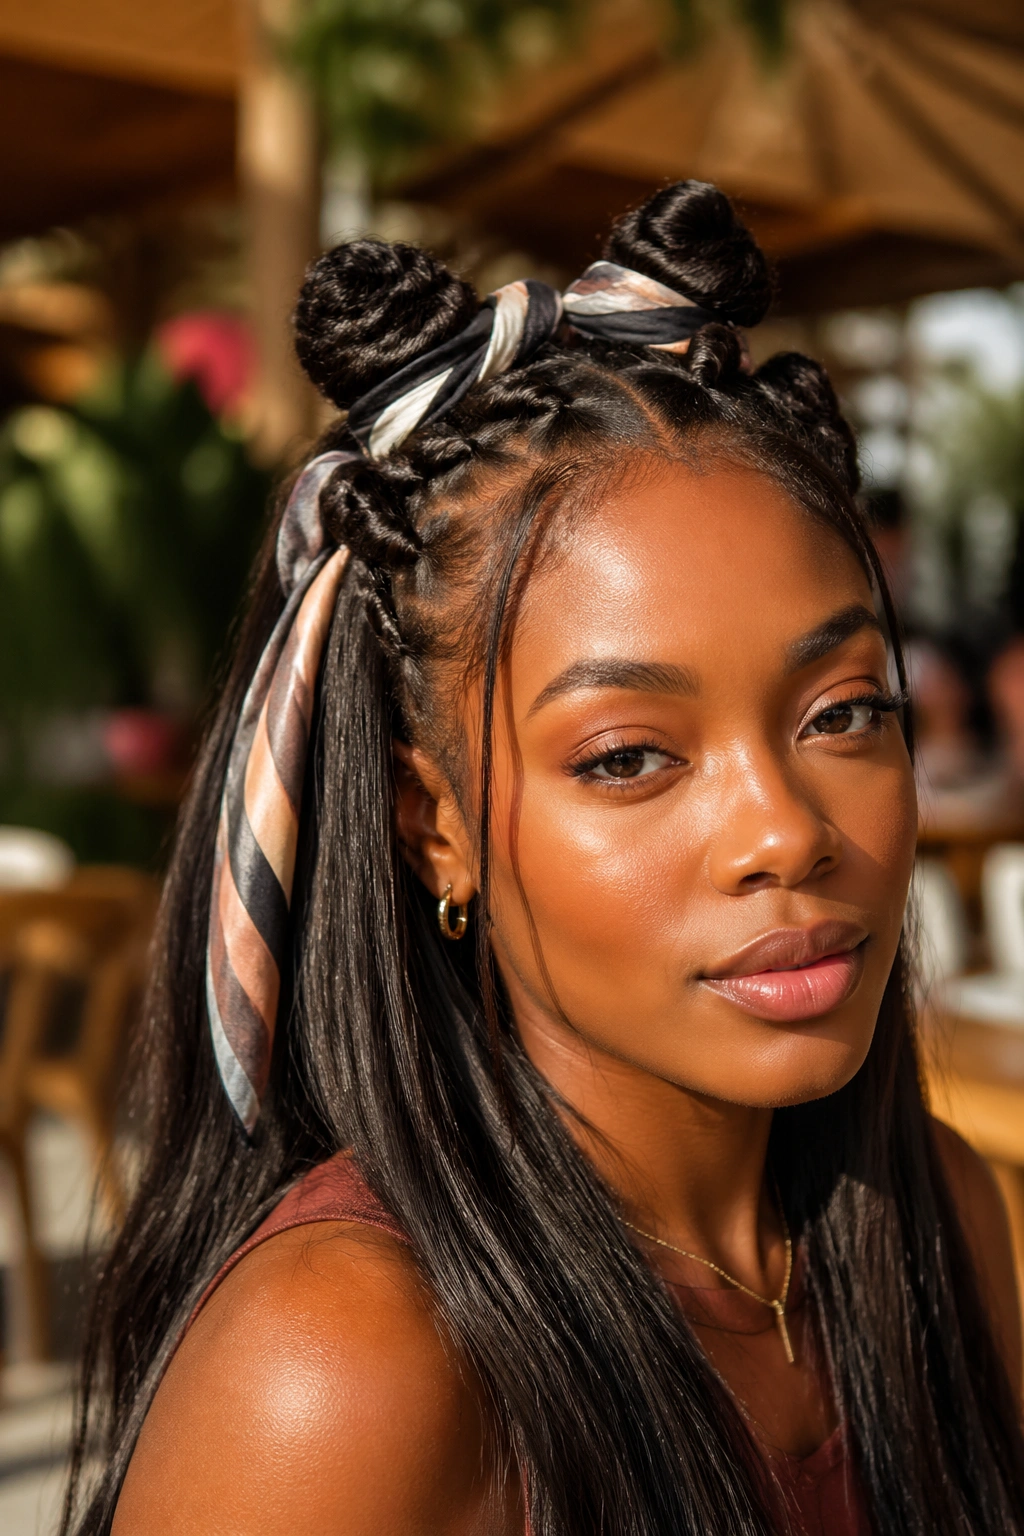
If you want the half-up shape with a little more personality and a nod to headwrap styling, a slim scarf wrapped around the knot area can pull everything together. The trick is using the scarf as a frame, not as a cover.
Create two crown knots first. Then fold a silk scarf into a narrow band about 1.5 inches wide and tie it behind the knots or weave it between them, letting the ends trail into the loose hair. Keep the scarf light so it does not pull at the style.
How to wear it without overwhelming the knots
Choose a print with one or two main colors, not ten. Let the knots stay visible. And keep the rest of the hair sleek so the scarf reads like an accent instead of a distraction.
This one has a little softness, a little history, and a lot more character than a plain half-up style. On straight hair, that contrast can be exactly what makes the whole look click.
Final Thoughts
Half-up Bantu knots on straight hair live or die on three things: clean sectioning, root grip, and smart pinning. Miss one of those and the style slides, swells, or falls apart. Get them right and even a simple two-knot version looks intentional.
The best choice is not always the biggest or busiest one. A single crown knot can look sharper than five. A bob with low knots can beat waist-length hair with oversized coils. And if your texture is silky enough to slip out of everything, braid the section first and save yourself the annoyance.
Start small, use less hair than you think, and pay attention to placement. Straight hair does not fight this style—it just asks you to build it with a little more care.