Feed-in cornrows paired with space buns represent one of the most versatile and visually striking protective hairstyles available. This combination merges the low-maintenance benefits of cornrows with the playful, dimensional appeal of styled buns positioned at the crown or sides of the head. The feed-in technique—where hair is gradually incorporated into the braid rather than cornrowed from the scalp—creates a sleeker, more refined foundation that flows seamlessly into voluminous buns. Whether you’re looking for a bold statement style or a softer, more understated look, this category of hairstyles offers tremendous creative flexibility.
What makes feed-in cornrow space buns particularly appealing is their adaptability across different hair textures, lengths, and face shapes. The styling works beautifully on natural coils, waves, and straightened textures. Installation typically takes two to four hours depending on braid thickness and pattern complexity, making it a reasonable time investment for a style that can last two to four weeks with proper maintenance. Beyond aesthetics, these styles provide genuine scalp protection by minimizing daily manipulation and tension on fragile strands, while the bun placement keeps hair secured away from the face and shoulders.
This guide walks through 18 distinct approaches to creating feed-in cornrow space buns, each with its own visual signature, installation method, and maintenance requirements. Some styles emphasize sleekness with thin, precise braids, while others prioritize volume and texture through thicker cornrows and abundantly stuffed buns. You’ll discover how different braid patterns, bun placements, and finishing techniques completely transform the overall aesthetic while keeping the core protective function intact.
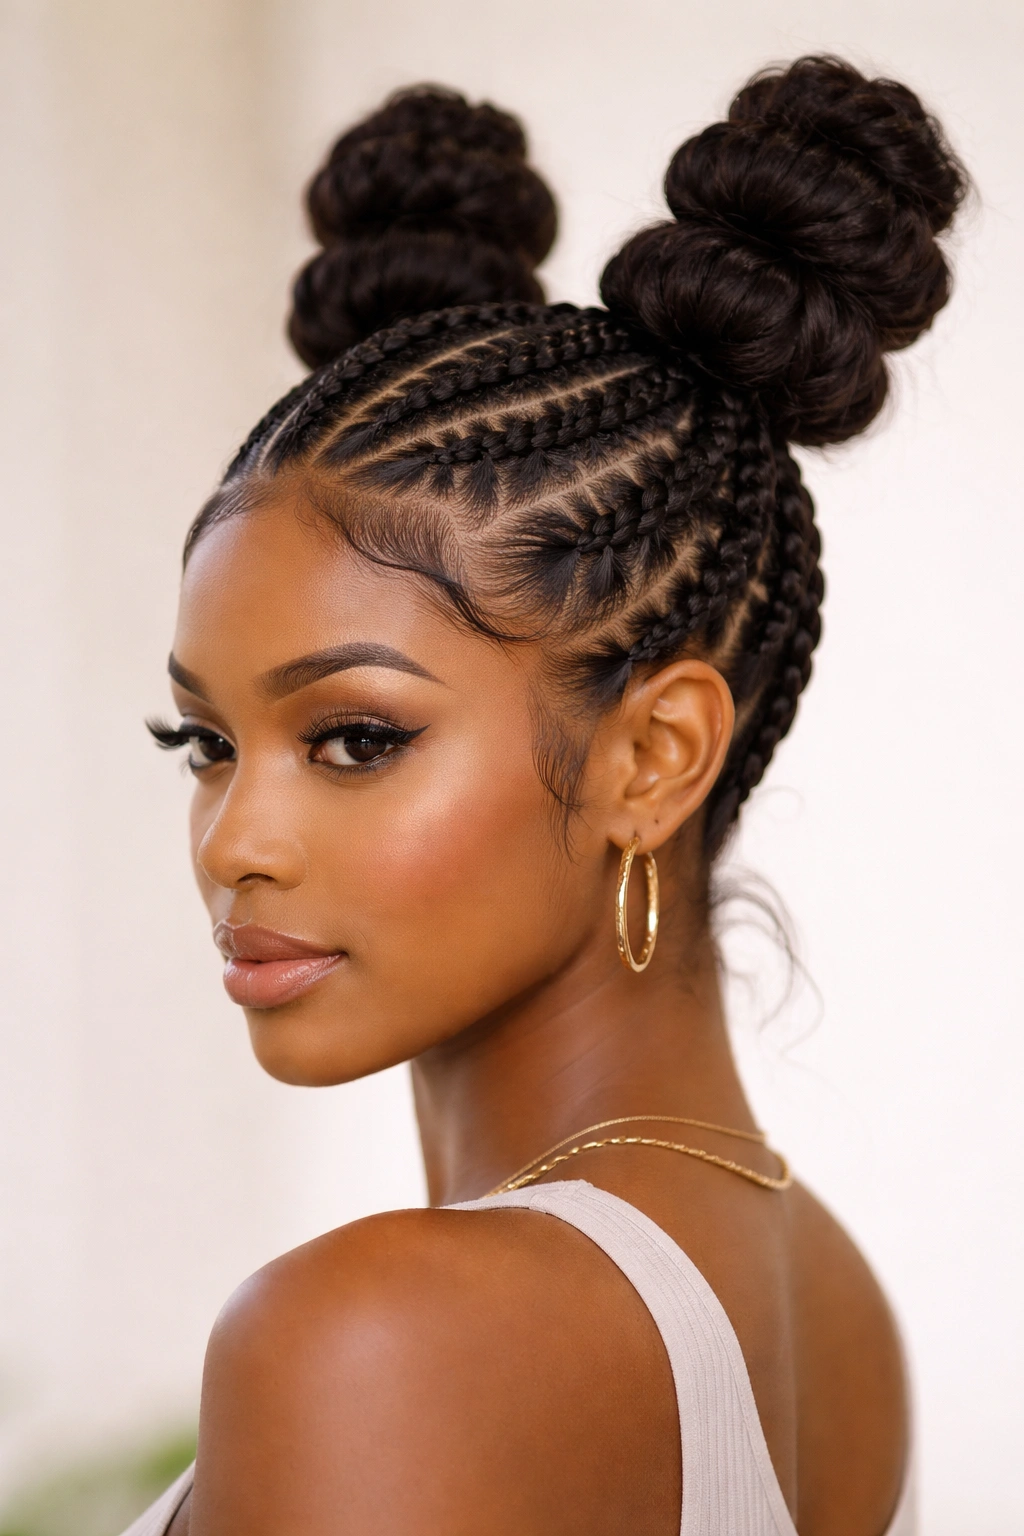
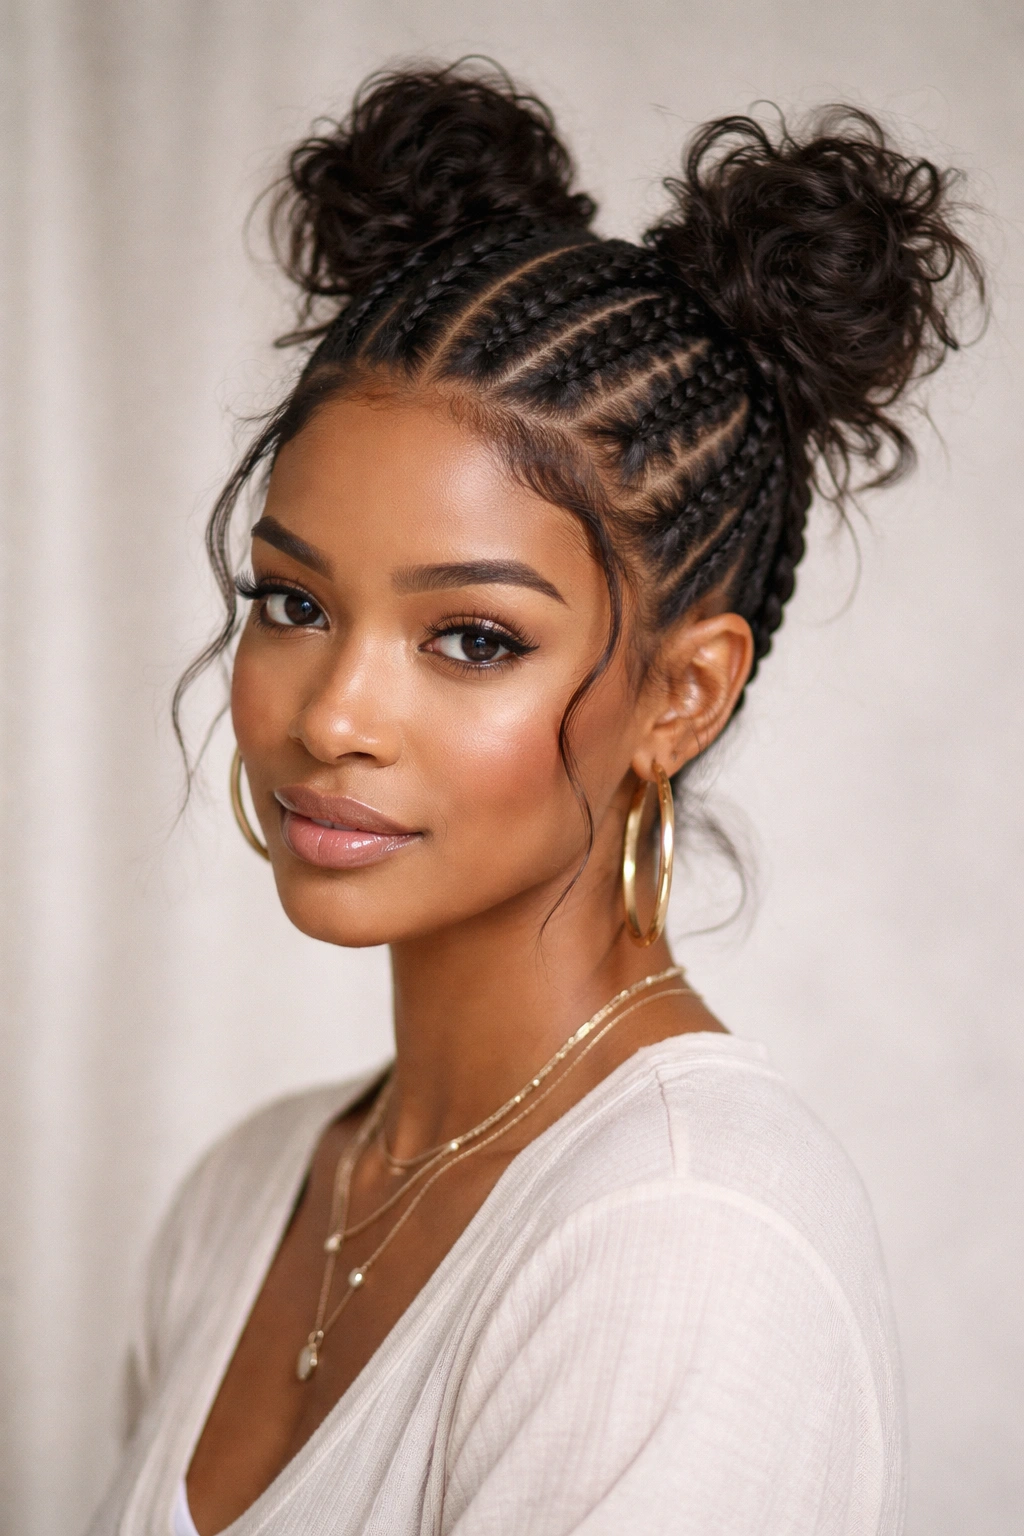
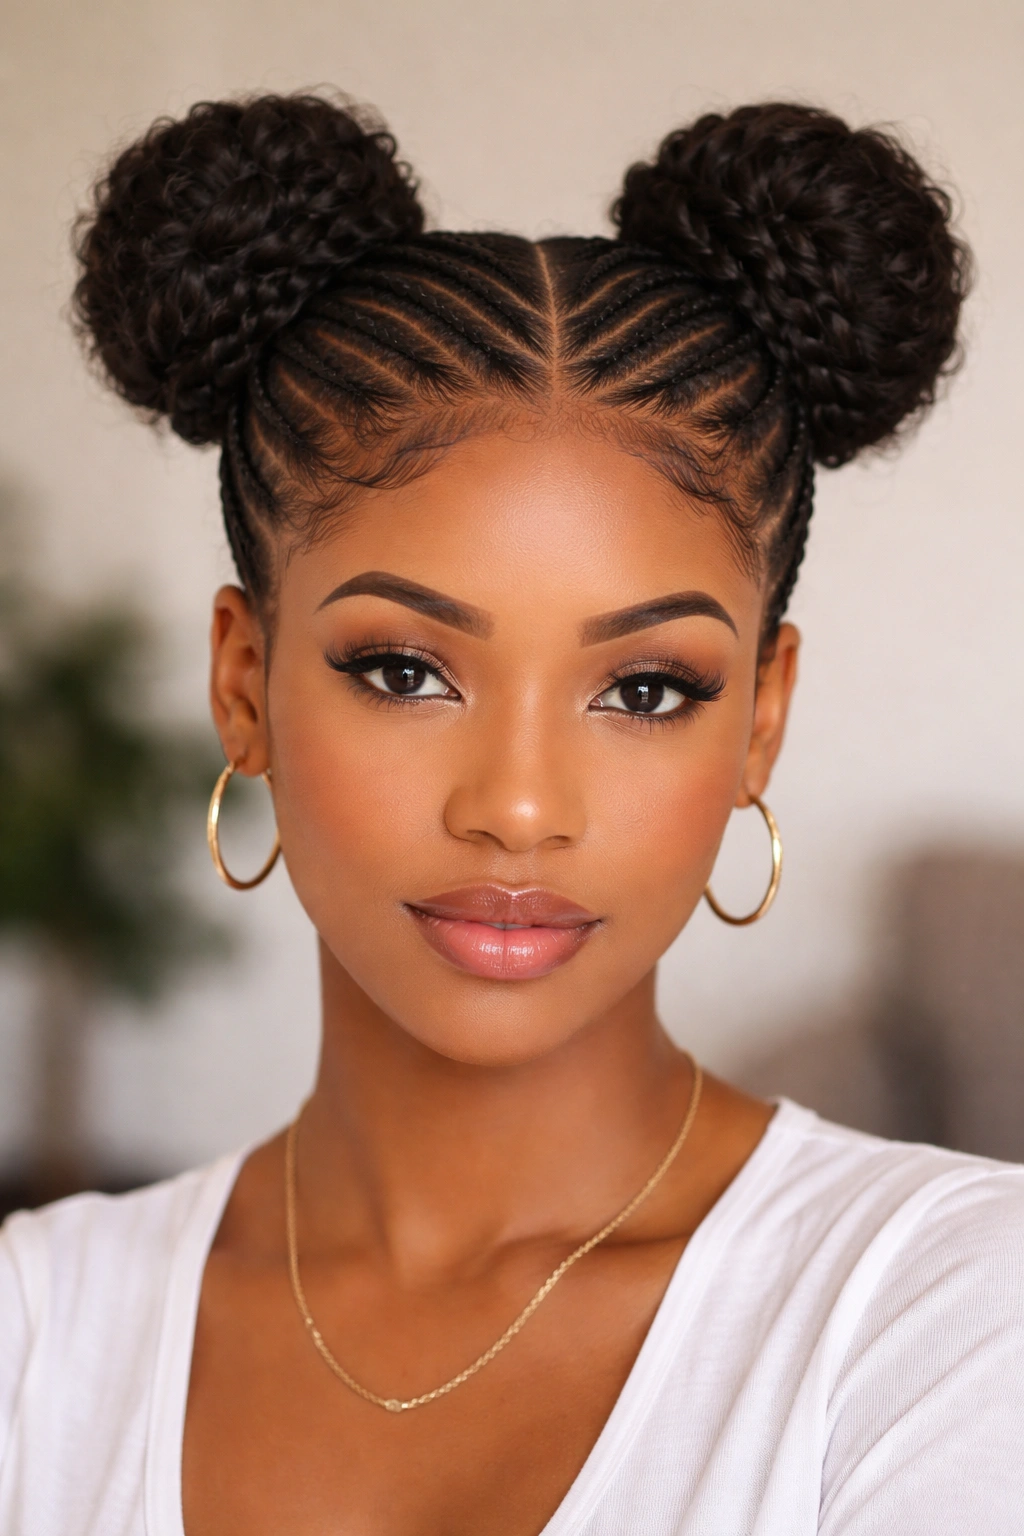
1. Classic Round Space Buns with Feed-In Cornrows
The foundational version of this style features two symmetrical round buns positioned at the crown, anchored by simple feed-in cornrows that run from the nape toward each bun base. This is the most straightforward interpretation and works as an excellent starting point if you’re new to this hairstyle. The symmetry creates a balanced, youthful appearance that photographs beautifully and suits virtually every face shape.
Installation and Technique
Start by sectioning your hair down the middle from forehead to nape, creating two equal halves. Smooth one section to the side and begin your first cornrow at the nape of the neck, using the feed-in method to gradually add hair as you braid upward toward where your first bun will sit. The braid should travel in a gentle curve, following the natural contour of your head. Once you’ve braided approximately three-quarters of the way up, secure the remaining loose hair into a high ponytail at the bun’s intended location. Wrap the ponytail around itself to form a full, round bun, then tuck the ends underneath and secure with bobby pins or a hair elastic. Repeat this exact process on the opposite side of your head, ensuring both braids and buns are proportionally matched.
Styling Variations and Longevity
This style holds beautifully for three to four weeks with minimal daily touch-ups. Use a soft brush or wide-tooth comb to gently smooth any baby hairs around the hairline with edge control, and apply this same product to the bun base to keep it looking polished. The buns can be worn tight and neat for a more refined appearance, or you can strategically pull a few strands loose around the face for a softer, more romantic variation. At night, wrap both buns loosely with a silk or satin scarf to prevent friction that causes frizz and breakage.
Pro tip: Add lightweight synthetic hair or hair extensions to the bun base if your natural hair doesn’t have enough density to create a visibly full bun—this is especially helpful if you have fine or thin hair and want the bun to look voluminous without excessive tension on your actual strands.
2. Twisted Feed-In Cornrows with Bubble Buns
This playful variation swaps traditional round buns for segmented “bubble buns,” where the hair is divided into stacked sections held apart by small elastics, creating a pillowy, textured effect. The feed-in cornrows remain the anchoring element, but the bubble bun aesthetic makes this style feel fresher and more contemporary. This version requires the same cornrow installation as the classic approach, but with a different bun-finishing technique.
Creating the Bubble Effect
Instead of wrapping your ponytail into a single compact bun, divide the secured ponytail into three to five equal sections using small elastics, spacing them roughly one inch apart down the length of the ponytail. Fluff and pull each individual section outward gently to create distinct bubble shapes stacked vertically. This creates dimensional pockets of hair that catch light beautifully and feel slightly bouncy when you move. For added texture, you can gently curl or wave each bubble section using a curling iron before or after styling—the bubbles frame the curl nicely.
Maintenance and Refreshing
Bubble buns maintain their shape well throughout the wear period, though the elastics can loosen slightly as you sleep and move. After three to five days of wear, spend a few minutes reflecting and tightening the elastics, then re-fluffing each bubble section. This quick maintenance keeps the style looking intentional rather than accidentally deflated. The bubbles also photograph particularly well from multiple angles, making this a great choice if you’re planning content creation or special event appearances.
Worth knowing: The individual bubble sections actually reduce overall tension on your hair compared to a single tight bun, since the weight and pulling are distributed across multiple elastic points rather than concentrated at one base. This makes bubble buns an excellent choice if your hairline or crown area is sensitive.
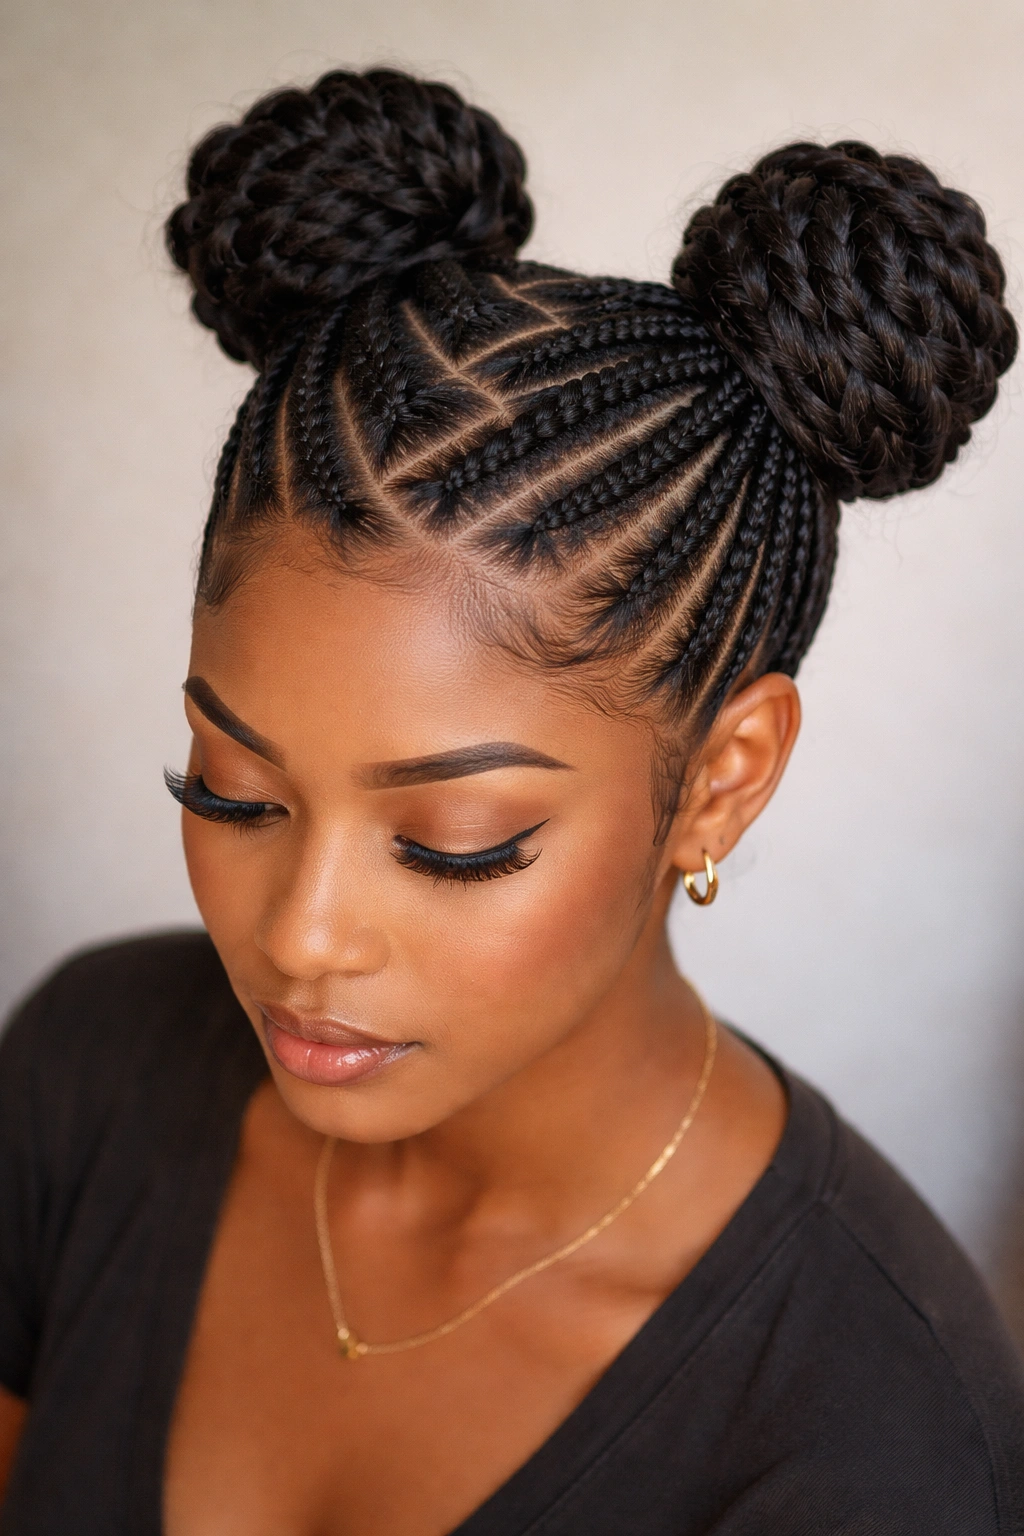
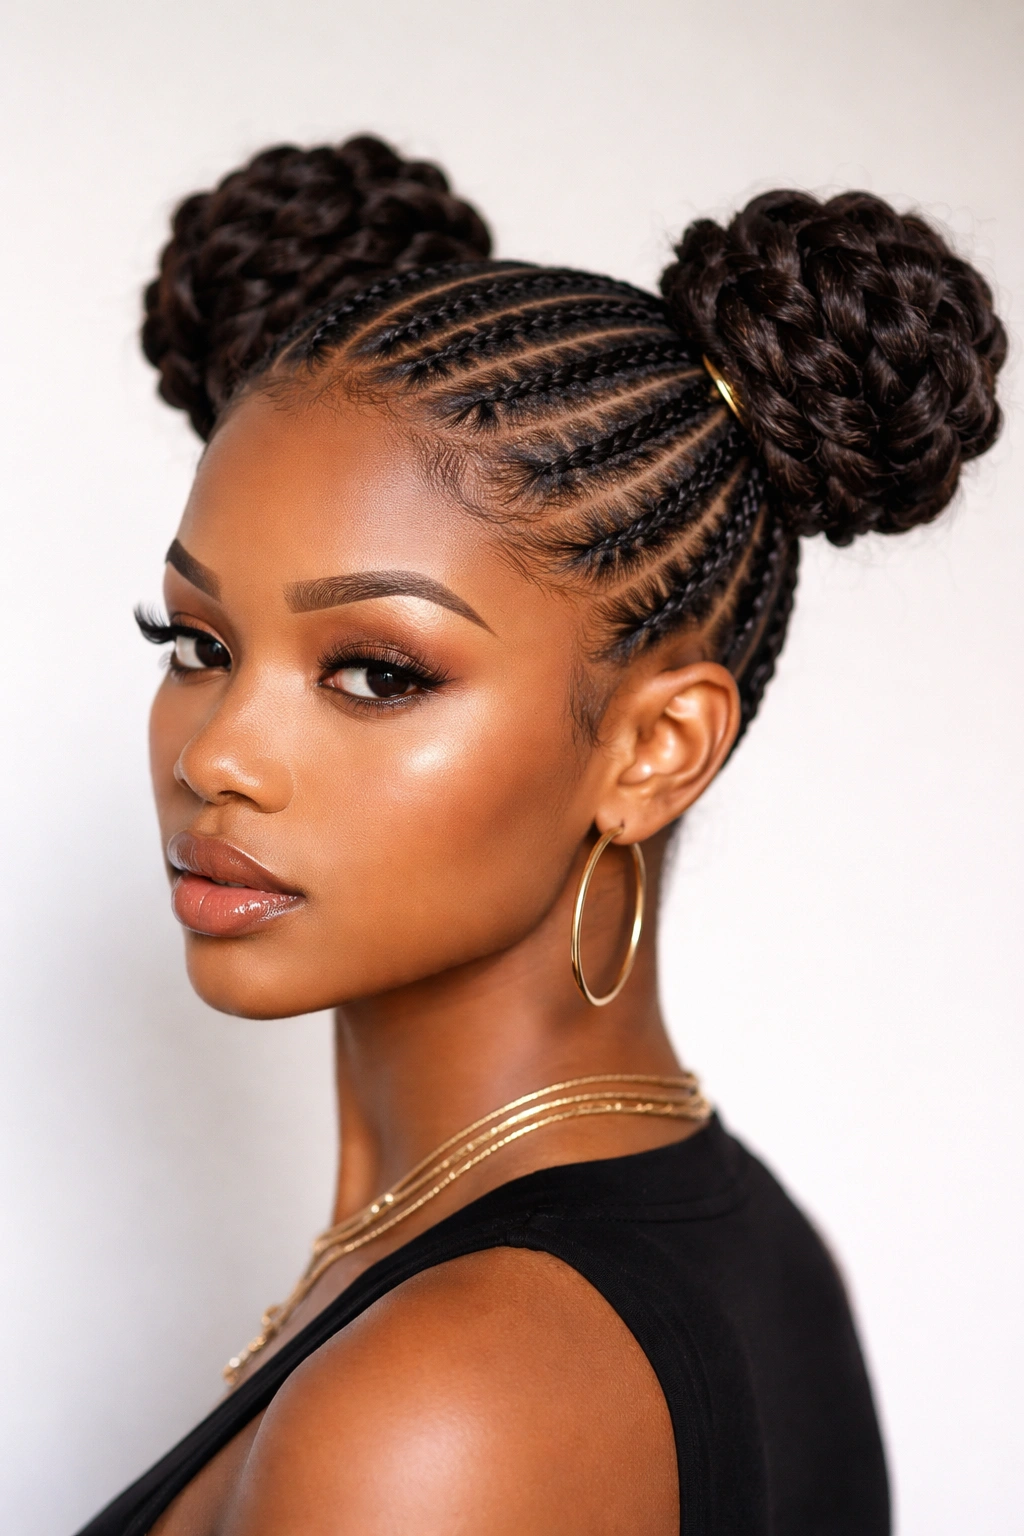
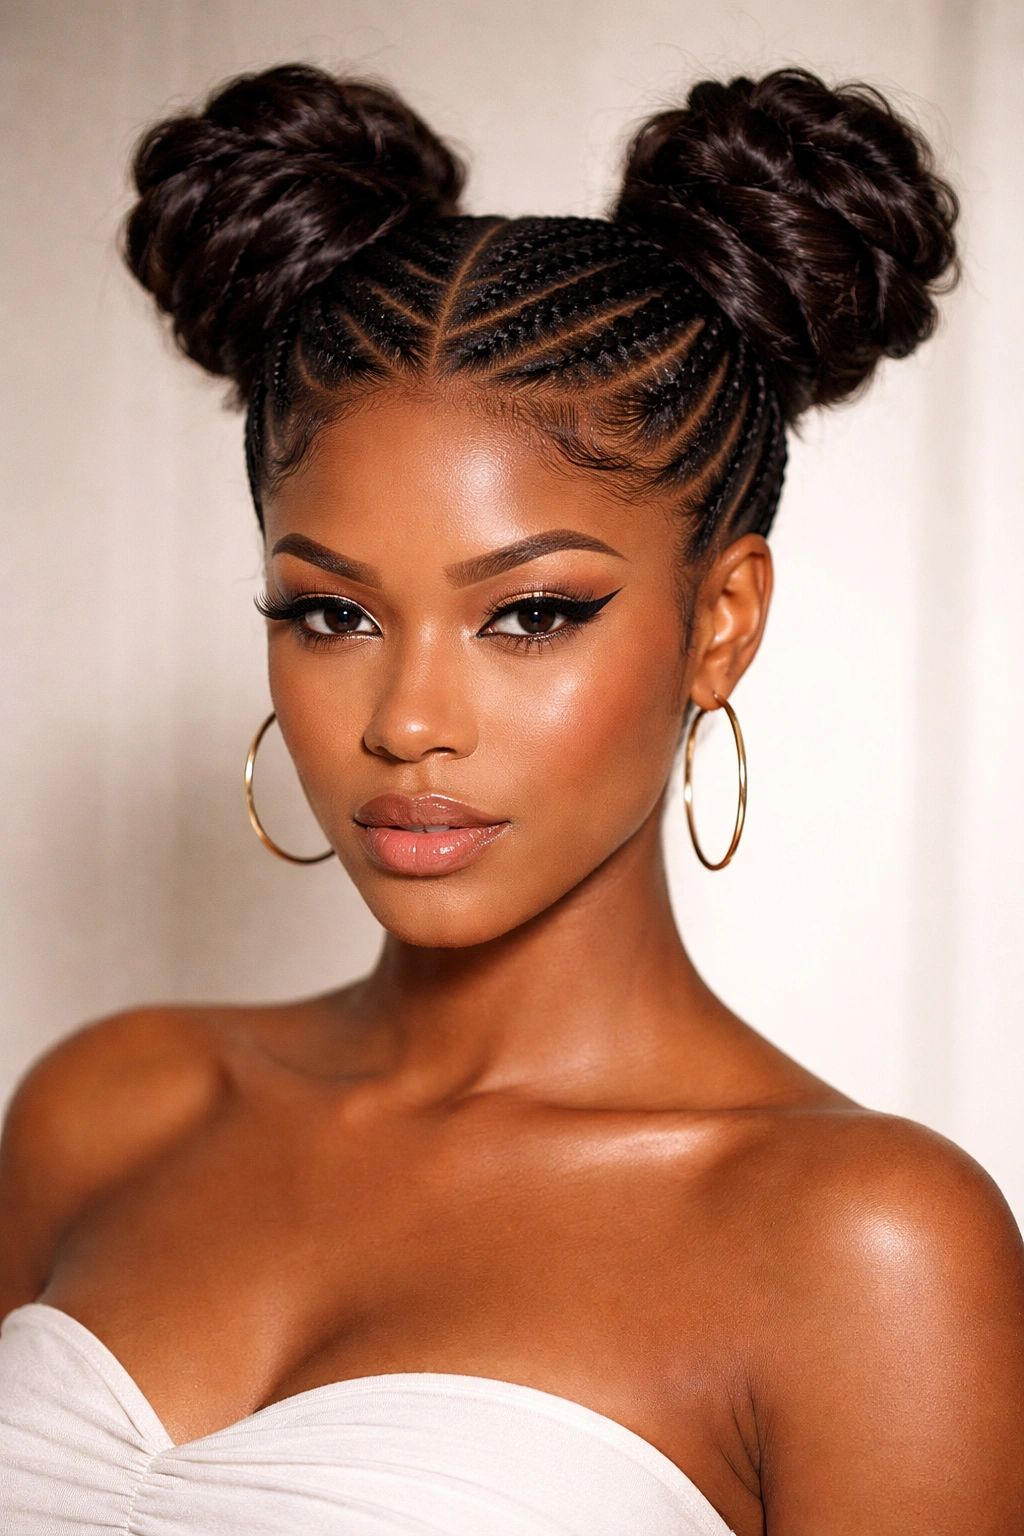
3. Double-Sided High Space Buns
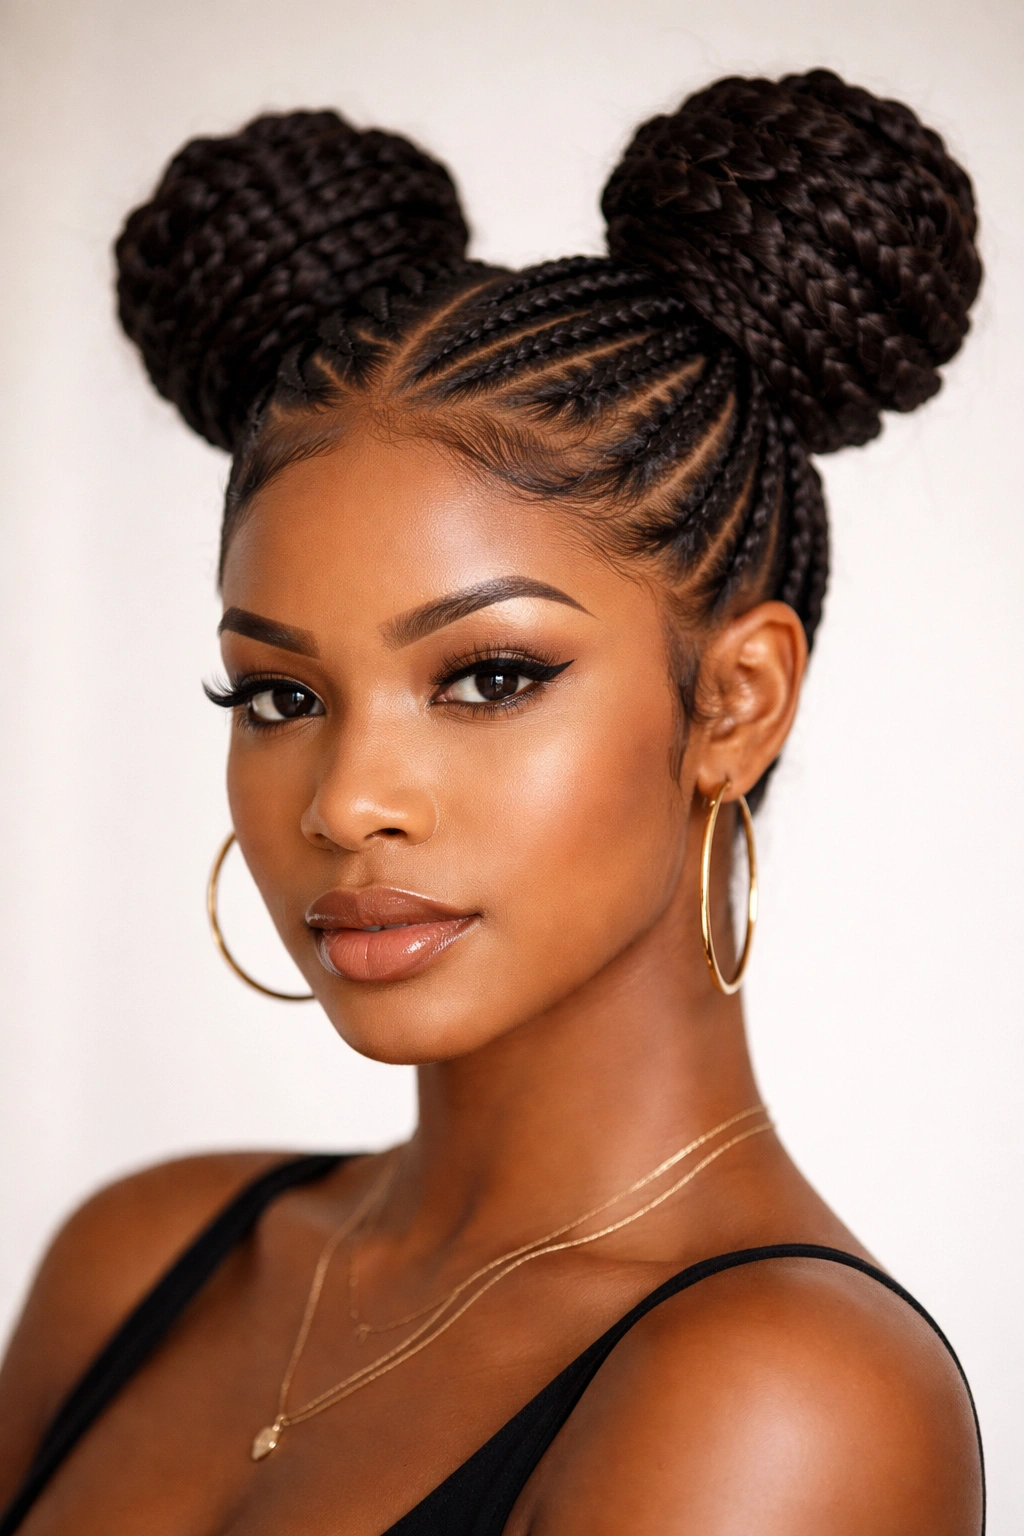
This style positions two substantial buns high on the crown—often directly above the ears—creating a bold, almost sculptural silhouette that commands attention. The feed-in cornrows follow the curve of the head upward from the nape and temples, meeting the bun bases at the crown’s highest point. The height placement fundamentally changes the style’s entire visual impact compared to more traditionally centered space buns.
Placement and Proportions
The critical element here is getting the bun height correct relative to your face shape and overall proportions. High buns work best when positioned at or slightly behind the crown’s apex, not directly above the ears. Map out your section lines first by creating a center part from forehead to nape, then drawing diagonal lines from behind each ear toward the crown. This creates two section shapes that taper as they travel upward. Your cornrows should follow these section lines naturally, with the width of each braid remaining proportional to the final bun size you want—thicker cornrows support larger, more dramatic buns.
Head Shape and Face Framing
High space buns genuinely flatter most face shapes, though the effect varies based on how you frame your face with braids. If you have a round face, creating braids that angle slightly backward and don’t fully close around the face (leaving some face-framing strands loose) provides a lengthening effect. For heart-shaped or angular faces, fuller buns positioned slightly forward on the crown create softness and balance. Take time during installation to assess how the braid lines shape your face before securing the buns completely.
Pro tip: When your buns sit extremely high, they’re more visible from a side profile, so make sure they’re symmetrical by checking them in a mirror from multiple angles before fully securing and styling.
4. Asymmetrical Feed-In Cornrow Space Buns
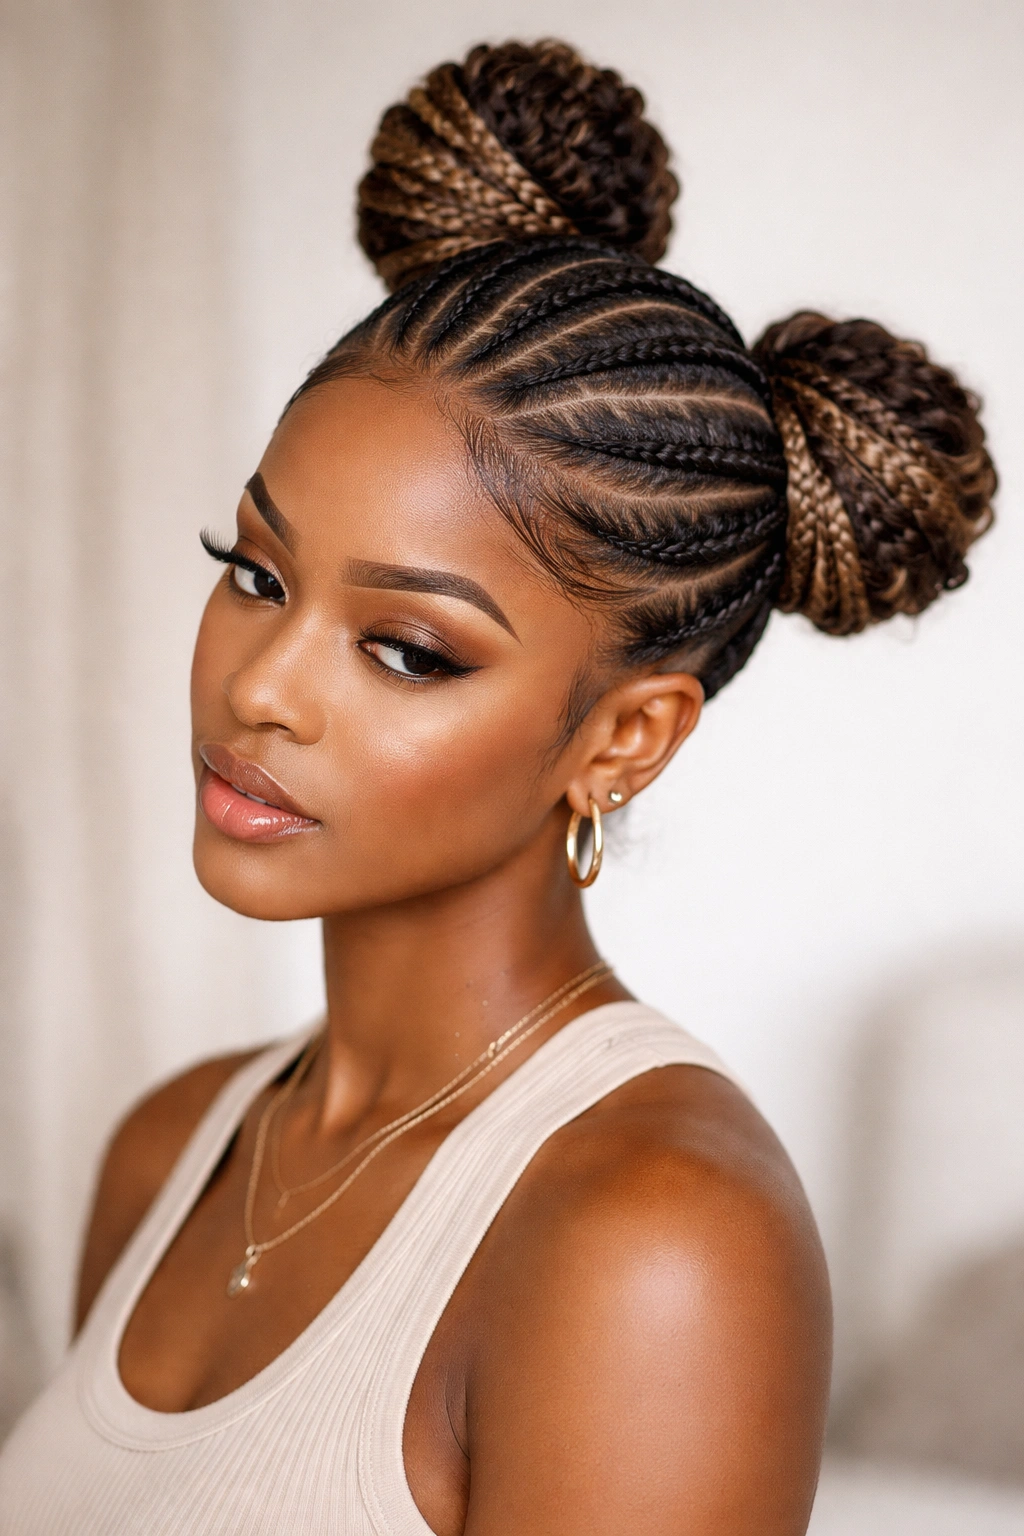
An asymmetrical layout puts one bun slightly higher or more toward the crown, while the other sits lower on the side—or places one bun at the crown and the other at the nape. This requires unequal section sizes and cornrow paths, which sounds complicated but creates a distinctly fashion-forward, contemporary aesthetic that feels intentional rather than accidental.
Planning the Asymmetry
Begin by deciding which side will have the higher or more prominent bun. Create your section lines with this asymmetry in mind—your center part might run from forehead to nape as usual, but your side sections can differ in width or angle. One side’s cornrow might travel in a gentle curve while the other travels more directly, or one might incorporate more zigzag or pattern variation. The key is making your choices deliberate and proportionally balanced—asymmetry works when it still feels visually coherent, not random or like a styling mistake.
Visual Balance Despite Uneven Placement
Even though the buns sit at different positions, you can create balance through bun size and fullness. If one bun sits higher and therefore more prominent, you might make it slightly smaller to avoid overwhelming the look. Conversely, if one bun sits lower, you could make it slightly fuller to draw equal visual attention. Experiment during installation—you can always adjust bun size and positioning slightly before fully committing. The best asymmetrical styles look intentionally designed, almost editorial.
Real talk: Asymmetrical styles require more confidence to wear because they’re noticeably non-traditional. If you love attention-getting, boundary-pushing hairstyles, this variation absolutely delivers. If you prefer flying under the radar, stick with symmetrical versions.
5. Thick Braided Base with Voluminous Buns
This approach prioritizes visual impact by using thicker feed-in cornrows (often created with thicker-than-normal sections of hair) as the foundation for oversized, genuinely voluminous buns. Where the classic version uses moderate-sized braids supporting proportional buns, this style embraces maximalism. The braids themselves become a statement element, not just an anchor for the buns.
Building Appropriate Bun Volume
Thick cornrows support chunky buns in a way that thinner braids simply cannot—the wider braid base provides more surface area for securing and shaping a large bun. To create truly voluminous buns on a thick cornrow foundation, you’ll want to either use hair extensions added at the ponytail stage (synthetic hair, human hair wefts, or bundles pinned onto your natural ponytail base) or ensure your natural hair has enough density and length to create genuine fullness. If you’re using extensions, choose a texture that matches your natural hair’s movement—kinky, coily, wavy, or straight versions all exist and blend seamlessly.
Installation Timeline and Styling Patience
Working with thicker braids takes longer—expect four to five hours for a two-bun style with thick cornrows. The upside is that thicker braids tend to hold their shape longer and require less maintenance during the wear period. When you’re securing the voluminous buns, resist the urge to make them perfectly sleek—the beauty of this style lives in its slightly textured, abundantly full appearance. Gently finger-fluff the bun sections rather than smoothing them into compactness.
Worth knowing: Voluminous buns with thick cornrows create noticeably more weight on your head than standard versions, so make sure you’re using secure bobby pins and possibly a few additional elastics positioned at different angles to distribute that weight and prevent slipping or headaches.
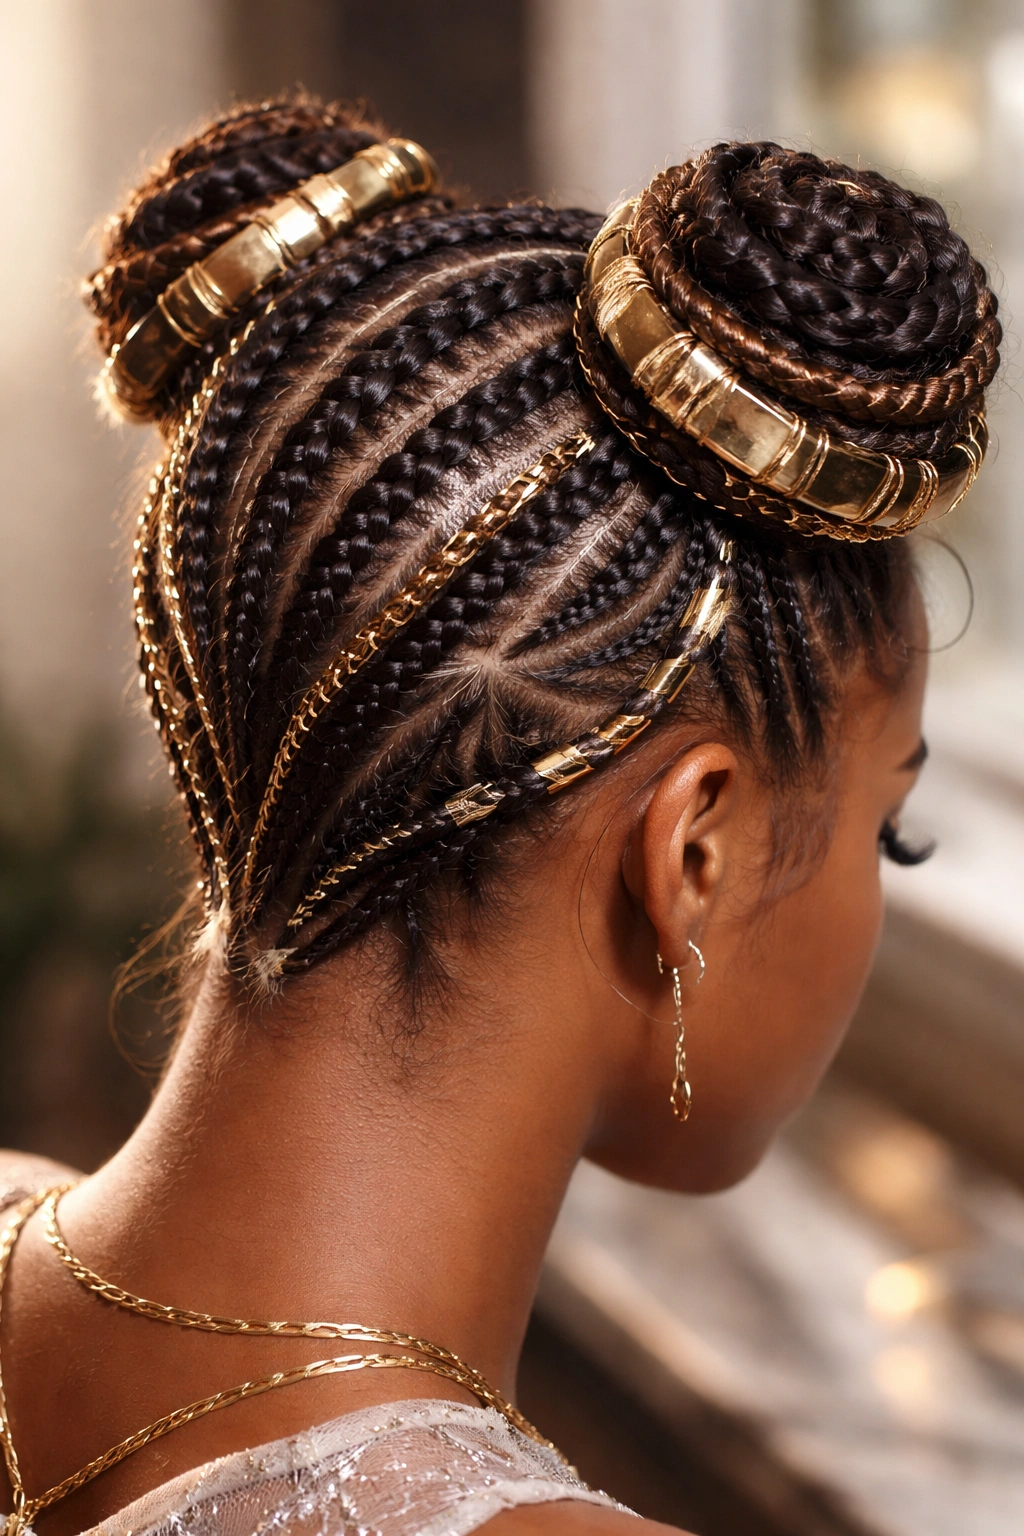
6. Goddess-Inspired Feed-In Space Buns
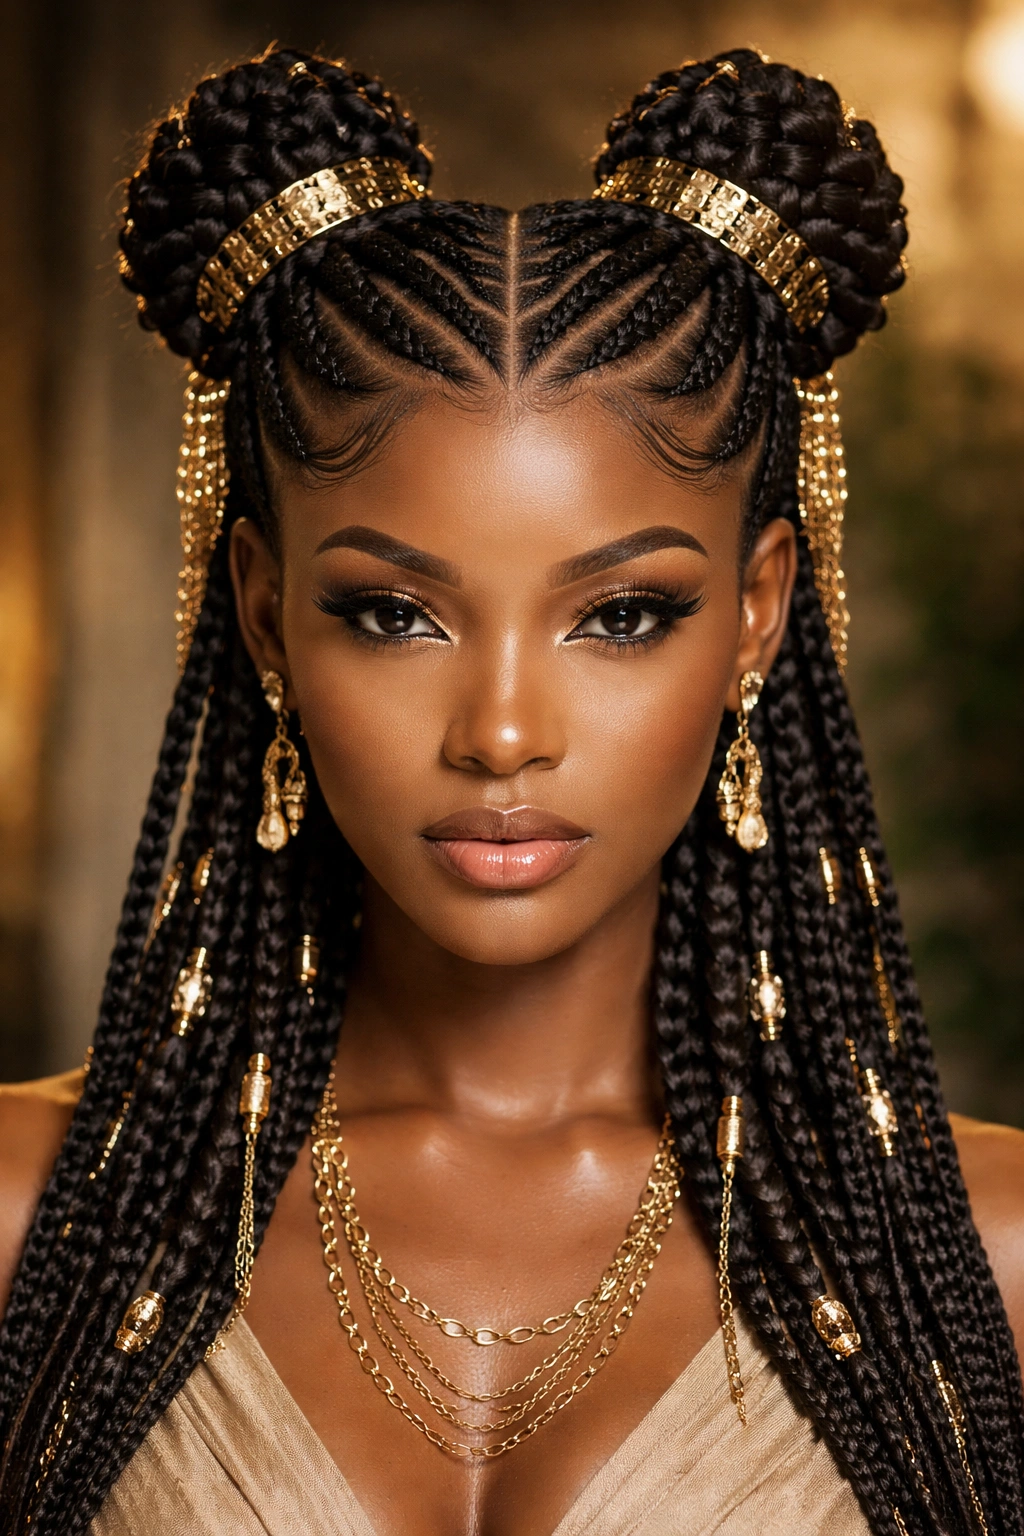
This style borrows from ancient Egyptian and African styling traditions, featuring elaborate feed-in cornrows that might include geometric patterns, multiple thin braids, or decorative elements like gold cuffs, beads, or wrapped sections. The buns maintain the essential space bun silhouette but feel elevated and ceremonial rather than casual. This version transforms the hairstyle into something that feels genuinely artistic.
Incorporating Pattern and Decoration
The cornrow base is where you introduce pattern—consider cornrows that angle in different directions, zig-zag geometrically, or include subtle loops and curves rather than traveling in simple straight lines. As you braid, you might incorporate thin synthetic hair in contrasting colors, gold thread, or decorative strings that create visual interest without adding significant weight. The buns themselves can remain relatively simple in shape, letting the braided foundation carry most of the visual complexity. Alternatively, wrap sections of the buns with gold wire, thread, or coordinating fabrics for additional ornamentation.
Styling for Special Occasions
Goddess-inspired space buns work beautifully for special events, festivals, performance, or any situation where you want your hair to feel intentionally elevated and expressive. They photograph beautifully because the pattern and decoration catch light dynamically. Consider coordinating any decorative elements with your outfit’s color palette or metallic accents for a cohesive overall look.
Pro tip: When adding beads, cuffs, or wrapped sections, secure them during installation rather than trying to add them after the style is complete—this prevents accidentally pulling on the braids or your natural hair, which causes breakage and discomfort.
7. Triangular Cornrow Pattern to Space Buns

This geometric variation uses three or more feed-in cornrows positioned in a triangular layout, with one bun at the peak of the triangle and one or two buns at the base. This requires more complex sectioning and planning but creates a visually sophisticated, almost architectural appearance. The braids work together to frame the face and create a distinctive silhouette.
Mapping the Triangular Section
Start by identifying your three anchor points: these might be your hairline center (top vertex), your left temple (bottom-left vertex), and your right temple (bottom-right vertex). Create cornrow sections that connect these points, then add additional internal braids that fill the space between your main three. Your primary bun will sit at or near the crown (top vertex point), while secondary buns sit on either side at roughly ear-height. This requires precision during sectioning, so use clips to map out your plan before you start braiding.
Creating Visual Harmony
The triangular layout naturally draws the eye upward and inward, which creates a lifting, face-slimming effect for most face shapes. The pattern also creates interesting visual lines that can be accentuated by your clothing and accessories. Make sure your buns are proportionally balanced—if the top bun is significantly larger than the lower ones, the triangle feels top-heavy. Conversely, if lower buns dominate, the style feels unstable.
Real talk: Triangular patterns require more advanced sectioning skills and take longer to execute than simpler layouts. If you’re getting this done professionally, discuss the pattern with your braider beforehand with photos or sketches so they understand exactly what you’re envisioning.
8. Sleek Center Part Feed-In Cornrows
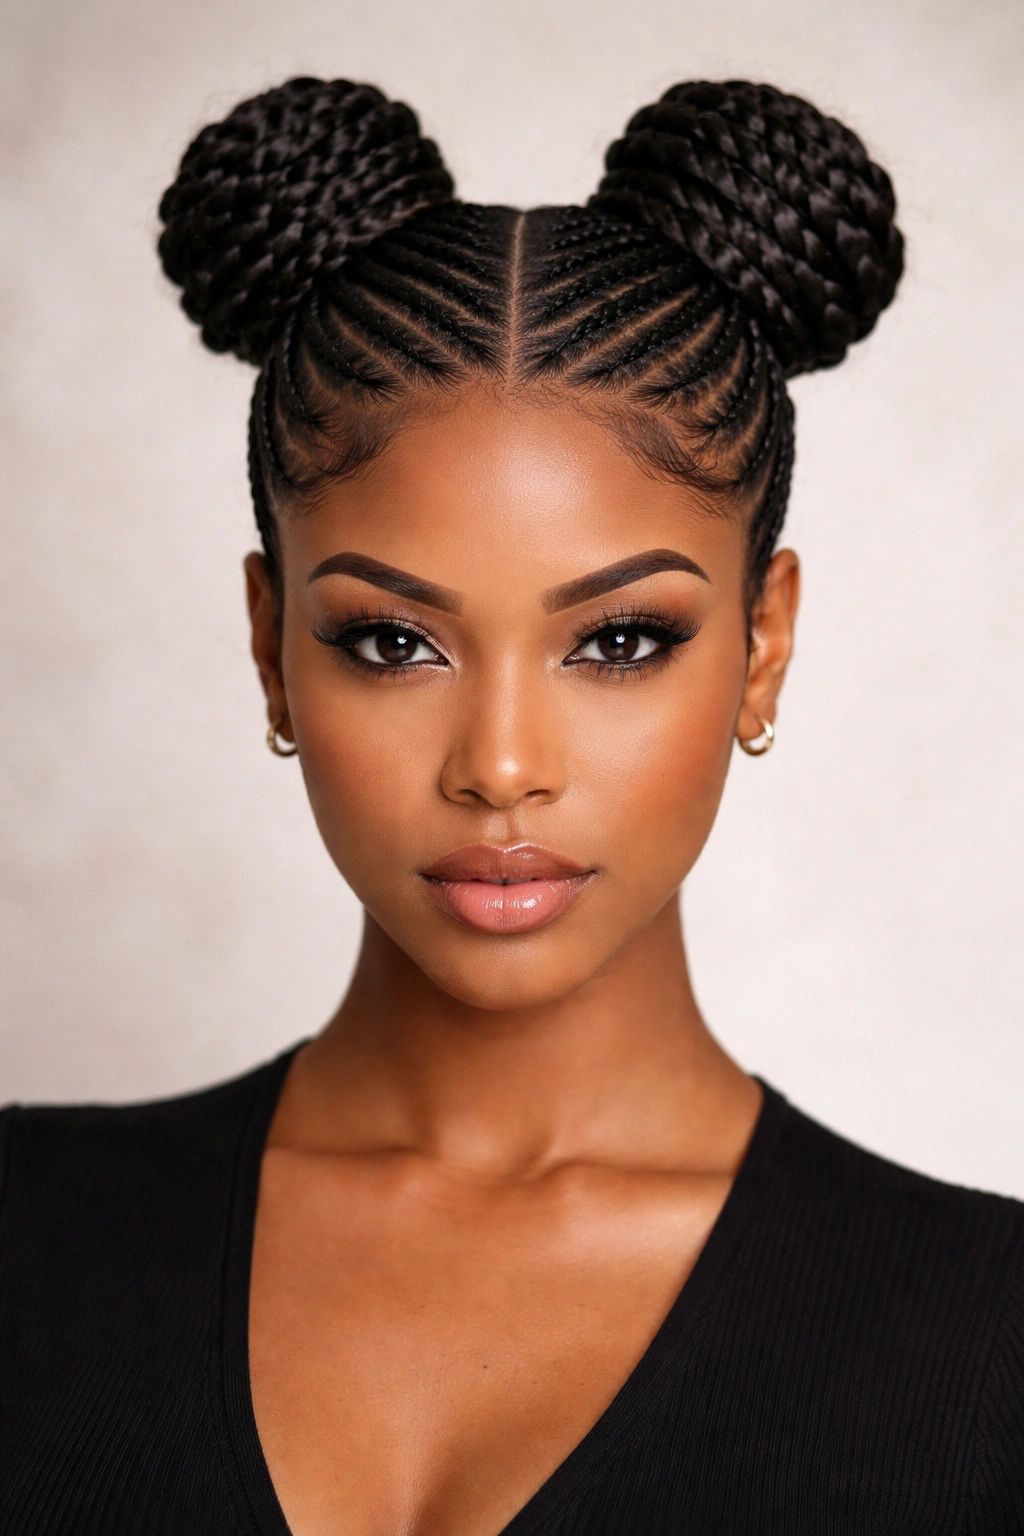
This timeless approach uses a precise center part running from forehead to nape, creating two perfectly symmetrical, sleek cornrow sections that flow upward to symmetrical buns. The emphasis is on precision and polish rather than volume or texture—every hair lies flat, every braid follows an exact line, and the overall impression is refined and intentional. This version suits professional settings, formal events, and anyone who appreciates understated elegance.
Achieving True Sleekness
Sleekness requires two things: excellent tension during braiding (tight enough to lay flat without causing discomfort or breakage) and proper edge treatment. Use a firm-hold edge control on your hairline and part line, smoothing every baby hair against your scalp. The cornrows themselves should be braided smoothly without any loose texture or puffiness—take your time with each braid section, ensuring consistent tension throughout. When you reach the bun base, the transition should feel seamless, as though the bun is a natural continuation of the braided line.
Maintenance of Sleekness
This style’s sleek aesthetic requires more active maintenance than textured variations. Plan to smooth your edges daily using edge control or a soft brush. Check braid tension every few days—if you notice any loosening, gently tighten by re-braiding the loose portions at the base of the buns. The sleekness gradually softens as the style ages, which is natural and acceptable if you prefer a slightly lived-in appearance, but if you want to maintain the original precision look, you’ll need to invest time in upkeep.
Pro tip: Apply edge control or lightweight moisturizing cream to your hairline and part line before bed and keep it there overnight—this prevents the part from shifting and keeps edges smoother throughout the wear period.
9. Zigzag Feed-In Cornrows with Space Buns
This playful variation uses cornrows that travel in a diagonal or zigzag pattern rather than straight vertical lines, adding movement and visual interest to the foundation. The buns themselves remain classic in shape, but the braided base feels more dynamic and creative. This strikes a nice balance between playfulness and polish—it’s more adventurous than a straight cornrow style but still wearable for daily life.
Creating Consistent Zigzag Lines
To create zigzag cornrows, you’ll need to plan your braid path before you start braiding. Imagine diagonal lines running from one side of your head to the other, creating a zigzag pattern across your scalp. Your cornrows should follow these lines, angling left, then right, then left again as they travel upward toward the bun bases. This requires you to section your hair accordingly—your sections won’t be the standard vertical strips, but rather angled, stacked segments that follow your zigzag path.
Visual Effects of Angular Braids
Diagonal and zigzag cornrow patterns create an illusion of width and movement across the crown. They photograph beautifully from above and at angles, catching light differently than straight braids. This pattern also works well for drawing attention away from any areas of your hairline or crown that you might feel self-conscious about—the pattern’s movement creates visual distraction in the best way.
Worth knowing: Creating consistent zigzag lines requires practice and patience. If you’re attempting this for the first time, practice on your own head at a slower pace, or ask an experienced braider to guide you through the process.
10. Chunky Feed-In Braids with Bun Topknots

This version uses noticeably thick feed-in cornrows as the primary visual element, with smaller secondary buns positioned on top of each main bun—creating a two-tiered bun situation. This requires more hair and more securing power but creates a genuinely striking, voluminous effect that photographs like a work of art. The chunky braids and stacked buns together create sculptural dimensionality.
Stacking Bun Sections
To create this effect, secure your primary ponytail at your intended bun location with a thick elastic. Form this into your first (larger) bun. Then, take a small section of hair from the top of this bun—roughly three to four inches in diameter—and twist or braid it up onto itself, forming a secondary topknot bun that sits directly on top of the primary bun. Secure this smaller bun with bobby pins pinned into the larger bun base. The two buns should look intentionally stacked, not accidental.
Volume and Weight Distribution
Two-tiered buns genuinely work best when you’re using thick cornrow foundations and either substantial natural hair or added extensions. Otherwise, the top bun can look insubstantial or precarious. Make sure your bobby pins are secure enough to prevent the topknot from shifting or falling throughout the day—test the stability before considering the style complete.
Pro tip: To make topknot buns feel intentional rather than like an afterthought, ensure the smaller bun uses the same hair texture as the lower bun. If you’ve used extensions for the primary bun, incorporate the same extensions into the topknot for visual cohesion.
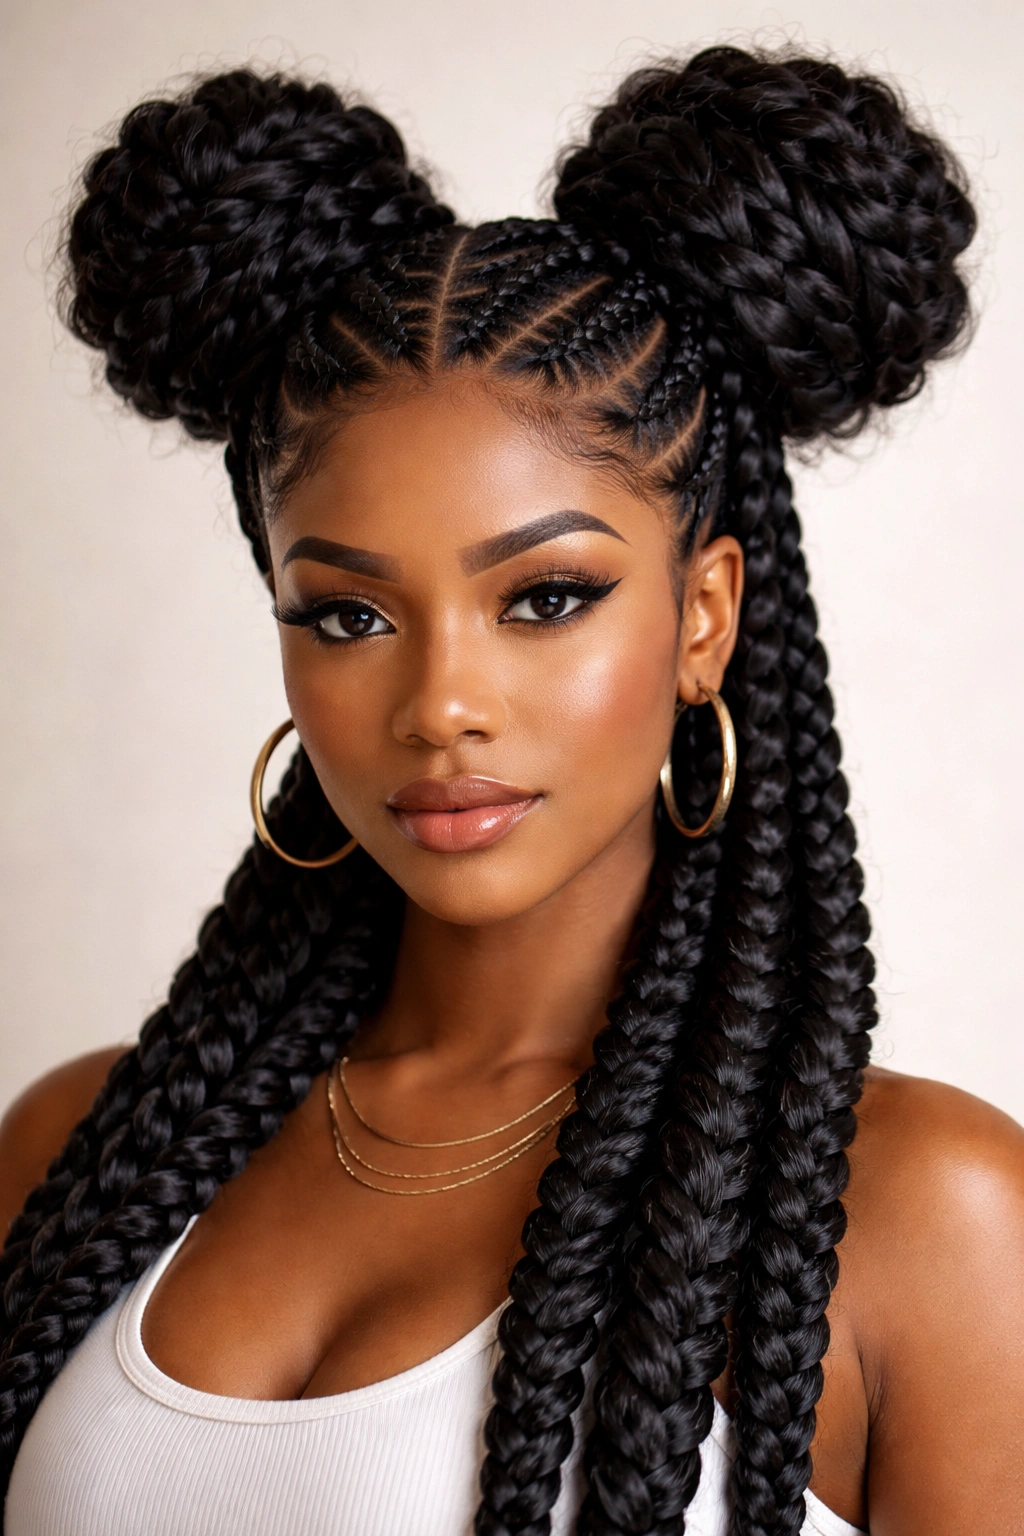
11. Three-Bun Configuration with Feed-In Cornrows
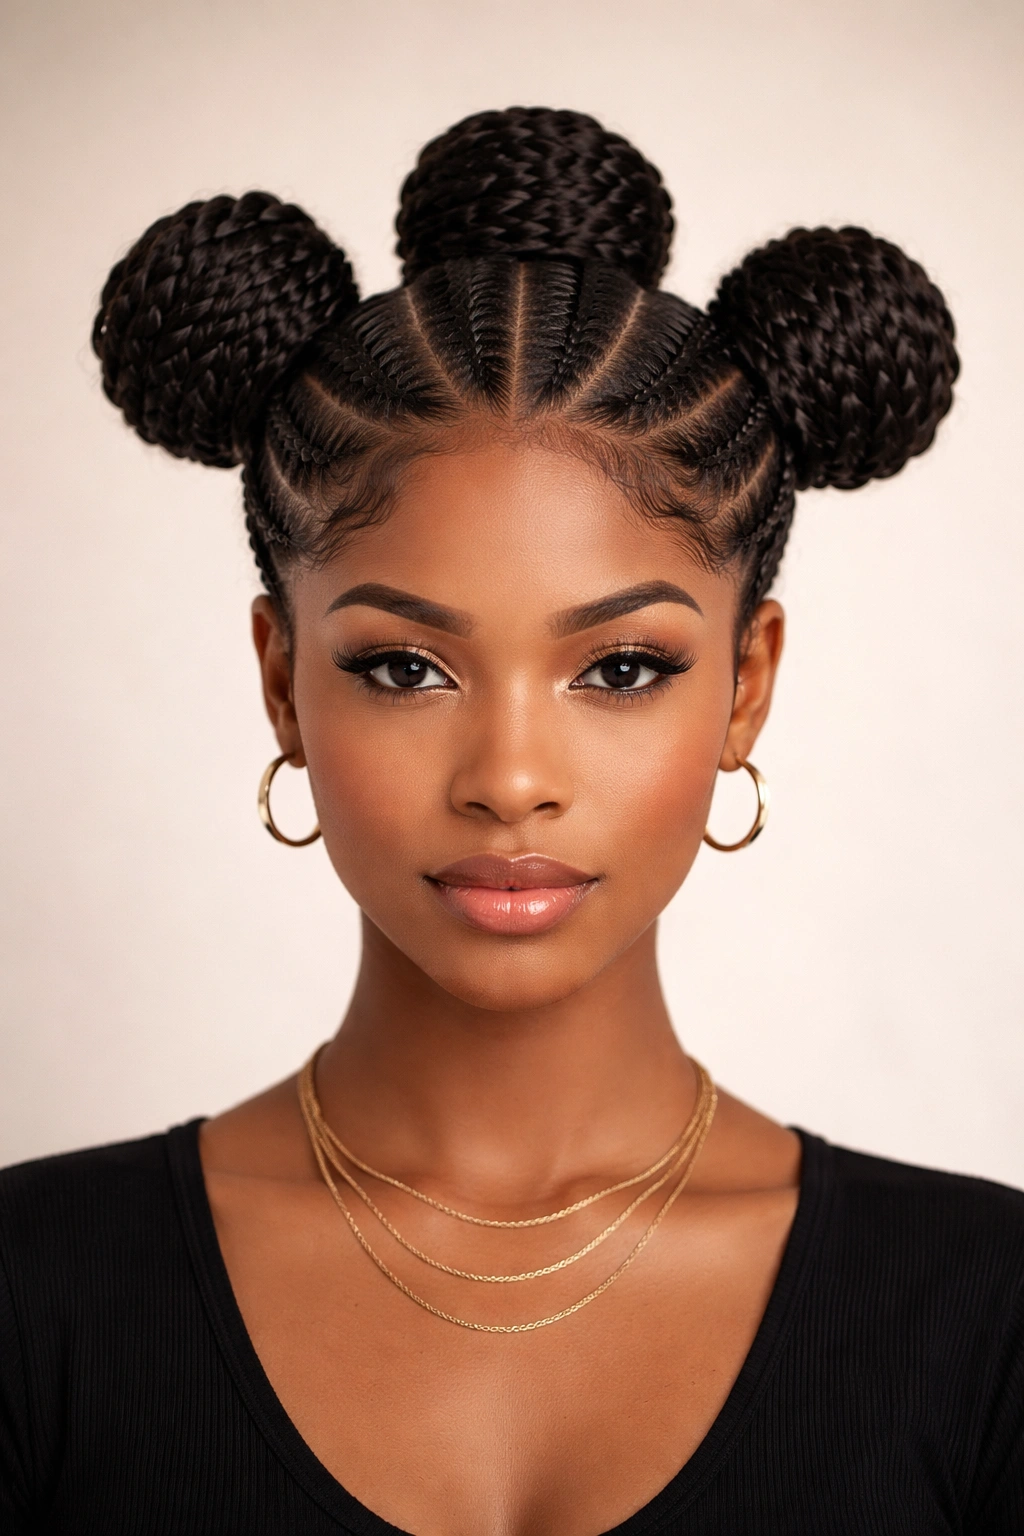
Instead of the standard two-bun space bun, this approach creates three distinct buns arranged in a triangle (one at the crown, two at mid-head height on either side) or a vertical line (high bun, middle bun, lower bun at the nape). Three buns require more careful sectioning and planning but create a genuinely unique silhouette that feels bold and intentional.
Planning Three Bun Placement
For a triangular arrangement, place your highest bun at or just behind the crown’s apex, and position your two lower buns at roughly ear height on either side. Your cornrow paths should travel from the nape upward to each bun location. For a vertical line arrangement, space three buns evenly from crown to nape, with cornrows connecting them vertically. Whichever arrangement you choose, ensure the bun sizes are roughly proportional—three tiny buns can look sparse, while three enormous buns can feel overwhelming.
Sectioning Complexity
Three buns require you to create three separate sections, which means more careful initial sectioning and planning. Use clips to map out your sections before you start braiding. The bun placements should feel balanced and intentional, not random. Step back frequently during installation to assess your progress from different angles.
Real talk: Three buns is genuinely bold and not for everyone, but if you love making a distinctive style statement, this variation is undeniably striking and unique.
12. Intricate Feed-In Cornrow Design with Metallic Wraps
This elevated version incorporates detailed cornrow patterns and accents them with gold, silver, or copper wire/thread woven directly into the braids, plus metallic cuffs or wraps applied to the bun bases. This transforms the hairstyle into something genuinely jewelry-like and artistic. The metallic elements catch light dramatically and elevate the entire look into special-occasion territory.
Integrating Metallic Elements During Braiding
As you feed hair into your cornrows, simultaneously feed thin metallic wire or thread alongside the hair strands. The wire should be positioned so it winds around and through the braid visibly but doesn’t dig into your scalp or create discomfort. You can use gold, silver, rose gold, or even iridescent metallic thread—choose colors that complement your outfit or personal aesthetic. Once you’ve completed the cornrows, wrap sections of the bun bases with coordinating metallic wire or decorative cuffs, securing them carefully so they don’t shift or catch on hair.
Durability and Maintenance
Metallic accents hold up well throughout the wear period and maintain their shine. Avoid getting them wet during your regular maintenance showers—keep them protected by wrapping your braids and buns loosely in a silk scarf. If you notice metallic thread starting to loosen or unravel, gently tighten it or secure it with a tiny dab of clear nail polish applied to where the thread ends.
Pro tip: Photograph this style in natural daylight and under different lighting conditions—the metallic elements photograph beautifully and create dynamic visual effects that change based on how light hits them.
13. Low Feed-In Cornrows with Back Space Buns
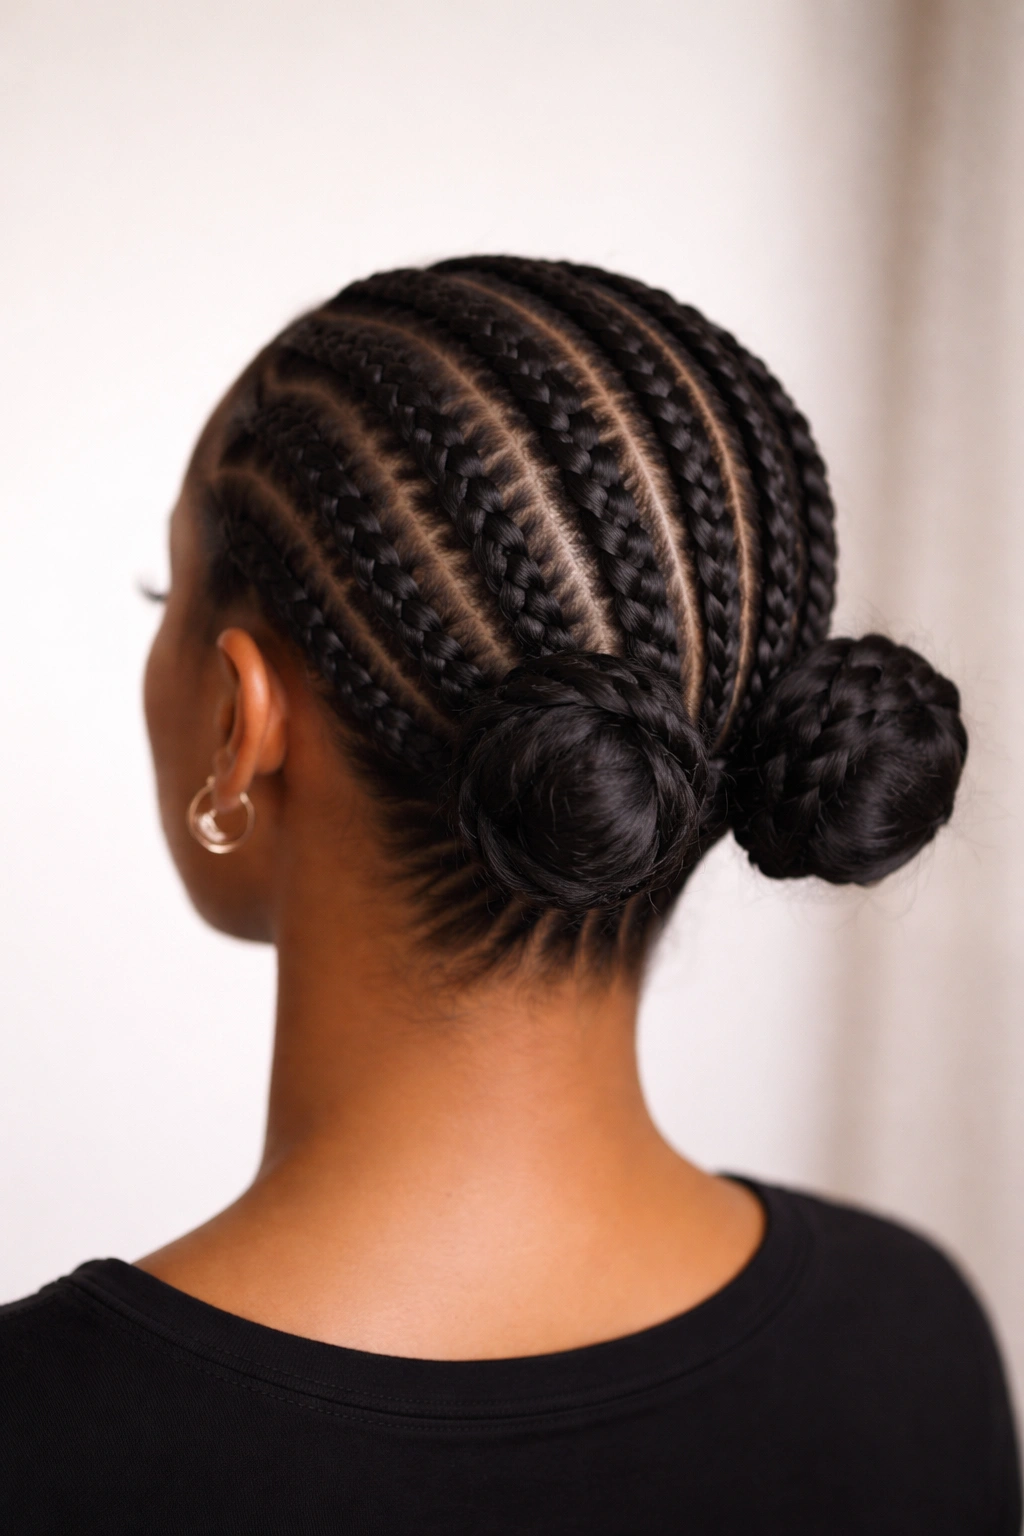
Rather than positioning buns at the crown, this variation places them lower on the back of the head—at roughly mid-scalp height or the nape area. The feed-in cornrows still run from below upward, but they travel shorter distances. This creates an unexpectedly elegant, understated aesthetic that works beautifully for professional settings or anyone who wants the protective benefits of braids without the boldness of crown-height buns.
Adjusted Placement and Styling
Low buns feel more conservative and less playful than high buns, which makes them excellent for workplaces, formal events, or personal preference reasons. The cornrows become more prominent visually since the buns sit lower and don’t draw as much attention. Make sure your low buns are still secure—they’re at risk of pulling out or shifting more than high buns if they’re not properly anchored and if you’re moving around a lot.
Hairstyle Versatility
Low space buns pair beautifully with bold earrings, a statement necklace, or an updo accessory positioned at the back of your head. You can also style your low buns to sit slightly forward (toward the sides of your head) rather than directly at the back, which creates a completely different visual effect. Experiment with positioning during installation to see what feels and looks best for your face shape.
Worth knowing: Low-placed buns require slightly less hair volume to look full than high buns do, since there’s less gravity pulling at them. This makes low bun placement an excellent choice if you have fine or thin hair.
14. Spiral Feed-In Cornrows with Wrapped Buns
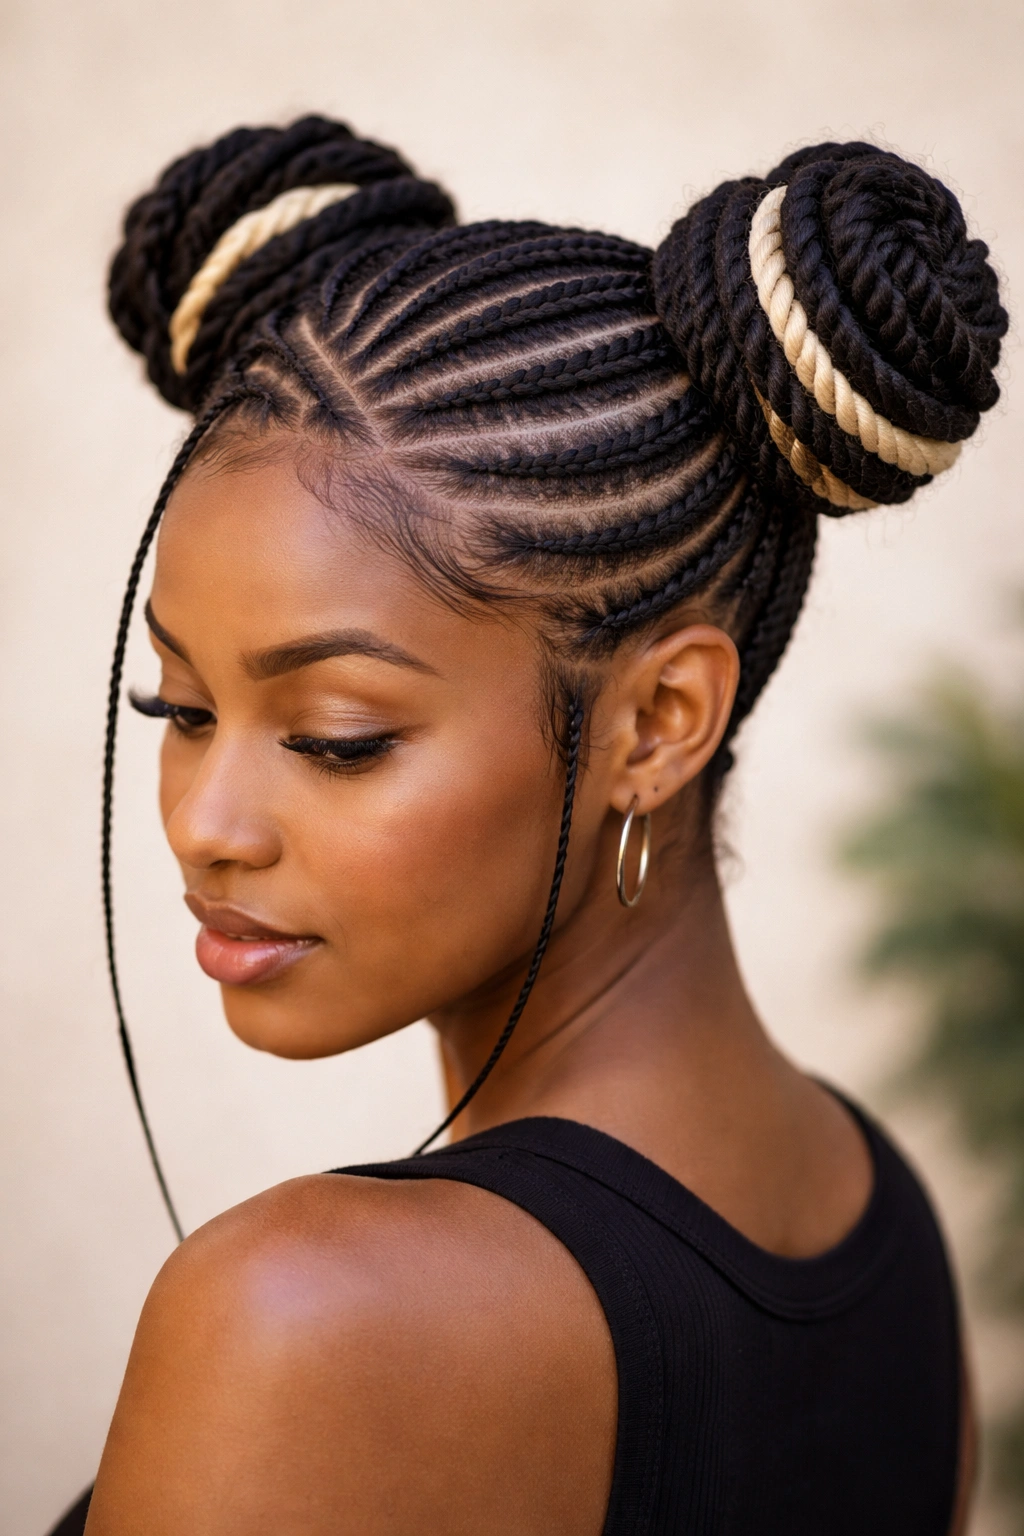
This playful variation creates cornrows that spiral or twist around the head toward the bun locations, rather than traveling in straight or angled lines. The braids themselves might incorporate gentle loops or curves, and the buns are wrapped with contrasting yarn, thread, or fabric to create additional visual interest. This style feels creative and artistic while remaining wearable.
Creating Spiral Braiding Patterns
To create spiral cornrows, plan a winding path from your nape upward toward your bun locations—imagine a gentle spiral staircase or a nautilus shell shape. Your cornrows should follow this path, creating curves and gentle loops rather than straight lines. This requires careful sectioning and a clear mental picture of your final pattern before you start braiding. It’s easier to execute if you’ve already successfully created zigzag or angled patterns.
Wrapping Techniques for Buns
Once you’ve completed your spiral cornrows and secured your buns, wrap the bun bases with yarn, thread, or fabric strips. You can spiral the wrapping material around the bun, creating lines that complement your cornrow spiral pattern. Use colors that coordinate with or contrast against your natural hair color and braids. Secure the wrapping ends by tucking them underneath the bun and securing with bobby pins.
Pro tip: When wrapping buns with yarn or fabric, use natural fibers like merino wool or cotton when possible—synthetic materials can catch and tangle in your braids more easily.
15. Heart-Shaped Feed-In Cornrow Pattern
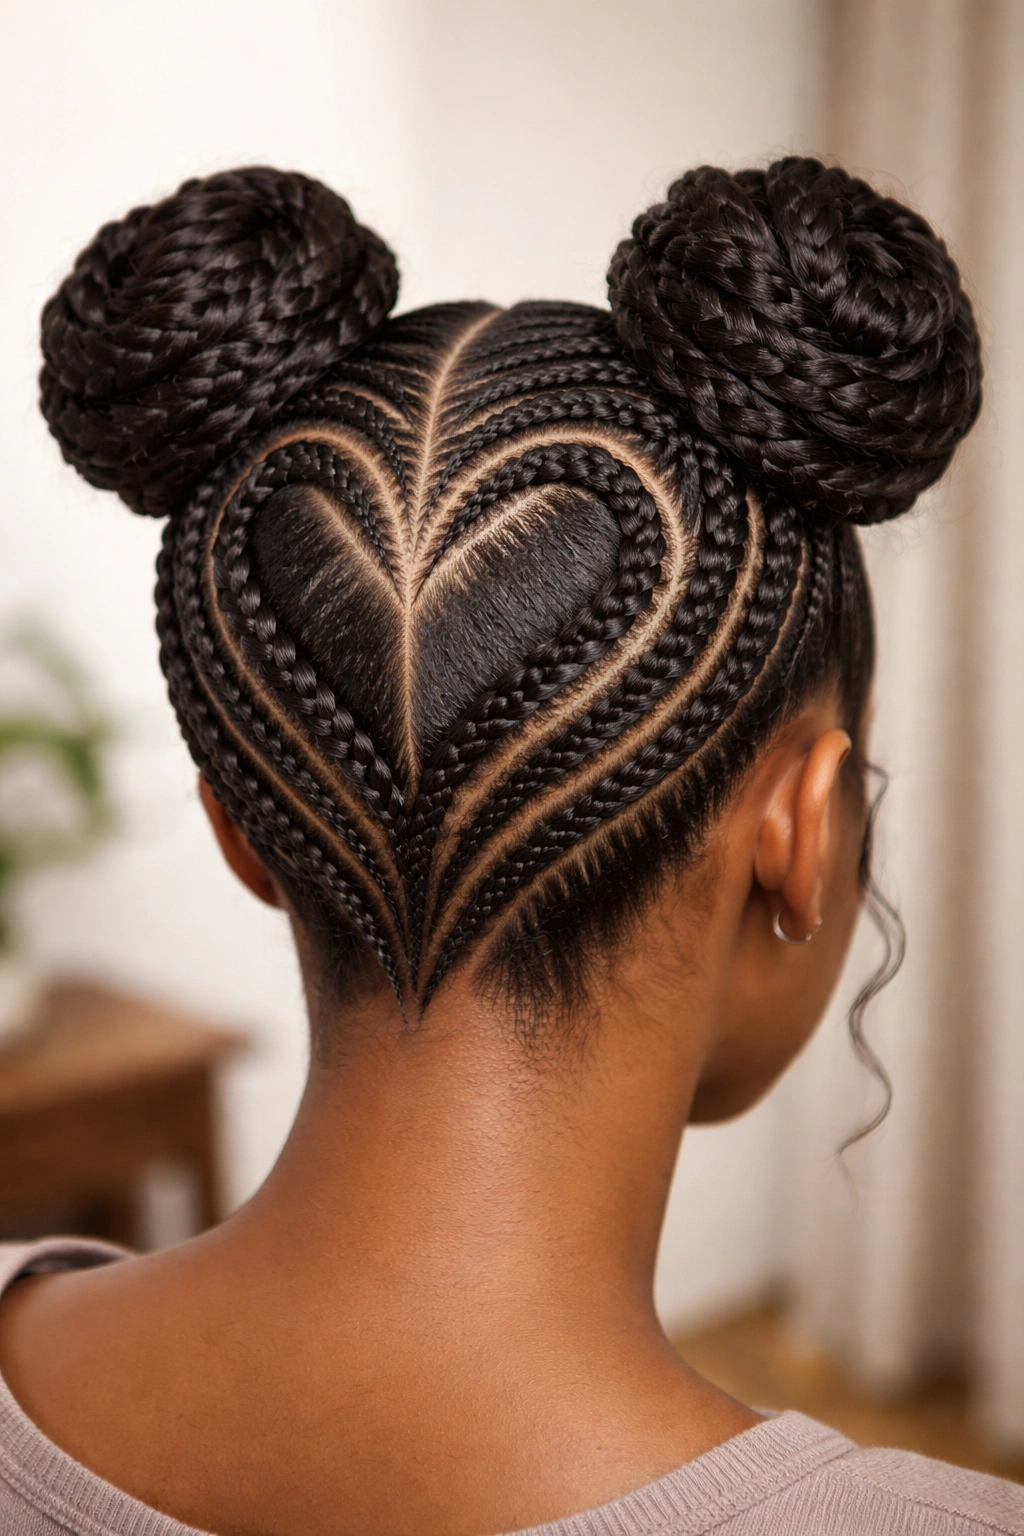
This geometric variation creates cornrow lines that form or frame a heart shape on your scalp, with space buns positioned at the top points of the heart or centered within it. This requires precise sectioning and planning but creates an utterly unique, romantic, and visually distinctive style that genuinely turns heads.
Mapping the Heart Shape
Visualize a heart shape on your head—the point of the heart sits at your nape, the top curves of the heart sit at the crown, and the dips of the heart sit at roughly ear-height. Create cornrow sections that follow these contours. You might create two braids that form the curved top portions of the heart, then additional braids that angle downward toward the pointed bottom. Your space buns can sit at the two top curves of the heart (creating the distinctive heart-top silhouette) or centered within the heart shape.
Skill and Planning Requirements
Heart-shaped cornrow patterns require intermediate to advanced braiding skills and excellent spatial visualization. Before you start braiding, use a fine-tooth comb or bobby pins to mark out your pattern on your scalp, creating visual guides you can follow. Taking a photo of your planned pattern from above is helpful if you’ll be having someone else braid this style, so you can show them exactly what you’re envisioning.
Real talk: Heart-shaped patterns are genuinely stunning and unique, but they require more time, skill, and planning than standard layouts. This is a style to invest in fully, not something to attempt hastily.
16. Multi-Strand Feed-In Cornrows with Messy Buns
This textured variation uses multiple thinner feed-in cornrows (often four to six braids total instead of the standard two) that create a more complex, intricate foundation for messier, less-refined buns. The braids themselves become more prominent as a visual element, and the buns feel deliberately undone rather than tightly constructed. This strikes a balance between protective styling and intentionally casual, lived-in aesthetics.
Multi-Strand Sectioning
Begin by dividing your hair into four to six sections rather than the standard two. These sections can be arranged however you like—you might create vertical strips, diagonal sections, or combine both patterns. Each section gets its own feed-in cornrow, and each cornrow travels upward to either a individual small bun or a cluster bun made from multiple cornrow ends twisted together. The more braids you create, the more time the installation takes, but the final style creates genuinely intricate visual texture.
Achieving the “Messy” Aesthetic Intentionally
Messy buns created from multiple cornrows actually look more intentional than an accidental mess. Gently pull and fluff each bun slightly, loosening the tension enough that they look soft and textured rather than perfectly round. Some braiders and stylists pull individual strands from the braids themselves to create additional wispy texture. This creates a romantic, romantic, effortlessly-styled appearance that photographs beautifully.
Pro tip: Multi-strand styles actually help distribute hair tension more evenly across your scalp than two-bun styles do, since the weight and pulling points are distributed across more braids. This makes them an excellent protective styling choice if your hairline or crown is sensitive.
17. Sleek Diagonal Feed-In Cornrows to Side Buns
This chic variation runs feed-in cornrows diagonally across the back of the head (from one side toward the opposite side) and routes them to buns positioned on the sides of the head rather than at the crown. This creates an asymmetrical, fashion-forward appearance that feels editorial and intentional. The diagonal cornrows create interesting visual lines and proportion shifts.
Diagonal Routing and Bun Placement
Plan diagonal cornrow paths that begin at one side of your nape and travel diagonally upward and across toward the opposite temple or ear area. Your bun will sit at the endpoint of this diagonal path. You might create two diagonal cornrows (one traveling from left-nape to right-temple, another from right-nape to left-temple) or create multiple diagonal braids that crisscross in a more complex pattern. The buns sit at the endpoints of these diagonal routes, creating side-positioned space buns.
Visual Effects of Diagonal Lines
Diagonal lines create an illusion of movement and elongation across the head. They work beautifully for widening narrow face shapes and creating visual interest across the sides of the head and face. This variation photographs exceptionally well from side profiles and three-quarter angles, making it excellent for content creation or special event styling.
Worth knowing: Side-positioned buns require secure anchoring since they’re subject to more gravity and friction than crown-positioned buns. Make sure your elastic and bobby pins are extremely secure to prevent shifting throughout the day.
18. Retro-Inspired Feed-In Space Buns
This nostalgic variation draws inspiration from 1950s-style “poodle cuts” and vintage space-age aesthetics, featuring perfectly round, precisely sculpted buns positioned high on the crown with sleek feed-in cornrows underneath. The emphasis is on creating truly symmetrical, polished buns that feel retro-futuristic rather than contemporary casual. This version celebrates the kitsch and charm of vintage styling while maintaining modern protective styling benefits.
Achieving Retro Precision
Retro-inspired space buns require precise installation with careful attention to symmetry and roundness. Secure your ponytails at exact mirror-image positions, then wrap them perfectly round and compact, pinning every hair firmly in place. The buns should look like identical circles from every angle. Use strong-hold edge control on your hairline, creating sharp definition at the part line and a pristine hairline. Consider adding vintage accessories like small hair ornaments, decorative clips, or hair flowers from the 1950s to accent the retro aesthetic.
Styling for Vintage Events
This version works beautifully for vintage-themed events, costume parties, or anyone who loves retro aesthetics and fashion. The style pairs perfectly with coordinating outfits in retro colors and styles, and photographs beautifully in both color and black-and-white. The geometric perfection of the buns creates a striking silhouette that’s instantly recognizable as vintage-inspired.
Pro tip: If you want to enhance the retro aesthetic, consider styling the rest of your look to match—red lipstick, winged eyeliner, and period-appropriate clothing create a complete, cohesive look rather than just a retro hairstyle.
Key Takeaways
Feed-in cornrow space buns represent far more than just a trendy hairstyle—they’re a versatile protective styling option that you can interpret in countless ways depending on your personal aesthetic, hair texture, and lifestyle needs. The variations outlined here span from the foundational classic version all the way to intricate, artistic interpretations that feel like genuine sculpture or wearable art.
The installation time, maintenance requirements, and visual impact vary significantly based on which variation you choose. A simple classic style with thin cornrows might take two hours and look casual and youthful, while an intricate geometric pattern with thick braids and multiple buns could take four to five hours and feel genuinely editorial. Neither approach is inherently “better”—they’re simply different expressions of the same fundamental protective styling technique.
The protective benefits remain consistent across all these variations: your ends are tucked away and secured, daily manipulation decreases significantly, and your natural hair gets a genuine break from styling and heat. Combined with proper nighttime care, moisturizing treatments, and intentional maintenance throughout the wear period, feed-in cornrow space buns can be an integral part of a genuine hair health regimen. Whether you’re drawn to bold sculptural statements or understated elegant simplicity, you’ll find a version of this style that feels authentically you.