Long, flowing hair paired with cornrows is a combination that’s hard to beat — and cornrow ponytails take that aesthetic to another level entirely. Whether you’re looking for a protective style that keeps your length secure while looking polished, or you want a low-maintenance option that still turns heads, cornrow ponytails deliver both function and serious style. The beauty of working with long hair is that you have endless possibilities for how you braid, position, and finish the style.
The key to nailing a cornrow ponytail on long hair is understanding how the braids work together with the length you’ve got. You want the cornrows themselves to feel intentional and defined, while the ponytail portion showcases the health and fullness of your hair. The style can be as laid-back or as intricate as you want — some people keep it simple with clean lines, while others layer in curves, textures, and decorative elements. The good news is that once you find the right cornrow ponytail structure for your hair texture and lifestyle, it becomes one of those go-to styles you can recreate again and again.
Let’s explore eleven different ways to style cornrow ponytails when you’ve got long hair to work with. Each variation offers a distinct look, difficulty level, and vibe, so whether you’re prepping for an everyday aesthetic or a special occasion, you’ll find something that works.
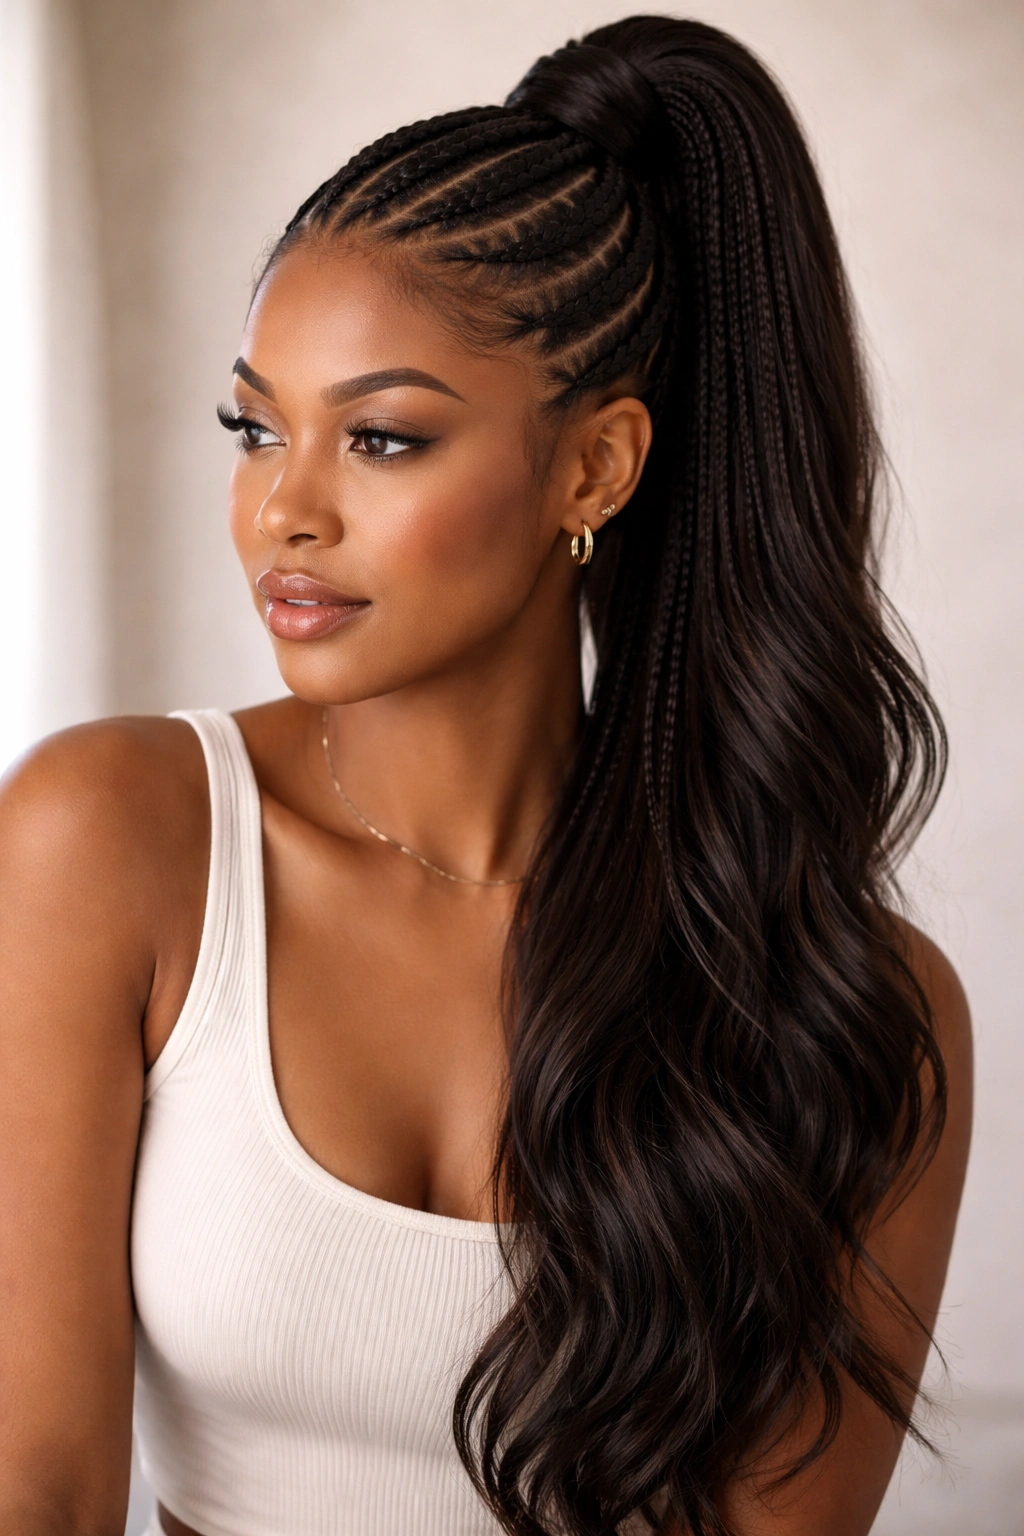
1. Classic High Cornrow Ponytail
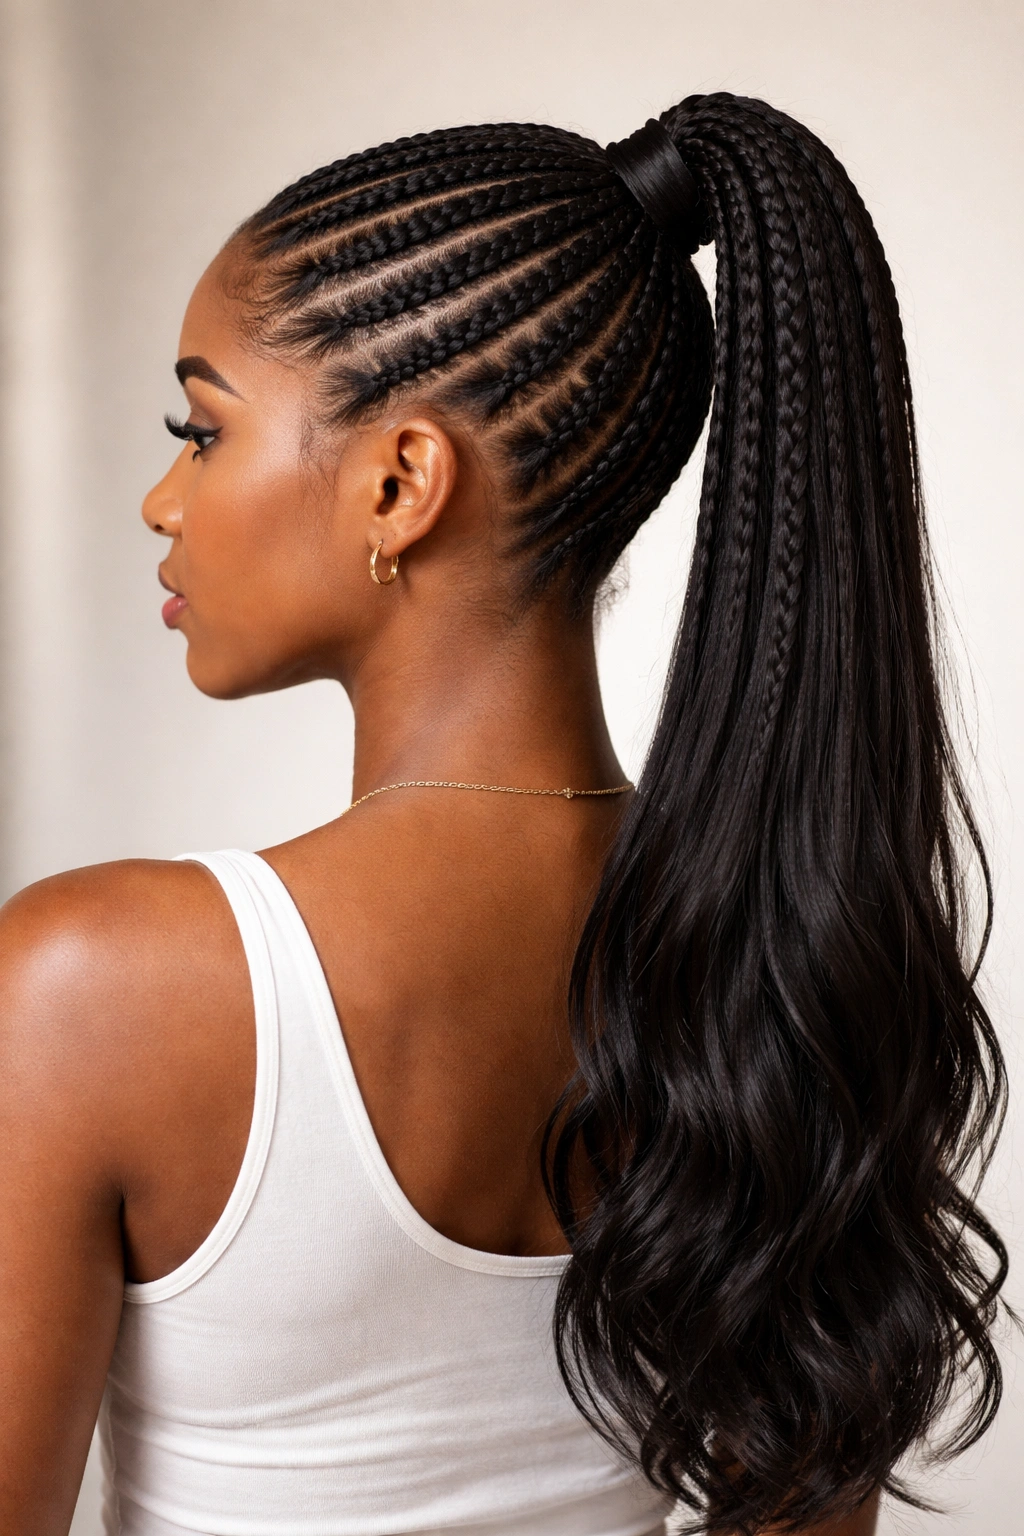
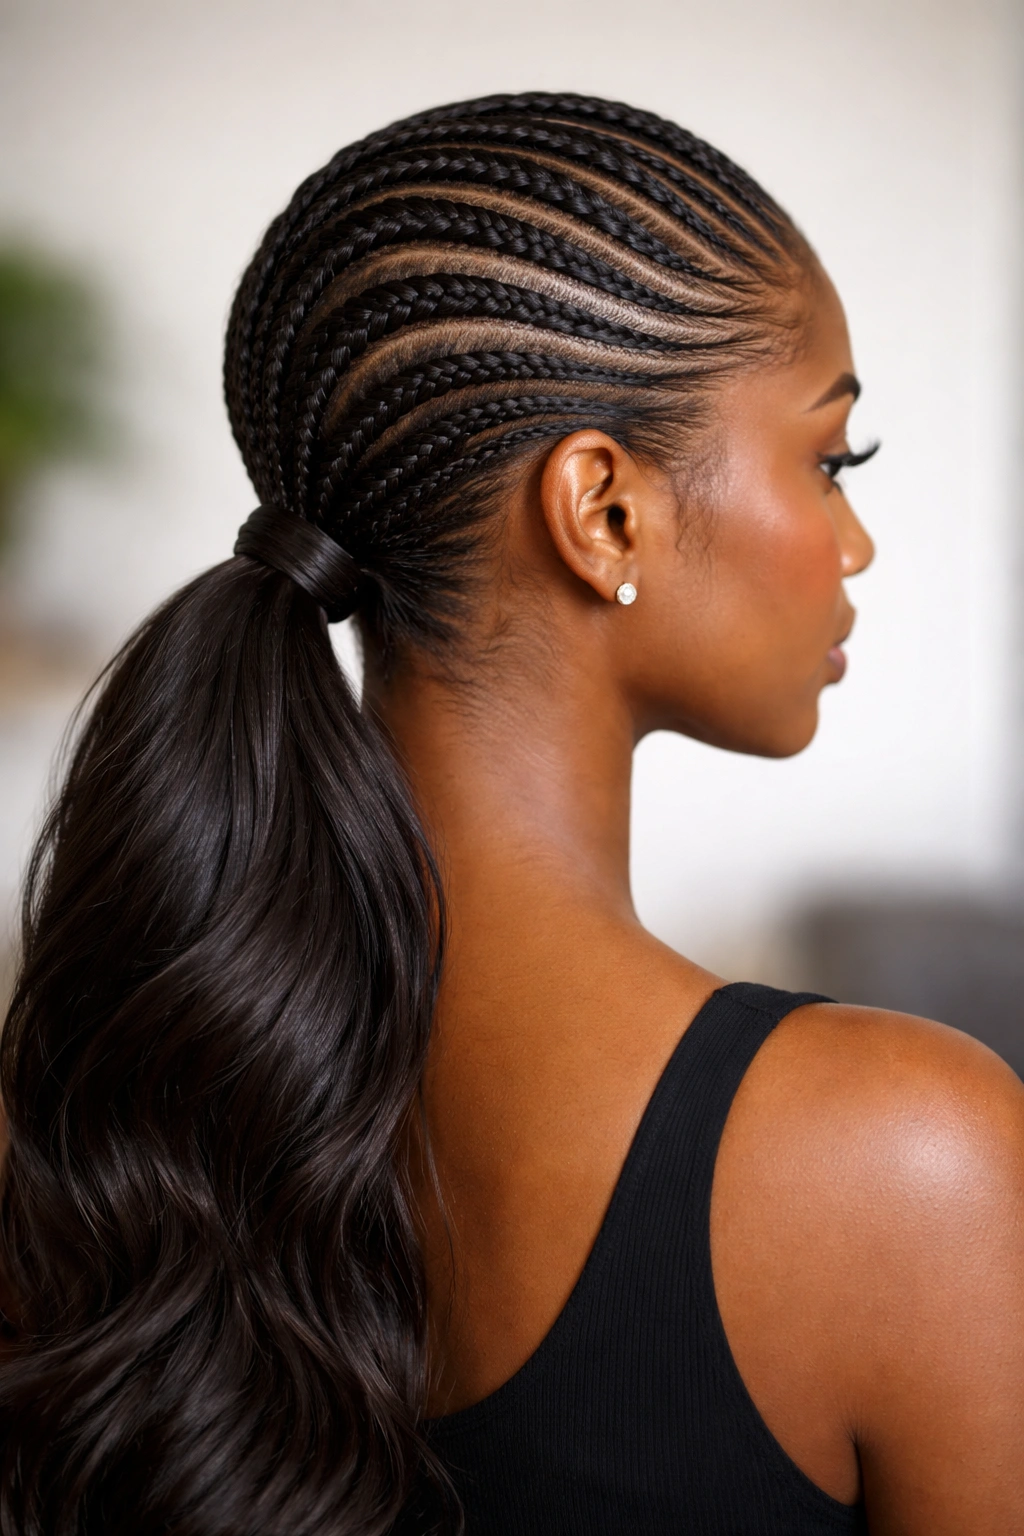
This is the foundation style that works in almost any situation — clean cornrows leading straight back to a high ponytail at the crown, letting your length do the talking below. The appeal here is sheer elegance and simplicity. You’re creating a strong visual line from your forehead straight back, which naturally elongates the face and draws attention to your hair’s fullness and texture.
Why This Style Stands Out
The high cornrow ponytail works because it’s incredibly versatile. You can wear it to the gym, to the office, or to a night out — just change your accessories and you’ve got a completely different vibe. On long hair, the ponytail becomes a statement by itself. The cornrows only need to travel about halfway back to your crown, which means the braiding is actually quite manageable even for beginners. The style also keeps all your hair completely off your face and neck, making it functional as well as beautiful.
How to Perfect It
- Use two or three clean, even cornrows depending on your hair density, all leading back to the same gathering point at the crown
- Keep the tension firm but not painful — tight enough that the cornrows hold their shape throughout the day, but loose enough that you can run your fingers underneath without discomfort
- Gather your remaining hair into a smooth ponytail using a soft hair tie, and smooth flyaways with a lightweight edge control applied with a small brush
- Optional: twist or braid a small section of your ponytail and wrap it around the base to conceal the hair tie and add polish
- Pin any stray edges using bobby pins that match your hair color
Pro tip: Apply a light setting spray after you finish — it’ll keep your cornrows crisp and your ponytail smooth for 2-3 days without needing a re-do.
2. Side Sweep Cornrow Ponytail
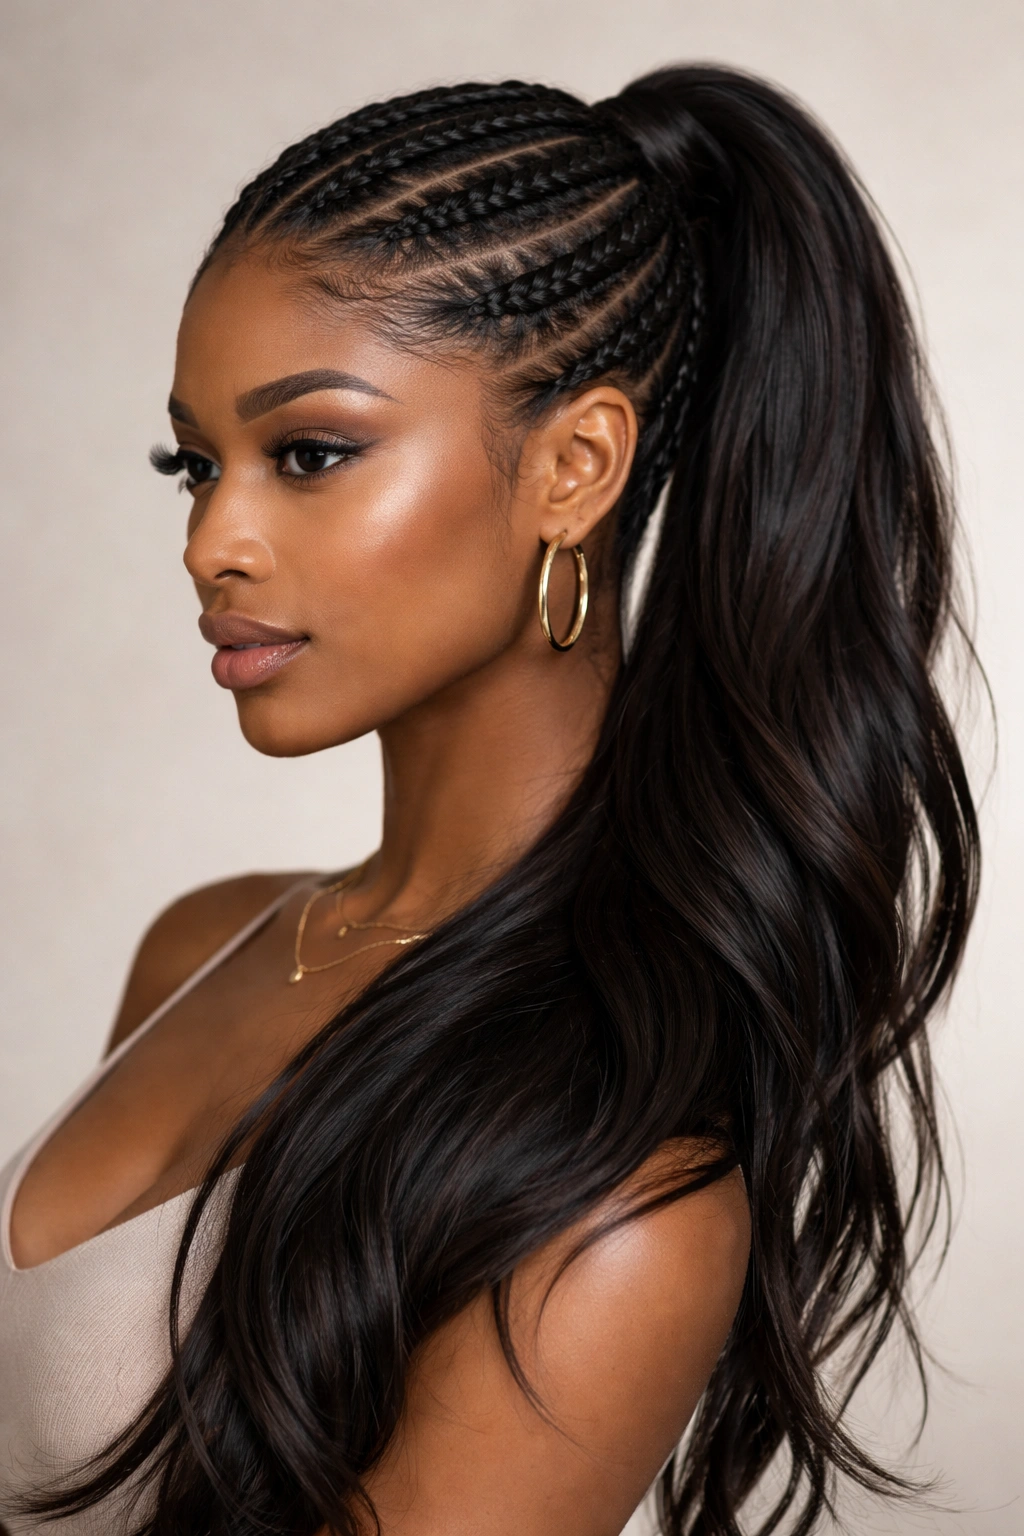
Instead of traveling straight back, your cornrows follow a curved path from one side of your head to the other, gathering into a ponytail that sits slightly off-center. This variation is a game-changer if you want something that feels special without being overly complicated. The side-swept approach adds movement and visual interest that a center-back ponytail doesn’t quite capture.
The Power of Asymmetry
A side sweep creates the illusion of volume and angles your face in a flattering way. By angling your cornrows diagonally across your scalp instead of going straight back, you’re adding dimension to the entire look. On long hair, this means your ponytail hangs at a slight angle too, giving you a softness and flow that feels less severe than a dead-center high ponytail. The style also reads as more fashion-forward — it’s subtle but definitely intentional.
Technique and Application
- Start your first cornrow on the side opposite where you want the ponytail to end (if you want the ponytail on the right, start braiding from the left side)
- Braid diagonally across your scalp, gently curving toward where you want your gathering point
- Add a second cornrow that follows a similar path, or braid in a complementary direction if you prefer symmetry
- Gather all the cornrowed sections and loose hair into a ponytail positioned slightly to one side of the crown
- Smooth the ponytail tail with a brush and secure with your preferred tie
Pro tip: Mist your cornrows with a light water and oil spray before pinning to keep them sharp all week long.
3. Double Cornrow Ponytail

Two thick, defined cornrows lead back to one ponytail, creating maximum visual impact with minimal braiding. This is the style to choose when you want statement-making cornrows but don’t want to spend two hours braiding. The two-braid structure also distributes tension more evenly across your scalp, making it a comfortable option for extended wear.
Why Two Cornrows Are Ideal
Two cornrows give you clarity and strength. Each braid gets more hair, which means thicker, more sculptural braids that look impressive. For long hair, this structure works perfectly because the weight is distributed in a way that keeps the cornrows from fraying or loosening as quickly as thinner braids would. You get the protective style benefit without the super intricate look — it’s all about clean lines and proportion.
Building the Style
- Section your hair down the center or slightly off-center, depending on where you want your ponytail to sit
- Create two thick cornrows that run parallel to each other from your hairline all the way back
- At the back of your head, gather the braided sections and remaining hair into one ponytail
- Use a sturdy hair tie and consider wrapping a small section of hair around the base to conceal it
- Edge your baby hairs with control product and pin them smoothly
In reality, the style holds really well because the individual cornrows are substantial enough to resist the tugging and friction that smaller braids experience throughout the day.
4. Goddess Cornrow Ponytail with Wrap
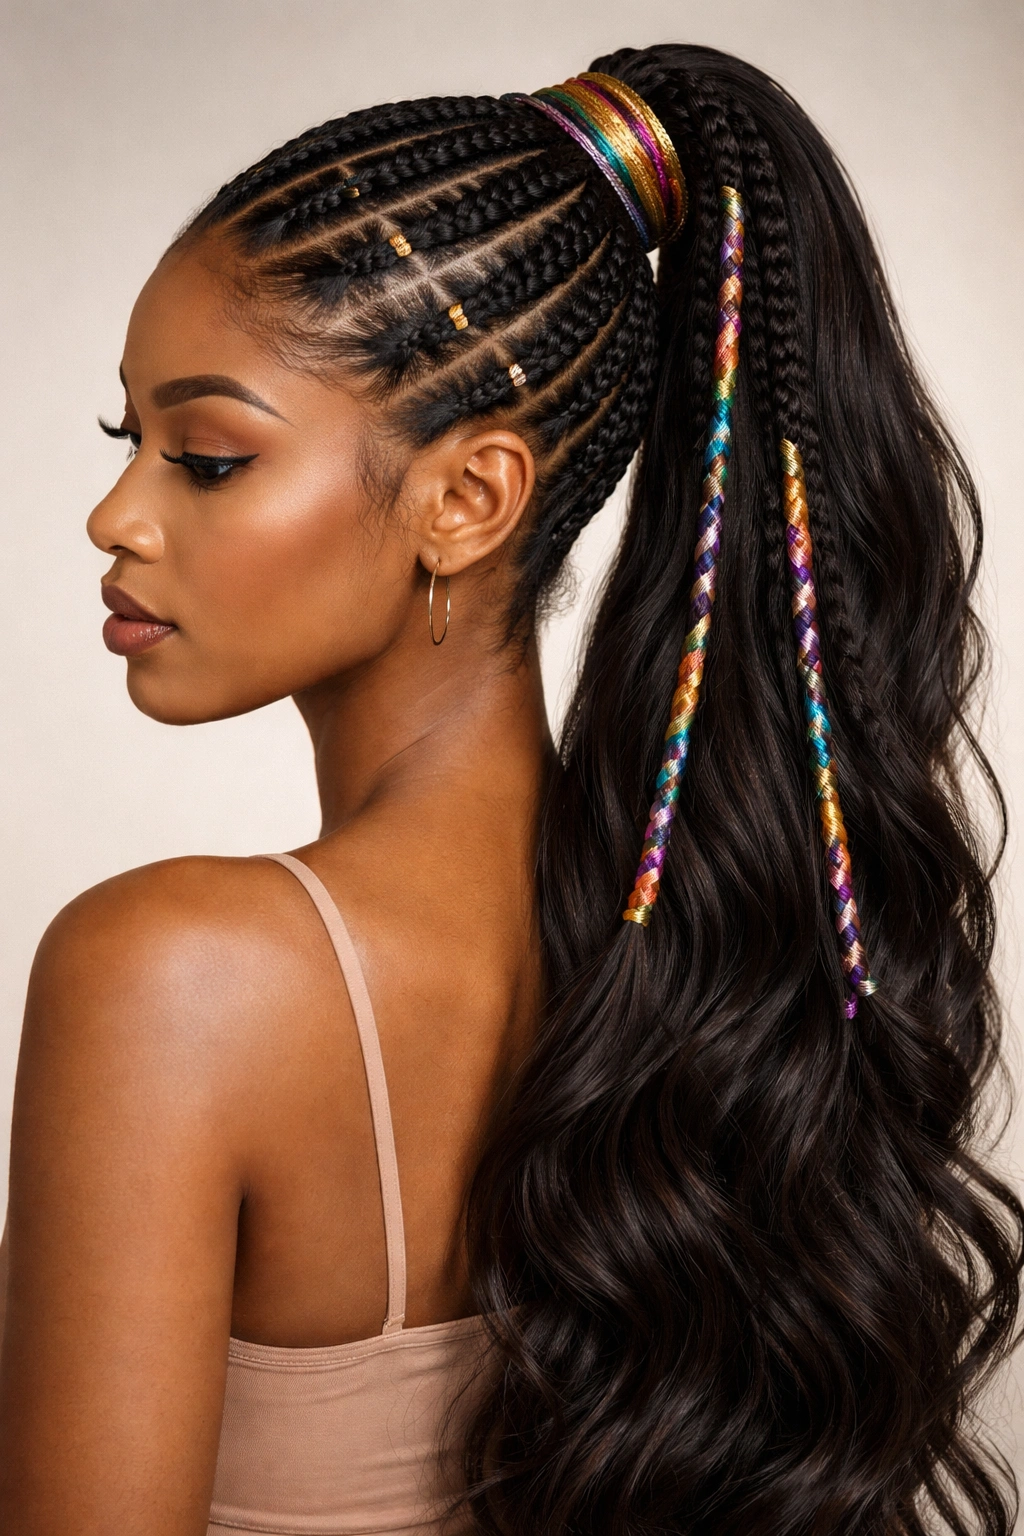
This one features thicker cornrows braided with a wrap of colored thread or yarn woven through each braid, creating a stunning decorative element that’s equal parts boho and bold. The wrap turns functional cornrows into actual art. On long hair, it becomes even more of a statement because the contrast draws the eye to your entire hair journey from scalp to ends.
The Drama of Wrapped Cornrows
Colored wraps transform cornrows from understated to unforgettable. The wrap can match your hair color for a subtle, elevated look, or it can contrast dramatically — gold on dark hair, white or silver for a futuristic vibe, or any color that speaks to your personal style. The wrap also actually serves a practical purpose: it adds structure to the braids and keeps them neat and defined longer than unwrapped cornrows typically stay.
Executing Wrapped Cornrows
- Choose your wrap material — nylon thread, yarn, or specialty hair wrap in the color you want
- Begin braiding your cornrows as usual, but incorporate the wrap into the braid structure from the very first stitch
- Keep the wrap tension consistent with your hair tension so it doesn’t bunch or slip
- Braid three to five cornrows, all with the wrap, and bring them back to a high ponytail
- Secure the ponytail with a matching or coordinating tie, and optionally wrap the base with additional thread
- Seal the ends of your wrap with a light application of edge control or a tiny bit of gel to prevent fraying
Worth knowing: Wrapped cornrows typically last longer — often up to two weeks — because the wrap adds structure that keeps the braids intact even after multiple days of wear and movement.
5. Braided Bun with Cornrow Base
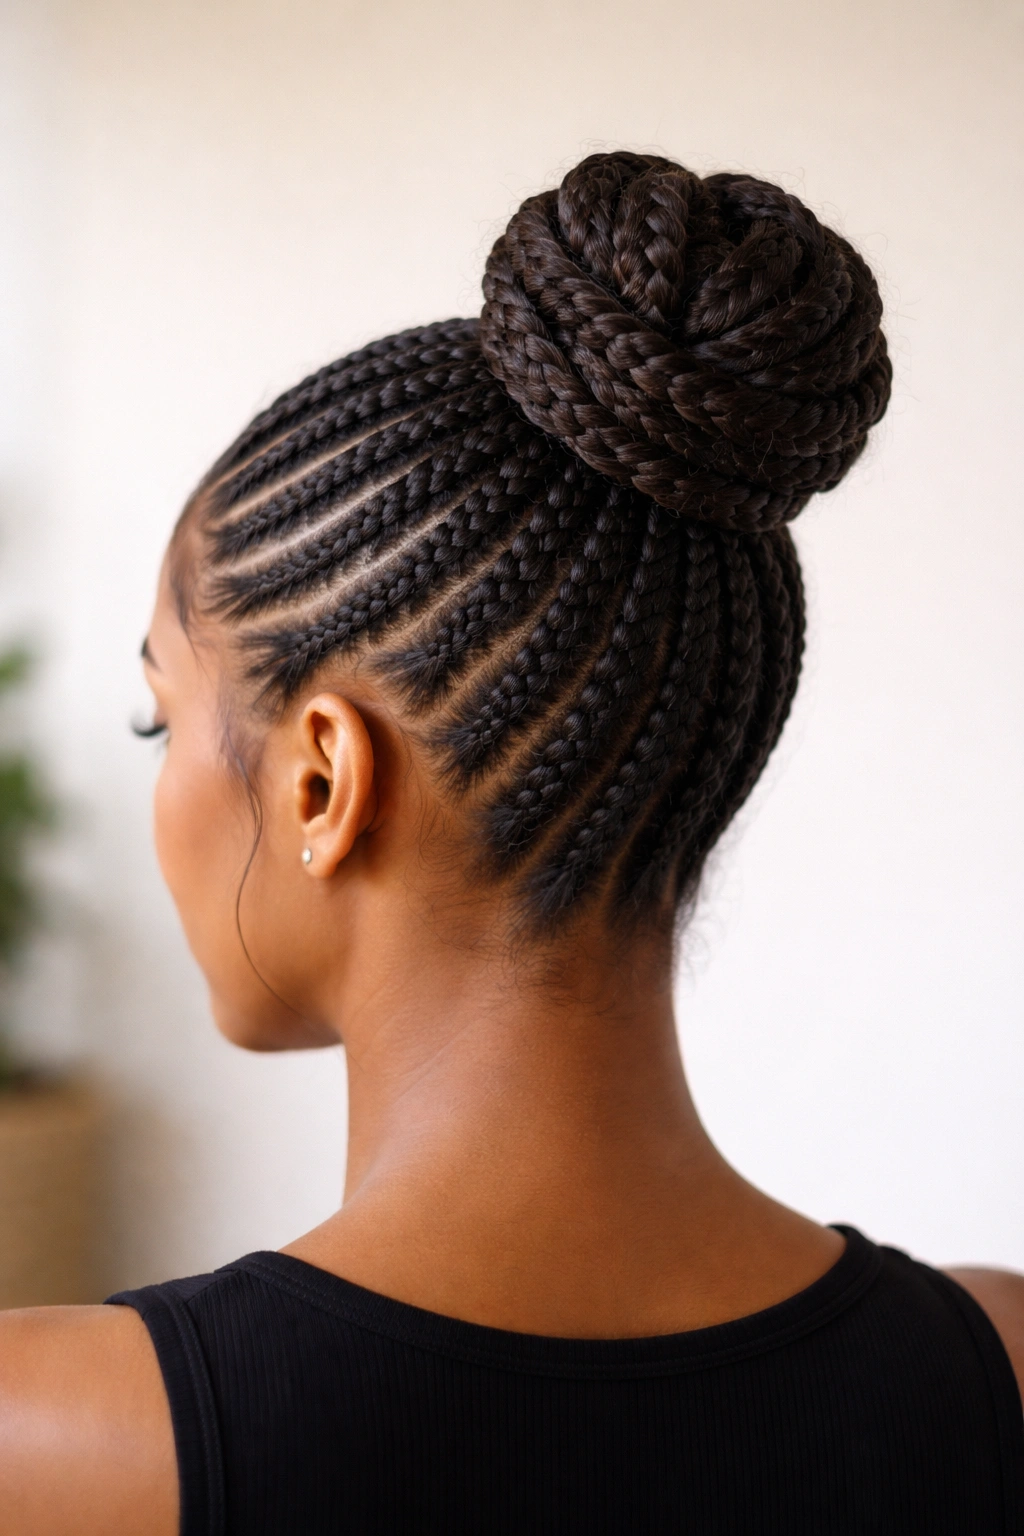
Your cornrows lead back to a point where your remaining hair is braided and twisted up into a bun that sits at the crown or nape of your neck. This style is perfect when you want the sophistication of a bun but want the visual strength that cornrows provide. It’s also genuinely protective — all your length is up and tucked away, minimizing breakage.
Why Cornrows Plus Bun Works
The cornrow base creates a solid foundation for your bun. Instead of pulling long hair straight into a bun (which creates tension and potential breakage), you’re gathering it into a bun after it’s already somewhat organized by the cornrow structure. Your long hair gets the benefit of being bound together gently while still looking intentional and sculpted. The bun portion can be messy or tight depending on your vibe — a loose, romantic bun looks completely different from a slicked-down, gym-ready one, but the cornrow base keeps both looking polished.
Creating the Bun
- Braid two to three cornrows leading from your hairline back toward where you want the bun to sit
- Gather all hair at the back of your head, including the ends of the cornrows and remaining loose hair
- Divide the gathered hair into two or three sections and twist or braid each section
- Coil the twisted/braided sections into a bun shape and pin securely with bobby pins
- Tuck any flyaways and set with a light-hold product that won’t flake
Real talk: A braided bun with a cornrow base is genuinely easier to maintain than a straight bun, because the structure is already built-in through the braiding.
6. Low Cornrow Ponytail with Curves
Instead of straight-back or diagonal, these cornrows follow a curved, almost S-shaped or wave pattern as they travel from your temples or sides back toward the nape of your neck. The curves add visual sophistication and make the style feel custom and intentional. This variation is particularly flattering because it softens the angles of the face while still being pulled back.
The Psychology of Curves
Curved cornrows feel more organic and flowing than perfectly straight ones. They work with your head shape instead of against it, which makes them feel more comfortable and more flattering. When you bring the curved cornrows back to a low ponytail at the nape, you’re creating a style that’s polished but not severe — it reads as intentional rather than just functional.
Mapping Your Curves
- Plan your curve path before you start — use your fingers to trace the route your cornrows will follow from start to finish
- Begin at your temple or the side of your head and braid in a gentle curve toward the back of your head
- Create three to five curved cornrows, spacing them evenly, all converging at the nape of your neck
- Gather all braided hair and remaining length into a low ponytail at the nape
- You can leave the ponytail as-is for a sleek look, or braid or twist it for added texture
Pro tip: The nape ponytail style works beautifully with long hair because the length stays below your shoulders, creating a romantic elongation of your entire silhouette.
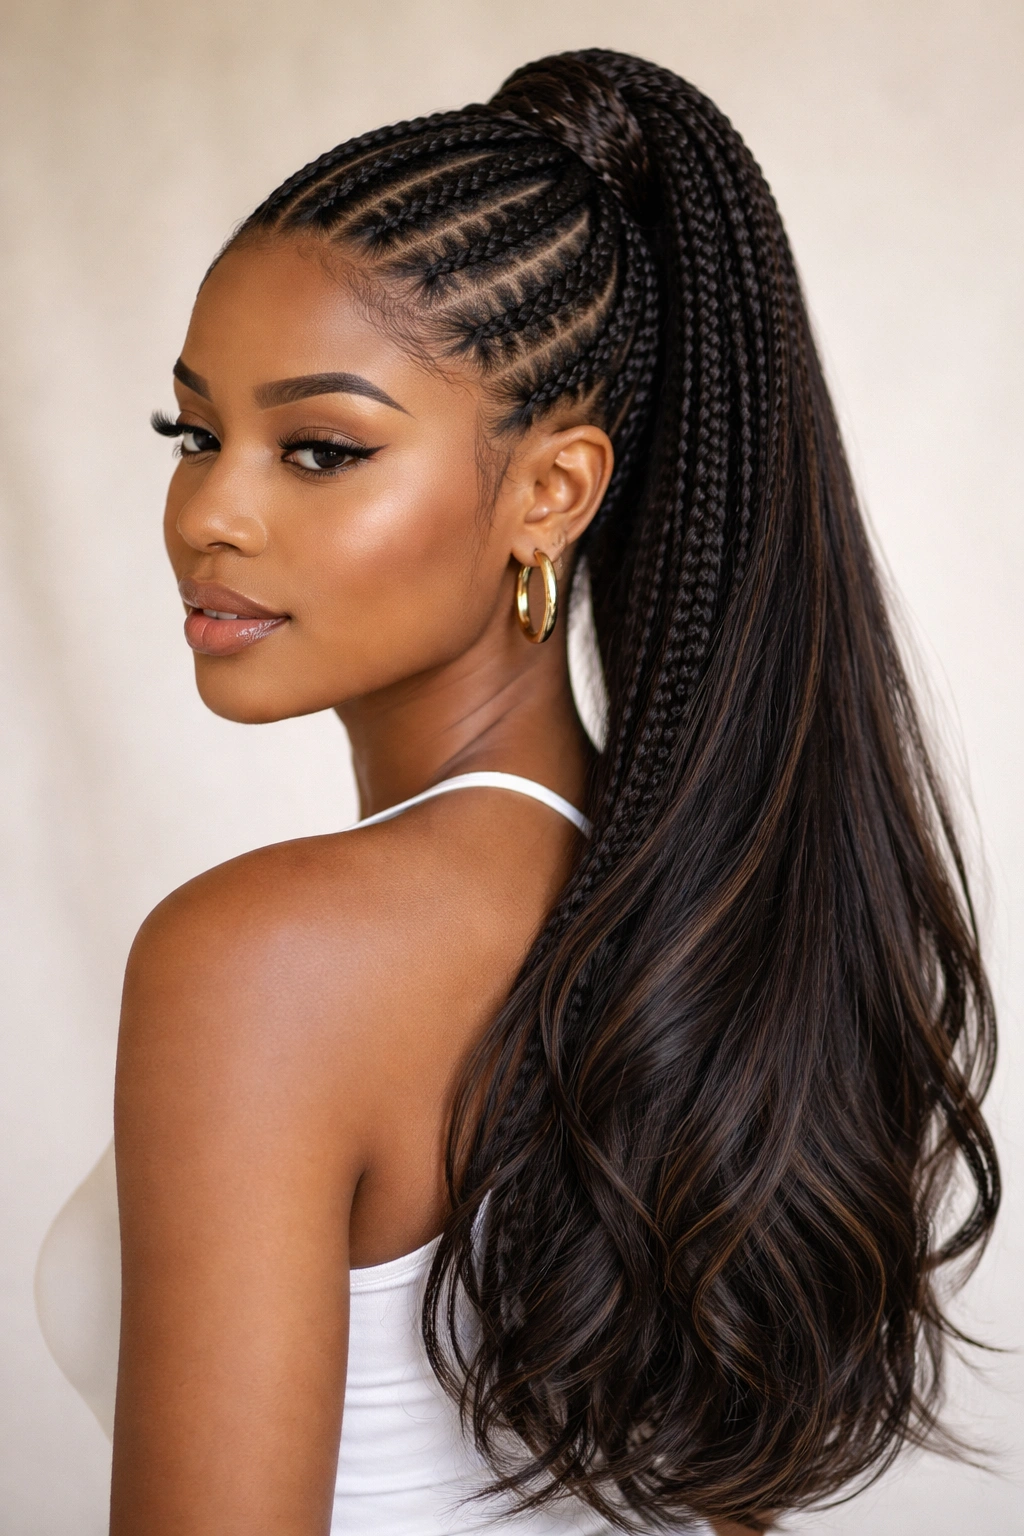
7. Frontal Cornrow Ponytail

This style features cornrows that start at your front hairline and braid completely forward before being swept back into the ponytail — essentially creating a thick, braided bang situation. It’s bold, it’s fashion-forward, and it’s a serious statement. On long hair, the effect is even more striking because you get the full contrast between the braided front and the flowing length behind.
Making a Statement with Frontal Braids
Frontal cornrows frame your face and draw immediate attention to your eyes and bone structure. By pulling braids forward instead of straight back, you’re adding an extra layer of visual drama. This is the style to choose when you want to feel confident and powerful. It’s also genuinely practical — those front braids keep hair completely off your face no matter what you’re doing.
Braiding Forward and Back
- Start at your hairline and braid several cornrows that travel forward toward your forehead or temples
- After braiding forward just an inch or two, begin redirecting your braids back toward where you want your ponytail to gather
- This creates almost a “swoosh” effect with your braids
- Bring all braided sections back to a high or high-middle ponytail point
- Gather remaining hair into the ponytail and secure with a tie
- Use edge control to smooth any baby hairs around your hairline and temples
Consider: This style requires a bit more practice to get the angle right, but once you nail it, you’ll have a distinctive look that sets you apart.
8. Zigzag Cornrow Ponytail
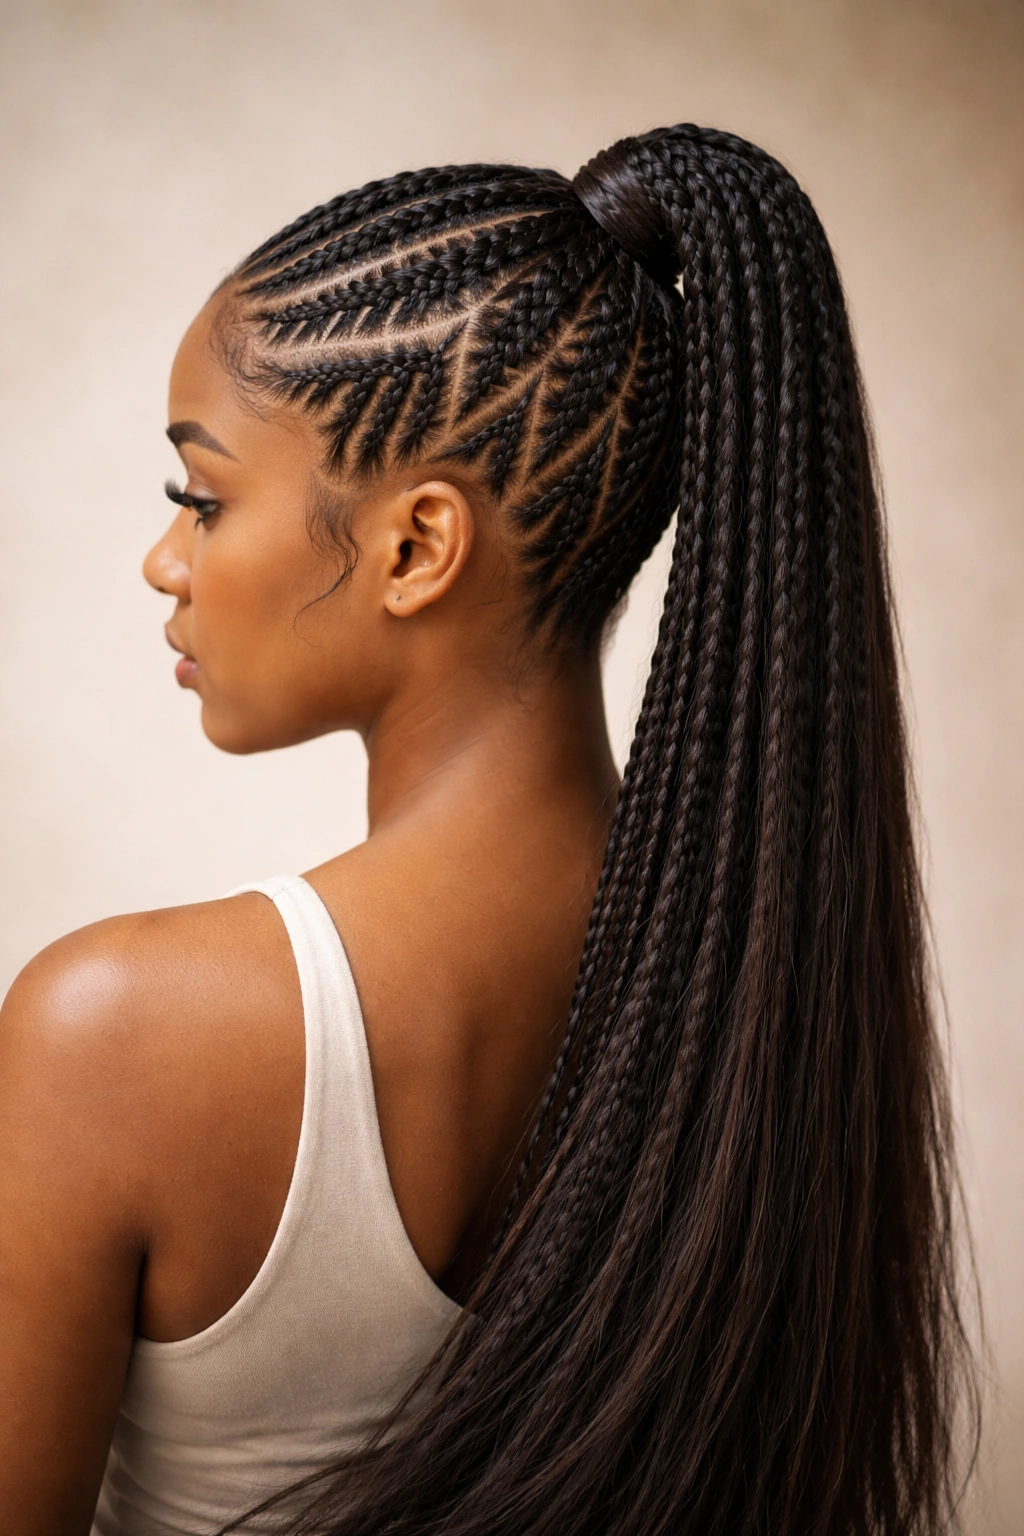
Instead of following a straight or curved path, your cornrows travel in a zigzag or chevron pattern from the front of your head to the back. It’s geometric, it’s eye-catching, and it turns your entire scalp into part of the design. This is the style for someone who’s confident, who loves detail, and who wants their hair to be a conversation piece.
The Artistry of Zigzag Braids
A zigzag pattern requires more planning and more precision than other cornrow structures, but the payoff is huge. You’re essentially creating a map on your scalp with your braids, and that map becomes visible the moment you pull your hair into a ponytail. Long hair makes this style even more impactful because you get the full visual of the braided pattern plus the gorgeous length falling below.
Creating the Zigzag
- Divide your head into sections that will form your zigzag path — roughly five to seven horizontal sections from crown to nape
- Start braiding a cornrow on one side, angling it diagonally across that first section
- In the next section, angle the cornrow in the opposite direction, creating the zigzag effect
- Continue this alternating pattern all the way back
- Gather everything into a high or mid-height ponytail at the back
- The zigzag becomes more visible when your hair is pulled back, revealing the full pattern
Be aware: This style takes longer to install than basic cornrows, so factor that into your timing if you’re doing this yourself or seeing a stylist.
9. Mixed-Texture Cornrow Ponytail
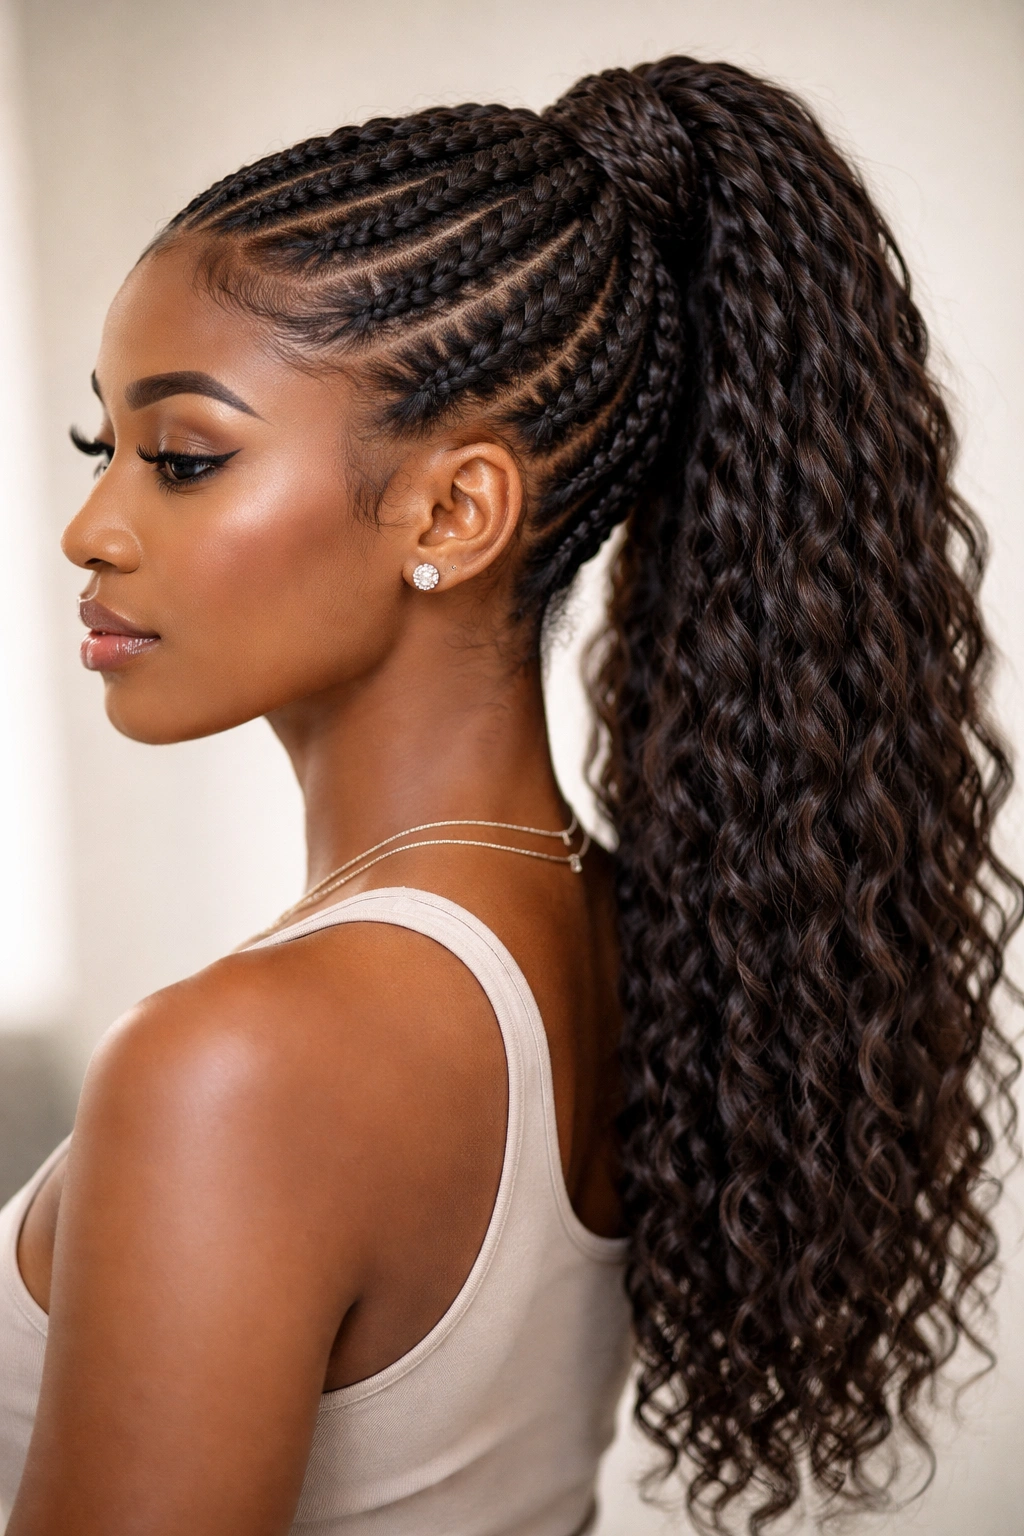
Combine traditional cornrows with twisted sections, braided sections, or even straight hair to create visual contrast and depth. Maybe your sides are cornrowed while the center is twisted, or maybe you alternate cornrows with box braids. The mixed-texture approach adds complexity without necessarily adding time, because you’re creating visual interest through variation rather than intricacy.
Layering Different Textures
Mixed-texture styles work beautifully on long hair because each texture reads differently and adds its own visual weight. Cornrows look sculpted and geometric, while twists look softer and rounder. By combining them, you get a balanced look that’s sophisticated without being overwhelming. You also reduce the amount of actual braiding you need to do, which makes the style more accessible if you’re doing it yourself.
Building Mixed Texture
- Plan which sections will get which texture — for example, maybe cornrows on the sides and twists in the center
- Braid your cornrows as usual in the designated sections
- Twist or braid the alternate sections using the technique you chose
- Bring all sections back to one ponytail gathering point
- Secure and smooth, focusing edge control on any area where different textures meet
The result: You get the visual impact of an intricate style with the time investment of something much simpler — it’s genuinely the best of both worlds.
10. Cornrow Ponytail with Feed-In Extensions
Use extensions woven into your cornrows to add extra volume, length, or even color to your ponytail. Feed-in braiding allows you to integrate hair extension material directly into your cornrow structure, so your ponytail ends up being thicker and fuller than it would be with just your natural hair. This is especially useful if your long hair has become thin toward the ends or if you want to add a contrasting color.
The Advantage of Feed-In Cornrows
Feed-in braiding is a protective technique that distributes tension more evenly than traditional braiding, which means less stress on your natural hair. When you feed extensions into your cornrows, you’re also getting a fuller ponytail without having to wait for your natural hair to grow even longer. Extensions can add volume, enhance color, or even give you texture — you could feed in straight pieces for smoothness or textured pieces to match your natural texture.
Incorporating Extensions
- Work with hair that matches your color or choose a contrasting color intentionally
- Begin your cornrows as usual, but start feeding in the extension material a few inches from your hairline
- Braid the extension material together with your natural hair as you continue the cornrow
- This creates a braid that’s thicker and fuller than using your natural hair alone
- Gather the braided sections and extension ends into your ponytail
- Secure and style as desired
Important note: Feed-in cornrows require a stylist if you’re not experienced with the technique — it’s not a beginner DIY project, but the results are absolutely worth the investment.
11. Bubble Cornrow Ponytail
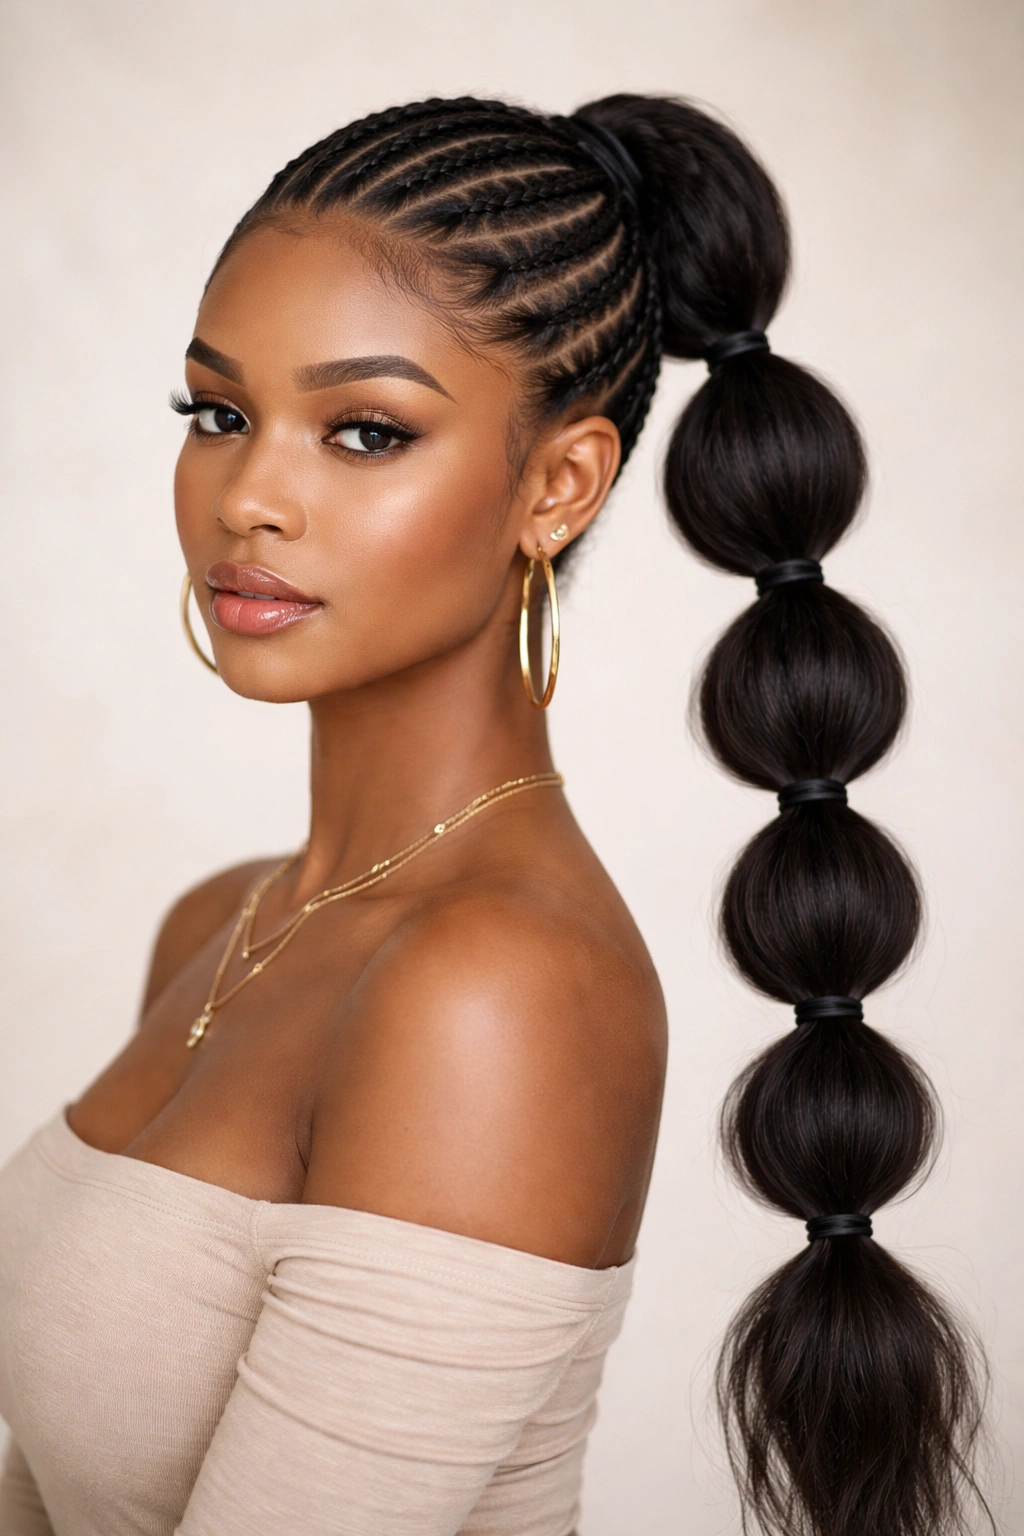
Add texture and playfulness by creating sections in your ponytail that puff out, creating a “bubble” effect. You can do this by securing the ponytail with multiple small elastics positioned a few inches apart, causing the hair between each elastic to balloon slightly outward. Your cornrows travel back as usual, but the ponytail becomes a statement of its own with the bubble structure.
Why Bubbles Work on Long Hair
Bubbles add dimension and movement to a ponytail. They make long hair look fuller and create a playful, youthful vibe that straight ponytails don’t quite achieve. The bubbles also reduce the amount of tension on any single point of your hair, distributing the weight throughout the length. This means bubble ponytails are genuinely gentler on your hair than traditional high-tension ponytails, especially when you’re working with longer lengths.
Creating Defined Bubbles
- Braid your cornrows and gather your hair into a ponytail as usual
- Secure at the base with your first elastic
- About two to three inches down the ponytail length, add a second elastic
- Continue adding elastics spaced evenly (every two to four inches) all the way down the length
- Gently pull out a small section of hair between each elastic to create the bubble effect
- Fluff each bubble slightly and mist with a light hold spray to keep them in place
- For extra texture, braid or twist each bubble section before securing the next elastic
Real talk: Bubble ponytails look especially stunning on long hair because you have enough length to create multiple bubbles, and each one catches light and adds to the overall visual impact.
Final Thoughts
The versatility of cornrow ponytails on long hair means you can rotate through different styles depending on your mood, the occasion, or what your hair needs in that moment. Some styles, like the classic high ponytail, become your go-to everyday option that you can recreate on autopilot. Others, like the frontal cornrow or the bubble ponytail, become your special-occasion choice that makes you feel polished and put-together.
The most important thing to remember is that your long hair is an asset — it gives you flexibility with styles, allows you to show off length and health, and provides the perfect backdrop for intricate cornrow work. Whether you’re choosing a style based on how long you want the braiding process to take, the occasion you’re dressing for, or simply what feels right for your hair texture and lifestyle, there’s a cornrow ponytail option here that works.
Start with whichever variation resonates most with you, and don’t hesitate to ask your stylist questions about technique, maintenance, and how to care for your cornrows while wearing them. With the right approach, cornrow ponytails can be both a gorgeous style choice and a genuinely protective option for your long hair.