Short hair opens up creative possibilities that long hair sometimes limits. Cornrows are an incredibly versatile protective styling option, but they require a different approach when you’re working with shorter lengths. Stitching technique—the pattern and method by which you divide sections and braid—becomes even more critical on shorter hair because the density of braids, the direction they travel, and how tightly they sit against the scalp directly affect how polished the style looks and how long it lasts.
The beauty of short hair cornrows is that you can experiment with patterns that would feel overwhelming in longer styles. Whether you’re looking for a minimalist aesthetic, maximum edge definition, or intricate geometric designs, the right stitch pattern transforms short hair into a statement. The key is understanding how each stitching technique plays with your hair’s natural texture, the available length, and your face shape.
What makes cornrowing short hair successful isn’t about having lots of length to work with—it’s about precision, understanding scalp tension, and choosing stitch patterns that complement rather than overwhelm your features. Some patterns work best with very short hair, while others need at least an inch or two of length to really showcase their design. This guide walks you through ten distinct stitch patterns that genuinely work for short hair, with the specific details you need to understand what makes each one different and when to choose it.
1. Classic Two-Strand Twist Cornrows
Two-strand twists incorporated into a cornrow pattern create a textured, dimensional look that works beautifully on short hair. Instead of traditional three-strand braiding, you alternate twisting two sections of hair while moving along the scalp, creating a ropelike pattern that’s less dense than traditional cornrows and often feels lighter and less restrictive.
Why This Works for Short Hair
Two-strand twist cornrows require less bulk than full three-strand braids, which makes them ideal when you don’t have much length to work with. The twisting motion is often easier to control on shorter sections, and the final result photographs beautifully because the twist pattern creates a rhythmic visual texture along each row. Short hair with this stitch pattern reads as intentional and modern rather than undone.
How to Create This Style
- Divide your hair into clean sections using a rattail comb, creating guide lines that map out where each cornrow will sit
- Start at the front hairline or crown, taking a thin section of hair
- Divide that section into two parts and twist them around each other, pulling gently upward toward the scalp as you move backward
- Add small pieces of hair to each section as you twist, incorporating new hair with each rotation just like you would in a traditional cornrow
- Continue the twist pattern all the way down the length of each section, maintaining even tension throughout
- The resulting cornrow should have a ropelike, slightly dimensional appearance rather than the flat appearance of a three-strand braid
Pro tip: Two-strand twists can sometimes unravel more easily than traditional braids on very short hair, so seal the ends with a light application of edge control or a tiny elastic to help them hold their shape longer.
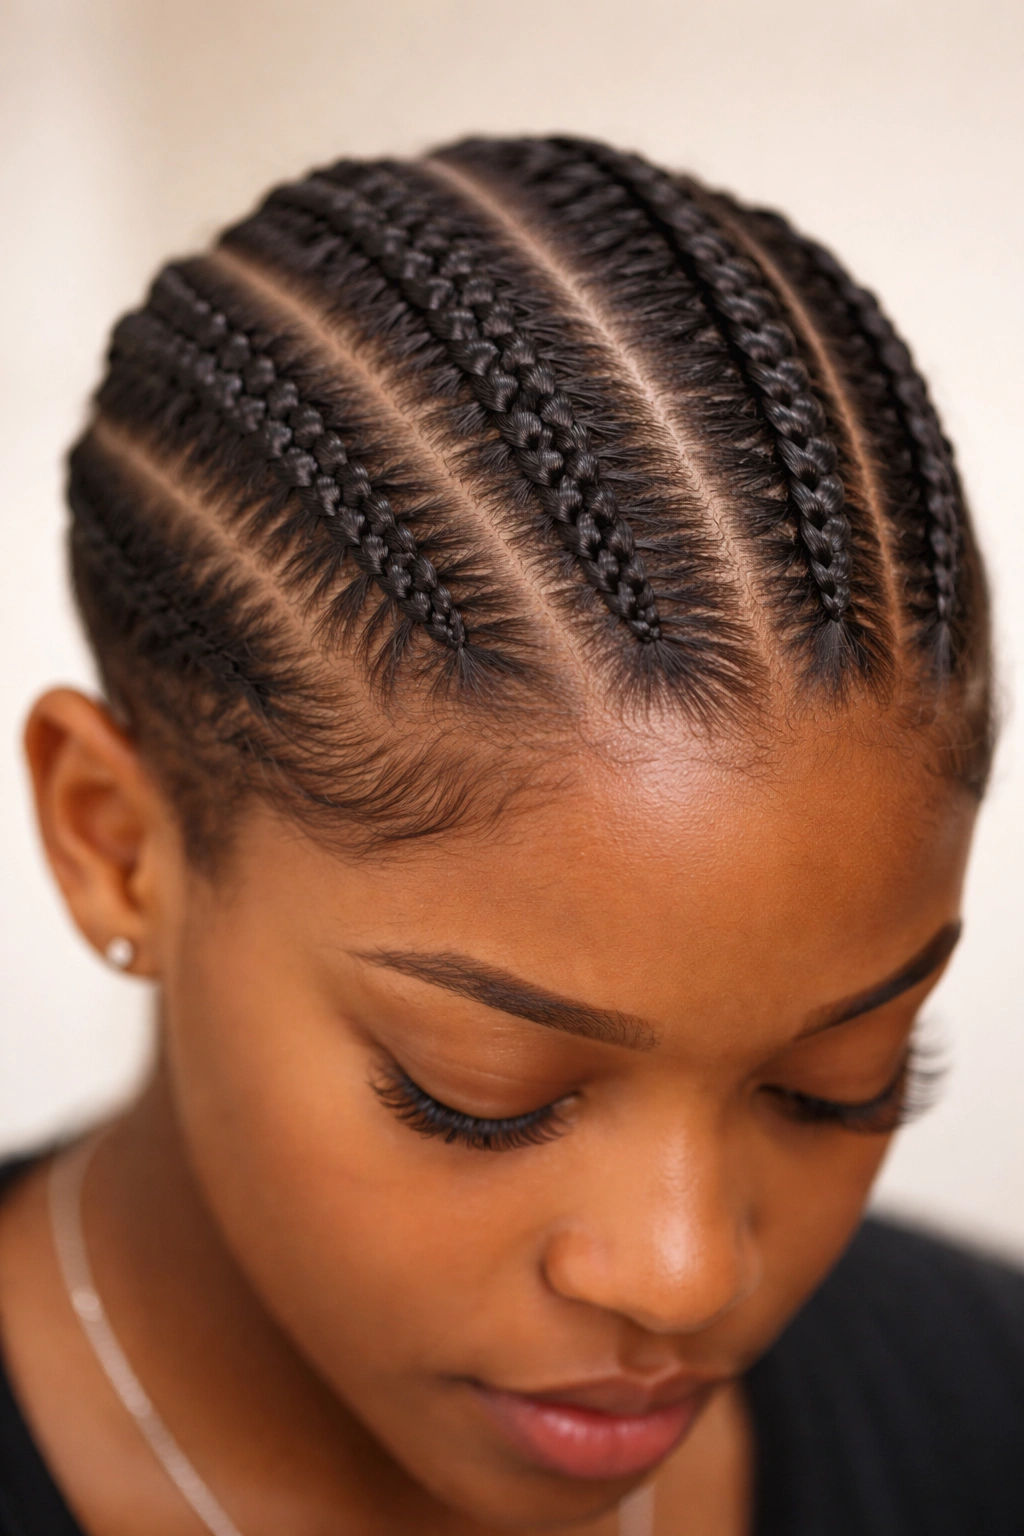
2. Micro Braids into Cornrows
Micro braids are incredibly thin, delicate braids that create a sophisticated, high-precision look. When incorporated into a cornrow pattern—where you’re adding hair as you go down the scalp rather than working with a closed-off section—you get a style that’s visually intricate but surprisingly manageable on short hair.
What Makes This Pattern Special
Micro braids into cornrows work exceptionally well on short hair because the small scale matches the available length. The tight, thin pattern creates sharp definition along your scalp, and the overall style feels very controlled and polished. This is the stitch to choose if you want a more formal or refined look rather than a relaxed, casual vibe.
Installation and Maintenance Considerations
- Start with very small, even sections mapped out with your comb—consistency in section size is what makes this style look intentional rather than chaotic
- Take only a tiny amount of hair (about the thickness of a pencil lead or smaller) for each micro braid
- Braid tightly enough to last, but not so tightly that you’re creating pulling and tension at the scalp
- Micro braids can feel delicate on short hair, so be especially mindful of friction when sleeping—use a silk or satin bonnet or pillowcase to minimize frizz and loosening
- Because of the tightness, micro braids should be taken down sooner than thicker styles—typically every 4-6 weeks
Quick Facts About This Style
- Micro braids require excellent hand coordination and patience; this isn’t a quick install
- They hold their shape longer than looser patterns and resist frizzing better
- This pattern works best on hair that’s at least 1.5 to 2 inches long
- The style reads as very intentional and deliberate—perfect for professional settings or special occasions
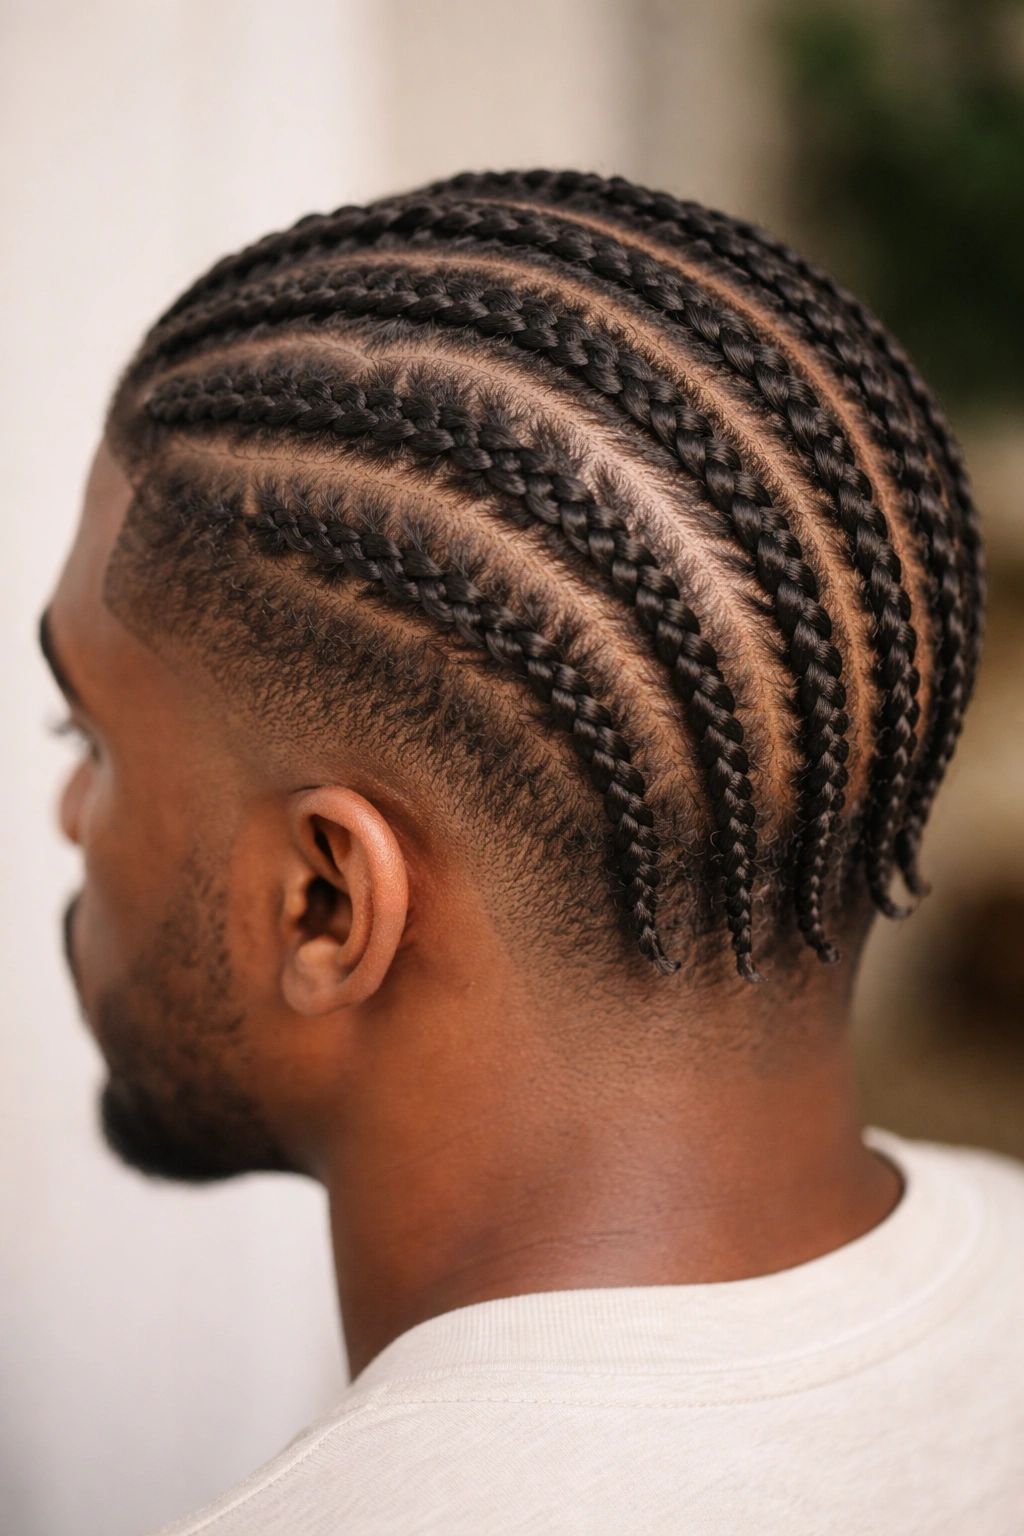
3. Feed-in Cornrows with Short Texture
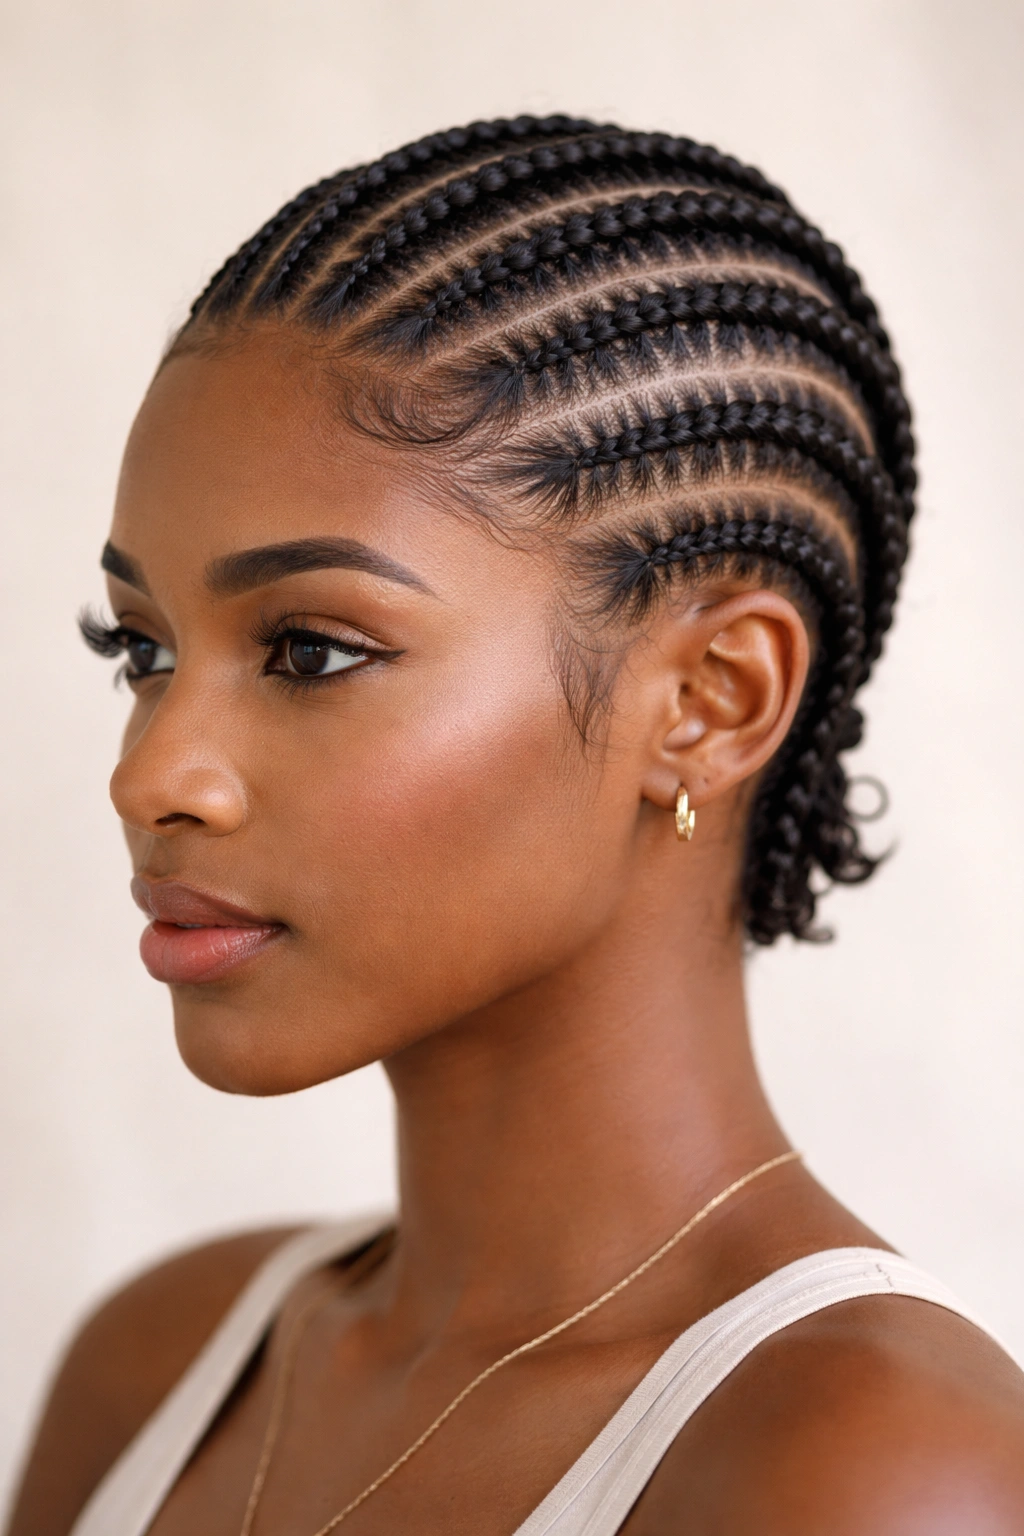
Feed-in cornrows are made by gradually incorporating hair into your braid as you move along the scalp, rather than dividing your hair into sections first. This creates an appearance where the braid seems to flow naturally from the scalp without visible box patterns, and it’s exceptionally forgiving for short hair because you’re not fighting against trying to braid pre-divided sections that are too short to manage.
Why Feed-In Works for Shorter Lengths
The beauty of feed-in cornrows is that you control exactly how much hair goes into each braid at each step. On short hair, this means you can work with the actual length you have instead of fighting with stiff, pre-divided sections. The resulting style looks softer and more natural than box-style cornrows, with less visible scalp division.
The Feed-In Technique Explained
- Start with a small amount of hair at your starting point (usually the hairline or crown)
- Begin braiding three strands together, picking up only a tiny bit of new hair on each rotation
- Gradually increase the amount of hair you feed in as you move down the row, so the braid grows thicker as it progresses
- The key is adding hair so gradually that the braid maintains even tension and thickness throughout
- Unlike traditional cornrows where sections are pre-divided, feed-in allows you to work more organically with what you have
- End each braid by braiding to the ends of your natural hair, then securing with a small elastic or tucking the ends under
What to Know Before You Start
- Feed-in cornrows take longer to install than basic cornrows because of the gradual hair-feeding technique
- This pattern shows scalp between rows, which can be beautiful on short hair but requires your scalp to be healthy and either well-moisturized or styled with a color-coordinating scalp makeup if desired
- Feed-in works on hair as short as 1 inch, making it excellent for tapered cuts or very short styles
- The softer appearance makes this ideal if you want cornrows to look less severe or less high-maintenance
4. Zig-Zag Stitch Pattern Cornrows
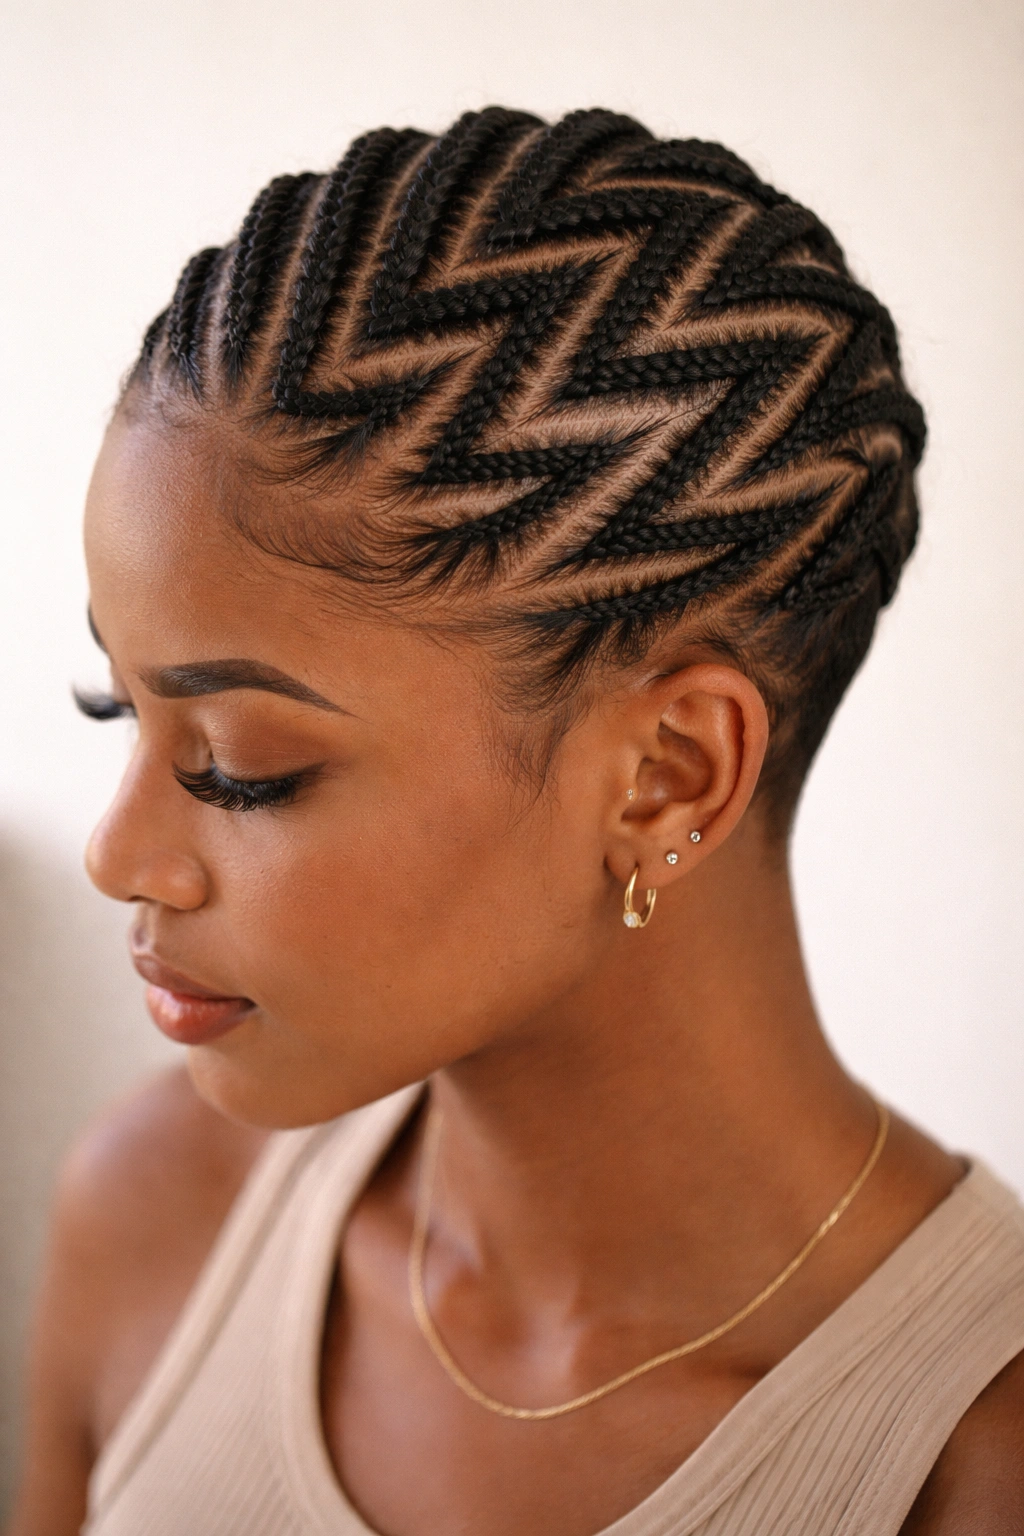
Instead of running straight from front to back or side to side, zig-zag cornrows move diagonally across the head in a zigzag or chevron-like pattern. This creates visual movement and interest, breaking up the monotony of parallel straight lines and adding a playful, fashion-forward element to short hair.
Why the Zig-Zag Pattern Stands Out
The diagonal movement of zig-zag cornrows draws the eye across the scalp rather than straight back, which can be incredibly flattering. On short hair, this pattern feels more contemporary and intentional than basic straight rows. The style also creates the optical illusion of width and dimension, which works beautifully on rounder face shapes.
How to Map and Execute Zig-Zag Rows
- Plan your pattern before you start by lightly mapping diagonal lines with a rattail comb or by drawing them on your scalp with a washable marker
- Start one cornrow at an angle from your hairline, moving diagonally backward across your head
- At a predetermined point (roughly mid-scalp), angle the braid direction so it shifts diagonally in the opposite direction, creating the “zig” and “zag” effect
- Continue this diagonal, angled pattern throughout all your rows, maintaining even spacing and consistent angles
- The more precise your angles, the more polished the final result
- Zig-zag patterns work best when all rows follow the same directional pattern for visual cohesion
Key Success Factors
- Precision matters: Sloppy angles read as accidental rather than intentional, so take time mapping before you braid
- Even spacing: Keep rows the same distance apart to maintain the geometric integrity of the pattern
- Tension control: Diagonal patterns require more scalp awareness because you’re working at angles rather than straight lines
- This pattern requires at least 2-3 inches of hair to show the zig-zag clearly, so it works best on moderately short hair rather than very tapered cuts
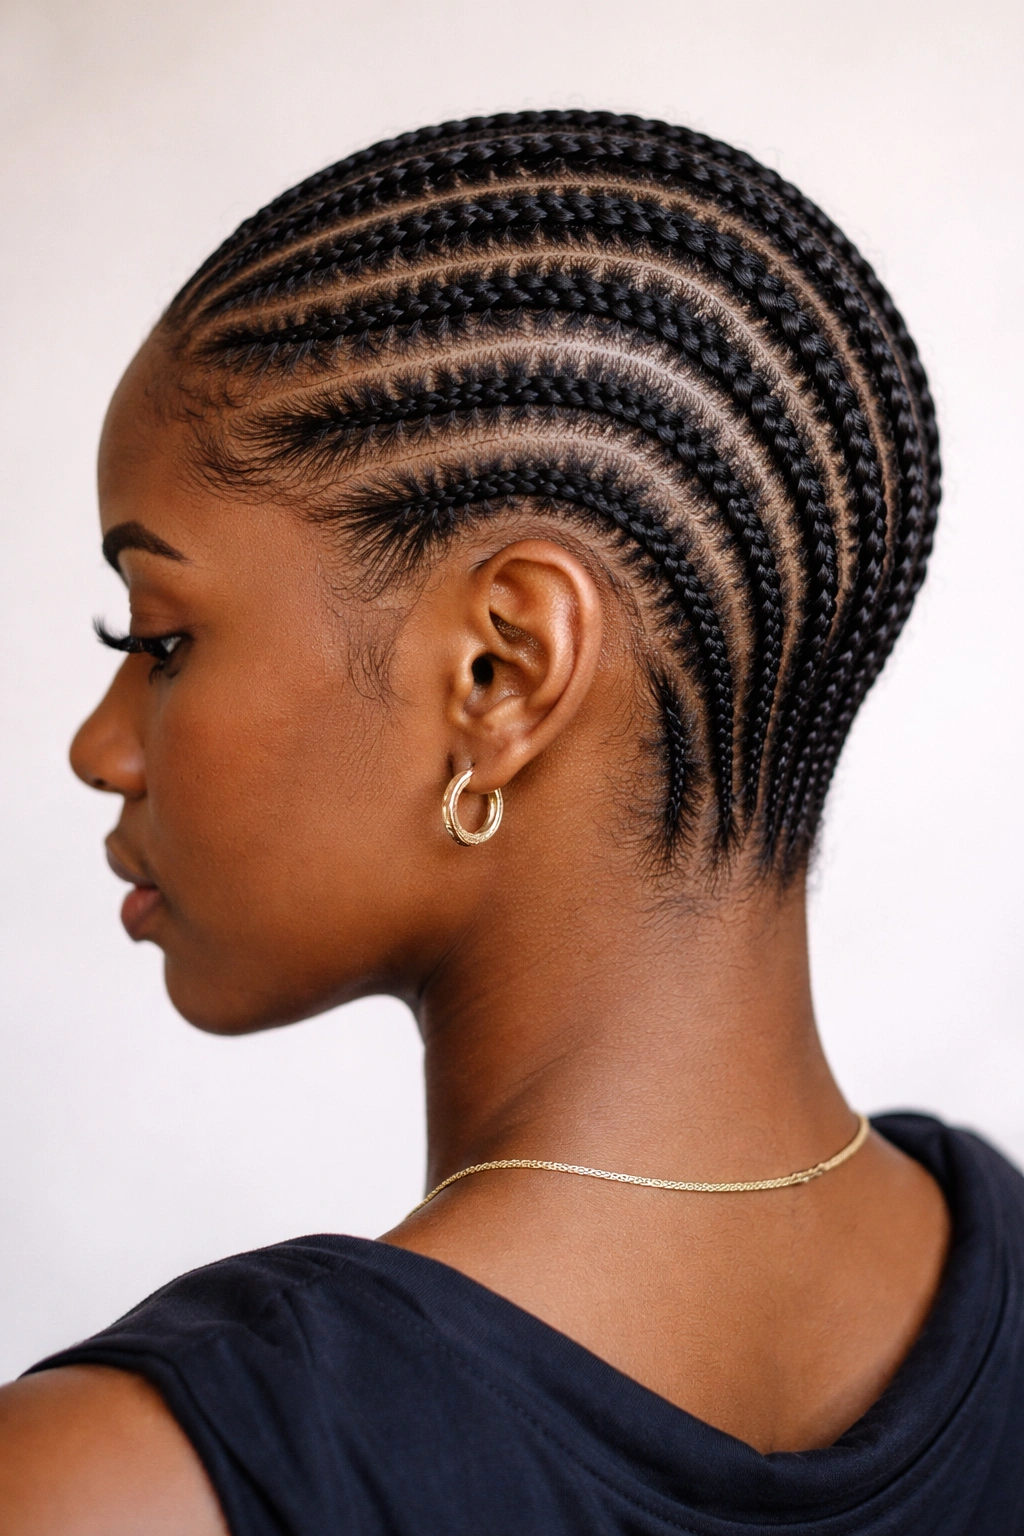
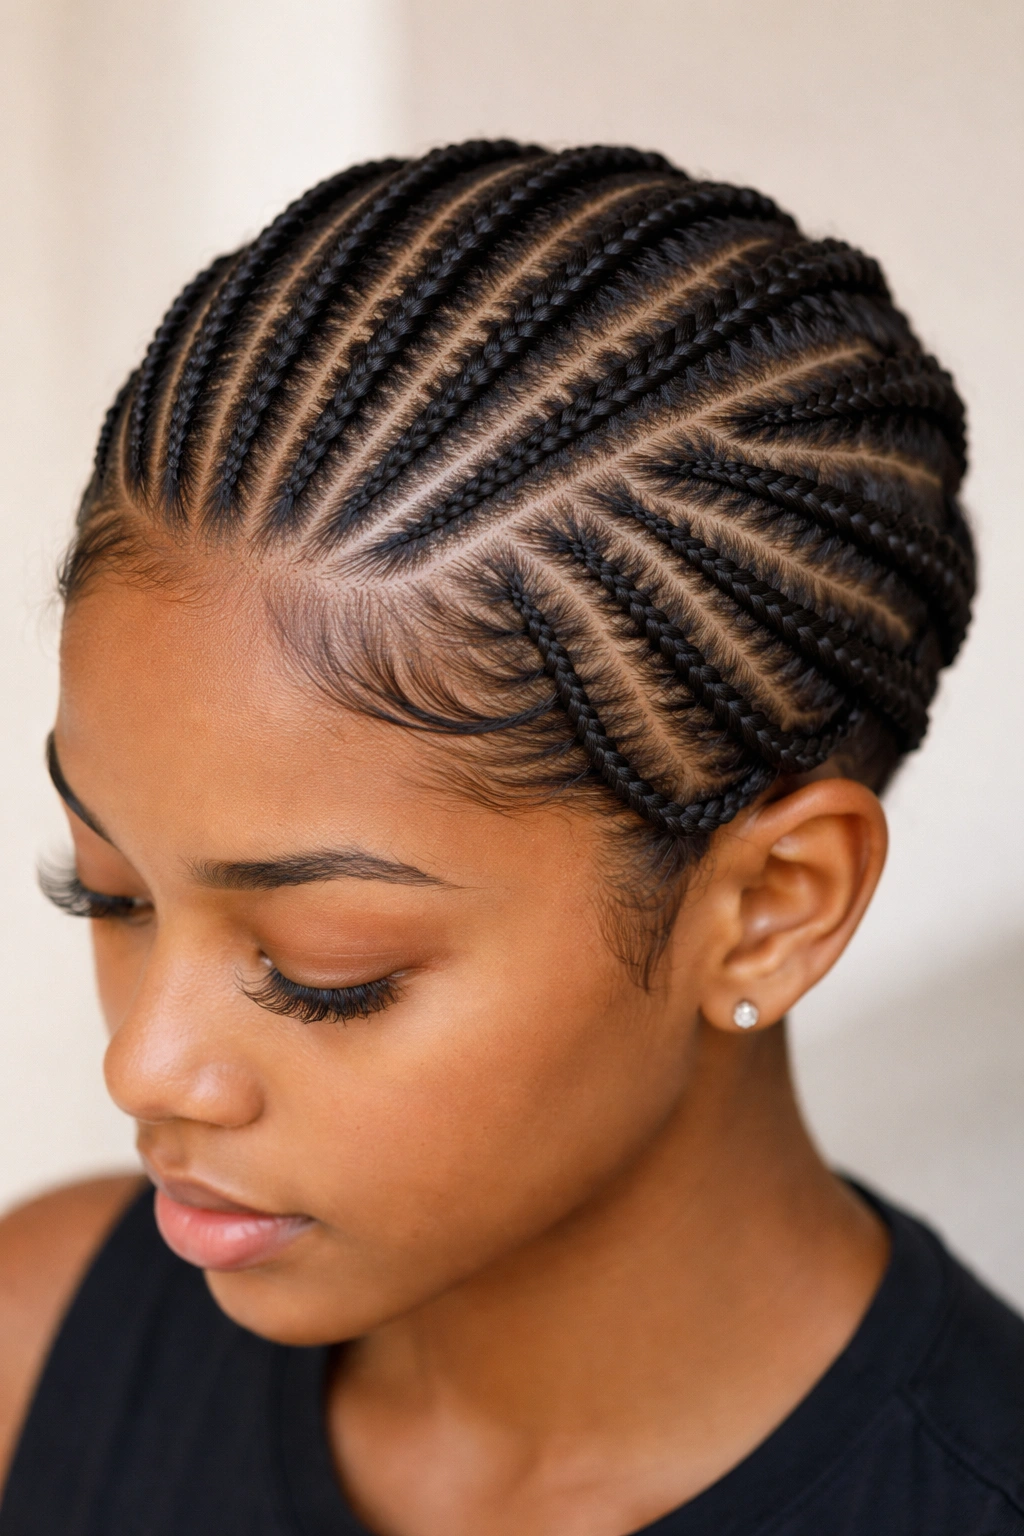
5. Thin Stitch Cornrows with Defined Edges
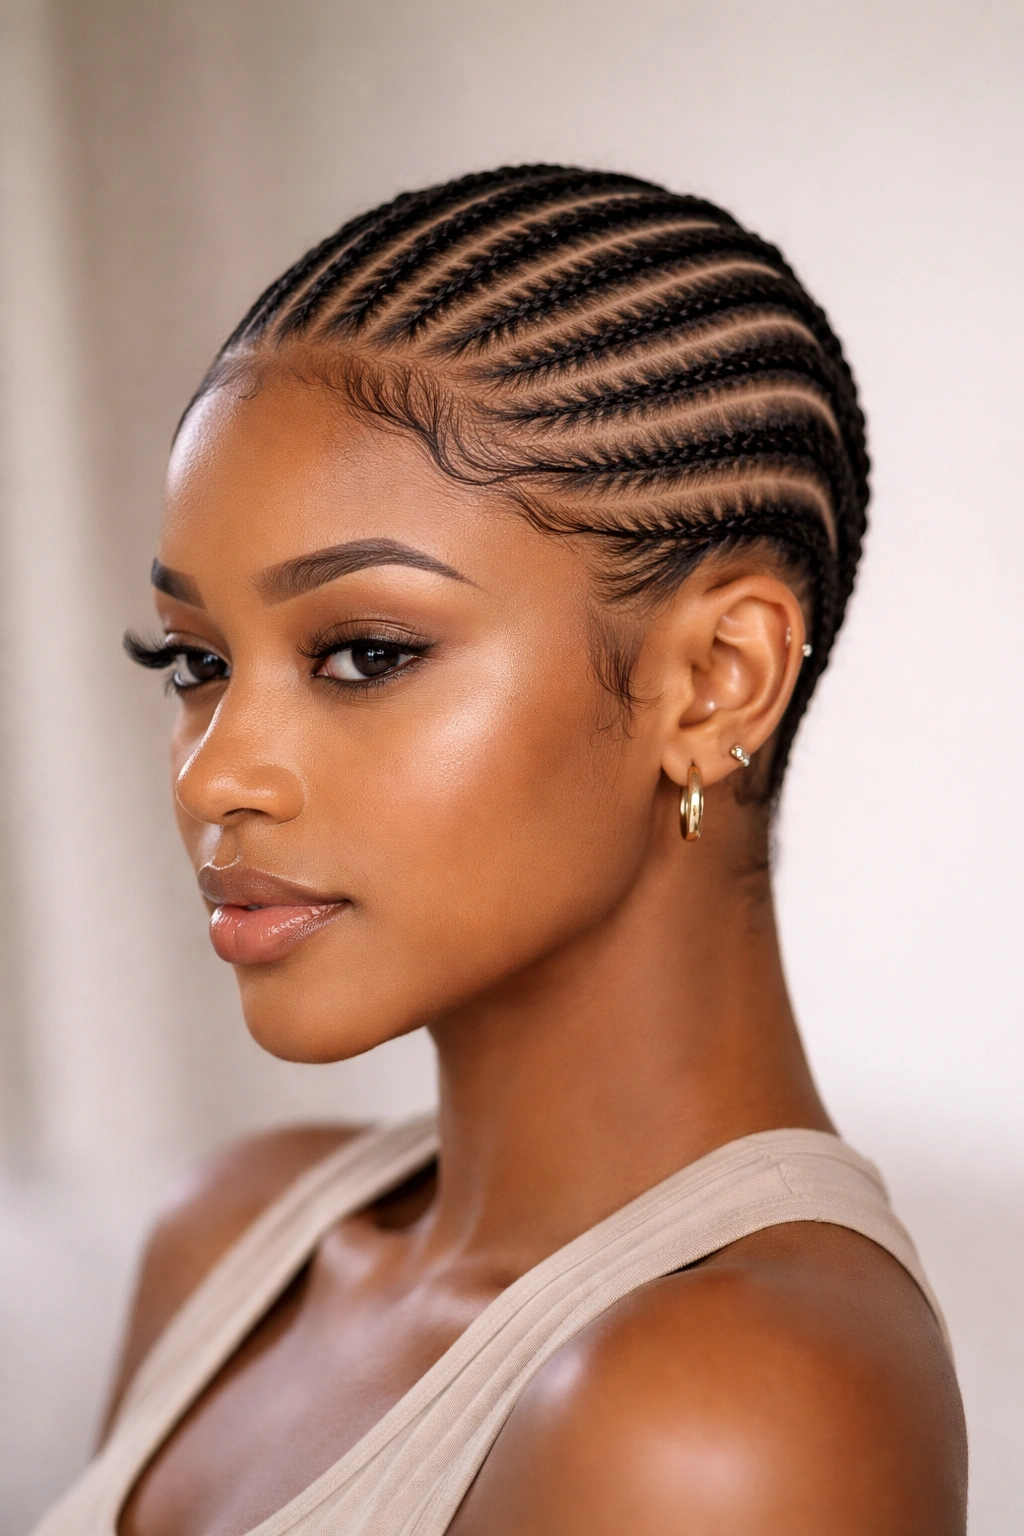
Thin, tightly braided cornrows create maximum definition and a very polished, controlled aesthetic. When you braid thin sections consistently, you create strong visual lines across the scalp, and on short hair this reads as intentional sophistication rather than a casual style.
What Makes Thin Stitch Cornrows Distinct
Thin cornrows emphasize the geometry and architecture of your scalp and head shape. The tight, defined lines create a sharp visual contrast, especially if your scalp shows between the braids. This is the stitch pattern to choose if you want your style to look meticulously groomed and precisely executed—it’s the difference between cornrows that look thrown together and cornrows that look like wearable art.
Creating and Maintaining Thin Cornrows
- Start with very even, thin sections—typically between 0.25 and 0.5 inches wide depending on your hair density
- Braid with consistent tension, keeping each braid snug against the scalp without pulling so hard that you create scalp pain or tension marks
- Thin cornrows hold their shape longer than thicker braids and create less bulk at the scalp, which is ideal for short hair where bulk can feel uncomfortable
- These braids will show loose hair and frizz more obviously, so invest in a good edge control and scalp moisturizer for maintenance
- The crisp, clean appearance of thin cornrows pairs beautifully with defined edges—clean, sharp, geometric hairlines enhance this style
Styling and Edge Options
- Thin cornrows look stunning with baby hairs laid down smoothly in swoops or precise geometric patterns
- Consider adding a subtle edge color or using scalp makeup if your scalp shows prominently between rows
- This style works beautifully on all hair types and textures, making it universally flattering
- Thin cornrows can be worn for 6-8 weeks if installed and maintained properly, longer than some other patterns
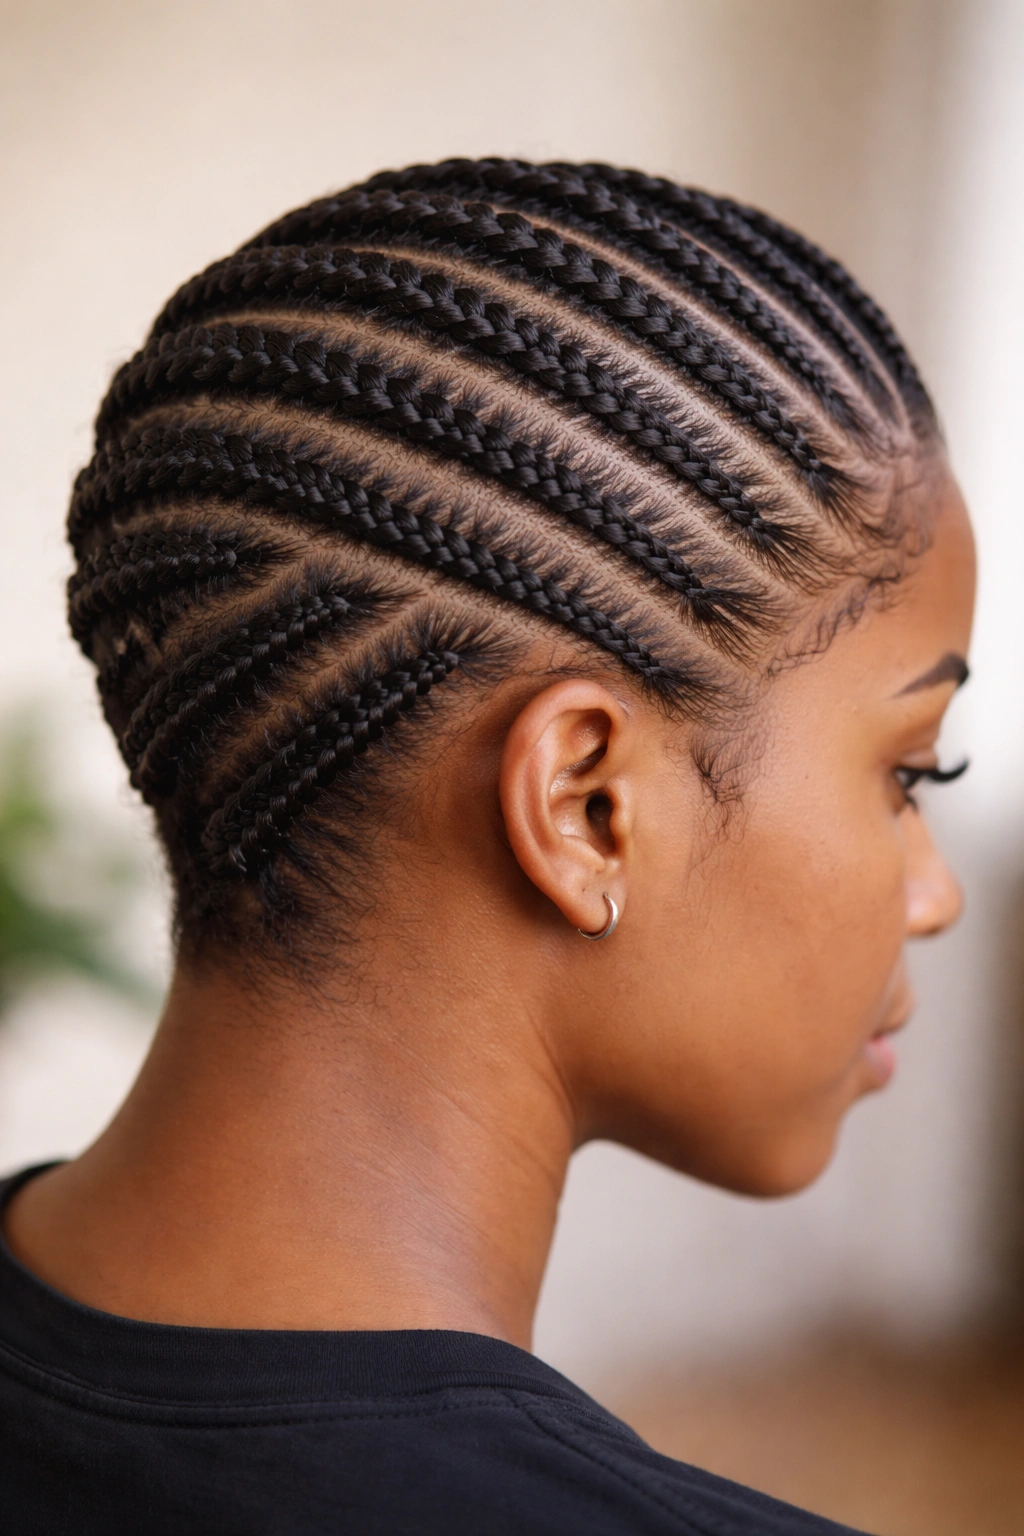
6. Thick Stitch Cornrows for Maximum Volume

When you braid thicker sections of hair into each cornrow, you create fewer overall braids, which means less total density on your scalp and a voluminous, statement-making style. Thick stitch cornrows are perfect for short hair that needs to feel impressive in terms of presence and visual impact.
Why Thick Cornrows Work for Short Hair
Thick cornrows can actually be easier to maintain than thin ones because fewer braids mean less overall styling and upkeep. Each braid is substantial enough to hold its shape longer, and the overall visual impact is undeniably bold. On short hair, thick cornrows read as confident and strong rather than delicate or intricate.
Creating Thick Cornrows Successfully
- Start with larger sections—typically 0.75 to 1 inch wide or even larger depending on your desired look
- Divide your head into fewer overall rows; instead of 8-10 thin rows, you might have 4-6 thick ones
- Braid with the same technique as thinner cornrows, but working with more hair in each section
- The key to thick cornrows on short hair is maintaining even tension despite working with more hair—it’s easy to create uneven texture when braiding thicker sections
- Thick cornrows on very short hair can sometimes feel heavy at the roots, so monitor your scalp comfort
Styling Options with Thick Cornrows
- Thick cornrows look beautiful adorned with gold cuffs, beads, or rings slipped onto the braids themselves
- The space between thicker braids is often noticeable on short hair, which can be a feature rather than a flaw—scalp showing between bold braids can look intentional and striking
- Thick cornrows work beautifully for creating a sleek, pulled-back look when secured at the nape or crown
- This pattern is excellent if you want a style that commands attention and makes a statement
7. Double Stitch Cornrows
Double stitch cornrows (also called stacked or layered cornrows) involve braiding two separate cornrows very close together, almost parallel, creating pairs of braids instead of single rows. This creates visual rhythm and texture while maximizing the use of your available hair.
What Makes Double Stitch Unique
Double stitch cornrows create a more intricate, visually complex pattern than single rows while actually being relatively straightforward to execute. The paired braids create a visual rhythm across the scalp that reads as thoughtful and intentional. On short hair, paired rows can help the style feel fuller and more interesting without creating the bulk of a fully braided scalp.
How to Execute Double Stitch Cornrows
- Divide your head into sections that will become pairs of cornrows—typically starting with marking where each pair will sit
- Create two close-together cornrows in the first marked area, spacing them about 0.25 inches apart
- Move to the next marked area and repeat, creating another pair of close cornrows
- The spacing between pairs should be equal to create visual consistency
- Each individual braid in the pair follows standard cornrow technique; the only difference is having two very close together
- Double stitch works best when both braids in each pair are the same thickness and tension
Why This Pattern Works on Short Hair
- Double stitch cornrows feel like a decorative style rather than a protective one, which reads as more intentional and fashion-forward
- The paired pattern creates visual movement without requiring length
- This is an excellent middle ground between the simplicity of straight rows and the complexity of more intricate patterns
- Double stitch pairs look beautiful adorned with coordinating cuffs or beads on each braid in the pair
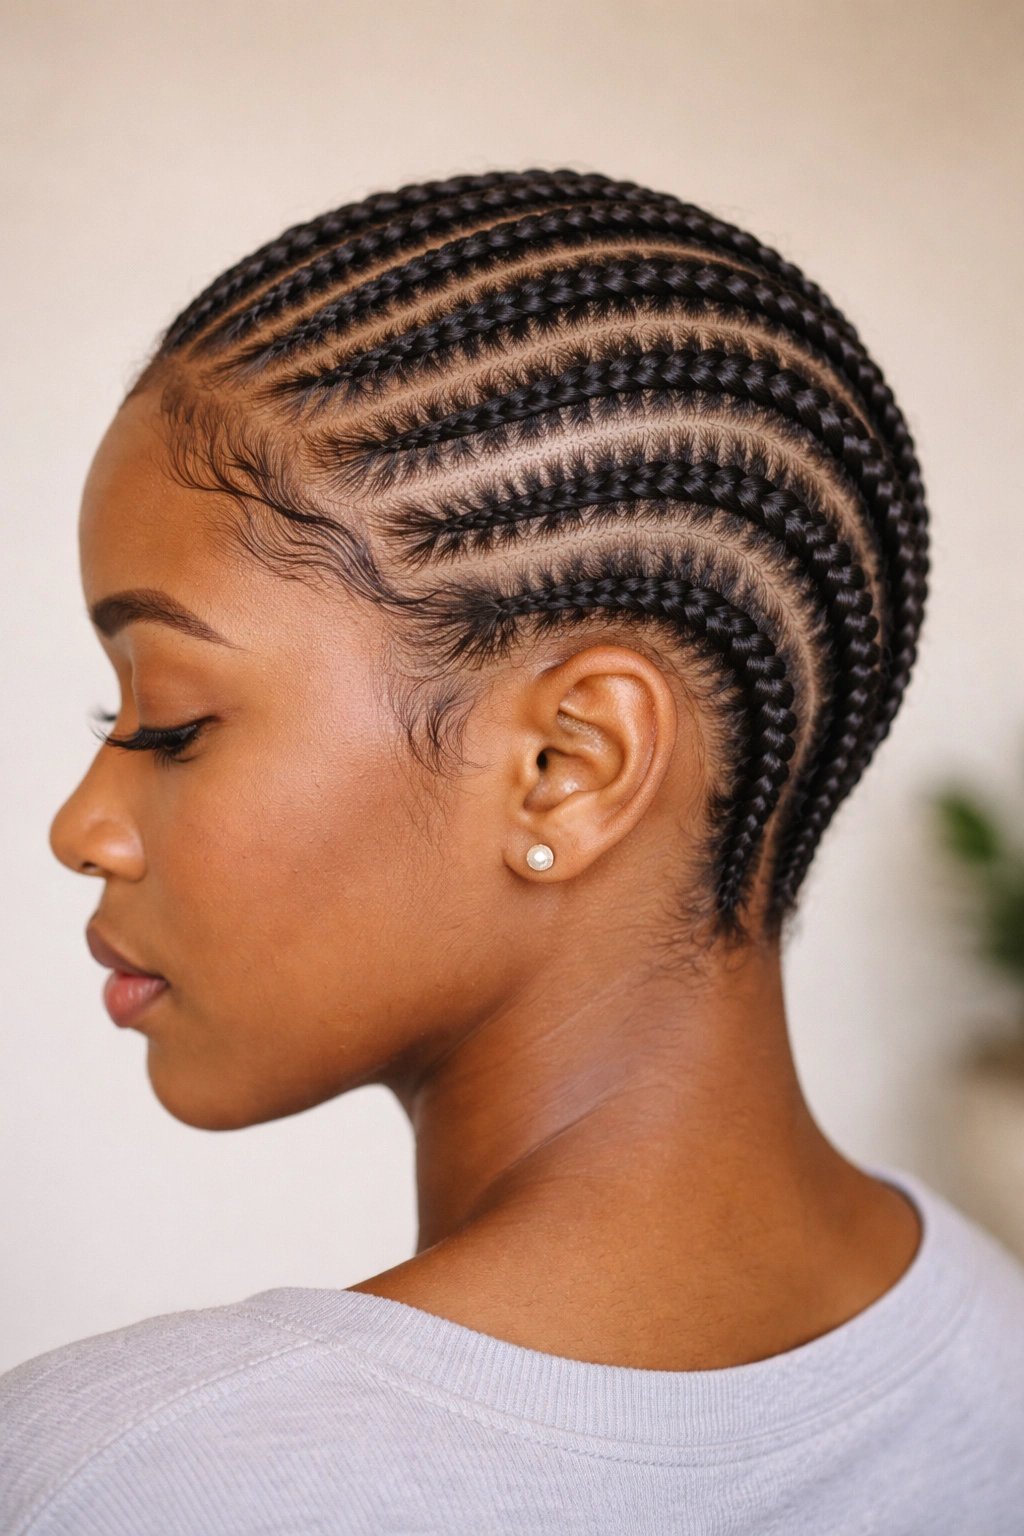
8. Diagonal Stitch Cornrows
Diagonal cornrows move from one side of the head toward the opposite side at an angle, rather than running straight back from the hairline or straight across from side to side. This creates a completely different visual flow and can be incredibly flattering for short hair.
Why Diagonal Patterns Flatter Short Hair
Diagonal cornrows create visual movement that travels across the face and scalp, which can lengthen the appearance of shorter hair and add dimension. The angled pattern is more interesting than straight rows and creates an off-kilter, artistic quality that feels modern and intentional. Depending on the direction of the angle, diagonal cornrows can subtly reshape how your face is framed.
Mapping and Installing Diagonal Cornrows
- Map out your diagonal lines before you start braiding, using a rattail comb to visualize where each cornrow will travel
- Start at one corner of your head and braid at a consistent angle toward the opposite corner
- Keep your spacing even so the diagonal rows are parallel to each other, not fanning out or converging
- The steeper the angle, the more dramatic the visual effect; shallower angles feel more subtle
- Diagonal cornrows work best when you have a clear plan before starting—changing your mind mid-style looks chaotic
Styling Diagonal Cornrows
- This pattern looks stunning on natural hairlines because the angle creates interesting framing around the face
- Diagonal cornrows can help face shapes feel more balanced—angles can add width where needed or create length where desired
- Consider your face shape and how the diagonal direction will interact with your features before committing to a direction
- Diagonal cornrows are beautiful paired with defined, geometric edges that complement the angled pattern
9. Curved Stitch Cornrows
Instead of straight lines, curved cornrows follow the natural contours of your head or create sweeping, arc-like patterns. This soft, organic approach to cornrows is perfect for short hair that deserves an elegant, flowing aesthetic despite its length.
What Makes Curved Cornrows Special
Curved cornrows feel more organic and less geometric than straight-line patterns, which can be beautiful if you want a softer, more artistic look. The curves follow the natural shape of your head, working with your skull shape rather than fighting against it. On short hair, curved cornrows can look incredibly sophisticated and flattering because they enhance rather than ignore your head’s natural contours.
Creating Curved Cornrow Patterns
- Visualize or lightly map out where your curves will sit before you start braiding
- Rather than planning straight lines from front to back, imagine curves or arcs that flow across your scalp
- Start braiding while maintaining the curve—this requires slightly different angles at different points in each braid
- Keep curves consistent throughout the style for visual cohesion; random, unpredictable curves look accidental rather than intentional
- Curved cornrows require careful attention to your angles and the natural shape you’re working with, making them more advanced than straight patterns
Why Curved Cornrows Work on Short Hair
- The organic, flowing appearance of curved rows can feel less severe than geometric patterns on very short cuts
- Curves enhance face shape more subtly than bold angles do
- Curved cornrows photograph beautifully because the flowing lines create visual interest without feeling chaotic
- This pattern is excellent if you want cornrows that feel artistic and considered rather than militantly geometric
10. Hybrid Stitch with Straight Sections and Mixed Patterns
Hybrid styles combine multiple stitch patterns in one installation—for example, straight cornrows at the crown, diagonal cornrows at the sides, and curved sections at the back. This creates a customized, fashion-forward look that takes advantage of your short hair’s ability to support varied patterns without feeling overwhelming.
Why Hybrid Styles Are Perfect for Short Hair
Short hair actually makes hybrid styles easier to execute than long hair because you have less length to manage and the overall look feels cohesive rather than chaotic. You can combine patterns strategically to flatter your face shape, fill space aesthetically, and create a truly custom style. Hybrid cornrows feel like a creative, intentional artistic choice rather than a default protective style.
Planning Your Hybrid Pattern
- Start by identifying different zones on your scalp—crown, sides, back, temple areas
- Assign a different stitch pattern to each zone based on what you want to achieve: straight rows for clean lines, diagonal for drama, curved for softness, thick for volume, thin for definition
- Make sure your zones transition logically rather than creating jarring changes in pattern or texture
- The most successful hybrid styles have a clear strategy—they’re not random combinations but thoughtful pairings
- Consider how patterns will interact at their edges to ensure the overall look feels intentional
Execution Tips for Hybrid Styles
- Start with your most challenging pattern while your hands are fresh, then move to simpler patterns
- Keep your section lines very clear so pattern transitions feel deliberate and not accidental
- Hybrid styles work best when you have a detailed plan before starting; improvising during installation usually results in a disjointed appearance
- Take a photo reference or draw your pattern down on paper before you begin—this prevents mid-installation regret
- Hybrid cornrows offer endless customization; this is your opportunity to create a style that’s uniquely suited to your hair, face, and personal aesthetic
Final Thoughts
The right cornrow stitch pattern for your short hair depends on what you want to communicate with your style. Are you going for polished and controlled, or soft and artistic? Do you want maximum definition or a more natural appearance? Should your style feel bold and statement-making, or subtle and understated? The answer to these questions points you toward your ideal stitch pattern.
Short hair’s biggest advantage isn’t that it’s easy to style—it’s that it forces you to be intentional. When you don’t have length to hide behind, every choice becomes visible. That’s not a limitation; it’s an opportunity to create a style that feels completely deliberate and custom-made for you.
The cornrows you choose should feel comfortable from day one, so tension and scalp health are non-negotiable. If a style feels tight enough to cause headaches or scalp tenderness, it’s braided too tightly regardless of how beautiful it looks. Your health comes first, and the best style is one that feels good to wear.
Experiment with different stitch patterns, save reference photos of styles that inspire you, and don’t be afraid to mix and match. Your short hair is a blank canvas for geometric designs, soft curves, bold patterns, and creative combinations. Each of these ten stitch styles offers something different—the one that’s right for you is the one that makes you feel confident and looks exactly like the artistic vision in your head.