Stitch cornrows have become a go-to braiding technique for people who want to protect their natural hair while creating intricate, sculptural styles that look as good as they feel. The stitching technique—which creates that distinctive raised, textured pattern—offers unique styling possibilities that sleeker traditional cornrows can’t quite match. But here’s what many people don’t realize: stitch cornrows aren’t just beautiful on their own. When you work them into updos, you unlock a whole new dimension of styling versatility. You can go from protective everyday wear to a polished updo that works for work meetings, celebrations, or special occasions—sometimes without adding a single additional hair or accessory. The texture, dimension, and built-in visual interest that stitch cornrows provide mean your updo often looks more elaborate and intentional than the time and effort required to create it actually demands.
The beauty of stitch cornrow updos lies in how they merge practicality with genuine artistry. These aren’t complicated styles that require you to visit your stylist every time you want variety. Many of them you can restyle, adjust, and re-pin throughout the wear week. Some can be dressed up or dressed down depending on the occasion. Others create natural lift and body at the crown that photographs beautifully. Whether you’re looking to add height, frame your face differently, transition between styles, or simply protect your edges while keeping everything off your shoulders, stitch cornrow updos offer solutions that work for virtually every texture, length, and face shape.
What follows is a collection of ten stitch cornrow updos that each bring something distinctly different to the table—from elegant and refined to playful and bold. Each style offers techniques you can apply and adapt, whether you want to recreate it exactly as described or use it as inspiration for your own custom version.
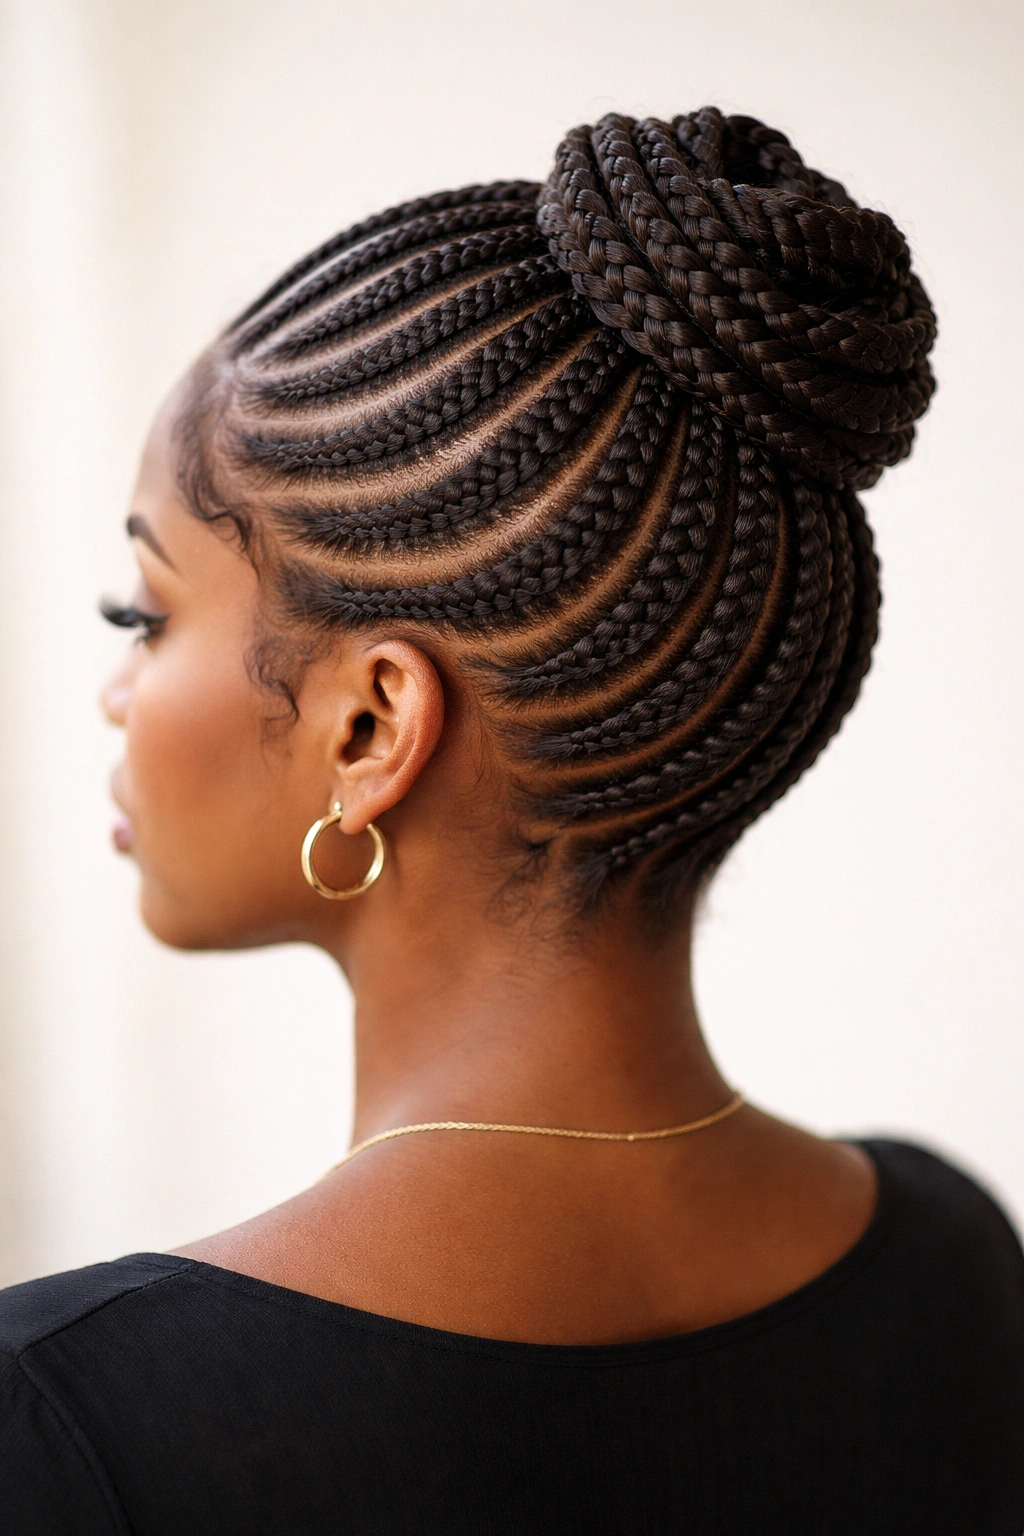
1. Crown Stitch Cornrow Updo
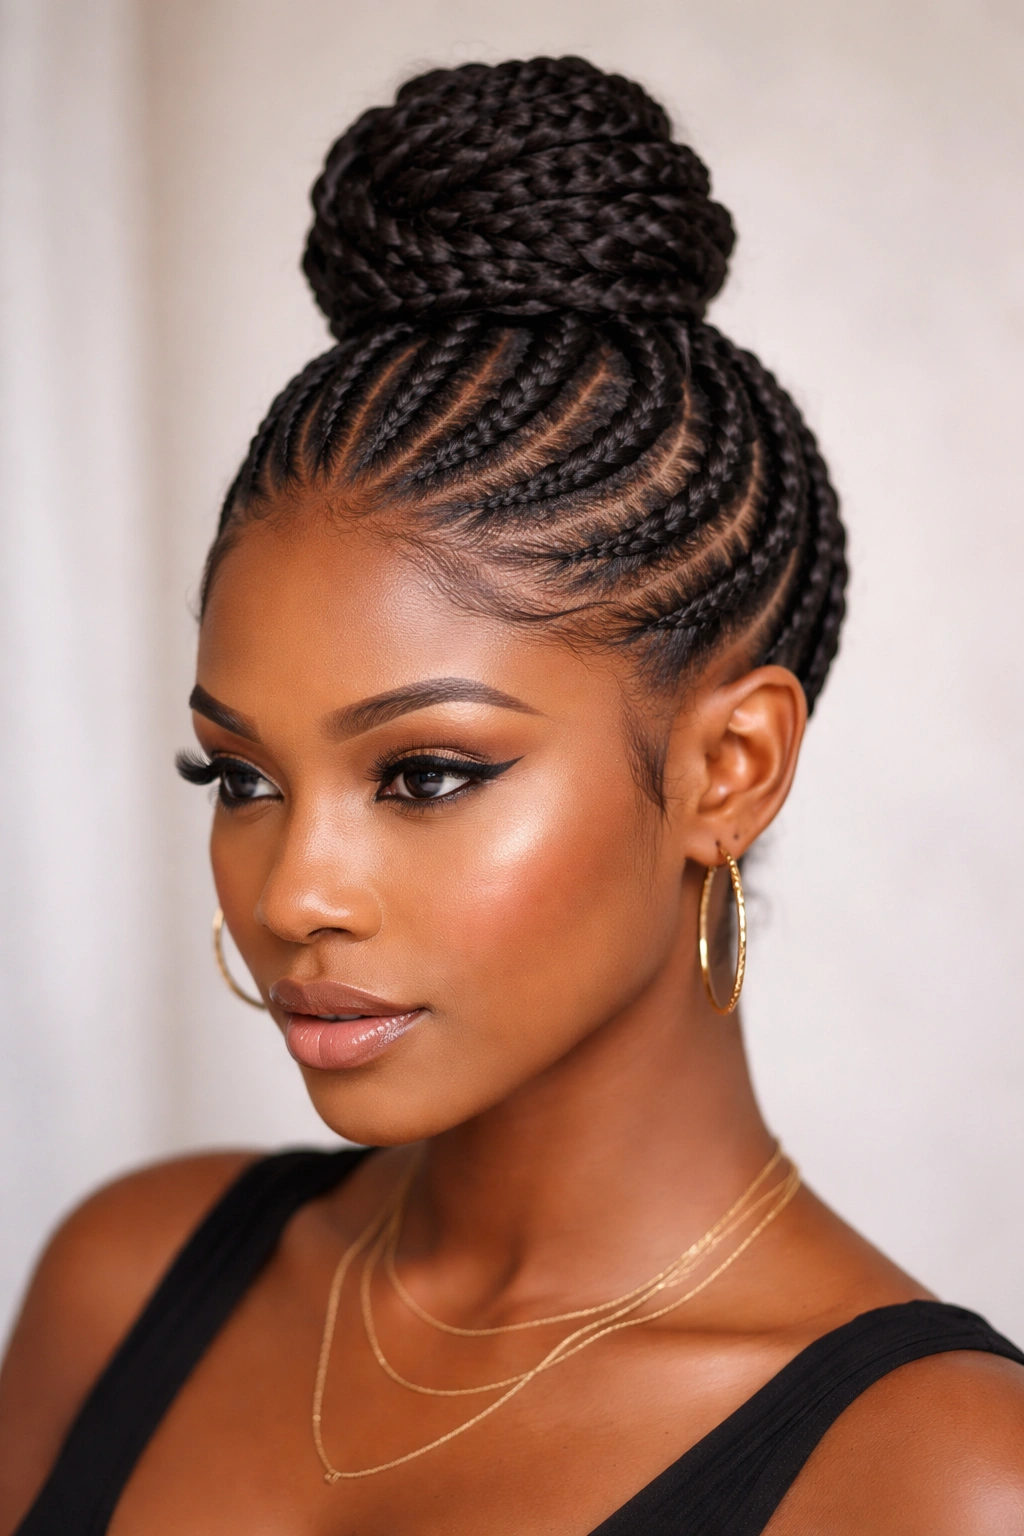
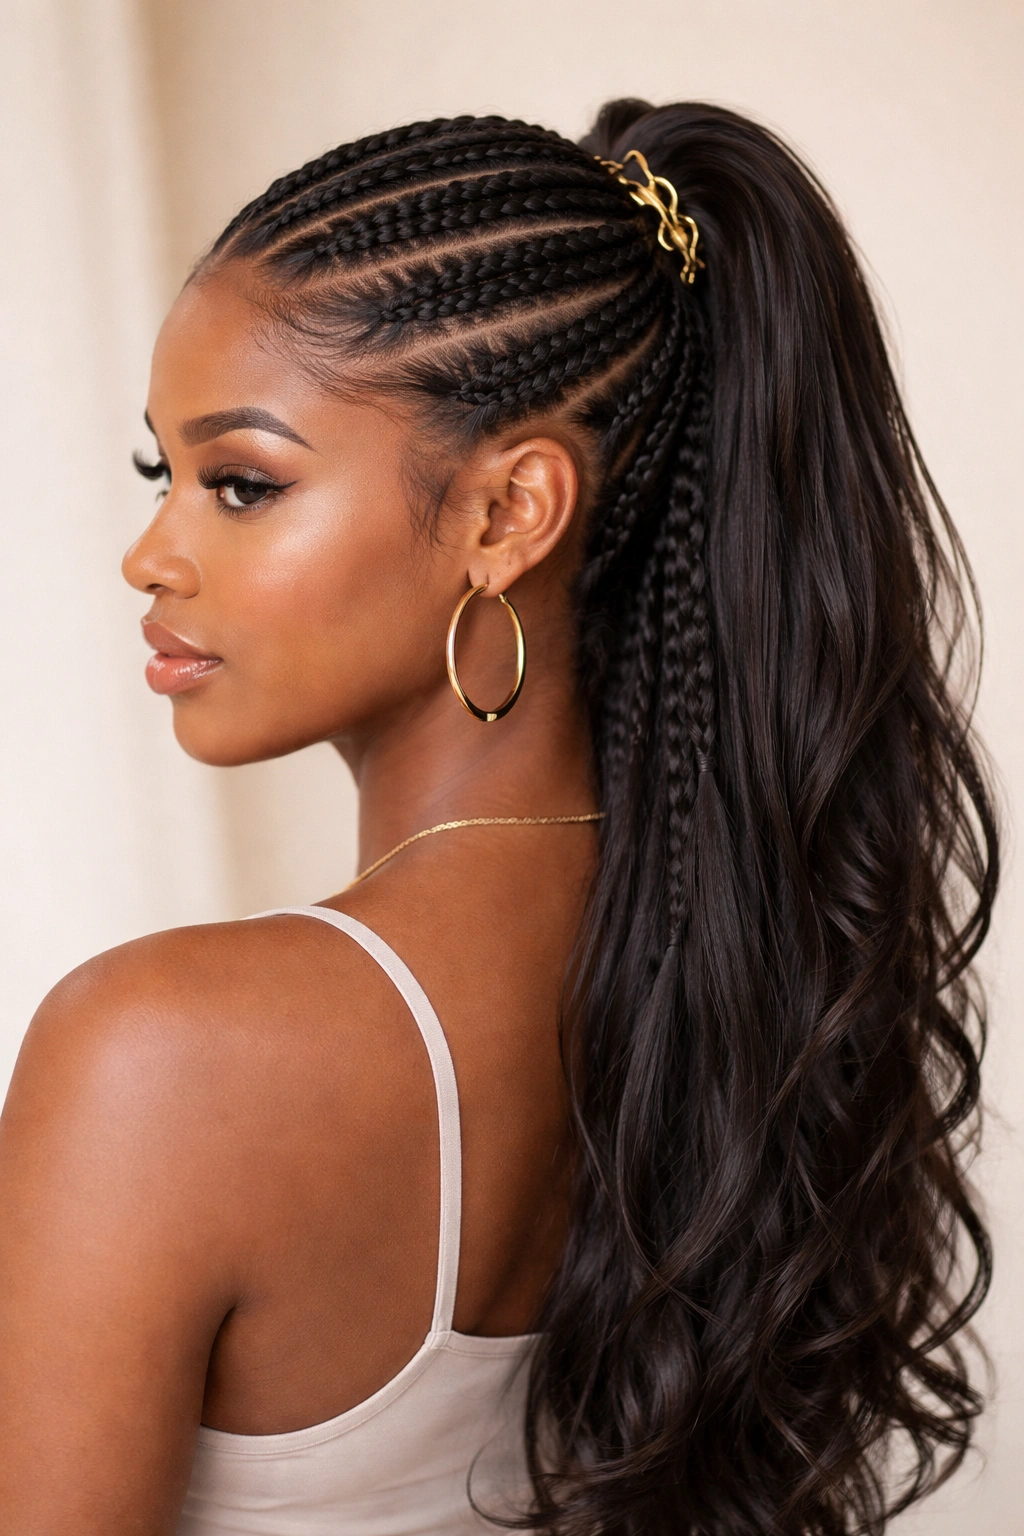
This is the style that often earns the most compliments precisely because it looks more complicated than it actually is. Rather than directing all your stitch cornrows toward the back, you’re routing them in a way that they naturally hug the crown of the head, then flowing the remaining length upward into a gathered bun, ponytail, or wrapped knot at the very top of your head. The effect is that your entire crown appears lifted, fuller, and more sculpted than your natural starting point.
Why This Style Works So Well
Stitch cornrows that follow the natural curve of your hairline and crown create an optical illusion of significant height and volume at the top of the head. This style is particularly flattering for people with rounder face shapes because the height at the crown helps elongate the face proportions. The technique also naturally prevents breakage around the hairline and temples because the braids are supporting that delicate hair rather than pulling directly from it.
How to Create It
- Start your first stitch cornrow at one temple, braiding upward and backward along the side of your head toward the crown
- Create a second stitch cornrow that mirrors this path on the opposite side
- Bring additional stitch cornrows up the center-back section toward the crown, angling them slightly forward as you work upward
- Gather all the free lengths of hair into a high point at the crown and secure with a hair tie or bobby pins
- Wrap a small section of hair around the base of your gathered ponytail to conceal the elastic, or use a decorative clip or cuff to anchor the style
- Gently pull and loosen the braids slightly if you want a softer, fuller appearance
Pro tip: Use bobby pins that match your hair color to secure stray pieces invisibly, and don’t pull the style so tightly that you’re stretching your hairline—you want it elegant and protective, not uncomfortably taut.
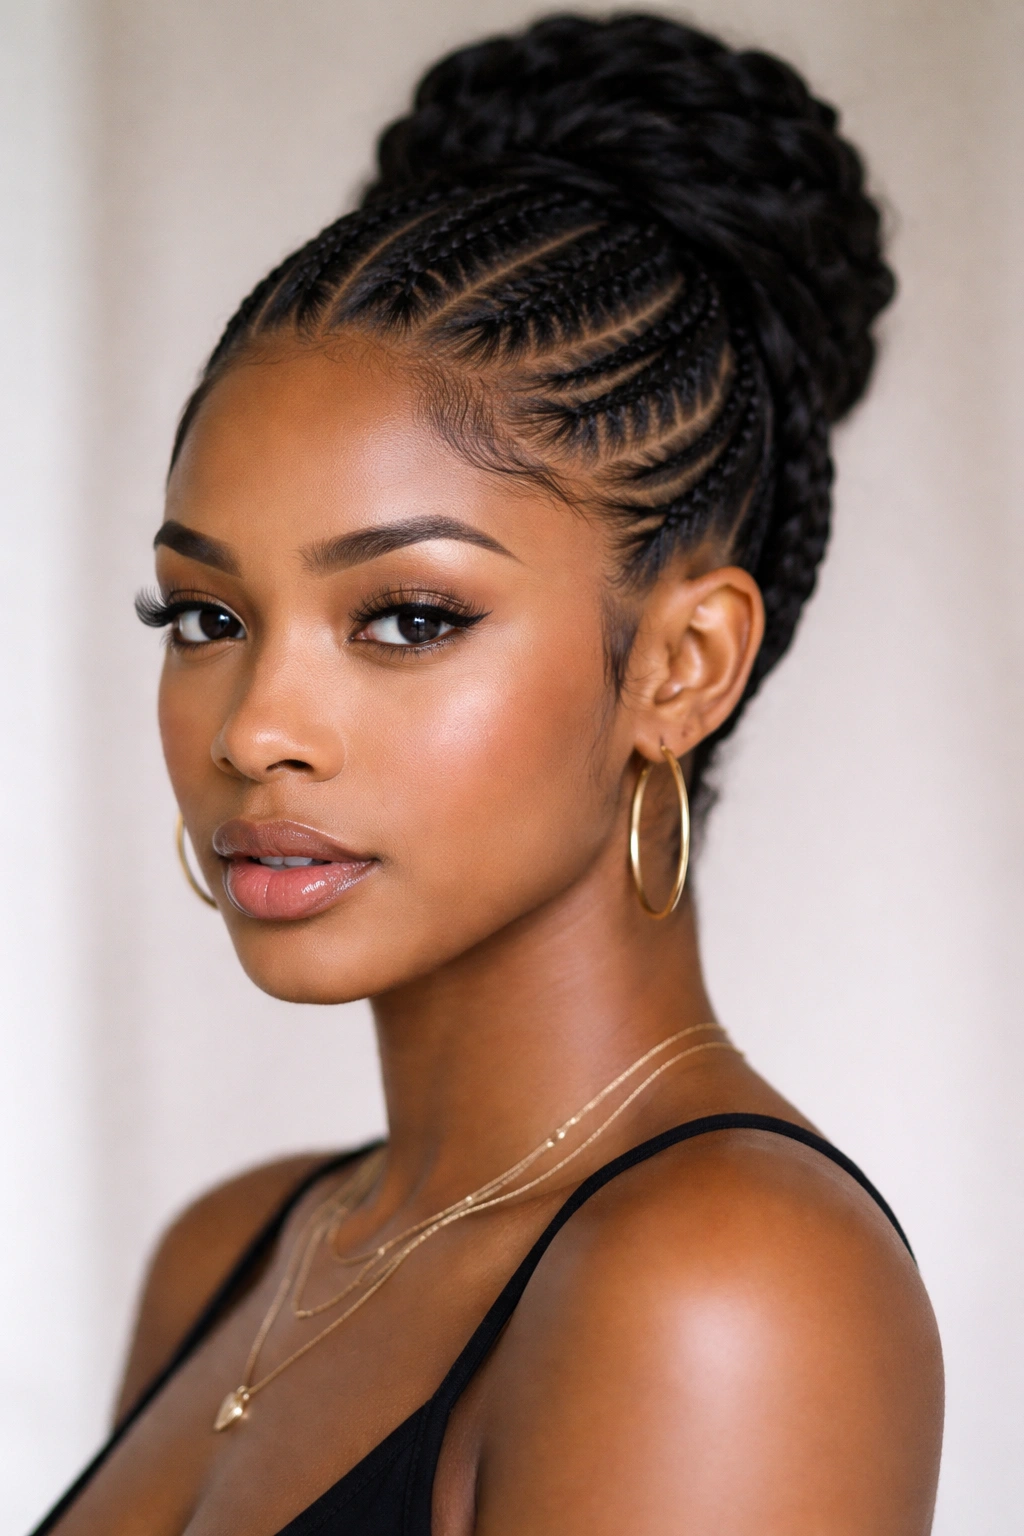
2. Braided Bun with Stitch Cornrow Frame
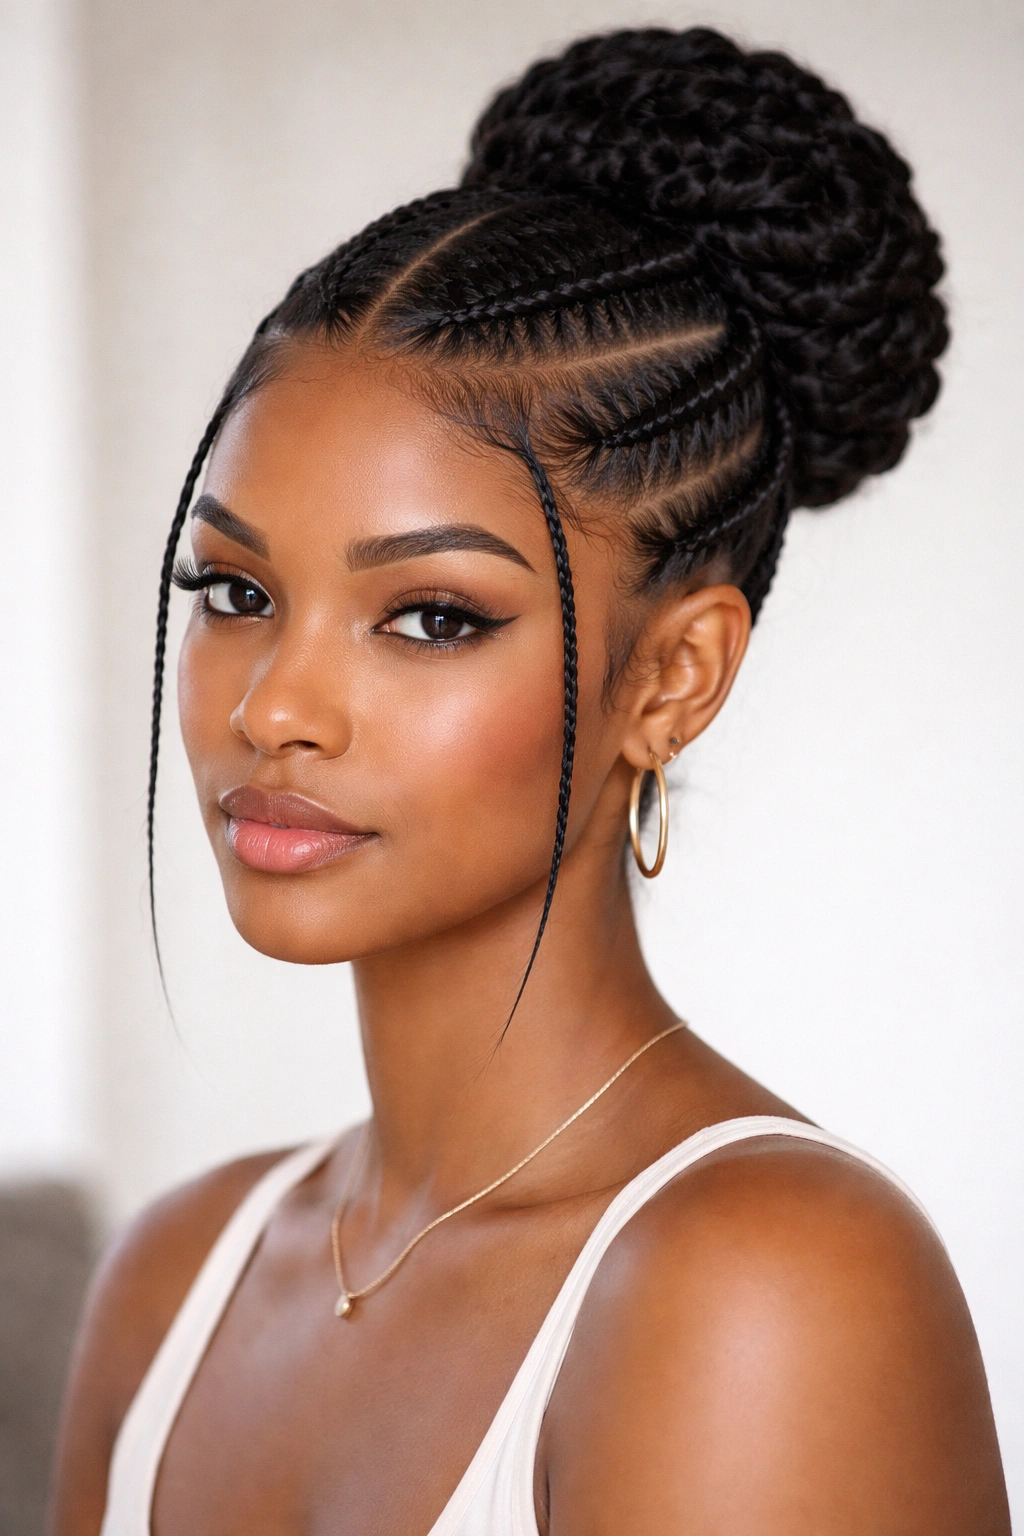
Instead of working multiple braids all the way to an updo, this version uses two or three stitch cornrows as a face-framing element while the bulk of your hair is released into a textured bun at the back. The cornrows themselves become a decorative frame and structural anchor, while a separate bun (whether twisted, curled, or braided) provides the main visual focus of the updo. This creates dimension and visual interest without requiring extensive braiding of your entire head.
The Visual Impact and Practicality
The combination of stitch cornrows with a soft, textured bun feels elevated and intentional while remaining genuinely practical. You’re protecting the hair closest to your face with the cornrows, which is exactly where tension and breakage tend to happen most. The bun portion can be created from your natural hair texture, a braid, twists, or even a curled section, giving you endless customization options depending on your mood, the occasion, or what you’re trying to achieve.
Styling Steps
- Create two stitch cornrows that begin at the temples and curve backward toward the crown area, positioning them to frame the face
- Allow these cornrows to end before you reach the back; gather the free-flowing hair at the nape into a low or mid-height ponytail
- Twist, braid, or curl this ponytail section into a compact bun, securing with bobby pins
- If desired, wrap one of the stitch cornrows around the base of the bun as a decorative accent
- Add a decorative hair cuff, pearl-adorned clip, or metallic bobby pins at the crown or bun base for visual polish
Worth knowing: This style works beautifully whether your natural hair is loose, textured, wavy, or in its own braids or twists—the stitch cornrows adapt to virtually any hair texture.
3. Side-Swept Stitch Cornrow Updo
This version takes all or most of your stitch cornrows and directs them diagonally across the head toward one side, where they converge into a side-swept bun, ponytail, or wrapped knot. The diagonal pattern is inherently more dynamic and flattering than straight-back cornrows, and the side-swept direction creates a sophisticated, almost art-deco visual that’s perfect for situations where you want to look polished without appearing stiff.
Why Asymmetry Is Powerful Here
Asymmetrical updos naturally draw the eye and create visual interest. The diagonal flow of stitch cornrows leading to a side-swept bun has an intentional, high-fashion quality that makes the style feel deliberate and considered. Depending on which side you choose, you can also use this style to frame one side of your face more dramatically, which is useful if you prefer to show off one side or have specific styling goals for a particular photo angle or event.
Creating the Look
- Decide which side you want to sweep toward (left or right)
- Begin stitch cornrows on the opposite side of your head—if you’re sweeping right, start on the left
- Angle each cornrow so it’s naturally directing toward the side point where your updo will be
- Create multiple cornrows (three to five, depending on hair volume and width) that all flow in the same diagonal direction
- Gather all the hair at your chosen side point and create your updo—a bun, twisted knot, or ponytail
- Secure with bobby pins, and add a decorative element like a hair clip, cuff, or wrapped section for polish
Pro tip: The side with the updo will appear smaller and more delicate, while the side without the updo will look fuller—use this to your advantage based on your face shape and personal preference.
4. Twisted Stitch Cornrow Crown
This style combines stitch cornrows with twists to create a hybrid look that’s even more textured and visually interesting than cornrows alone. You’re creating stitch cornrows that follow a curved path around the crown of the head, but then at key points, you’re transitioning into two-strand twists or larger twisted sections that flow into an updo at the back. The visual result is a crown that looks intricate without requiring extensive braiding, plus the twists add a different texture that complements the stitch braids beautifully.
The Technical Magic
The combination of two different braid techniques—stitch cornrows and twists—creates visual rhythm and complexity. Stitch cornrows have that raised, dimensional quality, while twists are typically smoother and sleeker. When you use them together, each one highlights the unique texture of the other. This is also a practical choice if you’re protective styling for a specific timeframe but want to change the style within that wear period—the twists can sometimes be loosened or restyled more easily than fixed cornrows.
How to Execute It
- Begin with stitch cornrows that follow the natural curve of your crown from one side of your head to the other
- As the cornrows reach the back crown area, transition into two-strand twists by dividing a section into two parts and twisting them around each other
- Continue these twists down toward the nape area, where they meet your remaining hair
- Gather all hair at the back nape and form your updo—a twisted bun, a gathered ponytail, or a wrapped knot
- Secure everything with bobby pins; you can tuck the twist ends under the bun for a neat, finished appearance, or let them peek out for texture
Worth knowing: Twists tend to loosen slightly more quickly than cornrows, so this style works especially well if you’re planning to re-style or adjust it midway through the wear week.
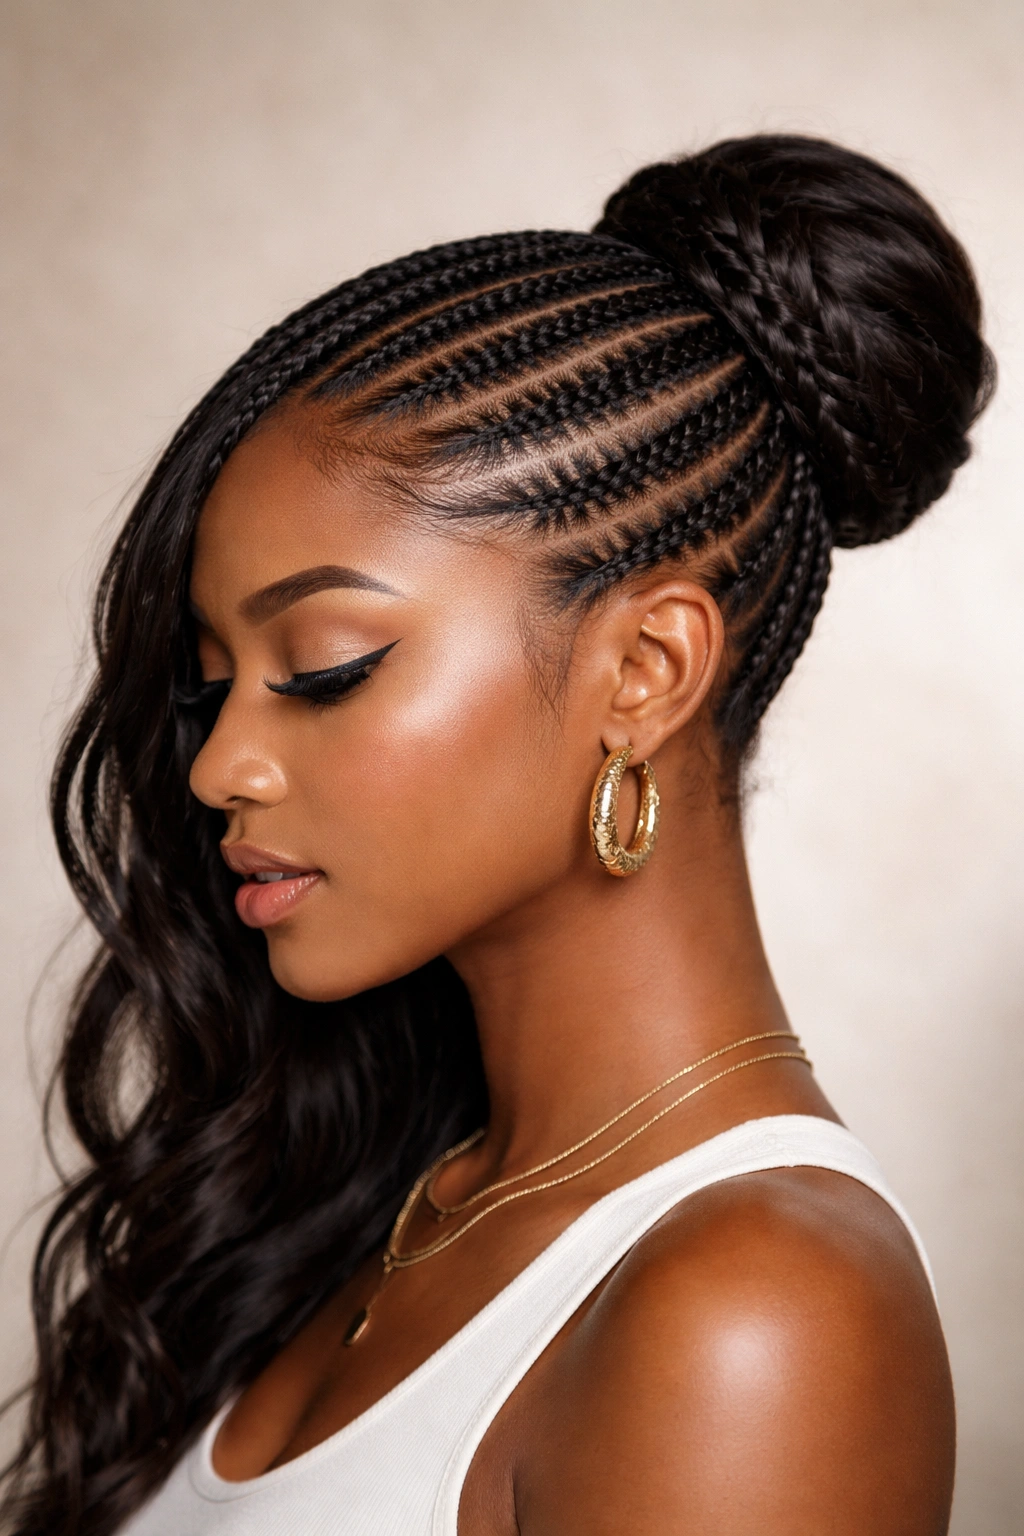
5. Double Stitch Cornrow Half-Up
A half-up style keeps hair away from your face and neck while maintaining the flow and movement of your hair down your back—perfect for situations where you want an updo feel without full commitment. This version uses two stitch cornrows that begin at the temples and meet at the back crown, where the hair is gathered into a clip, tie, or twisted knot. The remainder of your hair flows freely down your back, creating a balanced aesthetic that’s both practical and romantic.
The Best-of-Both-Worlds Appeal
Half-up styles are genuinely versatile—they offer the protective benefits of an updo while keeping your hair down where you can see it, feel it move, and experience the full sensory appeal of length. The two stitch cornrows provide enough structure that the style doesn’t look limp or incomplete, while the free-flowing back prevents that overly-restrained feeling. This works beautifully for work (polished enough), casual outings (relaxed but intentional), and even dressier occasions if you add the right accessories.
Step-by-Step Approach
- Create a stitch cornrow beginning at your left temple, angling it backward and slightly upward toward the crown
- Mirror this on the right side, so both cornrows are moving toward a central meeting point at the back crown
- Where the cornrows meet (at the back crown area), gather this section plus a small amount of the free-flowing hair into a small ponytail or twisted knot
- Secure with a hair tie, decorative clip, or bobby pins wrapped with a small section of hair
- Leave the remainder of your hair down, and lightly style it—you can leave it as your natural texture, create loose curls, or braid small accent sections
Pro tip: If your hair tends to frizz at the nape when it’s down, applying a light smoothing cream or edge control to the hairline before creating the cornrows will help everything stay neat throughout the day.
6. Stitch Cornrow Wraparound Updo
This elegant style routes stitch cornrows all the way around the head in a wraparound pattern—starting at one temple, moving along the sides and back, and ending at the opposite temple—where all the gathered hair then forms an updo at the back or side. The visual effect is a crown of braids that literally wraps around your entire head, creating an almost tiara-like frame for your face. This style is especially striking when photographed from behind or when viewed from certain angles.
Creating a Structured Halo Effect
The wraparound pattern naturally creates visual structure and definition around your face and head. This technique is particularly flattering for people with longer face shapes because the horizontal line of braids wrapping around the sides helps visually shorten the face. The halo effect is also inherently elegant—it’s a pattern people associate with thoughtful, intentional styling, which is why this style works beautifully for special occasions, celebrations, or any time you want to look genuinely polished.
Construction Details
- Begin with a stitch cornrow at one temple, angling it back toward the crown
- Continue creating stitch cornrows that follow a path around the sides and back of your head, maintaining consistent spacing between each braid
- Each cornrow should angle slightly forward as you work toward the opposite side, creating that wraparound effect
- Bring all your braids to meet at a central point (usually the back or side) where you’ll form your updo
- Gather all the free hair into a bun, knot, or twisted style, and secure with bobby pins and hair ties
- The braids themselves become architectural elements that look beautiful from every angle
Worth knowing: This style requires good spatial awareness and usually takes longer to create than some other updo options, but the impact and photos are absolutely worth the time investment.
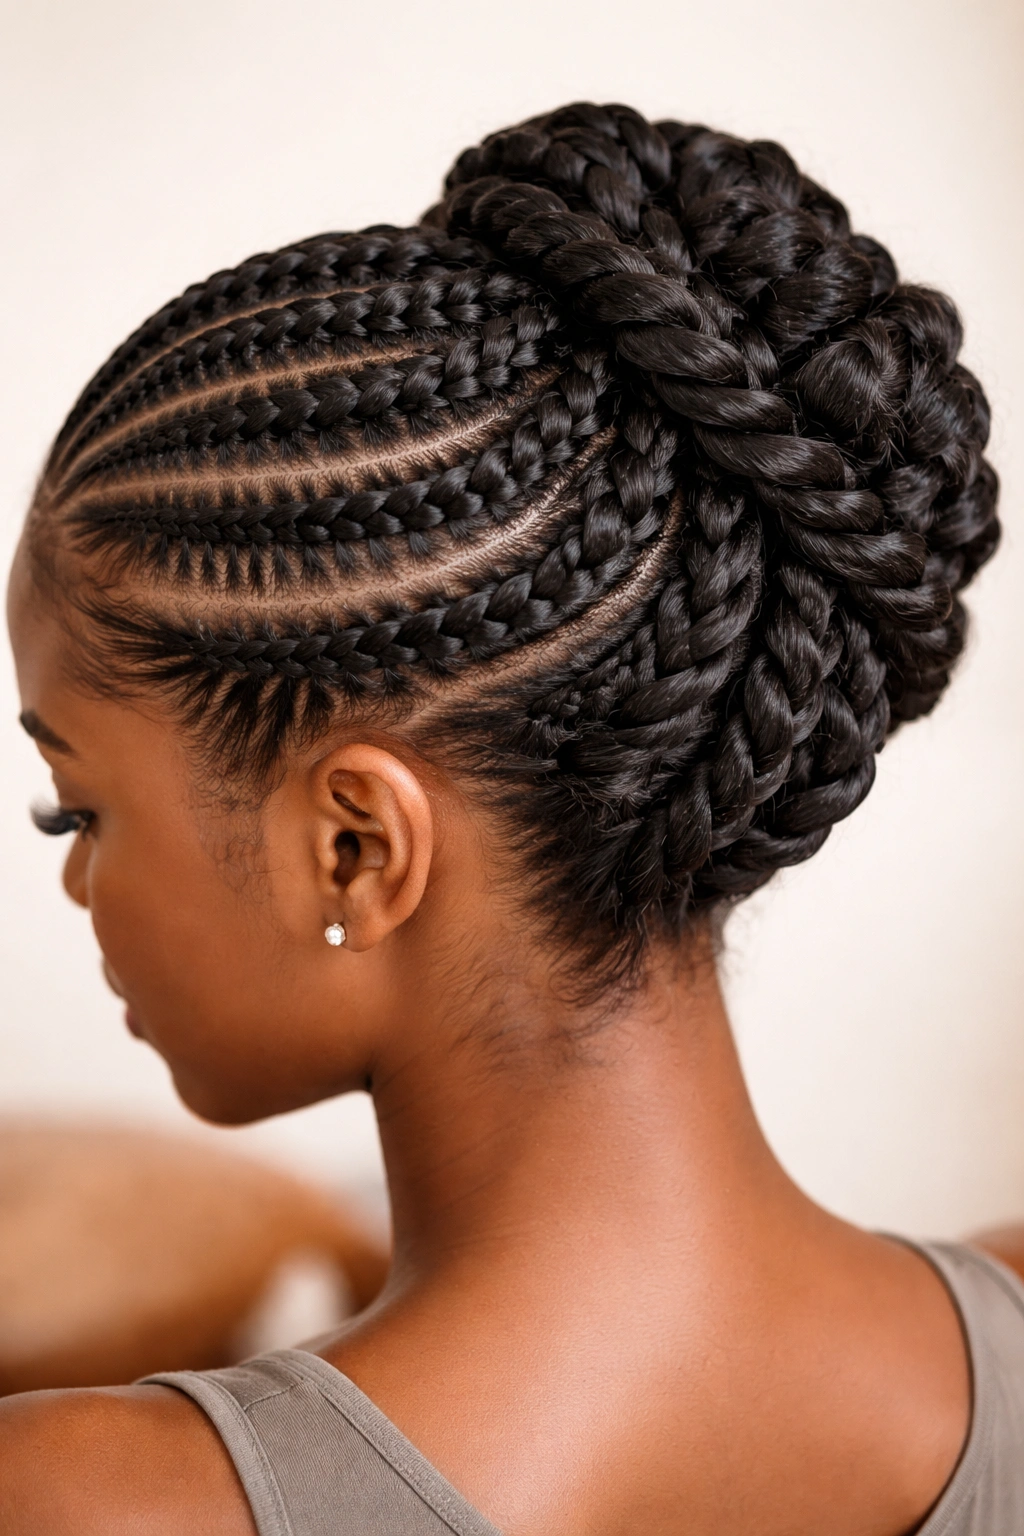
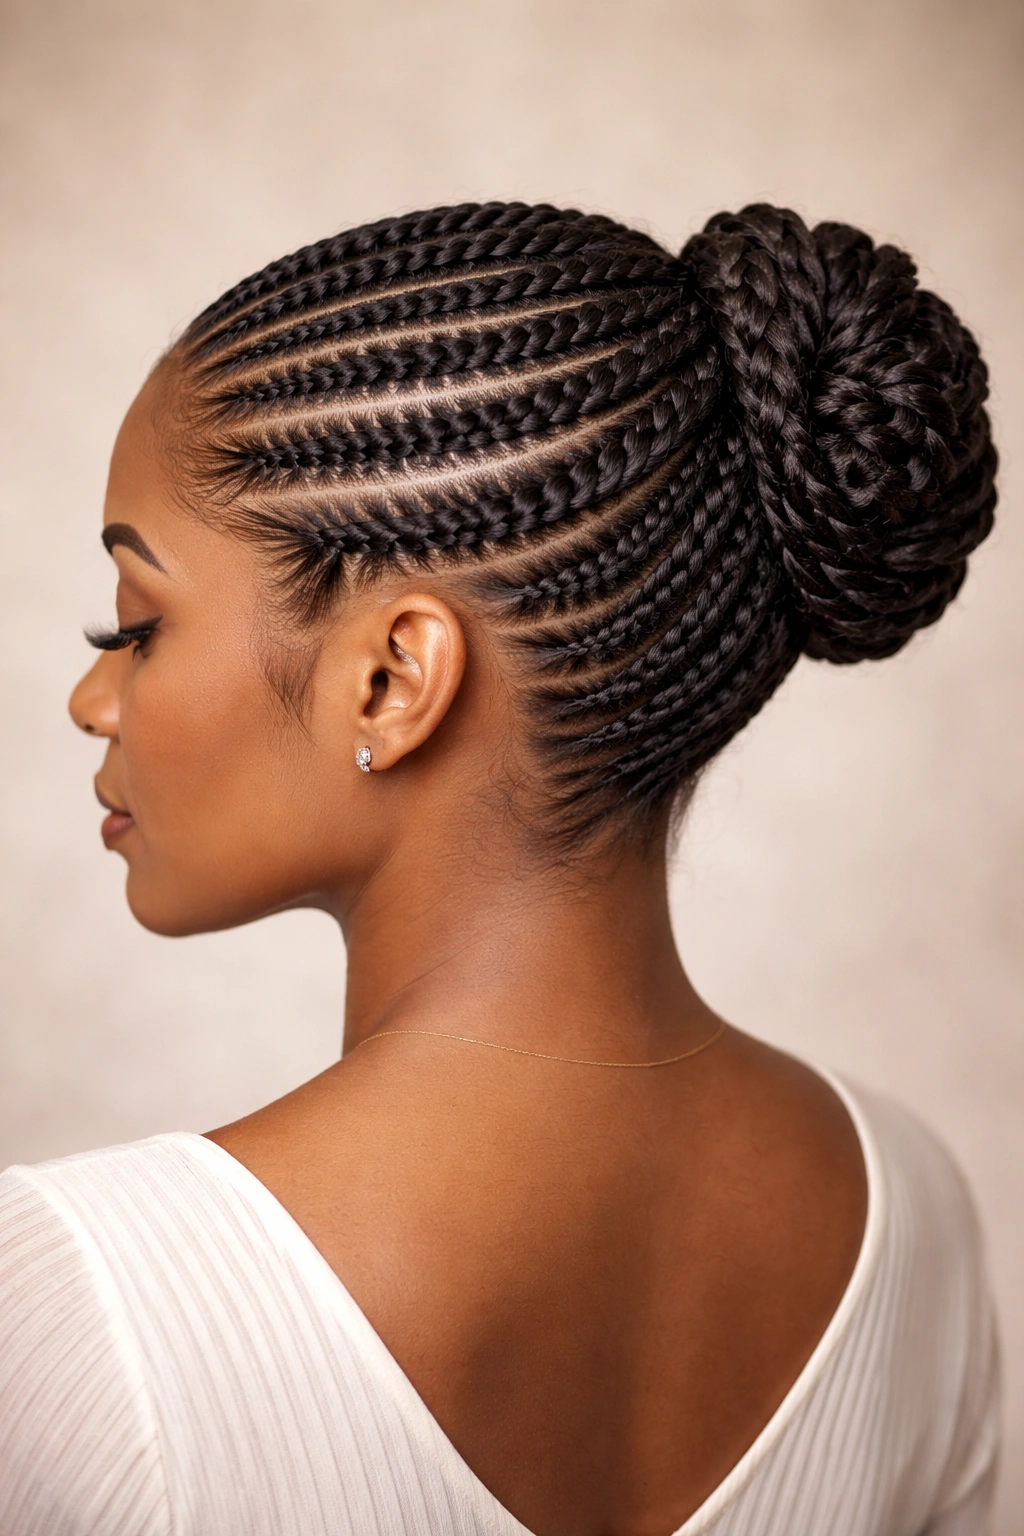
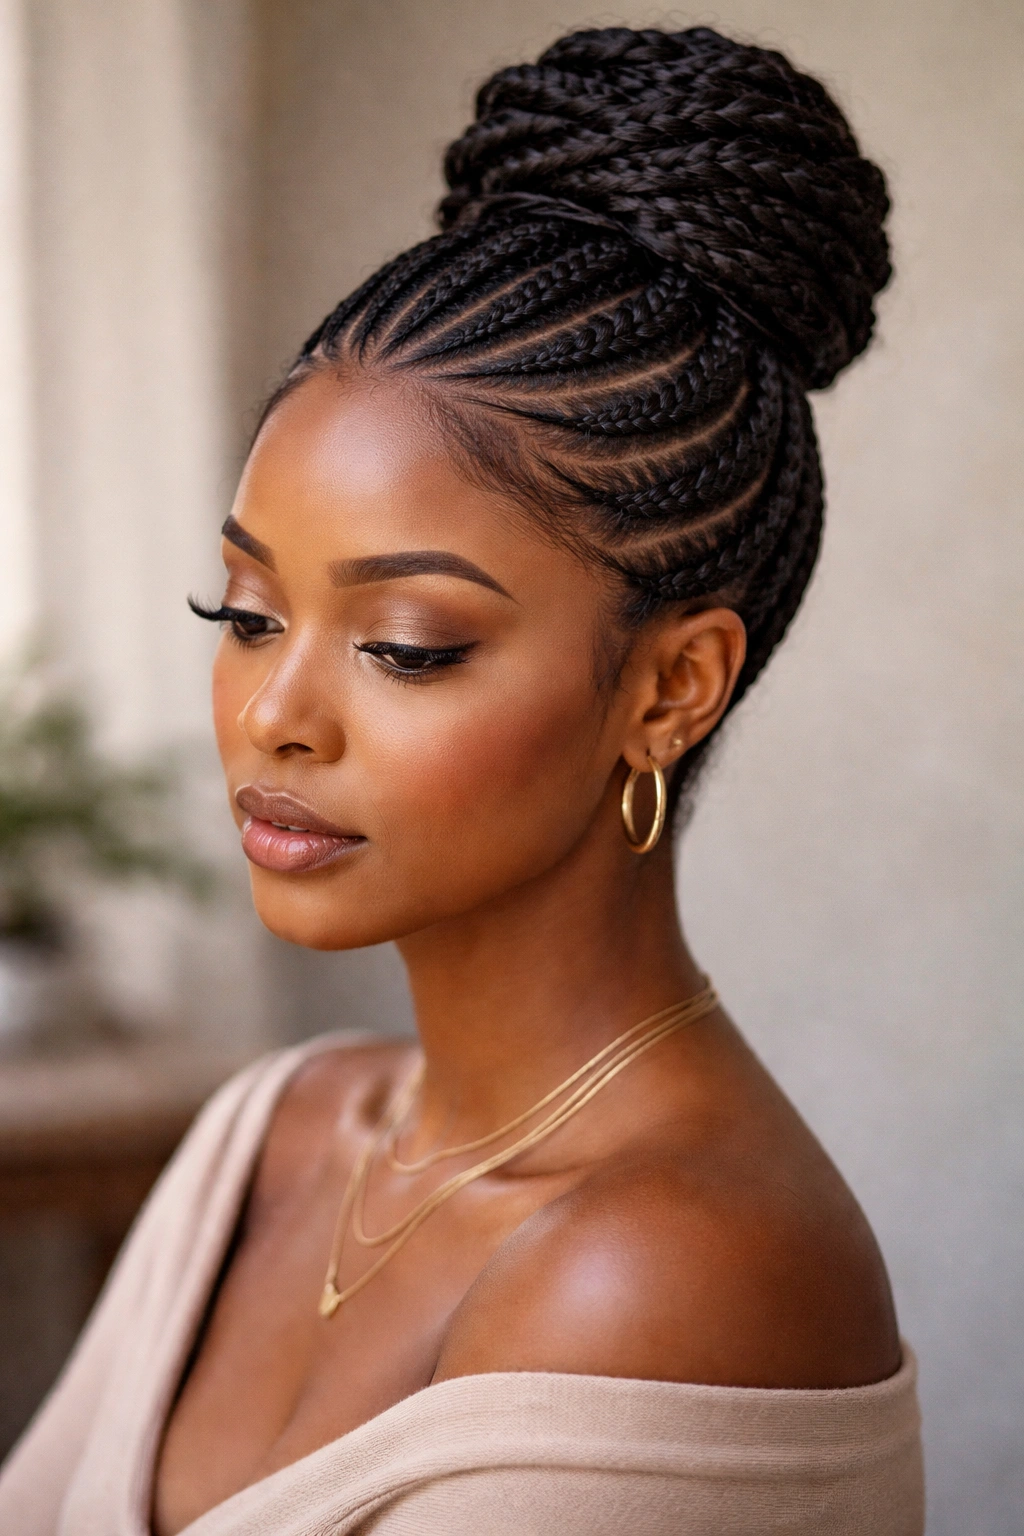
7. High Stitch Cornrow Bun
Sometimes the most impactful styling choices are the simplest ones. This version is straightforward: create multiple stitch cornrows all flowing in the same direction toward the very crown of your head, then gather everything into a high, voluminous bun positioned at the top of your head. The height, the texture of the cornrows, and the bun volume together create a style that’s striking, elegant, and surprisingly easy to maintain throughout the day.
Why High and Centered Works
A centered high bun automatically reads as polished and intentional, especially when it’s supported by well-executed stitch cornrows that provide natural lift and fullness. This style works for virtually every occasion because you can adjust the “finish” by how you style the bun itself—a tight, neat bun reads as professional and classic, while a looser, messier bun reads as relaxed and effortless. The height also has the practical benefit of keeping all your hair completely off your shoulders, neck, and face, which is genuinely helpful for concentration, comfort, and preventing friction on your skin.
Building the Style
- Create four to six stitch cornrows, each beginning near your forehead or temples and moving straight back or slightly angling toward the crown
- Space them evenly across your scalp so they’re balanced and provide natural lift
- Gather all the free-flowing lengths at the very top of your head
- Form your bun using one of several techniques: twist the ponytail into a coil and pin it into place, braid it and wrap the braid around the base, or simply bunch it and secure generously with bobby pins
- Add texture to the bun if desired by gently pulling it apart slightly, or keep it neat and compact depending on the occasion
- Use finishing spray or edge control to smooth any flyaways
Pro tip: If your high bun tends to feel top-heavy or uncomfortable, using a hair donut or bun ring inside the bun center provides support and distributes weight more evenly across your head.
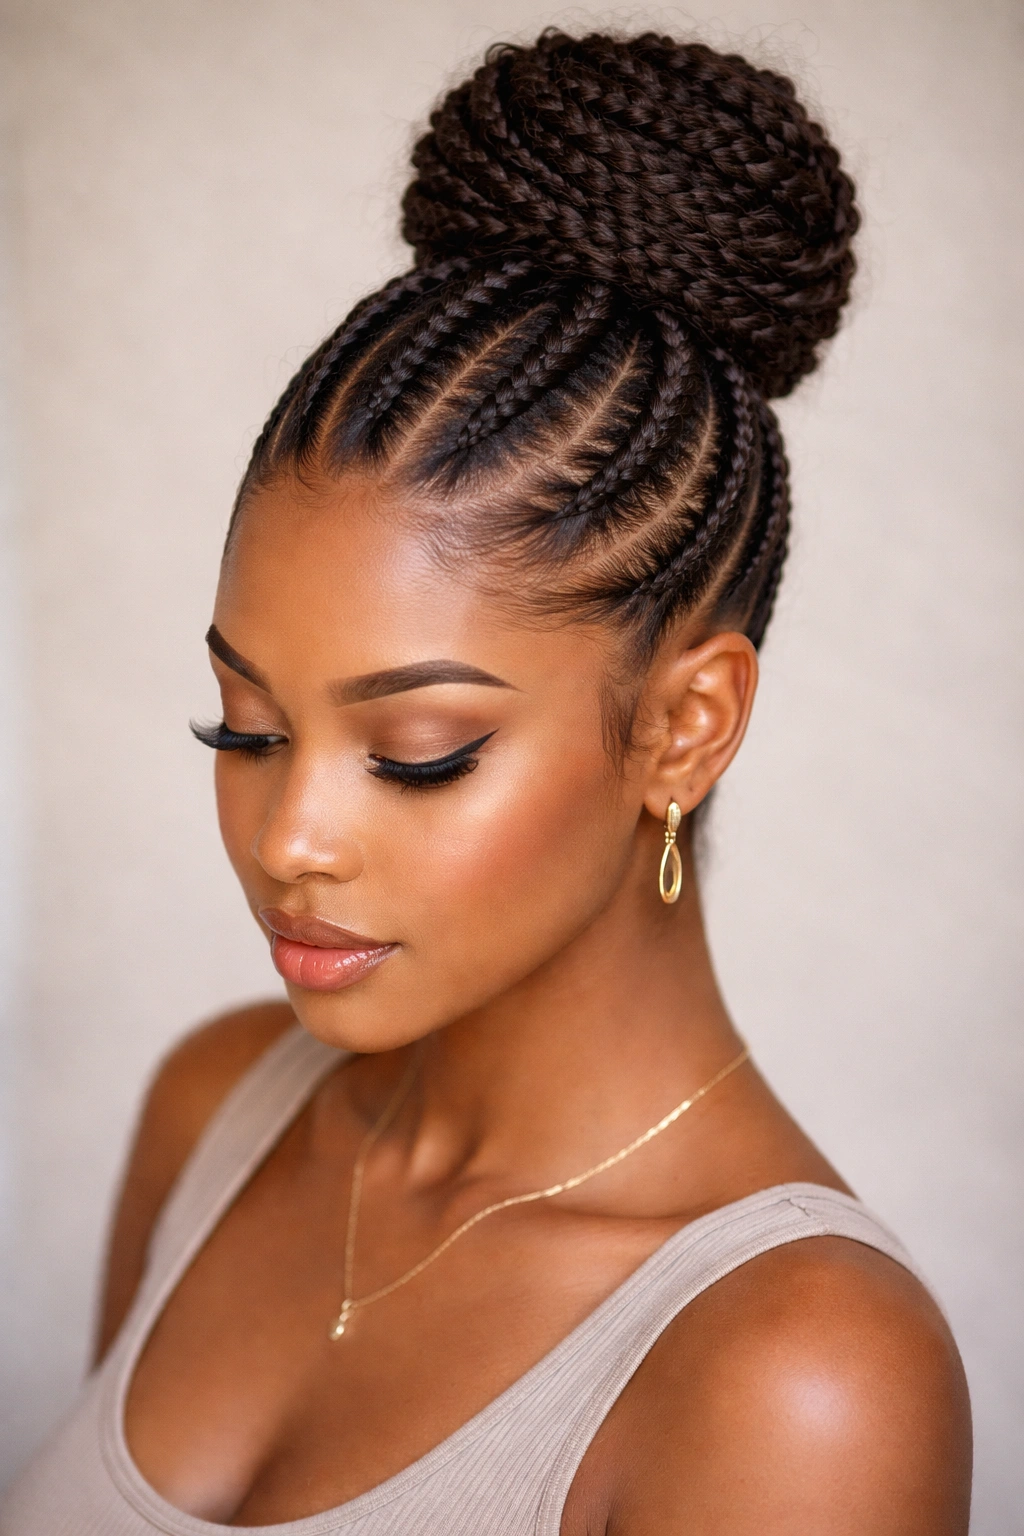
8. Layered Stitch Cornrow Updo
This more advanced style creates visual depth by braiding stitch cornrows in layers—some placed higher on the head and some lower—all converging toward a single updo point. The effect is multidimensional and intricate, often looking like an elevated or graduated pattern. This technique creates the impression of significant technical skill and takes a style from simple to genuinely striking, which makes it perfect for occasions where you really want to stand out.
The Complexity That Looks Effortless
Layering cornrows requires strategic planning and skillful execution, but the payoff is a style that looks significantly more elaborate than many simpler updos. The visual interest created by multiple layers means every angle of the style is beautiful—whether someone is looking at you from the front, side, or back. The layering also creates natural texture and dimension that photographs exceptionally well, which is an added bonus for events where photos will be taken.
Creating Layers
- Plan your cornrow layout mentally or on paper before you begin—decide how many layers you want and how they’ll all converge
- Begin with a bottom layer of stitch cornrows positioned lower on the head, angling them upward toward your intended updo point
- Create a middle layer of cornrows positioned at mid-height, also angling toward the same convergence point
- Add a top layer of cornrows near the crown, following the same pattern
- Bring all layers together at your chosen updo location and gather into a multi-dimensional bun or twisted knot
- The layering means you’ll have significant volume of hair gathered together, so secure generously with multiple bobby pins
- Some people enhance the effect by wrapping a decorative element (like a metallic cuff or scarf) around the updo base
Worth knowing: This style can take significant time to create, so it’s ideal for occasions where you have time to prepare or when you’re working with a stylist who can bring your vision to life.
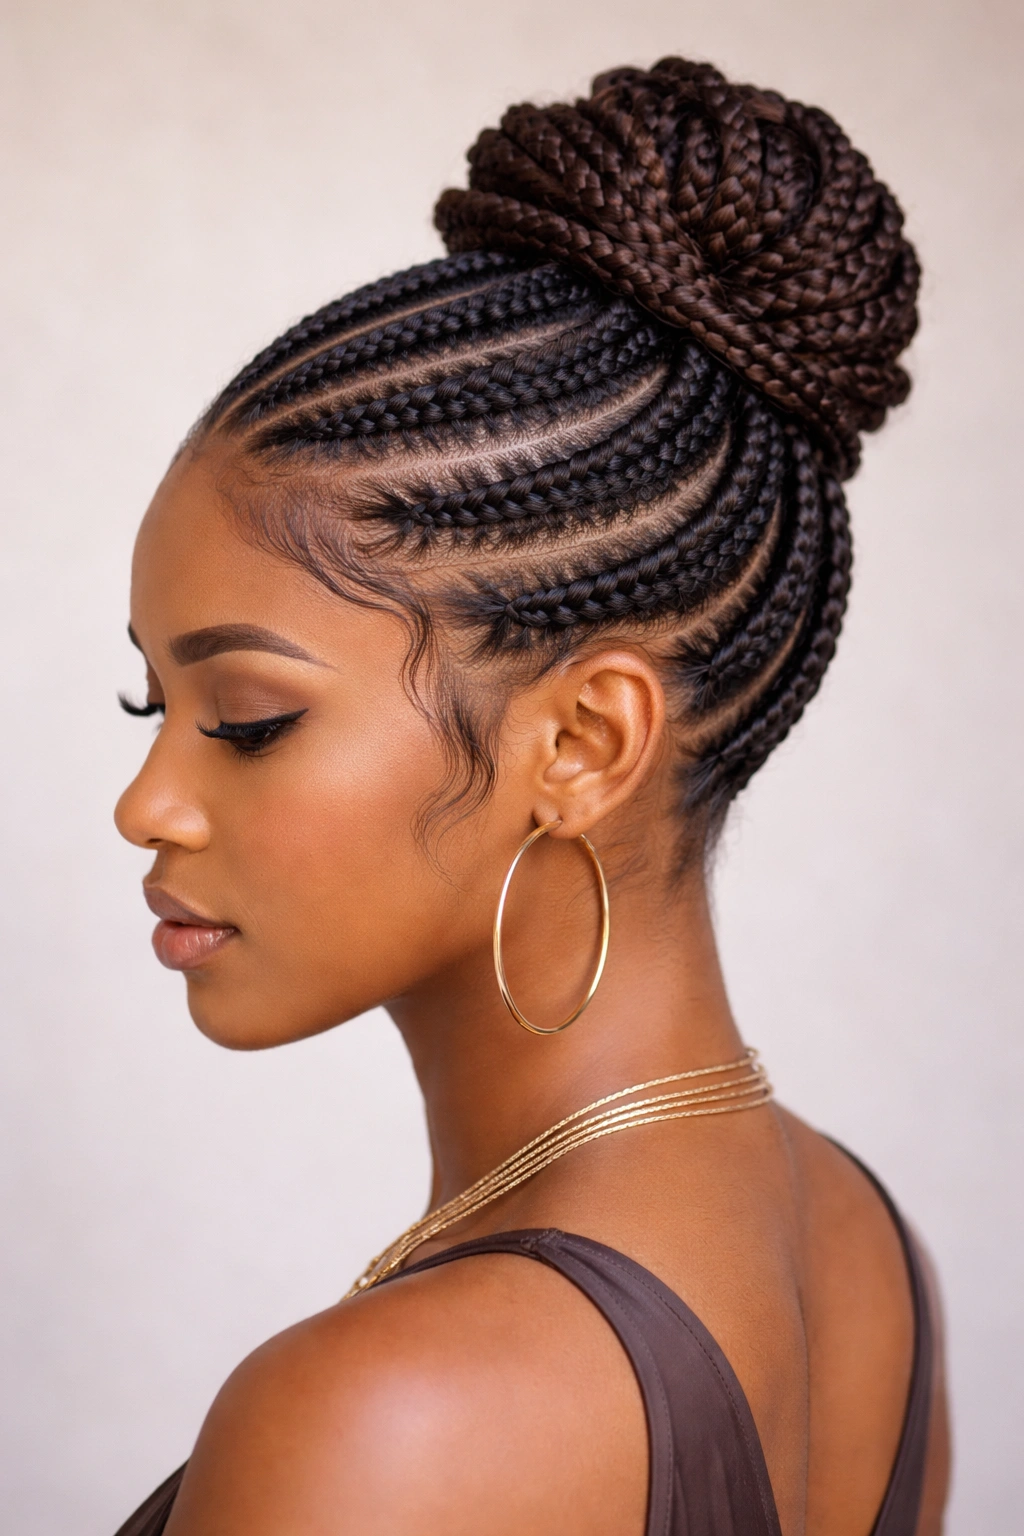
9. Spiral Stitch Cornrow Updo
Instead of directing your stitch cornrows in straight lines or simple curves, this style routes them in a spiral pattern—starting near the hairline and progressively moving around the head in a circular direction until all the braids converge at a central point (usually the back crown area) where they form an updo. The spiral pattern is inherently artistic and eye-catching, and it’s a technique that works beautifully whether you want a tight, geometric spiral or a more loose, organic one.
The Visual Drama of Spirals
Spirals are naturally captivating to look at because they create movement and flow even in a still image. The brain finds spirals visually interesting in a way that straight lines don’t quite match, which is why this style tends to get genuine compliments and make people actually stop and look closely at your hair. The spiral also creates a natural focal point at the crown, which directs attention upward and can be quite flattering for the face.
How to Execute the Spiral
- Begin with a stitch cornrow near one temple, angling it slightly toward the crown
- Rather than moving straight back, angle the cornrow to curve progressively around your head
- Continue adding stitch cornrows that follow the same spiral direction, each one positioned to continue the circular motion
- Work inward with each new cornrow, so they progressively spiral toward a center point at the crown or back
- The final cornrows will be tighter spirals near the crown, creating a natural focal point
- Gather all the hair at your spiral’s center point and form your updo—a twisted knot, gathered ponytail, or bun
- Secure everything with bobby pins; the spiral itself becomes part of the updo’s visual architecture
Pro tip: Spiral cornrows work especially beautifully with decorative elements like metallic bobby pins, beads, or hair cuffs positioned at the convergence point, which further emphasizes the geometric design.
10. Edge-Hugging Stitch Cornrow Updo
This final style prioritizes hairline protection and edge control by running stitch cornrows very close to your hairline, temples, and sides—creating a neat, controlled perimeter around your face and ears. The bulk of your hair then moves back into an updo, while the edge cornrows provide a finished, manicured frame. This is an ideal choice if you’re concerned about edge maintenance, heat damage from styling tools, or simply want that extra level of polish around your face.
Protection Meets Polish
The edges are often the most fragile and visible part of our hair, which is why protecting them while creating a pulled-together updo is genuinely valuable. Stitch cornrows placed strategically along the hairline provide tension that’s distributed more gently than some other styles, and they create a neat, defined frame that reads as intentional and well-maintained. This style works beautifully for work, special occasions, or anytime you want to look polished without appearing overly dressed up.
Building This Style
- Begin with a stitch cornrow that runs directly along your hairline from one temple to behind your ear on the same side
- Create a mirror cornrow on the opposite side, maintaining consistent tension and proximity to your hairline
- You can add a third cornrow at the very nape of your neck, running horizontally along that area if desired
- These edge cornrows should be tight enough to provide control but not so tight that they create discomfort or pull excessively on your hairline
- Gather all the remaining hair at the back and create your updo—a bun, ponytail, or twisted knot
- The edge cornrows frame your face and provide visual definition while the updo keeps everything organized and neat
- Complete the look with edge control on your hairline for a finished, polished appearance
Worth knowing: This style is one of the best options if you’re planning to transition from your updo into a different style partway through the wear week—the edge cornrows stay intact while you can adjust or re-style the back section as desired.
Final Thoughts
Stitch cornrow updos offer that rare combination of genuine protection for your hair, visual interest and artistry, and practical versatility for virtually any occasion. Each of these ten styles brings something distinctly different to the table—whether you’re drawn to the height and elegance of a crown updo, the asymmetrical sophistication of a side sweep, or the intricate geometry of a spiral pattern. The styles themselves can be mixed and matched: you might combine the edge-hugging concept from style ten with the high bun approach from style seven, or take the wraparound technique and direct it toward a side-swept endpoint instead of the back.
What makes stitch cornrow updos genuinely powerful is that they often photograph better than simpler styles, they hold up beautifully throughout your day without requiring touch-ups, and they protect your hair while looking intentional and polished. Whether you’re creating these styles yourself (which absolutely gets easier with practice) or working with a stylist to bring them to life, you’re investing in a protective style that actually looks like you put serious thought and artistry into your appearance—which, of course, you have.
The key is experimenting, finding the versions that genuinely work with your hair texture, face shape, and personal style, and then building your confidence with practice. Each time you create one of these updos, you’ll develop better intuition about tension, spacing, and the small adjustments that transform a nice style into a genuinely striking one. Your edges, your growth, and your creativity will all thank you.