If you’ve been scrolling through hair inspiration on social media, you’ve probably noticed this stunning hybrid trend taking over: flat twist cornrows woven seamlessly into box braids. It’s the best of both worlds—the intricate, sculptural look of cornrows meets the protective length and versatility of box braids. The combination creates texture, dimension, and visual interest that’s hard to achieve with either style alone.
The appeal goes way beyond aesthetics. Flat twist cornrows paired with box braids offer serious staying power while still giving you multiple styling options once they’re in. You can wear them down for maximum impact, wrap them around your head in different configurations, or even pin them up for a completely different vibe. This hybrid approach also tends to be gentler on your edges than traditional tight cornrows, since the box braids distribute tension more evenly and give your hairline room to breathe.
What makes this style so genius is how it plays with proportion and depth. The flat twists create visual pathways across your scalp—almost like they’re mapping out where your attention should go—while the box braids add weight and fullness below. It’s sophisticated without being fussy, and it works across different hair textures, lengths, and personal styles. Whether you’re going for something bold and geometric or soft and flowing, there’s a flat twist cornrow and box braid combination that speaks your language.
1. The Full-Head Geometric Pattern With Alternating Widths
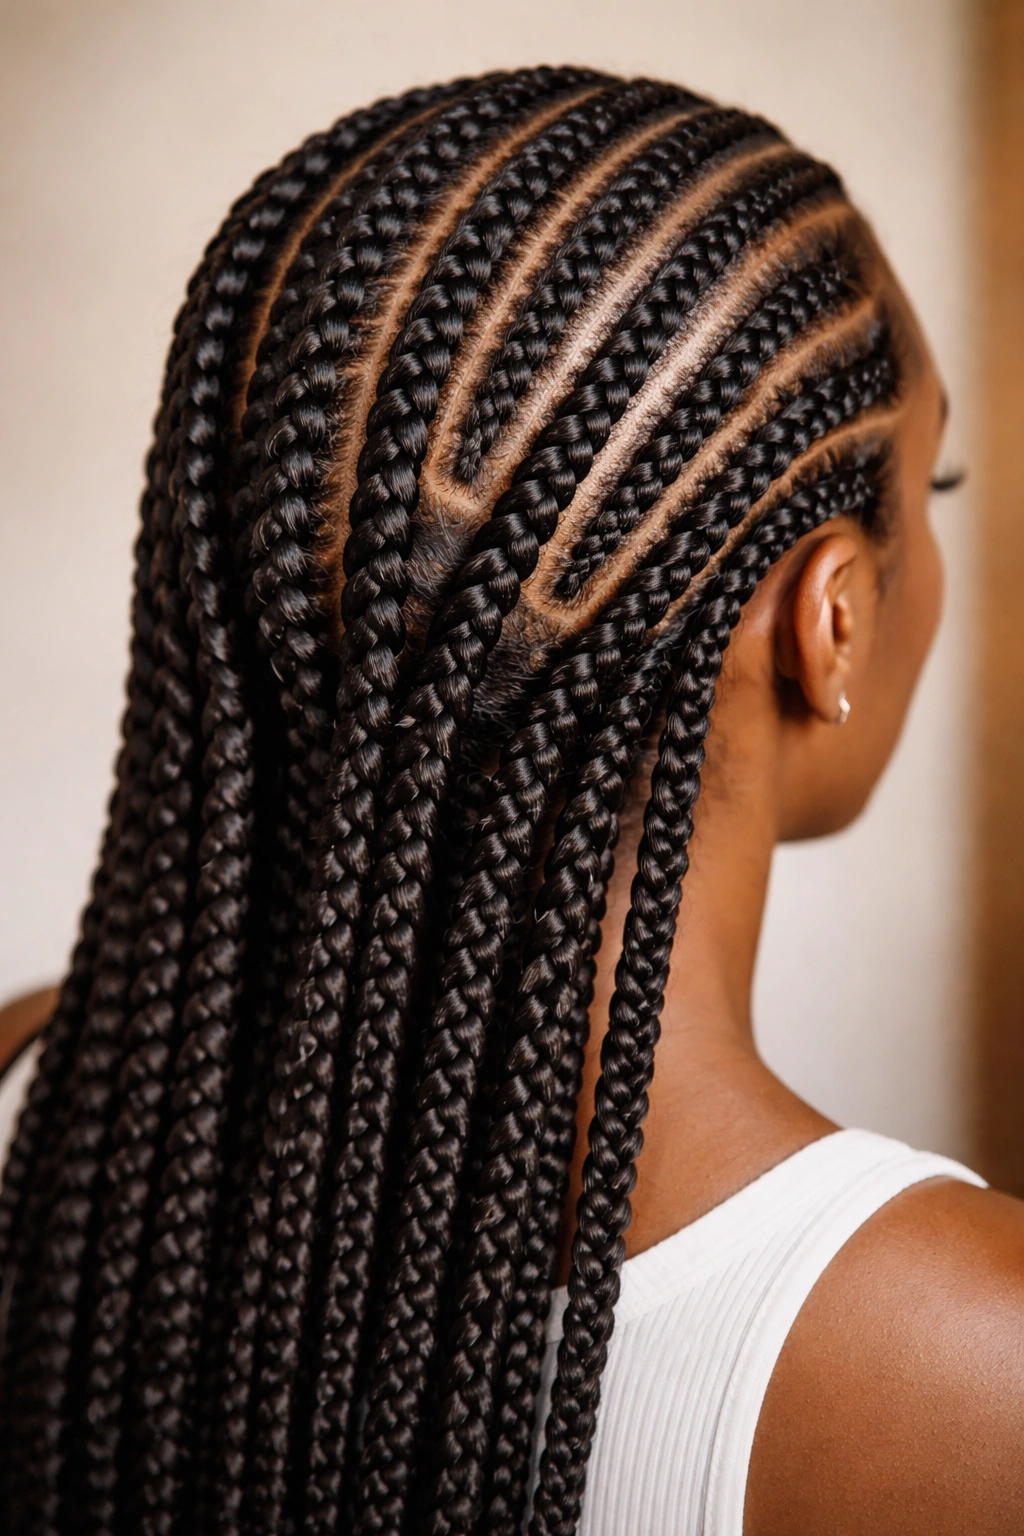
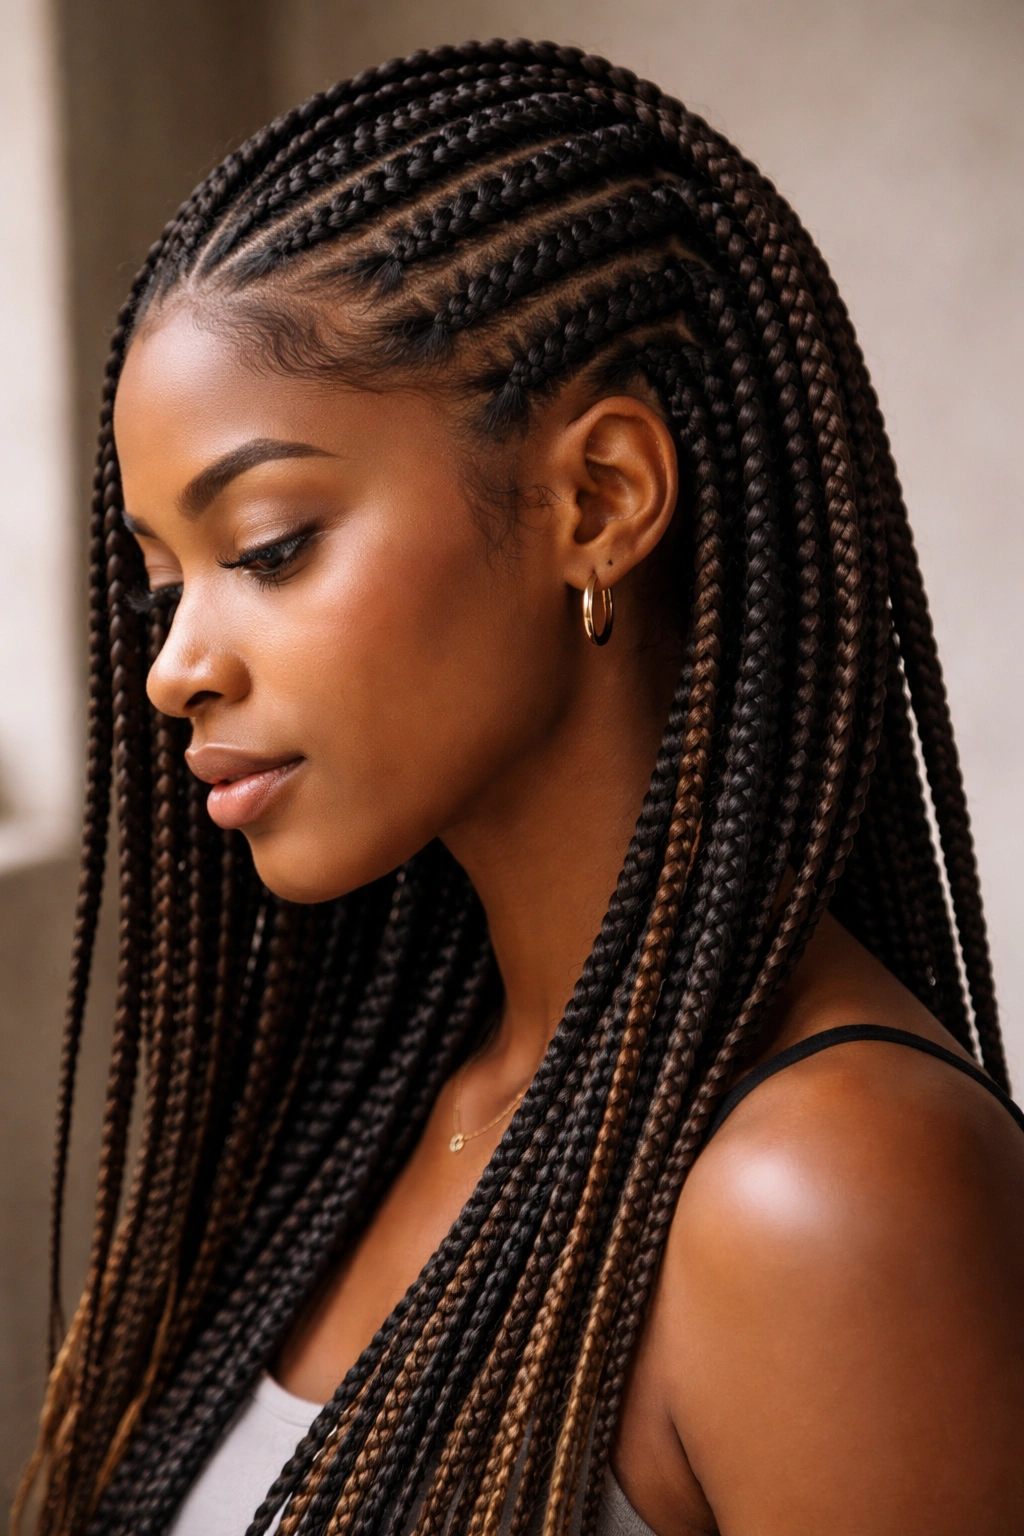
This style takes the structured approach to its logical extreme, creating a hypnotic pattern across your entire scalp using flat twist cornrows of varying thicknesses that eventually connect to box braids. The effect is almost like looking at a circuit board—everything intentional, everything clean, everything exactly where it should be.
What Makes This Style Stand Out
The magic here is in the contrast between thick and thin flat twists that map across your scalp in an alternating pattern before tapering into traditional box braids. You might start with a quarter-inch flat twist, skip a quarter-inch space, then lay down a half-inch flat twist, then another thin one—creating rhythm and movement while keeping everything geometric and controlled. This pattern plays beautifully with light, casting shadows that make your scalp design almost three-dimensional.
How to Create It
Start by mentally dividing your head into sections based on the pattern you want. Use a rattail comb to create clean, straight lines that will serve as your twist guides. Work one flat twist at a time, keeping the tension absolutely even so the widths remain consistent throughout. Once all flat twists are complete, seamlessly transition each one into a box braid of matching thickness. The transition point should feel invisible—the flat twist simply becomes a box braid without any interruption in the line.
Best For
This style demands patience and precision, making it ideal if you have the time to sit through a longer installation—usually 4 to 6 hours depending on how many twists you’re creating. It works especially well on medium to long hair and looks stunning when the braids eventually reach waist length or beyond.
2. The Side-Swept Spiral With Cascading Box Braids
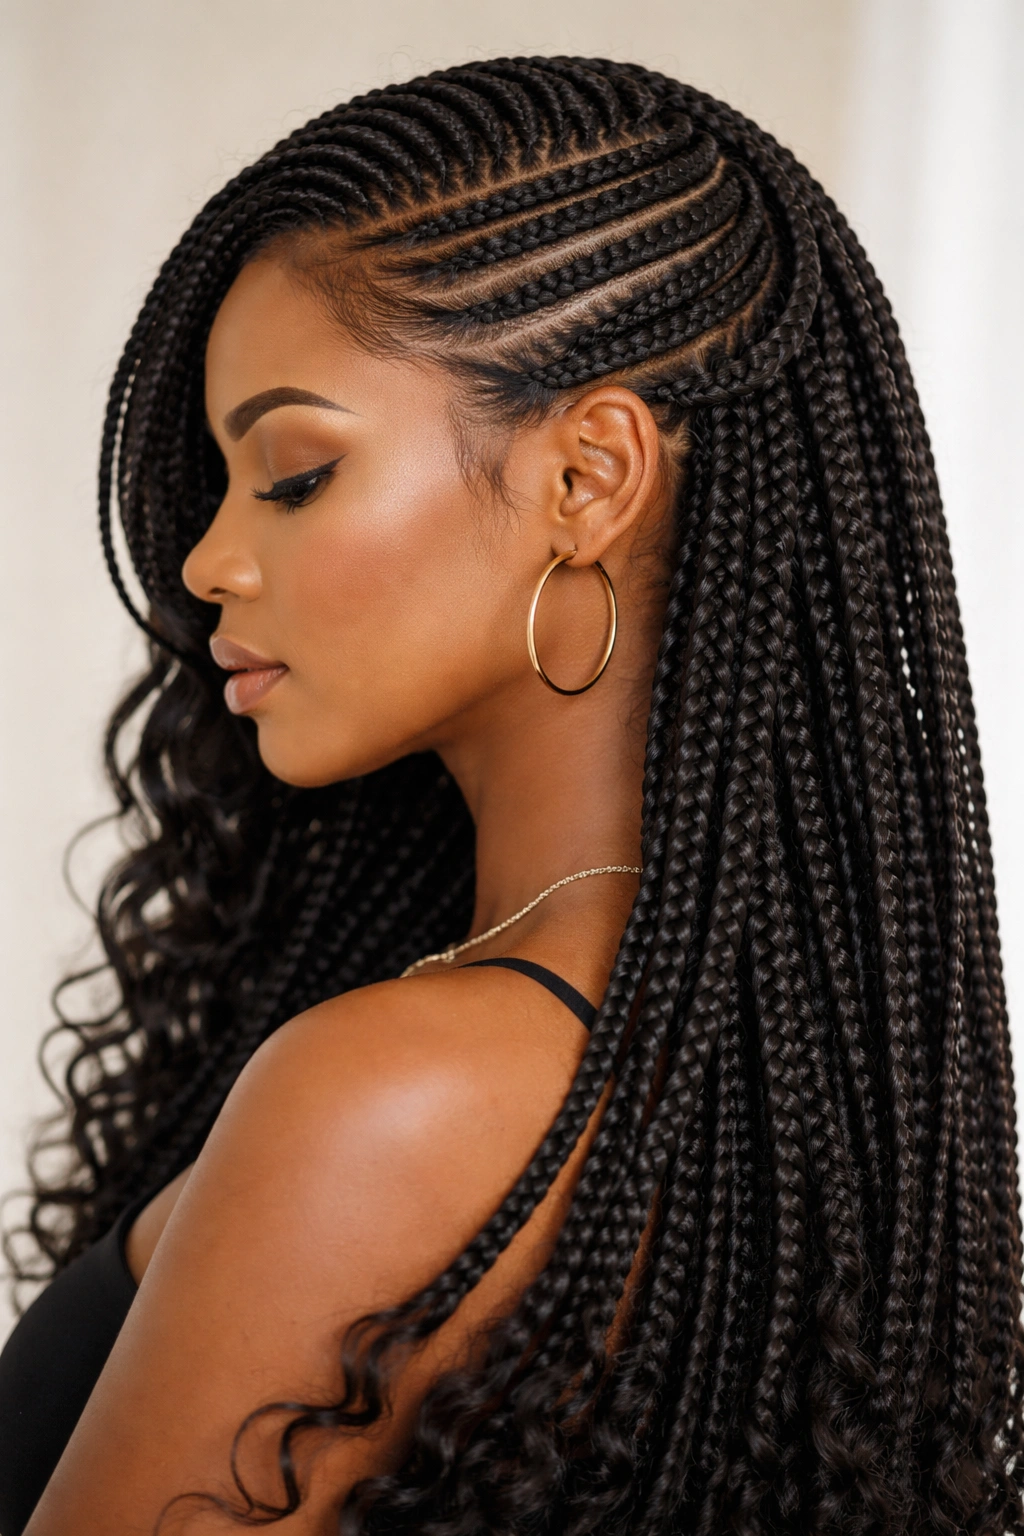
Imagine taking your flat twist cornrows and arranging them in a flowing spiral pattern that starts at one temple and winds around the back of your head, eventually releasing into long box braids that cascade down your back. It’s romantic without being fragile, structured without feeling rigid.
What Makes This Style Stand Out
The spiral arrangement gives this style movement and elegance that a straight-down approach can’t touch. Instead of geometric precision, you’re creating curves and momentum. A single thick flat twist might spiral from your temple, loop around your crown, and travel toward the back of your head, where it transforms into a fat box braid. Thinner twists fill the spaces, adding depth and visual interest without overwhelming the main spiral path.
How to Create It
Map your spiral path by dividing your hair into sections that follow the curve you want. The spiral should feel natural to your head shape—follow your scalp’s contours rather than fighting them. Begin the main spiral flat twist at your temple or the side of your head, twisting as you move backward and around. Keep the tension consistent so the spiral reads clearly. Once the spiral is complete, create smaller flat twists in the remaining sections, then transition everything into box braids.
Best For
This style suits people who want their braids to make a directional statement—it’s the hairstyle equivalent of an arrow pointing toward confidence. It works beautifully for events, special occasions, or anytime you want your hair to feel intentional and curated rather than purely protective.
3. The Feed-In Cornrow Into Box Braid Blend
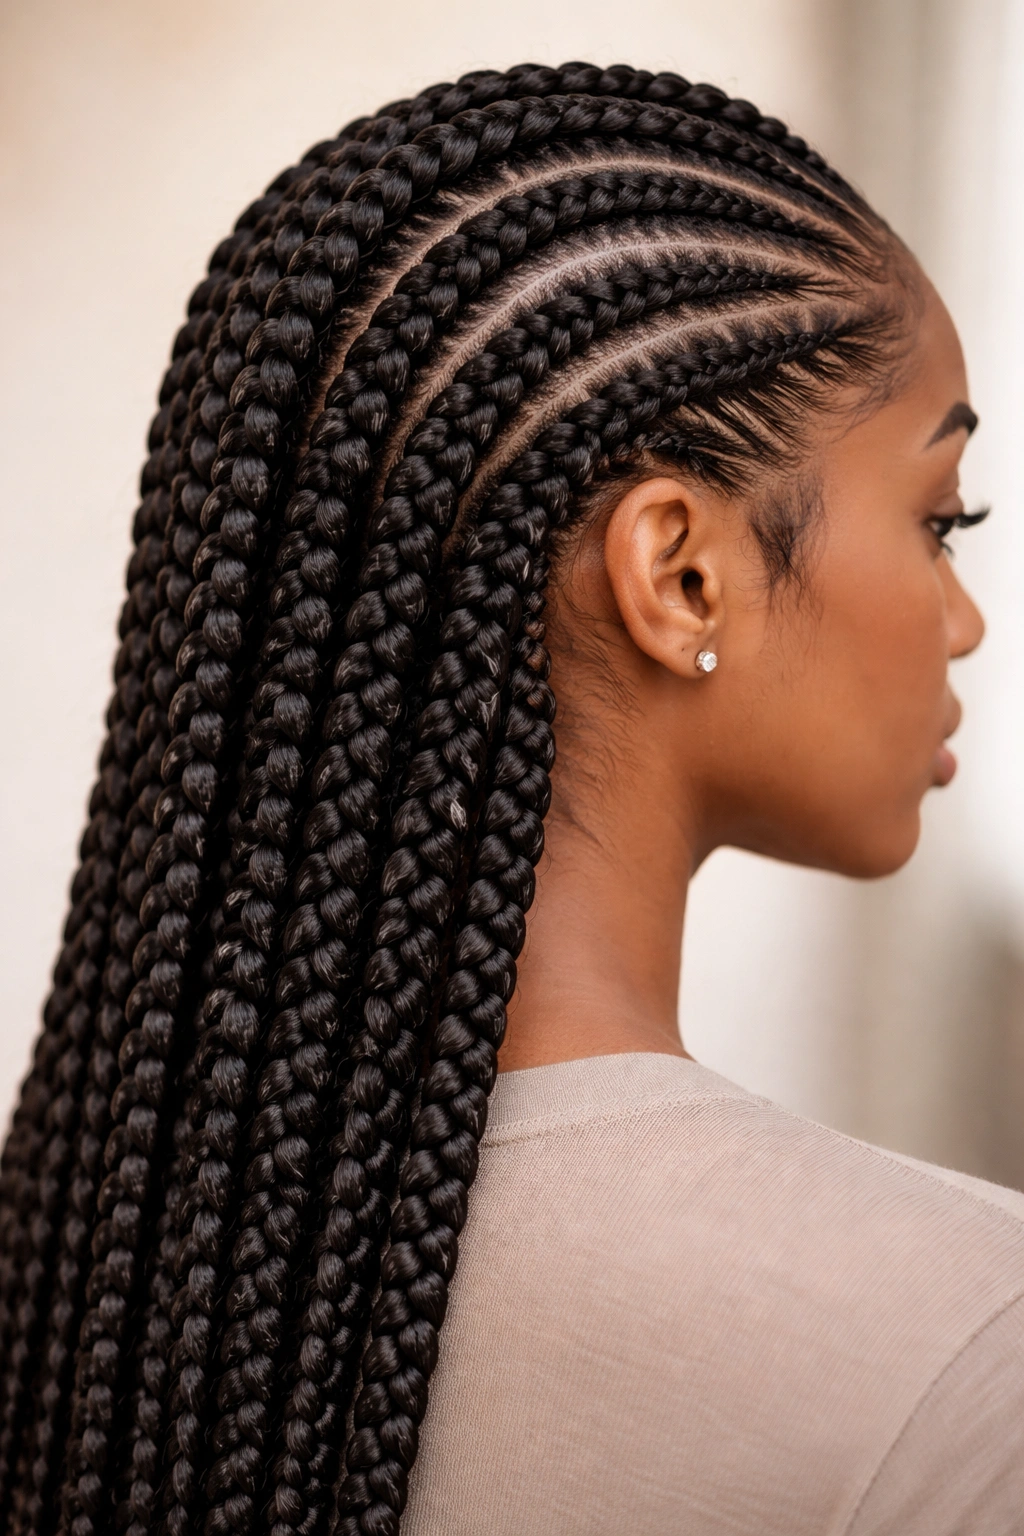
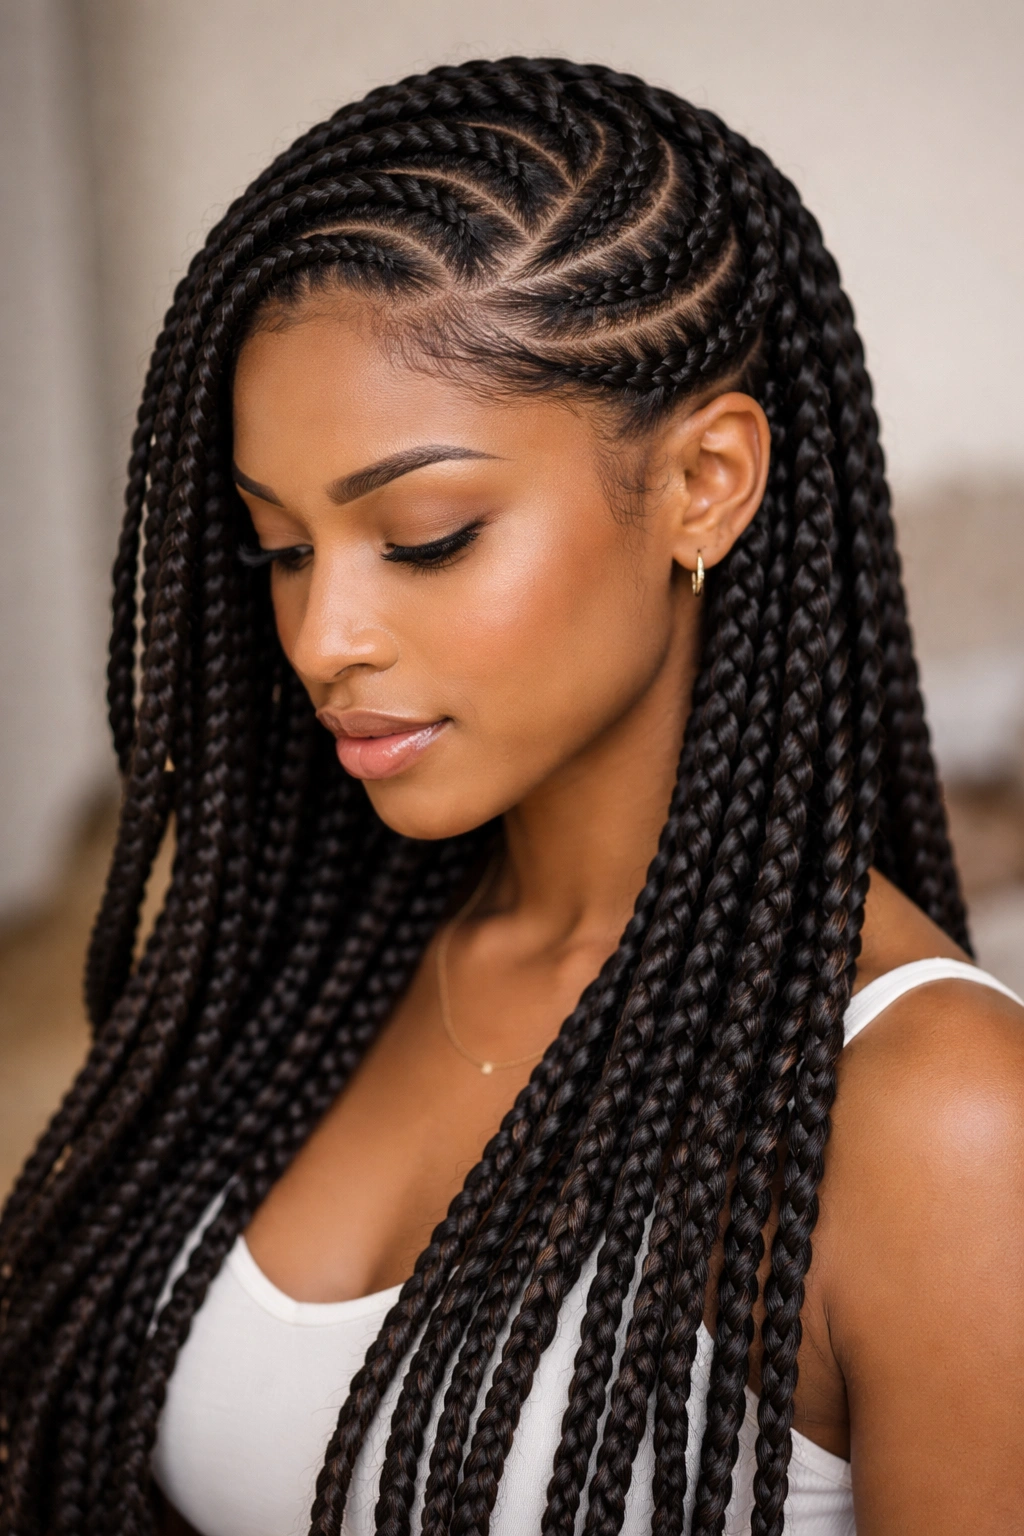
This style uses the classic feed-in technique to create flat twist cornrows that gradually build into fuller box braids as they descend. You’re essentially growing the braids as you go, starting thin and ending thick—which creates an ombré effect of density and shadow.
What Makes This Style Stand Out
The genius of the feed-in approach is that it looks organic and natural rather than constructed. Your flat twists don’t appear suddenly; they emerge gradually as you feed in small sections of new hair. By the time you reach the nape of your neck, you’ve built genuine fullness that transitions seamlessly into a box braid. This technique is also gentler on your edges because the tension distributes more evenly when you’re feeding in gradually.
How to Create It
Begin with a clean section at your crown or part line. Start a flat twist with a very small amount of hair, then feed in additional sections as you twist downward. With each new row of twists, you’re feeding in more hair, making the twist progressively thicker. Once the flat twist has reached maximum thickness, transition smoothly into a box braid by maintaining the same thickness and switching to the braiding technique. The transition should feel inevitable, not sudden.
Best For
People who worry about tension on their edges absolutely need this technique in their rotation. It’s also ideal if you want braids that look intentionally shaped rather than uniformly thick from scalp to tip. This style wears beautifully for two to four weeks because the tension remains manageable throughout that timeframe.
4. The Crown Halo With Waterfall Box Braids
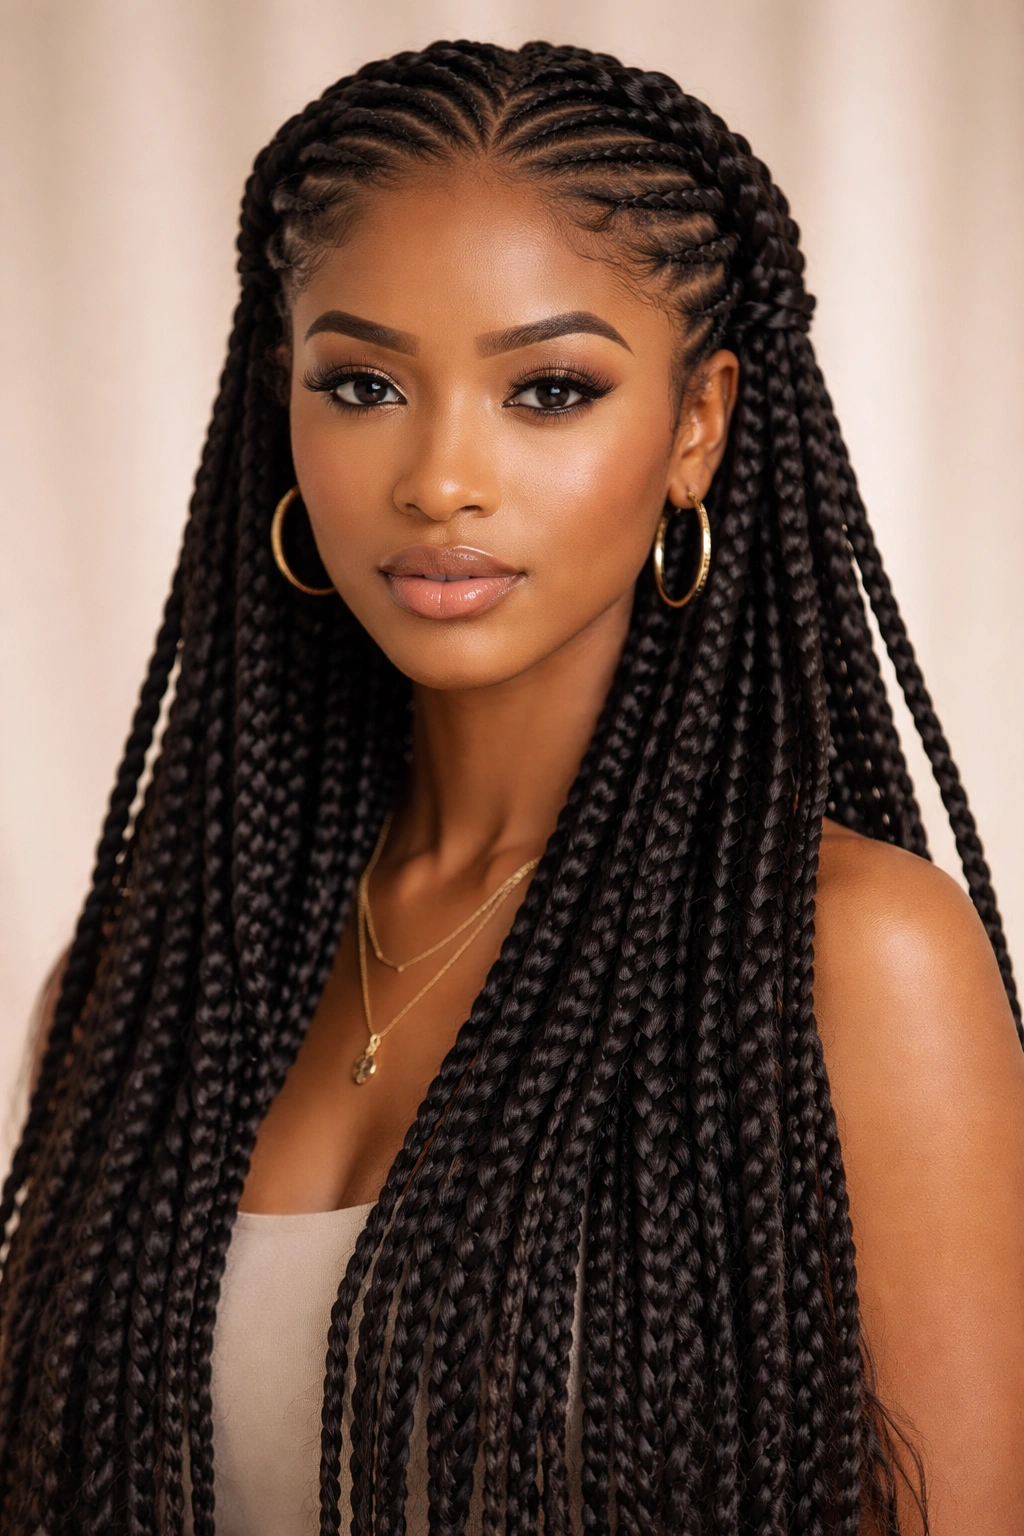
Picture flat twist cornrows arranged in a halo pattern around the crown of your head, with the remaining hair woven into cascading box braids that fall freely down the back and sides. It’s regal without being costume-y, protective without sacrificing style.
What Makes This Style Stand Out
The crown halo creates a framing effect that actually flatters most face shapes, while the waterfall braids give you movement and freedom. The contrast between the structured flat twists at the top and the flowing braids below creates visual drama. You can style the waterfall braids in multiple ways—flipped to one side, gathered at the nape, or left completely loose—making this one of the most versatile options on this list.
How to Create It
Divide the front sections of your hair from ear to ear—these will become the halo. Create one flat twist cornrow that travels from one ear, across the crown, to the opposite ear. You can add a second parallel flat twist below the first for more intensity, or keep it to a single halo line. Then create additional flat twist cornrows in the back sections, graduating into box braids. The braids in the back should feel loose and flowing compared to the structured halo.
Best For
This style is perfect if you want to keep some hair off your face and neck while maintaining softness and movement. It’s phenomenal for warmer weather because the structured top keeps hair contained while the flowing bottom provides coverage without heat-trapping bulk.
5. The Zig-Zag Flat Twist Pattern Into Chunky Box Braids
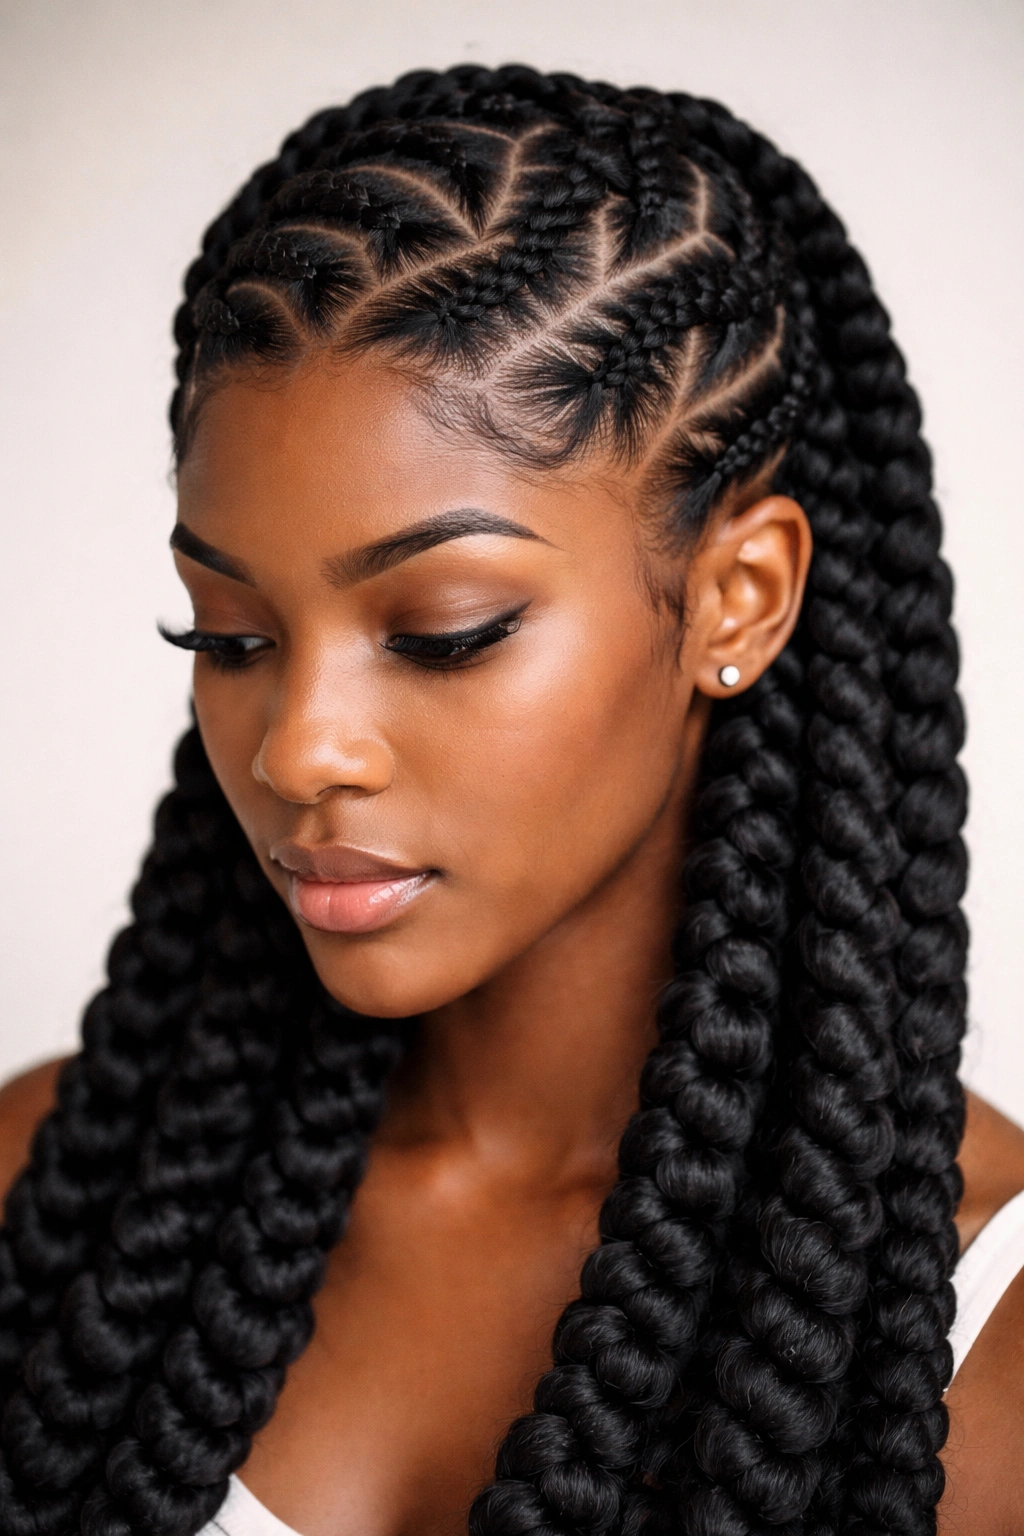
Instead of following straight lines or curves, create a bold zig-zag pattern with your flat twist cornrows across the scalp, then connect them into thick, statement-making box braids. It’s graphic, modern, and impossible to ignore.
What Makes This Style Stand Out
The zig-zag pattern creates actual visual movement—your eyes follow the path of the twists almost involuntarily. This arrangement is excellent if you love bold patterns and aren’t afraid to make a style statement. Paired with chunky box braids (thicker than usual), this combination reads as contemporary and fashion-forward. The zig-zag naturally divides your head into sections that can be styled separately or together.
How to Create It
This requires precision mapping. Use your rattail comb to mark zig-zag lines across your entire head before you begin twisting. Make sure each zig-zag section is the same width on both sides so the pattern looks intentional rather than accidental. Once you’ve laid out all the flat twist cornrows following your zig-zag map, transition into chunky box braids. Keep the braids slightly looser than you might normally wear them—the zig-zag pattern already creates intensity, so looser braids balance the visual.
Best For
Anyone who wants their protective style to double as a statement piece. This works especially well if you have medium to thick hair that can handle the visual weight of both a complex scalp pattern and substantial braids below.
6. The Goddess Locs Hybrid With Flat Twist Accents
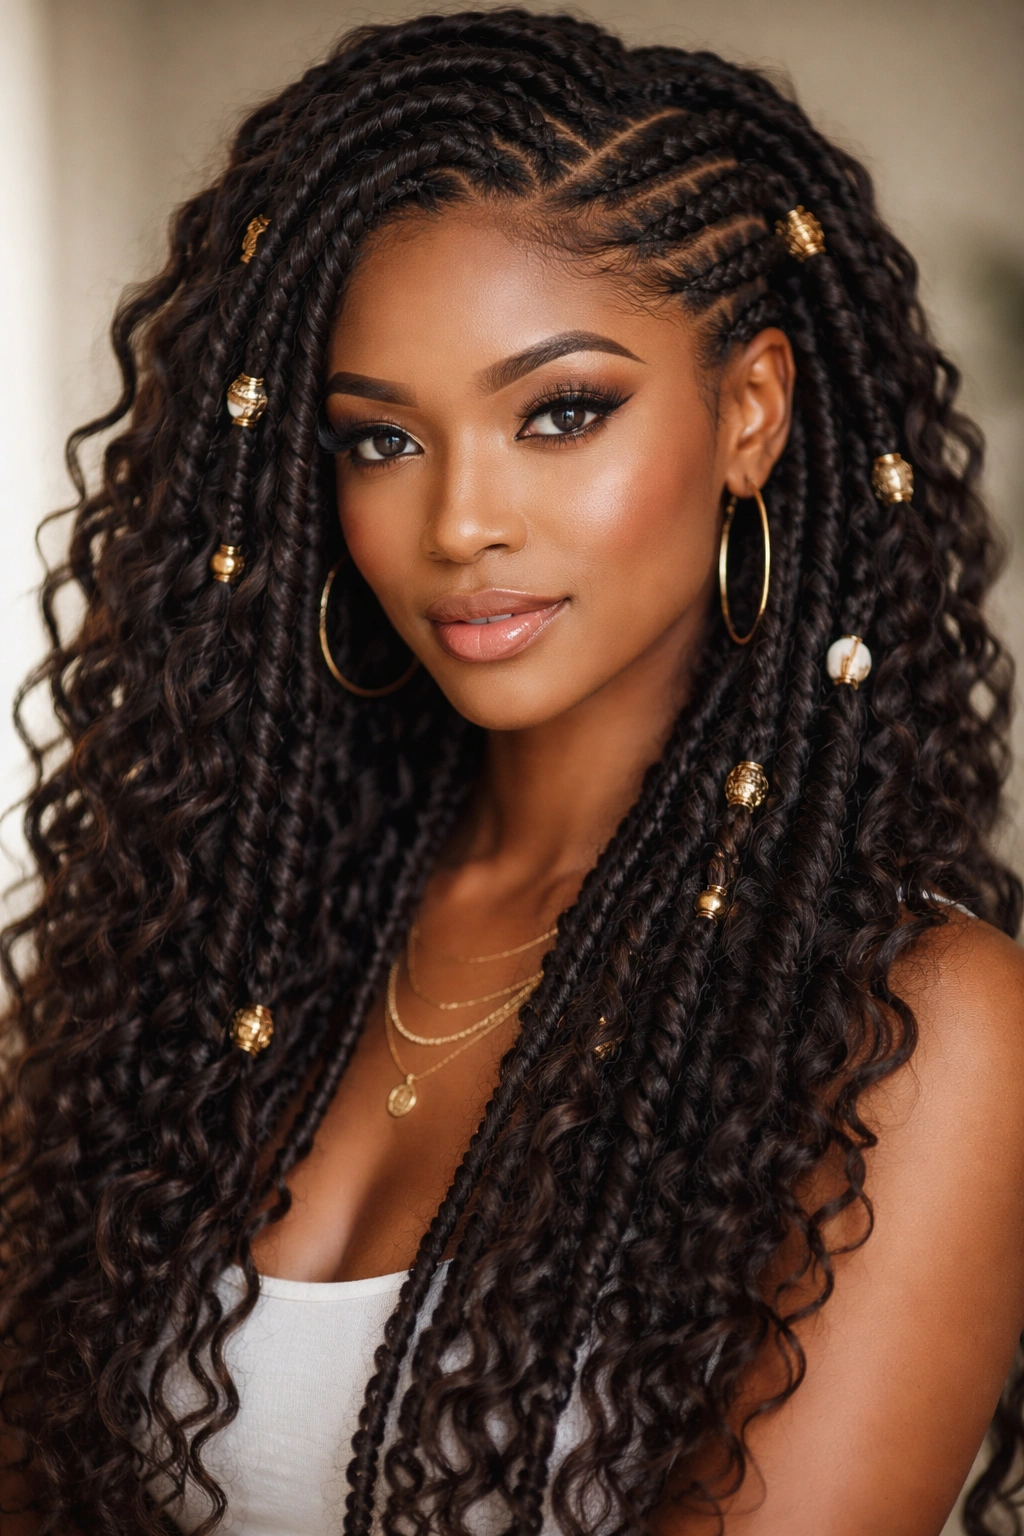
Blend flat twist cornrows with larger, fluffier box braids to create a style that’s somewhere between traditional goddess locs and classic protective braiding. It’s bohemian, textured, and absolutely enchanting.
What Makes This Style Stand Out
Rather than keeping the box braids uniform, you create some sections as full, fluffy braids while others remain as smaller flat twists—almost like you’re decorating your braids rather than just protecting your hair. The alternating thickness creates rhythm and the fluffiness gives an impression of volume and movement. This hybrid approach is less severe than traditional box braids while still offering full protective benefits.
How to Create It
Map out which sections will receive flat twists and which will become box braids. Don’t necessarily follow a strict pattern—let it feel organic. A good ratio might be two-thirds box braids to one-third flat twist accents. The flat twists can be positioned strategically around your face, across your crown, or woven throughout the back sections. Create the flat twists first, then move on to the box braids, making some of them deliberately fuller and fluffier by not pulling the sections as tightly.
Best For
This style is perfect if you want your protective style to feel artistic and individualistic. It photographs beautifully and wears well for three to six weeks depending on how you maintain it. It’s ideal for someone who loves a bohemian aesthetic but still wants genuine protective coverage.
7. The Two-Part Contrast With Sleek Front Twists and Full Back Braids
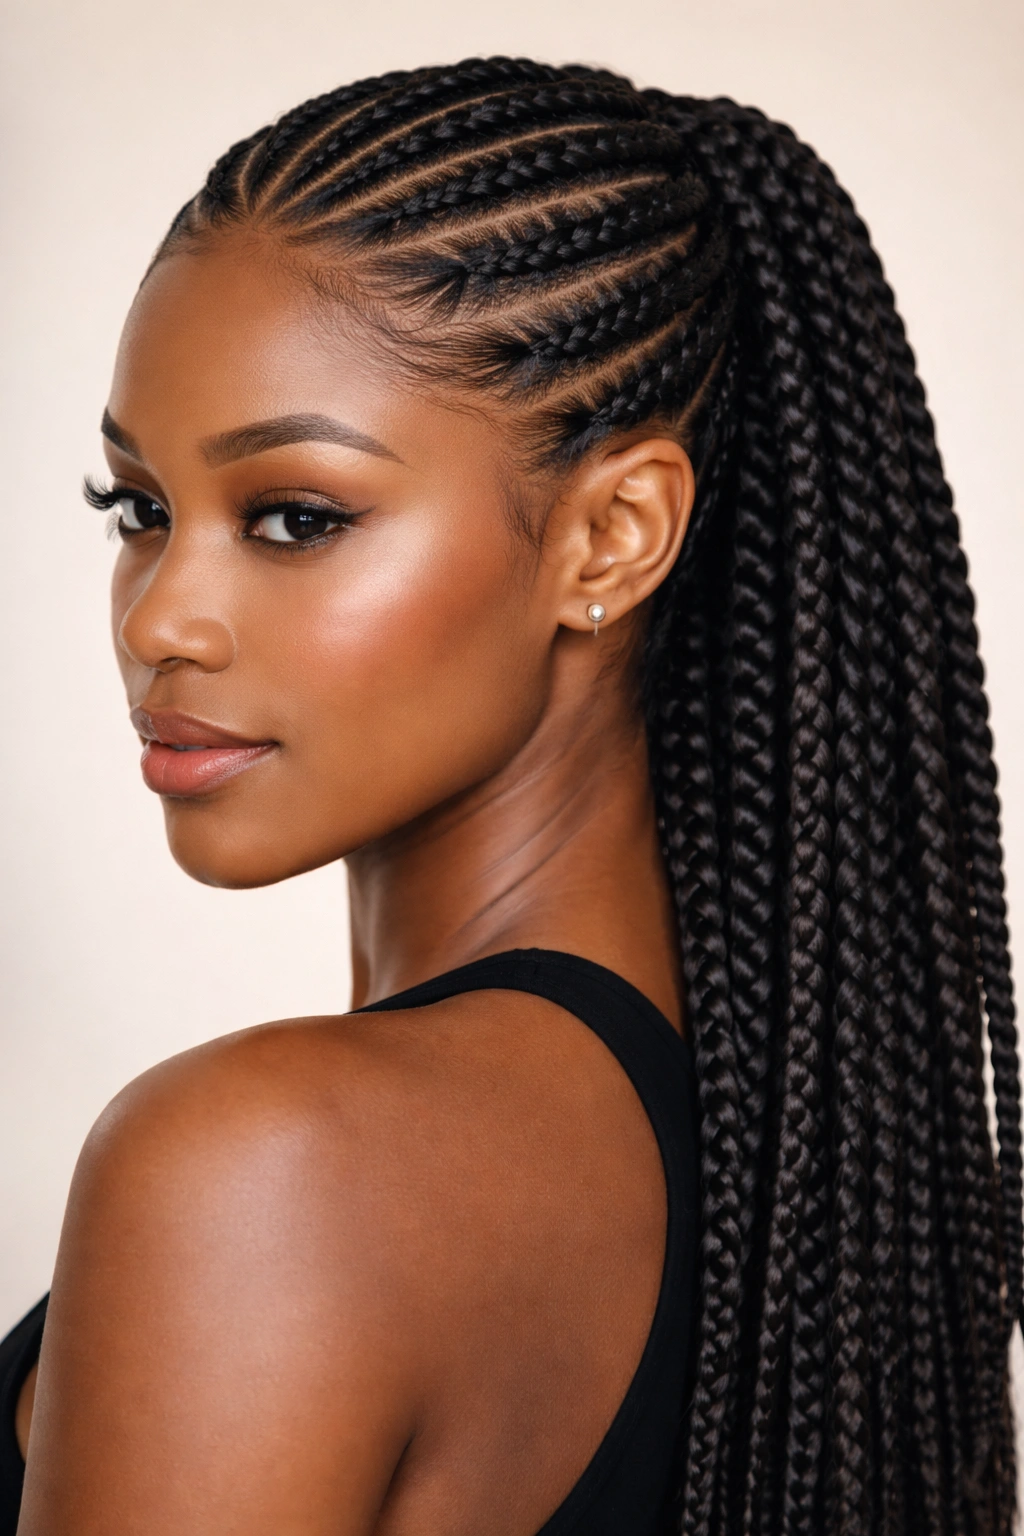
Create a striking contrast by keeping the front sections smooth and sleek with flat twist cornrows while the back section explodes into fuller, more voluminous box braids. It’s like having two hairstyles in one.
What Makes This Style Stand Out
The front-and-back contrast creates visual interest and allows you to control how much structure versus flow you want in your overall look. The smooth flat twists frame your face while the voluminous back braids give you drama and presence. This arrangement also photographs incredibly well—from the front you see clean lines, and when you turn around, people see the full sculptural impact of the braids.
How to Create It
Divide your hair with a line from ear to ear at the crown—everything in front is flat twist territory, everything behind is braid country. For the front sections, create sleek, parallel flat twist cornrows that sit close to your scalp. Keep the tension very even and smooth. For the back sections, create thicker box braids with deliberately looser braiding to maximize volume and movement. The contrast should feel intentional—almost graphic in its separation.
Best For
People with longer hair and the patience for a longer installation. This style works beautifully for special events, photo shoots, or any situation where you want your hair to tell a story. It also works well if you have sensitive edges, since the flat twists can be positioned away from your hairline while still creating visual interest.
8. The Reverse Pattern With Thick Twists and Thin Braids
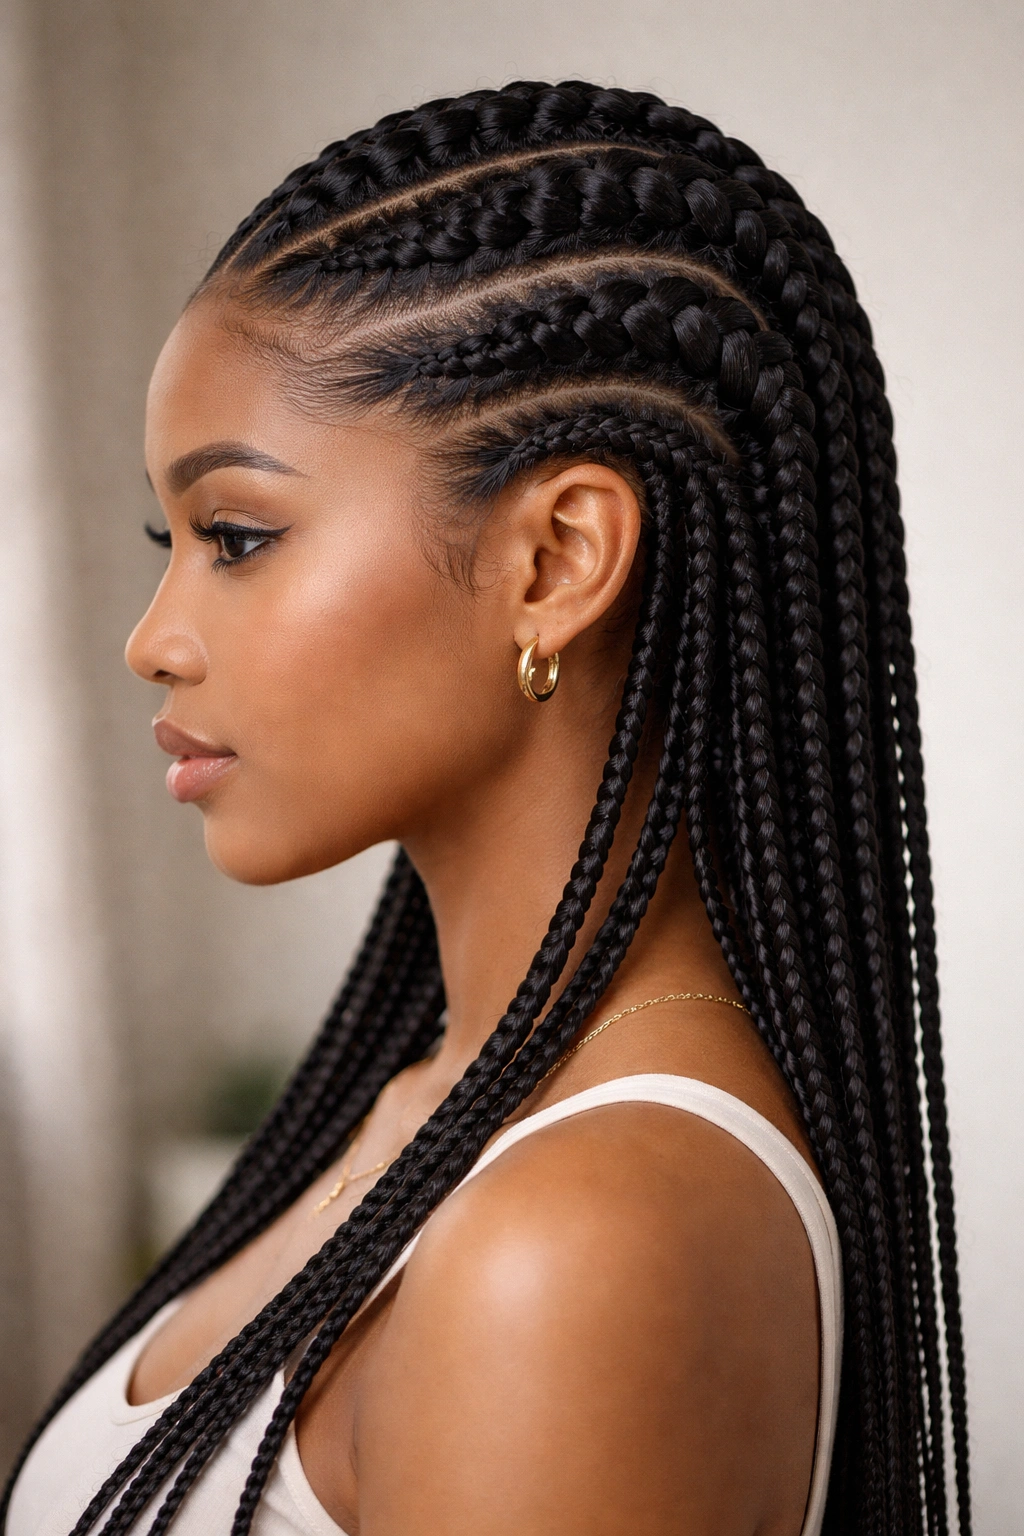
Flip the typical approach by making your flat twist cornrows extra thick and chunky, then transitioning them into thinner box braids. It’s unexpected and modern—it breaks all the rules in the most elegant way.
What Makes This Style Stand Out
Most protective styles gradually increase in thickness as you go down, but this style does the opposite. You start bold and sculptural at the scalp with substantial flat twist cornrows, then taper down into delicate, thin box braids. It’s visually interesting because it defies expectation. The thick twists create shadow and dimension across your scalp while the thin braids create a sophisticated, almost wispy feeling below. This contrast is sophisticated rather than chaotic.
How to Create It
Create your flat twist cornrows with sections that are thicker than usual—think half-inch to three-quarter-inch widths depending on your hair density. Keep them very neat and tightly twisted so the thickness reads as intentional styling rather than just bulky hair. Then transition each thick flat twist into a thin box braid—usually about quarter-inch thickness. The transition point should be crisp and clean. This style requires very skilled hands, so make sure your braider has done this technique before.
Best For
This style works best on people with medium to thick hair and scalps that can handle thicker twists without tension. It’s an excellent choice if you want something that looks professional and contemporary rather than casual or bohemian.
9. The Layered Look With Stacked Flat Twists and Braids
Create visual depth by stacking flat twist cornrows of different thicknesses directly on top of each other in the same general area, then releasing them into box braids that fall at slightly different lengths. It’s sculptural and three-dimensional.
What Makes This Style Stand Out
The layered approach creates an almost architectural effect—your hair becomes a landscape of peaks and valleys. A thin flat twist might sit next to a thicker flat twist, and when they both release into braids, those braids sit at different positions because of the different scalp placements. This creates incredible shadow and depth that really shows up in photographs and catches light beautifully in person.
How to Create It
Identify sections of your scalp where you want layering. For each layered area, create a thin flat twist close to your part line, then create a thicker flat twist slightly behind it, then possibly a third medium-thickness twist behind that. The twists should be slightly offset rather than perfectly parallel. Each one releases into a box braid, and the staggered positioning automatically creates layering in the braids below. This technique requires significant skill and patience during installation.
Best For
People who want their protective style to look intentionally styled and artistic. This works exceptionally well if you’re planning to wear your braids up in styles where the scalp design shows, because the layers create visual interest that’s visible from above.
10. The Soft Blend With Curved Flat Twists Melting Into Fluid Box Braids
Create the softest possible version of this hybrid style by using curved flat twist cornrows—following your natural hairline curves rather than fighting them—that gradually transition into fluid, loosely-braided box braids. It’s romantic, wearable, and genuinely protective.
What Makes This Style Stand Out
This approach prioritizes comfort and wearability over graphic impact. The curved flat twists follow the natural pathways of your scalp rather than imposing geometric patterns on it. The braids that follow are loosely braided rather than tightly constructed, which means they move slightly as you move, creating an almost organic quality. It’s the kind of protective style you can genuinely forget you’re wearing because it feels so natural.
How to Create It
Let your scalp shape guide your design. Create flat twists that follow your natural hair patterns and curves rather than forcing straight lines. Think of your twists as following the flow of water rather than creating dams. Keep the tension moderate rather than super tight—the goal is protection without tension headaches. Transition smoothly into box braids that are braided loosely enough that they have a slight wave or movement to them. This style typically takes less time than more complex patterns and wears beautifully for four to six weeks.
Best For
Absolutely anyone who wants protective braiding without the intensity. This style works across all hair types and textures, suits every face shape, and works whether you’re dressing up or dressing down. If this is your first time getting flat twist cornrows and box braids together, this is the pattern that will show you whether you love this combo before you commit to something more elaborate.
Final Thoughts

The real power of combining flat twist cornrows with box braids isn’t just about creating a stunning visual—it’s about having legitimate options. You can style the same protective style in multiple ways depending on your mood, your outfit, or what you’re doing that day. One day you’re wearing them down for maximum drama, the next day you’re pinning them up in a high bun for a completely different energy, and the day after that you’re wrapping them around your crown like a crown.
The key to making any of these styles work is finding a braider who understands the nuance of this hybrid approach. Not every braider who can do cornrows can execute the clean transition into box braids, and not every braider who does box braids has the precision for truly excellent cornrow work. Look for someone who shows examples of their flat twist and box braid combo work, ask specific questions about their technique, and don’t be afraid to invest in quality installation. A well-done flat twist cornrow and box braid style can last four to six weeks with proper care, which makes the initial investment more worthwhile than it might initially seem.