Some curly hair days fall apart the minute you sleep on them. The shape is still there, but the crown flattens, one side leans, and the ends decide to do their own thing.
That’s where quick curly styles earn their keep. A spray bottle, a satin scrunchie, a few bobby pins, and one good claw clip can stretch a whole week of curly hairstyles without turning your bathroom into a styling lab.
The smartest styles do two things at once: they keep the curl pattern from getting wrecked, and they make the mess look deliberate. That balance matters more than fancy technique. You do not need to start from zero every morning. You need a handful of looks that work with your curl density, your length, and the amount of patience you actually have before coffee.
1. The Defined Wash-and-Go for Quick Curly Styles
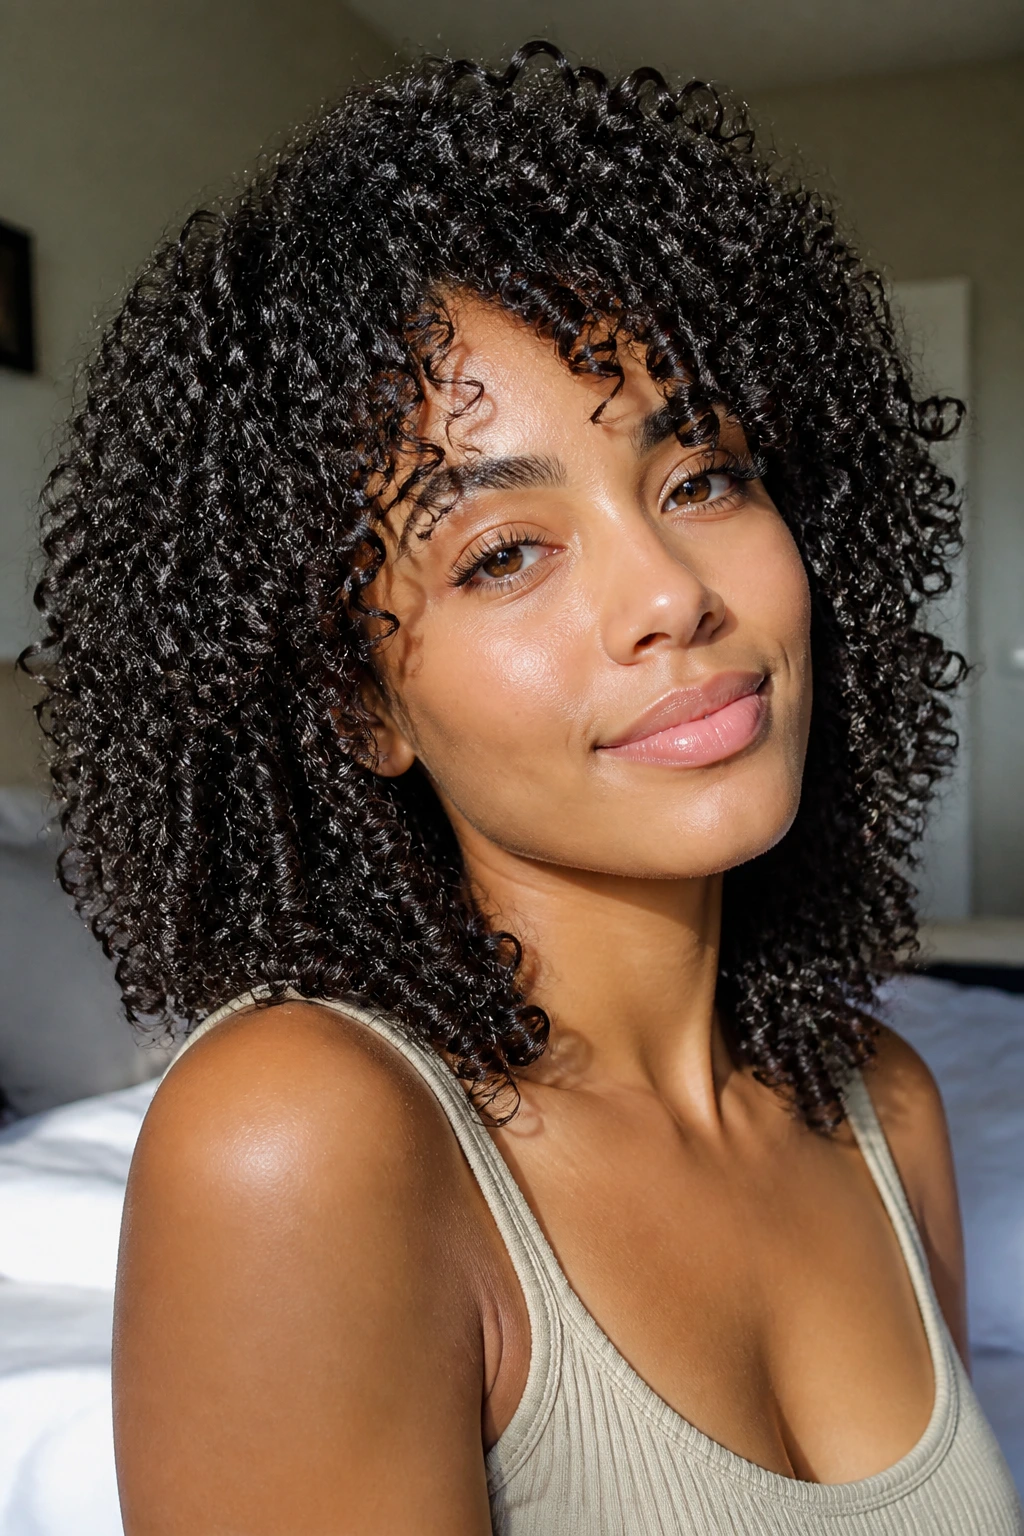
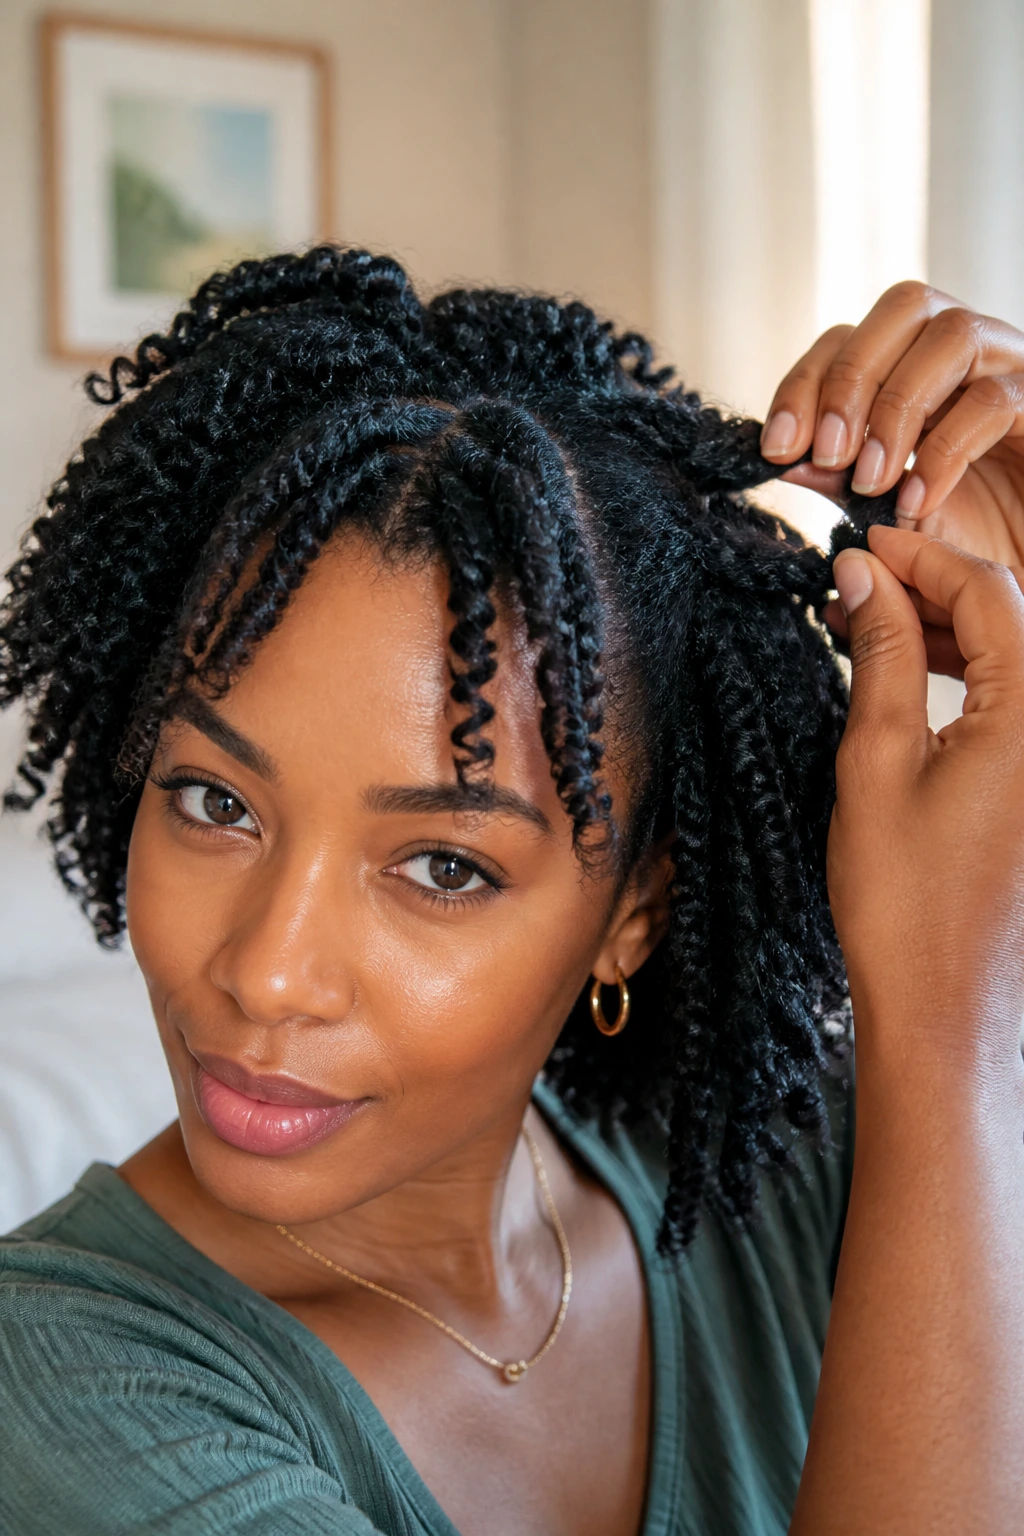
A good wash-and-go still counts as a quick curly style when the curls are already set and all you’re doing is waking them back up. The difference between “finished” and “frizzy” often comes down to how much water you reintroduce, where you place product, and whether you touch the hair too much while it’s drying.
Start with a light mist, not a soaking spray. Focus on the top layer, the front pieces, and any flattened curls at the crown. Then smooth a small amount of leave-in or curl cream over the sections that look dry, followed by a thin layer of gel if your curls lose shape fast. The goal is curl clumps, not a wet helmet.
What Makes It Look Fresh Again
A wash-and-go gets tired when the roots go flat and the ends start to fray. The fix is usually tiny. Lift the roots with your fingertips, shake the curls out at the base, and let a diffuser hit the crown for a few minutes on low if you need volume.
One-sentence rule: stop touching it once the curls start clumping again.
If you like a bit more polish, twist two front sections around your finger and let them fall into the rest of the style. That tiny move frames the face and makes the whole look feel intentional, even if you spent four minutes on it.
2. The Pineapple Puff That Saves Day-Two Curls
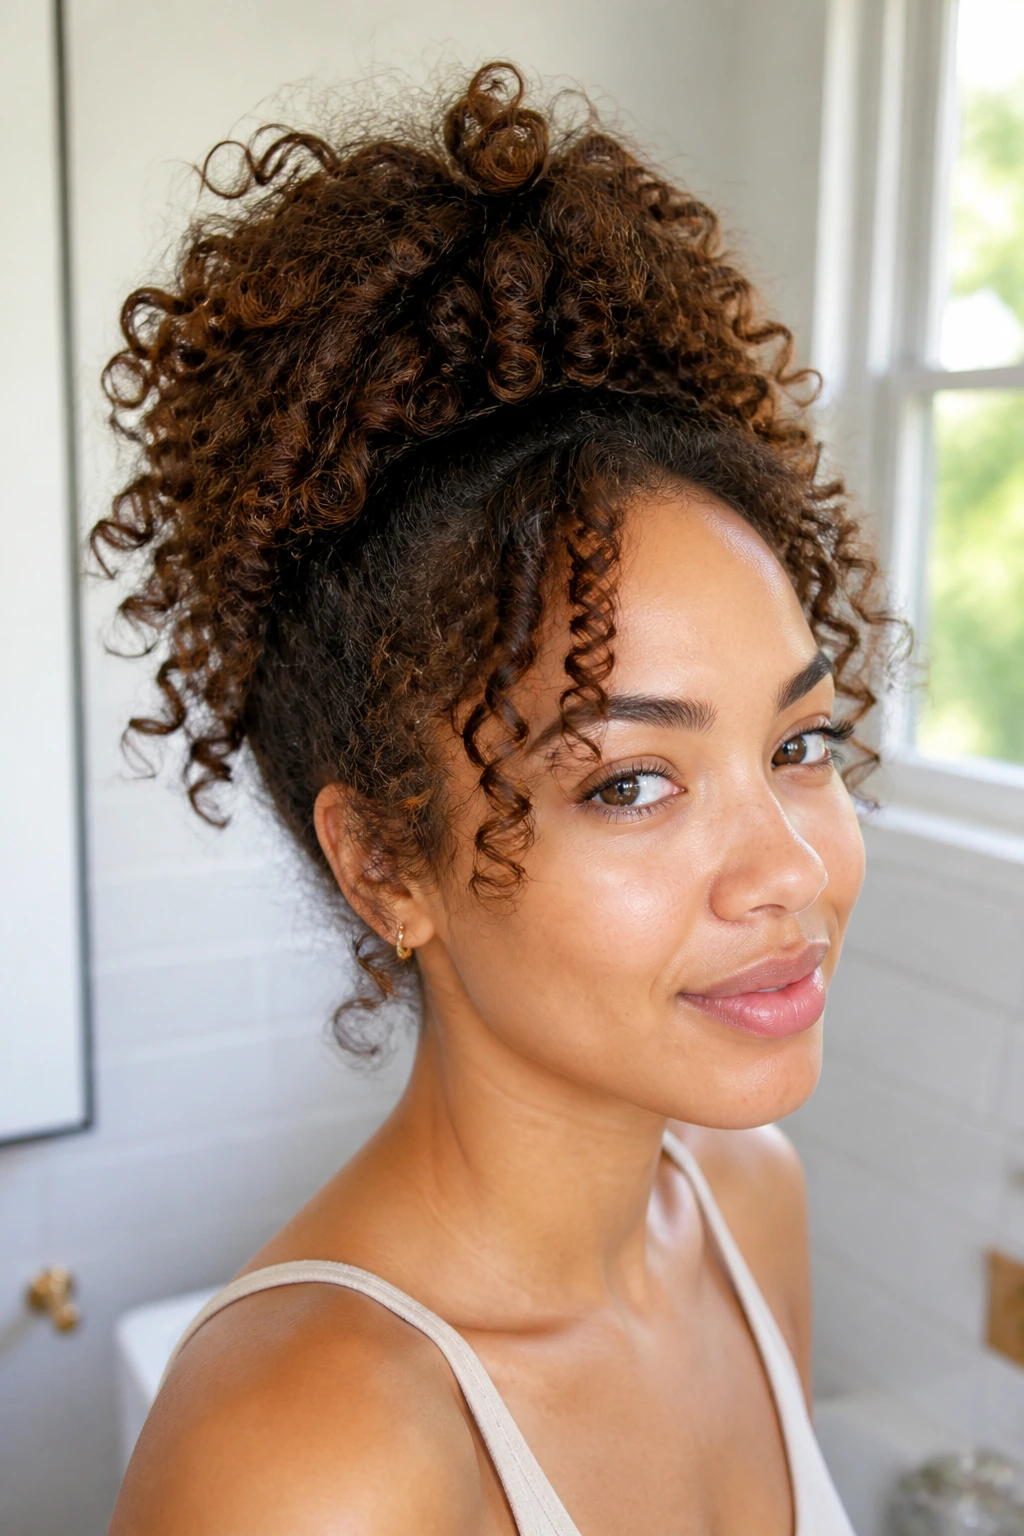
The pineapple puff is the style I reach for when the back of the hair is still pretty good but the top has lost all manners. It’s high, loose, and merciful to your curl pattern. The ends stay out of the way, which means less friction and less frizz.
Use a soft scrunchie or a stretch tie and gather the hair at the crown without yanking the front hairline tight. Leave the puff loose enough that the curls can spring upward instead of getting crushed into a flat knot. If your hair is long, let some of the ends spill out on purpose. It looks better that way anyway.
Why It Works So Well
The style keeps the oldest, driest part of the hair off your shoulders and away from collars, car seats, and straps. That matters more than people think. Curly hair gets tired from rubbing, not just from styling.
- Best for second-day or third-day curls
- Works well on medium to long lengths
- Takes about 2 minutes once you know your hand position
- Holds best with a satin scrunchie or soft coil tie
- Looks cleaner if you smooth the front with a tiny bit of gel
If the puff feels too casual, pull out two curls near the temples and let them fall forward. That’s enough to soften the shape without turning the whole thing into a “done” style.
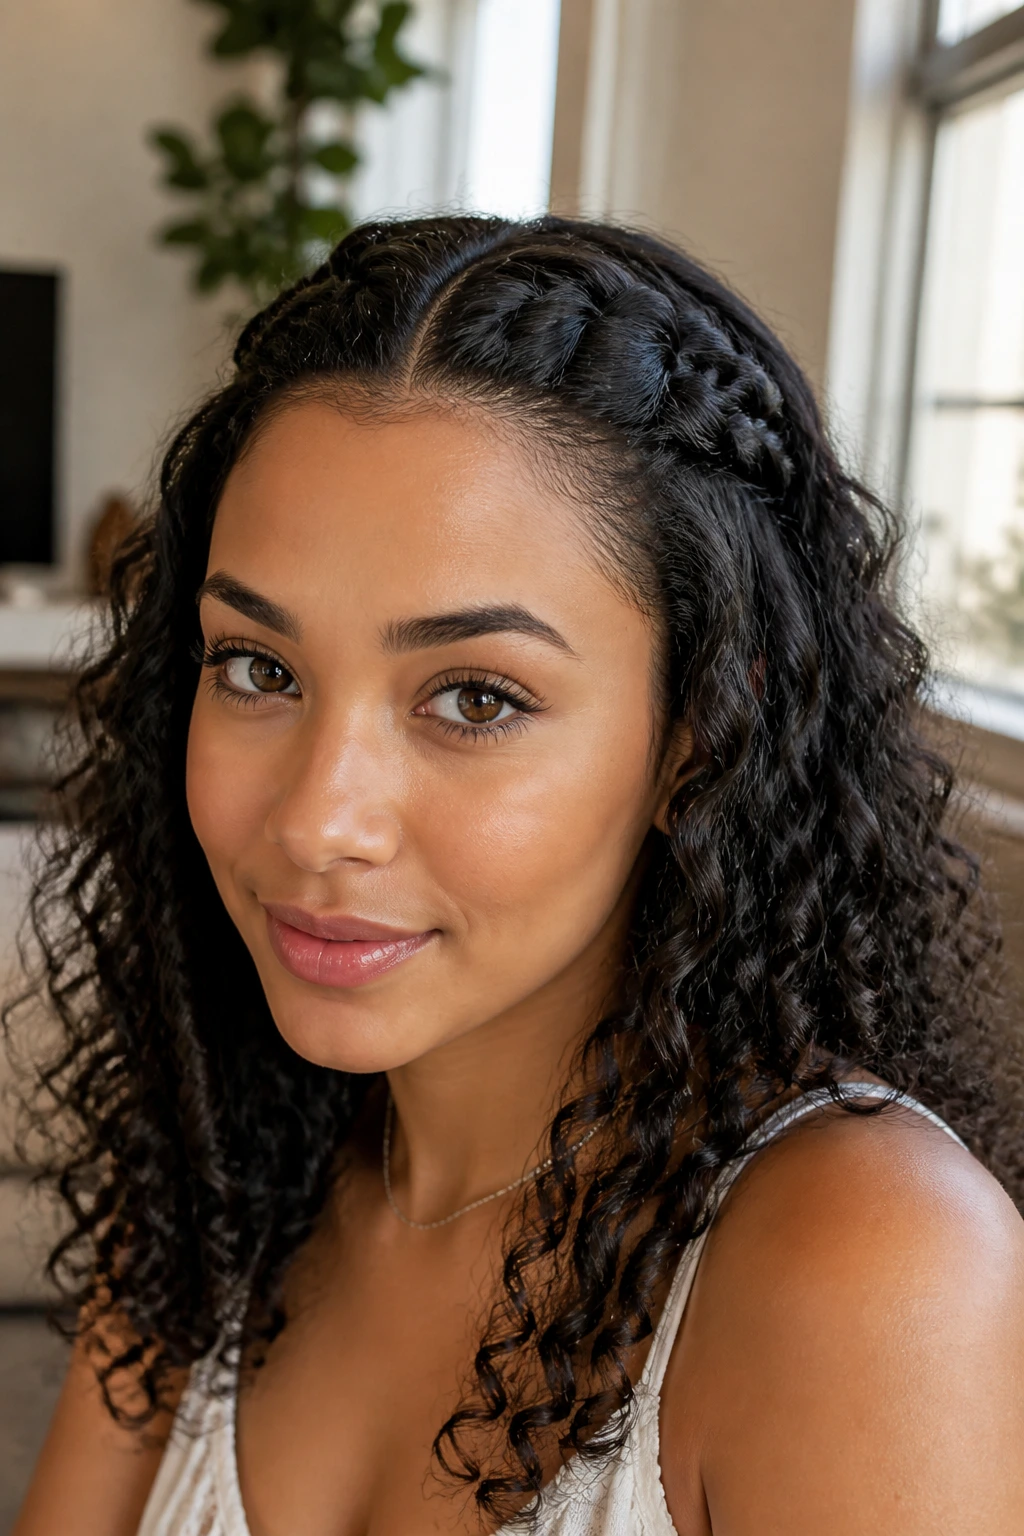
3. The Half-Up, Half-Down Curl Frame
Half-up, half-down styles solve a common curly-hair problem: the front goes flat before the back does. Pulling the top section away from the face gives the style structure while leaving enough hair down to keep it soft and full. It’s also one of the few styles that looks like you spent more time than you did.
Take the section from temple to temple and gather it at the back of the crown. You can clip it, twist it, or tie it with a small elastic. A loose twist usually looks better than a tight pull, because it lets the curls above it keep their bounce. If your hair is layered, this style is even easier; the shorter pieces naturally fall out and soften the top.
A Tiny Twist Changes the Whole Shape
A plain half-up style is fine. A twisted half-up style is better. Two rope twists meeting at the back of the head make the style look finished, and they take almost no extra time.
If the crown is puffy or uneven, smooth only that section with a little water and cream. Do not chase every curl. You’ll lose the texture that makes the style work in the first place.
A clean middle part gives this look a sharper finish. A deep side part makes it feel softer and a little more romantic. Pick one and stick to it long enough to learn what flatters your face fastest.
4. The Deep Side Part with a Clip
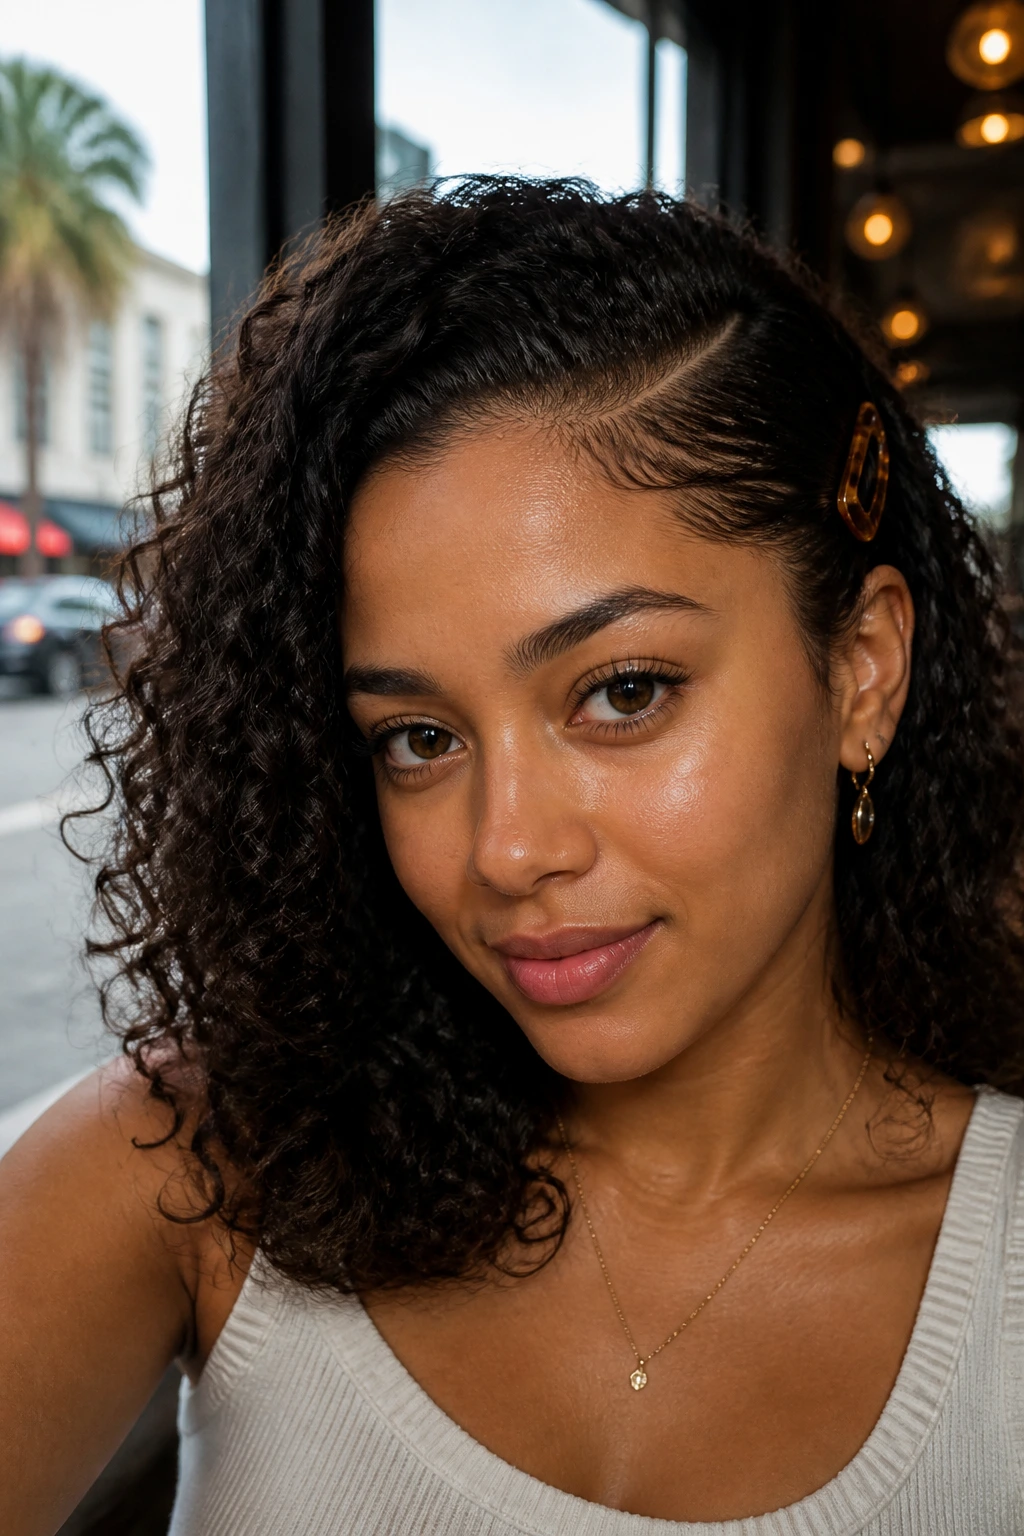
A deep side part is one of those fast moves that changes the whole mood of curly hair without asking the curls to do anything hard. One side gets lifted, the other side gets tucked or pinned, and the shape suddenly looks more intentional. Good when your roots are uneven. Better when one side has more volume than the other.
Use a tail comb or the end of a rat-tail brush to carve the part while the hair is slightly damp or lightly misted. Then tuck the heavier side back with a barrette, snap clip, or a flat metal pin. A decorative clip works here, but only if it actually holds. Cute clips that slide out in twenty minutes are a waste of money.
The Clip That Holds the Shape
- Snap clips are good for fine curls and smaller sections
- Barrettes work well when you want a polished finish
- Flat pins disappear into dense hair and keep the shape low-key
- Strong alligator clips hold thick hair better than tiny fashion clips
If your hairline frizzes fast, smooth just the part line and the front edge with a fingertip and a pea-size bit of gel. Leave the rest alone. That contrast — neat at the front, soft through the body — is what makes the style look good instead of overworked.
5. The High Curly Ponytail That Still Keeps Volume
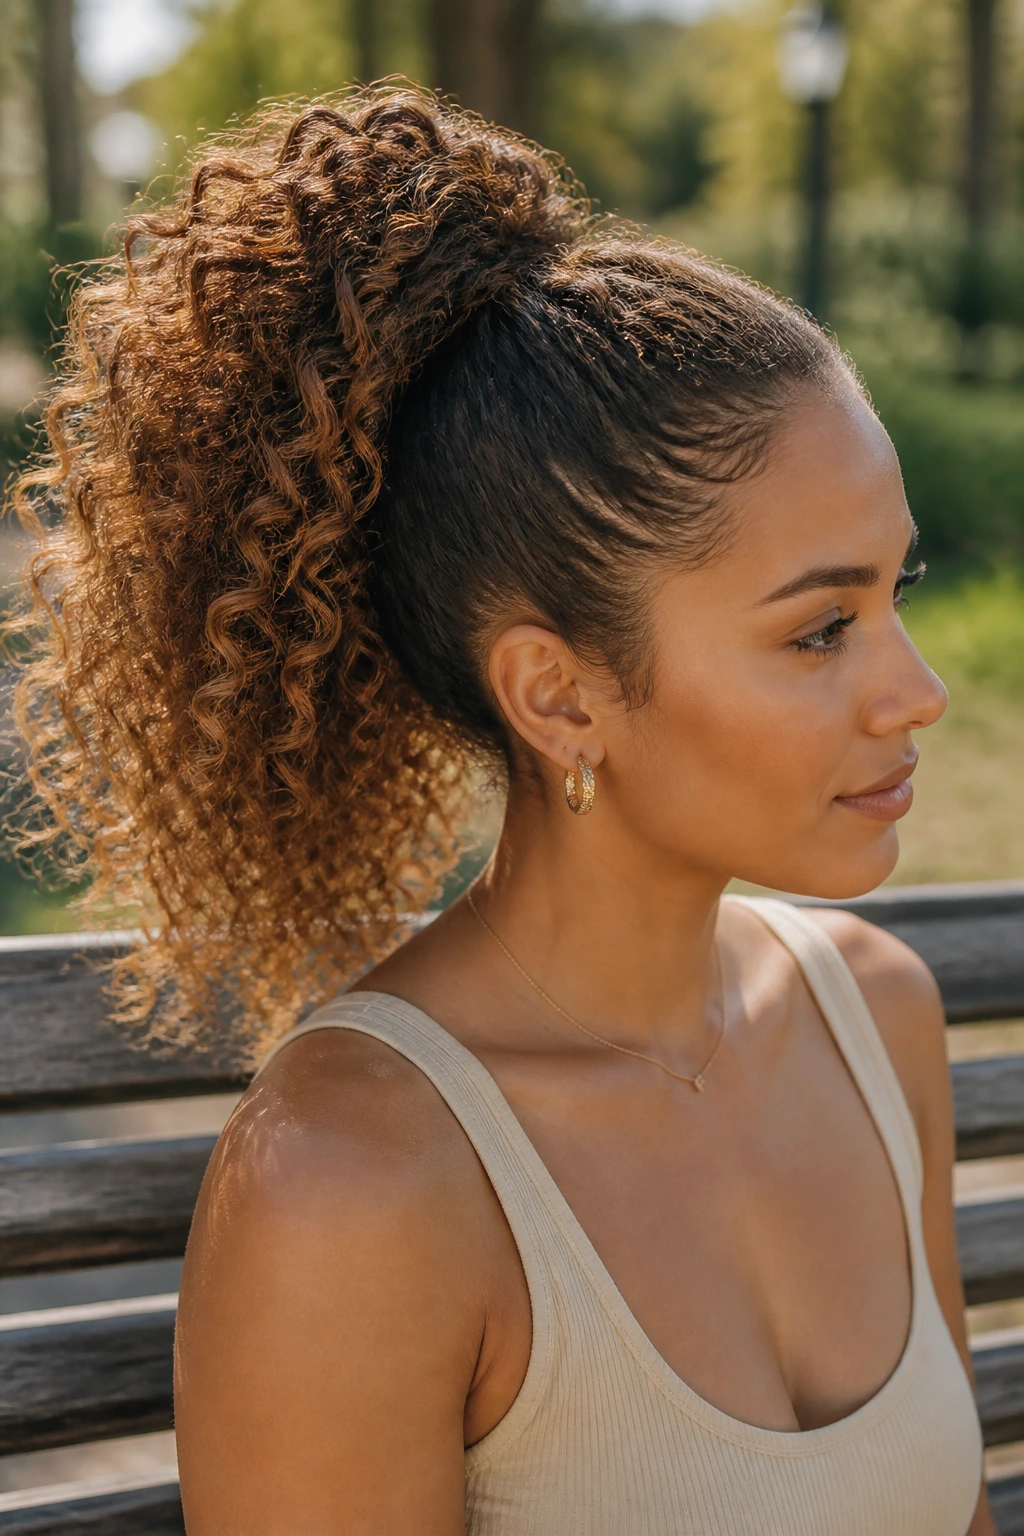
A high curly ponytail can look sharp without flattening the whole head, and that’s the part people often miss. The trick is to keep the top controlled while letting the pony stay full and springy. If you smooth every inch of hair back, you end up with a tight, sleek style that fights curly texture. That’s not the move here.
Brush or gather the hair up to the crown, but stop once the hairline is neat. Then secure it with a strong elastic and let the curls fan out naturally. Wrap one curl around the base to hide the tie if you want a cleaner finish. That tiny cover-up makes a standard ponytail look more finished with almost no extra effort.
The best version of this style has lift at the roots and softness at the ends. Too much gel at the top can make it look stiff. Too little control and the front starts puffing up in odd places. The sweet spot lives right in the middle.
If your curls are dense, split the ponytail in two with your hands after securing it. That gives the style more width and helps it read as a curly look instead of a compact lump. Small adjustment. Big difference.
6. The Low Curly Ponytail with a Wrapped Base
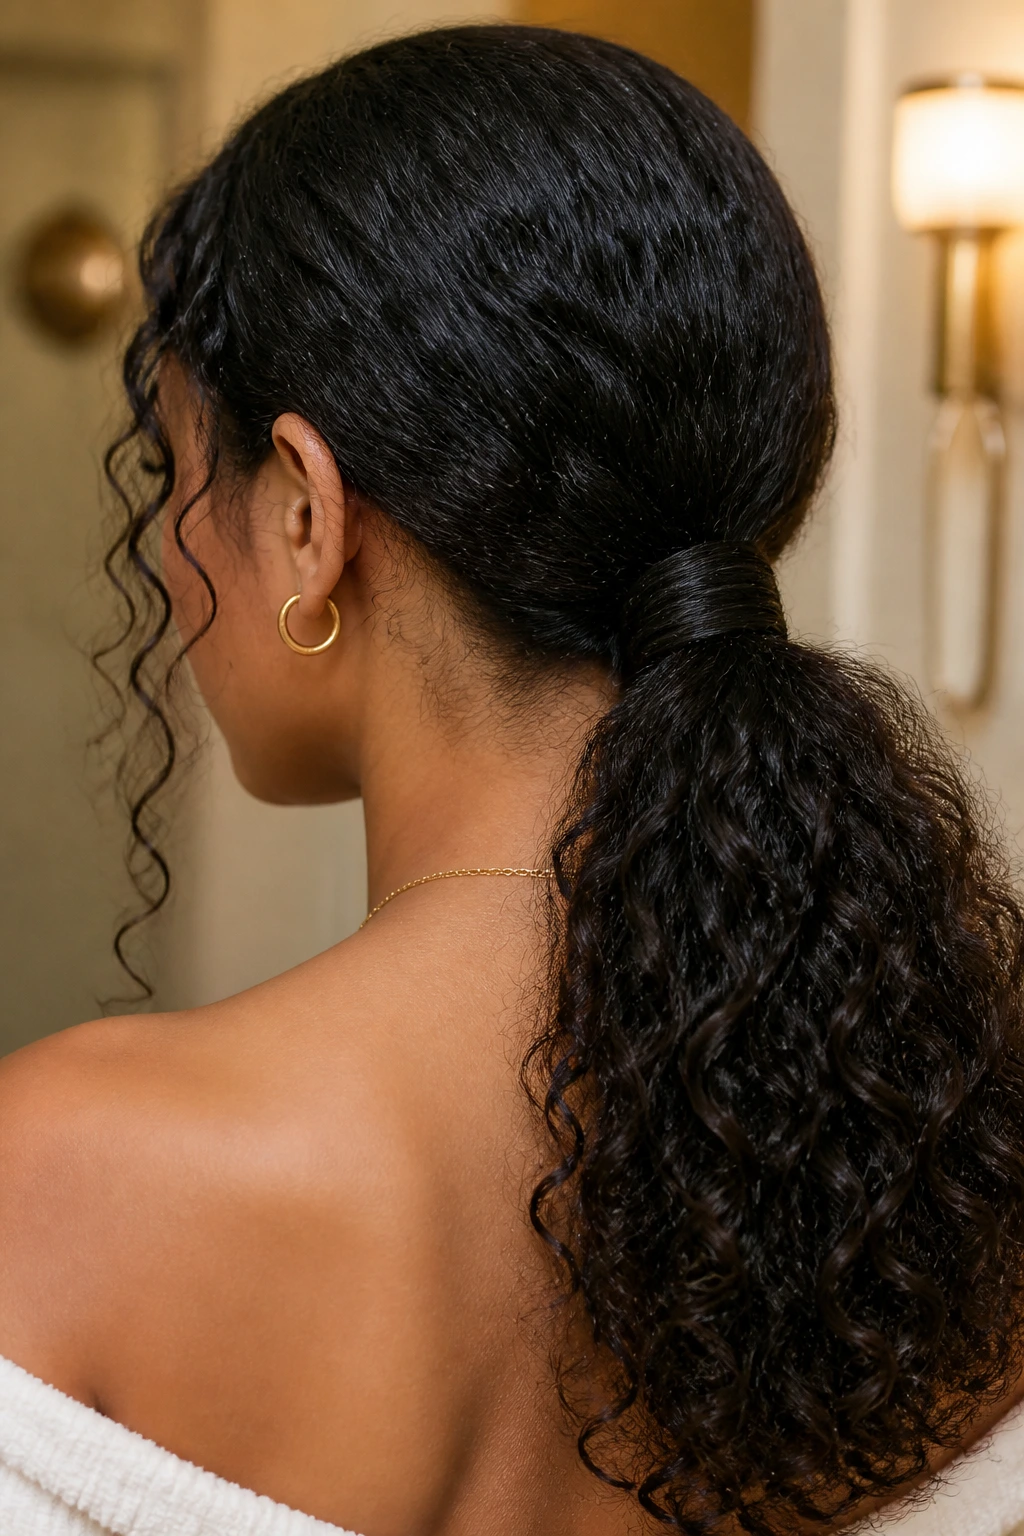
The low ponytail is the quieter sister of the high one. It’s easier on the scalp, gentler on the hairline, and cleaner when you need a style that can move from errands to dinner without looking like a gym holdover. This version works especially well when the curls are a little stretched and you want them to sit close to the neck.
Gather the hair at the nape, leaving a few face-framing curls out if you like that softer shape. Secure the ponytail with an elastic, then take a small curl or a thin strip of hair and wrap it around the base. Pin the end underneath with one bobby pin. If the pony feels too tight, loosen the crown with your fingers until the shape breathes a little.
When a Low Pony Beats a Bun
A low pony is useful when the ends still look good and the roots are the part you want hidden. A bun tucks the texture away. This lets it show off.
It also works better than a bun when your hair is layered or shorter around the face. A bun can leave awkward little ends sticking out. A low ponytail lets those pieces fall where they want.
Try it with a center part for a cleaner, more balanced look. Try it with a side part if you want movement. Both work. The hair usually tells you which one is less annoying.
7. The Two-Bun Crown for a Playful Reset
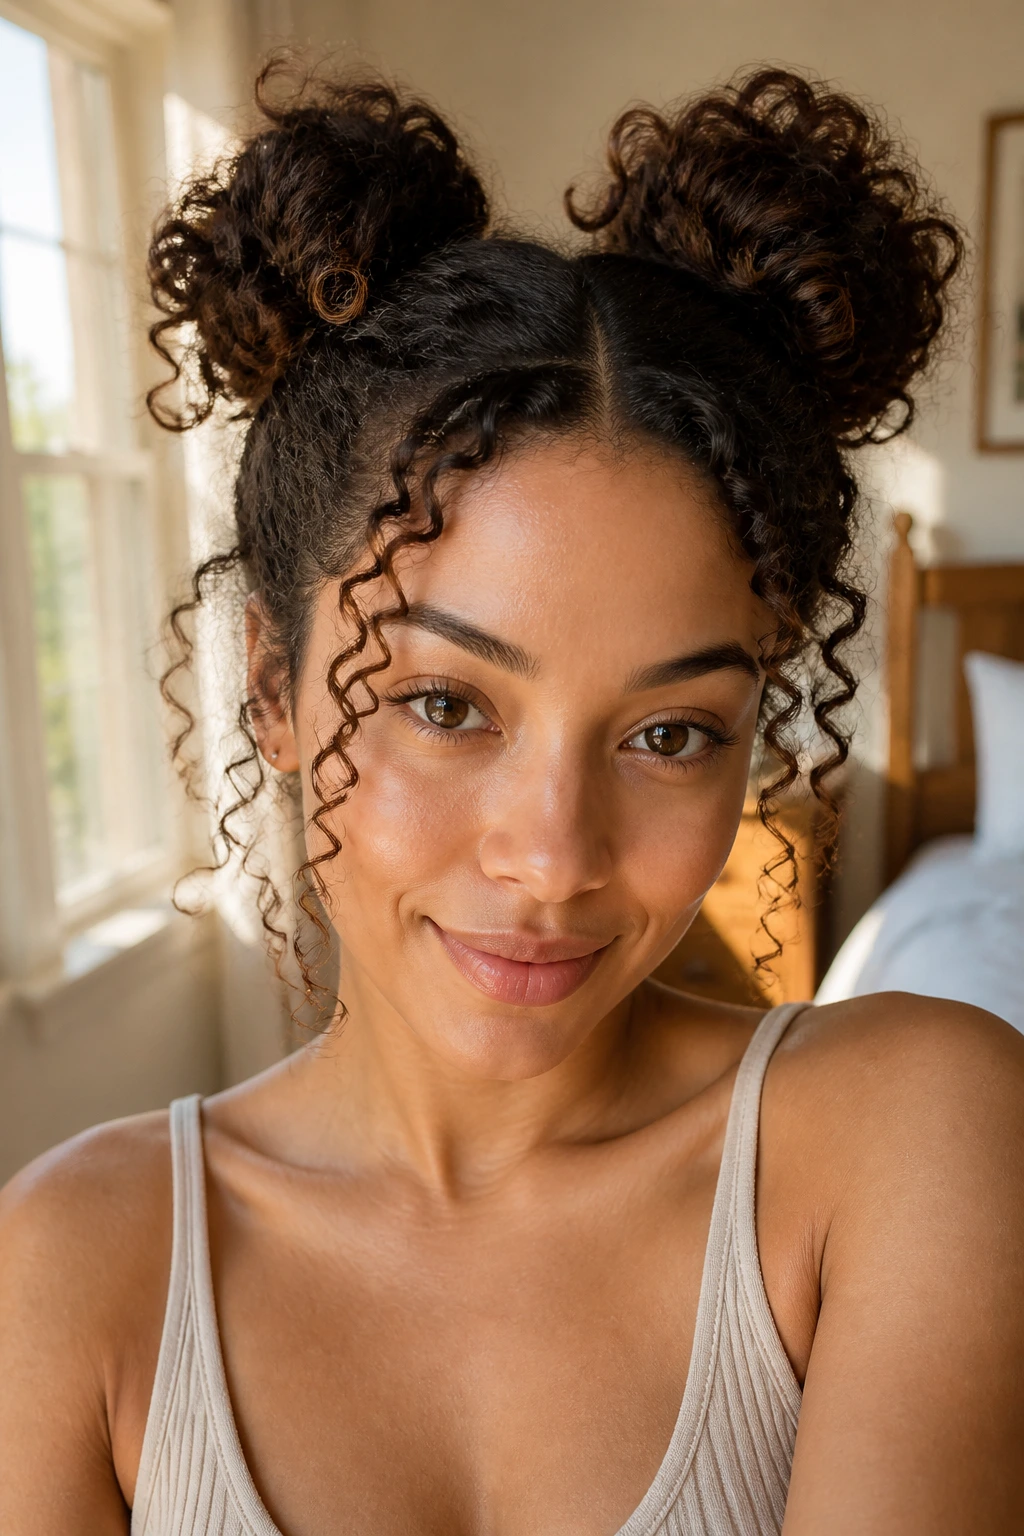
Two buns sound playful because they are, but they’re also practical. Split the hair in half, twist or gather each side, and secure two buns high on the head. The style keeps curls up and out of the way while still letting texture show. It’s one of the fastest ways to make day-two hair look like a choice.
You do not need perfect symmetry. In fact, a little mismatch makes the style look softer and less rigid. One bun can sit a half-inch higher than the other. Fine. That asymmetry reads as relaxed, not sloppy, if the bases are neat and the curls are fluffed a little.
How to Keep the Buns from Looking Flat
- Use two small elastics before pinning if your hair is thick
- Leave the ends slightly loose for more texture
- Pull a few curls free around the temples
- Cross two bobby pins at the base if the hair is heavy
- Loosen each bun with your fingers after it’s secured
This style works best on hair that still has some shape left at the ends. If the curls are extra frizzy, the buns can hide a lot. That’s part of the charm.
8. The Front Twist Crown for Soft Face Framing
Sometimes the fastest fix is around the face, not the whole head. Front twists are good for that. Take a small section from each side of the hairline, twist it back toward the crown, and pin it in place. The rest of the hair stays loose, which keeps the style from feeling too formal.
This is the move for curls that puff up near the temples or frizz around the forehead after sleep. The twists tuck that part away while giving the front shape. It also keeps the hair off your face when the weather is humid or you’re dealing with collar friction.
What Makes the Twist Look Clean
The twists should be small enough to lie flat, but not so tight that they pull at the scalp. If the twist is fighting the curl pattern, it will unravel or look stiff by lunchtime.
Use a little leave-in on the front sections before twisting. Not much. A pea-size amount per side is usually enough. Then pin the twists with crossed bobby pins, not one lonely pin that will slide out when you turn your head.
This style looks especially nice when the curls in the back stay loose and full. That contrast gives it shape without making it feel overly styled.
9. The Flat-Twist Front with Loose Back Curls
Flat twists at the front are a strong option when you want a style that stays put. They sit closer to the scalp than regular twists, so they keep the front neat without asking the rest of the hair to behave. It’s one of my favorite ways to fake a more detailed style when the clock is not on your side.
Section off the front of the hair from ear to ear, or take two to four smaller strips if you want more detail. Twist each section back along the scalp and stop where the hair becomes loose and full. Pin the ends under the back curls or let them blend in if the hair is long enough. A rat-tail comb helps here, but finger-parting works if you are not looking for perfect lines.
One-sentence truth: flat twists make even tired curls look planned.
They’re also a smart option if you’re trying to stretch a style another day without re-wetting the whole head. A little water on the front, a little cream on the ends, and the style is ready to go.
10. The Claw-Clip French Twist for Fast Polish
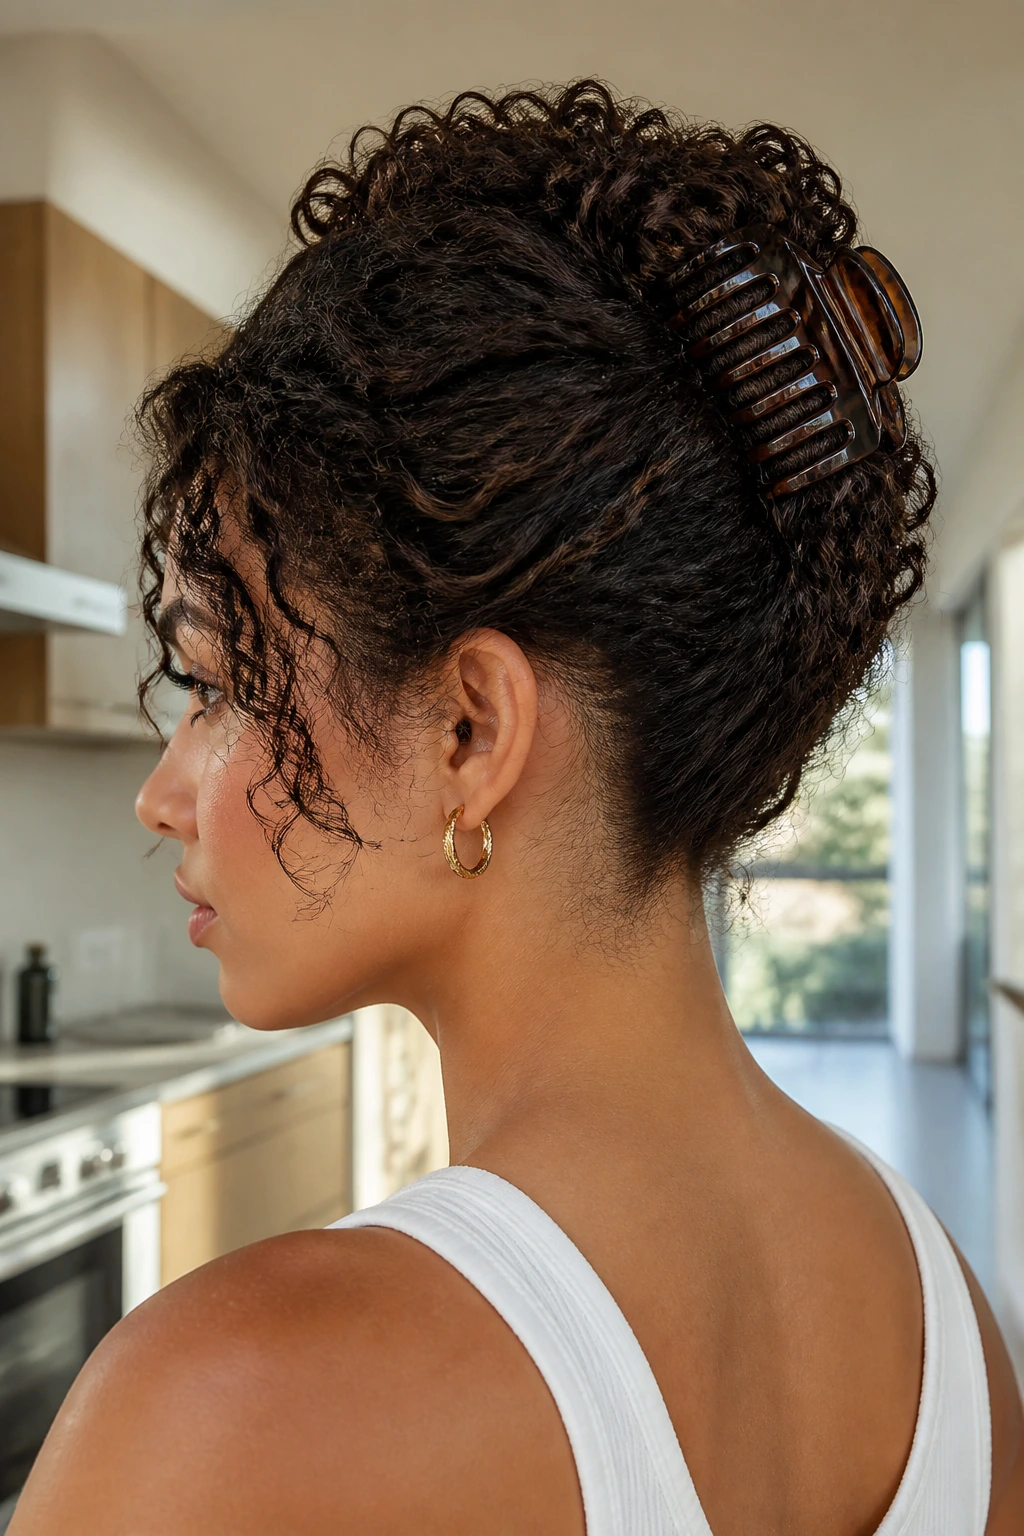
The claw-clip twist is the style people reach for when they need their hair up now. It looks more intentional than a plain clip-and-go, but it takes only a few seconds once your hands know the motion. Gather the curls at the back, twist the length upward, fold the ends in, and clip the roll in place.
The clip matters more than people admit. A tiny clip will fail the second the hair gets heavy. A larger claw clip with a strong spring holds dense curls better and spreads the weight across more hair. If your hair is thick or long, use a clip with teeth that grab instead of sliding.
A Fast Fix for Busy Mornings
If the crown is slipping, mist the roots lightly and add a touch of cream before twisting. Dry, slippery hair does not stay in place as well. Also, keep the twist loose enough that the curls still have room to spring out at the ends.
This style is good when you want your hair off your neck but do not want a tight bun. It reads a little more relaxed, a little more grown-up, and it works with second-day texture instead of pretending the texture isn’t there.
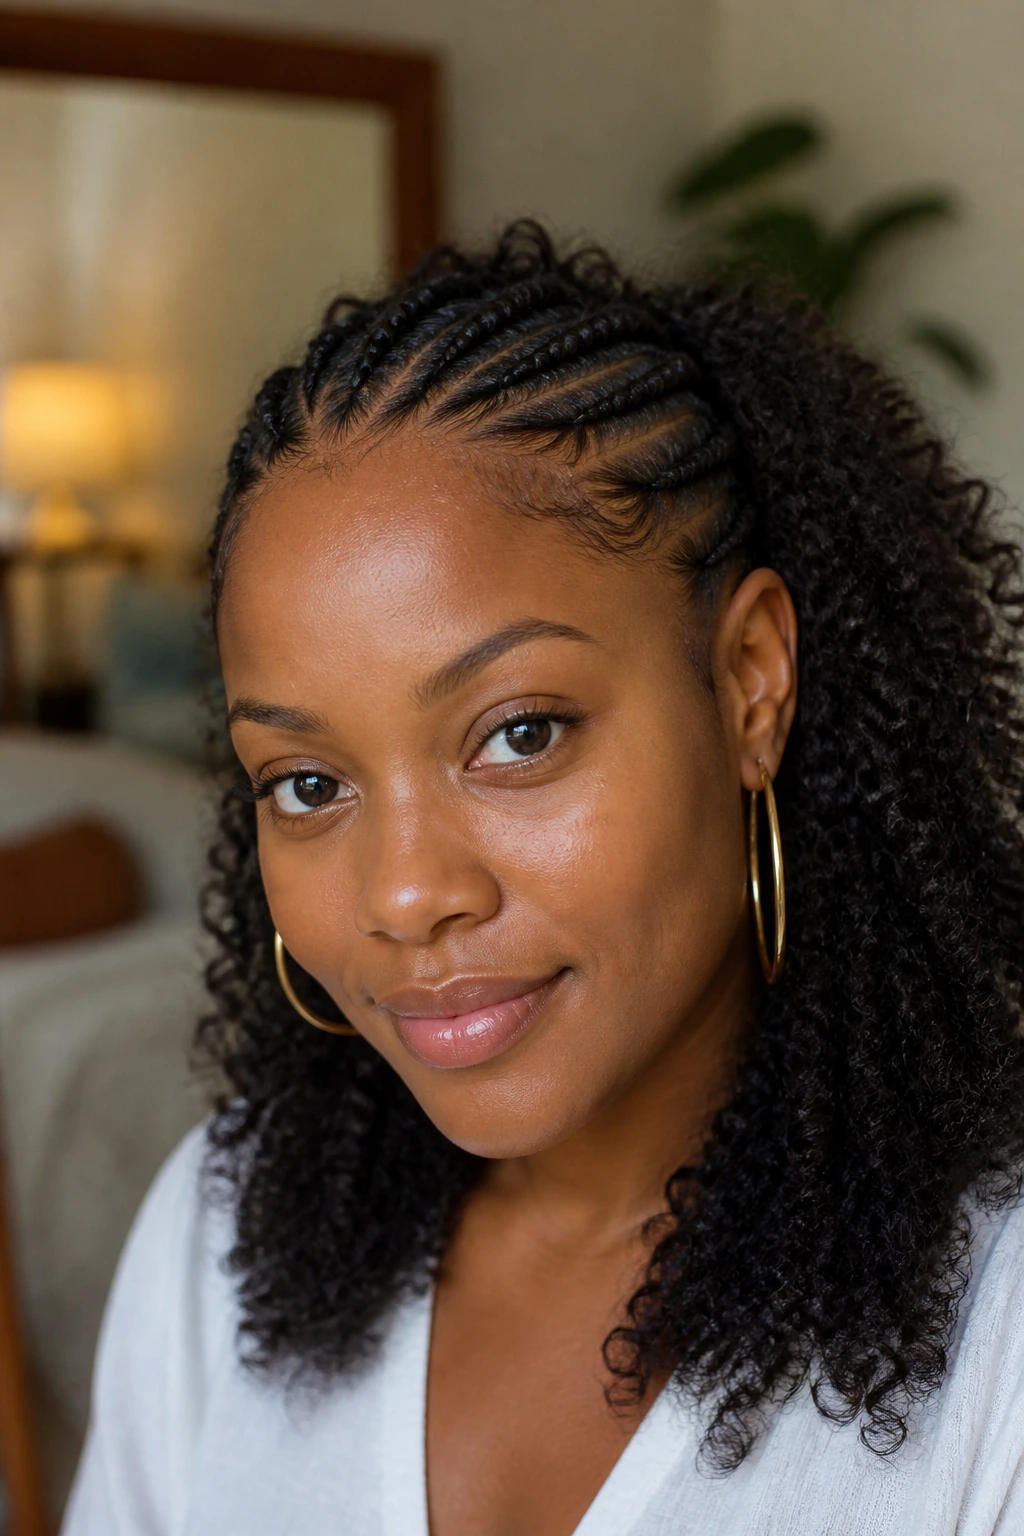
11. The Braided Sides with Loose Curls
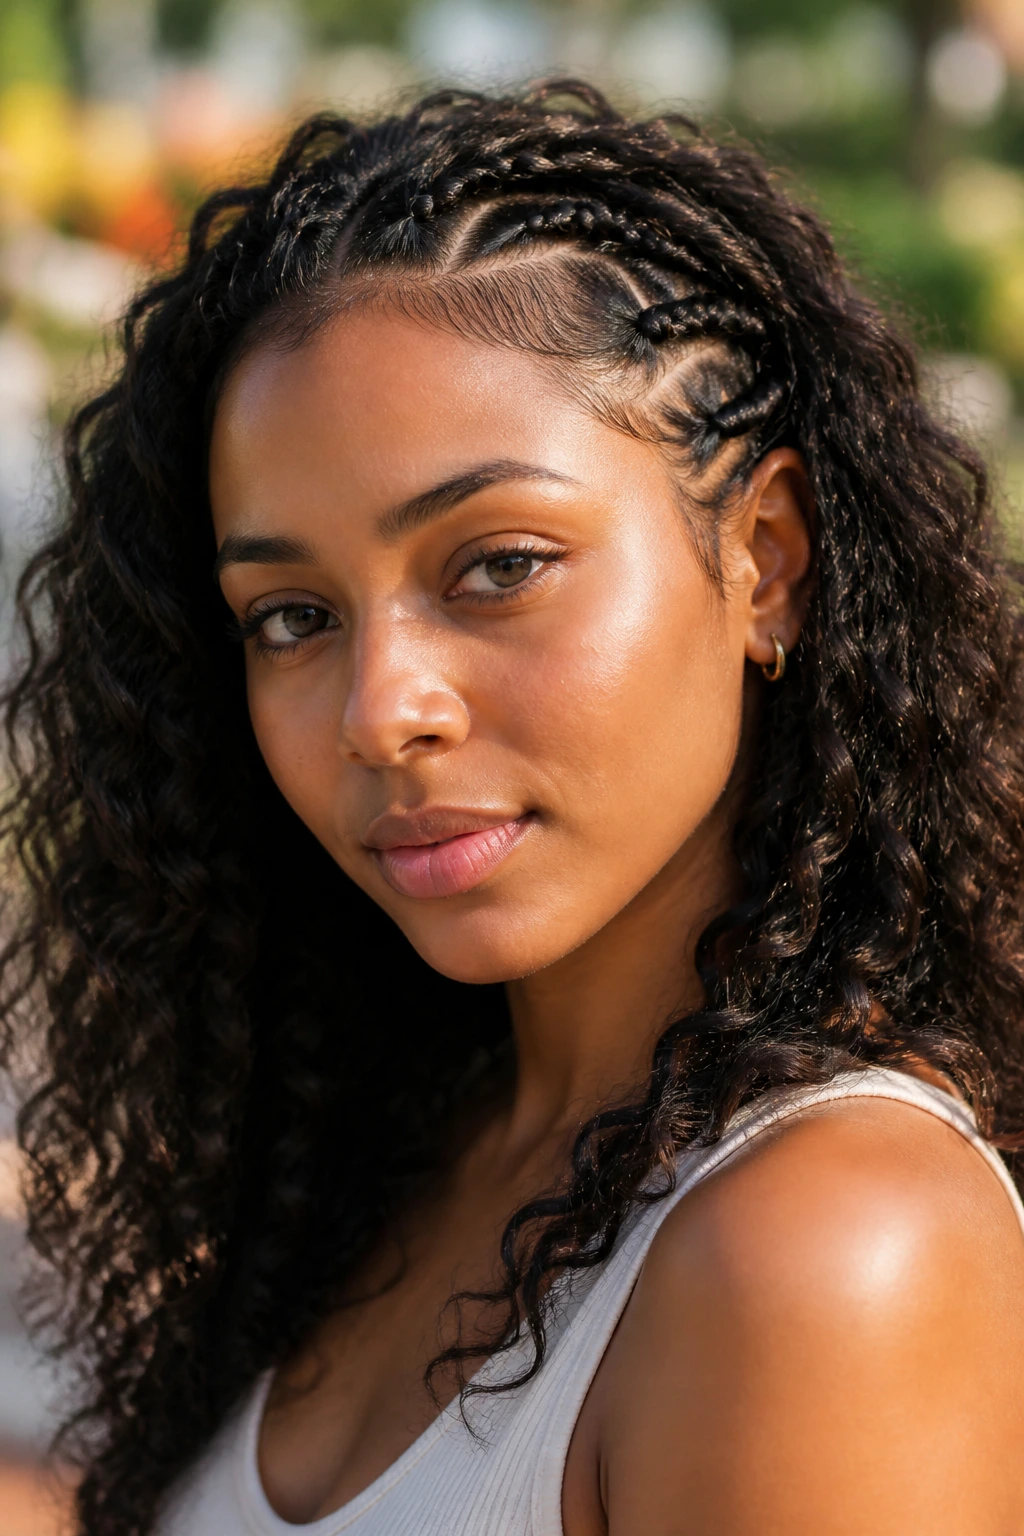
Braided side pieces are a nice compromise when you want some control and some movement. Braid a small section from the temple, or do two tiny braids on either side, and leave the rest of the curls loose. The style keeps the front tidy while still showing off the curl pattern through the length.
Braids hold a little more firmly than twists, especially on smoother or slightly stretched hair. That makes them a good choice for windy days or long hours out of the house. They also sit flatter against the head, which can be useful if you wear glasses or hate bulk near your ears.
A twist is faster. A braid lasts longer. That’s the real difference.
If the braids feel too formal, stop them early and pin them back instead of braiding all the way down. That leaves the ends soft and keeps the look from tipping into school-uniform territory. Small braids at the front can do a lot without taking over the whole style.
12. The Curly Bob Tuck-and-Pin
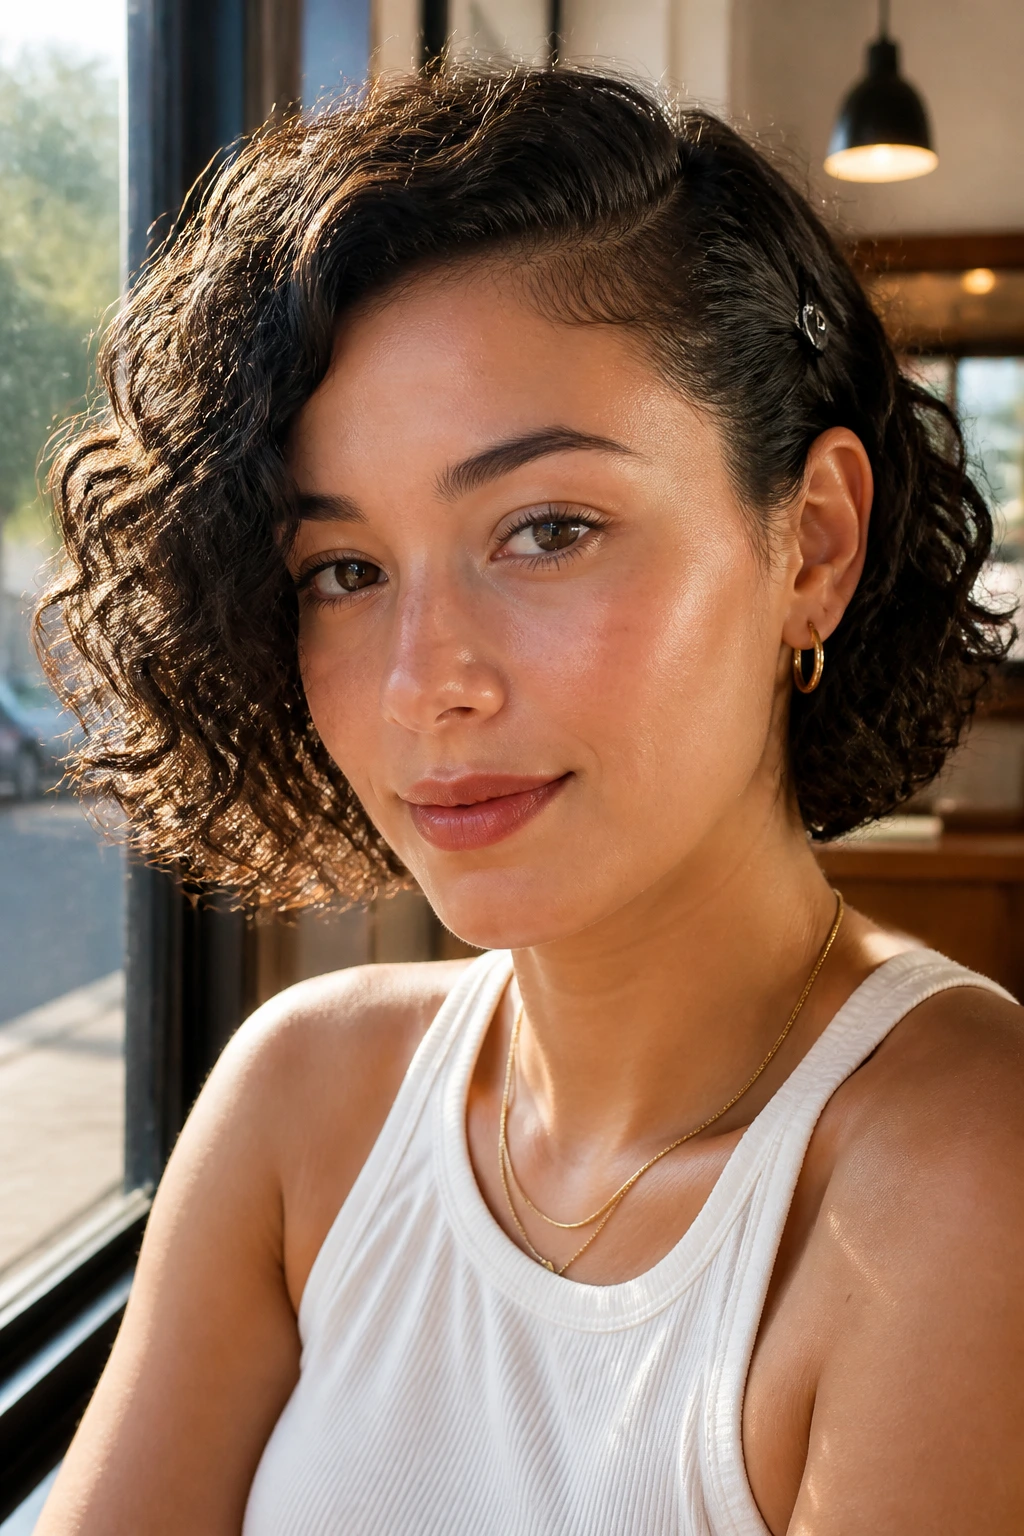
Short curls need their own strategy. A bob or lob will not behave like long hair, and it shouldn’t. The tuck-and-pin works because it uses the shape you already have instead of fighting it. Push one side behind the ear, secure the back pieces with a couple of pins, and let the rest of the curls sit where they naturally land.
If one side is flatter than the other, deepen the part and tuck the fuller side back. That creates balance fast. Add one clip above the ear if you want the style to feel finished rather than accidental. A small metal clip can do more here than a big decorative barrette that overwhelms the haircut.
Short curls often look best when they are not overhandled. A little cream at the ends, a tiny bit of gel at the front, and a clean tuck are usually enough. Anything more can make the hair look stiff, which defeats the whole point of curly texture in the first place.
One sentence works here: short hair looks styled faster than long hair, but it also shows every pin. Place them carefully.
13. The Wide Headband Style for Frizz Days
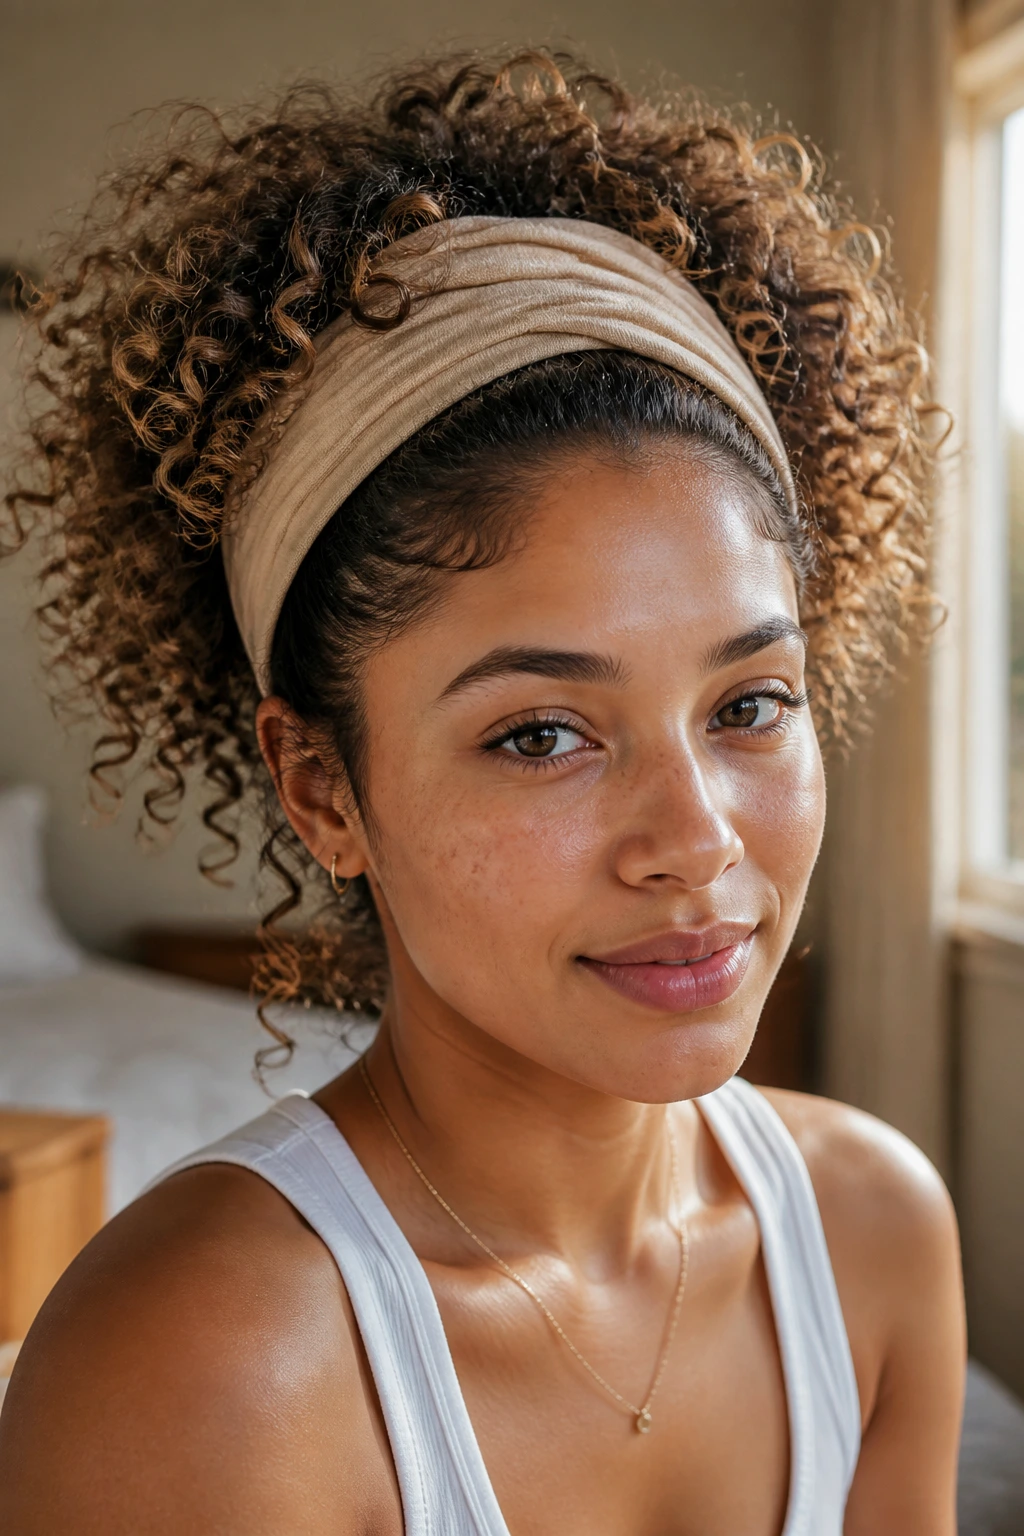
A wide headband is the fastest way to make a curly style look deliberate when the crown is doing its own thing. Push the band back from the hairline, lift the roots a little with your fingertips, and let the curls spill around it. The band controls the front, and the rest of the hair gets to stay full.
What to Look for in a Headband
- Soft fabric that does not snag the curls
- Satin lining if your hair frizzes fast
- A width of about 2 to 4 inches for fuller coverage
- Enough stretch to sit snug without leaving a deep dent
A hard plastic band can work in a pinch, but it often dents the roots and makes the style look more forced than it needs to. Fabric wins here. Every time.
This style is especially useful when you want your hair down but don’t want the front section in your face. It also takes well to a half-up version if you want more lift at the crown. Toss the band on, fluff the roots, and move on. Some mornings deserve that level of honesty.
14. The Shape-Around-the-Face Fro That Takes Five Minutes

A shaped fro can be one of the quickest curly looks in the whole rotation because it leans into the texture instead of arranging it into something else. The job is not to flatten or tame the hair. The job is to give it a clean outline so it looks intentional from every angle.
Pick the roots at the crown, not the ends. That keeps the body lifted without turning the curl pattern into a cloud of frizz. Then smooth the perimeter lightly with a bit of cream or gel on your fingertips. If one side is fuller, stretch the opposite side a little with your hands until the silhouette feels balanced.
The Shape Matters More Than the Length
A round shape feels soft. An oval shape looks a little longer. A tapered shape at the sides makes the top stand out more. You don’t need a salon finish to get this right. You need a shape that feels consistent from front to back.
If you want a tiny bit of detail, tuck one side behind the ear and add a clip. If you want more height, use a pick only at the roots and leave the curl pattern alone. That’s the trick. Lift the base, leave the body.
15. The Twist-Out Refresher That Buys You Another Day
A twist-out does not need to be perfect on day three to still count as a good style. Sometimes all it needs is a little reset. Separate the top pieces, smooth the frizziest parts with damp fingers, and add two or three small front twists or a side clip to give the style a new shape.
This is the move when your twist-out has gone fuzzy but still has enough texture to look good. Don’t drench it. A light mist is enough. Too much water breaks the old definition and sends you back to square one. Work section by section, starting with the areas that sit closest to your face and the parts that flatten first.
The Five-Minute Reset
- Mist the front and crown lightly
- Rub a drop of oil or leave-in between your palms
- Re-twist only the pieces that look tired
- Lift the roots with your fingers or a pick
- Add a clip, headband, or puff to finish the shape
This style is a good reminder that curly hair rarely needs a total restart. Most of the time, it needs a small adjustment and a little confidence. The curls are already doing the heavy lifting.
Final Thoughts

The best curly hairstyles are the ones that respect what your hair is already doing. That might mean a high puff on one day, a low ponytail the next, and a headband style when the front starts to wilt. None of those are complicated. That’s the point.
A small kit makes the whole week easier: one spray bottle, one satin scrunchie, a few bobby pins, a strong claw clip, and a clip or two that actually hold. Keep those close, and you stop treating every morning like a full styling session.
I also like to think in terms of “reset points” instead of “new styles.” If the crown is flat, change the part. If the ends are good, leave them alone. If the hairline is frizzy, cover only that part. Those little choices save time, and they tend to look better than overworking the whole head.