Wet curly hairstyles can look sharp fast when the shape is doing the work and the product stays out of the way. The style should read as defined and glossy, not soaked and weighed down. That difference matters more than most people think.
A small amount of gel, brushed into the root zone, can tame the top without flattening the curl pattern. Once the curls clump cleanly, the whole look gets cleaner; when the clumps break apart, it turns fuzzy in a hurry, and no amount of shine spray fixes that.
The best versions respect the haircut. A dense coil needs a different touch than a loose wave-curl mix, and a chin-length bob needs less product than shoulder-length ringlets. Heavy creams are often the villain here. They flatten the root, drag down the curl, and make the finish look greasy instead of glossy.
There’s also a trick most people miss: the “wet” part does not have to mean dripping. It can mean a slick root, a defined midsection, and curls that still look soft at the ends. That balance is what makes these styles wearable, whether you’re heading to work, a dinner, or just want your curls to look on purpose for once.
1. Slicked-Back Side Part for Defined Wet Curls
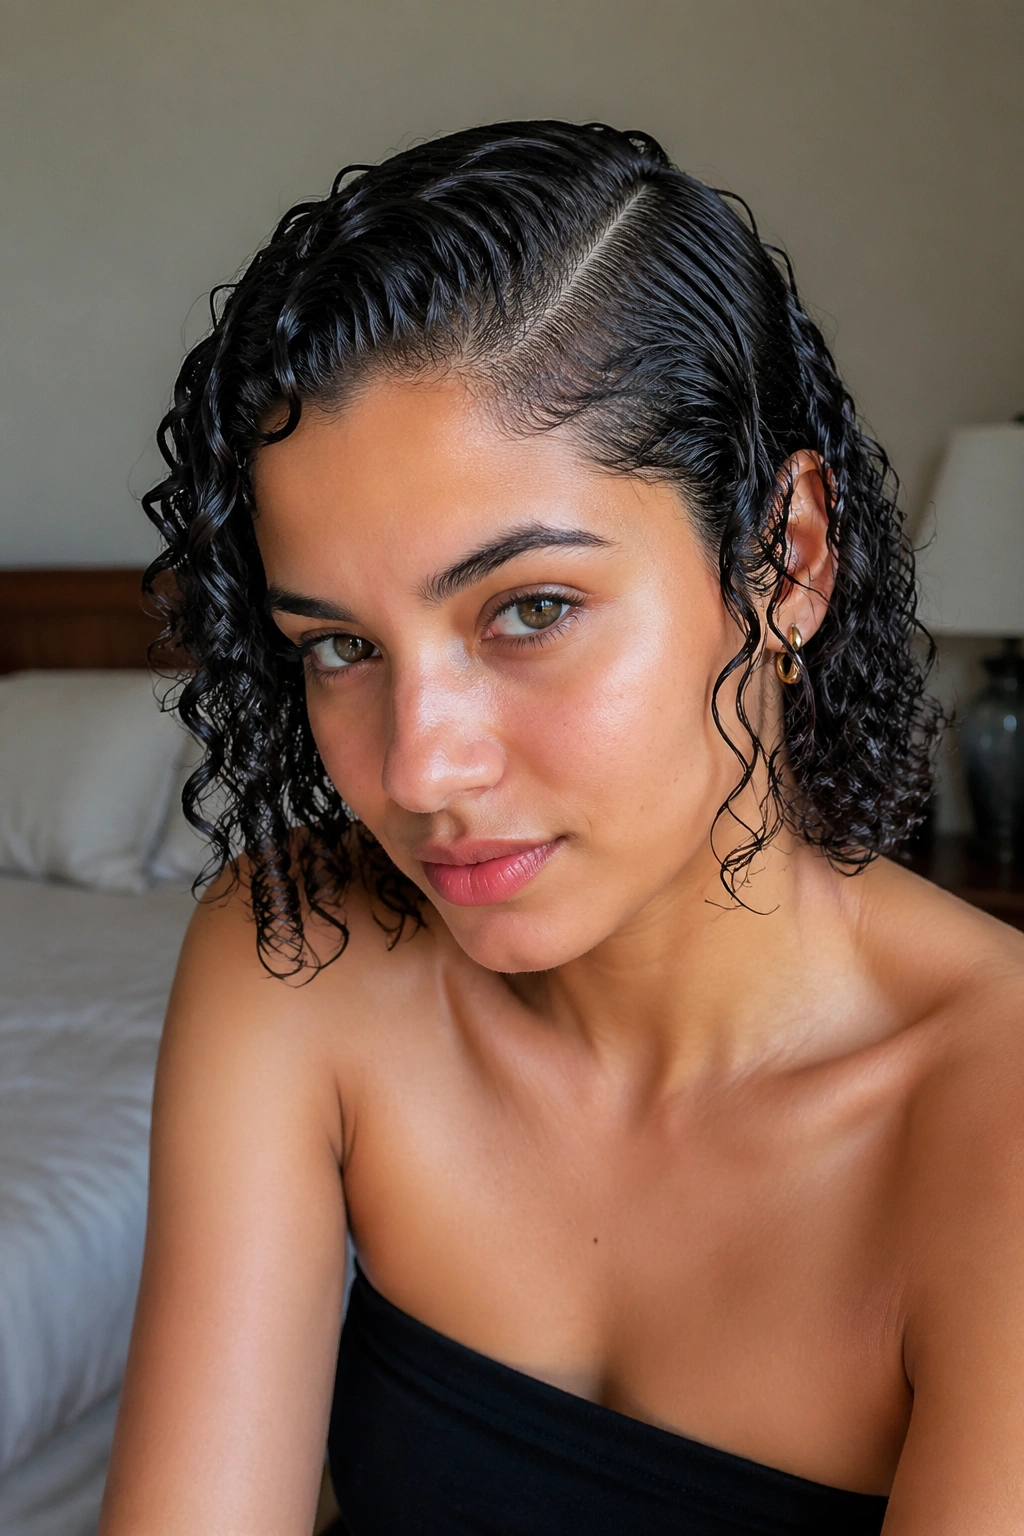
A deep side part is one of the easiest ways to make wet curly hairstyles feel deliberate instead of messy. The slick front gives structure, while the curls keep their shape and movement around the face. It’s clean without being severe, which is a nice line to walk.
Where the shine should sit
The shine belongs at the roots and along the top section, not all over the whole head. That’s where the eye lands first. If you coat every curl from root to tip, the hair can start looking heavy and sticky, and the shape disappears.
Use a comb to carve a clean side part on damp hair, then smooth the top 2 inches with a little gel or styling cream. After that, leave the lengths mostly alone. You want the curls to stay springy. That contrast between flat roots and lively ends is the whole point.
- Use a tail comb for a crisp part.
- Brush the top section only until it lies flat.
- Scrunch the ends once or twice, not ten times.
- Tuck one side behind the ear if your hair slips.
Best move: apply product in layers, starting light. You can always add more to the root zone, but it is harder to rescue curls after they’ve been drowned in cream.
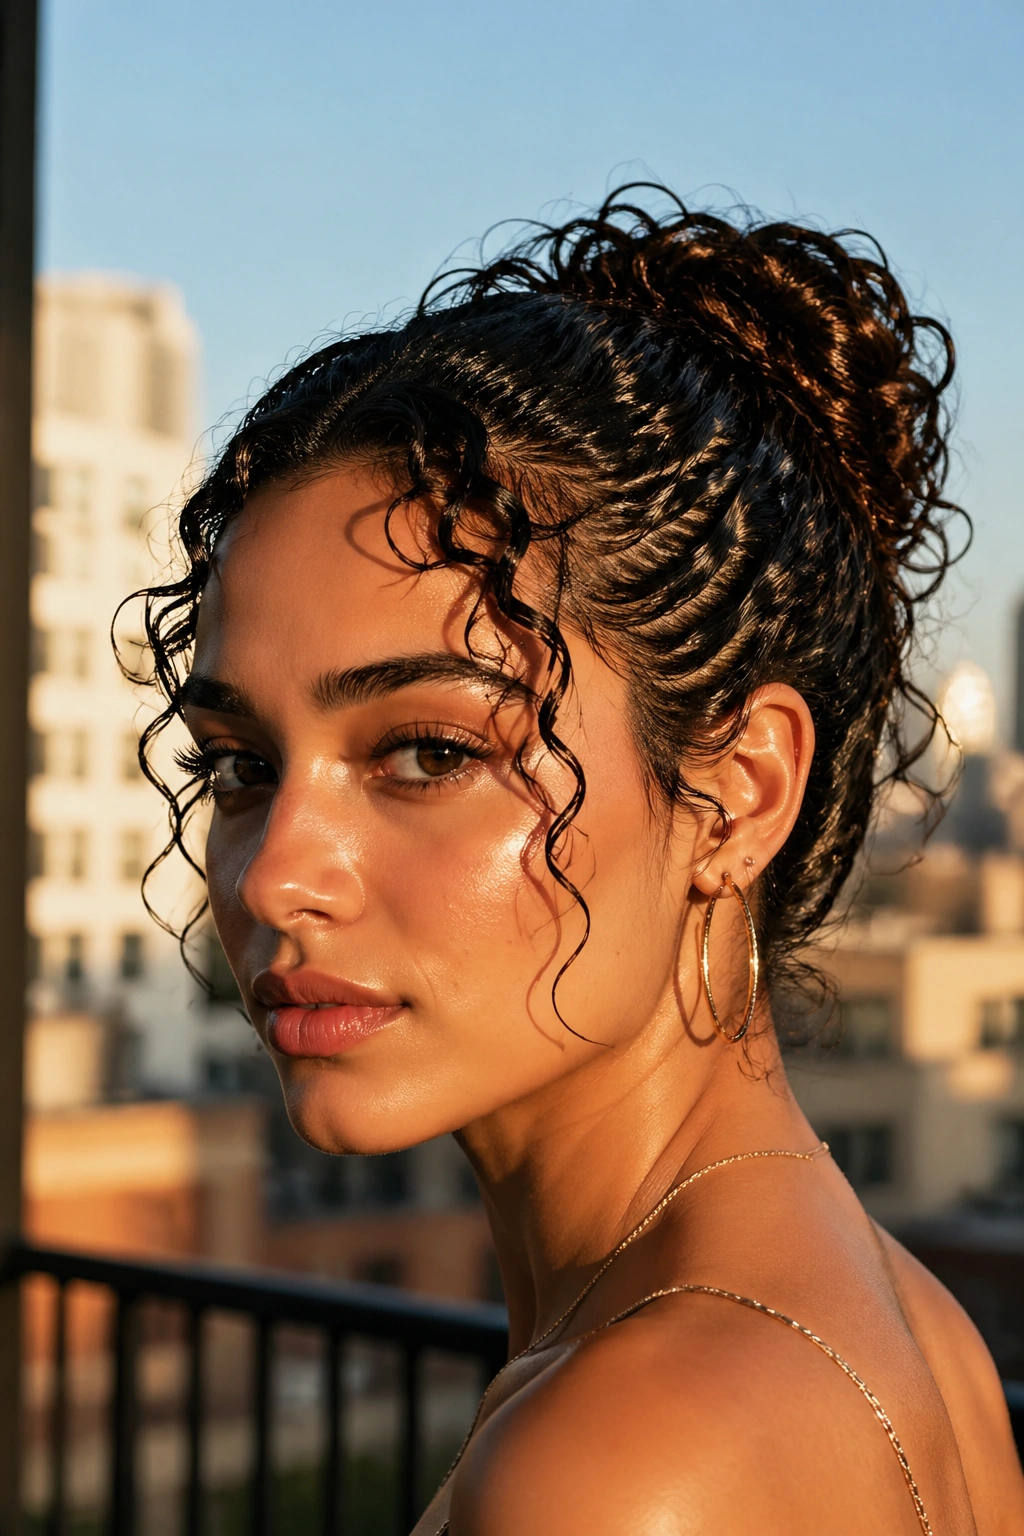
2. Glossy High Puff With Clean Roots
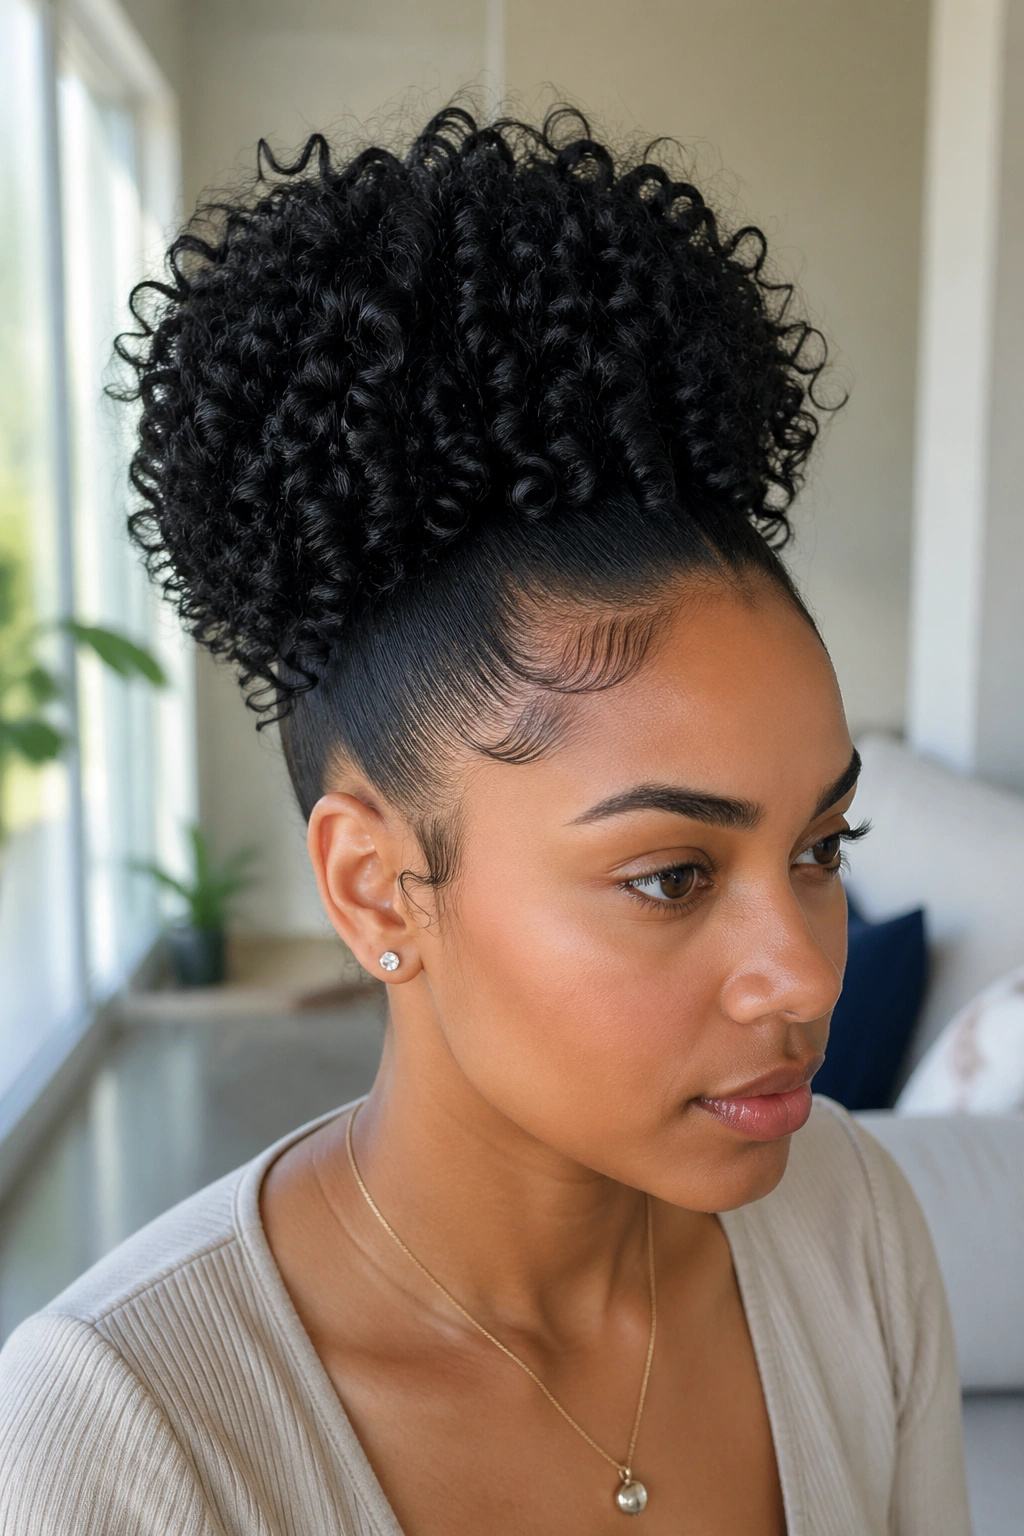
A high puff works because it lifts the hair away from the face and lets the curl texture do the decorating. The style looks polished when the base is smooth and the puff itself still has shape. That’s the sweet spot.
The trick is to stop trying to slick the entire head into submission. Focus on the front, sides, and nape first. Those are the places that need control. The puff should stay soft and full, not flattened into a hard dome. A satin scrunchie or a wide elastic will hold better than a thin band that digs in and leaves a dent.
For tighter curls, a little leave-in under gel can keep the surface neat without robbing the hair of bounce. For looser curls, a mousse at the root and a touch of gel along the hairline usually does the job. Keep the puff itself airy. If you pack product into the whole length, it starts to droop by lunchtime.
One-sentence truth: a high puff looks expensive when the crown is smooth and the puff still has life.
3. Curly Ponytail With a Wet Finish
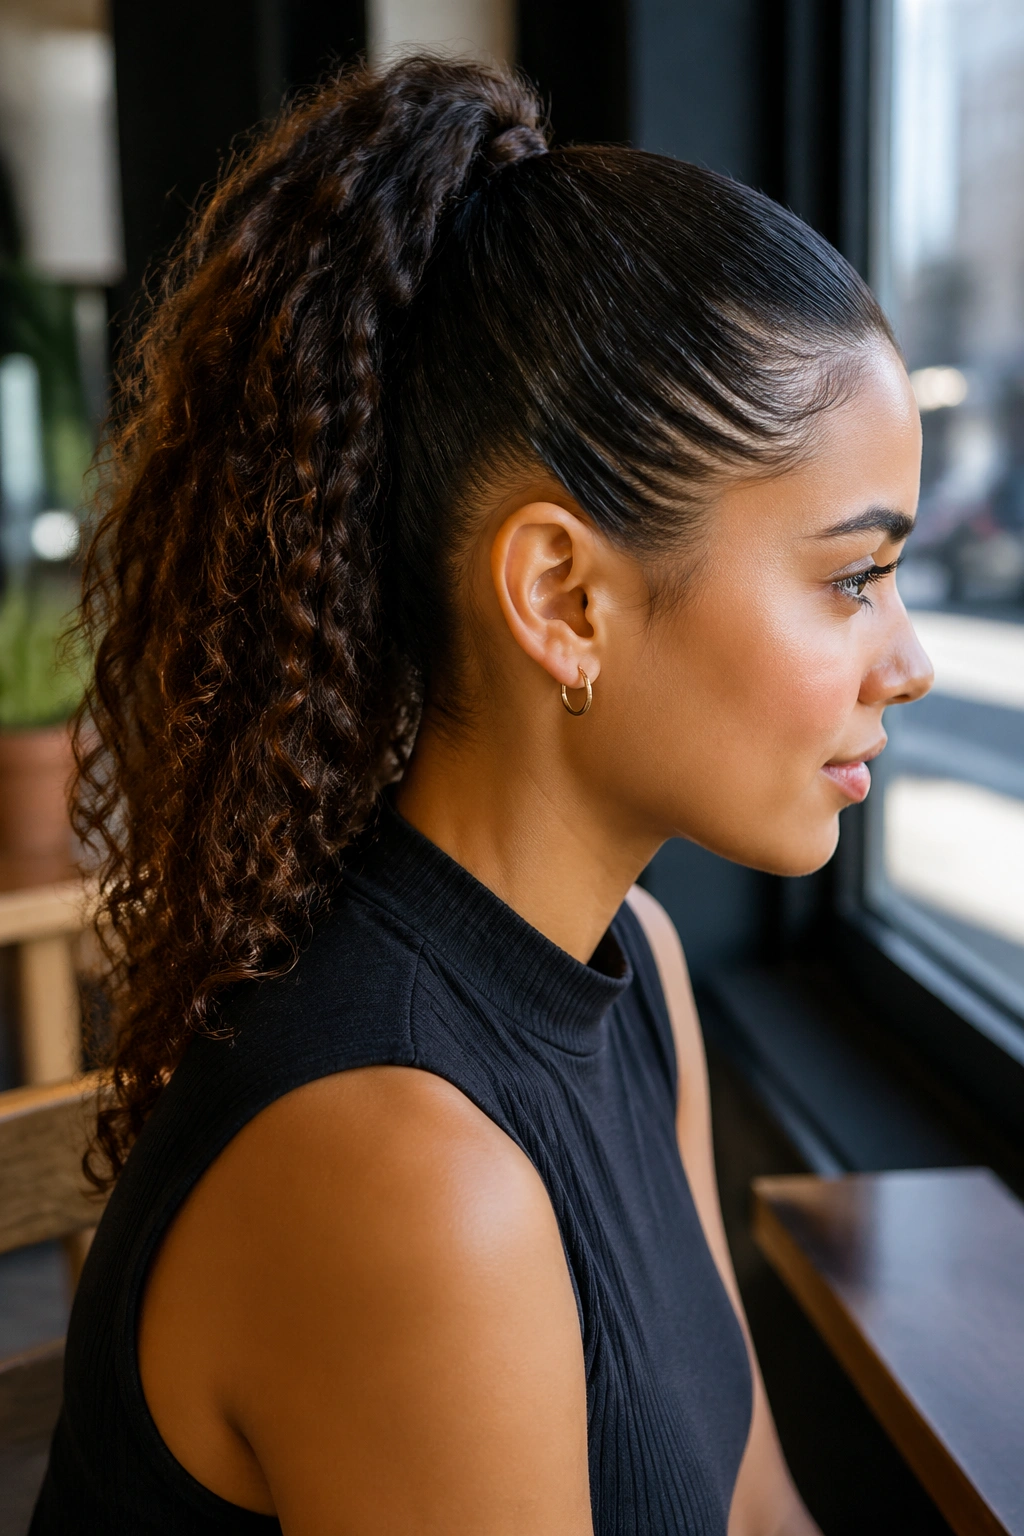
Picture a ponytail that starts sleek at the crown and ends with curls that still have shape. That’s the version worth wearing. It feels tidy, fast, and far less fussy than people expect.
How to keep it from sagging
Start with damp hair and decide where the ponytail will sit before you touch any product. High, mid, or low changes the whole mood. High reads playful, mid feels more balanced, and low looks cleaner if your curls are long and heavy.
Brush the top section back with a little gel, then secure it with a covered elastic. Don’t pull so hard that the front goes flat and shiny in a bad way. Leave enough lift at the crown so the style has life. After the ponytail is tied, define the tail with a bit of curl cream or foam and let the curls fall where they want.
- Use a snag-free elastic that won’t break curl clumps.
- Wrap a small curl around the elastic if you want a neater finish.
- Smooth flyaways with wet hands, not a palm full of product.
- Keep the tail soft; stiff ponytails look dated fast.
This style is one of the easiest to wear when you need hair off your neck but still want texture to show. It also survives a long day better than loose wet curls, which is why people keep coming back to it.
4. Sculpted Curly Bob With Glassy Clumps
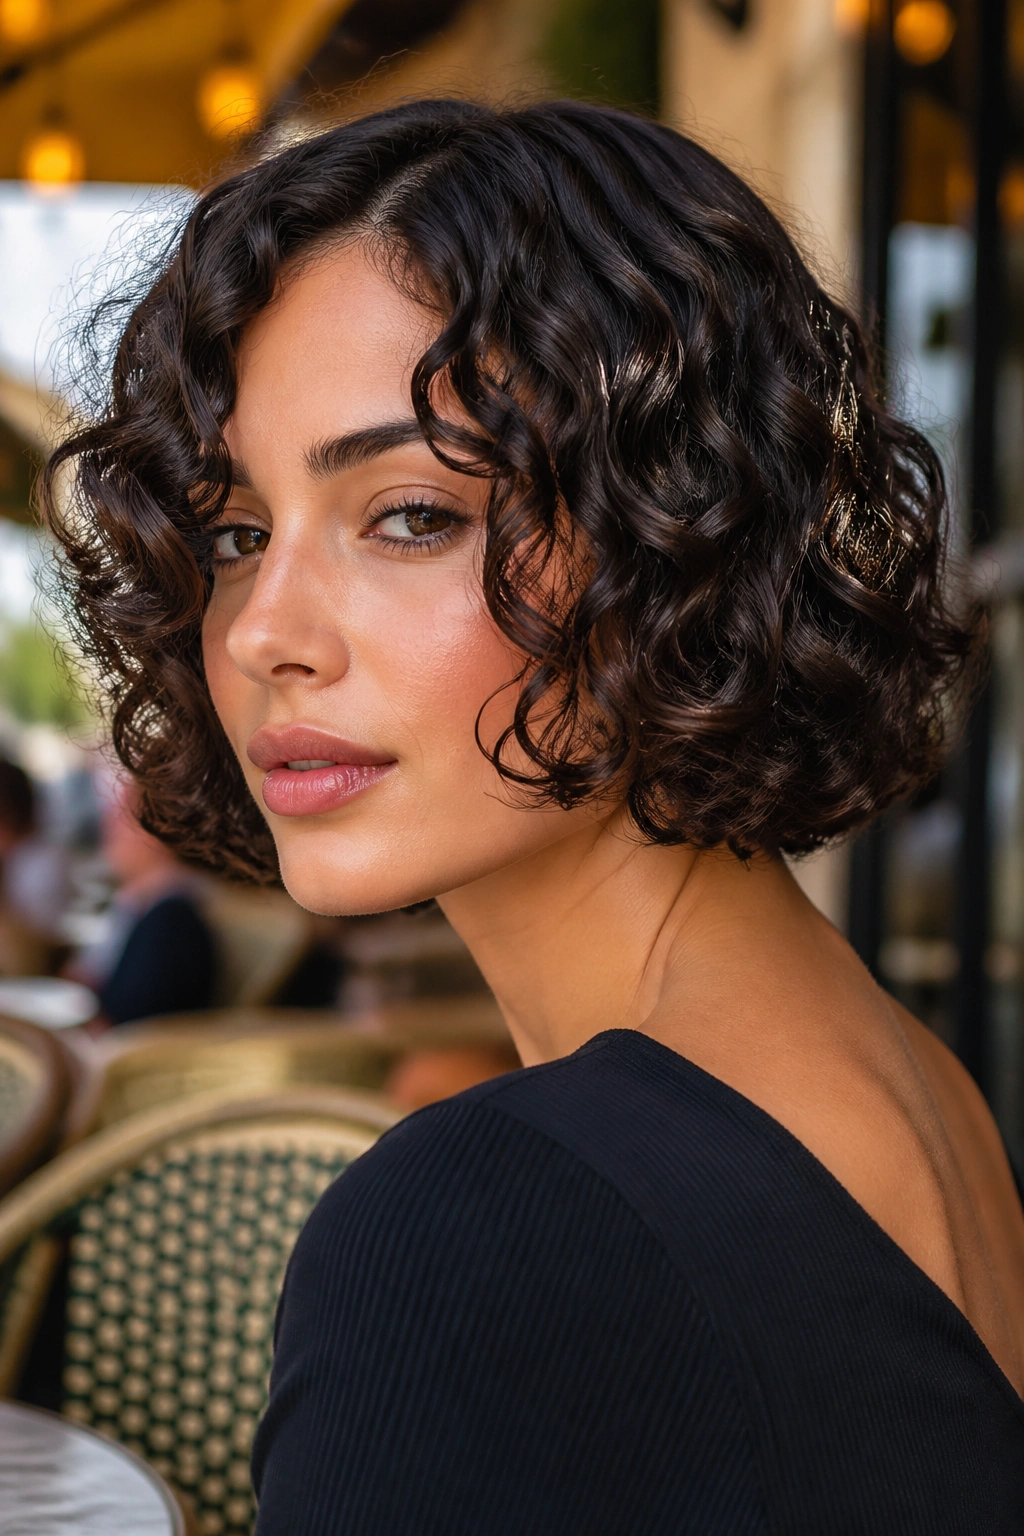
A curly bob can look fierce when the shape is clean and the curls are grouped into strong clumps. The length matters, but the silhouette matters more. If the bob sits at the jaw or just below it, the wet finish makes the edges look deliberate instead of puffy.
The biggest mistake is brushing the whole thing out after product goes in. Don’t. A bob loses its personality fast when every curl gets separated into frizz. Instead, rake styling cream through with your fingers, then press the curls together from the ends upward. That gives you thicker, more visible ringlets and keeps the outline neat.
Face-framing pieces help a lot here. A curl or two left slightly looser around the cheekbones keeps the bob from looking helmet-like. If your hair is fine, use less cream and more mousse. Fine curls need hold more than weight. If your hair is dense, a stronger gel layered over leave-in can hold the shape through the day.
The best curly bob finish has a little shine and a little movement. Not stiff. Not fluffy. Just clean, controlled, and easy to look at.
5. Half-Up, Half-Down Wet Curls
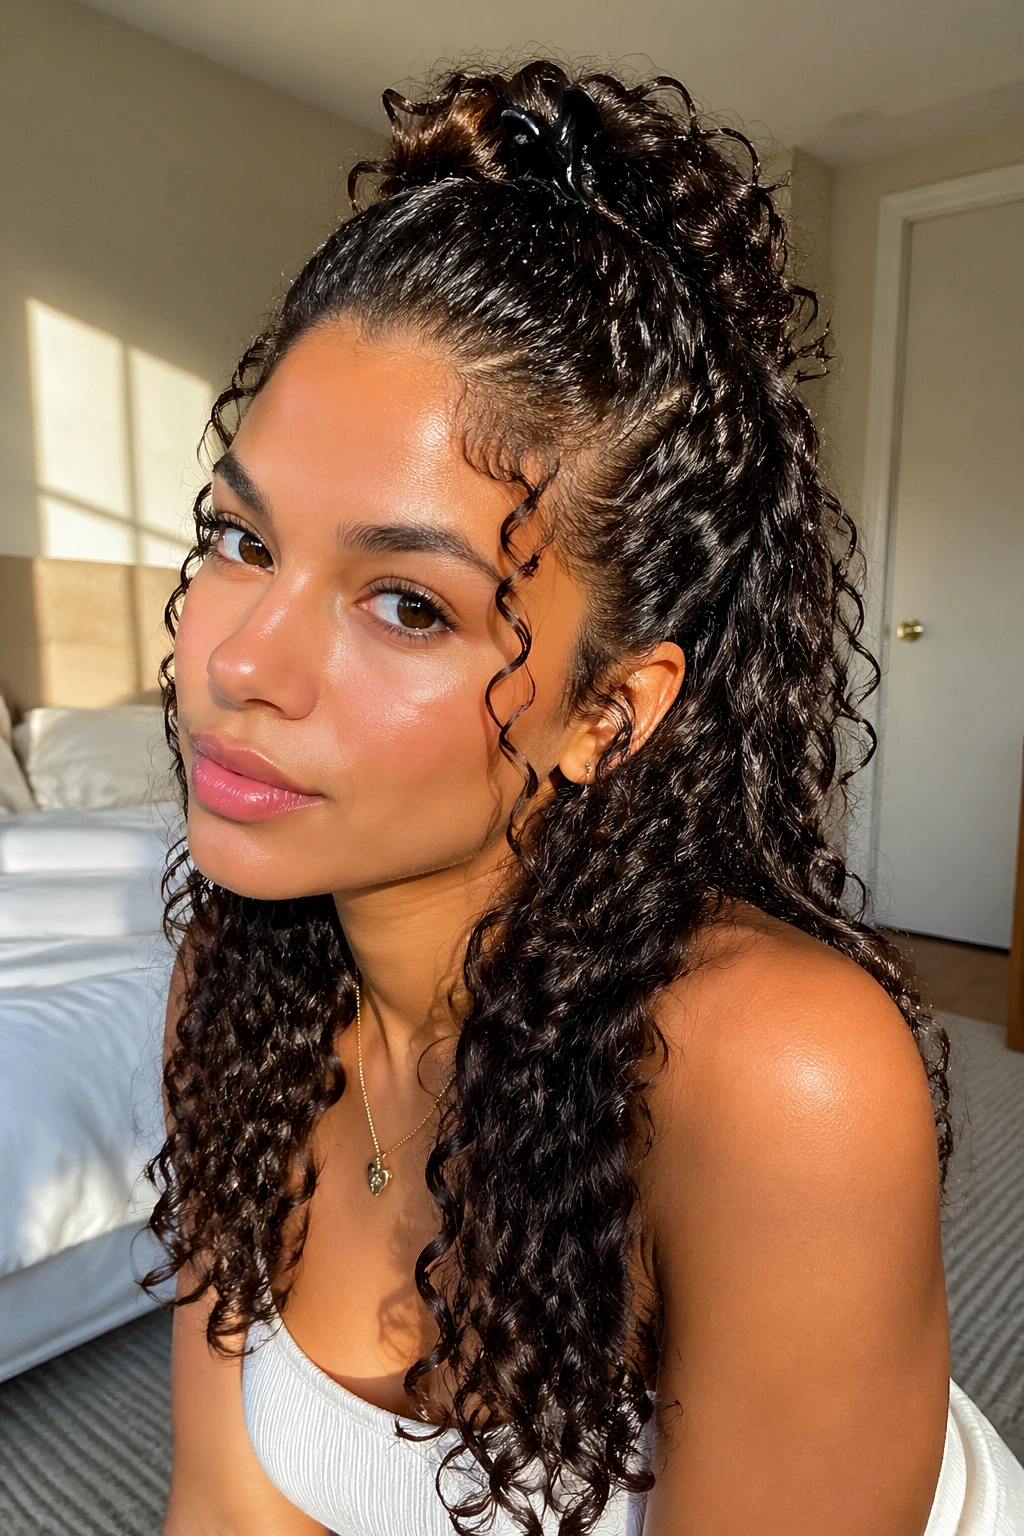
Why does half-up, half-down look so good on wet curls? Because it solves the two problems curly hair likes to give you at the same time: it gets the front out of your face, and it leaves enough texture loose so the style doesn’t feel severe.
Best spots to pin
The top section should start just above the temples, not from the crown unless you want a fuller, more lifted shape. Pull it back gently and secure it with a clip, barrette, or small elastic. Too tight and the front goes flat. Too loose and the top collapses the second you move.
This style works on shoulder-length curls, long curls, and layered cuts that need a little order. It’s also useful when the underside of the hair is doing its own thing and the top half needs a reset. A bit of styling gel at the roots and a softer cream on the loose section usually keeps the balance right.
- Pin the top half after the product is distributed, not before.
- Leave two or three face pieces out if you want softness.
- Use a pretty clip if you want the style to look finished fast.
- Keep the lower curls intact; they carry the style.
The nice part is that it doesn’t require perfect symmetry. A slightly uneven half-up can look better than a too-neat one. That’s one of those small truths people learn only after trying to force the style too hard.
6. Wet-Look Curly Bun With Face-Framing Pieces
A bun does not have to look strict to look polished. In fact, the wet-look curly bun is better when it has a few soft pieces around the face and a glossy surface that shows off the curl pattern at the edges. Too tidy, and it turns stiff. Too loose, and it just looks unfinished.
The root area is where the work happens. Smooth the hair back with gel or edge control, then twist or wrap the length into a bun at the back of the head. If your curls are long, you can leave the ends a little loose and pin them in a way that still lets a few ringlets peek out. That softens the whole thing.
Making the bun look intentional
A low bun tends to look calmer, while a mid bun can feel a little fresher and more lifted. The placement changes the face shape more than people expect. If your face is round, a slightly higher bun adds height. If your face is long, a lower bun usually feels easier.
- Smooth the surface with wet hands before you pin.
- Leave two small curls loose near the temples.
- Use bobby pins that match your hair color if you can.
- Stop adding product once the surface looks even.
This style is strong for formal events, but it also works on days when you want your curls tucked away without losing the curl identity. That’s the appeal, really. It keeps the texture visible.
7. Side-Swept Curly Cascade
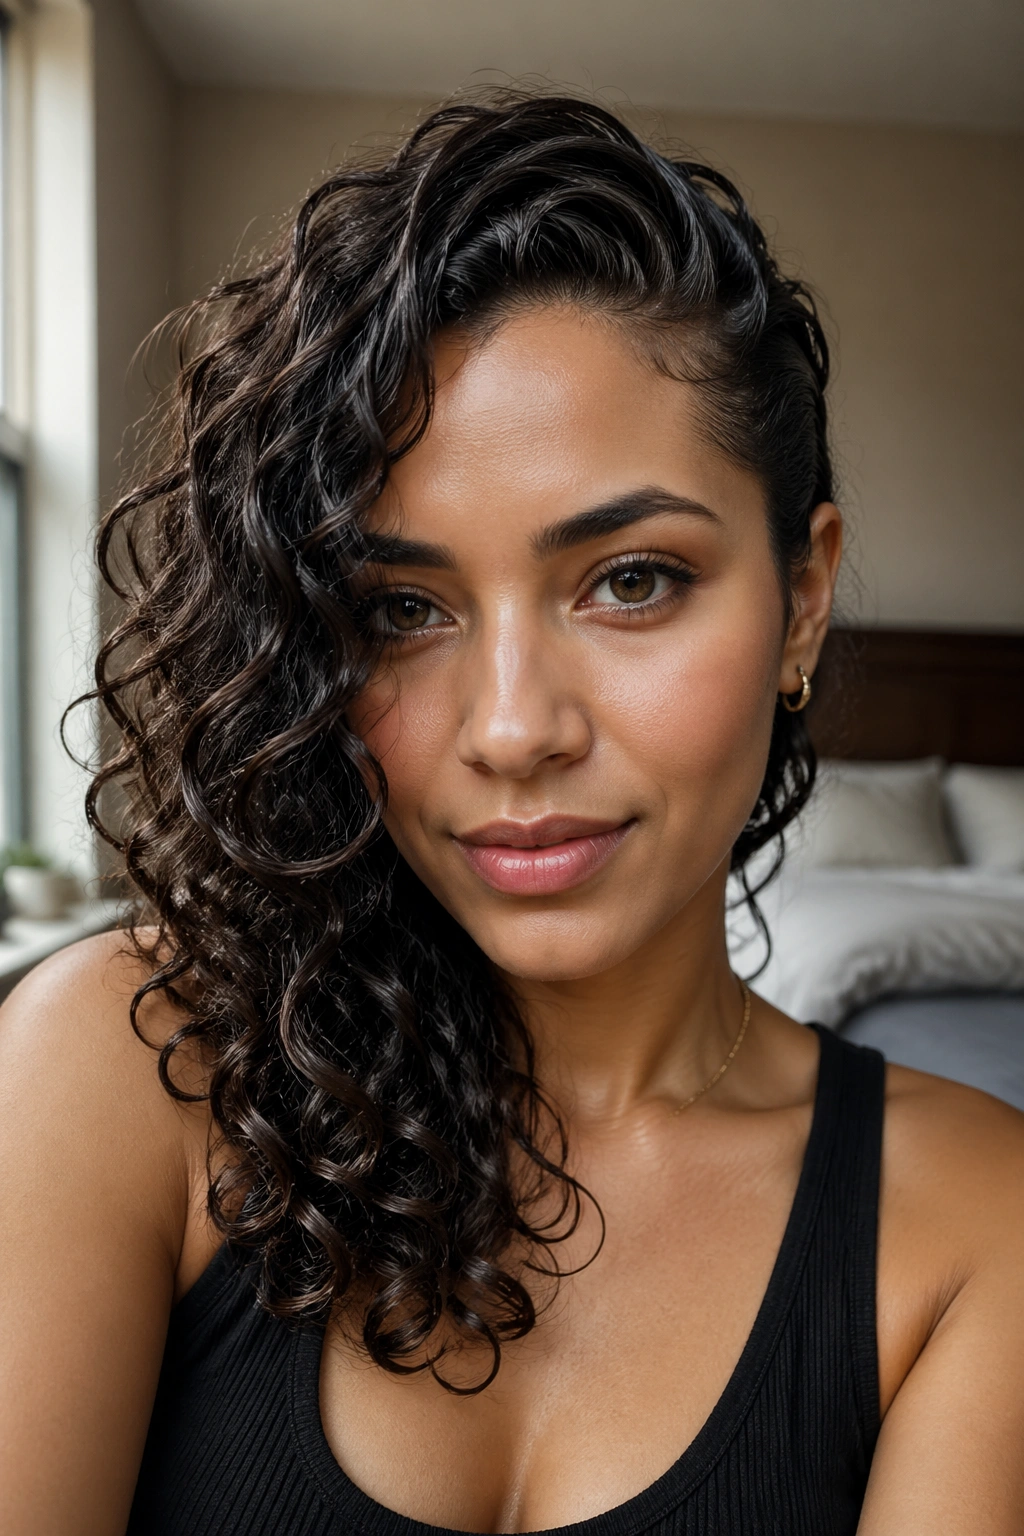
A side-swept cascade is the style I reach for when curls need to look softer but still put together. One side gets tucked or pinned back, and the rest falls over one shoulder in a shiny, defined sheet of texture. It feels a little old-school in the best way.
Compared with a center part, the side sweep gives the face more movement. It draws the eye diagonally, which tends to flatter layered curls, especially if the front pieces are shorter. If your hair has a blunt cut, the diagonal line helps break that up. If it’s layered, the style shows off the shape without making the layers fight each other.
The key is not to over-secure the tucked side. One or two pins is usually enough. Too many pins and the whole thing starts looking engineered. Let the loose side carry the style. A light layer of gel at the roots and a little mousse through the lengths keeps the curls from separating into fuzzy strands.
This one suits shoulder-length to long hair best. Short hair can do it too, but the effect is less dramatic. The style works because it leans into asymmetry instead of trying to hide it.
8. Wet Curly Space Buns

Space buns are not just for loud outfits and festival hair. On curls, they can look sharp, playful, and neatly controlled when the wet finish keeps the roots smooth. The style gets a lot of energy from the contrast between the sleek top and the curly buns.
What keeps the buns from puffing out
Start by parting the hair down the middle. Keep the part straight. A wobbly part makes the whole style look rushed. Then smooth each half into a high ponytail before twisting or wrapping it into a bun. Don’t chase perfection in the bun itself. A little texture there looks better than a tight, compact knot that seems glued on.
- Use gel near the part and hairline.
- Keep both buns at the same height.
- Leave the ends slightly visible for a softer finish.
- Pin the buns with bobby pins rather than one tight elastic.
This style works well on medium-length curls and thicker hair that has enough body to fill out the buns. On very fine curls, the buns can look tiny, so adding a little mousse for volume helps. It’s also a good option when you want something fun that still keeps the hair off your neck.
One detail people skip: smooth the nape last. The back of the neck is where a lot of flyaways collect, and the style looks cleaner when that area gets the same attention as the front.
9. Frohawk With Wet-Defined Curls
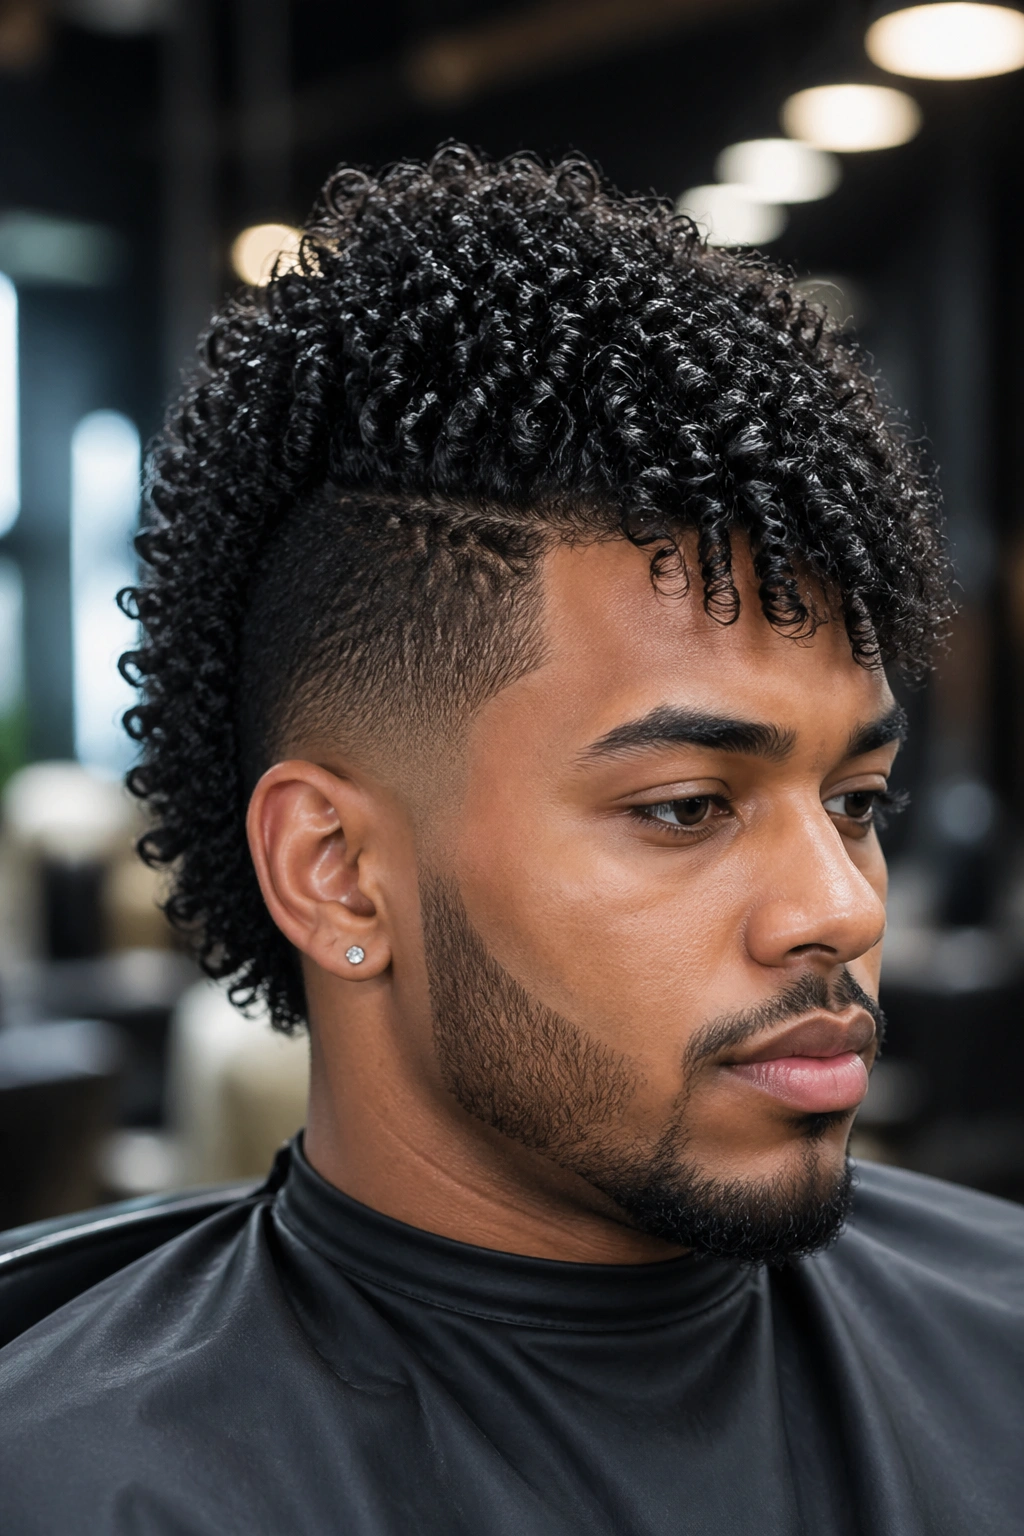
Want edge without a full mohawk? The frohawk is the answer. It keeps the sides sleek or pinned up and lets the center section rise and move, which gives coils and curls a stronger shape. The wet finish keeps the whole thing from looking chaotic.
The center strip does most of the visual work, so give it enough product to clump well. The sides should be controlled but not plastered to the scalp unless that’s the look you want. A little height in the middle goes a long way. On tighter textures, this style can look especially strong because the curls naturally build body without needing teasing or heavy backcombing.
The parts that matter
- Smooth the sides with a small brush and gel.
- Leave the middle section fuller and more defined.
- Pin the sides up with crossed bobby pins if needed.
- Add shine to the center curls only after the shape is set.
This style is good when you want a sharper profile. It shows off the curl pattern while giving the face a cleaner frame. It also handles earrings well, which sounds like a tiny thing until you see how much the shape matters next to a neckline.
The frohawk can lean bold or neat depending on how high you lift the center. Either way, it needs discipline at the edges and freedom in the middle. That balance is what keeps it from looking like an accident.
10. Braided Crown With Wet Curls Left Free
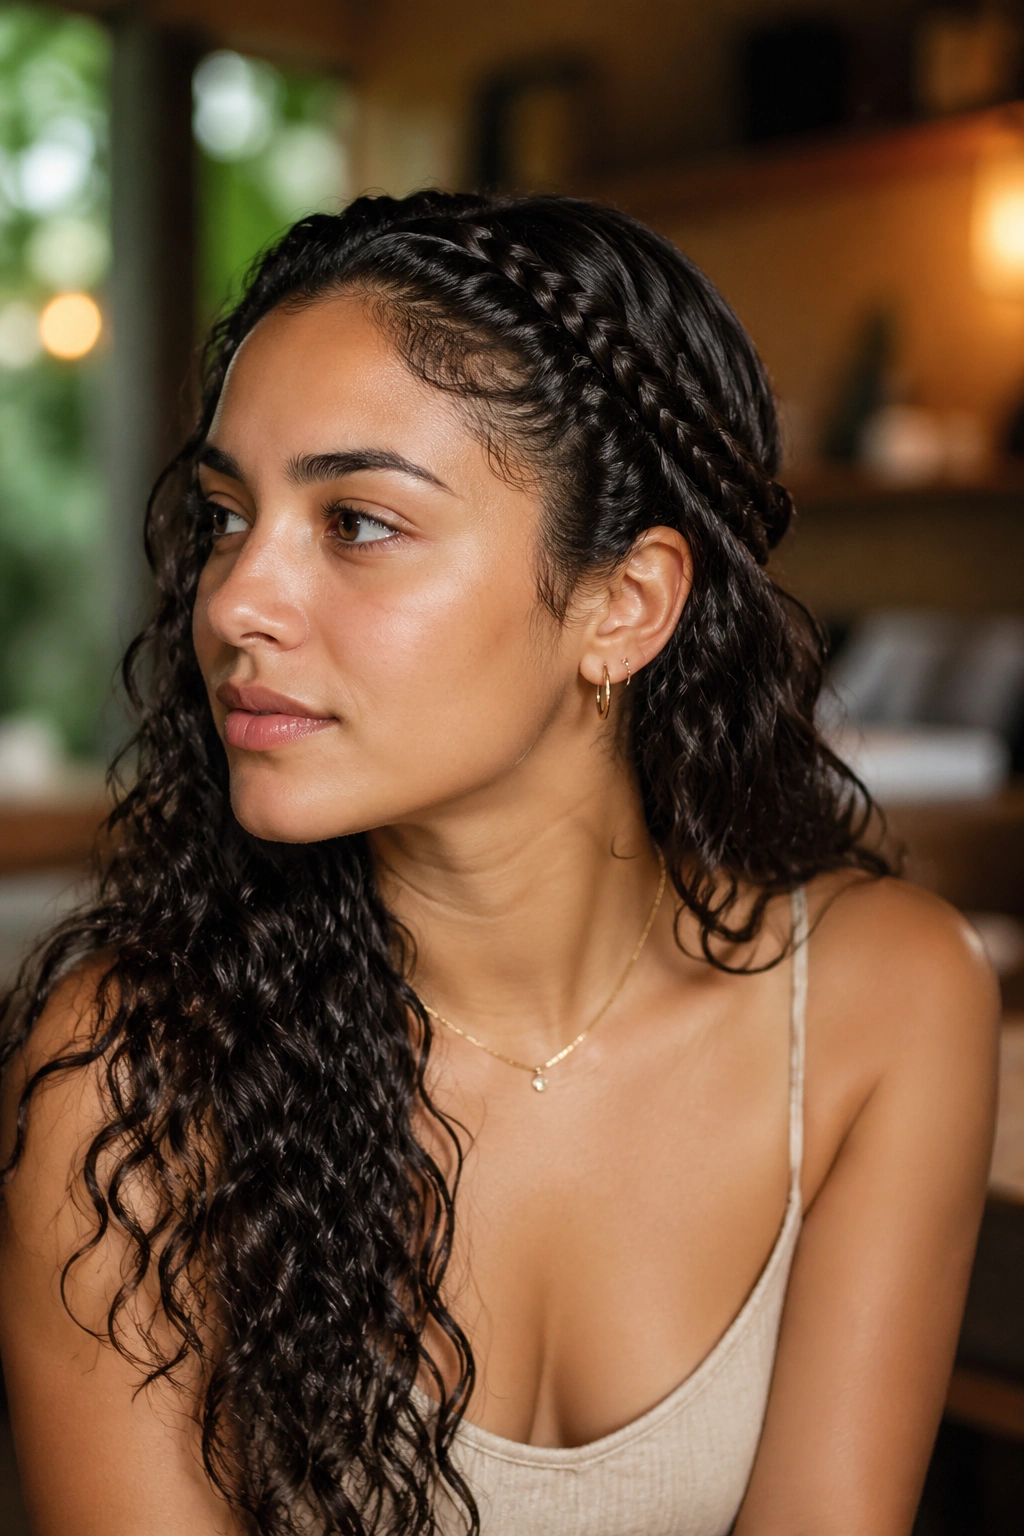
A braided crown works because it builds structure at the hairline and leaves the rest of the curls free to do their thing. You get control where you need it and texture where you want it. That combination is hard to beat.
Unlike a full braided updo, this version keeps more of the curl pattern visible. The braid only needs to be wide enough to anchor the front sections. After that, the loose curls can fall behind the crown or spill around the shoulders. If you like styles that look intricate without taking forever, this is a smart one.
Small braid, big payoff
A crown braid looks best when the sections are even and the tension is consistent. Too tight, and it pulls the hairline. Too loose, and the braid gets fuzzy before you even leave the house. Work slowly across the front, feeding in small sections, and stop once the braid reaches the opposite ear.
- Keep the braid close to the head.
- Smooth the front with a gel or pomade first.
- Leave the back curls defined, not brushed out.
- Tuck the braid end under loose curls so the finish looks clean.
This style suits medium to long curly hair, especially if the front pieces are long enough to braid without tiny sections falling out. It’s useful for events, but it also works on plain days when you want the hair off your face and still want the curl texture to be the main event.
11. Defined Curly Shag With a Wet Finish
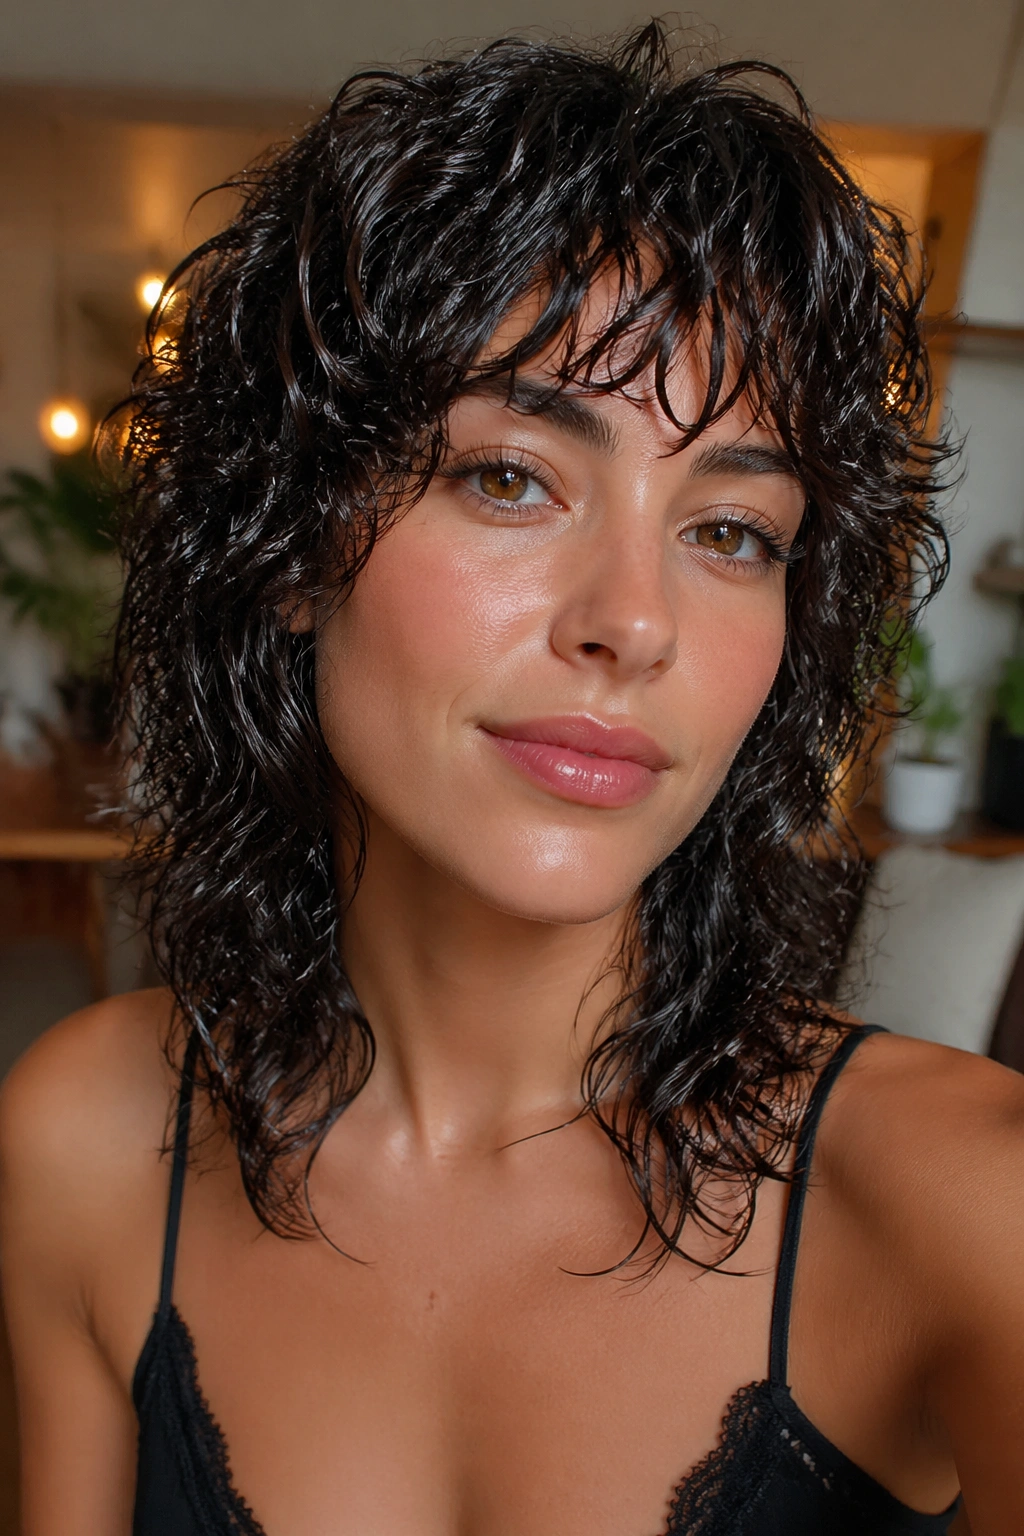
A shag can look polished when the layers are doing their job. That’s the part a lot of people miss. The haircut already gives you movement, so the wet finish just sharpens the shape and keeps the layers from fraying into fuzz.
This style works best when the curls are allowed to fall in their own little groups. Do not brush the layers into one big cloud and expect the cut to save you. It won’t. Use a leave-in, then a light gel or mousse, and scrunch the hair from the ends up to the crown. The fringe, if you have one, should stay piecey rather than stiff.
There’s a nice contrast here between the roughness of the shag cut and the gloss of the wet look. That contrast is what makes the style feel current without trying too hard. It also suits people who do not want a sleek bun or a tight ponytail every time they style their curls.
If your layers are uneven, even a little, this is the place where they can work for you instead of against you. The trick is control, not flattening. Let the layers move.
12. Soft-Shine Twist-Out With Defined Ends
A twist-out with a wet-look finish has a smooth, touchable surface and ends that still hold their shape. It feels softer than a slicked style, but it still looks intentional. That’s the appeal. The hair reads as styled, not left alone.
Start on damp hair with a light leave-in and a product that gives hold without making the twists crusty. Twist in neat sections, and keep the size consistent if you want the final shape to look even. Smaller twists give tighter definition. Larger twists make looser, chunkier curls. Neither one is wrong. They just do different jobs.
Why this one lasts
The style holds because the twist pattern sets the curl in place while the wet finish keeps the surface smooth. If you unravel too early, the whole thing loses definition. If you use too much oil, the twists slip and never really set. That middle ground matters.
- Twist on damp, not soaking hair.
- Let the twists set fully before separating.
- Separate only once or twice to avoid frizz.
- Smooth the roots with wet hands if they puff up.
This is the style for people who want curly hair to look finished without looking locked down. It can feel a little more relaxed than the slick styles above, which is useful when you want texture to stay the star. And if your hair frizzes at the first sign of movement, this one usually holds together better than loose wet curls do.
The main thing is restraint. Keep the product light, keep the sections clean, and let the twist pattern do the work. That’s what makes the shine look intentional instead of slick for the sake of it.