Type 3B to 3C curls look best when the shape is doing some of the work for you.
That sounds obvious until you’ve spent an hour defining coils, only to have the whole head puff out, collapse at the crown, or frizz around the hairline by lunch. These curl patterns have a lot of personality. They spring. They shrink. They can look full and soft one minute, then dense and wild the next if the style doesn’t match the texture.
A good style for 3B and 3C hair usually does three things at once: it gives the curls room, it keeps the roots from getting flattened, and it lets you control the edges without turning everything into helmet hair. That balance matters. A lot. And no, the answer is not always more gel or more pins.
What works tends to be a little smarter than that. A high ponytail changes the silhouette. A deep side part changes the whole mood. Layers keep thick curls from building into a heavy triangle. A braid at the front can buy you an extra day before wash day, and a shag cut can make the curl pattern look intentional instead of crowded. That’s the sweet spot for type 3B to 3C curly hair, and it shows up again and again in the styles below.
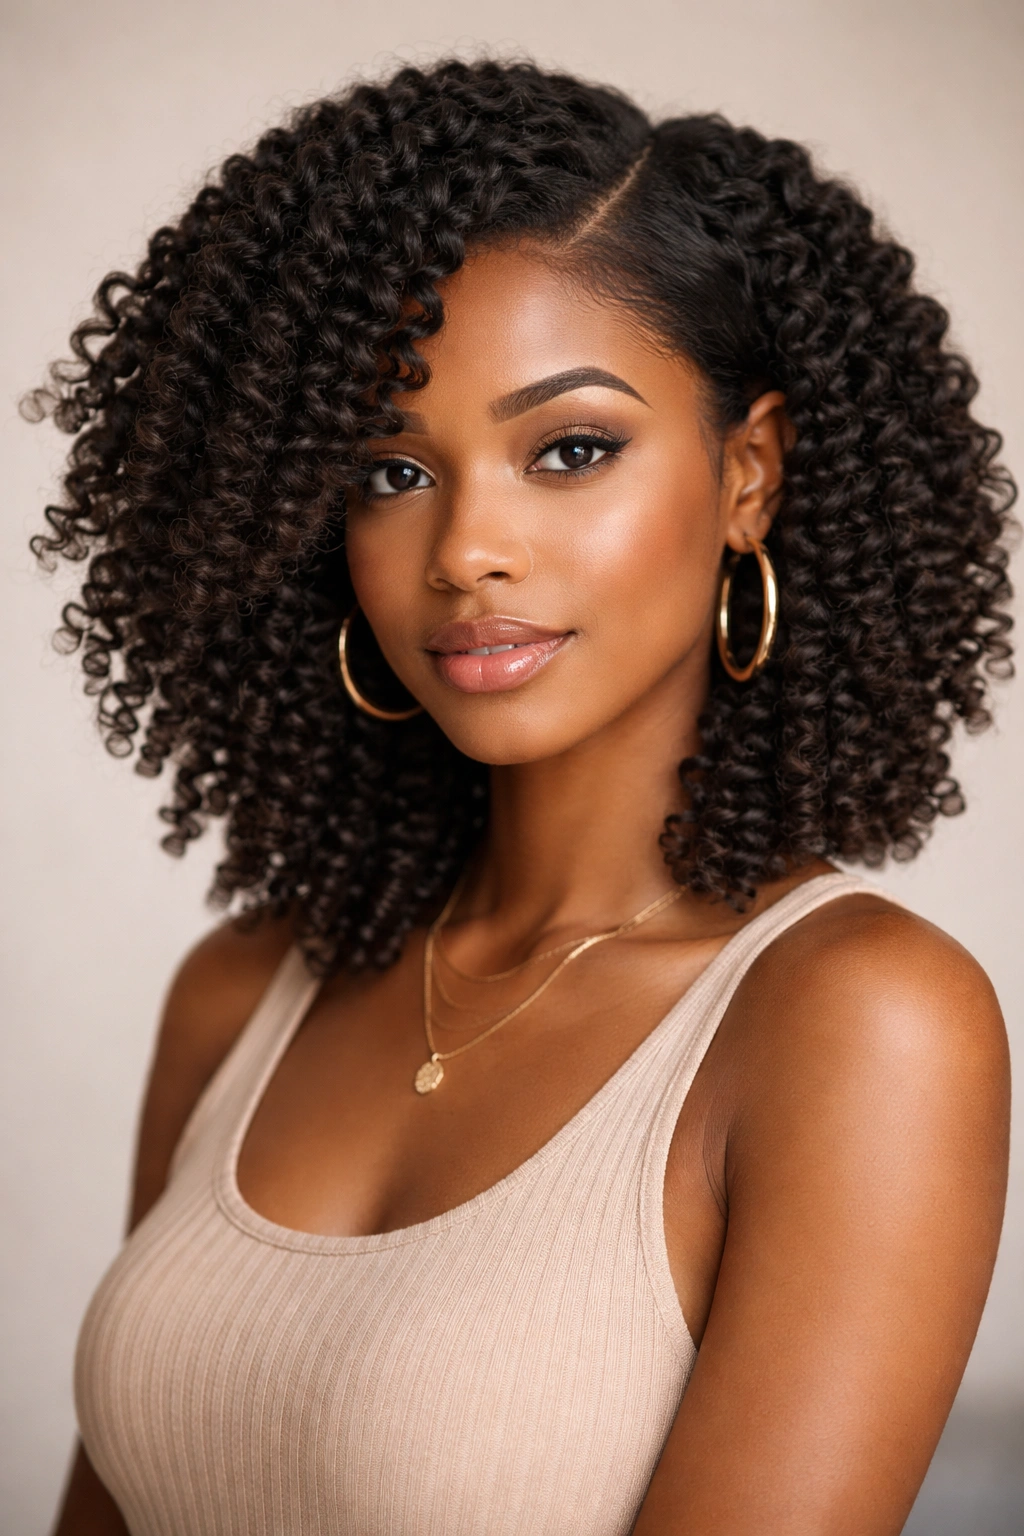
1. The Defined Wash-and-Go
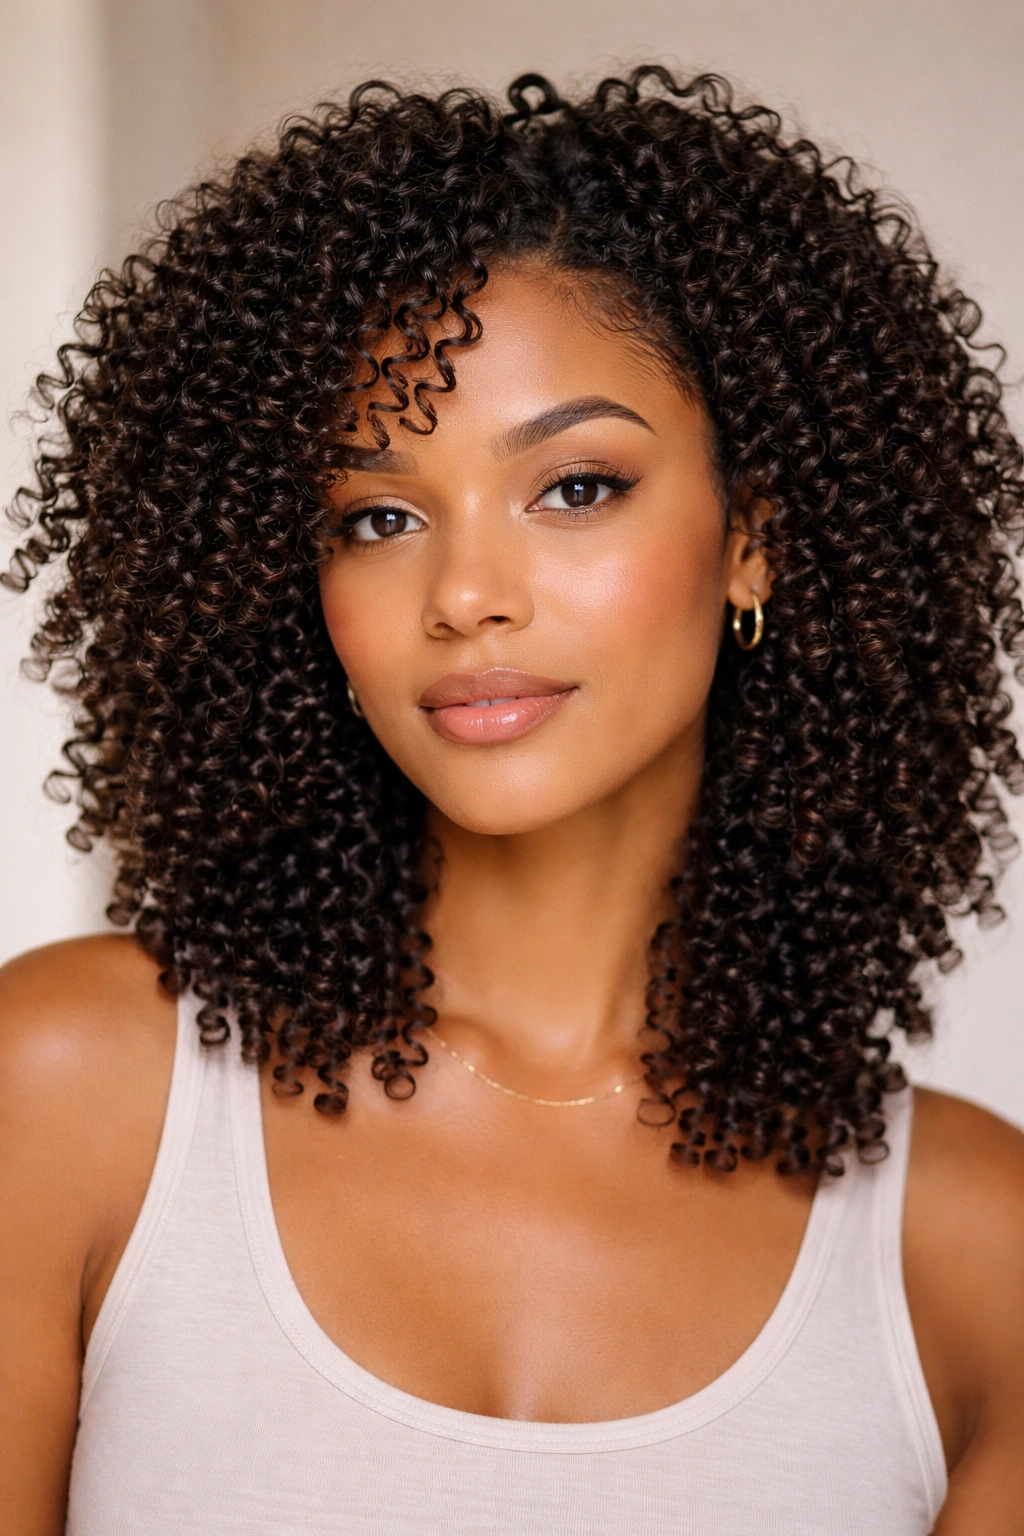
A defined wash-and-go is the style most people think of first, and for good reason. It lets type 3B to 3C curls do what they already want to do, only cleaner and more polished. You’re not forcing shape here. You’re encouraging it.
The key is clump, coat, and leave it alone. Work on soaking-wet hair, not damp hair that’s already starting to frizz. Smooth in a leave-in, then a curl cream if your hair likes more slip, then a medium-hold gel over the top. Scrunch upward, then stop touching it. That last part is harder than it sounds. Every time you rake through dried sections, you break curl clumps and invite frizz back in.
What Makes It Hold
- Section the hair in 4 to 6 parts so the product reaches the roots, not just the outside.
- Use a wide-tooth comb or your fingers only when the hair is fully wet.
- If your curls are dense, glaze the gel over each section instead of piling it all on at once.
- Diffuse on low heat and low speed if you want more lift at the crown.
A wash-and-go on this texture works best when it looks a little too defined before it dries. Once it’s fully dry, you can shake out the roots with clean hands and let the curls fall where they want. Easy? Not always. Worth it? Absolutely.
2. The Pineapple Puff
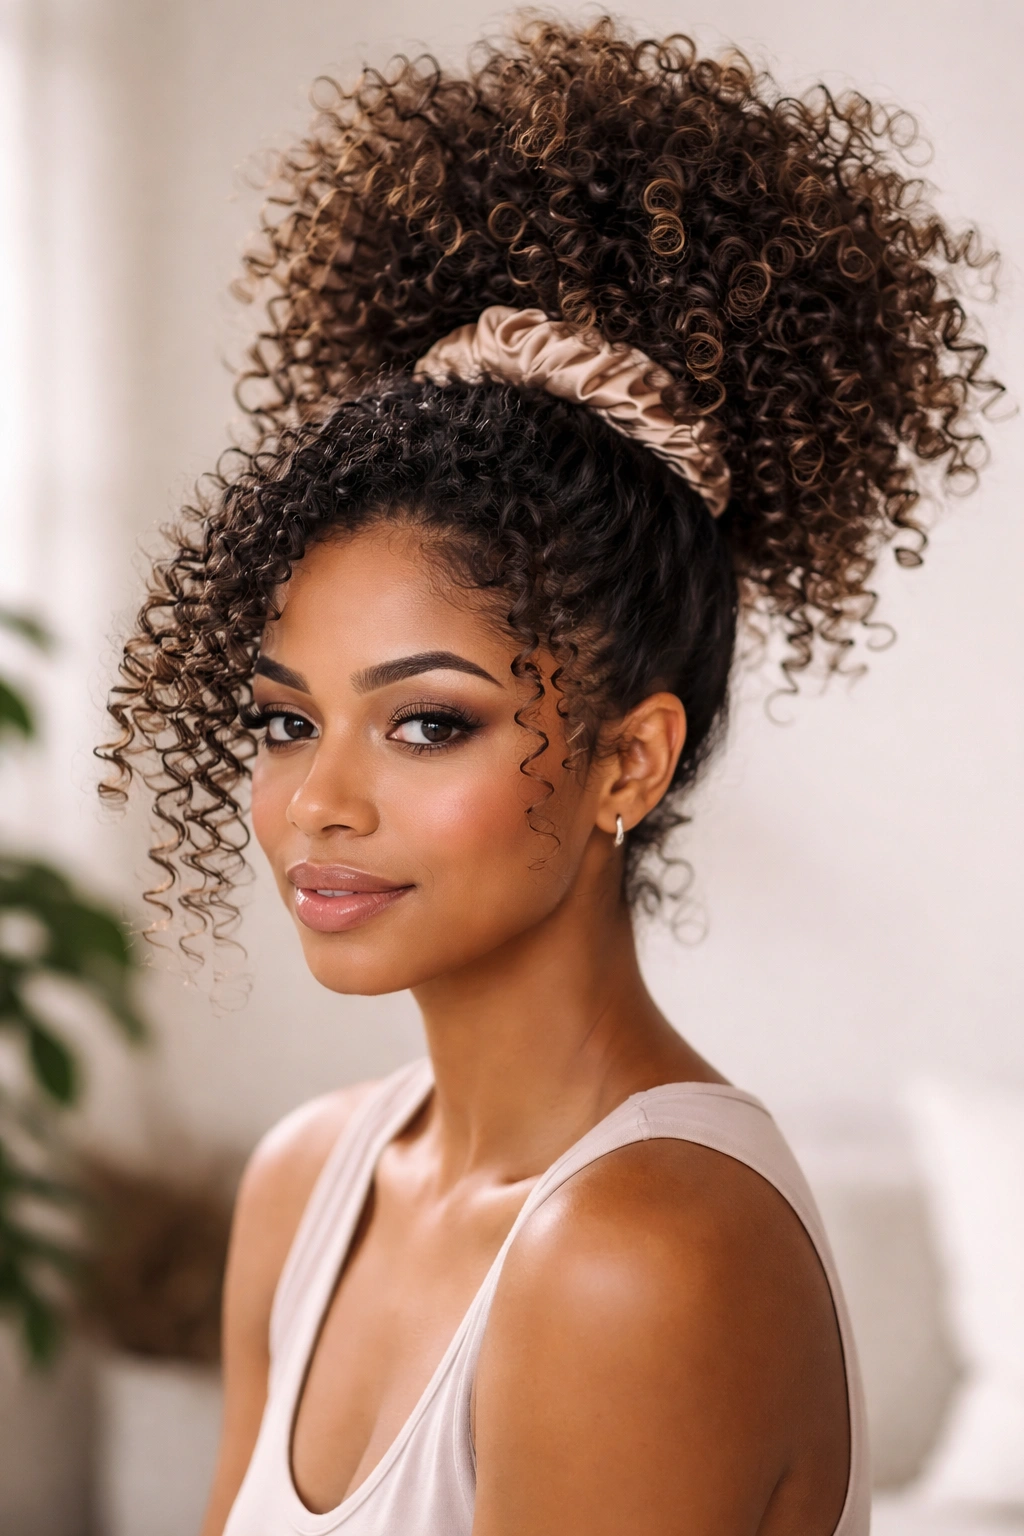
Why does the pineapple keep showing up in curl routines? Because it does a lot with very little effort. A high pineapple keeps the curl pattern intact, protects the ends from friction, and makes second- or third-day hair look on purpose instead of tired.
On 3B and 3C hair, the trick is placement. If the ponytail sits too low, you lose the shape. Too tight, and the front gets pulled flat. Aim for the crown or just above it, and use a soft satin scrunchie instead of a stiff elastic. That keeps the base from leaving a dent, which matters more than people think.
How to Keep the Puff From Looking Messy
A pineapple can look polished if you leave a few curls around the hairline instead of slicking everything back. A light edge control or a touch of gel on the front can help, but don’t chase perfection here. A pineapple looks best when it has some height and movement. That’s the whole point.
If your hair is very dense, split the ponytail into two loops rather than one tight knot. It spreads the volume better and stops the top from pulling down. Small detail. Big difference.
3. The High Curly Ponytail
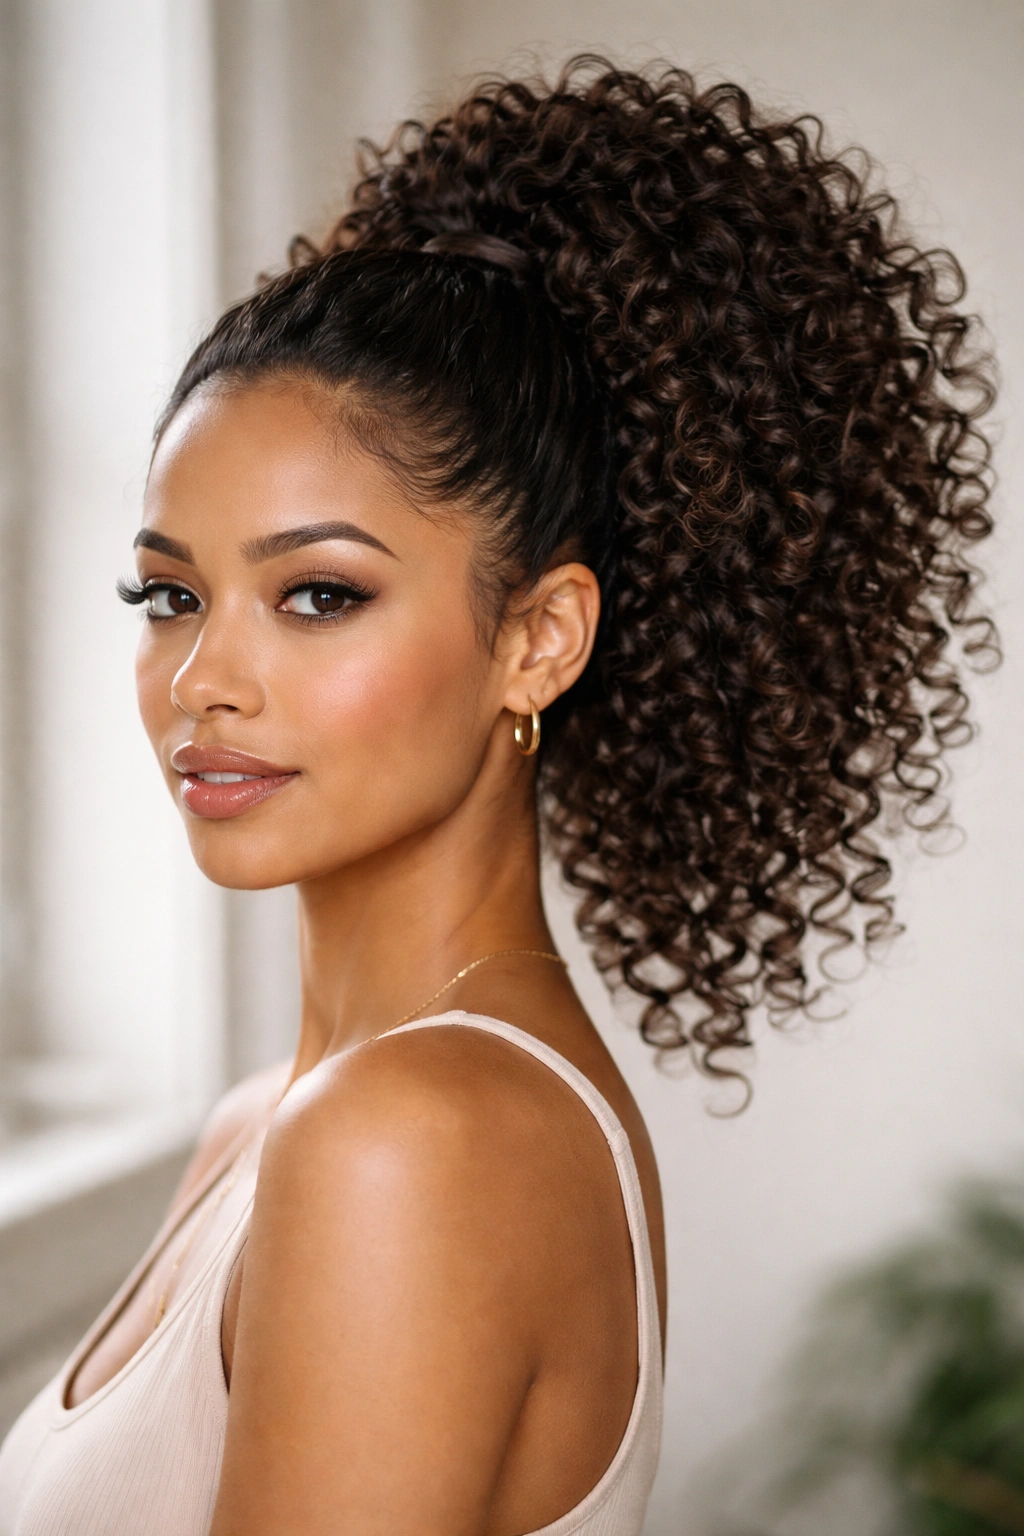
A high curly ponytail is the style you reach for when you want your face open and your curls still doing the talking. It works for brunch, errands, workouts, and those days when you need your hair out of the way but do not want to disappear behind a plain bun.
The style looks best when the ponytail sits high enough to lift the curls away from the neck, but not so high that the scalp starts screaming. Smooth the front with a brush or your fingertips, gather the hair at the crown, and let the tail stay full. If the base looks too tight, the whole style loses softness fast.
Use a small amount of gel around the hairline, then wrap a curl or a thin strand around the elastic to hide it. That tiny move makes the ponytail look finished. It also helps if the hair is stretched first, even a little. A quick blow-dry with a diffuser, a set of banding sections, or even just a well-done twist-out gives the ponytail more length and a less bulky base.
A high ponytail is one of those styles that looks simple and takes more thought than it seems. The shape has to feel deliberate.
4. The Half-Up, Half-Down Style
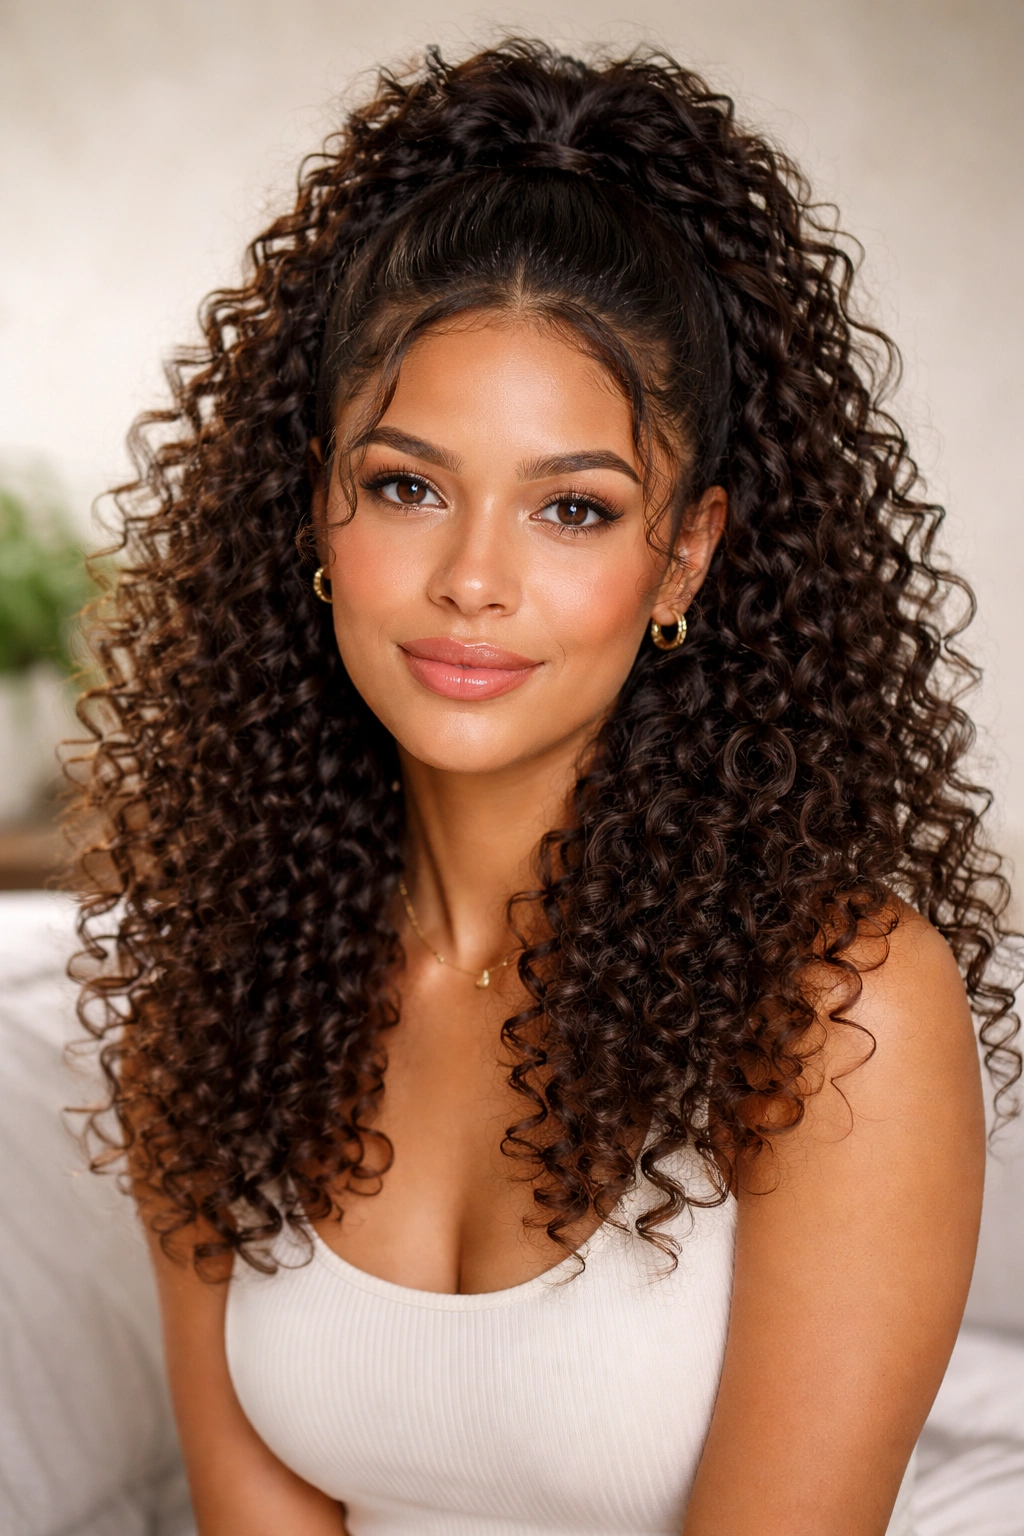
Half-up, half-down is one of the easiest ways to make type 3B to 3C curls look styled without pulling everything away from the face. You get the lift at the top, the volume at the bottom, and enough movement to keep the whole thing from feeling stiff.
I like this one because it works with shrinkage instead of against it. The top section can be twisted, pinned, clipped, or tied back with a small band, while the rest of the curls stay loose and full. If your crown gets flat easily, this style gives it structure. If the ends frizz faster than the roots, it also buys you some control where you need it most.
A middle part feels softer and more balanced. A deep side part makes the style a little dressier. And if the top section is left slightly loose, the result looks more relaxed than formal. That matters. Half-up styles can turn severe fast if the top is too tight.
This is also a useful style for day-two curls that still have shape but need a little revival. A mist of water, a dab of leave-in, and a few finger coils around the front pieces can wake it right back up.
5. The Curly Shag
A curly shag is one of the smartest cuts for type 3B to 3C hair, especially if your curls build a lot of width at the sides. The layers remove bulk where it usually turns boxy, and they let the curl pattern stack in a more flattering way. The result feels airy, not puffy.
The important part is the layer placement. Shorter pieces around the crown give lift. Longer layers at the bottom keep the shape from going frizzy and wide. Too many layers, though, and the cut can lose its structure. That’s why a curly shag should be cut with the curl pattern dry and in its natural fall. Wet cuts can still work, but a dry approach often gives a better read on how 3B and 3C curls sit once they spring up.
Why It Works So Well
The shag has movement built in. You don’t have to fight for volume at the roots, and you don’t have to flatten the whole head just to stop the sides from ballooning. It’s especially good if you like a lived-in look that still feels intentional. Not neat. Not messy. Somewhere in the middle, which is where most good curl cuts live.
If your curls get weighed down easily, ask for lighter layers around the face and keep the product load modest. Heavy creams can make the top collapse.
6. The Shoulder-Length Layered Cut
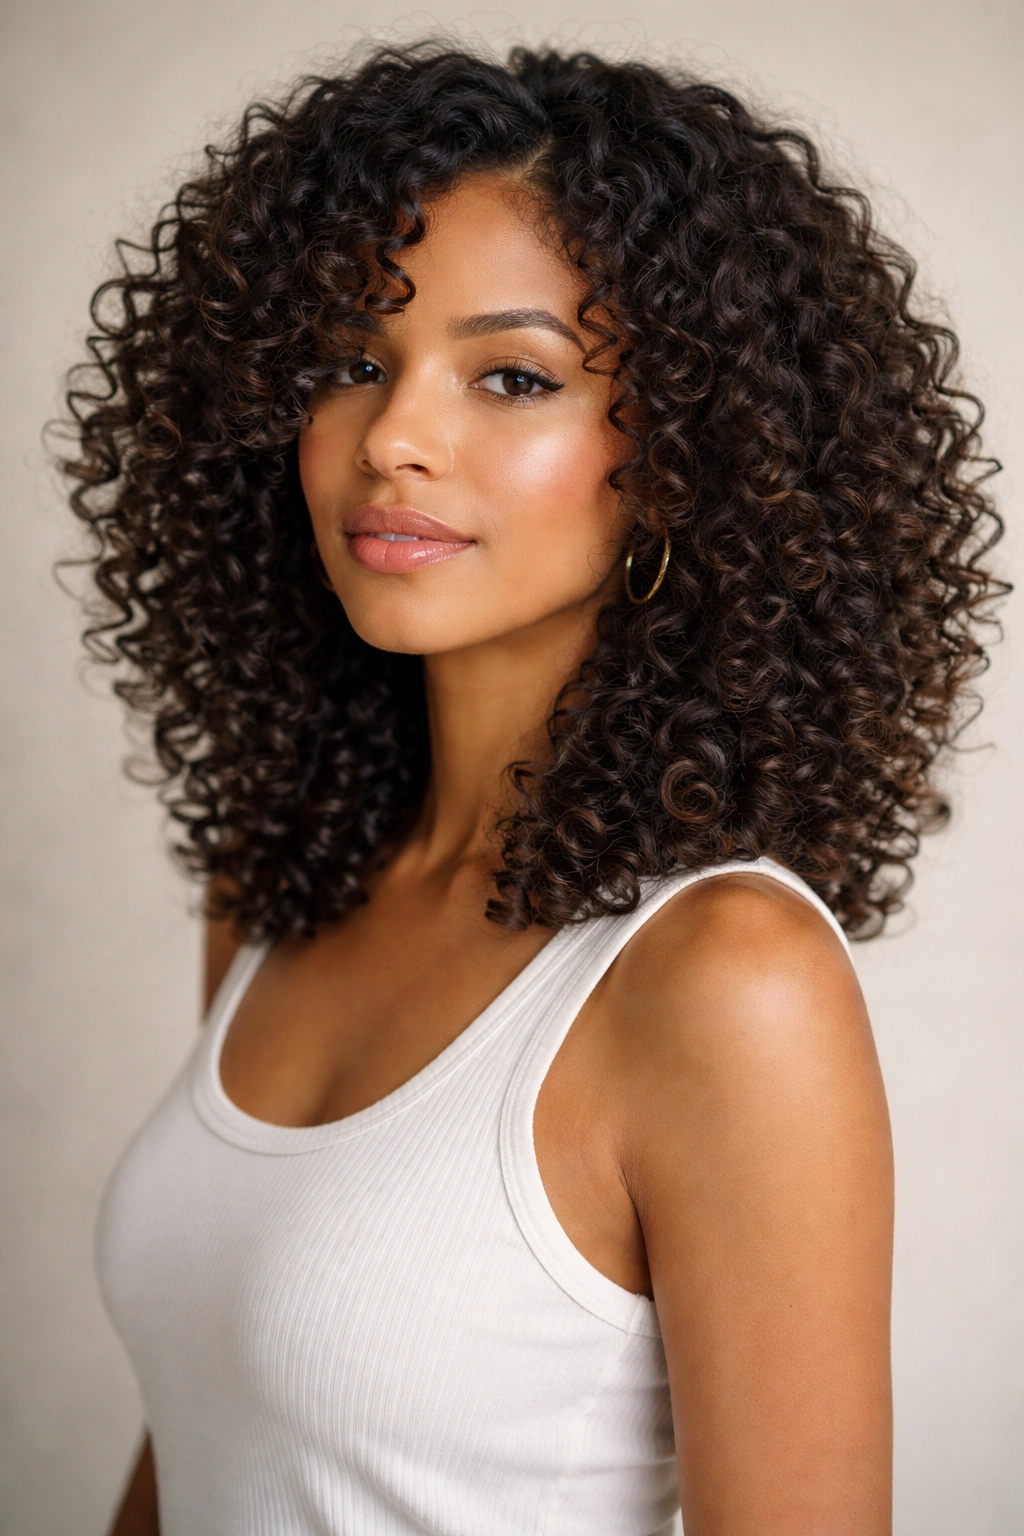
Shoulder-length layers are the practical choice when you want shape without committing to a shorter cut. On type 3B to 3C curly hair, this length tends to give a nice mix of bounce and control. The curls have room to spring, but the style still has enough weight to avoid floating into a halo.
A blunt cut at this length can go triangle-shaped fast if the hair is dense. Layers fix that. They keep the lower half from getting too thick and help the curls fall in a cleaner line around the shoulders. That’s especially helpful if your hair shrinks a lot when dry, because the visual length will still read as balanced.
This cut is one of the easiest to style on regular days. You can wear it with a center part, push it to one side, clip back a front section, or fluff it out into a fuller shape for a more dramatic look. It also gives you options on wash day. Air-dry for softer volume, or diffuse for a rounder shape with more lift at the roots.
Shoulder-length layers are not flashy. They are dependable. And for a lot of curly heads, that is the better deal.
7. The Curly Bob With a Deep Side Part
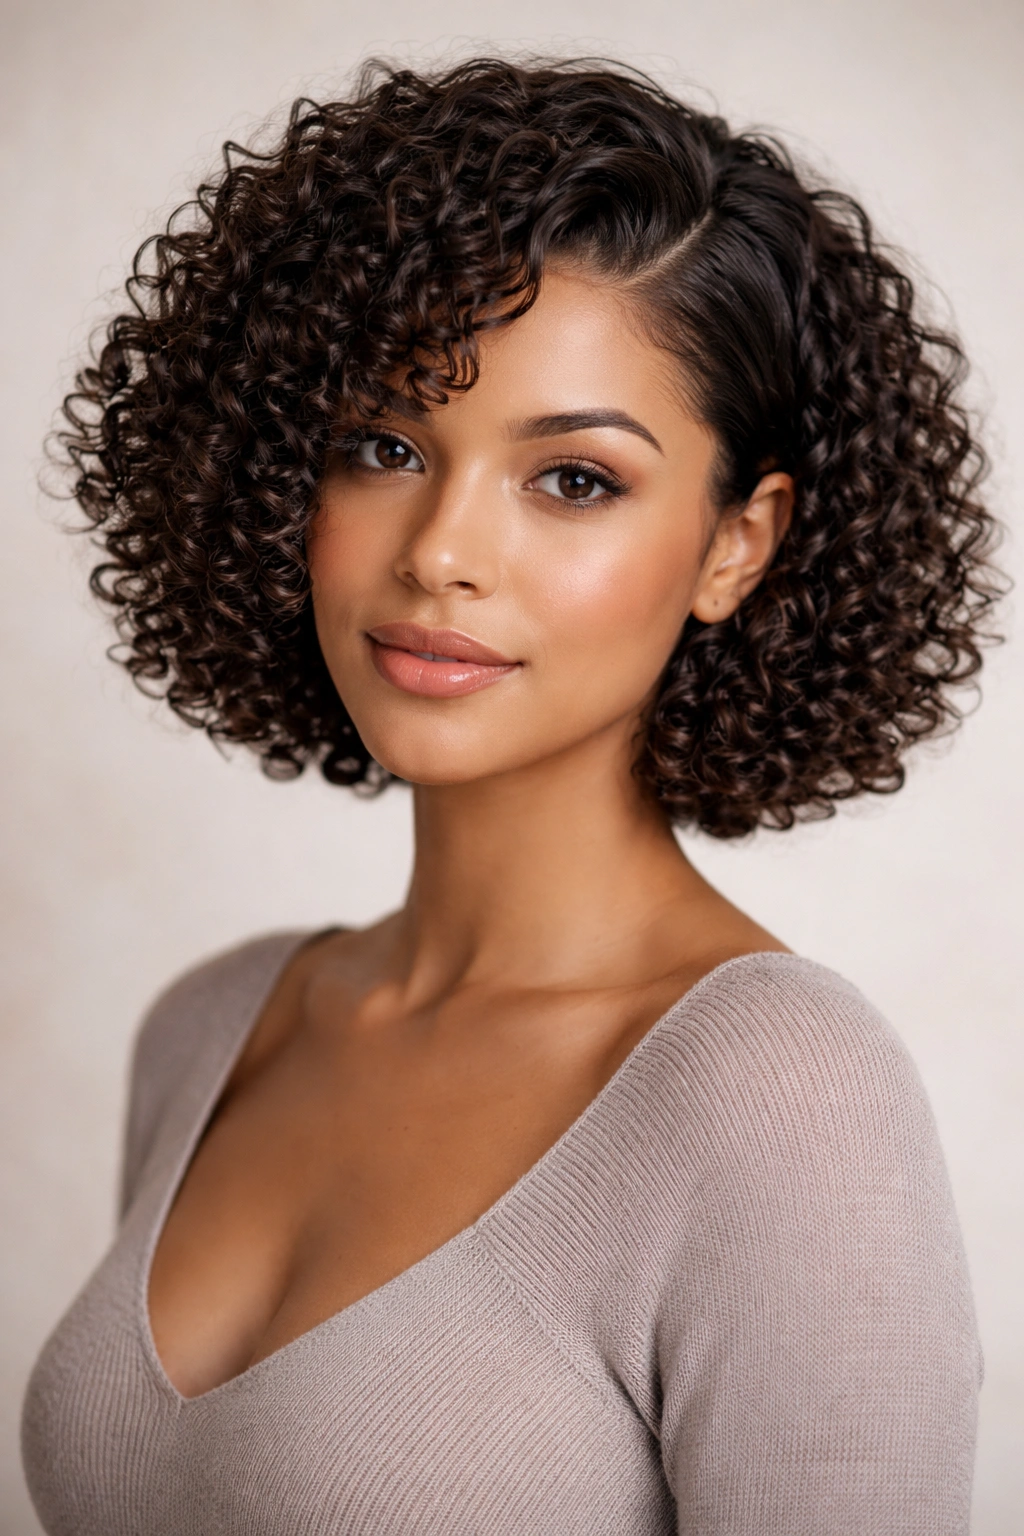
A curly bob with a deep side part changes the whole face shape in seconds. The part creates height on one side, which is a lifesaver if your roots tend to lie flat. The bob length keeps the curls bouncy instead of weighed down.
This style is especially nice on tighter 3C ringlets because the side part breaks up the density around the face. Instead of one big round shape, you get angle, movement, and a little softness near the cheekbone. If your curls are finer, the side part can also make the hair look fuller without adding extra product.
Quick Details That Matter
- Keep the bob at chin length or just below if shrinkage is strong.
- Use a light mousse at the root to keep the lift from falling.
- Direct the front section away from the face while drying.
- Pin the heavier side for 10 to 15 minutes if you want extra bend.
A bob like this can look sleek or playful depending on how tidy you make the part. I prefer it a little imperfect. A perfect side part can flatten the whole mood. A slightly off-center part gives the cut more life.
8. The Space Buns
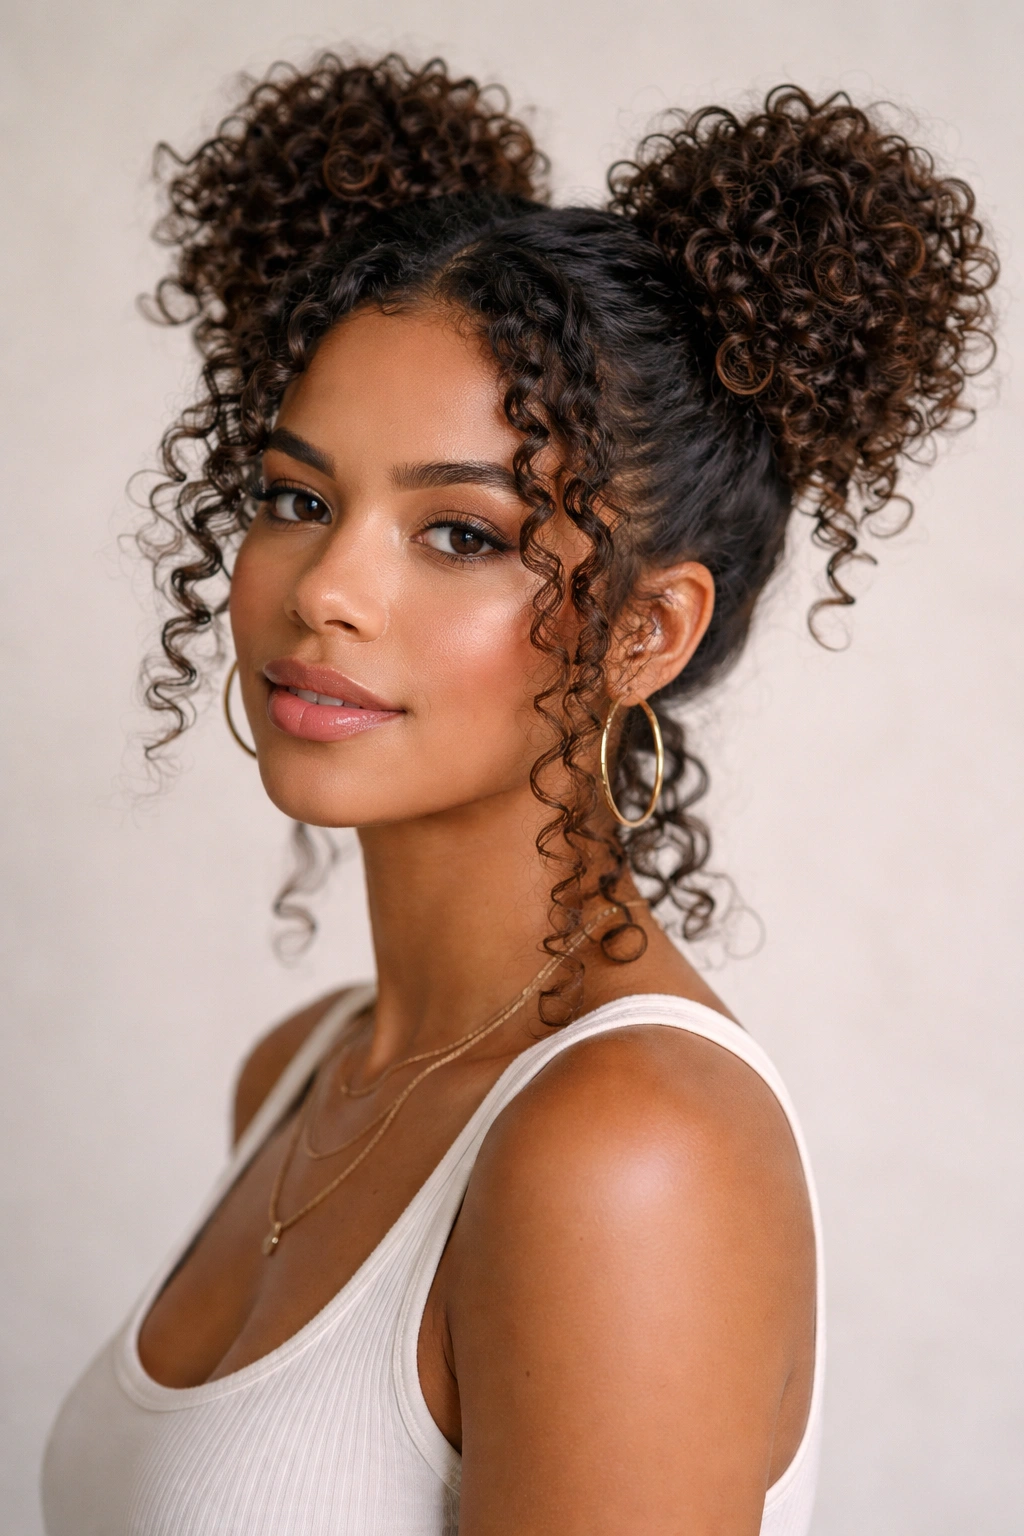
Can space buns work on 3B and 3C curls without looking childish? Absolutely. The trick is keeping them loose enough that the curl texture shows through. Tight, slicked-down buns are not the move here. You want shape, not strain.
Space buns work best when the hair is first stretched a bit. A twist-out, braid-out, or even a few hours of air-dried curls with some root stretch makes the buns easier to section and less bulky at the base. Split the hair into two even halves, gather each side high, and twist or wrap the sections into soft buns. Leave some curls free around the face if you want the style to feel less costume-like.
They’re handy for warm days, gym days, or any time you want your curls up but still visible. The style also gives the scalp a break from a single heavy ponytail. That matters more than it gets credit for. Repeated tension in one spot gets old fast.
If your hair is dense, don’t try to fit every strand into the buns. Let some of the ends spill out. It looks better, and it’s easier to do.
9. The Crown Braid Halo
A crown braid halo is one of those styles that looks elaborate even when the process is pretty straightforward. It frames the face, keeps the hair off the neck, and leaves the texture of the curls front and center. That mix is hard to beat.
It’s a good option when you need the front and sides controlled but still want the back to show off your pattern. On type 3B to 3C hair, a halo braid works best when the braid is started on stretched hair or at least detangled hair. If the texture is too tangled, the braid gets bulky in the wrong way and the shape stops looking clean.
What Helps It Stay Put
- Braid along the hairline using small, even sections.
- Use bobby pins that match your hair color so the anchors disappear.
- Keep the braid close to the scalp at the front, then tuck the ends securely.
- Add a light mist of holding spray if the flyaways are stubborn.
This style is a little more work than a ponytail, yes. But the payoff is real. It gives the curls a more polished frame, and it holds up well for long hours without needing constant fixing. If you like a style that looks intentional from every angle, this is a strong one.
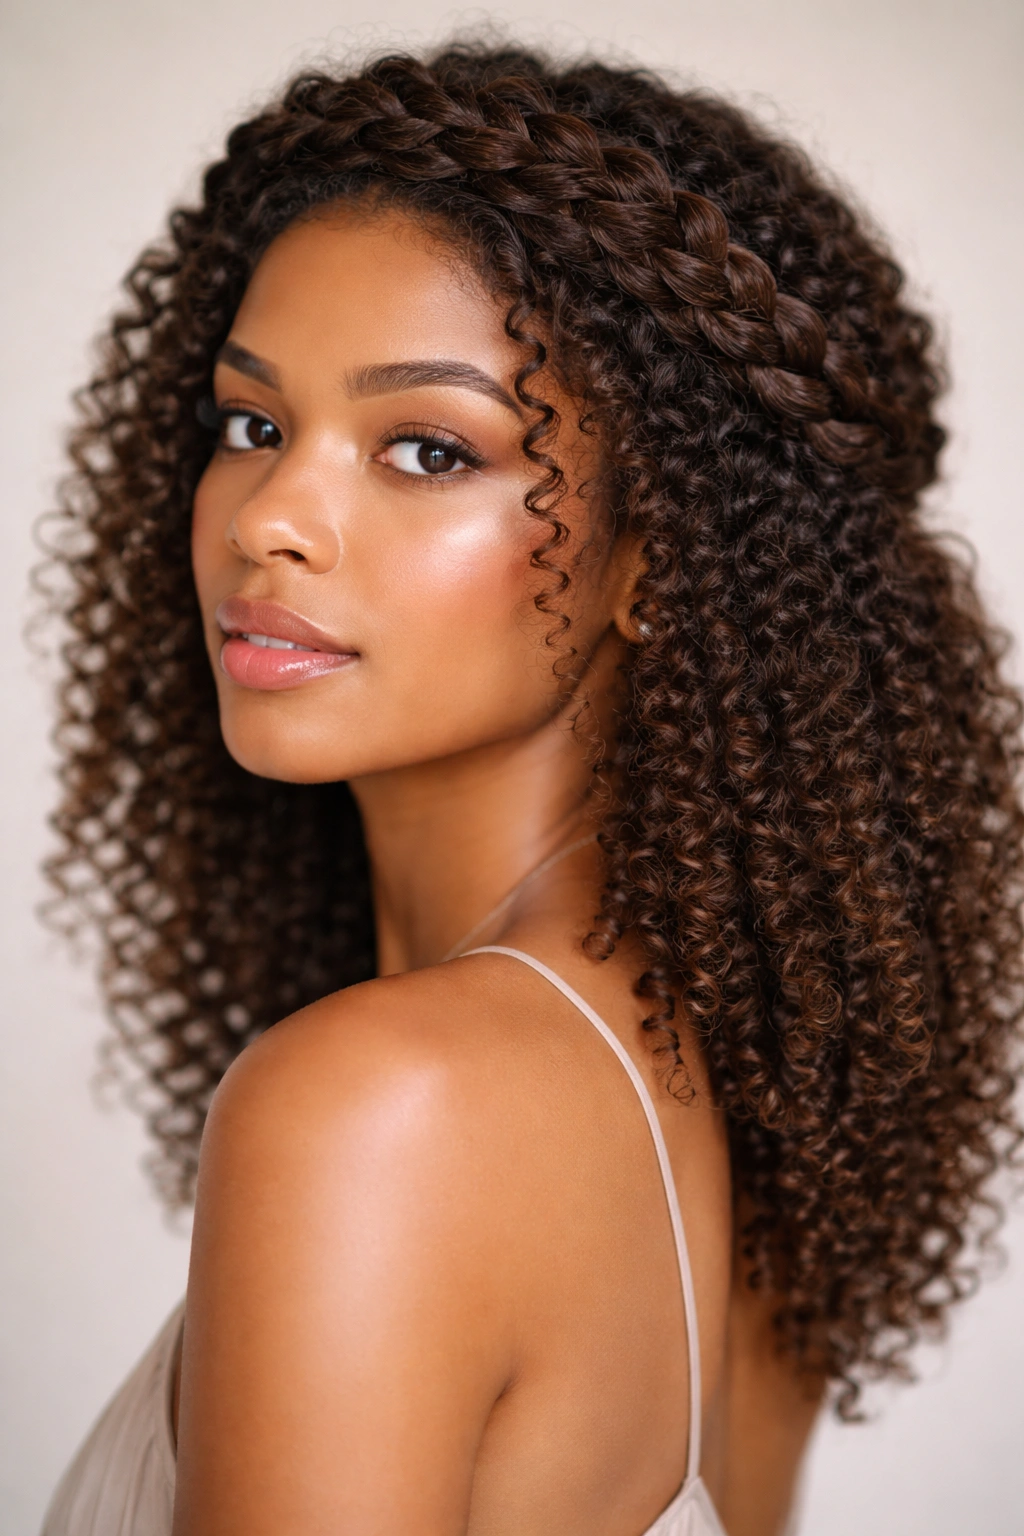
10. The Twist-Out With a Side Part
A twist-out is one of the most useful styles for type 3B to 3C curls because it gives you stretch, definition, and movement at the same time. A side part makes it feel less symmetrical and a little more styled, which is often the difference between “nice curls” and “great hair.”
The size of the twists matters. Medium twists usually give the best balance on this texture. Tiny twists can look crisp but take forever to dry. Big twists dry faster, but they can leave the curl pattern too loose if your hair is on the finer side. The middle ground usually wins.
The hair should be fully dry before you unravel. Fully. Not almost dry. Not “mostly dry around the edges.” If you rush it, the twist-out will frizz early and lose shape before the day is over. A lightweight cream plus a firm gel often gives better results than a heavy butter, which can make 3B curls sag and make 3C curls feel coated.
A side part keeps the style from feeling too round, especially if your curl pattern naturally forms a lot of width. It also helps the front pieces frame the eyes in a softer way. Small shift. Big effect.
11. The Braided Front, Loose Back Style
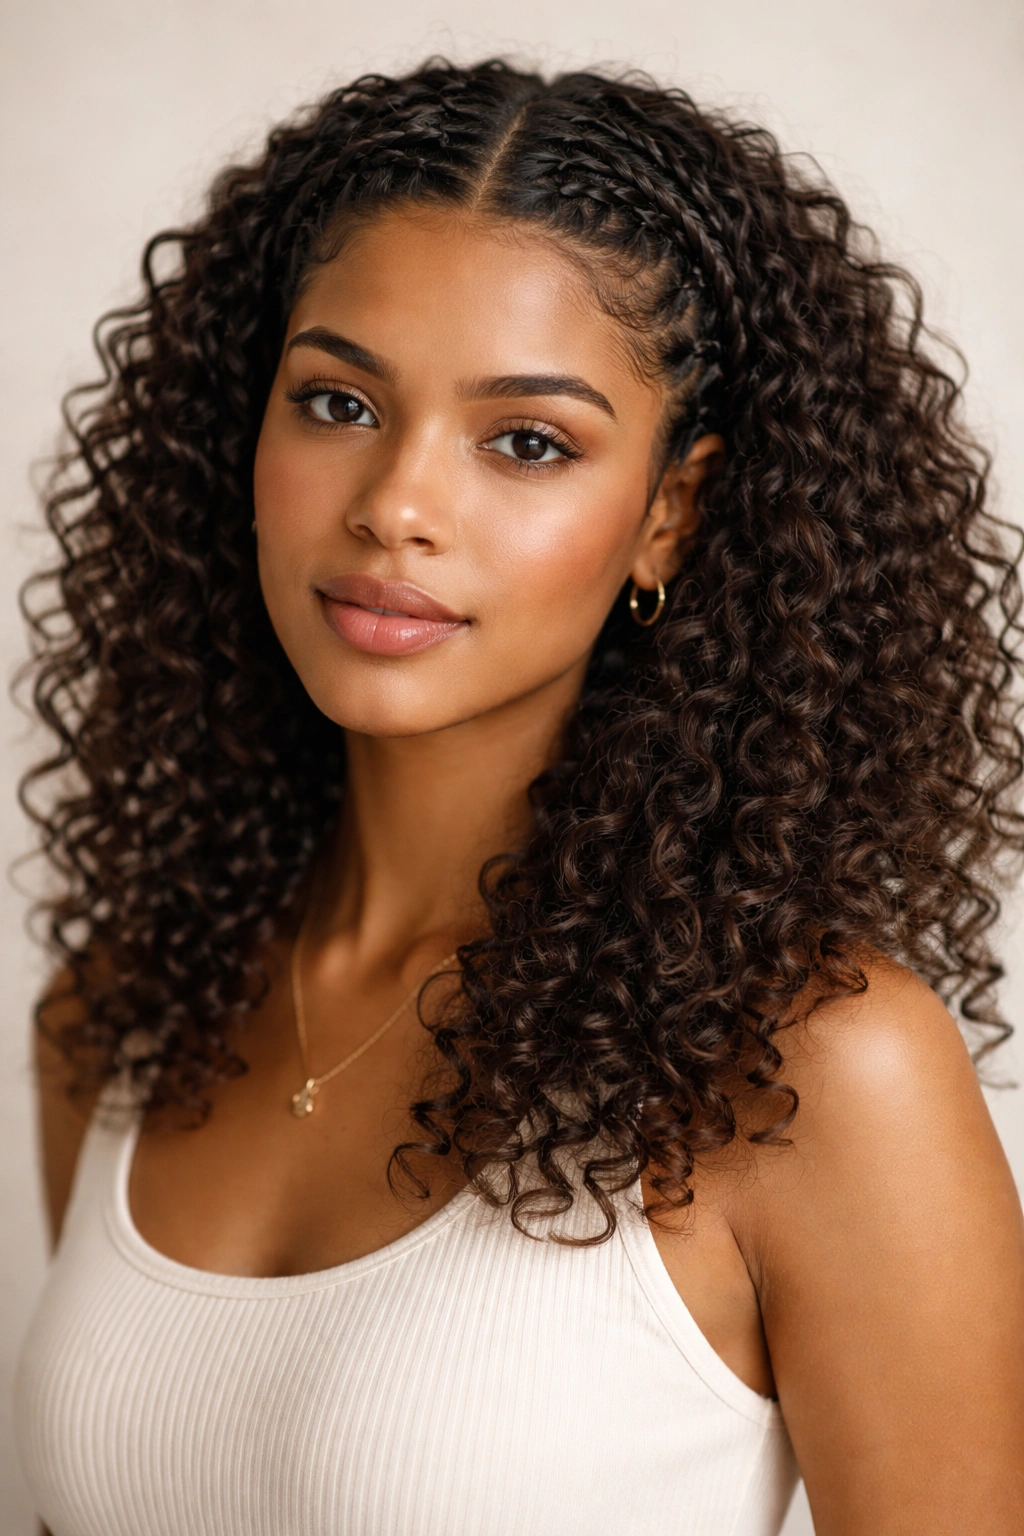
This one is a quiet problem-solver. Braiding the front and leaving the back loose gives you control where you need it most, while still letting the curls live where they look best. It’s an easy way to stretch a style through the week without fully putting the hair away.
Two small braids at the front can tame the hairline, keep frizz out of your eyes, and make the whole style feel more finished. The back stays loose and full, so you do not lose the volume that 3B and 3C curls are known for. It also helps if your front pieces dry faster than the rest, which happens more than people admit.
This style works well with a middle part, but a side part can soften the whole look. If you want the braids to blend in, match the braid size on both sides. If you want the style to look more casual, make one braid slightly thicker and let the curl ends stay messy. That little imbalance keeps it from feeling too precious.
I like this one for busy days. It does not ask for much, and it still looks like you tried.
12. The Claw Clip Updo
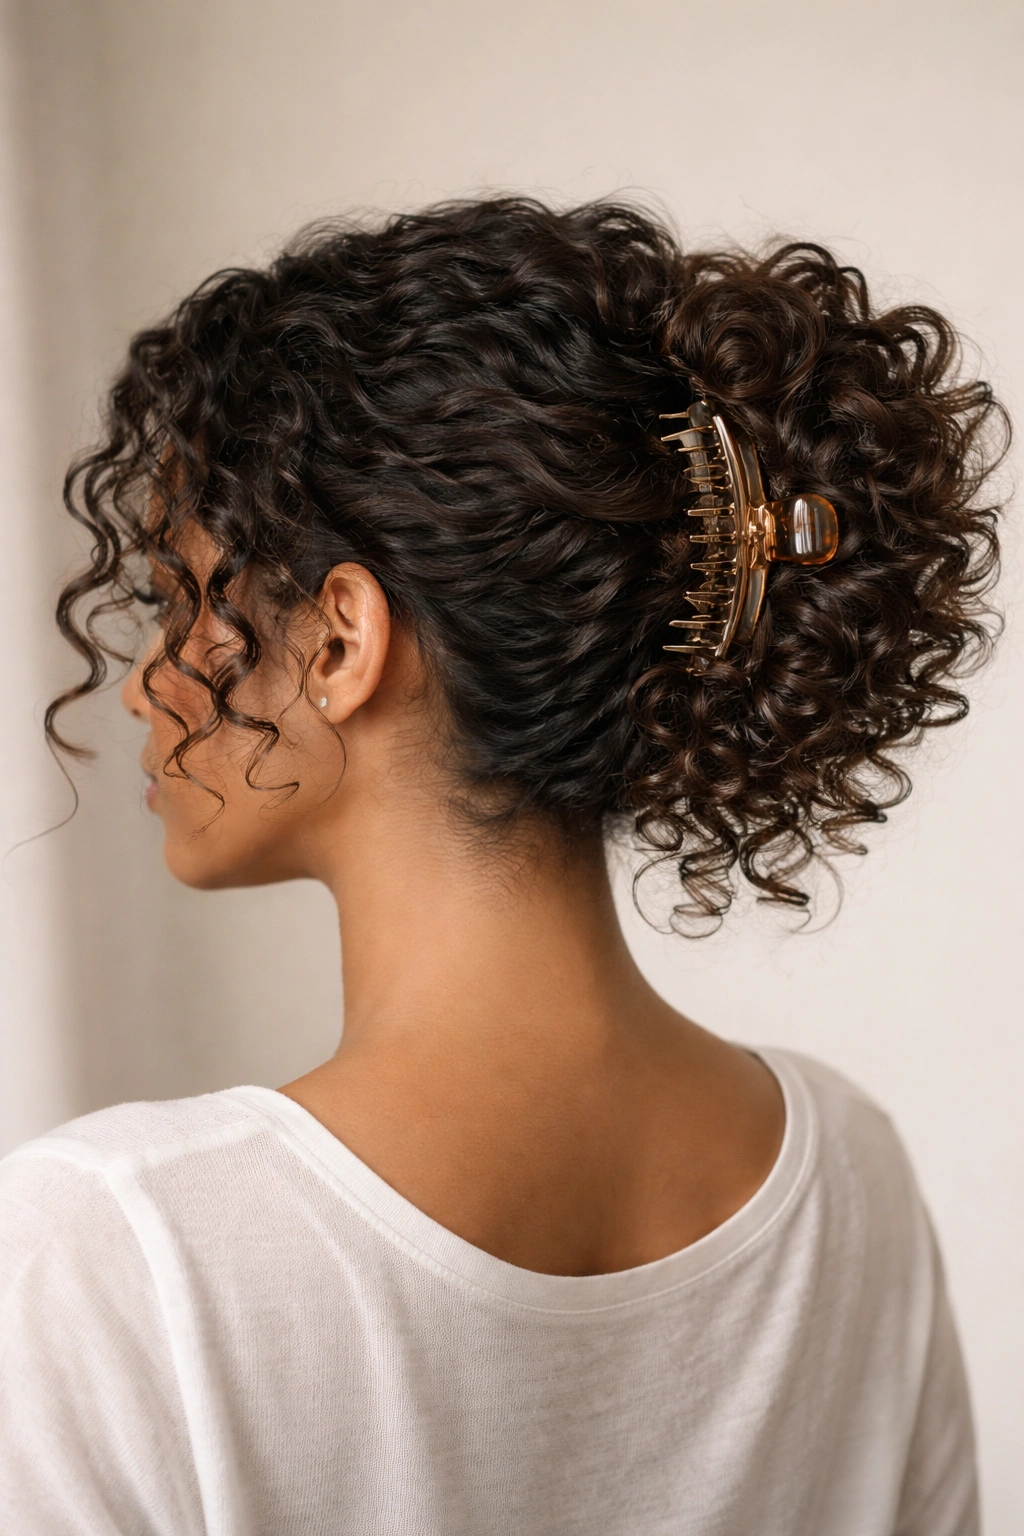
A claw clip updo is the easiest polished style in the entire bunch, and that is not a compliment I hand out lightly. On type 3B to 3C curly hair, it works because the clip can hold volume without crushing the curl pattern the way a tight elastic sometimes does.
The base of the style should sit low enough that the clip has something to grab, but high enough that the curls can spill over the top in a soft cascade. If the clip is too small, the style slips. If it is too stiff, it digs into the scalp and leaves dents. A larger clip with longer teeth usually works better for dense curls.
Where to Place the Clip
For a cleaner look, twist the hair once before clipping. For a looser look, fold the ponytail upward and let the ends fan out. Both work. The first is neater; the second has more shape. Use a few pins if the nape area feels slippery, because that spot tends to give up first.
This style is useful on days when your curls are still decent but not fully cooperative. It buys time, hides flat roots, and looks better than a rushed bun.
13. The Low Puff or Low Curly Ponytail
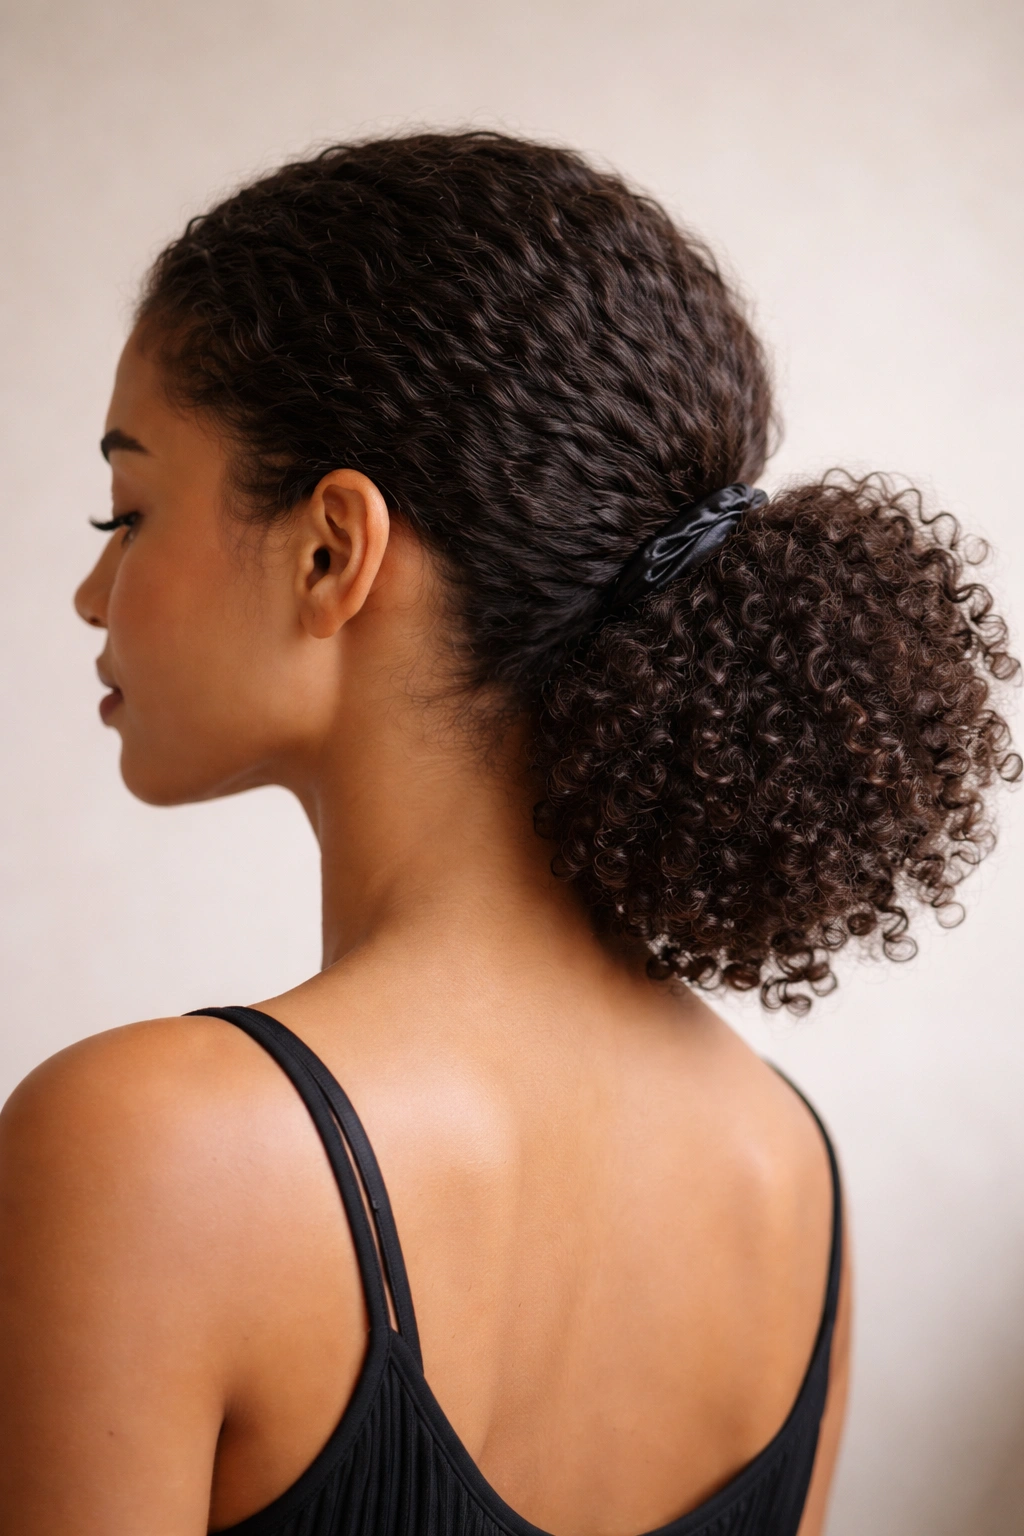
A low puff sits close to the nape and gives 3B to 3C curls a softer, more grounded shape. It is less dramatic than a high ponytail, but it often looks richer because the curls can spread out in a full, round mass. There’s a calmness to it. That sounds odd, maybe, but anyone who wears curly hair knows what I mean.
The style works best when the crown is smoothed just enough to look intentional. Not scraped. Smoothed. Leave a little texture at the front so the head doesn’t look flat or overly polished. Then gather the hair low, secure it with a soft band, and let the puff sit naturally. If the ends are long, you can make it into a low ponytail instead and still get a similar effect.
A satin tie helps keep the puff from snagging. So does avoiding heavy oils at the root; those can make the style collapse faster than expected. If you want a little more shape, stretch the front sections with a scarf for 15 to 20 minutes before you head out.
This style is plain in the best way. It gets out of the hair’s way and still looks finished.
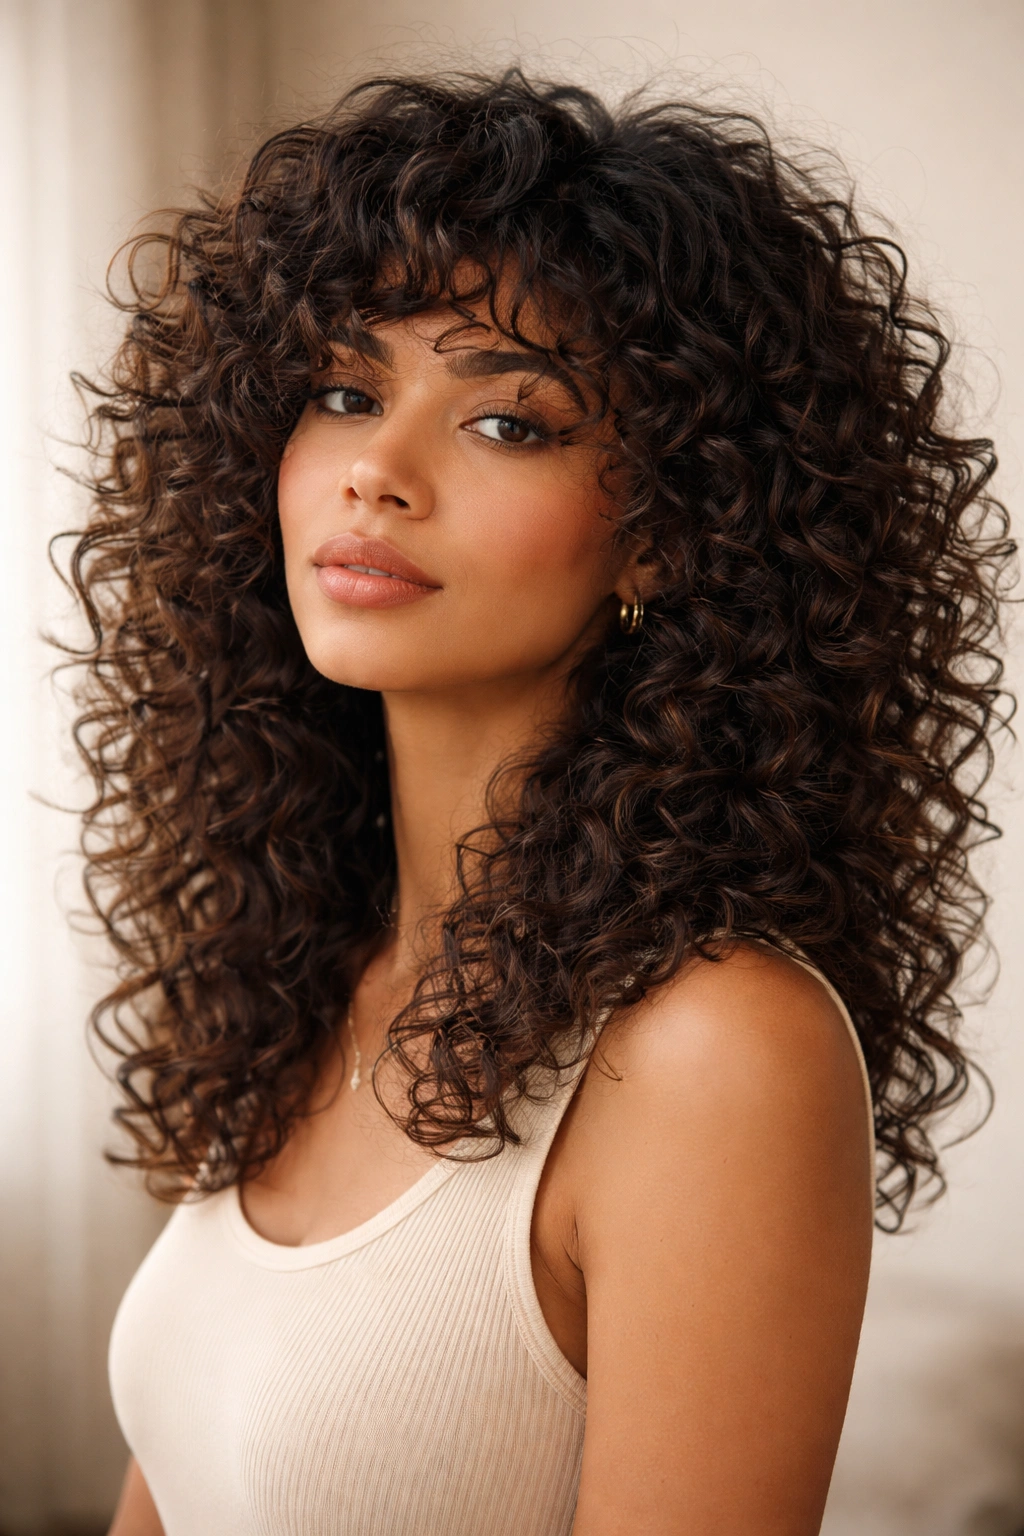
14. Curly Bangs With Long Layers
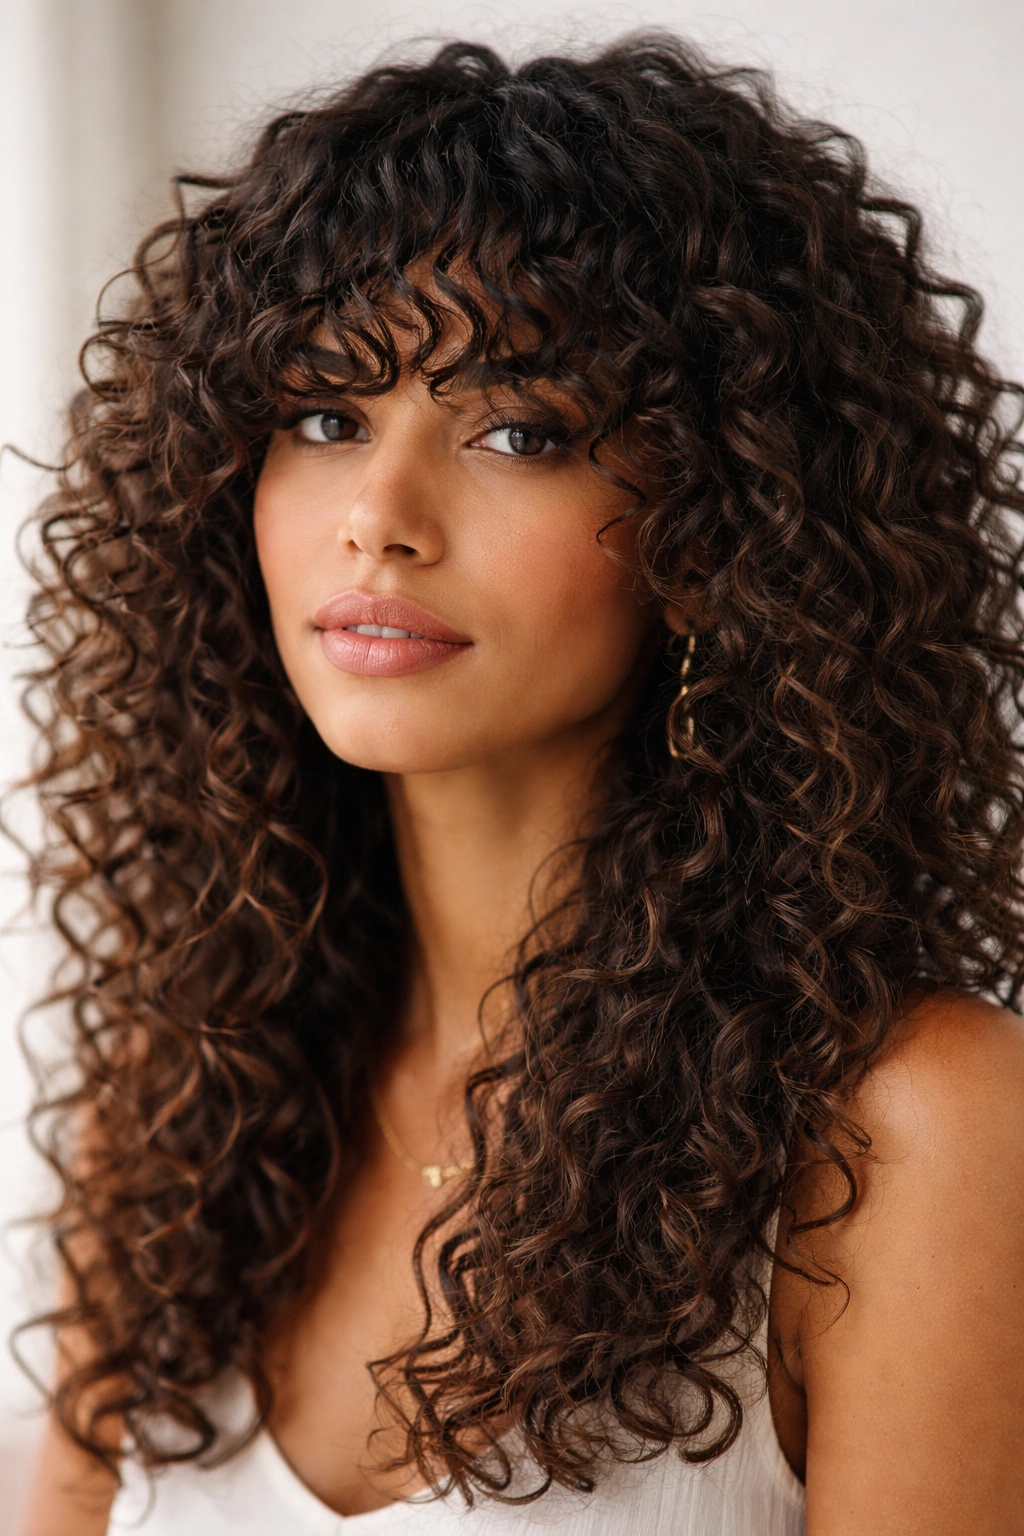
Do curly bangs work on type 3B to 3C hair? Yes, if the cut respects shrinkage. That is the part people miss. Curly bangs need to be cut longer than straight bangs because they spring upward once they dry. If you cut them too short, you end up with a forehead you did not sign up for.
Long layers around the face help the bangs blend instead of sitting like a separate piece. The goal is movement, not a hard line. A dry cut is often the safest route for this texture because the stylist can see how the curls naturally fall. Wet curls can fool people. They always look longer than they really are.
What to Ask For
- Bangs that start below the eyebrow when dry, sometimes lower.
- Face-framing layers that connect to the rest of the cut.
- Soft shaping at the sides so the bangs do not hang like a curtain.
- A trim schedule that keeps the fringe from taking over your eyes.
This style adds a lot of personality fast. It can also be high-maintenance if you like your hair to behave the same way every day. If you want easy, skip it. If you want shape and movement near the face, it’s a good one.
15. The Curly Frohawk
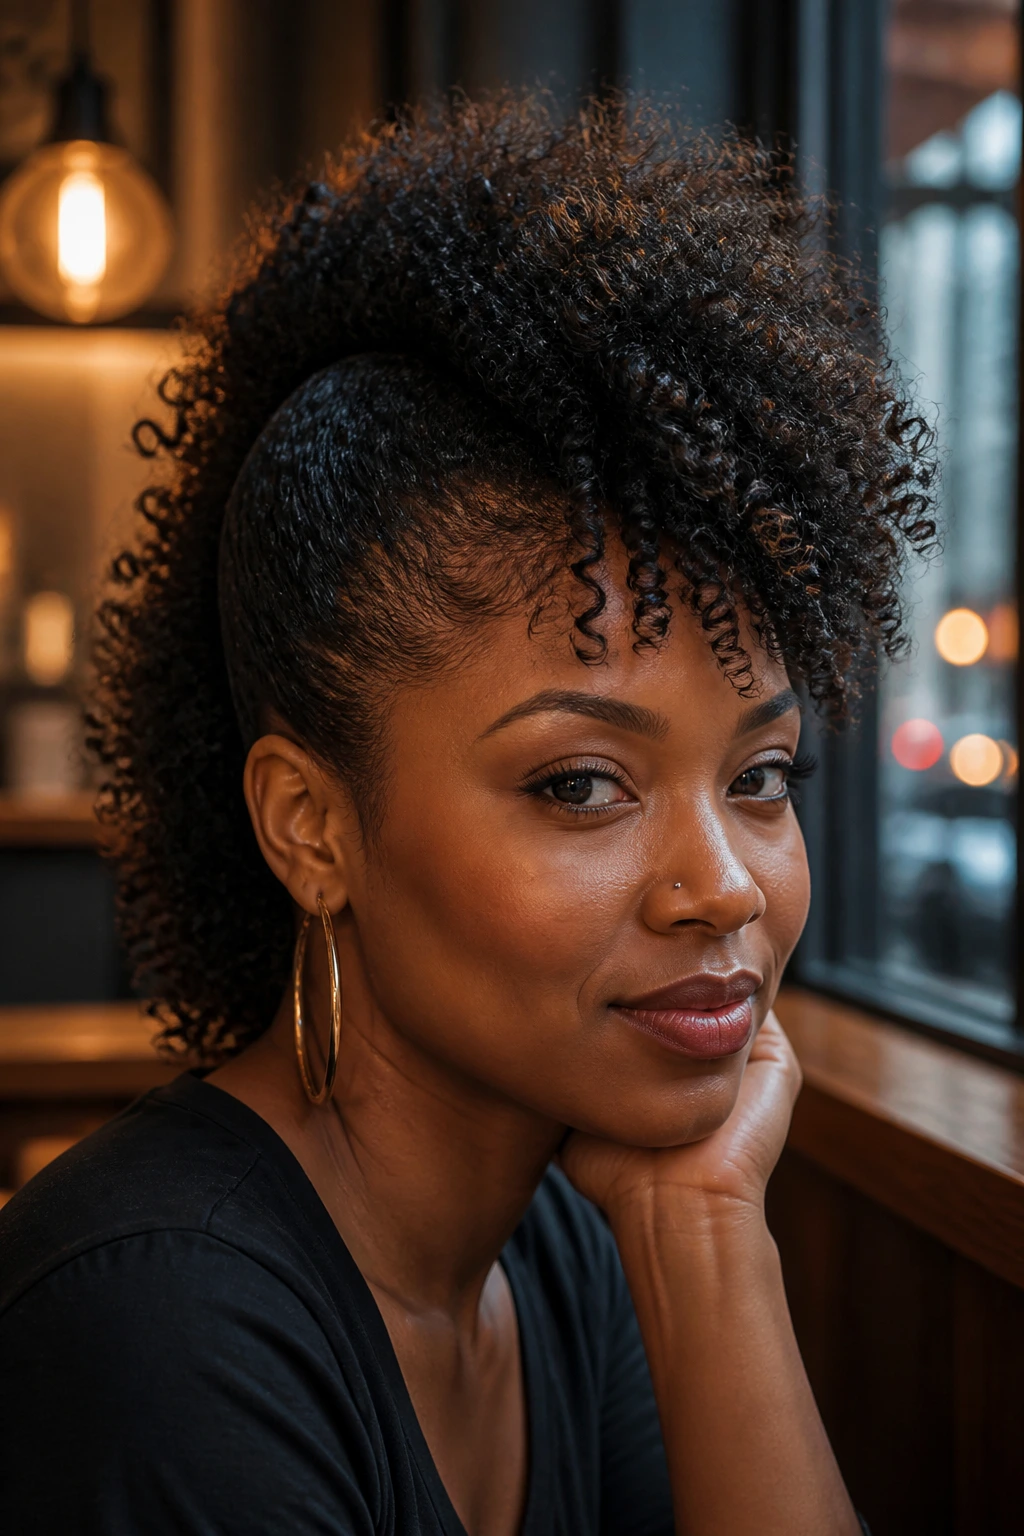
A curly frohawk has presence. It pulls the sides back or up and lets the center section rise into a tall, sculpted line that feels bold without needing a full cut. On 3B and 3C curls, it works especially well because the texture already has enough body to hold the shape.
You do not need shaved sides to get the look. A few well-placed pins, braids, or flat twists at the sides can create the same center-focused silhouette. Gather the curls toward the middle strip of the head, pin the sides down, and fluff the top until it stands in a clean ridge. A little gel at the roots helps, but the structure should come from the placement, not from making the hair stiff.
The frohawk is a strong choice for nights out, photo days, and any time you want your curls to do something dramatic. It also keeps the face open in a way that feels sharp and a little edgy. If the top starts to flatten, lift the roots with your fingers and insert one or two hidden pins under the heaviest curls. That usually fixes it fast.
Some styles whisper. This one doesn’t. It gives type 3B to 3C curly hair a shape with attitude, and honestly, that’s a very good place to end.