Graduation hairstyles for curly hair have one job: survive the cap, the camera, and the hugs. That sounds easy until you remember curls have opinions. Tight coils want lift, loose spirals want movement, and the crown under a mortarboard needs enough control that the whole style doesn’t go limp halfway through the ceremony.
The smartest looks work with your texture instead of flattening it into submission. A little hold at the roots, a clean part, and a few pins hidden under the top layer usually do more than a heavy cream ever will. I’m always wary of styles that load too much product near the crown; they tend to slip, and the cap presses everything downward anyway.
There’s a real sweet spot between polished and stiff. You want the front to look intentional in close-up photos, but you also want your curls to move when you turn your head. Flat roots are the enemy. So is a crunchy finish that makes every strand look like it’s been shellacked into place.
The styles below give you options for different curl patterns, lengths, and comfort levels. Some are cap-friendly right away. Some look best once the cap comes off. All of them keep curly hair looking like curly hair, which is the whole point.
1. Defined Wash-and-Go With a Side Part
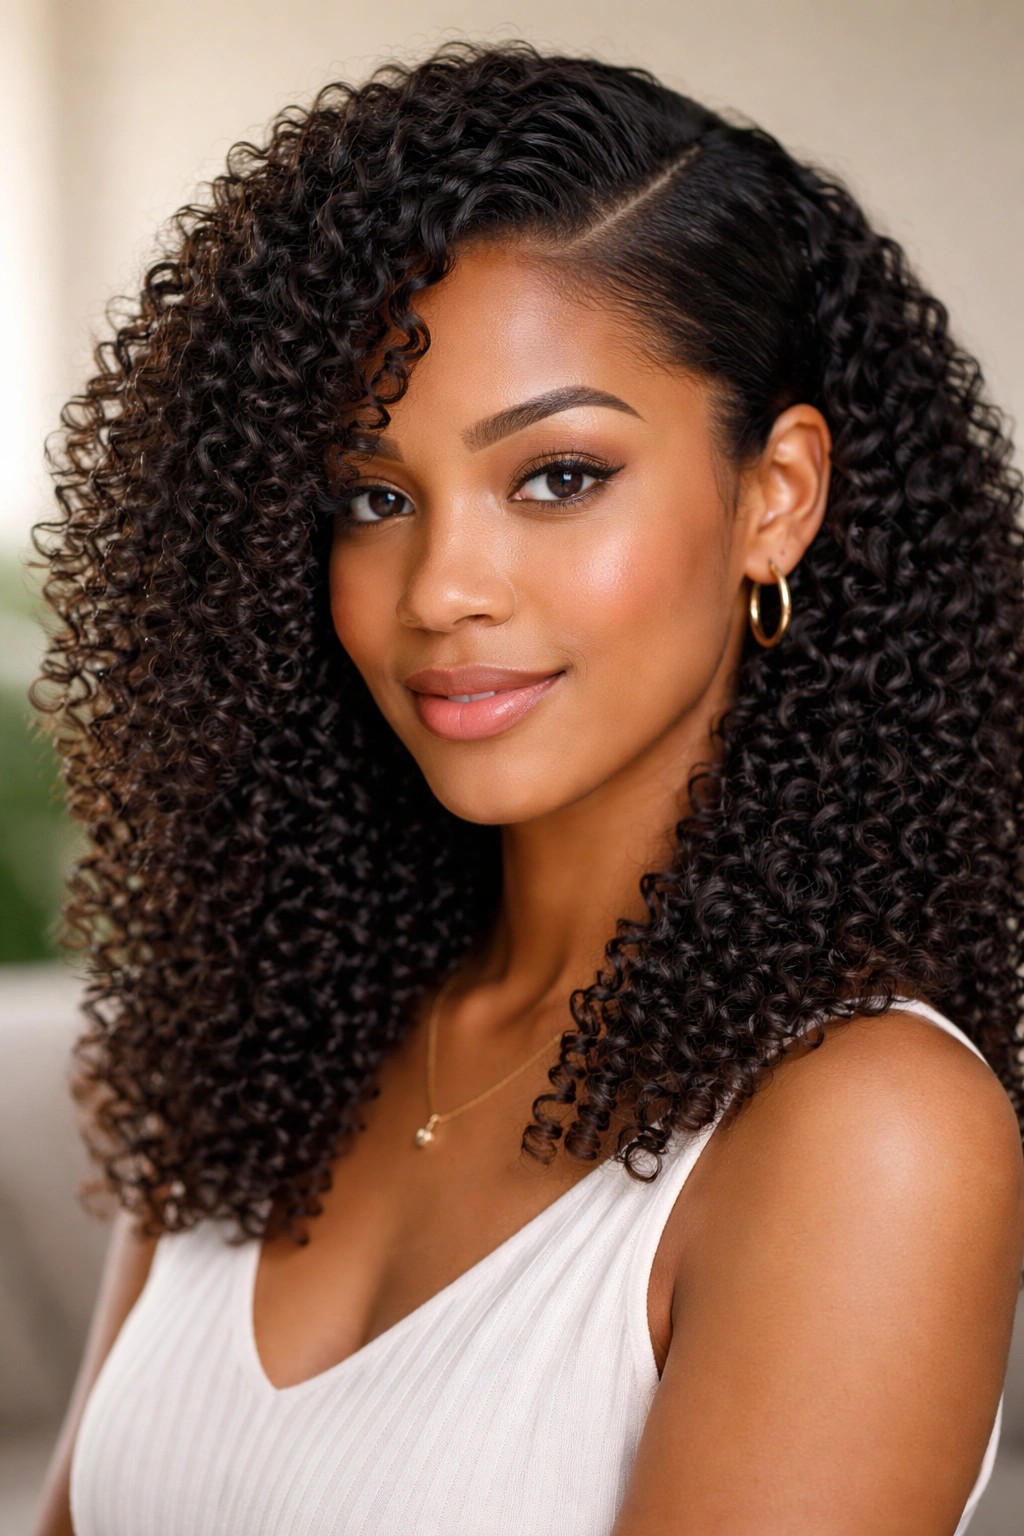
A strong wash-and-go can look more polished than an updo when the curls are healthy and shaped well. The trick is to make the silhouette clean, not to make the hair small. A deep side part gives the style direction, and that little bit of asymmetry helps the cap sit more naturally without crushing the top.
I like this look for curls that already have a clear pattern, because it lets the texture do the heavy lifting. Use a light leave-in, then add a gel or mousse with flexible hold while the hair is still damp. Diffuse the roots for lift, and let the ends air-dry if you want them softer.
A side part also draws attention to the face, which matters in those close graduation photos where the gown and cap can swallow up detail. If the front wants to puff up, smooth only the first inch near the hairline with your fingers and a tiny bit of gel. Do not overload the crown with cream; it will flatten fast.
One small thing. If you know the cap will rub, let the style dry fully before you put it on.
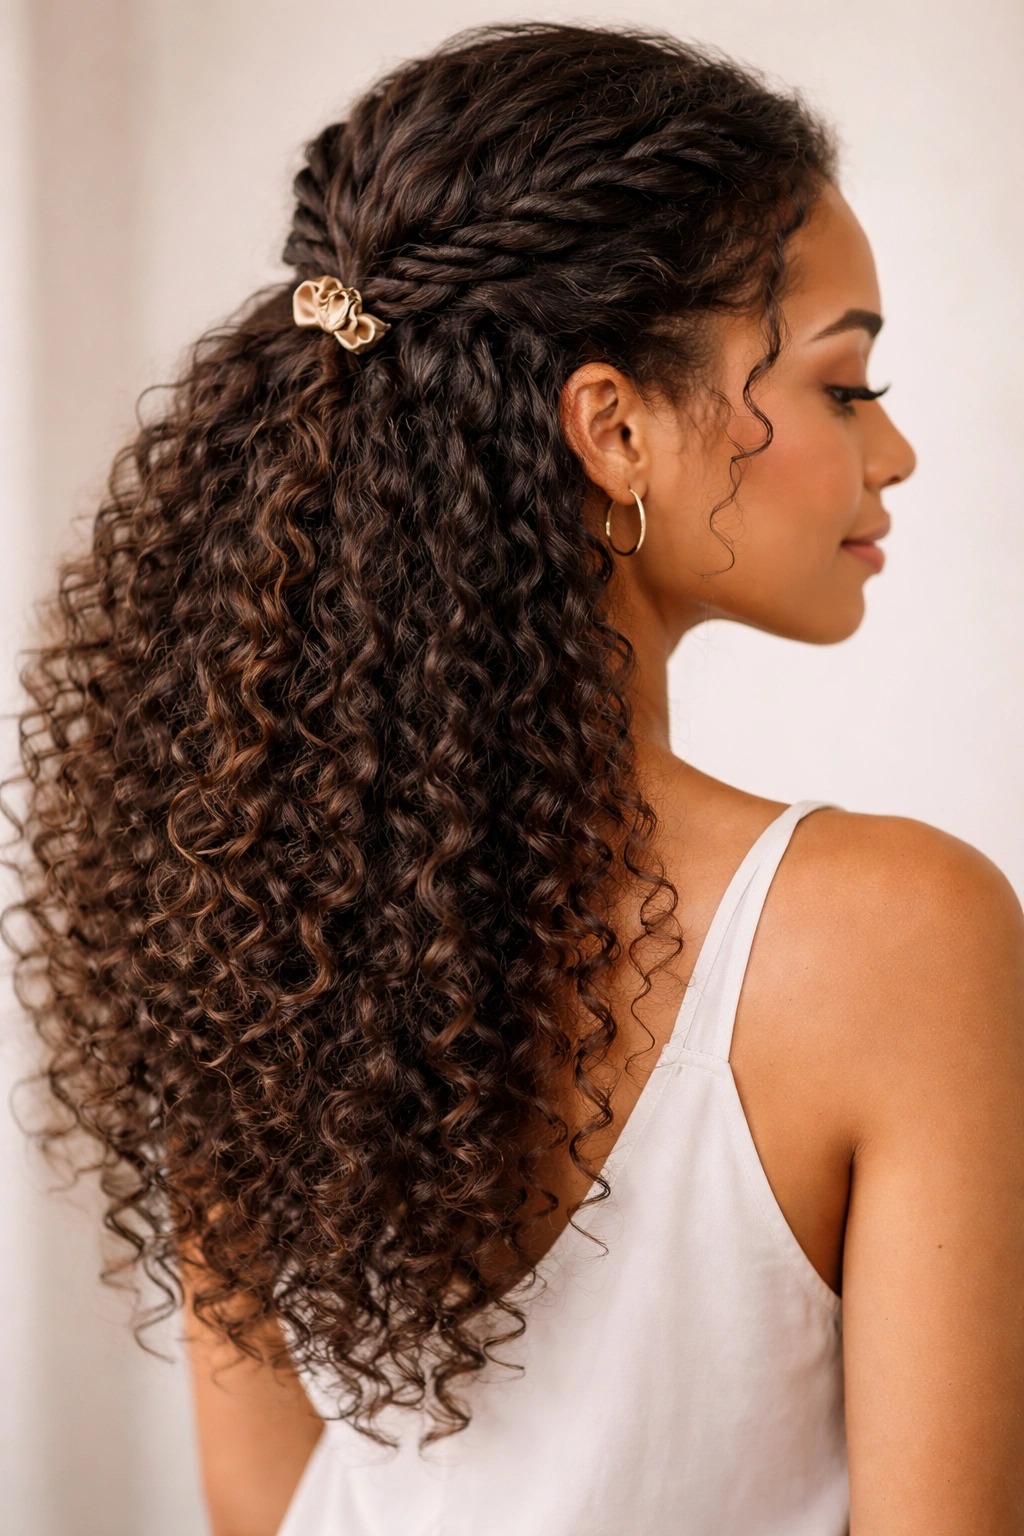
2. Half-Up Twist Crown
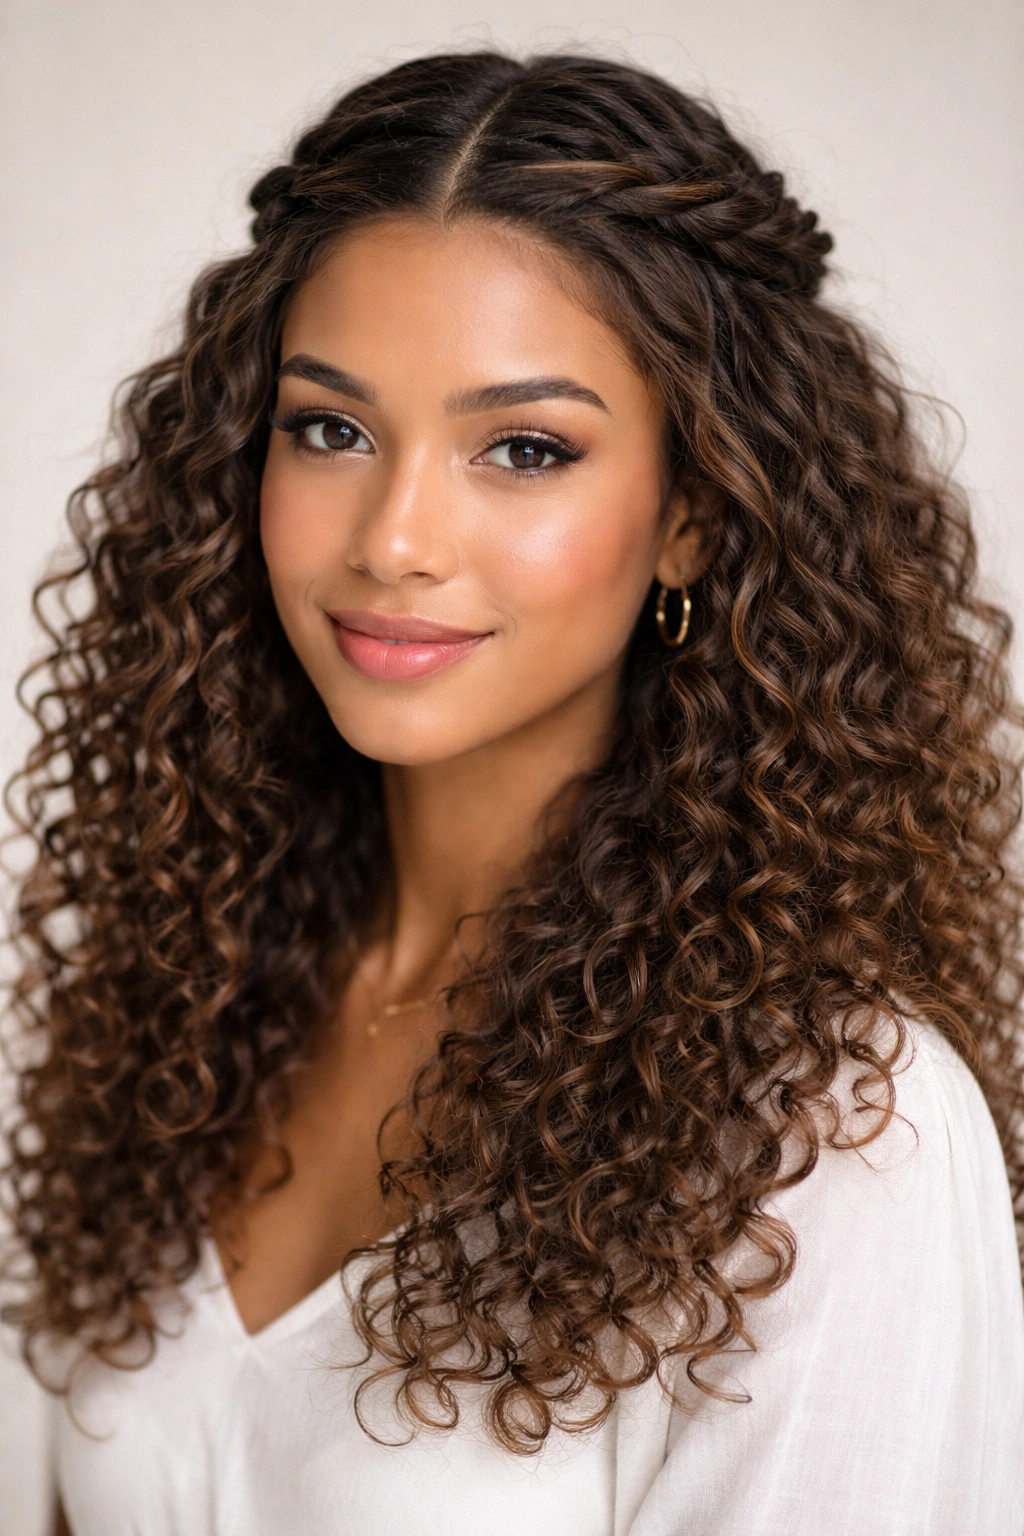
Why does this keep showing up at graduations? Because it solves two problems at once. The top stays neat, and the length still shows off your curls, which is exactly the balance most people want.
What Makes It Hold
Take a section from each temple, twist it back toward the crown, and pin the twists where they meet. The rest of the hair stays loose, so the style keeps movement instead of looking stiff. It works especially well on medium to long curls, and it gives the cap a cleaner landing spot across the top.
A light-hold spray at the pins helps more than people expect. So does crossing the bobby pins instead of dropping them in straight. If your hair is slippery, rough up the section with a tiny bit of texturizing spray before you twist.
- Use two sections about 2 to 3 inches wide from the front.
- Pin the twists just above the back of the head, not at the very top.
- Leave the lower curls untouched so the style keeps shape from the side.
- Add one small decorative pin where the twists meet if you want a little shine.
My favorite part: this style still looks good after the cap comes off, which is rare and useful.
3. Low Curly Chignon With Face-Framing Pieces
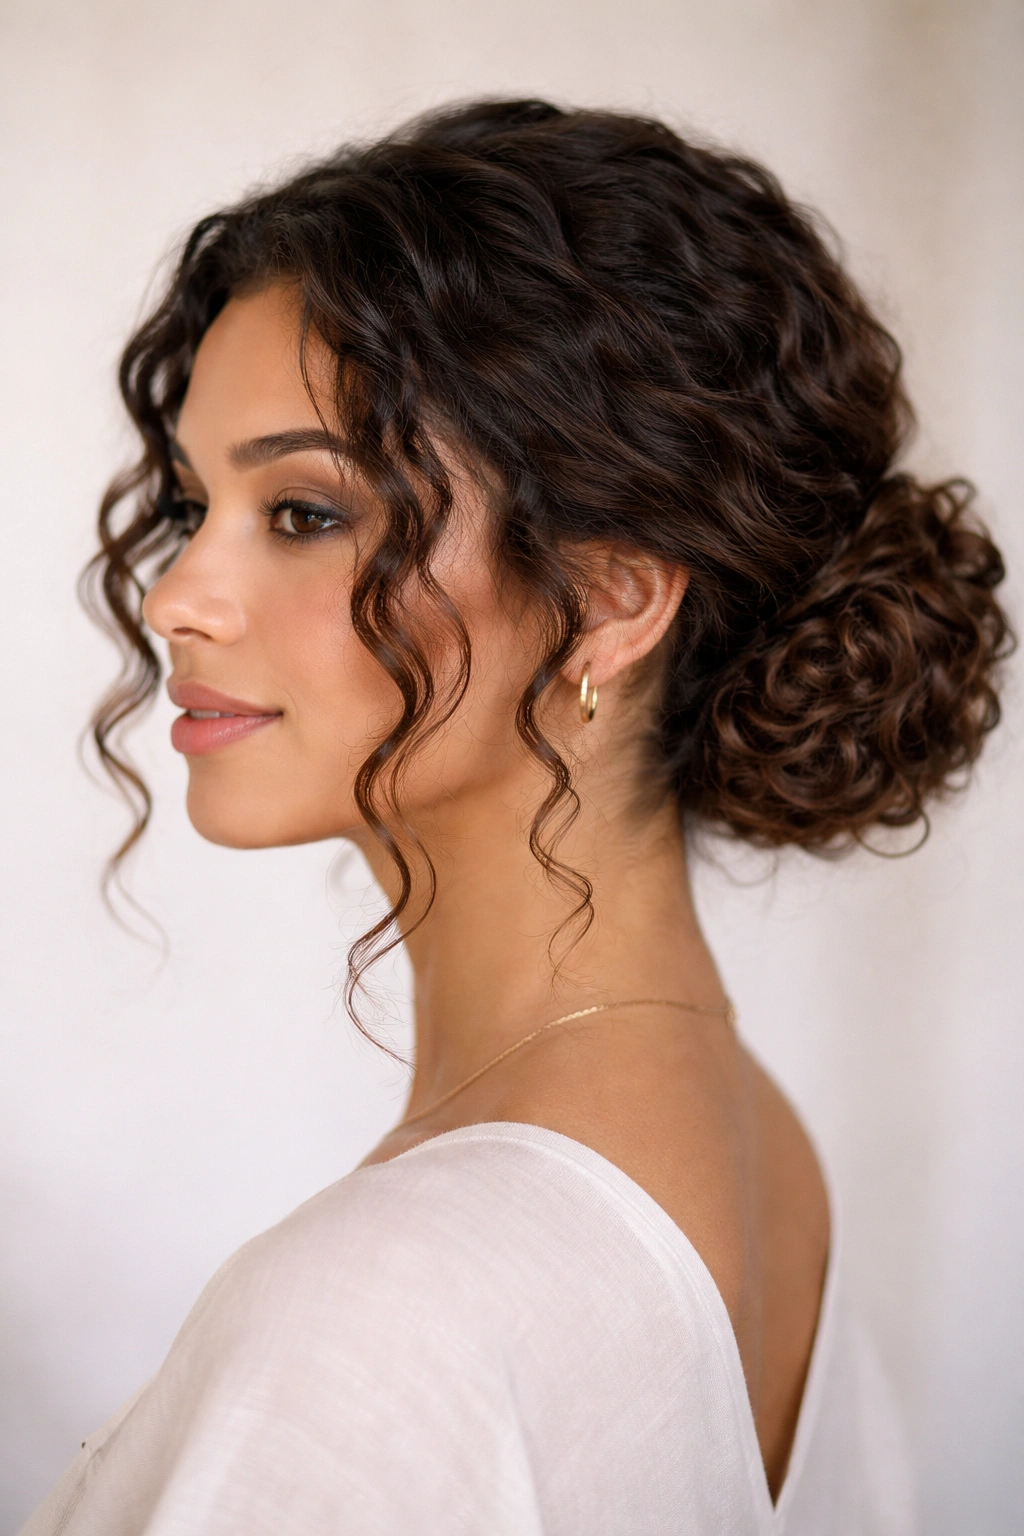
A low chignon is the safe choice, and I mean that in the best way. It sits neatly at the nape, keeps weight low, and doesn’t fight the cap. If your curls are dense or long, this is one of the few formal styles that can handle both structure and softness without becoming fussy.
The face-framing pieces matter more than people think. Two small curls left out near the cheeks keep the whole look from feeling too tight. They also photograph well when you turn your head toward friends, family, or the person taking way too many pictures from below.
The bun itself should be loose enough to show texture, not twisted so hard that it looks like a rope. If your hair is thick, split it into two sections first, then wrap each section around the base. That makes the shape flatter and easier to pin. Pin into the bun, not through the ends—that keeps the curl pattern from getting crushed.
A soft-hold spray and a few hidden pins are usually enough. Nothing fancy. Just secure.
4. High Puff With a Wrapped Headband
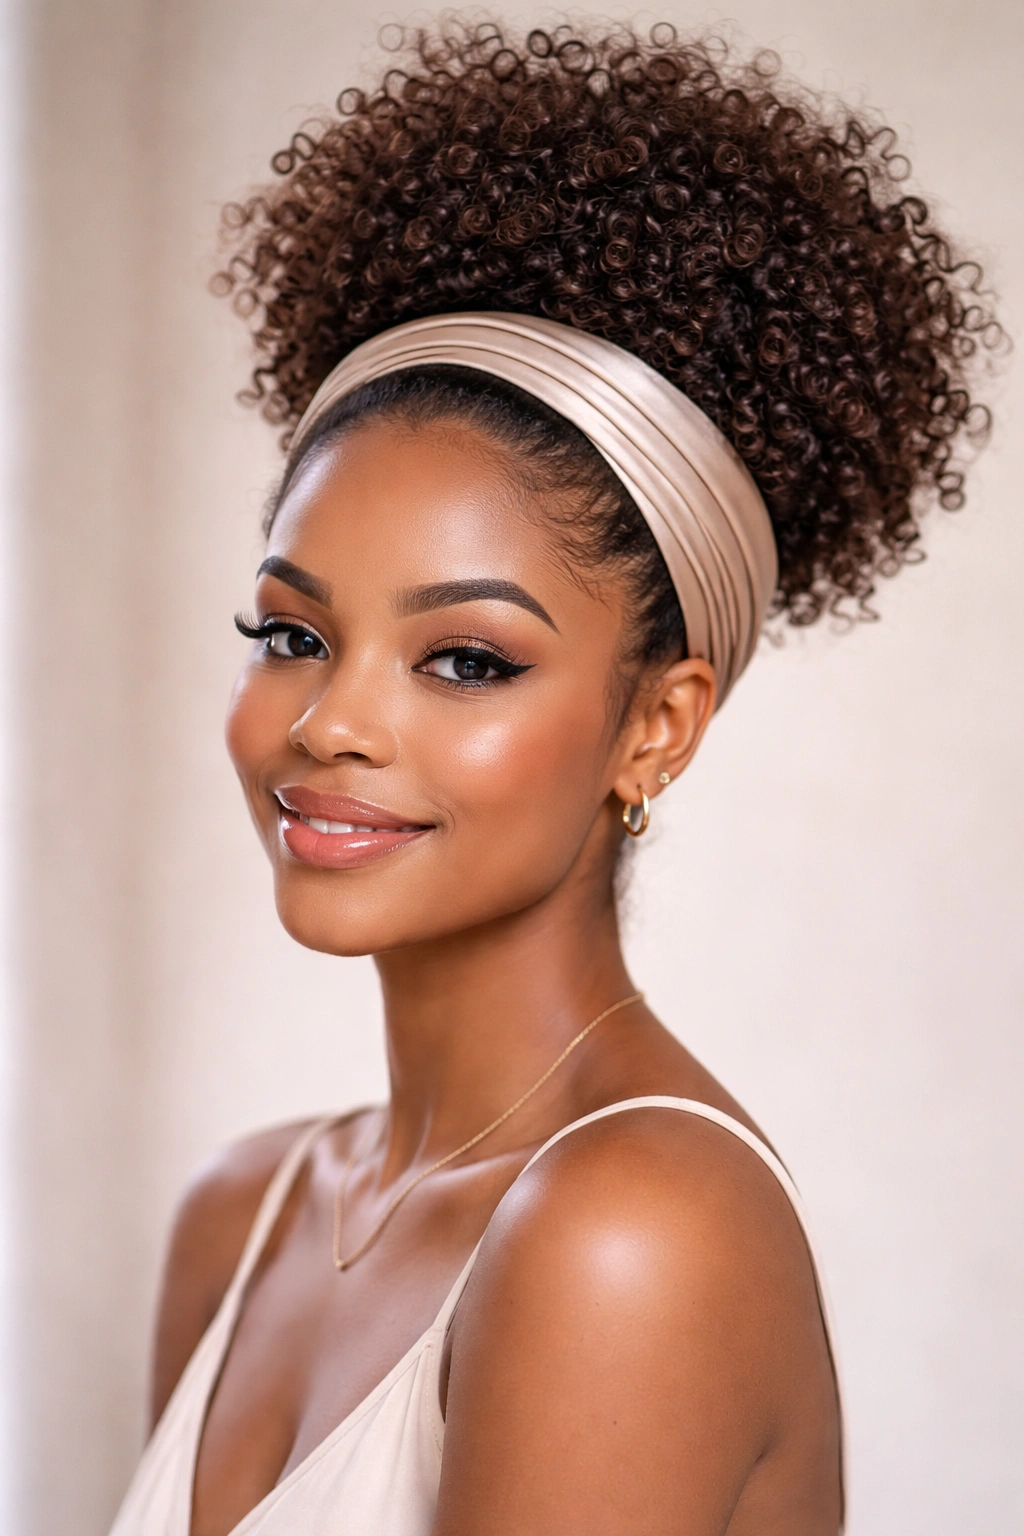
The high puff is for the graduate who wants height, attitude, and a clean outline around the face. It looks especially good on coily hair because it shows the natural volume instead of fighting it. A wrapped headband can finish it with a neat line across the front, which keeps the style from looking too casual.
This one is especially nice if your hair likes volume at the crown. Stretch the roots a little first if you want the puff to sit higher, then gather the hair with a soft band or puff cuff. The ends should stay fluffy and rounded. That’s the point. Don’t flatten them into a ball that feels stiff.
It’s not the best pick if you need the cap to sit low and stay there for a long ceremony. Be honest about that part. The puff looks fantastic in portraits and after the cap comes off, but a mortarboard can squash the shape if you force it.
A satin or velvet headband can make the front feel finished. A shiny band works too, though I’d keep the rest of the accessories simple. The puff already carries the look.
5. Braided Halo Into Loose Curls
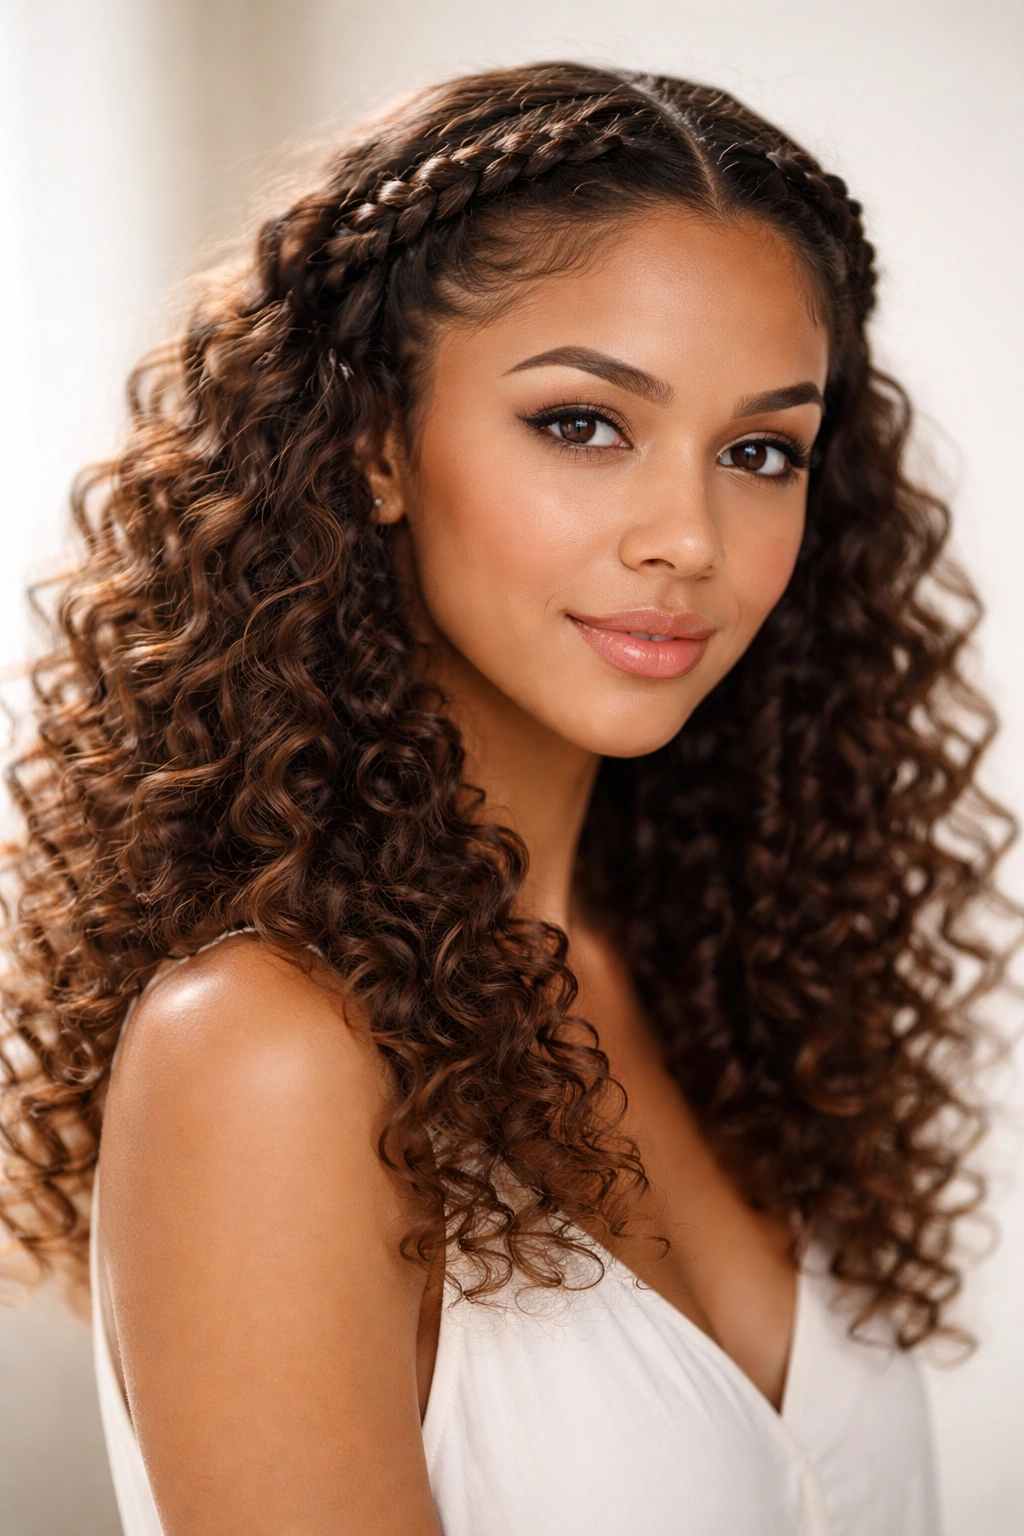
Two braids along the hairline can do a surprising amount of work. They keep the front controlled, make the face look framed, and leave the back free so the curls can still move. That mix is why the braided halo keeps earning its place on graduation days.
The Small Details That Keep It Neat
Start with a center part or a soft side part. Braid each front section back toward the ears, then pin the ends under the hair where they disappear. The back can stay loose, curly, and full. If your curls are prone to frizz, smooth the braided sections with a bit of gel before you start braiding.
The shape works nicely under a cap because the braids create a flatter front edge. You also get a built-in frame for earrings, which matters more than people admit. Big curls and a good pair of earrings can do a lot together.
- Use a fine-tooth comb only on the braid sections.
- Hide the braid ends with 4 to 6 bobby pins.
- Keep the loose curls separated with your fingers, not a brush.
- Finish with a mist of flexible hairspray, not a heavy shell.
Best part: the braid detail stays visible even if the rest of the hair gets a little windblown.
6. Sleek Center-Part Low Ponytail
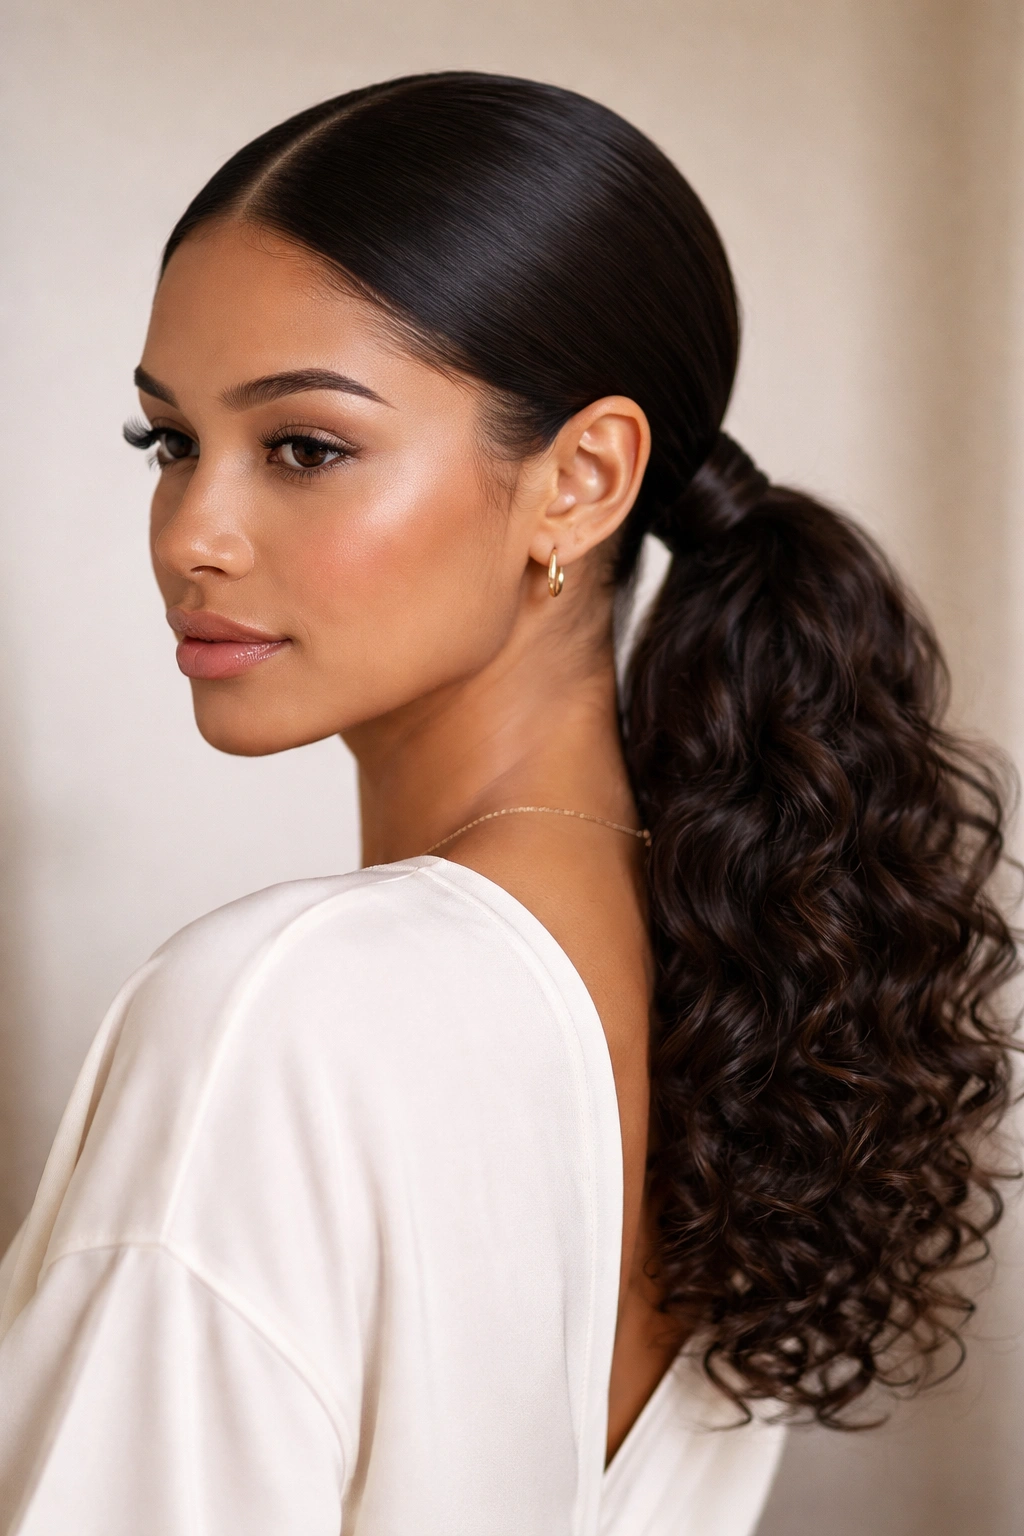
This one is quieter, and that’s why it works. A center-part low ponytail gives you a clean line down the face, then lets the natural texture show in the tail. It’s a good choice if you want something polished without going full bun.
The crown should look smooth, but not scraped back so tight that the style feels harsh. Use a gel or edge control along the part, brush it through lightly, and tie the ponytail at the nape with a strong elastic. Then wrap a small curl around the band so the base looks finished. A satin scrunchie can also work if your hair is thick enough to hide it.
Unlike a low bun, this style keeps more movement at the back. That matters if you want the photos to feel a little softer. It also gives you room to show off length, especially if the tail is defined with curl cream or a little mousse before the event.
If you’re wearing a cap for a long stretch, this can sit lower and flatter than a puff or top knot. That alone makes it worth considering. Simple wins sometimes.
7. High Curly Ponytail With a Wrapped Base
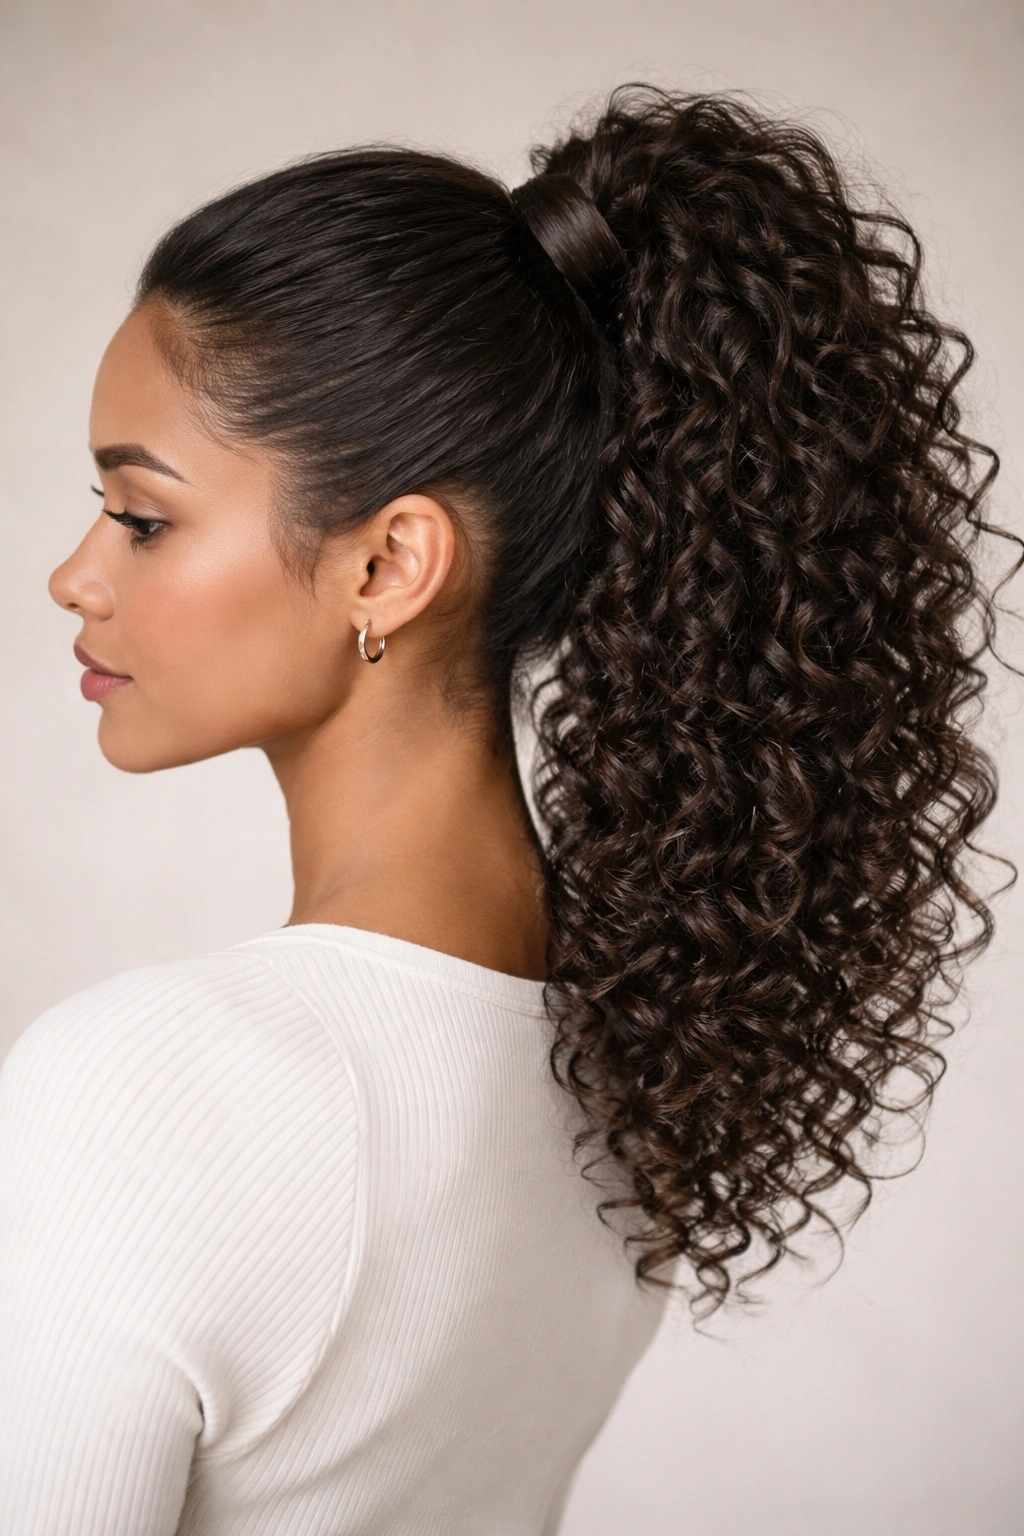
A high ponytail brings energy. It lifts the curls up and away from the neck, which is useful if the day runs warm or if you like a little drama in your photo set. Wrapped around the base, it stops looking like a gym ponytail and starts looking deliberate.
The key is to keep the front smooth without killing the texture in the tail. Use your hands or a soft brush to gather the hair, then secure it at the crown with a strong elastic. Take one small curl or a thin strip of hair, wrap it around the band, and pin it underneath. That tiny move changes the whole finish.
This style is best for medium to long curls that still have bounce once pulled up. If your roots are fragile, don’t yank them tight. A gentle lift at the crown is enough. Tension should be firm, not painful.
This one tends to shine once the cap comes off. Under the cap, the crown can lose some height. Afterward, though, the ponytail opens up again and you get all that movement back.
8. Side-Swept Curls With a Statement Clip

Can a single clip carry a whole graduation look? Yes, if the curls are already doing most of the work. Side-swept curls feel easy, but they look done when the part is deep and the clip is chosen with care.
A strong side part pushes the hair into a soft wave across the forehead and one cheek. Then you pin one side back with a decorative clip, comb, or barrette that can hold real weight. Pearl details, a matte gold clip, or a simple metallic bar all work. The point is to keep the visual focus on one side while the other side stays loose and full.
This is a smart option for shorter curls or layered cuts because it doesn’t ask the hair to do too much. The clip gives structure; the curls bring the texture. If the clip sits too high, the style can look fussy. Keep it just above the ear, where it can hold the hair without fighting the shape.
A light mist of spray on the swept side helps the clip stay put. Not too much. You still want the curls to move.
9. Faux Bob With Pinned-Under Ends
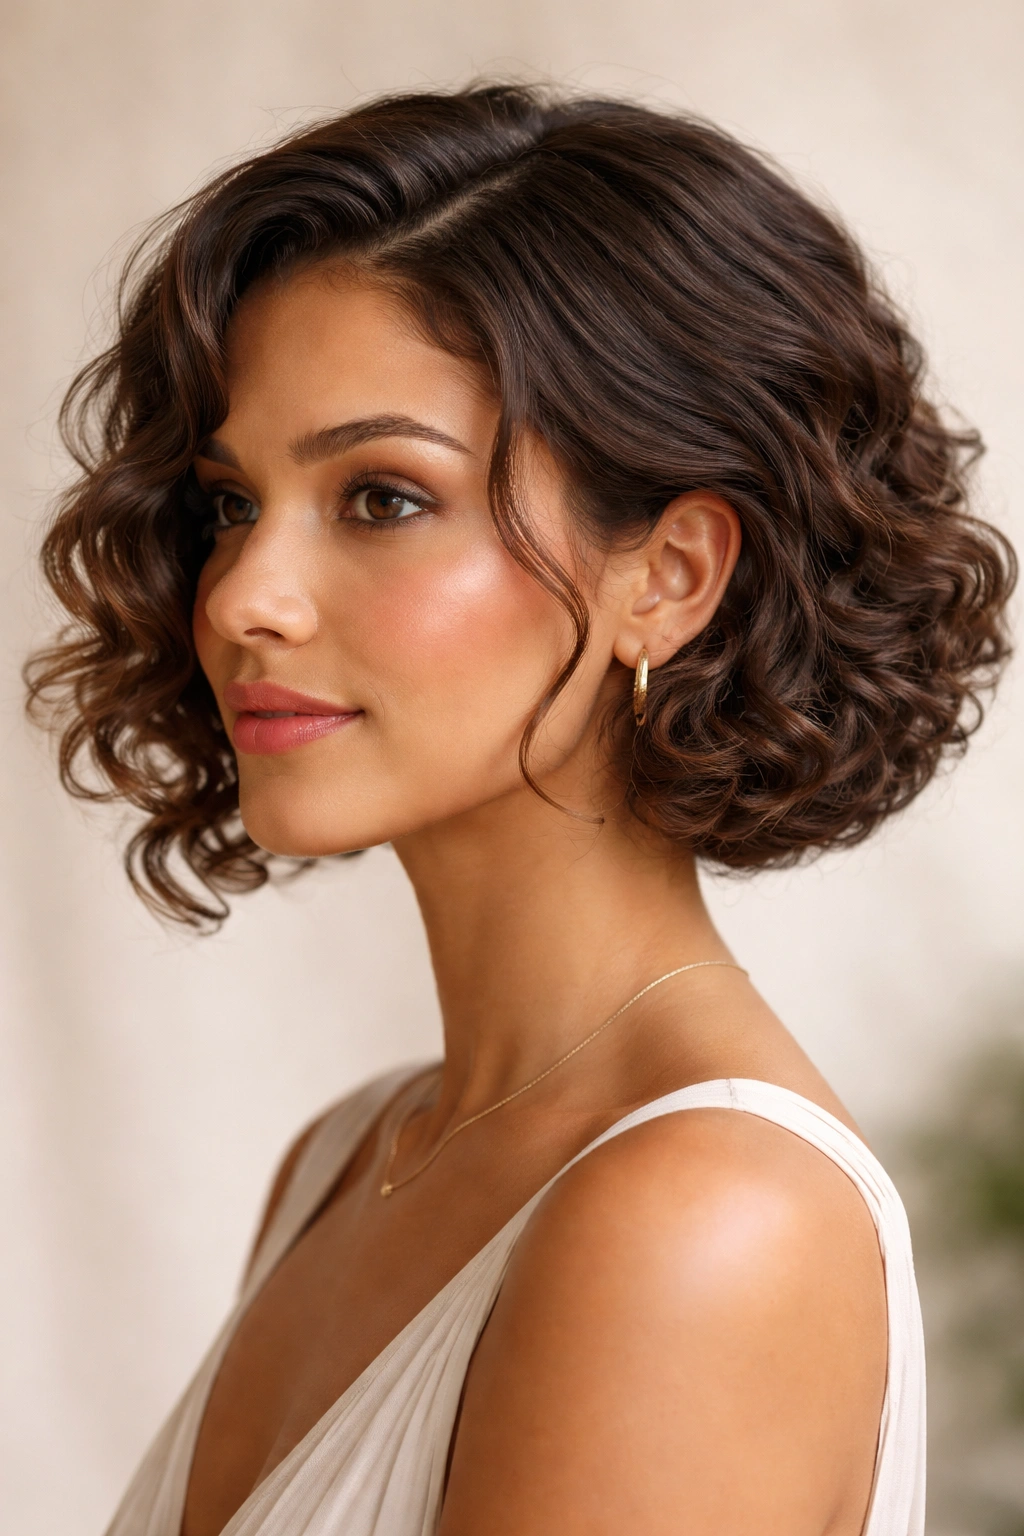
The faux bob has a little vintage energy, and I like it for graduation because it feels polished without looking stiff. Long curls get tucked under and pinned so they read as a shorter, rounded shape. The result is neat, compact, and much easier to manage under a cap.
The trick is to leave the outer layer soft. If you pin every strand flat, the style loses the curl texture that makes it interesting. Instead, curl the hair first, then tuck the lower lengths under in sections and secure them with hidden pins. Let a few curls peek out at the jawline and near the back so the shape doesn’t feel boxy.
This style is good when you want your neckline and earrings to show. It also holds up well in wind because the ends are already tucked away. The danger is over-pinning. Too many pins make the bob look helmet-like, and nobody wants that.
If your hair is layered, tuck the shortest pieces first and leave the longest ones for last. That usually gives a cleaner curve. A soft brush at the crown can help, but use it lightly.
10. Two-Strand Twist Half-Up Style
Two-strand twists are one of those styles that just make sense on curly hair. They keep the front controlled, add texture, and create a nice rhythm across the head without needing a ton of product. For graduation, a half-up version gives you that tidy front and full curls in the back.
You can twist from the temples or start closer to the part, depending on how much hair you want to keep out of your face. Pin the twists where they meet at the back of the crown, and let the rest fall loose. If your curl pattern is tighter, the twists may blend into the texture instead of standing out sharply. That’s fine. In fact, it looks good.
The style also has a practical edge. Twists tend to hold shape better than loose sections, so they’re useful if you expect a long morning and a lot of movement. Put them in on slightly damp hair if you want more definition, or on dry stretched hair if you want more volume.
A satin-lined clip or two bobby pins can keep the back secure. I’d avoid anything too shiny near the top unless your dress is simple. The hair should stay the focus.
11. Curly Space Buns
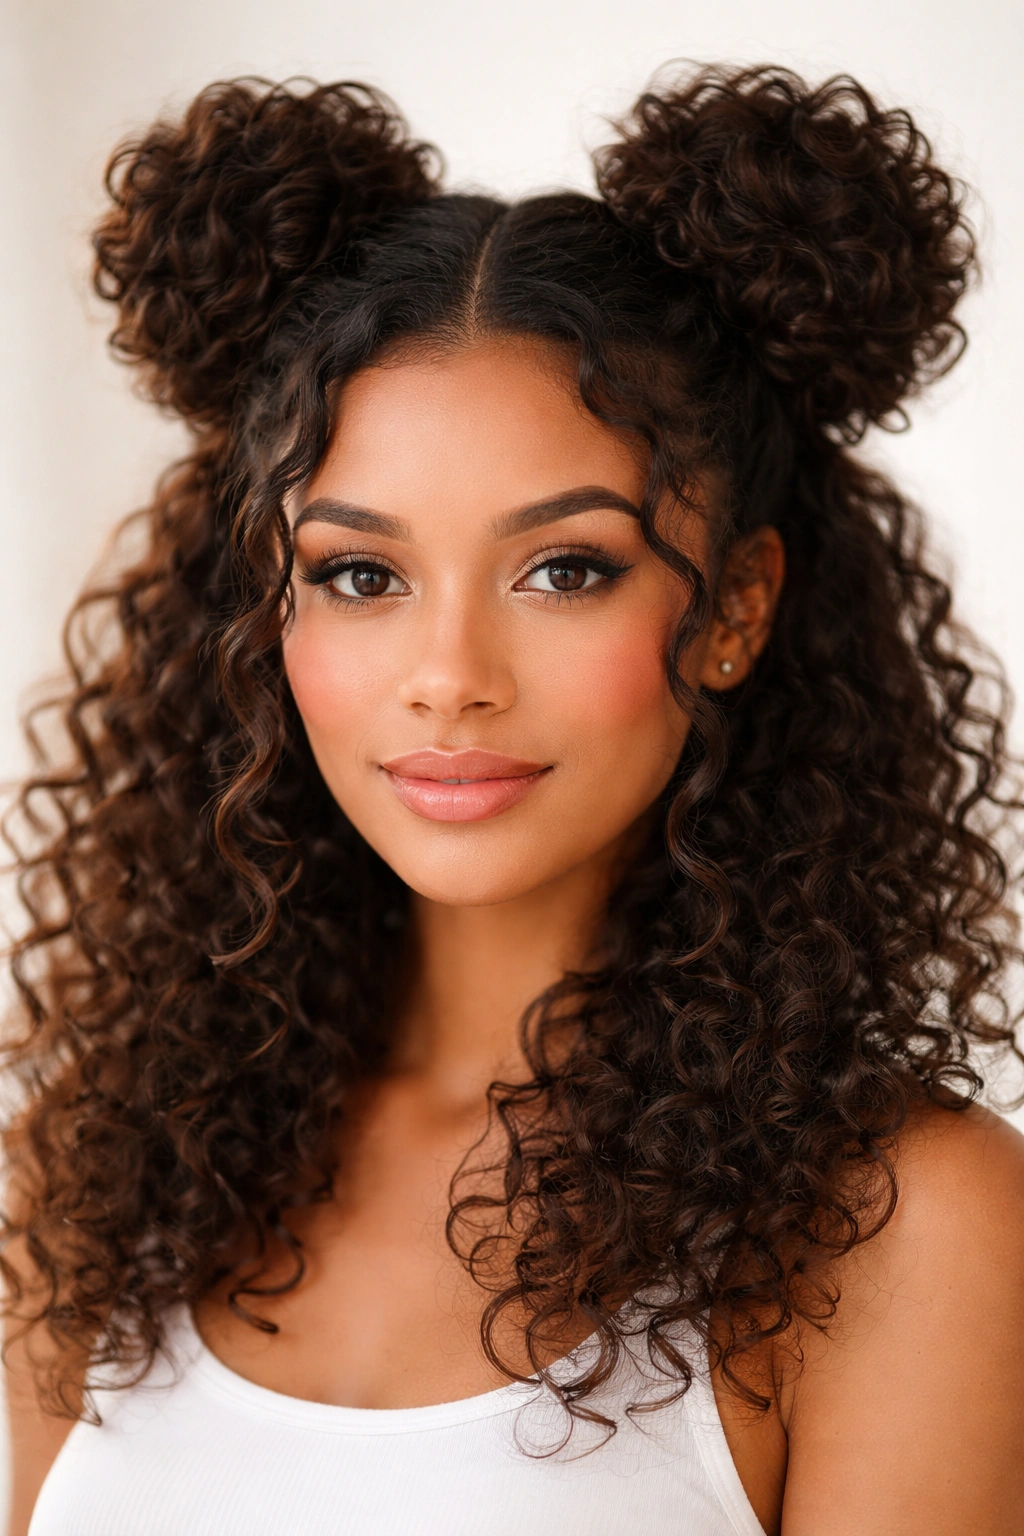
Space buns are playful, and graduation can absolutely handle a little play. They work best when you want something that reads fun in photos and still keeps the curls off your face. The look is bold, but not loud.
The shape is the whole point. Part the hair down the middle, gather each side, and form two buns high or mid-level depending on where you want the cap to sit. Leave a few curls free around the hairline so the style doesn’t feel too severe. If your hair is thick, don’t try to make the buns tiny. Bigger buns look better and hold more naturally.
This style is one I’d save for after the ceremony if your cap needs to sit low and clean. A mortarboard and two high buns can fight each other. If you wear the buns lower, closer to the back of the head, the cap has more room. That can work too.
A little edge control around the part keeps the front crisp. Keep the buns soft, not tight. They should look like curls gathered on purpose, not hair pulled into tiny knots.
12. Low Braided Bun With Tendrils
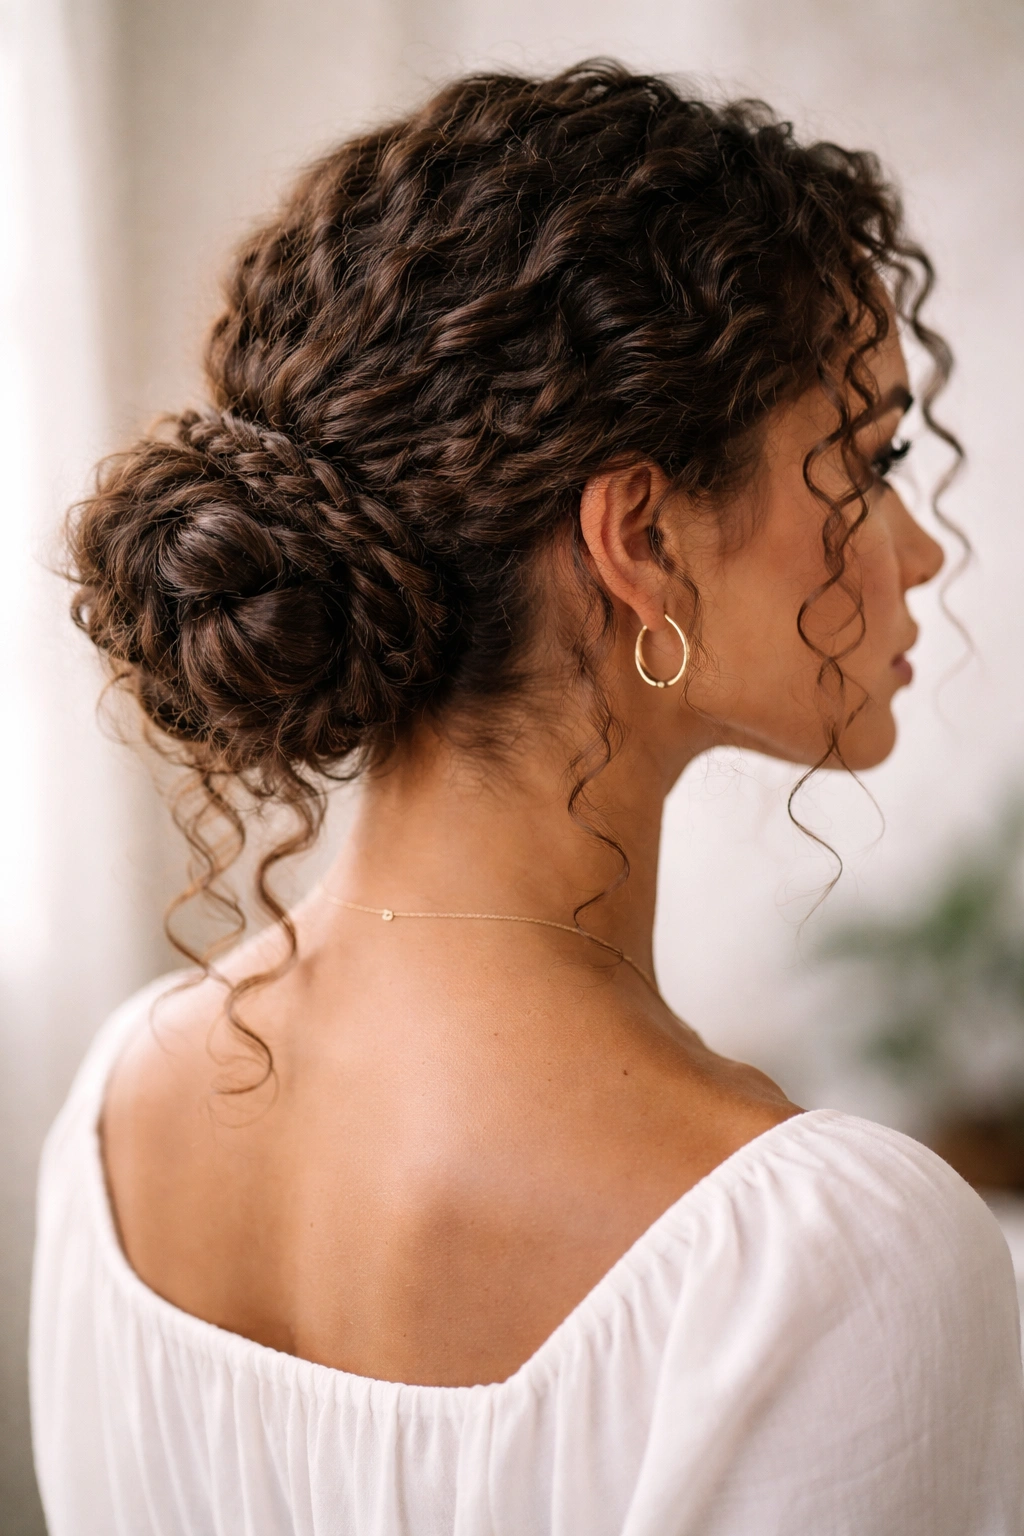
A low braided bun has more grip than a plain chignon, and that matters when the hair is thick, dense, or prone to slipping. The braid gives the bun some structure before it gets coiled into place. That extra texture helps it stay neat for the whole event.
Unlike a smooth bun, this one can handle a little humidity without falling apart. Braid the hair first — either one braid straight down the back or two braids joined at the nape — then wrap the braid into a bun and pin it flat. Leave a few tendrils loose near the temples or ears if you want softness around the face.
This style is especially good when you know you’ll be moving around a lot. Walking across a stage, posing for family pictures, hugging people who are taller than you — it all adds up. A braided bun takes the pressure well.
- Use 8 to 10 bobby pins for thick hair.
- Pin in the same direction the braid wraps so the bun does not loosen.
- Keep one small curl free on each side if you want a softer line.
- Finish with a medium-hold spray that won’t turn the hair stiff.
That last part matters. Stiff buns age badly in photos.
13. Accent Braid Into Open Curls
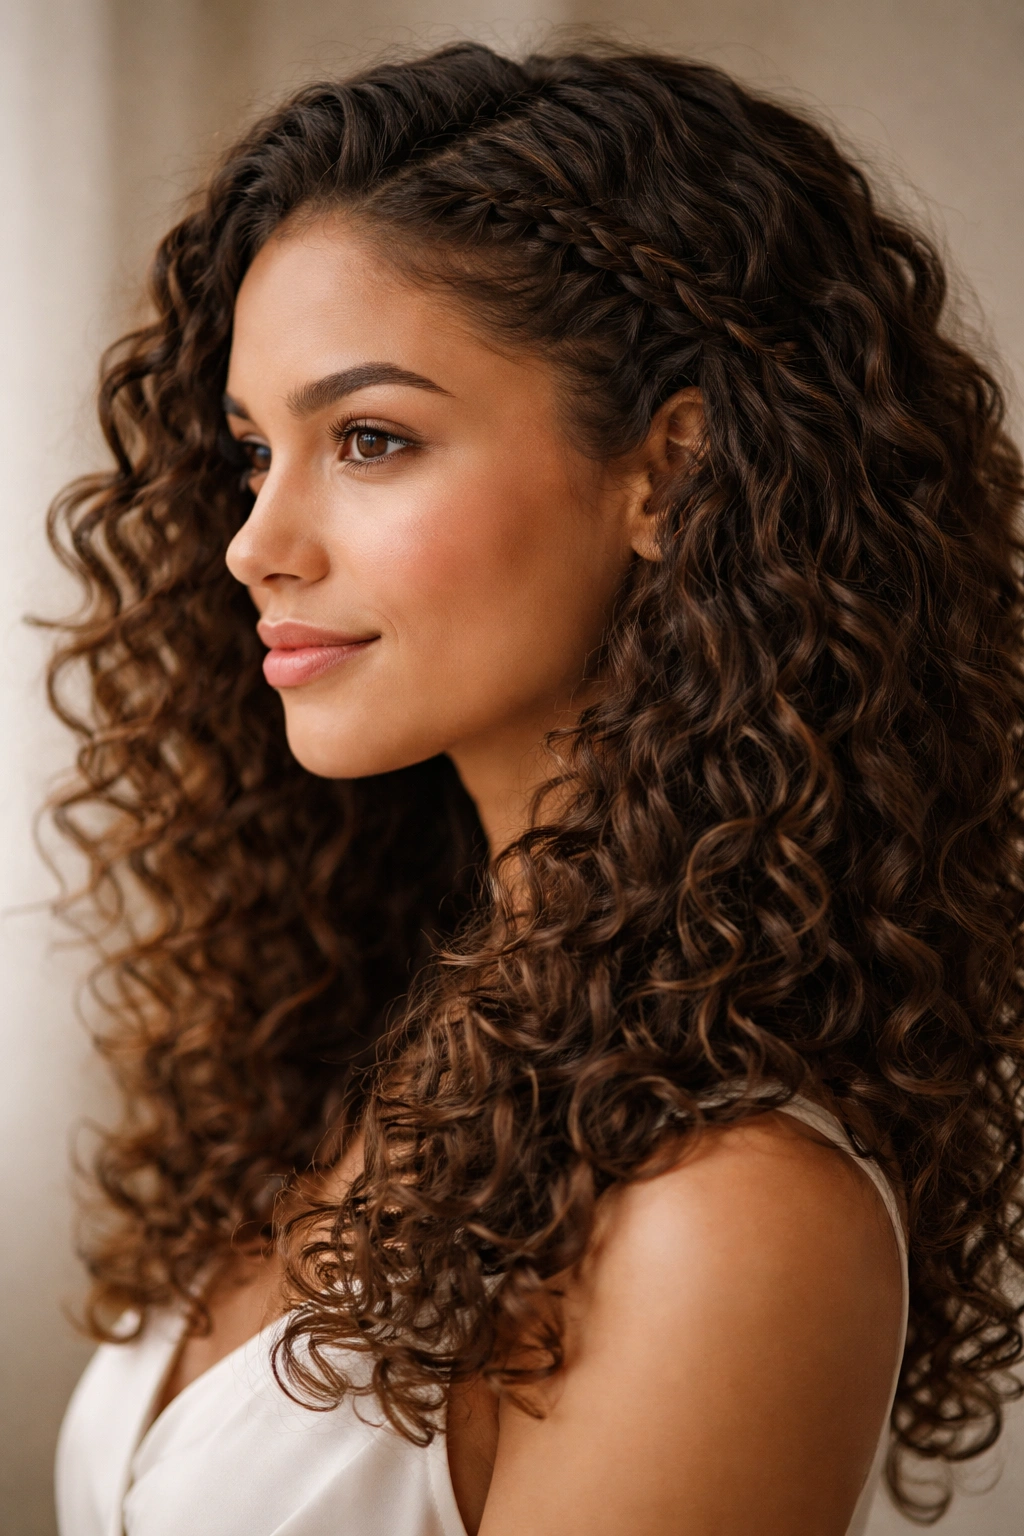
One braid can change the whole mood of a curly style. A single accent braid along the part, temple, or hairline makes the look feel intentional without hiding much of the curl pattern. It’s a small detail, but it carries weight.
This is a good choice for medium-length curls or layered cuts, especially when you want most of the hair loose. The braid gives a little order near the face, then the rest of the hair falls in its own natural shape. A side braid can soften a round face. A small braid near the part can make the whole style feel sharper.
I like this for people who do not want to spend an hour pinning hair into place. It’s quick, it holds, and it still looks styled when the cap comes off. If the braid starts near the front, keep it narrow so it does not dominate the style. One or two rows are enough.
A tiny cuff, bead, or discreet pin can finish the braid without turning it into a costume. The curls should stay the main event. The braid is just the detail that makes people look twice.
14. Rounded Afro With Pearl Pins
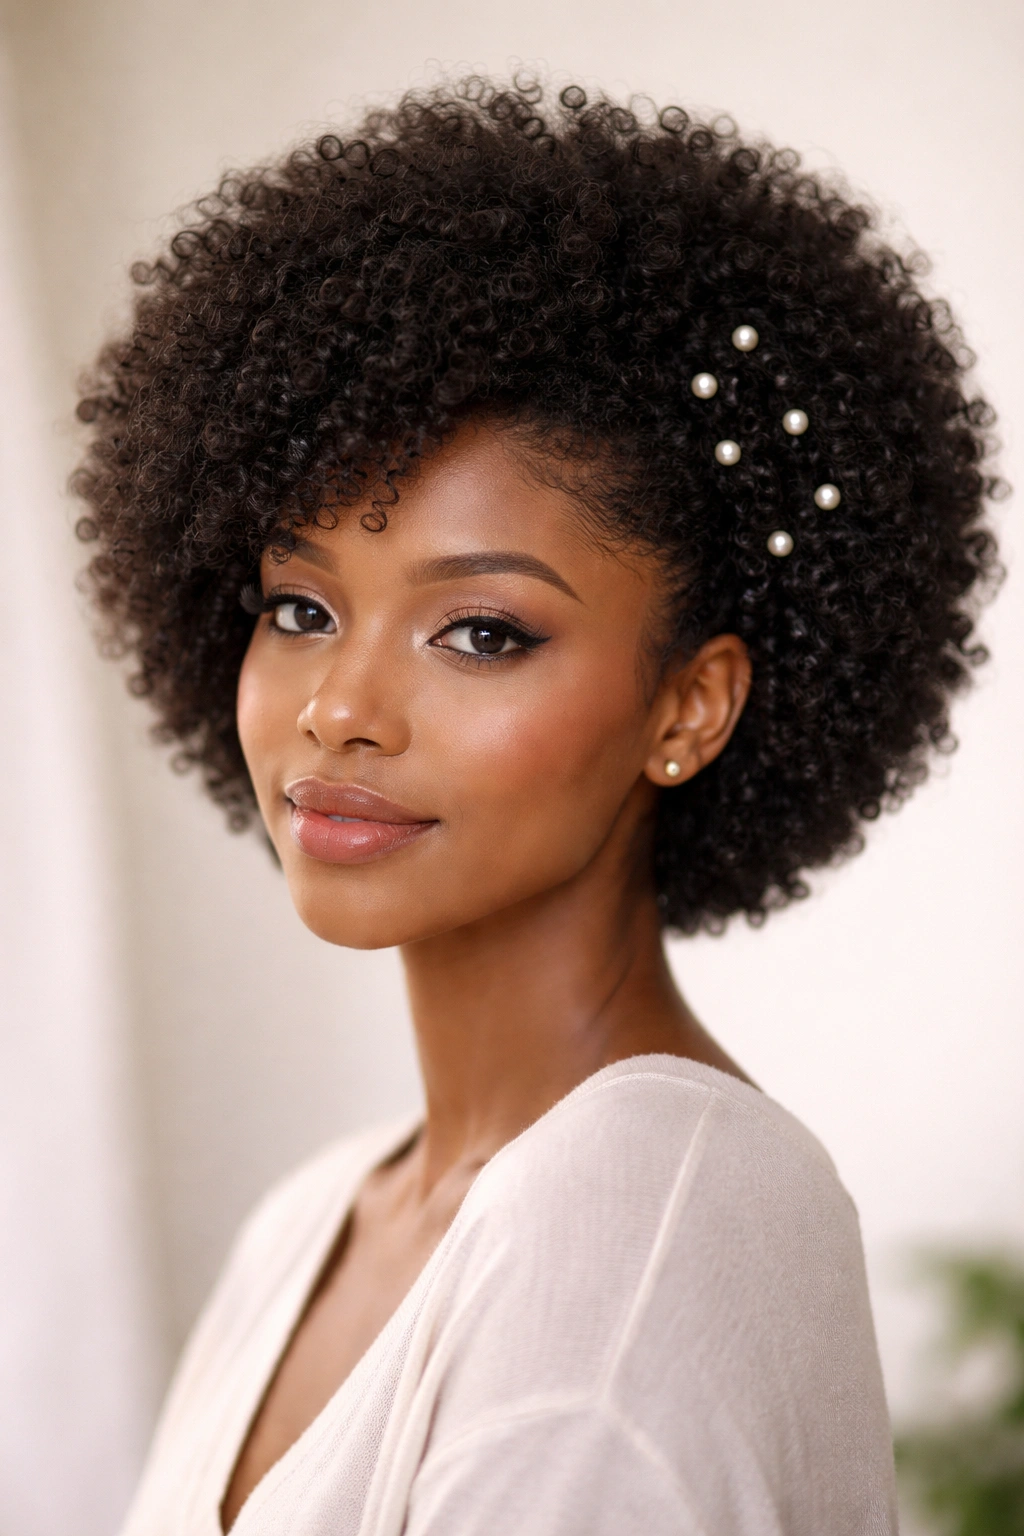
Why smooth the shape away when the shape is the point? A rounded afro celebrates texture in the most direct way possible, and for graduation that confidence reads well. It’s clean, balanced, and beautifully honest about what curly hair can do.
The outline matters here. Use a pick to lift the roots, shape the hair into a rounded halo, and smooth only the outer surface with a light moisturizer or sheen spray. You want definition, not collapse. Pearl pins placed near one temple or along the side can add a polished note without interrupting the shape.
This is one of the most striking styles for short natural hair. It doesn’t ask the hair to be something else. It just asks it to be shaped. If the cap sits a little higher than usual, that can actually work with the rounded silhouette. The profile stays strong even from a distance.
A light edge gel can tidy the hairline, though I’d keep the front soft enough that it still looks like hair, not paint. The result should feel full and breathable. That balance is the whole trick.
15. Soft Curly Top Knot With a Satin Ribbon
A top knot sounds casual until you give it a little structure. With curls, a soft knot at the crown can look polished fast, especially if a satin ribbon wraps the base or trails slightly for a formal touch. It’s a good last-minute option, too, which is honestly worth a lot on graduation morning.
The best version keeps some texture visible instead of twisting the hair into a hard ball. Pull the curls up loosely, leave a few face-framing pieces out, and pin the knot so it sits secure but not smashed. If your hair is layered, tuck the shortest pieces first and shape the rest around them. That helps the knot hold its form.
A ribbon can do more than decorate. It can hide the elastic, soften the finish, and match your gown or dress if you want a little coordination. Satin works well because it lies flat and does not snag the curl pattern. Velvet can work too, though it reads heavier.
This is the style I’d pick for someone who wants the look to feel formal without losing the texture that makes curly hair special. It’s neat, quick, and easy to adjust if the cap changes the shape a little.