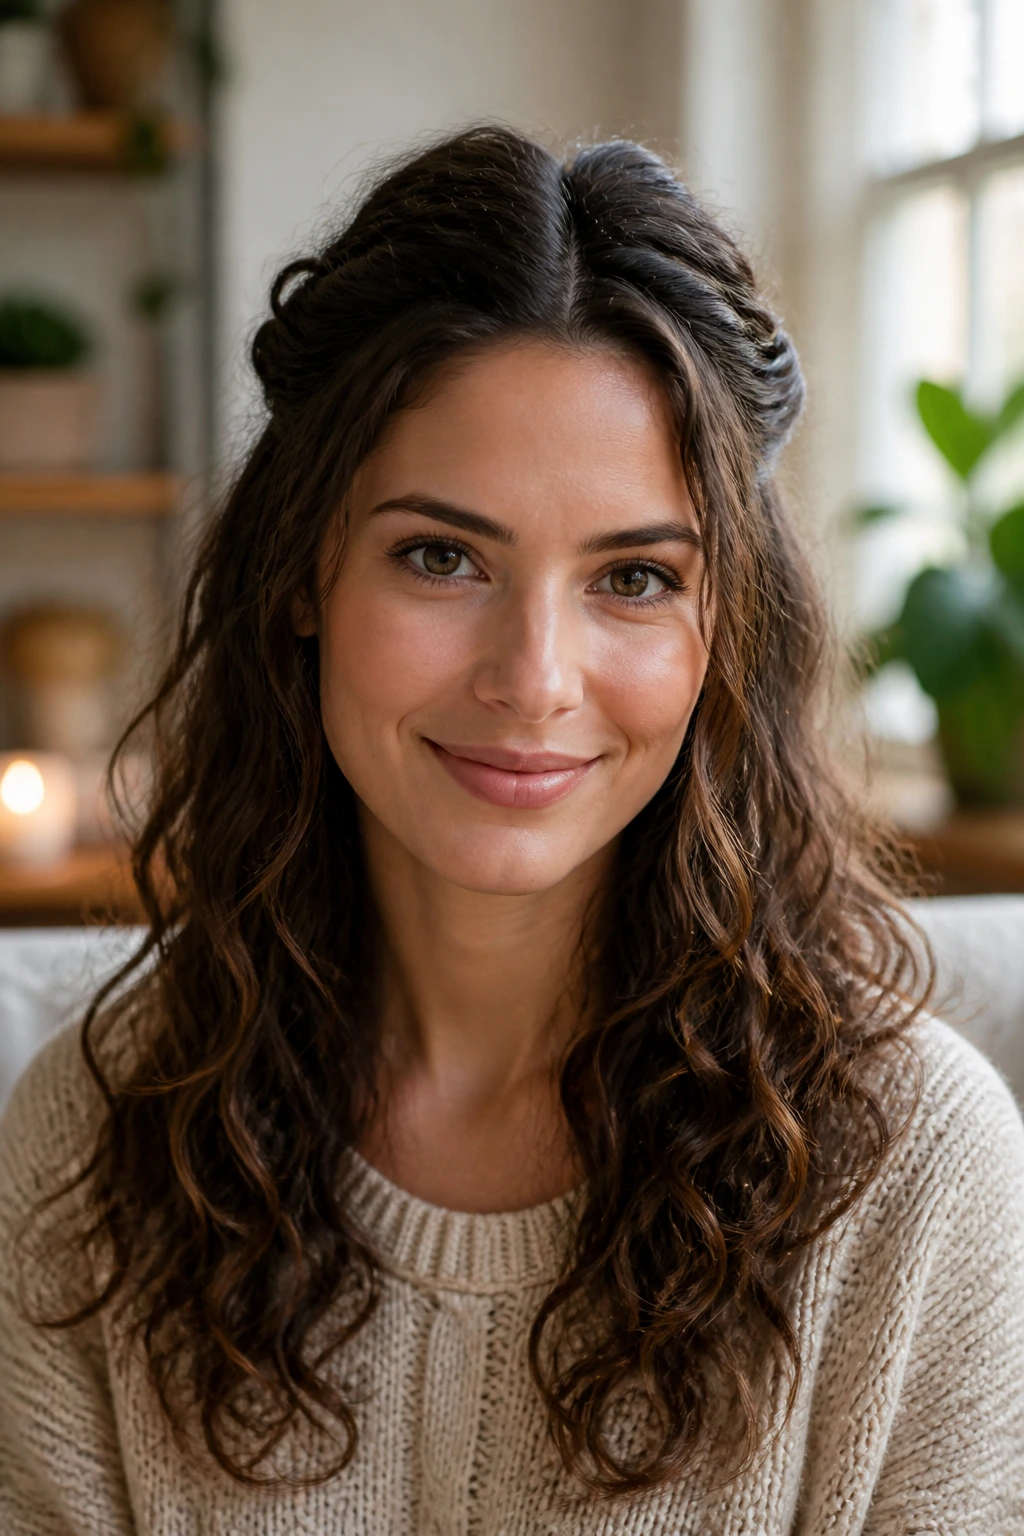
Semi-curly hair sits in that awkward middle lane where it can look effortless one day and oddly flat the next. It has enough bend to hold shape, but not always enough curl to hide a bad part, a heavy cream, or a clip that’s doing too much.
That middle texture is exactly why the right hairstyle matters. If you know how to work with the bend instead of flattening it, semi-curly hair can give you volume at the crown, movement through the ends, and a softness that straight hair has to fake with tools.
I’ve always liked textures like this because they have some personality built in. A 2-inch face-framing piece can fall in a way that looks deliberate. A low knot doesn’t need to be perfect. A braid can look fuller than the amount of hair you actually put into it, which is one of those small styling cheats I never get tired of.
The styles below lean into that bend rather than trying to bully it into submission. Some are fast. Some are polished. Some are the sort of thing you do when your hair is a little uneven, a little frizzy, and still somehow better left mostly alone.
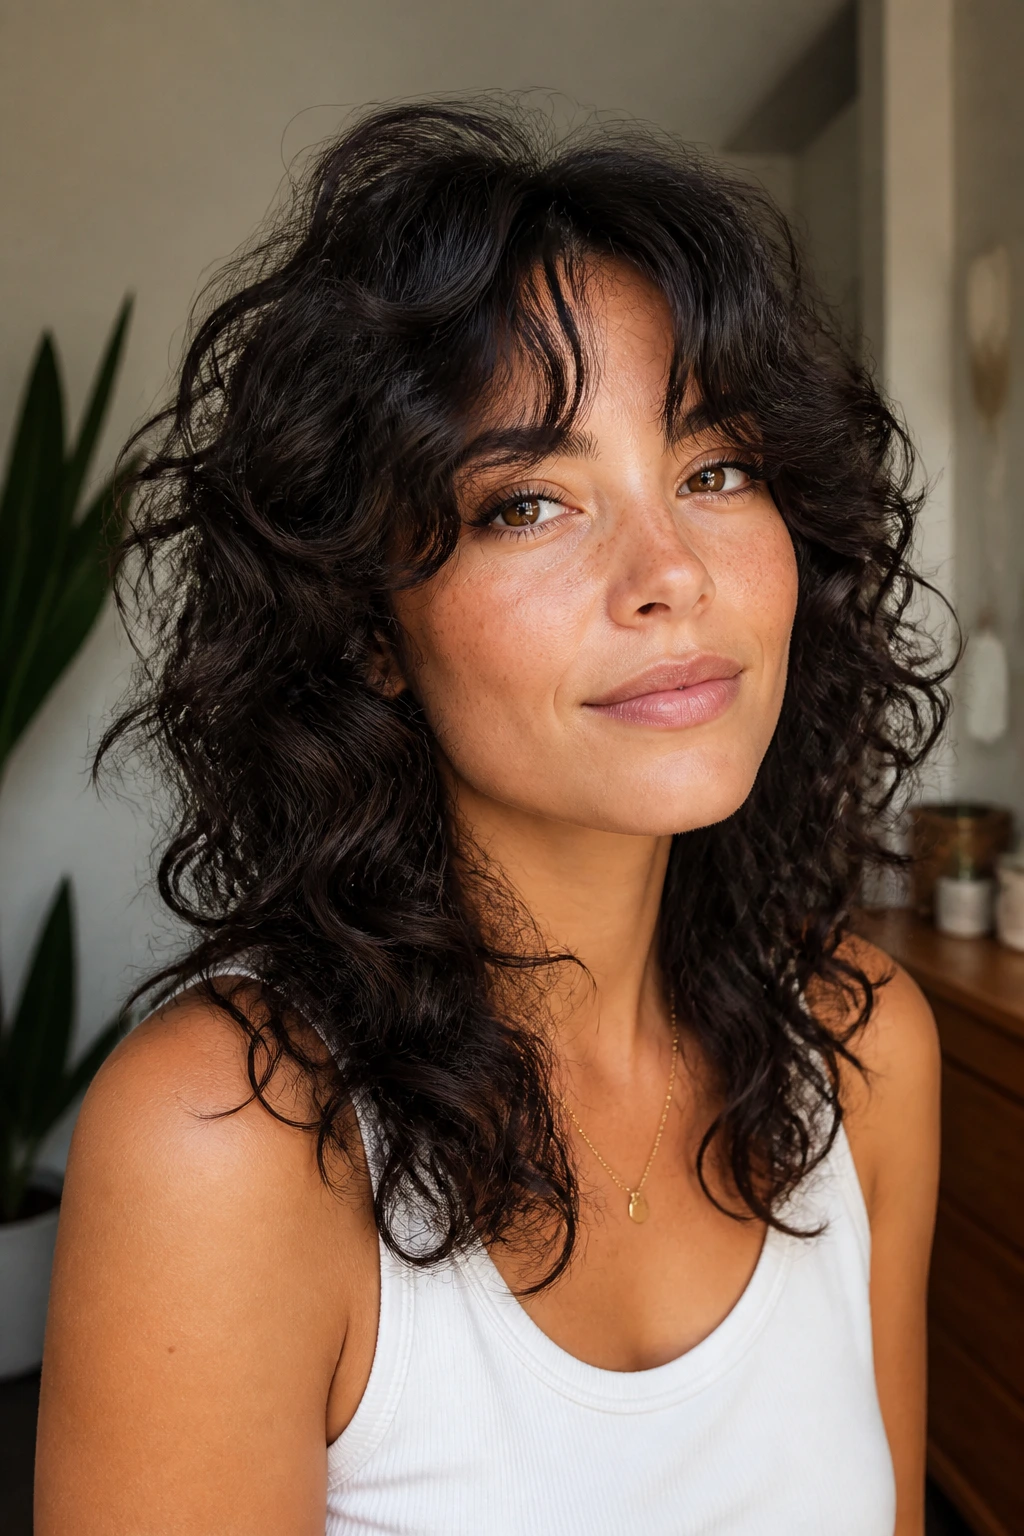
1. Loose Side Part With Air-Dried Waves
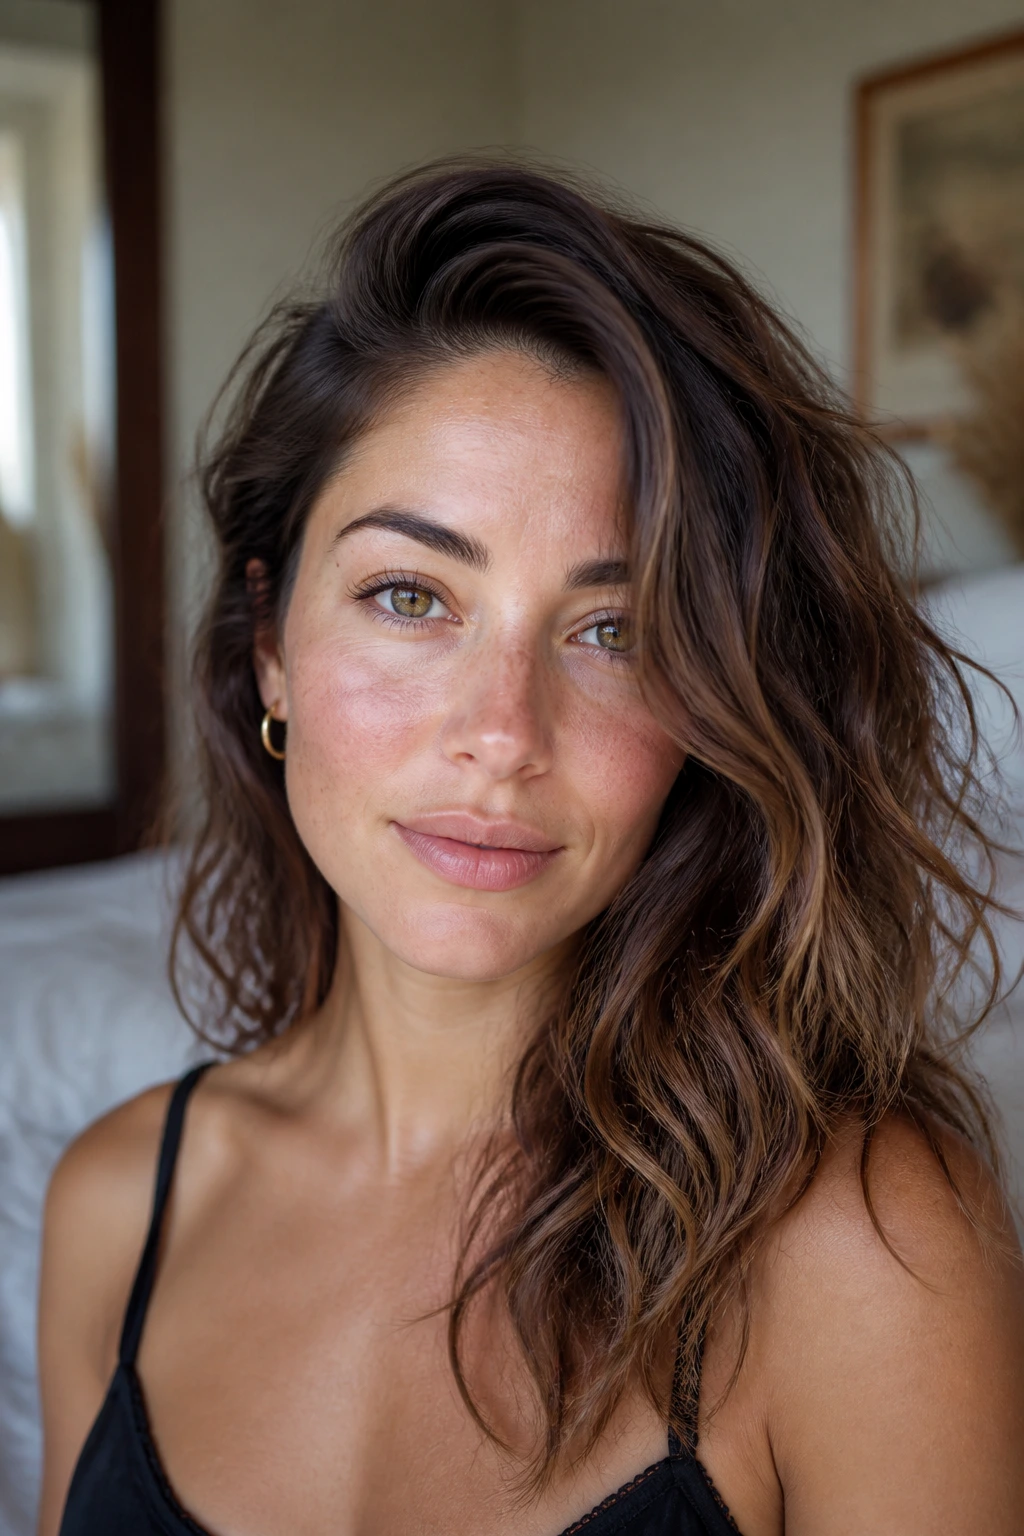
A loose side part is one of the easiest ways to make semi-curly hair look intentional without making it look stiff. The shift in parting gives the roots a little lift, and that extra lift matters more than people think when your texture tends to fall flat at the crown.
What makes this style work is restraint. You do not need to force every piece into the same wave pattern. Let the bend live where it wants to live, and shape only the front and top layers with a lightweight cream or mousse. If your roots dry too close to the scalp, clip the top section up for 10 to 15 minutes while it sets.
Why It Works on Semi-Curly Hair
- A side part adds height where semi-curly hair often collapses first.
- Air-drying keeps the natural bend from turning into a blown-out bend that disappears by noon.
- A light product gives the ends separation instead of the crunchy, overworked look.
- Tucking one side behind the ear makes the whole thing feel cleaner without making it fussy.
Best tip: Scrunch the ends once, then stop touching them. That alone saves a lot of frizz.
2. Claw-Clip French Twist
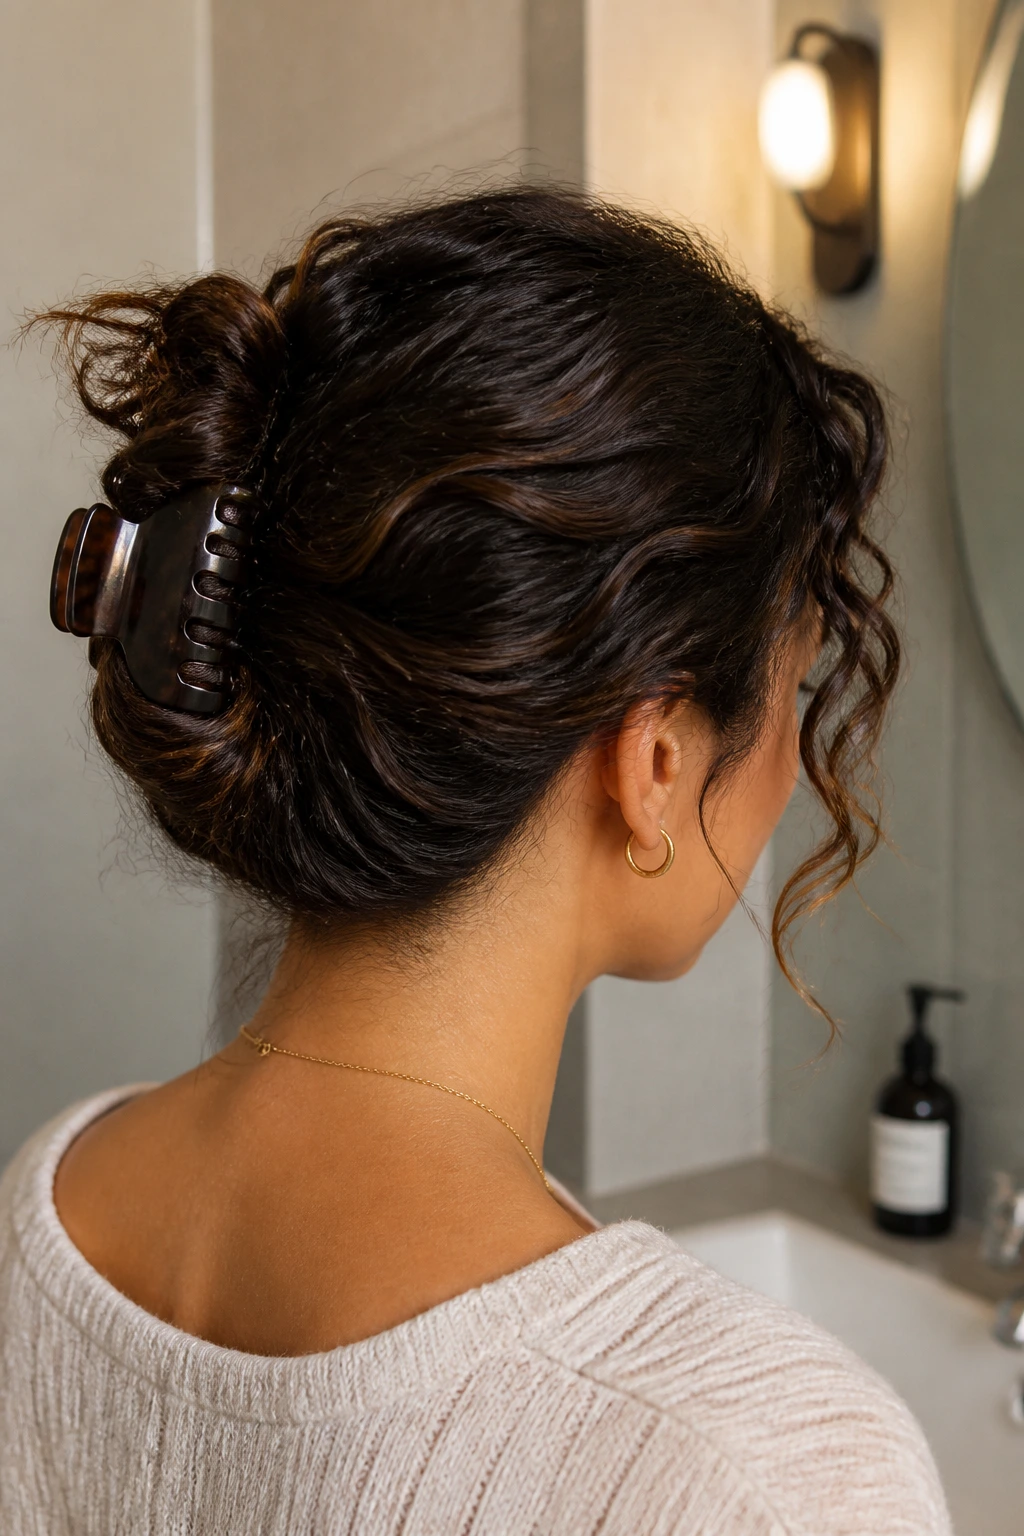
A claw-clip French twist is one of those styles that looks far more deliberate than it is. Semi-curly hair helps here because the texture gives the twist some grip, so you are not fighting silky strands that slide right out of the clip.
The trick is to keep the twist loose enough that the curve of your natural hair still shows. Gather the hair low at the back, twist it upward once, fold the ends under, and secure with a medium or large claw clip. If your hair is shoulder length, let a few ends peek out on purpose. It looks better that way.
A smooth twist can feel too severe on this texture. A softer one fits the hair better. And if your hair is thick, use two smaller clips stacked vertically rather than trying to cram everything into one oversized clamp.
3. Half-Up Twist Crown
Need something that keeps your hair off your face without flattening the wave pattern? The half-up twist crown is the answer I reach for when I want shape up top and movement everywhere else.
Take two sections from just above the temples, twist each one backward, and pin them together at the back of the head with two bobby pins crossed in an X. That tiny X matters. One pin often slips; two hold better because they lock each other in place. Leave the rest of the hair loose so the bottom half can do its thing.
How to Keep It Soft
- Pull the twists a little wider before pinning if you want more volume.
- Keep the sections no wider than 2 inches each or the style gets bulky fast.
- Use pins that match your hair color if you want the twist to disappear.
- Mist the front lightly with water before twisting if the pieces are frizzy and refusing to cooperate.
The result feels casual but not lazy. That’s a hard balance to fake.
4. Low Loose Bun With Face-Framing Pieces
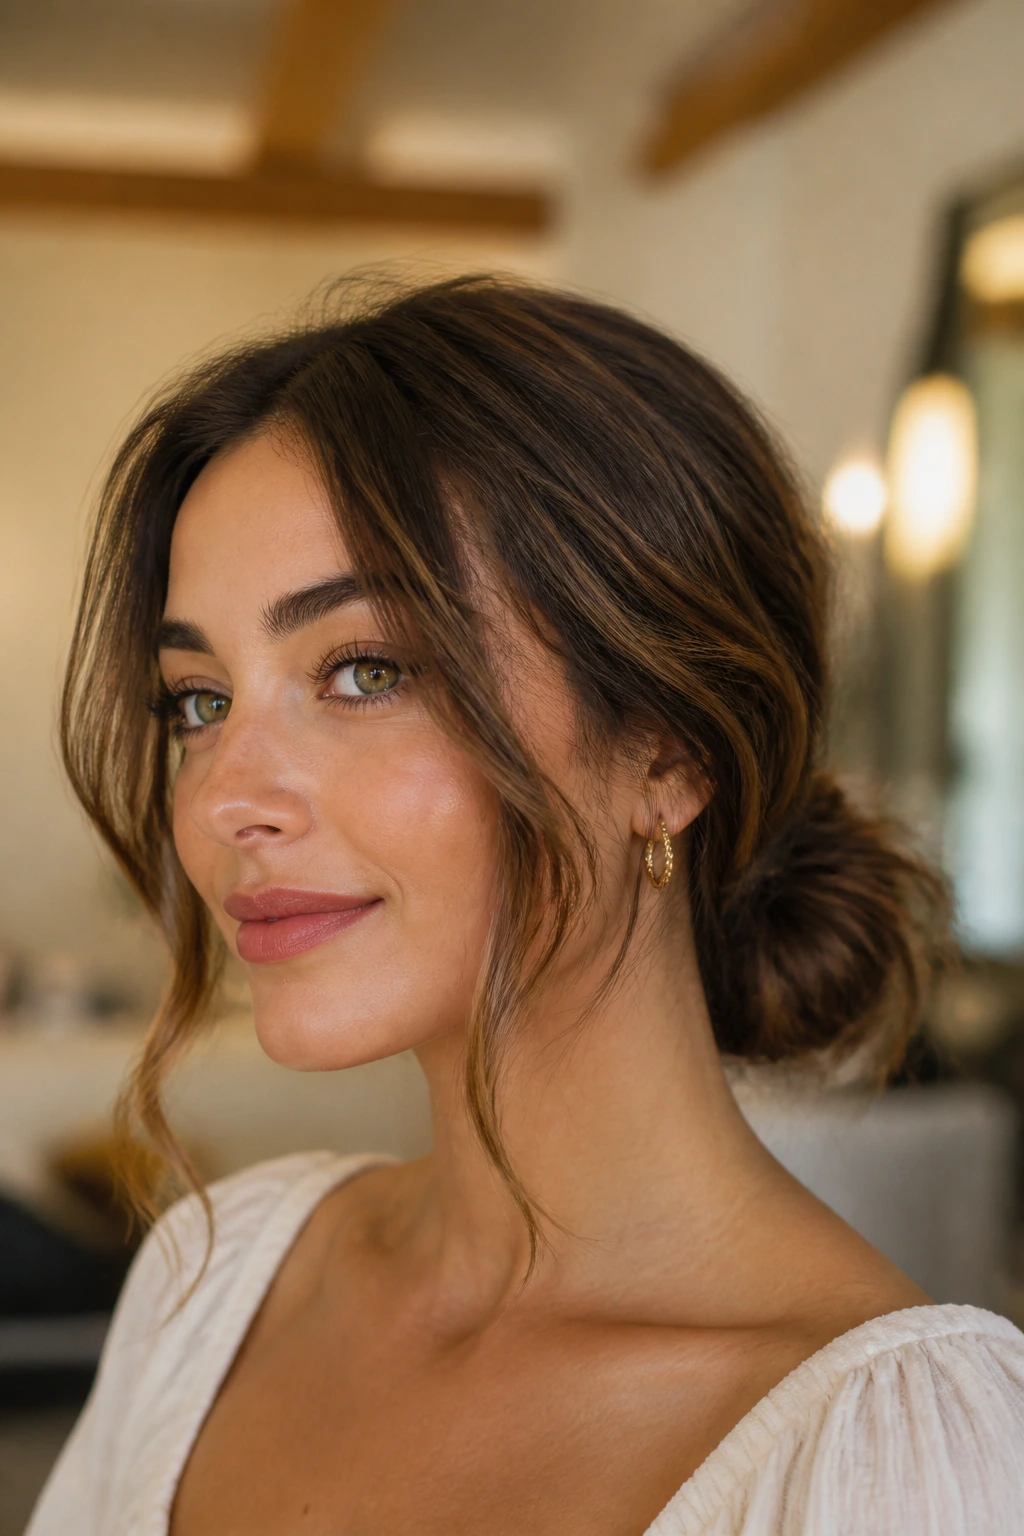
This is the hairstyle I’d wear to dinner, a long workday, or any event where I want to look put together without pretending I spent an hour on my hair. Semi-curly hair makes a low loose bun look fuller than a straight-haired bun, which means you get volume without stuffing in a hair donut or adding extensions.
Start by gathering the hair at the nape, but do not brush it back aggressively. Use your fingers. Twist the length once or twice, coil it into a bun, and pin it with U-pins or a second elastic. Then leave out two front pieces about the width of your index finger. Those pieces should fall in a soft bend, not a tight curl, so resist the urge to iron them flat.
A lot of people make this style too neat. They smooth down every bump, then wonder why it looks severe. The looseness is the point. A bun with a little texture around the hairline looks more expensive than a shellacked one ever will.
5. Curly Shag With Curtain Bangs
A shag haircut can be the best friend semi-curly hair ever gets. Not because it’s trendy in some vague sense, but because the cut solves a real problem: this texture often wants volume in some spots and flatness in others, and a good set of layers fixes the imbalance without stripping the hair of its movement.
Curtain bangs work especially well here because they break up the face softly and fall into the bend instead of against it. If you’ve got denser hair, the layers keep the shape from turning into a triangle. If your hair is finer, the shag gives it the illusion of more body through the crown and mid-lengths. The whole cut feels a little shaggy, a little lived-in, and a lot less precious than a blunt one-length cut.
Ask for layers that start around the cheekbone or chin rather than cutting everything short near the face. That keeps the shape from mushrooming out. And if your semi-curly hair shrinks up when it dries, don’t let anyone cut your bangs too short. That is how you end up spending months pinning them back with a bad attitude.
Styling Notes That Actually Help
A light mousse at the roots gives the shag lift without making it sticky. Scrunch in a curl cream on the mid-lengths, then diffuse on low heat or air-dry with the front pieces clipped away from the face until they set. If you want more separation, finger-coil just the curtain bangs and leave the rest alone. The cut should do most of the work.
6. Deep Side Part With One-Ear Tuck
A deep side part changes the mood fast. It makes semi-curly hair look sharper at the roots and softer through the lengths, which is a nice combination when the texture is doing its own thing and you want to steer it, not flatten it.
The one-ear tuck keeps the style from feeling too heavy on both sides. Sweep more hair over to one shoulder, tuck the lighter side behind one ear, and pin it once if it keeps slipping. That asymmetry is the whole point. It gives the style a little tension and stops the bend in your hair from reading as messy.
Compared with a middle part, this version is less symmetrical and usually more forgiving on days when one side of your hair is flatter than the other. It works especially well if the ends are a little flipped or curved already. No need to fight that.
7. Bubble Ponytail
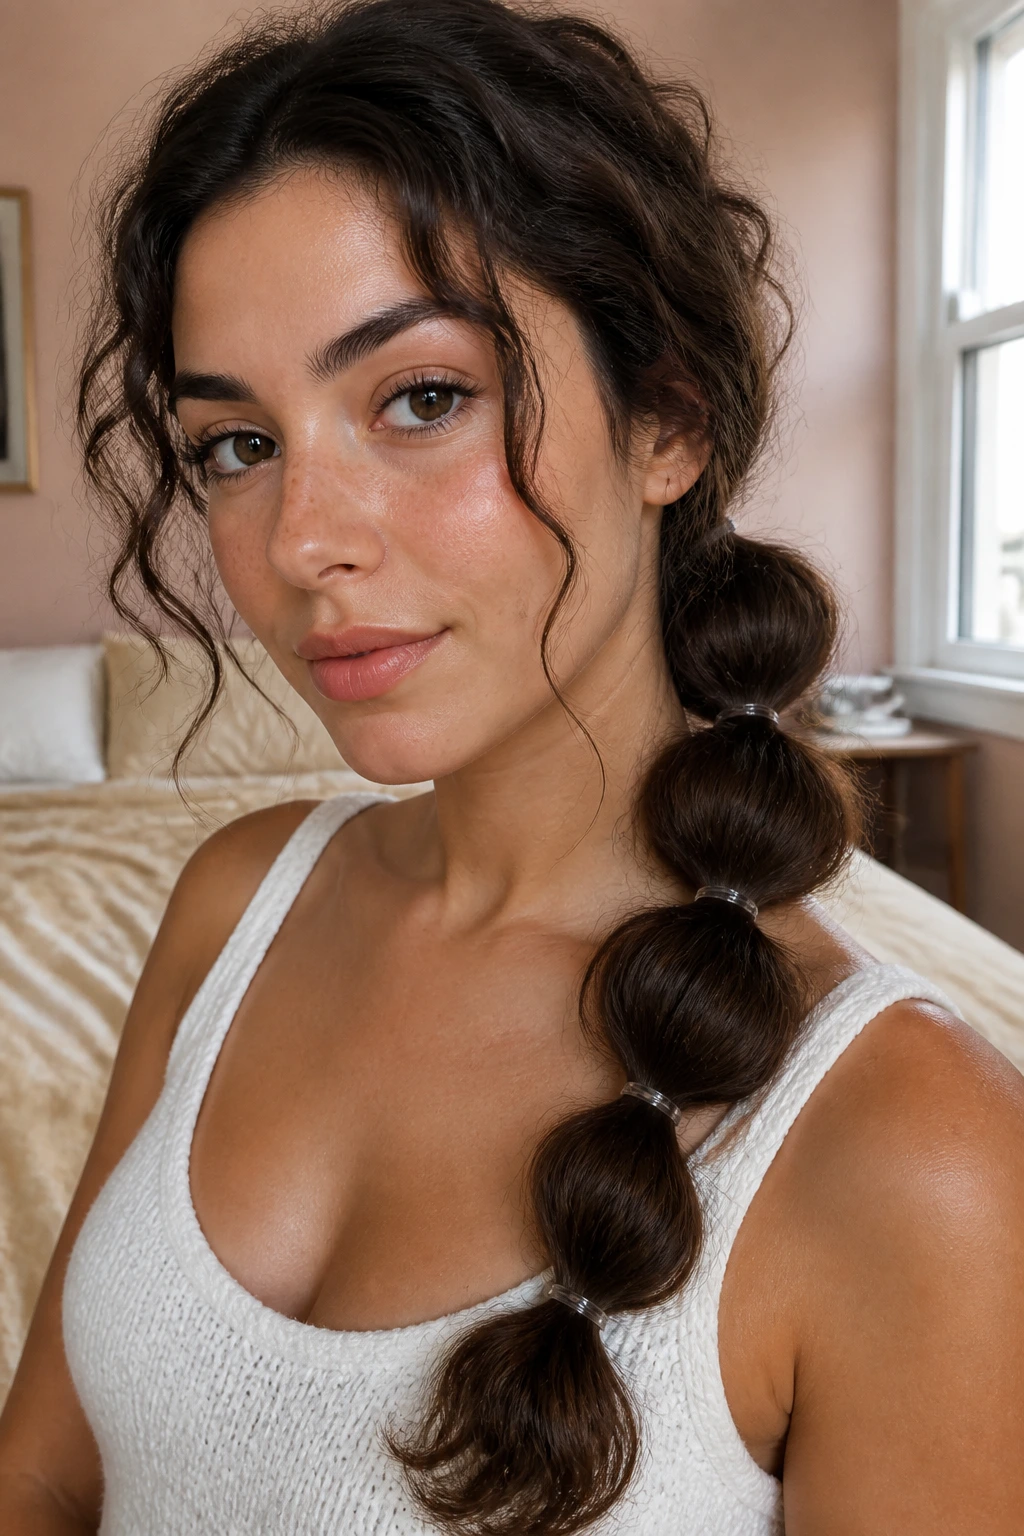
A bubble ponytail is the rare style that looks intentional even when your hair is on the second or third day and has lost some of its original bounce. Semi-curly hair makes the bubbles look fuller because the texture already has body, so you don’t need much teasing or product to fake volume.
Pull the hair into a low or mid ponytail, then add small clear elastics every 2 to 3 inches down the length. Gently tug each section outward until it rounds into a bubble. The bubbles should look soft, not tight. If you yank them too hard, the style turns stiff and a little cartoonish. Nobody needs that.
Keep an Eye on These Details
- Use matching elastics if you want the style to look cleaner.
- Mist the ponytail lightly with water before shaping if the ends are frizzy.
- Keep the top smooth, but not slicked down.
- Leave the last 2 inches of the tail alone so the finish doesn’t look overworked.
This one is better than a basic ponytail when you want your natural texture to stay visible.
8. Crown Braid Into a Low Bun
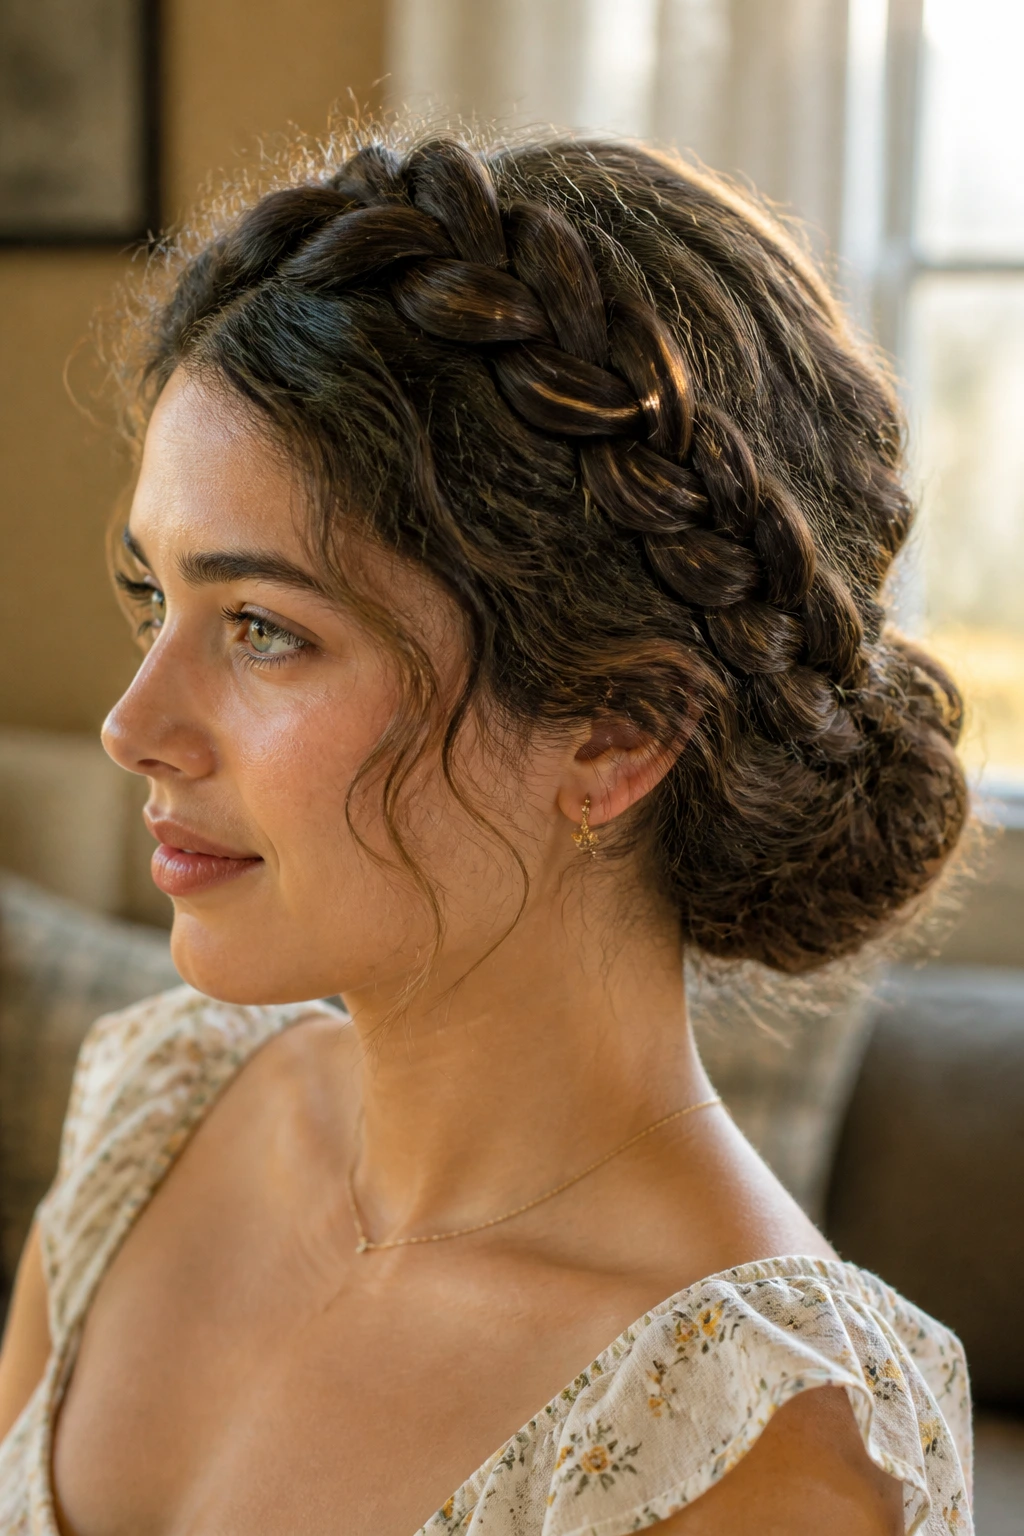
Some styles survive humidity because they were built for it. A crown braid into a low bun is one of them. The braid keeps hair controlled around the face and sides, while the bun at the nape gives the style a softer finish than a tight updo.
What Makes It Different
Semi-curly hair usually has enough grit to hold a braid without constant slipping, which is half the battle. Start a braid from one side near the temple, continue it around the crown, and gather the rest into a low bun. If you want a fuller result, pancake the braid by gently pulling the outer edges apart after it’s secured.
How to Keep It from Sagging
Use one pin every inch or so along the braid line, especially if your hair is layered. Layers are lovely, but they like to escape at the worst possible moment. A tiny bit of dry shampoo at the roots can help the crown look less shiny and give the braid some extra grip. If the bun feels too tidy, pull out a few half-inch pieces near the ears and curl them with your fingers.
This is one of the styles I’d pick for a long day. It holds up.
9. Messy Top Knot With Tendrils
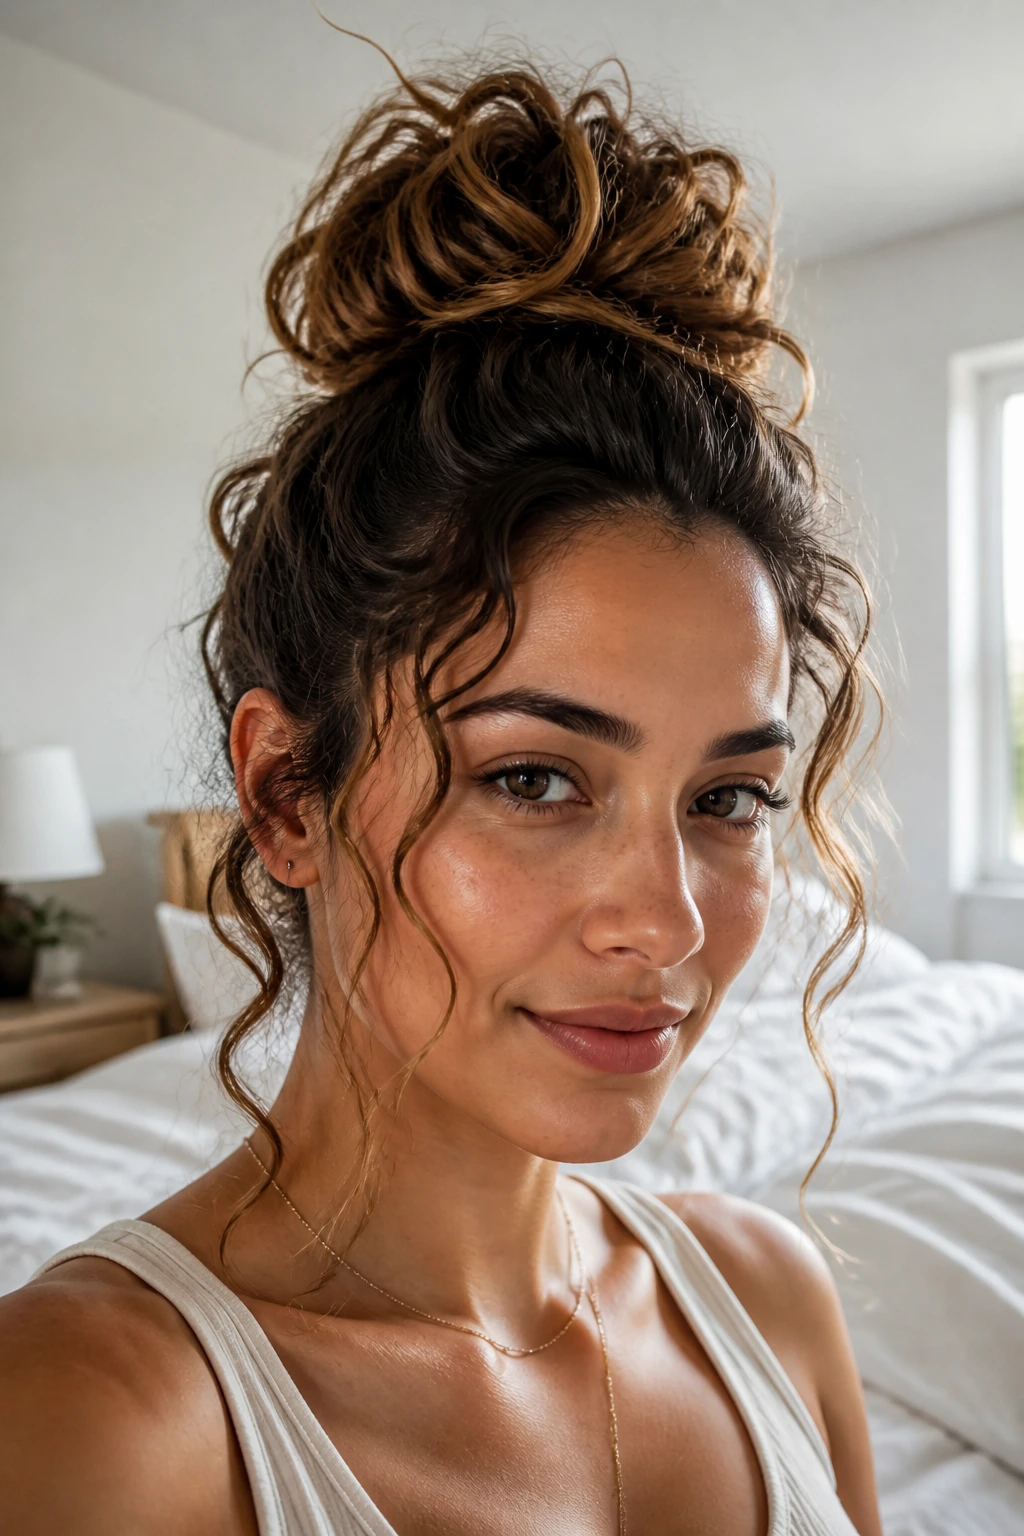
The messier the top knot, the better it usually looks on semi-curly hair. That’s not a cop-out. It’s the texture doing its job.
Pull the hair to the crown, twist it once, and wrap it into a knot that sits high but not painfully high. Secure it with a strong elastic or a couple of pins, then pull out a few tendrils around the face and nape. Those loose pieces stop the style from feeling severe. They also let the bend in your hair show where it matters most.
This style is useful when your roots are a little oily and your lengths still look good. It hides the fact that you haven’t washed your hair without pretending to be a different person. I respect that. A lot.
10. Half-Up Claw Clip With Curled Ends
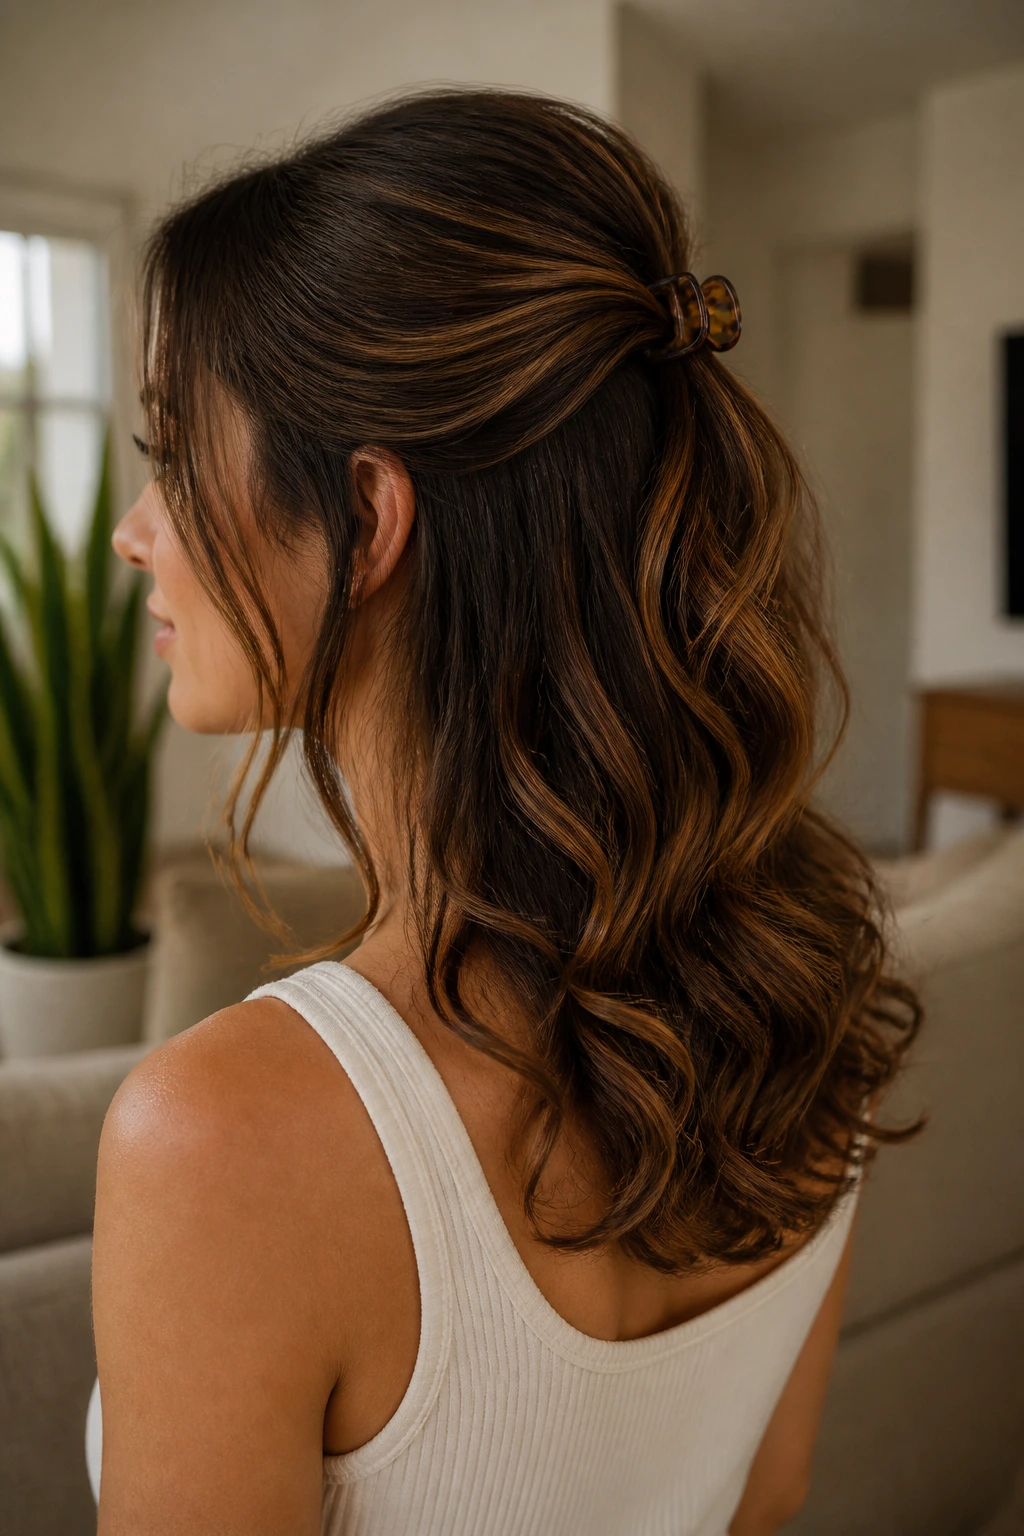
How is this different from a French twist? Easier question than it sounds. The half-up claw clip keeps the top section lifted while leaving the ends loose, so you get structure without committing to a full updo.
Take the top half of the hair from temple to temple, twist it once, then clip it at the back of the head. The loose lower section should fall freely, and on semi-curly hair those ends usually carry enough shape on their own that you don’t need much styling. If the crown is flat, lift it with your fingers before clipping instead of backcombing. Backcombing can get ugly fast on textured hair.
This is a solid choice for shoulder-length cuts. A giant clip can overwhelm shorter layers, so use a smaller one if the hair is fine or only grazing the collarbone. If the clip slides, place it a little lower so it catches more of the twist. Simple. Effective. No drama.
11. Shoulder-Length Lob With Flipped Ends
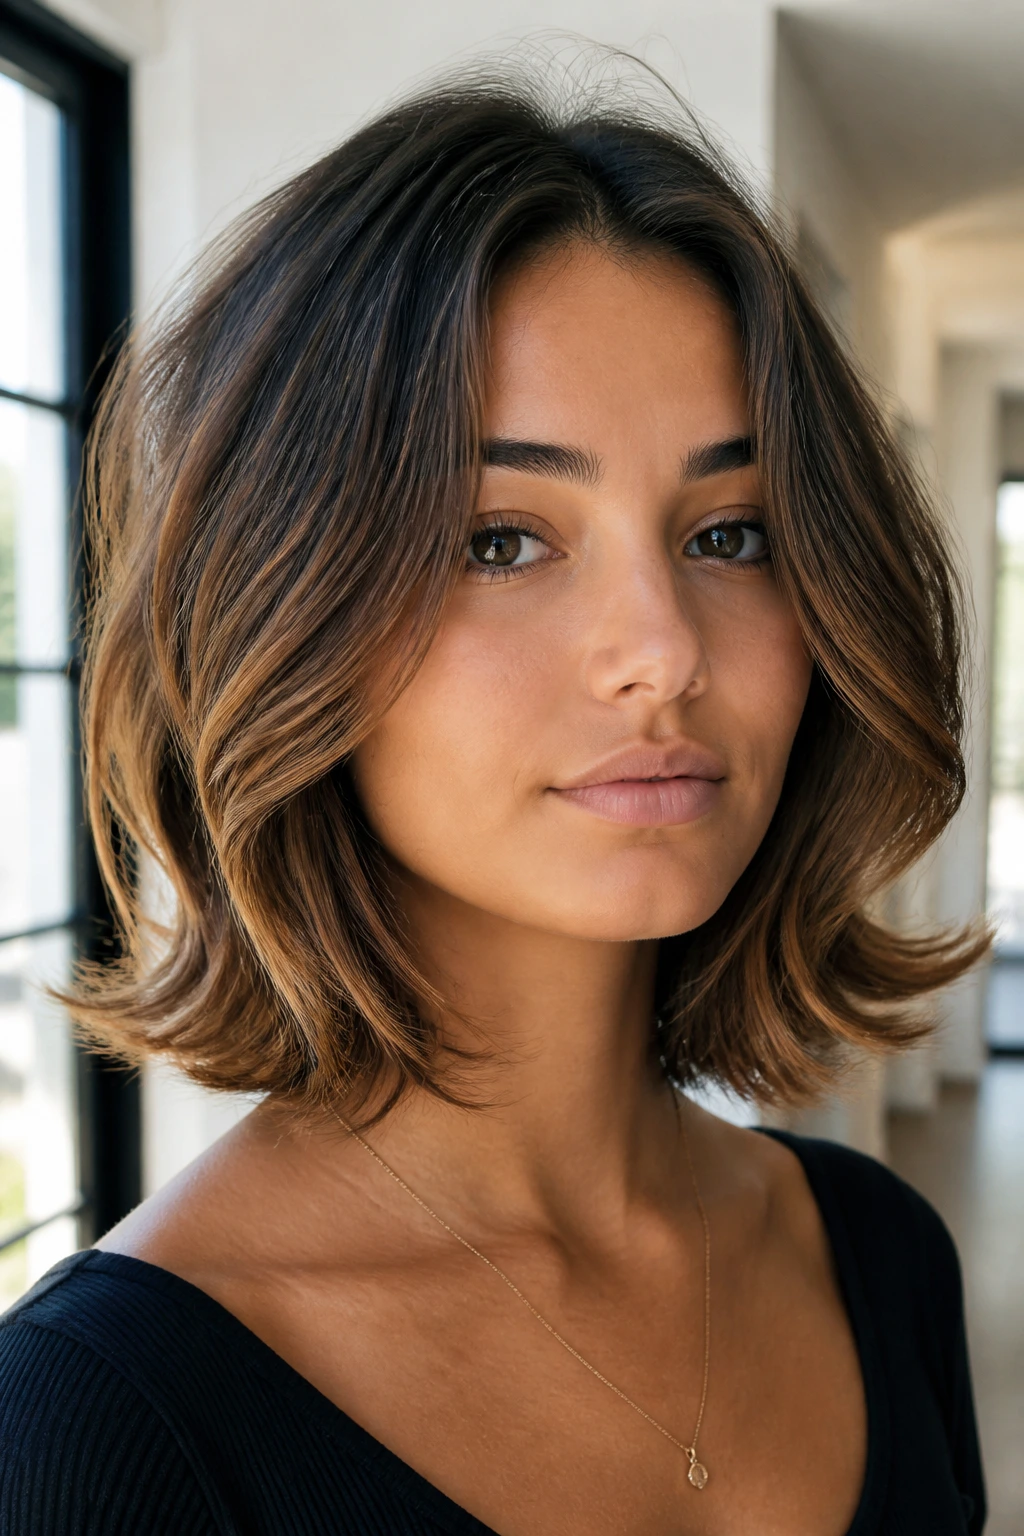
A lob with flipped ends can be a gift to semi-curly hair, because it works with the texture’s natural movement instead of forcing it into a smooth, uniform shape. The cut hits around the shoulders, where the weight is balanced enough to keep the roots from puffing too much but not so heavy that the bends disappear.
I like this style with a soft center part or a very slight side part. The ends can turn inward, outward, or alternate depending on how your hair dries. That little variation keeps the cut from looking too engineered. If you do blow-dry it, focus only on the top layer and the front pieces with a round brush. Leave the underlayer a little more natural. That contrast is what gives the lob its movement.
Why It’s a Smart Cut for This Texture
- It keeps enough length to show the bend.
- It prevents the triangle shape that some layered cuts create.
- It’s easy to pin, braid, or tuck when you want change.
- It doesn’t demand daily heat styling to look finished.
A good lob on semi-curly hair should feel easy, not precious. If it needs constant rescue, the cut is off.
12. Braided Pigtails With Soft Pull-Out Pieces
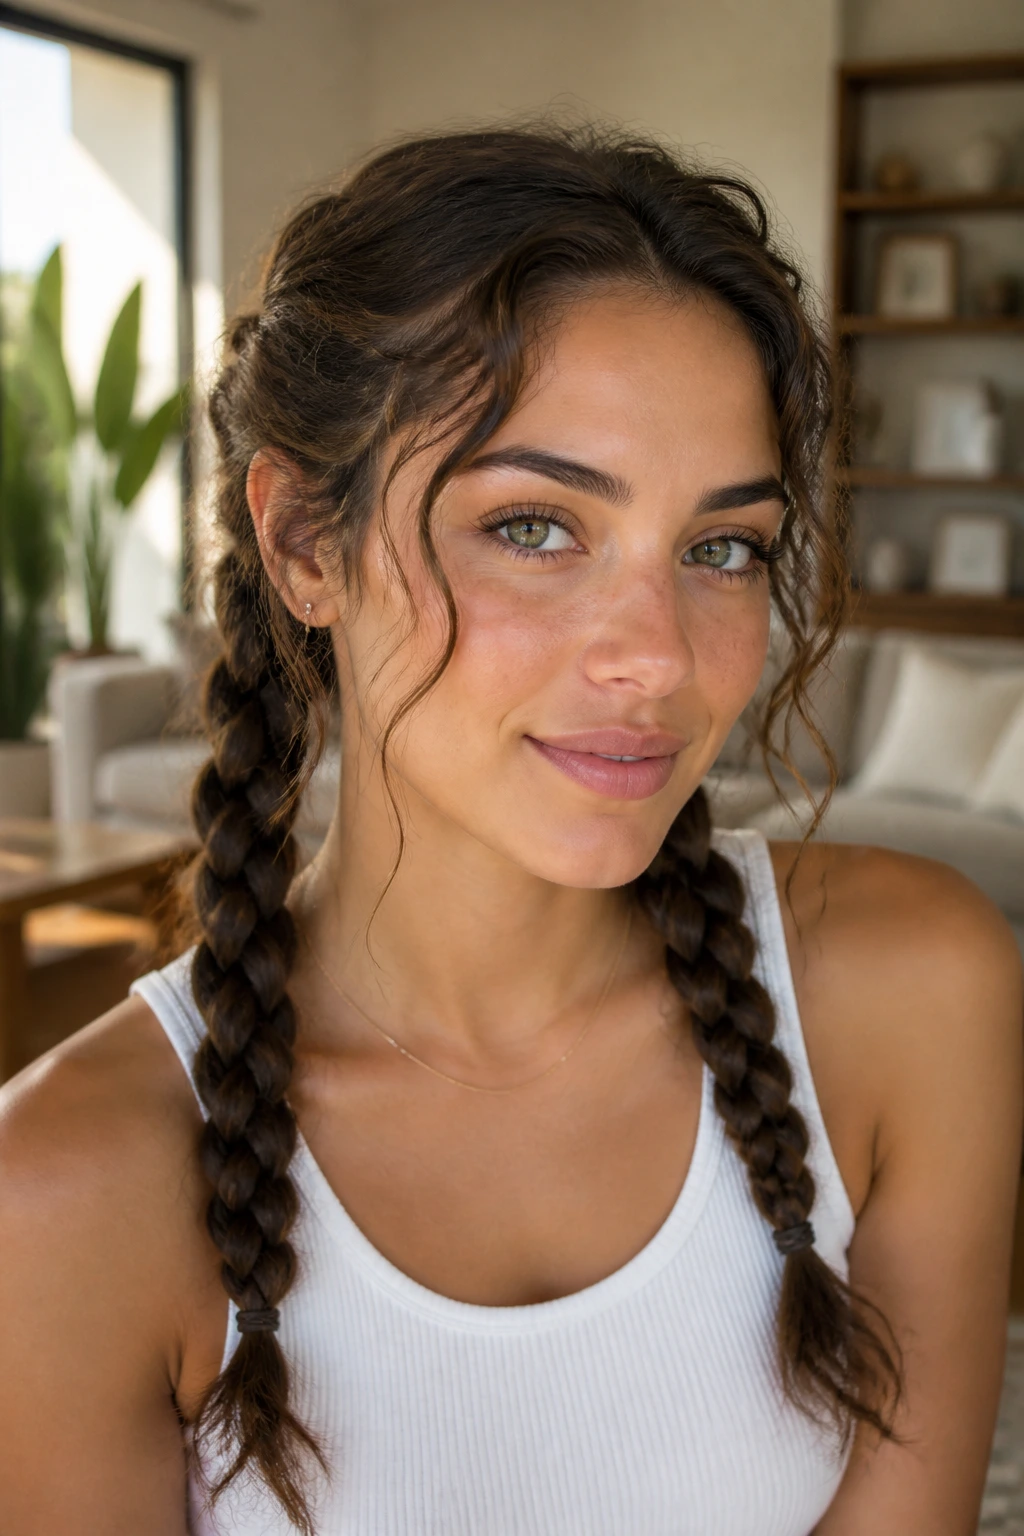
Braided pigtails sound youthful, but on semi-curly hair they can look sharp, clean, and a little unexpected in a good way. The secret is not braiding them too tight. Tight braids fight the texture and can leave the whole style looking severe.
Part the hair down the middle and start each braid low, just behind the ears. Keep the tension even, then tug a few pieces free around the face and crown after tying them off. Those pull-out pieces soften the lines and keep the style from feeling like it belongs in a gym locker room.
If your hair is layered, this is one of those styles where a little frizz around the braid is fine. Actually, it helps. The texture makes the braids look fuller than they are, which is a nice payoff when you want volume without curling anything first.
13. Scarf-Wrapped Low Ponytail
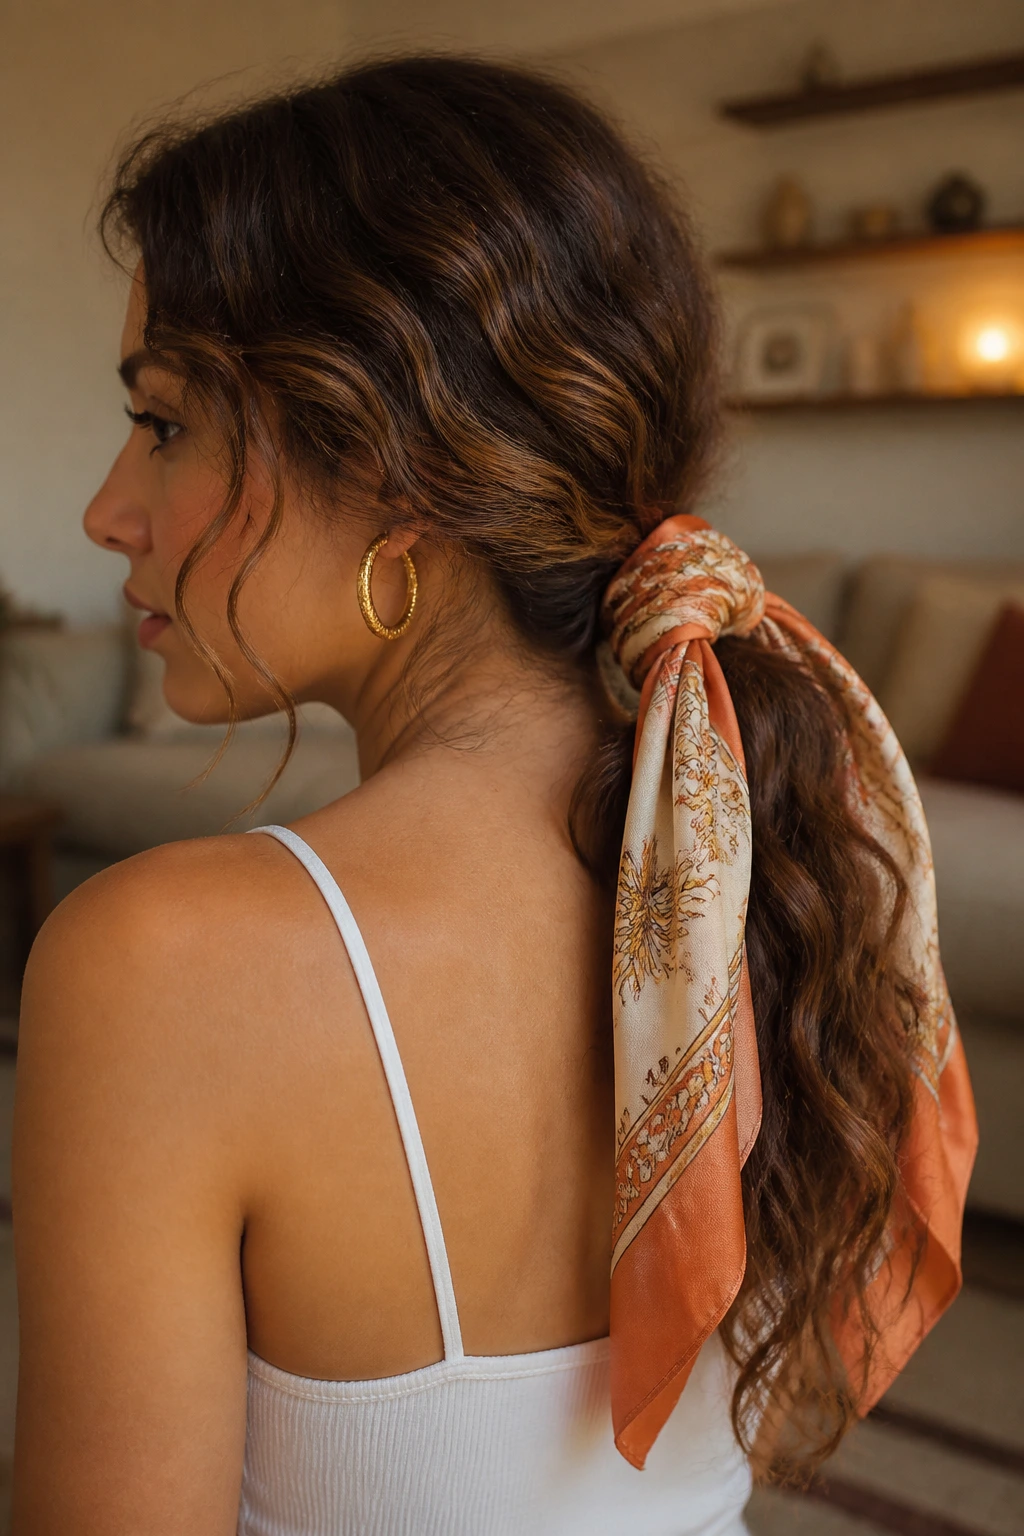
A scarf-wrapped low ponytail is the kind of style that solves multiple problems at once. It disguises a plain elastic, controls the base of the ponytail, and gives semi-curly hair a clean frame without flattening the ends.
Start with a low pony at the nape. Secure it with a soft elastic, then wrap a silk or cotton scarf around the base once or twice and knot it off to one side. Leave the scarf long if you want a loose, casual look, or trim the tail of the scarf into a shorter tie for something neater. The hair itself should still move. That movement is the point.
This style is especially useful when the nape area tends to frizz. The scarf covers the part that usually puffs up first, which means the rest of the texture can stay visible and relaxed. It is also one of the easiest ways to make a ponytail look less like an afterthought.
14. Defined Wash-and-Go With a Headband
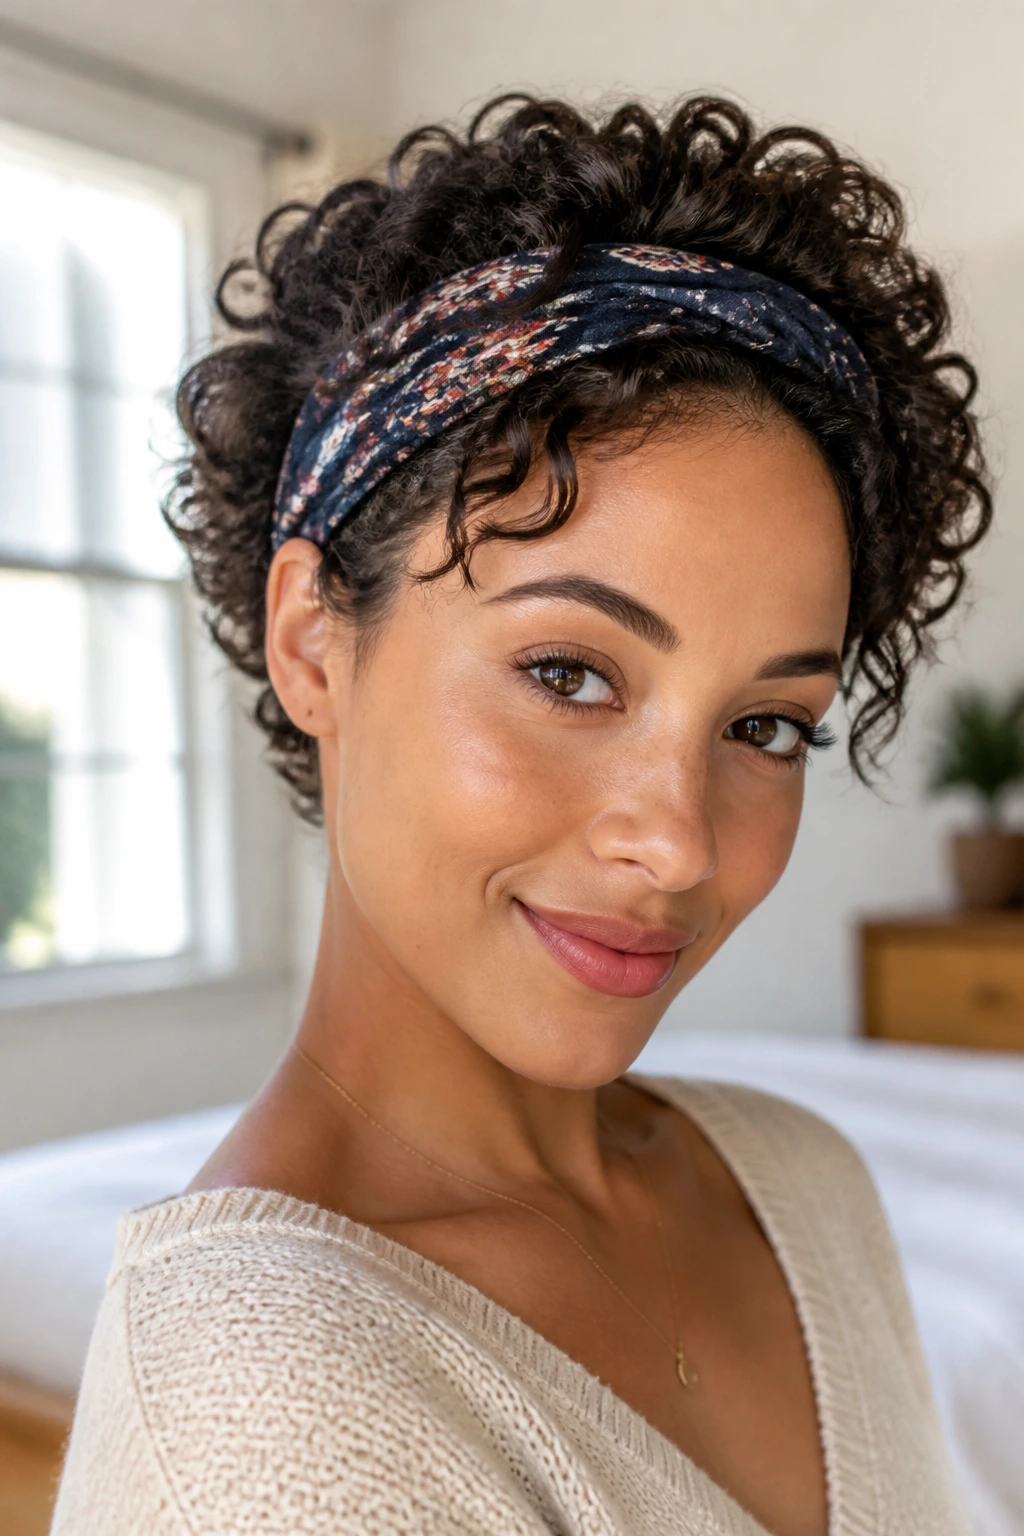
A wash-and-go can be a real hairstyle, not a compromise, if you give semi-curly hair enough support at the root and don’t drown it in product. The headband is the finishing piece that makes the whole thing feel styled rather than abandoned.
Start with damp hair and work in a small amount of leave-in conditioner from the mid-lengths down. Add mousse at the roots if you want lift, then rake in a gel or curl cream through the lengths with your fingers. Scrunch, don’t smash. If you want a few front pieces to land neatly, finger-coil them once and leave them alone until they dry.
A Few Things That Make This Work Better
- Diffuse on low heat or air-dry until the hair is 90 percent dry before touching it.
- Place the headband after the front pieces have set so it doesn’t leave a dent.
- Use a fabric headband with a little grip if the crown slips easily.
- Break the cast from the gel with clean hands once the hair is fully dry.
The best version of this style keeps the texture visible. It should look like your hair, only more organized.
15. Mini Space Buns or Double Knot Buns
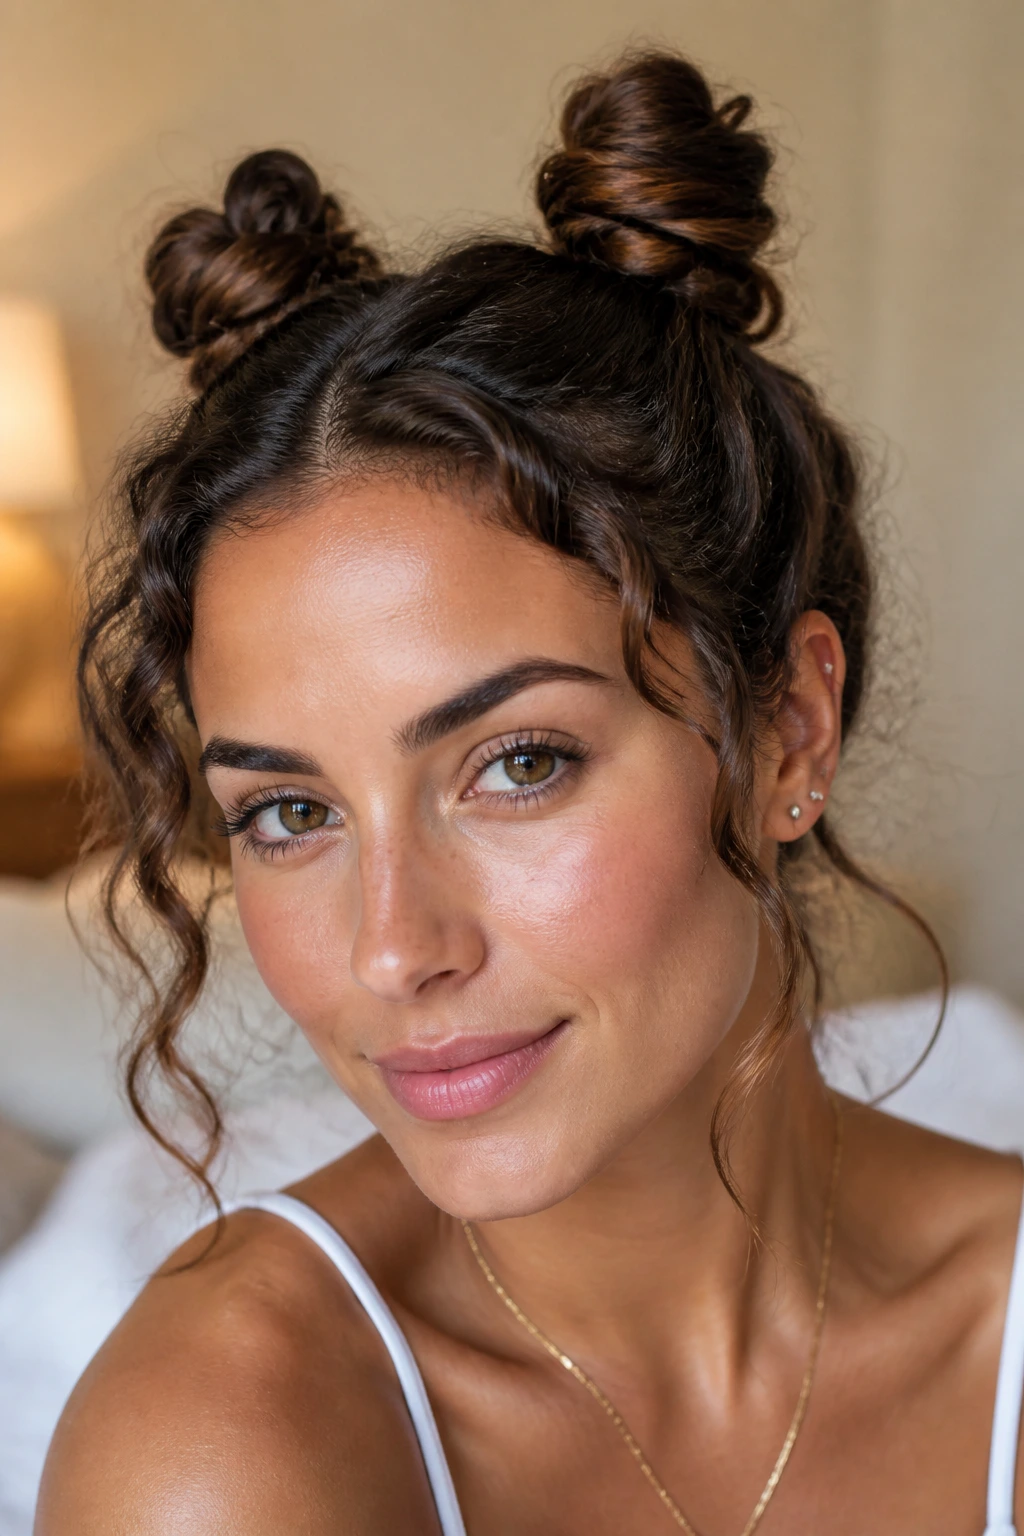
Mini space buns are a good answer when semi-curly hair feels too short, too layered, or too unruly for one full updo. Unlike bigger space buns, the mini version leaves more of the texture visible, so the style reads playful instead of costume-y.
Part the hair down the middle, gather each side into a high ponytail, twist the lengths, and wrap them into two small knots. Secure with pins or tiny elastics. If your hair is thick, keep the buns low on the crown so they don’t stick out like horns. If it’s fine, tease the ponytails lightly with your fingers before twisting so the buns have a little body.
This style works best when the pieces around the face are allowed to stay soft. Leave out a few short layers if they fall naturally, and do not chase every stray hair. The small loose bits are part of the look. They make the buns feel less strict and more like they belong on a real head with real hair that moves.
Semi-curly hair gives these buns a better shape than straight hair usually does. The bend adds bulk. The bulk gives the style personality. And that is the whole game with this texture, really.