A polished curly hairstyle does not have to mean stiff curls sprayed into place. The best versions usually look softer than that, with a little movement at the ends, a clean shape at the roots, and enough control that you do not spend the whole day fixing stray pieces in the mirror.
That balance matters more than people admit. Curly hair looks finished when the outline is intentional, not when every strand is pinned flat. A deep side part, a low bun, or a loose twist can do more for polish than a pile of heavy product ever will.
My bias is simple: work with the curl pattern you have, then shape it a little. A good curl cream, a few bobby pins, a satin scrunchie, and one smart part can change everything. You do not need a dramatic transformation. You need clean lines, soft texture, and a style that still looks like hair, not a helmet.
1. A Deep Side Part That Lets Your Curls Fall Softly
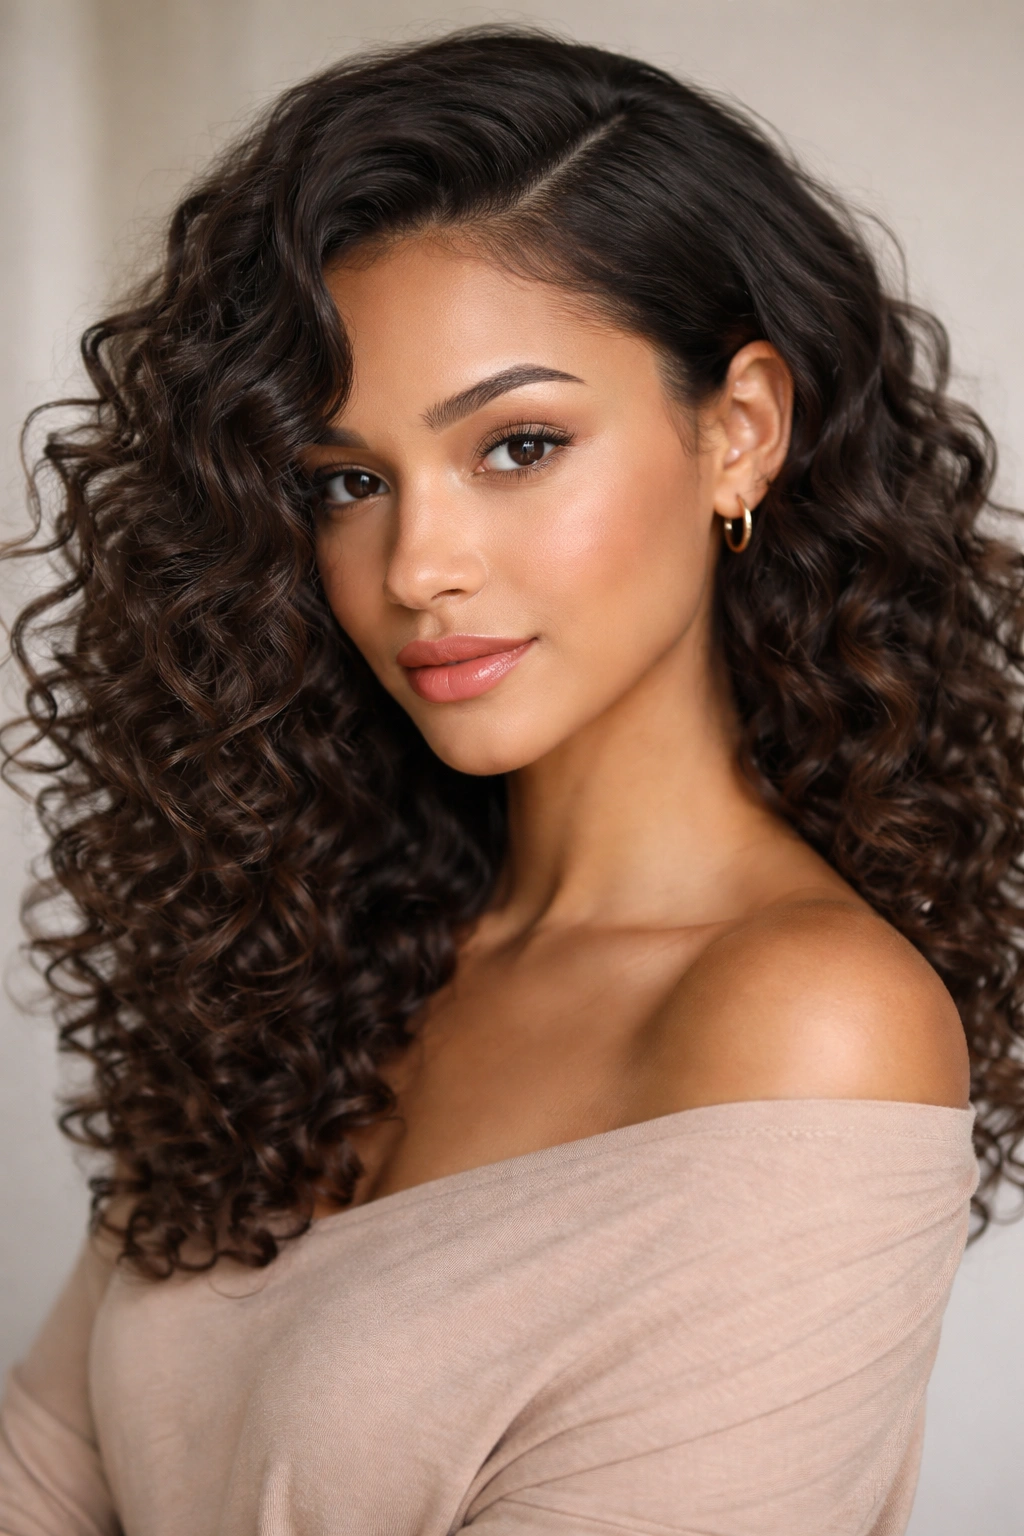
A deep side part is one of those styles that quietly does a lot of work. It gives curly hair shape fast, adds a little lift at the front, and makes the whole look feel deliberate even when the curl pattern is doing most of the talking. I reach for this idea when the hair itself looks good, but the outline needs help.
Why it reads polished
A center part can be lovely, but a deep side part often adds instant structure. The eye follows the part first, then lands on the curl volume, which makes the style feel more finished. It also helps balance fuller cheeks, a strong jawline, or a face that feels a little too open with hair pulled straight back.
How to style it
- Start on damp hair with a light leave-in conditioner and a curl cream.
- Draw the part with the tail of a comb while the hair is still flexible.
- Scrunch with a microfiber towel or cotton T-shirt.
- Diffuse the roots on low heat for lift, then let the ends dry without much touching.
- If a few roots lie flat, clip them up for 10 to 15 minutes while they set.
A small amount of gel at the front can keep the shape neat without making the curls feel crunchy. That’s the key. Soft does not mean messy, and polished does not mean sealed shut.
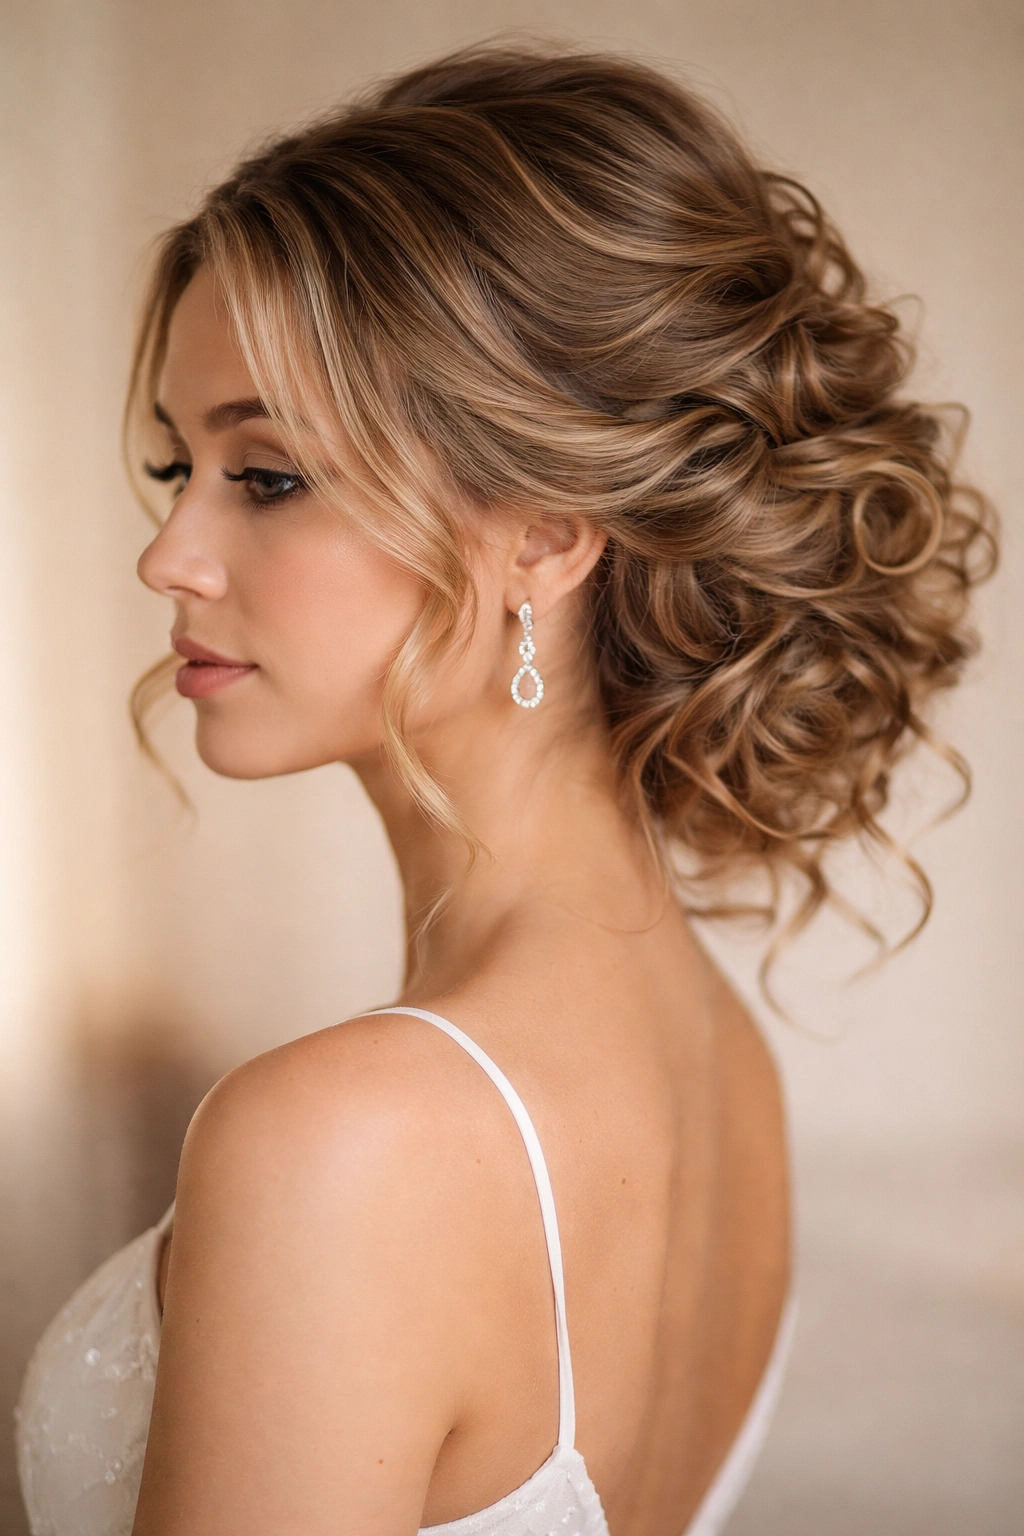
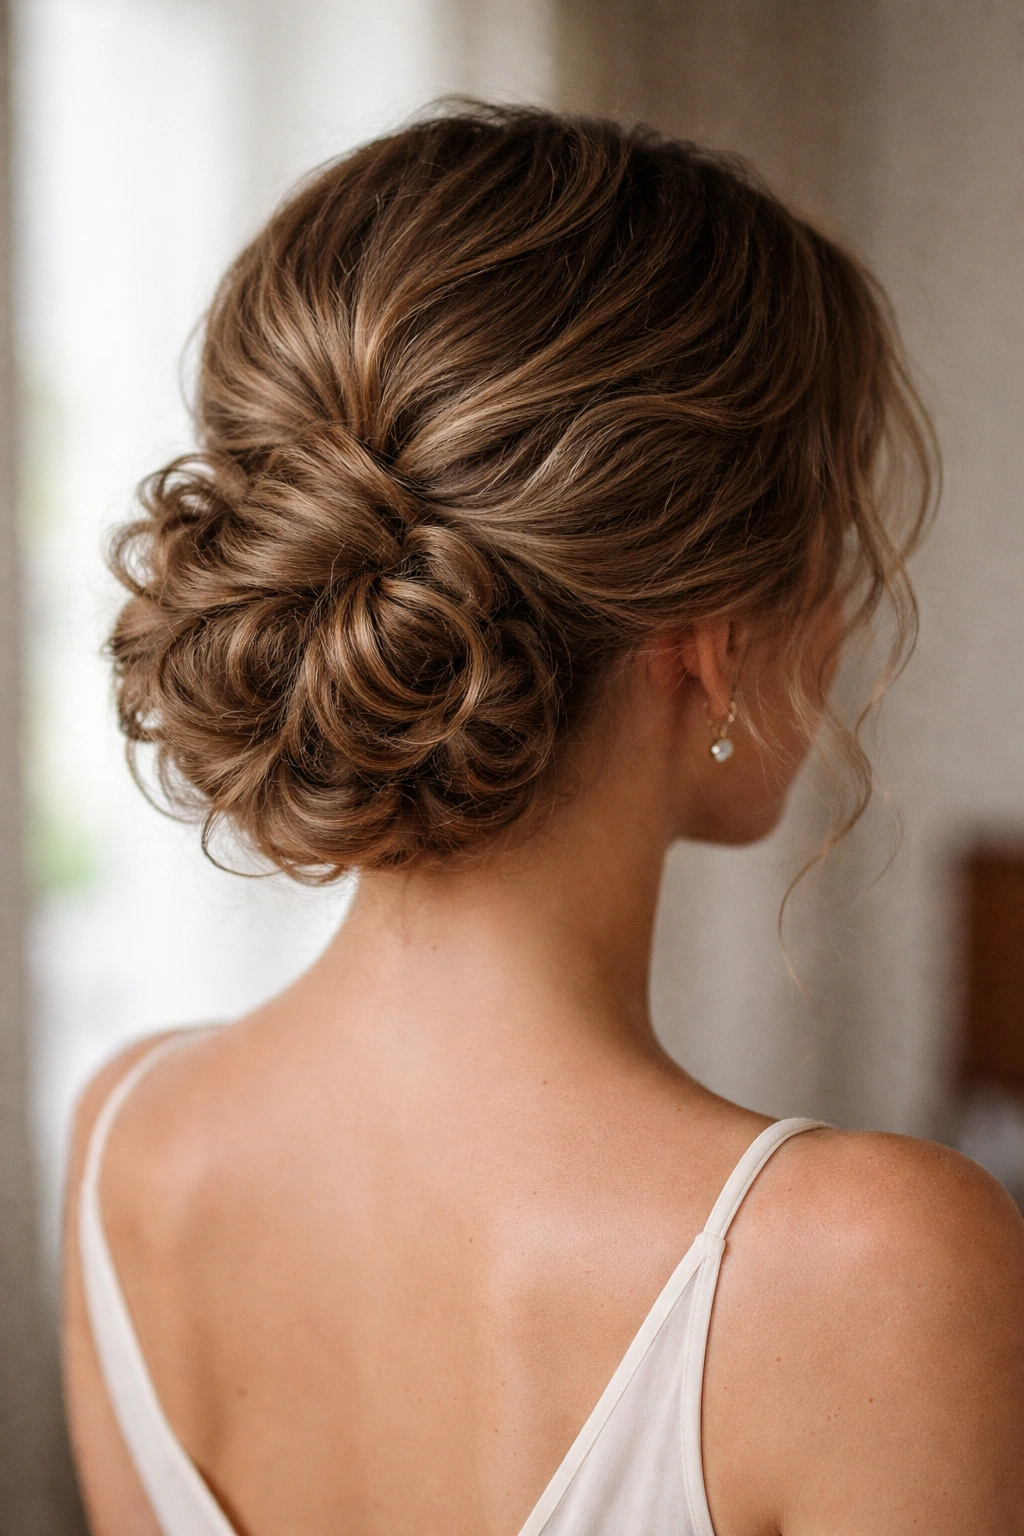
2. A Low Curly Bun with Face-Framing Pieces
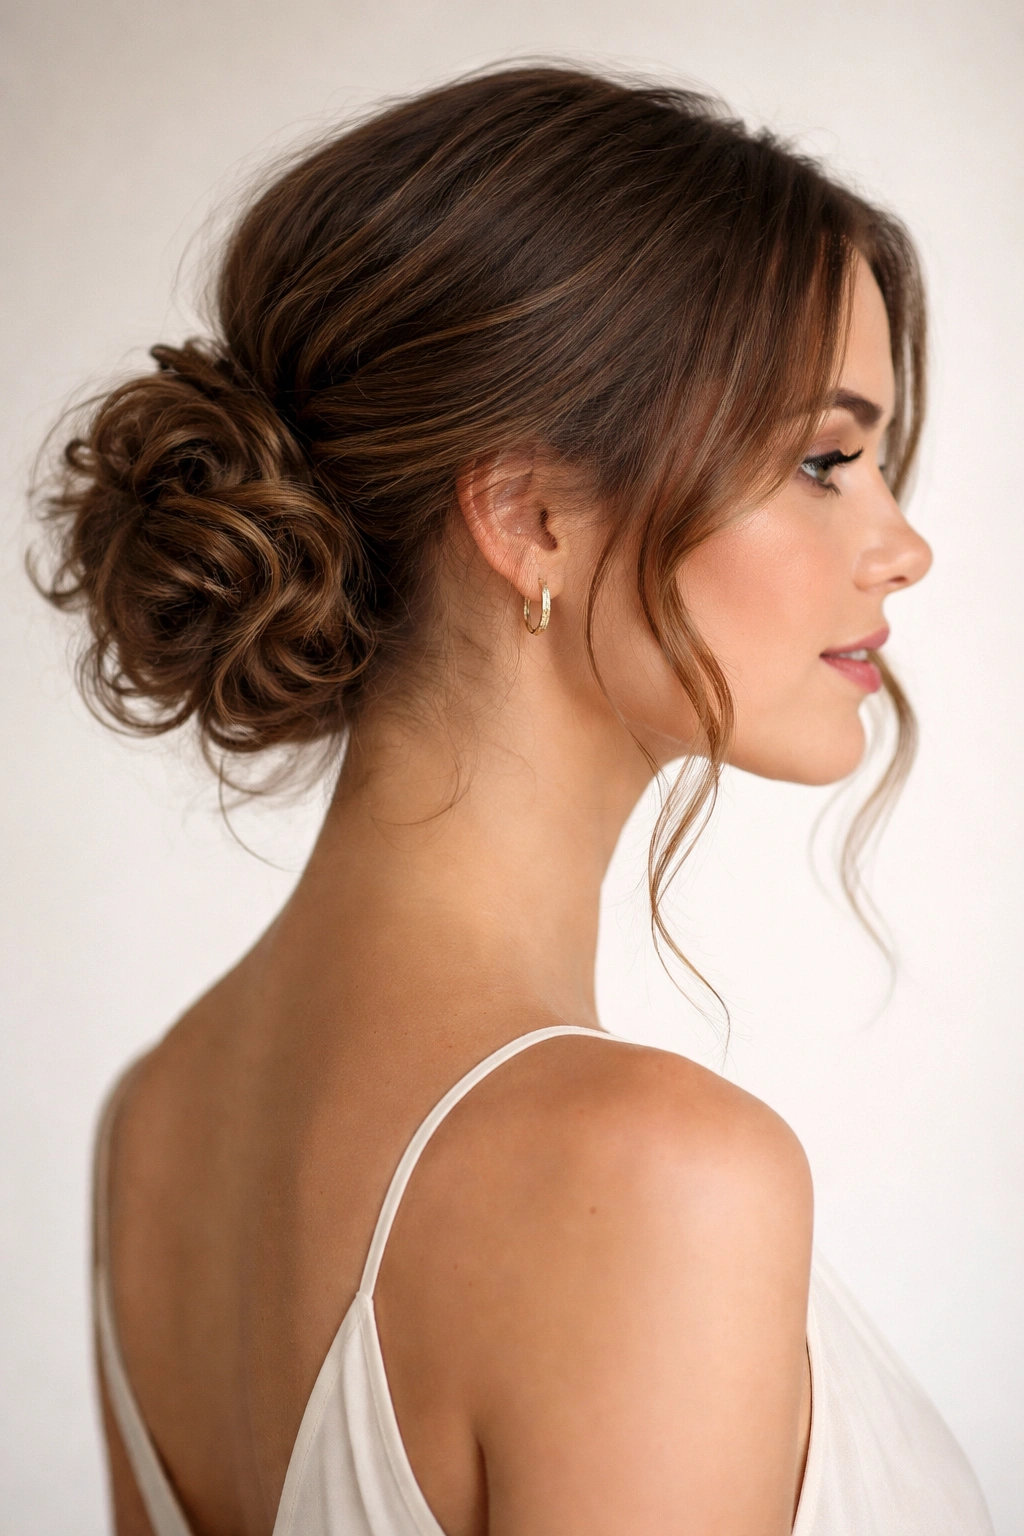
What makes a curly low bun look elegant instead of severe? Placement, mostly. A bun that sits low at the nape, with a couple of loose tendrils near the cheekbones, feels gentle right away. It is the kind of style that works for a dinner, a meeting, or any day when you want your hair off your neck but still want texture visible.
The trick is not to smooth every curl into submission. Leave the top slightly cushioned so the bun does not look pasted down, then gather the length into a loose coil. I like a bun that still shows a few curl ends around the edge. That little bit of texture keeps it from feeling formal in a stiff way.
What to leave loose
- Two pieces around the face, each about finger-width thick.
- A soft bit at the crown, especially if your hair is layered.
- The last inch or two of the bun, so the shape stays airy.
What to smooth
- The hairline only where needed.
- Any flyaways that stand straight up.
- The underside near the nape.
Use 4 to 6 bobby pins, crossed in an X if the bun feels heavy. A strong hold spray can help, but use it lightly. A low bun should feel neat, not shellacked.
3. The Half-Up Twist That Keeps Volume at the Crown
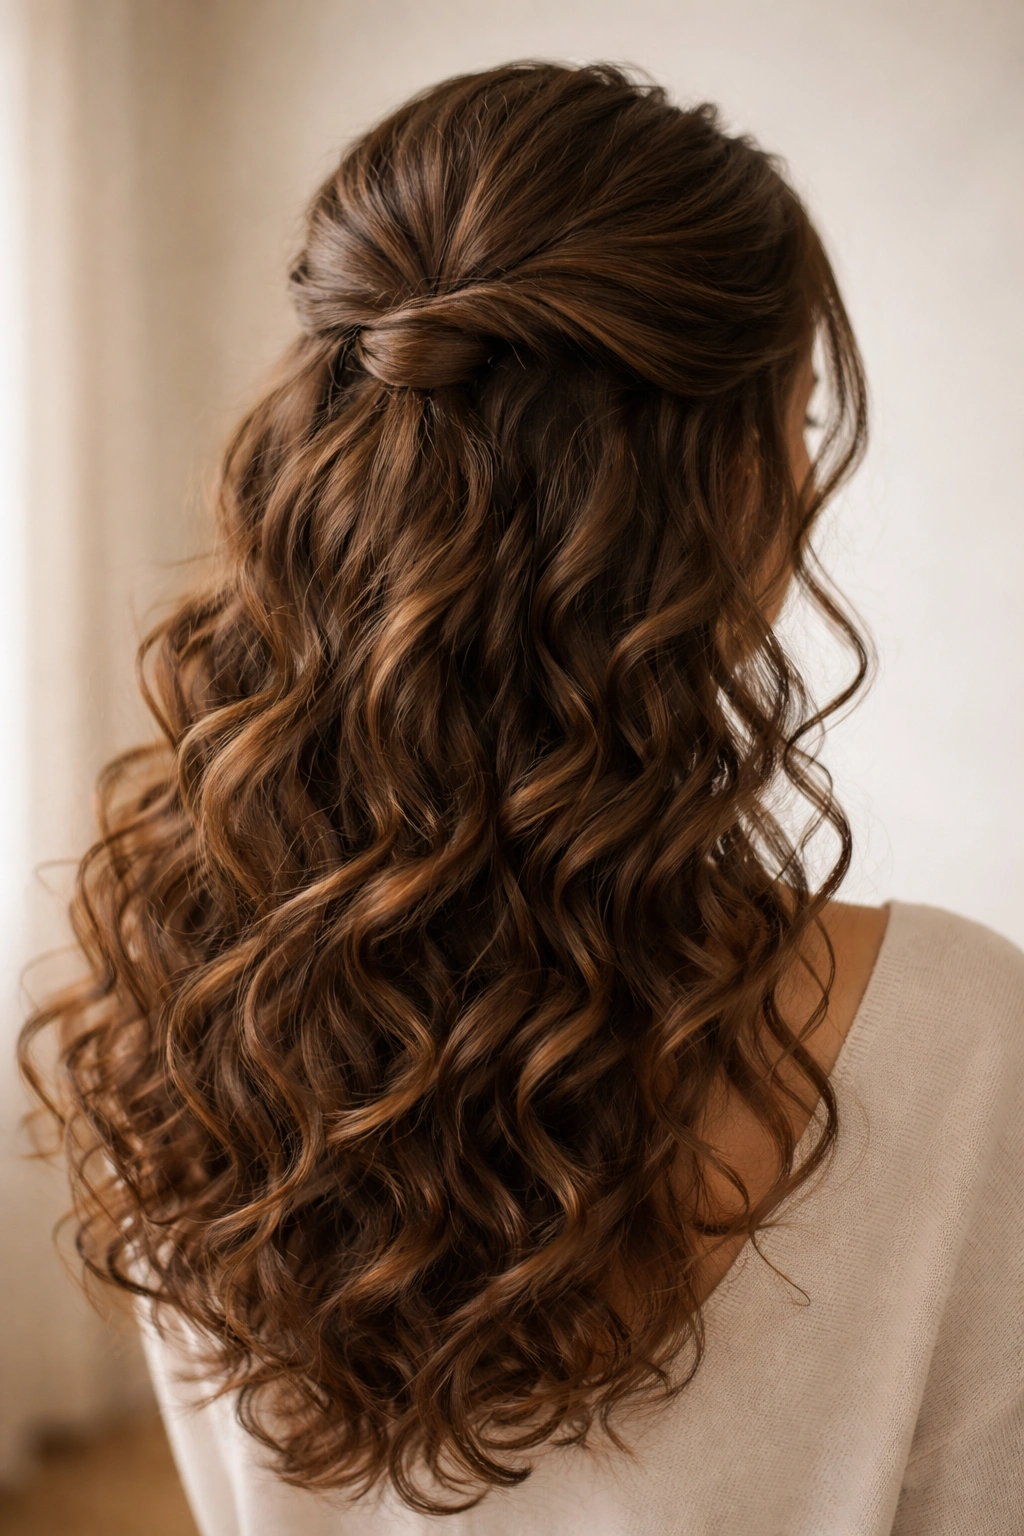
Sometimes the prettiest curly styles are the ones that take ten seconds and still look like you thought about them. A half-up twist does that well. It lifts the hair away from the face, leaves the length down, and keeps the curl pattern visible from every angle.
It works especially well on second-day curls that have softened a little. Fresh curls can be too springy for this shape; slightly settled curls tend to sit better. Twist back two sections from the temples, meet them at the crown, and pin them with a small clip or two hidden bobby pins.
How to make the twist stay
- Mist the front sections with water if they feel dry and frizzy.
- Twist backward, not upward, so the hair follows the head shape.
- Cross the pins under the twist instead of sticking them straight in.
- Pin into a curl clump, not through the middle of one.
A half-up twist is a good answer when you want polish without losing fullness. It keeps the top from puffing out in an odd way, and it lets the ends do their own thing. That mix is what makes it look easy, even when it took a little fussing.
4. A Wrapped Curly Ponytail That Looks Intentional
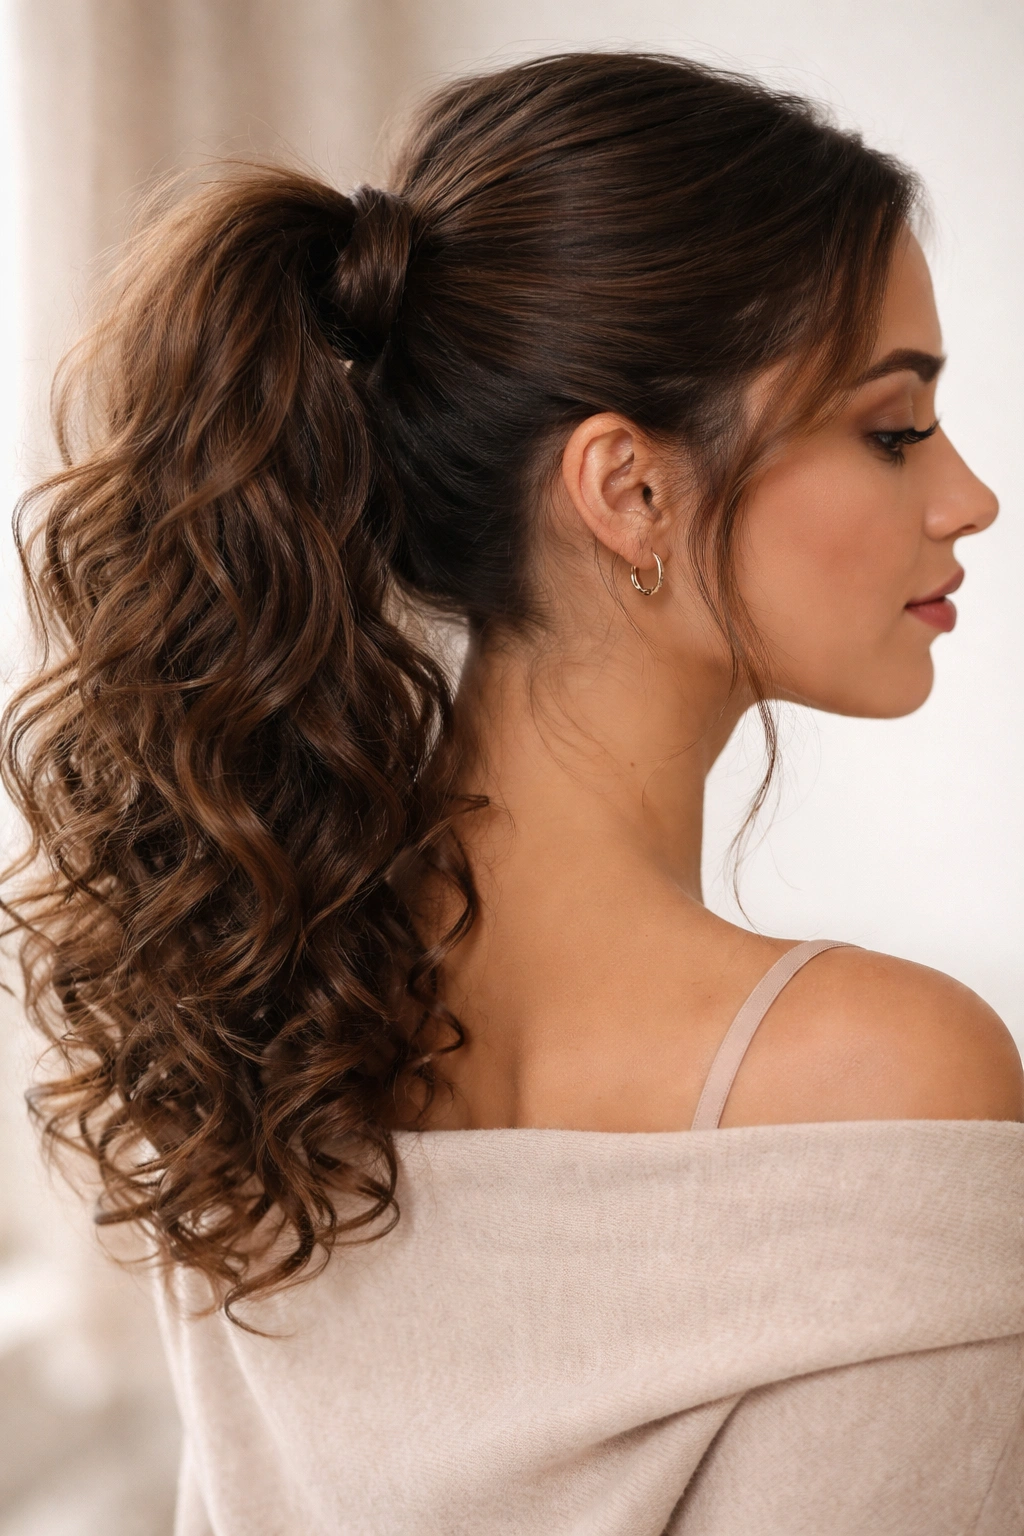
A curly ponytail can look plain, or it can look sharp. The difference is usually in the base. If you gather curls with a visible elastic and call it done, it reads casual. If you wrap one curl around the tie and keep the crown smooth but not flat, it feels finished fast.
I prefer this style at mid-height or just below the crown. Too high can make the profile feel tight. Too low can drag the curls down in a way that hides their shape. Somewhere in the middle tends to give the best balance.
The ponytail itself should stay fluffy. Separate the curl clumps just enough to show texture, then pin or clip one curl around the elastic so the tie disappears. A satin scrunchie helps too, especially if your hair gets dented easily.
A few practical details matter here:
- Keep the base snug enough to hold, not tight enough to crease.
- Tease the ponytail gently with your fingers, not a brush.
- Add a drop of serum to the ends if they look dry.
- If the crown needs polish, smooth it with a soft brush and a tiny bit of gel.
That’s it. Clean base, soft length. Simple, but it works.
5. The Claw-Clip French Twist for Loose Texture
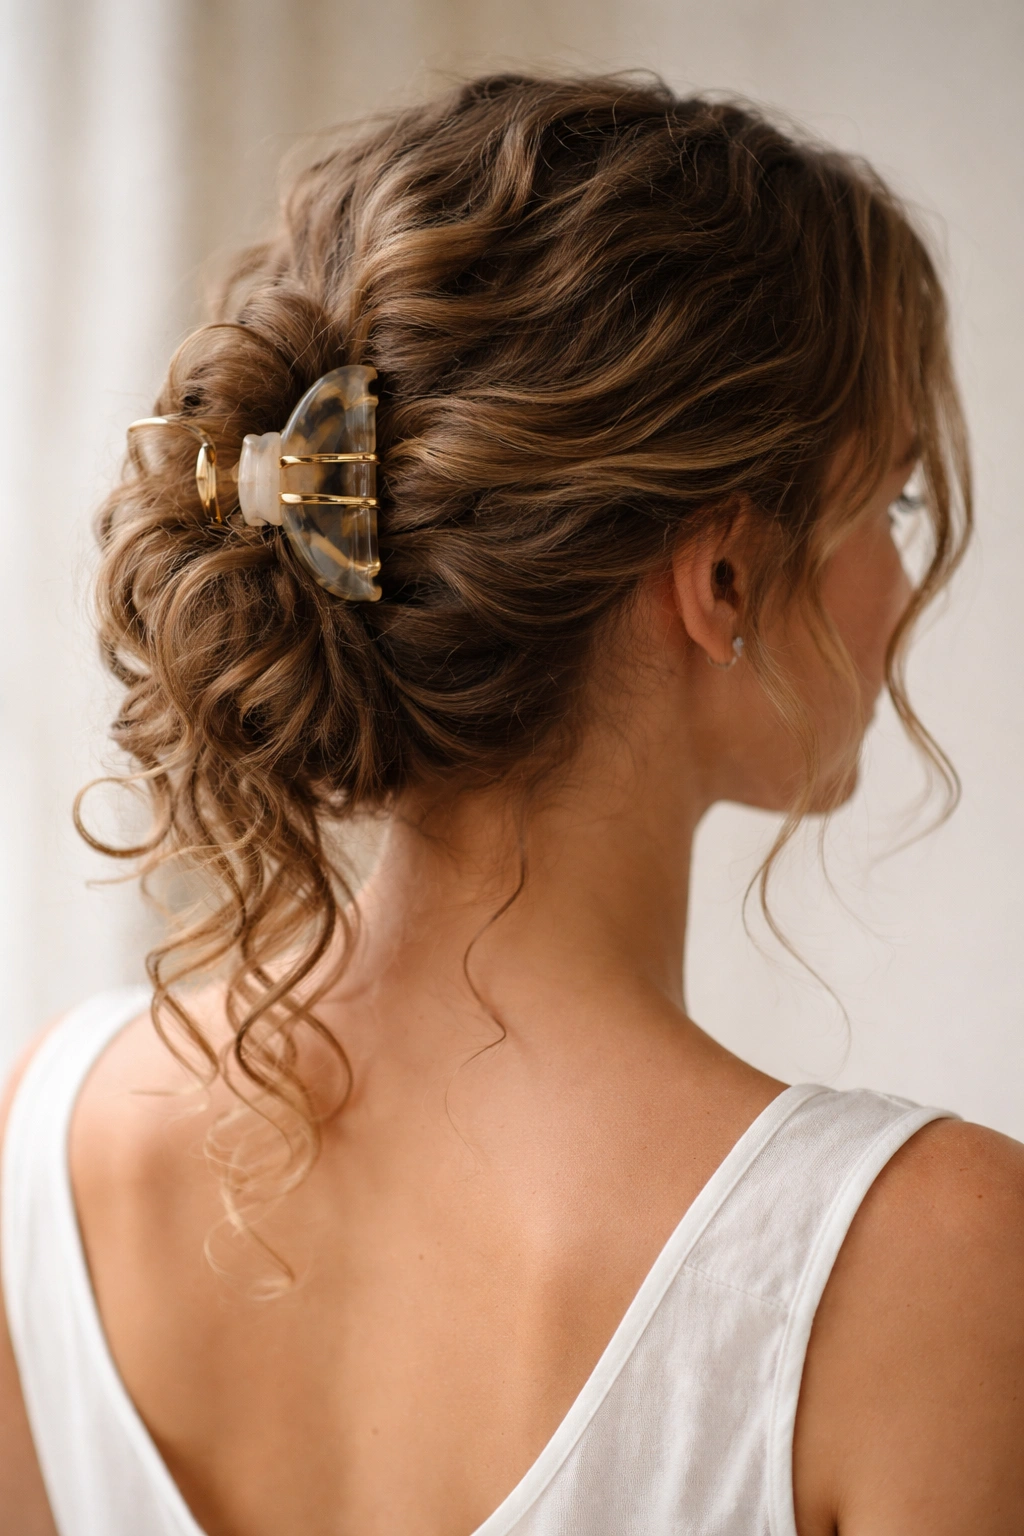
There’s a particular kind of curly-hair day when you want everything up, but you do not want the feeling of being pulled back. The claw-clip French twist is good for that. It keeps the neck clear, leaves texture visible, and avoids the overdone look that some formal updos can get.
A large clip works better than a tiny one. Tiny clips tend to collapse under thick curls, and then the whole style starts slipping by lunchtime. Twist the hair upward from the nape, tuck the ends in loosely, and catch the fold with a strong clip near the center of the twist. Let a few curls spill out on purpose. Yes, on purpose.
The nice thing about this style is that it does not ask for perfection. A little volume at the crown looks right. A few face-framing curls make the shape softer. If the front is too sleek, the whole thing starts to feel a little severe.
Best for: medium to thick curls, layered cuts, and days when you need the look to stay put without feeling rigid.
Avoid: using a clip that is too small, twisting so tightly that the curls lose their spring, and smoothing the whole head until it loses personality.
Seriously, a loose twist is enough.
6. Shoulder-Length Curls Tucked Behind One Ear
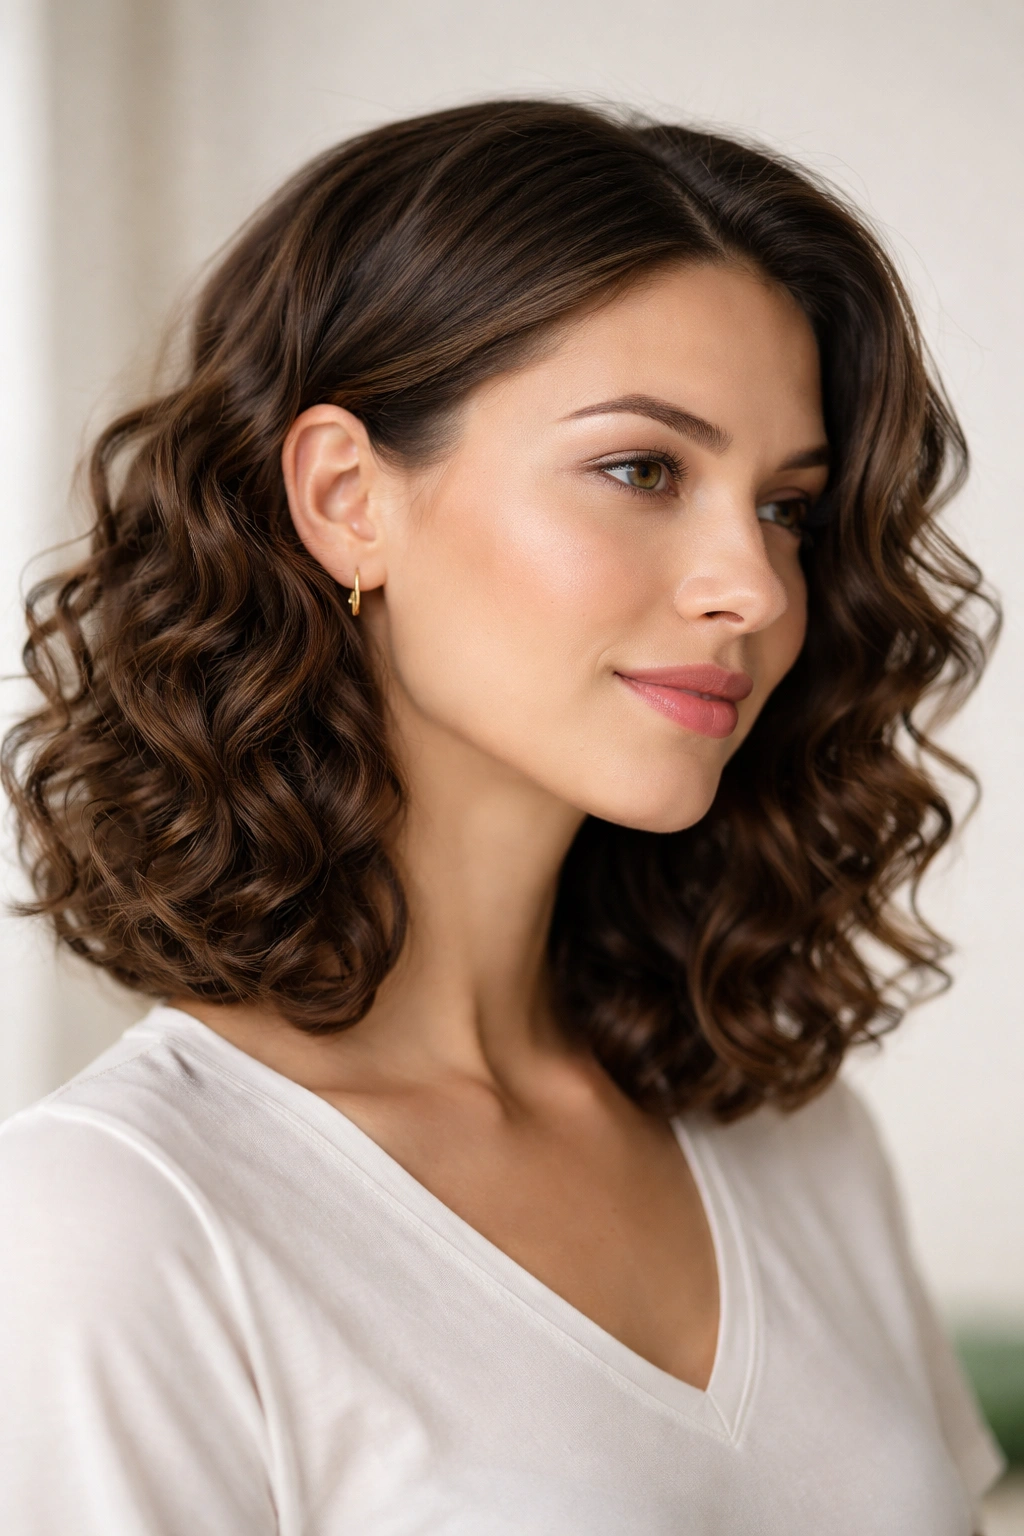
A shoulder-length curl cut can be a little tricky. Left alone, it can look fluffy in the wrong spots. Pulled back too much, it can lose that easy shape that makes curly hair feel alive. Tucking one side behind the ear solves a lot of that.
The style feels polished because it creates asymmetry. One side stays open and soft; the other side gets a clean line. That contrast looks intentional, which is half the battle. A small barrette, a simple pin, or even nothing at all can work if the curl pattern is cooperative.
Why this works so well
The tucked side opens the face without removing volume. The loose side keeps the style from feeling too styled. On a shoulder-length cut, the result is balanced and easy to wear with earrings, glasses, or a collared shirt.
What helps
- A side part or slightly off-center part.
- One smooth tuck behind the ear, not both sides.
- A tiny bit of cream on the ends if they look fuzzy.
- A light spray at the roots if the part keeps drifting.
I like this one for workdays because it looks put together without asking for much. It is not flashy. That’s the appeal.
7. A Braided Crown with the Rest of the Curls Down
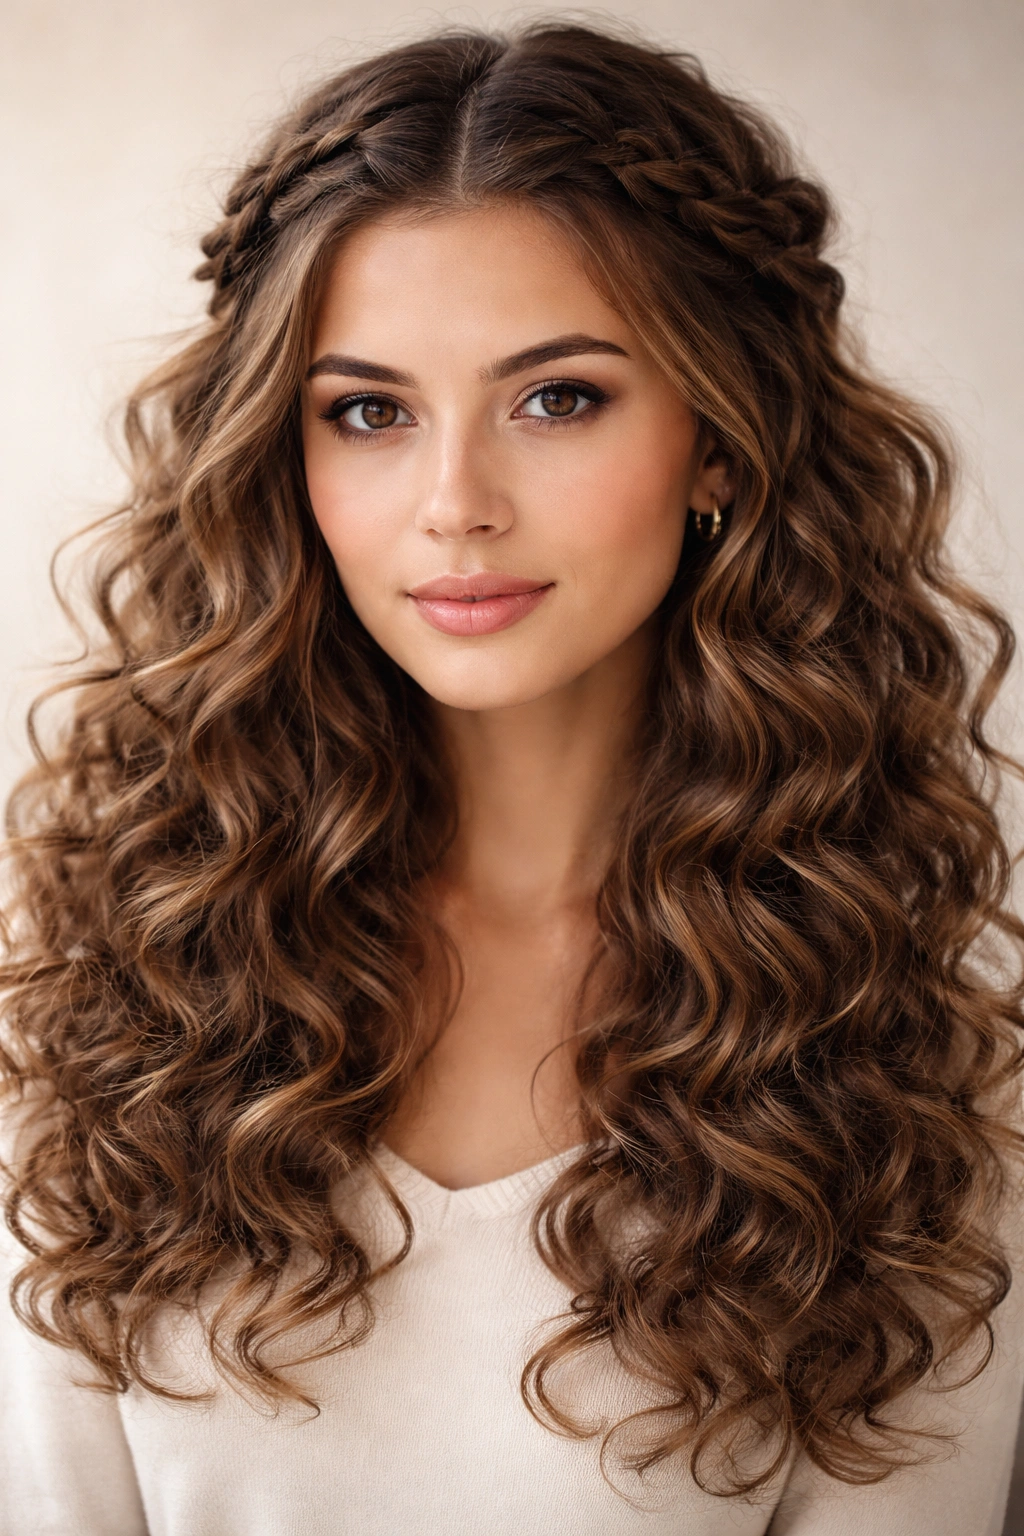
Want hair off your face without flattening the curl pattern? A braided crown does that better than most styles. Two loose braids or twists along the hairline create a frame, then the rest of the curls stay free and full. The shape feels pretty, but not precious.
The braid should be soft enough to blend into the hair, not tight enough to look like a school uniform. Pull the braid edges a little after securing them so they look fuller. That tiny step makes a huge difference, especially on finer curls.
How to use it
- Start at the temple with a small section on each side.
- Braid or twist backward toward the crown.
- Secure each side with a pin or clear elastic.
- Join the sections at the back, or let them stop there and keep the length loose.
This style is useful on humid days because it keeps the front in place. It also works when curls need a little extra shape around the face. The crown acts like a frame, and the loose lengths give the whole thing some air.
If your hair is layered, leave the shortest pieces out around the temple. They soften the line and make the braid blend instead of sitting on top like an afterthought.
8. A Loose Top Knot with Curly Ends Left Out
The best curly top knot is not scraped back into a tiny ball. It sits high, but not harshly. It has height, but still looks like curls, not a knot from a gym bag. Leave a few ends out, and the whole style softens fast.
I like this one when the hair is a little too wild to wear down, but not dirty enough to feel hidden. Gather the top section loosely, twist it once or twice, and let the ends fan out instead of tucking every single piece under. A soft scrunchie works better than a sharp elastic because it leaves less of a dent.
A few curls around the temples help too. They make the knot feel less severe and keep it from pulling the face back too hard. If the hairline is frizzy, smooth only the first inch from the edge. Don’t chase every flyaway. That usually makes the style look overworked.
A loose top knot is also one of the easiest ways to make curly hair look neat on a rushed morning. High shape, soft edges, done.
9. Side-Swept Curly Updo for Dressier Days
Unlike a tight chignon that can look a little formal in the wrong way, a side-swept curly updo keeps some movement on purpose. The curls are gathered to one side, pinned low or mid-height, and allowed to spill a bit at the edges. That gives the style a softer profile, which is why it works so well for events.
The side sweep also helps if one side of your hair has better curl definition than the other. Use the better side as the visible side. That sounds almost too simple, but it matters. Hair has mood swings, and sometimes the smartest move is just choosing the side that behaves.
A few small pins usually hold this style better than one big one. Build the shape in layers: pin the first section, then tuck the next under it, then leave a few ends out around the ear or nape. A light mist of hold spray keeps the outline neat without freezing it.
I’d pick this over a super-smooth updo whenever the dress or shirt has a softer neckline. It matches that kind of line well.
10. A Curly Lob with Barrette Placement That Feels Finished
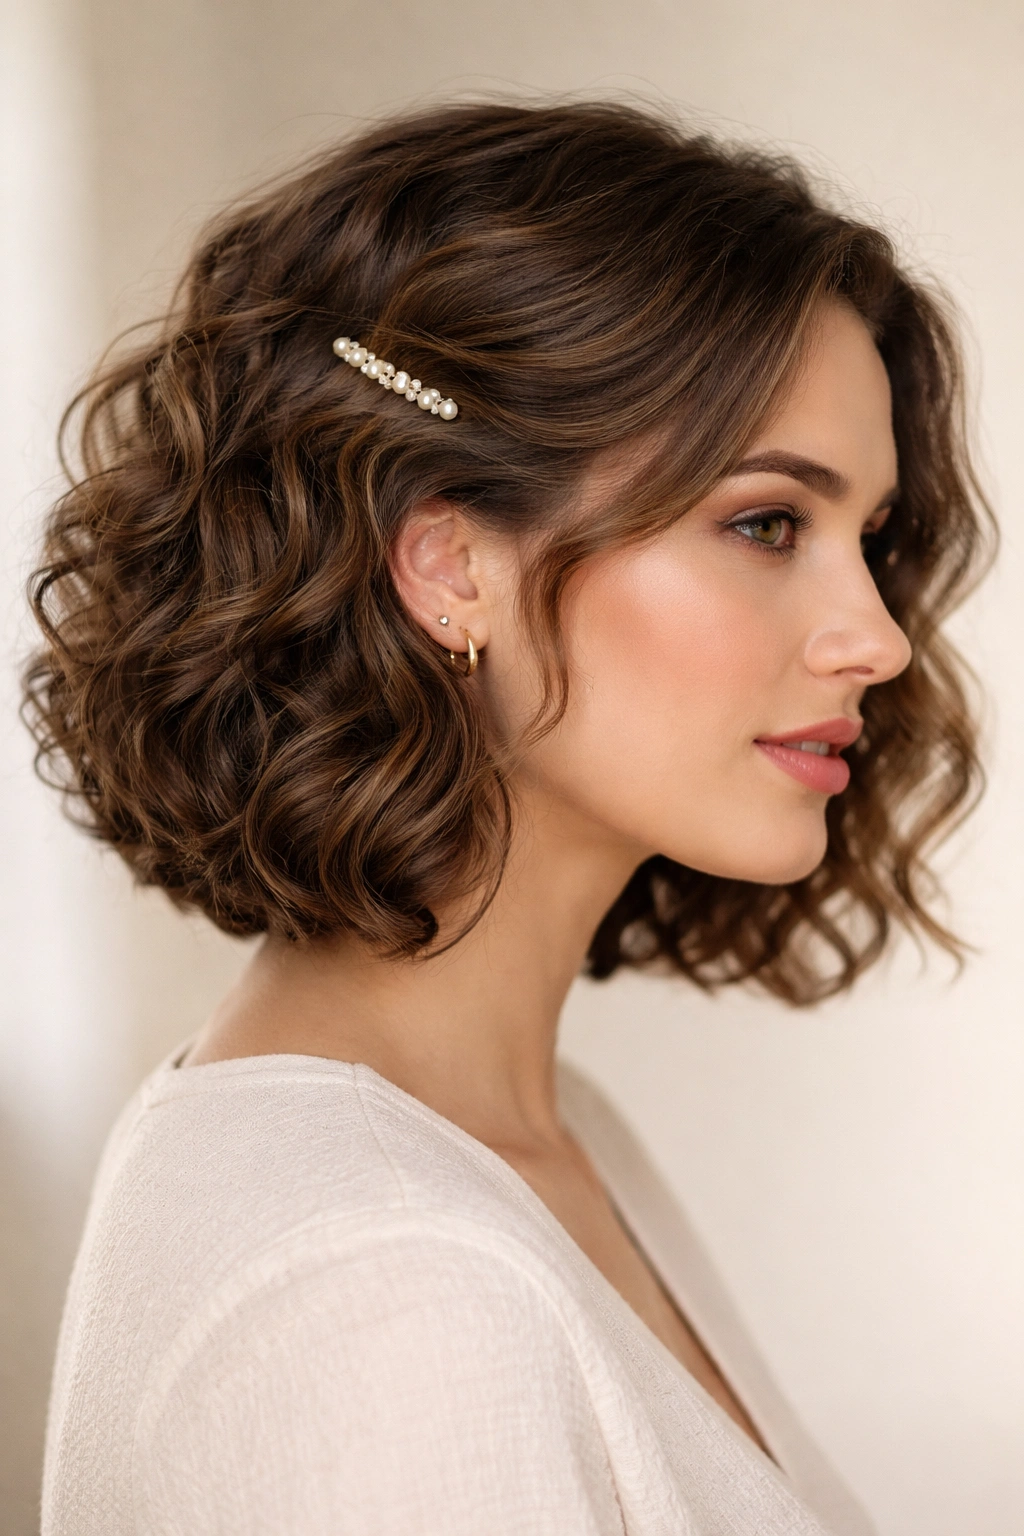
A curly lob has a built-in advantage: it already looks edited. The cut lands in that sweet spot where the curls have room to move, but they do not drag the face down. Add a barrette in the right place, and the whole thing feels polished without becoming fussy.
The trick is placement. A barrette too high can look childish. Too low, and it disappears. Slide one above the ear on the side with less volume, or place two small clips in a line to create a neat accent. I prefer simple metal or pearl-toned clips here because they look crisp against curly texture.
The rest of the lob should stay soft. Let one side fall forward. Let the ends curve naturally. If the curl pattern is loose, a little cream on the mid-lengths can help define the shape. If it is tighter, a tiny amount of oil on the tips is enough.
A lob like this works because it does not fight the haircut. It just gives the haircut a small point of focus. That is enough.
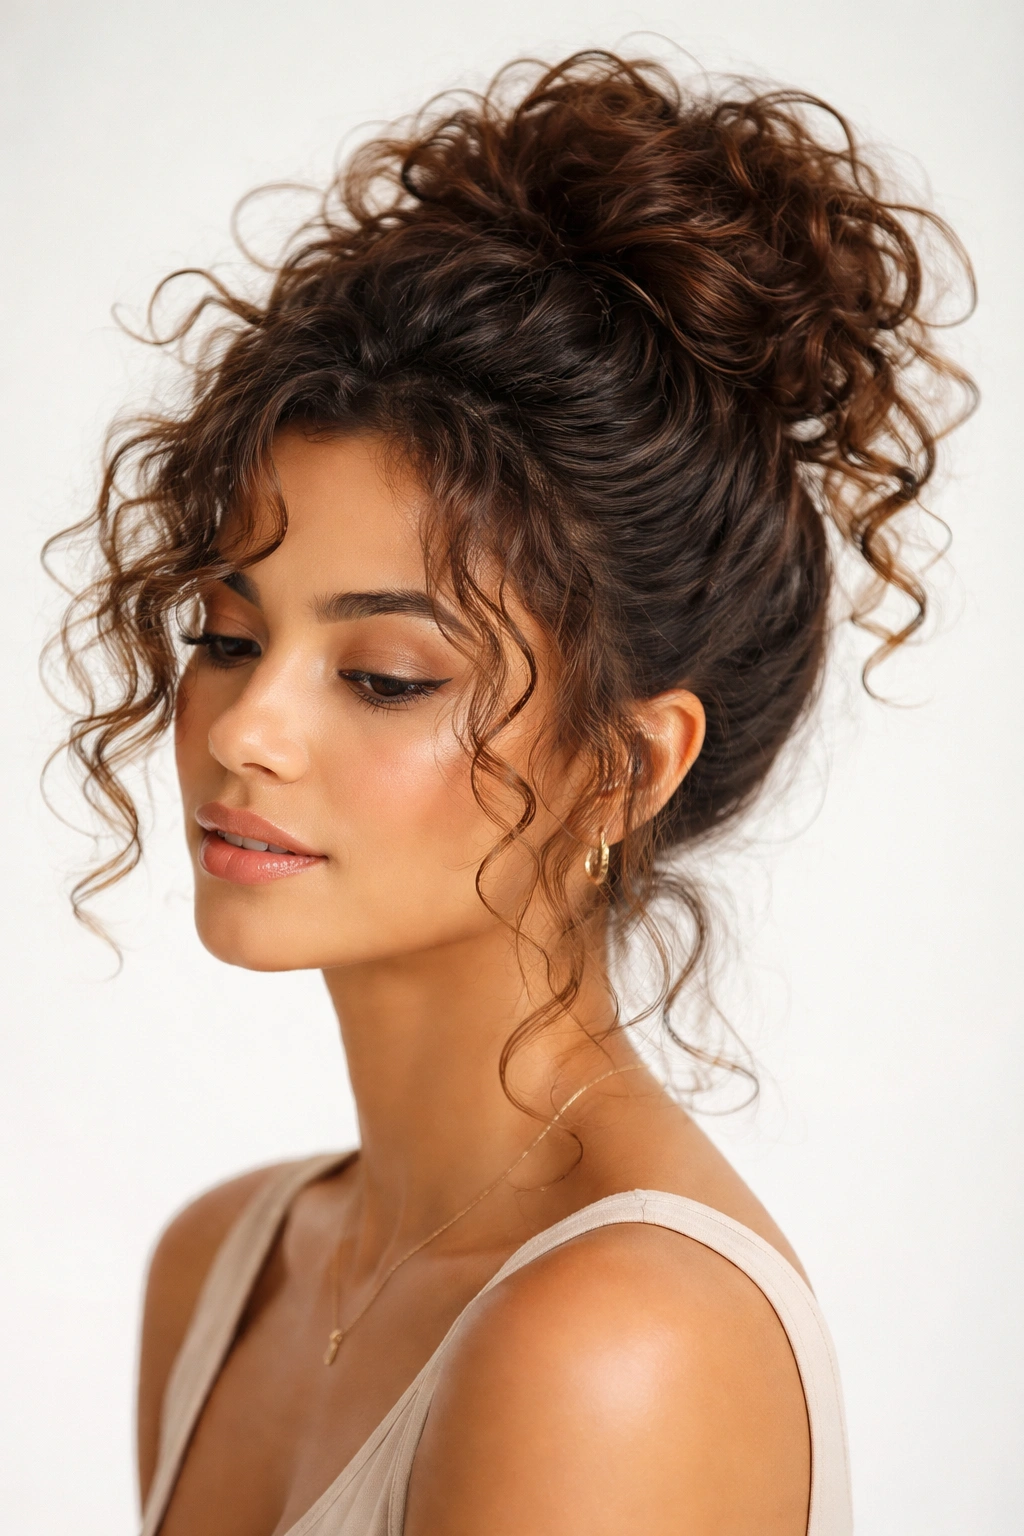
11. The High Puff with Soft Edges and Shape
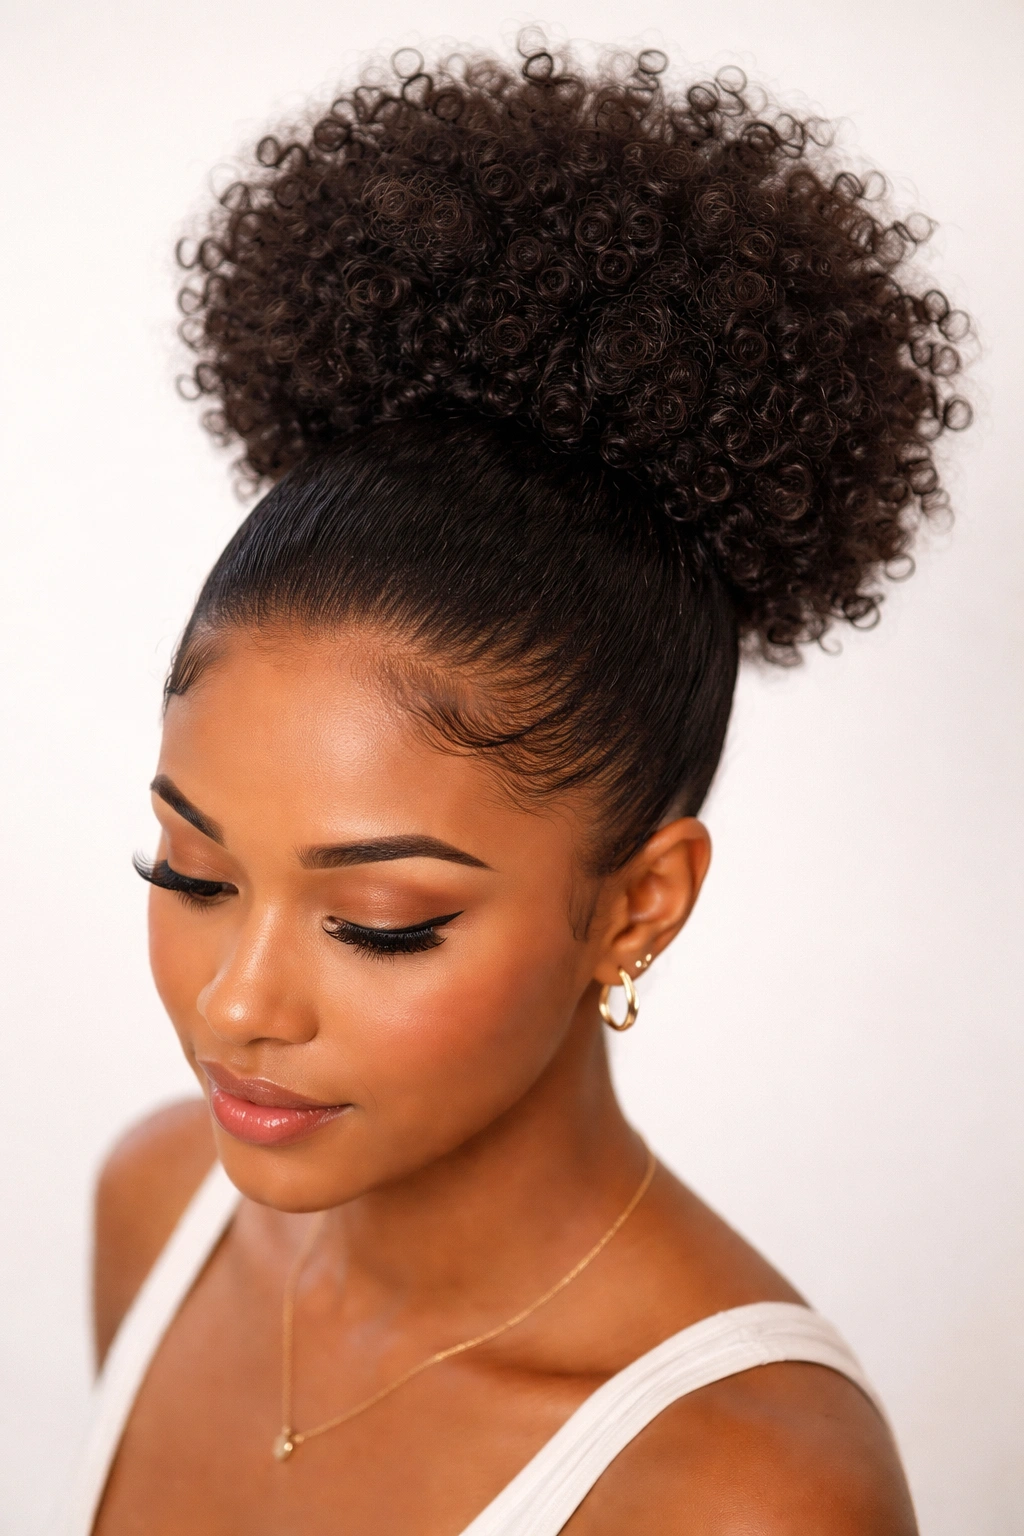
A high puff can be one of the most polished curly styles in the room when it is done with care. The silhouette is clean, the texture is proud, and the shape sits where the eye expects it to sit. It is bold without being stiff.
What makes it look neat
The base matters more than people think. Smooth the hair at the front and sides, then let the puff rise naturally from the crown. A little edge work can help, but the goal is tidy, not painted on. The puff itself should stay full and round, with enough definition that the curl pattern still shows.
What helps the most
- Use a soft brush or hands to gather the hair.
- Secure with a thick satin band or strong elastic.
- Fluff the puff after tying so it opens up.
- Smooth only the perimeter; leave the puff texture alone.
If your curls are denser, a high puff can look especially elegant because the shape is clean and strong. If your curls are looser, a little root volume spray at the crown helps keep the lift from collapsing. Either way, the style works best when the edges and the puff are treated separately. One part gets control. The other gets freedom.
That split is what makes the look feel finished.
12. Twisted Half-Up Halo with Open Lengths
Need something that keeps hair off your face but still lets the curls do their thing? A twisted half-up halo is a strong answer. It frames the head with two soft twists, then leaves the rest down so the hair keeps its body.
This style is gentler than a braid crown and often easier to pull off on layered cuts. Start with small sections from each temple, twist them back, and pin them together near the back of the head. Pull the twists slightly outward before securing them so they have width. Narrow twists can look thin and a little sad. Wider ones read as deliberate.
What to pin first
- The side with more volume, so the shape balances.
- The twist closest to the part line.
- Any short pieces that fall loose near the ear.
A twisted halo works well on curls that need a reset between wash days. The front gets control, the back stays soft, and the whole look feels polished enough for a lunch date, a family gathering, or a normal day when you want your hair to act civilized.
The best part is that it still looks like curly hair. That matters. Too many styles try to erase texture, and that usually makes them look older than they are.
13. A Low Curly Chignon with Hidden Pins
A low chignon is one of those styles that can look either graceful or painfully tight. The difference comes down to texture and placement. On curly hair, the better version keeps a little movement at the crown and hides the pins where the eye won’t catch them.
Pull the hair into a low twist or coil at the nape, then tuck the ends under instead of forcing them flat. Leave the crown with a bit of cushion so the head shape stays soft. A few hidden pins should do the job. If you need ten pins, the base is probably too slippery or too tight.
The face-framing pieces matter here too. Thin tendrils can soften a strong jaw or balance a high forehead. Thicker pieces look more casual. Pick the amount based on the mood you want, not a rule someone made up.
This style is especially good when you need a neck-friendly updo that still reads formal. It goes well with earrings, a structured collar, or a neckline that deserves attention. It also holds up better than people expect, provided the pins are crossed firmly and the coils are not overloaded with product.
14. A Rounded Curly Afro with a Clean Part
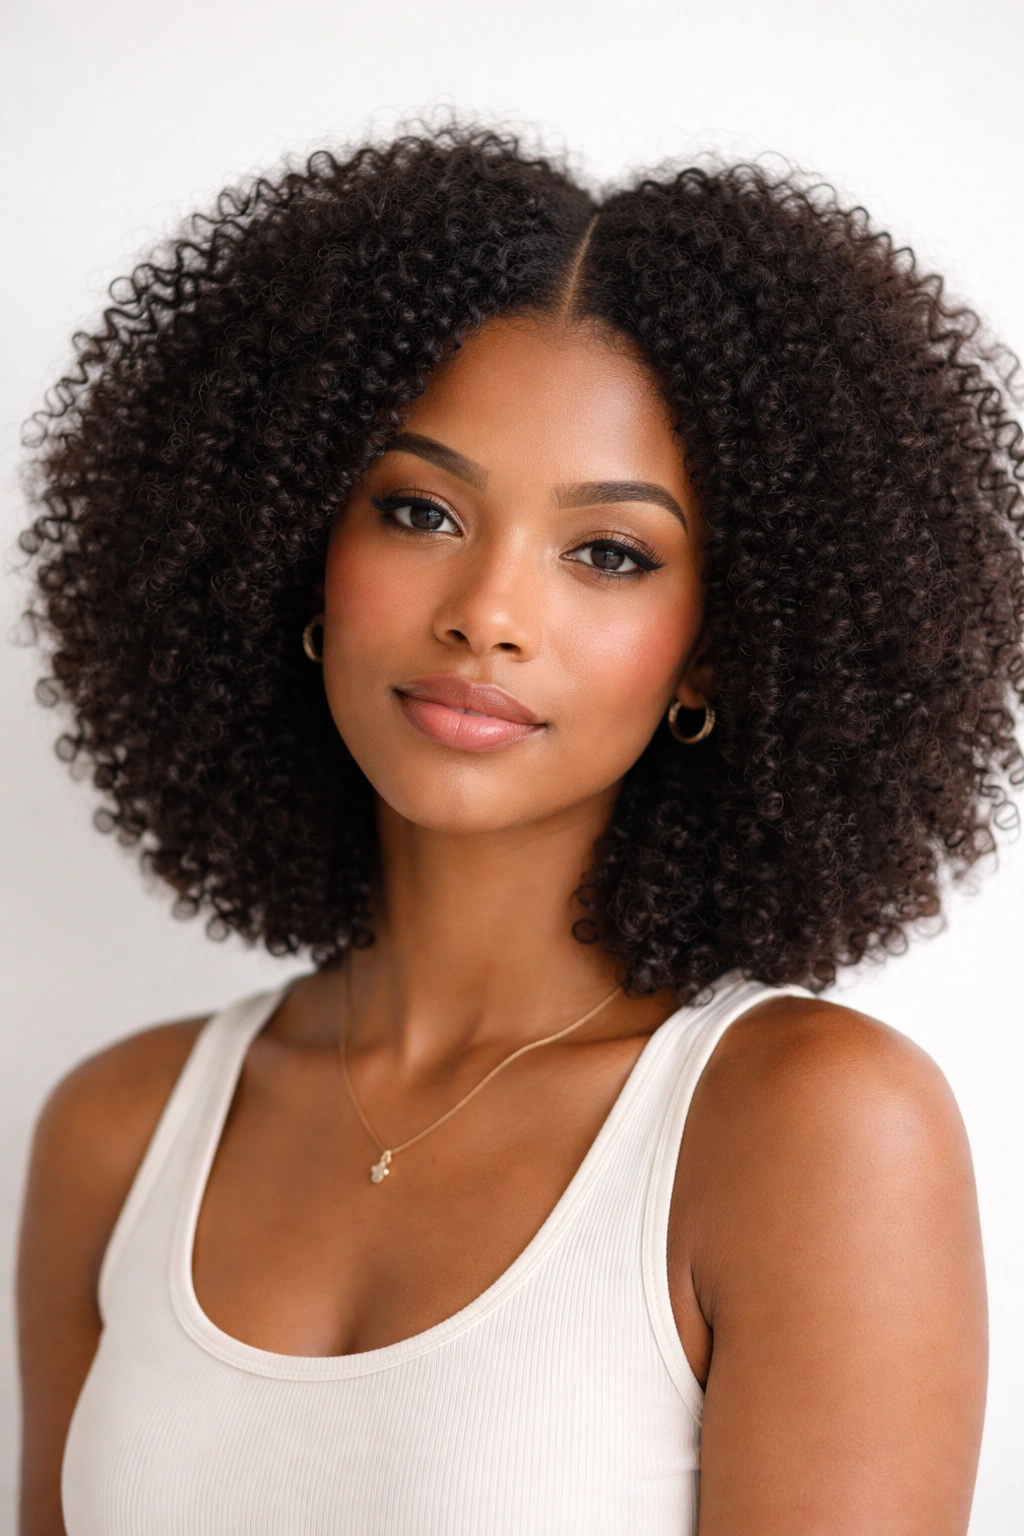
Polished does not mean flattened. A rounded curly afro with a clean part can look more intentional than a style that has been smoothed to death. The shape is the whole story here: even, balanced, and full in a way that feels measured rather than random.
A neat part helps a lot. Center part, side part, or a slight off-center line — any of them can work if they are clean and deliberate. Then shape the curls outward with a pick at the roots only. Hands can do the rest. You want volume, but you want it placed well.
What to focus on
- Moisture first, shape second.
- A defined part that stays visible.
- Rounded edges instead of a lopsided silhouette.
- Very light product at the surface so the curls don’t get weighed down.
A shaped afro looks especially sharp when the neckline, makeup, or outfit is clean and simple. There is no need to pile on accessories. The haircut and texture already carry the style. If one side needs more lift, pick it from the root for a few seconds and stop before the curl pattern breaks apart.
That little restraint is what makes it look polished.
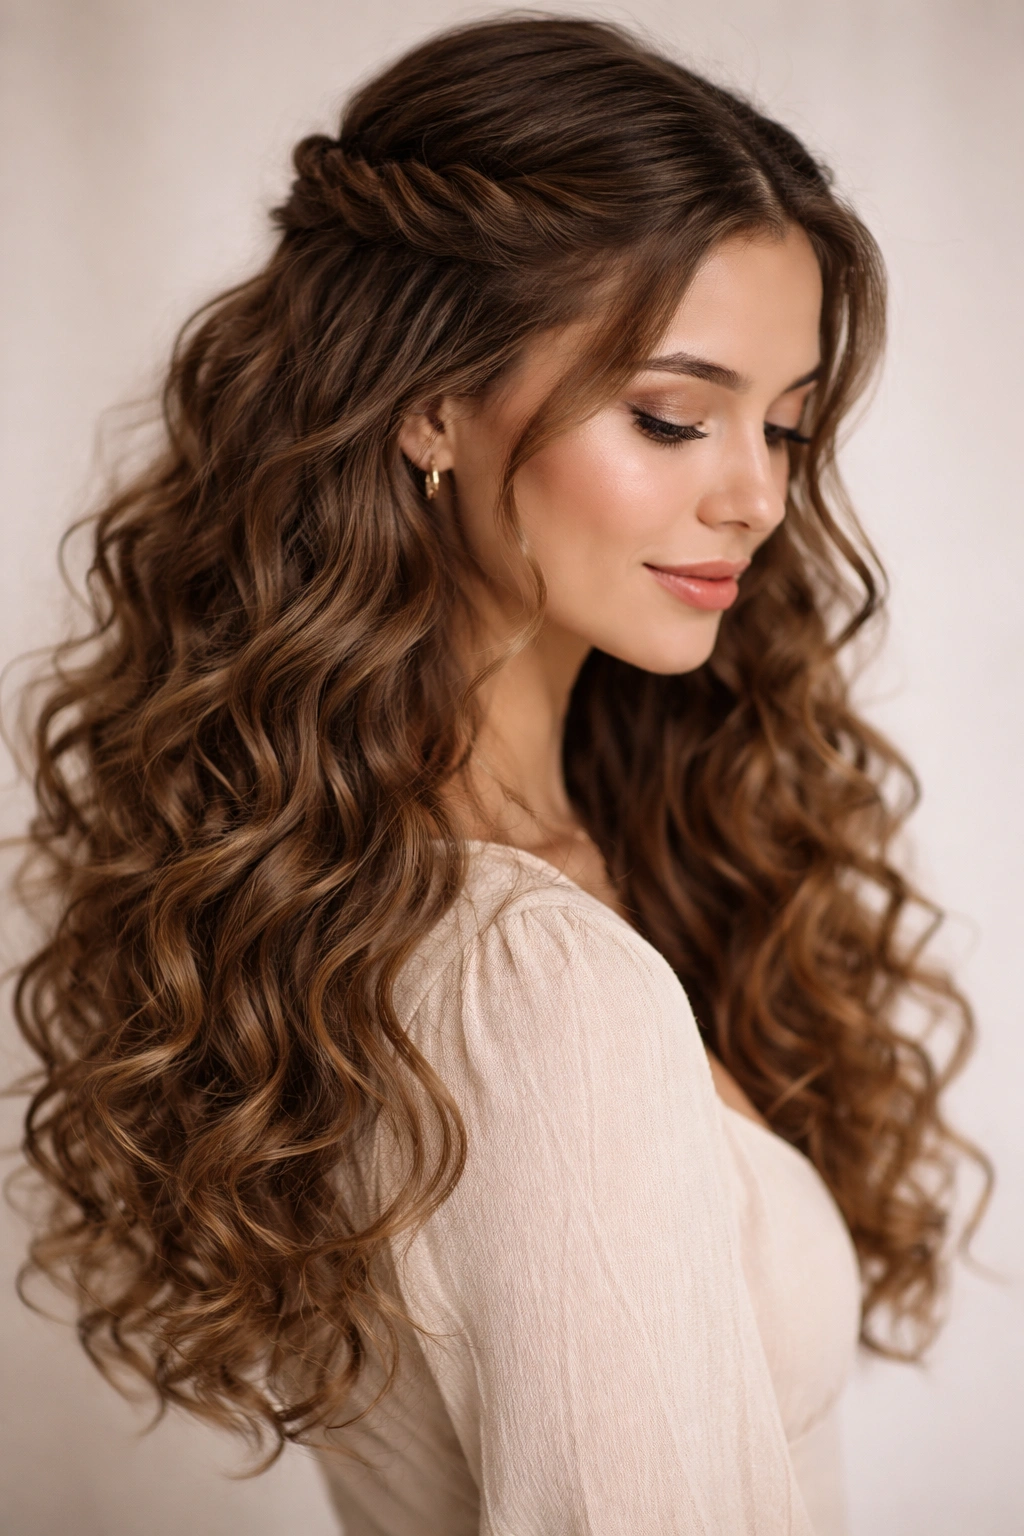
15. Glossy Long Curls with Minimal Accessories
Three things make long curly hair look polished fast: a clean part, defined curl clumps, and a little shine. That’s it. No complicated twist, no heavy clip cluster, no overthinking. Long curls often look best when they are given room to move, then finished with the smallest touch of control.
A center part can look especially neat on longer hair because it creates balance down the middle. If that part does not suit your face, move it slightly off center and keep the line crisp. After styling, smooth a drop or two of lightweight serum over the ends and any dry outer layers. The hair should look glossy, not greasy.
I’d keep accessories simple here. One slim barrette on one side, or nothing at all. Too many pieces compete with the length, and long curls already have enough presence. If the top starts to puff, a diffuser on low heat can help set the crown before you step out. If the curls lose shape halfway through the day, finger-coil just the front two pieces and leave the rest alone.
That restraint is usually the smartest move. Long curls do not need much help when the cut is right and the finish is clean.