Curly hair extension hairstyles work best when the base hair and the added length agree on the shape. Miss that match, and the style looks patched together. Get it right, and even a simple half-up ponytail feels finished.
The part people usually skip is the boring part: weight and placement. A bundle that sits too low can tug at the scalp; one that sits too high can make the crown look stiff; a curl pattern that is too loose or too tight can fight the rest of the head. I care more about those details than about fancy names, because the details decide whether the style moves or just sits there.
Clip-ins are the easiest for quick volume. Ponytail extensions are cleaner for sleek looks. Sew-ins and other longer-wear options give a smoother drape when you want the curls to fall as one shape. If your own hair is shorter, root prep matters too. A little mousse, a touch of leave-in, and a quick twist set often do more than another round of hot tools.
The best curly styles are not the ones with the most hair. They’re the ones where the curls sit where they should. That is where the fun starts.
1. High Puff With Curly Hair Extensions
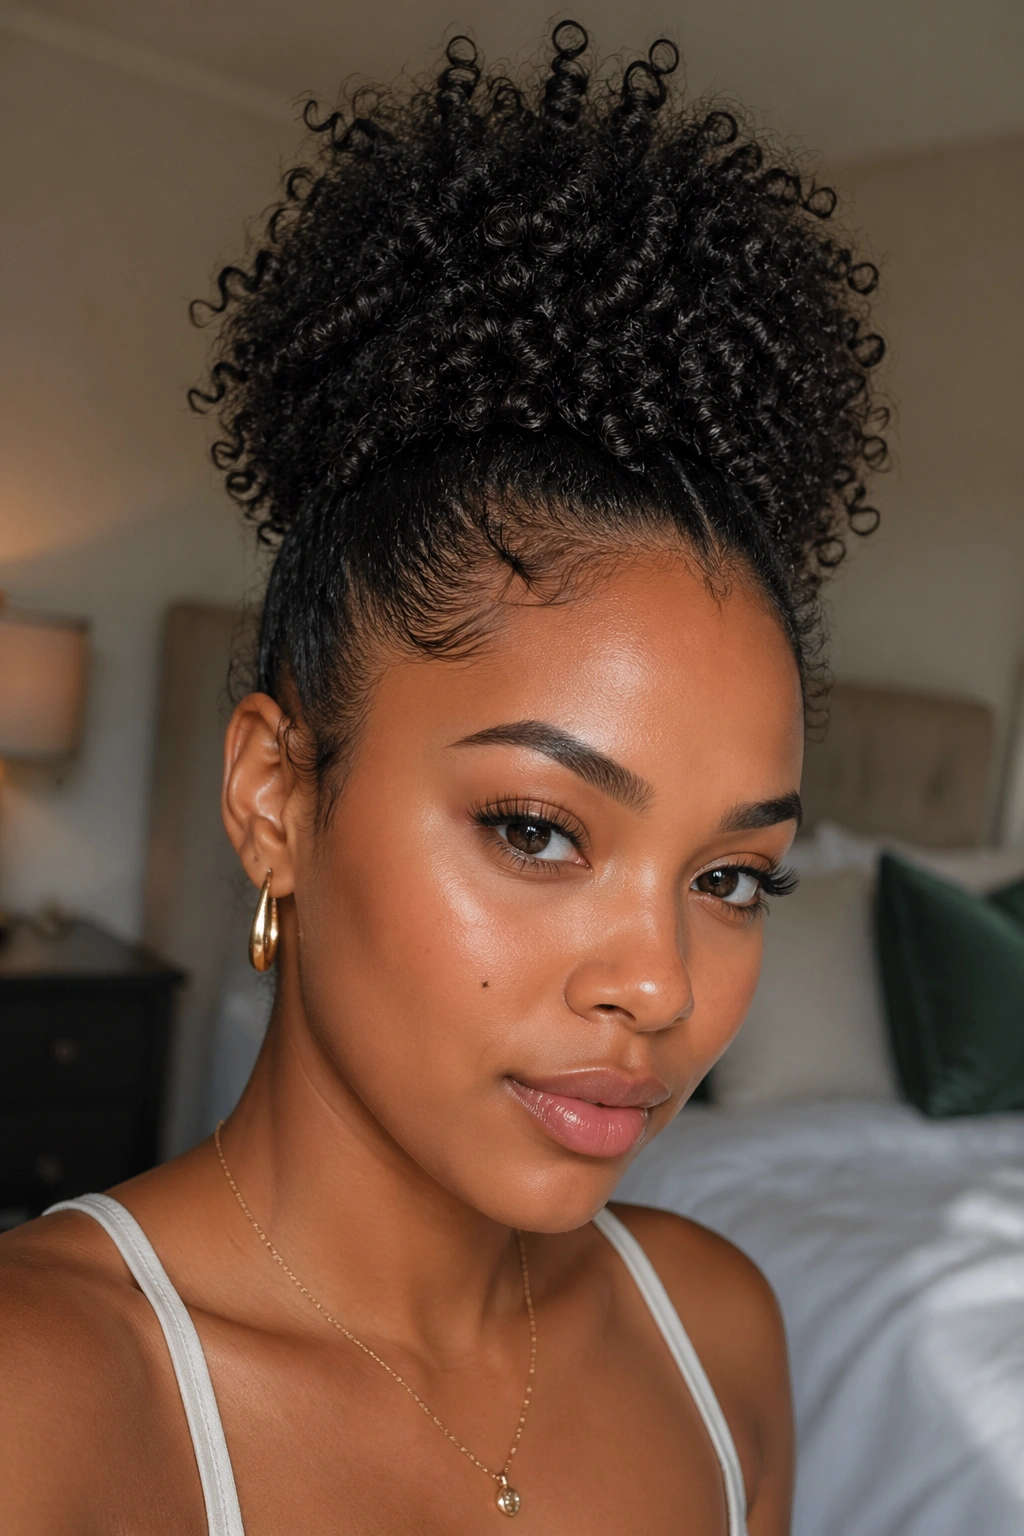
A high puff is one of those styles that looks casual from a distance and surprisingly deliberate up close. It gives your curls height, shows off your cheekbones, and lets the extension length hang where it matters instead of swallowing your face. When the crown is full and the ends are defined, the whole style feels alive.
Best when the roots need lift
This works especially well if your natural hair has enough texture to anchor the base without slipping. Pull the hair up with a soft brush or your fingers, then secure it with a strong elastic or puff cuff. Add the curly pieces after the base is steady, not before. That order matters.
- Place the puff at the highest point of the crown, not at the hairline.
- Leave the front smooth, but do not flatten it into a helmet.
- Pin the extension wefts in a circle so the volume spreads instead of stacking in one lump.
- Let a few curls fall around the temples for softness.
My favorite part: the style looks fuller when the crown is slightly messy. Too neat kills the shape.
2. Half-Up Crown Ponytail

Want the length visible and the face open at the same time? A half-up crown ponytail does both without trying too hard. It pulls the upper section back just enough to show the cheekbones, while the lower curls still do their full, dramatic thing.
The trick is to keep the ponytail a little wider than you think you need. If it sits too narrow, the top looks flimsy and the bottom looks overloaded. A small backcomb at the crown helps, especially with clip-ins, because it gives the elastic something to hold onto. Use a rat-tail comb for the sectioning and smooth the surface with a light gel or edge control if the front needs taming.
Keep two face-framing pieces loose. They should move when you turn your head. That little bit of movement keeps the style from feeling formal in a boring way.
3. Sleek Middle Part With Loose Curls
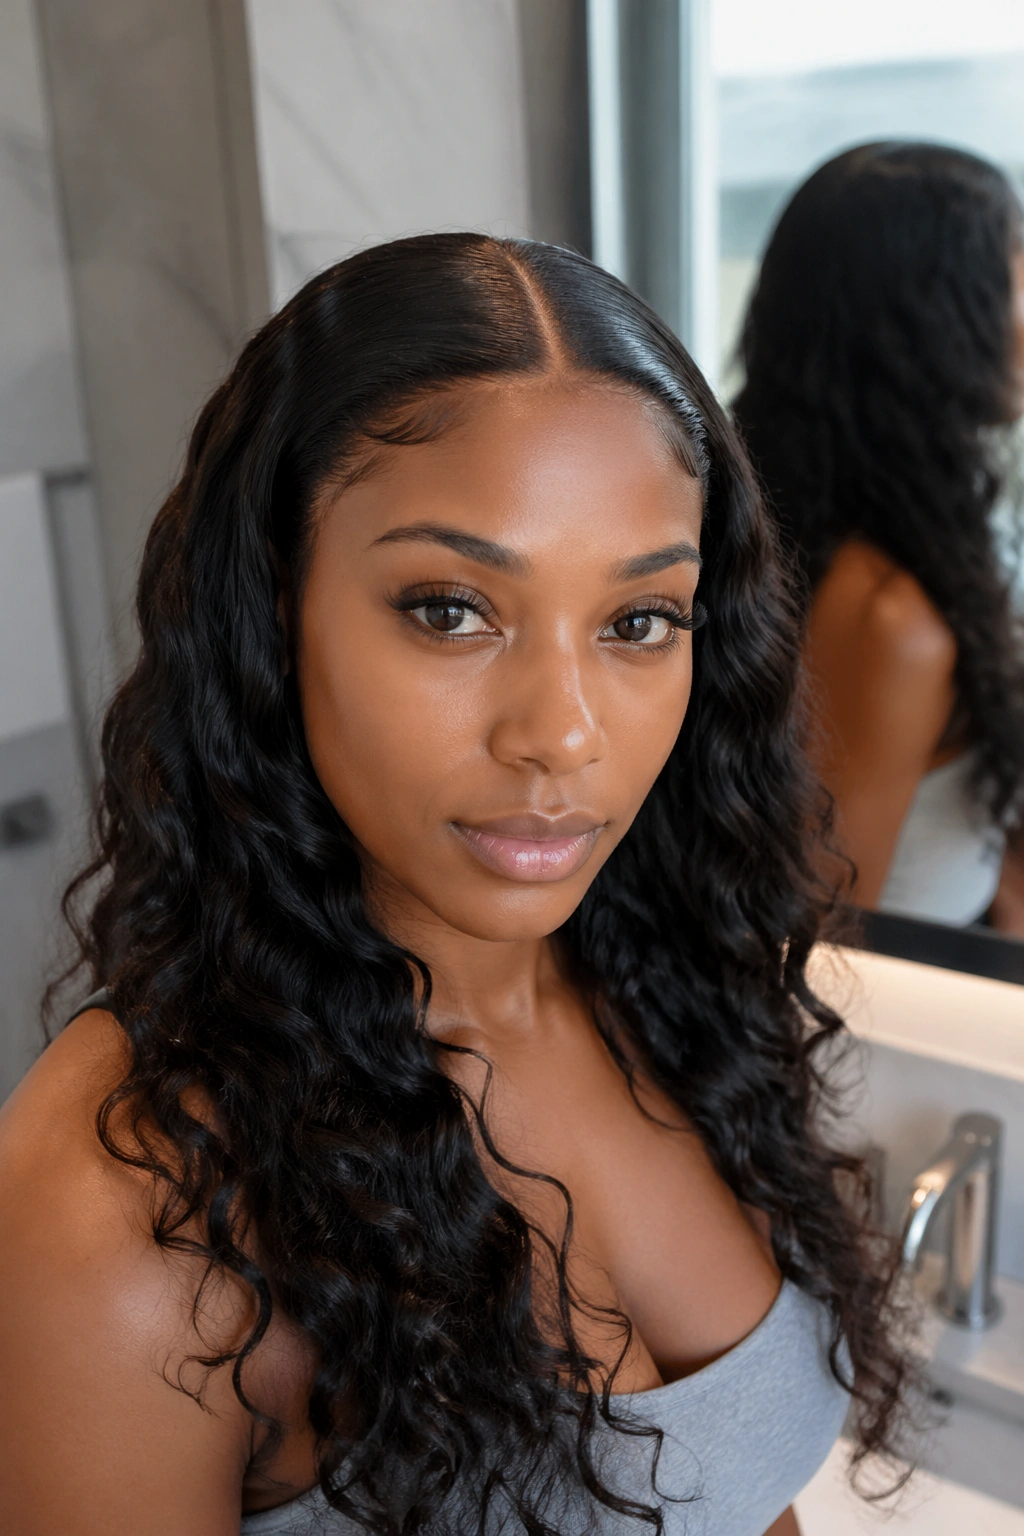
A clean middle part makes curly extensions look polished fast. It puts the focus on the texture instead of the setup, which is exactly why I like it when the hair itself is already doing the heavy lifting. The center line also gives a nice balance if the extensions are long and thick.
The root area should be smooth, but not greasy. A pea-sized amount of gel along the part, brushed down with a small boar-bristle brush, usually does the job. After that, leave the lengths alone. If you keep combing them, the curls turn into fluff, and not the good kind.
Less product. More shine.
A middle part also lets you see if the curl pattern matches. If one side looks tighter or looser, mist both sides with water and scrunch them back into shape before you pin anything. That five-minute reset saves a lot of frustration later.
4. Side-Swept Low Ponytail

If you have a long day and no patience for fuss, a side-swept low ponytail is the safe bet. It feels relaxed, but it still looks styled. The asymmetry does a lot of the work for you, especially when the curls are long enough to drape over one shoulder.
How to keep the sweep soft
The base should sit just behind one ear, not at the center of the nape. That angle matters because it changes how the curls fall. Bring the hair over the opposite shoulder, then pin the top side lightly so the part stays clean without getting flat and severe.
- Use 2 to 4 bobby pins hidden under the top layer.
- Wrap one curl around the elastic to cover it.
- Keep the ponytail loose enough that the curls can separate.
- Add a little shine spray only to the ends.
This is one of those styles that looks better when it is slightly imperfect. A too-tight side sweep loses the easy movement that makes it good.
5. Bubble Ponytail
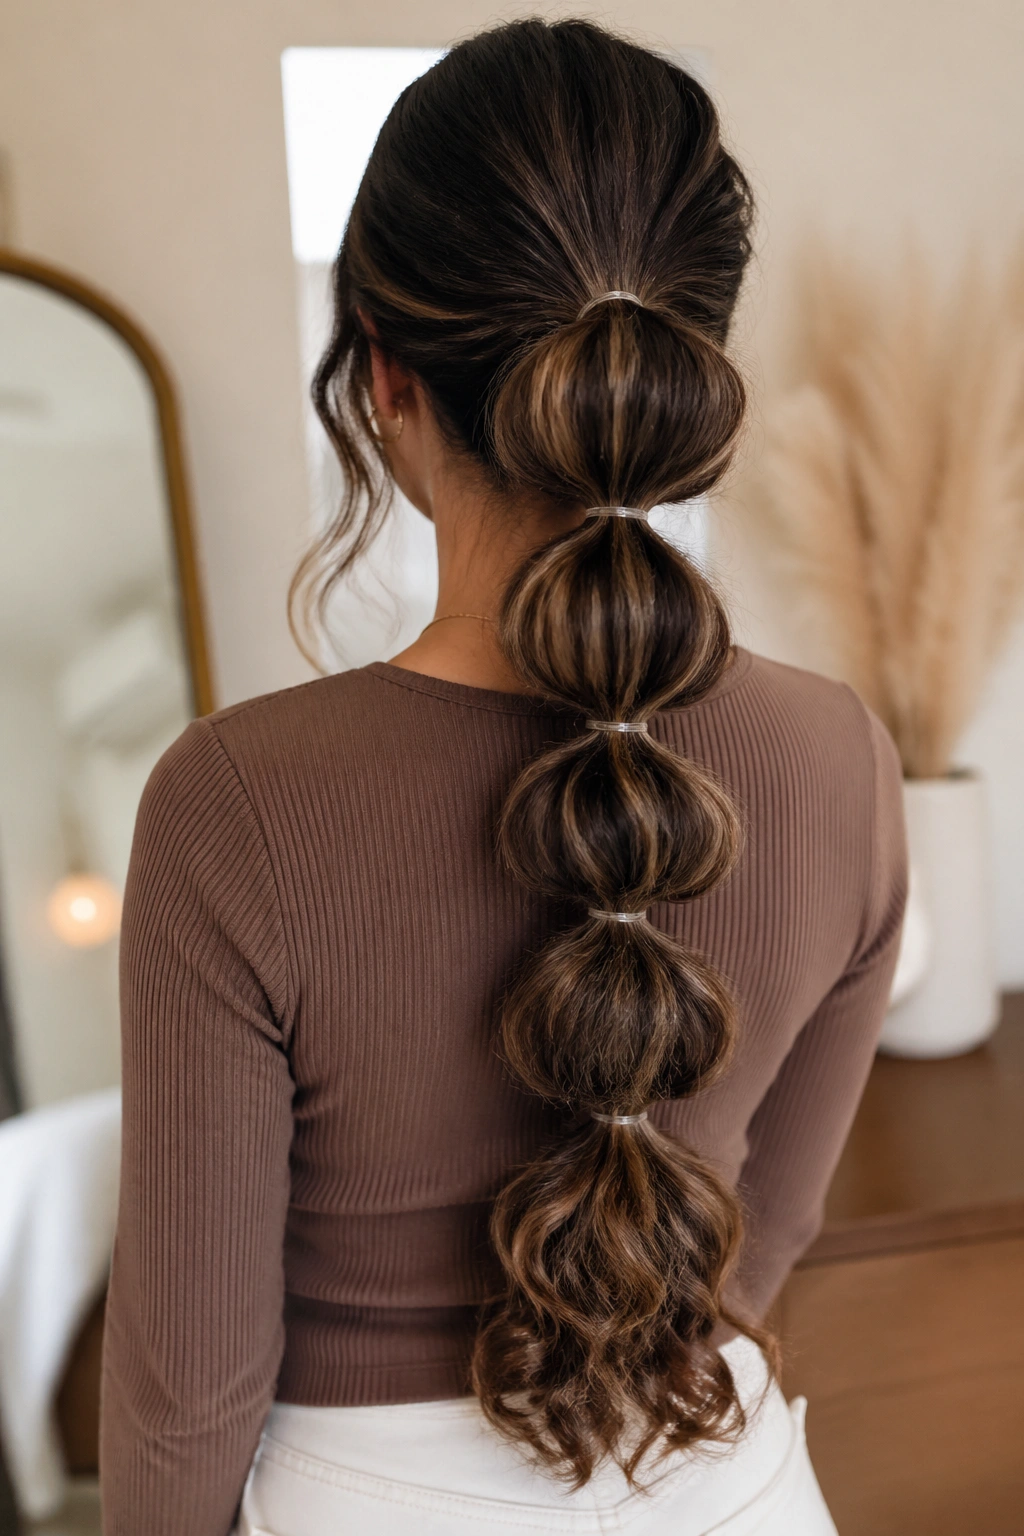
Bubble ponytails are basically a cheat code for textured extensions. They make one long ponytail look more interesting without needing extra braiding skills or a box full of pins. The sections turn into soft, rounded shapes, and curly hair gives them more body than straight hair ever will.
The spacing is the whole game. Use clear elastics or small snag-free bands every 3 to 4 inches down the ponytail, then gently pull each section outward until it looks puffed. Do not yank. You want roundness, not frizz exploding in different directions. If the hair is very dense, add a tiny elastic halfway through each bubble for extra hold.
This style is especially handy when the curls are long but you want them controlled. It keeps the length visible and stops the ends from tangling into one giant knot by the end of the day.
6. Pineapple Updo

A pineapple updo should feel loose at the crown and full at the ends. If it looks too tight, the shape gets harsh. If it sits too low, you lose the whole point. The sweet spot is high and slightly forward, with the curls spilling out in a soft fountain.
I like this style because it plays well with second-day texture and because it is kinder to the hairline than a pulled-back bun. Gather the hair with a satin scrunchie, tilt your head forward, and let the curls fall naturally into place before you secure anything. That little forward lean helps the curls keep their shape instead of getting crushed flat.
A pineapple works for casual plans, but it can still look intentional if you leave two or three curls around the temples. Those pieces give the style a face, which sounds dramatic, but it’s true.
7. Curly Space Buns
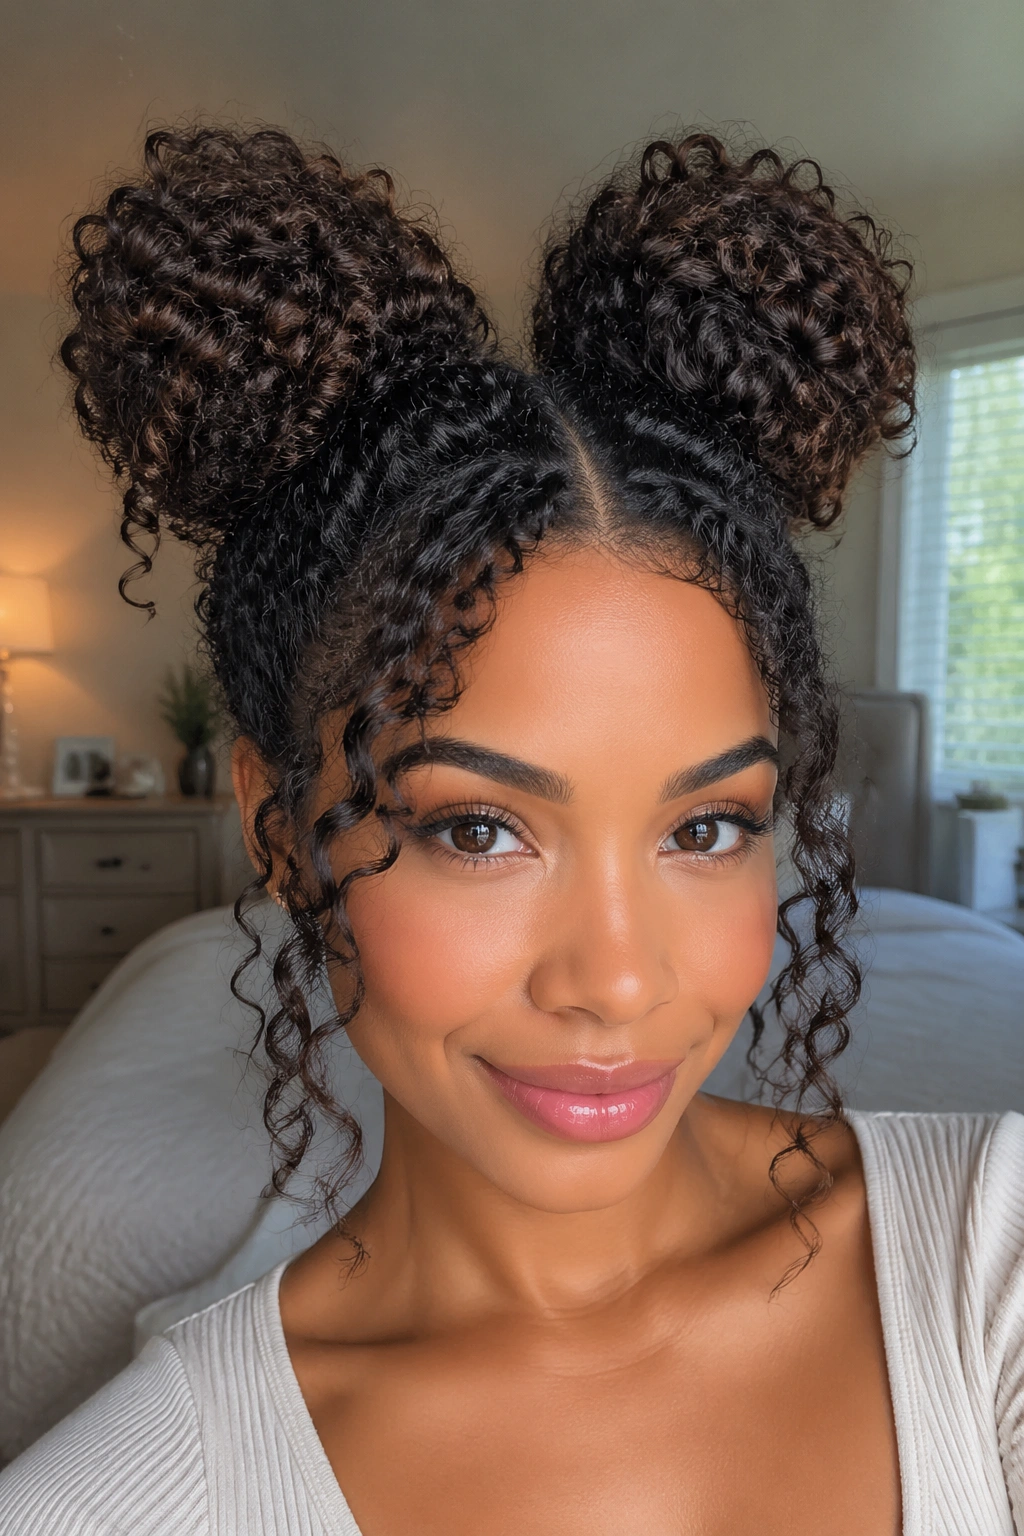
Curly space buns should look playful, not rigid. The best ones sit high enough to show the parting and low enough that they don’t turn into little hard spheres. Think of them as soft knots with attitude.
Where to split the hair
Start with a clean center part, then divide the hair from ear to ear so each side has enough density to build a bun. If the buns are tiny, the style looks unfinished. If they are too big, the head shape gets clumsy. Aim for balance.
What to pin first
Pin the base of each bun before you fluff the curls. That keeps the structure from sliding. Then pull a few curls loose around the ears and at the nape. The loose pieces soften the whole look and stop it from feeling costume-like.
What to leave loose
Leave the ends visible. That’s the part people love. A bun that hides every curl loses the point of using curly extensions in the first place.
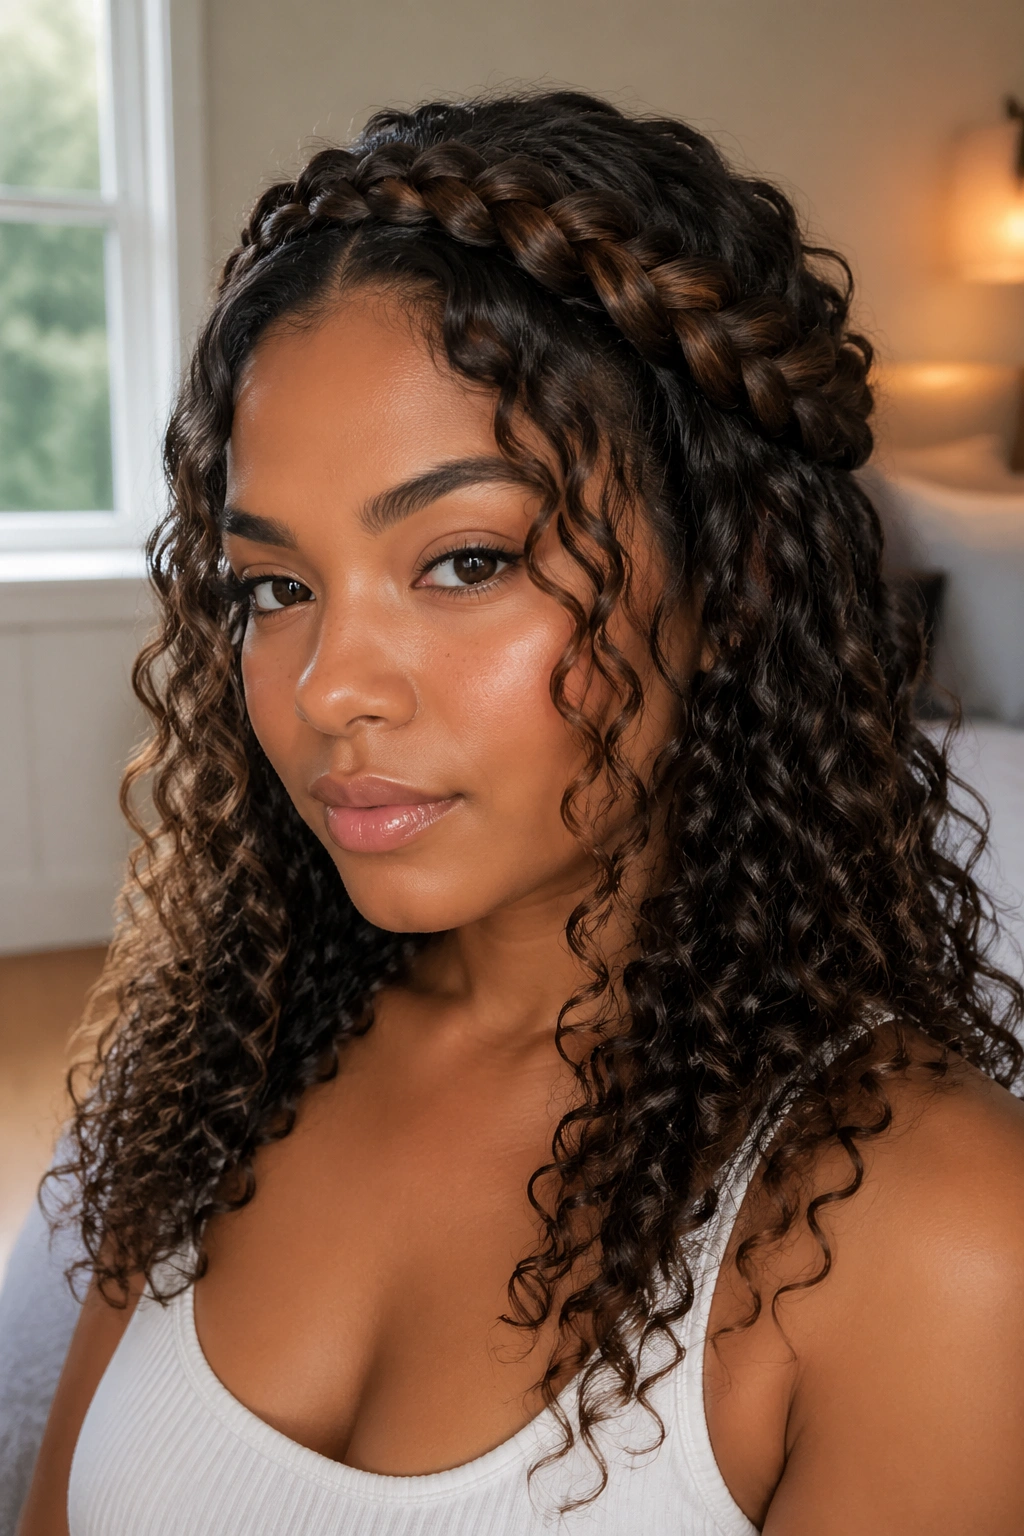
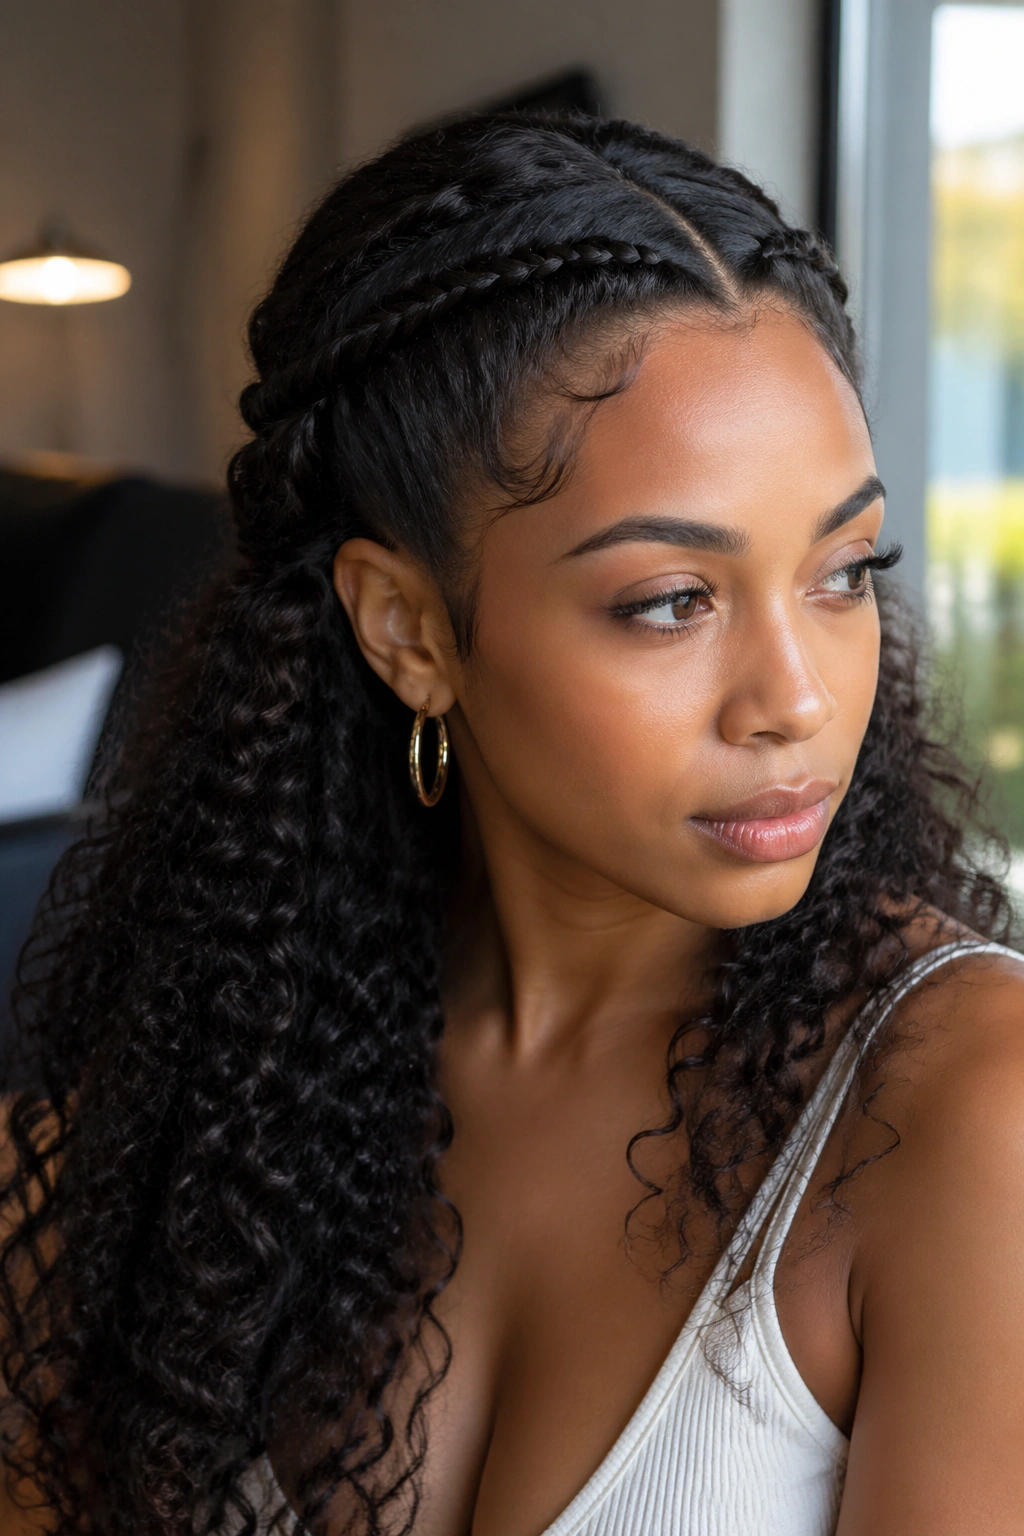
8. Braided Front Accent With Loose Curls
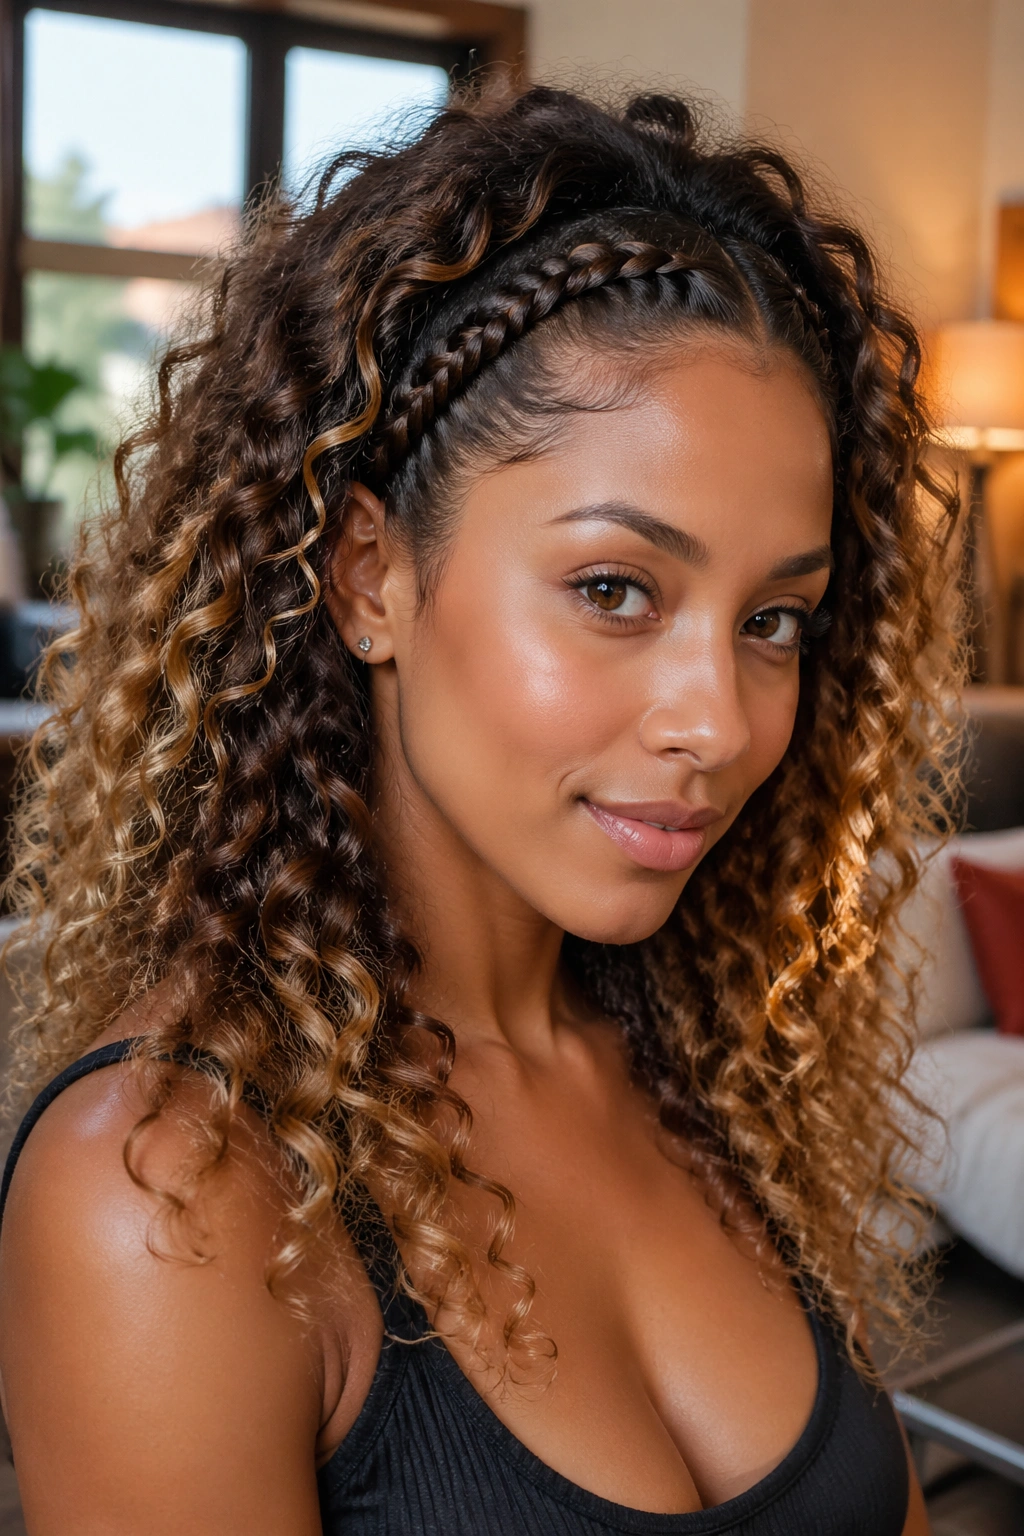
A single braided accent at the front changes the whole mood of curly extensions. It gives the hair a bit of structure near the face, which is handy when the rest of the style is free and full. One slim braid can make loose curls look more styled without taking over the entire head.
I like this move when the front pieces need a job. A braid at the hairline keeps them from frizzing into your eyes, and it gives the style a cleaner start. Keep the braid narrow—about half an inch to three quarters of an inch—so it reads as detail, not a full braid style. If you want more softness, stop the braid just past the temple and pin the end under the curls.
A couple of small braids work too. They’re especially nice when you want the face framed but not crowded. Quiet, but not boring.
9. Low Curly Chignon
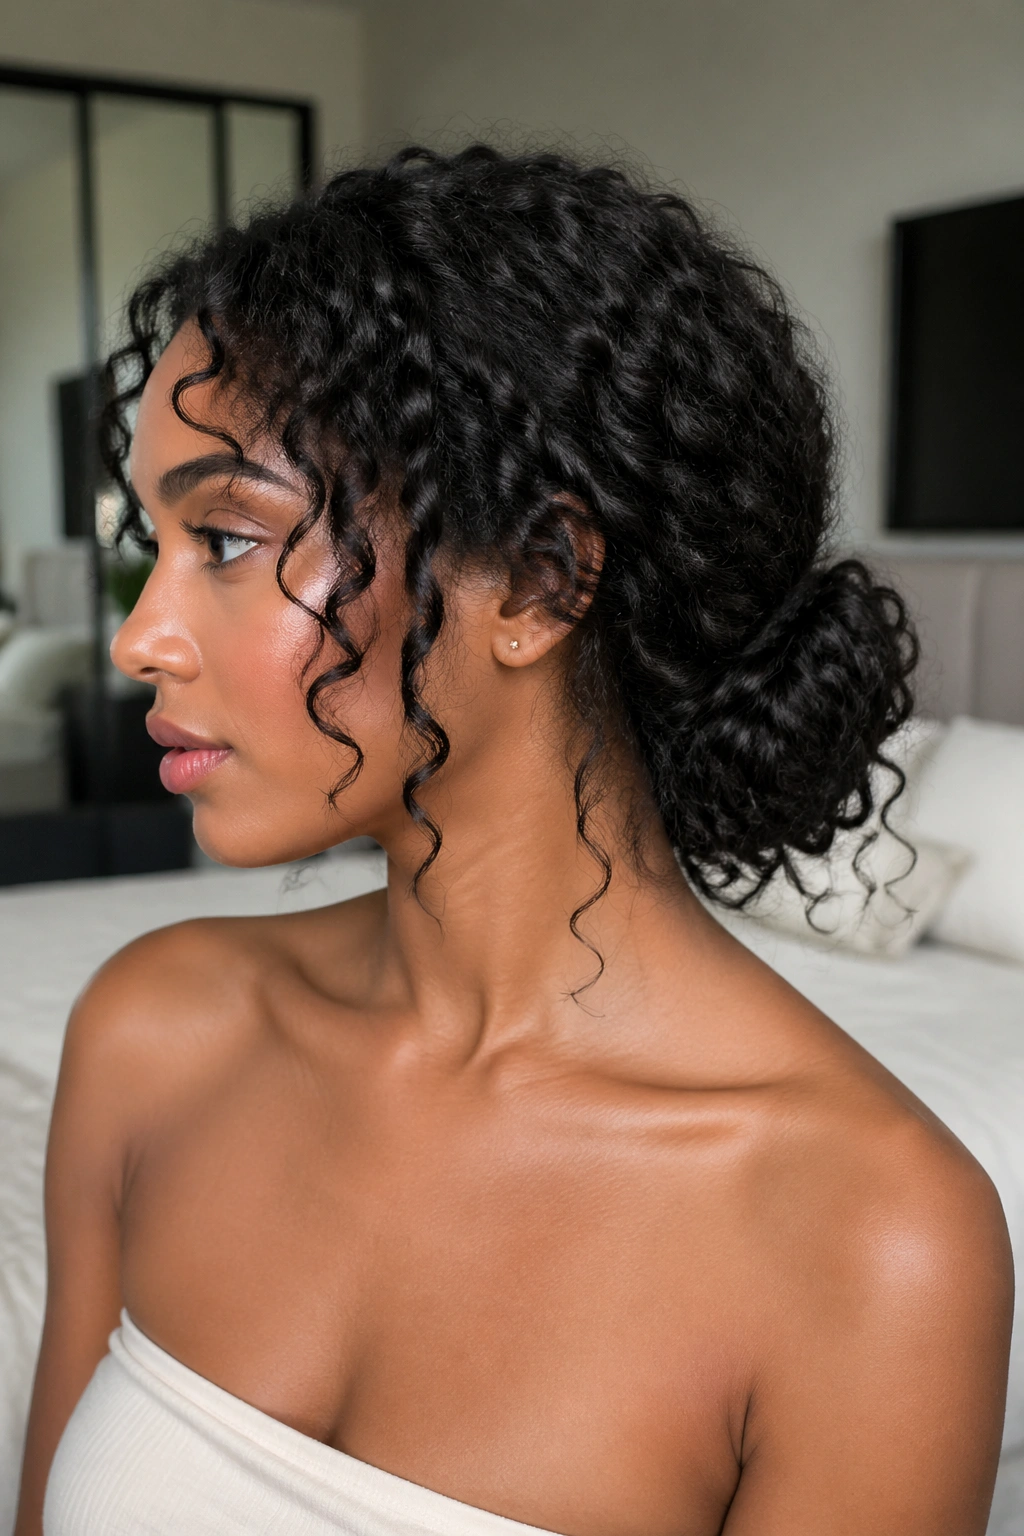
A low chignon is not boring when the curls have enough texture. In fact, it can look richer than a high-volume style because the shape is controlled and the details are easier to see. The twist of the bun, the curve at the nape, and the little ends peeking out all matter.
Pull the hair into a low ponytail first, then twist it into a loose bun and pin it in layers. If you try to force the whole thing into one knot, it collapses. Use longer bobby pins so they catch both the bun and the hair underneath. A few curls can stay loose at the base or around the ears. That gives the bun a softer finish.
This one is good when you want the hair off your neck but still want the texture to show. Clean, calm, and a little dressy. No drama required.
10. Faux Hawk With Pins
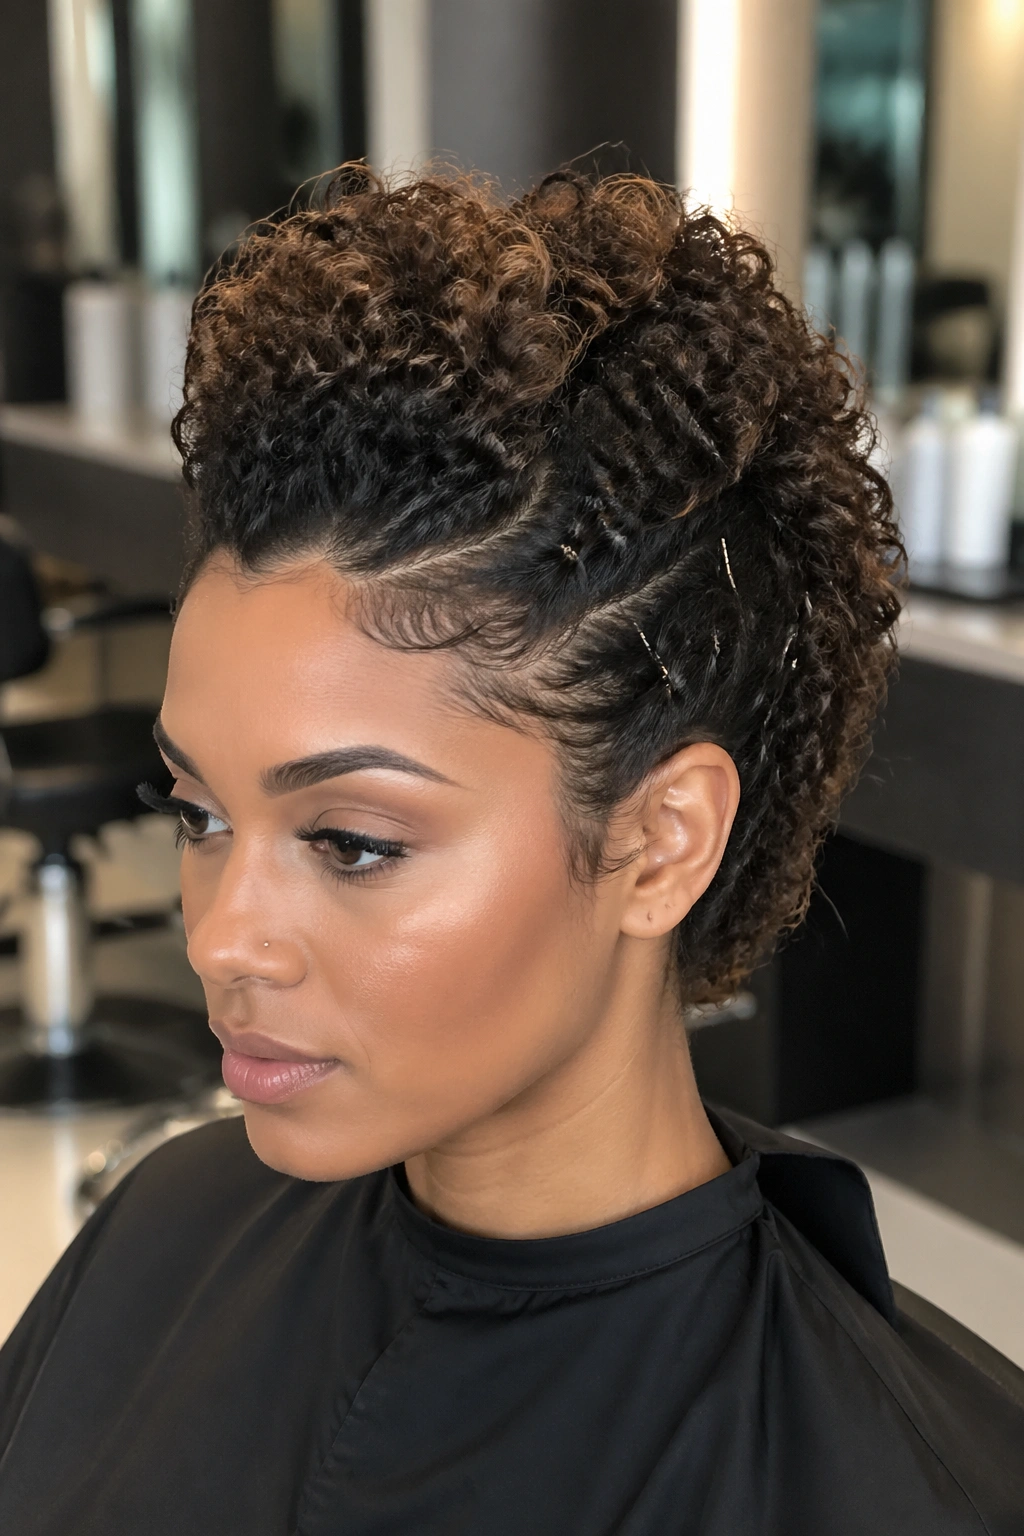
This is the style I reach for when I want height without a full updo. A faux hawk gives the curls a center ridge and keeps the sides close to the head, which makes the whole look sharper. It’s a little edgy, sure, but not in a try-hard way.
How to build the ridge
Start by taking the middle section from forehead to nape. Clip the sides away first. Then pin them upward in rows so they disappear into the center shape rather than hanging loose. Once the sides are secure, fluff the ridge with your fingers until it looks full and rounded.
- Use smaller pins at the temples and longer pins at the back.
- Keep the center strip wide enough to show the curl pattern.
- Mist the ridge lightly if the curls look dry.
- Leave the top slightly taller than the rest for shape.
The style works on long extensions, but it also does a nice job on mid-length hair that needs a lift.
11. One-Shoulder Sweep

A one-shoulder sweep gives curly extensions a little drama without asking for much effort. The whole idea is asymmetry: one side stays open, the other is tucked or pinned, and the curls cascade forward over a single shoulder. It’s flattering because it creates movement where the eye wants it most.
I prefer this style when the curls have good definition and the part can hold. A deep side part helps, but it does not need to be severe. Pin the smaller side behind the ear with a hidden clip, then let the longer side fall forward in loose, separate pieces. If the front wants to puff up, smooth just the root and leave the rest alone.
The best part is the shape it creates in photos and in person. The curls don’t disappear into the back. They stay visible. That matters more than people admit.
12. Half-Up Top Knot
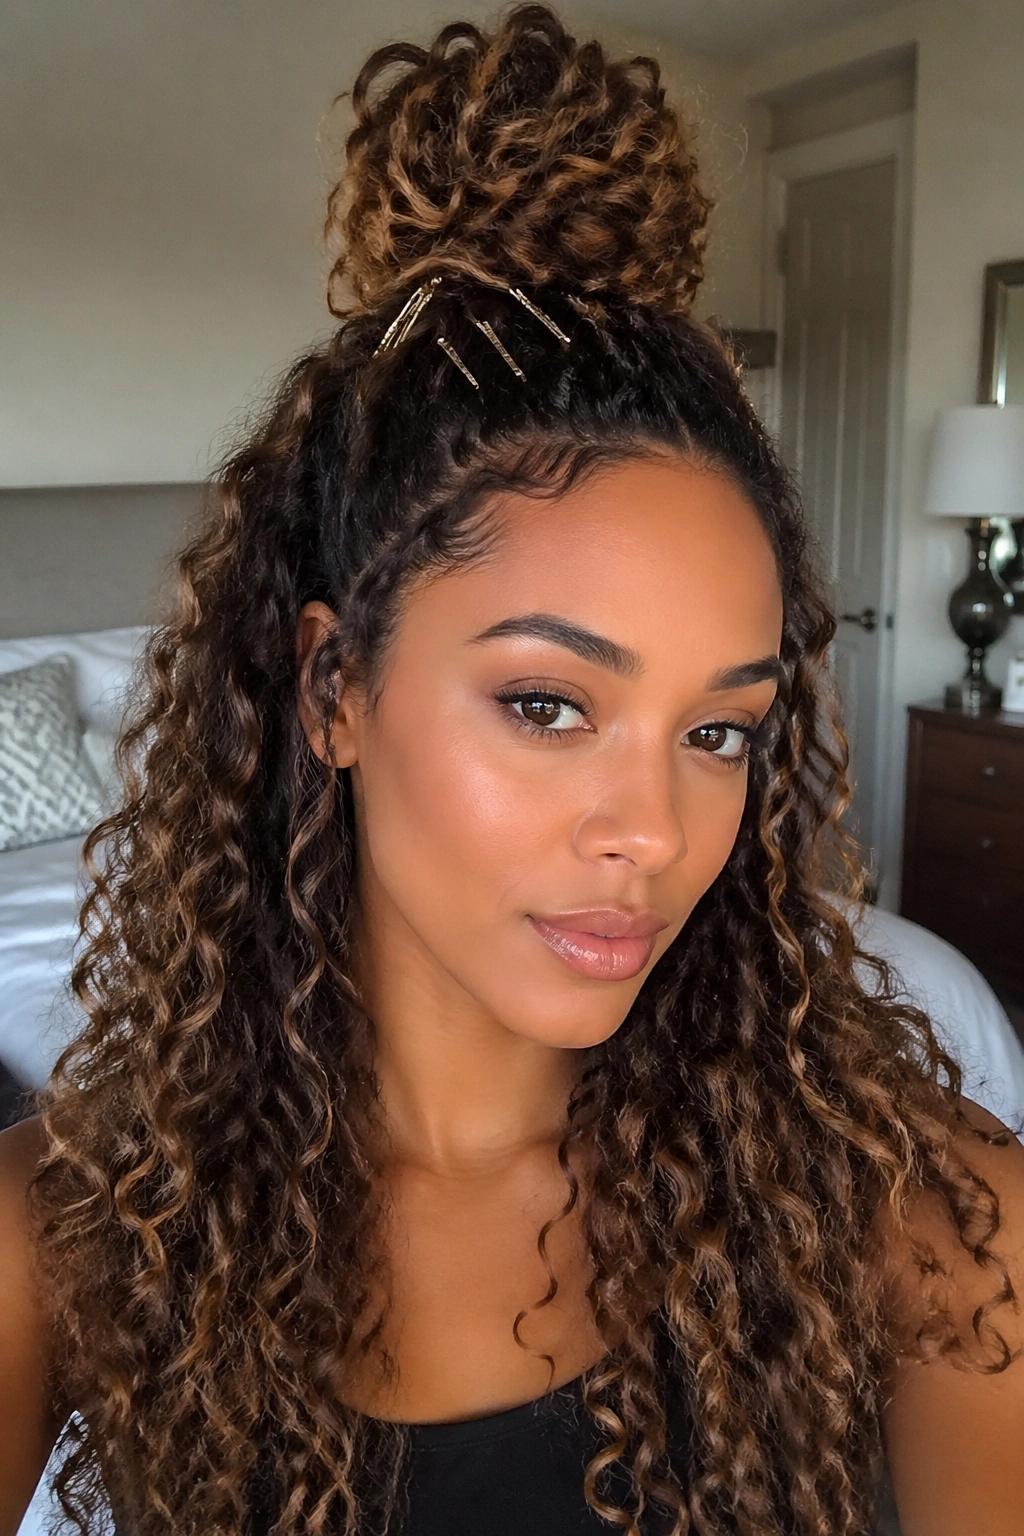
A half-up top knot saves the shape when the roots start to puff at the wrong moment. It also gives you the cleanest mix of structure and softness. The top stays controlled, while the rest of the curls hang loose and full.
The knot should sit at the crown, not the forehead. Pull only the upper third of the hair into the knot so the bottom still has enough density to feel like a real style. Wrap the knot loosely, then secure it with 3 to 5 pins around the base. One lonely elastic usually isn’t enough. The shape needs a little help.
I like this one because it works on hair that is not perfectly matched. Even if one section of the extensions is a bit looser, the knot distracts the eye and keeps the whole style looking planned. Useful. That’s the word.
13. Halo Braid With Curly Ends
Unlike a full braided crown, a halo braid with curly ends keeps the length visible. That’s the part I care about. You get the neat frame around the head, but the curls still fall where they can move, which stops the style from feeling overworked.
Braid around the perimeter of the head, starting at one temple and moving across the hairline like a built-in headband. Leave the rest of the curls loose or tuck them low at the back, depending on how dressed up you want the finish. A softer braid is better here than a super-tight one. If it grips too hard, the crown starts to look stiff.
This style is a good pick when you want hair off your face but don’t want a full updo. It also works well if the front layers are shorter than the back, because the braid gives those shorter pieces somewhere to live.
14. Feed-In Braids Into Curly Hair Extensions
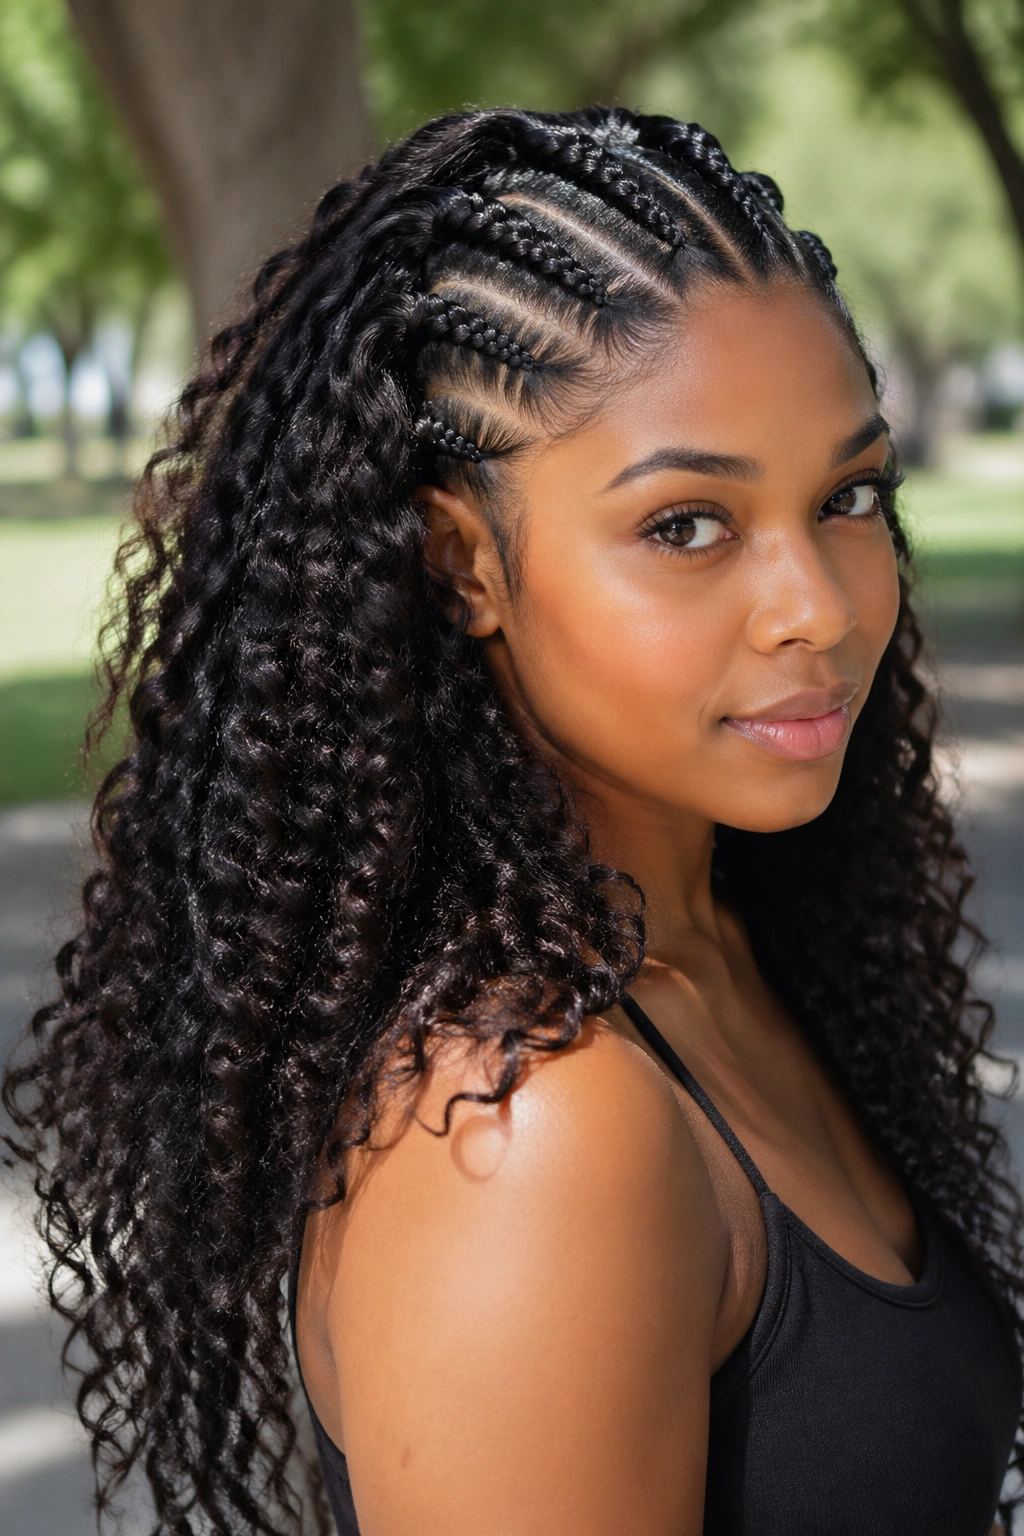
Feed-in braids that end in curly extensions give you the cleanest mix of control and movement. The braid handles the front and sides, while the curls bring the length to life. It’s a smart choice if you want your hairline protected and your ends still visible.
Start each braid small at the root, then add hair gradually so the base stays flat. Four to six braids is enough for most looks. If you go wider, the style can start to feel heavy at the scalp, especially when the added curly length has serious density. Keep the braids directed back or slightly down so the curls fall in a natural line.
The finish matters. Once the braids end, let the curls drop freely and separate them with your fingers, not a comb. A wide-tooth comb can work, but only if the curl pattern is loose enough to handle it.
15. Wrapped-Base Ponytail
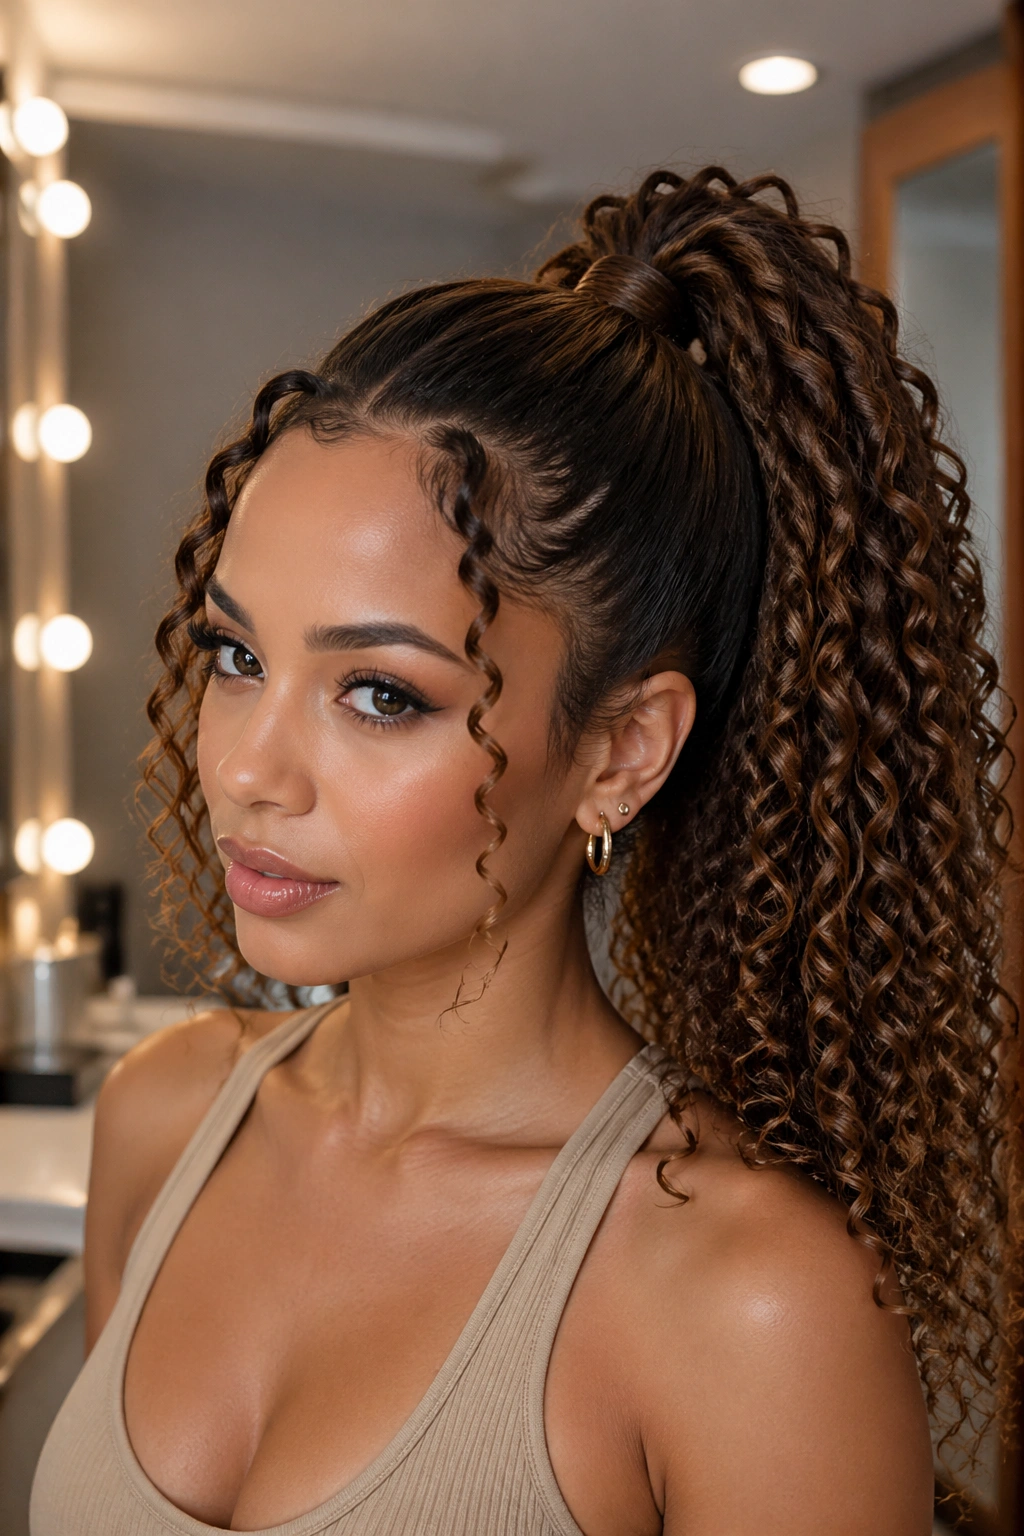
Clean. High. Easy to dress up.
A wrapped-base ponytail is one of the most useful curly hair extension hairstyles because it hides the hardware. The elastic disappears under a small piece of hair or extension, so the whole ponytail reads as a single, polished shape. That makes a bigger difference than people expect.
Pull the hair into a mid or high ponytail, secure it tightly, then take a one-inch section and wrap it around the base until the elastic is hidden. Pin the end underneath the ponytail with a small bobby pin. If the ponytail feels too bulky, loosen the top slightly with your fingers instead of adding more product. Too much gel near the root can make the style look wet in a bad way.
I like this one for days when the curls need to stay contained but still look full. It’s straightforward, and that’s not a weakness.
16. Afro Puff Pigtails
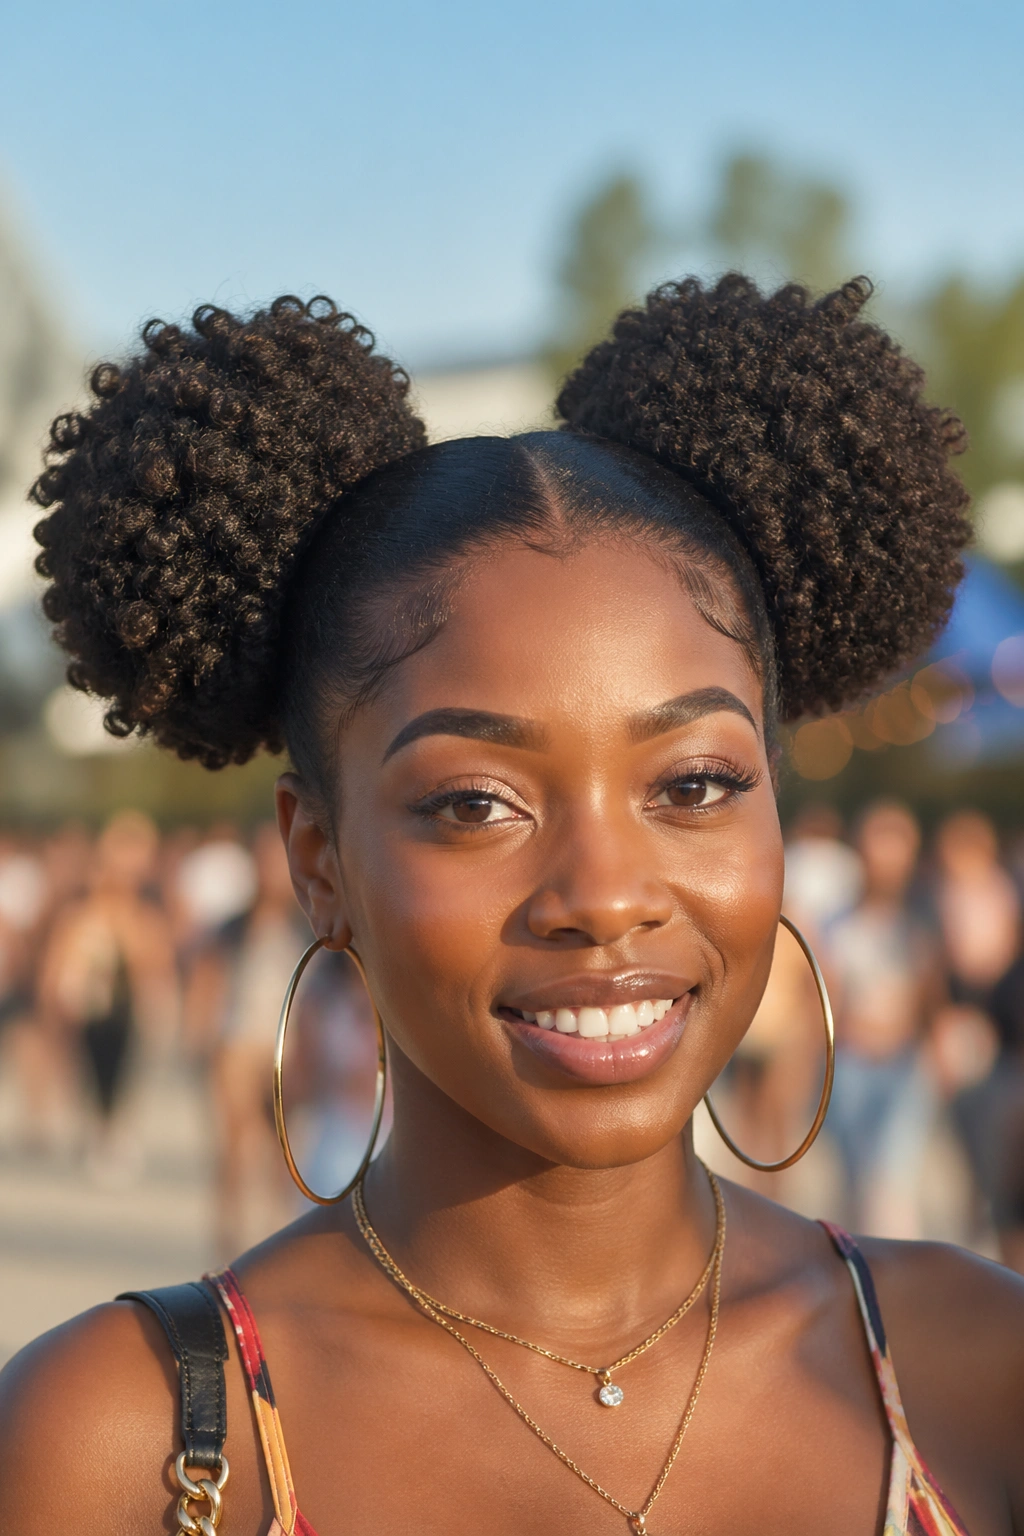
Afro puff pigtails have a fun shape, but they only work if both sides are balanced. One puff sitting higher than the other makes the whole style look accidental. Two matching puffs, placed with care, look fresh and confident.
Balancing the two sides
Split the hair down the center first, then check the head shape in a mirror before tying anything. The puffs should sit around temple or ear level, not too low. If they’re low, the face loses lift. If they’re too high, the style starts to look compressed.
What gives them shape
Use enough extension density to make the puffs round, not stringy. Smooth the roots, fluff the ends, and let the curls spread outward. A light mist of water helps the curls clump in a better way if they’ve gone fuzzy.
When to wear them
This is a good choice for relaxed weekends, festivals, or any day when you want a little bounce. It’s cheerful without being fussy.
17. Twist-Crown Style
Two flat twists crossing the top of the head can look more refined than a braid when curly extensions are involved. The twist has a softer edge, so it blends into textured lengths without shouting for attention. I reach for this style when I want the face framed and the crown controlled.
It helps to part the hair cleanly and keep the twists even in size. Start near the temples, bring the twists back toward the crown, and pin them where they meet. The rest of the curls can fall loose, or you can tuck them into a half-up finish if you want more structure. Either way, the top stays neat and the bottom stays airy.
It looks complicated. It isn’t.
The style is especially nice when the extensions have a little movement at the ends, because the twists act like a frame and the curls do the rest.
18. Curly Bob Tuck-In
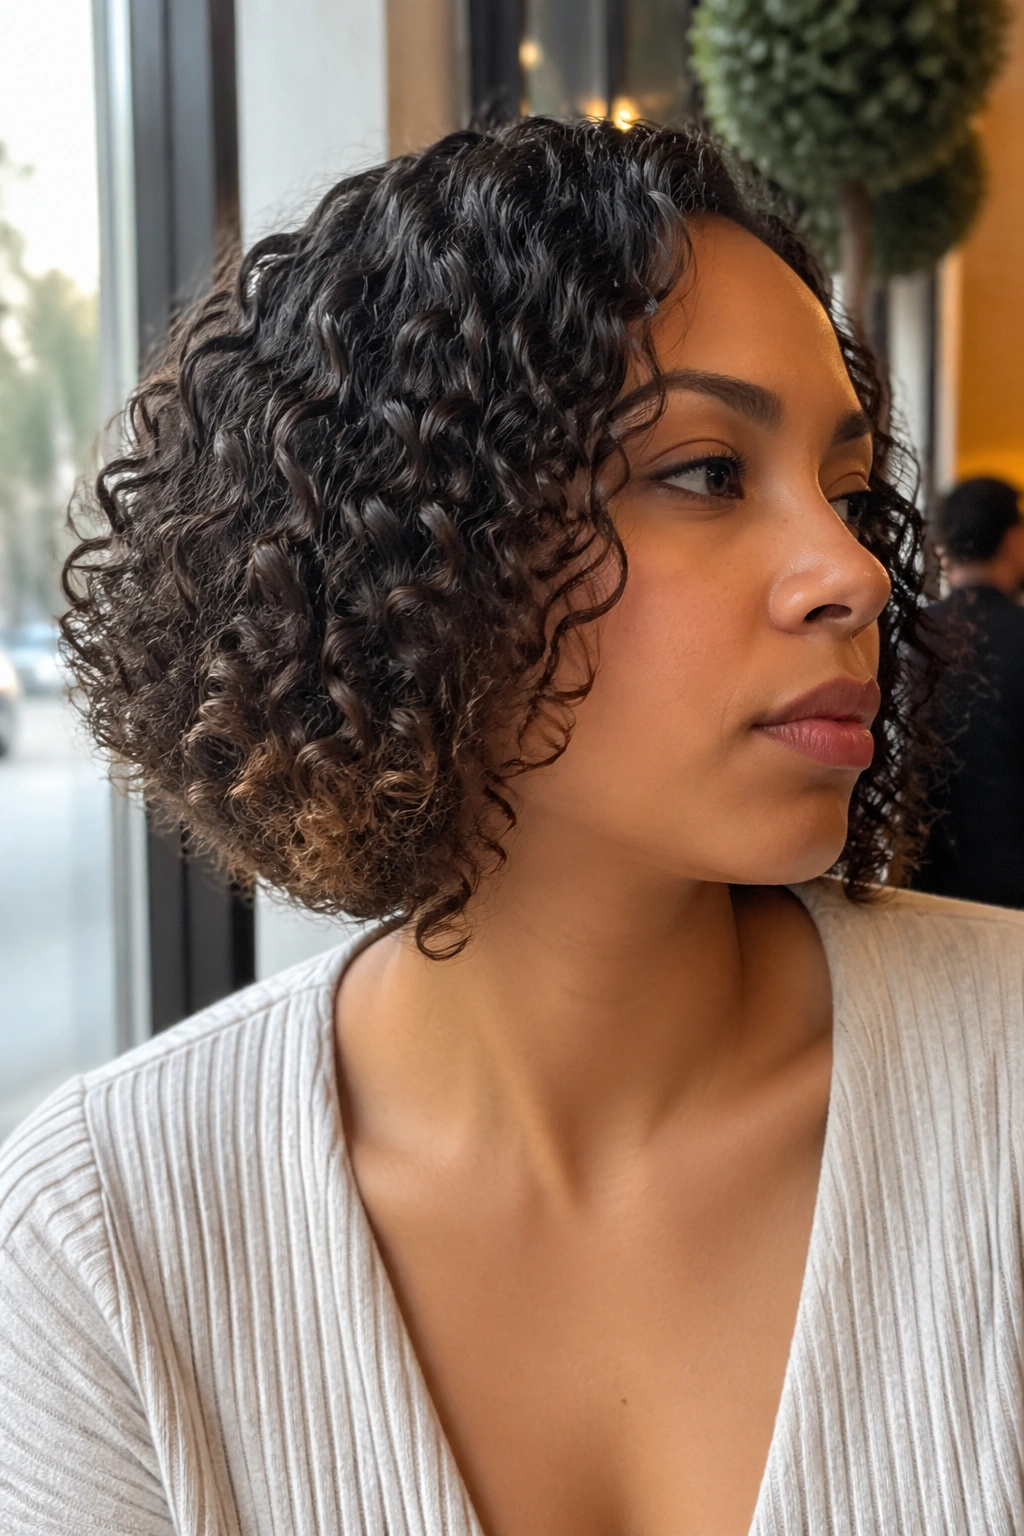
If you want the volume of long extensions but the shape of a bob, this trick is worth knowing. Tuck-in styling lets you keep the fullness while cutting the visual length, which is handy when a long shape feels too much for the outfit or the occasion.
Use longer extension pieces, then fold the lower half under and pin it close to the neck or jawline. The top layers should fall over the tucked section so the hidden pins disappear. A length around 18 to 20 inches can usually be tucked into a bob shape that reads closer to chin or shoulder length, depending on your curl pattern. The ends should peek out just enough to show the texture.
This style works best when the neckline is clean. A turtleneck can crowd it; a simple neckline lets the shape breathe. Small thing. Big difference.
19. Waterfall Braid Over Curls
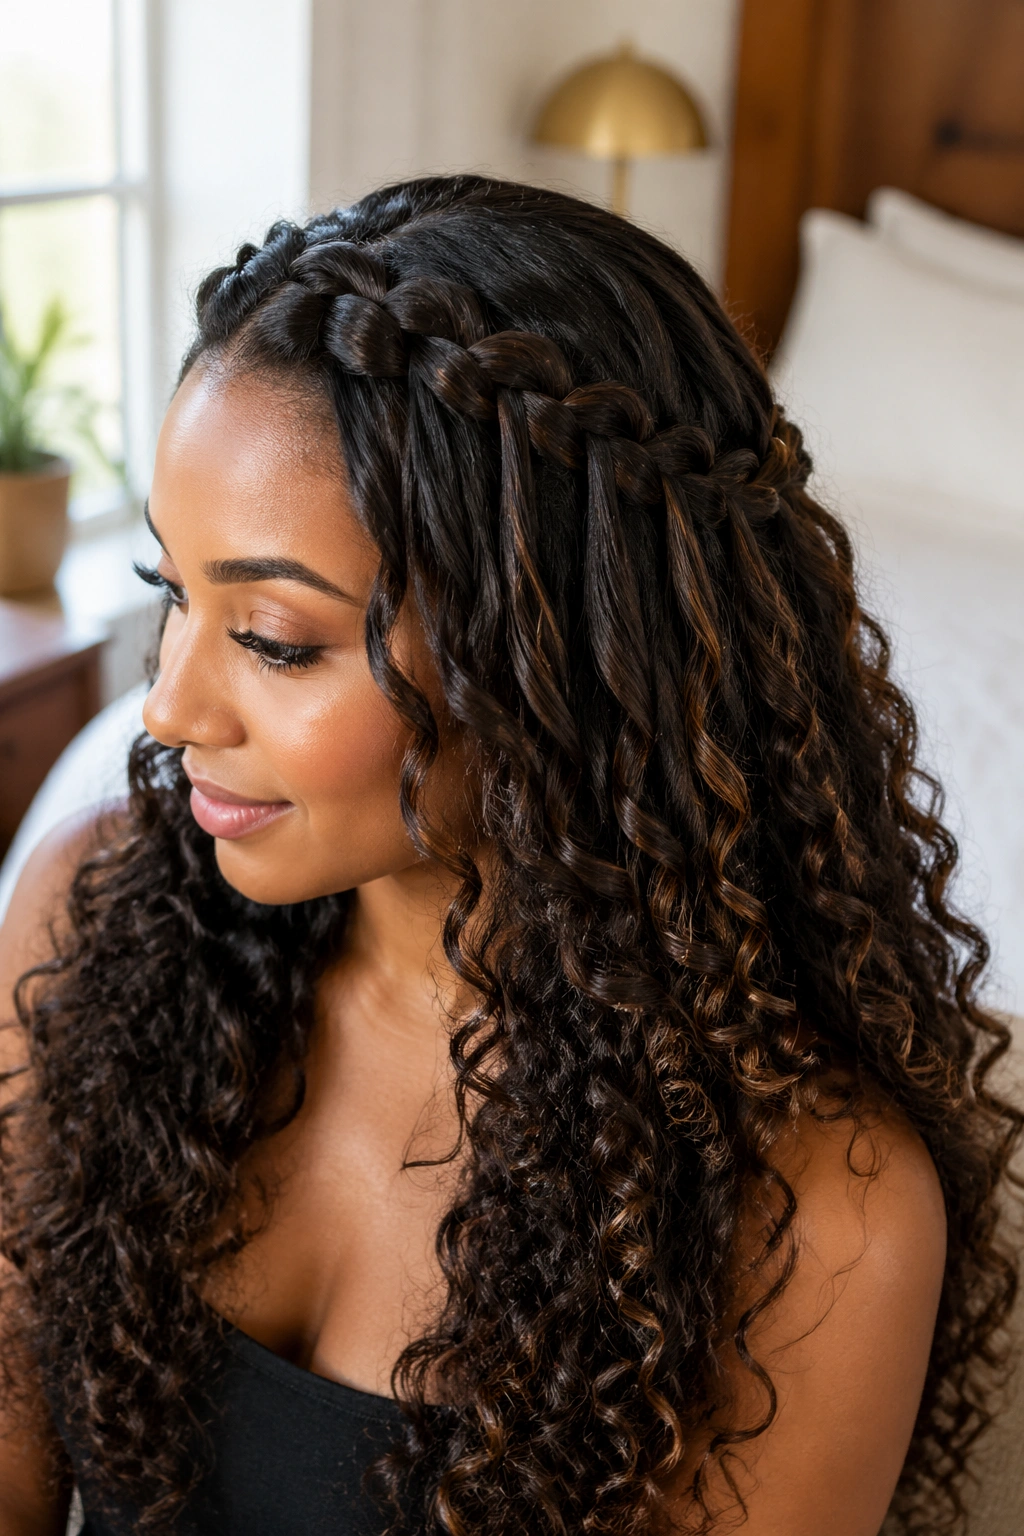
What makes a waterfall braid work with curly extensions? The braid acts like a frame, and the curls falling through the open sections give it movement. Without that curl contrast, the braid can look plain. With it, the whole style gets depth fast.
Keep the braid loose enough that the strands slide out with a soft curve instead of a hard bend. If the braid is too tight, the curls beneath it lose their softness. I’d rather see a slightly looser braid with good texture than a perfect braid that crushes the hair. The sections should be small and even, but not tiny. Tiny sections take forever and still do not read better from a normal distance.
This style shines when the hair is long and the curl pattern is defined. It’s a detail style, not a “throw it together in two minutes” style, but the result looks worth the extra hands.
20. Side Bun With Curly Hair Extensions
A side bun is the style I choose when I want something soft, secure, and a little romantic without drifting into fussy territory. The curls are gathered low and to one side, which gives the face a gentle angle and keeps the neck clear. It’s one of those looks that works for dinner, a wedding, or just a day when you want the hair out of the way but not flattened down.
Build the bun loosely at the side of the nape, not directly under the ear. That position gives the curls room to spill outward a little. Leave a few sculpted tendrils around the face and one near the bun itself. Those pieces stop the style from looking too fixed. If the extensions are long, fold the ends under in sections so the bun has depth instead of one giant twist.
If you want a single style to keep in mind from this whole list, this is probably the most forgiving one. It hides uneven pieces well, it photographs cleanly, and it still looks like hair, not a project.