Curly hair takes a curling iron better than people expect. The trick is not trying to invent a new texture; it is refining the one you already have. A 1-inch barrel can tighten a bend, a 1¼-inch barrel can soften a stubborn edge, and a clipless wand can keep the finish from looking boxed in.
That is why so many curling iron styles for naturally curly hair work best when they borrow from the curl pattern instead of fighting it. You are not flattening your curls into submission. You are nudging shape, tightening a few pieces, loosening others, and giving the whole head a cleaner outline.
And yes, heat protectant matters. On curly hair, a thin layer of thermal protection can be the difference between a polished curl and a dry, straw-like end that refuses to behave. Keep the iron moving, keep the sections controlled, and stop pretending that bigger chunks of hair will save time. They usually do not.
A good style on curly hair has a specific kind of honesty to it. It should still look like your hair, just a little more intentional around the face, the crown, or the ends. The first style below is the easiest place to start.
1. Soft S-Bend Volume for Everyday Curls
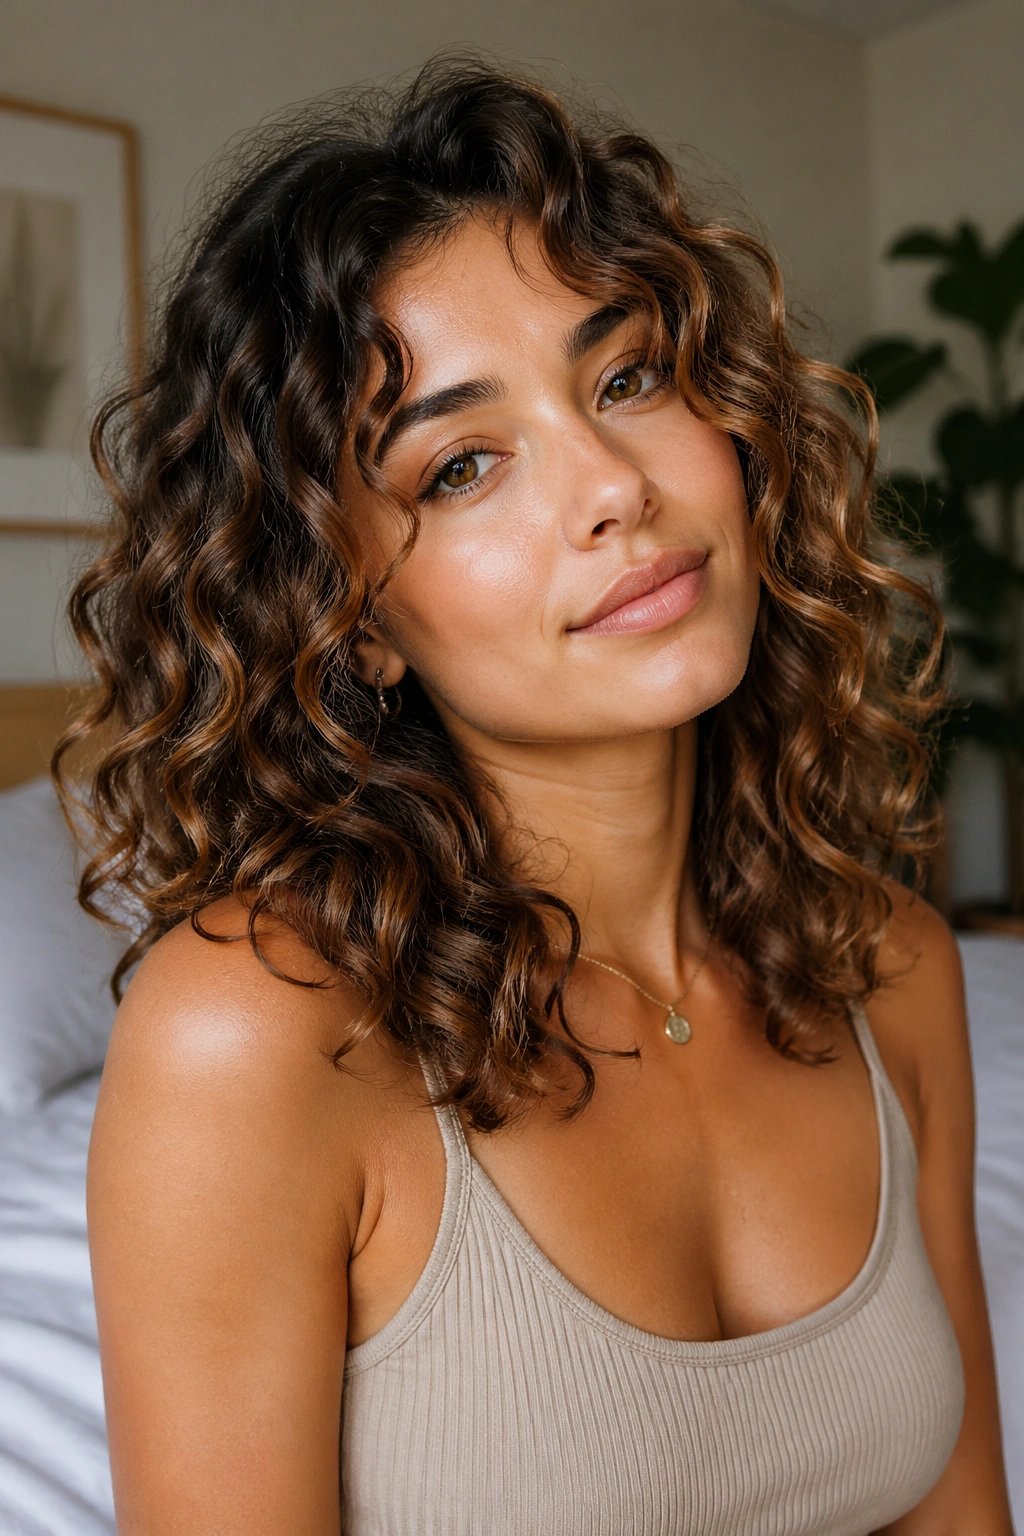
This is the style I reach for when curly hair needs a little smoothing but not a full reset. A 1¼-inch curling iron gives you enough room to create a soft S-shape through the mid-lengths without collapsing the body your curls already have. Use sections that are about 1 to 1½ inches wide, clamp lightly in the middle, and leave the last inch or so out if the ends already have a good bend.
The point is not uniform curl. It is movement. That little shift keeps the hair from looking bulky around the cheeks or puffy at the bottom, which is usually where naturally curly hair starts acting stubborn.
Why It Works
The barrel softens the outer layer of the curl and calms the pieces that stick out at odd angles. If your hair tends to frizz at the surface while the inside of the curl still looks fine, this style solves that mismatch without forcing every strand into a new pattern.
Quick facts:
- Best barrel: 1 to 1¼ inch
- Section size: 1 to 1½ inches wide
- Heat range: about 300°F to 325°F for most healthy curls
- Finish: flexible spray or a pea-sized drop of serum on the ends
My one rule here: let the curl cool before you touch it. That pause does more than people think.
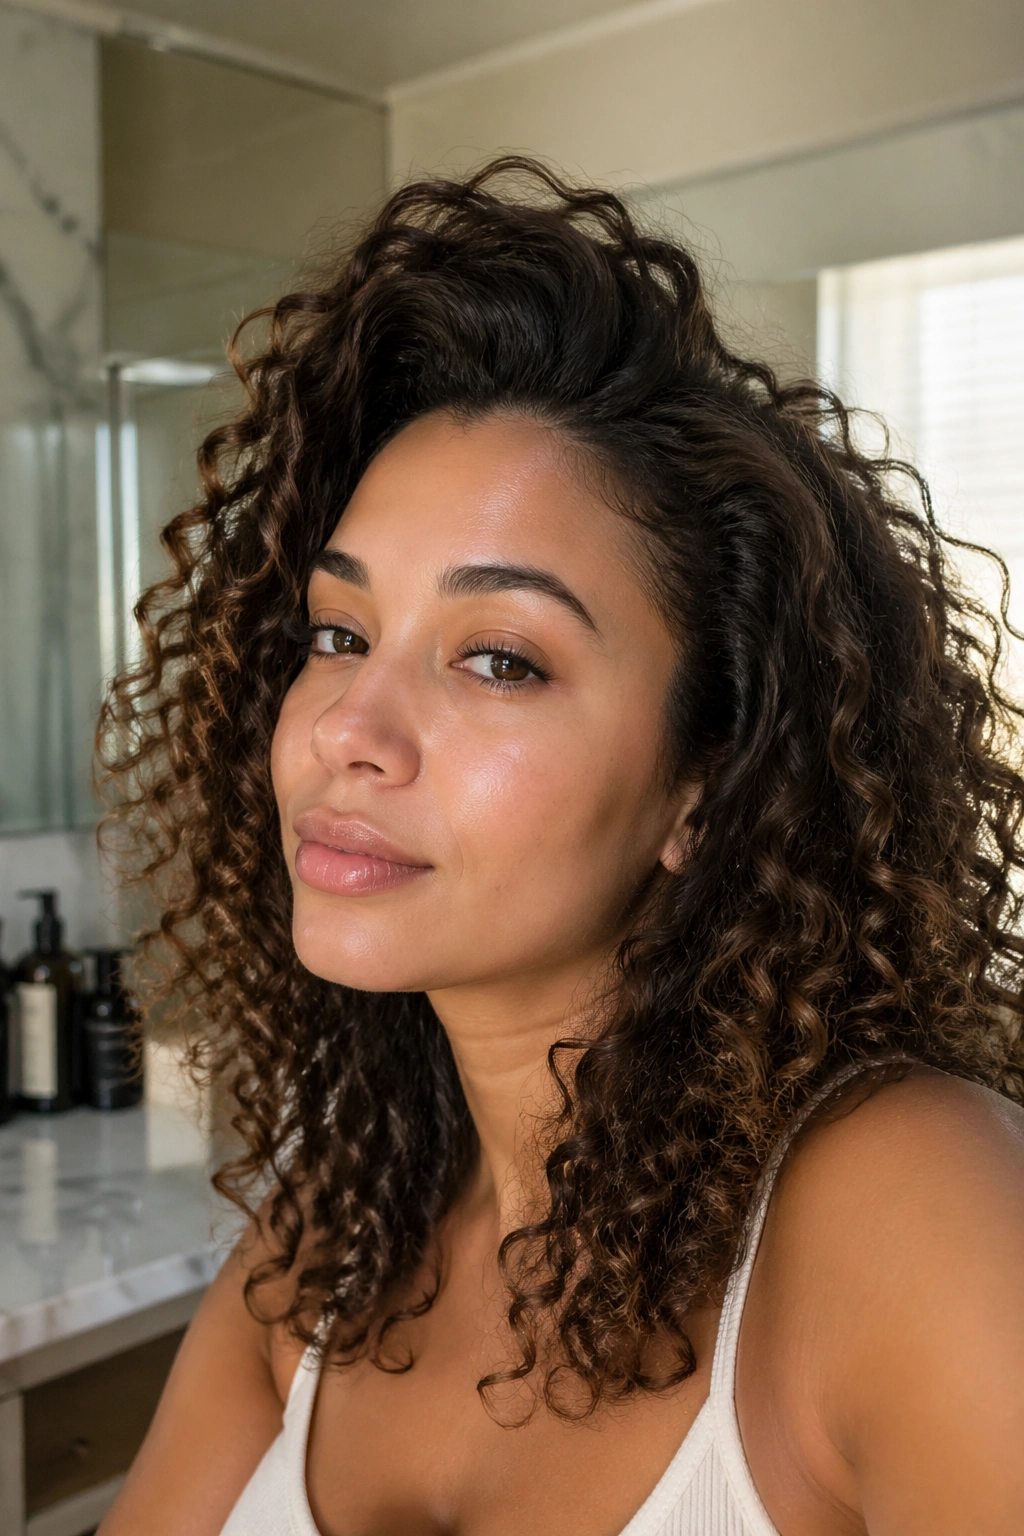
2. Tight Spiral Ringlets for a Clean, Defined Finish

If you want your curl pattern to look sharper, this is the cleanest move. Tight ringlets are the style that makes naturally curly hair look freshly shaped, especially when the ends have gone fuzzy or the curl clumps have started to split apart.
Use a 3/4-inch or 1-inch curling iron and work with small sections, about 1/2 to 3/4 inch wide. Wrap the hair smoothly from mid-shaft to ends, keeping the tension even all the way through. Hold it for 5 to 8 seconds, then release the curl into your palm for a second or two so it can cool in place.
That cooling step matters more than the actual wrap. Hot curls are floppy curls. Once they drop, they set in the shape you want.
This style is especially good when you want definition at the ends and a little spring near the face. It can look too neat if you overwork it, though. Don’t separate the ringlets while they are warm. Don’t brush them. And do not overload the hair with oil before curling, because the ringlets can slide right out before they have a chance to set.
The result should feel bouncy, not crunchy. If it looks like a long corkscrew with a shiny surface and a springy end, you got it right.
3. Brushed-Out Glam Curls With a Soft Satin Look
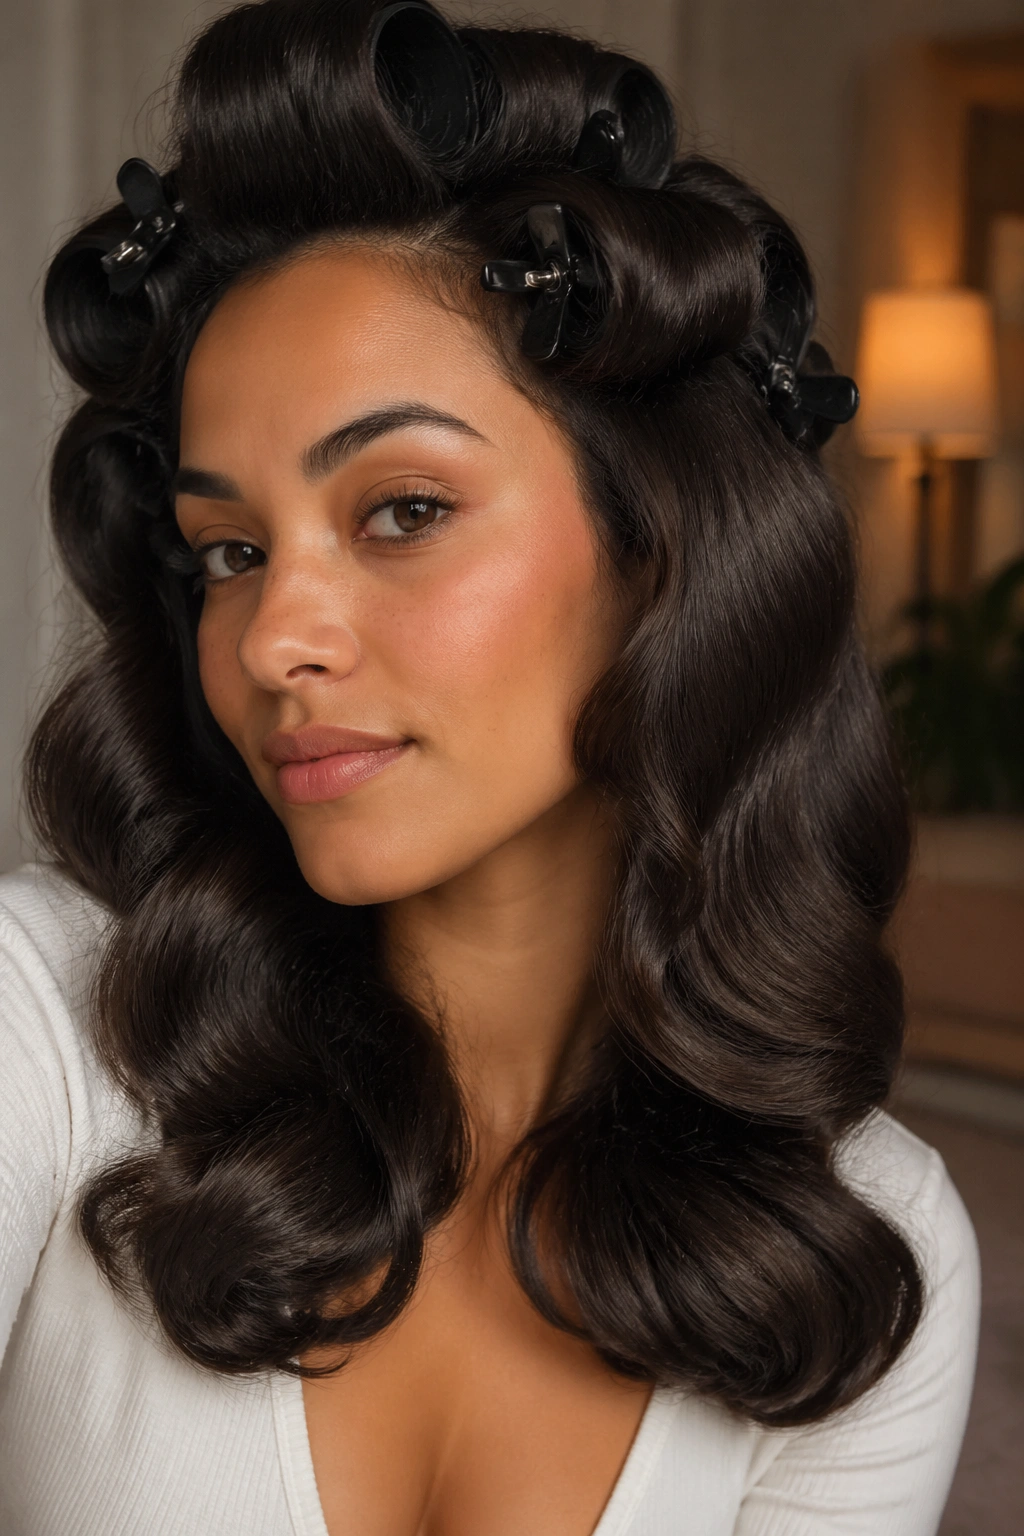
A brushed-out glam curl looks fancy without looking stiff, which is a nice trick when you want your naturally curly hair to read a little more dressed up. Start with a 1¼-inch to 1½-inch barrel, take larger sections, and curl everything in the same direction for the cleanest wave pattern. Then pin each curl flat against the head while it cools.
That pinning step is where the style earns its keep. Skip it, and the curls will stay too narrow. Let them cool, and they loosen into that soft wave pattern that sits between polished and relaxed.
After the hair is fully cool, use a soft boar-bristle brush or a mixed-bristle brush and sweep through the lengths gently. Not aggressively. You want the curls to blend, not vanish. A little shine spray or a tiny amount of serum on the palms will keep the finish from looking dusty.
What to Watch For
- Do not brush hot curls. They will puff.
- Do not use a heavy oil before curling. It can make the style collapse.
- Do use clips or pins while the curls cool. That part is not optional.
- Do finish with a light spray, not a sticky helmet of product.
This style is one of my favorites for curly hair that has a few different textures in the same head. The brush smooths the story together.
4. Beachy Alternating Waves That Never Look Too Matching
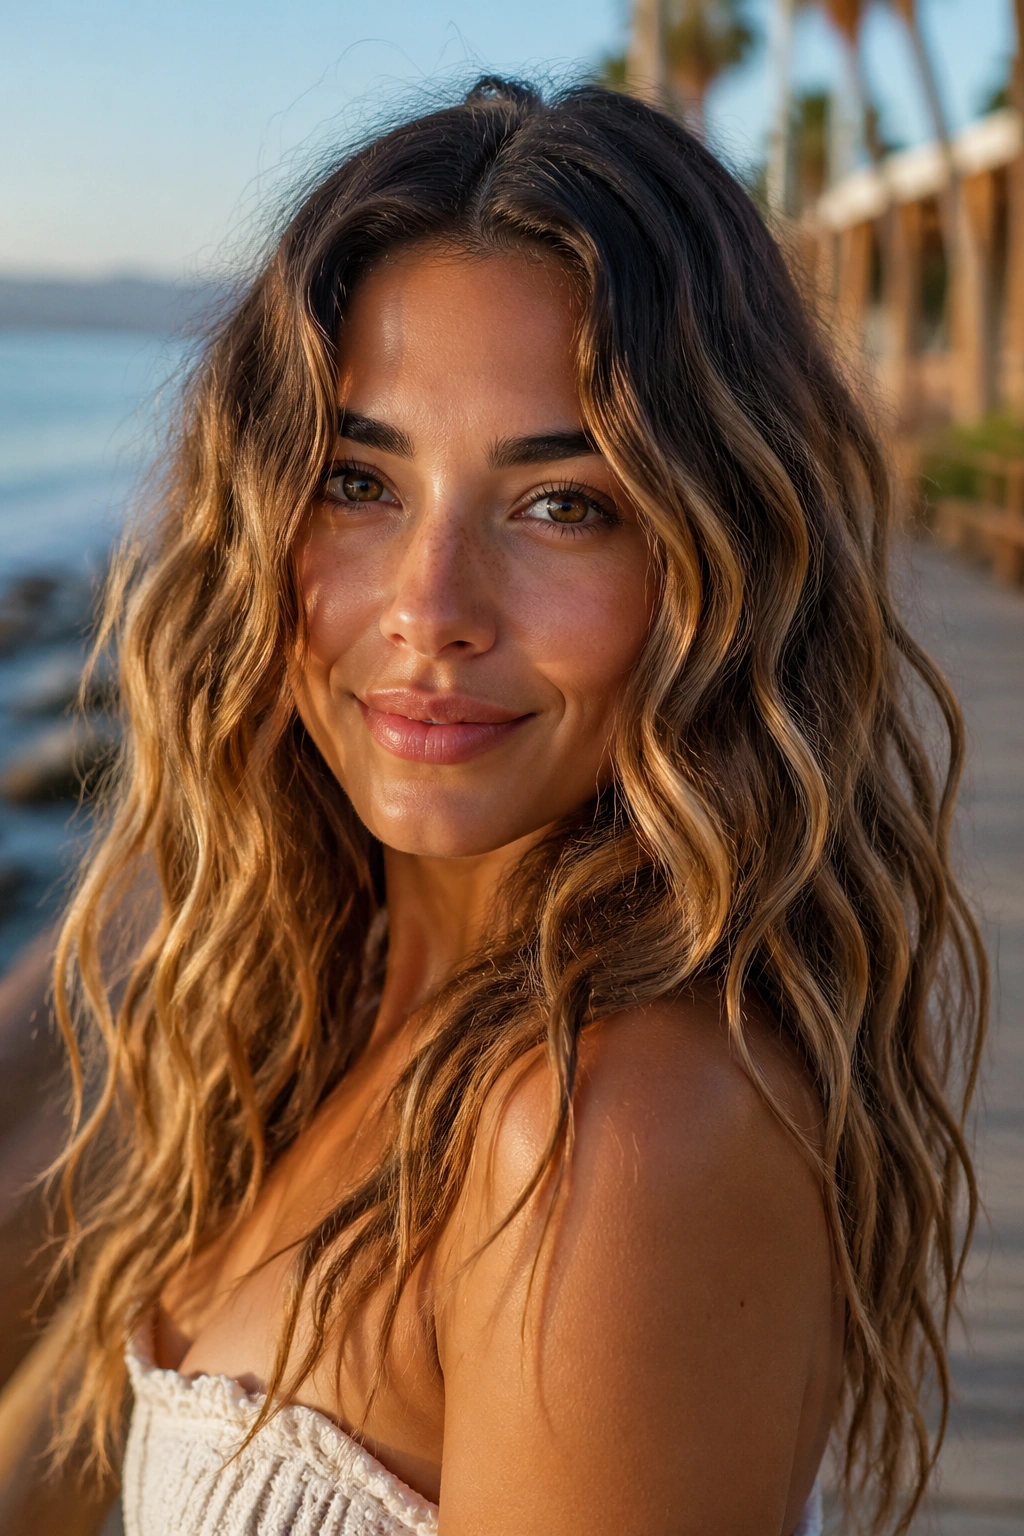
Want something looser and a little more carefree? Alternate the curl direction from section to section. One piece goes away from the face, the next one goes toward it. That one small change keeps the style from reading too perfect, which is exactly what makes it work on naturally curly hair.
A 1-inch curling iron usually gives the right amount of bend for this. Leave the last inch out on some pieces if your ends already have shape; otherwise the waves can look overdone at the bottom. Use medium sections, not huge ones. Big chunks make the wave less visible, and you end up with a soft bend that disappears by lunchtime.
How to Wear It
If you wear it with a center part, the movement feels easy and a little casual. A side part gives it more lift around the cheekbones and makes the face-framing pieces do more work.
The finish should look touched, not shellacked. Finger-comb the waves once they cool, then stop. If you keep raking through the hair, the curl pattern opens too much and the whole thing loses shape fast.
A touch of texturizing spray at the mid-lengths can help, but use a light hand. Curly hair already has texture. You are not trying to build a sand sculpture.
5. Face-Framing Curl Pieces That Open the Cheekbones
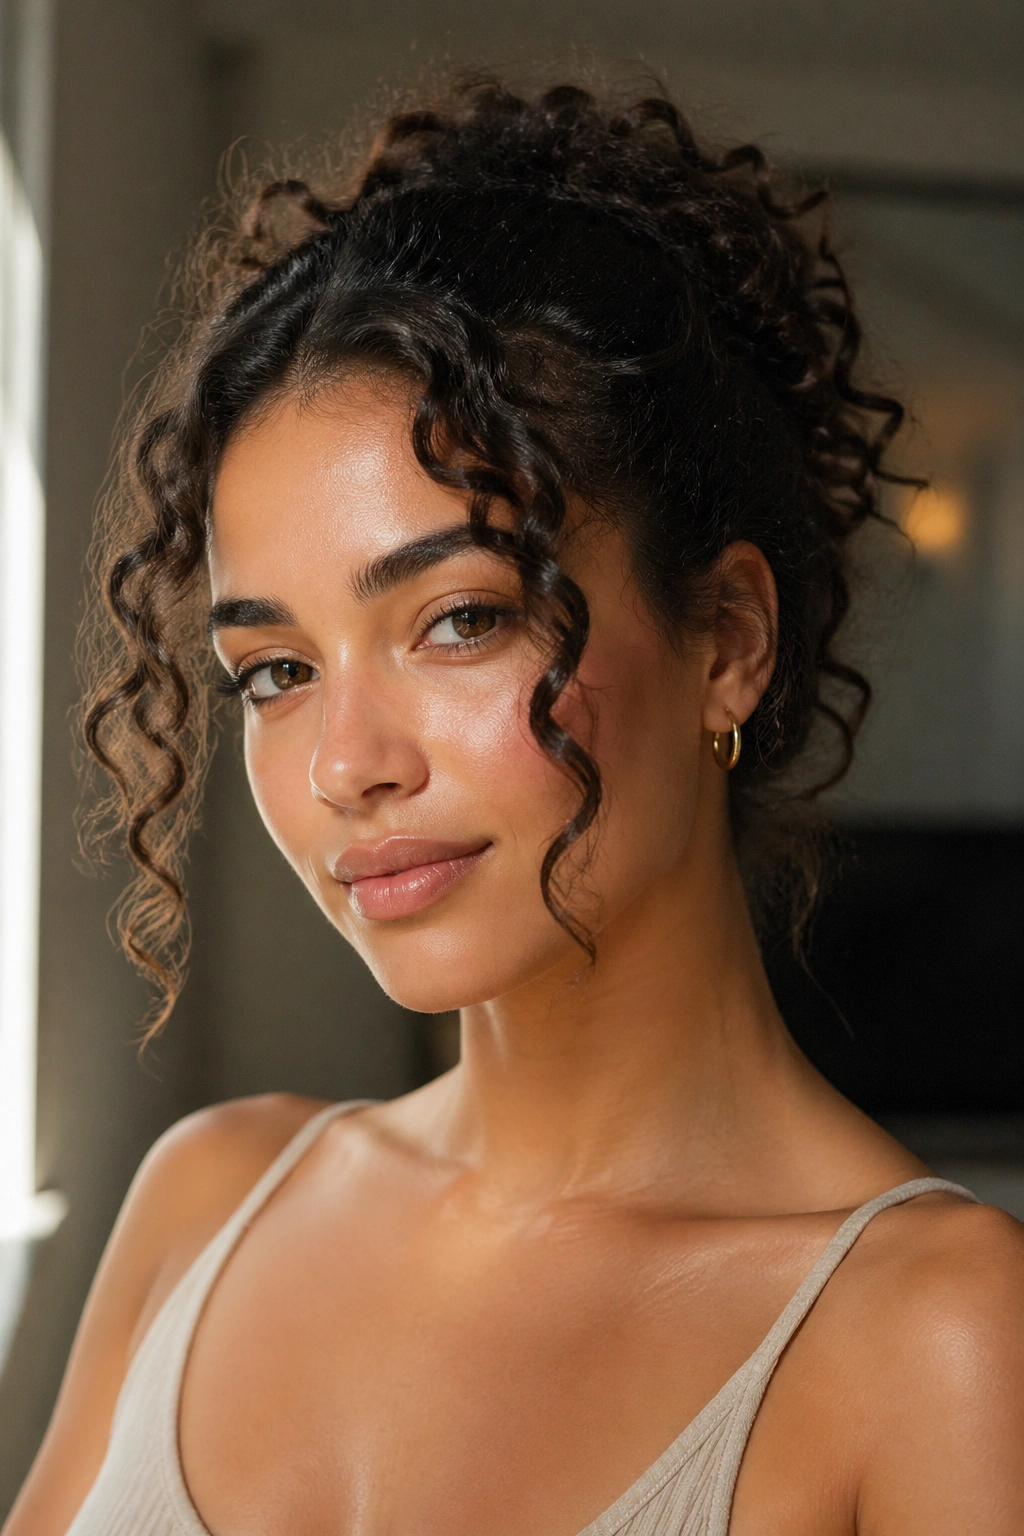
Sometimes the whole head does not need touching. A few smart pieces around the front can change the entire look of naturally curly hair, especially if the rest of the hair still has a good shape from the last wash day.
Use a 1-inch barrel and focus on the front panels, the top layer near the part, and maybe one or two pieces near the jawline. Curl those pieces away from the face if you want a lifted, open look. Curl them toward the face if you want a softer, more tucked-in frame. That small choice changes the mood more than people expect.
The rest of the hair can stay natural. That’s the point. If the curl pattern through the crown and lengths still looks good, do not mess with it just because the front pieces are behaving badly. A lot of styling mistakes start with overcorrecting a tiny problem.
I like this style for days when the ends are fine but the front has gone flat from sleeping, hats, or a long stretch of being tied back. Two or three curled face pieces can make the whole head look awake again. Keep the curl soft near the cheekbone and avoid turning every front strand into a perfect ribbon. Too much of that starts to look rigid.
6. Retro Flipped Ends for Bobs and Lobs
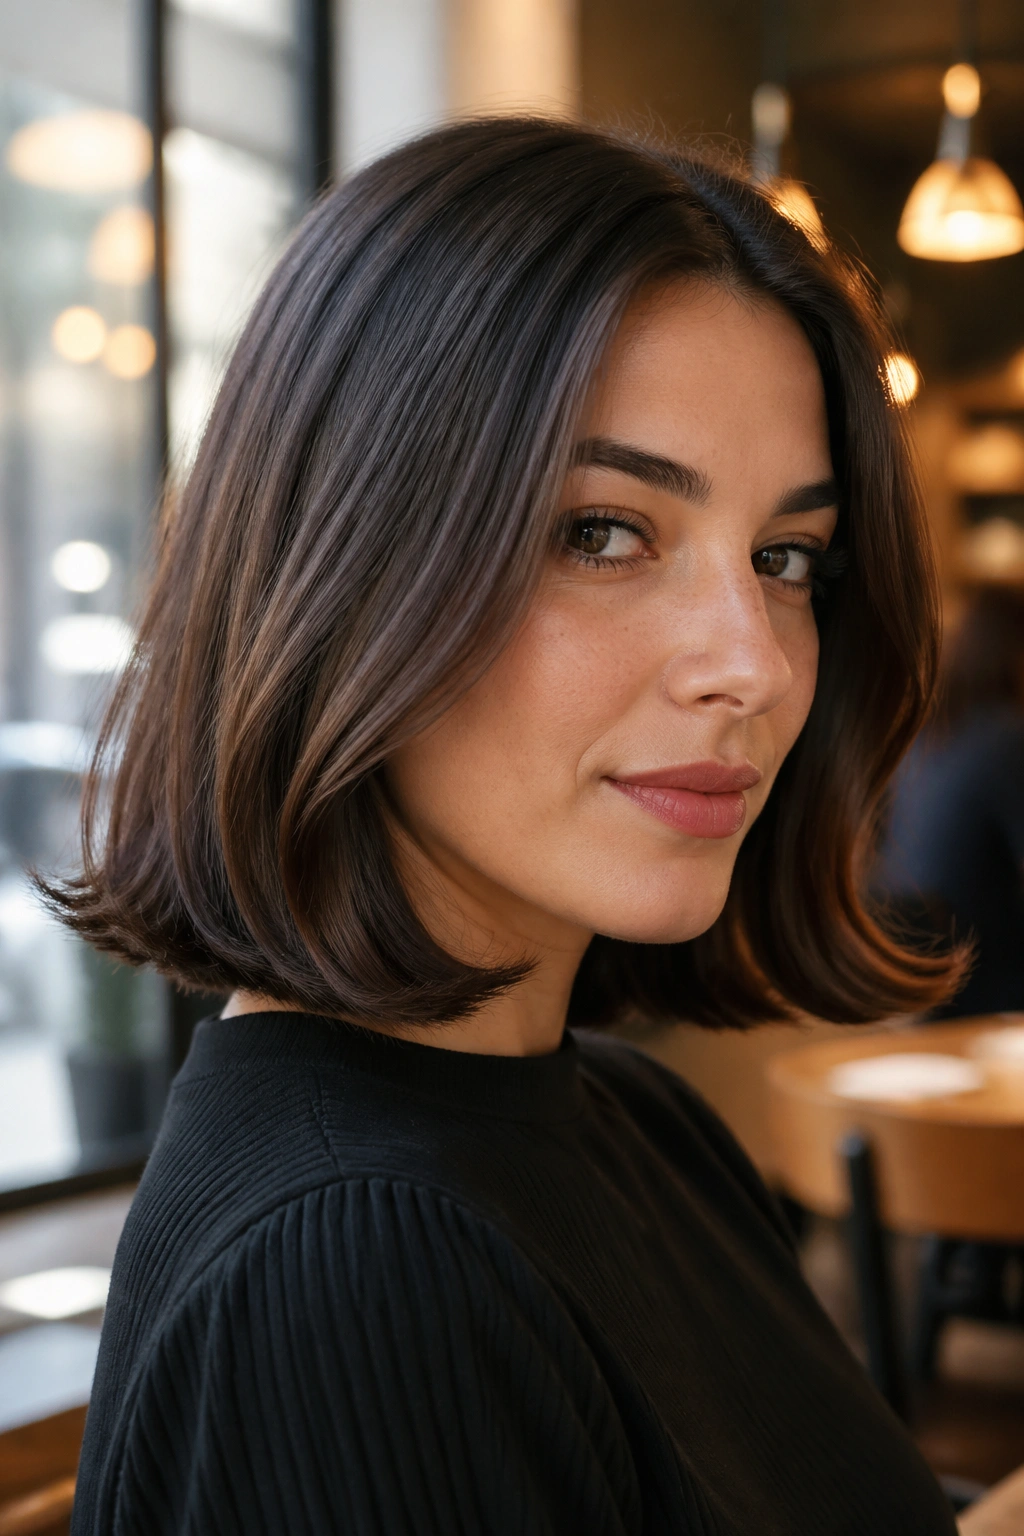
Unlike beachy waves, this style wants a cleaner edge. Retro flipped ends work especially well on curly bobs, lobs, and shoulder-length cuts where the shape around the bottom needs help more than the top does. Use a 1-inch or 1¼-inch curling iron and bend just the last two inches of hair either under or outward, depending on the mood you want.
Under gives you a neat, polished line. Out gives you a little attitude. Both can look good. The real difference is the amount of control you keep at the root and mid-lengths.
A lot of curly hair shortens itself when it dries, which is why the ends can feel visually heavy. A small flip at the bottom solves that without blasting the entire cut into a full curl set. If the hair has a stronger curl pattern, smooth the surface of each section with your fingers before you bend the ends. You do not need to flatten the hair. You just need enough control to make the line read clean.
Best use cases:
- Curly bobs that puff at the bottom
- Lobs that need a sharper outline
- Shoulder-length cuts that lose shape at the ends
- Haircuts with blunt edges that need softening
This one is practical, not precious. That’s why it works.
7. Ribbon Curls for Long Layers and Heavy Hair
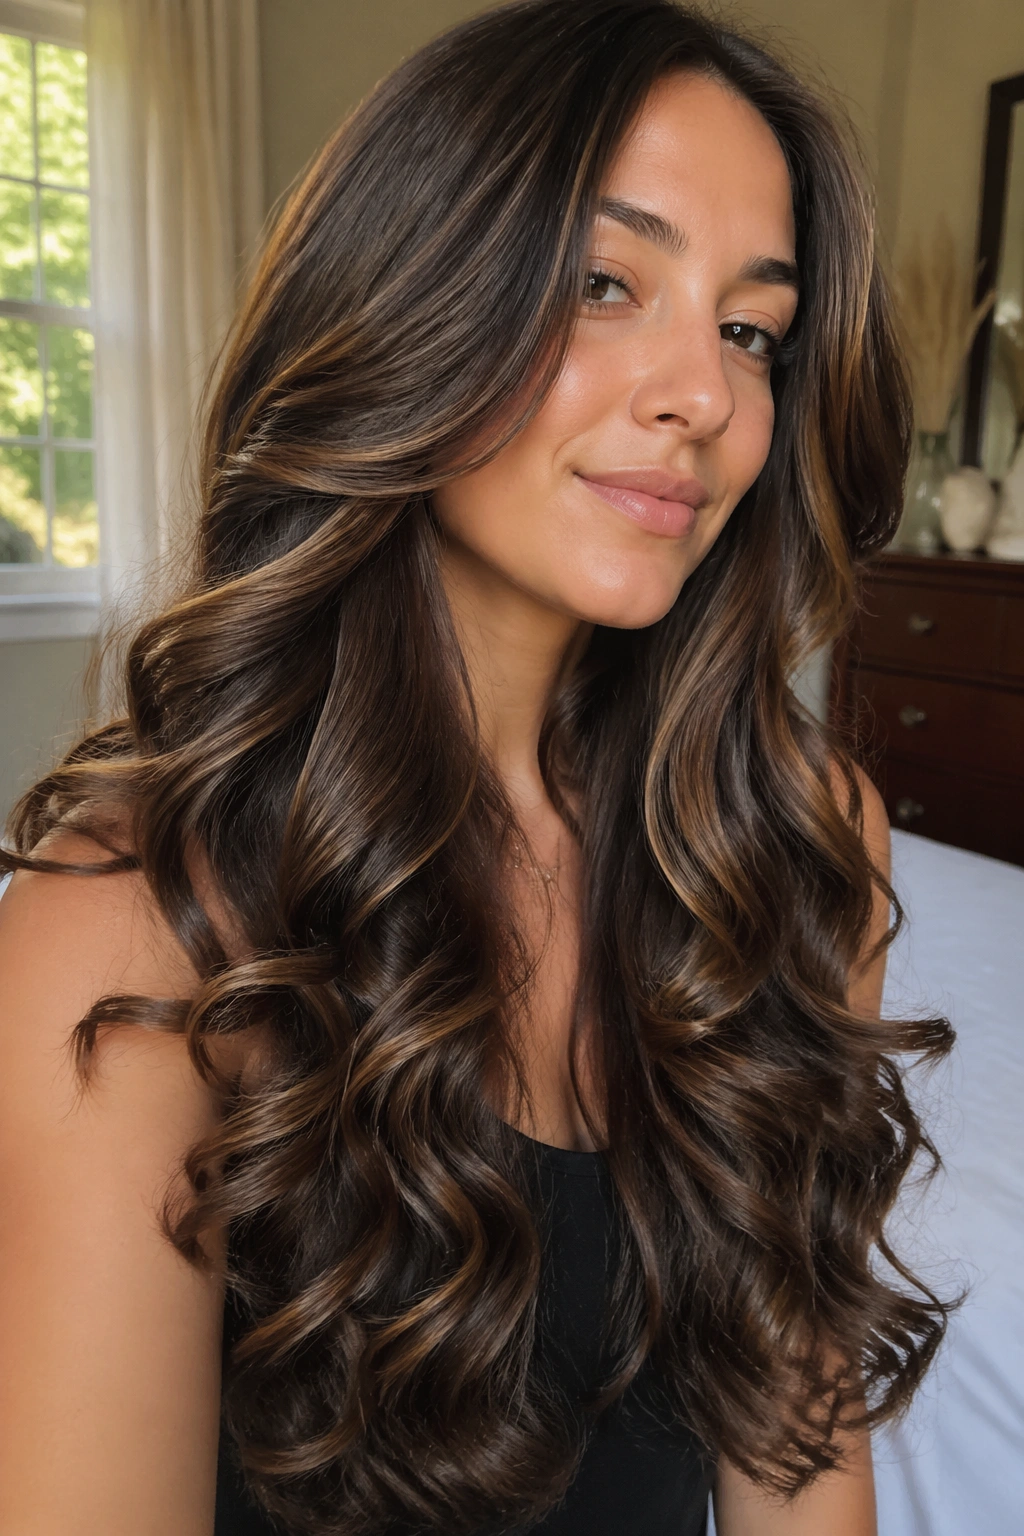
Long layers and a clipless wand get along. Ribbon curls are what you reach for when naturally curly hair is long enough to feel weighed down and you want the style to stretch out instead of shrinking tighter. A 1¼-inch clipless wand or curling iron gives the best ribbon effect because the hair can slide across the barrel in a flat, smooth wrap.
Keep the section flat. That is the whole trick. If the strand twists as you wrap it, the curl turns messy in a way that looks accidental. If it stays flat, you get those long, shiny ribbon curls that move when you walk.
How to Get the Most From It
Use sections around 1 inch wide for more structure or closer to 2 inches if you want a softer wave. Wrap from mid-length to ends, hold for a few seconds, then release into your hand instead of letting the curl drop straight down. That tiny bit of support helps the shape stay smooth.
This style is especially good for dense curls because it reduces the triangle effect that heavy hair can get when it puffs out at the sides. It also plays well with layers. The curl stretches the layers downward in a way that keeps the overall shape airy.
One small warning: if your hair is very porous, keep the heat lower and work faster. Ribbon curls can go from glossy to tired-looking fast if the barrel is too hot.
8. Root-Lifted Crown Volume When the Top Falls Flat
Flat at the crown, wild everywhere else? Annoying. Naturally curly hair can do that after sleep, after a long day tied back, or after the weight of the lengths pulls the top sections down. A curling iron can fix the crown without changing the whole head.
Use a 1-inch barrel and work on thin top sections only. Lift each piece at about a 90-degree angle from the scalp, wrap just the first inch or inch and a half around the barrel, and release after a few seconds. You are not trying to create a full curl there. You are teaching the roots to stand up.
A little dry shampoo at the base can help, but it is not the main event. The real lift comes from heat direction and cooling. Hold the section until it cools a bit before letting it fall. If you drop it while it is still hot, it flops right back down.
Key Details
- Best barrel: 1-inch
- Section size: thin, almost pencil-width near the crown
- Direction: lift away from the scalp
- Goal: volume at the top, not a visible curl pattern
This style is the quiet hero of curly hair. You barely see the work, but you notice the shape right away.
9. Half-Up Curly Style With Polished Top Layers
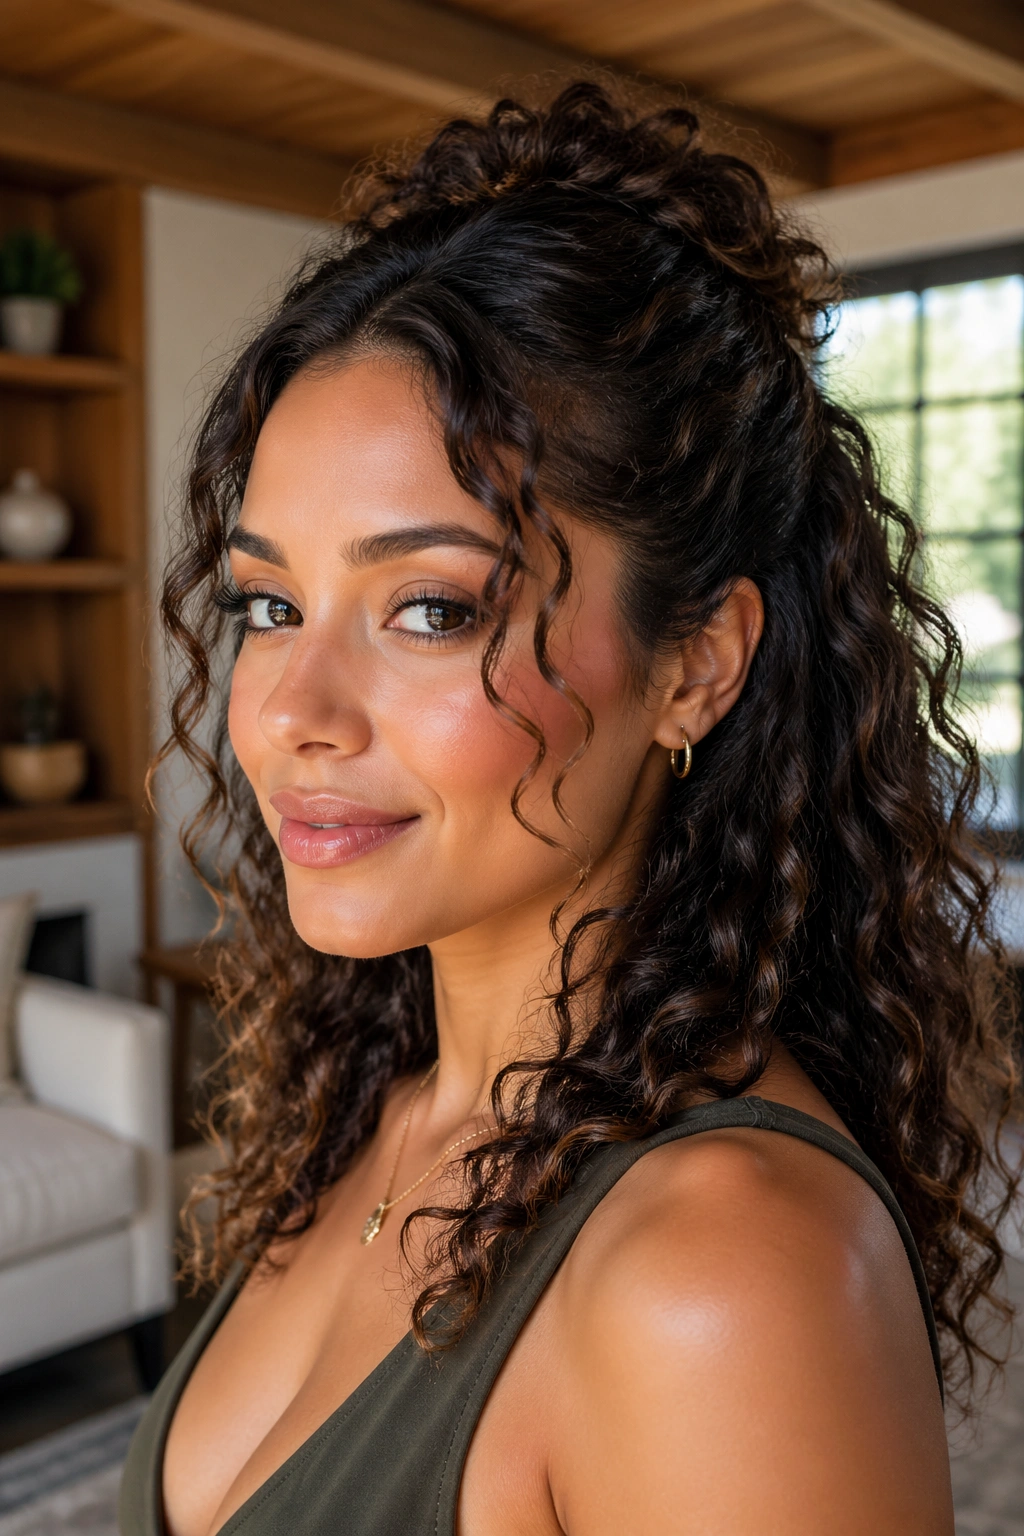
Why does a half-up look work so well on curly hair? Because it solves two problems at once. The back stays full and textured, and the top gets just enough polish to look deliberate.
Start by curling the top layer and the pieces around the part with a 1-inch or 1¼-inch barrel. You do not need to touch every strand. Focus on the curls that will sit around the face, crown, and the section that gets pulled back. If the front tends to frizz, smooth only those pieces and leave the rest alone.
Then gather the top half of the hair and secure it with a clip or elastic. Leave out a few soft pieces near the temples if you want movement. A half-up style on curly hair looks best when the visible pieces have a little shape but not too much uniformity. Too much perfect curling makes the top half look separate from the bottom half, and that split is awkward.
This is a good style for days when your curls are holding but not cooperating. It also keeps weight off the face, which matters more than people admit. Curls that fall forward all day can get tired, and a half-up style gives them a break.
A small mist of flexible hold spray at the front helps the shape stay lifted without turning stiff.
10. Side-Swept Old-Hollywood Waves for Dressier Days
A side-swept wave is not the same thing as a beachy wave. It wants a cleaner part, a more controlled direction, and a smoother finish through the surface. That difference matters. If you try to do this style too loosely, it falls apart and just looks like a bent mess.
Use a 1¼-inch or 1½-inch barrel, create a deep side part, and curl all the sections away from the face on the heavier side. Pin the curls while they cool, then brush them into one broad wave shape once they are set. The hair should move as a single line across the forehead and temple, not as separate little curls.
This style is especially flattering on naturally curly hair that already has decent density, because the weight helps the wave hold its curve. Shorter layers can escape, though, so pin them carefully and keep the sections controlled.
A light shine spray near the ends and a little more hold near the part will help the wave keep its shape. Do not drench the hair. That is how the finish turns limp.
I like this one for occasions when you want the curls to feel more structured, more deliberate, and a little old-school without looking stiff. It asks for patience, but not perfection. That is a nice trade.
11. Short Curly Hair Shape-Up for Pixies, Bobs, and Lobs

Short curly hair needs a different kind of curling iron thinking. A 1/2-inch to 3/4-inch barrel gives you enough control to fix awkward pieces, lift a front fringe, or bend the ends of a bob without creating giant loops that overwhelm the cut. Bigger barrels on short hair tend to do almost nothing. The bend barely shows.
This style is less about changing the whole head and more about steering the pieces that misbehave. A short curly cut often has one side that flips differently, or a fringe that sits too flat, or a nape section that sticks out like it has an opinion. Use the iron on those parts only.
A lot of people overcurl short hair because they want it to look styled. That usually backfires. The best short curly shapes keep most of the texture natural and use the iron to correct the outline. The cut should still read as curly, not as tiny ringlets pasted to the scalp.
If your hair is very tight or dense, work in very small sections and keep the heat modest. Short hair shows damage fast, especially near the ends. The finish should feel light and lively, not overworked.
One good touch on a curly bob: curl the front pieces away from the face, then leave the crown alone unless it needs help. That keeps the shape open and avoids the helmet effect.
12. Low Ponytail With Curled Face Pieces and Soft Ends
A low ponytail is not boring if you handle the front pieces with care. On naturally curly hair, it can look polished without hiding the texture, especially when you use a curling iron on the face-framing pieces and the ponytail ends. A 1-inch barrel works well here because it gives enough bend to smooth the shape without making the style look overbuilt.
Start with the front sections. Curl them away from the face if you want a lifted shape, or toward the face if you want something softer and more tucked in. Then gather the hair at the nape and secure it low and neat. If the tail itself feels frizzy, wrap a few outer pieces around the barrel so the end of the ponytail falls in a loose, controlled shape instead of a puff.
This style is useful when the curls everywhere else are doing their own thing and you need the silhouette to calm down. It’s also one of the easiest ways to make curly hair feel dressy without spending a long time in front of the mirror. The ponytail keeps the bulk under control. The curled front pieces keep it from looking like a quick tie-back.
A light mist of spray at the temples helps, but keep the rest flexible. You still want to see the texture.
The nice part about all twelve styles is that none of them ask curly hair to become straight, obedient, or boring. They just ask the iron to do a narrow job: shape a bend, sharpen a line, or lift a section that lost its nerve. That’s usually where the good styles live.
If your hair already has curl, the smartest move is usually restraint. Pick the section that needs help, choose the barrel that matches the job, and stop before the hair starts looking overmanaged.