Rain and curls have a funny relationship. The minute moisture hangs in the air, even well-behaved curls start writing their own script.
That is why rainy day hairstyles for curly hair need a different kind of thinking. You are not trying to defeat texture. You are giving it a shape that survives a damp walk, a hood, a cramped bus seat, and the random puff of humidity that makes the front pieces do whatever they want.
The best rainy-day styles do three things at once: they cut down on friction, keep the ends out of the weather, and still look intentional when a few curls escape. That last part matters more than people admit. A style can be practical and still look like you meant it.
A few tools help a lot here: a satin scrunchie, a handful of bobby pins, a claw clip, a wide headband, and a little restraint with product. That is usually enough. The rest is about choosing a shape that works with your curl pattern instead of forcing it into something stiff.
1. The Pineapple Puff
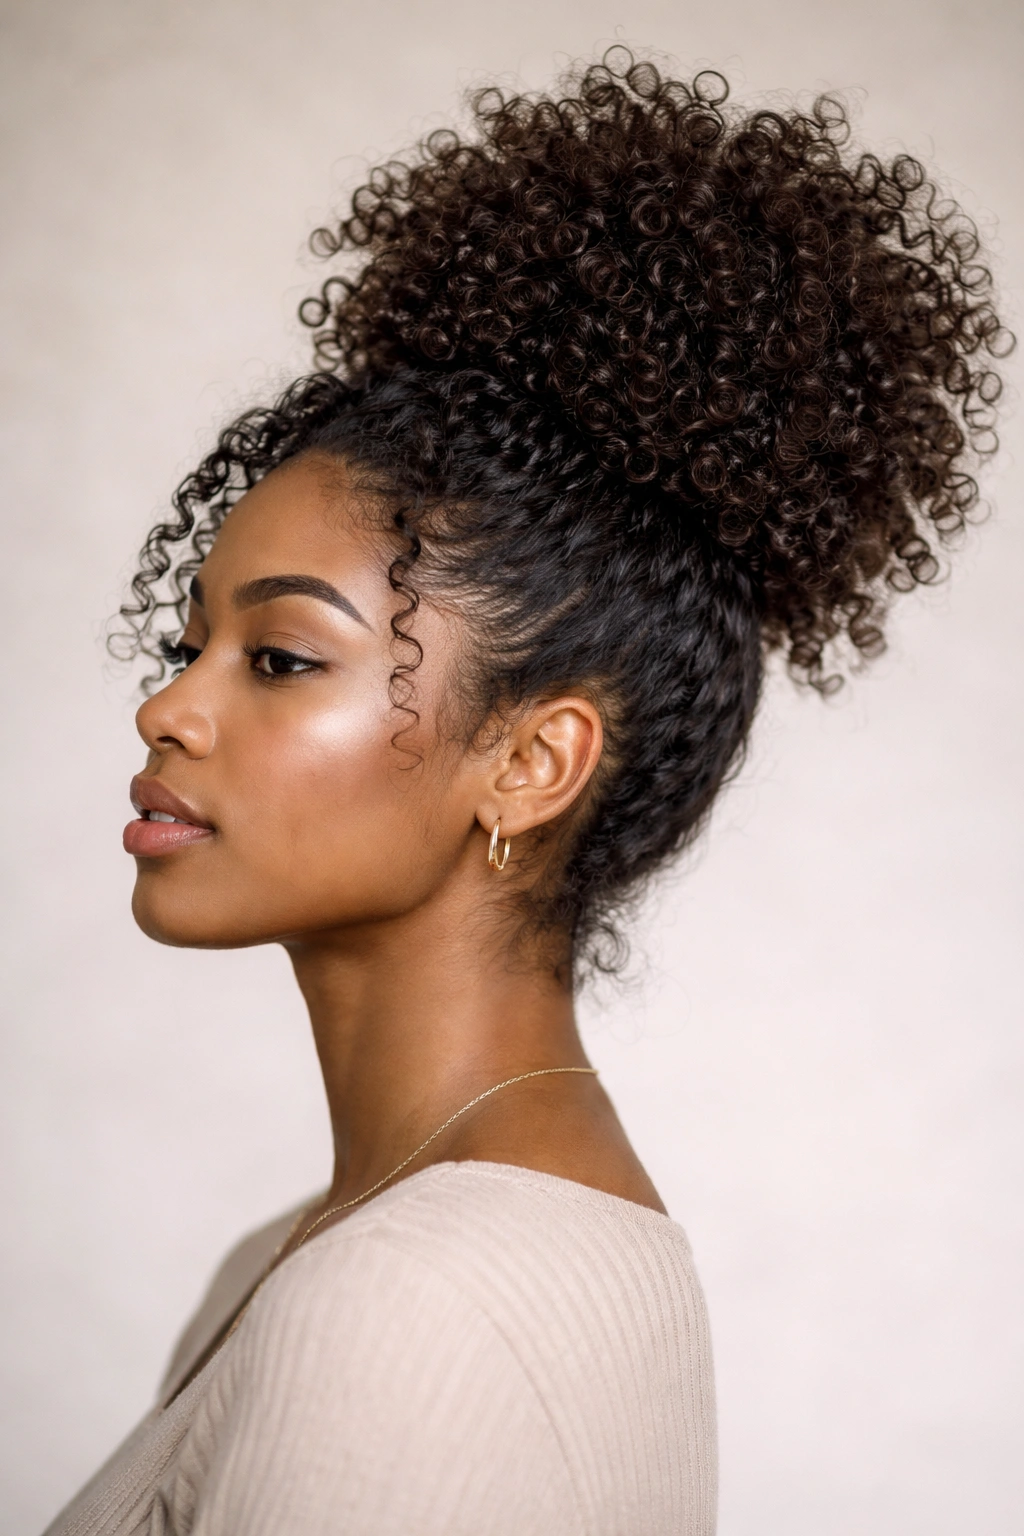
If your curls are long enough to gather high, the pineapple puff is one of the least fussy rainy-day moves you can make. It keeps the ends lifted away from damp collars and jacket hoods, which is where a lot of frizz starts in the first place.
The trick is tension. You want the hair high, loose, and secure enough to stay put without flattening the crown. A satin scrunchie is the right call because it grips without leaving a hard crease. Regular elastics can make the whole thing look tired by lunch.
Why It Works So Well in Damp Weather
A pineapple puff protects the shape of your curls instead of smashing them against your neck and shoulders. That matters on rainy days, because wet outer layers and dry inner layers do not mix well. You end up with frizz at the perimeter and collapsed curls underneath.
It also gives you a little volume back when the weather tries to take it away. Big, soft curls at the top look better than stringy half-flattened lengths, and the style reads casual on purpose rather than accidental.
- Gather hair at the crown, not the exact top of your head if your curls are heavy.
- Let the front curl line fall a bit forward so the style does not look too tight.
- Use one satin scrunchie or two if your hair is thick.
- Keep the base loose enough that you can slide a finger underneath.
My favorite part: it works on second-day hair without asking for a full refresh.
2. The Half-Up Claw Clip Twist
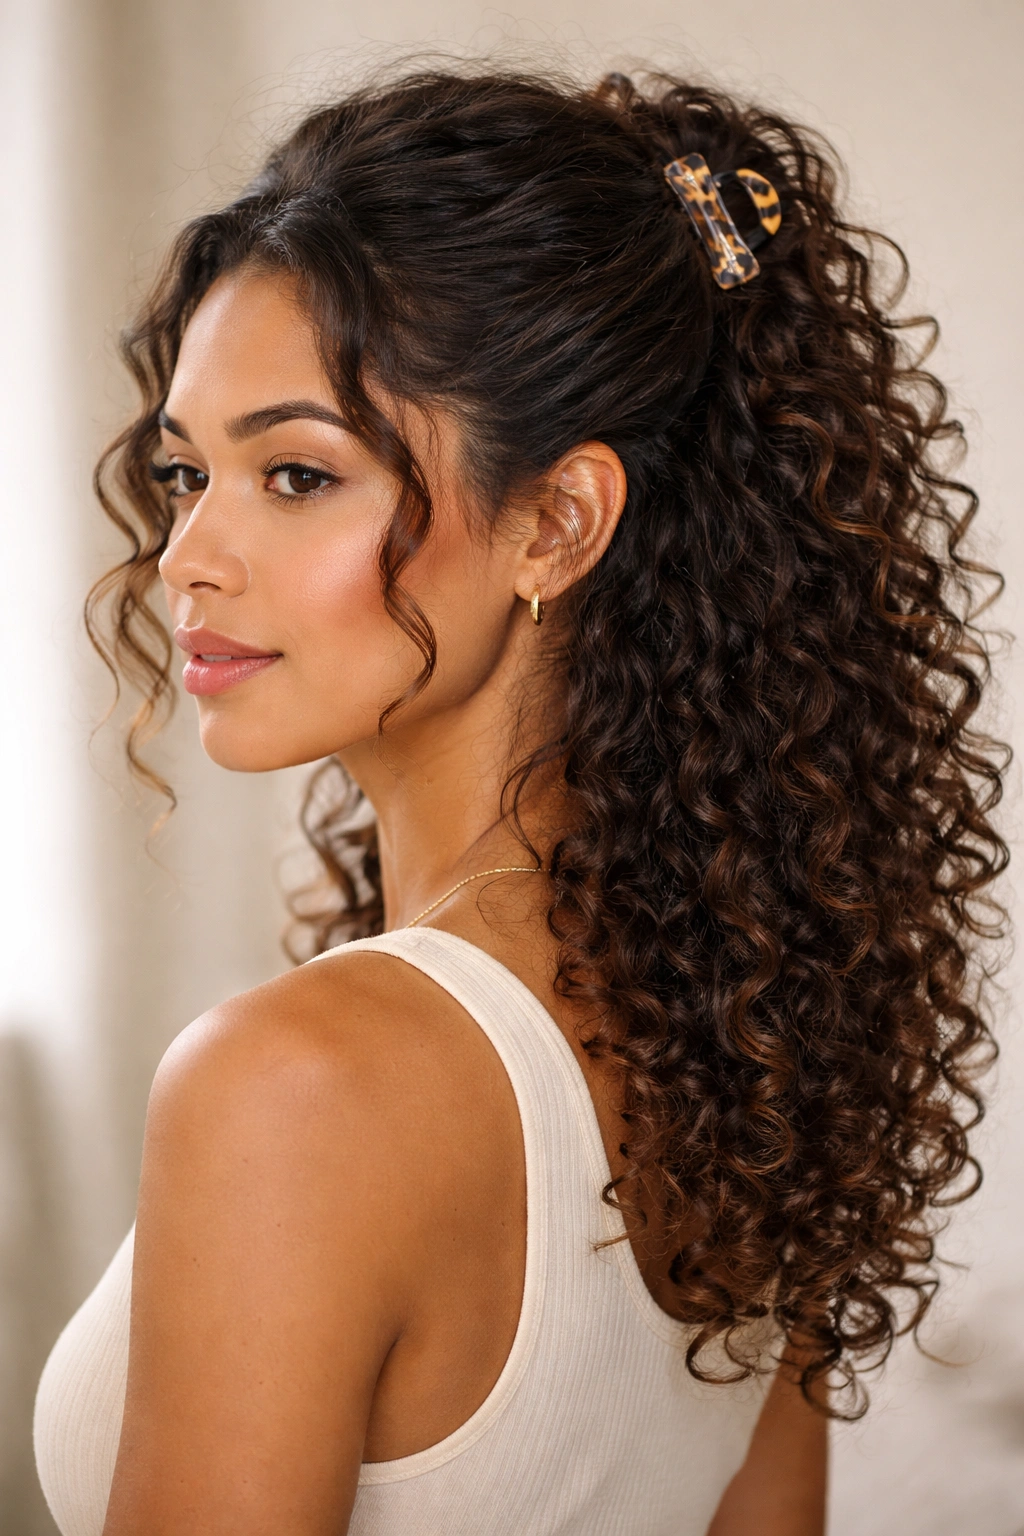
Need something that looks intentional in under two minutes? This is the one. A half-up claw clip twist gives you enough control to keep the front and crown out of your face, while the back stays loose and curly.
I like this style for light rain or those ugly gray days when moisture is hanging in the air but not fully pouring down. The top section gets lifted away from the weather, and the lower curls are free to do their thing. If a few pieces puff out, they just look soft.
The key is choosing the right size clip. Tiny clips slide out of dense curls. Oversized clips can feel heavy and awkward. A medium claw clip with strong teeth usually works best for shoulder-length to long curls.
A quick twist at the back of the head is enough. You do not need a perfect French twist or anything fussy. Pinching the twist in with the clip gives the style some shape, and leaving a few curls loose around the temples keeps it from looking too stiff.
And yes, it can look polished. A little.
3. The Low Loose Bun With Face-Framing Curls
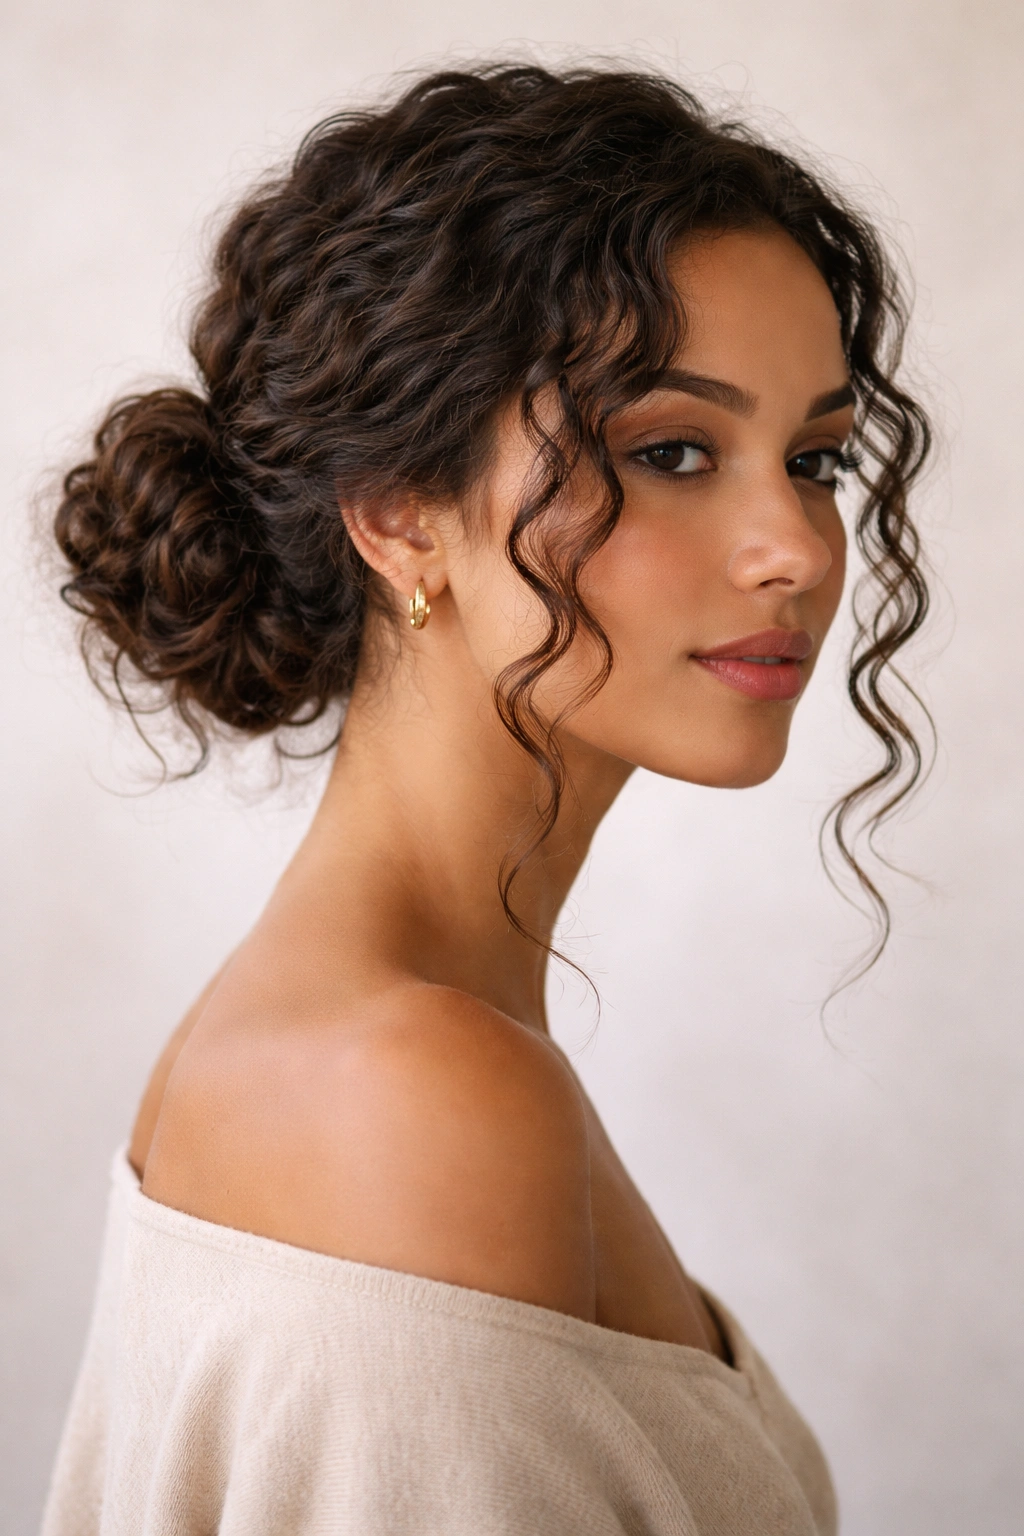
A low bun is the style I reach for when I know a hood will come on and off all day. It sits below most jacket collars, which means less rubbing and less fuzzy mess at the nape of the neck.
The mistake people make here is pulling everything too tight. That gives you a flat crown and a bun that looks like it’s been there for twelve hours before lunch. Keep the bun soft, gather it at the nape, and leave two face-framing curls out if your hairline likes a gentler look.
Small Details That Matter
- Part the hair with your fingers instead of a sharp comb line if you want it to stay relaxed.
- Use a few bobby pins crossed in an X shape for better grip.
- Smooth the outer layer with a little leave-in cream, not a heavy grease.
- Keep the bun slightly off-center if your hair is thick; it tends to sit better that way.
This style is also one of the easiest to refresh. If the bun gets a little fuzzy, a tiny bit of water on your hands and a quick smoothing pass is often enough. No full redo needed. That is the real win.
4. The Braided Crown
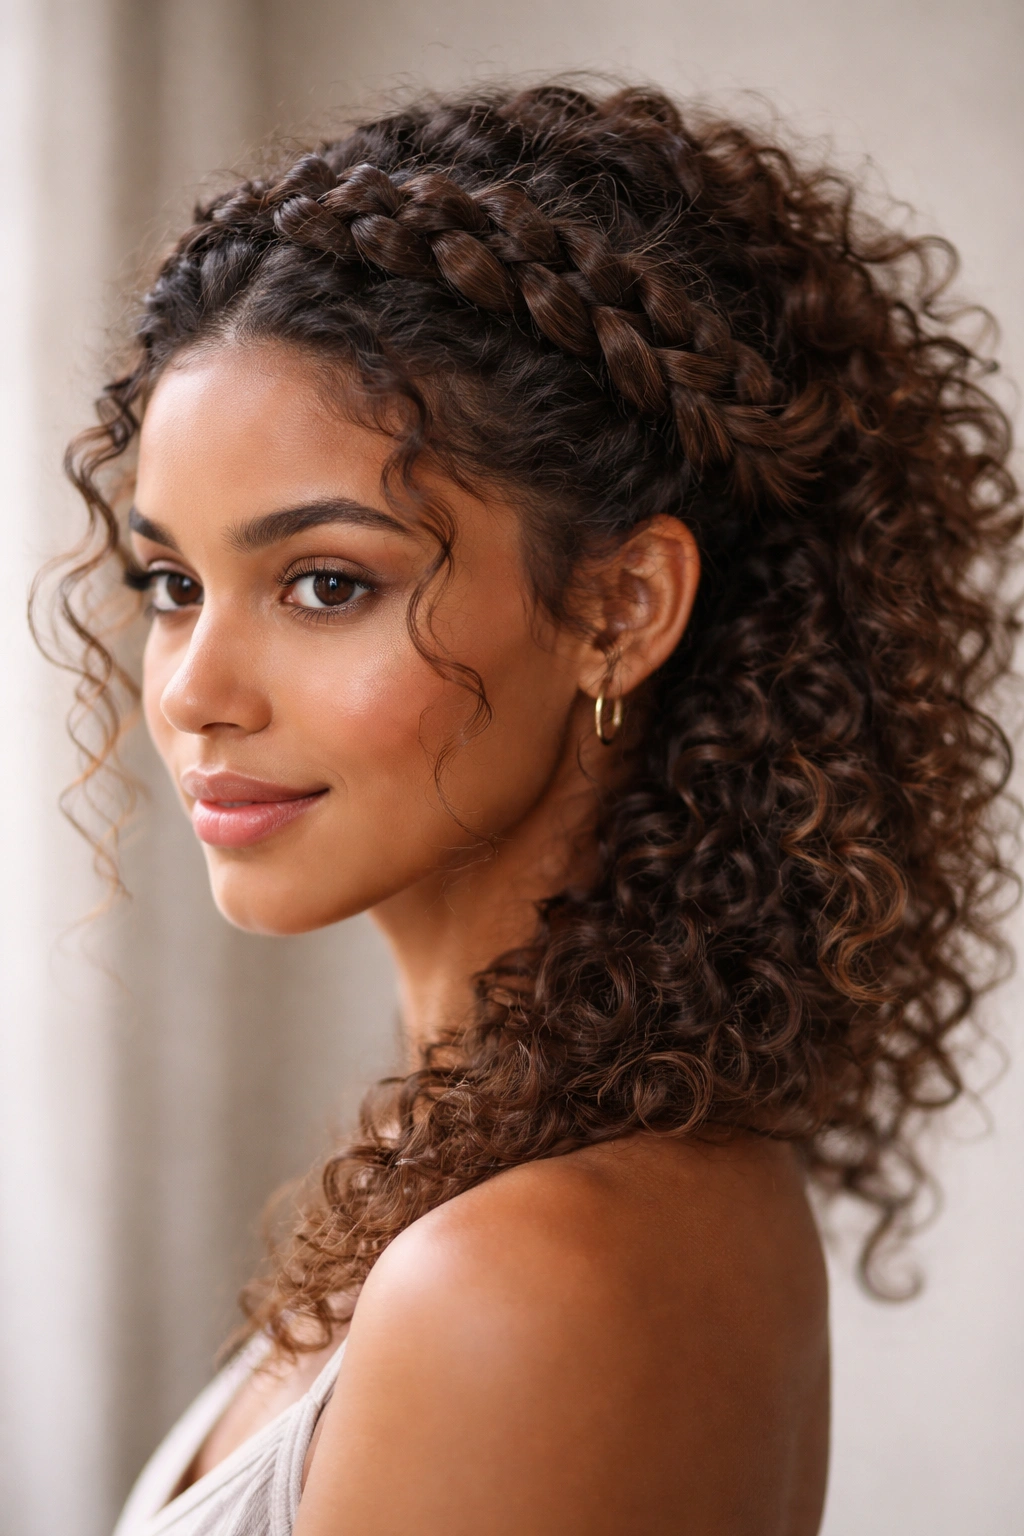
A braid does not have to be perfect to work. In fact, rainy weather is the wrong place to chase perfection anyway.
The braided crown wraps texture around the head and keeps the hairline more controlled than a loose down style ever will. It is one of those looks that can handle a bit of weather without turning chaotic, and it gives older wash-day hair a second life. I like it especially when the roots are starting to puff but the ends still have shape.
There is a nice trick here: the braid does not have to be tiny and precise. A slightly fuller crown braid looks more natural with curls, and it gives the style some softness. If pieces slip out, they usually blend into the texture instead of making the whole thing look messy.
A few small pins tucked under the braid help a lot, especially if your layers are slippery. Those hidden pins are the difference between a braid that sits all day and one that starts sagging by afternoon.
Why It Lasts
The braid spreads the tension across the head instead of putting all the stress in one place. That matters when moisture makes hair feel less cooperative. The style also keeps the top layers from rubbing against scarves, collars, and hood edges.
It is a little more work than a bun. Worth it.
5. The Side Braid Into a Low Ponytail
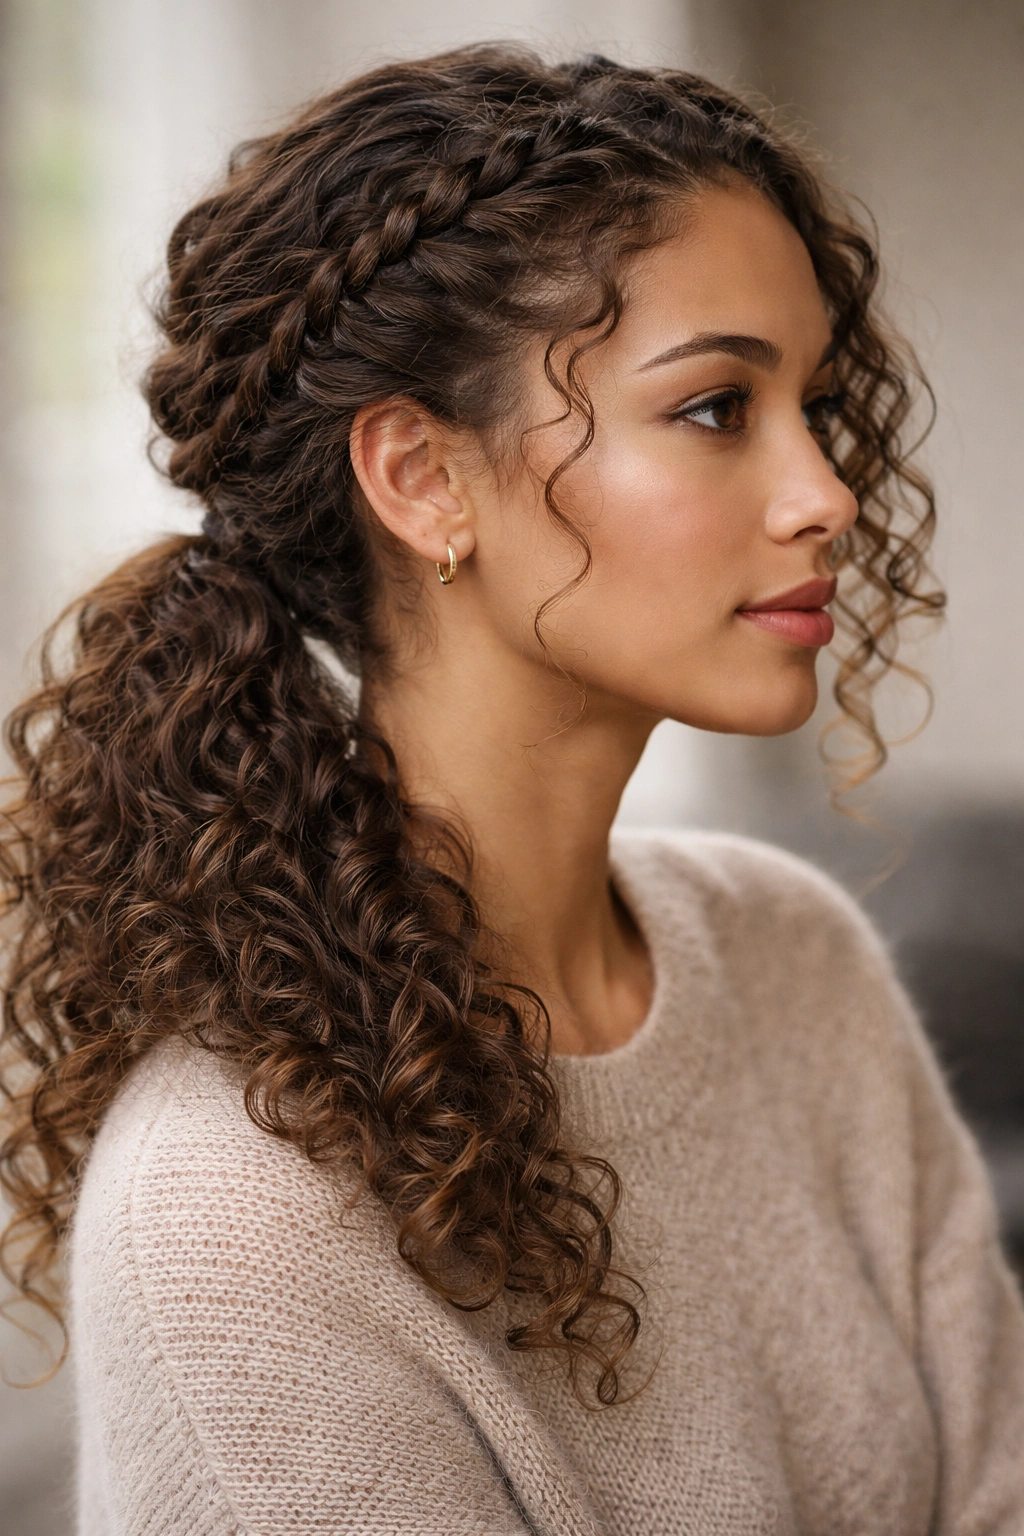
There is something satisfying about a braid that starts at one temple and finishes low against the neck. It feels deliberate, and it keeps the front of the hair from turning into a fuzzy frame the second the air gets damp.
This style works especially well if your curls are medium to long and you do not mind a little asymmetry. The braid takes the pressure off the front section, then the ponytail at the bottom keeps the rest contained. It is a smart middle ground between wearing your hair down and pinning everything up.
A side braid also gives you a clean place to tuck a scarf or the strap of a hood without the whole style collapsing. That sounds small. It is not. Rainy days are full of small annoyances.
Best Uses for This Style
- Long errands where you’ll be in and out of doors.
- Hair that frizzes first at the temples.
- Curls that still look good when gathered into a low pony.
- Days when you want one side to stay neat and the rest to stay soft.
If your hair is slippery, start the braid with a little styling cream at the roots. If it is dry, a mist of water on your hands can help the braid hold without turning crunchy. Keep the tail low, not at the middle of the head, or the whole look loses its weight.
6. The Space Buns That Keep Their Shape
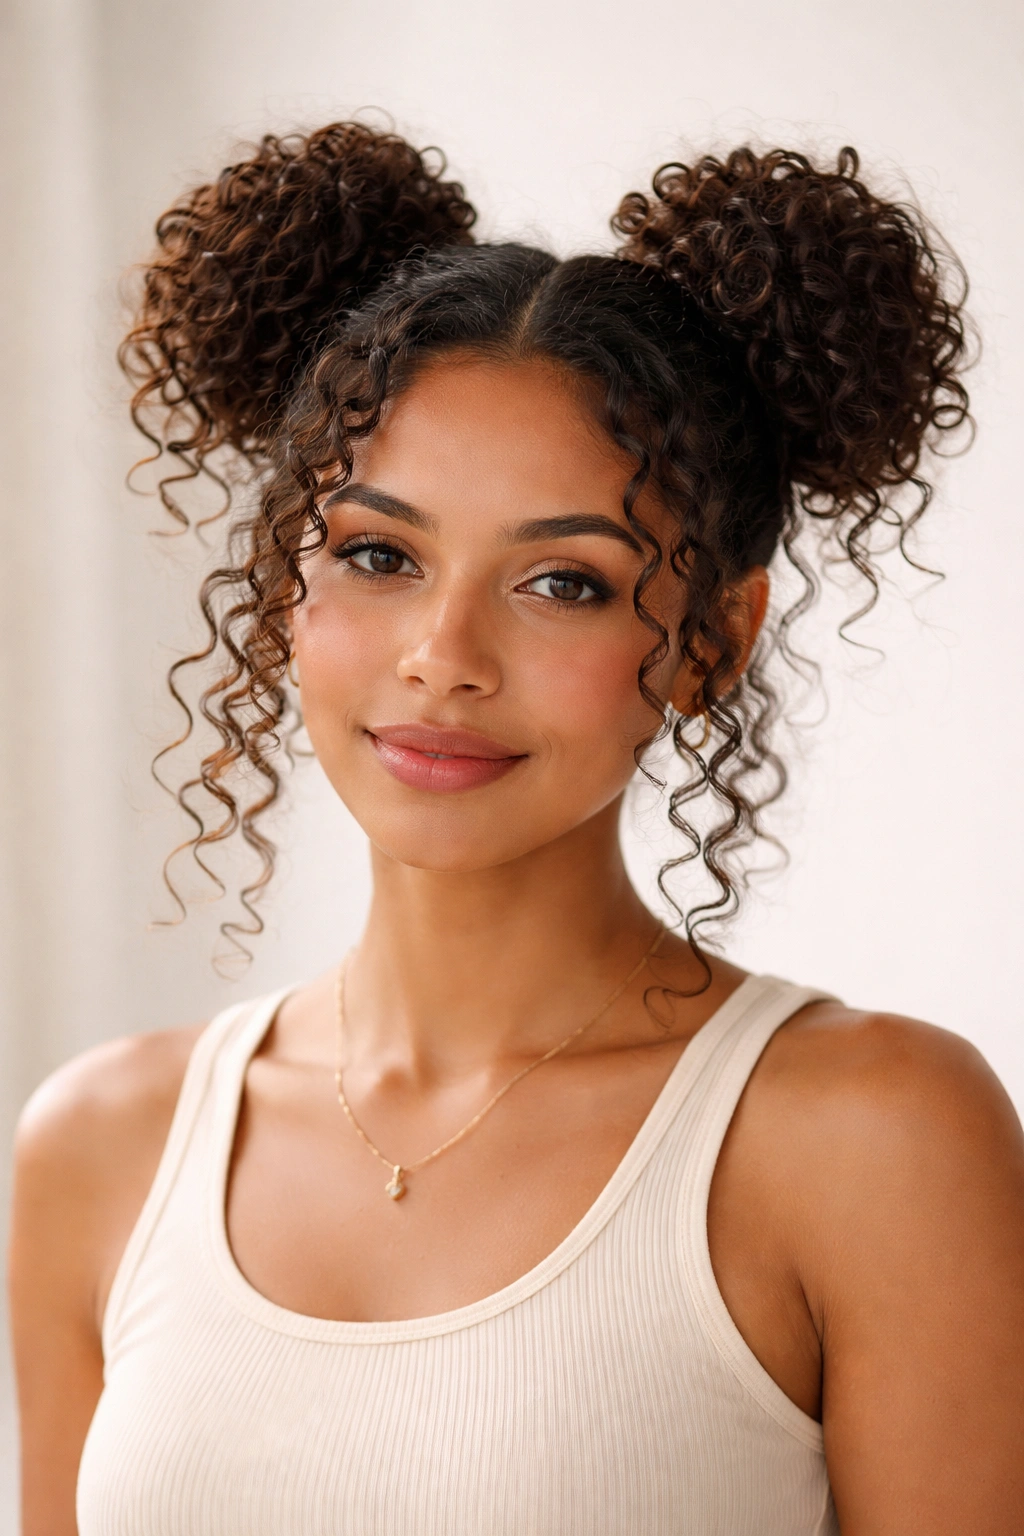
If your curls puff up the second the air turns damp, split the volume on purpose. Space buns do that in a way that feels playful instead of accidental.
The part people get wrong is placement. Too low, and the buns look heavy. Too tight, and they pull the curl pattern straight at the scalp. The sweet spot is slightly above the ears, with enough looseness that the buns still have movement. You want them to look like buns, not stretched knots.
How to Keep Them from Looking Overworked
Use your fingers to section the hair rather than drawing a razor-straight part. A crisp part can look sharp, but on rainy days it often feels too severe once a few wisps escape. Soft sections hold the style better visually.
A pair of small elastic ties or a single set of pins is usually enough. If your curls are dense, twist each side loosely before wrapping it into a bun. That gives the style more structure without turning it stiff.
Space buns are also one of the easiest ways to hide a bad hair day without hiding your hair. The curls still show texture. They just do it in two clean shapes instead of one giant puff of volume. I appreciate that balance.
7. The Headband Refresh Style
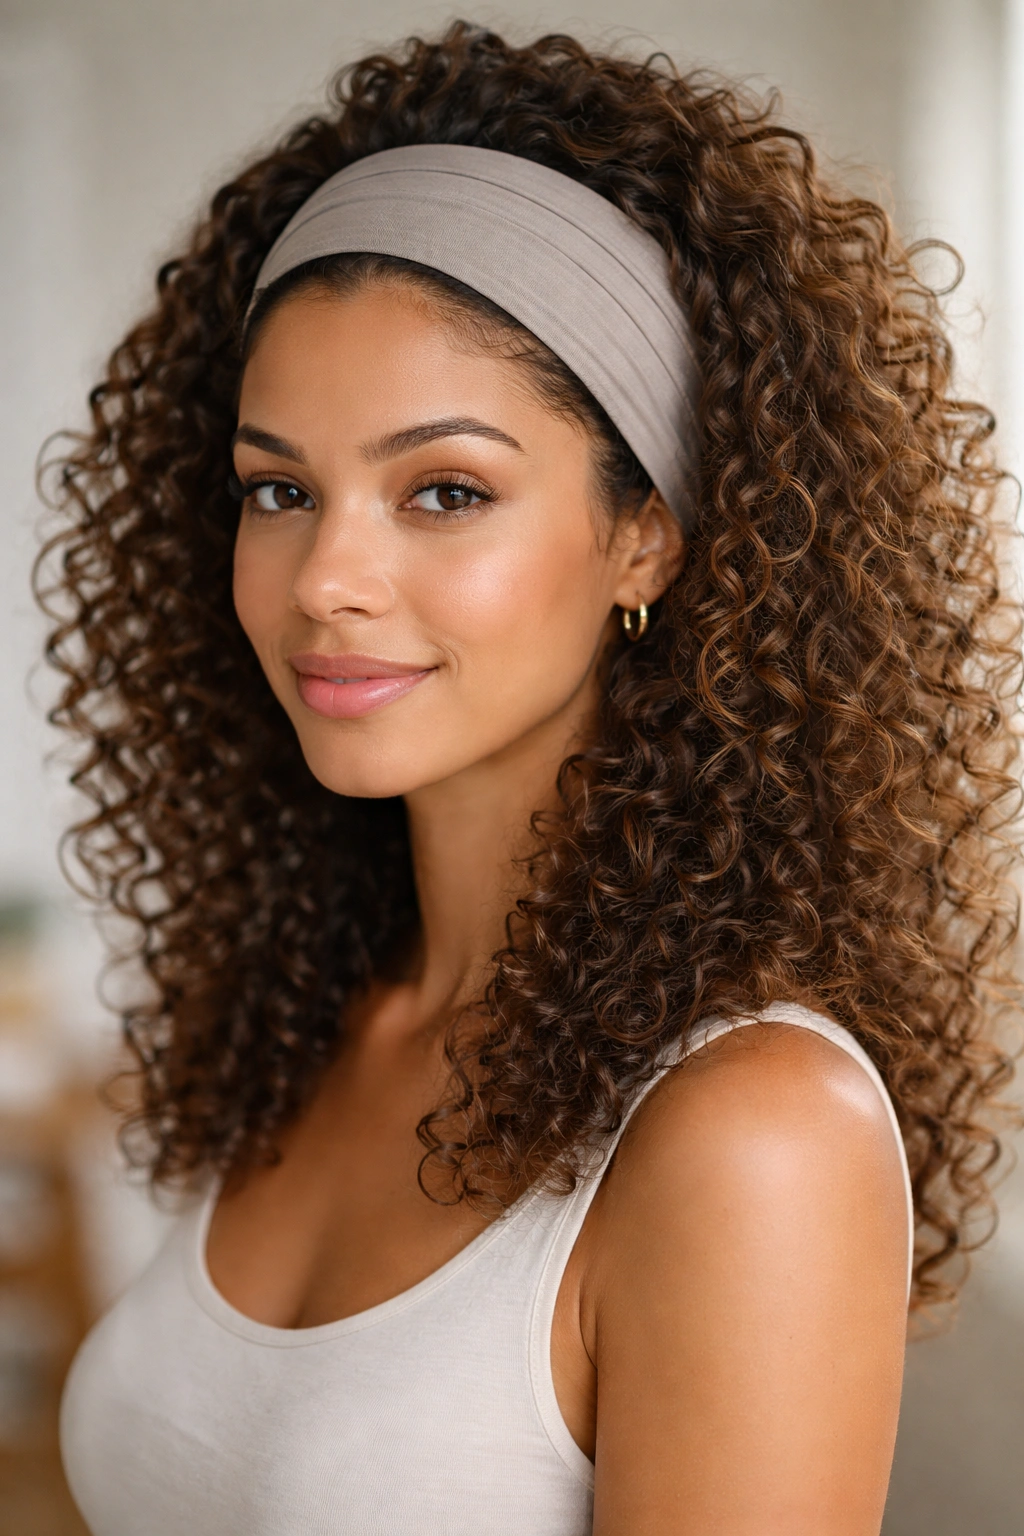
Some mornings call for saving yesterday’s twist-out instead of starting over. That is where a headband style earns its keep.
The basic idea is simple: refresh the curls at the front, smooth the crown just enough to tame flyaways, then push on a wide headband and let the rest of the texture stay loose. A fabric headband works better than a thin plastic one because it holds without digging into the scalp or creating a hard line.
Best For
- Second-day or third-day curls that still have shape.
- Medium-length hair with a bit of movement left in the ends.
- People who want to keep some hair down without fighting the whole head.
- Rainy days when the front section needs more control than the back.
I would not soak the hair here. That is where people go wrong. Too much water turns the refresh into a mini wash day, and mini wash days are a gamble when the weather is already damp. A light mist, a small amount of curl cream, and a bit of scrunching is enough.
The headband gives you a little shelter from frizz at the front while the curls behind it stay soft and visible. It is one of the few rainy-day styles that still looks like hair, not a survival project.
8. The High Puff With Sleek Edges
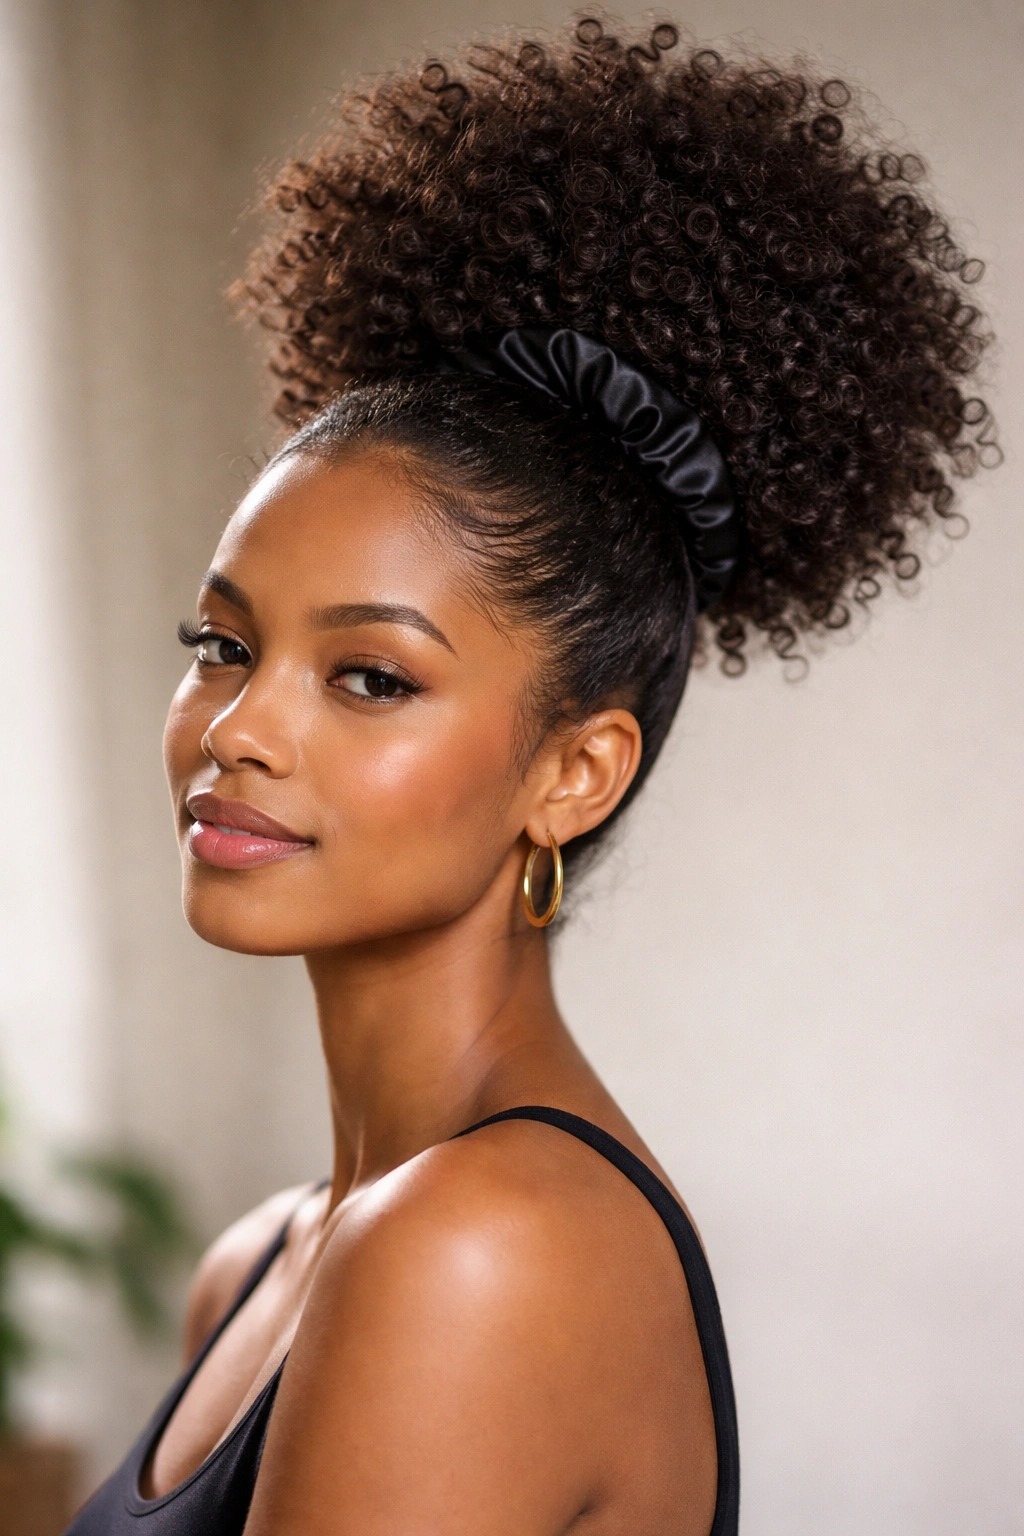
Big hair. Wet air. Still fine.
A high puff is a strong choice when you want your curls lifted away from your neck and your face. Rain loves to make loose hair swell at the wrong moments. A puff turns that volume into part of the style instead of a problem to manage.
The real trick is keeping the base neat without plastering it down. A little gel or edge control around the hairline is enough. Too much and the style starts looking sticky or flaking once it dries. I’m not a fan of over-slicked edges in any weather, and in damp weather they age fast.
The puff itself should feel soft and full. If your curls are dense, a satin scrunchie or stretchy puff cuff can hold the hair without flattening the base too much. If the puff sits too low, it loses that lifted shape and starts looking heavy.
A high puff also pairs well with earrings, a lip color, or a scarf. That sounds cosmetic, but it matters. A rainy-day style gets easier to wear when the rest of the look feels pulled together. Nobody wants to look like they wrestled a storm and lost.
9. The French Braid Into a Bun
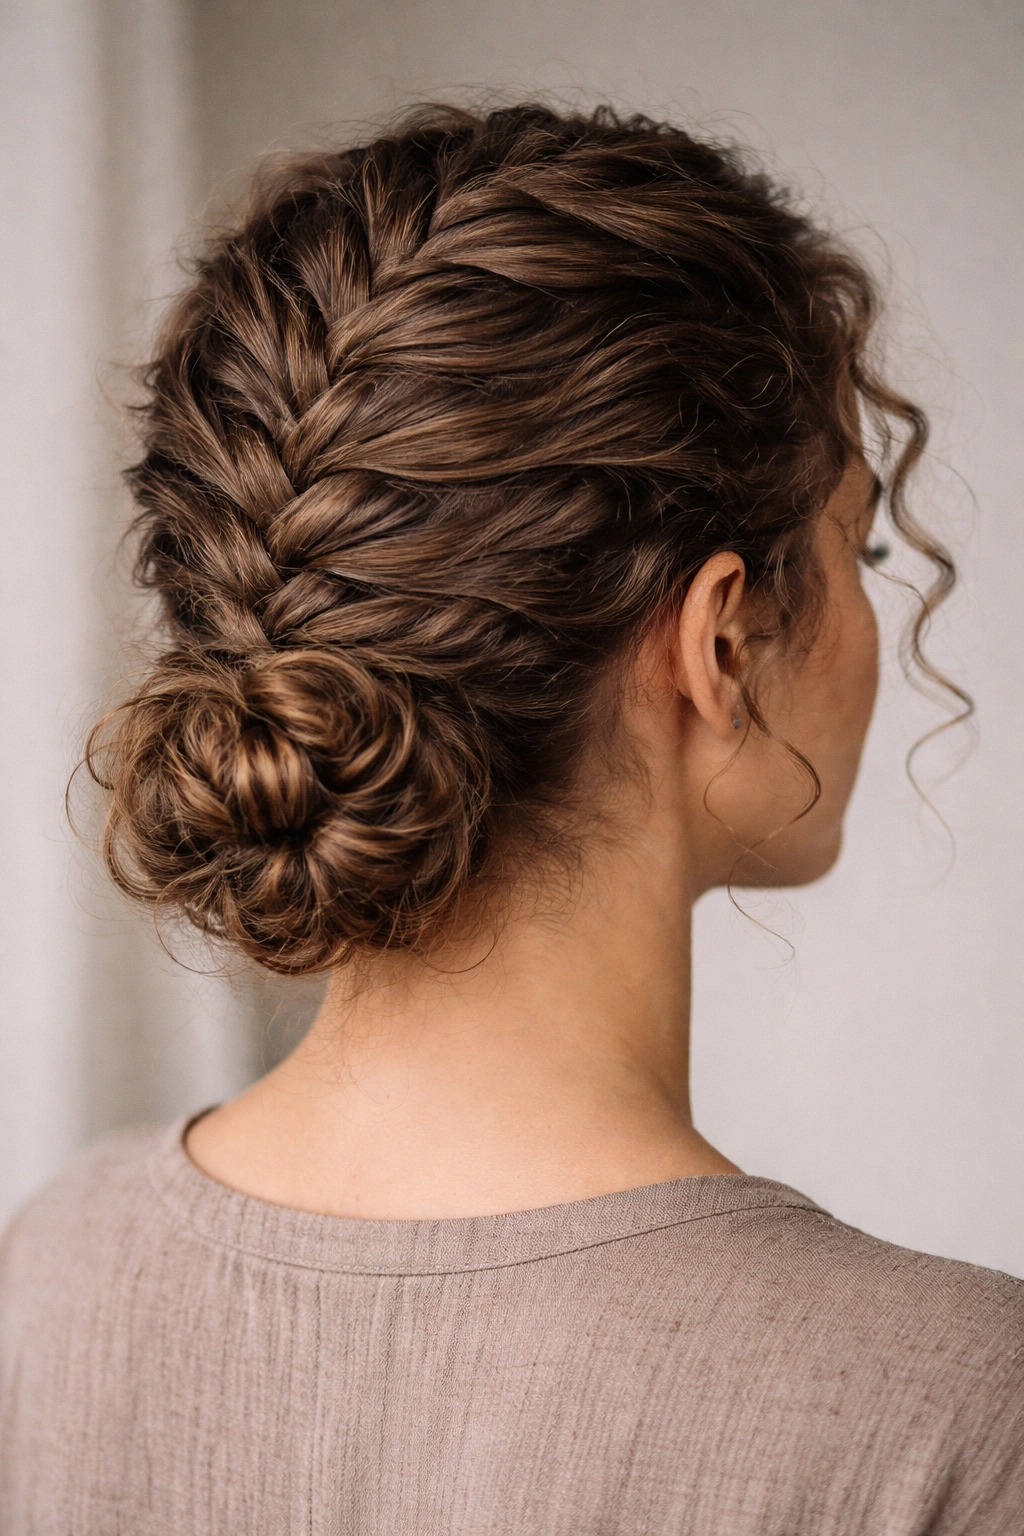
Unlike a plain bun, a French braid feeds new hair into the style as you go, so the crown stays flatter longer. That is a huge help when humidity is making the roots puff up by the minute.
Start at the hairline, braid down the back, and then wrap the ends into a low bun. It sounds more elaborate than it is. Once you get the hand position right, the style moves fast, and the finished shape stays in place better than a standard ponytail or loose bun.
Why This One Lasts Better
The braid locks the top section down first, which means less shifting under a hood or scarf. The bun at the end keeps the lengths tucked away. Together, they make a style that can handle wind better than most single-step looks.
This is also one of the better choices for layered curly hair. Shorter layers tend to escape around the crown, and the braid gives them somewhere to live instead of floating free. I like a few soft pieces around the ears, but if you want the style cleaner, pin them in.
If you have time for only one slightly more structured style, pick this one. It looks like you tried harder than you did.
10. The Silk Scarf Wrap With a Curly Bun
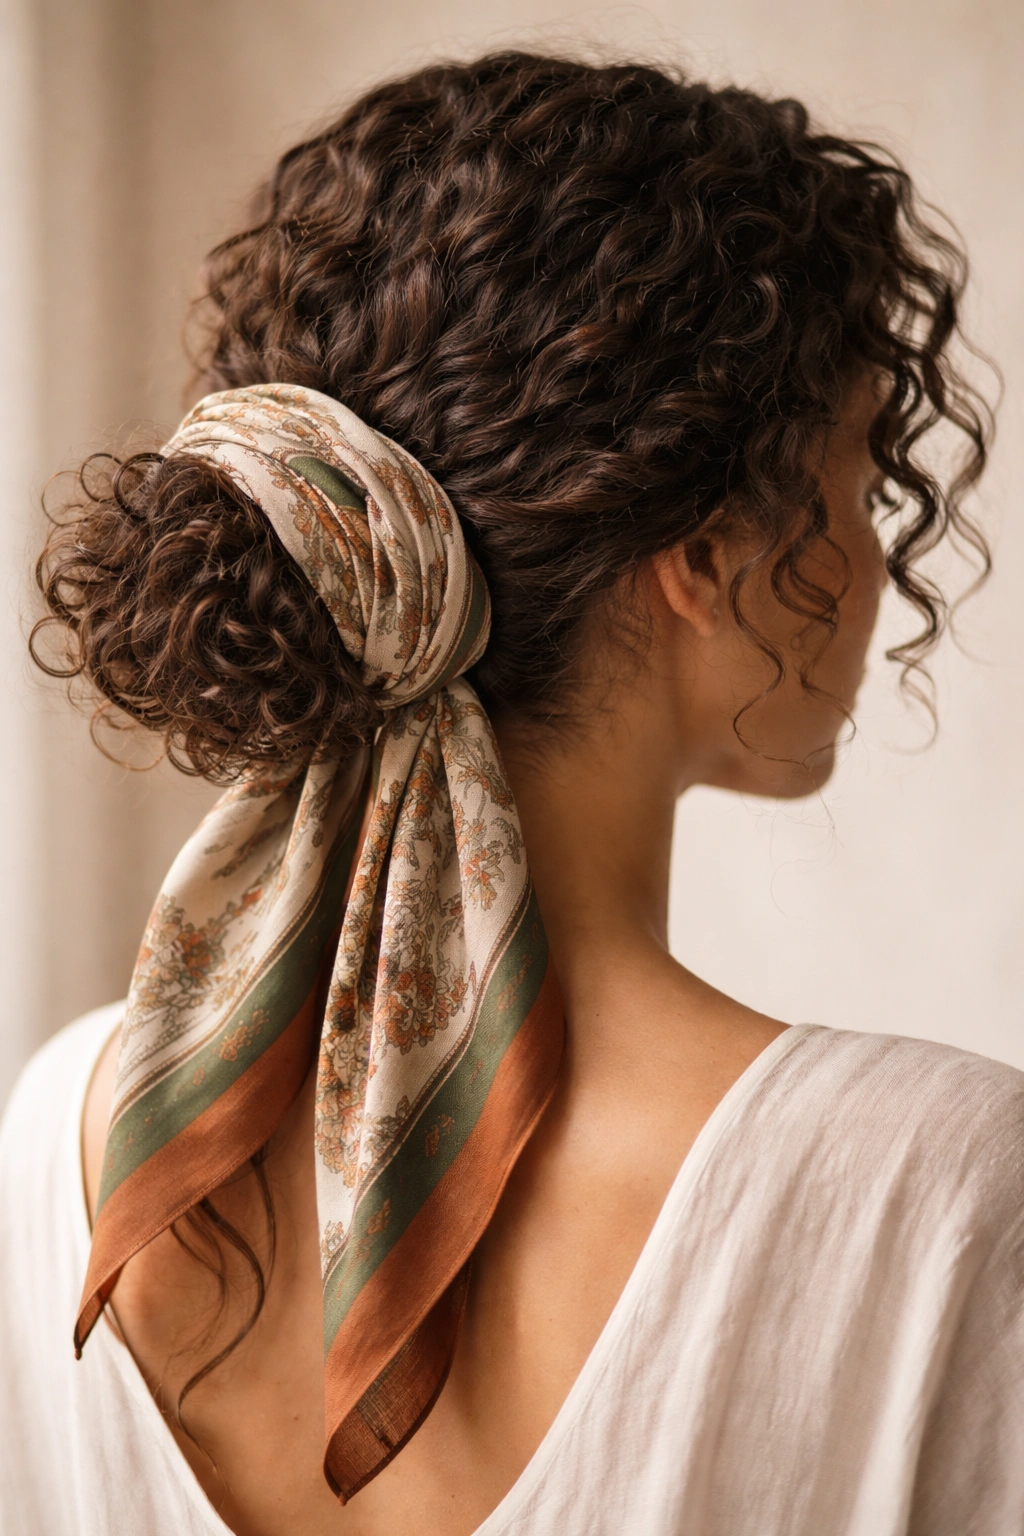
What if the smartest rainy-day move is protecting the whole shape at once? That is the appeal of a silk scarf wrap.
A low bun gives you the base, and the scarf protects the surface from friction, drizzle, and all the little rough moments that happen when you pull a coat on and off. The scarf also lets you keep some style on purpose, which I love. Rainy-day hair does not have to look like you surrendered.
A Few Useful Scarf Notes
- A square scarf is easiest if you want a full wrap.
- A long rectangle scarf gives you more room for a knot or tail.
- Silk is lovely, but satin works if that is what you have.
- Keep the wrap snug enough to stay in place, not tight enough to flatten your curls.
The bun underneath can be soft or tucked. I prefer soft, because the scarf does the real controlling work. If a few curls peek out at the nape or around the ears, that usually looks better than a sealed-off helmet shape.
This style is especially good when the rain is steady and you know you will be outside for a while. The scarf is doing more than decorating. It is cutting down on moisture exposure and friction at the same time.
11. The Wet-Look Curly Ponytail
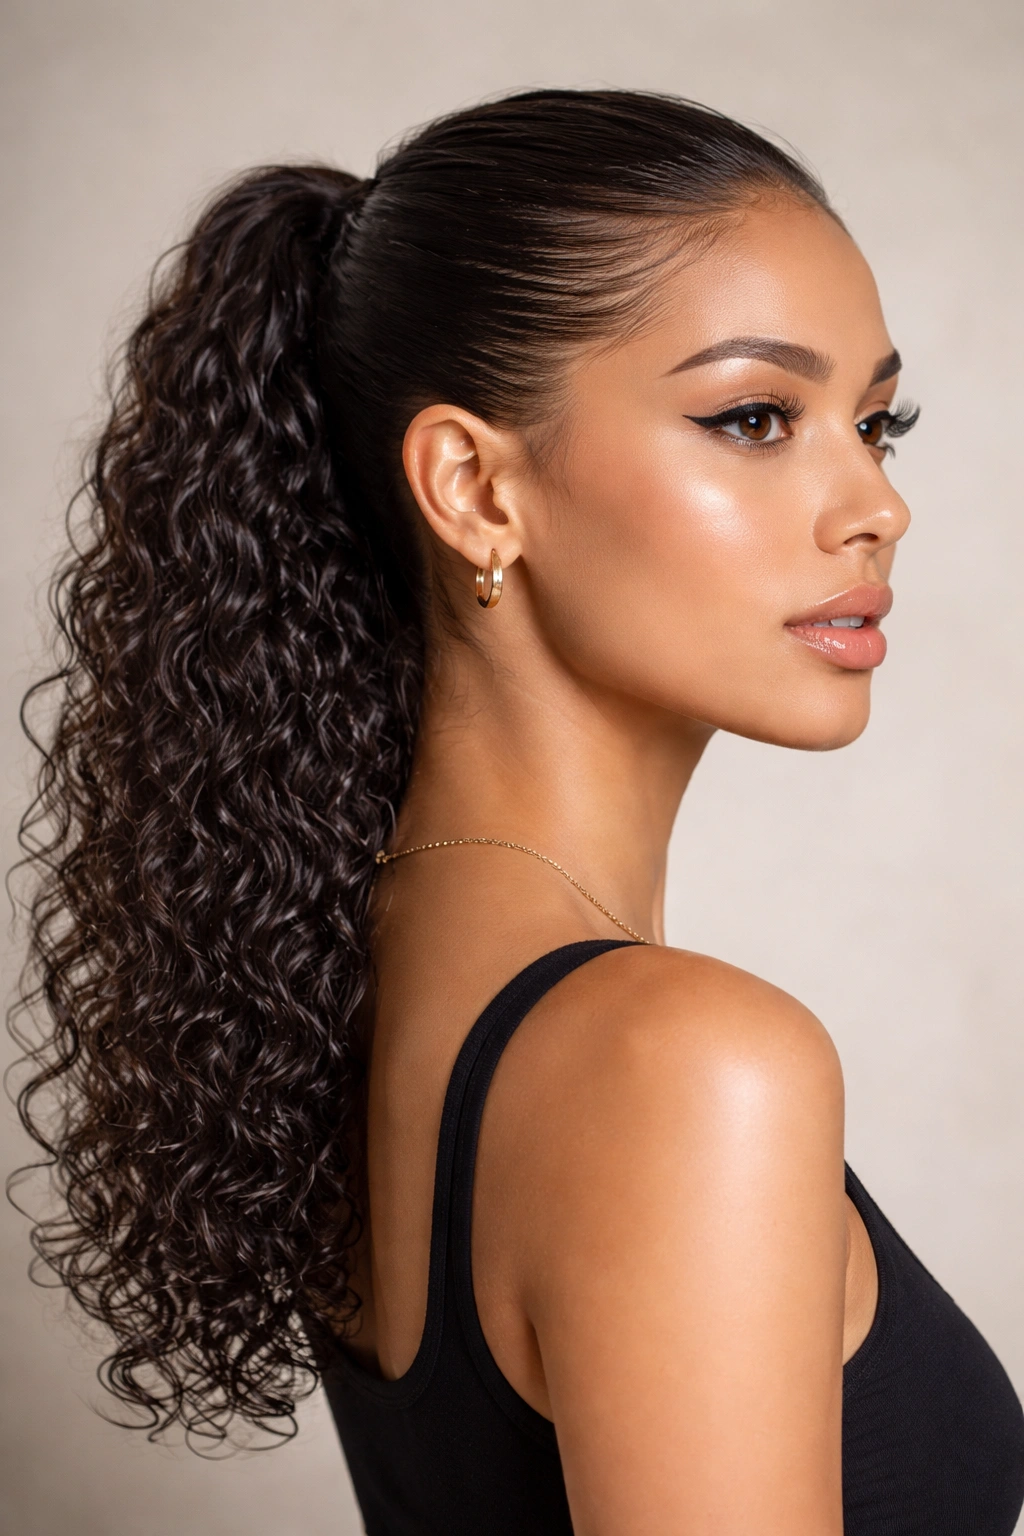
A wet-look curly ponytail can be the cleanest answer to drizzle, especially when you do not want to fight humidity all day.
The whole point is to make the style look intentional from the start. Smooth the hair back with a light gel and a bit of cream while it is still damp, then gather it into a mid or low ponytail. The top stays sleek, and the curls in the tail keep their shape. Rain does not ruin that look. It just fits into it.
The Key Is Restraint
Use enough product to smooth the surface, not so much that the hair feels hard or sticky. If the top is overloaded, you will see flakes once it dries, and that looks worse than a little frizz ever could. The ponytail should move.
A wide-tooth comb or your hands usually works better than a tight brush pass. Brushes can pull out curl pattern if you are not careful, and the wet-look style still needs some softness in the tail. A small elastic at the base keeps it secure, and a wrap of hair around the elastic makes the whole thing look finished.
This style is not for someone who wants volume at the crown. It is for someone who wants control, shine, and a shape that will not collapse the moment the air turns heavy.
12. Flat Twists Into a Low Knot
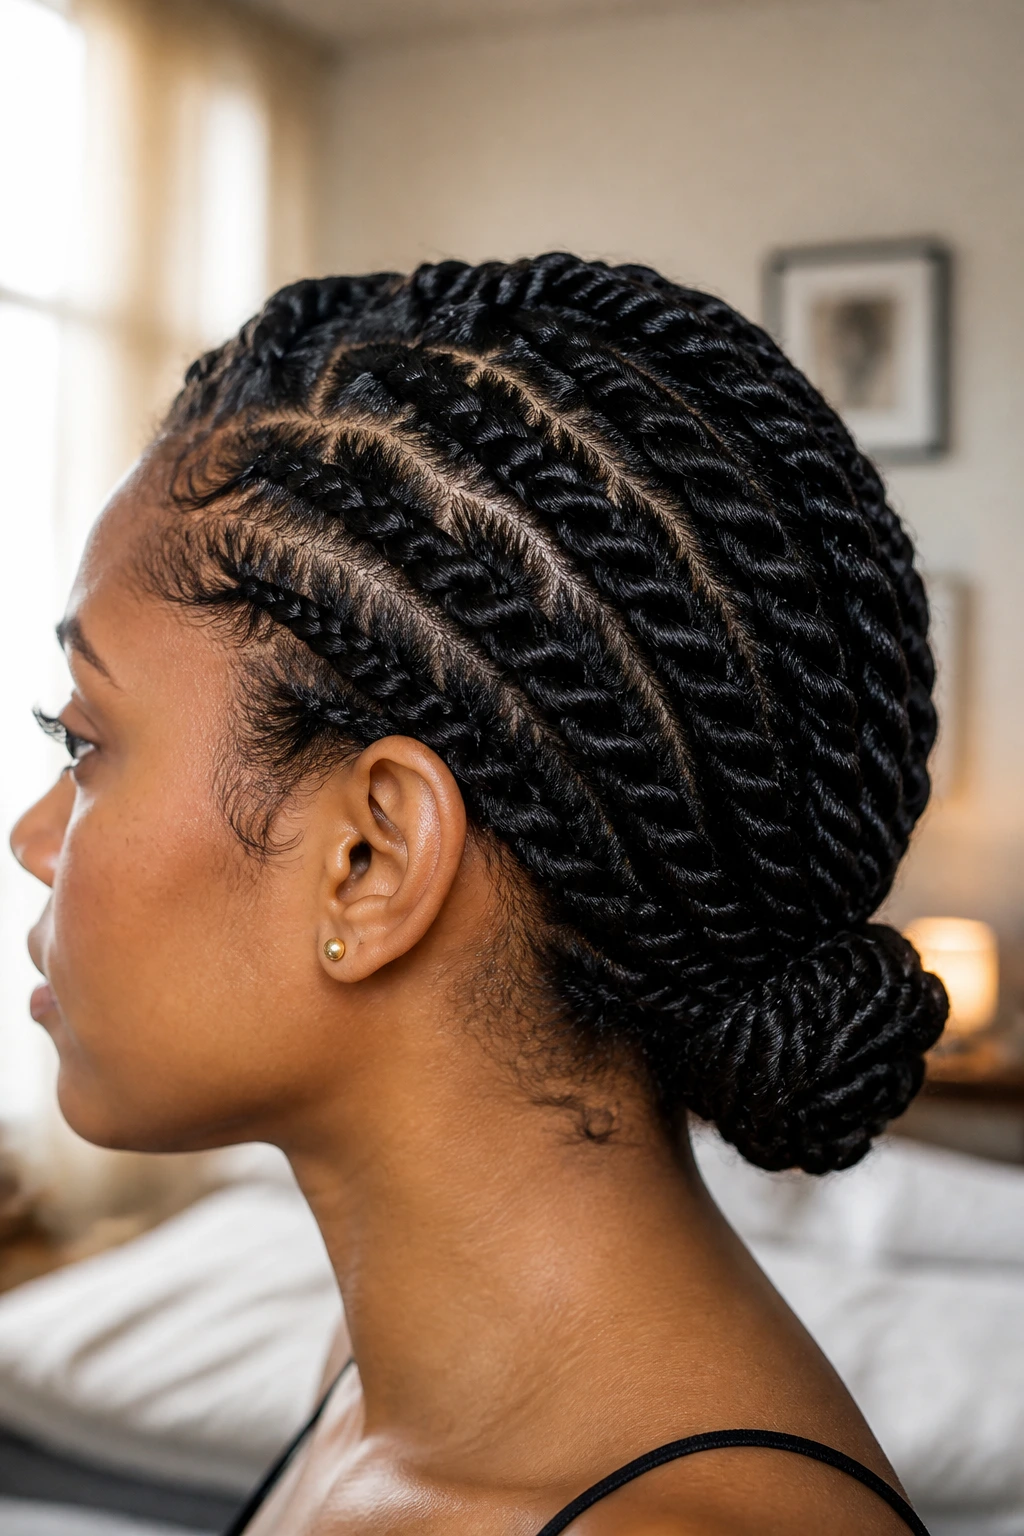
If you know you are heading into wind, rain, and a hood that rubs, flat twists are the grown-up answer. They keep the scalp neat, protect the surface of the hair, and create a shape that still looks good if the weather gets rude.
I like flat twists into a low knot because they give you more control than loose braids, but they are gentler than a tight pull-back style. You can part the hair into two, four, or even six sections depending on thickness. Then twist each section close to the scalp and gather the ends into a knot at the nape.
What Makes It So Practical
- It holds up well under a hood or beanie.
- The twists keep the roots from ballooning as fast.
- The low knot keeps the ends tucked away from damp coats.
- It works on hair that is stretched, freshly styled, or a little worn-in.
If your hair is fine, use fewer, larger twists so the style does not look overcomplicated. If your hair is thick, more twists help distribute the bulk and make the knot sit flatter. A few pins hidden at the base are often enough to keep everything stable.
This is the style I’d pick for a long day with bad weather and no patience for touch-ups. It is not flashy. It is reliable. And on a rainy day, that counts for a lot.
Rainy weather has a way of exposing which styles are doing real work and which ones only look good under perfect lighting. Curly hair usually does better when it is given a shape, a little protection, and room to stay curly instead of being forced into a fight it cannot win.
If you only remember one rule, make it this: keep friction low and the ends protected. That small shift changes everything. The right rainy-day style should leave you looking put together even after the weather has had its say.