A V-part ponytail is one of the most flattering and versatile protective styles for natural hair, and it’s especially transformative if you’ve been experimenting with your look but haven’t quite figured out what works best for your hair texture and face shape. Unlike traditional center or side parts, the V-part creates a distinctive angular section that frames the face with intention, adds dimension, and shows off your natural hair texture in a way that feels both polished and effortlessly cool. The beauty of a V-part is that it works across all curl patterns—from loose waves to tight coils—and it’s equally at home as a sleek everyday style or a statement moment at a special occasion.
What makes the V-part technique so special for natural hair is that it’s deeply intentional without being complicated. You’re creating a clean, shaped section that anchors your whole look, and everything that follows—whether it’s a sleek ponytail, voluminous curls, or an intricate braid pattern—flows naturally from that foundation. The V-part also happens to be incredibly kind to your edges and hairline because you’re creating clean lines without the tension that comes with some other parting methods, making it accessible for people prioritizing protective styling and hair health.
The 12 styles below show you how to adapt the V-part ponytail to work with different hair lengths, textures, occasions, and your own personal aesthetic. Whether you’re looking for something you can throw together in 15 minutes or a more elaborate weekend style, you’ll find exactly what you need here—plus the real, practical techniques that make each one actually work on natural hair.
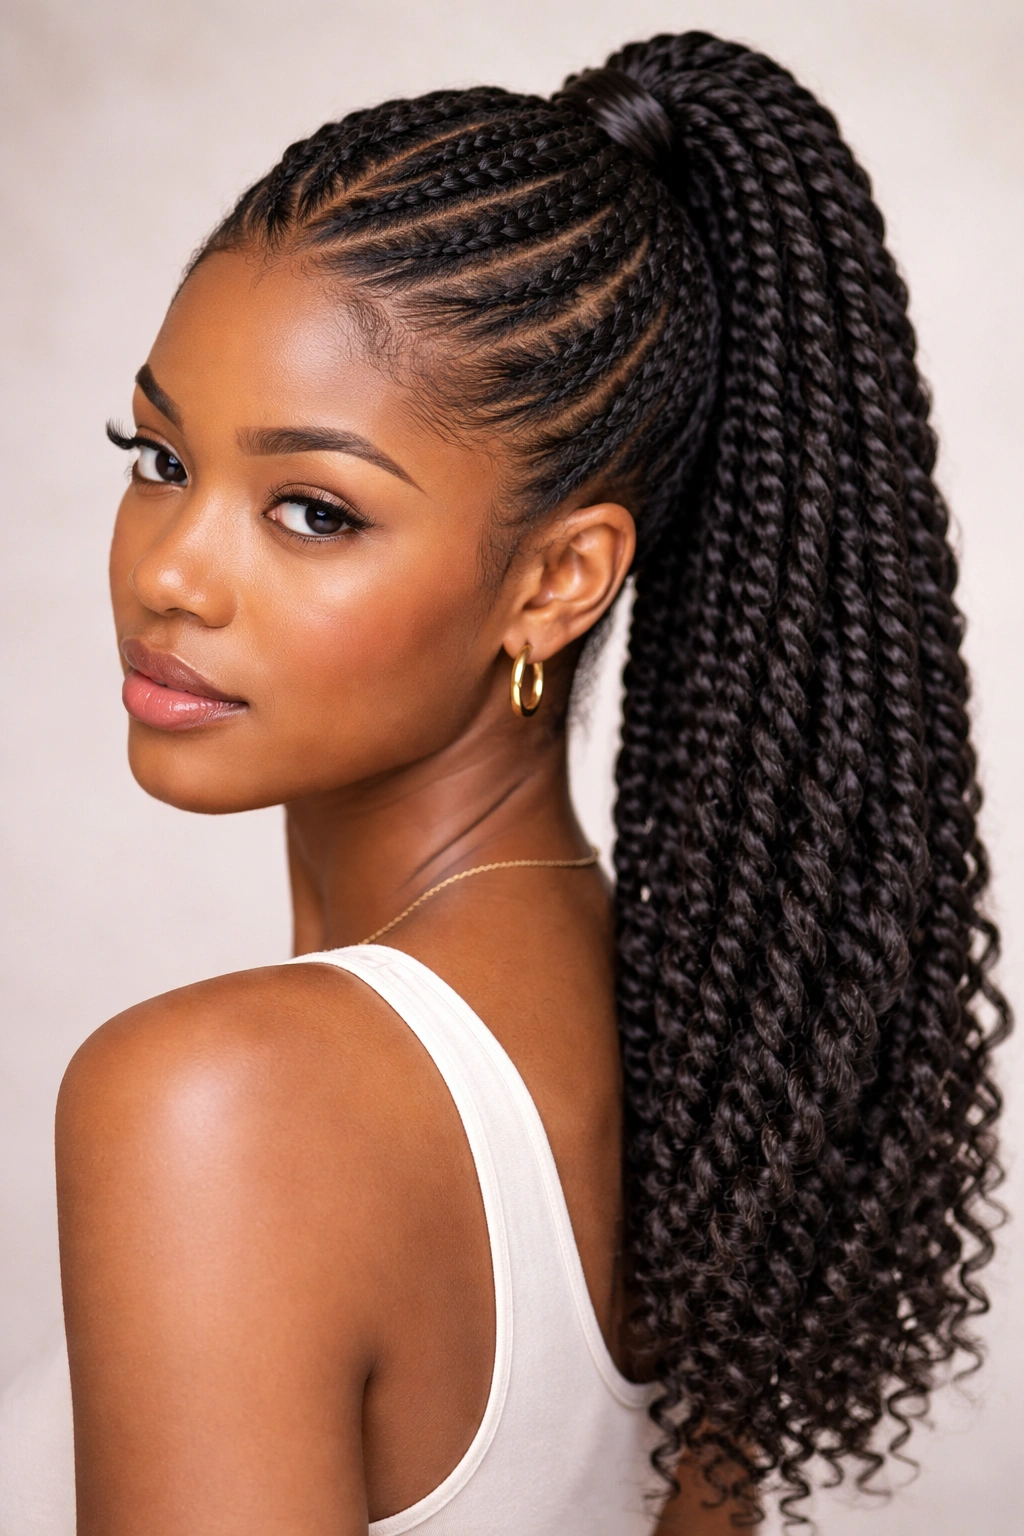
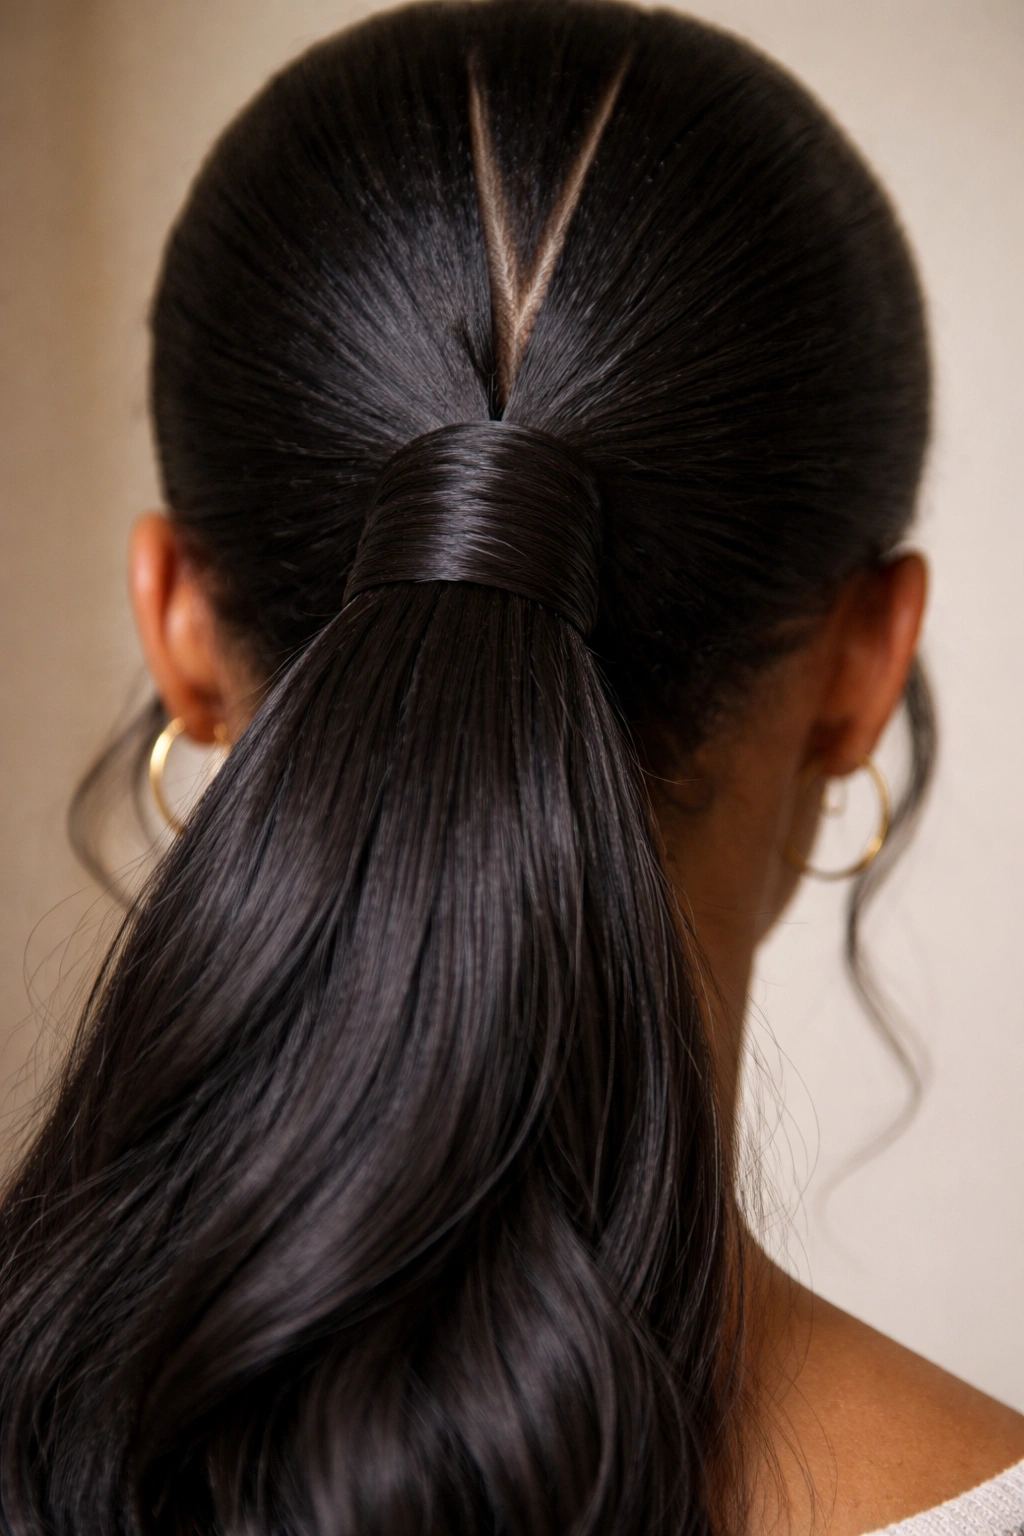
1. Classic V Part with High Ponytail
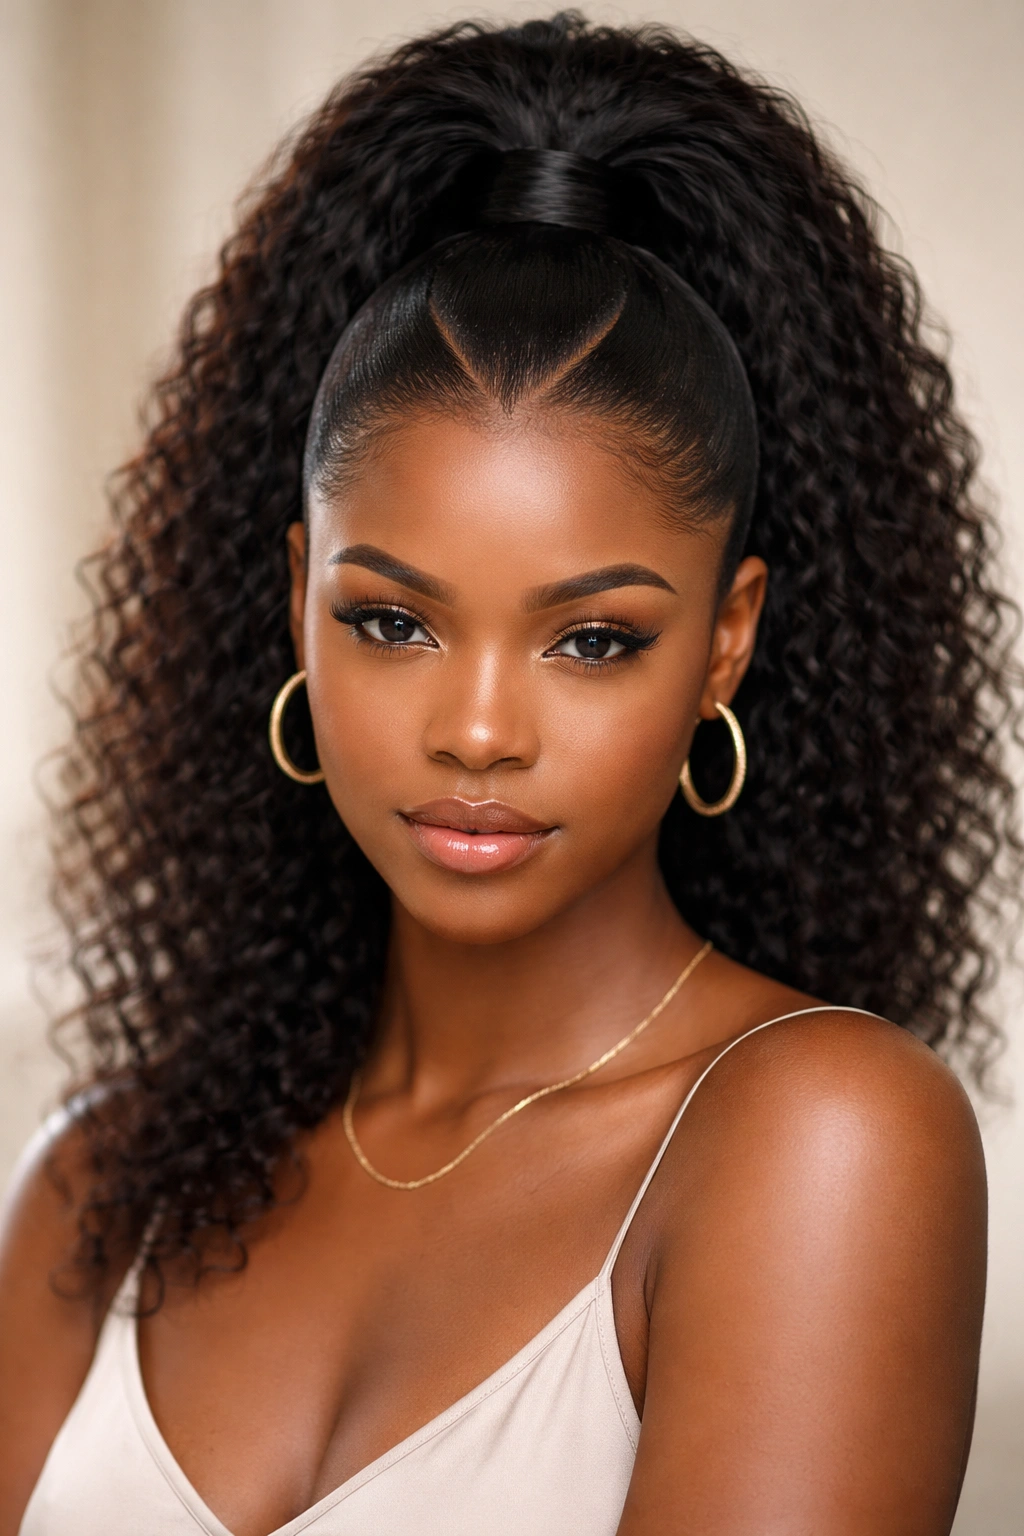
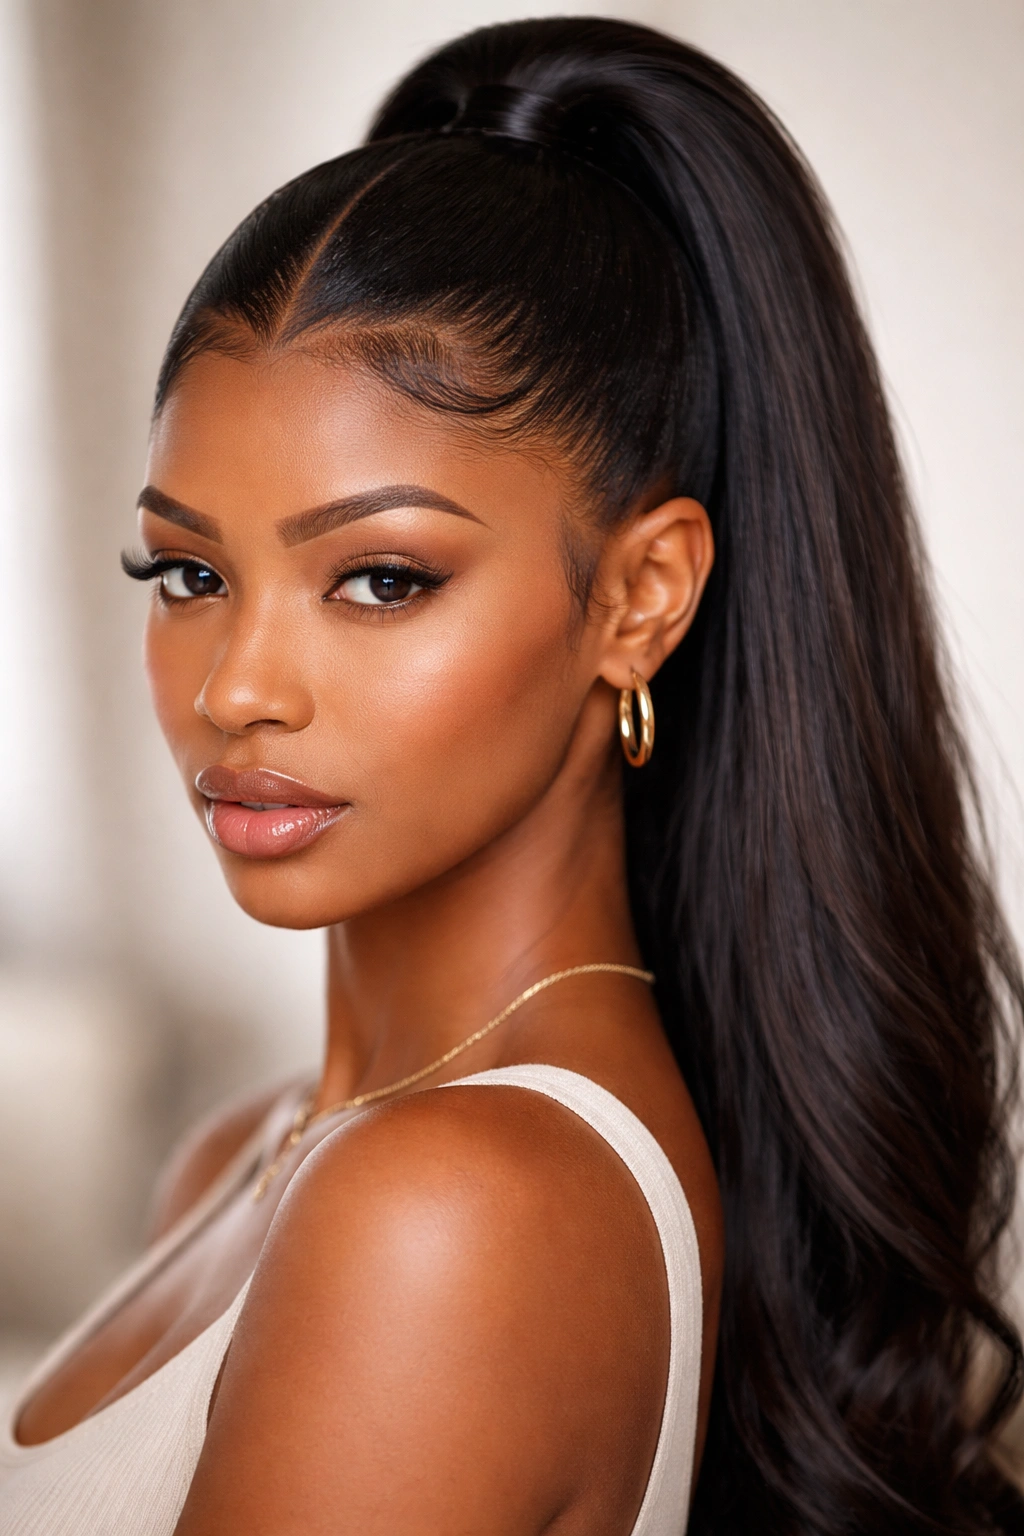
The classic V-part high ponytail is the foundation style that every natural-haired person should master because it’s genuinely one of the most polished, face-framing looks you can achieve. This style sits at the crown of your head and creates an elegant elongated line that works beautifully for everything from casual workdays to formal events. The clean V-part creates a sharp focal point at the front of your hairline while the ponytail itself remains full and voluminous, which is exactly what makes this style feel so intentional rather than rushed.
Why It Works So Well
The high placement combined with the V-part creates the illusion of height and lift, which is incredibly flattering on most face shapes. Because the V-part draws attention to your center hairline and forehead, this style shines when you’ve got a clear, healthy hairline—which makes it perfect for a protective style that’s gentle on your edges. The height also prevents the style from looking flat or heavy on your crown, and it photographs beautifully because the ponytail catches light in a dynamic way.
How to Get It Right
- Start with hair that’s freshly moisturized but not dripping wet—damp hair is your sweet spot for creating clean sections
- Use a pointed comb to draw an inverted V shape from the inner corner of one eyebrow to the inner corner of the other, then down the center of the back of your head (creating the two-pronged V)
- Gather everything into a high ponytail using a hair tie, then smooth your edges with a brush, edge control, and a light scarf for a few minutes to set the pattern
- Secure with bobby pins along the hairline if your edges feel loose or if you’re going somewhere fancy
- You can wear this with or without extensions—it looks equally stunning either way
Pro tip: If you have baby hairs or thinner edges that feel fragile, skip the tight brushing and instead use your fingers and a small amount of oil to pat your hair into place gently. You’re looking for defined, not pulled.
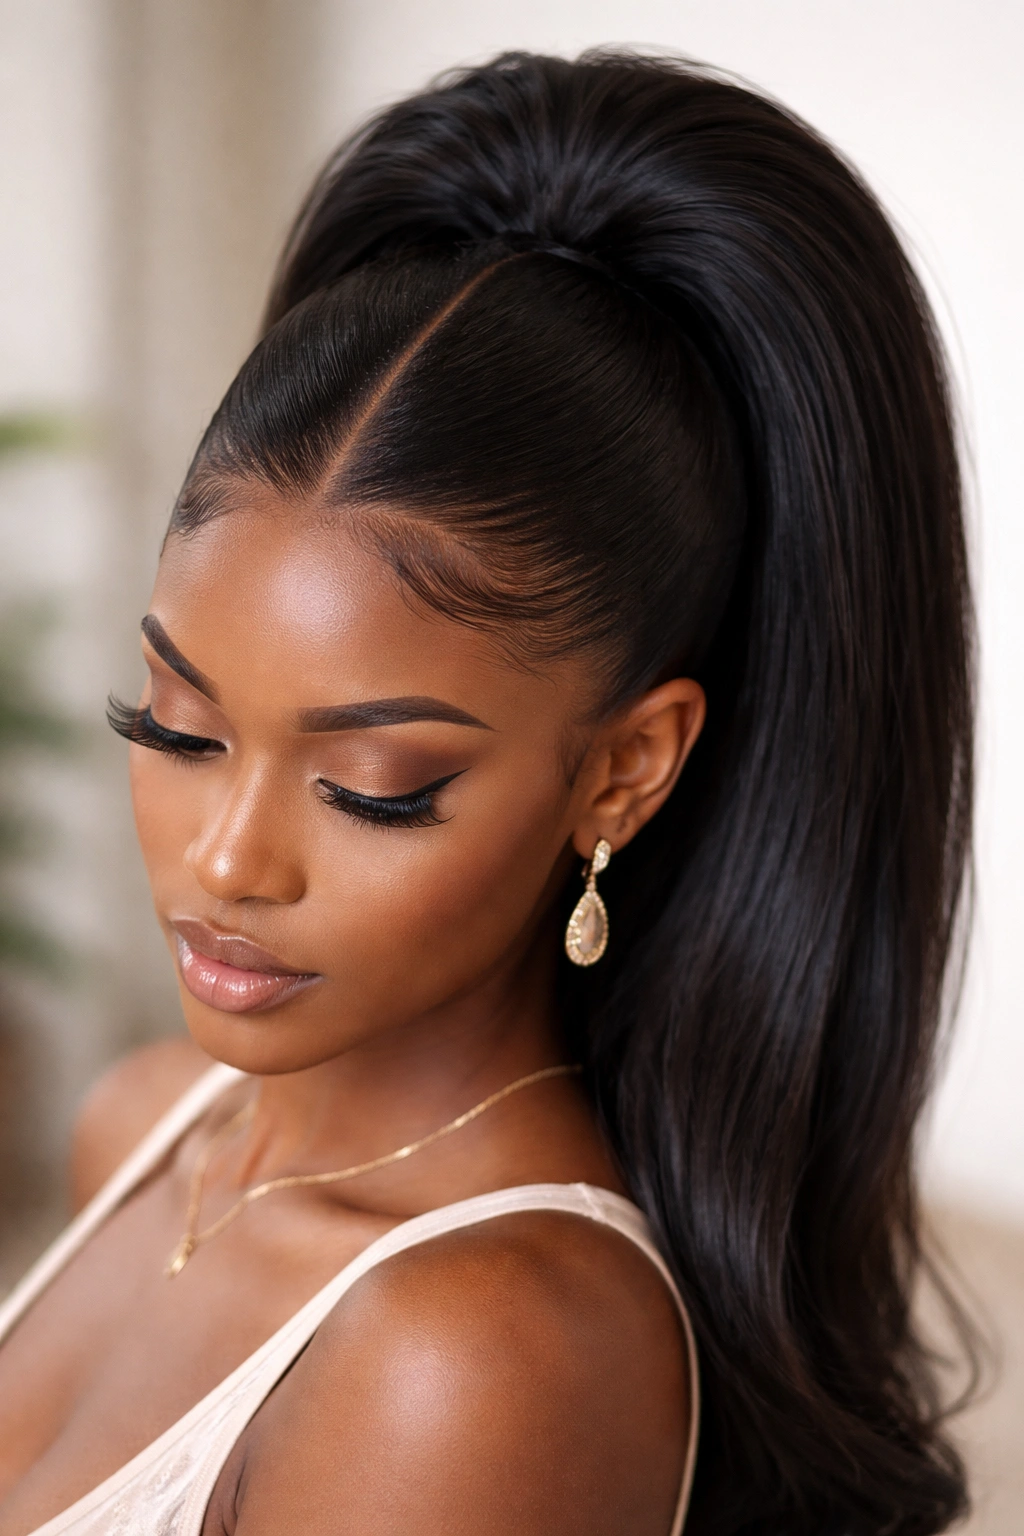
2. V Part with Sleek Low Ponytail
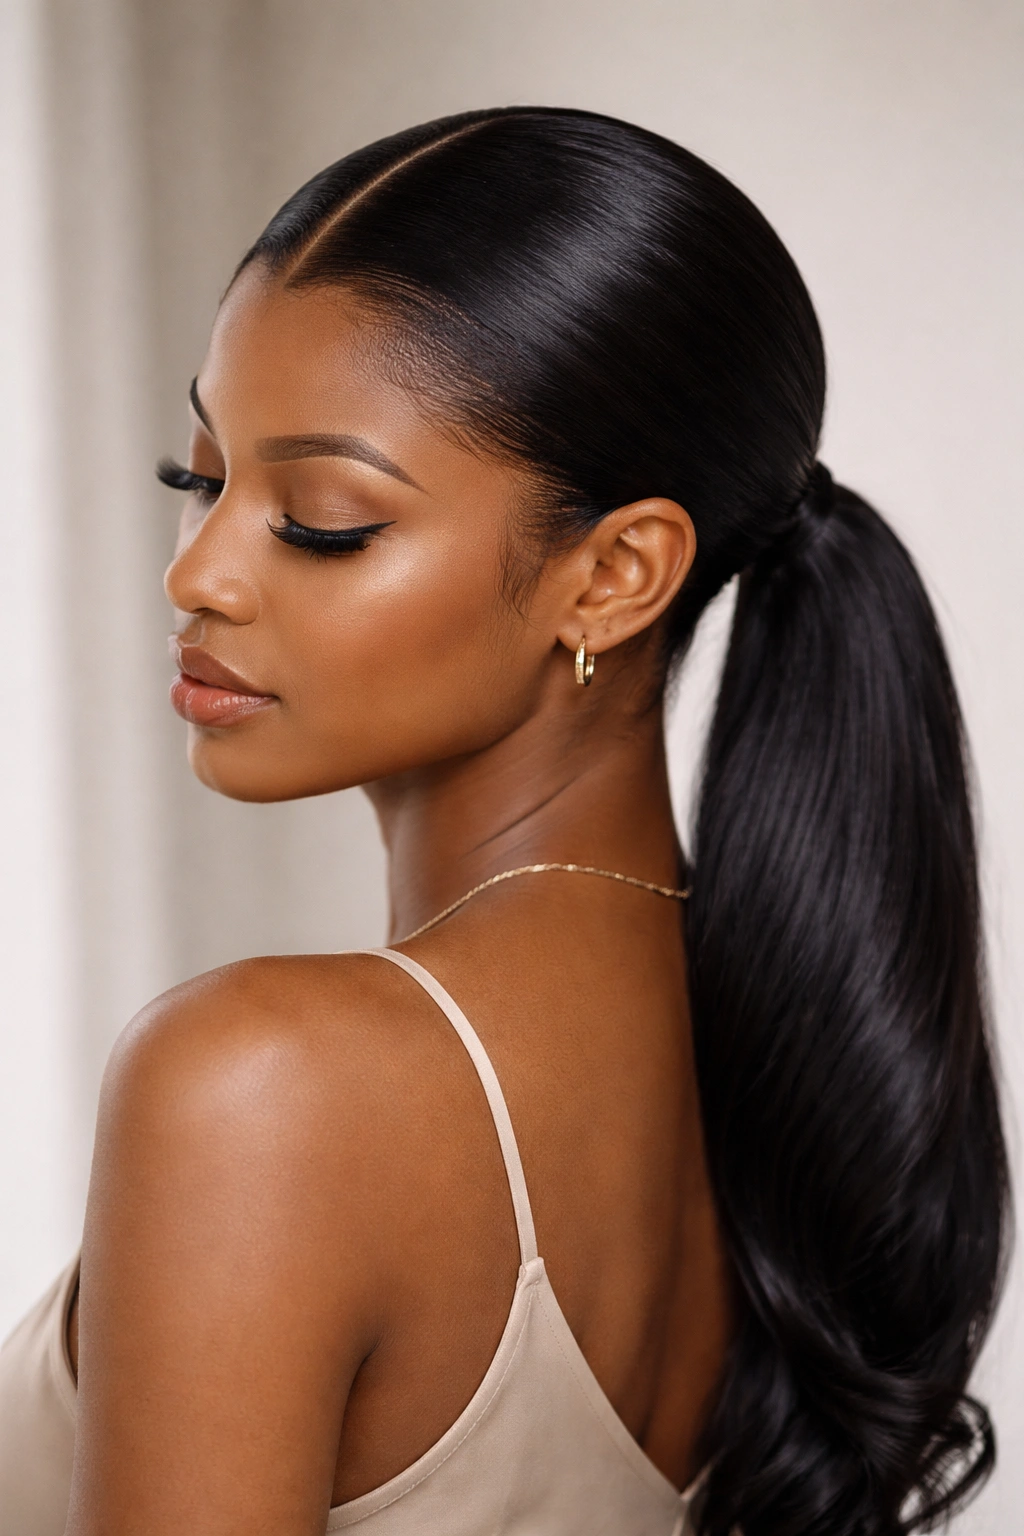
The low ponytail paired with a V-part is your answer when you want something that feels sophisticated and understated, but you’re still maintaining that intentional, framed-face aesthetic. This version places the ponytail at the nape of your neck, which shifts the visual balance and creates an elongated, graceful line—perfect if you’ve got a longer neck or you’re going for something that reads as quietly confident rather than statement-making. The V-part still does all its magic at the hairline, but now you’re directing all the volume and texture downward instead of upward.
The Refined Appeal
A low ponytail actually tends to work better on people with finer or more delicate facial features because it doesn’t pull the eye upward to the crown—it lets your face breathe. This version is also incredibly practical for people with longer, denser hair because the lower ponytail sits more comfortably against your scalp and neck without creating tension points. It’s genuinely easier to maintain throughout the day because gravity is actually working with you, not against you.
Essential Techniques for Sleekness
- Use a lightweight smoothing cream or gelée—not a heavy pomade—to define your V-part and edges (heavy products can weigh down your ponytail)
- Draw your V-part, then gather the ponytail lower, roughly where your ears align with your neck
- Use a fine-tooth comb to smooth the hair as you gather it, working in the direction the hair naturally falls
- Wrap a small section of hair around the elastic band to hide it and create a polished finish
- Finish the edges with a light edge control and a fine-tooth edge brush for precision (you want definition, not shininess)
Worth knowing: Low ponytails work beautifully with extensions, but make sure your ponytail base is secure because you’re not relying on the positioning to do the work—you need an actual strong grip.
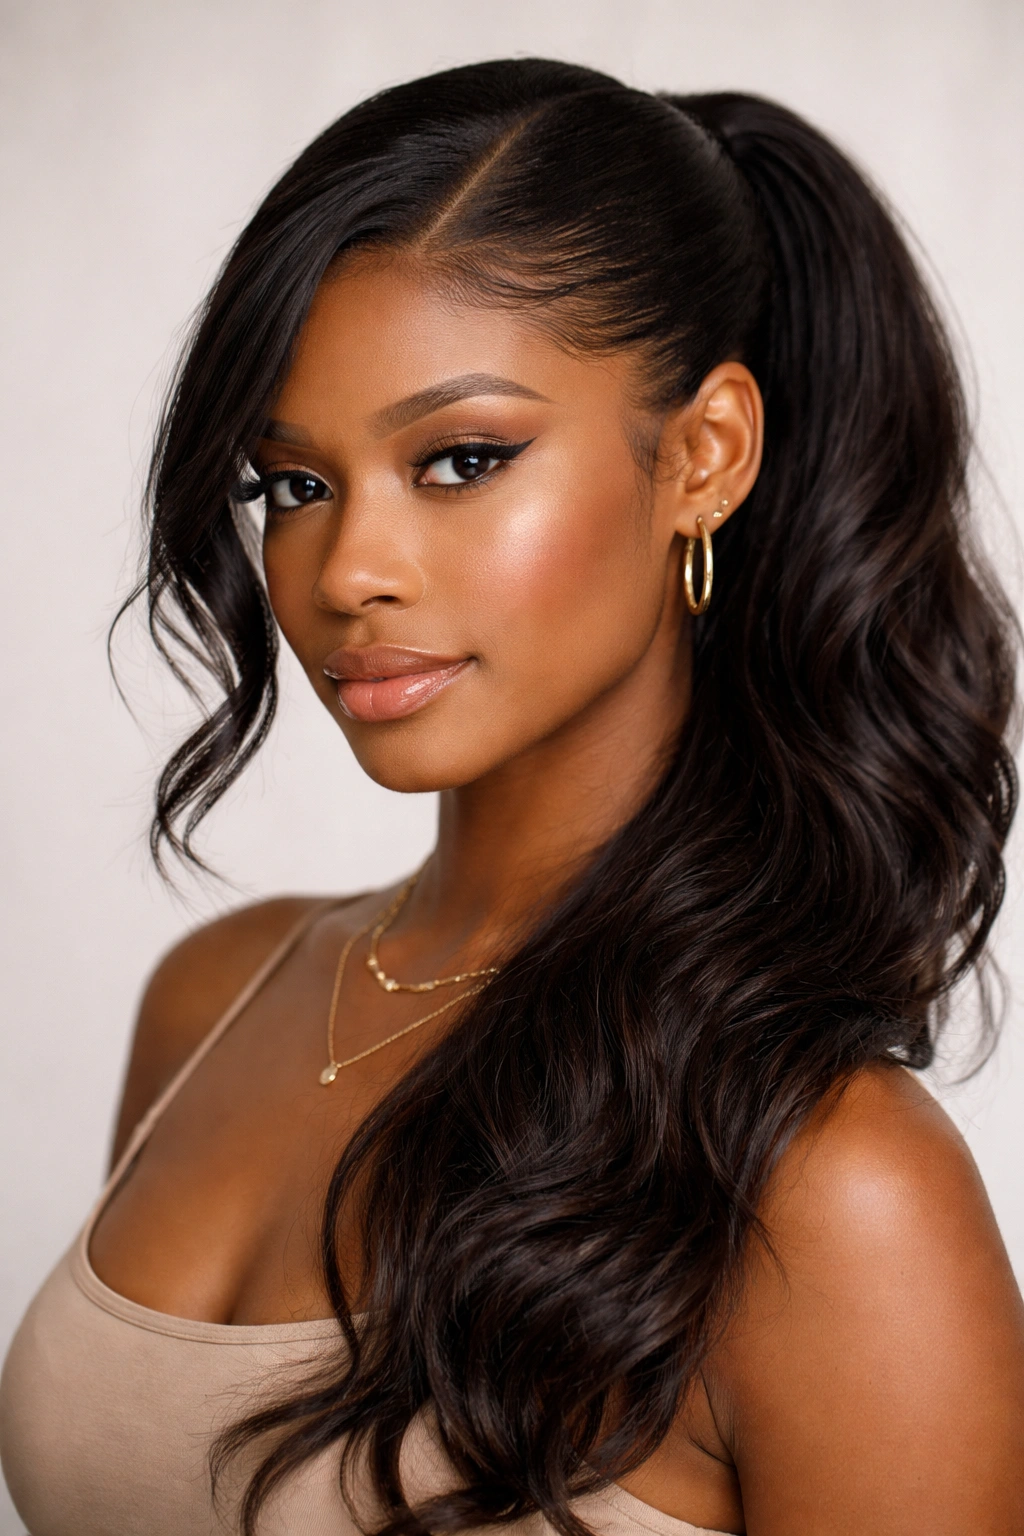
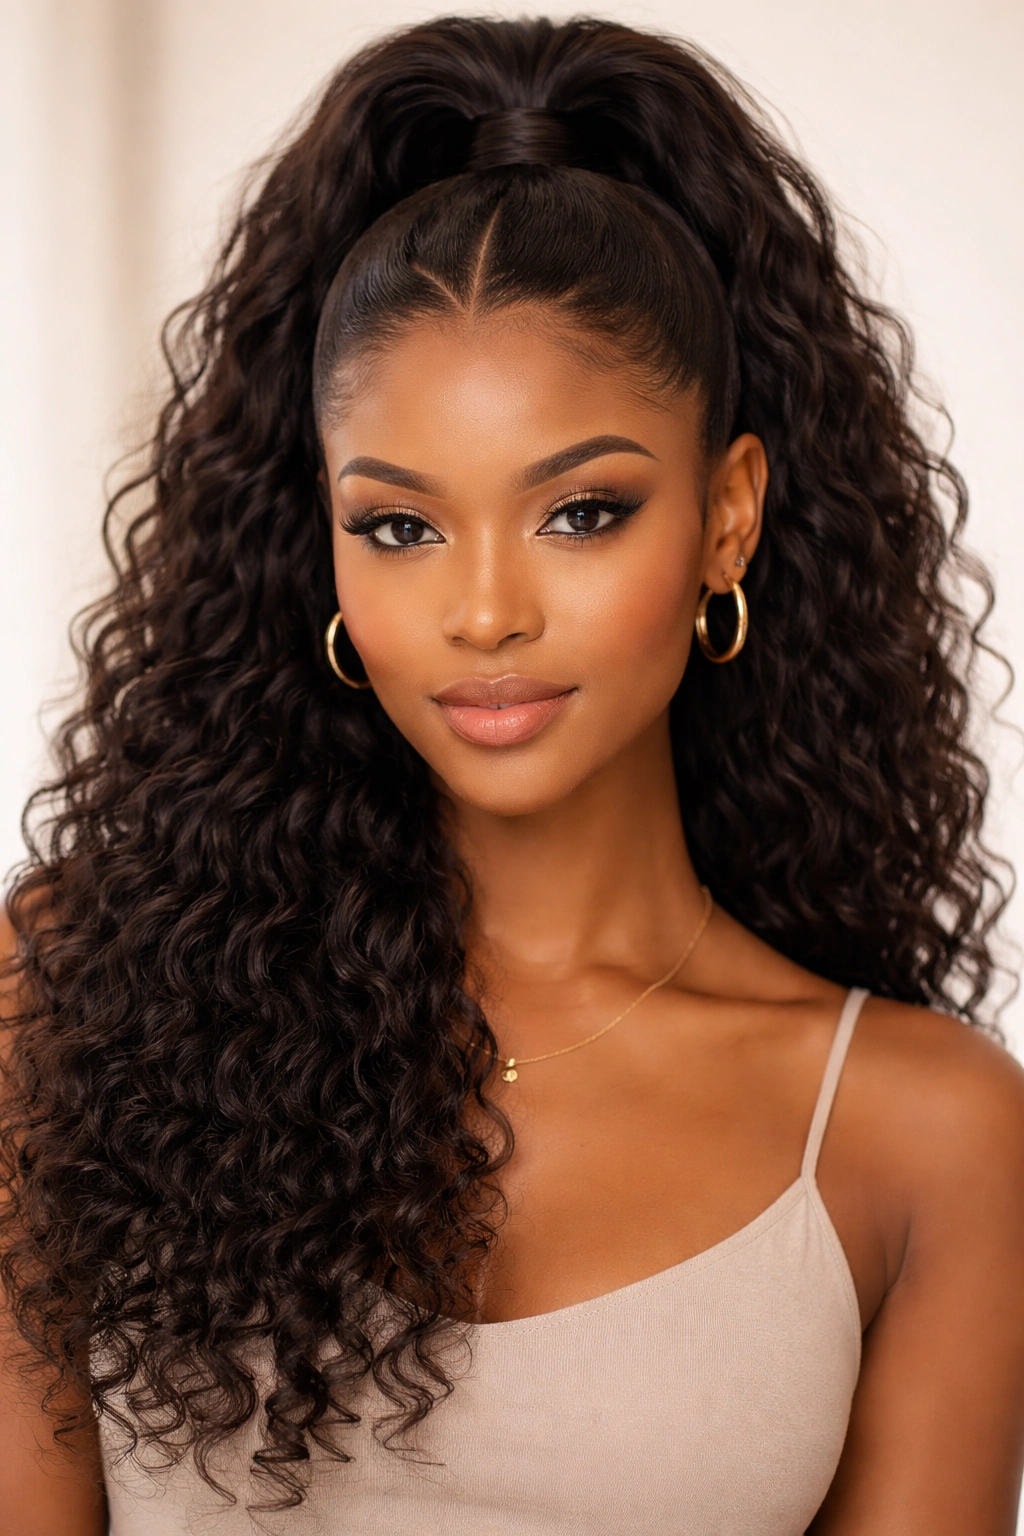
3. V Part with Textured Curly Ponytail
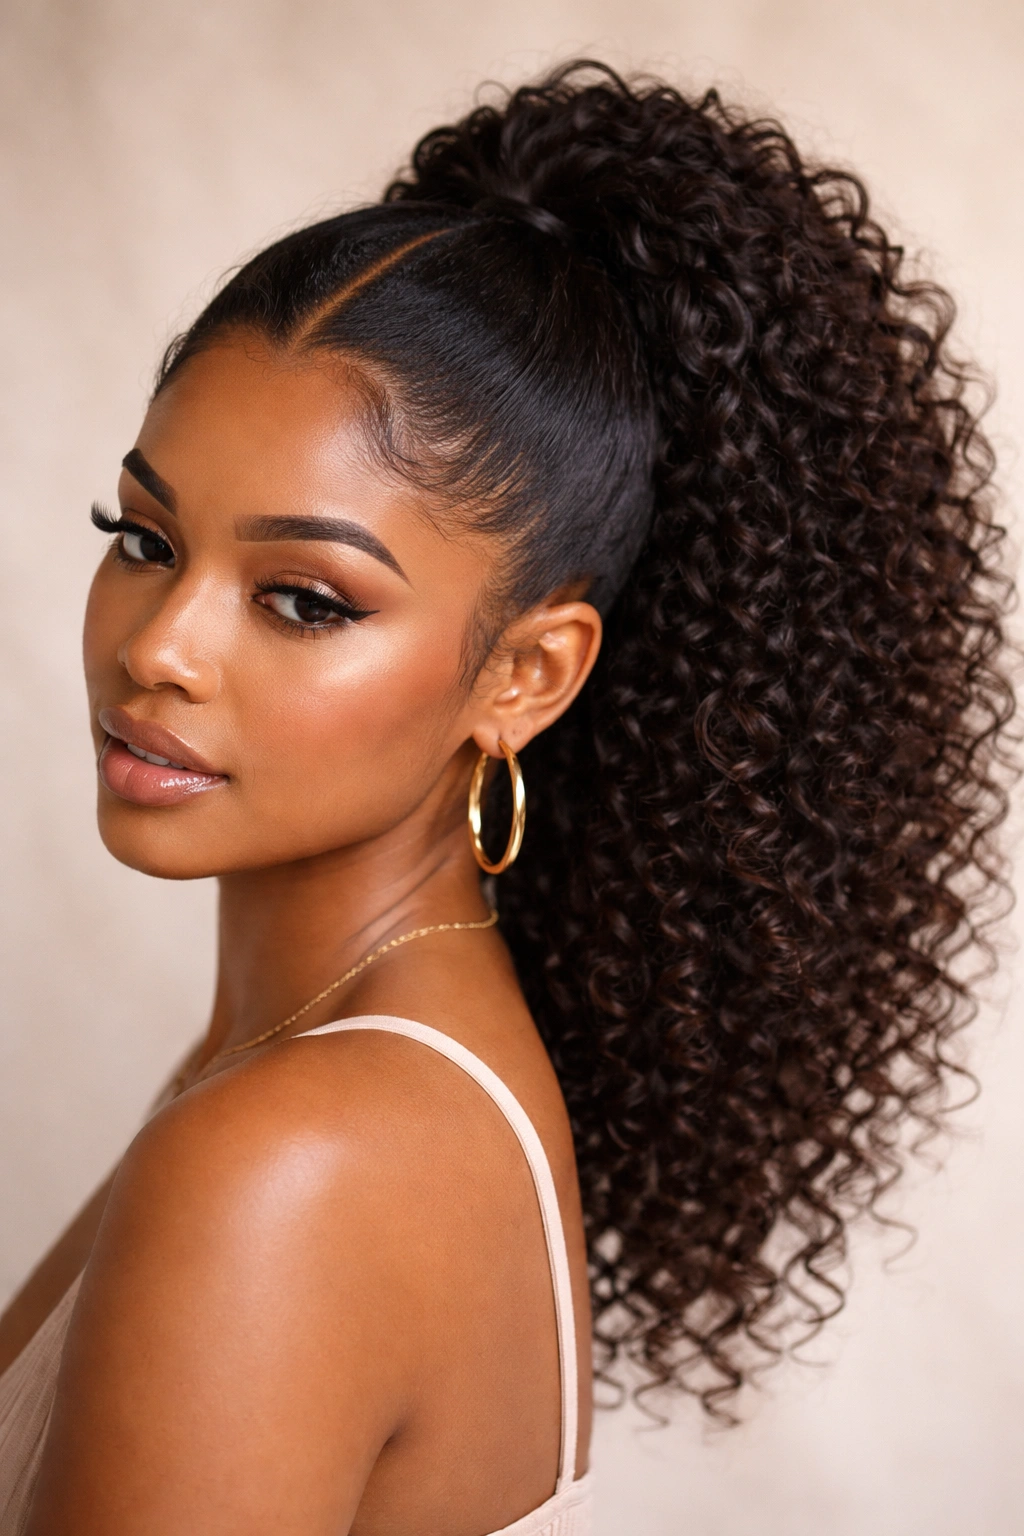
If you want to lean into your natural curl pattern rather than smooth everything down, the V-part paired with a curly, textured ponytail celebrates your hair’s actual texture while still providing that framing, face-focused structure. This is the style for days when you want something that feels special and fashion-forward but you also want to honor your hair’s natural state. The V-part creates definition and intentionality while the curly ponytail bursts with volume and personality.
Why Texture Works Here
Textured ponytails paired with V-parts create visual interest in a way that sleek styles simply can’t match. The contrast between the clean, sharp V-part lines and the soft, bouncy ponytail texture is genuinely striking—it catches light differently, it moves differently, and it photographs with dimension. This is also one of the most forgiving styles to maintain throughout the day because your texture naturally hides any flyaways or baby hairs that might show on a sleek style.
Building the Texture
- Create your V-part with slightly damp hair, using water or a lightweight leave-in conditioner to define the sections
- Don’t smooth the V-part aggressively—a few gentle strokes with a comb are enough to make it clear without disrupting your curl pattern
- Gather your ponytail, and here’s the key: separate it into 3-4 sections and use your fingers or a wide-tooth comb to gently encourage your curls to clump and curl rather than combing through
- You can lightly mist with a curl refresher spray or a diluted leave-in to encourage definition without creating crunchiness
- Let it air dry if you have time, or use a diffuser on a very low heat setting if you need to speed things up
Insider note: The best textured curly ponytails happen when you resist the urge to overwork your hair. Light hands, gentle encouragement of your natural curl pattern, and time create way better results than trying to “shape” your curls.
4. V Part with Braided Detail Ponytail
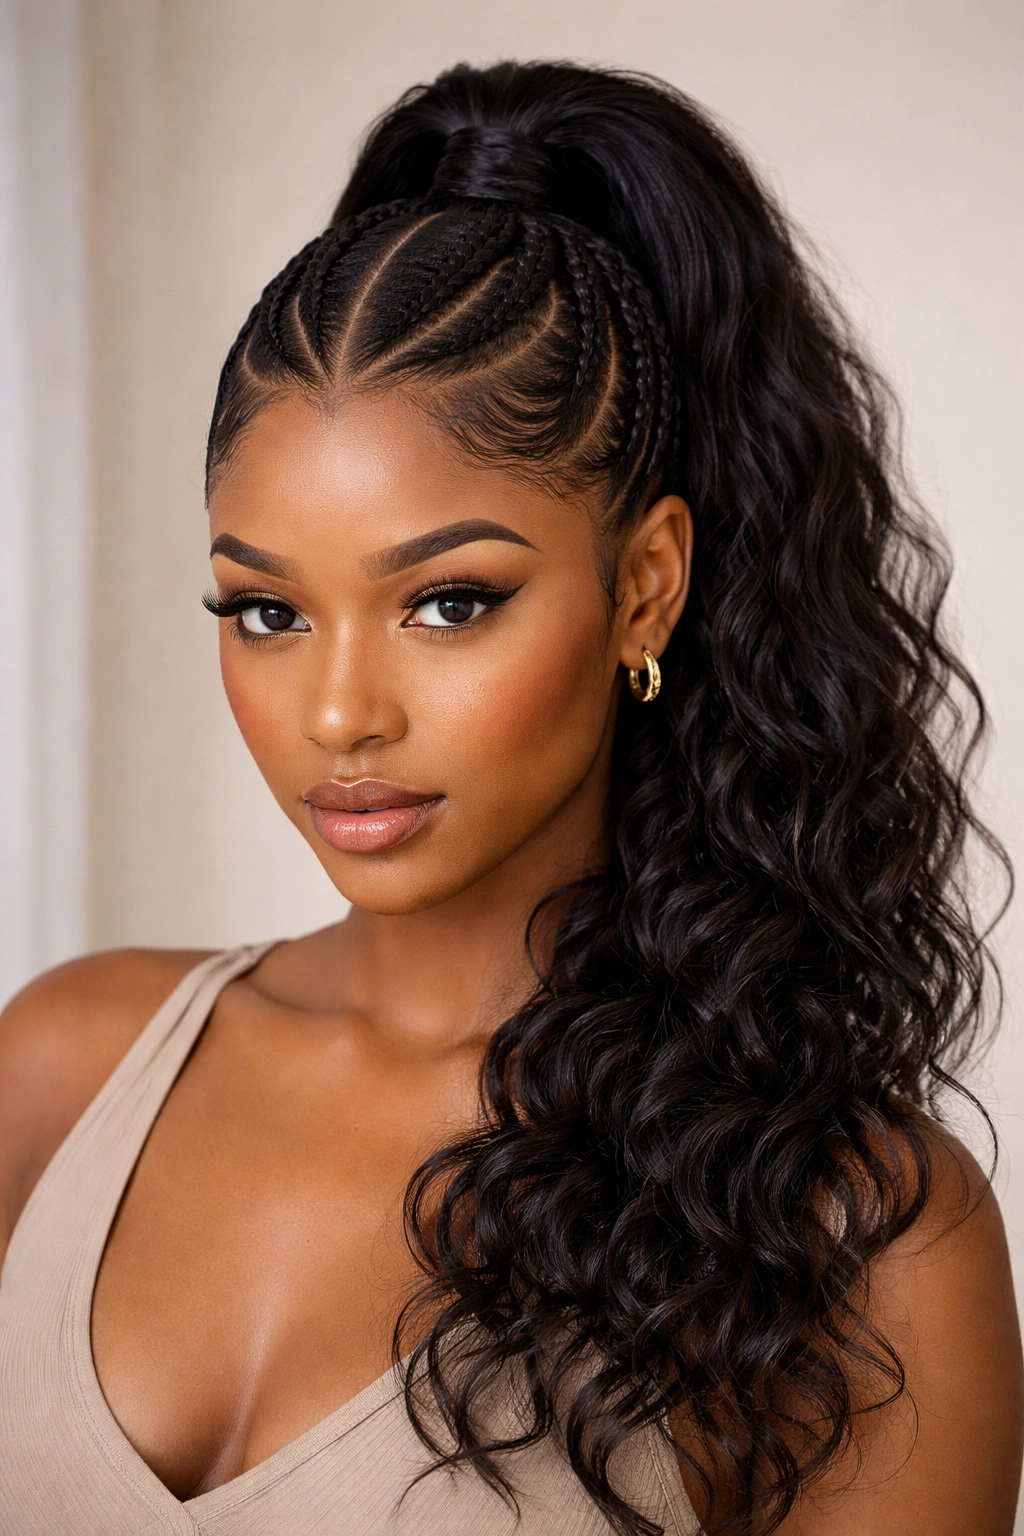
A V-part ponytail with braided elements transforms a basic style into something that feels creative and intentional, and it’s perfect if you want to show that you’re thinking about your styling rather than throwing together something quick. You can add braids in countless ways—cornrows along the sides, a thick braid wrapped around the base, small braids layered throughout, or thin braids woven into the ponytail itself. The braided detail adds dimension and visual interest while still maintaining the clean, face-framing power of the V-part.
Strategic Braid Placement
The most impactful placements are either cornrows that begin at the V-part and flow toward the ponytail (which creates beautiful lines and movement), or a statement braid that wraps around the base of the ponytail like a crown. If you’re going for something more delicate, thin plaits woven into the loose ponytail feel romantic and thoughtful without being overwhelming. The key is that the braids should feel like a deliberate design choice, not a last-minute afterthought.
Braiding for Success
- If you’re adding cornrows, map them out before you start braiding—they should be evenly spaced and flow toward your ponytail gathering point
- Keep braids at a medium tension: tight enough to last all week, loose enough that they’re not creating stress on your scalp
- For cornrows along the sides of a V-part, start the braids at or near the V-point and angle them back toward where your ponytail will be
- If wrapping a braid around your ponytail base, braid a section from underneath the gathered ponytail and wrap it around the elastic, then secure with bobby pins
- Finish braids with small hair clips or rubber bands color-matched to your hair for a seamless look
Real talk: Braided V-part ponytails last longer than smooth ones because braids hold their shape and definition beautifully for days. This is genuinely a protective style that improves over time.
5. V Part with Two-Strand Twist Ponytail
Two-strand twists are a beloved natural hair texture technique, and when you combine them with a V-part ponytail, you get a style that feels both organic and carefully crafted. You can do individual two-strand twists throughout your ponytail, create thicker twists for a bolder look, or even twist the entire ponytail into one unified spiral. This style works for natural hair because it actually enhances your curl pattern rather than fighting against it.
The Visual Magic of Twists
Two-strand twists create beautiful diagonal lines that add movement and visual texture to your ponytail. Unlike braids, which sit on the surface of your hair, twists feel more integrated with your natural curl pattern—especially if you’ve got coils or tight curls, twists look like a natural extension of your hair’s own personality. The V-part frames your face while the twists draw the eye downward along those diagonal lines, creating a balanced, intentional composition.
Creating Lasting Twists
- Divide your ponytail into sections before twisting—3-6 sections depending on the thickness of twists you want
- Separate each section into two strands and twist them around each other, keeping tension even and consistent
- For longer-lasting twists, twist slightly tighter than feels comfortable, then let them relax by about 20% once you’re done—they’ll last longer this way
- You can air-dry twisted ponytails or use a bonnet dryer, which actually helps set the twist pattern more firmly
- Refresh twists by gently re-twisting them if they start to unwind; touching them up takes 5 minutes rather than redoing everything
Pro tip: Two-strand twists actually get better-looking over several days as they sponge up moisture and your curl pattern really activates them. Don’t judge them on day one.
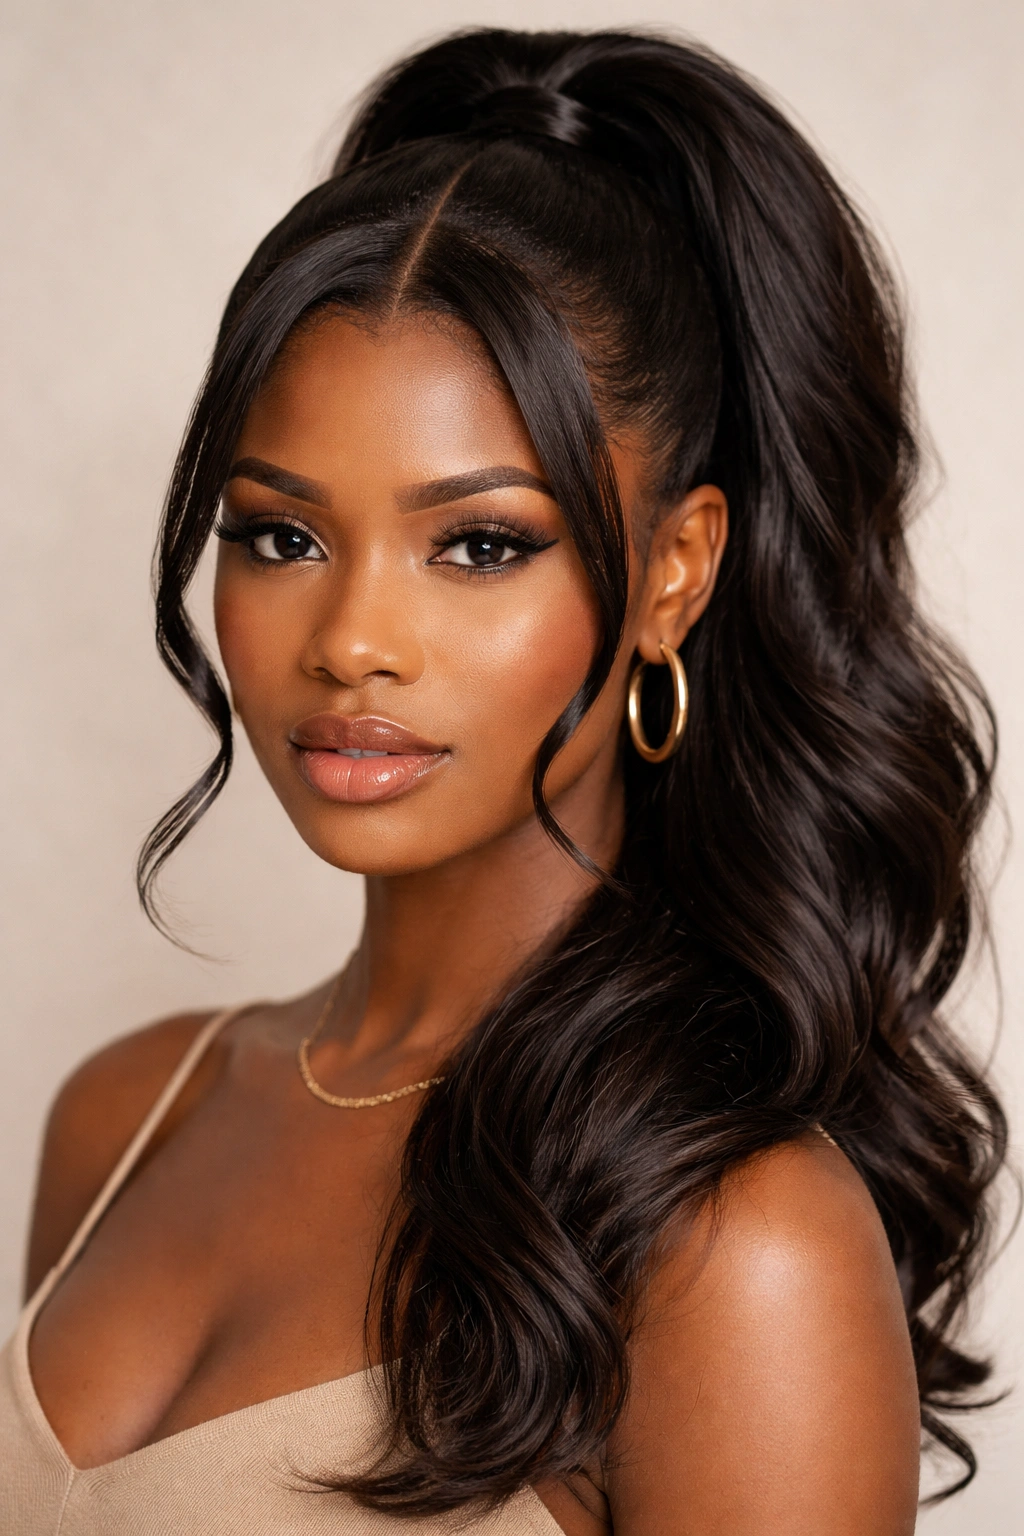
6. V Part with Poof/Volume at Crown
Some days you want the V-part’s face-framing structure, but you also want all the drama and dimension that comes with volume at the crown. This style creates a poof or lifted section right at your hairline before everything flows back into a ponytail—it’s fun, it’s fashion-forward, and it’s completely wearable even for work environments that require professional styling. The poof can be subtle or statement-making, depending on how much hair you section off and how much you tease it.
Creating Intentional Volume
The secret to a poof that doesn’t look messy is that you’re creating it from a defined section, not just teasing your whole hairline randomly. You section off the front of your hair (creating your V-part sections but not pulling everything back yet), then use your fingers or a teasing brush to gently create volume by backcombing the roots and smoothing the surface. The result is a pillowed effect rather than a fuzzy, chaotic look.
Building a Structured Poof
- Create your V-part as usual, but section off more hair at the front—roughly 2-3 inches deep from your hairline
- Use a teasing brush or fine-tooth comb to gently backcomb the roots of this section, working in small areas at a time
- Smooth the surface with a fine comb, working gently so you’re not destroying all the texture you just created
- Use a light smoothing cream or edge control to define the edges of your poof and keep flyaways in place
- Gather everything into your ponytail, securing it below the poof so the lifted section frames your face
Worth knowing: The best poofs are built from clean hair or hair that’s been fresh-washed within the last day or two. Product buildup actually prevents good volume because the hair won’t lift cleanly.
7. V Part with Side-Swept Ponytail
A side-swept V-part ponytail is the answer when you want something that feels a little unexpected and creative—instead of gathering your hair straight back, you’re angling everything slightly to one side. This creates asymmetry and movement while still maintaining the face-framing benefits of the V-part. It’s perfect for days when you want to show a different side of your style or when you’re heading somewhere that celebrates individual expression.
Why Side-Swept Works
Side-swept styling is universally flattering because asymmetry naturally creates visual interest and draws attention to your best features. If you’ve got one side of your face you prefer to show, you can angle the side-swept ponytail to emphasize that. The style also feels effortlessly cool—not trying too hard, but clearly intentional. It photographs beautifully from certain angles, which makes it a great choice for events or just because.
Executing the Side-Sweep
- Create your V-part as usual, keeping it centered or very slightly off-center
- As you gather your ponytail, angle everything slightly to one side—maybe 15-30 degrees off true back
- You can either gather at the back-side of your head (so the ponytail sits more to one side) or gather at the true back and let the ponytail fall to the side as it length allows
- Use bobby pins on the opposite side of where you’re sweeping to hold the hairline and poof area in place
- Add texture or curl to your ponytail to emphasize the movement of the style—a side-swept straight ponytail can feel flat, but side-swept curls feel dynamic
Insider note: Side-swept styles work better on people with at least shoulder-length hair because the ponytail needs enough length to actually sweep noticeably. Shorter hair tends to just look like you grabbed it off-center rather than creating intentional asymmetry.
8. V Part with Space Buns
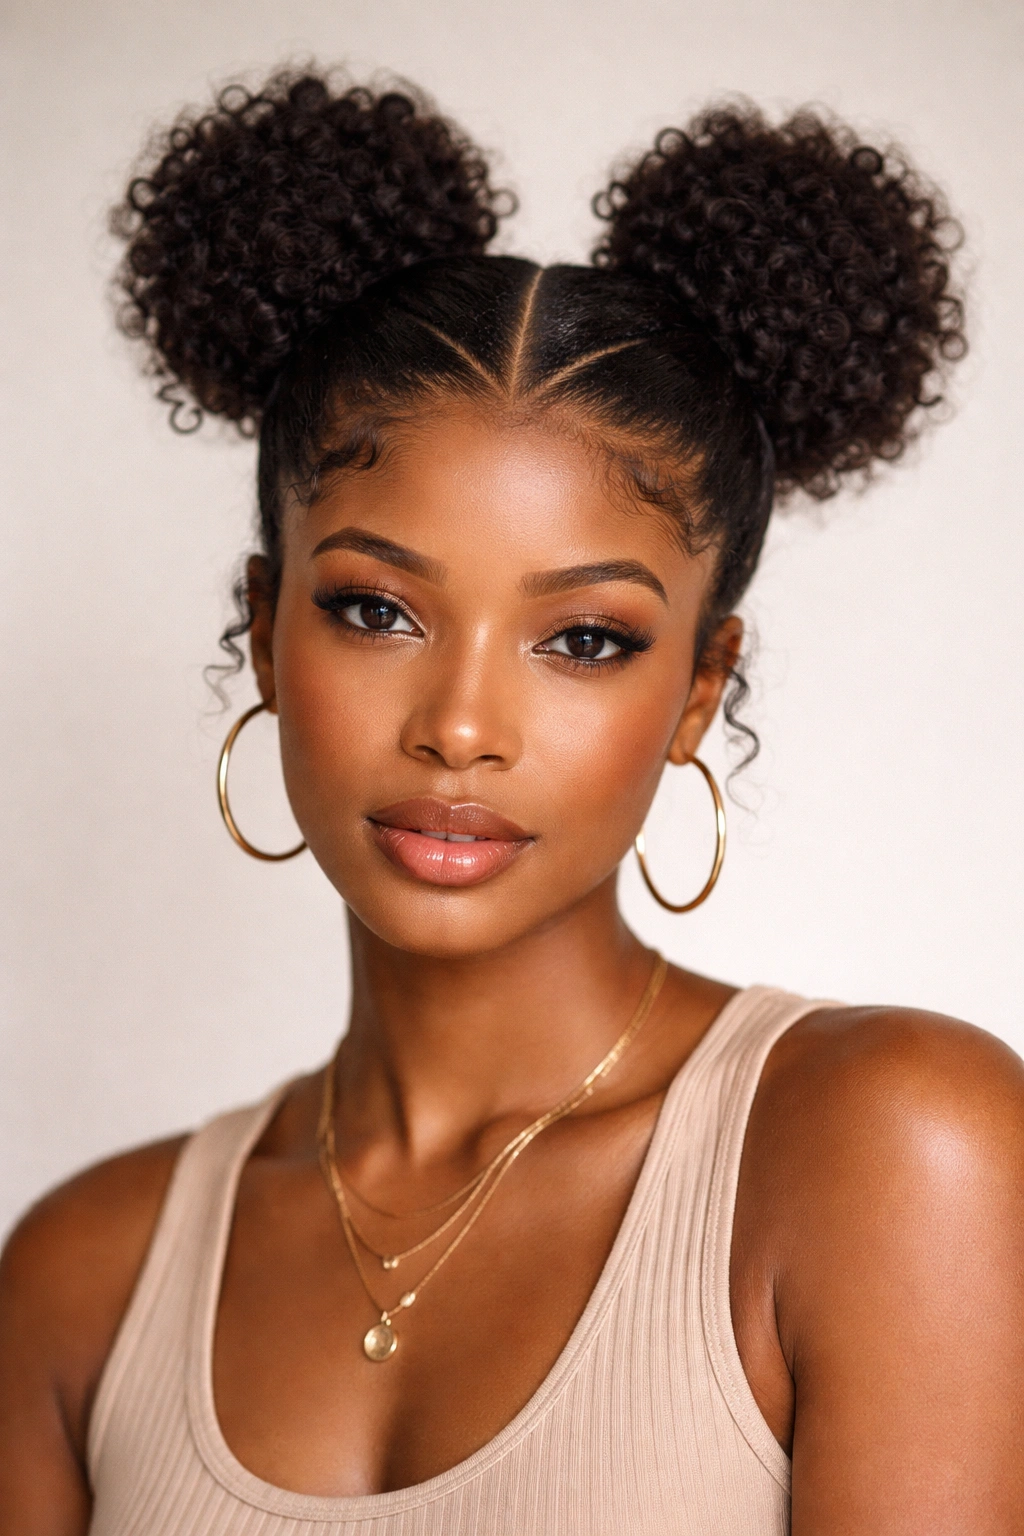
Space buns with a V-part might sound young or playful, but when you execute them with intention and texture, they’re actually a sophisticated, eye-catching style that works for festival season, a bold work day, or any time you want to lean into your creative side. You’re essentially creating two ponytails or knots at the crown of your head (positioned off-center, creating space between them) while maintaining that intentional V-part structure. This style is fun precisely because it’s unexpected—most protective styling is traditional, but this celebrates personality.
The Appeal of Double Structure
Two space buns create symmetry and balance while also showcasing your hair’s texture and volume in a way that a single ponytail never could. The V-part grounds the whole look and prevents the space buns from feeling costume-like—you’re creating intentional structure that just happens to be unconventional. This style also actually works for professional environments if you use sleek hair, keep the space buns proportional, and avoid overly cute accessories.
Building Space Buns with a V-Part
- Create your V-part, then divide your hair into two sections down the center back of your head (you’re essentially creating two halves)
- Gather one half into a ponytail at approximately the mid-crown of your head, slightly off-center to one side
- Gather your other half into a second ponytail on the opposite side, creating two focal points
- Twist or braid each ponytail, then wrap it around the base to create a bun shape, securing with bobby pins
- Keep the bundles relatively tight and secure so they don’t shift around throughout the day
- The V-part section in front remains loose and textured, creating contrast with the structured buns
Real talk: Space buns actually hold better when the buns are slightly on the smaller side because gravity has less to work against. Massive space buns tend to loosen throughout the day unless you’re really securing them with bobby pins.
9. V Part with Wrapped Base Detail
A V-part ponytail with a wrapped base is the styling equivalent of a French seam—it’s a detail that you notice subconsciously because something looks polished and intentional, even if you can’t quite articulate why. You’re wrapping a small section of hair (or a strip of fabric, thread, or even a small accessory) around the base of your ponytail, covering the elastic and creating a finished, high-effort look. This detail transforms a basic ponytail into something that looks salon-done.
Why Wrapping Matters
A wrapped base serves both functional and aesthetic purposes. Functionally, it secures your elastic and prevents hair from sliding through. Aesthetically, it creates a focal point right at the gathering point and signals that you’ve put thought into your styling. A wrapped base also actually helps protect your hair because the wrapped section creates a cushion between your elastic and your strands, preventing as much stress on the hair at the base.
Wrapping Techniques
- After gathering your ponytail, take a small section of hair from the base of the ponytail—roughly pencil-thick—and separate it
- Wrap this section tightly around the elastic band, spiraling up and then down, overlapping slightly so you completely cover the elastic
- Secure the end of this wrapping section with a bobby pin hidden inside the base (not visible from outside)
- Alternatively, use a thin piece of fabric, thread, or even a small hair accessory—wrap it around the base and tie or secure it invisibly underneath
- For a polished finish, smooth a tiny amount of edge control over the wrapped section so everything looks seamless
Pro tip: If you don’t have enough hair to wrap from your own ponytail, you can absolutely use a strand of thread, embroidery floss, or a thin fabric strip in a matching color—it looks just as intentional and requires way less maintenance.
10. V Part with Curved/Swooped Front
A V-part with a curved or swooped front section takes the basic V-part concept and adds soft, curved lines instead of sharp angles. Rather than creating a strict V-shape, you’re creating gentle curves that frame your face like parentheses—it’s more romantic and fluid while still maintaining that face-framing intention. This style works beautifully if you prefer softer lines to sharp geometry, or if your hair naturally wants to curve rather than hold a strict angle.
The Softness Factor
Curved fronts are inherently more forgiving than sharp V-parts because a slightly imperfect curve still reads as intentional, whereas a slightly imperfect V-point can look accidental. This style is also more versatile for different face shapes because curves complement more face shapes than sharp angles do. The curved lines create a softer overall impression while the ponytail itself can be as textured, voluminous, or sleek as you like.
Creating Soft Curves
- Instead of creating a sharp V-point at the center of your hairline, draw gentle curves from somewhere near your temples back toward where your ponytail will gather
- Use a comb to section off these curved areas gently—you’re not trying to carve sharp lines, just define curved sections
- Keep the sections slightly softer and less defined than you would with a true V-part; a few wispy pieces in the front are actually charming here
- Smooth these curved front sections gently with a light smoothing cream rather than heavy edge control
- Gather your ponytail and let those curved sections frame your face naturally—they don’t need to be perfectly smooth
Worth knowing: Curved V-parts actually work better with slightly textured ponytails because the texture echoes the softness of the curves. Curved + sleek can sometimes feel a bit confused, whereas curved + curly feels cohesive.
11. V Part with Half-Up Ponytail
A half-up V-part style is for when you want the structure and face-framing of a V-part without committing to a full ponytail—you’re gathering roughly the top half of your hair while leaving the bottom half down and textured. This style sits right in the middle between a full protective style and loose hair, making it perfect for days when you want some styling structure without the sleekness of a true ponytail. The V-part still frames your face while your bottom hair keeps things casual and textured.
The Best-of-Both Worlds Appeal
Half-up styles are genuinely ideal for protecting your hair while maintaining a more relaxed, undone aesthetic. The gathered section receives less manipulation and stress throughout the day, while the bottom section can flow and move naturally. This style also works beautifully for different occasions—casual enough for a weekend, but polished enough for a professional setting with the right execution. If you’ve got longer hair, the half-up creates beautiful visual balance and movement.
Styling a Half-Up V-Part
- Create your V-part with clean sections from your hairline back
- Gather roughly the top half of your hair into a ponytail at the crown or slightly back from the crown
- The bottom half remains loose and textured—you can wear it curly, coily, or even slightly wavy depending on your preference
- The key is that your V-part sections remain visible and frame your face; don’t pull them back into the gathered portion
- You can add texture to the bottom section by diffuser-drying, pineapple-ing overnight, or using a curl refresher spray
Insider note: The best half-up styles have a ponytail that’s full and textured enough to hold its own visually against the loose hair below. A skinny, slicked half-up next to voluminous loose curls creates imbalance—aim for similar visual weight.
12. V Part with Defined Coils
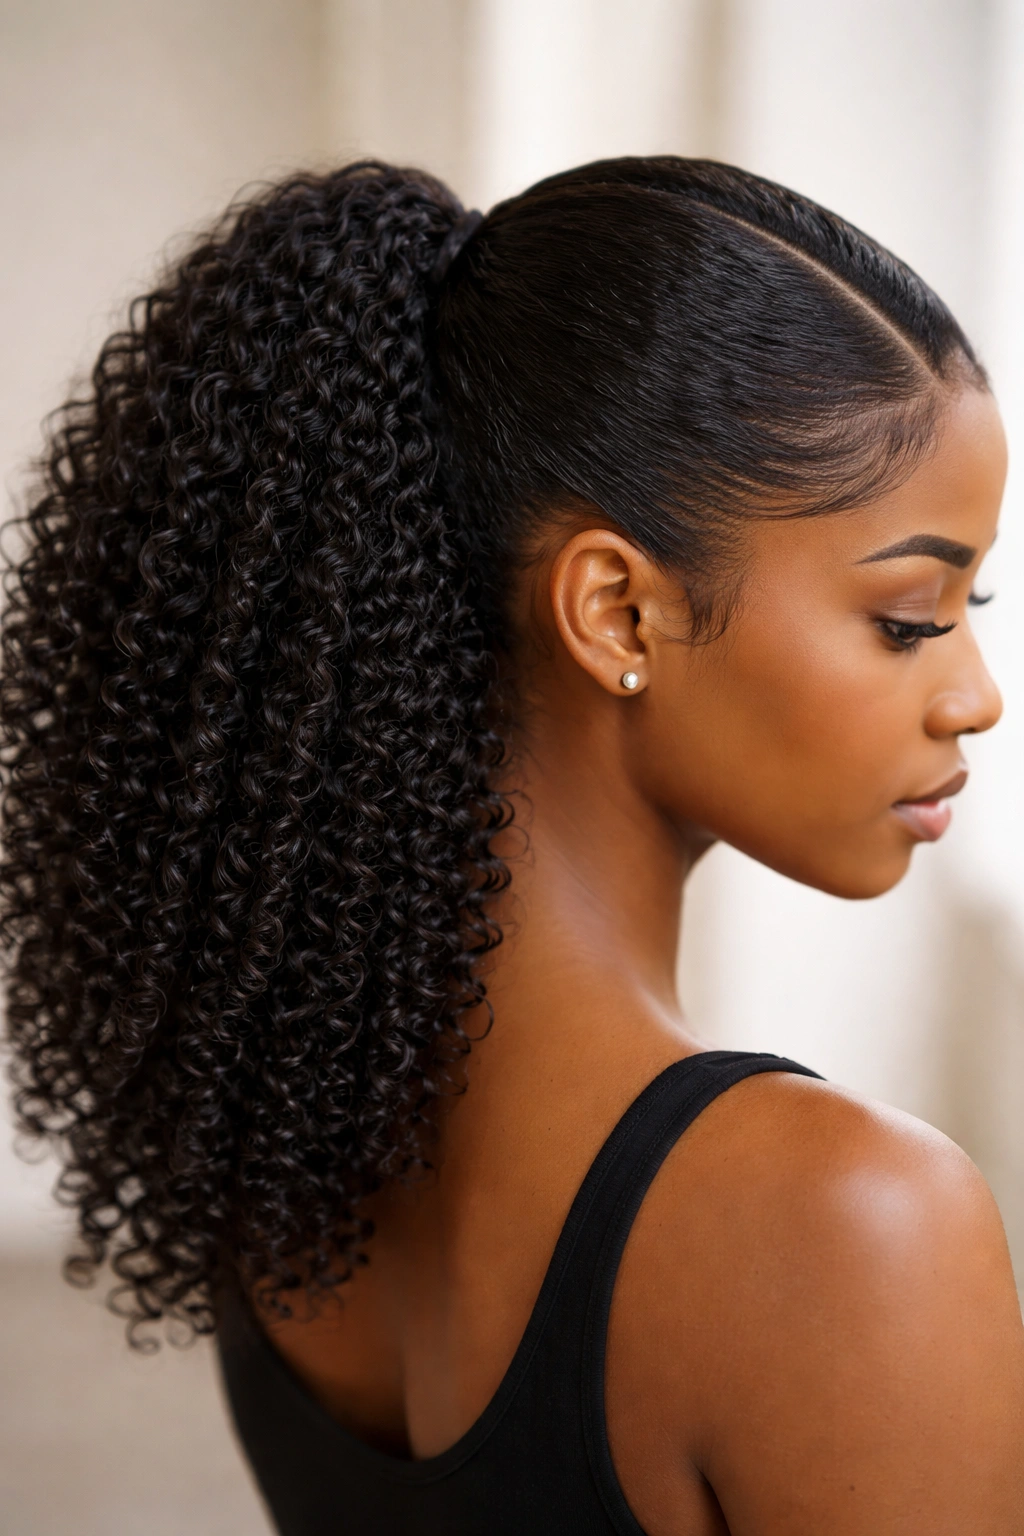
A V-part ponytail that celebrates defined, separated coils is an absolute masterclass in honoring your natural hair texture while creating intentional styling. If you’ve got naturally coily hair, taking time to define individual coils in your ponytail section creates a style that looks intricate, polished, and like you genuinely understand your hair. This style showcases your actual curl pattern rather than grouping coils together into general texture—it’s personal styling at its best.
Why Defined Coils Stand Out
Defined coils create visual complexity and texture in a way that clumped or general curls simply can’t match. Each coil catches light individually, creating dimension and movement. The V-part provides structure and framing while the coils provide the visual interest—it’s a perfect balance of intention and natural texture. This style is especially stunning when you’re outdoors in natural light because the sun hits each individual coil differently, creating a luminous, multidimensional effect.
Defining Your Coils
- Start with freshly washed, deeply conditioned hair—coil definition requires moisture and slip to work properly
- Apply a thick leave-in conditioner or curl gel to each section of hair you’re working with
- Use your fingers or a fine-tooth comb to gently separate coils, working through the hair slowly and patiently
- Start at the roots and work toward the ends, encouraging each coil to stand independently rather than clumping with its neighbors
- This process takes time—don’t rush it or you’ll break up the coils you’ve already defined
- Gather your coil-defined ponytail and allow it to fully air-dry so coil definition sets in firmly
Real talk: Defined coil ponytails look absolutely stunning but they take genuine time and gentle handling. If you’ve got a busy schedule, this is a weekend style rather than a weekday rush style. The payoff is 100% worth it though—you’ll feel like your hair is a work of art.
Final Thoughts
The V-part ponytail has become a styling staple because it actually delivers what it promises: face-framing structure that works with your natural texture rather than against it, versatility across different occasions and hair types, and enough room for creative variation that you’ll never get bored. Whether you’re drawn to the sleekness of a smooth low ponytail, the personality of coil definition, or the creative energy of space buns, there’s a V-part style that matches your vibe and your lifestyle.
What makes these styles genuinely accessible is that they don’t require expensive extensions, professional equipment, or hours of practice to execute well. You need a good leave-in conditioner, a comb with both wide and fine teeth, some bobby pins, and patience—things most natural-hair-care routines already include. Start with whichever style speaks to you most, and don’t be discouraged if your first attempt isn’t perfect; V-parts get cleaner and easier the more you practice them.
The real magic of a V-part is that it signals intentionality. You’re not just pulling your hair back—you’re creating structure, framing your face, and showing that you’ve thought about how you want to present yourself. That confidence, that sense of “I know what I’m doing,” is what actually makes any of these styles shine. Try them all, figure out which ones make you feel like yourself, and then make them yours by tweaking the details until they’re perfect for your hair, your face, and your personal style.