Kids’ hairstyles don’t need to be complicated to look polished and put-together. A great ponytail can transform a child’s entire look in less than five minutes, which is exactly what you need on busy school mornings or before special occasions. The beauty of ponytails lies in their versatility — they work for every hair type, every age, and every situation, whether you’re dealing with fine, wispy hair or thick, curly strands that have a mind of their own.
What makes a ponytail truly “easy” isn’t just about speed, though that matters when you’re working with a child who’d rather do literally anything else. It’s about reliability. These are styles that actually stay in place throughout the day, that won’t leave your child with a painful hair-pulling headache, and that look intentional and polished rather than hastily thrown together. They’re also styles you can teach your child to do themselves once they’re old enough to handle a brush and elastic band, which builds their confidence and gets you off the hook for daily styling duties.
The ponytails in this guide range from the streamlined and professional to the playful and fun. Some take two minutes, while others give you a dressier option that’s still completely achievable without advanced braiding skills. Most importantly, they all work with real kids’ hair — the kind that gets tangled, that has baby hairs escaping everywhere, and that doesn’t always cooperate with your styling vision. Each style comes with honest tips about what makes it work and exactly how to execute it so it actually looks polished when you’re done.
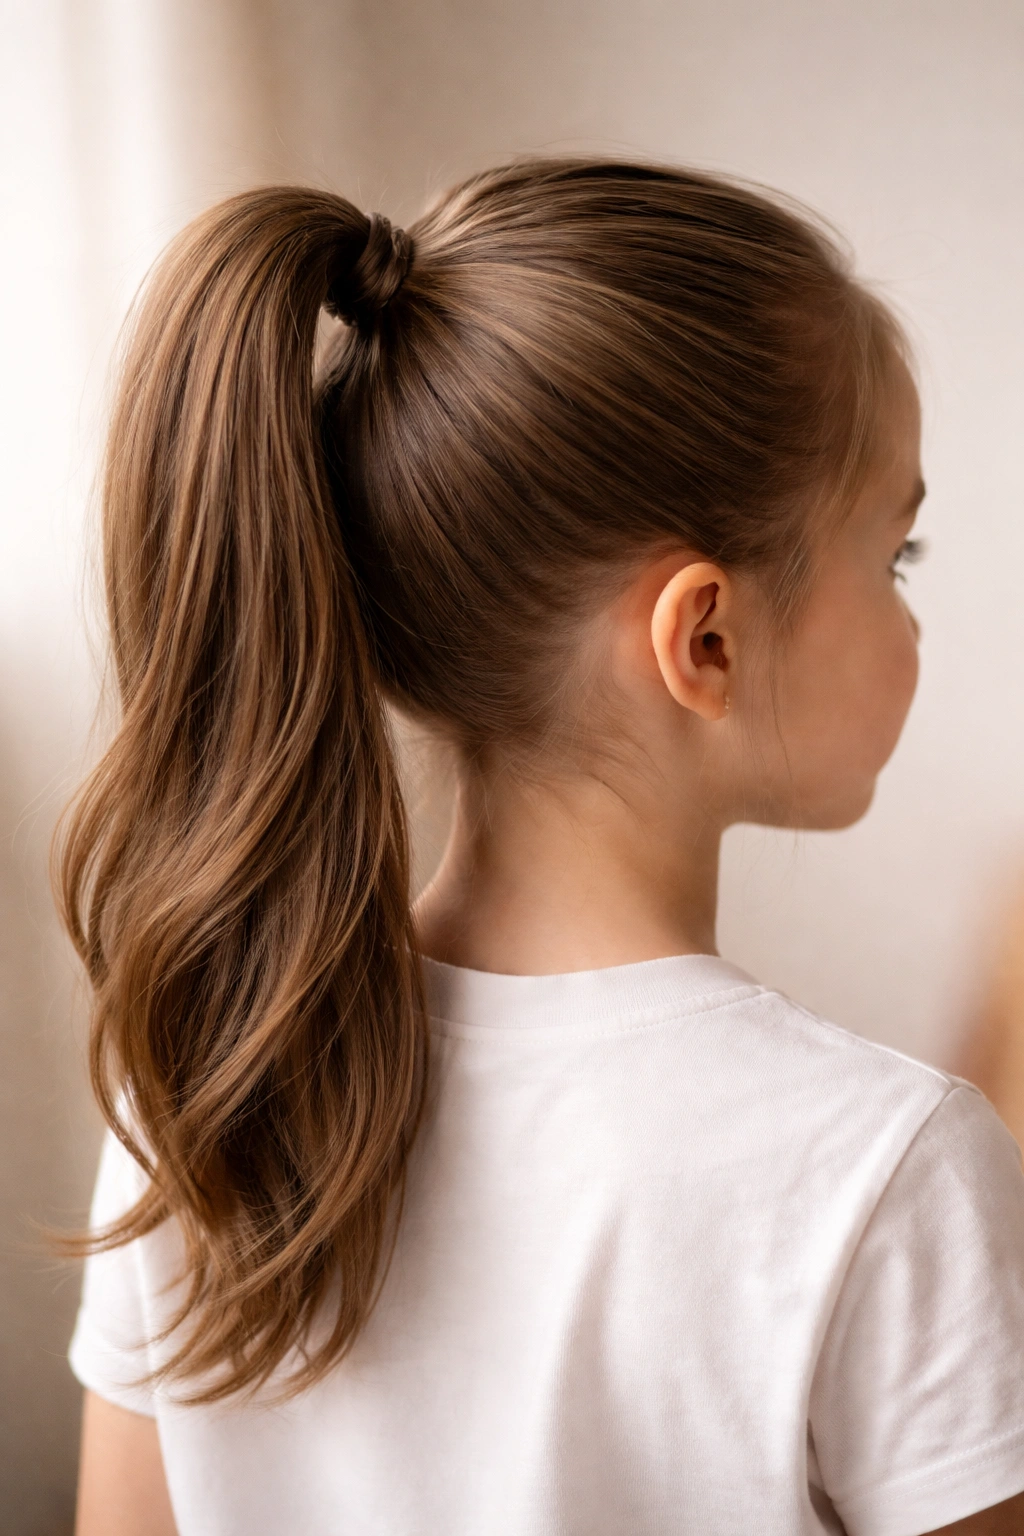
1. Simple High Ponytail
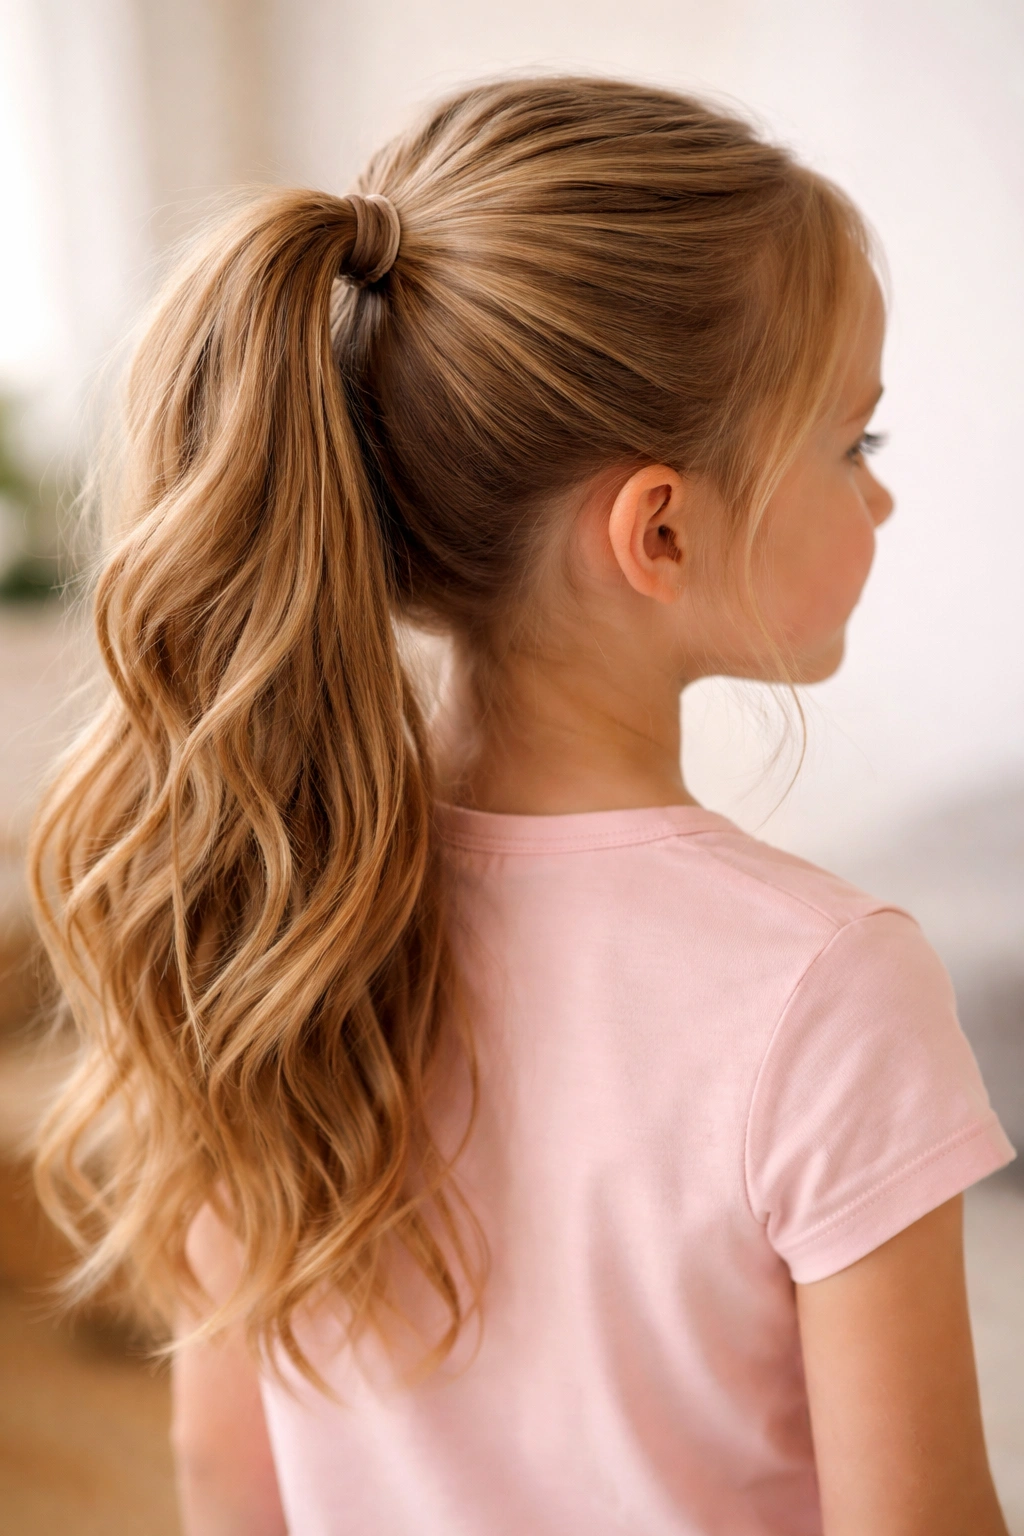
The high ponytail is your foundational go-to style, the one you’ll return to again and again because it’s quick, it works for every occasion, and it genuinely looks put-together without requiring any special skills. Start by brushing your child’s hair straight back, smoothing it as you gather it at the crown — this is higher than the middle of the head, but not so high that it creates tension on the scalp or makes your child uncomfortable.
Why This Works for Daily Wear
A high ponytail keeps hair completely off the face and neck, which is especially useful during warm months or when your child is playing sports and sweating. It also helps you see your child’s face better, which surprisingly matters when you’re trying to get them out the door on time. The simplicity means your child can take it down and redo it themselves when (not if) they decide it feels “too tight” or “weird” partway through the day, which at least gives them agency even if their preferred solution is to just have completely down hair by 2 PM.
How to Make It Look Polished
- Use a fine-tooth comb or paddle brush to smooth the hair as you gather it — loose hairs create a messy appearance even when everything is technically secured
- Gather the ponytail and hold it firmly while you loop the elastic around once, then twist the ponytail and loop the elastic around again for a tighter hold
- Take a small section from the bottom of the ponytail, wrap it around the base where the elastic is, and secure with a bobby pin that matches your child’s hair color — this hides the elastic and makes the whole thing look more polished
- If you have flyaways around the face, use a tiny dab of gel or smoothing cream on your fingertips and gently smooth them down — this prevents the “just rolled out of bed” appearance
Pro tip: A high ponytail looks significantly more intentional when you curve the hair slightly forward as you gather it, rather than pulling it perfectly straight back. This is what stylists call “face-framing” and it makes even a basic ponytail look professionally done.
2. Low Ponytail
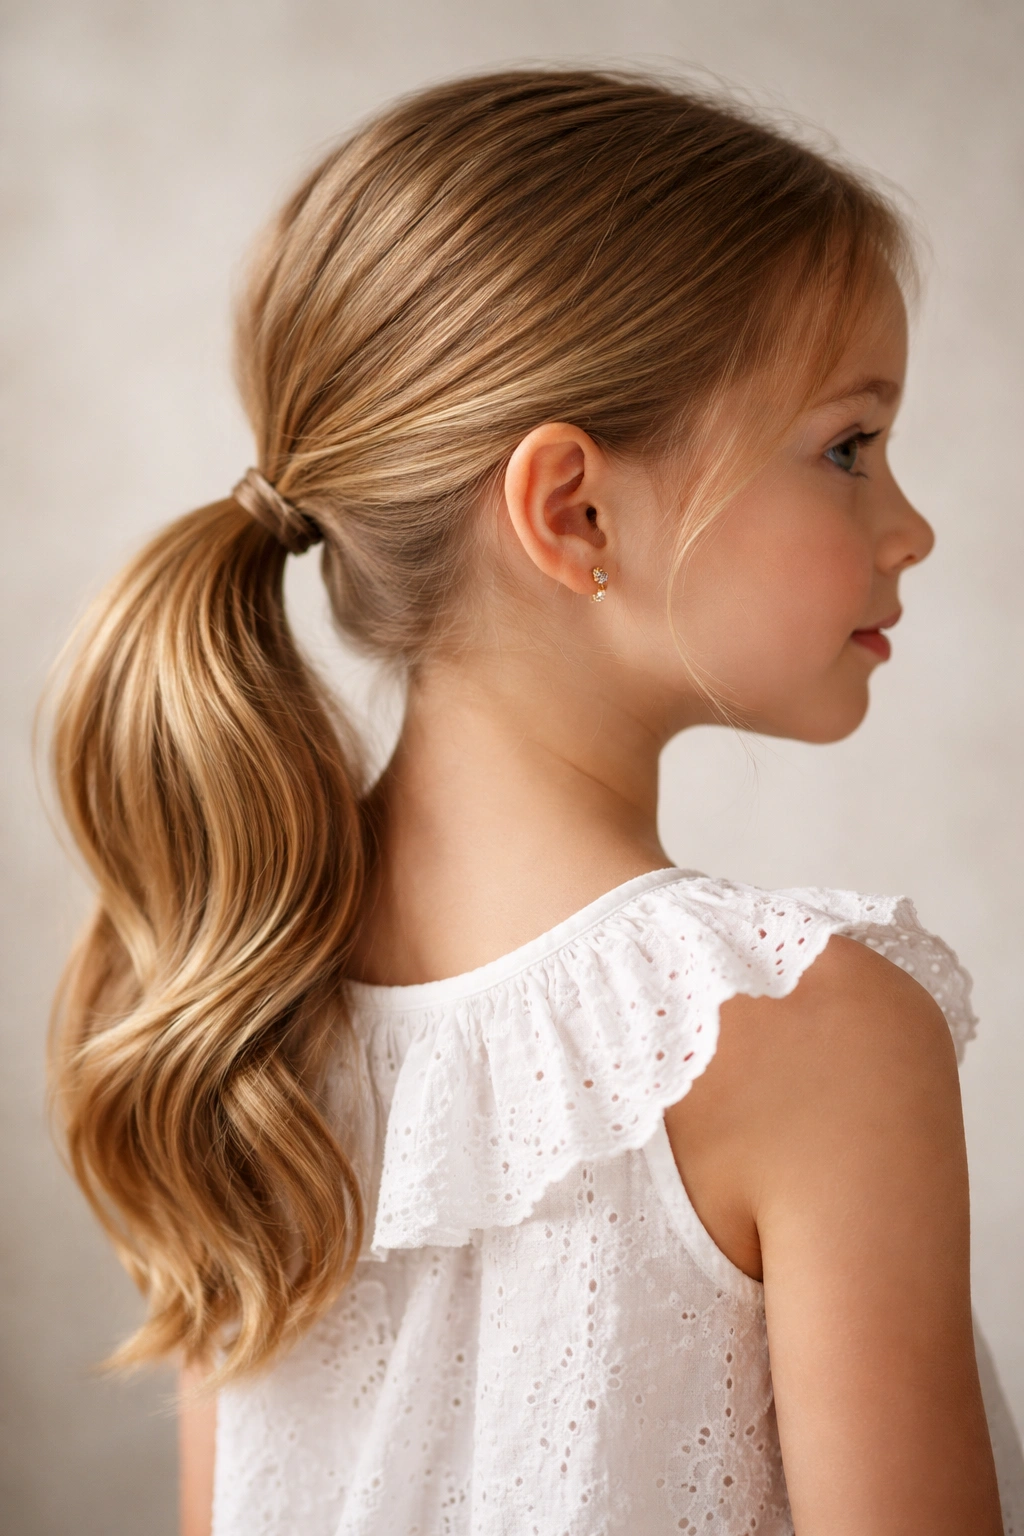
A low ponytail sits at the nape of the neck, gathered right where your neck meets your shoulders, and it’s your best choice when you want something polished enough for portraits, school pictures, or special events without the commitment of more complex styling. This style is also significantly more comfortable for children who have sensory sensitivities or who complain that their hair feels “too pulled” when it’s gathered high on their head.
The Age and Comfort Advantage
Younger children often do better with low ponytails because they don’t feel as tight, and the lower positioning means less strain on the hairline. This matters more than you’d think, especially for children with fine hair who are prone to breakage. A low ponytail is also the foundation for many dressier styles — you can easily add a braid, a wrap, or texture to make it more special without starting from scratch.
Making It Look Elegant
- Brush the hair downward and gather it at the nape, keeping the top of the head smooth but not aggressively slicked back
- Use a fabric hair tie instead of a regular elastic band if possible — fabric is gentler on the hair and actually stays in place better because it grips without snagging
- Create a subtle bend in the hair by gently arching the ponytail forward at the base, then securing it — this prevents the stiff, pulled look that reads as unfinished
- For extra polish, take a thin section from the front and twist it around the base, securing with a matching bobby pin
Worth knowing: A low ponytail photographs better than a high one because the proportions are more flattering, and you can actually see your child’s face clearly. If you’re preparing for pictures, this is the style to choose.
3. Side Ponytail
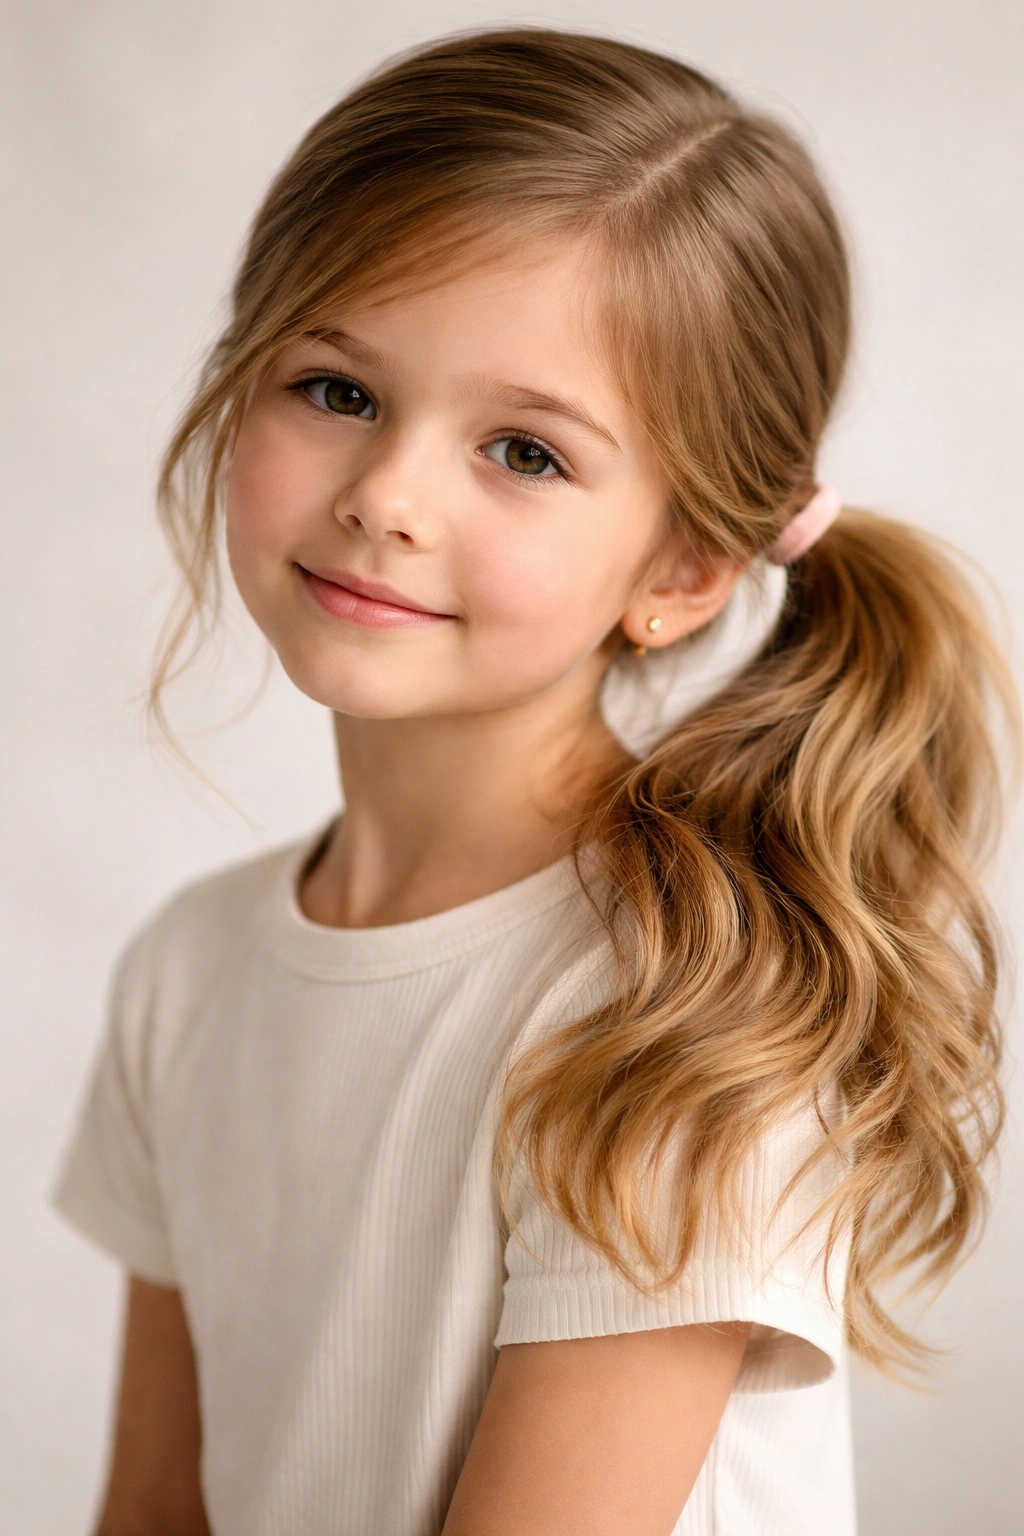
A side ponytail gathers the hair toward one side of the head rather than the center back, creating a playful, asymmetrical look that’s particularly flattering for children with longer hair or those whose hair has some natural wave or curl. This style works especially well for children who find typical ponytails uncomfortable because the weight is distributed differently across the head.
Why Kids Like Side Ponytails
There’s something inherently fun about a side ponytail — it feels special and different from the everyday centered look, but it’s not so different that it requires special occasion justification. It also tends to feel less tight to children, possibly because the hair isn’t being pulled straight back. Kids often feel more confident wearing their hair this way, and their confidence matters more than you’d expect when it comes to them actually keeping the style in for the full day.
The Technique for Success
- Brush the hair and decide which side you prefer — you’re not aiming for perfectly even distribution, more like 70% of the hair on one side, 30% on the other
- Gather the hair toward your chosen side at approximately ear level, tilting your head slightly so you can see what you’re doing
- Secure with an elastic band, then take a small section and wrap it around the base to hide the elastic
- The beauty of this style is that it looks intentional even when it’s slightly messier than other ponytails, so don’t overwork it
Quick Facts About This Style:
- It works beautifully with a curved side part or with hair parted down the middle — there’s no “wrong” way to do it
- This style is particularly flattering when you leave a few thin sections loose at the front near the face, which softens the overall look
- Side ponytails often feel less heavy to children, potentially because the hair weight pulls down rather than straight back
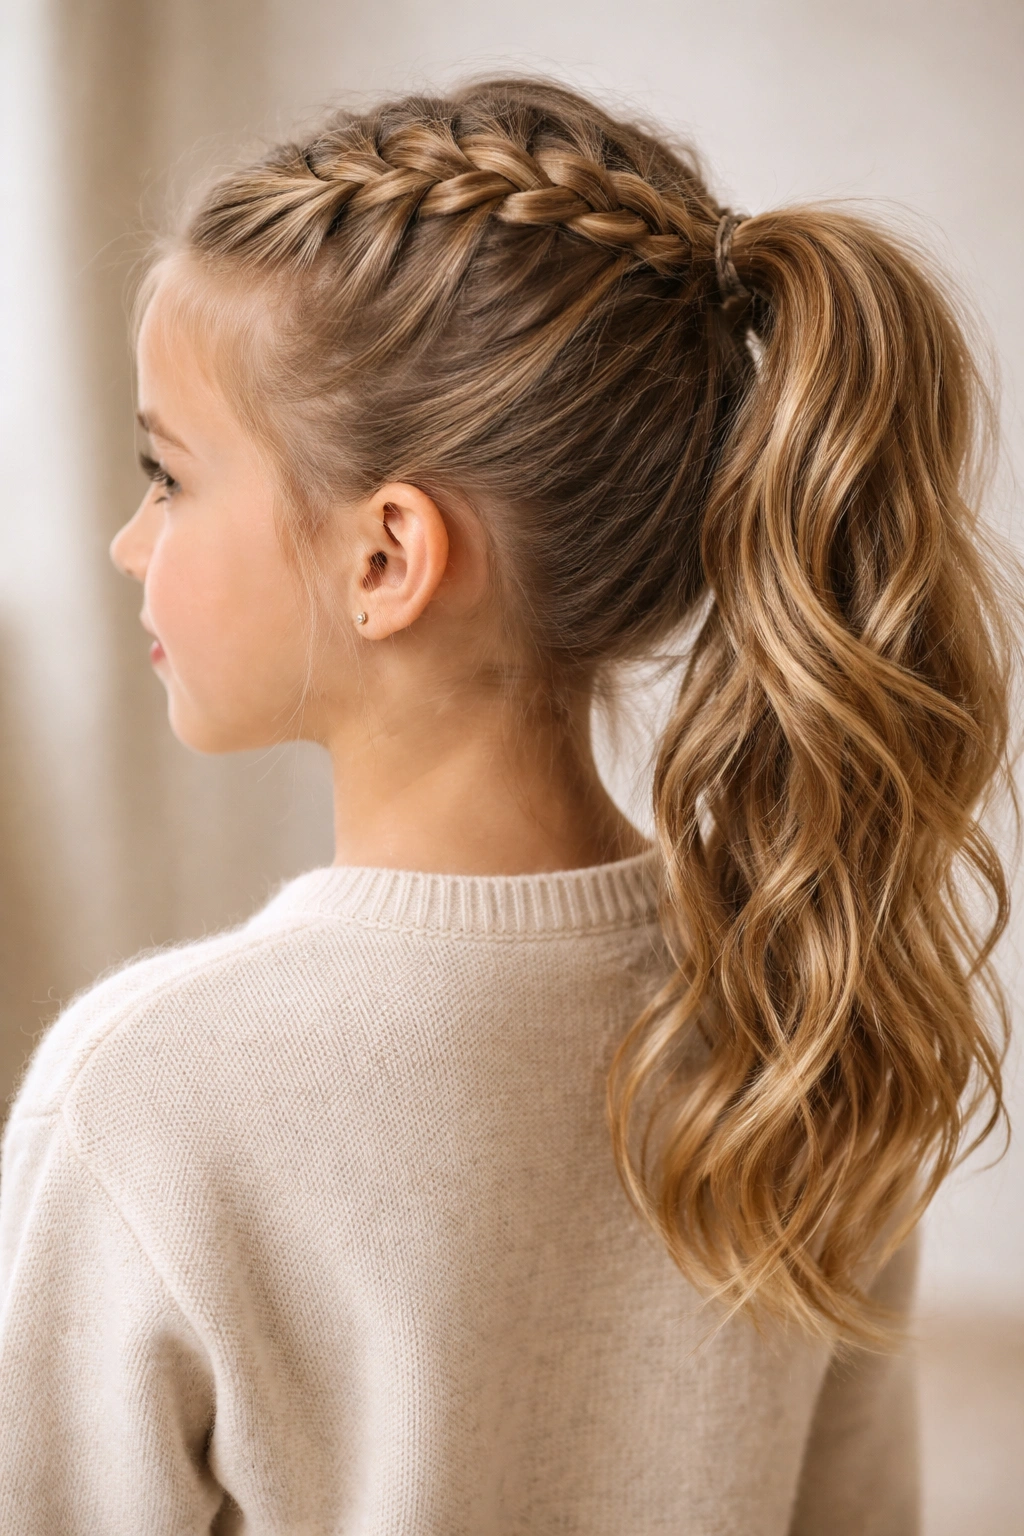
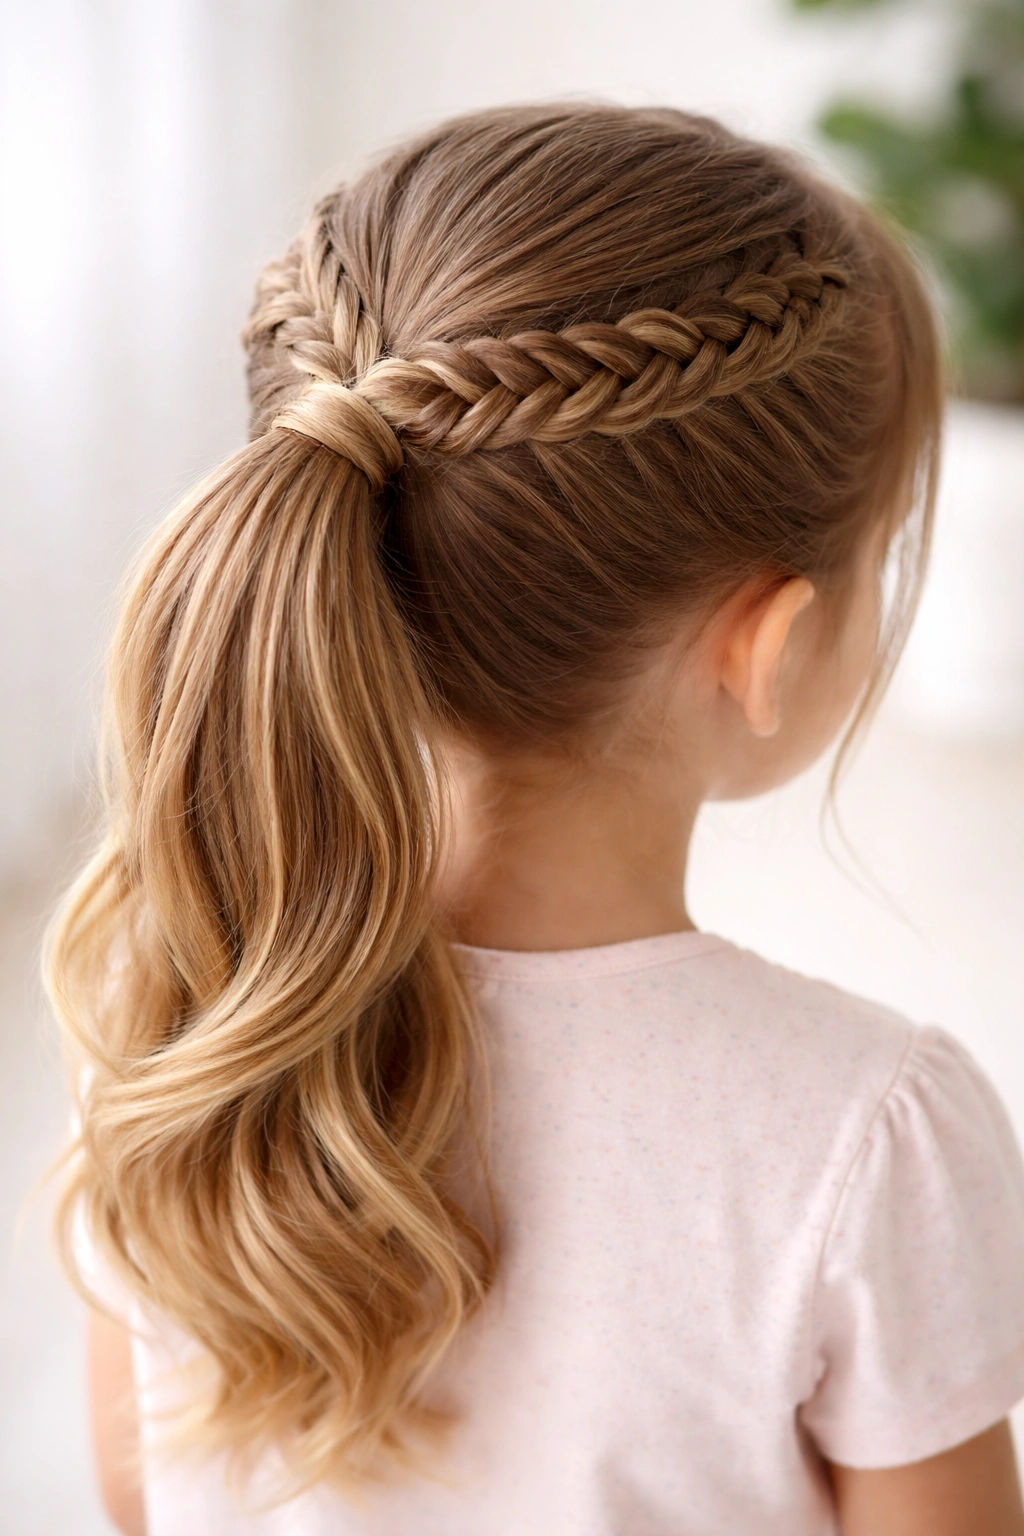
4. Braided Ponytail
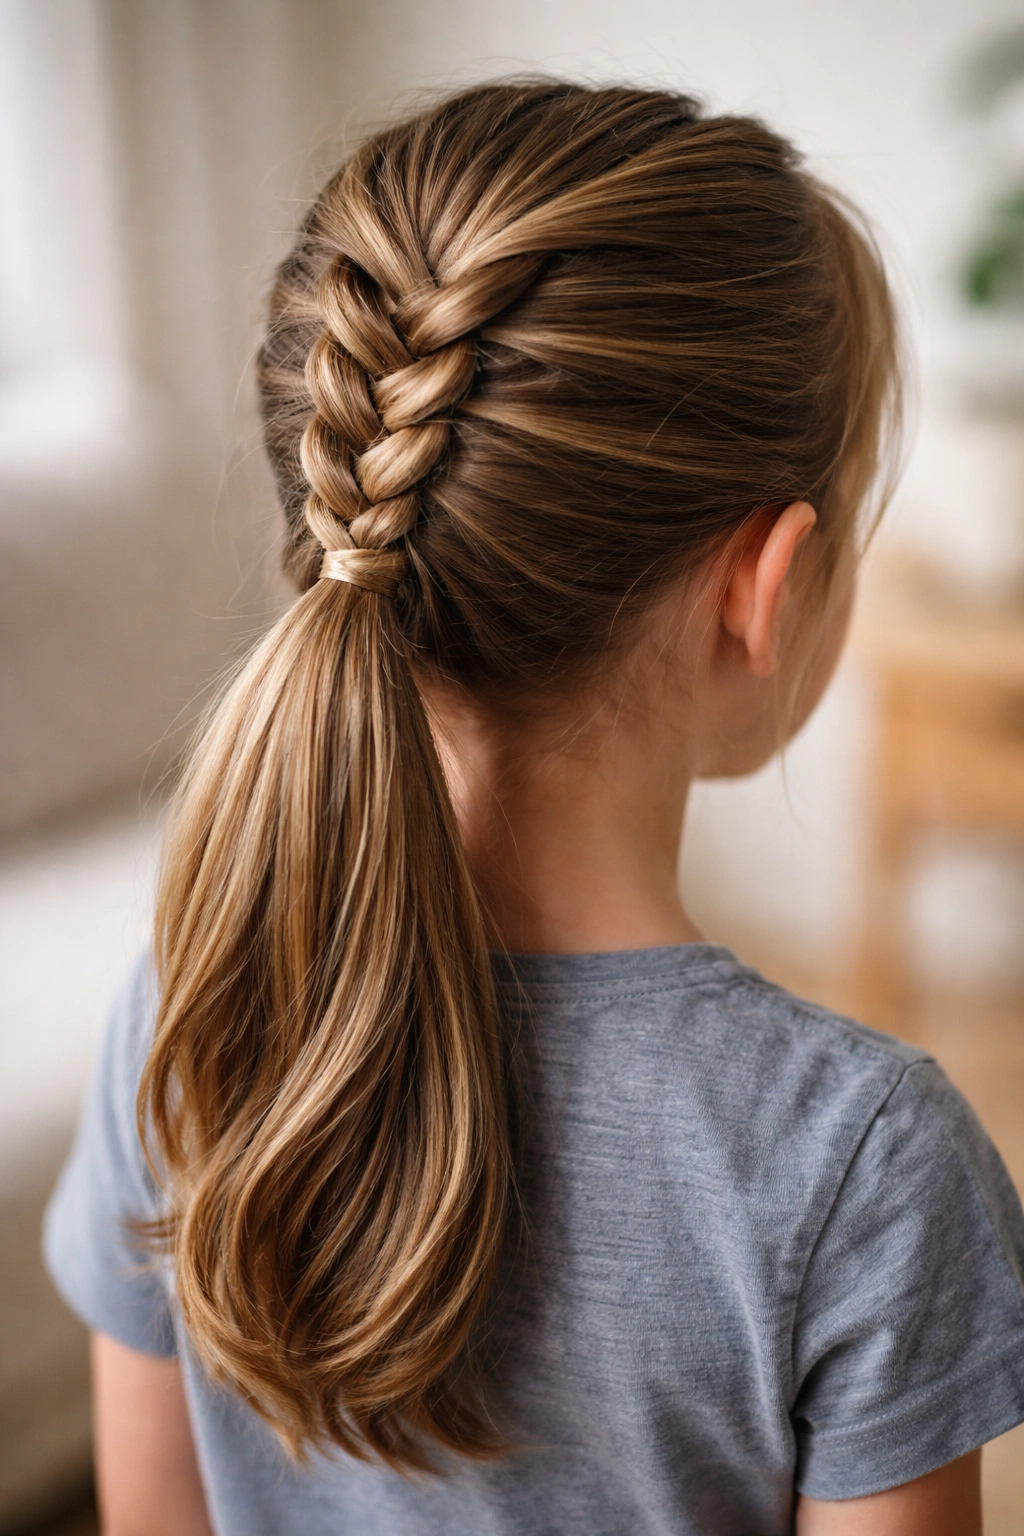
A braided ponytail starts with a three-strand braid that runs down the back of the head, then gathers the remaining loose hair into a ponytail at the base where the braid ends. This style bridges the gap between “simple” and “fancy” — it looks noticeably more styled than a regular ponytail but requires only basic braiding skill, making it perfect when you want something dressier without the complexity of an all-over braided style.
Building the Braid Base
Start by sectioning off a small triangle of hair at the crown, then begin a three-strand braid using just that section. Rather than braiding all the way down, stop after about three or four braid crossings — you’re creating a small decorative braid that will sit on top of the regular ponytail. Once you’ve braided that section, gather all the hair below it into a standard ponytail, securing everything with one elastic band.
Styling Tips for a Finished Look
- The small braid should be snug enough to hold its shape but not so tight that individual strands pop out — this is genuinely the hardest part of the style
- The contrast between the structured braid and the looser ponytail below creates visual interest and makes the style read as more polished
- If the braid section is thinner than you’d like, gently tease the braid with a fine-tooth comb — this makes it appear fuller without making it loose enough to fall apart
- Wrap the base as you would with a simple ponytail to hide the elastic
What Makes This Style Special: A braided ponytail is fancy enough for events and portraits but quick enough for regular school days. It’s the workhorse of ponytail styles, and once you can execute it confidently, you have a go-to option for basically any occasion.
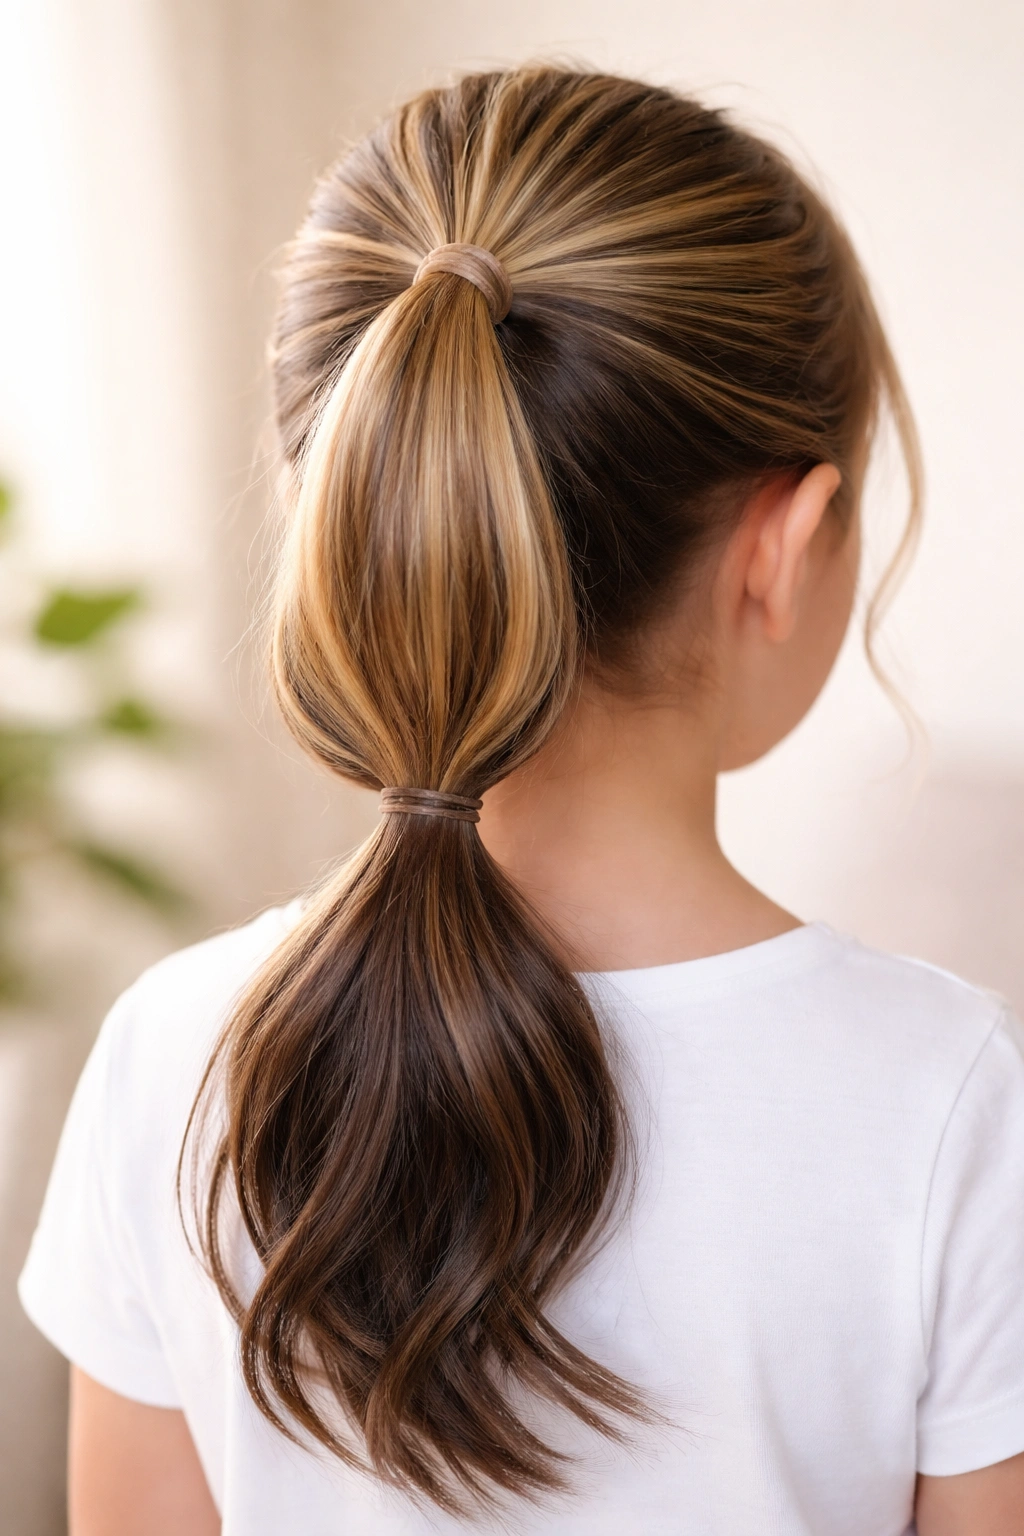
5. Bubble Ponytail
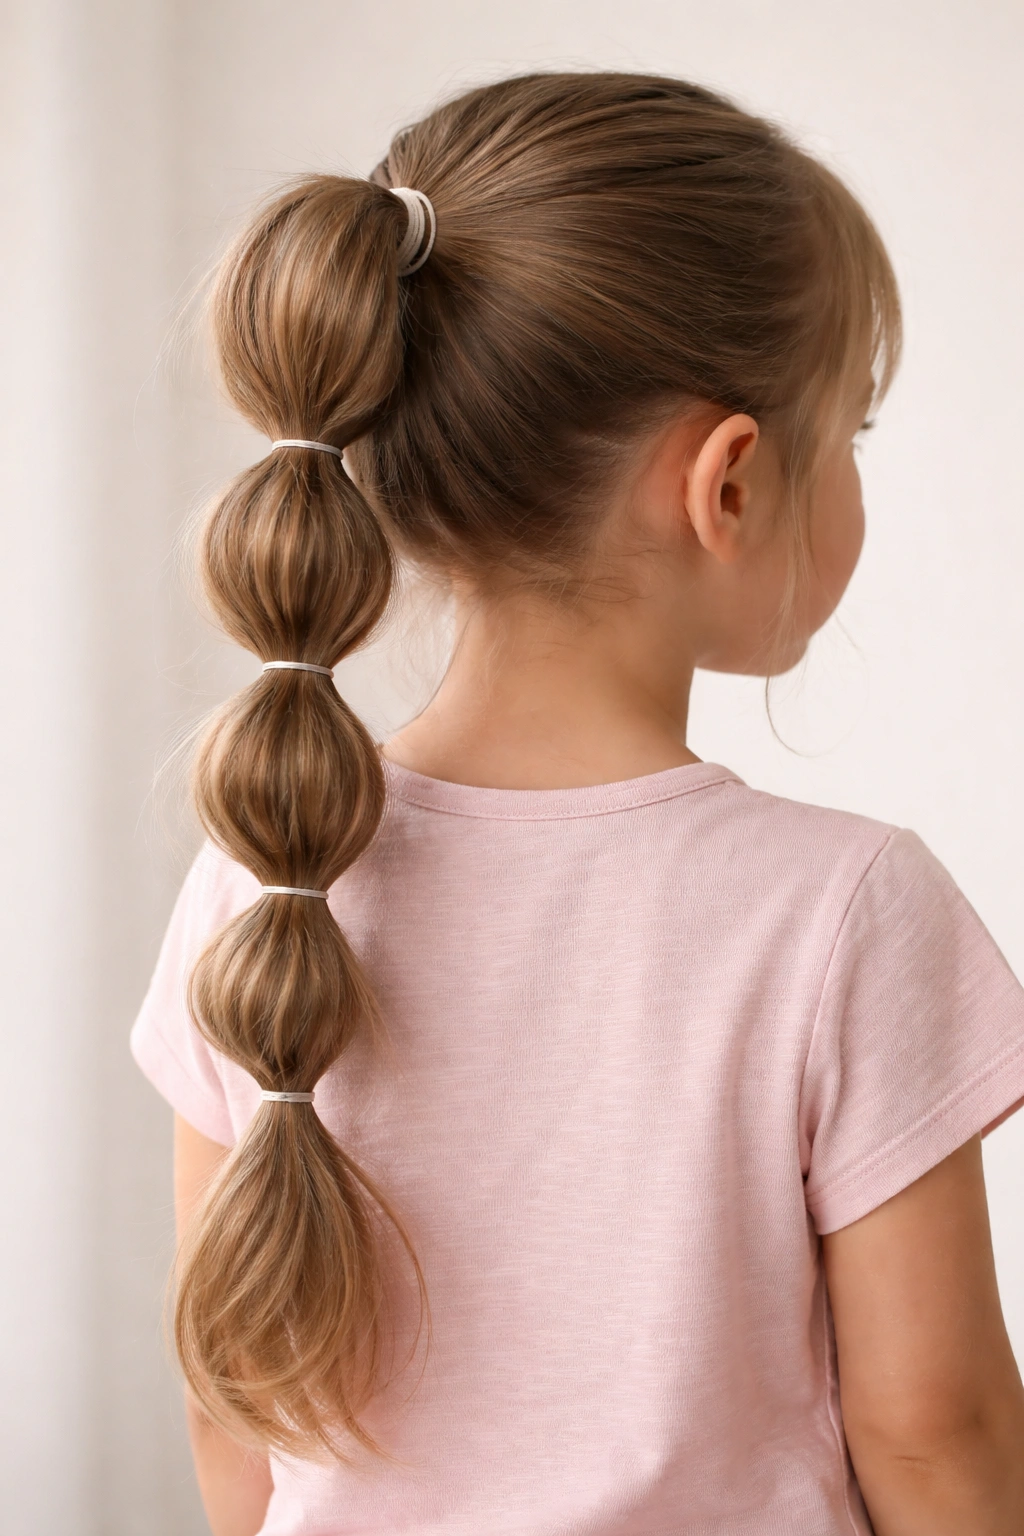
A bubble ponytail is created by gathering hair into a regular ponytail, then placing additional elastic bands down the length of the ponytail, creating sections that puff out slightly like bubbles. This style looks playful and intentional, and kids genuinely love it because the rounded texture makes it feel special and different without requiring them to sit still for extended styling time.
Creating Perfectly Shaped Bubbles
Gather the initial ponytail tightly at the crown or middle of the head, securing with an elastic band. Next, place a second elastic band about two inches below the first one — not so high that it overlaps, not so low that there’s excessive loose hair between them. Gently fluff the hair between the first and second band outward so it creates a small bubble shape. Continue this pattern down the length of the ponytail, spacing the elastic bands evenly, usually about two to three inches apart depending on the length and thickness of your child’s hair.
Making Bubbles Look Intentional
- Use elastic bands that match your child’s hair color so they’re less visible — the style is about the texture and shape, not about seeing the elastics
- Fluff each section slightly outward after you’ve placed all the bands, working section by section from top to bottom
- Don’t expect perfect symmetry — slight variation in bubble size actually makes the style look more natural and less overly constructed
- This style works better on hair that’s at least shoulder-length, as shorter hair doesn’t have enough length to create visible bubbles
Pro tip: A bubble ponytail holds its shape longer if you gently spray it with light hairspray after you’ve fluffed all the sections. The spray keeps the puffed sections from deflating as your child moves around.
6. Half-Up Ponytail
The half-up ponytail gathers only the top half of the hair into a ponytail at the crown, leaving the bottom half down and loose. This style is perfect for children who want their hair off their face but don’t want the full commitment of a complete ponytail, and it’s a great compromise when your child is being stubborn about styling.
Why This Style Solves Common Problems
A half-up ponytail addresses the child who wants some hair down but also wants it out of their eyes. It’s comfortable because only half the hair is gathered, meaning less pulling on the scalp. It also looks naturally tousled and friendly rather than severe, which some kids prefer. This style works on all hair types and lengths, though it’s most visually striking on longer hair where the contrast between the gathered top and loose bottom is clear.
Execution for Maximum Flattery
- Section off the top half of the hair by running your fingers from one temple across to the other temple, following the natural curve of the head
- Gather this section at the crown, creating a ponytail with just the top portion — the bottom half remains completely loose
- Secure with an elastic band and wrap the base as usual to hide it
- Gently tease the crown slightly for more volume and dimension — this makes the style look less flat and more intentional
- The loose bottom section can be as smooth or as curly as it naturally is; the style looks good either way
Quick Facts About This Style:
- It works beautifully with wavy or curly hair left loose on the bottom, creating a pretty contrast with the gathered top
- This is an excellent style for teaching children to do their own hair, as it requires minimal skill and only a few seconds to execute
- You can dress up a half-up ponytail by adding a braid to the gathered section or by securing it with a decorative clip instead of a regular elastic
7. Twisted Ponytail
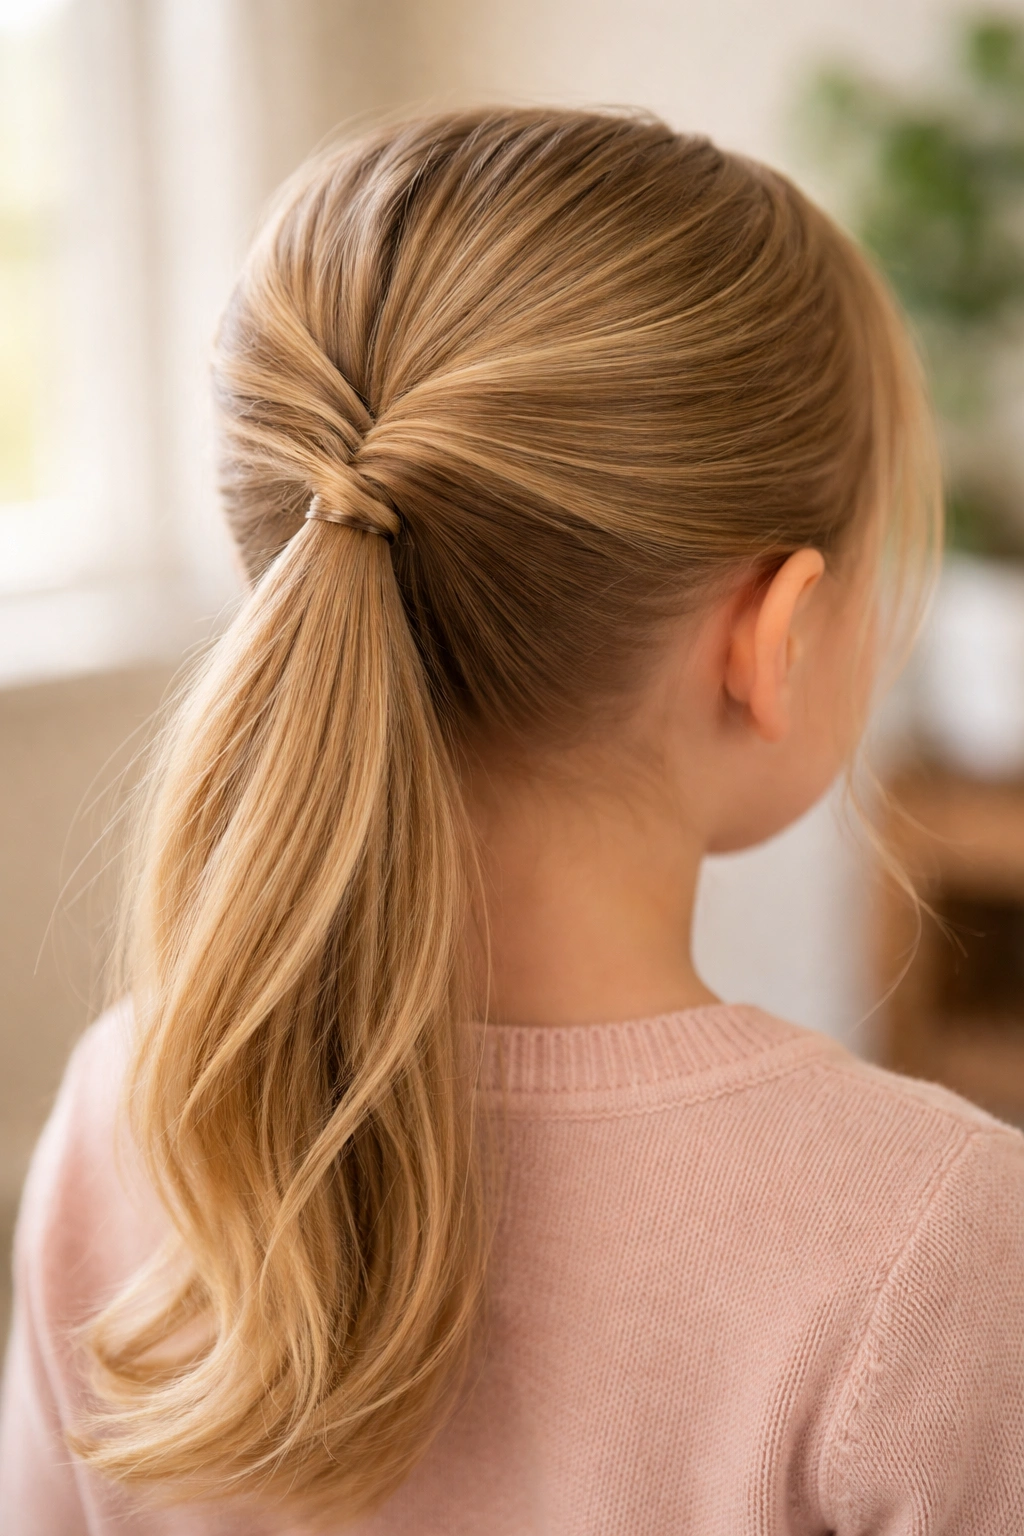
A twisted ponytail replaces the braid with a simple twist, making it easier to execute than a braided ponytail while still looking noticeably more styled than a plain ponytail. You create this style by twisting a section of hair around itself, then securing all the hair into a ponytail where the twist ends. It’s a great option when your child’s hair is too fine or slippery for a neat braid but still has enough length to gather into a style.
How Twists Are Easier Than Braids
A twist requires only two strands of hair rather than three, which means less coordination and fewer opportunities for things to go sideways. You simply take a small section from the crown, divide it in half, twist the two halves around each other as they spiral down, then gather all the remaining hair into a ponytail at the base of the twist. The result looks surprisingly sophisticated for such a simple technique.
Perfecting Your Twist Technique
- Divide your initial section cleanly into two equal parts — uneven halves make the twist look sloppy
- Hold the two strands gently as you twist them around each other, being careful not to pull too tightly, which makes the twist appear thin and strained
- As you twist, you can either keep the two strands consistently the same thickness throughout, or you can gradually release tension to create a looser, more relaxed twist — either looks intentional
- Once you reach the end of your twist section, gather all remaining hair and secure everything with one elastic band at that point
Worth knowing: Twists actually hold their shape better than you’d expect because the two strands are naturally locked into each other. This style tends to last all day without requiring touch-ups, which is a significant advantage on busy days.
8. Messy Bun Ponytail

A messy bun ponytail takes the foundation of a regular ponytail and adds a twisted or looped bun element at the end, creating a style that looks effortlessly put-together while being forgiving of imperfection. “Messy” here is intentional — it’s a style that actually benefits from not being perfectly polished, which takes pressure off you to achieve flawless execution.
Creating the Messy Bun Effect
Gather the hair into a ponytail as you normally would, securing it with an elastic band. Rather than leaving the ponytail hanging straight down, twist the entire length of the ponytail loosely and wrap it around itself to form a bun shape at the base of the ponytail. Secure the bun with bobby pins, but don’t obsess over making every strand perfectly placed — you actually want some hair to escape slightly from the bun structure, which is what creates the “messy” aesthetic.
What Makes This Style Work for Kids
- The messiness is forgiving — stray hairs and imperfection are features, not bugs
- It keeps hair completely off the neck and out of the way, making it excellent for warm weather or active play
- Once in place, it rarely needs adjustment because the twisted and wrapped structure is quite stable
- This style transforms a ponytail from casual to dressy in seconds, making it perfect for when you need quick elevation for an event
Pro tip: For a more polished messy bun, you can use a bun shaping tool (a small donut-shaped foam piece) instead of just twisting and wrapping. Place the tool at the end of your ponytail, then wrap the ponytail hair around it and secure — the tool helps create a rounder, fuller bun shape that reads as more intentional.
9. Dutch Braid Ponytail
A Dutch braid ponytail is similar to a regular braided ponytail, but the braid is created using an underhand braiding technique (where strands go under rather than over each other), creating a raised, 3D effect that looks noticeably more textured and complex than a standard three-strand braid. The Dutch braid sits on top of the head and draws the eye upward, making it flattering for all face shapes.
Learning Dutch Braid Basics
A Dutch braid is created by taking three sections of hair at the crown and braiding them, but instead of crossing the side strands over the middle strand, you cross them under. This creates a braid that sits on top of the scalp rather than lying flat against it. If you’ve ever done a Dutch braid before, the motion is identical — just remember “under” instead of “over,” and you’re already halfway there.
From Dutch Braid to Ponytail
Start your Dutch braid at the crown and braid down about three to four inches, using the same underhanded technique. Once you’ve created enough braid for visual interest, gather all remaining hair (both the unbraided sections and the braided section) into a ponytail, securing with an elastic band. The result is a dramatic textured top with a smooth ponytail hanging below, which reads as quite sophisticated.
Execution Tips for Success
- Dutch braids look best when they’re not too tight — if the braid is uncomfortably snug, the texture gets lost
- Gently fluff the braid slightly after you’ve secured the ponytail to enhance the 3D effect
- This style requires more dexterity than a simple braided ponytail, so it’s worth practicing once or twice before you try it under time pressure
- It holds beautifully throughout the day without requiring adjustments, even with active play
Quick Facts About This Style:
- Dutch braids appear thicker and fuller than regular braids, which is flattering if your child has fine hair
- This is dressier than a regular braided ponytail, making it excellent for special events or occasions where you want something obviously styled
10. Wrapped Ponytail
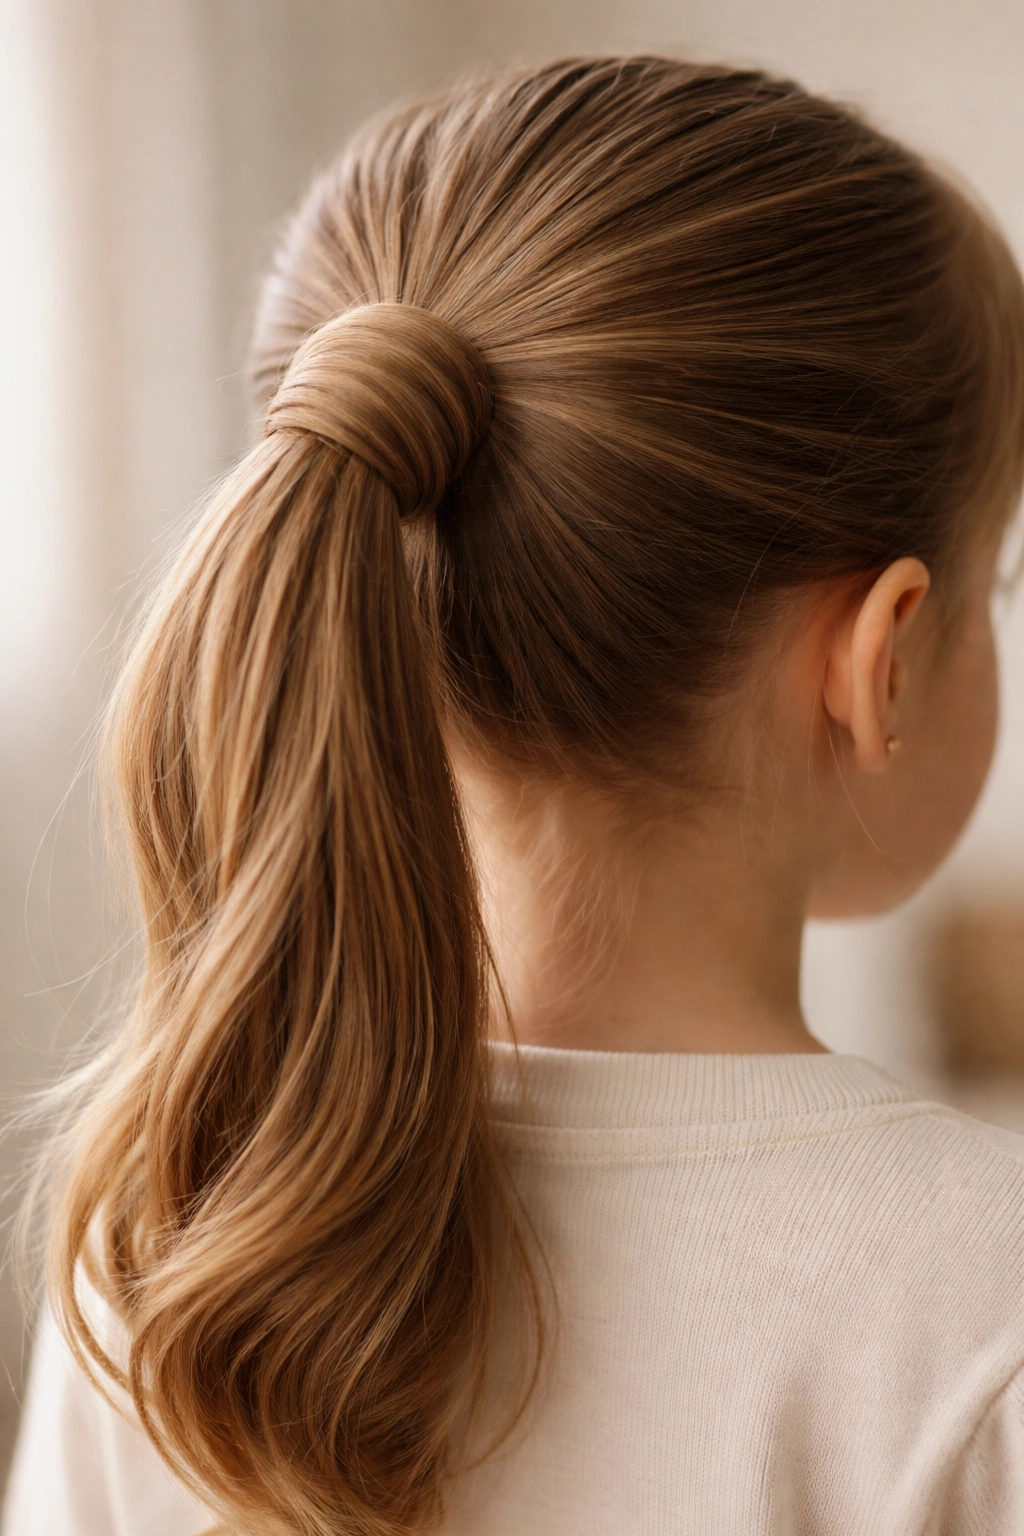
A wrapped ponytail takes a basic ponytail and wraps a section of hair around the base, but rather than using a single small section, you use a thicker section and wrap it multiple times, creating a textured, dimensional look at the base of the ponytail. This style elevates a simple ponytail into something that looks intentionally designed without adding significant complexity.
The Wrapping Technique
Gather your hair into a regular ponytail and secure it with an elastic band. Next, take a section of hair from the outer edge of the ponytail that’s about one inch wide and one inch thick. Hold the ponytail firmly with one hand and wrap this section around the base repeatedly, going around the elastic band multiple times (usually three to five times depending on the thickness of the hair). Secure the wrapped section with a bobby pin that matches your hair color, tucking the end of the section underneath the wrapped layer so it’s hidden.
Variations on the Basic Wrap
You can make this style different by varying the thickness of the section you wrap (thicker creates a bolder look, thinner creates a more delicate look), by choosing whether to wrap straight around or spiral as you wrap, or by leaving the wrapped section slightly loose and fluffy rather than tight and sleek. Each variation looks intentional and polished.
Why This Detail Matters
The wrapped section draws the eye to the base of the ponytail, making the entire style look more curated and less like you simply threw the hair up in two minutes (even if you did). It’s a small detail that signals intentionality and polish, which is exactly what separates a “styled” ponytail from a “just put it up” ponytail.
Worth knowing: If you have a section of hair that’s visibly thinner or damaged, you can strategically place the wrap over that section to hide it. This is a practical use of this technique beyond just aesthetics.
11. Fishtail Braid Ponytail
A fishtail braid is a delicate-looking braid created by taking tiny alternating sections from each side of two main sections and weaving them together, resulting in a narrow, intricate braid that looks far more complex than it actually is. When you create a fishtail braid at the crown and finish it into a ponytail, you get a style that’s genuinely stunning and dress-up ready.
Understanding Fishtail Braid Mechanics
Divide the hair into two sections. From the outer edge of one section, take a thin strand and pull it across to the opposite section, then repeat from the other side. Continue alternating, each time taking a thin strand from the outer edge of one section and crossing it to the other side. The result is a narrow, textured braid with a fish-scale appearance. It sounds complicated, but once you understand the two-section alternating pattern, it becomes quite intuitive.
Creating the Fishtail Ponytail
Begin your fishtail braid at the crown using only the top portion of the hair. Braid down about three to four inches, creating that delicate fishtail pattern. Once you’ve achieved enough braid texture for visual impact, gather all the remaining loose hair and the fishtail braid section together into a ponytail, securing with an elastic band. The fishtail sits on top, creating visual interest, while the regular ponytail hangs below.
Why Kids Love This Style
This braid looks expensive and intricate, which makes kids feel genuinely special wearing it, even though it’s often faster to execute than a regular three-strand braid. It works beautifully for photographs and special occasions, and it genuinely holds its shape all day without needing adjustments.
Pro tip: A fishtail braid looks fuller and more impressive when you gently fluff it after you’ve finished braiding. Pull slightly on the outer edges of the braid to make the fishtail pattern more pronounced and dimensional. This takes about thirty seconds and noticeably improves the final appearance.
12. Two-Toned Ponytail
A two-toned ponytail (sometimes called a double ponytail or a ponytail with a twist) uses two different hair sections gathered at two different heights, creating a stacked effect with ponytails at the back of the crown and at the nape of the neck. This style is visually striking and reads as far more complex than it actually is, making it perfect for occasions when you want something special without the complication.
Executing the Two-Toned Effect
Gather the top section of hair (everything above ear level) into a ponytail at the crown, securing it with an elastic band. Next, gather all remaining hair (including the hair from the top section that hangs below the elastic band) into a second ponytail at the nape of the neck, securing with another elastic band. The result is two stacked ponytails, which creates dimension and visual interest. You can leave both sections as simple ponytails, or you can braid one or both sections for additional texture.
Styling Variations
You can make this style different by using different colored elastics for visual contrast, by braiding only the bottom ponytail while leaving the top smooth, by curling both sections with a curling iron if your child’s hair is long enough, or by wrapping the base of each ponytail to create a more polished finish. Each variation gives you a slightly different final look.
What Makes This Style Work
The stacked effect is inherently flattering because it creates height and dimension. It’s also surprisingly versatile — it works for casual school days and for dressier occasions depending on how you finish each section. The style is quite forgiving because the two-section structure is visually interesting regardless of whether each individual section is perfectly smooth.
Quick Facts About This Style:
- It works on hair that’s at least mid-back length, as you need enough hair for two distinct ponytails
- The style keeps all hair securely in place, making it excellent for active play or sports
- You can customize this style entirely by choosing which sections you use as your upper and lower ponytails — they don’t have to be exactly equal
Final Thoughts
The right ponytail can genuinely change your morning routine, turning hair styling from a stressful task into a quick, satisfying part of getting your child ready for the day. These twelve styles represent a range of complexity levels, so you can find something that matches both your comfort level with styling and your child’s willingness to sit still. Start with the ones that feel most intuitive — maybe that’s a simple high ponytail or a half-up option — and build from there once you’ve mastered the basics.
The most important thing to remember is that your child’s comfort matters more than achieving salon-perfect results. A slightly imperfect ponytail that your child actually wants to wear is infinitely better than a flawlessly executed style that they’ll spend all day trying to escape. Once you find a style that your child feels confident wearing, you’ve genuinely won half the battle.
As your child’s hair grows longer or as their own styling skills develop, these styles become tools they can use independently. Teaching them to create their own ponytails builds their confidence, gives them agency over their appearance, and frees you from daily styling duties — which honestly might be the best outcome of all.