Mornings before school can feel like a race against the clock, and your hair often ends up being the last thing you think about. But here’s the thing: a good ponytail can actually save you precious minutes while keeping you looking polished, pulled-together, and ready for whatever the day throws at you. Whether you’re heading to class, sports practice, or a school assembly, the right ponytail does more than just keep hair out of your face—it sets the tone for how confident and prepared you feel.
The challenge is that not all ponytails are created equal, especially for school. You need styles that are quick to create on busy mornings, comfortable enough to wear through a full day of classes and activities, and practical enough to hold up during sports, PE class, or outdoor lunch breaks. You also want variety so your hair doesn’t look exactly the same every single day, which matters more than people realize when you’re seeing the same group of people from 8 AM to 3 PM.
What most people don’t realize is that the foundation of a great ponytail comes down to where you place it on your head, how you secure it, and whether you add texture through braiding, twisting, or styling techniques. These small details transform a basic ponytail into something that looks intentional and effortless. The styles covered here range from dead-simple (ready in 30 seconds) to slightly more involved (worth it if you have 5 extra minutes), but every single one is something you can actually achieve and maintain throughout a full school day without needing a hair dryer, curling iron, or extensive product collection.
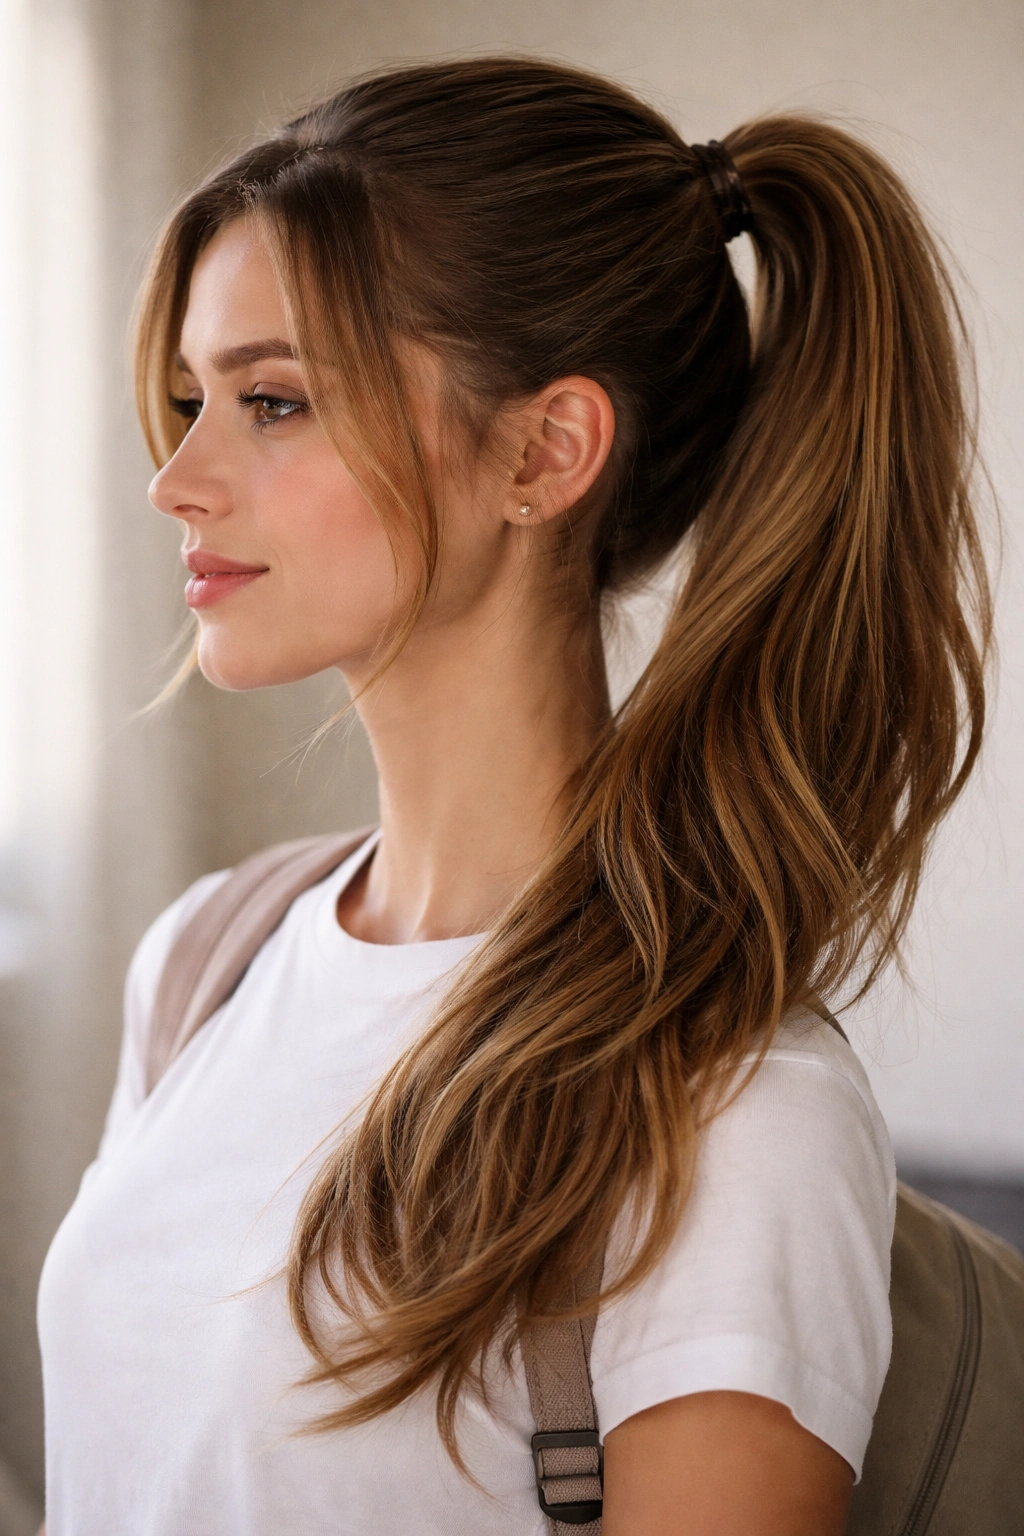
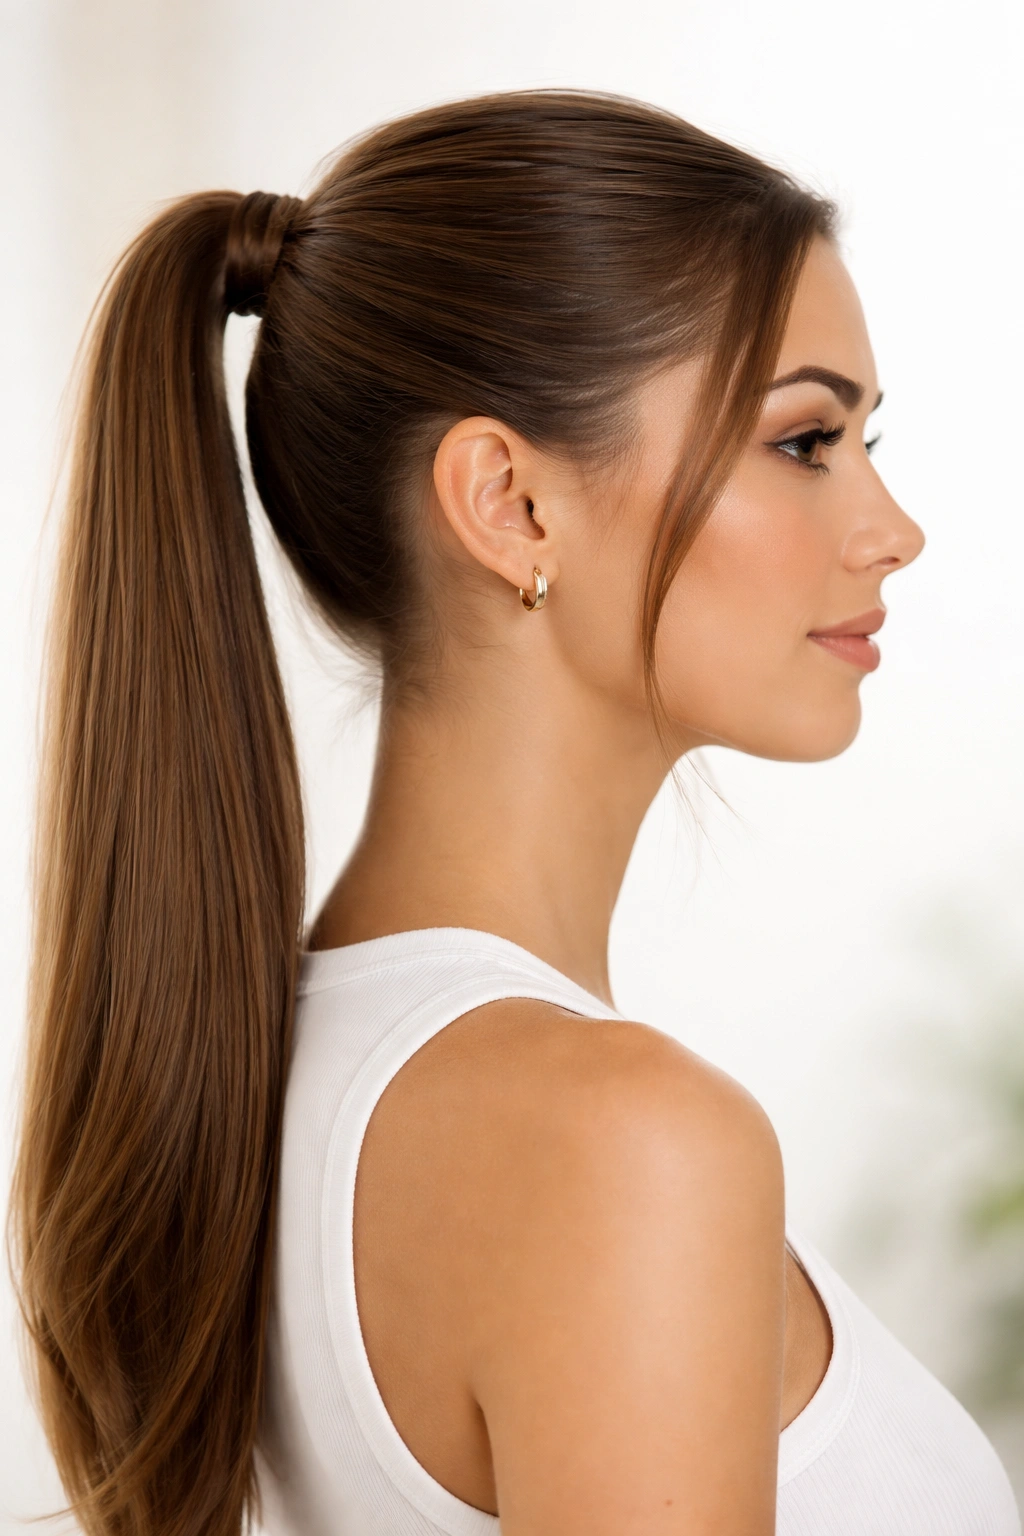
1. The Classic High Ponytail

The high ponytail is the foundation that every other style builds from, and there’s a reason it’s been the go-to for decades. When done right, it’s not boring—it’s clean, intentional, and works with every outfit and hair type. The key to making it look refined rather than plain is where you position it and how you finish the base.
Why It Works Best for School Days
A high ponytail keeps every strand off your face and neck, which matters during long days when you’re sitting at a desk or working through an intense study session. It also shows you’ve put thought into your appearance, even if it only took two minutes to create. The positioning naturally elongates your face and neck, which is why this style is so flattering and why it’s worn by athletes, professionals, and students alike.
How to Build the Perfect High Ponytail
- Start with hair that’s either freshly washed or from the day before (day-two hair actually holds styles better)
- Flip your head forward and brush all your hair straight back, then flip back upright
- Gather your hair at the crown and secure it with a elastic band, positioning it where you naturally feel the back of your head curves
- Take a small section from the ponytail itself and wrap it around the elastic base, then secure with a bobby pin for a finished look
- If you have flyaways, use a light smoothing cream or gel on the edges to tame them without making hair look wet
Pro tip: Use a mirror behind you (if you have one) or check with your phone’s selfie camera to make sure your ponytail is sitting evenly centered on your head, not tilted to one side.
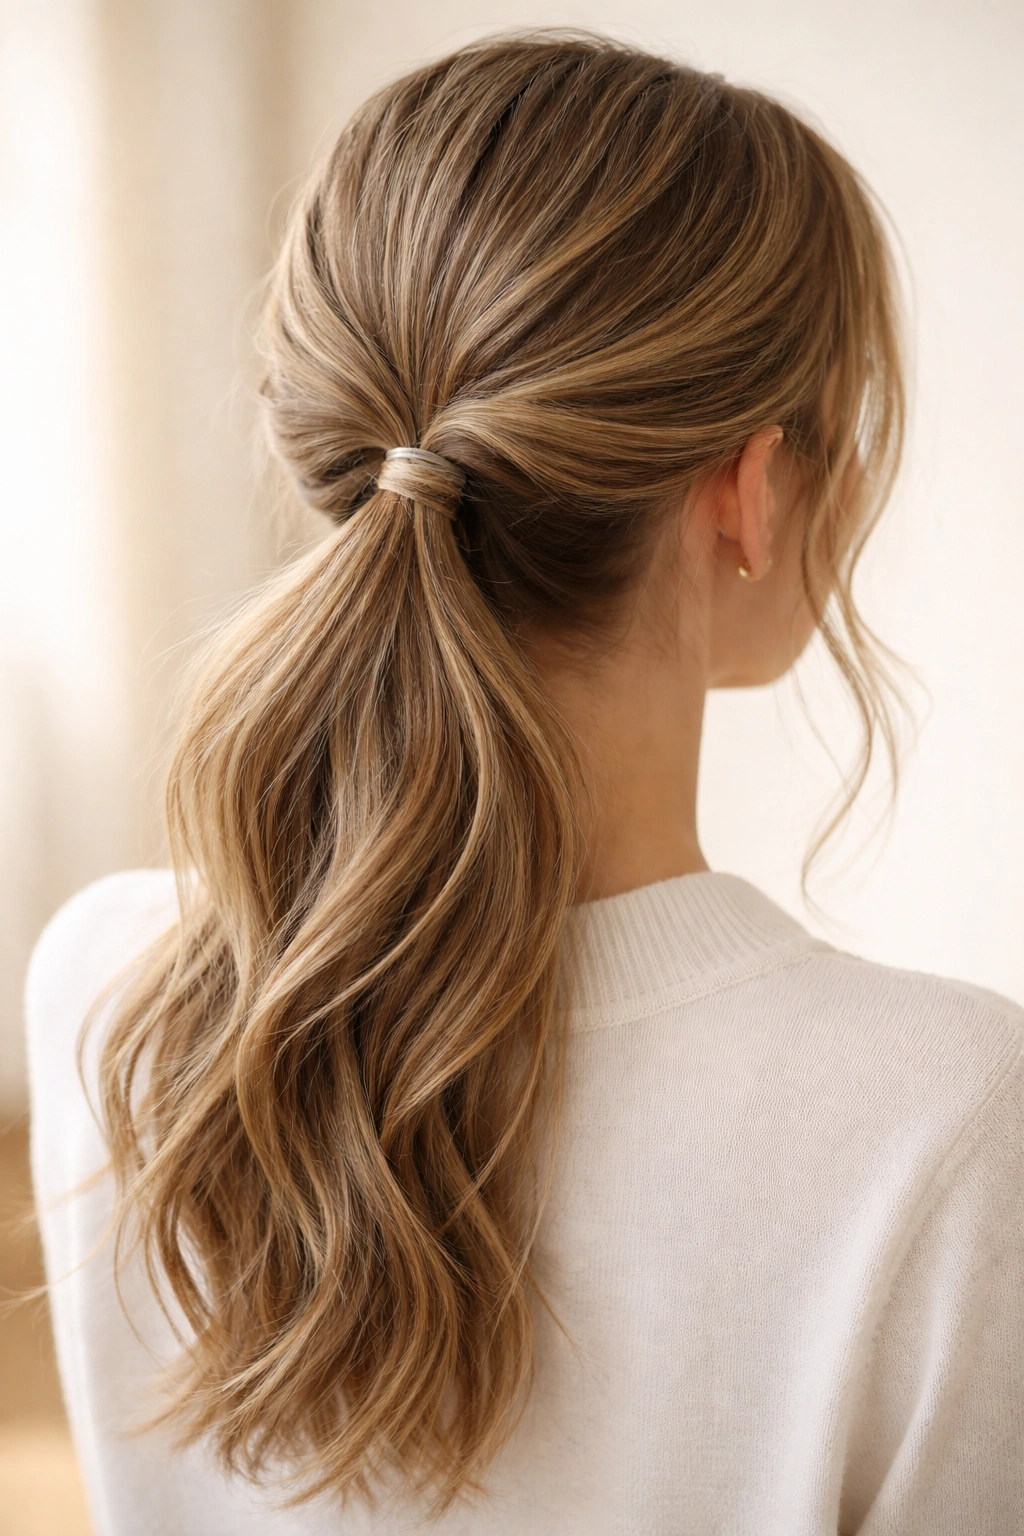
2. The Low Ponytail with Texture
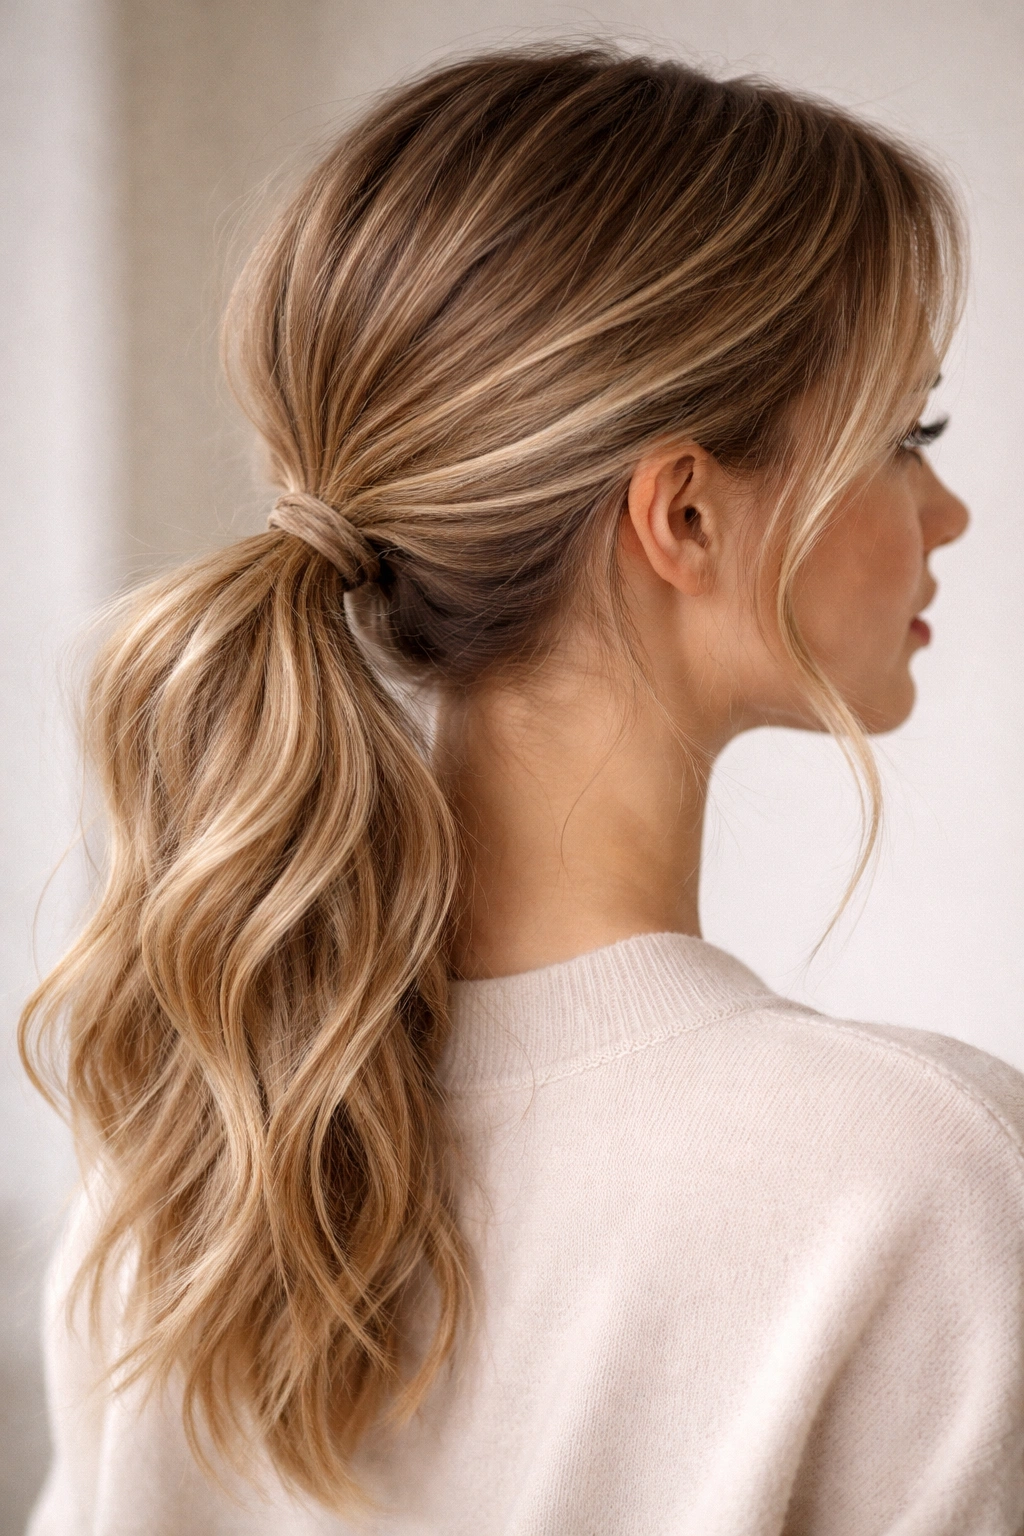
A low ponytail sits at the nape of your neck and feels more relaxed than a high ponytail, making it perfect for days when you want to look polished without appearing overly formal. Adding texture through waves or slight crimping makes this style feel current and effortless rather than too sleek.
What Makes the Low Ponytail Different
This positioning is genuinely more comfortable for long school days because it doesn’t pull at your scalp the way high ponytails sometimes do, especially if you have thick or heavy hair. The lower placement also photographs well and feels sophisticated—it’s the style you see worn by people who look like they woke up looking that way, even if you spent five minutes styling it.
Creating Natural-Looking Texture
- Secure your low ponytail first at the nape of your neck, not so tight that it causes tension
- Take your flat iron or curling iron and add loose waves to the length of the ponytail (not the scalp area)
- Gently pull and tease small sections of the ponytail to add volume and dimension
- Finish with a texture spray or dry shampoo to keep everything set through the day
- Leave a few whisper-thin face-framing pieces loose if you want an extra relaxed vibe
Worth knowing: If you don’t have a flat iron, you can create texture by braiding the ponytail loosely, letting it sit for a few hours, then unbraiding it for natural-looking waves.
3. The Sleek Pulled-Back Ponytail

This is the style for when you want to make a statement—hair completely smooth and tight against your head, secured low, with zero flyaways. It’s bold, modern, and works especially well if you have shoulder-length hair or longer that you want to fully control.
The Purpose Behind the Sleek Look
A sleek ponytail shows intention and precision, which can genuinely boost your confidence walking into a presentation or school photo day. It’s also incredibly practical because it keeps every single strand in place, which matters if you’re participating in PE, sports, or any activity where hair falling out would be distracting or unsafe.
How to Achieve Genuine Sleekness
- Start with damp or dry hair that’s been brushed thoroughly to remove any tangles
- Apply a smoothing cream, gel, or mousse to your hands and smooth it over your entire head, focusing on creating a sleek base
- Brush your hair straight back with a fine-toothed comb, smoothing as you go
- Gather everything into your chosen ponytail position and secure tightly with an elastic
- Smooth down any baby hairs around your hairline using a toothbrush and a tiny dab of edge control
- Finish with a light hairspray to lock everything in place
Insider note: If you’re dealing with static or frizz, rub a dryer sheet over your hair after you’ve secured the ponytail—it tames flyaways without the chemical feel of hairspray.
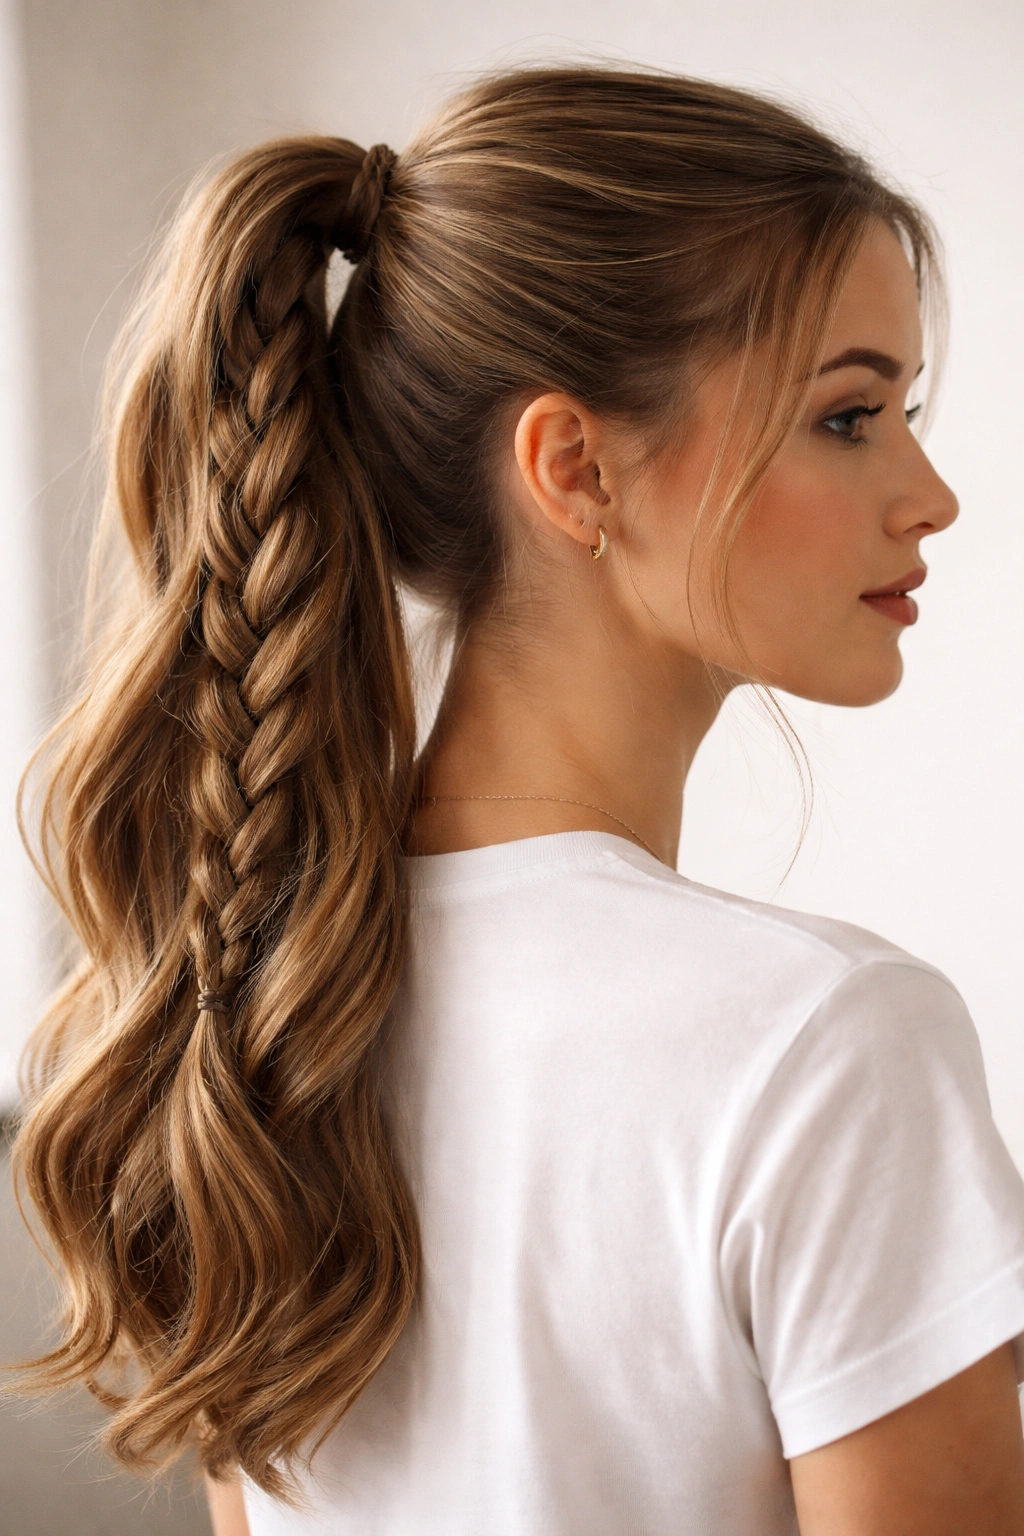
4. The Two-Braid Wrapped Ponytail
This style takes a regular ponytail and adds visual interest by wrapping braids around the base, creating a polished look that appears more complicated than it actually is. It’s the kind of style that makes people assume you spent way more time on your hair than you actually did.
Why This Style Gets Compliments
The two-braid wrap adds dimension and texture to an otherwise simple ponytail, making it feel like a deliberate choice rather than just a quick hair solution. It also creates the illusion of thicker, fuller hair because the braids add volume to the base where ponytails can sometimes look flat.
Creating the Wrapped Braid Effect
- Secure your main ponytail (high or low) first with an elastic band
- Take a small section from the underside of the ponytail and divide it into three strands
- Braid this section, keeping it relatively loose and thick rather than tight and neat
- Wrap this braid around the base of your ponytail and secure with bobby pins
- Repeat with a second small section to create a second braid wrap
- Gently tug and loosen both braids slightly for a fuller appearance
Worth knowing: This style actually works better when your ponytail is positioned slightly lower on your head because it gives you more room to wrap the braids without them looking cramped.
5. The Messy Bun Ponytail
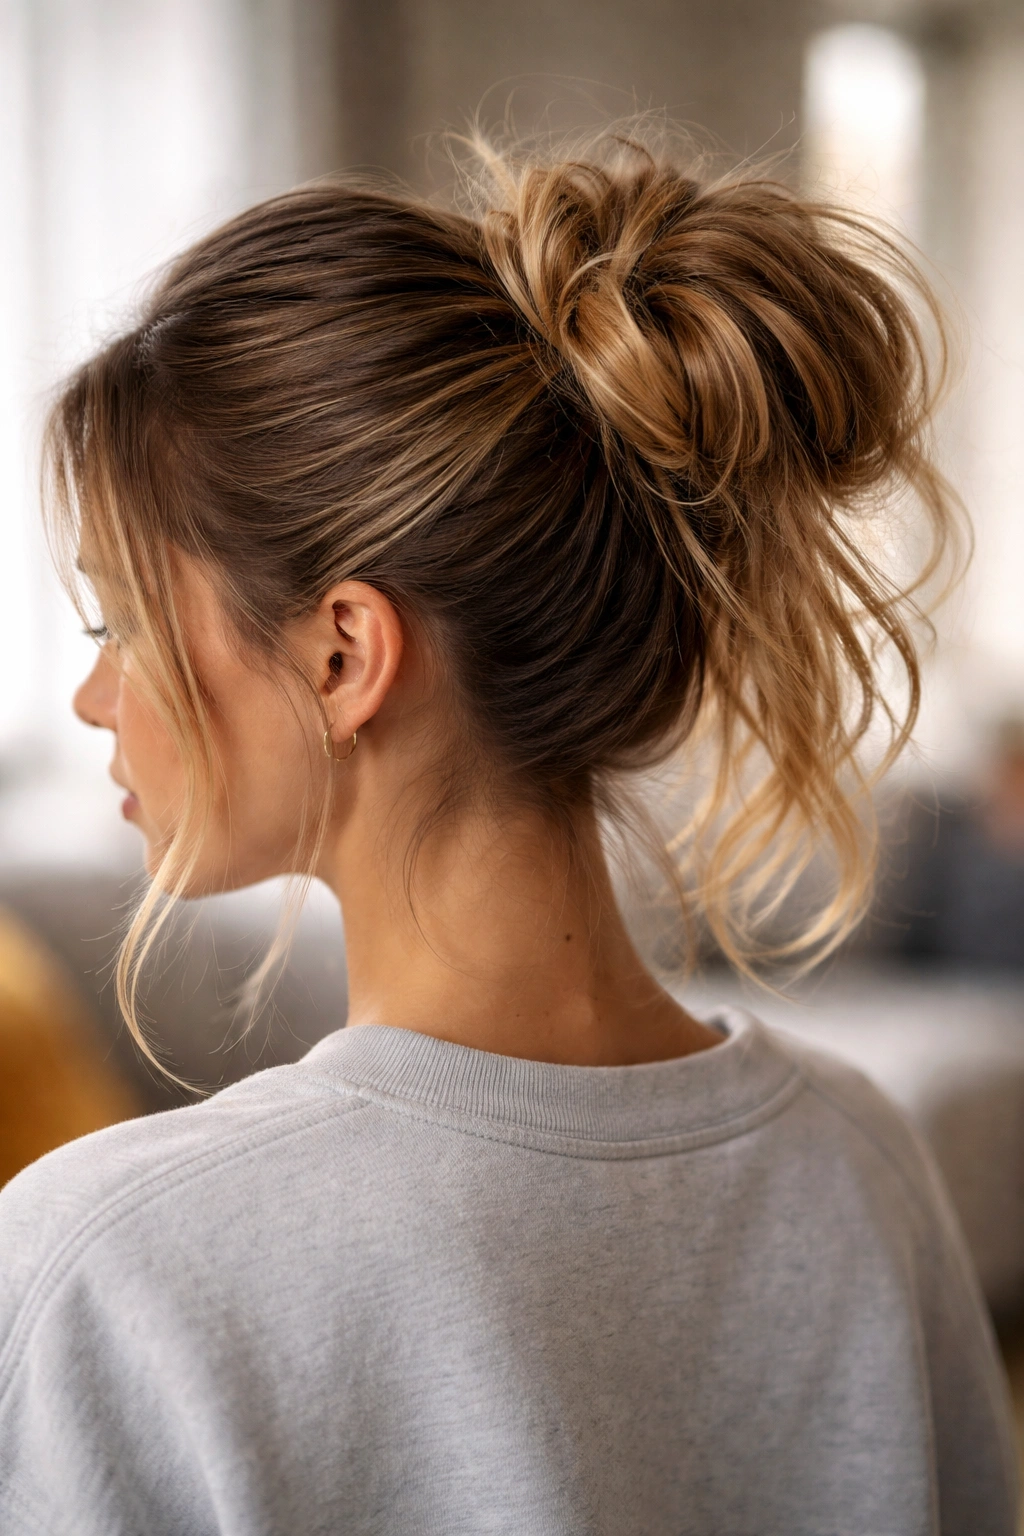
This is technically a ponytail variation that looks intentionally undone and effortless—the kind of style that feels appropriate for a casual school day or whenever you want to prioritize comfort over polish. The “messy” part is actually calculated, creating a specific look rather than just tying your hair in a bunch.
When This Style Is Perfectly Appropriate
A messy bun ponytail works for literally any school day, especially when you’re pairing it with comfortable clothes. It’s ideal on days when you’ve slept in, didn’t get time to style your hair, or want to focus your energy on something other than your appearance. The style says “I have my life together even if my hair is relaxed.”
How to Make It Look Good (Not Accidental)
- Gather your hair into a high or mid-height ponytail and secure it loosely
- Take the ponytail length and twist it in on itself, wrapping it around the base to form a bun shape
- Don’t make it perfect—some strands should fall out and frame your face
- Leave 2-3 face-framing pieces loose before you even start creating the bun
- Secure the bun loosely with bobby pins, making sure you see some texture and intentional messiness
- Pull a few random strands from the bun to enhance the relaxed, undone feeling
Pro tip: This style actually looks better after you’ve worn it for a couple hours and it naturally loosens up a bit, which makes it perfect for school because it only improves as the day goes on.
6. The Dutch Braid into Ponytail
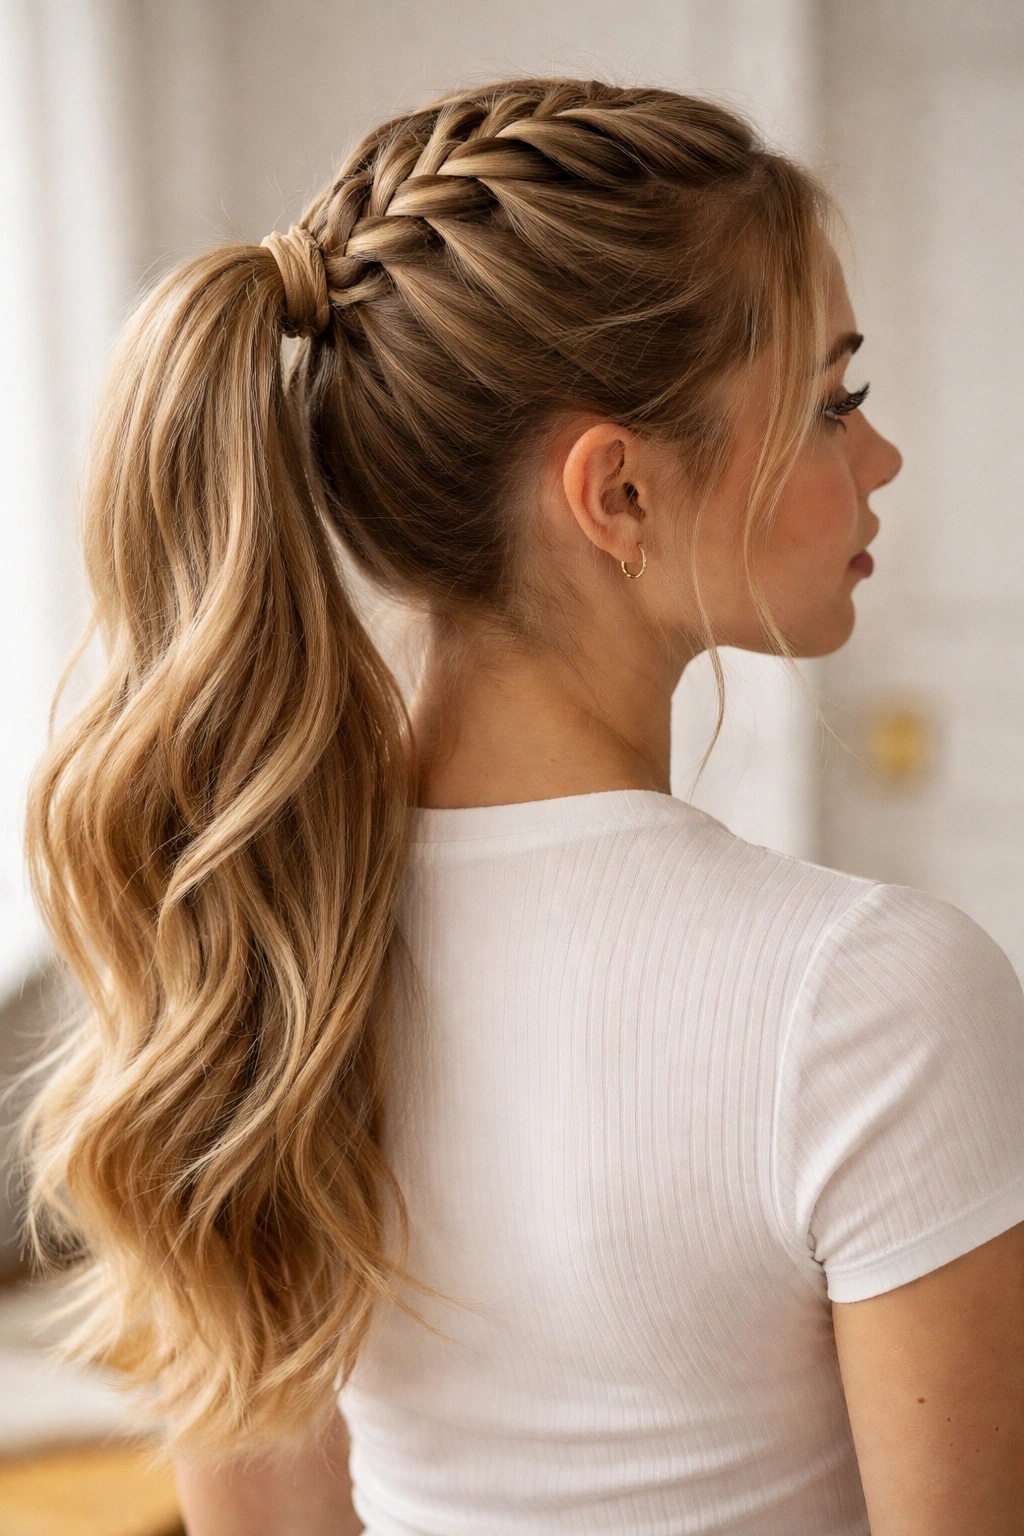
A Dutch braid (a braid that sits on top of your head) that flows directly into a ponytail creates visual interest and structure that transforms an ordinary ponytail into something special. This style works for all hair types and textures, and it’s something you can recreate consistently once you practice it a couple times.
What Makes This Combination Work
The braid creates a focal point that draws attention and gives your hair dimension. It also has a practical purpose: the braid gathers a chunk of your hair in a controlled way before it becomes the ponytail, which creates more volume and interesting texture than a simple gathered ponytail would have on its own.
Creating the Dutch Braid-to-Ponytail
- Start at the top of your head with a small section of hair divided into three parts
- Cross the right strand under the middle, then the left under the middle (this is what makes it a Dutch braid—the reverse of a French braid)
- Continue the braid down the back of your head, adding small sections of hair as you go
- When you reach the nape of your neck, gather all of your hair (including the braid) into a ponytail and secure
- Gently pull sections of the braid outward to add volume and softness
- The braid should feel like part of the ponytail structure, not a separate element
Worth knowing: Dutch braids look amazing in the front-facing mirror photos that matter for school socials and candid pictures because the braid is visible and shows craftsmanship.
7. The Side Ponytail
A side ponytail sits off to one side of your head rather than centered, creating an asymmetrical, modern look that feels younger and less formal than centered styles. This works particularly well if you have longer hair and want to show off length and texture.
Why Side Ponytails Stand Out
There’s something about the asymmetry that makes a side ponytail feel intentional and fashion-forward without being impractical for school. It also photographs beautifully from one angle, which matters if you’re the type to take photos during school events. The positioning is also slightly less tight on your scalp than a centered high ponytail.
Positioning and Securing a Side Ponytail
- Decide which side you want your ponytail on (usually the side that has more volume when you part your hair naturally)
- Gather your hair to that side, creating a high, mid, or low side ponytail depending on your preference
- Make sure the elastic isn’t pulling too tightly, especially on one side of your head
- Add texture to the ponytail with waves, texture spray, or by loosely curling it
- Leave a couple face-framing pieces loose on the opposite side to balance the asymmetry
- Pin your hair with bobby pins if needed to keep the side ponytail from sliding around
Insider note: A side ponytail is actually more stable than it seems, especially if you use a stronger elastic and secure it with a couple bobby pins strategically placed where your hair meets the elastic.
8. The Bubble Ponytail
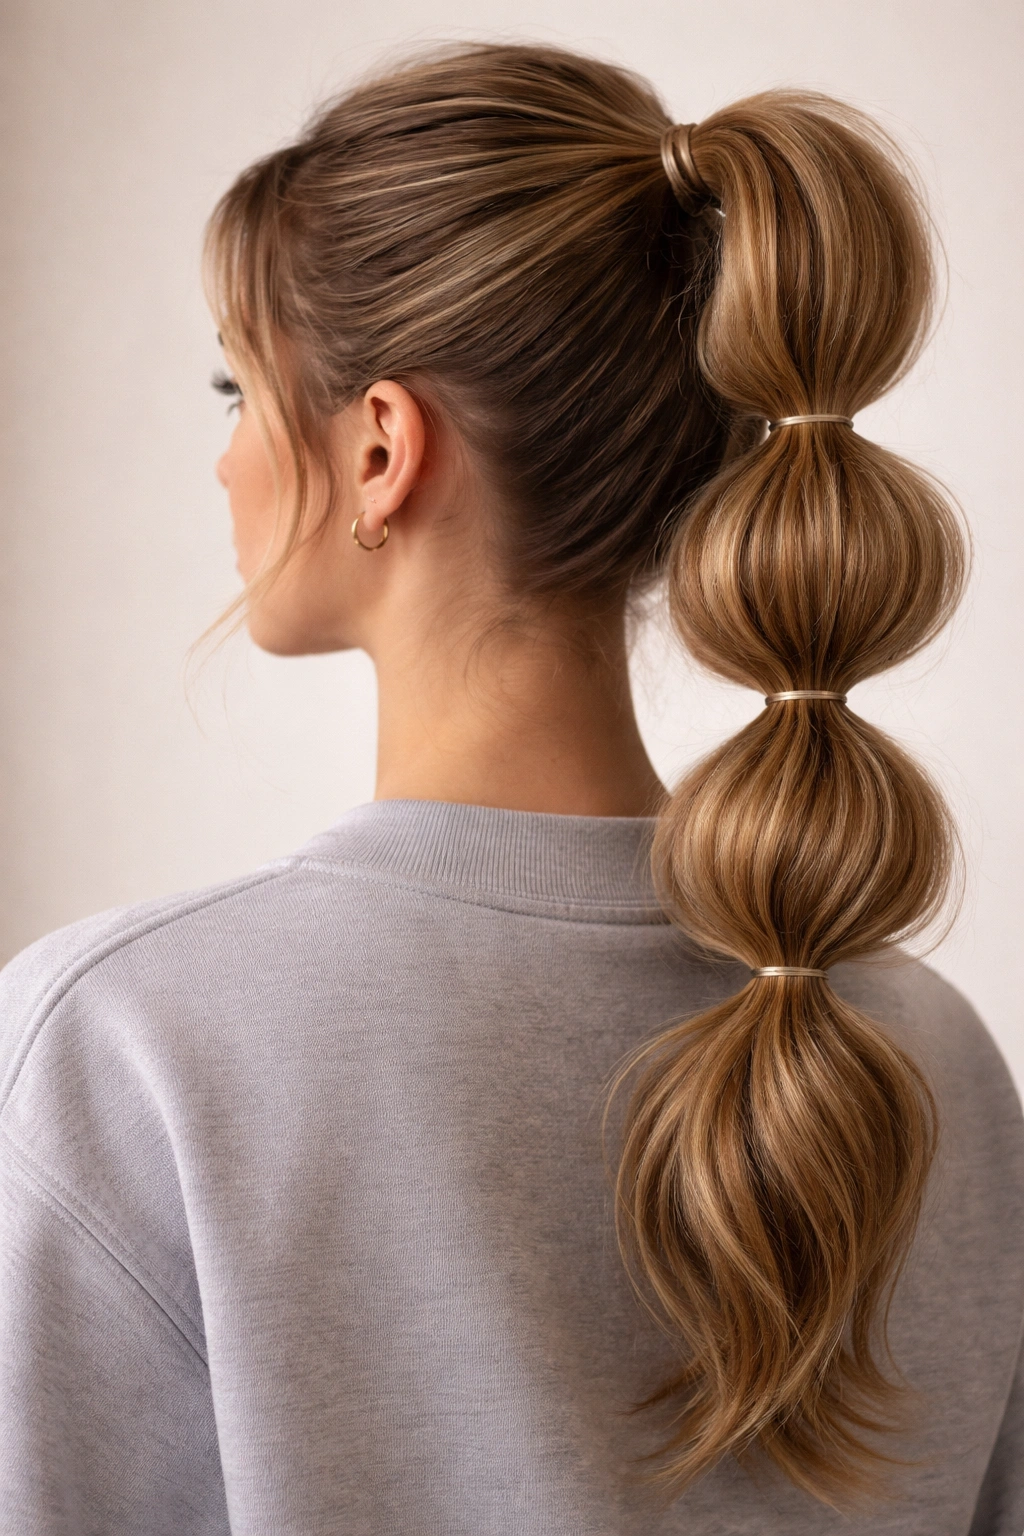
A bubble ponytail is created by securing multiple sections of one continuous ponytail with separate elastics, creating distinct “bubbles” of hair stacked vertically. It’s a trendy style that’s surprisingly easy to create and maintains surprisingly well through an active school day.
Why This Style Works for School
The bubble ponytail provides visual interest and a modern look that definitely catches people’s attention, but it’s also practical because each section is individually secured, which means if one elastic loosens, you don’t lose the entire style. It’s also forgiving on second-day hair or any hair type that has natural texture.
Creating Individual Bubbles
- Start with a high ponytail secured with an elastic band
- Measure down about 2-3 inches and secure with a second elastic band
- Gently fluff out the hair between the two elastics by pulling small sections of hair outward to create a bubble
- Continue measuring and securing at 2-3 inch intervals down the length of the ponytail
- Fluff each bubble as you go, pulling some strands out to create dimension
- The final section can be left down or secured, depending on how long your hair is
- Finish with texture spray to keep the bubbles set and defined
Pro tip: Use small, thin elastic bands for this style because they create neater sections than thick elastics do, and they’re less visible if you’re going for a polished look.
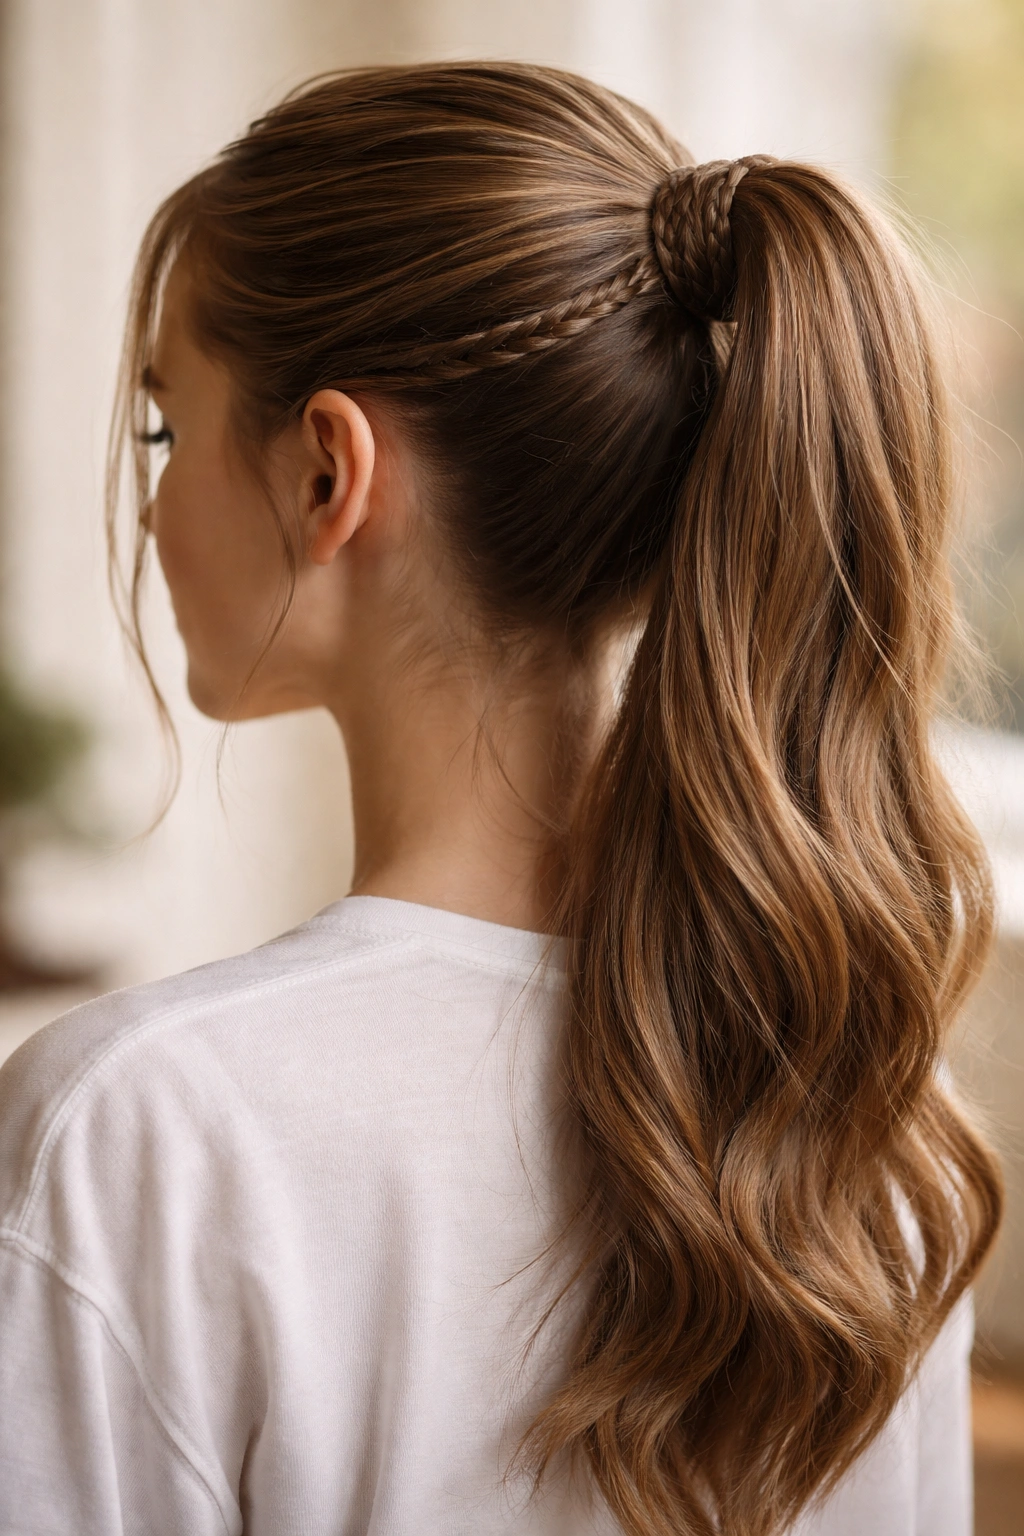
9. The Crown Braid Ponytail
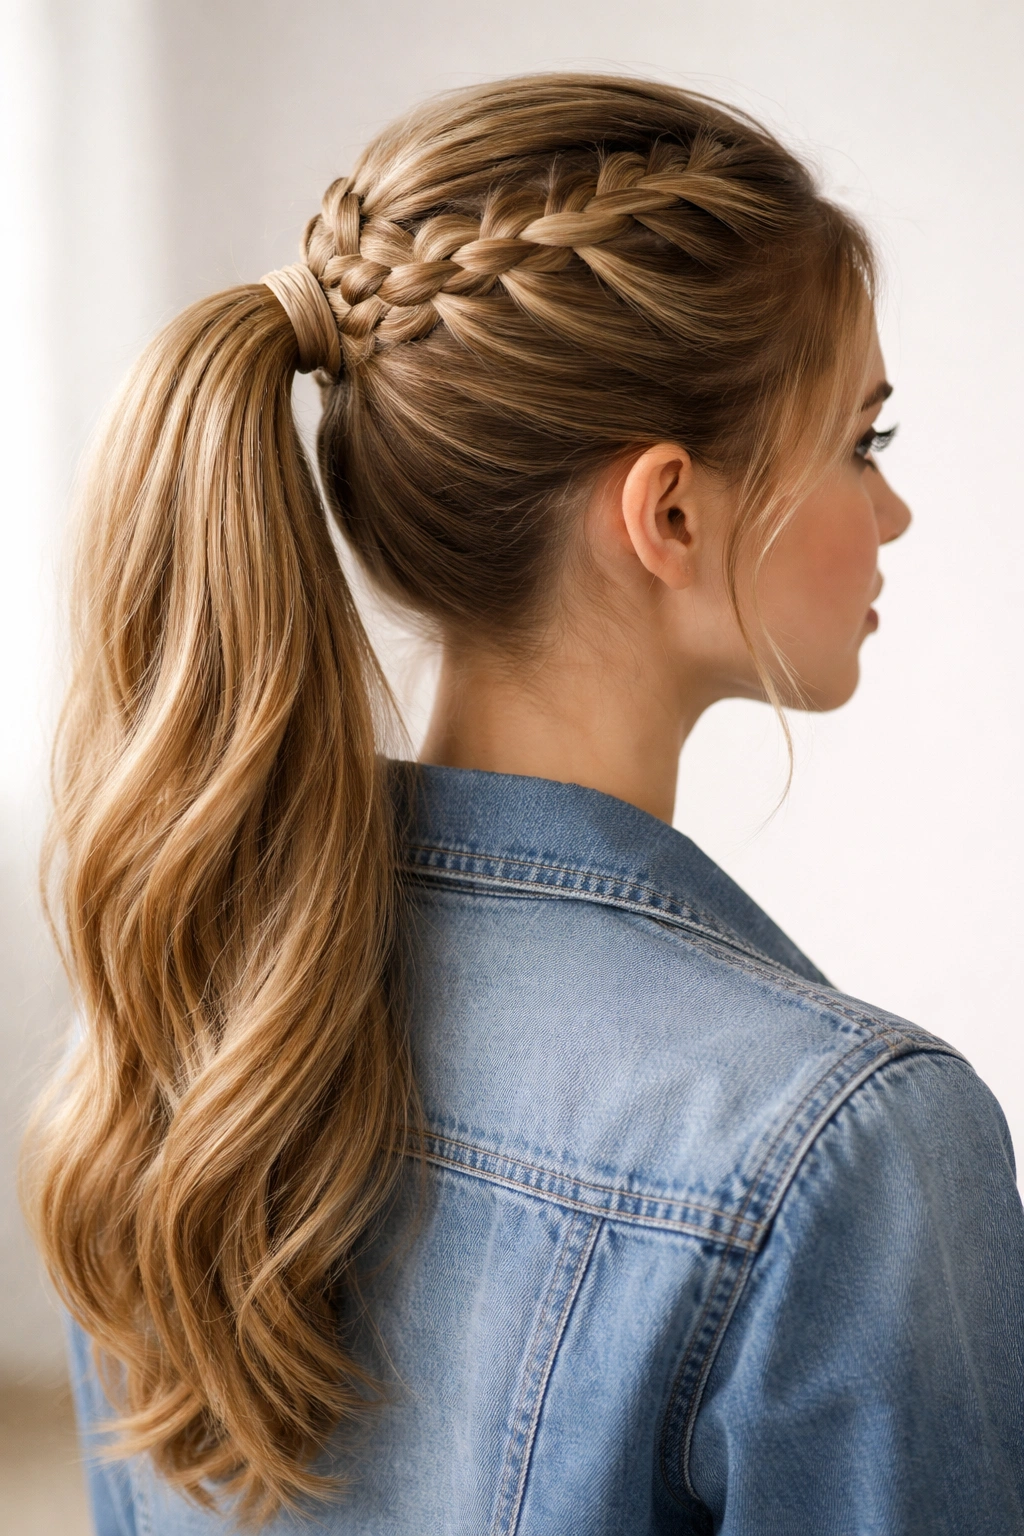
A crown braid circles your head and flows into a ponytail, creating a style that looks both intricate and wearable. This works especially well if you want to keep hair off your face and neck while maintaining an elegant appearance that’s appropriate for school photos or presentations.
The Visual Impact of a Crown Braid
This style is legitimately stunning and makes a clear effort without screaming “I’m trying too hard.” It also frames your face beautifully and keeps every strand in place, which is perfect for anyone who needs their hair completely controlled during the school day. The style automatically looks polished because of its structure.
How to Braid Your Crown
- Start at one side of your head near your temple and section off a small amount of hair
- Create a regular three-strand braid, but instead of braiding straight down, angle the braid across the back of your head
- Add hair from both sides as you braid (using a French braid technique), creating a braid that circles around toward the other side
- Once your braid reaches the opposite side of your head, gather all remaining hair into a ponytail
- Secure the ponytail with an elastic, and the braid becomes part of the ponytail base
- Gently pull sections of the crown braid outward for a softer, fuller appearance
Worth knowing: This style stays secure all day because the braid structure is built into the foundation of your ponytail, which means it won’t slip or loosen as you move around.
10. The Half-Up Ponytail
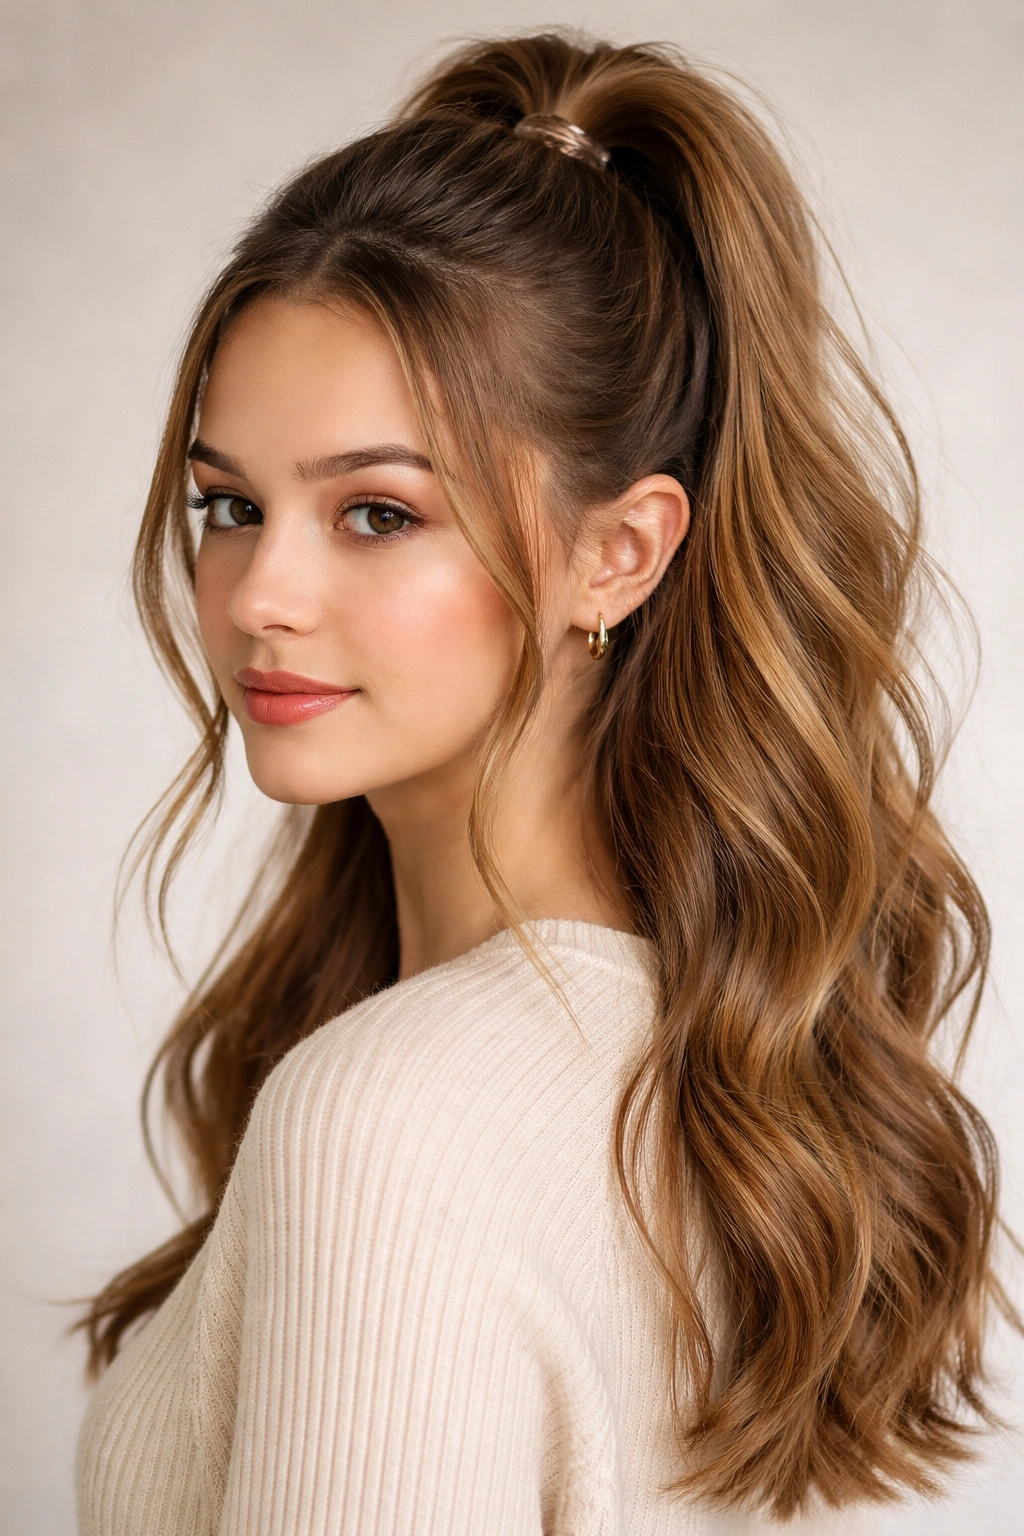
A half-up ponytail gathers only the top portion of your hair, leaving the bottom half down. This is perfect for days when you want some control at the crown without fully committing to a ponytail, and it works beautifully with textured or wavy hair.
When Half-Up Is the Right Choice
This style is ideal when you have hair length that you want to show off, or when you want to add texture and movement that a full ponytail wouldn’t allow. It’s also the answer for anyone who finds full ponytails too tight or uncomfortable. The style feels casual but still intentional, making it perfect for a regular school day.
Creating a Polished Half-Up Ponytail
- Take hair from your temples and the crown area only, leaving the sides and bottom section loose
- Gather just this top section at the crown and secure with an elastic
- Gently pull and tease this top section to create volume and softness
- If you want, wrap a small braid around the elastic base (using hair from the ponytail)
- Leave face-framing pieces loose on both sides
- Add waves or texture to the bottom section that’s left down using a curling iron or braiding method
- Finish with texture spray for hold and definition
Pro tip: A half-up ponytail actually looks fuller and more impressive than a full ponytail if you tease the top section before securing it, which takes literally 30 extra seconds.
11. The Twisted Ponytail
Instead of gathering hair straight back, a twisted ponytail involves twisting sections of hair as you gather them together, which adds texture and visual interest without requiring braiding skills. This is genuinely easier than braiding for many people and creates an equally polished appearance.
Why Twists Are Easier Than Braids
Twisting is mechanically simpler than braiding—you’re only working with two sections of hair instead of three—and it creates a different aesthetic that’s just as interesting. Twists also create more texture and volume than simply gathering hair straight back, which makes the final ponytail look thicker and fuller.
Twisting Your Way to an Interesting Ponytail
- Section your hair into two parts at the sides of your head
- Twist one side section loosely as you move toward the back of your head
- Twist the other side section the same way, moving toward the back
- Gather both twisted sections plus any remaining hair at the center back of your head
- Secure everything with an elastic band
- Gently pull and tease the twisted sections to loosen them and add volume
- The twists should look organic and soft, not tight and mechanical
Worth knowing: This style actually works better when you do the twists loosely rather than tightly, because loose twists photograph better and feel more comfortable to wear throughout the day.
12. The Braided Ponytail Extension Style
If you want the look of longer, thicker hair, you can create a ponytail that incorporates a braided section flowing from the main ponytail downward. This isn’t an extension—it’s a technique using your actual hair to create layers and visual depth.
Creating the Illusion of Length and Volume
This technique makes any ponytail feel more substantial and styled. It also keeps the bottom section of your ponytail interesting visually, rather than having all the length look the same. This style is particularly flattering if you have medium-length hair that you want to appear longer or fuller.
How to Braid a Flowing Section
- Secure your main ponytail at your chosen height
- Take a section of hair from one side of the ponytail (about 1-2 inches thick)
- Divide this section into three parts and create a braid flowing downward from the ponytail
- Let this braid flow loosely down the middle or side of your remaining ponytail
- Secure the bottom of the braid with a small elastic or bobby pins
- Take additional small sections from your ponytail and loosely wrap them around the braided section for extra dimension
- Gently fluff the braid to soften it
Insider note: This style actually becomes more visually interesting as the day goes on and the braid naturally loosens and relaxes, which makes it perfect for wearing to school.
13. The Low Twisted Bun Ponytail
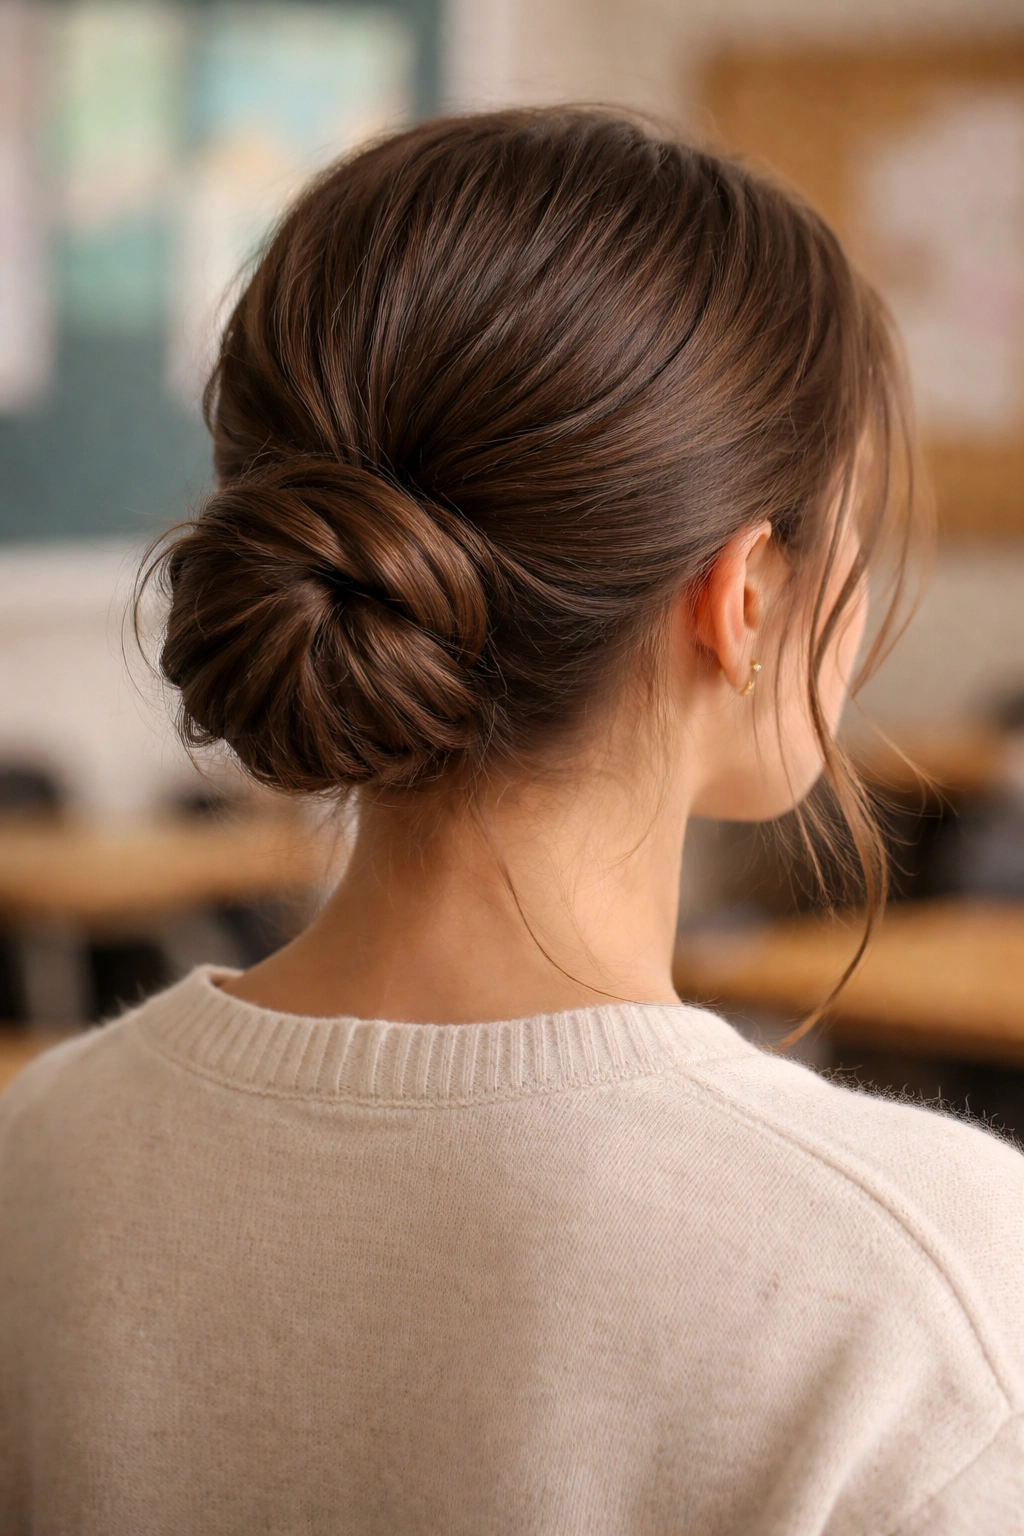
This combines the security of a low ponytail with the visual interest of a bun structure. It’s sophisticated enough for school presentations or photos, but relaxed enough for a normal school day. The twist element adds dimension that a simple bun wouldn’t have.
Why This Hybrid Style Works
You get the security and control of a ponytail with the elegant appearance of an updo. This style is also incredibly comfortable to wear because the low positioning doesn’t create tension on your scalp, even if you wear it for a full school day plus after-school activities.
Creating the Twisted Bun Base
- Gather your hair into a low ponytail at the nape of your neck
- Divide the ponytail into two sections
- Twist each section loosely in on itself, creating two twisted ropes of hair
- Wrap these twisted sections around each other, creating a rope-twist bun
- Secure the bun with bobby pins, using at least three to ensure stability
- Leave a few wispy pieces loose around your face for softness
- Gently pull and tease the bun structure to add volume and a relaxed appearance
Pro tip: This style holds remarkably well even when you’re active, because the twist structure is self-supporting—it doesn’t unwind easily like a simple wrapped bun might.
14. The Accent Braid Ponytail

This style takes a standard ponytail and adds one decorative braid on top or intertwined through the length, creating visual interest without requiring complicated braiding skills. You’re essentially adding one braid element to an otherwise simple style.
Why One Braid Makes All the Difference
A single accent braid transforms a basic ponytail into something intentional and thoughtfully styled. It’s also easier to execute than a fully braided ponytail, which makes it perfect for mornings when you want something more interesting than a regular ponytail but don’t want to spend extra time.
Adding Braid Accents
- Create your basic ponytail first (high, mid, or low)
- Divide a section of the ponytail into three parts and create a braid down one side of the ponytail
- Alternatively, create a braid across the back of the ponytail, weaving through the length
- Secure the bottom of the braid with a small elastic that matches your hair
- Leave the braid slightly loose rather than tight for a softer appearance
- Gently pull sections of the braid outward to add dimension
Worth knowing: An accent braid works especially well if you have slightly textured or wavy hair, because the texture makes the braid more visible and interesting.
15. The Sleek Signature Ponytail (Your Personal Version)
The final style is really about recognizing that the ponytail you wear most often—the one you’ve perfected and that feels most like you—is your signature style. Maybe it’s simple and straightforward, maybe it incorporates elements from several of the styles above. The point is creating one version that you can execute consistently and that makes you feel confident.
Developing Your Go-To Ponytail
Everyone needs one style they can create on autopilot, even on mornings when you’ve overslept or you’re running late. This is the ponytail that requires minimal products, minimal thought, and takes under five minutes. It should feel like an extension of your personality rather than something you’re forcing.
Making It Your Own
- Pick the positioning that feels most comfortable (high, mid, or low)
- Decide if you want sleek and polished or textured and relaxed
- Determine if you want to incorporate any braids, twists, or wraps
- Practice it a few times until you can do it without thinking
- Add one small element (a wrap braid, a face-framing piece, a texture technique) that makes it distinctly yours
- Wear it with confidence—consistency and authenticity matter more than complexity
Insider note: Your signature ponytail should be something you genuinely enjoy wearing and that gets compliments regularly. If people consistently respond positively to one of your styles, that’s often a sign you’ve found your signature.
Key Takeaways
A great school ponytail comes down to three core elements: choosing the right positioning and height for your face shape and hair type, mastering one or two styling techniques that add texture or interest, and making sure whatever you create is secure enough to last through an entire day of moving, sitting, writing, and general activity. You don’t need expensive products, professional tools, or an hour of preparation time to have a ponytail that makes you feel confident walking into school.
The reality is that most of these styles are variations on the same basic principle—you’re gathering hair, securing it, and potentially adding texture through braids, twists, or wraps. Once you understand that foundation, you can mix and match elements to create dozens of different looks without ever feeling stuck in a rut. The styles that feel best and get the most compliments are usually the ones you practice enough times that you can execute them without overthinking the process.
Start with whichever style resonates with you most—maybe it’s the classic high ponytail if you want something foolproof and timeless, or maybe it’s the bubble ponytail if you want something that catches people’s attention. Practice it a few times so you feel genuinely comfortable creating it. Then, once that’s second nature, try adding one or two elements from another style to create variations. Before you know it, you’ll have multiple ponytail styles in your rotation, and your mornings will feel less rushed because you’re confident in what you’re creating.