Straight hair offers the perfect canvas for sleek weave ponytails—and that’s where most people stop thinking about their styling options. But the reality is far more exciting. When you pair the smoothness of straight hair with quality weave extensions, you unlock an incredible range of sophisticated ponytail styles that work for everything from the boardroom to evening events. The combination of sleekness and structure creates a polished look that’s difficult to achieve with natural hair alone, especially if you’re aiming for that ultra-refined aesthetic that feels both effortless and intentional.
The magic of weave ponytails lies in their versatility and longevity. A well-installed weave gives you styling freedom for weeks at a time, which means these ponytail styles aren’t just beautiful—they’re practical investments in your look. You can sleep in them, refresh them with some lightweight serum, and they bounce back looking just as sharp the next morning. For straight-haired clients and enthusiasts, this translates to reliable, professional styling that maintains its integrity through your entire day, whether you’re in meetings, at the gym, or out for the evening.
What separates a basic ponytail from a genuinely striking weave ponytail is understanding how to work with texture, positioning, and the specific qualities that make sleek styles stand out. Straight hair requires slightly different technique than curly or wavy hair—you need to know exactly where to place the ponytail for visual balance, how to create shape without relying on curl, and which styling methods preserve that coveted sleekness without creating a harsh, overly tight appearance that damages your edges. The styles below represent the most versatile, chic, and achievable weave ponytail options for straight hair, each offering its own distinct vibe while maintaining that clean, polished aesthetic.
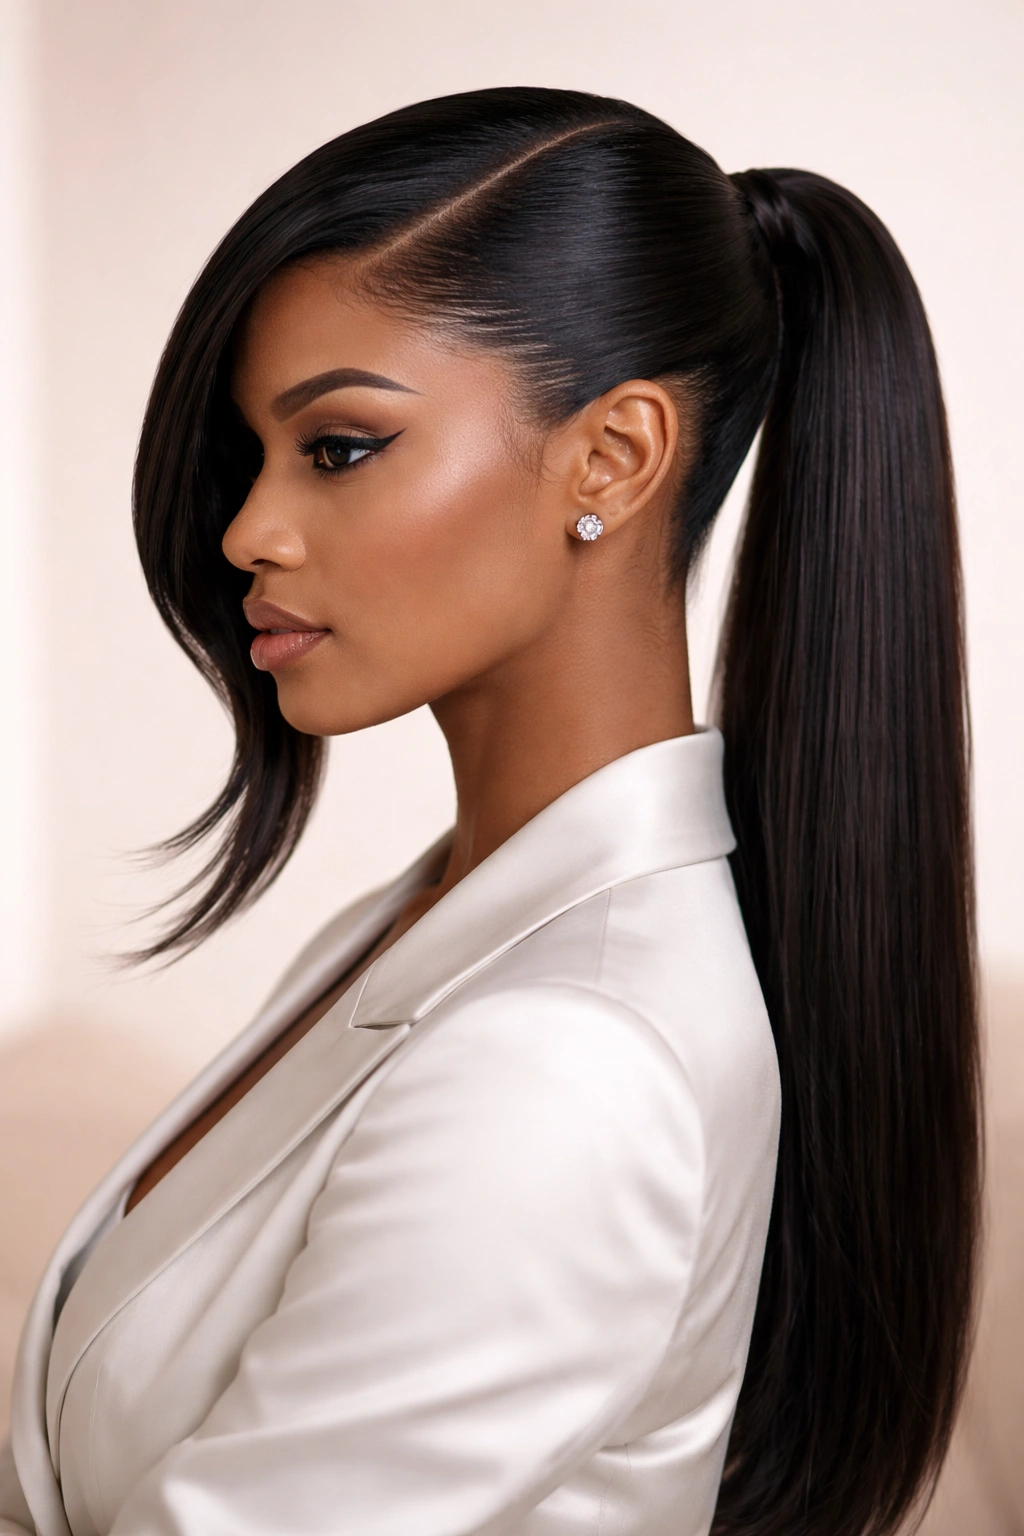
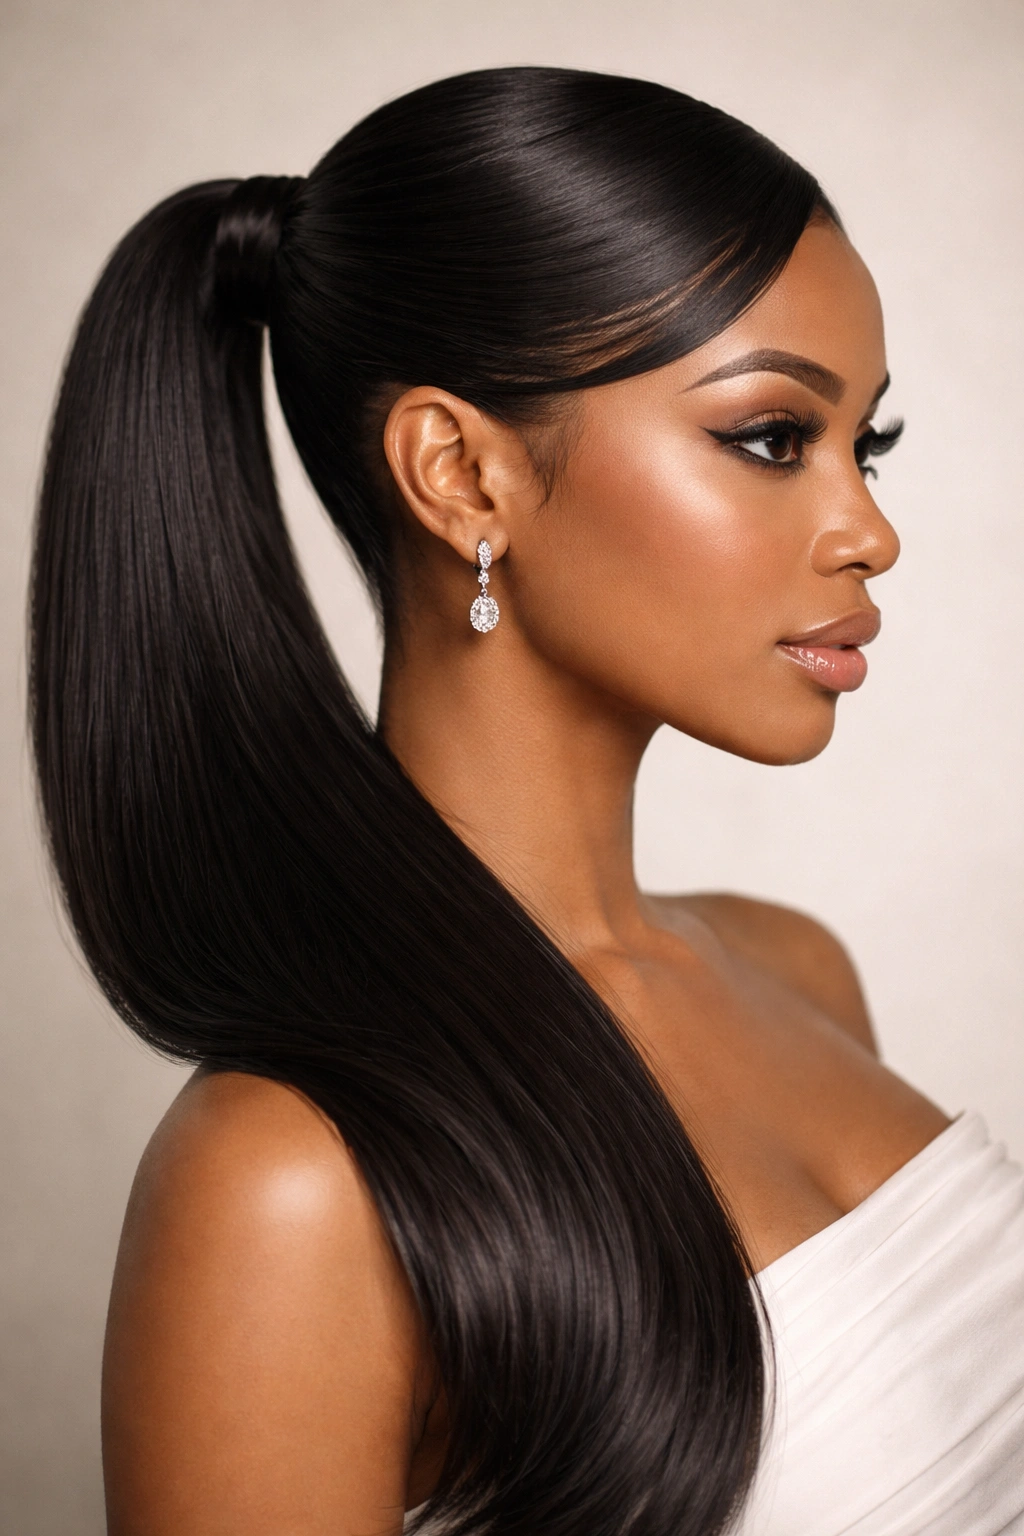
1. Classic High Weave Ponytail
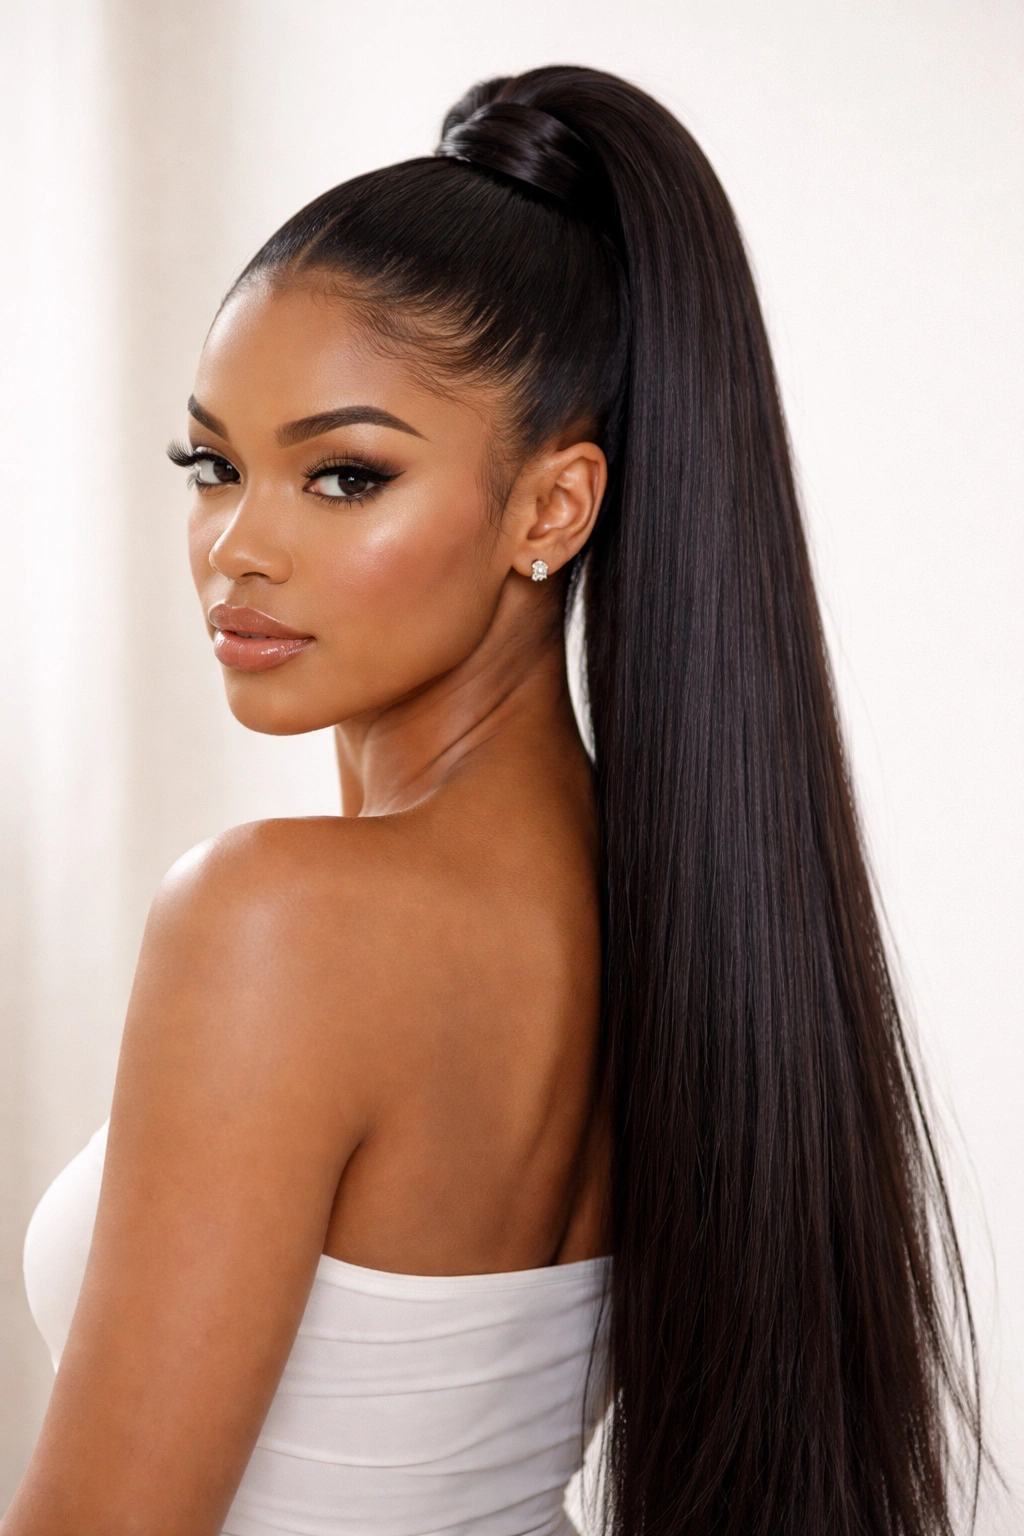
The foundation of all sleek ponytail styling, the classic high weave ponytail sits at the crown and demands precision in how you secure it. This isn’t just a basic pony—it’s a statement of intention. When executed perfectly on straight hair with quality weave, it creates an elongated line from the crown down the center of the back, naturally lifting the face and creating a sense of elegance that works in nearly any professional or formal setting. The key is achieving that ultra-smooth finish without any flyaways or bumps that break the sleekness.
How to Build the Base
The foundation determines everything about how polished your finished style will look. Start by parting your hair down the center from your forehead to the nape of your neck—this creates visual symmetry and balance. Section out the portions you’ll be gathering into the ponytail by creating a horseshoe shape around your crown, clipping away the sides and front pieces that will frame your face. This isolation makes it easier to control the hair you’re actually gathering and prevents accidentally pulling in sections that should stay loose.
Essential Styling Details
- Apply a lightweight smoothing cream or gel to your edges and hairline before gathering—this keeps any baby hairs in place and maintains the polished look throughout the day
- Use a fine-tooth comb or soft brush to smooth hair as you gather it, working from your parting straight back toward your gathering point
- Secure with a clear elastic or silk-covered elastic that won’t snag the weave
- Wrap a small section of weave around the base of the ponytail to conceal the elastic completely and create a finished, intentional appearance
- Finish with a light hairspray designed for edges to keep everything locked in place without creating crunchiness
This timeless style works beautifully for job interviews, formal dinners, presentations, and any situation where you want to project confidence and attention to detail.
2. Sleek Low Weave Ponytail at the Nape
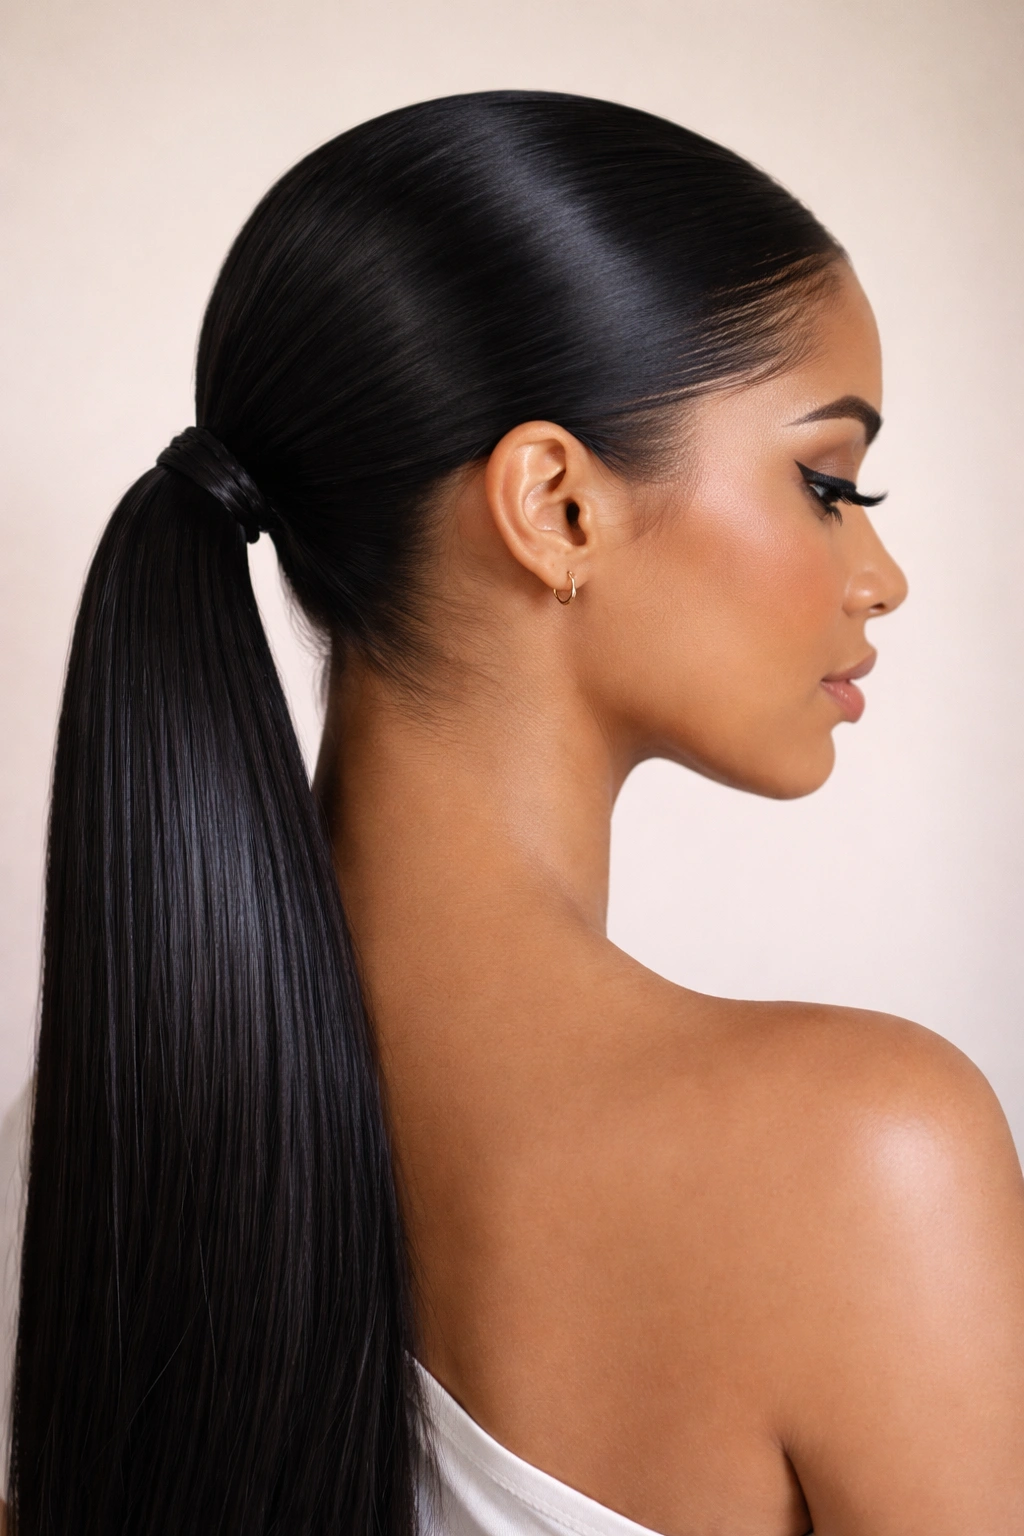
Moving the ponytail down to the nape of your neck completely transforms the energy and sophistication of the style. A low weave ponytail feels more relaxed and modern while maintaining the sleekness that straight hair and quality weave make possible. This positioning flatters most face shapes, elongates the neck, and creates a slightly softer silhouette than a high ponytail. It’s the goto style when you want to look polished without appearing overly formal or severe.
Why Low Placement Works Better for Some
The lower position distributes visual weight differently than a high pony, creating balance for round or square face shapes that might feel overwhelmed by a crown-positioned style. For straight hair with weave, the lower placement also allows the full length of the ponytail to showcase the sleekness and shine of quality extensions. The nape placement feels inherently more relaxed—it’s a statement of understated elegance rather than high-impact formality.
Step-by-Step Technique
- Create a clean part where you want it (center, side, or deep side)
- Gather the hair into a low ponytail positioned roughly 2 inches above the nape of your neck
- Use a smoothing cream on your hairline and brush everything back and down with a soft-bristle brush for maximum sleekness
- Secure with a matching elastic and wrap the base with a small weave section
- For added polish, flatten any bumps with a fine-tooth comb and smooth flyaways with edge control cream
- Finish with lightweight hairspray that won’t weigh the ponytail down
This style pairs beautifully with a deep side part, facial framing pieces, or sleek ear-exposing styling.
3. Weave High Ponytail with Center Part and Bang Framing
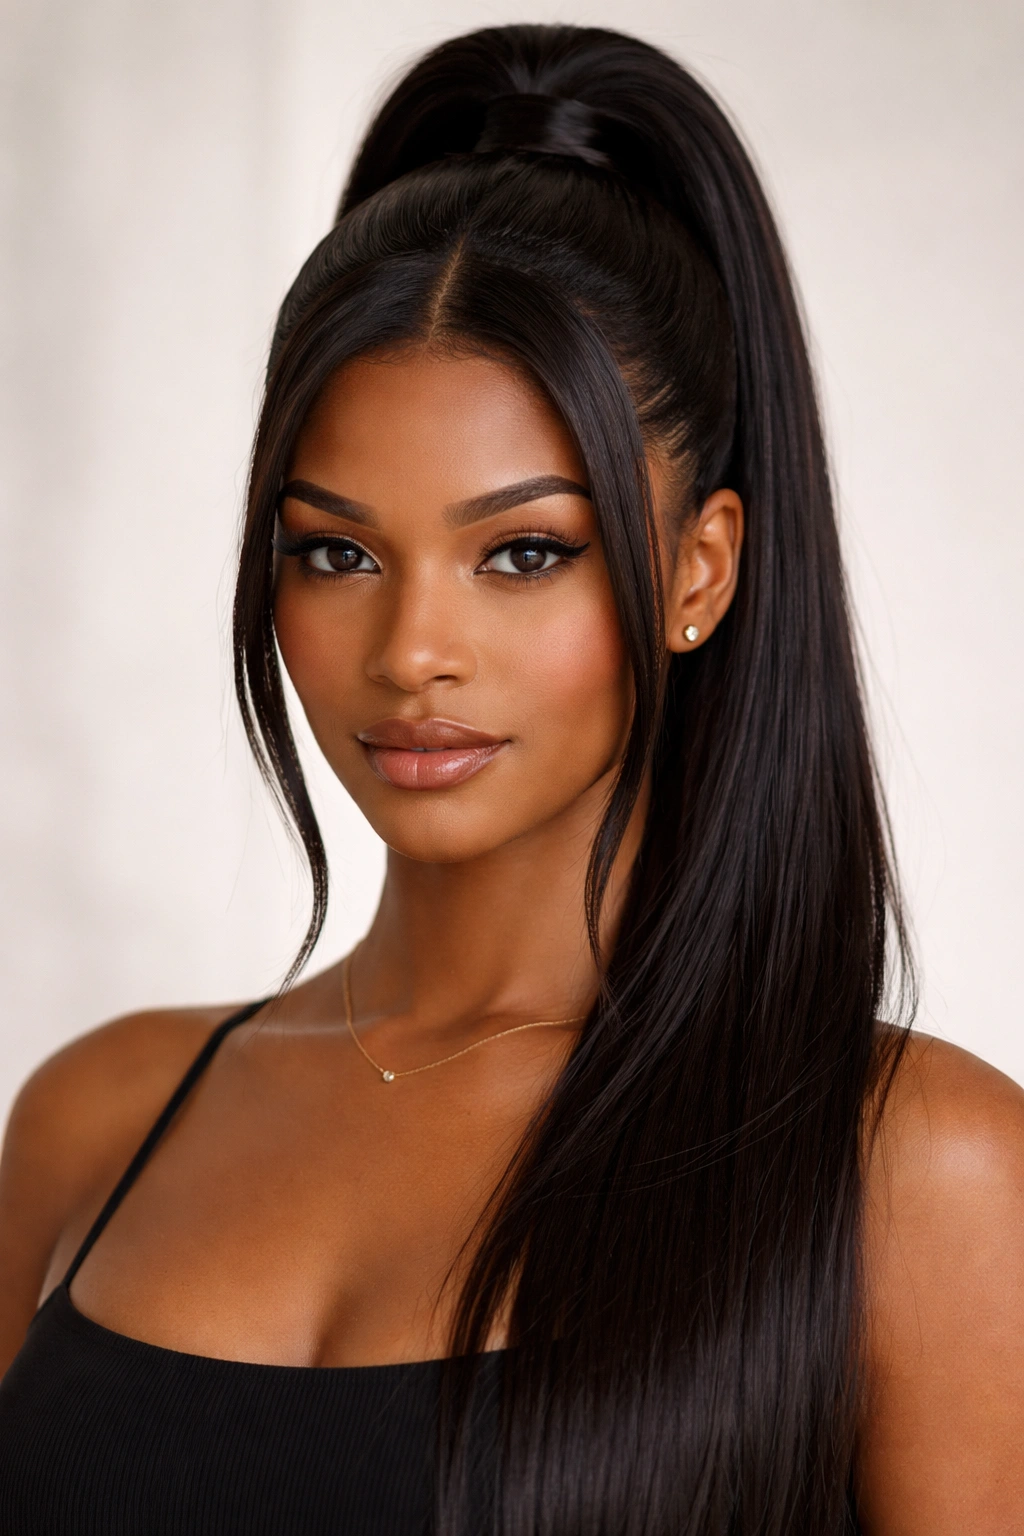
This style combines the lift and formality of a high ponytail with subtle facial framing that keeps it from feeling too severe. The center part creates symmetry, while carefully positioned pieces at the front soften the overall appearance. It’s the perfect balance between polished and wearable—structured enough for professional settings yet approachable enough for daily wear. For straight hair, this style really showcases how quality weave maintains sleekness while allowing for intentional, face-framing pieces.
Creating the Perfect Frame
The framing pieces make or break this style. Rather than pulling everything back tightly, you’re leaving 1-2 sections on each side of your face that fall forward naturally. These pieces should start at your temples and be roughly 1-2 inches wide, creating a soft edge around your face while the majority of your hair stays pulled back sleekly. The contrast between the pulled-back ponytail and the soft framing creates visual interest without sacrificing polish.
Application and Finishing
- Part your hair down the center from your hairline to the crown
- Identify your framing sections (one on each side starting at the temple)
- Gather the remaining hair into a high ponytail at the crown, excluding your framing pieces
- Apply smoothing cream to the center part and brush everything back except the framing pieces
- Secure the ponytail and wrap the base with weave
- Style your framing pieces by curling them slightly away from your face with a flat iron or smoothing them straight depending on your preference
- Lock everything in place with lightweight hairspray
This style works exceptionally well for rectangular or long face shapes and adds softness while maintaining sophistication.
4. Sleek Side-Swept Weave Ponytail
The side-swept ponytail is where a deep side part meets strategic positioning to create a style that feels naturally elegant rather than obviously styled. This particular look works beautifully on straight hair because the sleekness emphasizes the clean lines of the deep part and the smooth sweep toward the back. It’s more interesting than a standard center-part ponytail while maintaining the same level of polish and professionalism. The asymmetry of the deep part and side ponytail positioning creates visual drama in a subtle, sophisticated way.
Mastering the Deep Part
A deep side part is the foundation of this style’s success. Your part should start at one temple and extend straight back, creating a clear division where roughly 60-70% of your hair falls on one side and 30-40% on the other. The side with more volume creates an interesting shape, while the sleeker side shows off your face and neck. For straight weave, this part needs to be razor-sharp—use a fine-tooth comb and smoothing cream to create definition that lasts throughout the day.
Positioning and Technique
- Create your deep side part, applying edge control to both sides for definition
- Gather your hair into a ponytail positioned slightly off-center, toward the back of the head (not quite at the crown, not quite at the nape—somewhere in between)
- Use a soft-bristle brush to sweep all hair smoothly toward the ponytail, maintaining the sleekness of your part
- Secure with a silk-covered elastic and wrap the base with weave
- Smooth any bumps with a fine-tooth comb and finish with a flexible hairspray that won’t create crunchiness
- Optional: curl the ends of your ponytail slightly away from your face for added dimension
This style looks stunning with a sleek ponytail hung straight, or with the ends curled for textural contrast against the sleekness.
5. Weave Bubble Ponytail with Sleek Roots
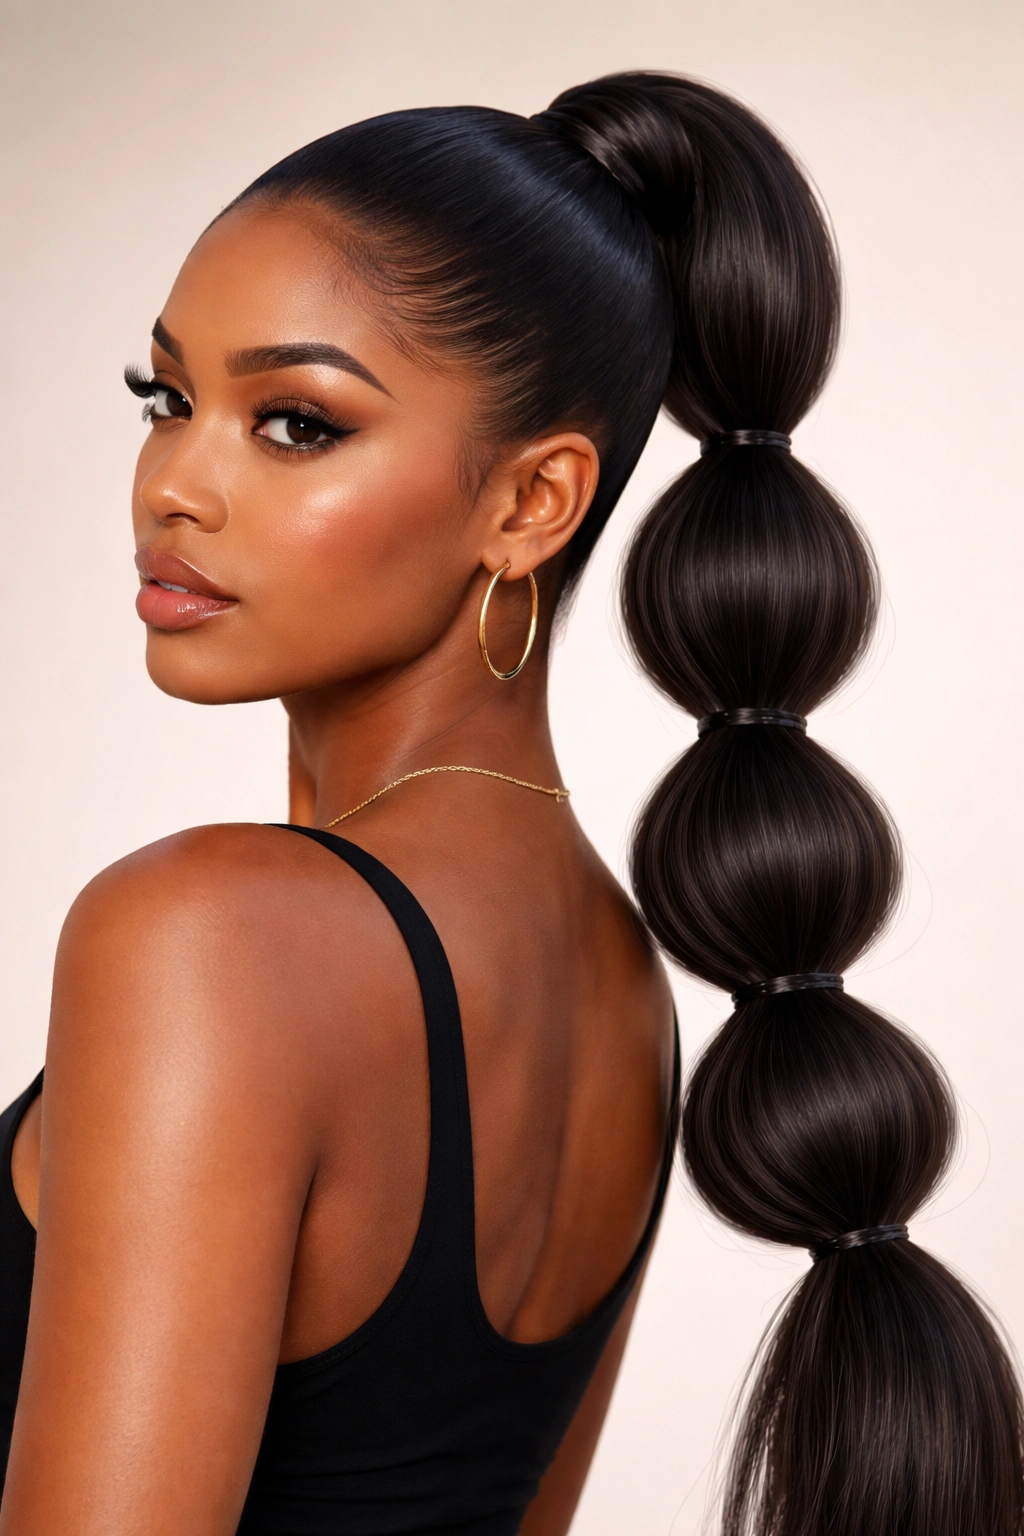
The bubble ponytail combines the polish of a sleek root area with intentional texture and shape lower down, creating a style that feels modern and playful while maintaining sophistication. Multiple elastics section off distinct “bubbles” down the length of the ponytail, creating visual interest without sacrificing the sleekness that straight hair with weave makes possible. This style works beautifully for people who want structure and definition but find a completely straight ponytail a bit boring.
Understanding the Bubble Effect
Each bubble is created by gathering the ponytail with an elastic, then gently teasing or fluffing out the hair between elastics to create rounded sections. The key is keeping the root area (closest to your head) perfectly smooth and sleek while allowing controlled volume in each bubble. For straight weave, you’ll use your fingers and a light texturizing spray to create the bubble effect—you’re not creating curls or waves, but rather adding controlled dimension and shape.
Creating Defined Bubbles
- Start with a sleek, smooth ponytail gathered high on your crown (follow the technique from the classic high ponytail above)
- Place your first elastic about 2-3 inches down from the base of the ponytail
- Place subsequent elastics every 2-3 inches down the length of the ponytail (typically 3-4 bubbles total)
- Between each elastic, gently pull the ponytail sections outward and slightly downward to create a rounded bubble shape
- Use a light texturizing spray to help hold the bubbles in place
- Smooth the root area with edge control cream and hairspray to maintain sleekness where it meets your head
- The elastics themselves should be hidden inside each bubble for a polished appearance
This style is perfect for casual dates, creative workplaces, or situations where you want to show personality alongside professionalism.
6. Sleek Weave Ponytail with Braided Wrap
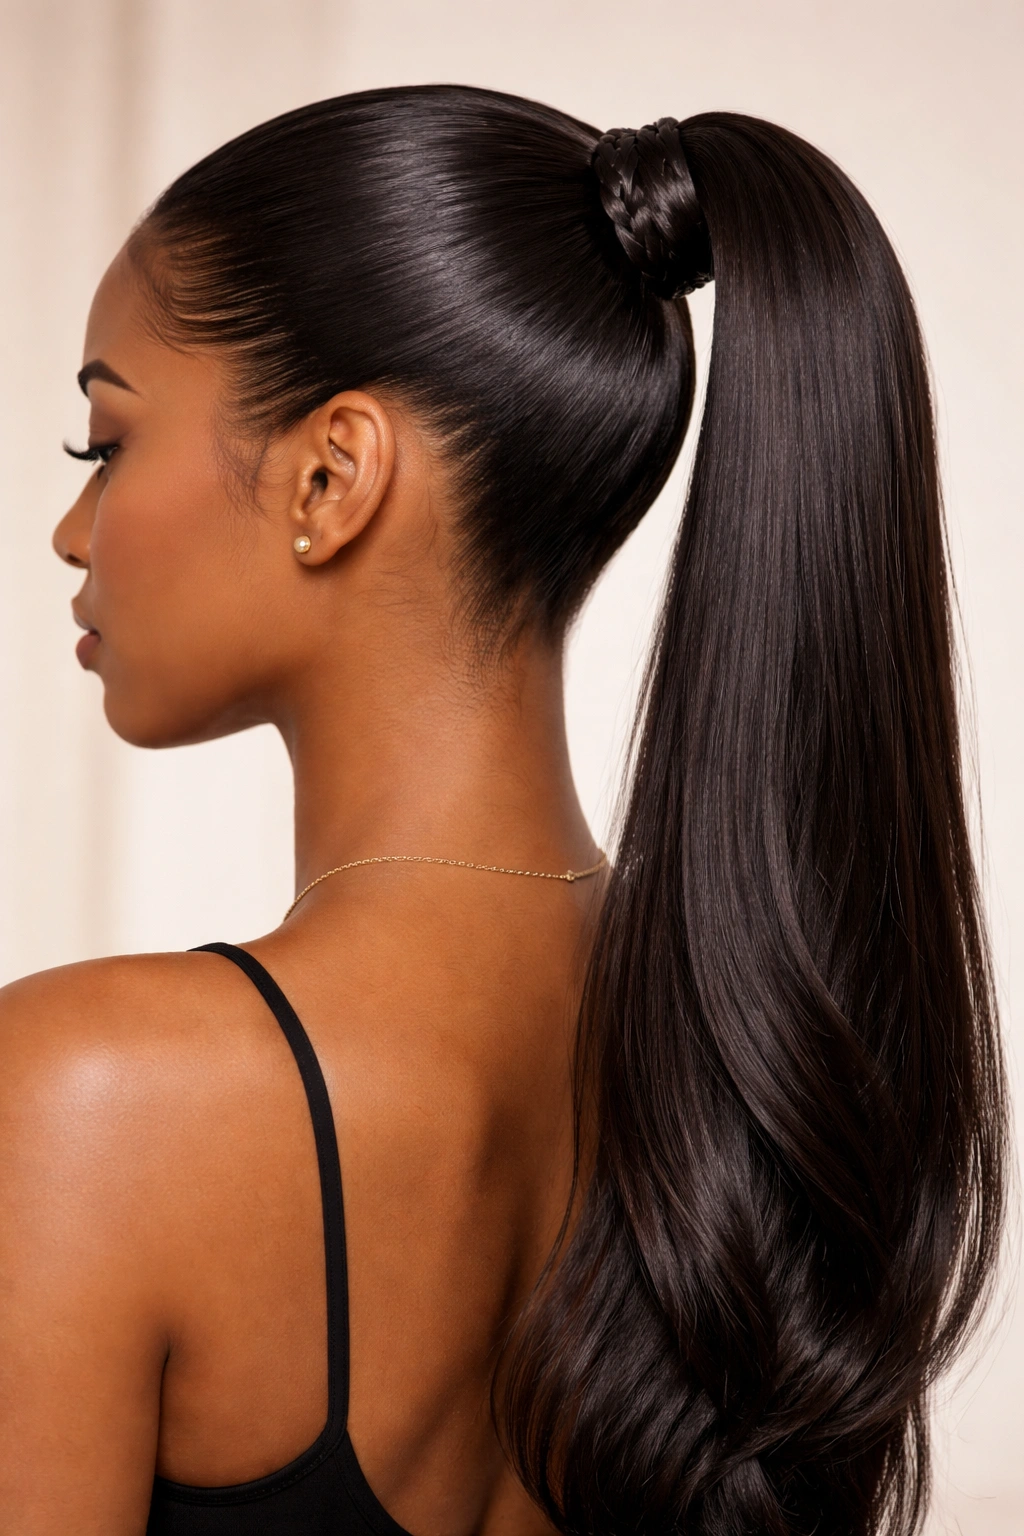
Adding a thin braid around the base of your ponytail transforms it from simple to intentional, creating visual interest and a handcrafted appearance that speaks to someone who knows hairstyling. The braid serves both functional and aesthetic purposes—it hides the elastic while adding a decorative element that elevates the entire style. For straight hair, a sleek ponytail with a braid wrap looks refined and modern, suggesting effortless sophistication rather than trying too hard.
Choosing Your Braid Style
You have three main options: a three-strand braid, a two-strand twist, or a more intricate pattern like a four-strand braid if you’re feeling adventurous. For sleek straight hair, a clean, tight three-strand braid or two-strand twist typically looks best—you want definition without creating a busy, overly textured appearance. A single thin braid (roughly ½-inch wide) is more elegant than multiple braids or an extremely thick braid that overwhelms the base of the ponytail.
Creating the Wrap
- Gather your hair into a sleek ponytail using your preferred position (high, low, or side-swept)
- Secure with a clear elastic
- Take a small section of hair from the ponytail itself (roughly the width of a pencil)
- Braid this section tightly, working your way around the base of the ponytail to cover the elastic
- Secure the end of the braid with a small clear elastic or bobby pin hidden under the braid
- Smooth the main ponytail with a soft brush and lightweight hairspray
- Optional: add a small hair accessory (clip, cuff, or decorative elastic) at the base where the braid ends
This technique works beautifully in professional settings and adds a personalized touch that makes your style memorable.
7. Sleek High Weave Ponytail with Elongated Straight Length
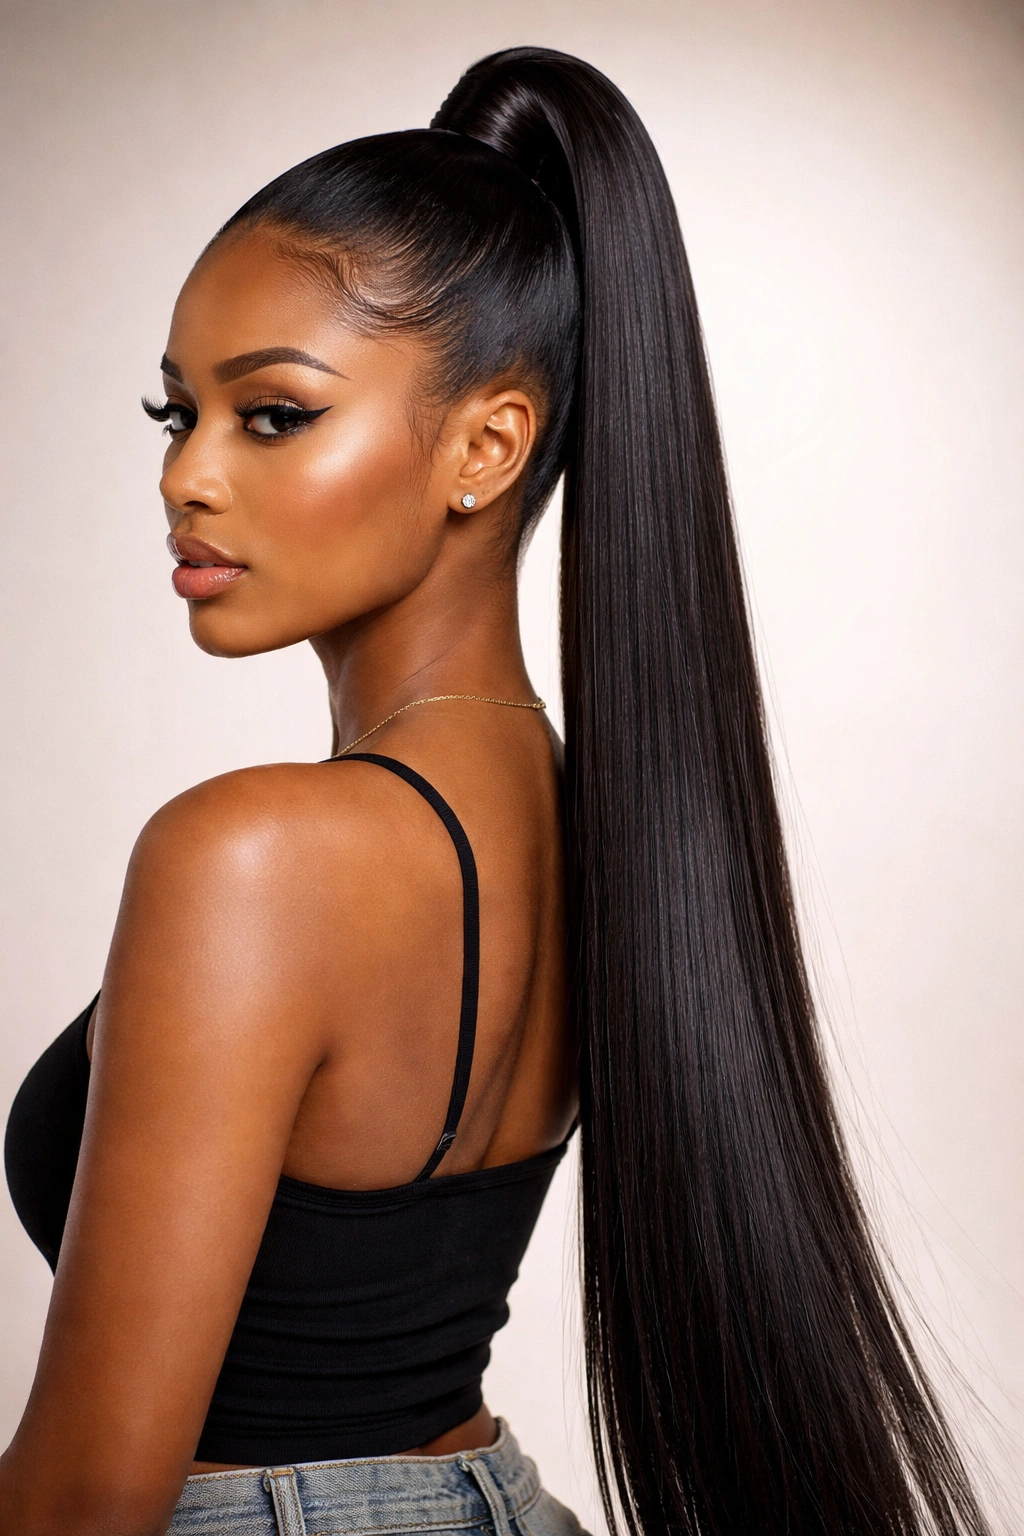
This style prioritizes length and sleekness above all else, creating an elegant line that draws the eye downward and elongates the entire silhouette. By gathering the hair high on the crown and allowing the full length of the weave to hang straight with no texture or movement, you create a style that feels almost architectural in its precision. For straight hair paired with quality weave, this becomes a statement piece—simple, but undeniably striking through its commitment to sleekness and length.
Maximizing Visual Length
The positioning of this ponytail is critical. Gathered at the very crown (higher than your natural hairline), it creates maximum length and visual impact. The hair should be smoothed so completely that it catches light and creates shine, emphasizing the sleek texture. This style works best on people with longer hair or longer weave extensions—if your ponytail is shorter than shoulder-length, the proportions might feel off. The goal is creating an elongated vertical line that’s visually striking through its simplicity.
Execution for Maximum Impact
- Create a clean part (center, side, or zig-zag depending on preference)
- Gather hair at the crown, positioning the ponytail as high as possible without creating discomfort or pulling your edges too tightly
- Use a smoothing cream on all hair going into the ponytail, working through with a soft-bristle brush
- Secure with a silk-covered elastic that matches your hair color
- Wrap the base with a thin section of weave to conceal the elastic
- Use a fine-tooth comb to smooth any bumps or texture in the gathered area
- Apply a lightweight smoothing spray designed for shine (not heavy oils that create greasiness)
- Ensure the ponytail hangs perfectly straight by occasionally smoothing it down with your hands throughout the day
This style is perfect for formal events, professional settings, or anytime you want to project understated elegance and confidence.
8. Weave Sleek Side Ponytail with Curved Part
Taking the side ponytail concept and adding a curved part instead of the traditional straight part creates a more contemporary, fashion-forward aesthetic. The curved part draws a subtle arc from your temple back toward your ponytail, creating movement and visual interest in the parting itself. This is the option when you want to move beyond classic styling but maintain the sleekness and sophistication that straight hair and quality weave make possible. The curved part creates an optical illusion of lift and dimension without any textural work.
Creating a Curved Part
A curved part requires a bit more precision than a straight part, but the payoff in terms of visual interest is substantial. Using a fine-tooth comb, you’ll create a curved line that arcs backward from your temple, following the natural contour of your head. The curve should be deliberate but not exaggerated—you’re not creating a dramatic spiral, but rather a subtle arc that feels modern and intentional. Practice with a fine-tooth comb and a styling cream before you commit to the final styling.
Building the Style
- Start with damp or lightly product-coated hair for maximum control
- Use a fine-tooth comb to create your curved part, starting at one temple and arcing back
- Apply smoothing cream to both sides of the part for definition
- Gather your hair into a side ponytail (positioned off-center toward the back of your head)
- Brush all hair toward the ponytail smoothly, maintaining the curve of your part
- Secure with a silk elastic and wrap the base with weave
- Use edge control cream along your part to maintain definition throughout the day
- Finish with a flexible hold hairspray that won’t crack or flake
This style photographs beautifully and works well for creative professionals, fashion-conscious individuals, or situations where you want your styling to be noticed and appreciated.
9. Sleek Weave Ponytail with Geometric Wrap Detail
For the styling enthusiast who wants to take things a step further, a geometric wrap detail involves using multiple thin sections to create shapes or patterns around the base of the ponytail. This might be a diamond pattern, a zigzag, or a combination of crisscrossing sections that create visual complexity without textural complication. The wrap remains sleek and smooth while adding graphic interest that makes your ponytail feel intentional and designed. This is advanced styling, but absolutely achievable with practice and patience.
Understanding Geometric Wrapping
A geometric wrap uses sections of hair wrapped or twisted around the base of the ponytail to create visual patterns. Unlike the braided wrap that circles around once, a geometric wrap might feature multiple sections crossing over or under each other, creating layers and visual depth. The sections are typically very thin (roughly the width of a thin pencil) so they read as graphic lines rather than chunky texture. Everything remains sleek because you’re working with straight sections rather than creating texture—the visual interest comes from placement and pattern rather than texture or movement.
Basic Geometric Wrap Technique
- Secure your base ponytail sleekly at your chosen position (high, low, or side)
- Divide out 4-6 very thin sections from the ponytail itself (roughly pencil-width each)
- Take the first section and wrap it horizontally around the base of the ponytail, securing it underneath
- Take the second section and wrap it diagonally, crossing over or under the first section depending on your design
- Continue this pattern, alternating direction (horizontal, diagonal left, diagonal right) until you’ve created your desired pattern
- Secure all loose ends with bobby pins hidden under the wraps
- Maintain sleekness throughout by smoothing each section as you work and using light hairspray
- Optional: add a decorative element (cuff, clip, or jeweled piece) at the center of your geometric pattern
This style is perfect for special events, creative professionals, or any situation where your styling should be a conversation starter.
10. Sleek Weave Super Slicked Back High Ponytail
The most extreme version of the sleek ponytail, the super slicked back style uses maximum hold products and precision technique to create a perfectly smooth appearance from your hairline all the way back to the ponytail. Every hair is in place, every flyaway is controlled, and the overall effect is undeniably striking. This is the style when you want to make a bold statement through commitment to sleekness and polish—it works beautifully for performances, red-carpet events, or any situation where your hair should be a showcase of technical skill and precision. This requires strong-hold products and isn’t for everyday wear, but it’s absolutely stunning when executed correctly.
Product Selection for Super Slicked
This style requires different products than your typical styling. You’ll need a heavy-hold edge control cream (not a light gel), a smoothing cream that provides hold without flaking, and a strong-hold hairspray designed for high-impact looks. The key is using enough product to achieve complete control without creating visible product buildup or greasiness. Work with one product category at a time, fully integrating each before adding the next. Test your product combination beforehand to ensure it provides the hold you need while looking clean and polished rather than heavily product-coated.
Execution and Maintenance
- Start with clean, dry hair (damp hair won’t hold the sleekness as effectively)
- Apply your smoothing cream throughout your hair, working through with a soft-bristle brush
- Create your preferred parting (center, side, or no visible part)
- Use a fine-tooth comb dipped in edge control cream to smooth every section of hair back toward your gathering point
- Work methodically, smoothing small sections at a time to ensure complete coverage
- Gather into a high ponytail at the crown, using a fine-tooth comb to smooth everything back as you gather
- Secure with a silk elastic and wrap the base with weave
- Use a bobby pin or clip to help secure any pieces that want to slip forward
- Finish with a strong-hold hairspray, applying it in light mists rather than heavy sprays to avoid flaking
- Throughout the day, smooth flyaways with a fine-tooth comb and touch up edges with additional edge control as needed
This style demands maintenance but delivers unparalleled sleekness and polish when done correctly.
Final Thoughts
Sleek weave ponytails offer an incredible range of styling possibilities for straight hair, from timeless classics to contemporary fashion-forward designs. The common thread running through every style above is the emphasis on smoothness, polish, and precision—qualities that straight hair naturally possesses and that quality weave extensions amplify dramatically. Whether you’re choosing a simple high ponytail or attempting geometric wrap details, your success depends on three factors: investing in quality products that provide hold without crunchiness, taking time to smooth and refine your work as you build each style, and understanding that maintenance throughout the day keeps everything looking fresh and intentional.
The styles that feel most effortless typically require the most technical precision to achieve. A classic high ponytail works so well precisely because it demands perfect smoothness and clean technique—there’s nowhere to hide imperfections. Once you’ve mastered the fundamentals, however, you have the foundation to explore more creative variations. Each style above builds on basic techniques of parting, gathering, smoothing, and securing, with different combinations creating completely different aesthetics. The beauty of this range is that you can adapt based on occasion, mood, or the statement you want to make on any given day. Start with the classics, practice your technique relentlessly, and gradually work toward more complex styles as your confidence and skill increase.