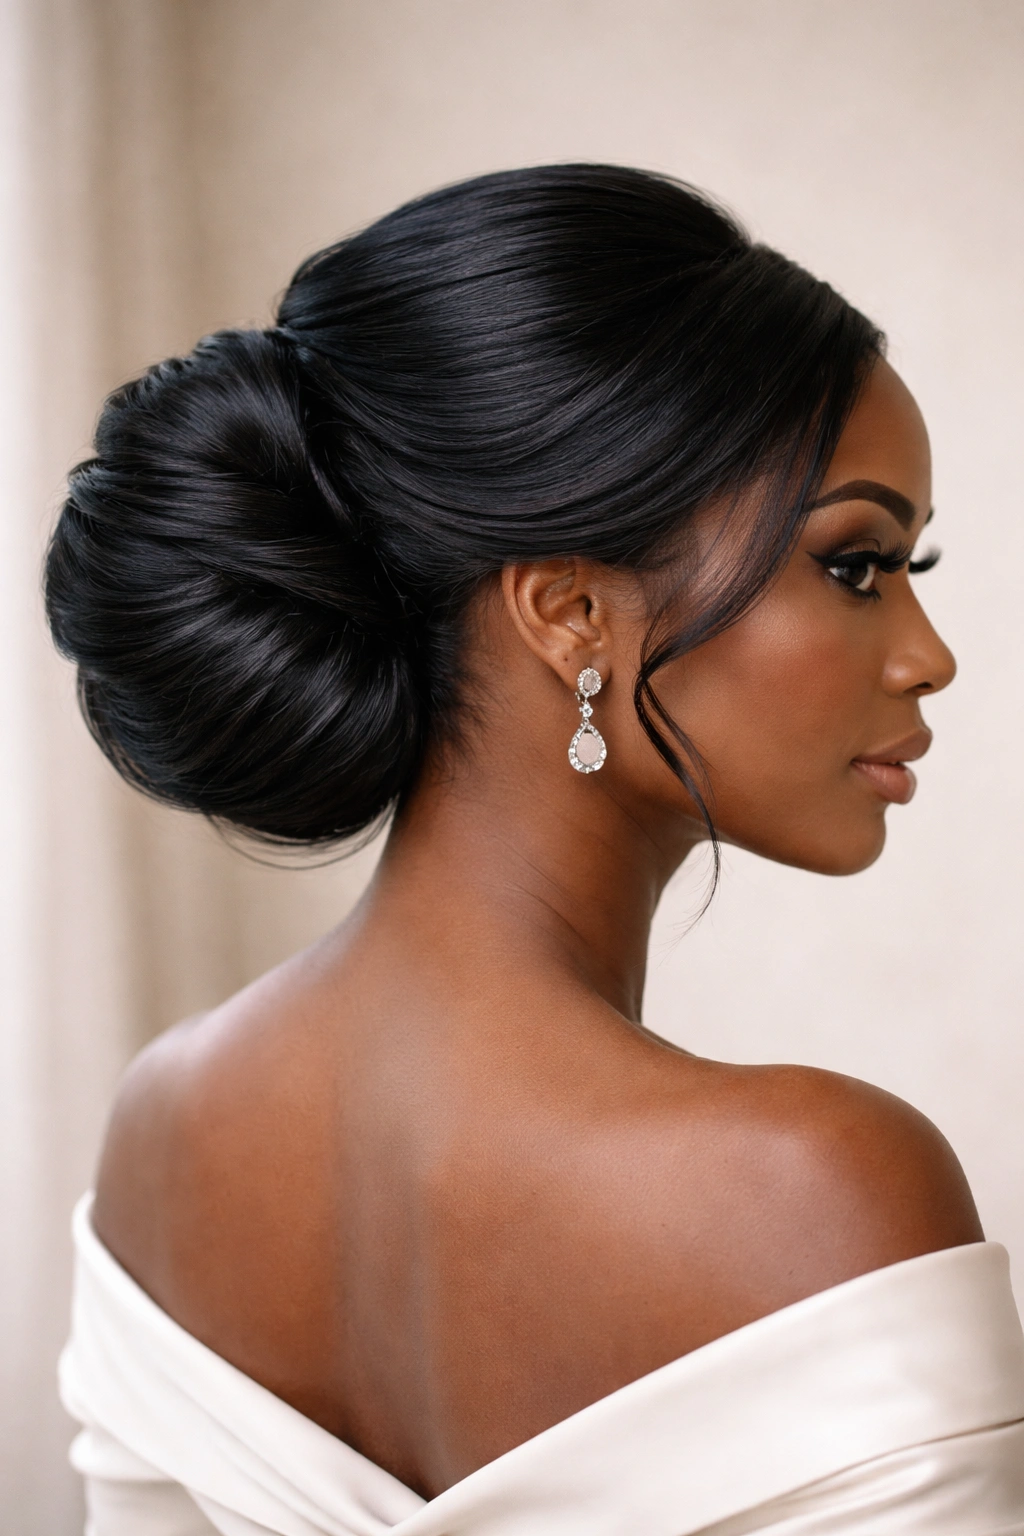
Low ponytail buns have become a go-to protective style for Black women who want elegance without the commitment of a full updo, or the daily manipulation of loose styles. The beauty of these styles lies in their versatility — they work for natural hair, relaxed hair, textured extensions, and everything in between. A well-executed low bun sits just at the nape of the neck, creating an elongated, sophisticated silhouette while keeping the bulk of your hair secured and protected from environmental stress and daily friction.
What makes low ponytail buns particularly valuable isn’t just their polished appearance — though they absolutely deliver that. These styles offer genuine practical benefits. They reduce daily manipulation and tension on your hairline, which matters tremendously for long-term hair health and retention. A low bun keeps your ends tucked away from your clothing, your shoulders, and elements like humidity that can cause frizz and breakage. They’re also remarkably practical for work, professional settings, and situations where you need your hair completely secured but still want to look intentional and put-together.
The styles in this collection showcase different techniques and visual effects you can achieve depending on your hair texture, length, and the amount of time you want to invest. Some of these buns take five minutes flat once you understand the technique. Others are more elaborate and designed for special occasions or weekend styling. All of them translate beautifully across different hair types and can be customized with accessories, edge styling, and your own creative touches.
1. Classic Low Bun with Sleek Edges
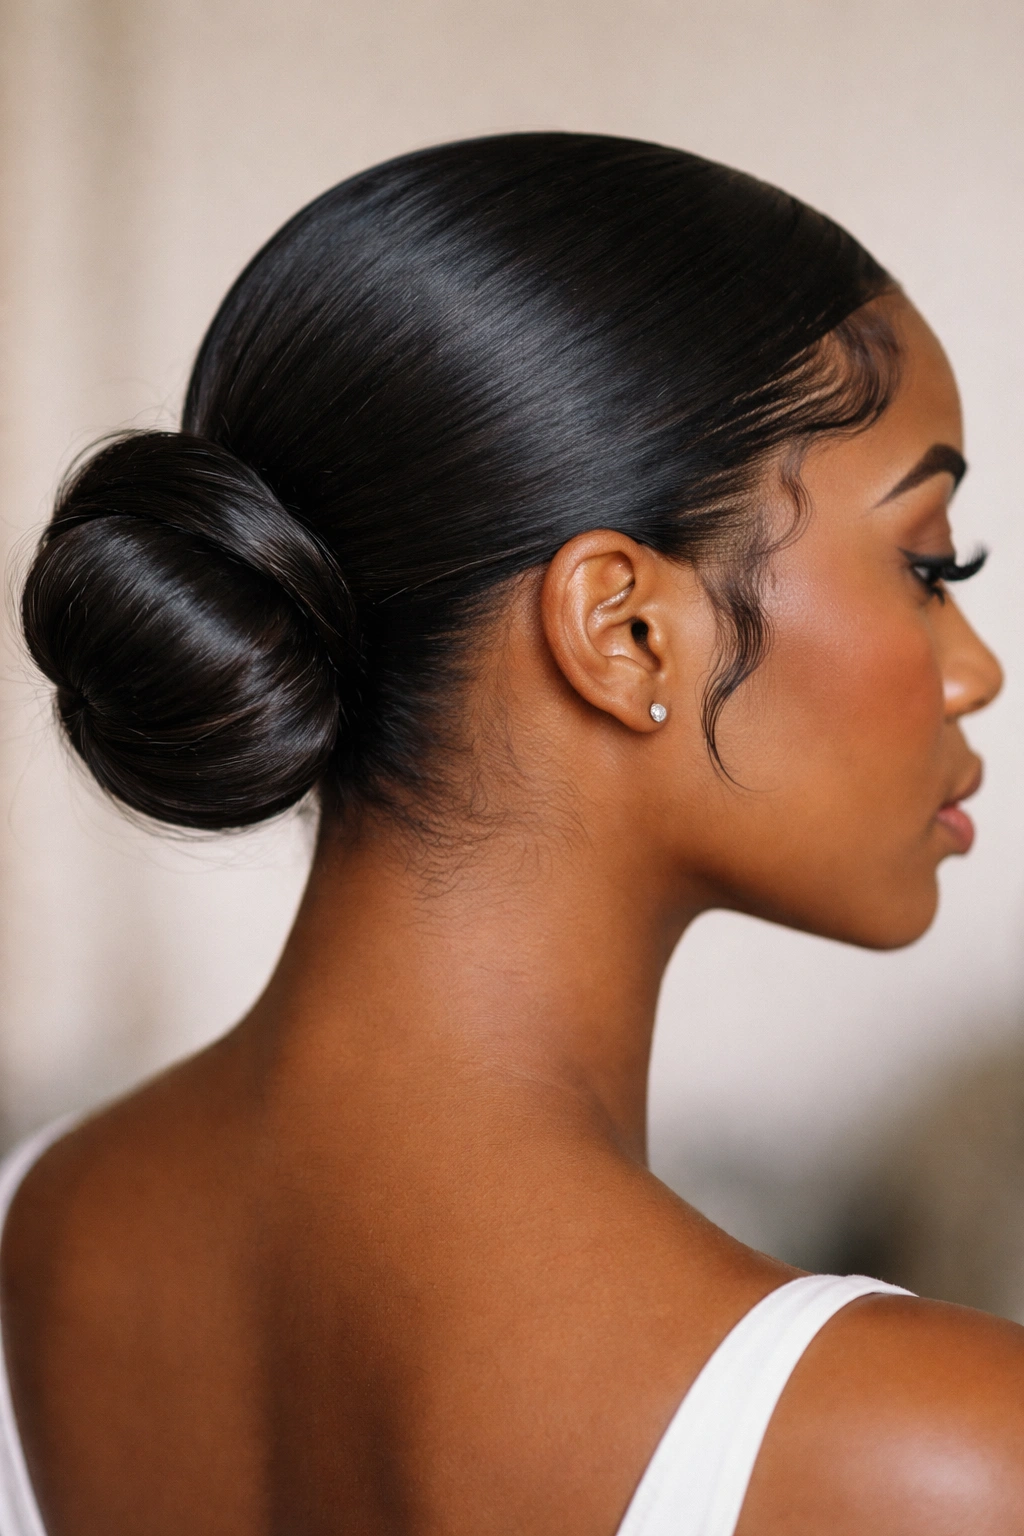
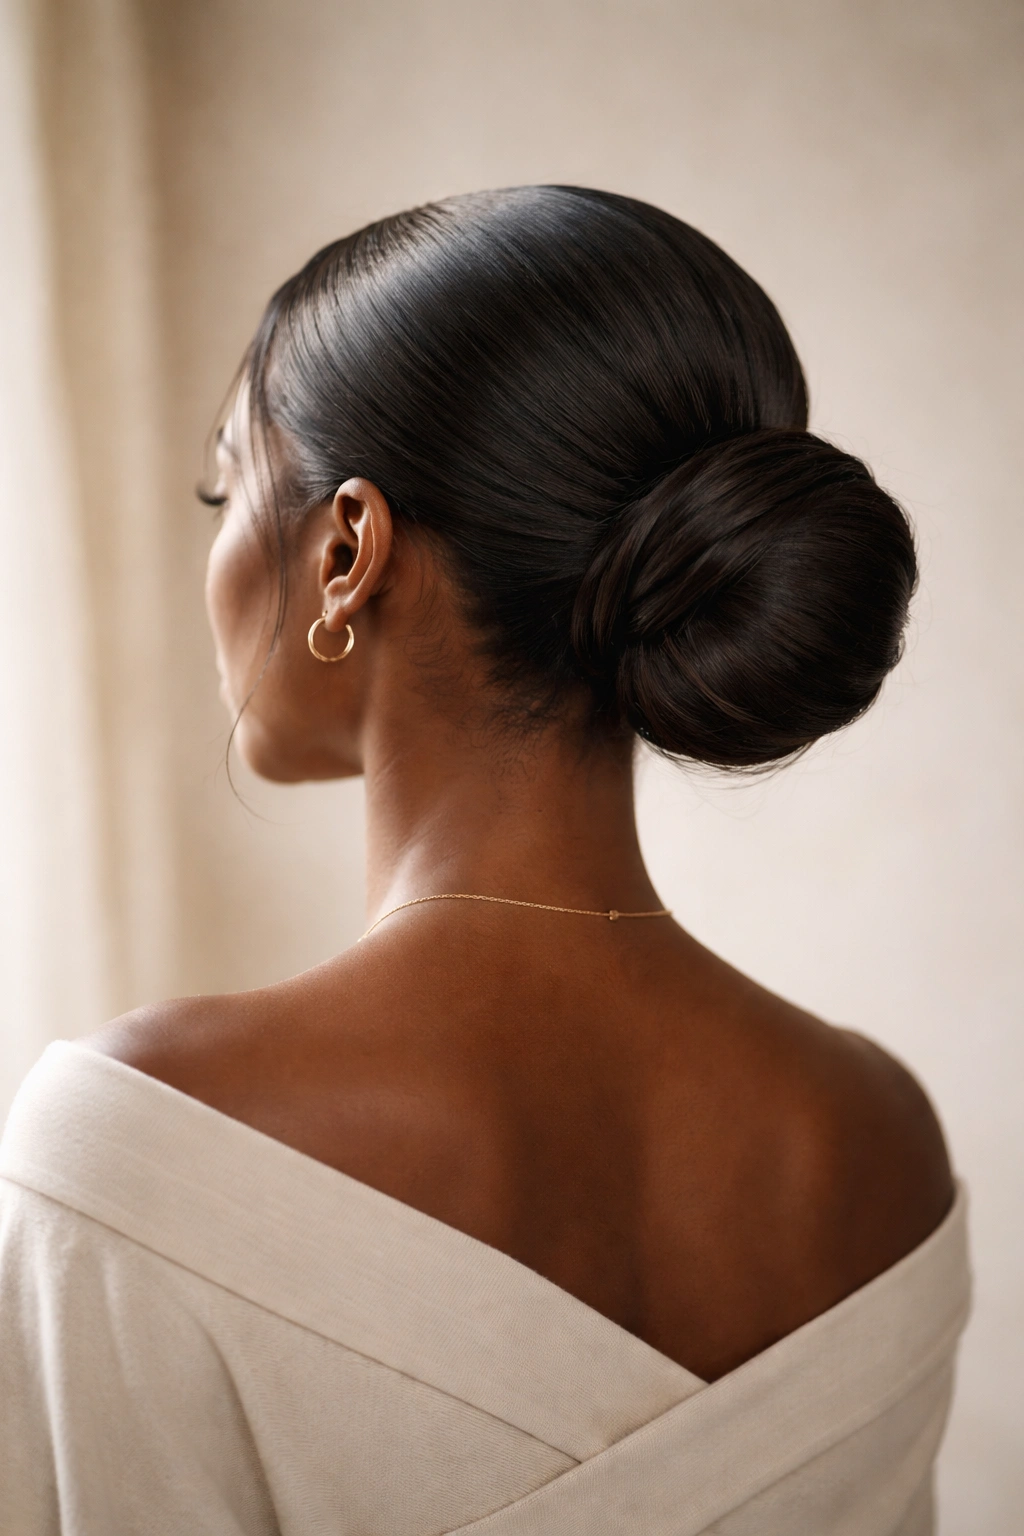
This is the foundational low bun — the one you can wear to an interview, a dinner date, a work meeting, or just about anywhere and feel completely polished. The style combines a smooth, gathered ponytail at the nape of your neck with a wrapped or pinned bun shape, finished with impeccably laid edges that frame your face.
Why This Style Works
The classic low bun reads as professional and intentional without feeling overdone or trying too hard. It works beautifully with natural hair, braids, locs, or relaxed hair. The smooth edges add a refined touch that elevates your entire appearance, and the style keeps all your hair secured and protected without creating excessive tension on your hairline. It’s the kind of bun you can sleep in (loosened slightly) and wake up with still looking decent, which makes it genuinely practical for busy weeks.
How to Create This Look
- Start with clean, moisturized hair and apply a lightweight leave-in conditioner or smoothing serum to reduce frizz
- Use a fine-tooth comb or brush to gather your hair into a low ponytail at the nape of your neck, slightly off-center if you prefer an asymmetrical feel
- Smooth any flyaways with edge control — use just enough to define without creating a stiff, product-heavy appearance
- Wrap a small section of hair (or use a silk hair tie) around the base of the ponytail to conceal the elastic and create definition
- Twist or coil the ponytail into a bun shape and secure with bobby pins tucked underneath
- Lay your edges using a soft toothbrush or edge brush with your preferred edge control product, creating a neat frame around your face and hairline
Pro tip: Wrap the base section tightly enough that it stays put all day, but not so tight that it creates tension on your hairline. The goal is a polished finish, not a painful headache by noon.
2. Twisted Low Bun with Wrap
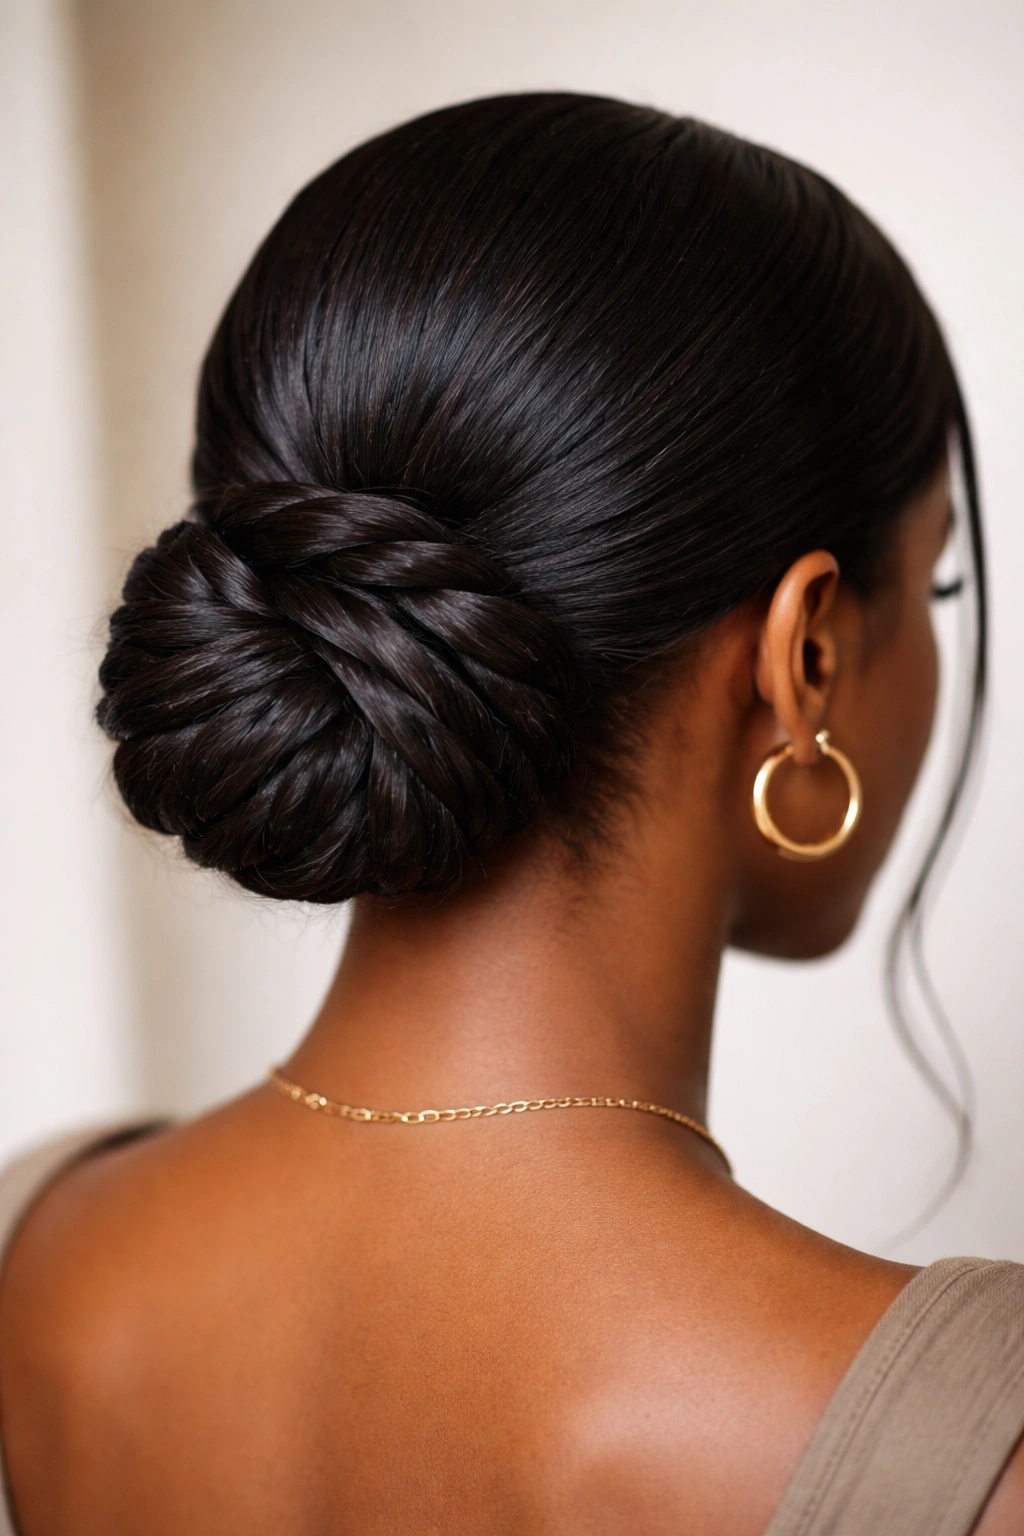
The twisted variation adds visual interest and texture to your bun while maintaining that same professional, elegant aesthetic. This style involves creating two-strand twists that wrap around your low ponytail, creating defined spiral patterns that catch light beautifully and add dimension.
What Makes This Version Stand Out
Two-strand twists create a texture and movement that a simple wrapped bun doesn’t quite have. The style works particularly well if you have medium to longer hair with some natural texture or curl pattern, because the twists amplify and showcase that texture. It also takes slightly longer than a basic bun, which makes it feel more intentional and special — perfect for days when you want to look like you put real thought into your styling.
Steps to Achieve the Twisted Look
- Gather your hair into a low ponytail and secure it gently with a silk hair tie
- Divide the ponytail into two thick sections
- Twist each section tightly, using a moisturizing cream or oil to keep the twists defined and frizz-free
- Wrap one twisted section around the base of the ponytail, securing with bobby pins as you go
- Wrap the second twisted section in the opposite direction around the bun, creating a spiral effect
- Smooth any loose pieces and secure the entire bun with additional bobby pins tucked underneath
- Apply edge control to lay your edges neatly
Worth knowing: The tighter you twist each section before wrapping, the more defined and longer-lasting your bun will be. Loose twists look softer but may unravel by evening.
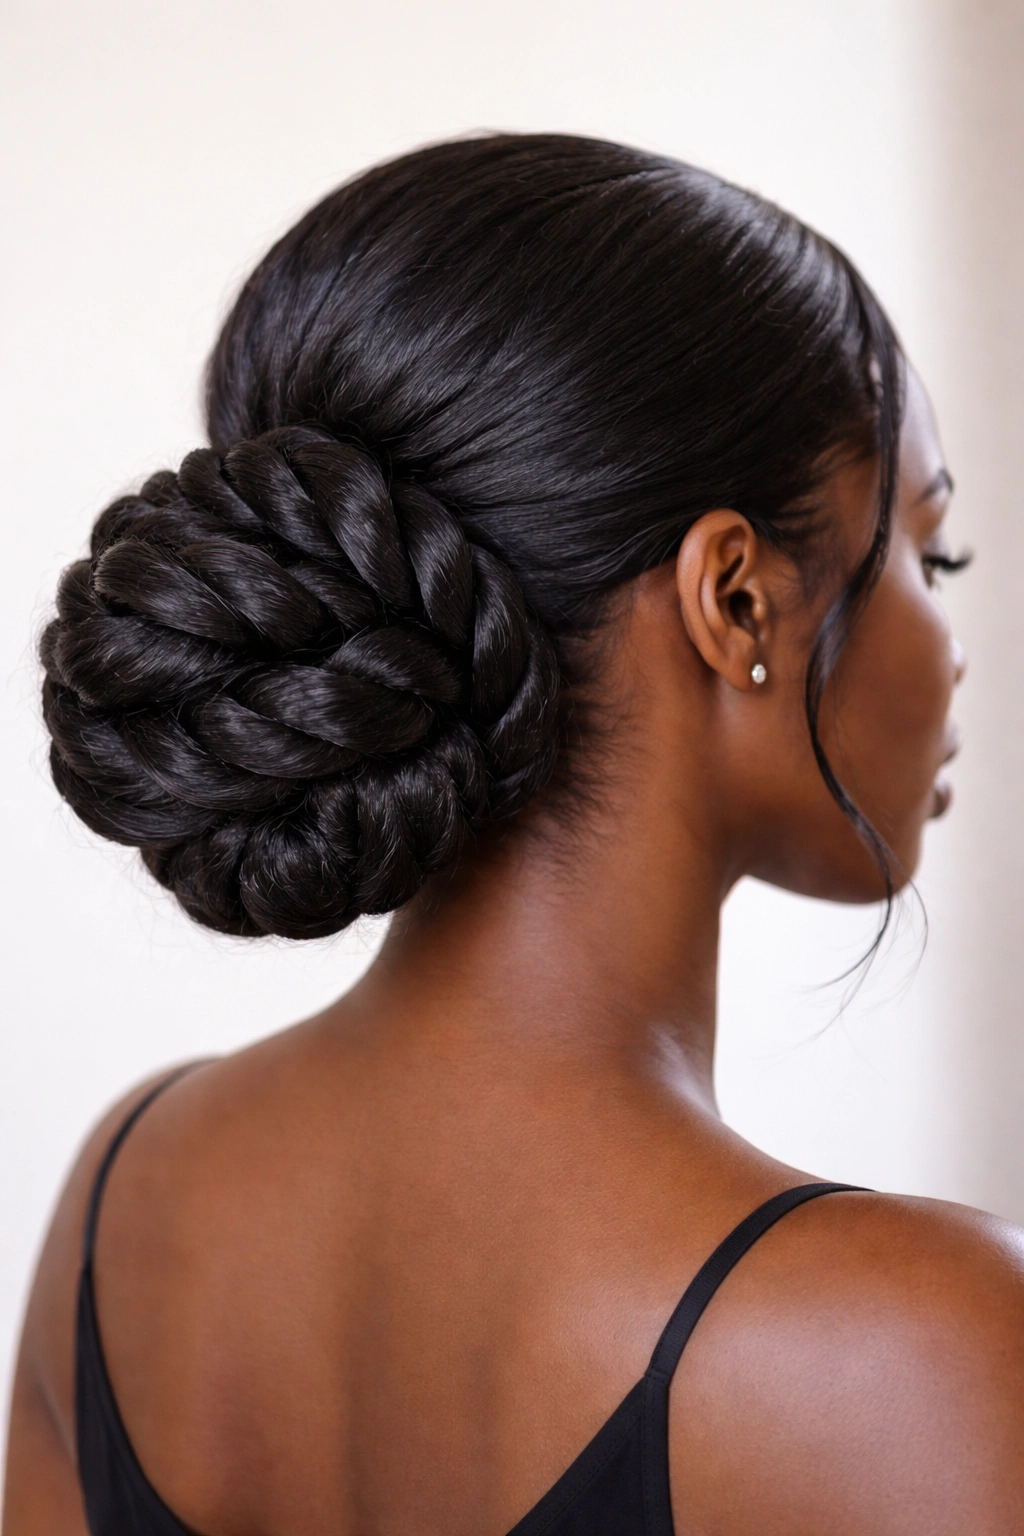
3. Braided Low Bun with Defined Pattern

Braids integrated into your low bun add a sophisticated, intricate element that immediately elevates the style from everyday to special occasion. This version involves braiding sections of your gathered ponytail before forming the bun, creating visible texture and pattern detail.
Why the Braided Detail Matters
Braids create structure and visual interest that simple gathered or twisted buns don’t offer. The braided sections hold their shape beautifully throughout the day and tend to last longer without coming loose. This style is particularly striking on camera — if you’re going to a wedding, photo shoot, or event where you know there will be pictures, the braided detail photographs gorgeously. It also works well if you have finer hair that might not hold a twist as securely, because braids lock your hair together more firmly.
Building Your Braided Low Bun
- Create your low ponytail and divide it into 2-4 sections depending on how elaborate you want the braid pattern to be
- Braid each section starting from the base of the ponytail, using a basic three-strand braid or a more intricate pattern if you’re confident with braiding
- Secure each braid with a small clear elastic at the end
- Coil the braided sections around the base of your ponytail, layering and overlapping them to create a bun shape
- Secure everything with bobby pins, tucking them underneath so they’re not visible
- Tuck any loose ends of the braids underneath the bun shape and pin securely
Insider note: If your braids come out slightly loose or uneven, that’s actually a feature with this style — the texture and movement look more organic and less rigidly perfect.
4. Smooth Low Bun with Side Part
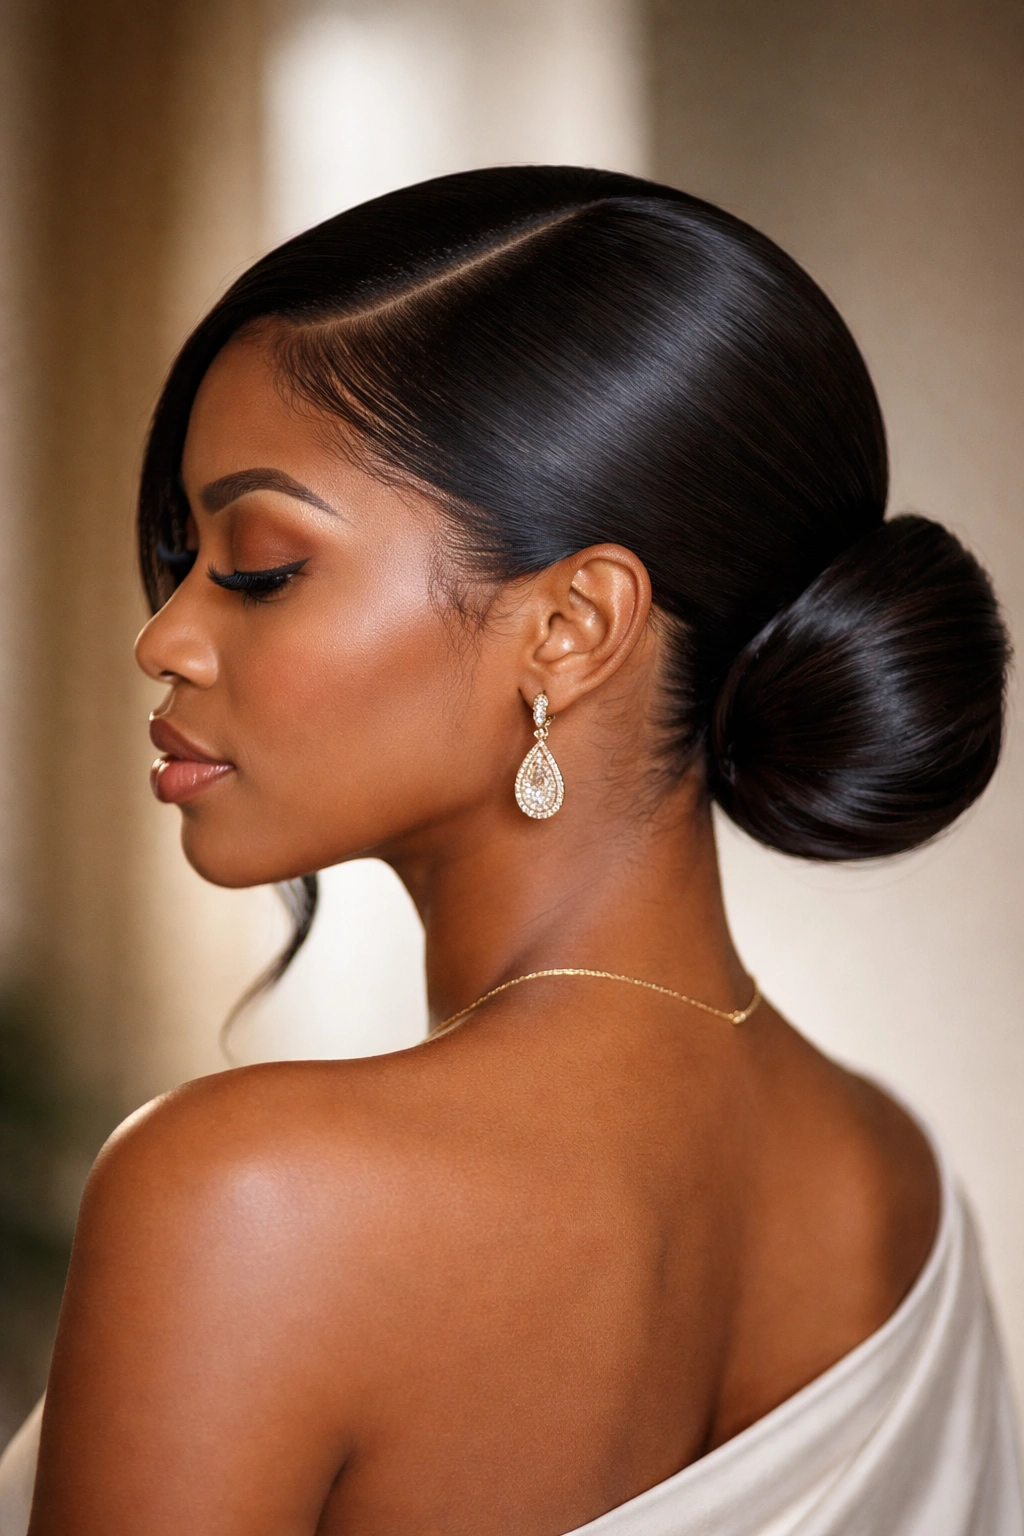
This variation shifts the visual focal point of your bun by creating a pronounced side part before gathering your hair. The side part creates an asymmetrical, modern look while the sleek, smooth bun maintains classic sophistication.
How the Side Part Changes the Game
A deep side part adds visual interest and can subtly flatter your face shape in different ways than a center-parted bun does. It’s a small change that makes a noticeable difference in how polished and intentional the style feels. If you have a naturally off-center hair pattern or baby hair distribution, working with your natural part (rather than forcing a center part) also reduces tension and breakage. The asymmetrical vibe also photographs beautifully from certain angles, which matters if this is a style you’ll be wearing for events or photos.
Creating the Side-Parted Version
- Create a deep side part — really exaggerate it more than your everyday part, because the more dramatic the part, the more intentional the style looks
- Smooth the hair on both sides of the part using a brush and smoothing serum, working any slight waves or texture into a sleek finish
- Gather all your hair at the nape of your neck into a low ponytail, keeping the part visible from the front and sides
- Smooth the ponytail smooth before creating your bun — you want zero frizz or flyaways for this particularly polished version
- Wrap and pin your bun securely, using edge control to lay edges neatly
- Step back and check that your side part is still clearly visible and defined when you look at the style from the front
Pro tip: Use a fine-tooth comb to redefine your part right before you gather your ponytail, and apply a tiny bit of edge control along the part line to keep it crisp throughout the day.
5. Textured Low Bun with Puff Detail
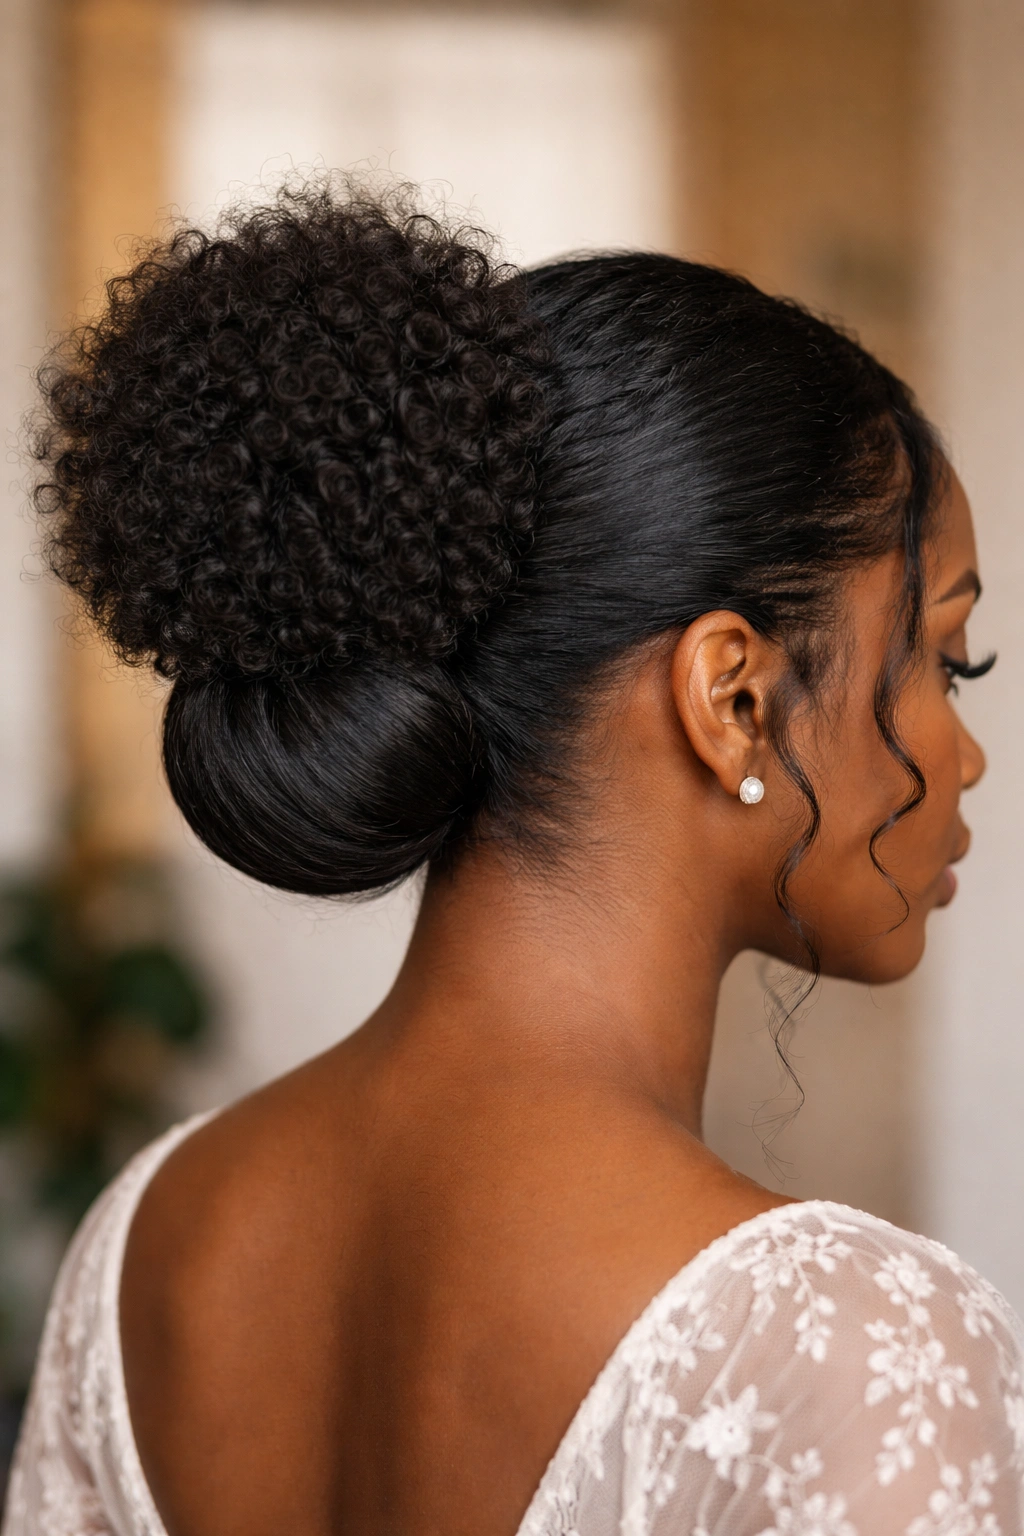
This style celebrates natural texture by intentionally incorporating a small puff or crown detail at the top of your bun. It’s playful, modern, and particularly beautiful if you have natural hair with curl or coil pattern that you want to showcase rather than completely smooth down.
Why Texture Works in a Professional Bun
Incorporating intentional texture into an otherwise neat bun allows you to celebrate your natural hair while still maintaining a polished, put-together aesthetic. The puff detail adds dimension and visual interest, making the bun feel more modern and less severe. This style is especially powerful as a statement of hair acceptance and celebration — you’re not fighting your texture or trying to achieve a totally smooth look. Instead, you’re using your natural hair texture as a design element.
Building the Textured Bun
- Gather most of your hair into a low ponytail at the nape of your neck, but leave a section at the crown loose — roughly 2-3 inches in diameter
- Fluff that loose crown section gently with your fingers or a wide-tooth comb to create a defined puff shape
- Secure the low ponytail with a soft hair tie
- Wrap the base of the ponytail with a section of hair or a decorative wrap
- Create your low bun by twisting or coiling the ponytail, and secure with bobby pins
- Adjust the crown puff so it sits nicely above the bun, adding volume and definition
Worth knowing: The puff works best if you have textured or curly hair, but you can also create a small bun puff on top of your larger bun if you have straighter hair — think of it as a small secondary bun detail.
6. Two-Strand Twist Low Bun
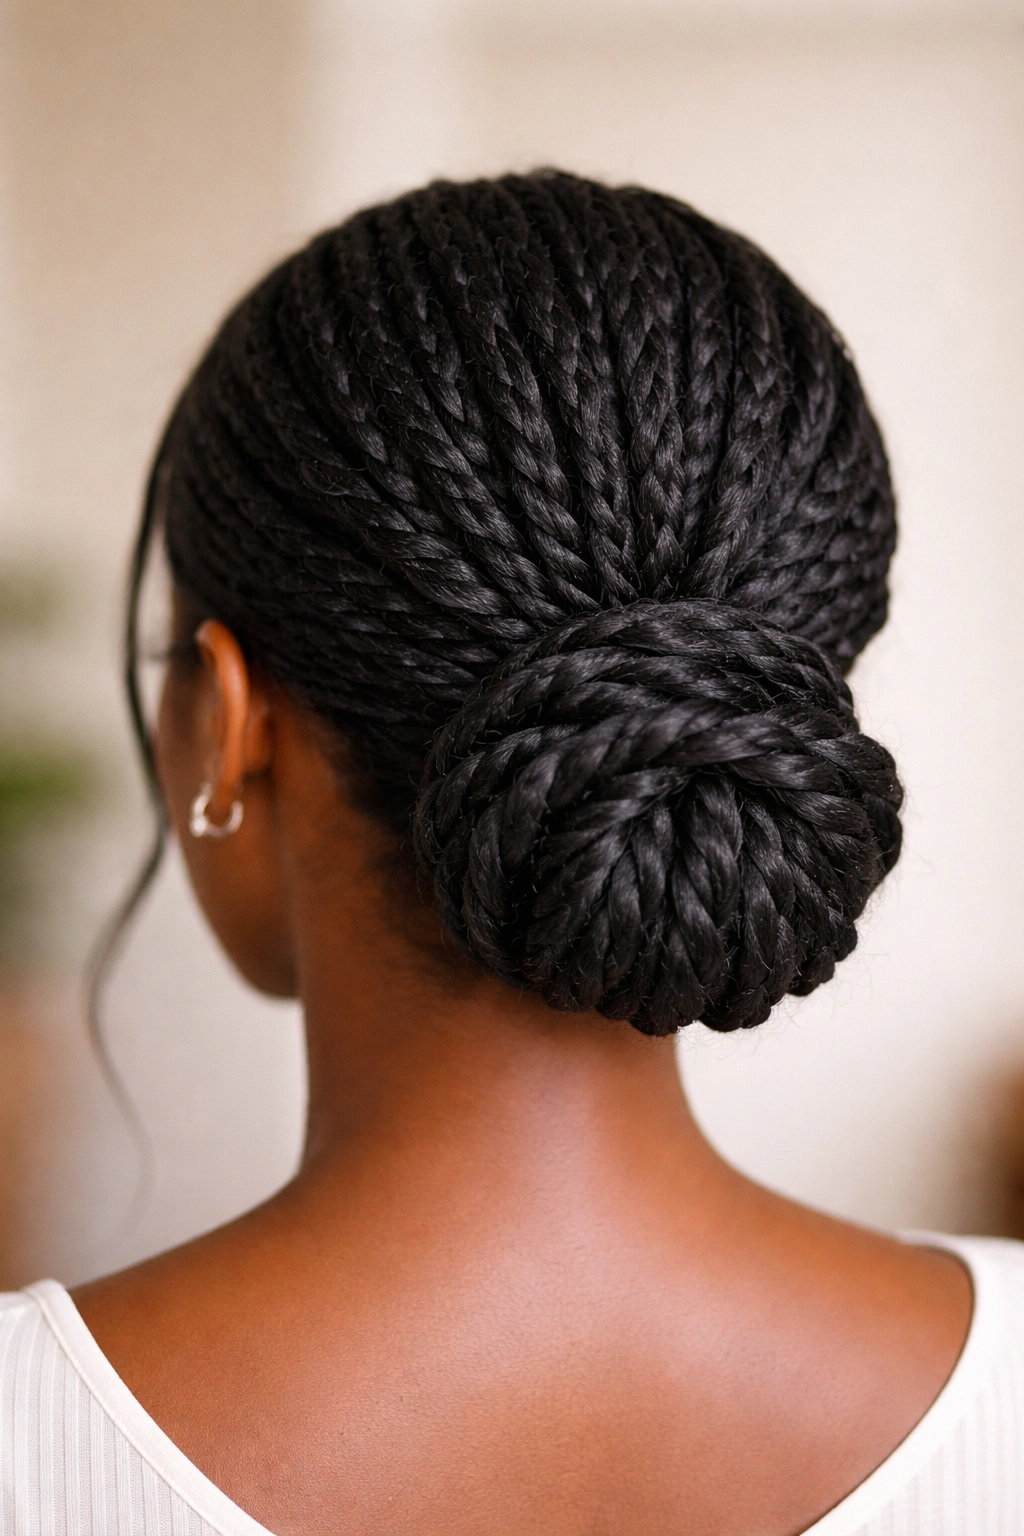
Two-strand twists throughout your entire low bun create a unified, textured look that’s visually striking from every angle. Unlike the wrapped variation, here the twists are the primary structural element creating the entire bun shape.
What Makes Twist Buns Distinctive
Twist buns hold their shape beautifully and last longer throughout the day or overnight than some other bun styles. They work wonderfully on natural hair and also photograph incredibly well because the twisted texture catches light and creates visual depth. The style also takes advantage of your natural texture or curl pattern rather than fighting against it, which means less heat damage and less manipulation overall. If you’re trying to maintain healthy hair while keeping it neat and protected, twists are genuinely one of the best options.
How to Execute the Full-Twist Bun
- Gather your hair into a low ponytail using a soft, silk-lined hair tie that minimizes breakage
- Apply a light twisting cream or moisturizing product throughout the ponytail
- Divide your ponytail into 3-6 sections — the more sections you create, the more intricate your final bun will look
- Two-strand twist each section from root to tip, keeping the tension even and the twists tight enough to hold their shape
- Begin coiling your twisted sections around the base of the ponytail, layering and overlapping them
- As you coil, secure each twisted section with bobby pins tucked underneath
- Continue until all sections are wrapped and coiled into a bun shape
- Smooth any flyaways and check that everything is secure
Pro tip: Slightly damp hair holds twists better than completely dry hair, so if your twists start to lose definition, lightly mist with water and re-secure.
7. Low Bun with Protective Edge
This style prioritizes protecting your hairline and edges while creating a sophisticated, intentional look. It involves careful edge laying with premium edge control products and often incorporates a scarf or headwrap element that becomes part of the style rather than hidden.
Why Edge Protection Matters in Styling
Your hairline and edges are more delicate than your mid-shaft hair and are vulnerable to breakage from constant tension, product buildup, and manipulation. A protective bun that’s styled specifically with edge care in mind reduces tension on your hairline while still allowing you to wear a polished style. This is particularly important if you’ve experienced traction alopecia, hair loss at your hairline, or any sensitivity in that area.
Creating an Edge-Protective Low Bun
- Gather your hair into a gentle low ponytail — loose enough that you don’t feel tension on your hairline when you move your eyebrows up and down
- Use a lightweight edge control product on your edges, smoothing them gently with a soft brush
- Create a low bun with your ponytail, using bobby pins to secure
- Optional: wrap a lightweight silk or satin scarf around the front of your head, covering your edges and tucking the scarf into the bun or securing it with a decorative pin — this provides an extra protective layer and looks intentionally styled rather than utilitarian
- Apply a second light layer of edge control once the bun is complete, but focus on defining your edges rather than creating a heavy, stiff appearance
Worth knowing: Protective styling doesn’t mean your style has to look understated or boring. Add a beautiful scarf wrap, decorative pins, or geometric edge patterns to make it feel intentional and fashionable.
8. Chunky Twist Low Bun
This variation uses thicker, more pronounced twists than the traditional two-strand twist bun, creating a bolder, more textured visual effect that feels modern and fashion-forward.
Why Chunky Twists Stand Out
Thick, chunky twists create visual drama and texture that finer twists don’t quite achieve. They’re also faster to install and remove than multiple thinner twists, which is genuinely practical if you’re styling yourself. The chunky twist bun works beautifully as a statement style — it says you’re intentional about your aesthetic and not trying to blend in. It’s perfect for someone who loves texture and wants their hair to be a design element rather than just neatly put away.
Creating the Chunky Twist Effect
- Gather your hair into a low ponytail with a soft hair tie
- Divide your ponytail into 2-4 thick sections — chunky twists use fewer, thicker divisions than regular twist buns
- Apply a twisting product with hold to each section
- Two-strand twist each section, using thicker portions of hair (roughly the thickness of a pencil or wider) to create pronounced, visible twists
- Coil each twisted section around the base of your ponytail, building your bun shape from the bottom up
- Secure with bobby pins as you coil, making sure everything feels snug and sturdy
- The chunky twists should be visible and textured, not smooth or blended
Pro tip: Chunky twists hold their definition longer if you twist them fairly tightly and use a product with some hold, rather than a lightweight product that might relax throughout the day.
9. Layered Low Bun with Height
This style builds vertical dimension by creating multiple layers within your bun, so it has height and shape rather than sitting as a flat disk at the nape of your neck. It’s a more elaborate style that works beautifully for special occasions and creates a genuinely stunning silhouette.
How Layering Adds Sophistication
A layered bun has more visual interest, more depth, and photographs far more impressively than a flat bun. The elevated shape also creates an elongated line from your neck upward, which is flattering and elegant. If you have medium to long, thicker hair, a layered bun lets you showcase the volume and dimension of your hair rather than compressing everything into a tight, flat shape.
Building a Layered Bun
- Gather your hair into a low ponytail at the nape of your neck
- Divide your ponytail into 3-4 distinct sections from root to tip
- Create a small bun with the first (innermost) section, securing it close to the base of your ponytail
- Add the second section around and slightly above the first bun, creating a second layer
- Continue adding sections, each slightly higher and building outward, so your bun gets progressively larger as you move away from your scalp
- Each layer should overlap slightly with the layer below it
- Secure everything thoroughly with bobby pins, checking from the side to make sure you have the height and layered effect you want
- Finish with edge control and any final touches
Worth knowing: A layered bun requires more hair and more bobby pins than a simple bun, so make sure you have plenty of pins on hand and that your hair is long or thick enough to create distinct layers.
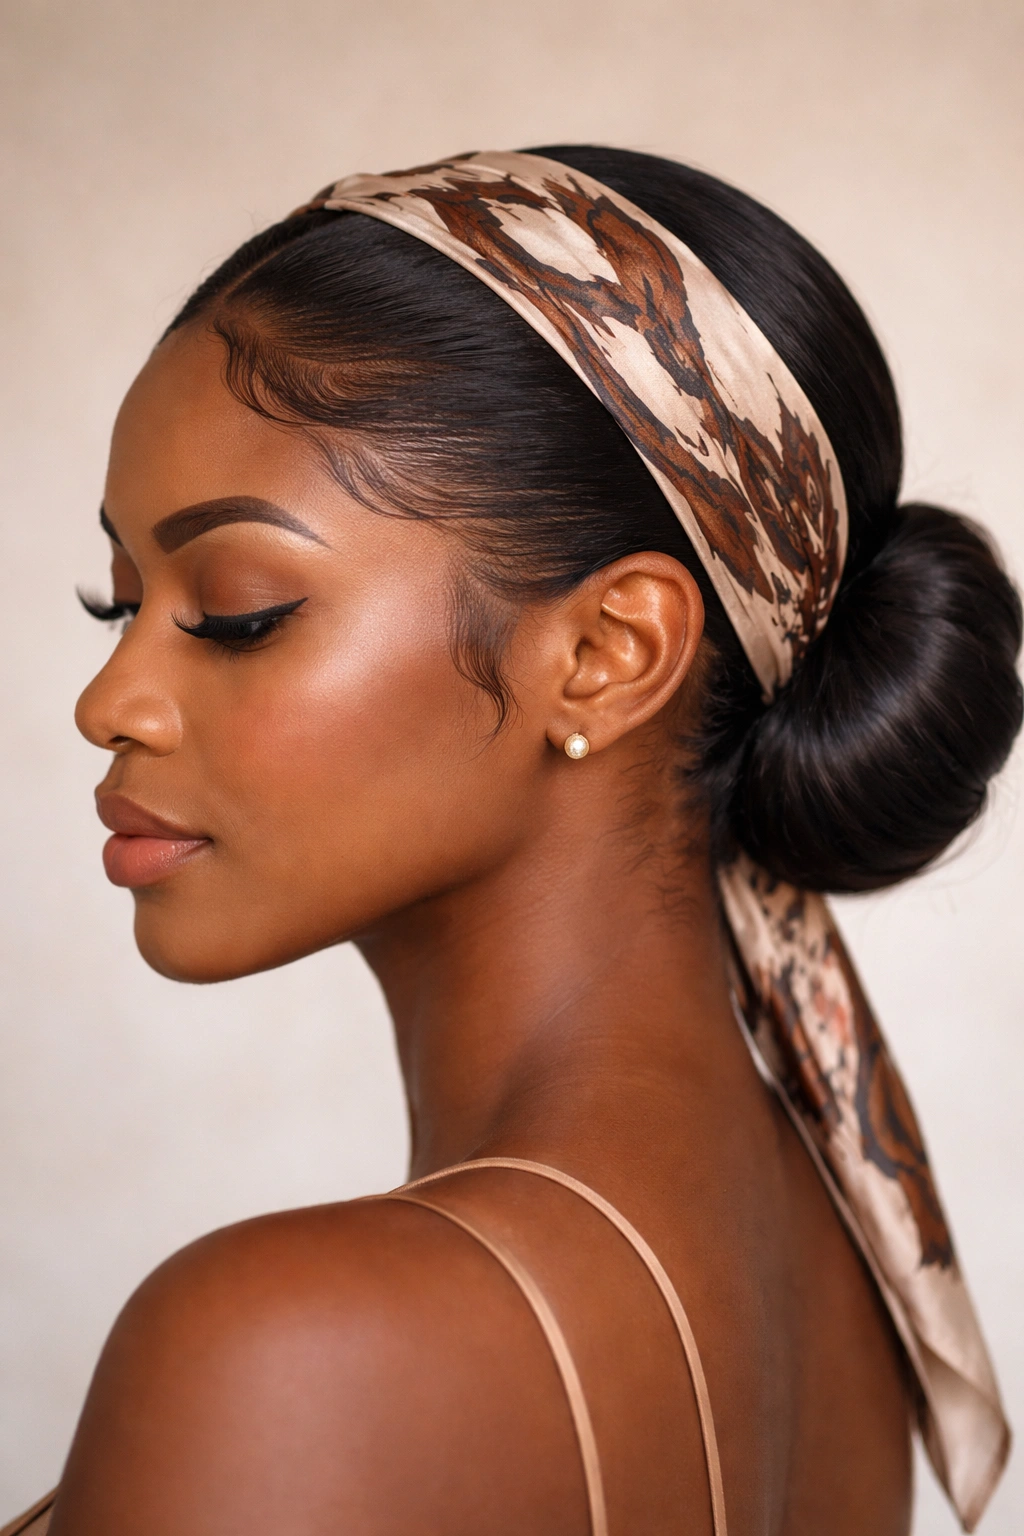
10. Low Bun with Decorative Accessory
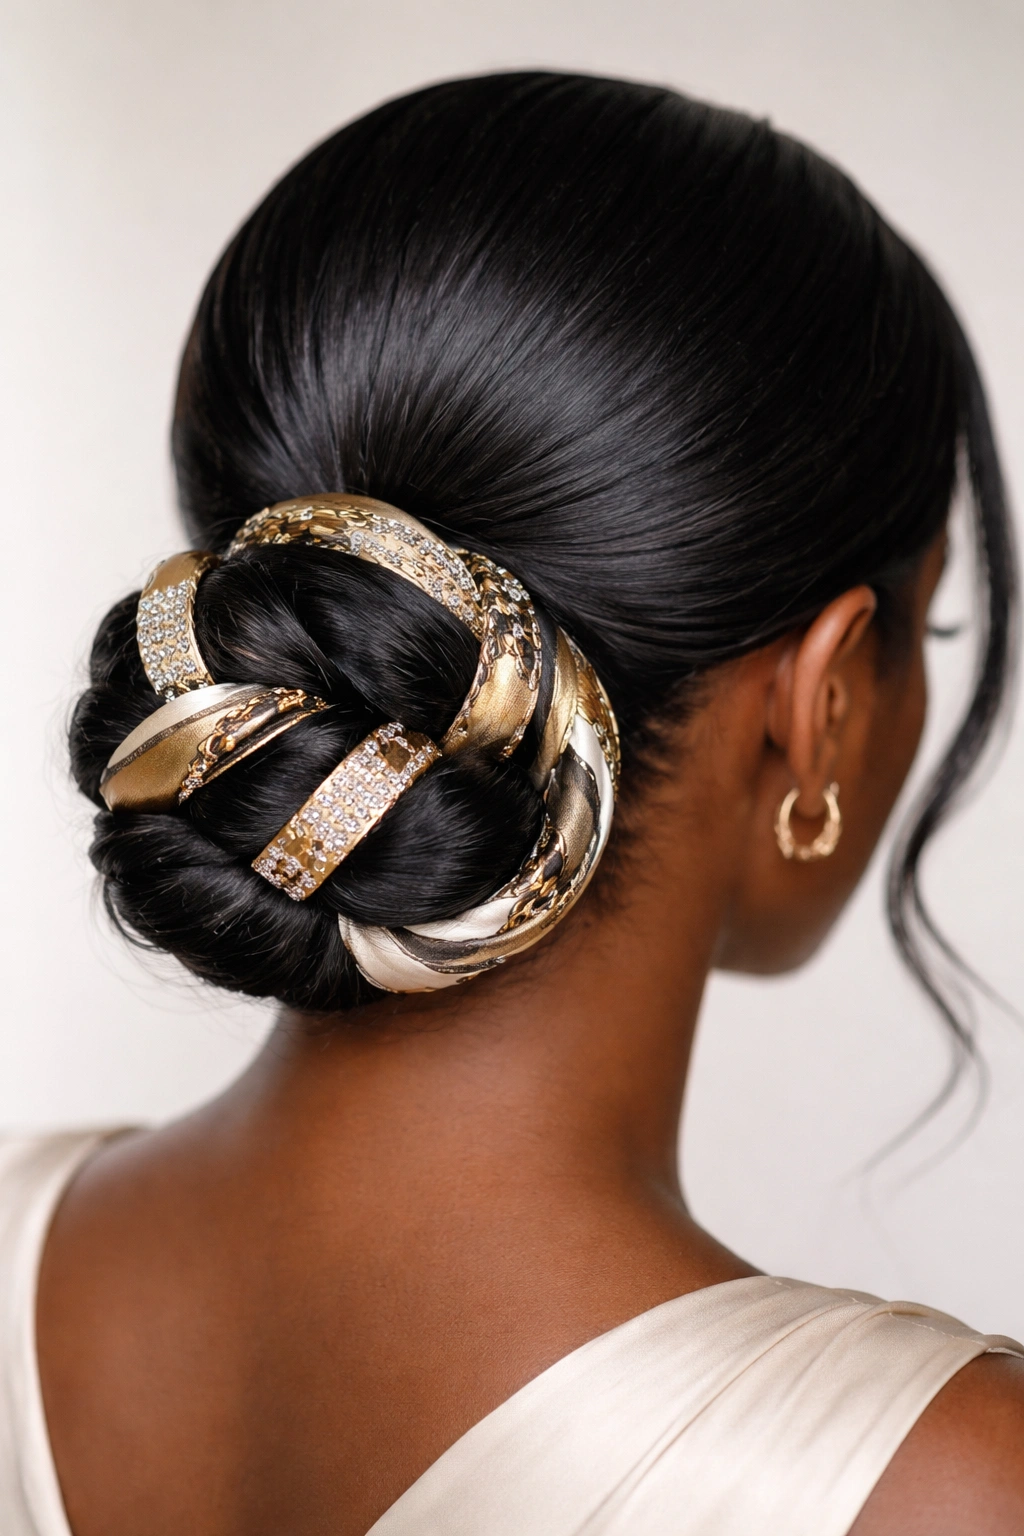
This final variation uses the bun itself as a foundation for jewelry or decorative elements — cuffs, scarves, pins, or hair jewelry — that transform a basic bun into something special occasion-ready and visually striking.
The Power of Intentional Accessories
A simple low bun becomes an elevated, special-occasion style the moment you add an intentional accessory. Gold or pearl hair cuffs, a decorative silk scarf wrapped through and around your bun, geometric hair pins, or delicate chains woven through your bun create visual interest and make the style feel considered and polished. Accessories also allow you to wear the same basic bun style for multiple occasions — add elegant jewelry for a formal event, or a casual scarf for a weekend look.
Styling Your Bun for Maximum Accessory Impact
- Create a smooth, neat low bun that will serve as the foundation for your accessory
- Choose an accessory that speaks to your style and the occasion — consider the metals, colors, and overall aesthetic you’re going for
- If using a scarf: weave it through your bun, letting it wrap around and frame the bun shape
- If using hair cuffs: position them strategically around your bun (at the base, in the middle, near the top) for visual balance
- If using decorative pins or hair sticks: insert them at angles that complement your bun’s shape and your face
- If using chains or hair jewelry: drape or weave them through your bun, testing different positions until the look feels balanced
- Make sure any accessories are secure and won’t shift during the day
Pro tip: Matte gold and matte silver accessories feel more modern and sophisticated than shiny, reflective versions. Choose finishes that complement your skin tone and existing jewelry.
Final Thoughts
Low ponytail buns work as a styling solution because they’re genuinely protective, remarkably versatile, and beautiful in their simplicity. Whether you choose a sleek, smooth classic bun, a textured twist creation, or an accessorized special-occasion version, the foundation is the same: gather, secure, and style with intention. The variations you’ve just explored show that a “low bun” isn’t actually just one style — it’s a whole category of possibilities that can adapt to your hair texture, your schedule, your occasion, and your personal aesthetic.
The real secret to buns that last all day, that protect your hair, and that look intentional rather than hastily thrown together comes down to a few key things. Use quality, hair-friendly products — silk hair ties, moisturizing twisting creams, edge control that defines without stiffening. Take time with the basics: make sure your ponytail is smooth before you bun it, secure your bobby pins thoughtfully so they’re not visible and aren’t creating tension points, and finish with intention rather than calling it done halfway through the process. And remember that your edges matter — the way you lay them, care for them, and protect them is just as important as the bun itself.
The beautiful thing about these styles is that you can rotate through them depending on your mood, your hair’s current state, how much time you have, and what the occasion calls for. A Tuesday at work might be a classic sleek bun, while a weekend event might be your chunky twist or layered version. Your edges and your hair health remain protected throughout, and you get to express different sides of your style without constantly manipulating your hair. That’s the real win of mastering low bun styling.