Swoop ponytails are having a major moment with natural hair lovers, and honestly, it’s not hard to see why. There’s something effortlessly chic about a high, voluminous ponytail that sweeps to the side—it works for everything from a casual Friday morning to a night out. The beauty of swoop styles is that they work across all hair textures and densities, whether your natural hair is tightly coiled, loosely wavy, or anything in between. What makes a swoop different from a standard ponytail is that intentional directional sweep and the emphasis on height and movement at the crown. The style creates an instant lift that’s flattering from virtually every angle, and it showcases the texture of your natural hair in a way that feels celebratory rather than controlled.
The challenge a lot of people run into with swoop ponytails on natural hair is making sure the style actually holds. Unlike straight hair, natural curls, coils, and waves need extra support and the right techniques to keep that swoop in place throughout the day. The good news? Once you understand the tricks—proper sectioning, the right elastics, strategic pinning, and how to work with your curl pattern instead of fighting it—you can create swoop ponytails that look polished and feel secure. Whether you want maximum volume, a sleek and smooth finish, an asymmetrical edge, or a low swoop that still reads as directional and intentional, there’s a version here for you. Let’s break down 12 different ways to wear a swoop ponytail with natural hair, from styles you can do in five minutes to more intricate designs that let you show off your skills.
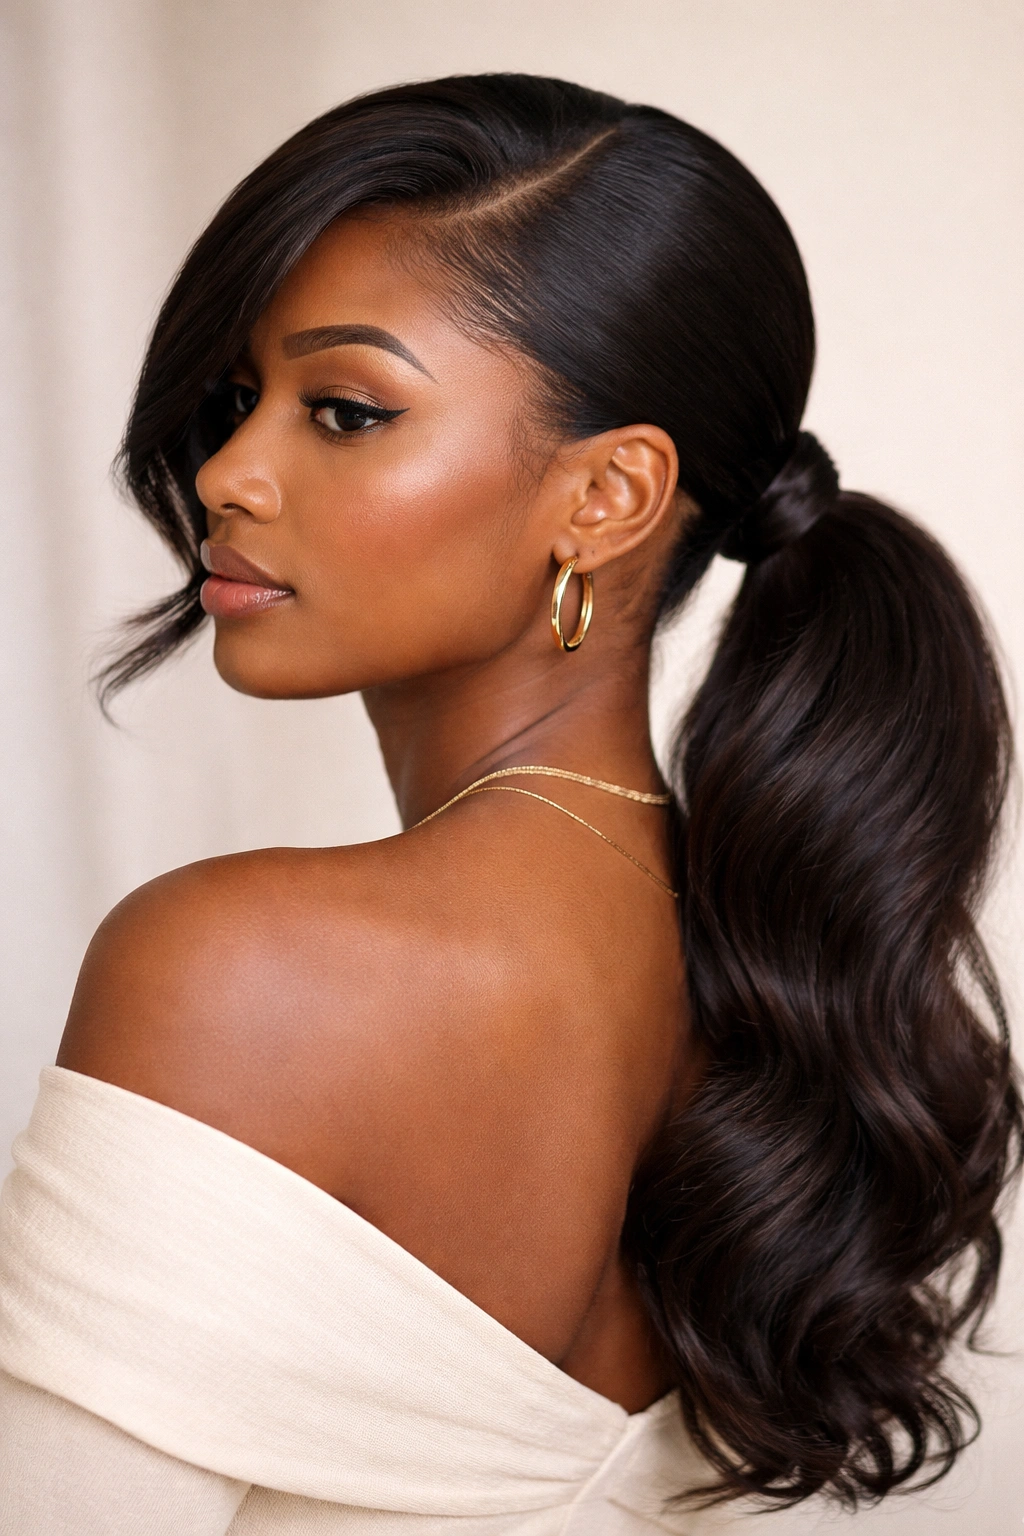
1. The High-Volume Swoop with a Deep Side Part
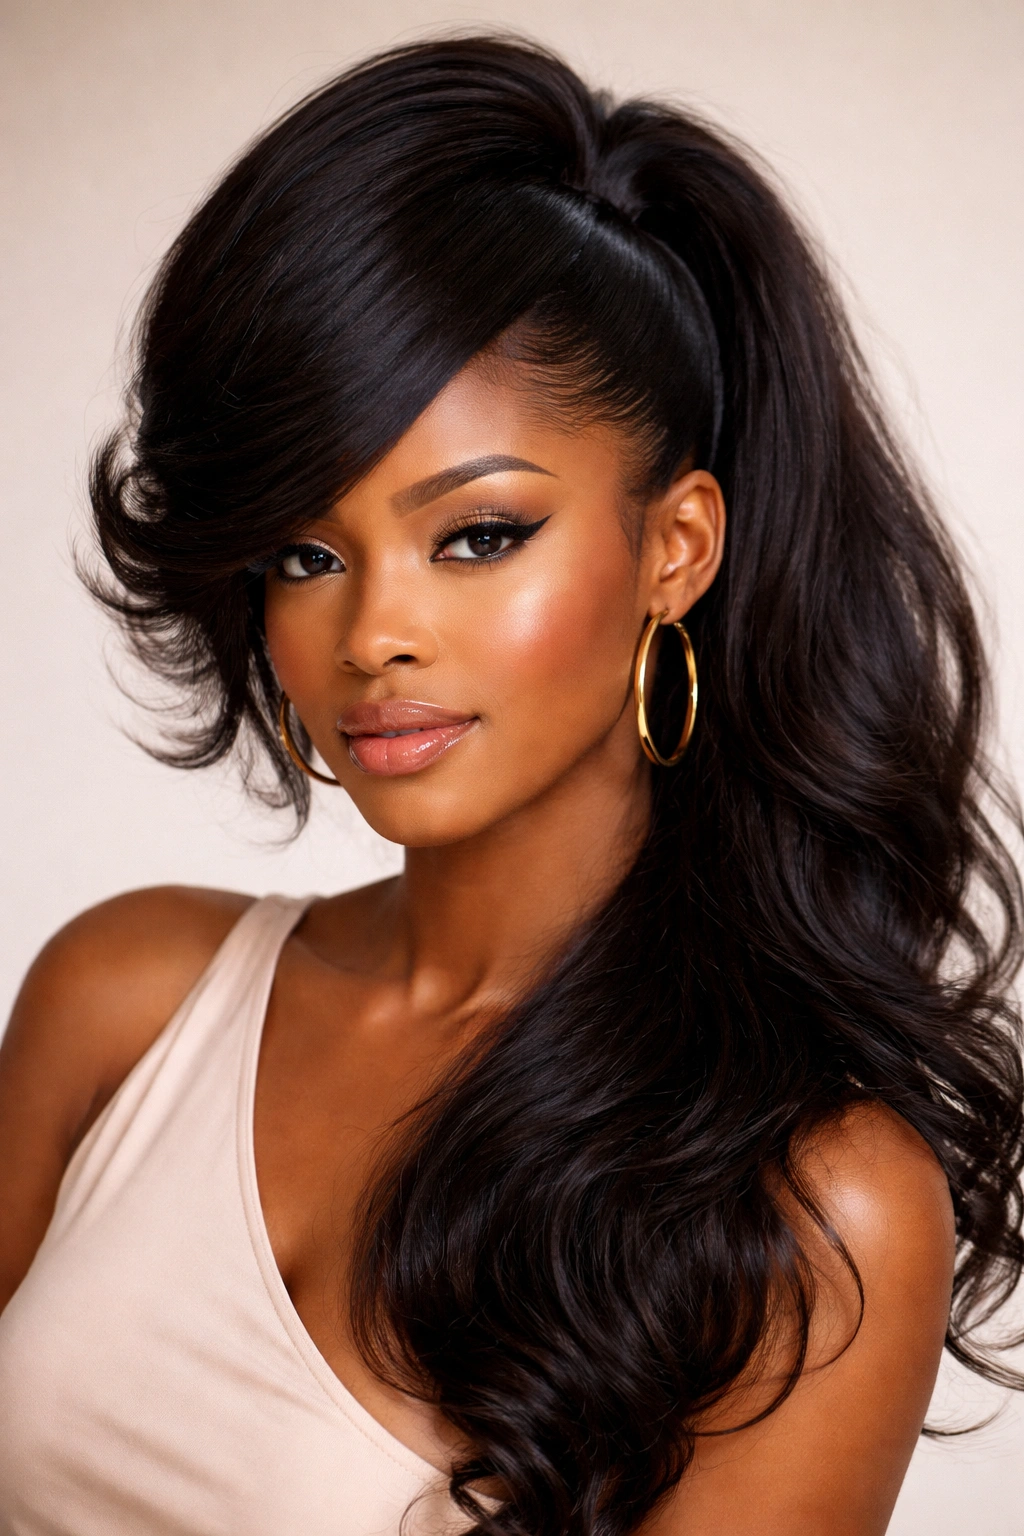
This is the iconic, show-stopping swoop that catches attention the moment you walk into a room. The key to making this work on natural hair is creating maximum volume at the crown while keeping the directional sweep intentional and clean. Start with a deep side part that sweeps all the way from one temple area, creating a natural line that guides the hair direction. Blow-dry your hair if you prefer added volume, or work with air-dried curls—both work beautifully here.
Why This Style Stands Out
The high-volume swoop works because it creates an instant elongating effect for your face and neck, and the side-swept direction adds a sense of movement that feels modern and deliberate. On natural hair, this style is especially striking because your curls or coils actually add to the visual impact of that height. When you combine the natural texture with the sculptural swooping action, you get a style that photographs incredibly well and feels equally confident in person. The asymmetry is what makes this feel editorial rather than everyday.
Essential Styling Tips
- Use a volumizing mousse or curl cream on damp hair before styling to give texture and grip
- Blow-dry with a concentrator nozzle directed toward the crown for maximum lift at the root
- Secure the ponytail with a sturdy elastic at the base, then use bobby pins along the swooped section to keep the direction locked in place
- Smooth any flyaways along the swept part with a light gel or edge control
- The ponytail itself can be left textured and voluminous, or you can braid sections for added interest
Pro tip: If your swoop starts to lose definition halfway through the day, use a dry texture spray or light misting spray to re-activate your curls and refresh the directional flow.
2. The Sleek Swoop with Gel-Laid Edges
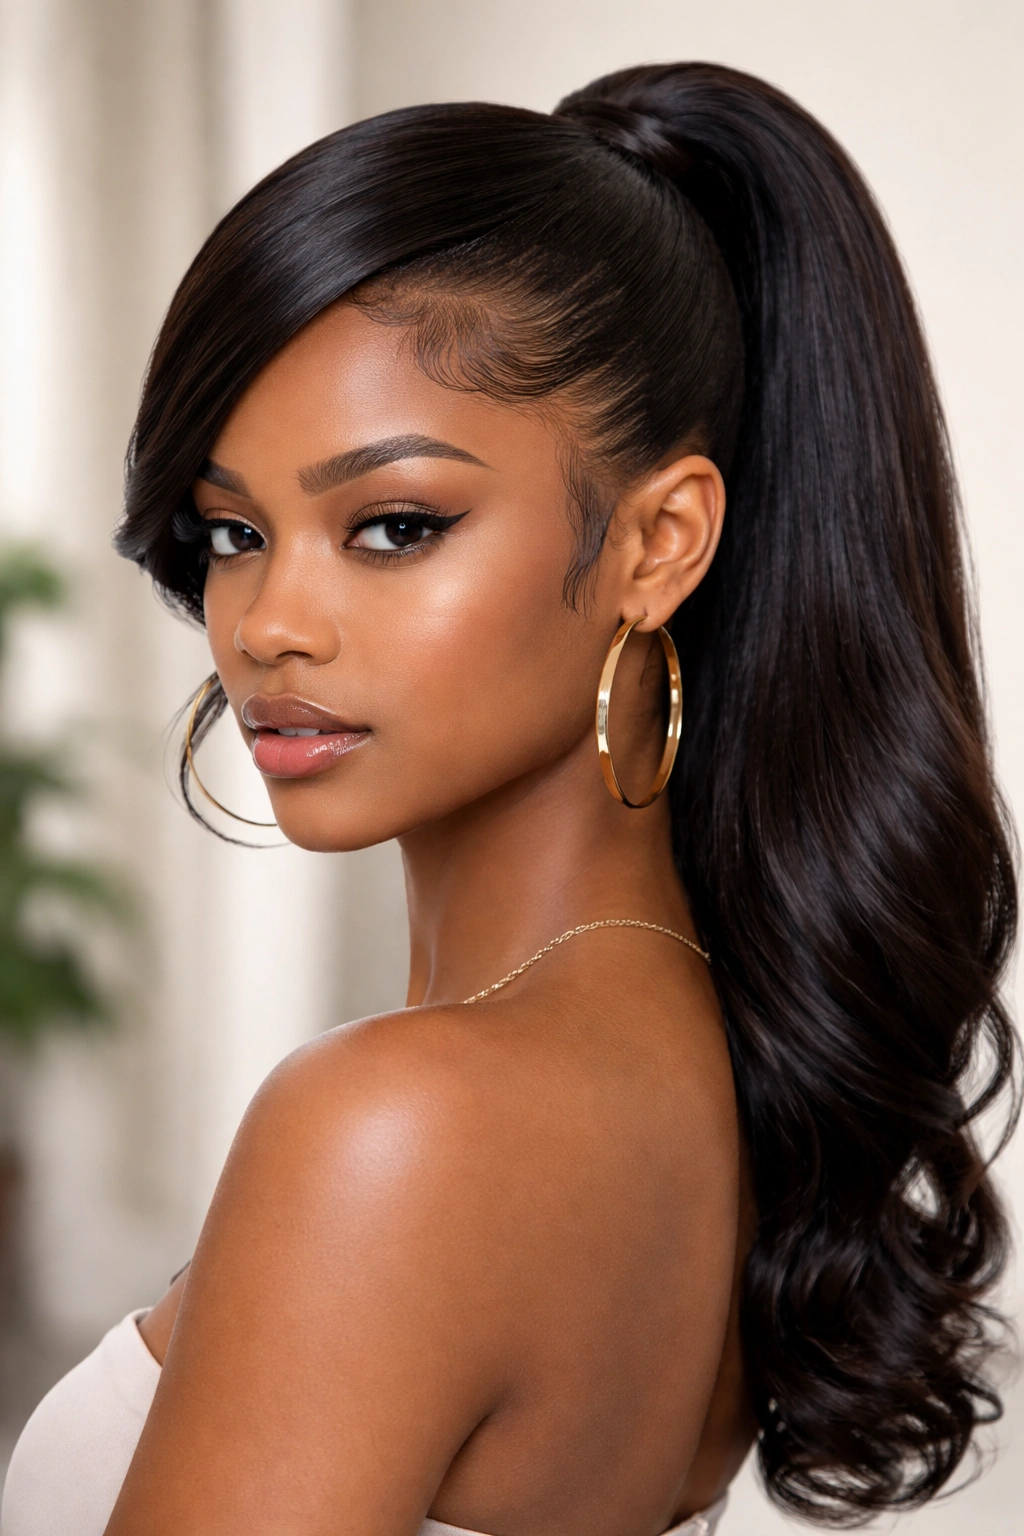
For those days when you want polish and polish only, a sleek swoop delivers maximum sophistication. This style emphasizes smooth, defined edges and a clean directional line that looks intentional and refined. The sweeping side motion is obvious and exaggerated here, so the style reads immediately as intentional, not accidental. This version works beautifully on all hair types and textures, but it particularly highlights natural hair when you use the contrast between the smoothed crown and textured ponytail.
What Makes This Version Different
The sleek swoop is a completely different energy than the volume-focused version. Where high-volume emphasizes texture and movement, the sleek swoop is about control and line. This style actually makes your natural hair look more intentionally styled than any other version—it shows restraint, precision, and confidence. The smoothness at the crown frames your face cleanly, which is why this is a go-to for professional settings, special events, or when you simply want to feel polished.
How to Achieve It
- Apply a smoothing gel or cream to damp hair and let it dry completely or blow-dry with a paddle brush for a sleeker base
- Use a fine-tooth comb or brush to smooth hair back from your face in the direction of your swoop
- Apply edge control to your hairline and smooth down any baby hairs with a toothbrush for ultra-clean lines
- Secure the ponytail low to mid-back of the head for that sophisticated swoop trajectory
- You can leave the ponytail textured at the ends, or keep it smooth—either creates beautiful contrast with the smooth crown
Worth knowing: This style holds best when your hair is around 3-5 days post-wash and has some natural grip built in. Brand-new wash day hair sometimes struggles to hold smoothness throughout the day.
3. The Playful Swoop Bun
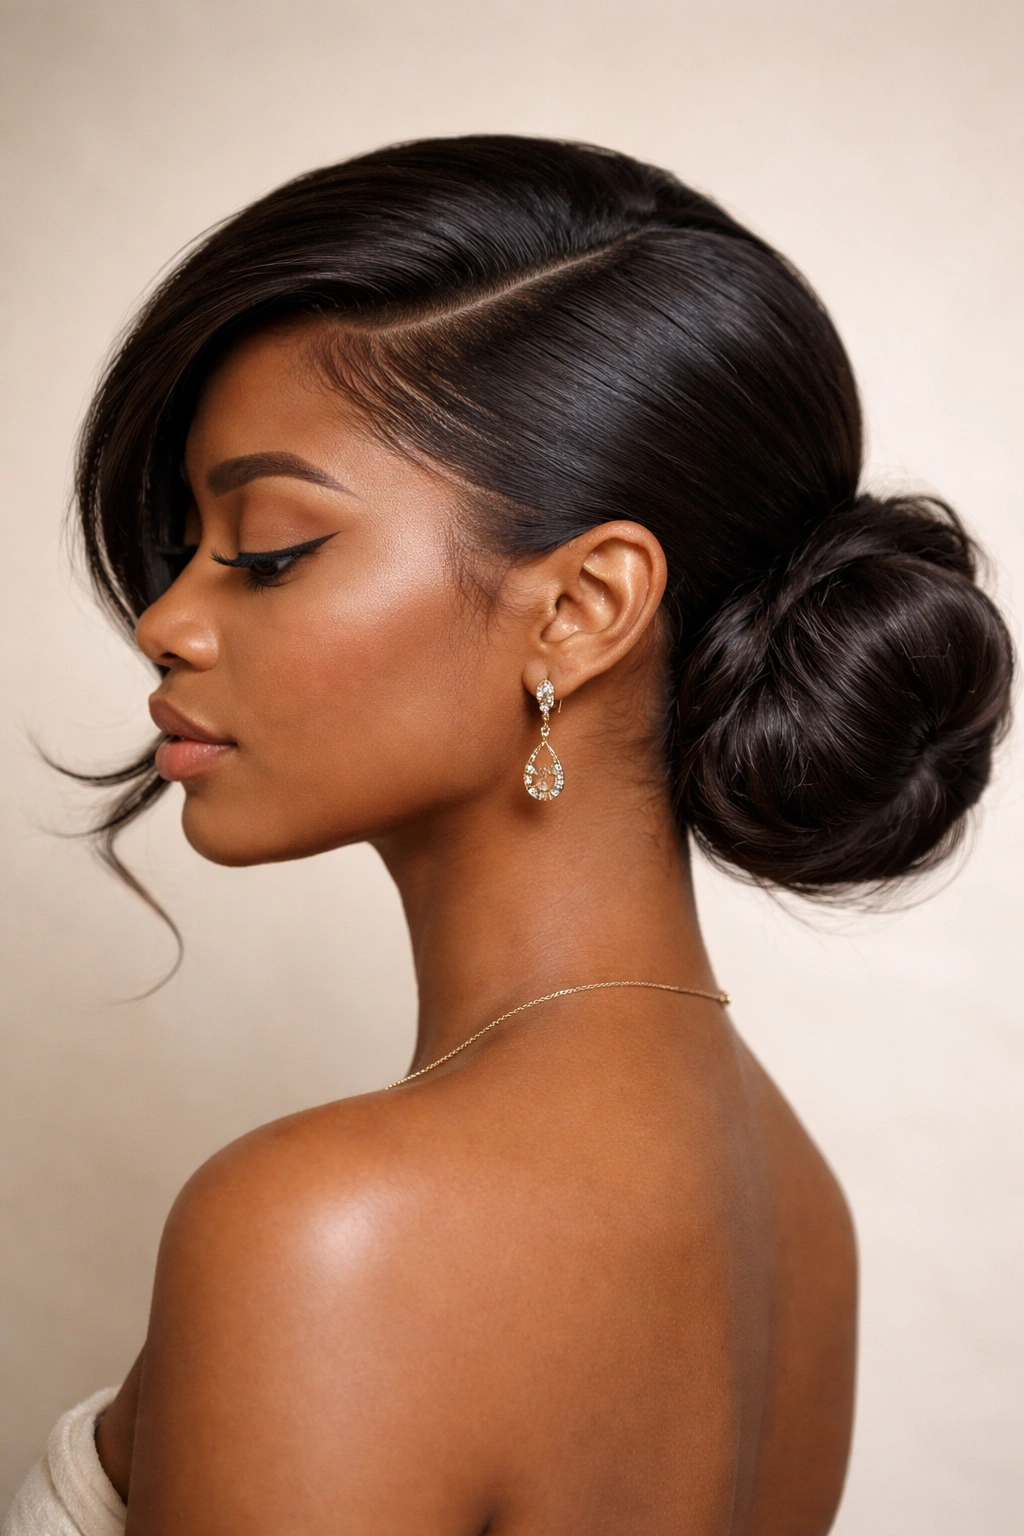
Want a swoop ponytail but also need practicality? The swoop bun converts that directional ponytail into a low, twisted or coiled bun that sits to one side of the nape of your neck. This hybrid style gives you all the visual impact of a swoop with the security and low-maintenance durability of a bun. The swooped section is visible and directional, while the bulk of the hair is tucked and protected.
Why It Works So Well
The swoop bun solves a real problem: swoop ponytails are gorgeous but can sometimes feel like they need a lot of maintenance and pinning to stay in place all day. Converting that ponytail into a bun immediately makes the style more stable without losing the aesthetic. On natural hair, a bun also protects your ends and reduces manipulation, which is always a bonus. The side-placement of the bun creates an asymmetrical silhouette that feels way more interesting than a centered bun.
How to Build It
- Create your swoop ponytail first using the high-volume or sleek method described above
- Secure the ponytail low and to one side at the nape of your neck
- Divide the ponytail into 2-4 sections depending on how full your hair is
- Twist each section loosely (if your curls are tight, you can skip the twisting and just coil the sections as they are)
- Wrap the twisted sections around the base of the ponytail to form a bun
- Secure with bobby pins and smooth any surface flyaways with gel
Quick fact: This style can easily last 2-3 days with light refreshing if you sleep on a silk pillowcase and don’t disturb it too much during the day.
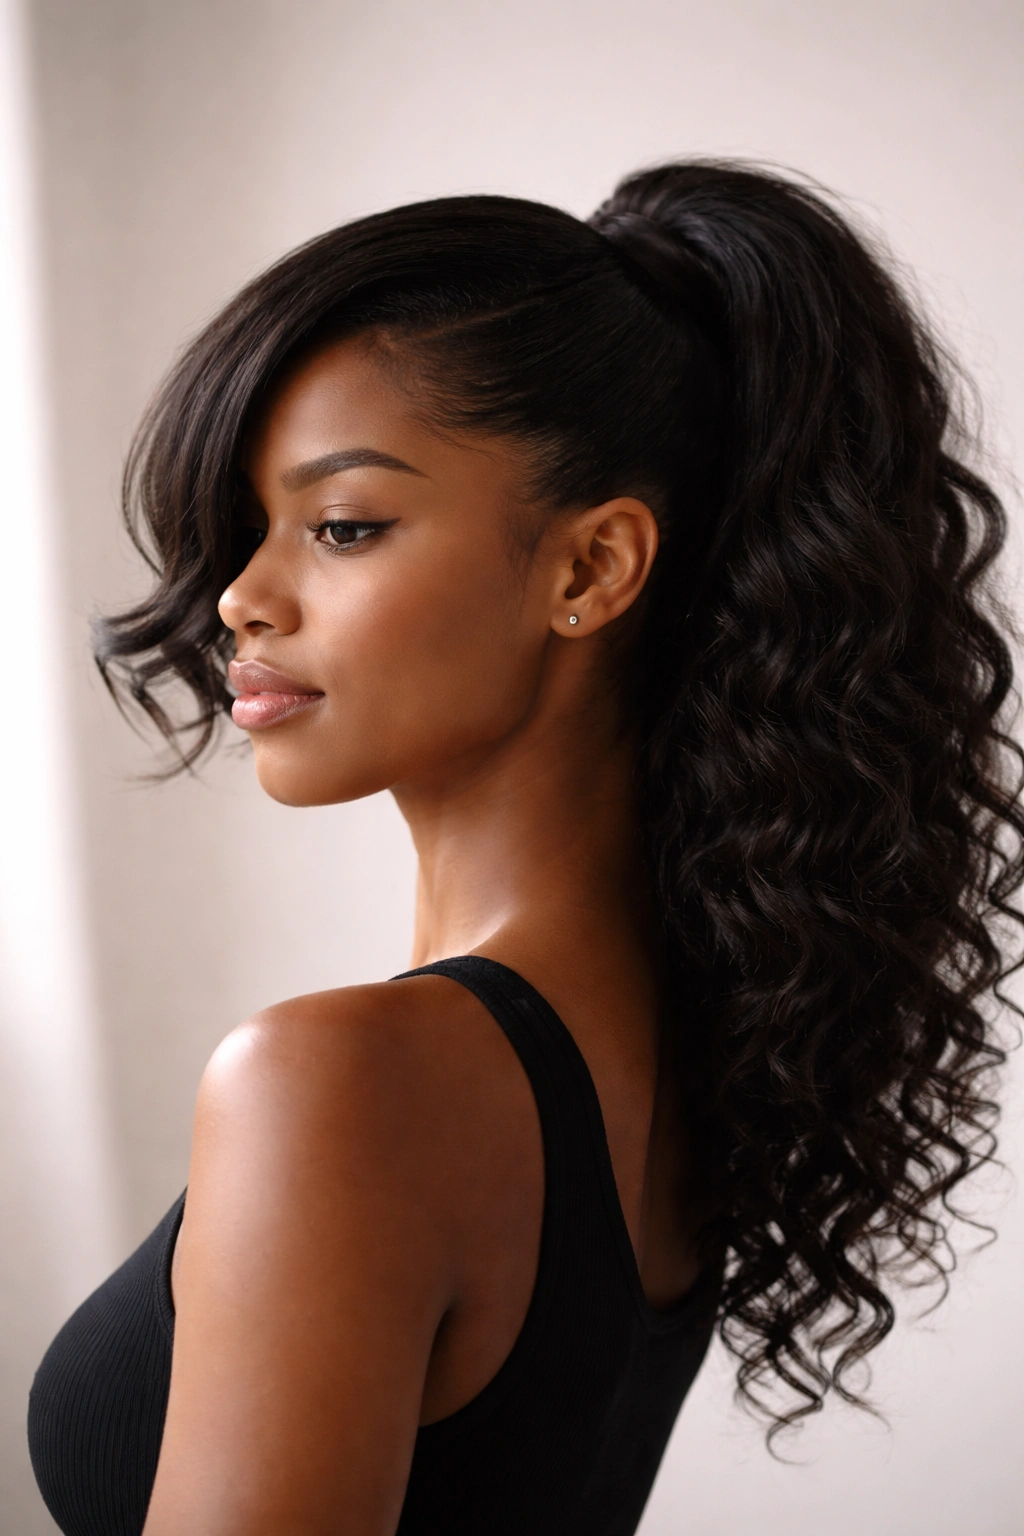
4. The Textured Swoop with Defined Curls
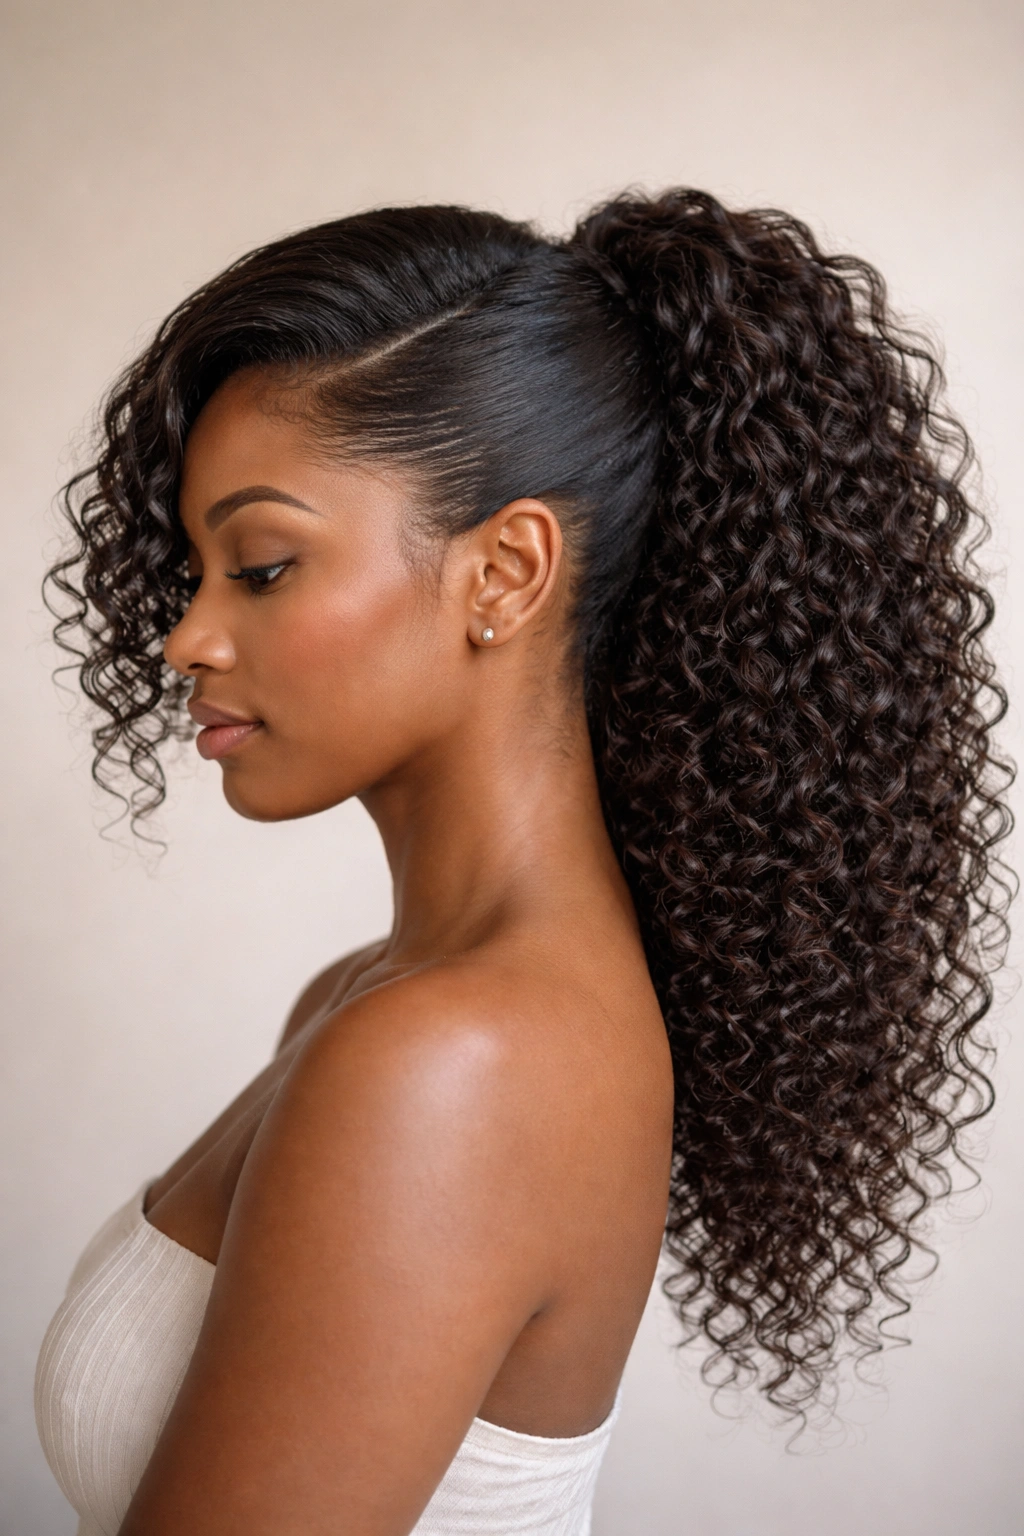
This version celebrates your natural curl pattern and texture rather than trying to smooth or manipulate it. Instead of blowing everything back into a sleek swoop, you’re working with your wet or damp curl definition, creating a swoop that’s visibly textured and full of dimension. The curls show their natural wave, coil, or curl shape while still moving in one clear directional direction.
What Sets This Apart
The textured swoop is all about honoring your hair’s natural state while still creating intentional styling. Rather than fighting your texture, you’re directing it—which is so much more sustainable on natural hair. This style actually improves with a good curl-definition product and the right technique. The movement comes from the directional sweep, not from flattening your curl pattern. This reads as confident and knowing, like someone who understands their hair and works with it rather than against it.
Application Steps
- Apply curl cream or gel to damp hair and define curls using your preferred method (finger coils, praying hands, diffusing, etc.)
- Allow curls to set and dry fully before styling into the ponytail
- Sweep hair to one side, using your fingers to maintain the curl shape as you do
- Gather into a ponytail and secure with an elastic
- Use bobby pins along the swept section if needed for security, but keep them hidden within the curls
- You can leave the ponytail completely loose and textured, or loosely braid sections for added visual interest
Pro tip: The texture-swoop reads most intentional when you use a lightweight product that doesn’t create too much crunch or stiffness—you want movement and flexibility, not a hardened style.
5. The Low Swoop with a Wrap Detail
Taking the swoop lower and closer to the nape of your neck creates an entirely different vibe. A low swoop reads as more casual and romantic than its high-crown cousins, and when you add a wrap—using a section of your own hair twisted around the base—you get instant elevated detail. This style bridges the gap between casual and intentional beautifully.
Why Low Swoops Hit Different
There’s something inherently softer about a low ponytail that sweeps to the side. It’s less dramatic than a high swoop, which makes it work for more occasions—it works equally well on a casual day or dressed up for an event. The lower placement also feels less severe on your face and hairline, which some people prefer. Adding a wrap elevates the entire look from simple to clearly intentional and styled.
Creating the Wrap
- Create your swoop ponytail at a lower placement (closer to the nape)
- Take a small 1-inch section from the underneath of the ponytail, just after the elastic
- Twist or braid this section tightly
- Wrap it around the base of the ponytail to cover the elastic, going around once or twice
- Secure the wrap end with bobby pins underneath where they won’t be visible
- You can leave the wrap smooth or textured—both look beautiful
Worth knowing: If you’re using a thin wrap, you’ll need that lower placement to make it visible and readable as an intentional detail. A high swoop wrap can disappear into your volume.
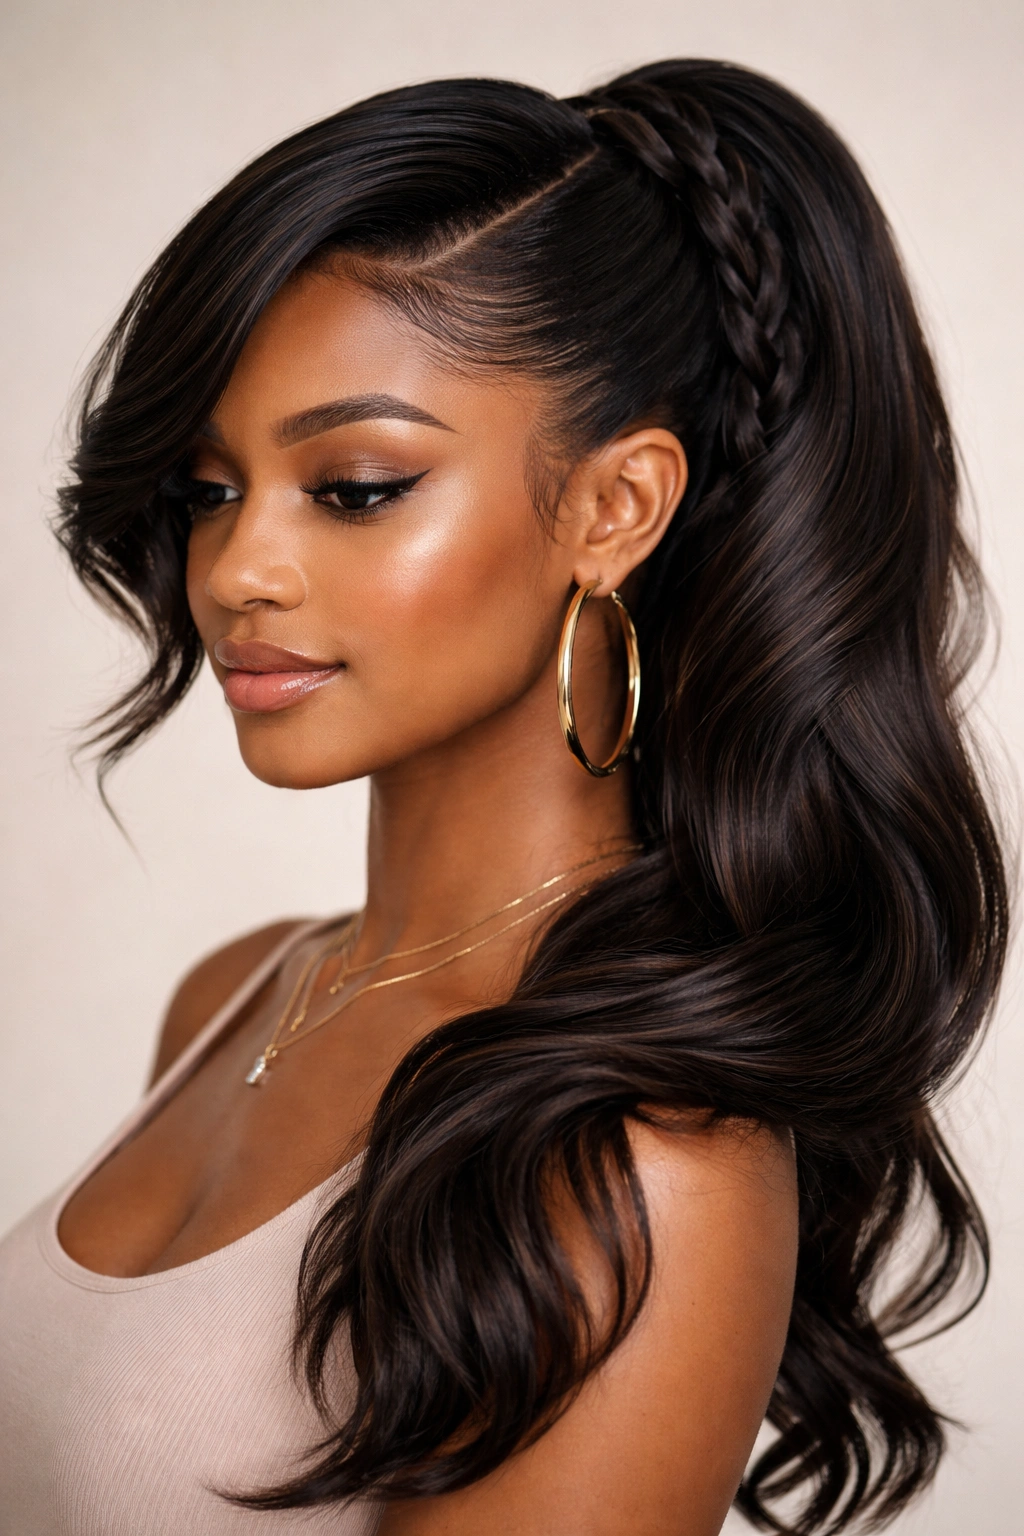
6. The Swoop with Side-Swept Braids
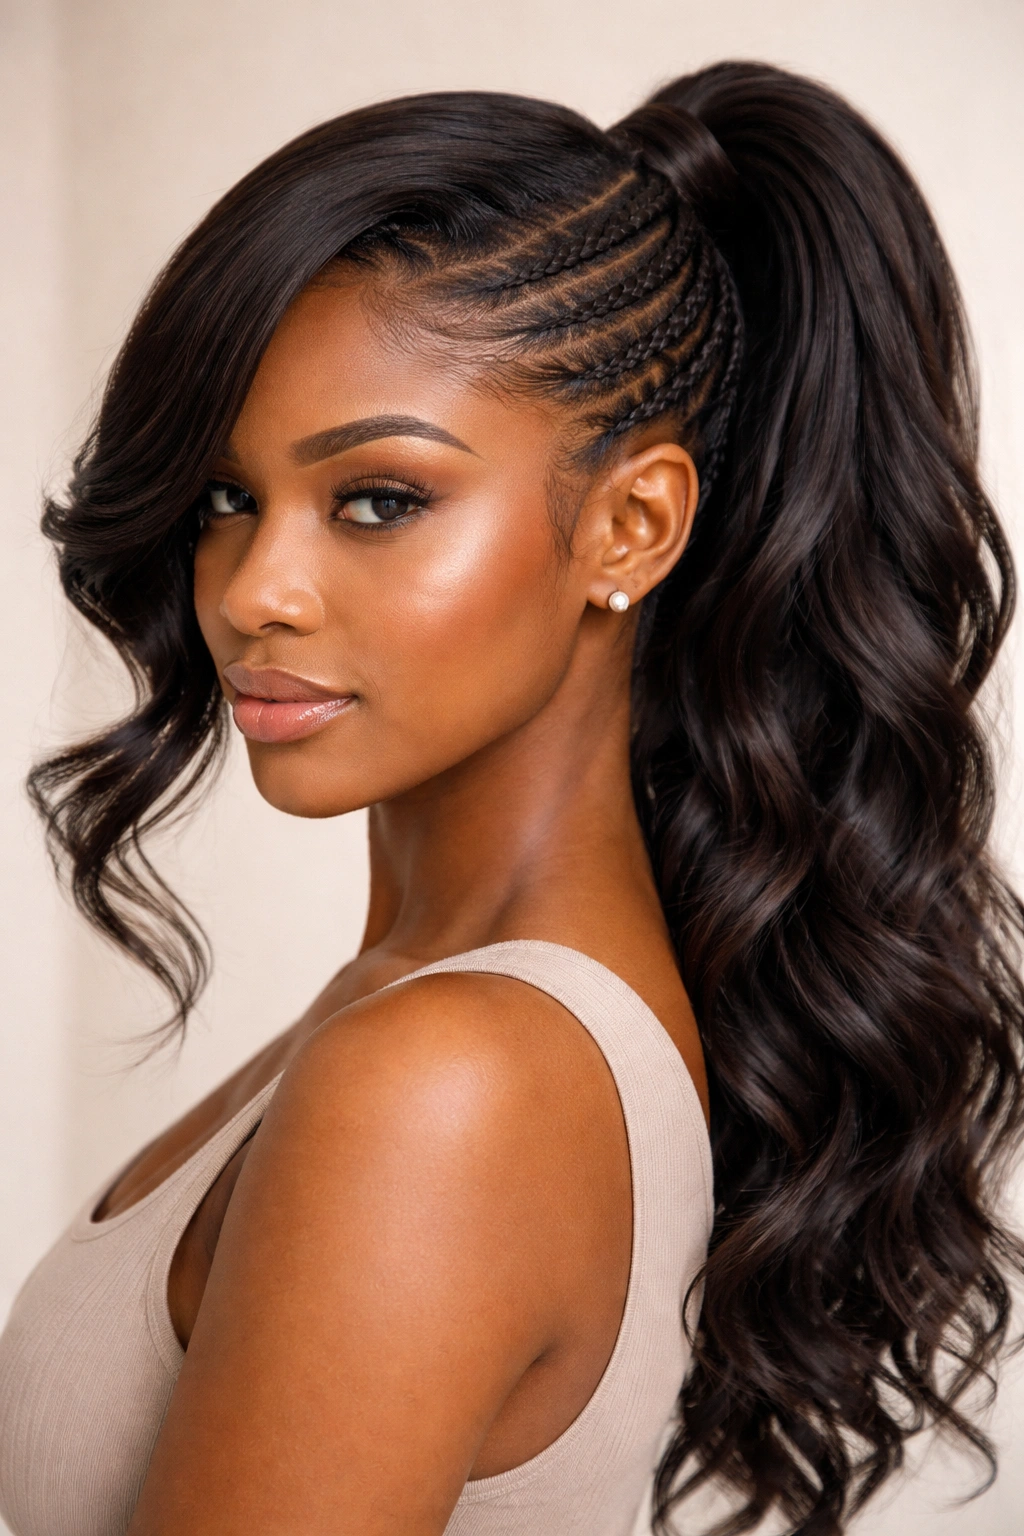
For a more intricate style, braids incorporated into the swoop create visual complexity and added security. You’re not doing traditional braids along the scalp—instead, you’re taking sections of the swooped hair and braiding them partially or fully before tucking them into the ponytail. This creates texture, visual interest, and extra hold.
What Makes Braids Enhance a Swoop
Braids automatically increase the visual weight and intentionality of a style. On natural hair, they also provide practical benefits—braids don’t slip the way loose hair does, so your swoop holds longer and looks more deliberate throughout the day. The contrast between braided sections and loose textured hair in the ponytail creates visual dimension that photographs beautifully.
Braiding Technique
- Create your base swoop ponytail first
- Divide the ponytail into 2-4 sections depending on thickness
- Braid each section loosely (tight braids can create tension on natural hair and look less organic)
- You can braid all the way to the ends, or braid halfway and leave the bottom loose
- Secure braids at the ends with small elastics that match your hair color
- You can leave braids as-is or “pancake” them (gently pulling the edges out) for a fuller, more textured look
Pro tip: Do your braids when your hair still has some moisture in it—completely dry hair can be harder to braid neatly on some curl patterns, especially very tight coils.
7. The Asymmetrical Swoop with Undercut Lines
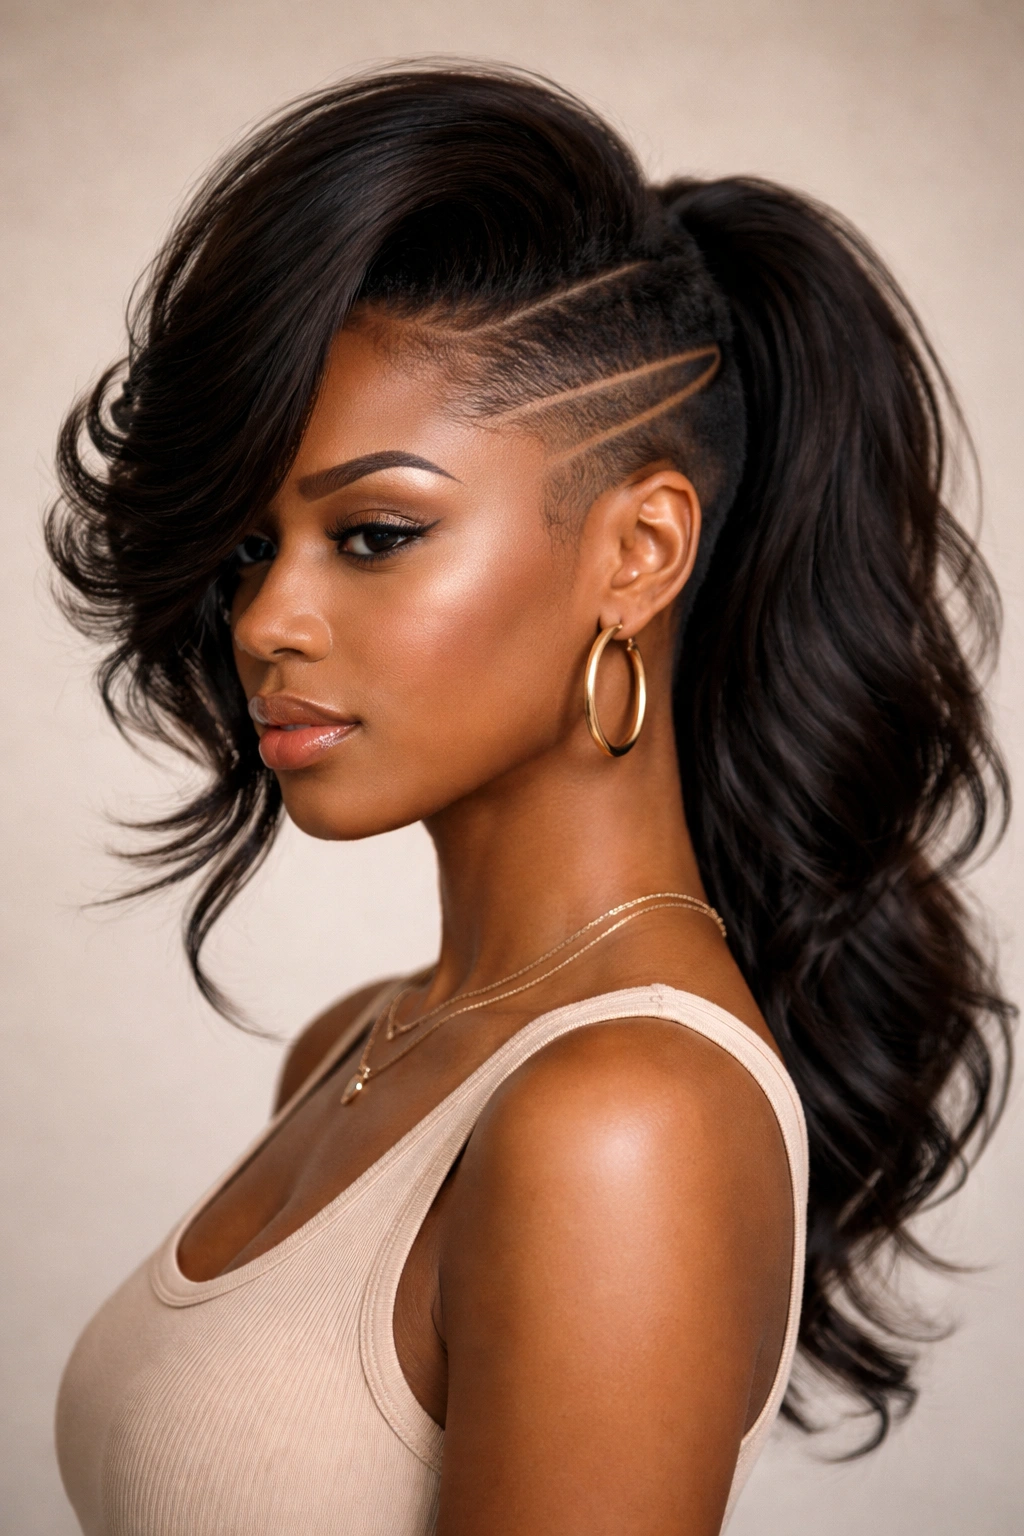
This is for the people who like to push style boundaries just a little bit. An asymmetrical swoop emphasizes one side dramatically while leaving the other side with minimal volume. You can enhance this by adding clean lines or design elements on the side with less hair—whether that’s a clean undercut shape, etched lines with a razor, or even a subtle pattern shaved in. The asymmetry makes an already bold statement even bolder.
Why Asymmetry Commands Attention
Asymmetrical hairstyles are inherently more visually interesting than balanced ones. They feel artistic and fashion-forward. On natural hair, an asymmetrical swoop creates an immediate focal point on whichever side you’re emphasizing, which draws attention and makes the style feel intentional. If you combine this with any kind of undercut work, you’re creating a hairstyle that clearly took thought and possibly professional styling help.
Styling Approach
- Blow-dry for extra volume if possible, especially on the side you want to emphasize
- Create a more exaggerated side part, possibly starting at or behind one ear
- Sweep the larger volume to one side, securing at the base
- The side with the undercut or shaved detail should be smooth and clean—you can use edge control to highlight the contrast
- This style looks best with minimal products on the asymmetrical side so the lines show clearly
Quick fact: Asymmetrical styles require a little more daily styling attention than symmetrical ones, but the payoff in impact is significant.
8. The Wet-Look Swoop with Gel Shine
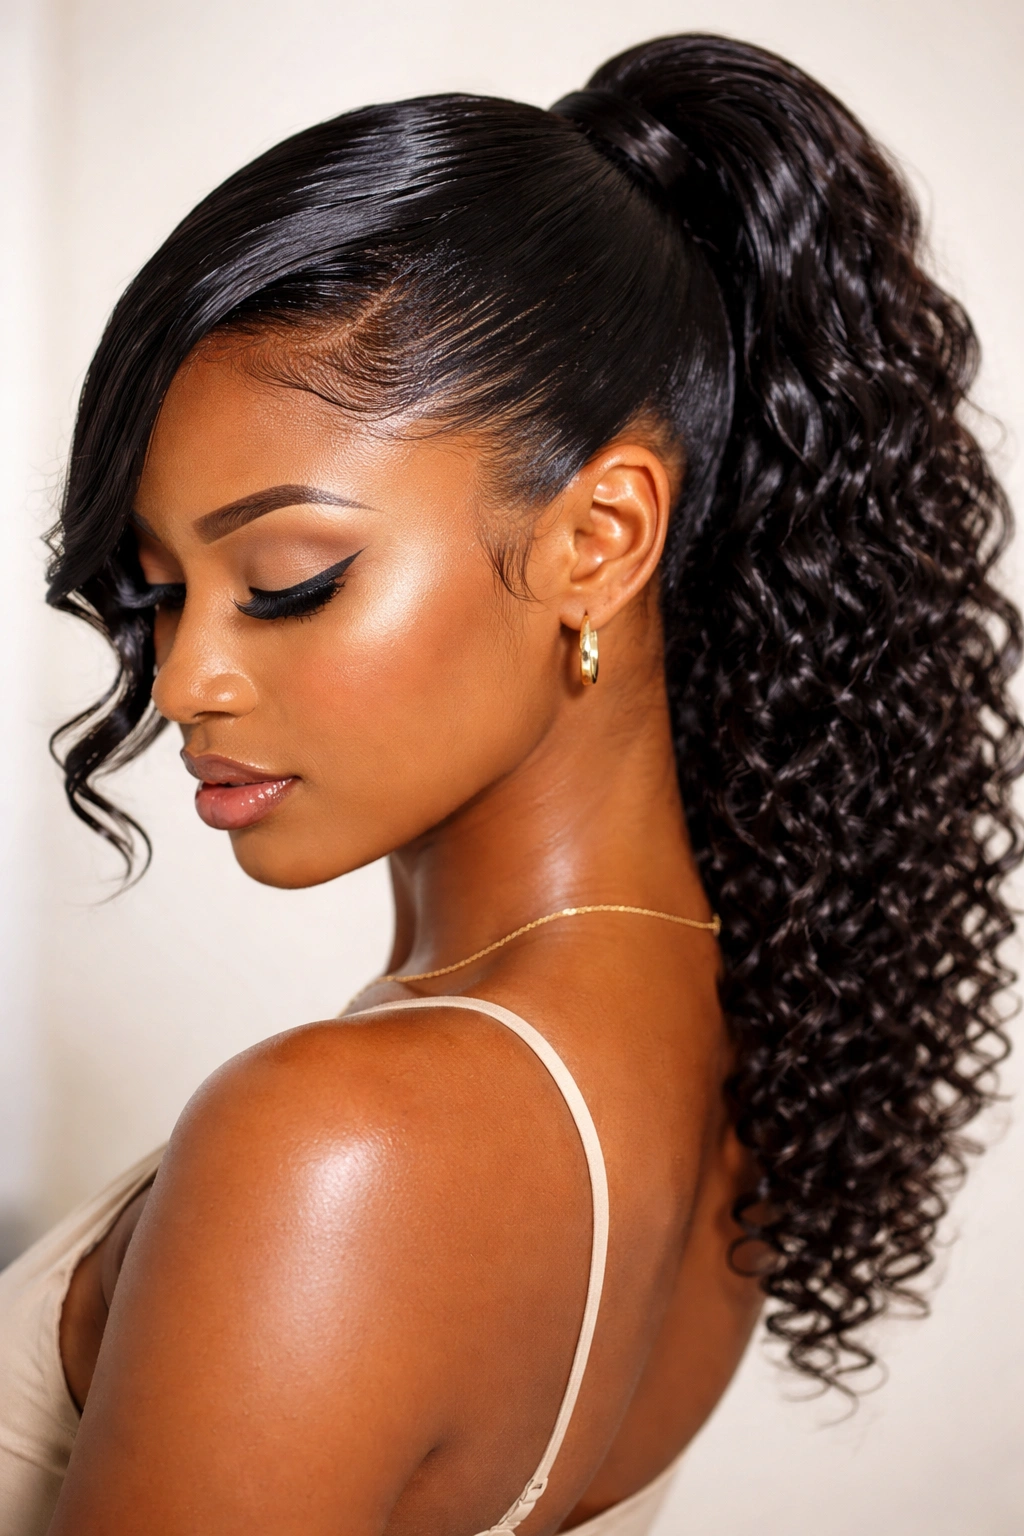
A wet-look swoop emphasizes the glossy, slicked quality of your hair by applying a strong-hold gel that creates shine and definition. The “wet” effect is purely visual—your hair is actually dry, but the gel creates that gleaming, freshly-soaked appearance. This style is bold, sleek, and works beautifully on natural hair because the shine makes curls and coils particularly luminous.
The Appeal of Wet-Look Styling
The wet look reads as very current and fashion-conscious. It’s also refreshingly low-maintenance compared to other polished styles—all that shine actually helps hide any texture irregularities. On natural hair, a wet-look swoop can highlight your curl definition beautifully because the gel creates clarity and separation in each coil or wave.
Creating the Wet Look
- Apply a strong-hold gel (wet-look formulas work best) to damp hair, starting at the roots
- Work through completely, making sure every section is coated evenly
- Use a comb or paddle brush to smooth hair back into your swoop direction
- Blow-dry or air-dry—the gel will harden as it dries, creating that glossy finish
- Secure into a ponytail
- You can apply a light hairspray over the top for extra hold and shine
Worth knowing: Wet-look products can be heavy, so this style works best on hair that can handle moisture and product without becoming limp. Very fine or low-density natural hair sometimes struggles with wet-look formulas.
9. The Swoop Ponytail with Accessory Detail
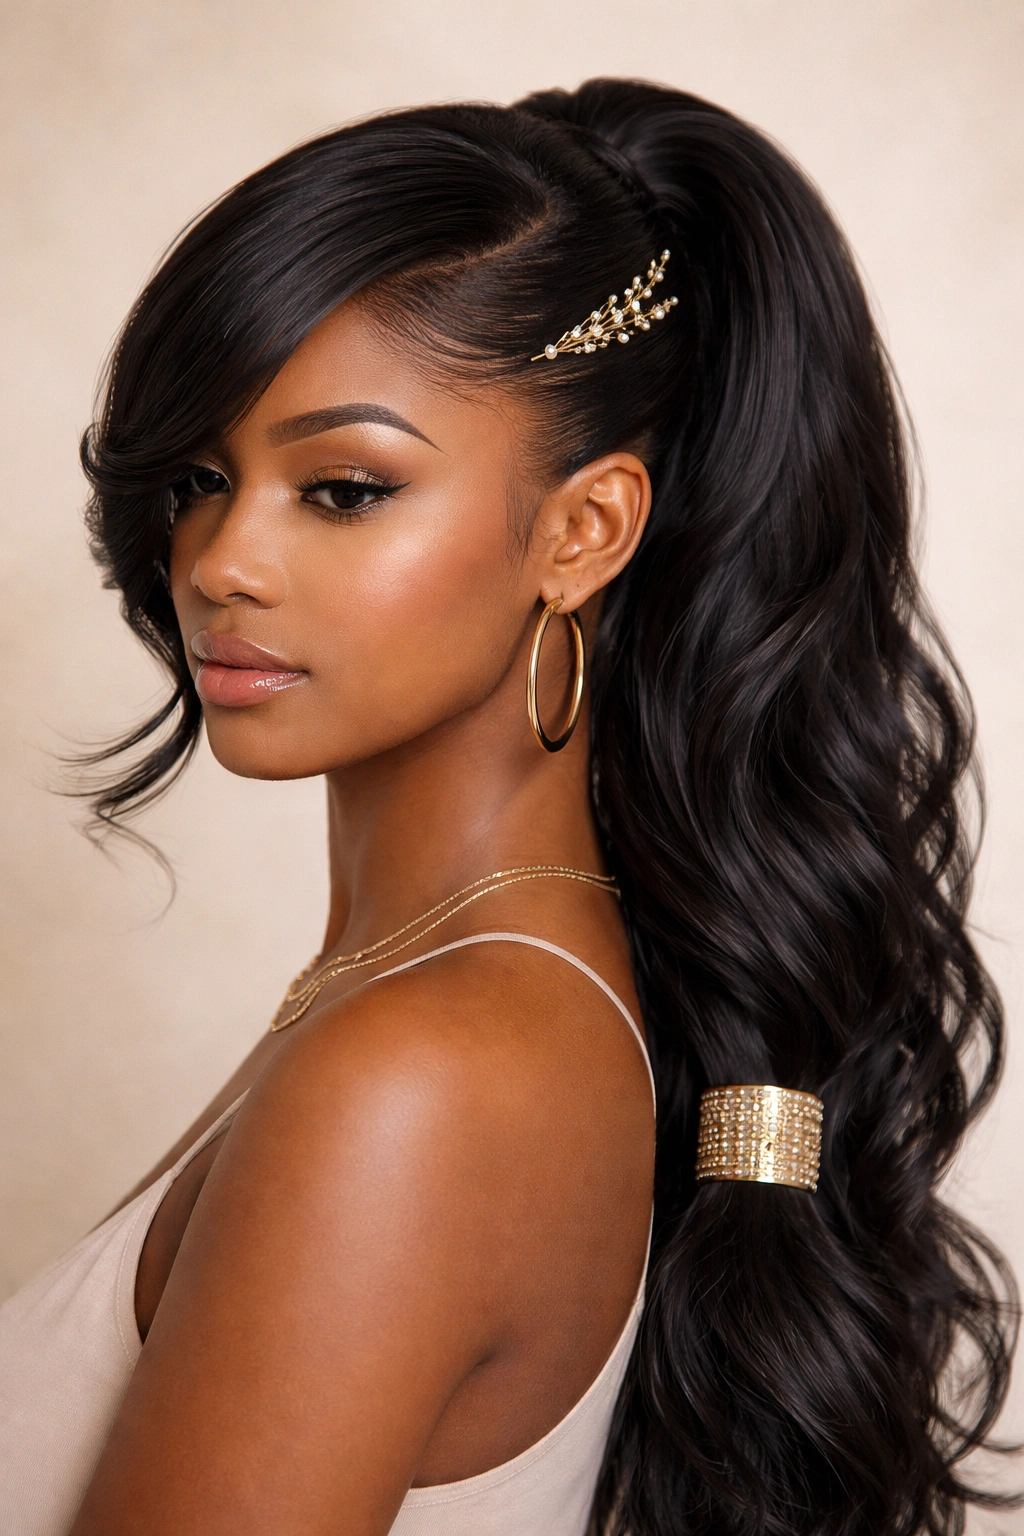
Sometimes the magic of a swoop comes from what you add to it. A decorative cuff, a clip, a hair wrap, beads, or even a fabric or lace hair tie can completely transform a basic swoop into something special. Accessories draw the eye to your ponytail and add instant personality and intention to the style.
Why Accessories Matter
Accessories are the easiest way to customize a standard swoop and make it feel unique to you. A gold cuff reads completely different than a colorful fabric wrap or delicate hair clips. Accessories also serve a practical function—many of them add security and help hold your swoop in place while looking intentional rather than like you’re trying to hold your hair down. On natural hair, accessories create visual interest and can highlight your hair’s texture beautifully.
Accessory Ideas
- Metal or acrylic cuffs around the base of the ponytail
- Silk or fabric hair scarves wrapped around the base or woven through the ponytail
- Decorative clips or barrettes placed along the swooped section
- Hair beads, shells, or rings threaded onto braided sections
- A metallic or decorative elastic that shows instead of hiding
- A luxury hair stick or fork placed through a coiled or bun-style swoop
Pro tip: The more minimal and sleek your base swoop is, the more of an impact an accessory will have. A bold accessory on an already busy, highly-textured swoop can feel overwhelming.
10. The Swoop Ponytail with Face-Framing Pieces
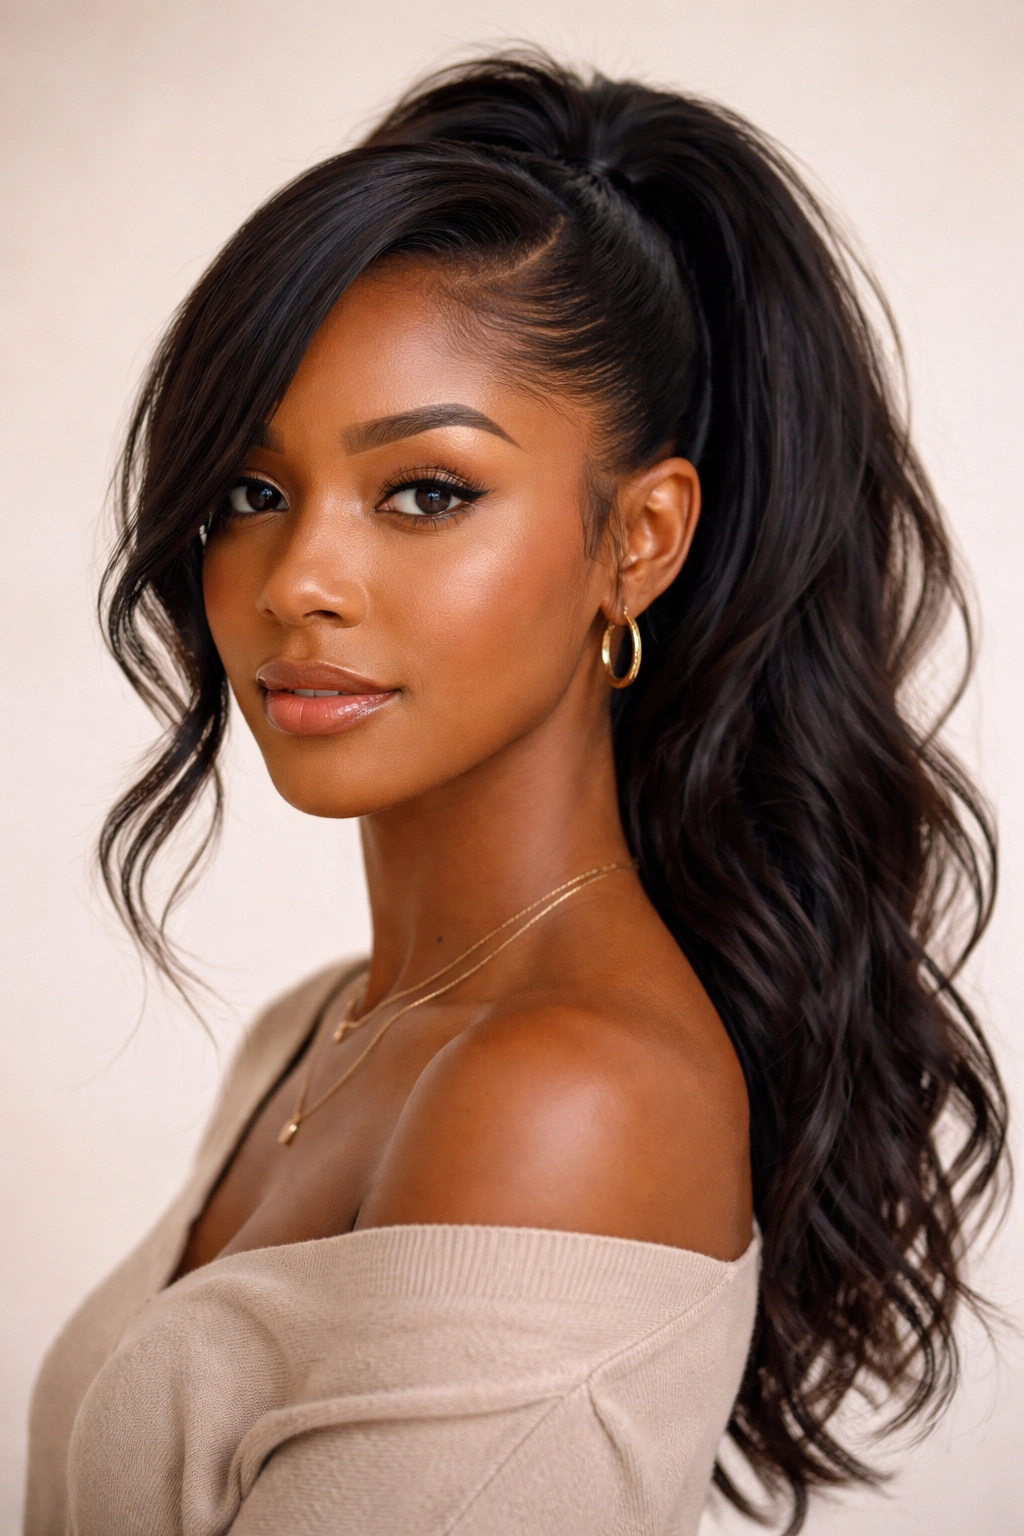
Sometimes a swoop feels too polished or too pulled-back. Leaving a few strands loose around your face softens the look while maintaining the directional swoop of the main ponytail. This style is about balance—you’re creating the visual movement and intention of a swoop without committing fully to it. Those face-framing pieces add softness and movement that feels romantic and approachable.
Why Face-Framing Softens the Impact
A severe, fully-pulled swoop can sometimes feel harsh depending on your face shape and the width of your part. Intentionally leaving a few strands loose—whether that’s a full curl on each side or just a few thin pieces—creates a frame that’s flattering and less severe. You’re maintaining the directional swoop while softening the overall effect.
Creating the Face Frame
- Before securing your main ponytail, determine which pieces you want to leave loose
- Common placements: one full curl on each side of your face, thin pieces at the temples, or a few pieces along your hairline
- These pieces should flow in the same direction as your swoop, not against it
- Secure them away from your face with a small clip, bobby pin, or curl defining product
- The rest of your hair sweeps back into the ponytail as usual
- Your face-framing pieces can be left completely loose or lightly pinned so they frame without looking chaotic
Quick fact: Face-framing pieces need a little more refreshing during the day since they’re moved against your face and neck. A light texture spray helps keep them looking intentional.
11. The Swoop Ponytail with Tucked Twists

Building on the braided swoop idea, instead of braiding, you can incorporate twisted sections into your swoop before securing the ponytail. Twists are slightly faster and often more flattering on very tight curl patterns than braids. They create the same visual interest and hold as braids while sometimes looking less formal and more organic.
Twists vs. Braids
Twists are two-strand holds that spiral around each other, while braids use three or more strands. On natural hair, twists often feel more flowing and less structured than braids, which is why some people prefer them. They also have a beautiful visual quality where you can see the defined structure of the twist against the texture of loose hair. Twists in a swoop ponytail create movement and visual depth without the more formal feeling of braids.
Building the Twisted Swoop
- Start with your swoop direction established and hair gathered loosely
- Divide the main swoop section into 2-4 parts
- Take two subsections and twist them around each other loosely (tight twists can stress your hair)
- Work the twist from the crown area down toward where your ponytail will be
- Secure the end of each twist with a small elastic or bobby pin
- Complete the rest of the loose ponytail, and the twists will sit along the top of it
- You can keep twists sleek or gently pancake them for fullness
Pro tip: If your twists start to unravel during the day, it usually means they were too loose to begin with. A light texture spray can reactivate product and help hold them in place.
12. The Swoop Ponytail with Intertwined Hair Piece or Extension
For extra volume and length on a swoop ponytail, adding a hair piece or extension creates instant fullness and allows you to achieve that ultra-voluminous swoop even if your own hair is shorter or finer. Extensions don’t have to be obvious—when matched properly to your hair color and texture, they integrate seamlessly into your natural swoop ponytail.
Why Extensions Elevate a Swoop
Extensions immediately increase the visual impact of any ponytail style. They allow for fuller volume, more length, and create a more dramatic directional sweep. On natural hair, extensions that match your curl pattern create a unified look that feels cohesive, not added. The key is choosing extensions that respect your hair’s texture and securing them in a way that doesn’t create tension at your hairline.
Adding Extensions Properly
- If using a clip-in piece, secure it at the crown or base of your ponytail before gathering the full swoop
- If using sewn-in extensions, they should be installed well before your swoop styling day
- Gather your natural hair and extensions together into your swoop ponytail
- The combination will create noticeably more volume and weight
- Use a sturdy elastic rated for thicker hair to handle the added weight
- Secure with multiple bobby pins if needed—the weight of extensions requires more anchoring than natural hair alone
Worth knowing: Extension weight pulls on your hairline, so this isn’t a style to wear every single day. Reserve it for occasions where you want maximum impact and can commit to being gentle with your hair afterward.
Final Thoughts
The versatility of swoop ponytails for natural hair is genuinely remarkable. You can go from sleek and professional to textured and playful, from minimalist to heavily accessorized, from a quick five-minute style to something that takes intentional time and skill. The through-line with all of these versions is the directional sweep—that intentional movement to one side that immediately elevates a ponytail from basic to considered. What works best for you depends on your hair’s density, curl pattern, lifestyle, and what feeling you’re going for. A sleek swoop with laid edges reads completely different than a high-volume textured swoop, even though they share the same core concept.
The real power of understanding these different swoop variations is that you can rotate through them depending on your mood, the occasion, and what your hair needs. Some days you want maximum volume and visual impact. Other days a low, soft swoop with face-framing pieces feels like the right energy. The best natural hair styles are the ones you can actually maintain and the ones that make you feel confident—and swoops, in all their variations, consistently deliver both. Start with whichever version speaks to you most, practice the technique until it feels natural, then gradually experiment with the others. Each one adds a different skill and possibility to your natural hair styling toolkit.