A textured ponytail isn’t just a quick, casual style pulled back into a elastic—it’s a carefully crafted wedding look that says you’ve put thought into every detail. Whether you’re the bride, a bridesmaid, or a guest, a textured ponytail offers the perfect balance of elegance and movement, catching light beautifully in photographs while keeping your hair secured through hours of celebration and dancing. The texture adds dimension and visual interest that a sleek, smooth ponytail simply can’t match, and it works with virtually every wedding aesthetic, from bohemian garden ceremonies to formal ballroom receptions.
The beauty of textured ponytails for weddings is their versatility. You can incorporate braids, twists, waves, curls, and layers in endless combinations. A textured style also forgives minor imperfections—loose tendrils and flyaways actually enhance the romantic feel rather than detract from it. Unlike rigid, high-maintenance updos, a well-executed textured ponytail feels effortless and wearable, which means you can actually enjoy the wedding instead of worrying about your hair slipping or feeling uncomfortable.
If you’re considering a textured ponytail for an upcoming wedding, this guide will walk you through 12 distinct styles, each with specific techniques, styling tips, and the personality each one brings to different wedding settings. Whether you prefer intricate braids, romantic waves, dramatic volume, or a modern hybrid approach, you’ll find a style here that matches your vision and comfort level.
Best Hair Types and Preparation for Textured Ponytails

Before diving into the individual styles, it’s worth understanding which hair types wear textured ponytails best and how to prep your hair properly. Fine or thin hair benefits enormously from backcombing and texturizing sprays, which create grip and make braids or twists hold securely. Thick, wavy, or curly hair naturally has the texture needed and often looks stunning with minimal added texture. Straight hair can achieve beautiful texture through curling or crimping before assembling the ponytail.
Prep your hair the day before or the morning of. Freshly washed hair is slippery and difficult to work with, so aim for hair that’s one or two days old. Apply a texturizing spray or dry shampoo to the roots for grip and volume—this single product makes braiding and securing a ponytail infinitely easier. If you’re starting with straight hair, add waves or curls using a curling iron, flat iron, or overnight waves (braid damp hair and release in the morning for loose texture). Fine hair benefits from light backcombing at the base of the ponytail and along the crown to create volume before you begin styling.
Pro Tip for Long-Lasting Texture
Use a lightweight hairspray between layers—spray the base of your ponytail before pulling it tight, spray any braids as you weave them, and do a final mist when the style is complete. This ensures the texture holds throughout the entire wedding event without feeling stiff or sticky.
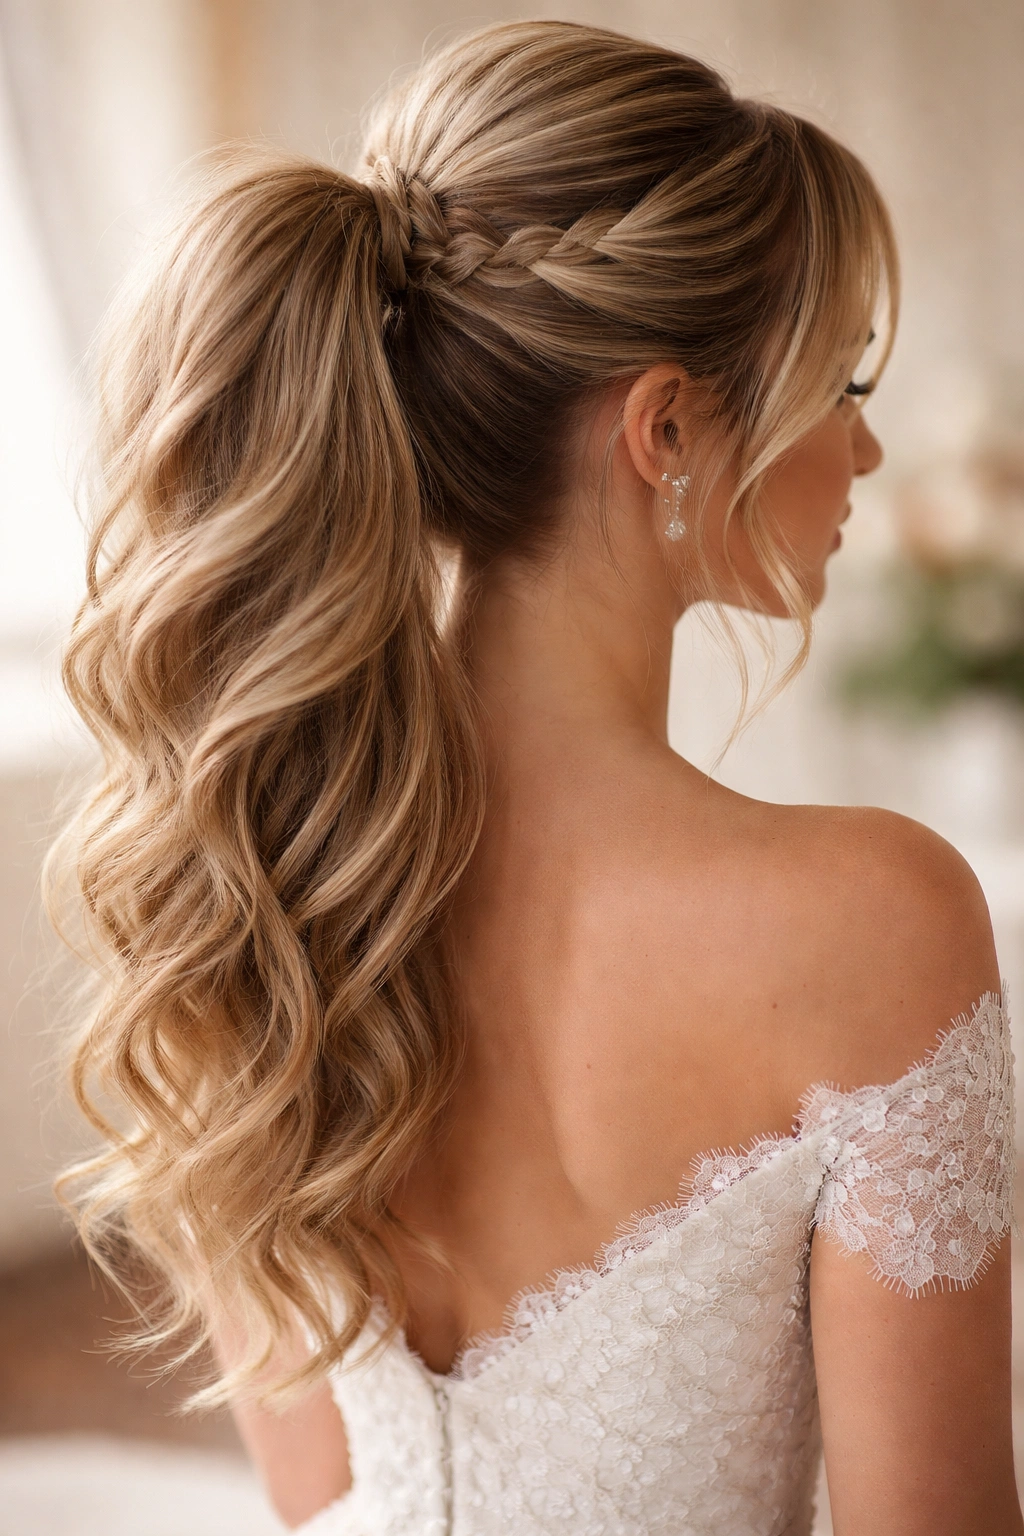
1. Braided Crown Ponytail
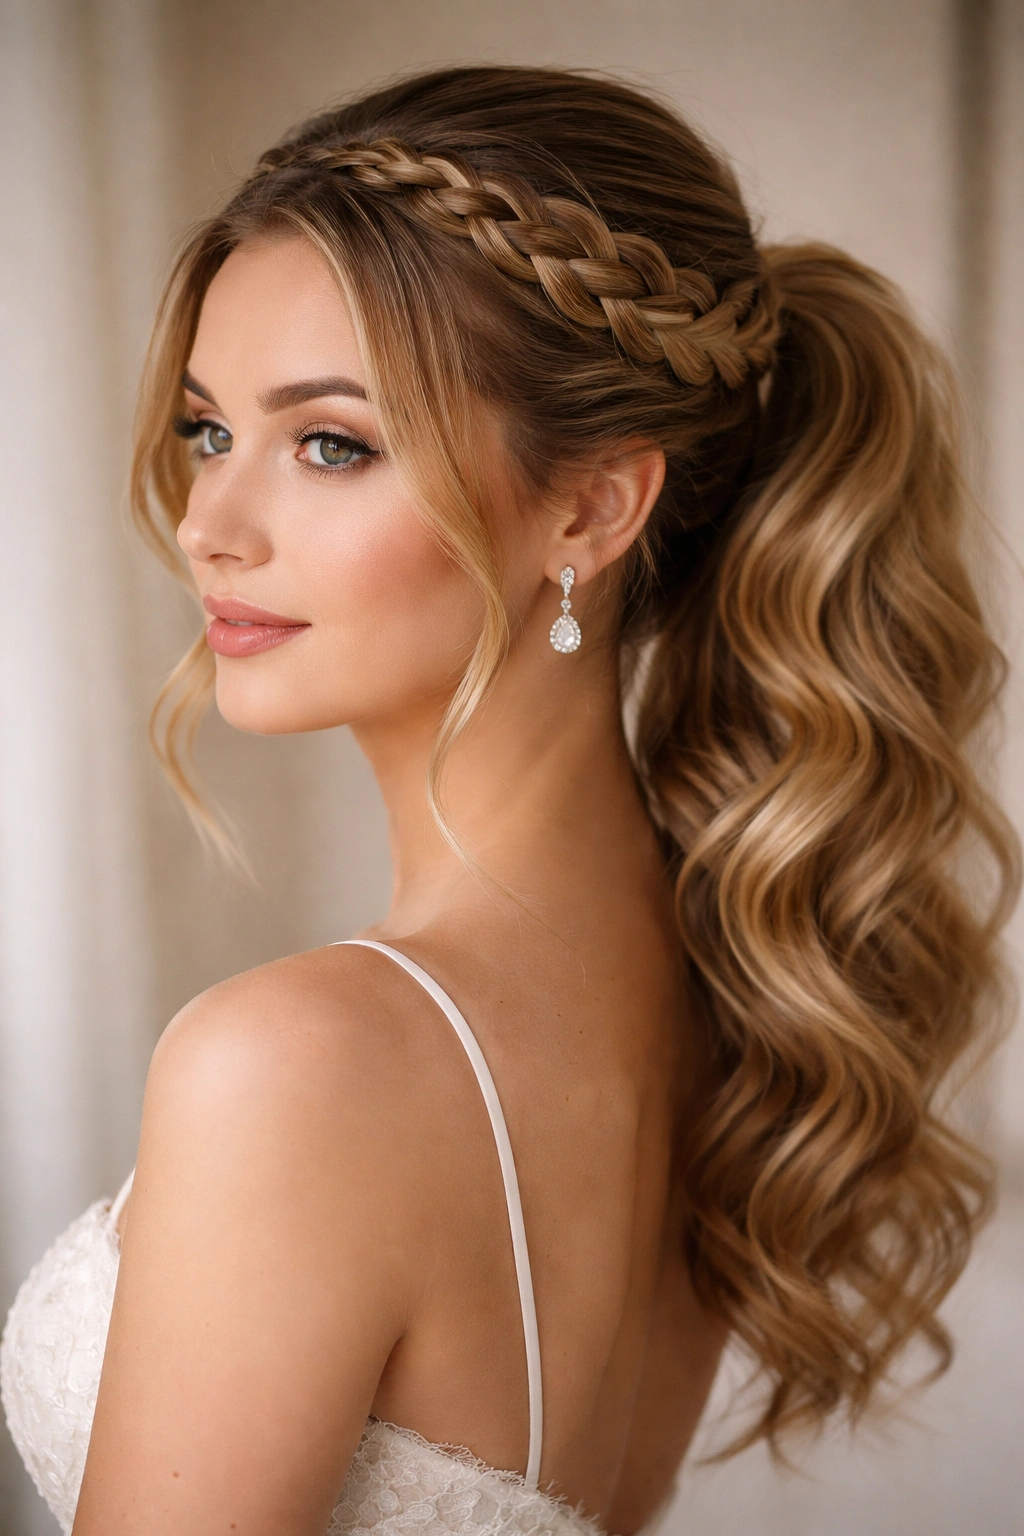
This style blends the romance of a crown braid with the sleekness of a ponytail, creating a sophisticated look that works for brides and attendants alike. A braided crown starts at one ear, travels across the back of the head, and anchors the base of a textured ponytail, creating an intricate frame for the face while keeping all hair secured.
Why It Works for Weddings
A braided crown reads as intentional and polished without appearing overly complicated. The braid sits close to the head, which flatters most face shapes, and the trailing ponytail allows your hair to flow and move. This style also photographs beautifully from the back—the braided detail is visible in shots where you turn your head, and the texture in the ponytail catches light in candid moments.
How to Create It
- Section off a piece of hair from your ear, roughly two inches thick, on one side of your head
- Dutch braid (braiding backwards under rather than over) this section horizontally across the back of your head toward the opposite ear
- Pull out small pieces from the braid gently to add width and texture as you go—this makes the braid look fuller and more organic
- Secure the end of the braid with a small elastic at the base of your ponytail
- Gather the remaining hair into a high or mid-level ponytail, incorporating the end of the braid
- Tease the base of the ponytail for volume, then smooth the outer layer lightly
- Wrap a thin section of hair around the elastic to hide it, and secure with bobby pins and hairspray
Timeline: 15-20 minutes (slightly longer if you’re new to Dutch braiding)
2. Twisted Rope Ponytail

Instead of braiding, this style uses two-strand twists woven into and around the ponytail base, creating a modern, textured look that’s surprisingly easy to execute even if braiding intimidates you. The twists add visual complexity without requiring the skill level of a full braid.
Why It Works for Weddings
Twists are trendy and contemporary without feeling casual. They sit beautifully in photographs and create defined lines and movement. This style works especially well for modern or minimalist weddings where you want intentional detail without elaborate ornamentation.
How to Create It
- Start with hair that has waves or texture already (curled or textured spray applied)
- Section off two pieces of hair from the front on opposite sides of your head
- Twist each piece tightly, moving backward and slightly inward
- Cross the left twist over the right at the back of your head, then continue twisting each strand
- Secure both twists with bobby pins at the nape of your neck
- Gather all remaining hair into a ponytail, incorporating the twisted ends
- Tease gently at the base for volume
- Take a thin strand from the ponytail and wrap it around the elastic several times to conceal it
- Secure and hairspray
Pro tip: Create multiple thin twists rather than one or two thick ones for a more textured, intricate appearance.
3. Bubble Ponytail with Textured Sections
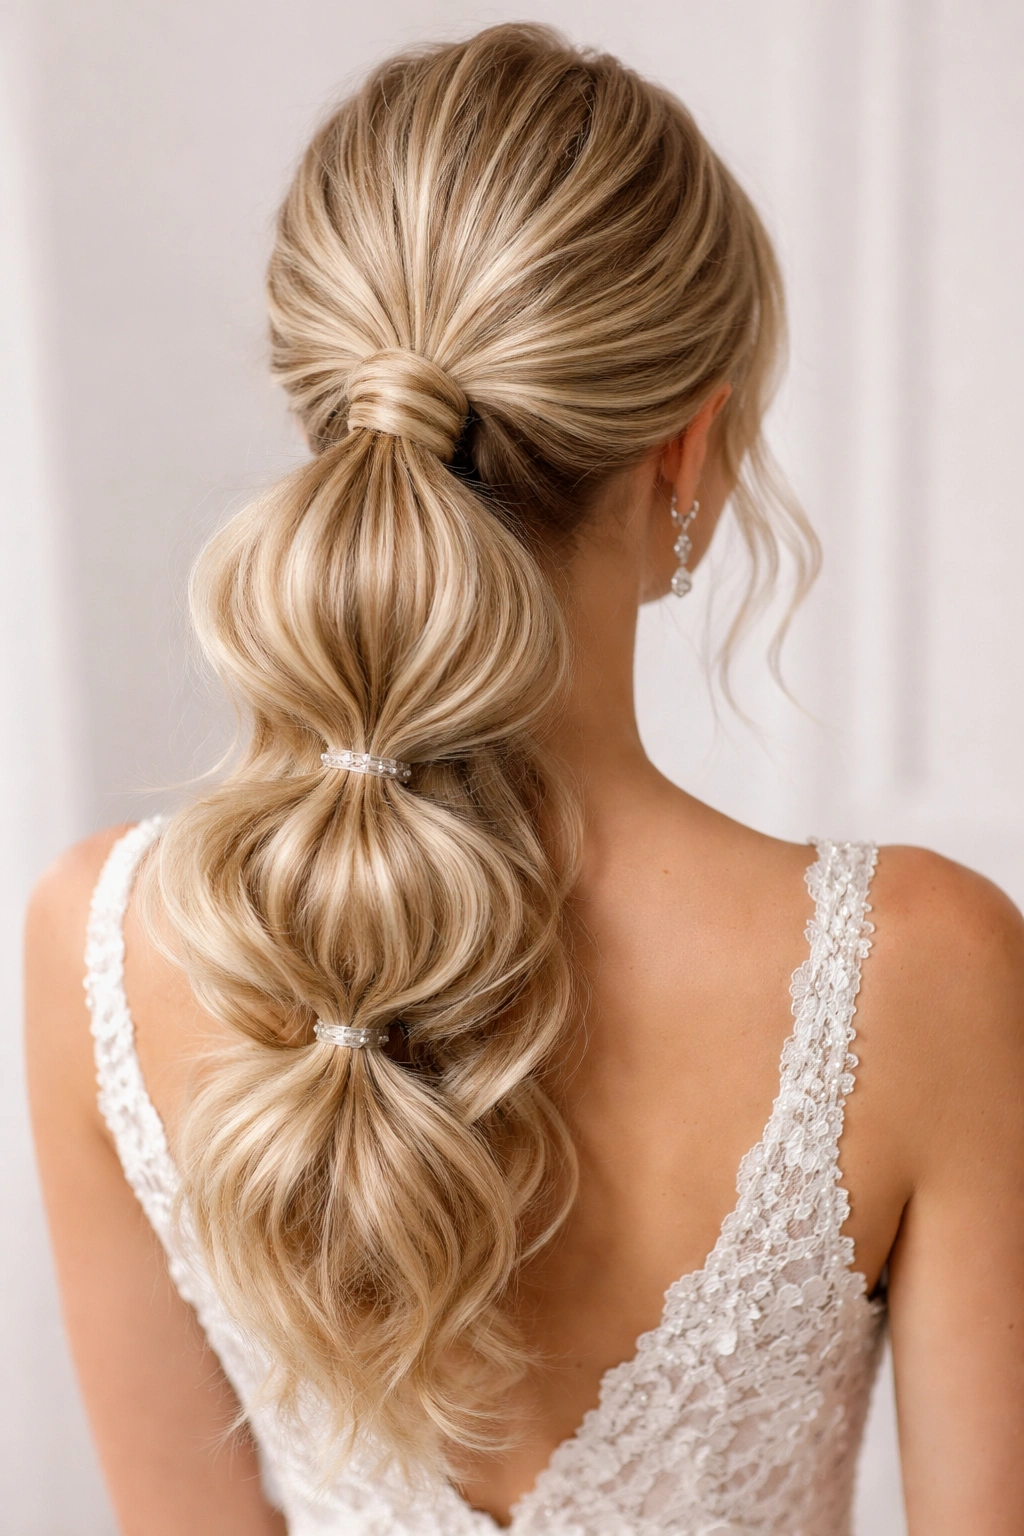
A bubble ponytail divides the length of the ponytail into sections separated by elastics, creating a dimensional, almost beaded effect. Adding texture to each bubble—through curls, waves, or crimping—elevates this playful style into something wedding-appropriate.
Why It Works for Weddings
This style is eye-catching and modern while remaining romantic and youthful. It photographs remarkably well because the light catches each bubble section differently, creating depth and visual interest. It’s especially flattering in candid photos where your hair is moving and the bubbles bounce slightly.
How to Create It
- Gather hair into a sleek or slightly textured base ponytail as high or as low as you prefer
- Starting about three inches from the elastic, secure a second elastic around the ponytail
- Push the hair between the two elastics upward and outward, creating fullness—this is your first bubble
- Below that elastic, create another section and add a third elastic about three inches down
- Repeat this process down the entire length of the ponytail, typically creating 4-6 bubbles depending on hair length
- After all elastics are in place, curl or wave each individual bubble section using a 1.25-inch curling iron, wrapping the bubble around the barrel and holding for a few seconds
- Gently brush through the curls to blend them into soft waves rather than tight ringlets
- Mist with hairspray to set the waves in place
Timeline: 20-25 minutes
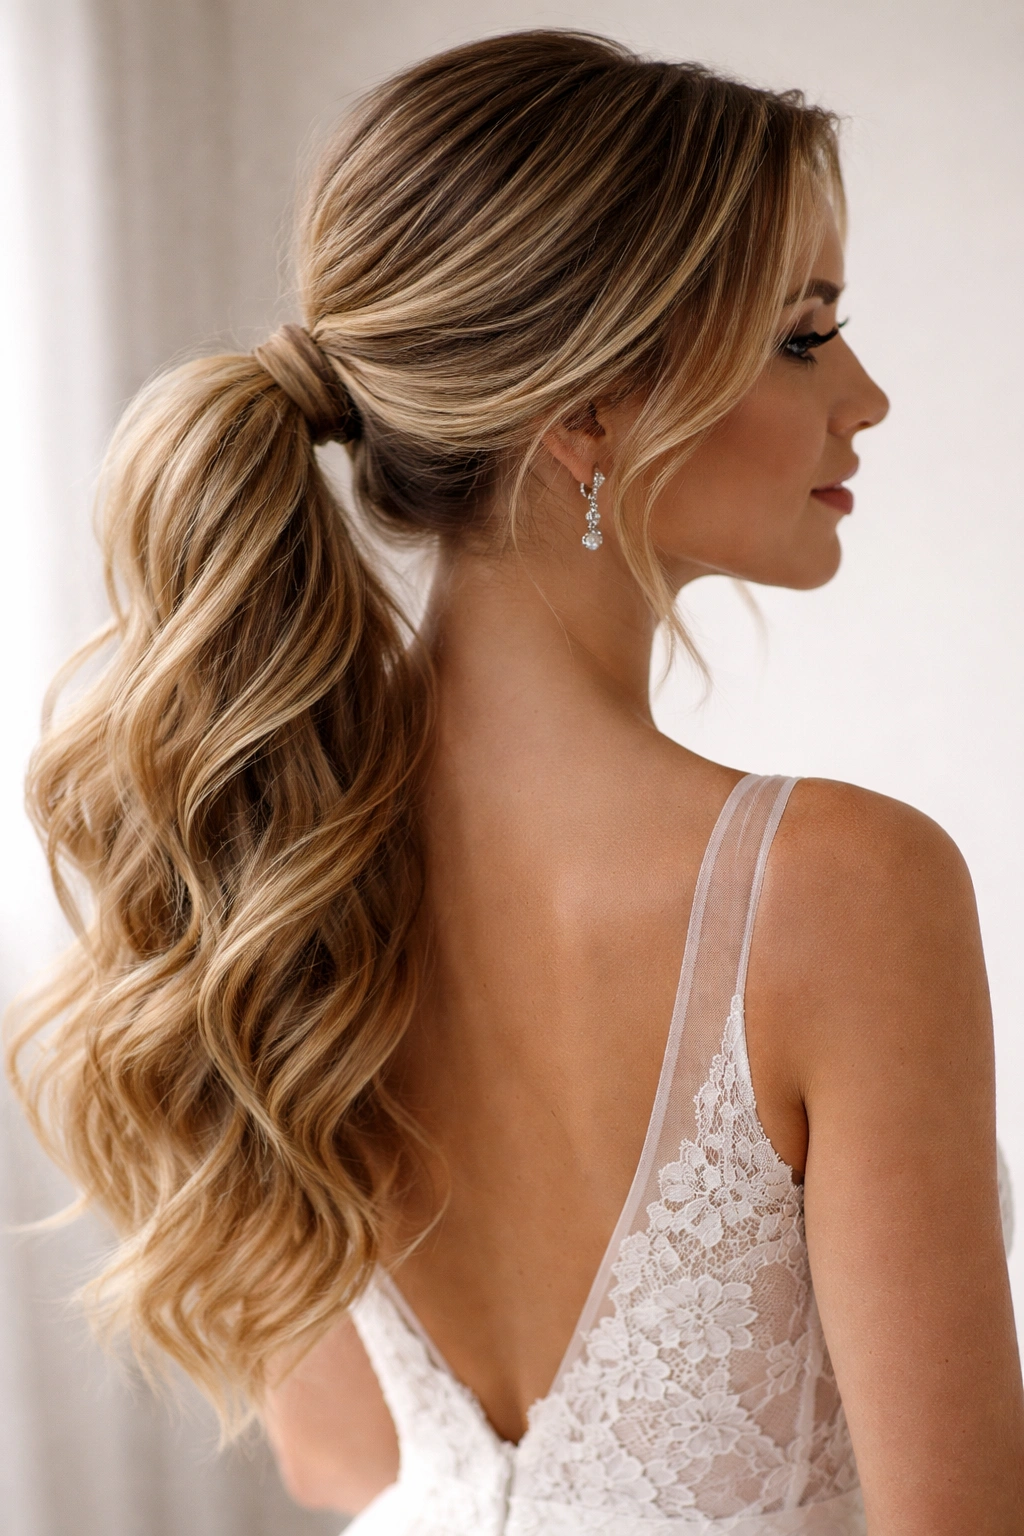
4. Messy Romantic Ponytail with Loose Tendrils
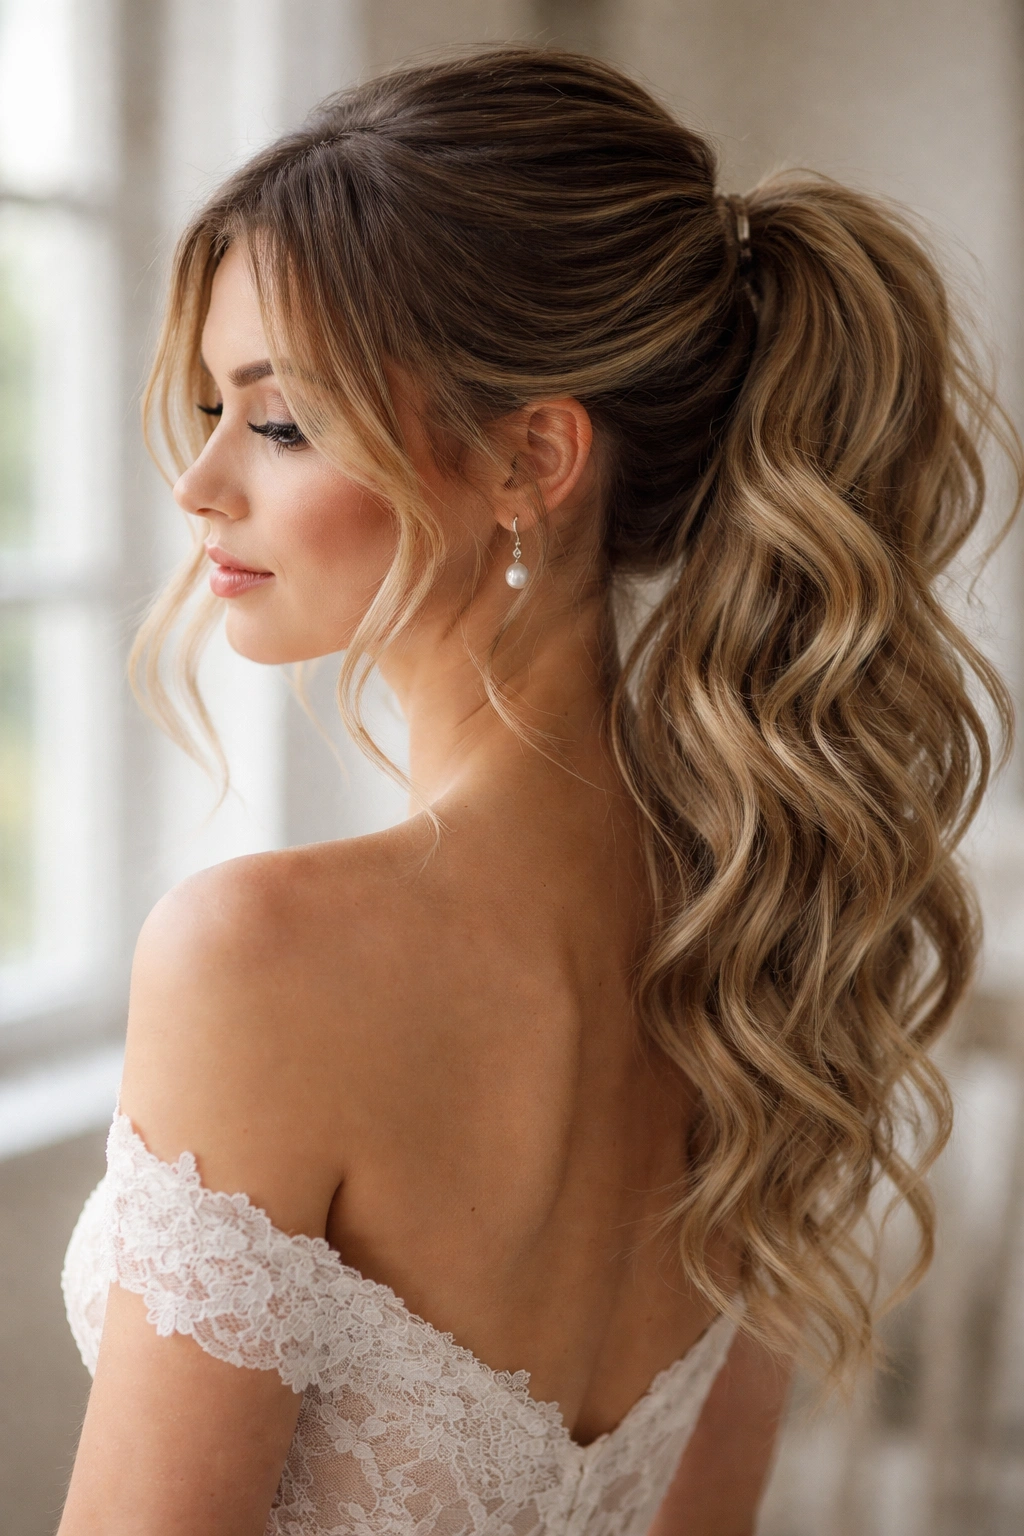
This style embraces intentional imperfection, pairing a voluminous, lightly tousled ponytail with strategically placed loose strands that frame the face. It’s the epitome of effortless romance and works beautifully for outdoor or rustic weddings.
Why It Works for Weddings
The beauty of this style is that it looks intentional without appearing overdone, and it actually improves as the day progresses—a small amount of movement and looseness only adds to the romantic vibe. The loose tendrils frame the face and soften features in a way that photographs gorgeously. It’s also genuinely comfortable to wear for a full day since you’re not pulling every hair tightly.
How to Create It
- Start with hair that has been lightly curled or waved throughout
- Before pulling the ponytail, release a small section on each side of your face near the temples and a few strands at the nape of your neck—these become your loose tendrils
- Gather the remaining hair into a high or mid-level ponytail, purposely leaving the ponytail slightly loose rather than pulling it taut
- Tease the gathered hair gently at the base to create subtle volume and texture
- Wrap a thin strand around the elastic to hide it, securing with bobby pins
- Using a 1.25-inch curling iron, curl each section of the ponytail away from the face, working in multiple passes to add dimension and texture
- Gently brush through the curls with your fingers or a wide-tooth comb to soften them into waves
- Pull out a few more strands gently around the crown to add to the lived-in texture
- Finish with a light mist of flexible-hold hairspray that won’t make the style feel stiff
Pro tip: This style actually benefits from being created an hour or two before the wedding ceremony—allowing the curls to set and the style to settle naturally.
5. Dutch Braid into Ponytail
A Dutch braid (braiding backward, with strands going under rather than over) creates a raised, dimensional effect that’s distinctly different from a French braid. Running a Dutch braid into the base of a ponytail creates impressive visual drama with solid construction.
Why It Works for Weddings
The Dutch braid sits on top of the head rather than nestled into it, making it more visible and striking in photographs. It reads as intricate and intentional, and the braid itself becomes a focal point of the style. This works particularly well for brides and formal wedding parties where a structured, polished look is desired.
How to Create It
- Section off a triangular section of hair at the crown, roughly three inches across at the front hairline
- Begin your Dutch braid at the front hairline, braiding backward (pulling strands under rather than over)
- Pick up new pieces of hair from each side as you braid, continuing down the center back of your head
- As you approach the nape of your neck, gather the end of the braid along with all remaining hair into a ponytail section
- Secure the ponytail with an elastic
- Gently pull on the braided sections to widen the braid and add texture
- Tease the base of the ponytail for volume
- Wrap a thin strand around the base elastic and secure with bobby pins
- Curl or wave the ponytail section for additional texture
- Finish with hairspray
Timeline: 12-15 minutes (faster than a French braid since fewer pieces are involved)
6. Wrapped and Tucked Textured Ponytail
This sophisticated style takes a ponytail and wraps sections of it back into itself, creating layered, folded texture. It’s architectural and modern while remaining timelessly elegant.
Why It Works for Weddings
The wrapped-and-tucked technique creates the illusion of a more complex updo while still maintaining the ease of a ponytail. It flatters the face by drawing attention upward and backward. This style works especially well for brides who want something polished and intentional but don’t want to commit to a full updo that restricts movement and warmth.
How to Create It
- Pull hair into a high or mid-level ponytail and secure with an elastic
- Tease the base of the ponytail to create volume and grip
- Divide the ponytail into three or four thick sections
- Take the left section and twist it, then fold it backward and tuck it underneath the ponytail base, securing with bobby pins
- Repeat with the next section, wrapping it in the opposite direction and tucking it in
- Continue alternating directions with each section until all are wrapped and tucked
- Use bobby pins liberally to secure each fold—these will be hidden by the wrapping
- Curl or wave any exposed pieces of the ponytail
- Finish with hairspray, making sure to spray inside the folds and tucks to keep them in place
Pro tip: This style holds best if you use textured or waves hair to begin with—smooth hair is slippery and folds won’t hold as securely.
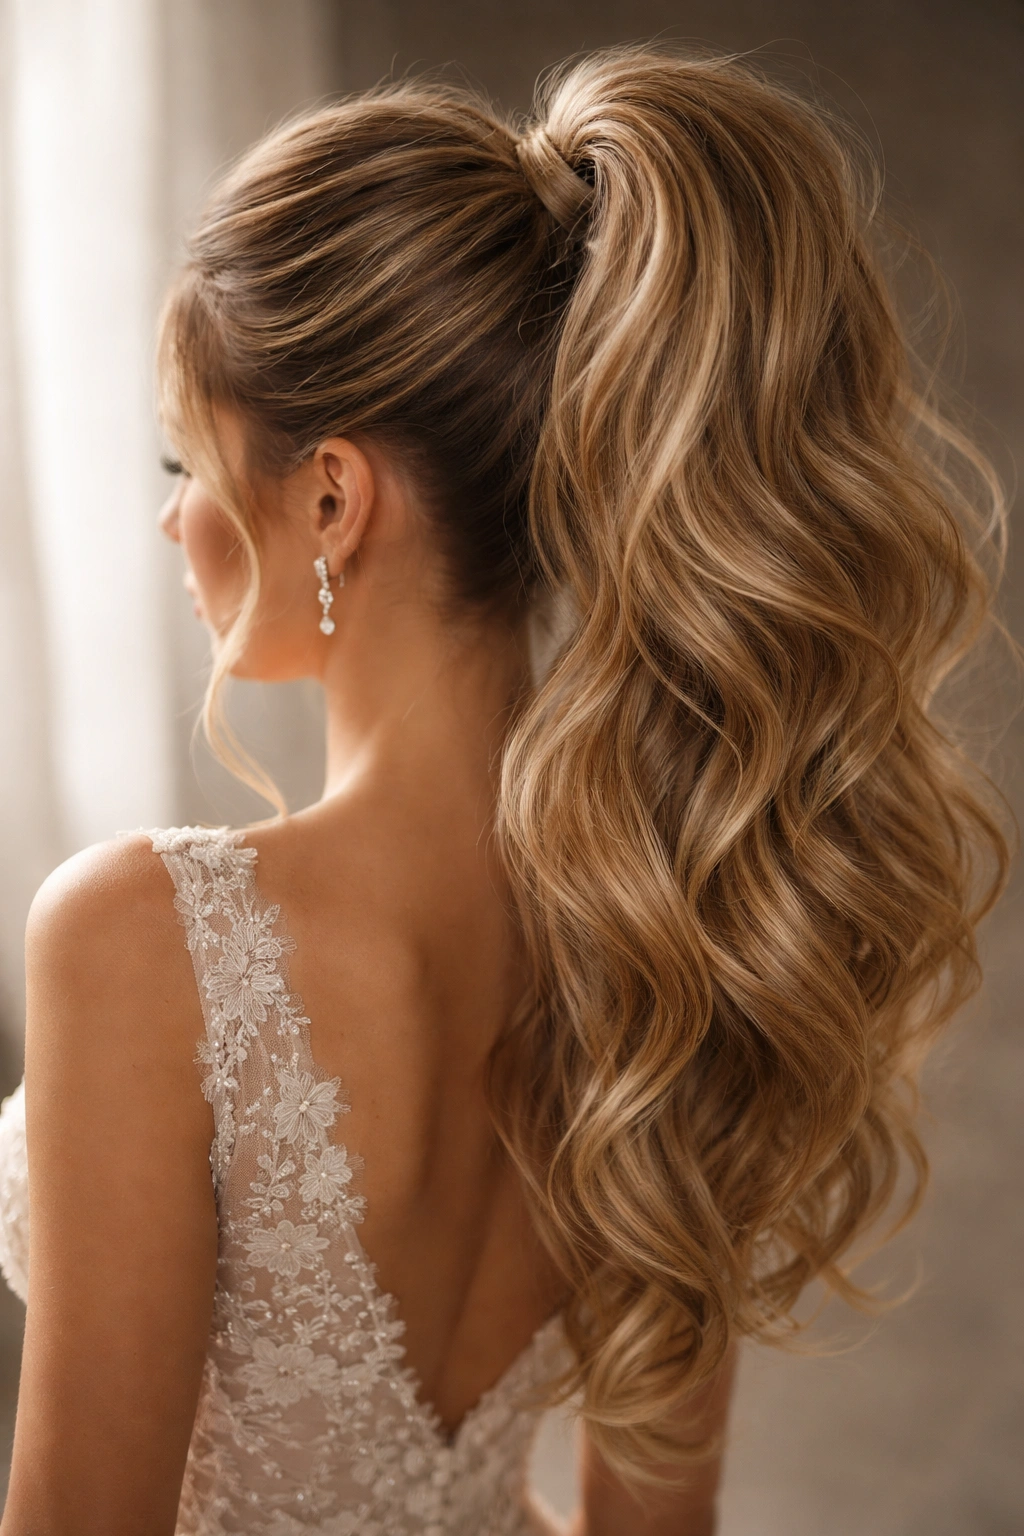
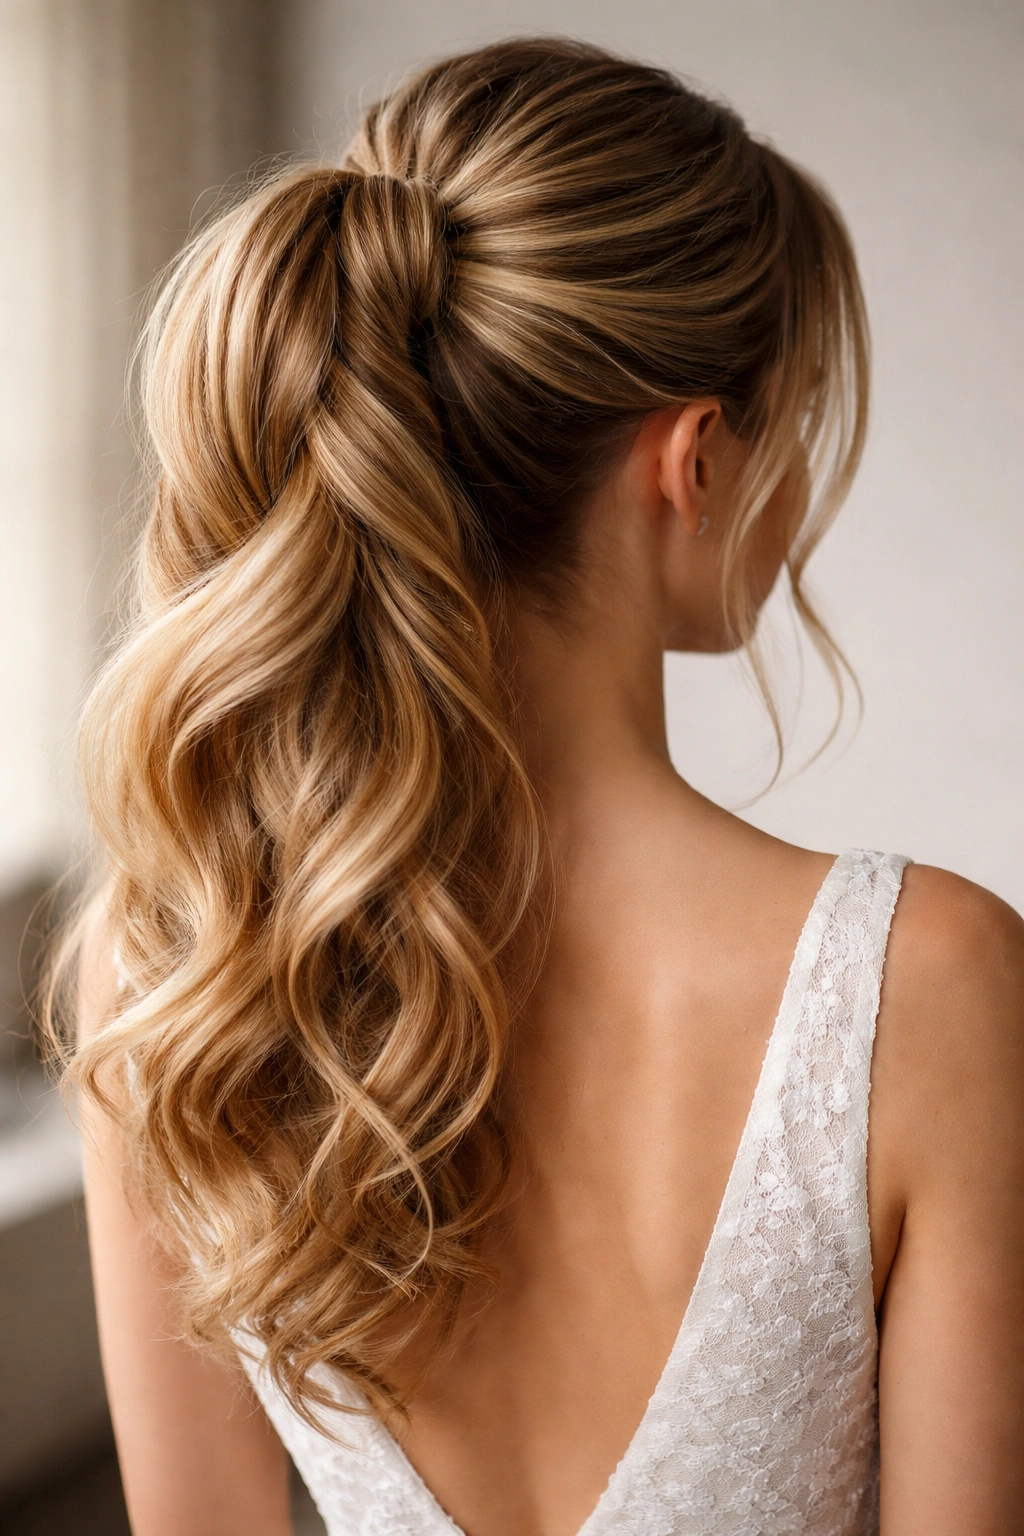
7. Curled Ponytail with Soft Waves
Sometimes the best textured ponytail is the simplest: perfectly curled or waved hair gathered into a ponytail with the texture being the primary visual element. This style puts the focus on shiny, healthy, beautifully textured hair rather than structural complexity.
Why It Works for Weddings
This timeless approach works with any wedding style and any face shape. The soft waves create movement and elegance without the maintenance or styling requirements of intricate braids. It photographs beautifully because the texture catches light and creates dimension, and the waves move gracefully in candid shots and videos.
How to Create It
- Begin with clean or lightly texturized hair
- Using a 1.5-inch curling iron, curl the entire head in sections, wrapping each section around the barrel away from the face and holding for 3-5 seconds
- Work throughout the entire head, ensuring all sections are curled, including underneath layers
- Allow curls to cool for a few minutes (this helps them hold better)
- Gently brush through the curls with a paddle brush or your fingers to blend them into soft, unified waves
- Gather hair into a high or mid-level ponytail, choosing how tight or loose you prefer
- Tease gently at the base of the ponytail for subtle volume
- Take a thin strand from the ponytail and wrap it around the elastic
- Secure the wrap with bobby pins
- Do a final pass with your curling iron on any ponytail sections that have straightened slightly
- Finish with a flexible-hold hairspray that maintains the soft wave texture
Timeline: 25-35 minutes depending on hair thickness and length
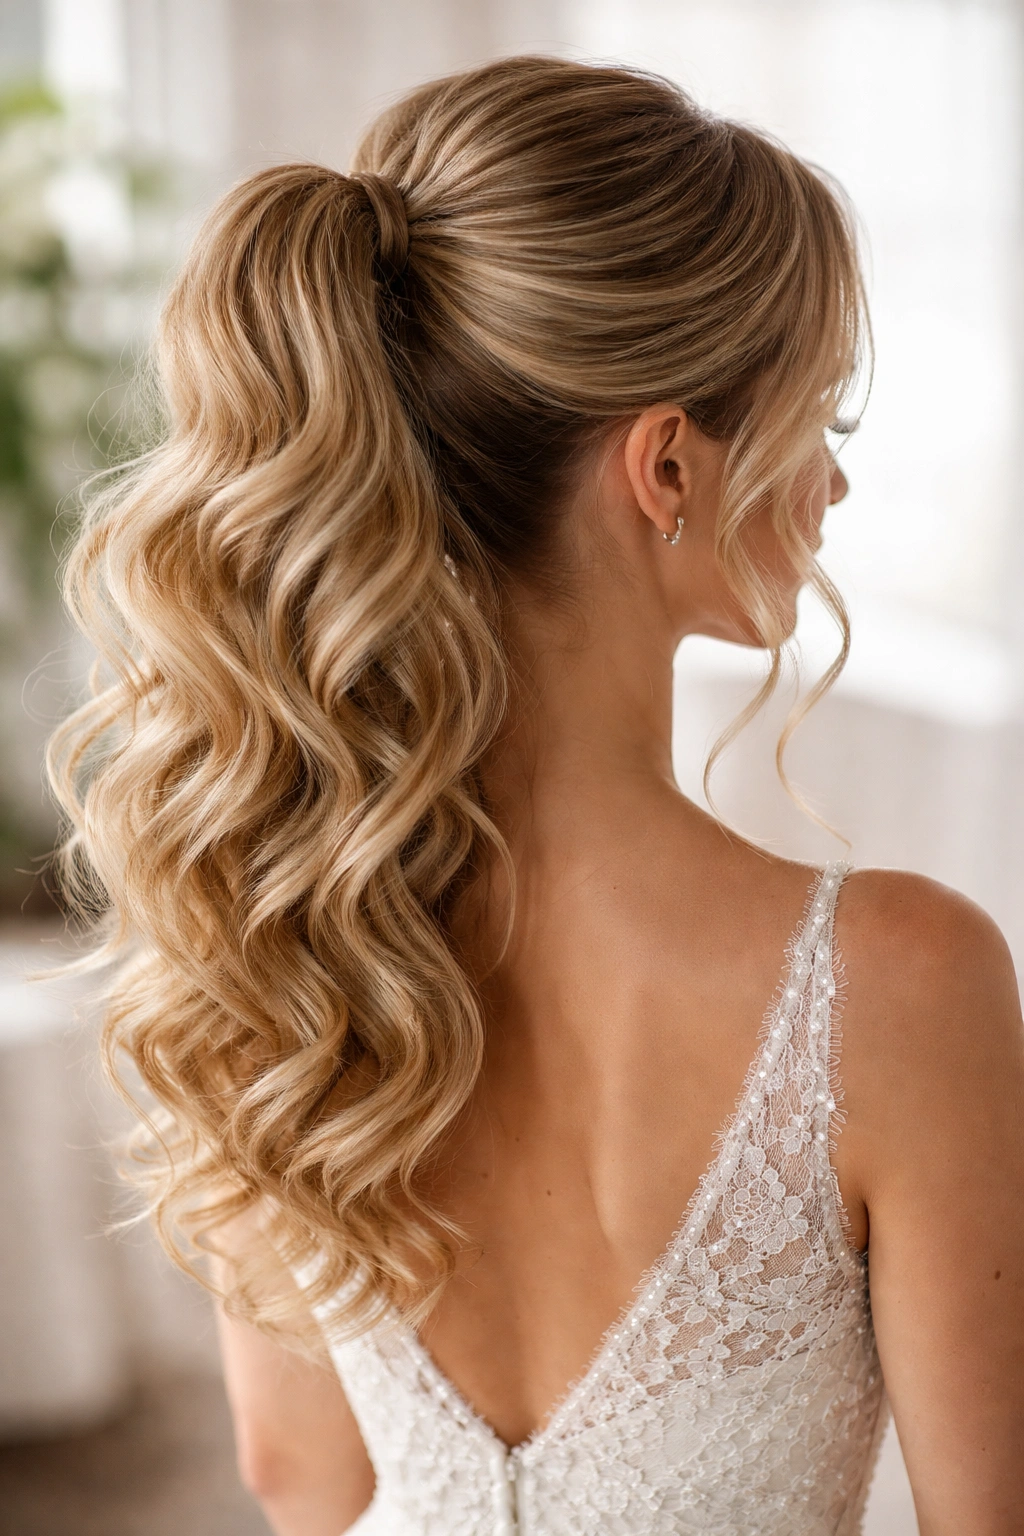
8. Voluminous Textured High Ponytail
This style maximizes volume and drama by anchoring the ponytail high on the crown and using backcombing and strategic teasing to create a full, rounded shape. It’s bold, modern, and unapologetically glamorous.
Why It Works for Weddings
A high, voluminous ponytail is undeniably striking and creates instant elevation and drama. It flatters tall brides and frames the face beautifully, drawing attention upward. This style works wonderfully for modern, bold, or fashion-forward weddings where you want to make a strong visual statement.
How to Create It
- Start with textured hair—waves or curls throughout create more volume than smooth hair
- Flip your head upside down and backcombing sections of hair, working from underneath to add texture and grip
- Flip back upright and brush the backcombed sections back together, maintaining the volume
- Gather hair into a high ponytail at the crown and secure with an elastic
- Backcombing the base of the ponytail (the hair around the elastic) adds grip and creates the illusion of even more volume
- Smooth the outer layer of the ponytail lightly with a brush so the finished style looks intentional rather than messy
- Take a thick strand of hair from the ponytail and wrap it around the base elastic several times, tacking it in place with bobby pins
- Curl the ponytail length in sections for additional texture and movement
- Use a light-hold hairspray rather than a heavy one—heavy product can weigh down the style and diminish the volume you’ve created
Pro tip: The higher you position the ponytail, the longer your neck appears and the more flattering the style tends to be for most face shapes.
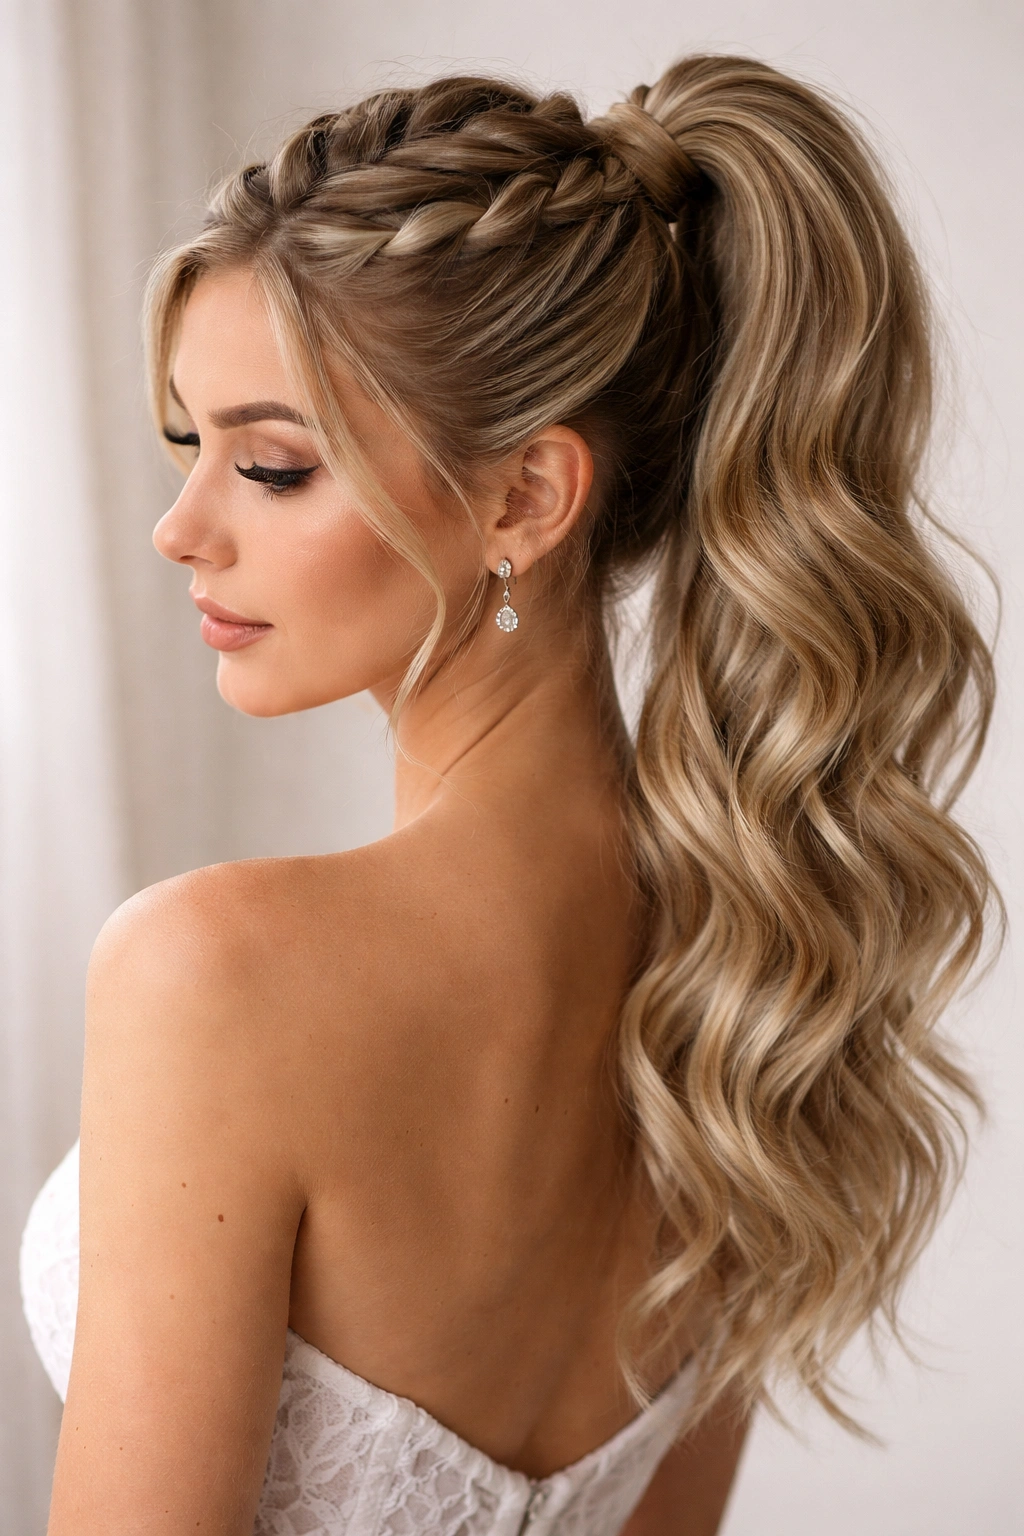
9. Side-Swept Textured Ponytail
Rather than centering the ponytail at the crown, this style angles it dramatically to one side, creating asymmetrical elegance. The textured waves flowing over one shoulder create a romantic, asymmetrical silhouette.
Why It Works for Weddings
A side-swept ponytail is inherently romantic and photographs beautifully, especially in profile shots. The asymmetry draws attention to one side of the face, which can be flattering for highlighting makeup or accentuating one side of a wedding dress bodice. This style works especially well for second-time brides or non-traditional wedding settings where you want something less centered and formal-feeling.
How to Create It
- Begin by creating soft waves throughout the entire head
- Section off a small piece of hair from the opposite side of where you want the ponytail to sit (if you want the ponytail on the right, start on the left)
- Create a thin Dutch braid or twist on the left side, running it diagonally back toward where you want the ponytail base
- Gather all hair into a ponytail on the right side of the head, incorporating the end of the braid or twist
- Tease gently at the base of the ponytail for volume
- Wrap a thin strand around the elastic to hide it
- Curl or wave the ponytail section if the existing texture needs refreshing
- Gently brush through to create soft, unified waves down the length
- For added drama, pull one or two strands from the braid and let them fall loose around your face
- Finish with a flexible-hold hairspray
Timeline: 15-20 minutes
10. Braided and Looped Ponytail
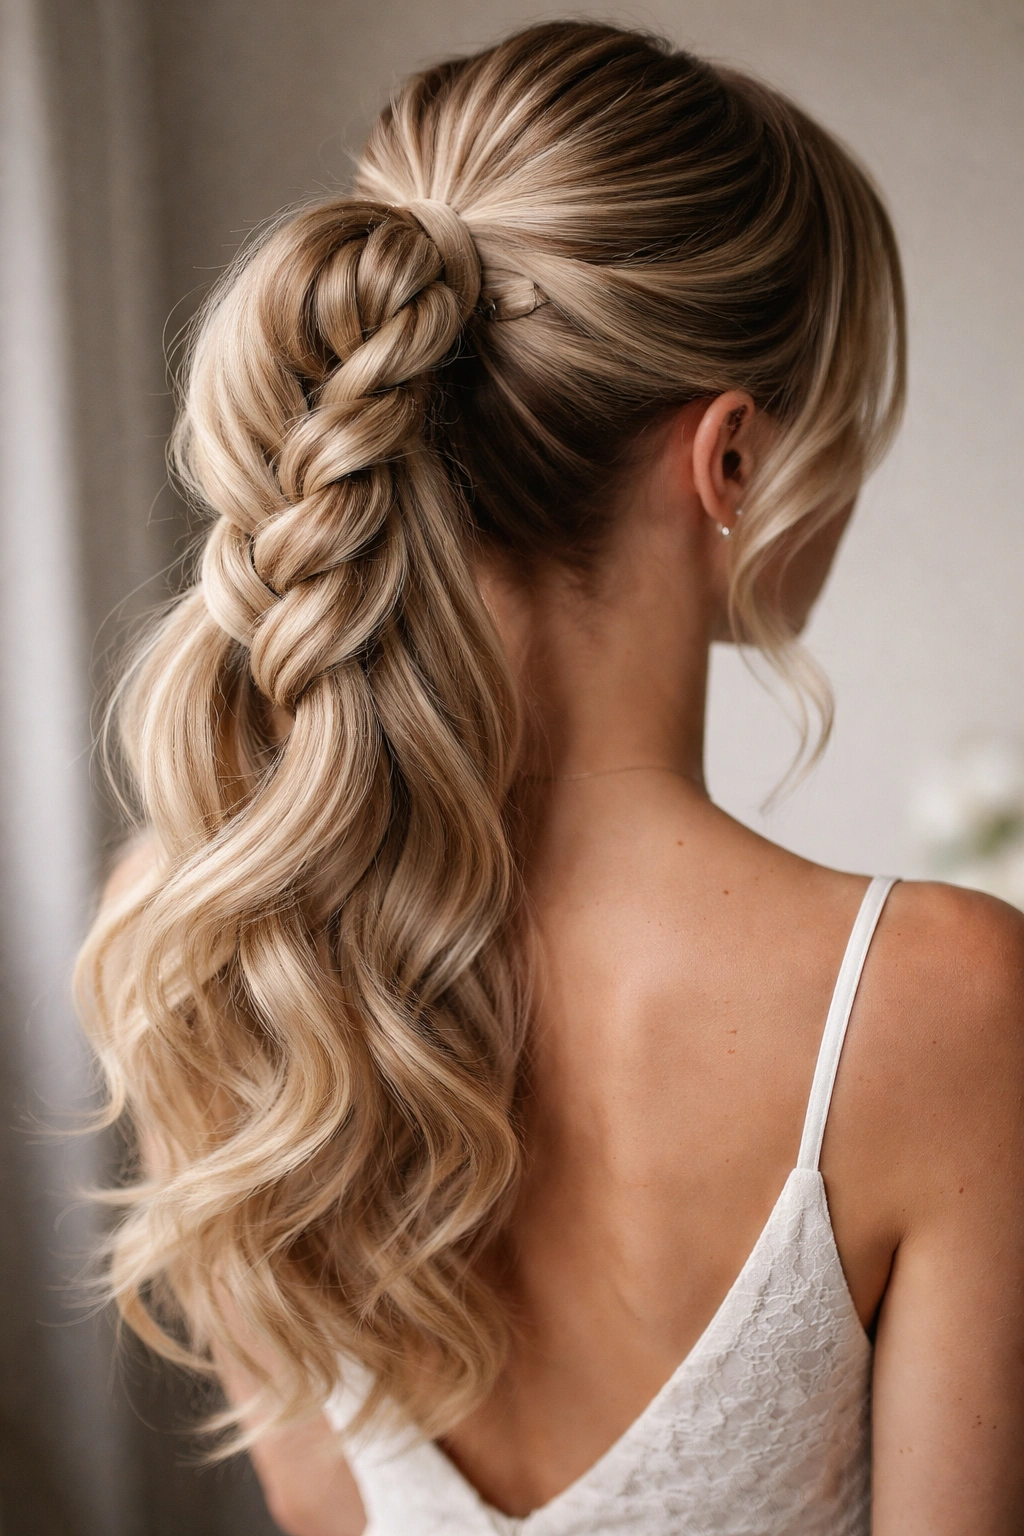
This modern style incorporates a braid into the ponytail itself, then loops sections of the braided ponytail back and pins them, creating a multi-dimensional structure that’s somewhere between a ponytail and a partial updo.
Why It Works for Weddings
The braided-and-looped style offers complexity and polish while maintaining the ease and comfort of a ponytail. It looks intentional and fashion-forward, and the looped sections add visual interest when viewed from behind. This style works beautifully for wedding receptions and cocktail hours where you want something that looks like you spent hours perfecting but actually took 20 minutes.
How to Create It
- Gather hair into a high or mid-level ponytail and secure with an elastic
- Divide the ponytail into three thick sections
- Braid these three sections together (a simple three-strand braid)
- As you braid, gently pull the braid slightly to add width and texture
- Once the braid reaches roughly the middle of the ponytail length, secure the end with a small elastic
- Create a loop by folding the braided section back on itself and pinning the loop to the base of the ponytail with bobby pins
- Take the remaining unblooped portion of the ponytail and create a curl or gentle wave with a curling iron
- You can create a second loop if your hair is long enough, or leave the remaining length wavy
- Secure all pins and loops with hairspray, making sure bobby pins are hidden by hair
Pro tip: The looser you keep the braid (by gently pulling it as you braid), the more romantic and less severe the final style appears.
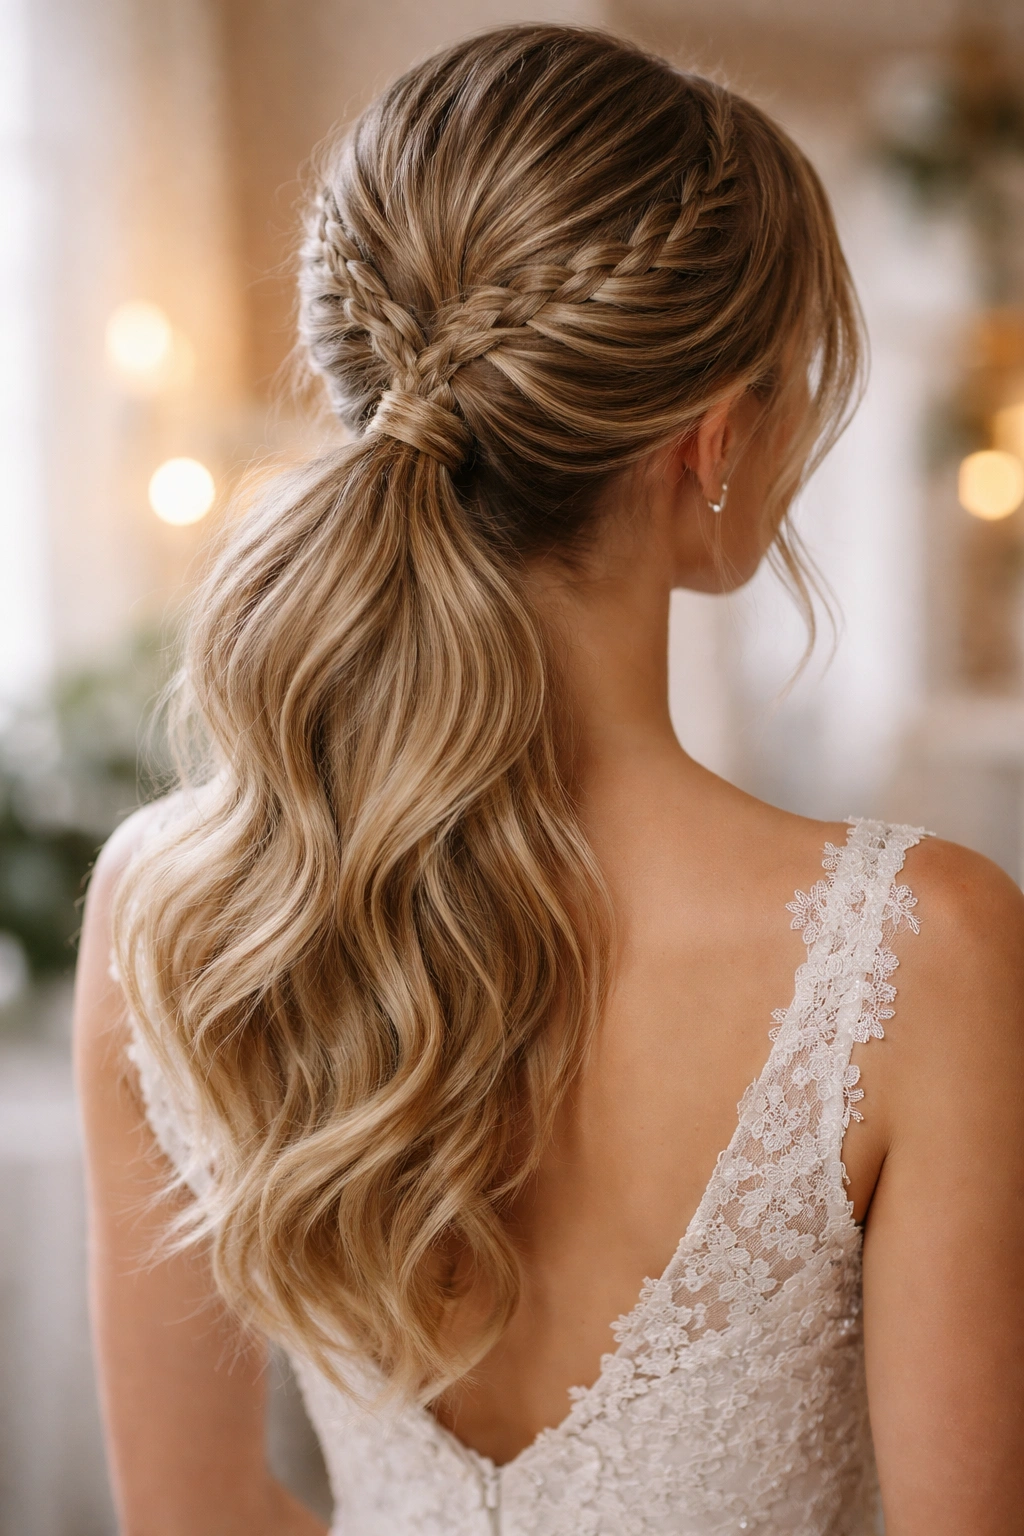
11. Teased Crown Ponytail with Braid Detail
This style combines the softness of a slightly teased, voluminous crown with a delicate braid detail that runs into the ponytail, creating a balanced look that’s both romantic and structured.
Why It Works for Weddings
This style bridges the gap between a full updo and a simple ponytail, offering the best of both worlds. The teased crown creates height and presence, while the braid adds feminine detail. It’s a safe, universally flattering choice that works for nearly any wedding setting and photograph beautifully from multiple angles.
How to Create It
- Create soft waves throughout the entire head
- Take a small section of hair from one side near your temple
- Create a thin French or Dutch braid, starting at the temple and running it horizontally back toward the opposite side of your head
- Gently pull the braid to add width
- Secure the end of the braid with a small elastic or bobby pins
- At the crown, backcombing gently to add volume without creating an obvious messy appearance
- Smooth the top layer of the crown slightly so it looks polished
- Gather all hair, including the braid, into a high or mid-level ponytail
- Tease the base of the ponytail for additional grip and volume
- Wrap a thin strand around the elastic
- Curl the ponytail for soft waves
- Final pass with flexible-hold hairspray
Timeline: 18-22 minutes
12. Multi-Braid Integrated Ponytail
For those who love intricate braiding and want maximum textural detail, this style incorporates multiple braids woven together and integrated into the ponytail base, creating a statement-making look that’s truly personalized.
Why It Works for Weddings
This style is ideal for brides or attendants who feel confident with braiding and want to showcase braiding skill and hair artistry. The multiple braids create visual complexity and interest that looks incredible in photographs, especially bridal portraits and detail shots from behind. It’s a style that makes a clear statement and works beautifully for boho, garden, or artistic wedding aesthetics.
How to Create It
- Section off two separate pieces of hair from the front of the head on opposite sides
- Create a thin Dutch braid on one side, running it backward and slightly toward the center
- Create a second Dutch braid on the opposite side, also running toward the center
- Both braids should meet at the nape of your neck
- Gently pull both braids to add width and texture
- Gather all hair into a ponytail, incorporating the ends of both braids
- You can either keep the braids distinct and visible, or gently merge them into the ponytail
- Tease the base of the ponytail for volume
- Create a third thin braid using a section of the ponytail itself, weaving it down the center of the ponytail length
- Secure the ponytail with an elastic
- Wrap a thin strand around the base elastic
- Curl or wave the remaining loose sections of the ponytail for additional texture
- Finish with hairspray, using a flexible-hold product that won’t stiffen the braids
Pro tip: Practice this style at least once before the wedding day—it’s intricate enough that familiarity helps tremendously with execution.
Products and Tools That Make Textured Ponytails Easier
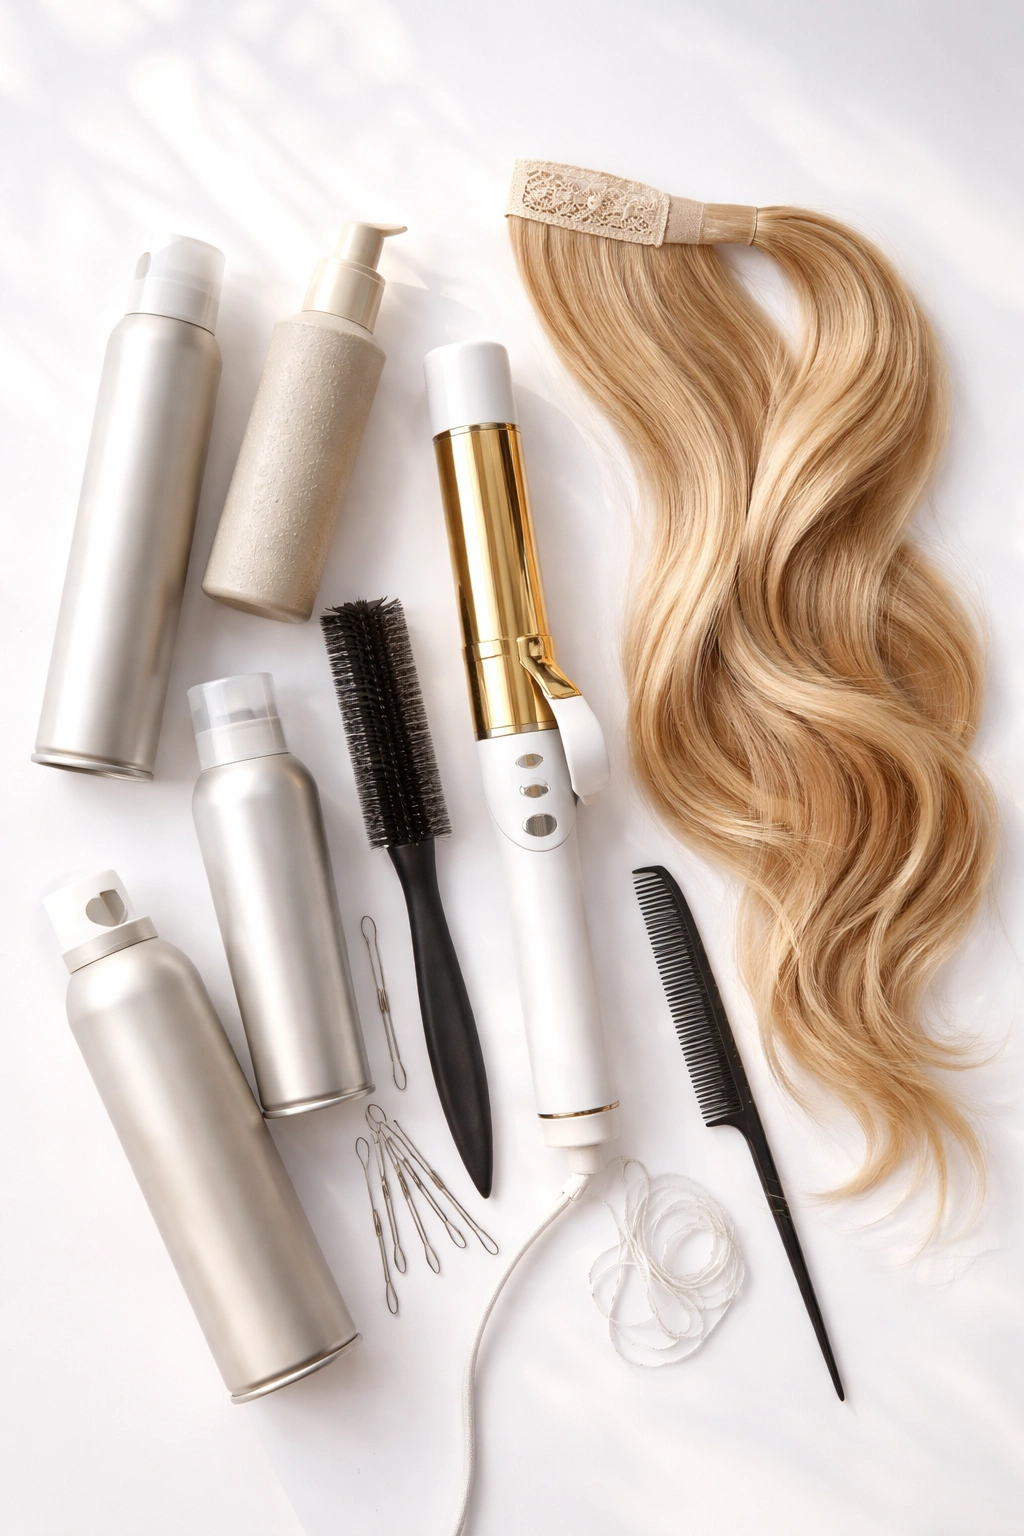
Having the right products and tools in your styling kit makes a dramatic difference in how quickly and easily you can create any of these styles. Texturizing spray or dry shampoo (applied the day before or morning of) provides grip and makes braiding infinitely easier—it’s honestly the most important product for textured ponytail success. A volumizing or lifting spray applied at the roots before you begin styling creates lift that lasts throughout the day.
For styling tools, a 1.25-inch curling iron creates the soft, romantic waves that pair beautifully with textured ponytails. Bobby pins in a color matching your hair blend in better than obvious metallic pins, and having a variety of sizes (smaller for delicate work, larger for securing thick sections) gives you flexibility. A teasing brush with short, dense bristles is essential for backcombing and creating grip. Flexible-hold hairspray (rather than heavy-hold) maintains texture without stiffening the style.
For intricate styles like braids, a fine-tooth comb helps separate and control sections. A clip-in hair extension or piece can be added at the base of the ponytail if you want additional volume—this is especially helpful if you have fine or thin hair. Many stylists use clear elastics for a cleaner appearance, though you can find elastics in various colors to match your hair.
Final Thoughts
A textured ponytail elevates your wedding day hair from functional to intentional, proving that you don’t need an elaborate updo to look polished and special. The key is choosing a style that matches your hair type, comfort level with styling, and the overall aesthetic of the wedding. Each of the 12 styles here offers a distinct personality—from the structured elegance of a braided crown to the romantic imperfection of a messy ponytail with tendrils—ensuring there’s an option that feels authentically you.
The most important thing to remember is that your hair should feel comfortable and stay secure throughout the entire event. A textured ponytail that feels loose or requires constant adjustment will distract from your enjoyment of the celebration. Plan to do a trial run at least a week before the wedding, using the same products and tools you’ll use on the day. This gives you time to troubleshoot any issues, build confidence with the technique, and adjust the style if needed. Your hair should look beautiful and feel forgotten—secure enough that you never think about it all day.