A high ponytail is one of those hairstyles that works for absolutely everyone — it’s polished enough for the office, practical enough for the gym, and chic enough for a night out. The beauty of a high pony is that it takes just five to ten minutes once you know the technique, and the variations are endless. Whether you’re working with fine, straight hair or thick, wavy texture, whether you want sleek and structured or tousled and romantic, there’s a high ponytail style that’ll become your go-to.
What most people don’t realize is that a great high ponytail isn’t just about pulling your hair up and securing it with an elastic. The difference between a mediocre pony and one that actually looks polished comes down to a few specific tricks: how you position the elastic, whether you smooth flyaways, how you create volume at the crown, and what you do with the section of hair around the base of the elastic. Once you master these fundamentals, you can execute any of these 12 styles in minutes flat, and your hair will look like you spent way more time on it than you actually did.
The styles below range from sleek and minimalist to textured and playful, so you’ll find something that matches your hair type, your schedule, and your personal aesthetic. Each one includes exactly what you need to do to nail the look, what tools help, and how to customize it based on your hair length and texture.
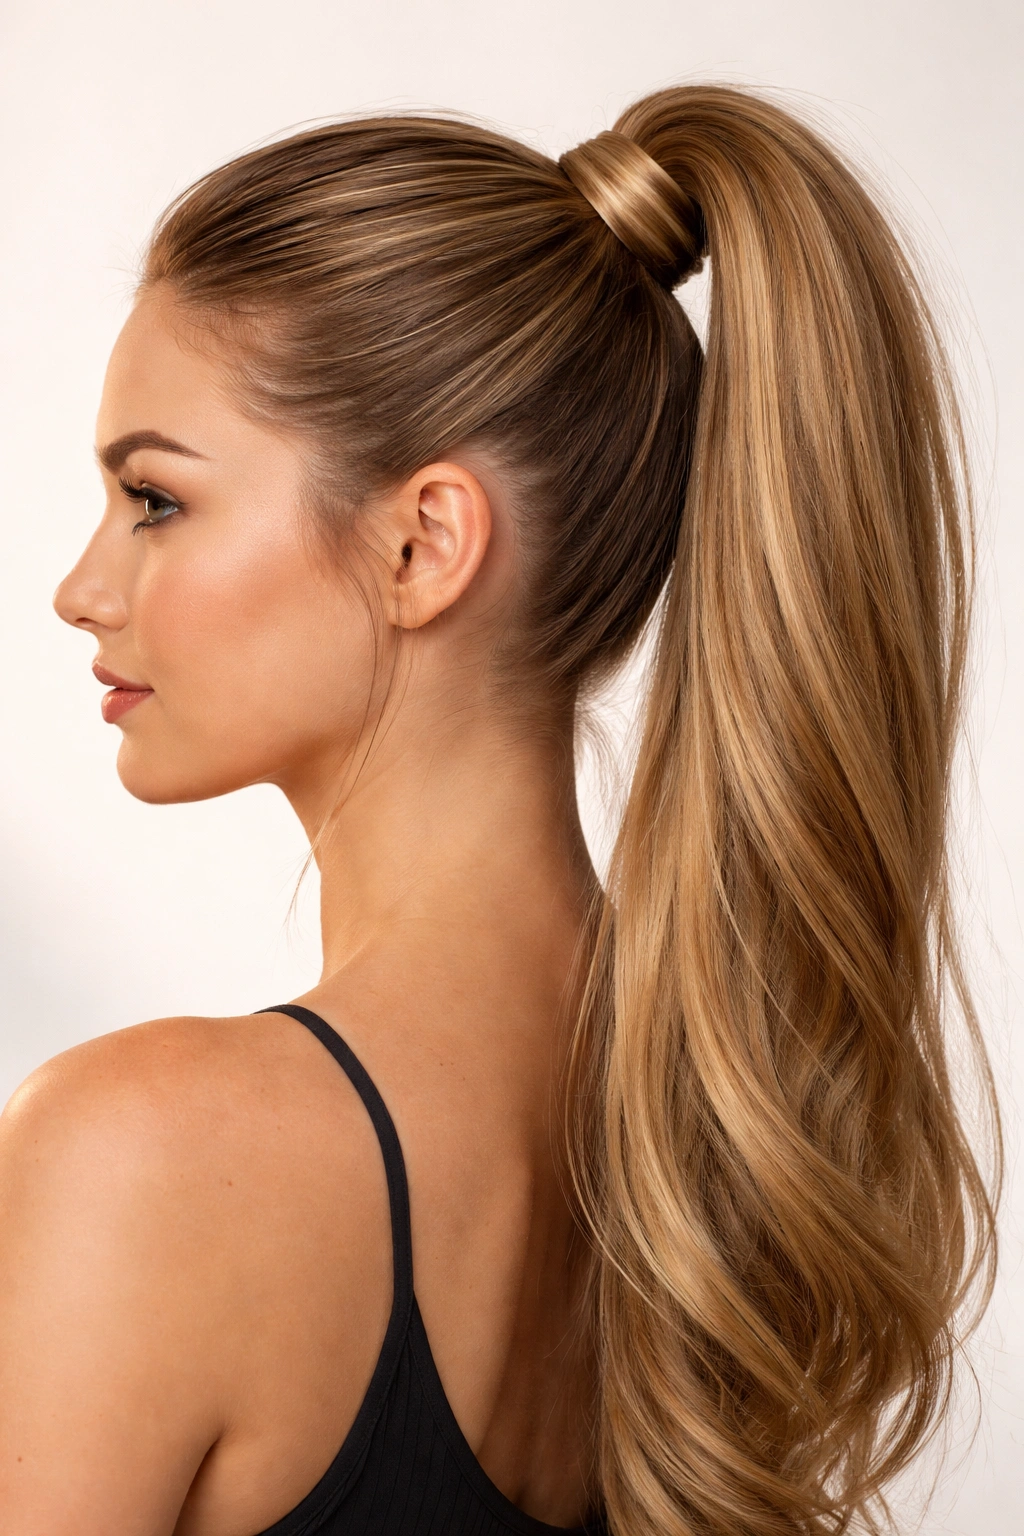
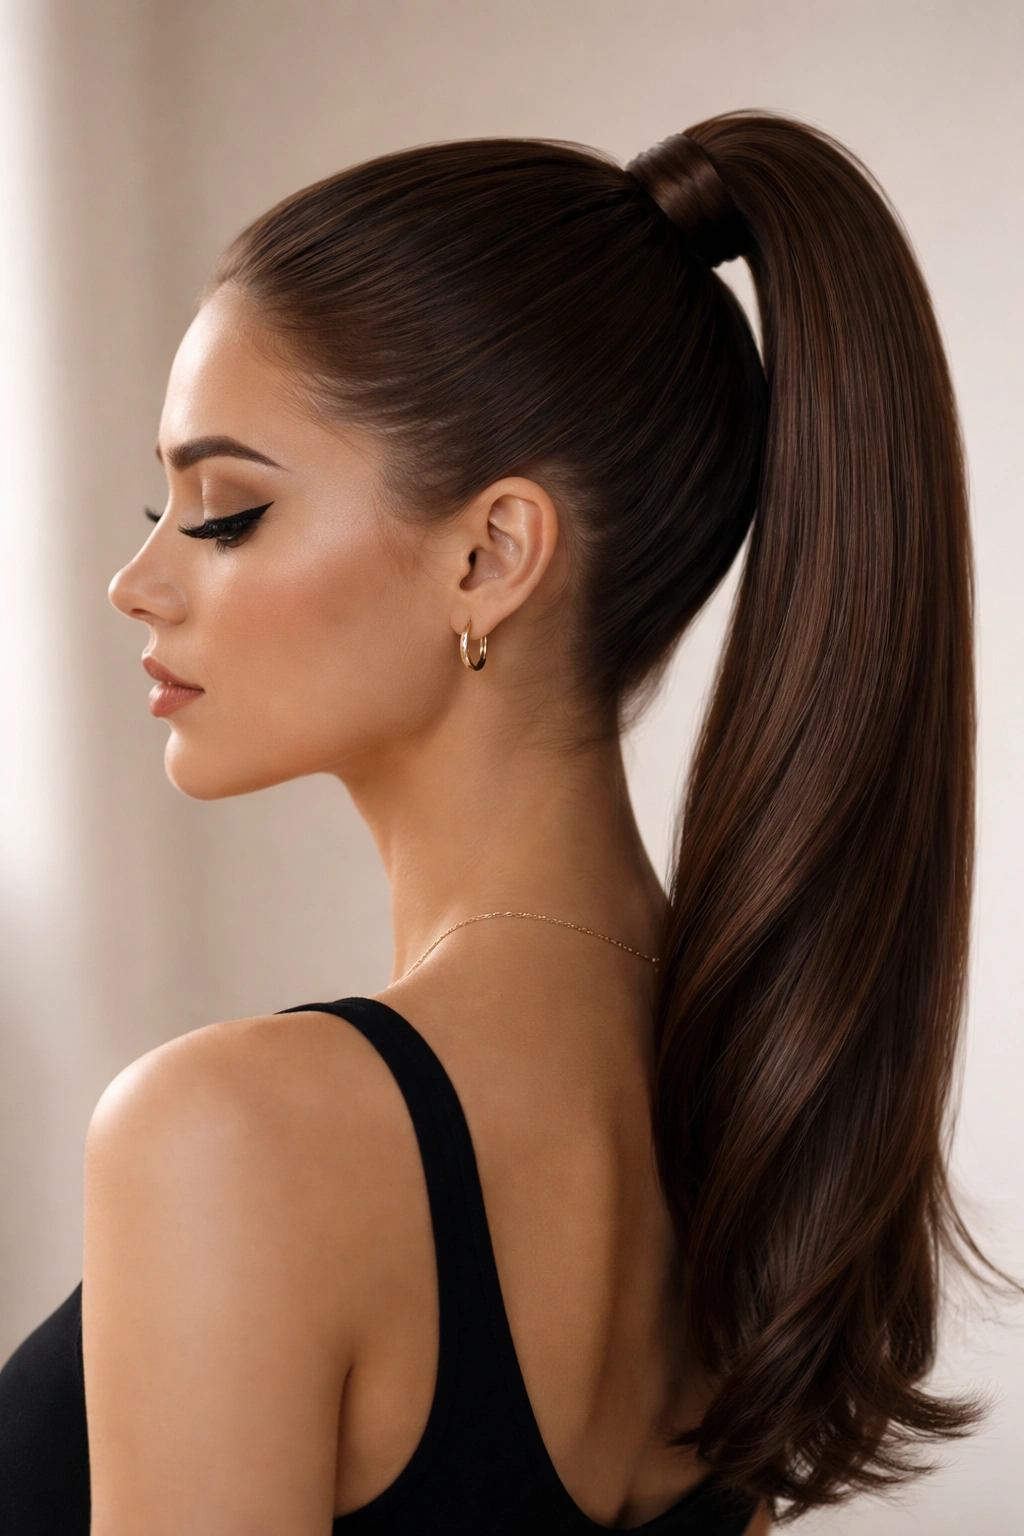
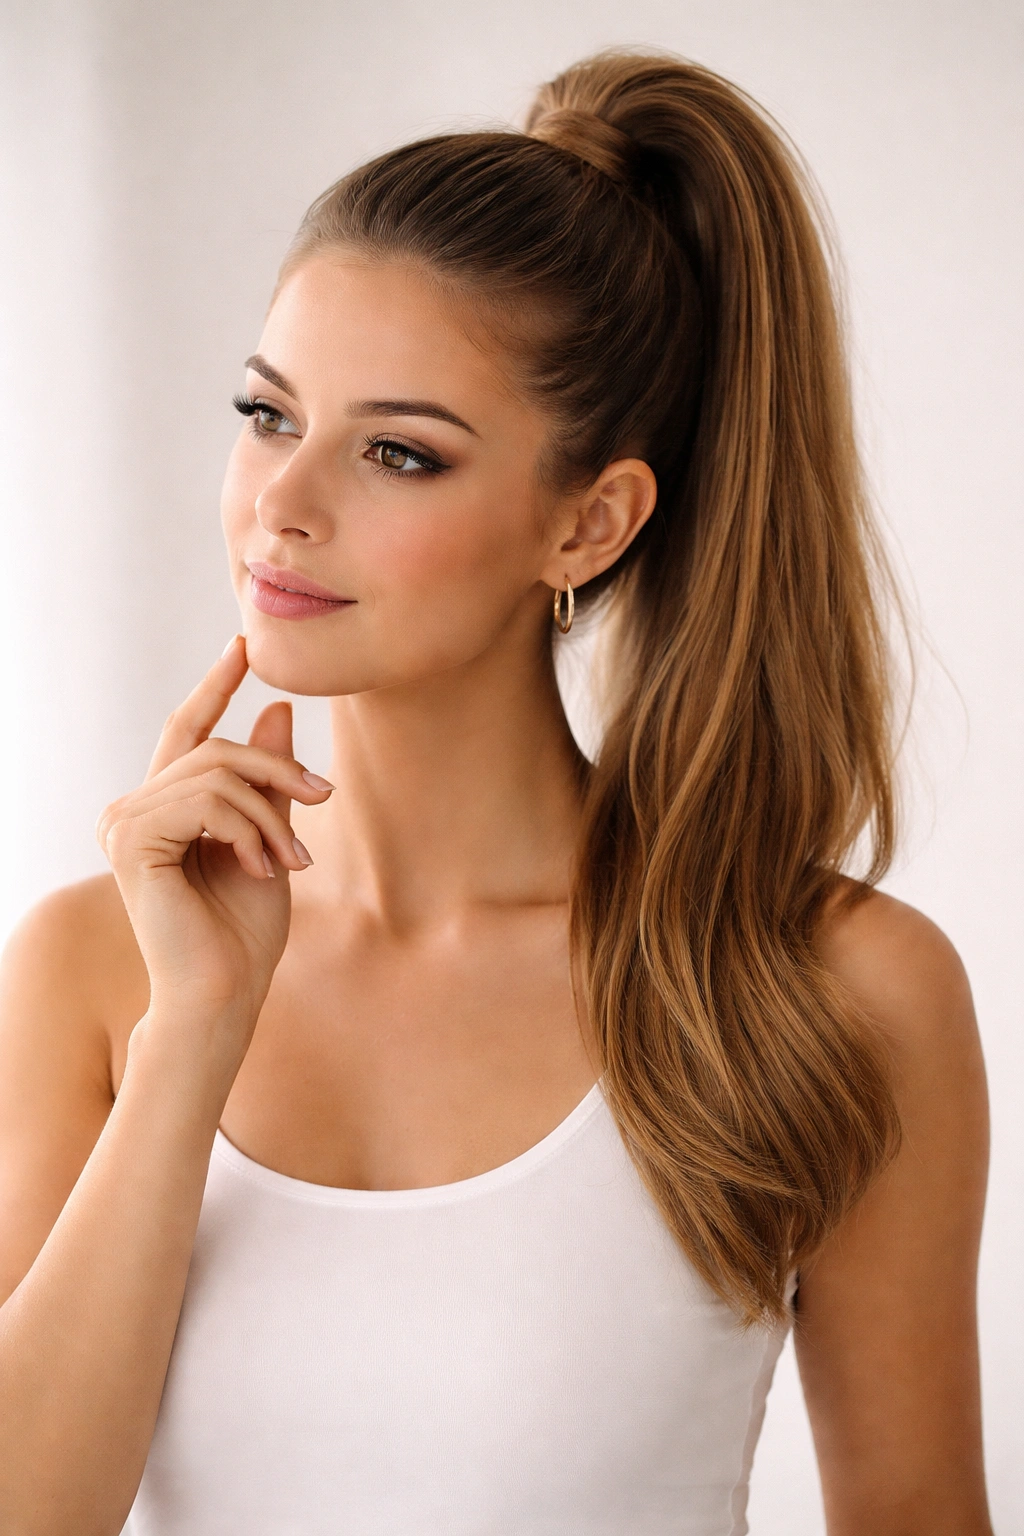
1. The Classic High Ponytail
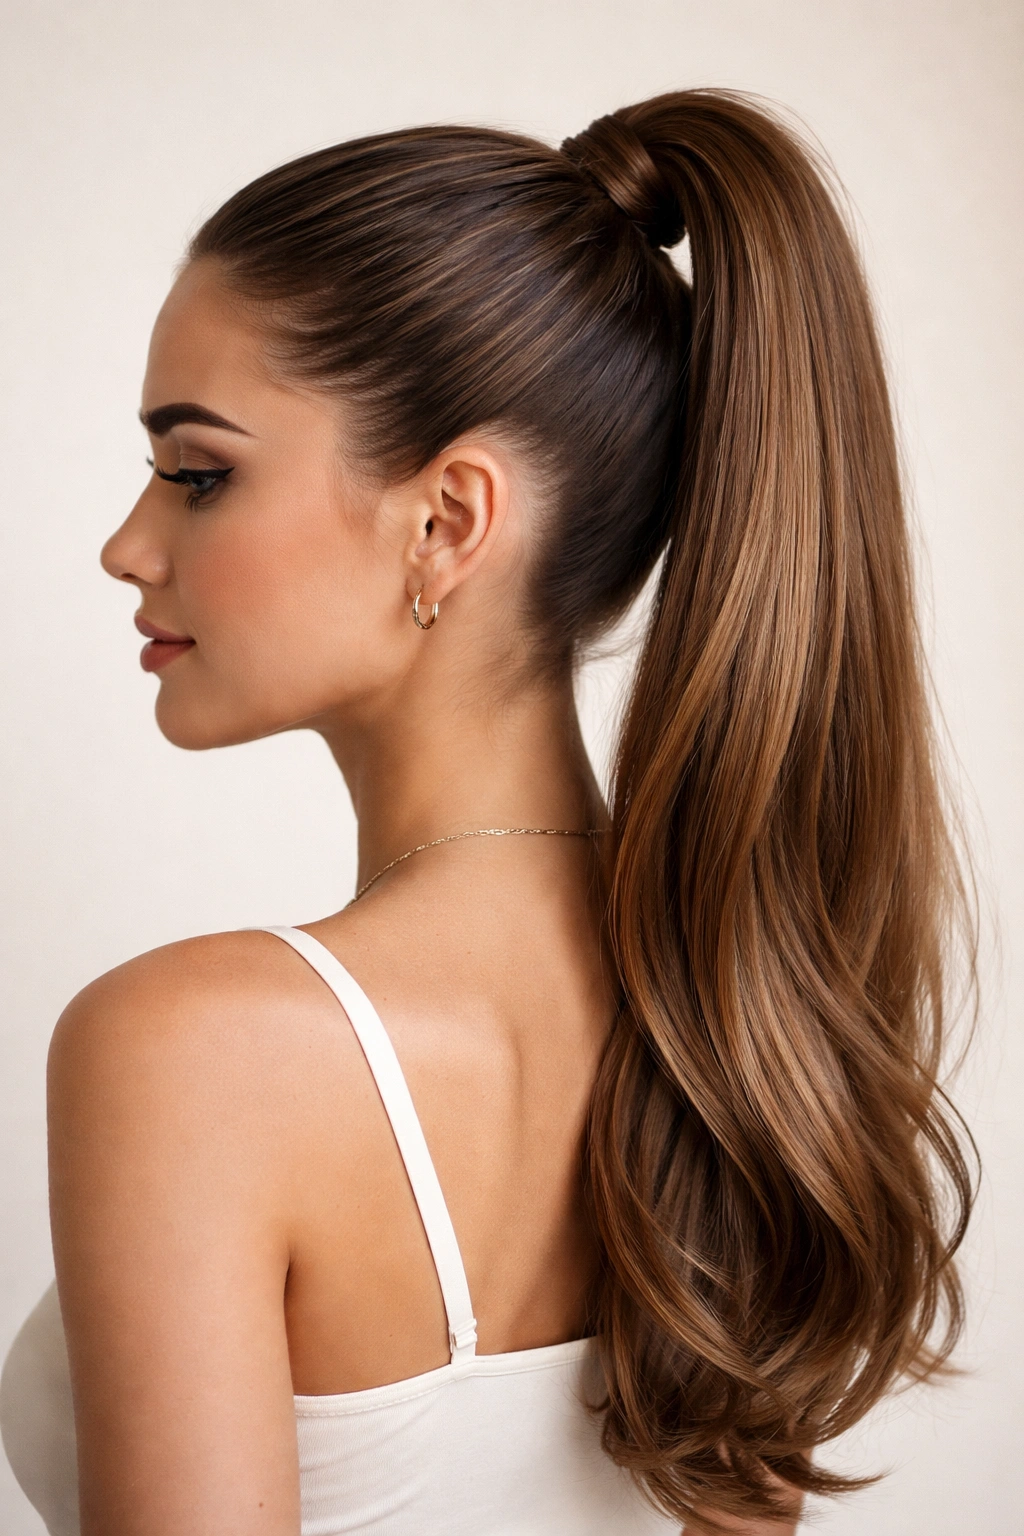
This is the foundational high ponytail style — the one you build all other styles from. A true classic high pony sits at the crown of your head (not at the back of your head like a standard ponytail), with every hair smoothed back sleekly and the elastic positioned so it’s barely visible.
Why It Works for Every Hair Type
The classic high pony works beautifully on straight hair, wavy hair, curly hair, fine hair, and thick hair because the foundation is the same: solid technique. The difference is just texture — you can make this style work with your hair exactly as it is, without fighting it. On straight hair, it reads as sharp and polished. On curly or wavy hair, it has a different vibe entirely but is equally elegant.
How to Create the Perfect Classic High Pony
Start with the right section. Use your fingers to locate the crown of your head — if someone were looking at you from above, your crown is the highest point. This is where your ponytail should originate, not further back toward your neck. Brush all your hair straight up toward that point, gathering it as you go.
Smooth out flyaways before elasticizing. This step separates a polished pony from a messy one. Use a fine-tooth comb or a smoothing brush to work through any texture or strays. A tiny bit of smoothing cream or gel on your fingers (work it between your palms first so it’s not gloopy) helps tame fine hairs and keeps everything unified.
Secure with a quality elastic. Use a thick, stretchy hair elastic — not a thin one that cuts into your hair or snaps easily. Hold your gathered hair at the exact point where you want the elastic to sit, then wrap the elastic around twice. Tight enough to hold everything, but not so tight that you’re creating tension that will give you a headache or snap your hair.
Hide the elastic with a small section of hair. Take a thin vertical section from the ponytail itself and wrap it around the elastic, covering it completely. Secure that wrap with a bobby pin inserted horizontally into the wrapped section. This is what makes the difference between a casual ponytail and a polished one — you literally cannot see where the hair is fastened.
Pro Tips for Maximum Impact
- Lightly tease at the crown with a fine-tooth comb before gathering, which adds subtle volume without looking obvious
- Apply a lightweight hairspray right at the crown area before pulling the ponytail up — this holds everything in place without stiffness
- Make sure your ponytail hangs straight down from the elastic with no bumps or twists — adjust until it’s perfectly aligned
2. The Sleek High Pony with Face-Framing Layers
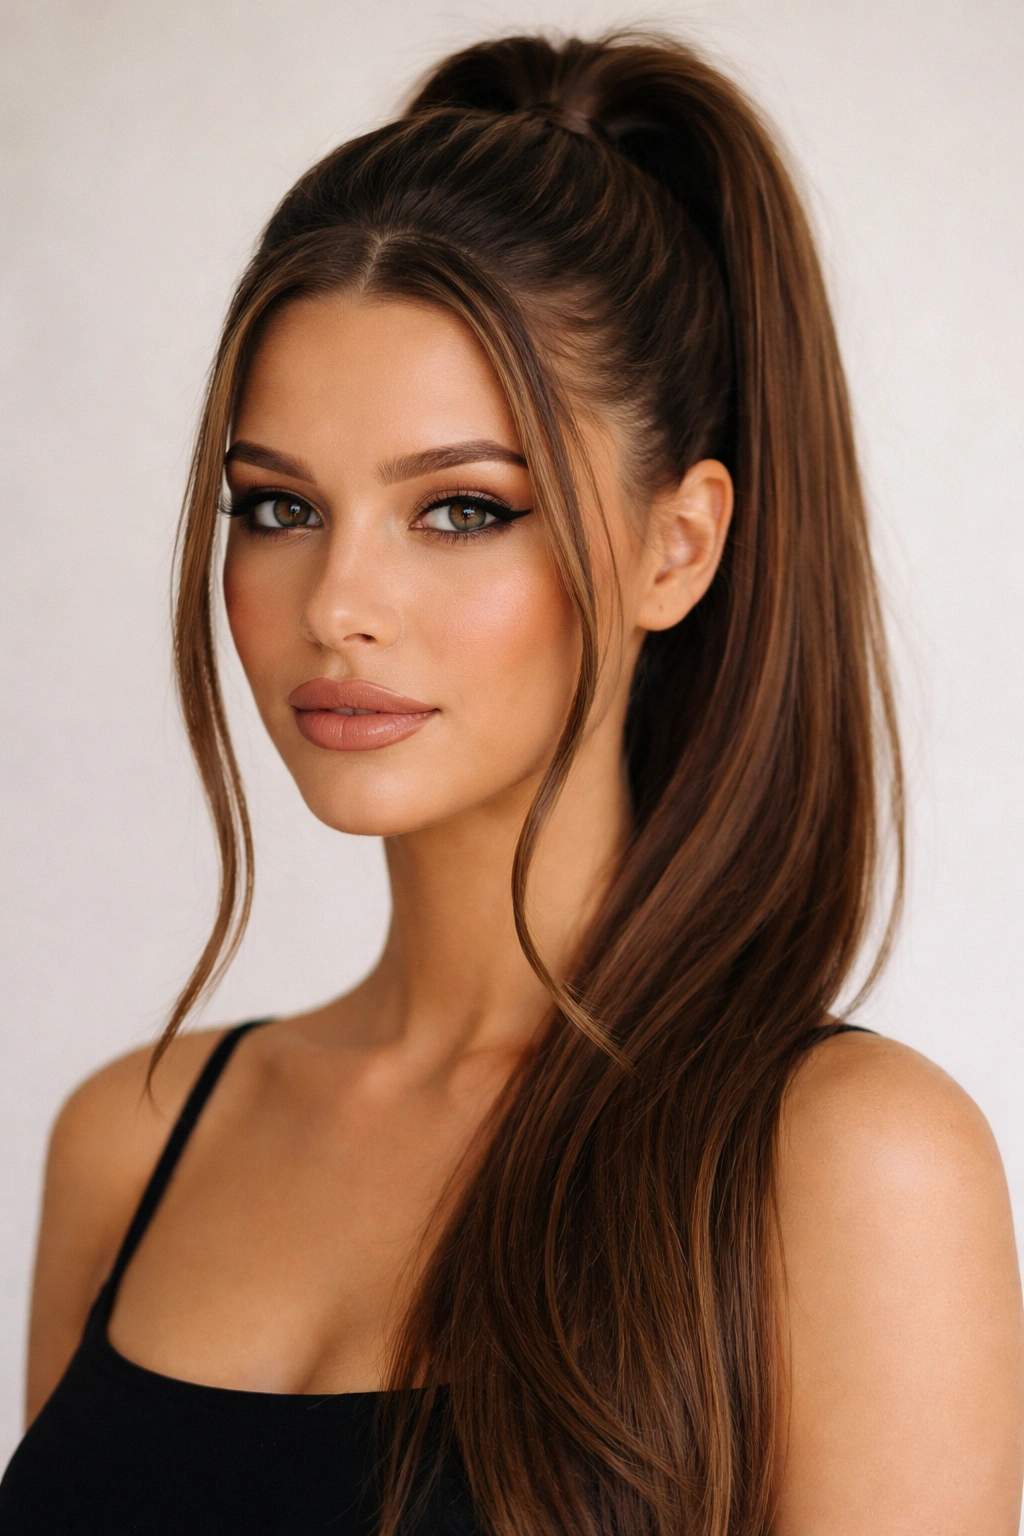
This variation on the classic takes the clean, polished aesthetic and softens it by leaving a few face-framing pieces down. It’s less severe than a completely sleek pony, and it works especially well if you have a longer face or if you want something that photographs beautifully from the front.
The Strategic Purpose of Face-Framing Pieces
Face-framing layers next to your cheekbones create the optical effect of making your face appear slightly wider and more open — which is flattering for most face shapes. They also catch light beautifully and add movement to what might otherwise be an ultra-still style. The key is to keep these pieces intentionally placed, not just “some hair fell out and now it looks loose.”
Exactly How to Create It
Identify the pieces before you gather. Before you brush everything up, take a small section on each side of your face, roughly from your temple area back to about ear level. These two pieces will stay down. Clip them away temporarily so they’re not in your way.
Gather and secure your main ponytail using the classic technique above. Make sure you’re only gathering the hair from the back and crown, leaving those face-framing sections completely separate.
Unclip one face-framing section and shape it. Take a small curling iron or straightener and curl or wave this section, depending on your texture and the vibe you want. If you’ve already got natural waves or curls, you might just define them with a texturizing spray or light cream. The piece should curve gently around your face, not hang completely straight and rigid.
Repeat on the other side to match. Use the same tool and technique so both sides have the same dimension and movement.
Secure those pieces subtly. You want them to look like they’re naturally framing your face, not pinned awkwardly behind your ear. A bobby pin clipped at the back of the ear — hidden by your hair — can anchor one side if it keeps slipping. Often, a light layer of hairspray is enough to hold the shape without clips.
Best For
This works beautifully when you’re going out, getting photographed, or want to show your face while keeping hair completely off your neck. It’s also ideal if you have layers already cut into your hair — those pre-existing pieces work perfectly as face-framers.
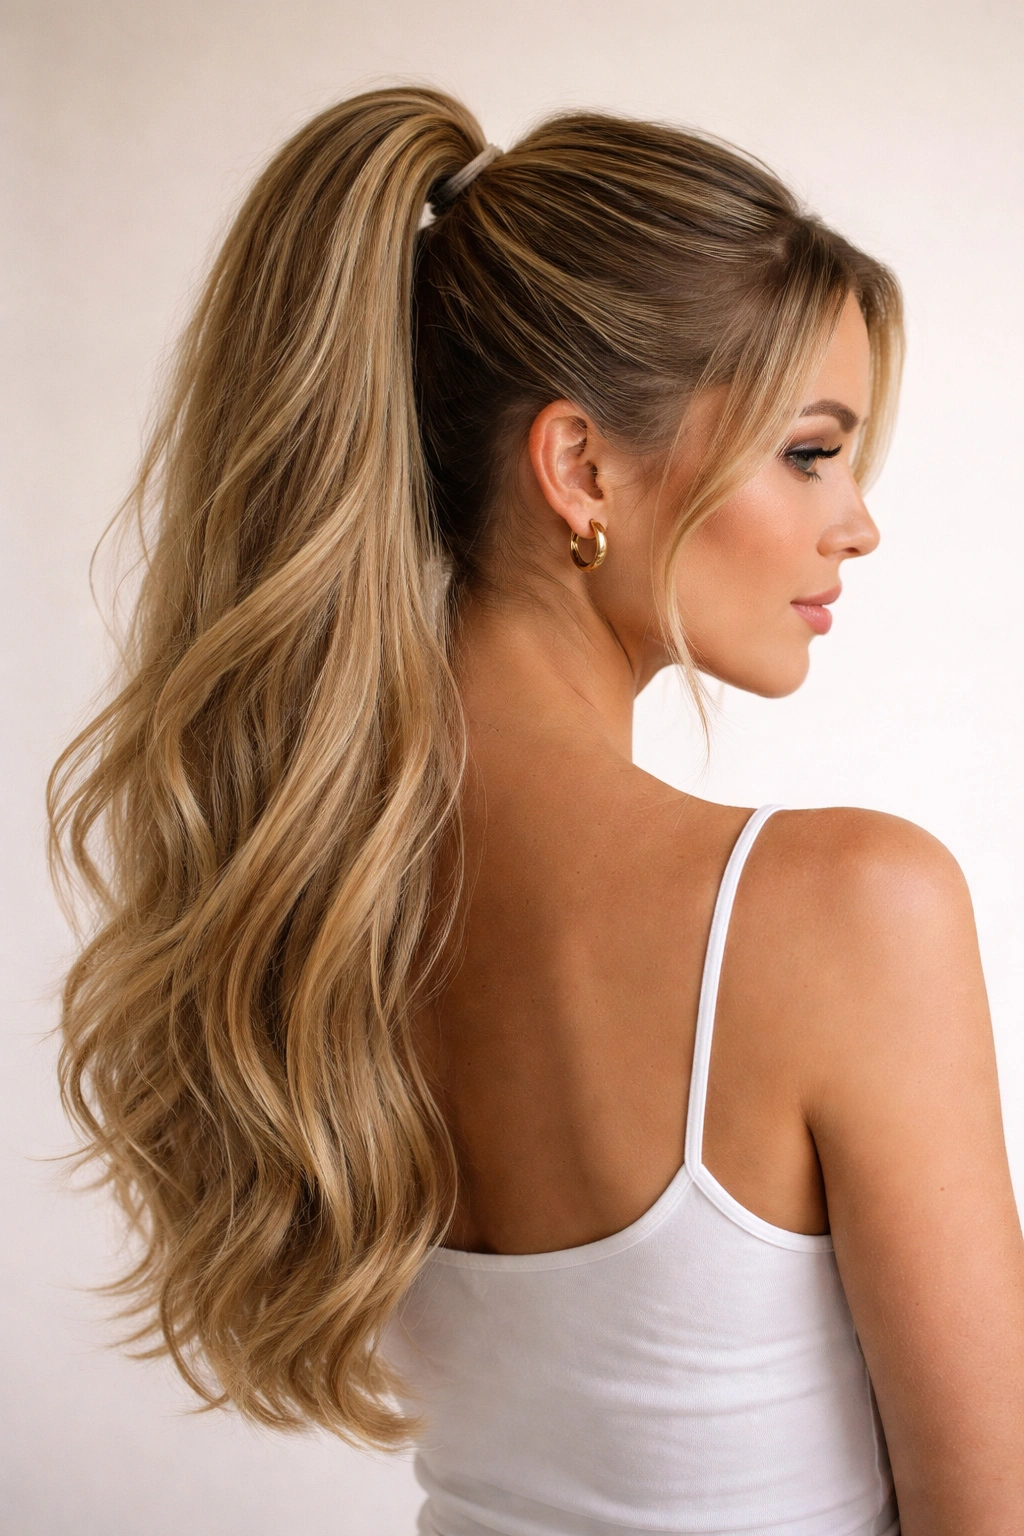
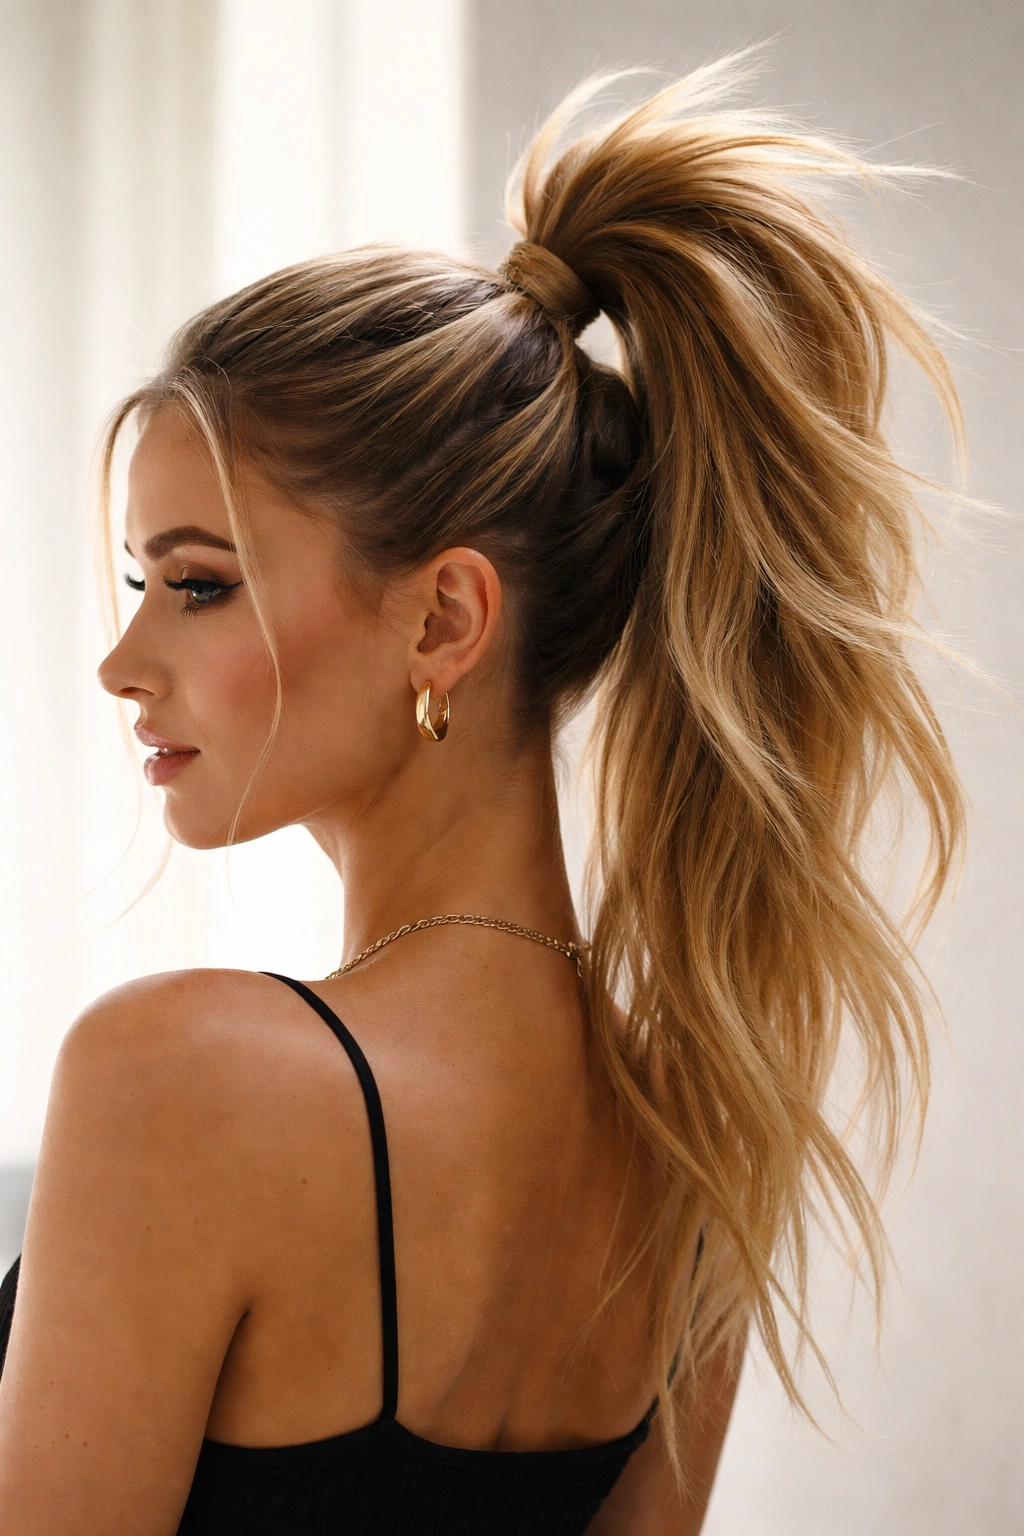
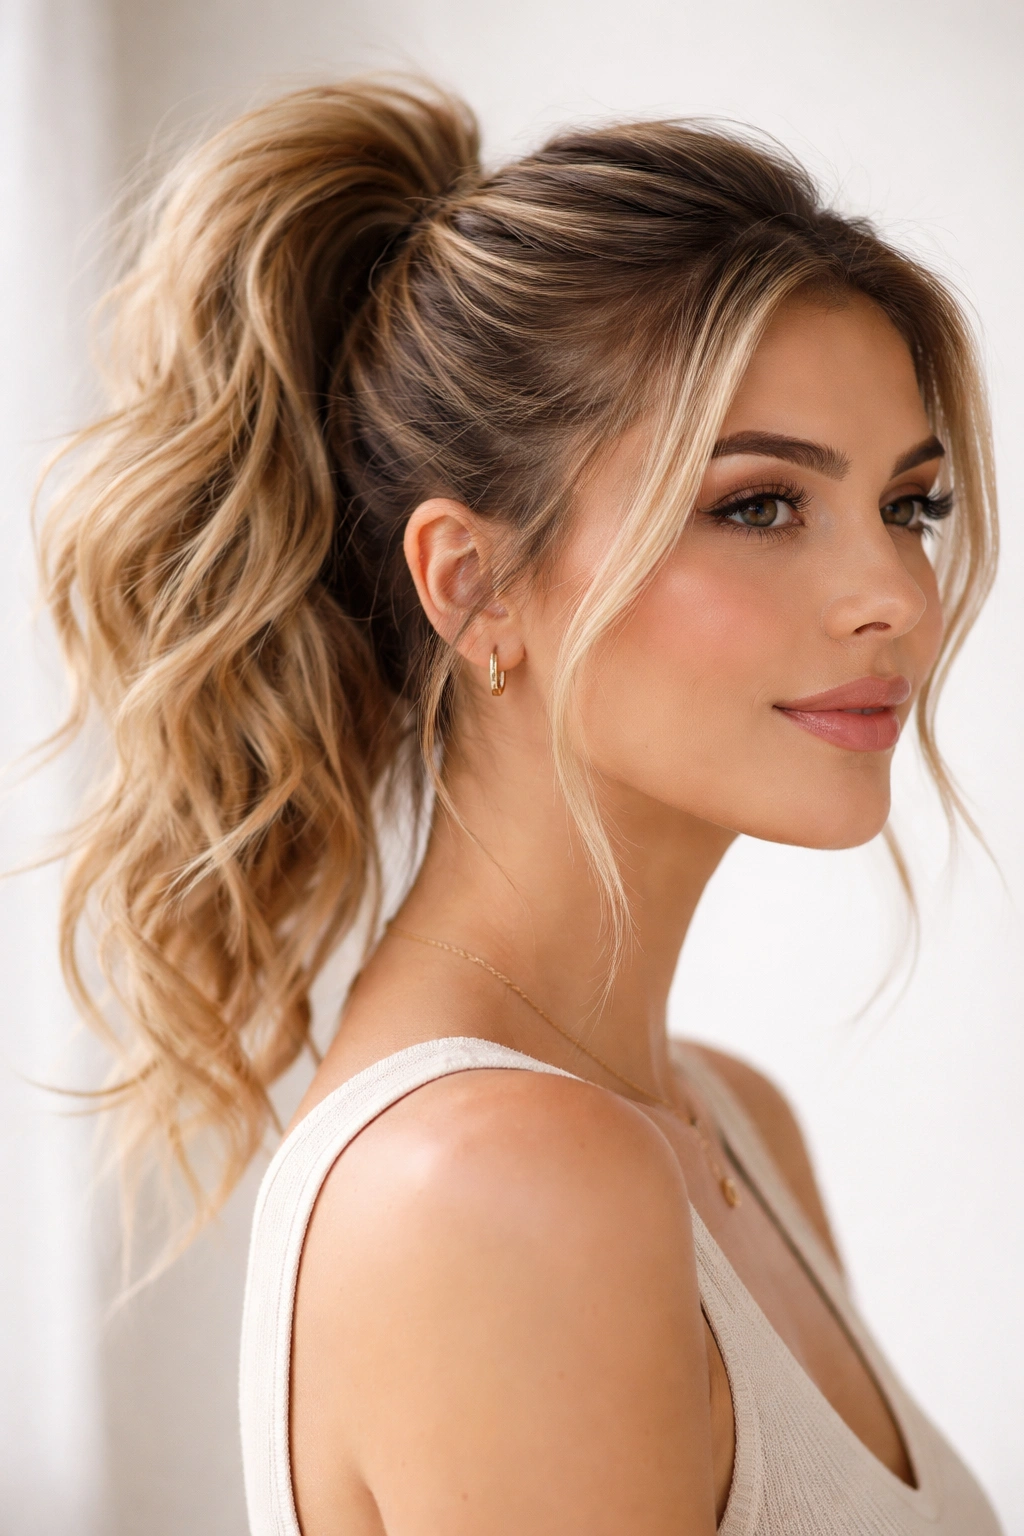
3. The Voluminous Tousled High Pony
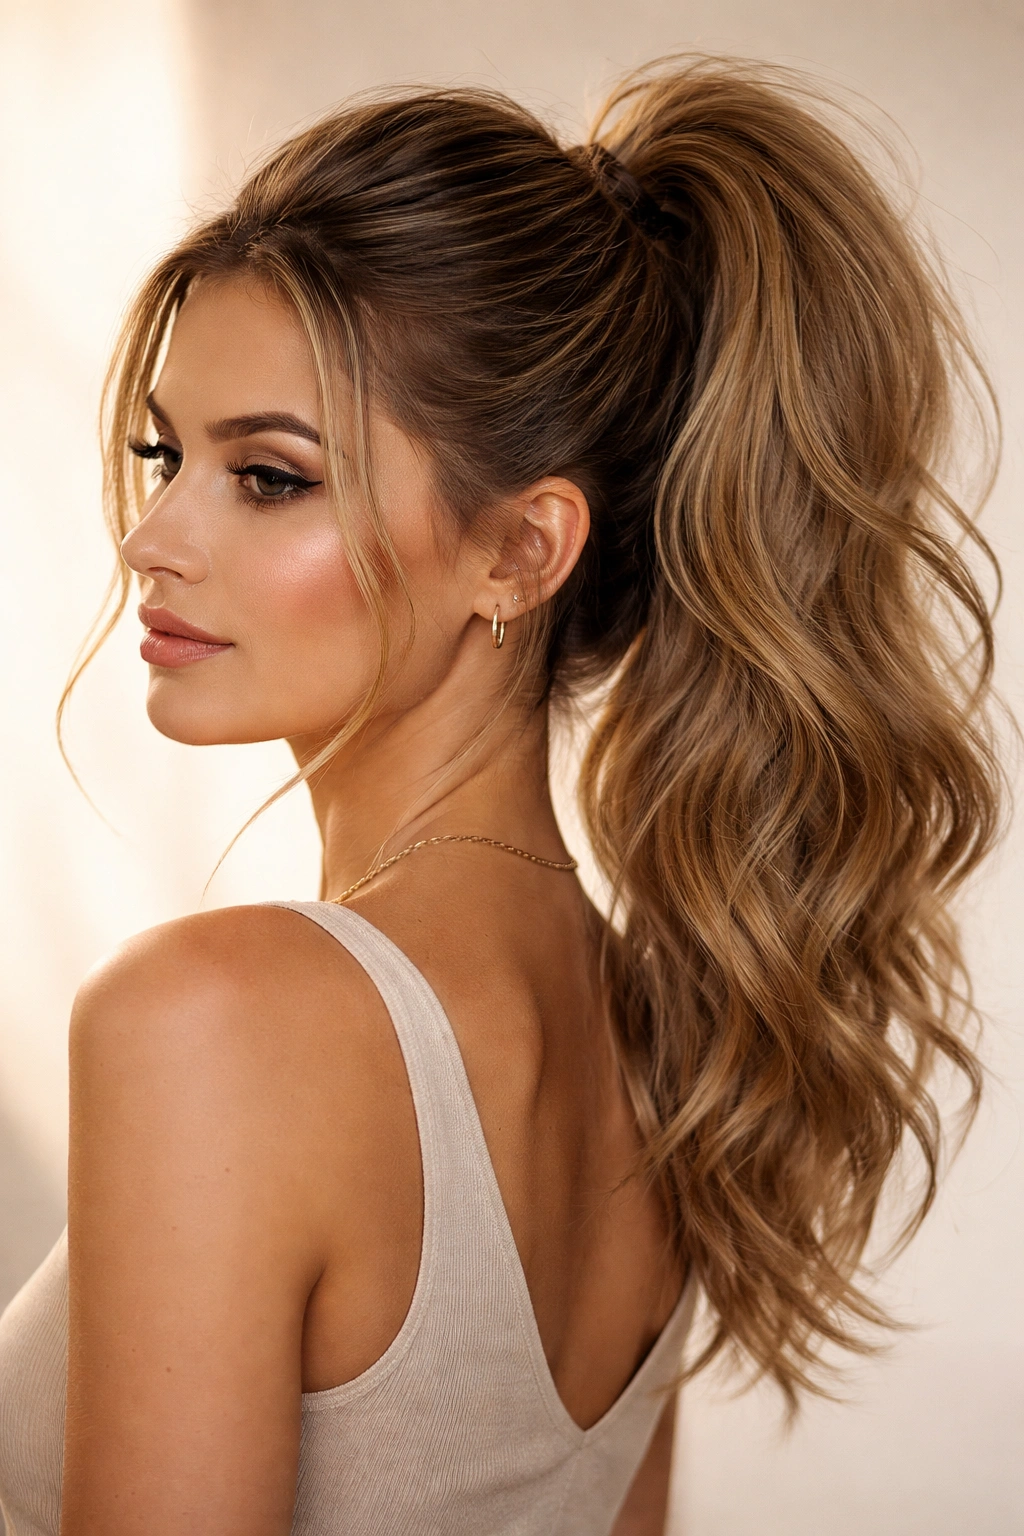
If you want a high ponytail that has personality, movement, and dimension instead of being sleek and controlled, this tousled version is your style. It reads as effortless and playful while still being intentional and polished.
Building Volume Strategically
Volume in a tousled pony doesn’t come from backcombing your entire head — it comes from strategically teasing and then lightly smoothing the top layer, so you get dimension without visible texture lines.
Step-by-Step for a Tousled High Pony
Tease at the crown and sides. Use a fine-tooth teasing brush and backcomb at the crown of your head in small, 2-inch sections. Don’t go crazy — you’re aiming for subtle volume, not a beehive. Also lightly tease sections along the sides of your head (the temples and ear areas) so the whole crown area has dimension.
Smooth the teased areas lightly. Now take a fine-tooth brush (not the teasing brush) and gently brush over the teased sections. You’re not smoothing everything out — you’re just creating a smoother surface while keeping the underlying volume intact.
Gather your hair at the crown just like a classic high pony, but be gentle — you want to keep that volume you just created, not flatten it.
Secure your elastic and wrap the base as you would with a classic pony.
Tousle the ponytail itself after it’s secured. Take your fingers and gently massage and separate the hair in the ponytail, creating texture and movement. You can also lightly backcomb the outer layers of the ponytail tail itself if you want extra texture.
Mist with a light-hold hairspray. This keeps the tousled texture in place without stiffening your hair.
Customizing Based on Hair Texture
If you have naturally wavy or curly hair, you can skip the teasing entirely and just work with your natural texture. Gather your hair into the high pony and then finger-comb through the ponytail to enhance your natural waves and curls. If you have straight hair, the teasing step is essential to create any volume at all.
4. The Half-Up High Pony
The half-up style occupies the perfect middle ground between wearing your hair fully down and pulling it completely back. It keeps hair off your face and neck while still showing off length and texture. This is also the perfect style when your hair needs washing — you can make dirty hair look intentional with a half-up style.
Why This Style Is Deceptively Sophisticated
Half-up styles read as more fashion-forward than a full ponytail because they show more intention and styling knowledge. They work for literally every occasion — casual, professional, date night, active.
Creating a Polished Half-Up Pony
Determine your section line. The dividing line between your “down” hair and your “up” hair runs roughly from one ear to the other ear, across the top back of your head. Anything above that line goes up; anything below stays down.
Brush the upper section back. Working only with the hair above that invisible line, brush it straight back toward the crown. Keep your hands gentle so you don’t disrupt the hair below.
Gather at the crown or slightly back from it. For a half-up pony, you can position the elastic slightly further back than a full high pony — this actually looks more balanced when half your hair is still down.
Secure and wrap the elastic just as you would with a full ponytail.
Create dimension in the down section. Now that your upper hair is secured, work with the hair that’s hanging down. If you want texture, you can wave or curl the ends. If you want it sleek, brush it smooth. You can also add face-framing pieces by pulling out a small section on each side near your face.
Optional: Add a second elastic or braid. Some people love securing the base of the half-up with an additional tiny elastic, or wrapping a thin braid around the base for extra detail. This is entirely optional but creates a more polished, intentional look.
Best Hair Length and Type
Half-up styles work best when you have at least shoulder-length hair so there’s enough length to show in both the up and down sections. They look particularly beautiful on straight or wavy hair where you can see the texture in the down section.
5. The Bubble Ponytail
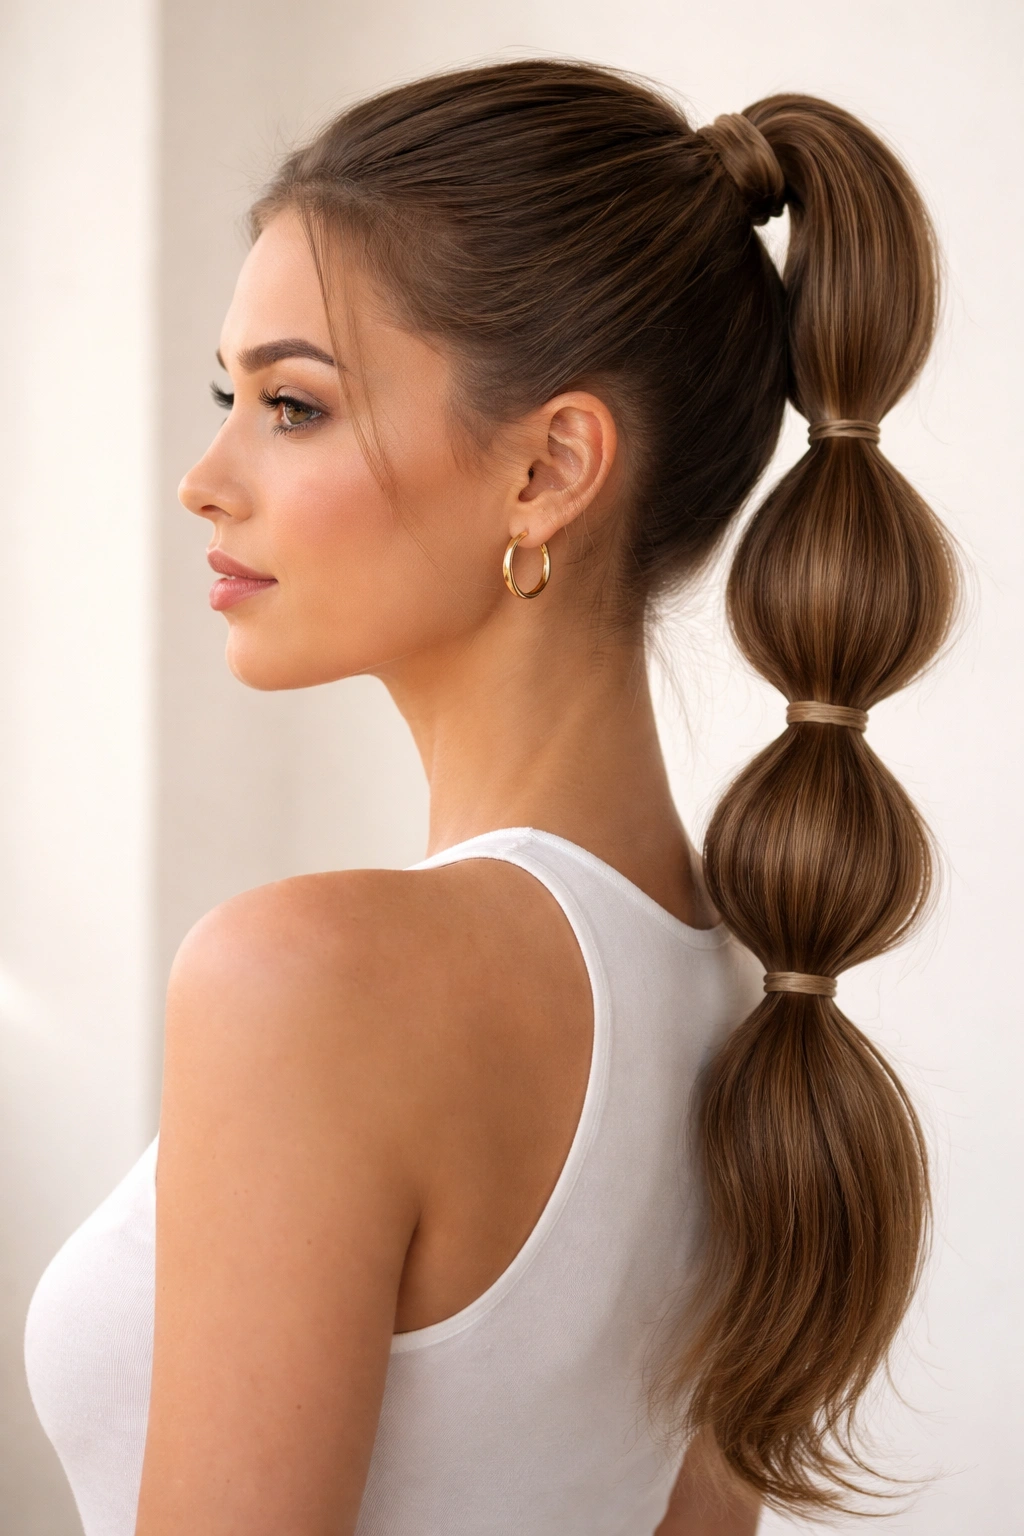
The bubble ponytail — also called a stacked ponytail — creates a playful, youthful look by dividing the ponytail into sections and fastening each section with its own elastic. It’s super trendy with younger people, but honestly, it works at any age if you style the bubbles right.
The Mechanics of Creating Distinct Bubbles
Each “bubble” is a section of ponytail trapped between two elastics. The space between the elastics creates a bubble of hair that puffs out slightly, and repeating this creates a fun stacked effect.
How to Execute a Bubble Ponytail
Create your base high ponytail. Gather your hair and secure it with an elastic at your crown, using all the classic techniques for a polished ponytail.
Add your first elastic lower down. Measure about 2-3 inches down from your base elastic (adjust based on the length of your hair and how large you want the bubbles). Place a second elastic around the ponytail at that point. This creates your first bubble.
Gently tease the section between the two elastics. Use your fingers to slightly separate and fluff the hair between the two elastics so the bubble is visible and dimensional. Don’t go overboard — you want it to look intentional, not messy.
Repeat down the length of the ponytail. Add elastics every 2-3 inches, creating bubbles as you go. Stop when you reach about 1-2 inches from the ends of your hair.
Customize the bubble sizes. You don’t have to make every bubble the same size. You can make the top bubbles slightly larger and gradually make them smaller as you go down, or alternate between larger and smaller bubbles for visual interest.
Enhance with texture if desired. You can add even more dimension by lightly curling or waving the ponytail sections before you create the bubbles, or by teasing each bubble section lightly after you secure it.
Who Should Skip This Style
If you have very fine or thin hair, bubble ponytails can look thin and sparse because you’re dividing your hair into multiple sections. If you have shorter hair (above shoulder length), you won’t have enough length to create more than one or two bubbles before you run out of hair.
6. The Braided High Ponytail
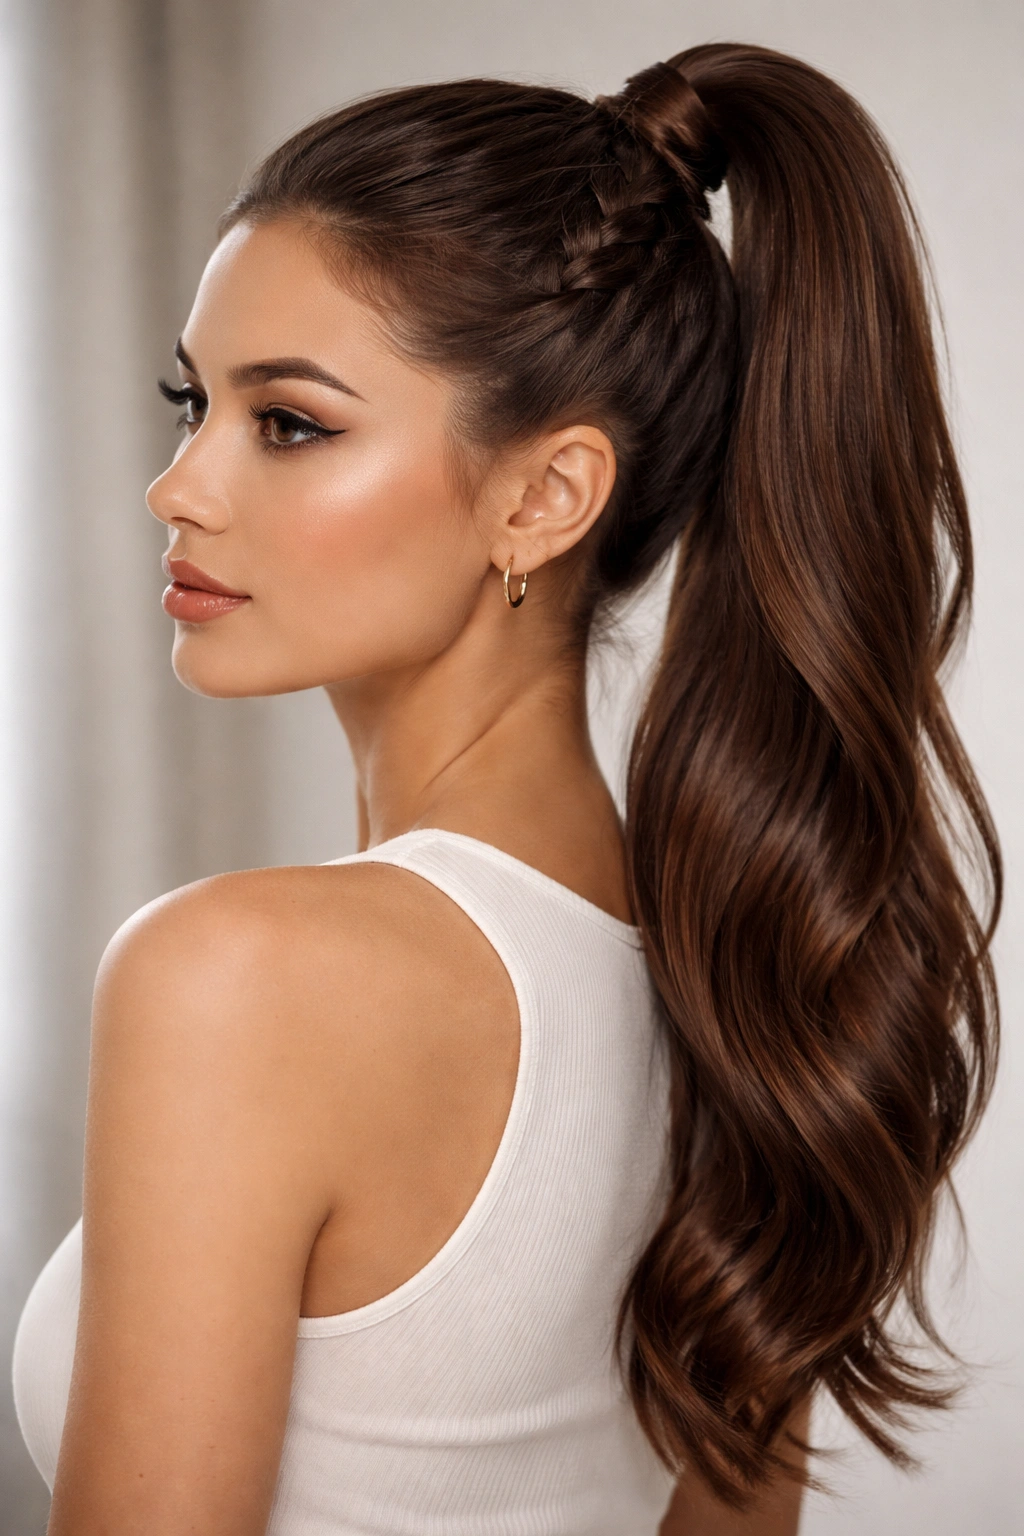
Adding a braid to your ponytail transforms the entire look from simple to intricate, even though braiding is actually quite quick once you practice. This style works for professional settings, special events, or any time you want something with more visual interest than a straight ponytail.
Different Braiding Options for Your Ponytail
You have options here: you can create a single braid, multiple smaller braids, a Dutch braid, a fishtail braid, or even a combination. The braid can start at the crown or be worked into the ponytail itself after it’s gathered.
The Easiest Method: Braid Your Ponytail After It’s Gathered
Create your high ponytail base using classic techniques. This is actually easier than trying to braid as you gather, especially if you’re not a braid expert.
Divide your ponytail into three sections (or however many you need for the braid style you want). For a classic three-strand braid, you literally just divide your entire ponytail into three equal parts.
Execute your braid type. Whether it’s a regular three-strand braid, a Dutch braid (which looks thicker and more dimensional), or a fishtail braid (which has a delicate, intricate look), you’re just working with the sections you’ve created.
Secure the braided ponytail at the very bottom with a small elastic, or leave it unbraided for the last 2-3 inches to show the layered strands.
Tease the braid gently after it’s complete. Run your fingers along the edges of the braid and gently pull to loosen and widen it. This makes the braid look fuller, more dimensional, and less tight.
For Multiple Smaller Braids
Instead of dividing your entire ponytail into three sections for one braid, divide it into however many sections you want (four, five, or six), and create a smaller three-strand braid with each section. This creates a fuller look and is easier to manage if your ponytail is very thick.
Timing Consideration
A braided ponytail does take slightly longer than a straight one — add about 3-5 minutes to your styling time. If you’re super rushed, skip this style. But if you have even 10 minutes, a braided pony is absolutely doable.
7. The Twisted High Ponytail
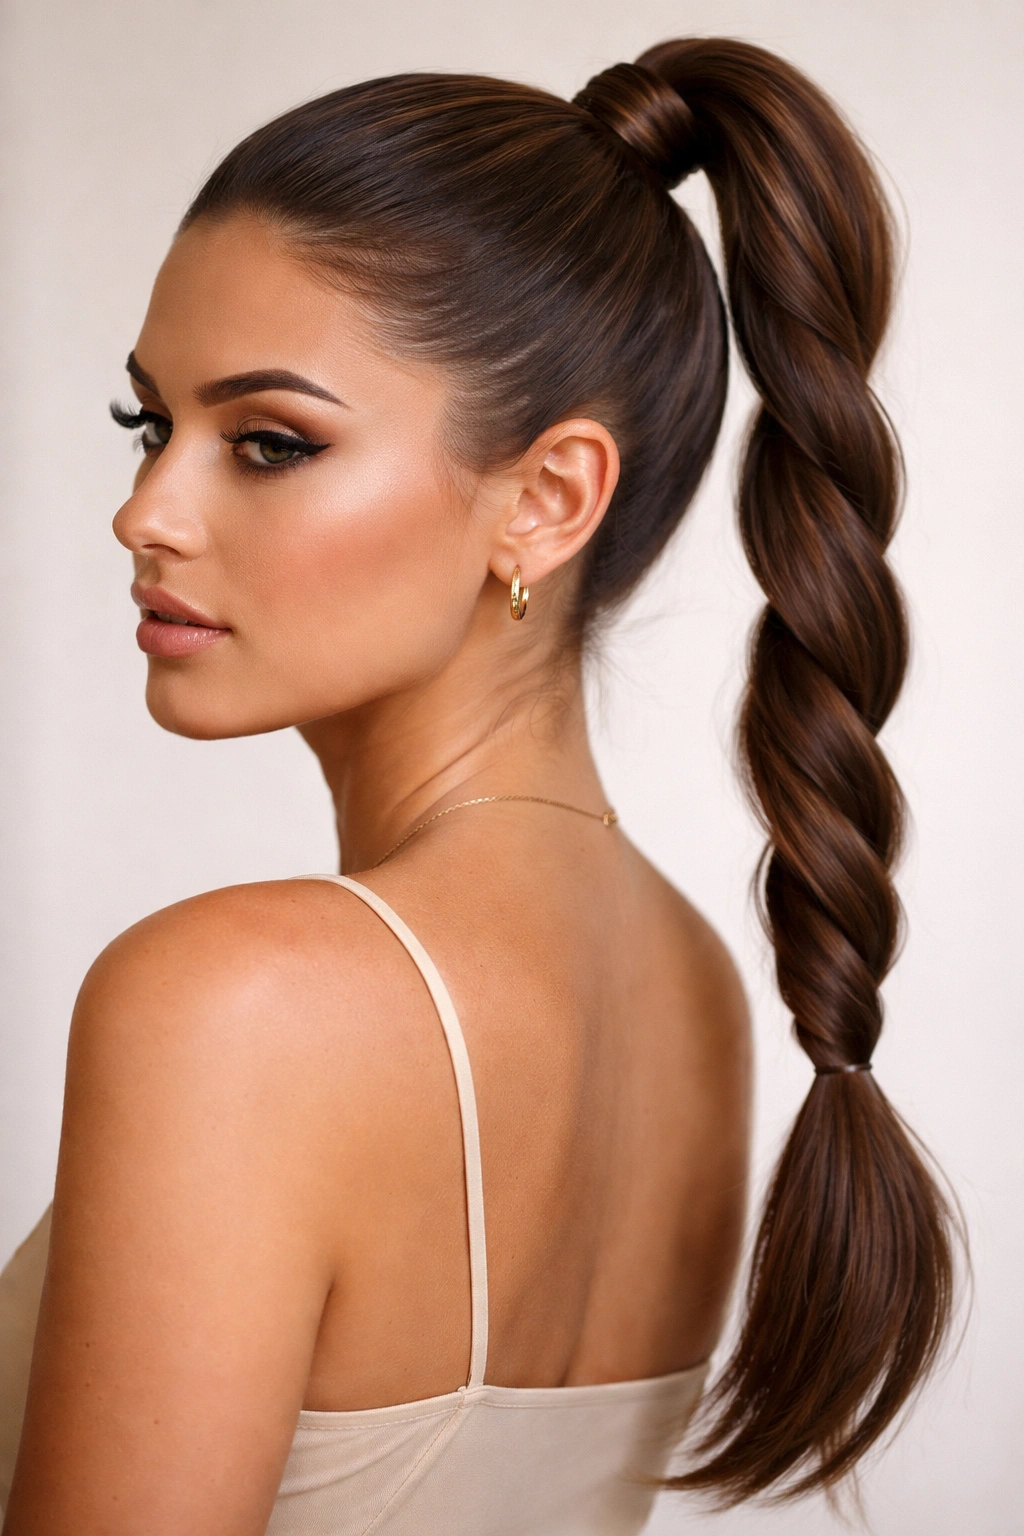
A twist creates an elegant, refined look that’s actually quicker than a braid because you’re only working with two sections instead of three. It’s also easier to master if braiding frustrates you.
Why a Twist Is Often Easier Than a Braid
A twist uses simple two-strand mechanics — you literally just wrap one section around the other, over and over. There’s no “crossing left over center, then right over center” pattern to remember. It’s intuitive and forgiving.
Creating a Twisted Ponytail
Start with your high ponytail gathered and secured using standard techniques.
Divide your ponytail into two equal sections. Take the sections in each hand and ensure they’re roughly the same thickness.
Begin your twist. Cross one section over the other — let’s say the right section goes over the left. Then take the right section (which is now underneath) and cross it back over the new top section. Keep alternating, crossing each section over the other as you work down the length of your ponytail.
Work slowly to keep the twist tight and even. You can make this as snug or as loose as you prefer, but a slightly snug twist looks more intentional and polished than one that’s loosely twisted.
Secure the end with a small elastic.
Loosen the twist for dimension. Just like with braids, running your fingers along the twist and gently pulling at the edges makes it look fuller and more dimensional. Don’t go overboard — you’re not unraveling it, just making it more visually interesting.
Combination Option: Twisted Base with Straight Ends
You can also twist the top half or two-thirds of your ponytail and leave the bottom section straight and untwisted. This creates visual interest at the crown and top while keeping some movement and flow at the ends.
8. The High Pony with Wrap Detail
This style adds a decorative element around the base of your ponytail, covering the elastic and creating visual interest. You can wrap with a section of your own hair, a thin scarf, a ribbon, or even a decorative hair cuff — the options are wide open.
Different Wrapping Materials and Their Effect
A hair wrap (using a thin section of your own hair) reads as elegant and sophisticated. A silk or satin ribbon adds a romantic, delicate look. A colorful thin scarf adds personality and can tie into your outfit. A decorative cuff adds a statement-making element. Choose based on the occasion and your personal style.
How to Wrap With Your Own Hair
Create your high ponytail and secure it with an elastic.
Take a thin vertical section from the ponytail itself — about a quarter-inch thick. This section should be long enough to wrap around the base of your ponytail and cover the elastic completely, with enough length left to tuck the end back into the ponytail.
Wrap this section around the elastic and base of the ponytail. Start at the side and wrap clockwise (or counterclockwise, doesn’t matter) around the base. Keep the tension even so the wrap looks smooth and intentional.
Tuck the end of your wrapping section under the wrap and secure it with a bobby pin inserted horizontally into the wrapped section so the pin is hidden by the wrap itself.
Optional: Lightly tease the wrapped area before wrapping to add subtle texture and make the wrap look fuller.
How to Wrap With a Ribbon or Scarf
Follow the same gathering and elastic process to create your base ponytail.
Take your ribbon or thin scarf and wrap it around the base just like you would wrap with hair. You can tie it off at the back (hidden by the ponytail) with a secure knot, or you can tuck it under itself so the tie is hidden.
Leave the ends of the ribbon/scarf to hang down as part of the ponytail design, or tuck them entirely under the wrap.
9. The Textured Spiky High Pony
This is a fun, edgy style where your ponytail has visible sections of texture that stick out at different angles, creating a spiky, dimensional look. It’s perfect if you want something that stands out.
Building the Texture
You’re creating this look by strategically teasing and separating sections of your ponytail so they don’t lie flat together. It requires a bit more work than a sleek pony, but it’s absolutely doable in under 10 minutes.
How to Create Spiky Dimension
Create your base high ponytail and secure it well. You want a solid foundation because you’re about to work with the hair above it.
Divide your ponytail into 4-6 sections. Use bobby pins to temporarily clip each section away from the others.
Tease the first section with a fine-tooth teasing brush, working the brush backward to create texture. Tease more aggressively than you would for subtle volume — you want visible texture.
Smooth the top layer only. Use a fine-tooth brush to smooth just the outer surface of that teased section, leaving the texture intact beneath the surface.
Flip this section outward and pin it. Once teased, gently separate this section from the others so it stands out at its own angle. You might pin it slightly to the side or let it stick up and out.
Repeat with each remaining section, teasing and positioning each one so they’re all at different angles.
Lightly mist with hairspray to keep all your sections in position throughout the day.
Who Should Try This
This style works best on people with medium to thick hair — fine hair won’t hold the texture as well. It also works best on people with some texture or wave in their hair already, which will hold the teasing better than perfectly straight hair.
10. The Sleek Curved High Pony
This variation on the classic uses slight curves or bends in how you gather and position your ponytail, creating an elegant, almost sculptural look. It sounds complicated, but it’s actually just a small positioning adjustment.
The Visual Effect of Strategic Curves
Instead of gathering all your hair straight up in one direction, you create subtle curves that follow the shape of your head and neck. This looks more refined and intentional than a purely vertical ponytail.
Creating the Curved Effect
Brush your hair back and to the side slightly instead of straight up. If you typically part your hair down the middle or on one side, you can work with that existing pattern.
Gather at the crown but angle your ponytail slightly — not 100% vertical, but at a subtle angle. If you brushed your hair to the left, angle your ponytail very slightly to the left as well.
Smooth everything before securing to ensure there are no bumps or twists in the curved sections.
Secure your elastic and wrap the base as usual.
Optional: Very gently curve the ponytail itself by loosely wrapping it around your head or neck for a few seconds after you secure it, creating a gentle curve. Release and let it hang — it will maintain a slight curve.
When to Use This Style
This works beautifully for professional or formal settings because the curves read as intentional and polished. It’s also flattering if you have a rounder face, because the diagonal angle creates visual lengthening.
11. The High Pony with Bang Section
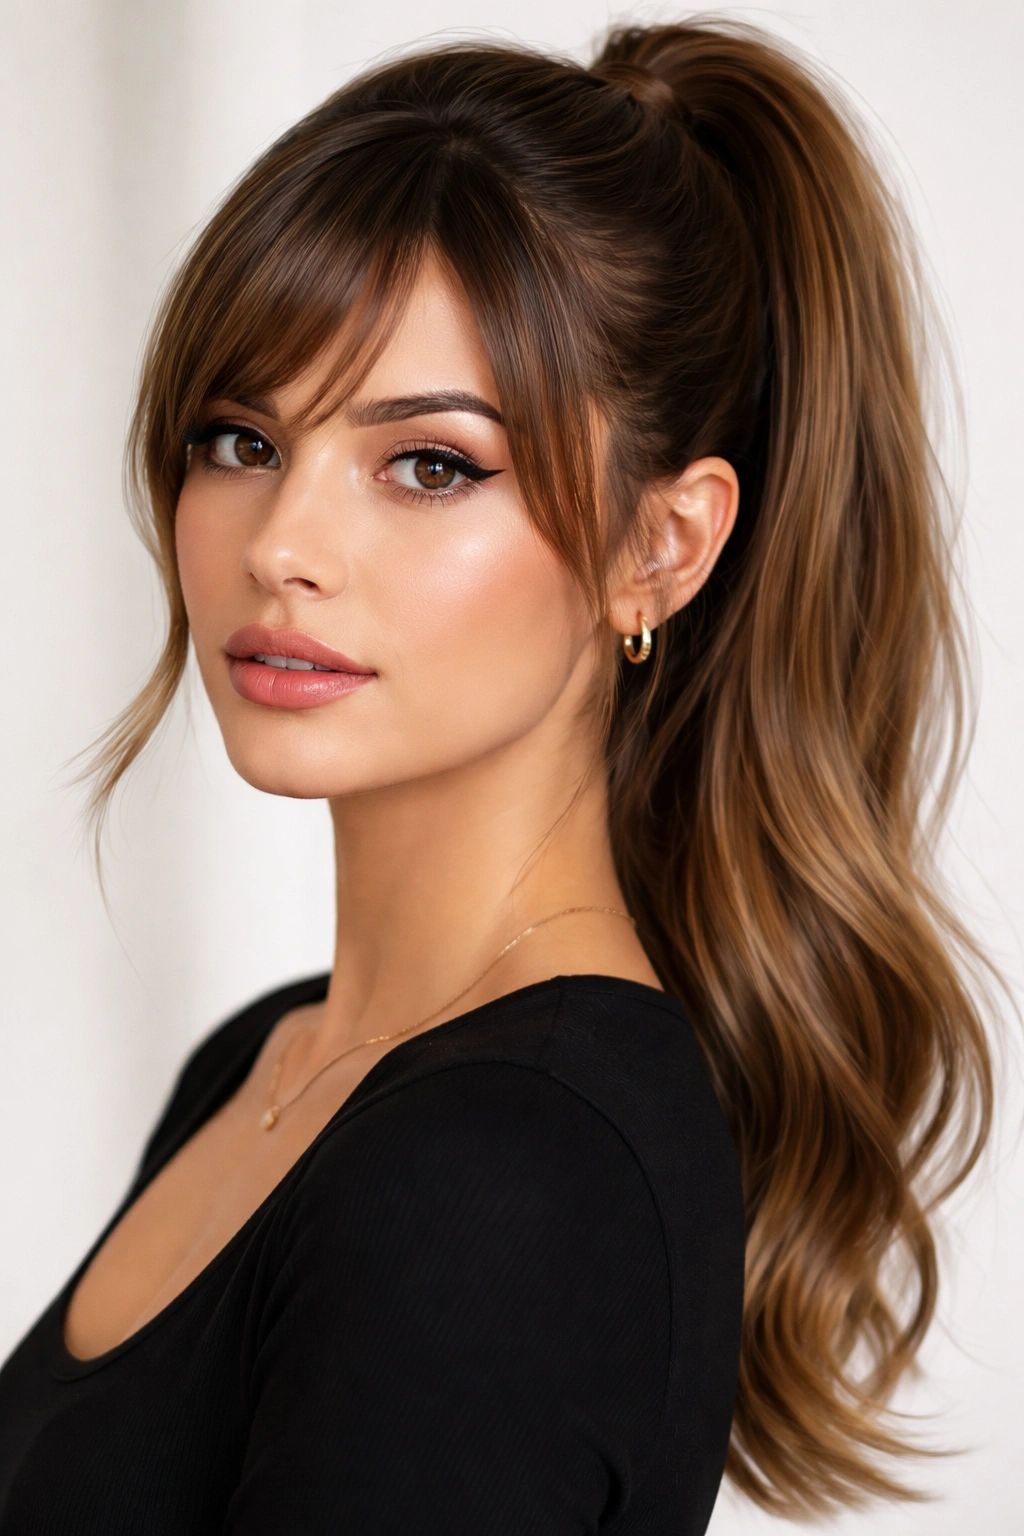
If you have bangs or you’re willing to section out some hair to look like bangs, you can create a sophisticated high ponytail where the front section is left out. This works beautifully for people who don’t usually wear bangs but want the softness and framing they provide.
The Strategic Purpose of Keeping Bangs Out
Bangs frame your face and draw focus to your eyes. Combining a high, polished ponytail with a softer bang section creates contrast and visual interest. This is also a lifesaver if your bangs are overdue for a trim — pull them aside while your ponytail handles the rest of your hair.
How to Execute This Style
Create a three-section division of your hair. Imagine a line running from temple to temple, across your forehead at about eyebrow height. That’s your bang section. The rest of your hair will be gathered into the ponytail.
Brush the bang section aside and temporarily clip it away. You’re not using this hair for the ponytail yet, so get it out of your way.
Gather all remaining hair into a high ponytail at your crown, using all the standard techniques.
Secure your ponytail and wrap the base.
Release the bang section and style it. Brush it smooth, or add a slight wave with a curling iron, or tease it lightly for volume. The idea is that this section frames your face while your ponytail is sleek and polished.
Optional: Pin the bang section slightly back. You don’t want it falling completely in your face, but you also don’t want it pinned so far back that it defeats the purpose of framing. A bobby pin clipped discreetly at the side of your head (hidden by the bang section itself) can anchor it.
Adjusting Based on Hair Length
If you have very short hair, your bang section might be too short to reach back far. That’s fine — let your bangs be shorter and frame your face, and your ponytail will handle the back. If you have very long hair, your bangs will be quite long too, which can create a really dramatic, fashion-forward look.
12. The Messy Bun-Ponytail Hybrid
This is the style to reach for when you want something between a ponytail and a bun — structured enough to look intentional, but textured and relaxed enough to feel casual and effortless. It’s perfect for days when you want your hair completely off your neck but don’t want to commit to a full bun.
Why Hybrid Styles Are So Versatile
A messy bun-ponytail takes the practicality of a high ponytail and adds the relaxed texture of a bun. It works for the gym, for casual days, for sleeping if you need to keep your hair contained overnight, and even for casual social settings.
Creating the Hybrid Style
Start with a high ponytail, gathered and secured using standard techniques. Your base elastic should be quite secure because you’re about to work with the ponytail.
Tease the entire length of your ponytail. Use a fine-tooth teasing brush and backcomb the outer sections and front surface of your entire ponytail. Don’t go crazy — you’re creating texture, not a completely matted mess.
Loosely wrap your ponytail around the base. Take the ends of your ponytail and gently wrap them around the elastic and the gathered section at the crown, creating a loose, textured loop. This doesn’t need to be neat or perfect.
Secure with bobby pins. Use several bobby pins to hold the wrapped ponytail in place. Insert them horizontally into the wrapped sections so they’re hidden by the texture.
Flip your head upside down and muss everything up. This might sound counterintuitive, but it actually helps distribute the texture and makes the style look intentional and not just “I wrapped my hair badly.”
Flip back up and adjust any pieces that are sticking out awkwardly. Pull out a few face-framing pieces if you want softness around your face. Tease any flat spots.
Mist with hairspray to hold everything in place.
The Beauty of This Style
The messy bun-ponytail is inherently forgiving because the whole point is that it’s textured and not perfectly smooth. You can make this style in five minutes and it will look intentionally effortless rather than actually sloppy.
Final Thoughts
A high ponytail is one of those foundational hairstyles that every person should have in their styling arsenal. Once you understand the core technique — gathering at the crown, securing with a quality elastic, wrapping the base to hide the elastic, and smoothing flyaways — you can execute any variation in just a few minutes.
The versatility of high ponytails means you’re never bored or limited by what you can do with your hair. On days when you want sleek and polished, the classic or curved versions work beautifully. On days when you want texture and personality, the tousled, textured, or braided versions deliver. On days when you’re running late, the half-up or messy hybrid styles look put-together without requiring much effort at all.
The key to mastering all of these styles is practice and not being afraid to experiment. Your first braided ponytail might be a little lumpy, and your first bubble pony might have uneven bubbles — that’s completely normal. Every hairstylist and person who does their own hair has been exactly where you are. Within a few attempts, these styles become muscle memory, and you’ll be able to execute them without thinking while getting ready in the morning.