When you’re trying to keep your hair protected and your scalp healthy, traditional braids can work against you. Tight pulling and tension at the roots are major culprits behind hair loss, breakage, and that nagging scalp discomfort that leaves you reaching for painkillers by evening. Knotless braids offer a smarter alternative—they distribute tension more evenly throughout your hair rather than concentrating it at the base, which means less strain on your scalp and fewer headaches by day’s end.
The beauty of knotless braids is that they’re incredibly versatile. You can style them into sleek ponytails that look polished for work, casual high ponytails for the gym, or romantic low ponytails for going out. Each variation lets you protect your hair while maintaining a look that actually suits your lifestyle and aesthetic. The key is understanding which knotless braid ponytail works best for your hair type, face shape, and the level of styling effort you’re willing to invest.
Here’s what makes knotless braid ponytails genuinely different: because the braiding technique starts with loose sections that gradually incorporate more hair, your scalp experiences consistent, manageable pressure instead of the concentrated pull that comes from traditional box braids. This means you can wear protective styles longer, your edges stay healthier, and you’re less likely to experience that tender scalp feeling by day three. Whether you’re looking for something understated or a statement-making style, the options below will help you find the perfect knotless braid ponytail for your needs.
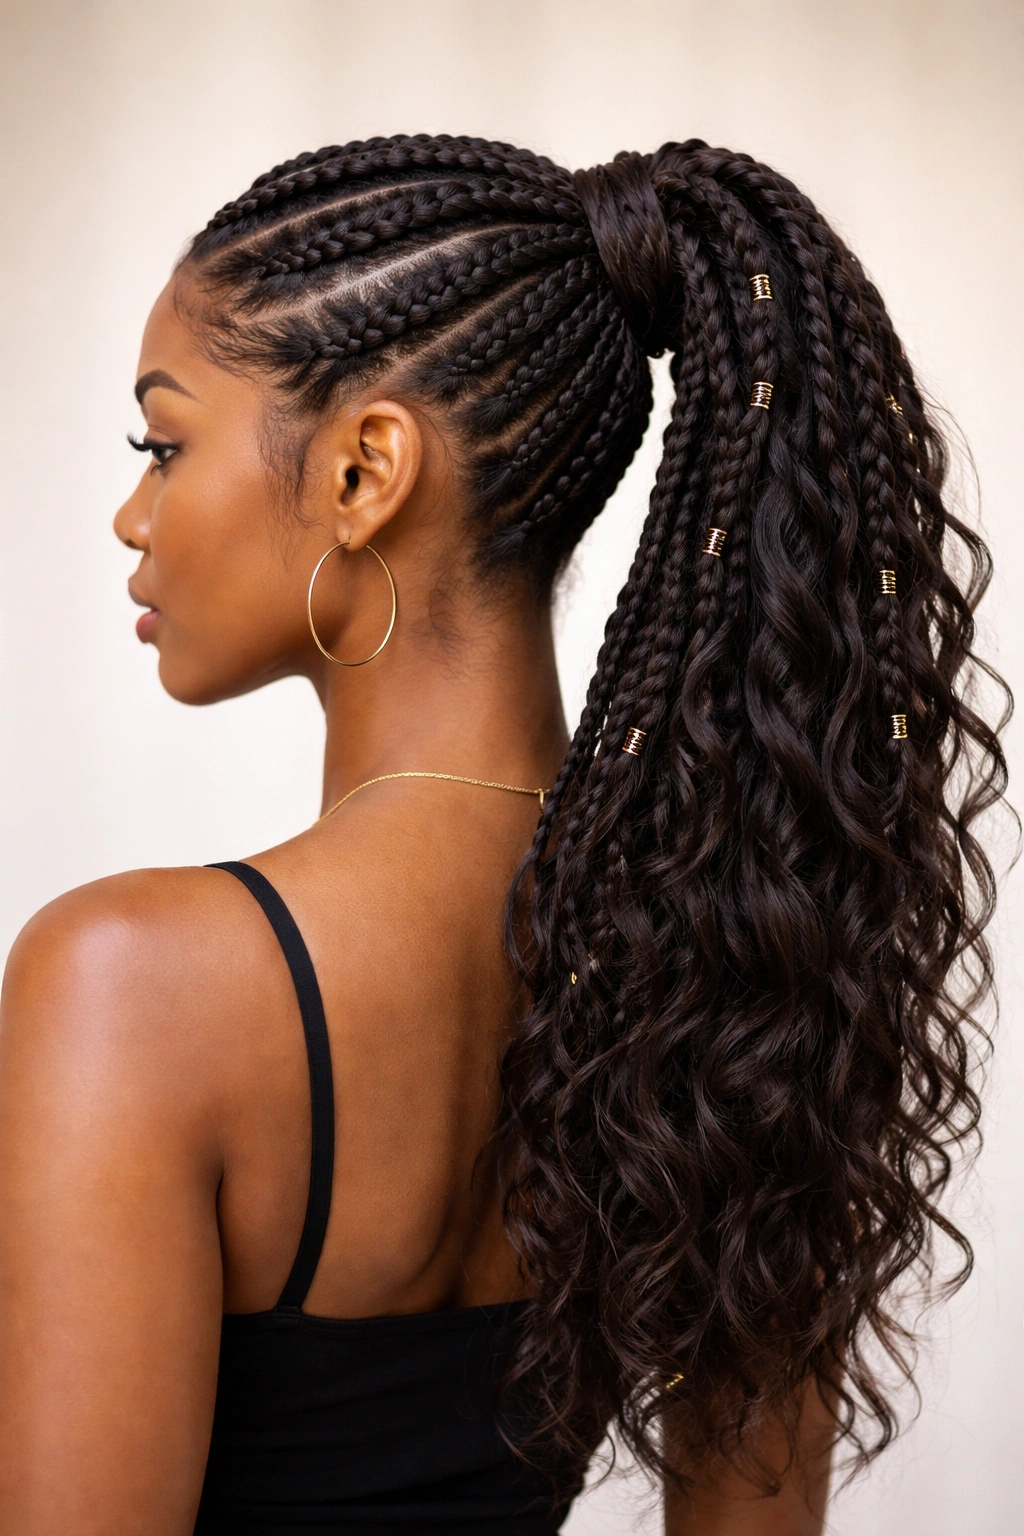
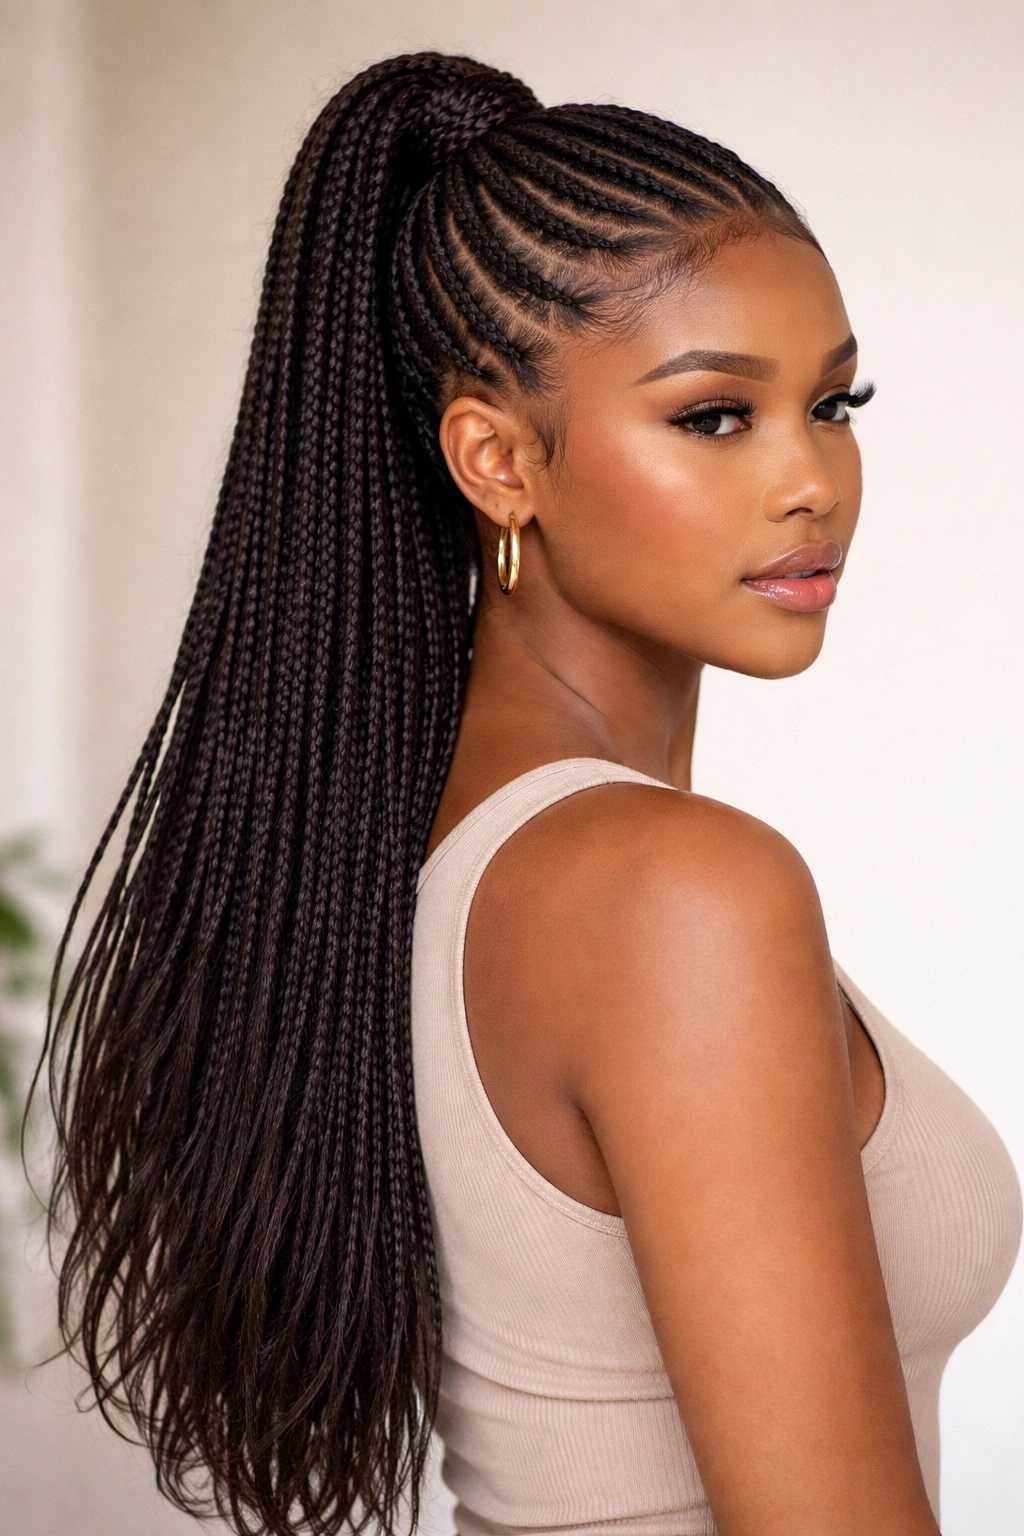
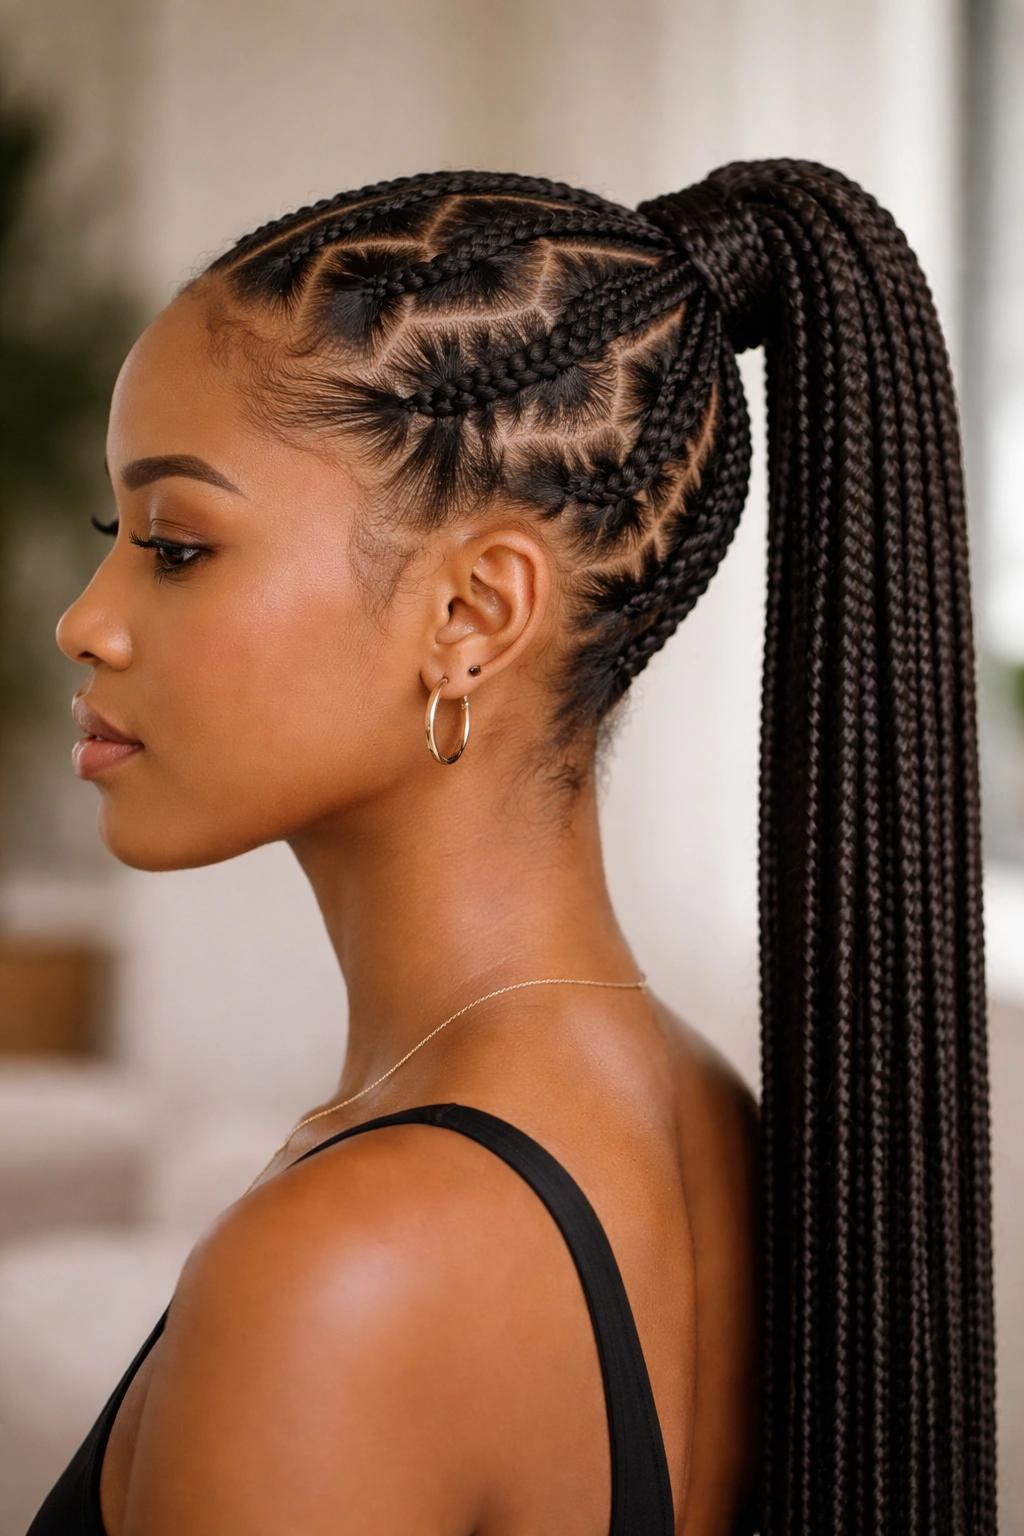
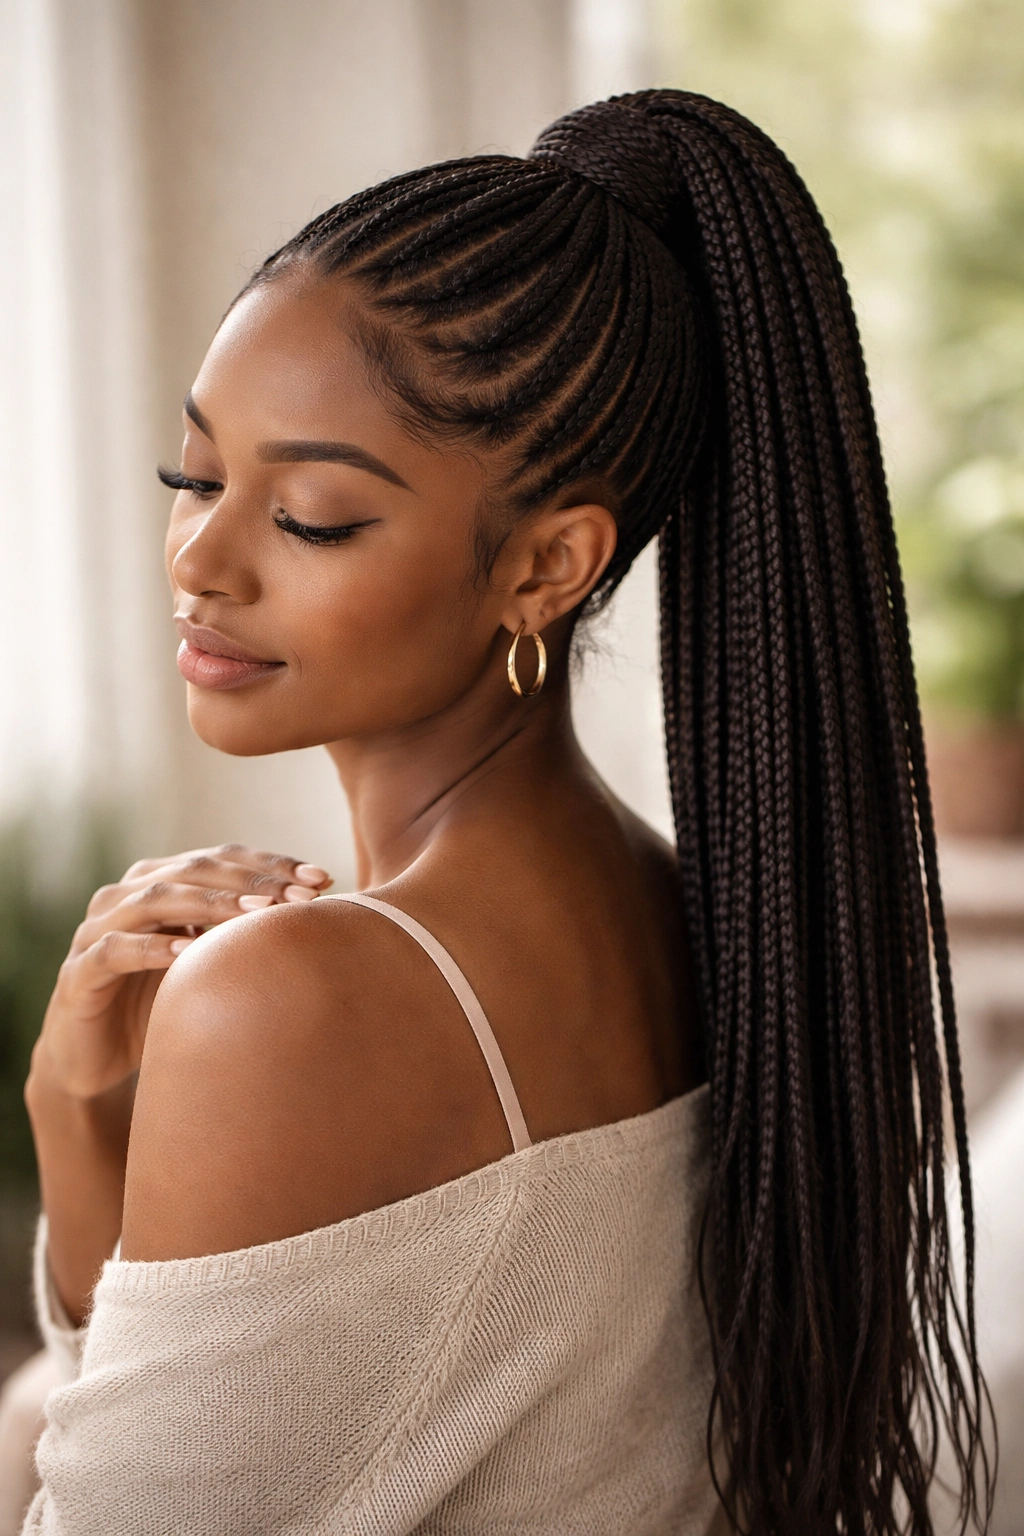
1. Sleek High Ponytail With Knotless Box Braids
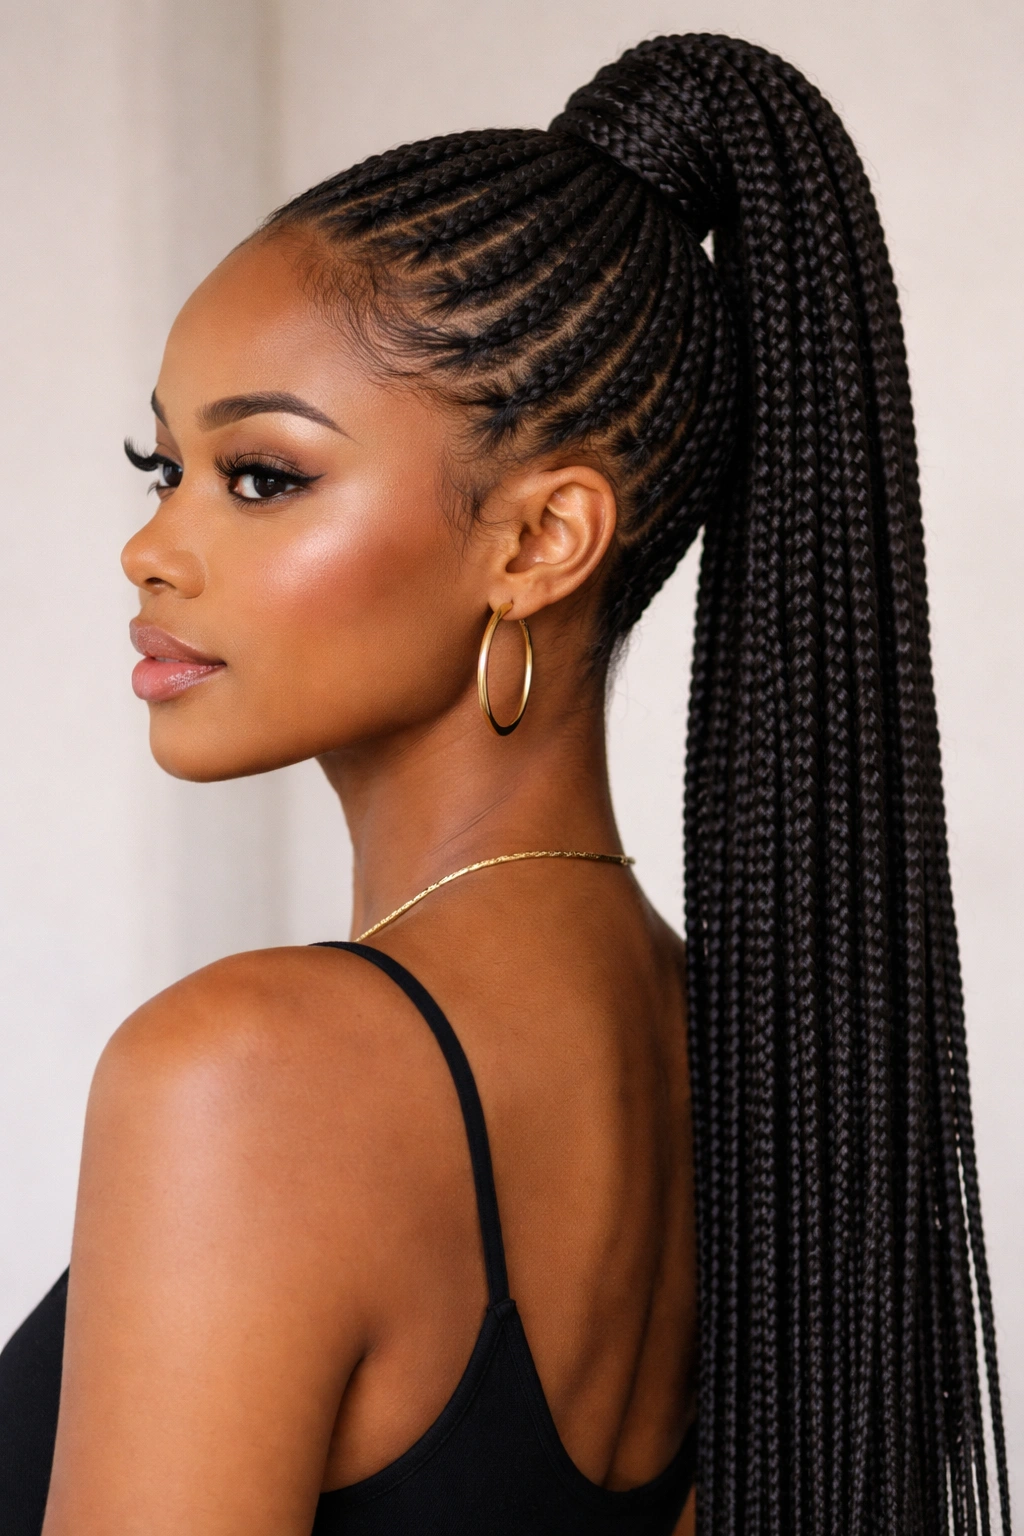
The sleek high ponytail with knotless box braids is pure elegance—it pulls your face forward, elongates your neck, and gives off a polished, intentional vibe whether you’re heading to the office or out for dinner. This style starts with smaller knotless braids that you gather into a high ponytail at the crown, then secure with a hair tie or decorative cuff. The height makes a real difference; it catches light in a way that flatters your features and feels more sophisticated than a standard middle ponytail.
Why This Style Reduces Tension
Knotless box braids distribute the weight of your ponytail more evenly across your scalp because they don’t have that tight knot at the base that traditional braids create. The high placement means the majority of the ponytail’s weight sits above your crown rather than pulling directly downward. Your scalp experiences a gentle, continuous pressure throughout the day rather than the sharp, concentrated pull that can cause discomfort or hair loss.
How to Create This Look
- Start with freshly washed and conditioned hair, or use a styling cream to smooth your edges and reduce frizz
- Section your hair into the size braids you want—smaller braids (about pencil-thickness) are gentler on your scalp than larger ones
- Begin braiding from your hairline using the knotless technique: start with three strands and add hair gradually without twisting the base into a knot
- Braid all sections down to the ends, then gather them into a high ponytail at the crown using a silk hair tie
- Smooth your edges with edge control and a fine-tooth comb
- Optional: wrap a small braid or decorative cuff around the base of your ponytail for added polish
Pro tip: Use a silk or satin hair tie instead of elastic—this reduces friction against your braids and helps them last longer while maintaining their shape.
2. Twisted Crown With Low Knotless Ponytail
This style combines the best of two techniques: you twist sections of hair around your crown, then gather loose knotless braids into a low ponytail at the nape of your neck. The twisted crown adds visual interest and texture while keeping hair off your face, and the low ponytail placement puts minimal stress on your hairline and edges. It’s romantic, playful, and genuinely flattering on most face shapes.
What Makes This Look Work
The twisted crown naturally smooths flyaways and creates a defined frame for your face, while the low ponytail keeps the overall weight distribution even. Your scalp experiences almost no tension because the ponytail sits lower on your head, and the twists actually serve as a protective layer for your delicate edges. Most people find this style comfortable enough to wear for extended periods without any scalp tenderness.
Steps to Achieve This Style
- Braid knotless braids throughout your hair, focusing on sections around the crown and back
- Take two sections from the front and gently twist them around your head toward the back—don’t pull tight; let them wrap loosely
- Secure the twists with bobby pins at the back of your head
- Gather all remaining braids into a low ponytail at the nape of your neck
- Use a silk scrunchie or fabric-wrapped elastic to secure the ponytail
- Gently pull and stretch the twists slightly to create texture and volume
- Tuck any loose strands behind your ears for a polished finish
Worth knowing: This style works beautifully with curly or textured hair because the natural variation in your hair texture makes the twists look fuller and more intentional.
3. Side Ponytail With Thin Knotless Braids
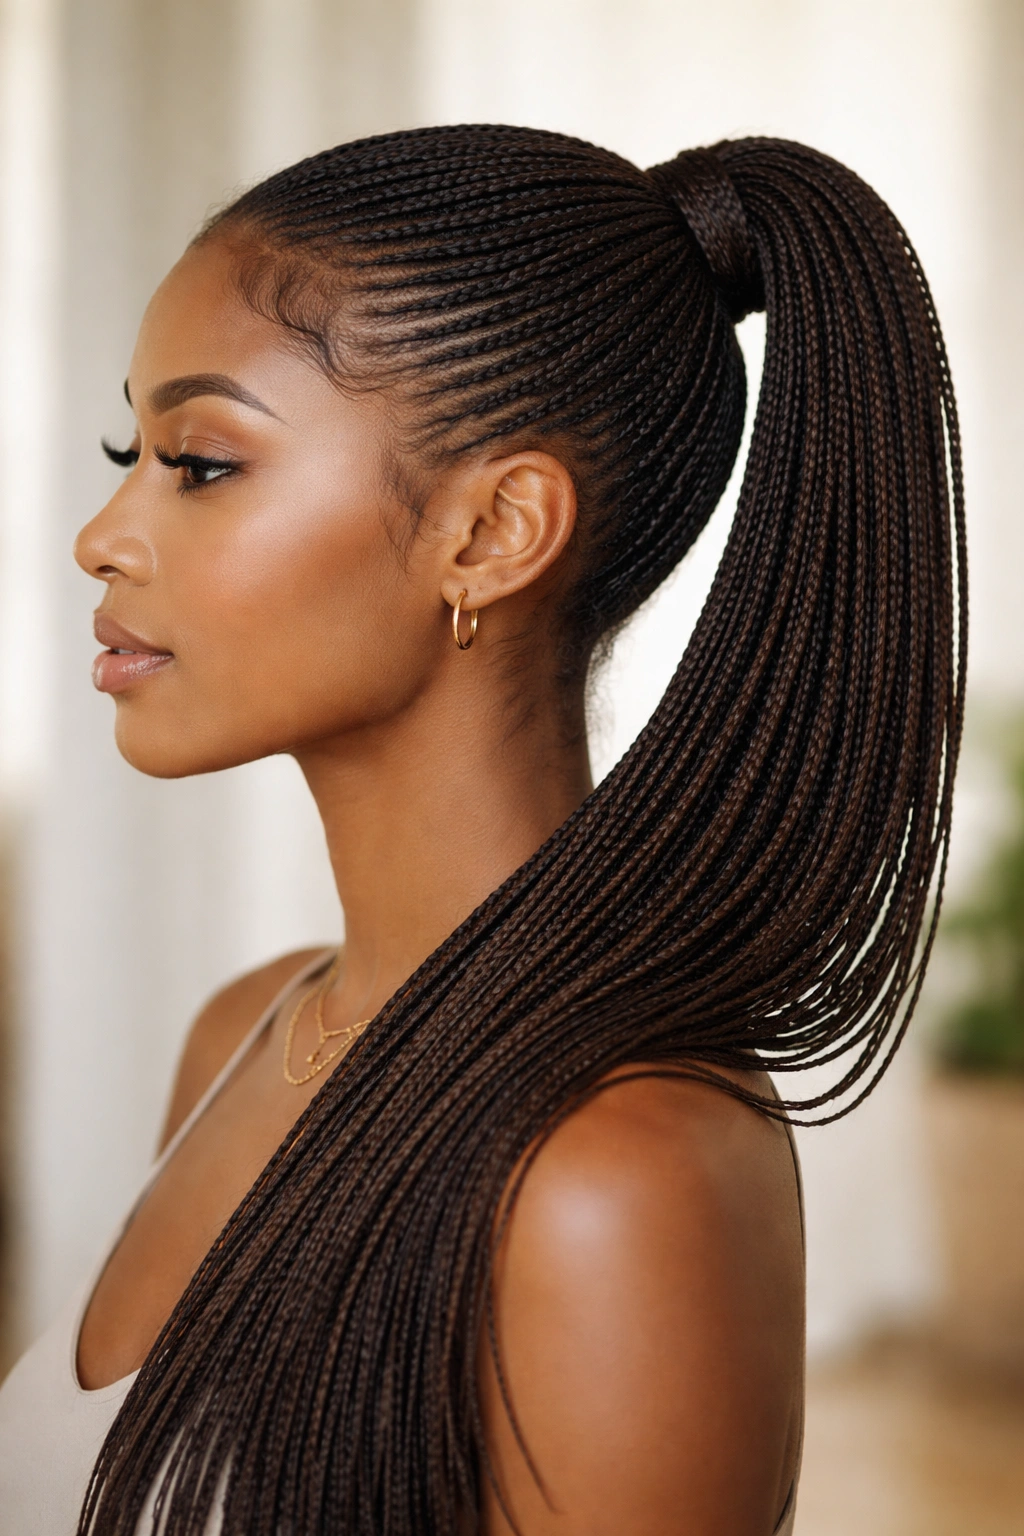
A side ponytail is inherently gentler on your scalp than a centered style because the weight pulls to one side rather than straight back, which naturally redistributes pressure. When you use thin knotless braids, you’re adding extra protection and longevity to your style. The side placement also flatters most face shapes and gives off a relaxed, effortless-but-intentional vibe that works for casual days and dressier occasions alike.
Why Thin Braids Make a Difference
Thin knotless braids—sometimes called micro knotless braids—have less individual weight than thicker braids, which means less cumulative pull on your scalp. Because the tension is spread across more individual braids, your hair follicles experience gentler, more distributed pressure. Most people can comfortably wear this style for six to eight weeks without experiencing hair loss or breakage at the roots.
How to Style Your Side Ponytail
- Create thin knotless braids throughout your hair, starting from one side
- Brush or gently comb your braids to smooth them and create a cohesive look
- Gather the braids into a low side ponytail by sweeping them to one side of your head
- Secure with a silk hair tie or covered elastic band
- Leave a few face-framing braids loose on the opposite side for a softer look
- Use edge control along your hairline to smooth any flyaways
- Consider adding a decorative cuff or wrapped band around the base of your ponytail
Insider note: If you have a wider face, a side ponytail actually makes your face appear slimmer because the gathered braids on one side create vertical lines that elongate your features.
4. Bubble Ponytail With Knotless Braids
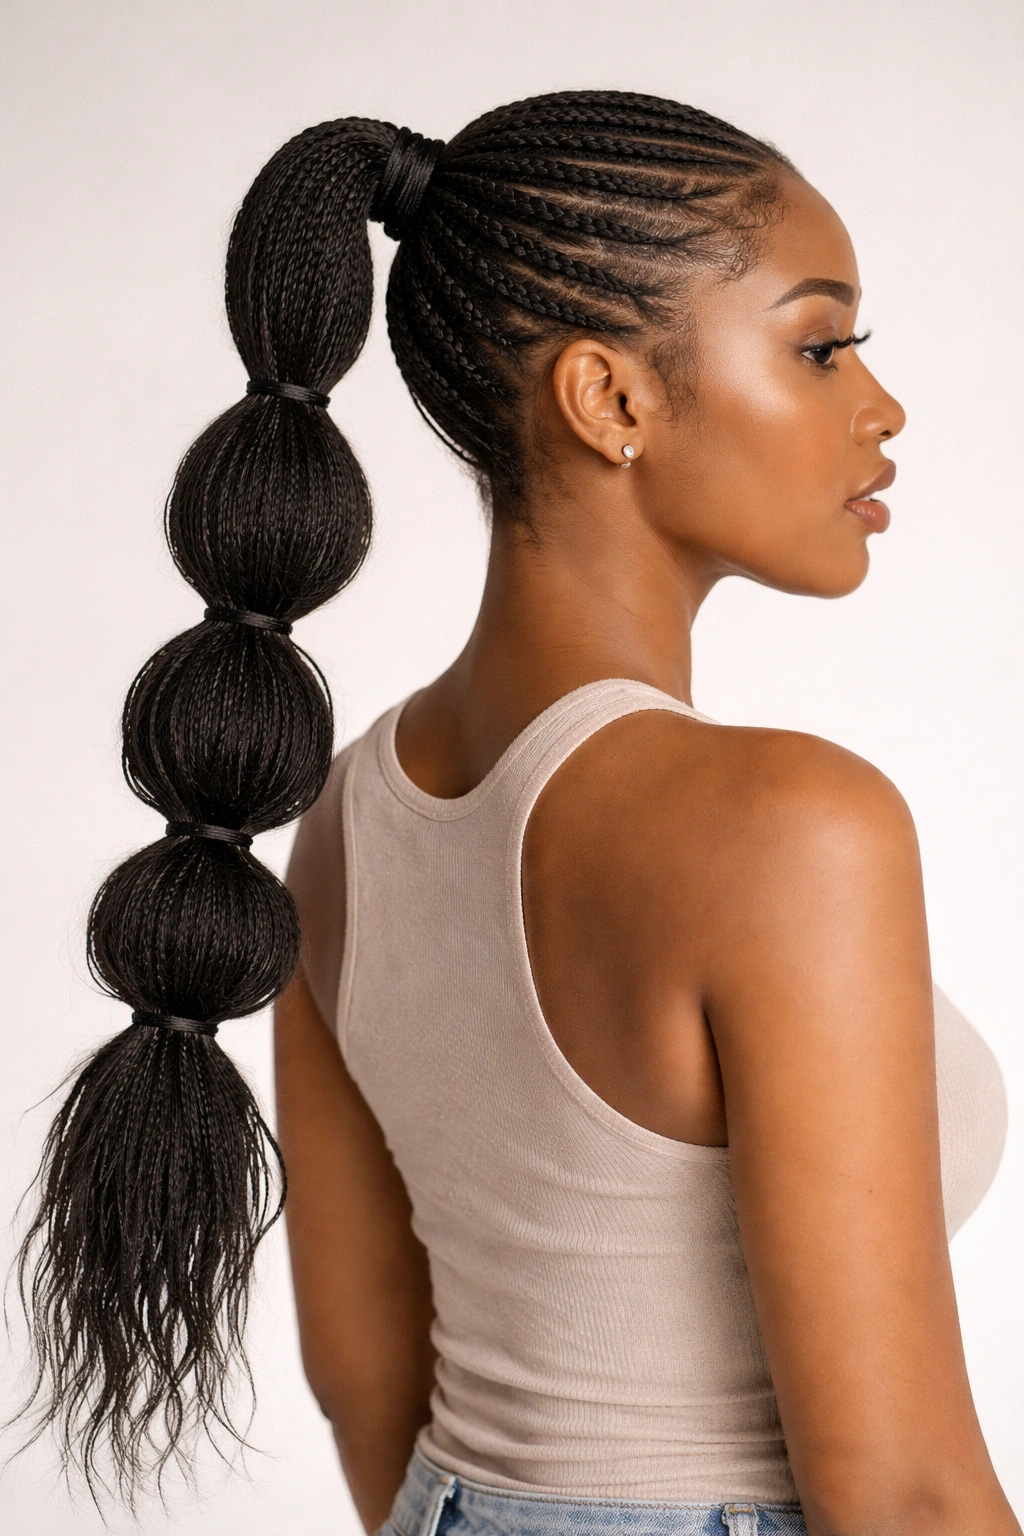
The bubble ponytail is where multiple hair ties create distinct sections that puff out, giving your ponytail dimension and texture. When you start with knotless braids, the texture becomes even more interesting, and the bubble effect keeps the style looking fresh and intentional rather than limp. This playful style is perfect for active days, weekend hangouts, or any time you want to add visual interest without appearing overdone.
The Tension-Reducing Benefits
Because you’re spacing out multiple hair ties along the length of your ponytail, no single elastic is bearing the full weight of your hair. Each section holds less tension than a traditional single ponytail would, and the overall effect actually reduces the pull at your roots. The bubble effect also keeps your braids from looking flat or compressed, which happens when you wear a traditional tight ponytail for hours at a time.
Creating the Bubble Effect
- Braid knotless braids throughout your entire head
- Gather all braids into a ponytail at your desired height using a silk elastic
- Place a second hair tie about two to three inches down from the first
- Gently pull the section between the two elastics slightly upward and outward to create a puffy “bubble”
- Continue adding hair ties every two to three inches down the length of your ponytail
- Pull each section outward to create uniform bubbles
- The bubbles will relax slightly over a few hours, which is part of the style’s charm
Pro tip: Use clear or matching-colored hair ties so the elastics fade into the background and the focus stays on the bubble texture.
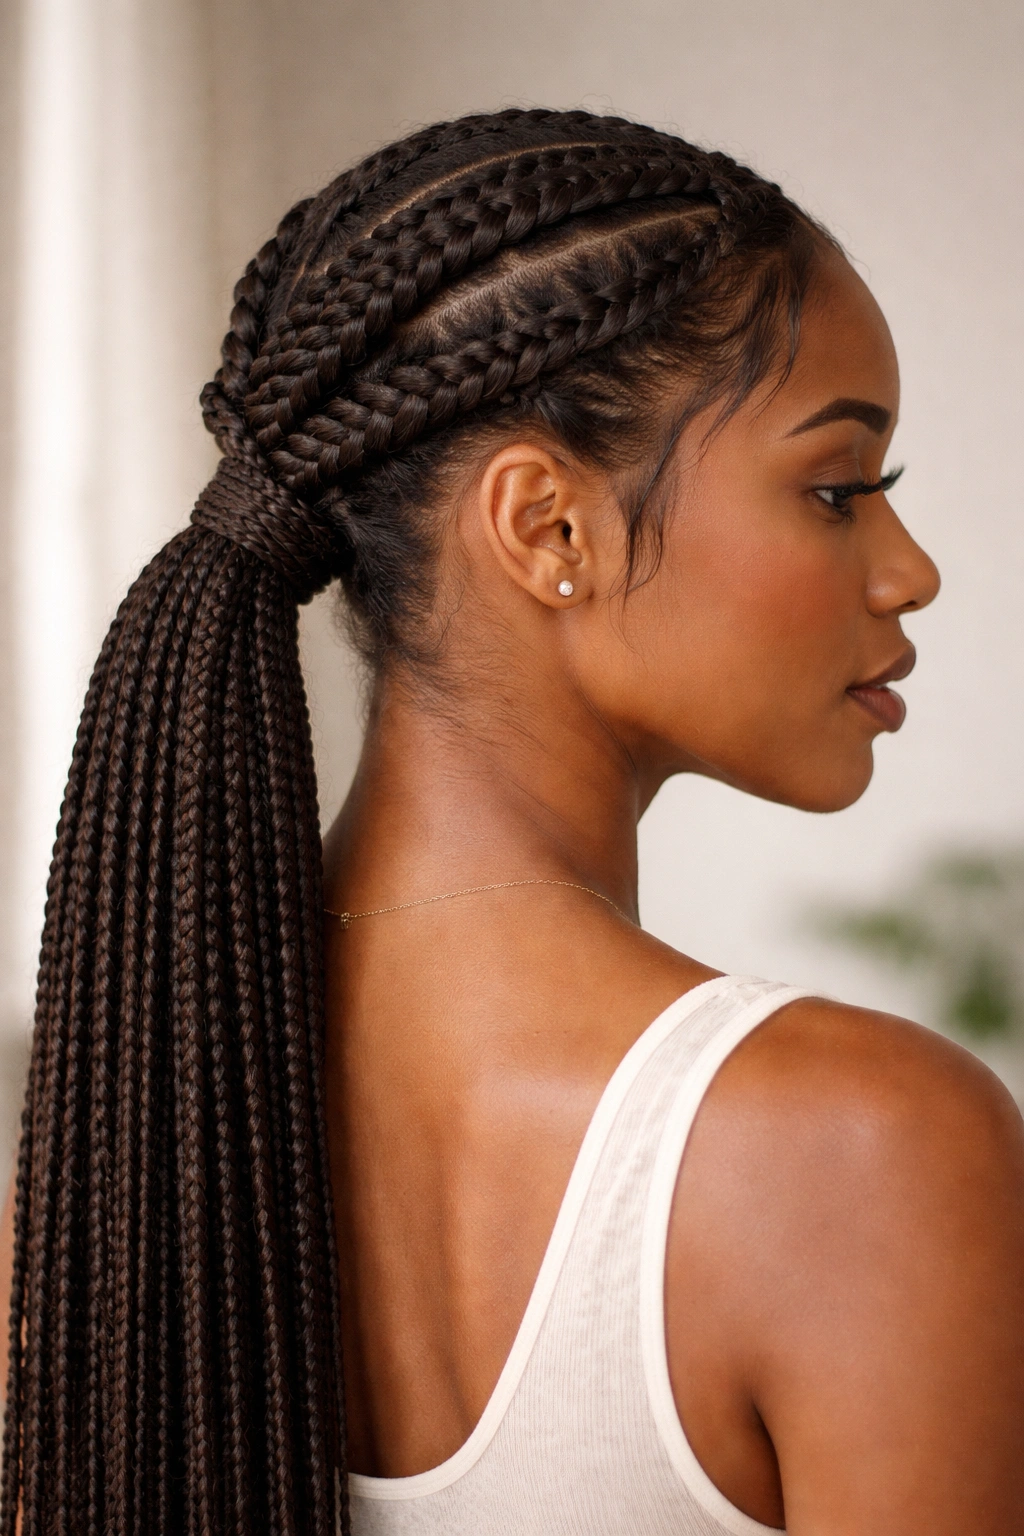
5. Goddess Braids Wrapped Into Ponytail
Goddess braids are thicker, more sculptural knotless braids that frame your face and wrap around your head like a crown. When you gather them into a ponytail, you create a sophisticated, almost regal look that genuinely turns heads. This style sits somewhere between casual and formal, making it perfect for date nights, special events, or days when you want to feel extra polished.
Scalp Comfort and Style
Because goddess braids are thicker and fewer in number than smaller knotless braids, your scalp experiences even pressure spread across fewer attachment points. The braids themselves are positioned more gently because they’re created with the knotless technique, and their size means they’re less likely to create tender spots or localized pressure points. Many people find this their most comfortable protective style.
How to Create Goddess Braids Ponytail
- Start by sectioning your hair into four to six larger sections, depending on your head size
- Create knotless braids using each section, starting near your hairline and braiding back
- Allow the braids to wrap naturally around your head rather than pulling them tightly
- Gather the braids into a ponytail at the back or side of your head
- Secure with a fabric-wrapped elastic
- Gently pull and stretch each braid to increase volume and create a fuller appearance
- You can leave the braids as-is or wrap smaller braids around the base of your ponytail for added detail
Worth knowing: Goddess braids actually look better as they loosen slightly over the first few days—that soft, relaxed appearance is part of what makes them look so elegant.
6. Half-Up, Half-Down Ponytail With Knotless Braids
The half-up, half-down style is perfect for days when you want to keep hair off your face without committing to a full ponytail. You braid knotless braids throughout, then gather only the top section into a ponytail while leaving the lower braids down. This gives you the benefits of a protective style (your edges and crown stay protected) while maintaining the versatility of half-down hair (your shoulders stay visible, you can still move freely).
Pressure Distribution Benefits
Because you’re only gathering a portion of your hair into the ponytail, the tension is automatically reduced compared to a full ponytail. Your hairline experiences minimal stress, and the loose lower braids actually protect your ends while looking intentional and styled. This is one of the most comfortable protective styles you can wear for extended periods.
Steps to Create This Style
- Braid knotless braids throughout your entire head
- Create a horizontal section from ear to ear across the back of your head
- Gather the braids from that top section into a ponytail at the crown
- Secure with a silk elastic
- Leave all lower braids loose and let them fall down your back
- Optional: create a smaller accent braid from the side and wrap it around the ponytail base
- Use edge control to smooth your hairline and create a polished look
Pro tip: Adding a small decorative cuff or metallic band to your half-up ponytail instantly elevates the style and makes it look more intentional.
7. Wrapped Side Knot With Knotless Braid Ponytail
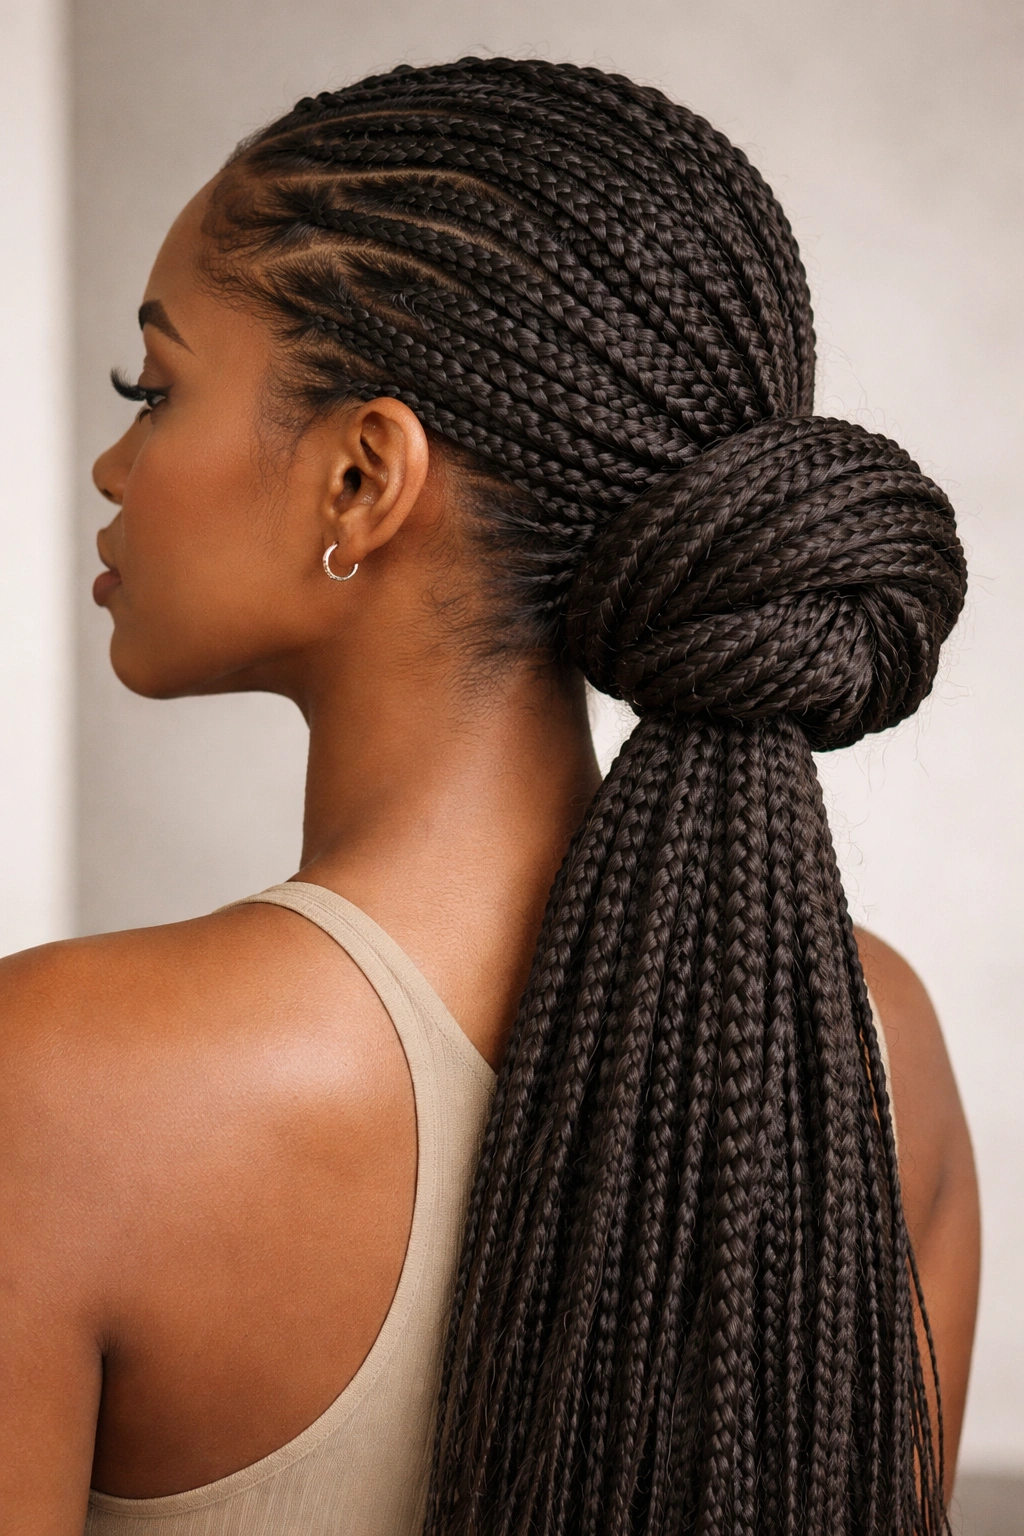
This unique style takes knotless braids and arranges them into a low side knot, then wraps additional braids around the outside. It’s playful, textured, and looks significantly more complex than it actually is to create. The side placement and lower positioning mean your scalp experiences minimal tension throughout the day.
Why This Variation Feels So Comfortable
The knot sits at the back of your head rather than at the crown, which means the weight of your ponytail is distributed at a lower point where your neck muscles can better support it. This positioning actually reduces the likelihood of headaches and scalp tenderness. The wrapping technique adds visual texture without adding actual tension to your hair.
How to Construct This Style
- Create thin to medium knotless braids throughout your hair
- Gather a section of braids from one side of your head and create a loose knot shape at the nape of your neck
- Secure the knot loosely with bobby pins
- Take additional braids and wrap them around the outside of the knot
- Secure with bobby pins as you wrap
- Gently tug and stretch the braids to create texture and soften the overall look
- Leave two or three braids loose on the opposite side of your face
Insider note: This style actually improves over several days as the braids relax slightly and the wrapped sections settle, creating an even softer, more romantic appearance.
8. Braided Crown Ponytail With Loose Ends
Start with knotless braids around the perimeter of your head to create a crown effect, then gather everything into a ponytail at the back. This style is more interesting than a standard high ponytail because the crown braids frame your face and add dimension. The technique puts minimal stress on your hairline because the braids don’t pull from your edges—they simply frame them.
Protective Benefits for Your Hairline
Because the braids form a crown rather than pulling directly back from your hairline, your most delicate edges experience almost no tension. Your hairline stays protected while the style looks intentional and polished. This is genuinely one of the best protective styles if you’re concerned about maintaining your edges and preventing hairline recession.
Creating Your Crown Ponytail
- Section hair around your head creating a crown-like pathway
- Create knotless braids in those sections, positioning them loosely rather than pulling tightly
- Allow the braids to naturally frame your face and follow your hairline
- Gather all braids plus any remaining hair into a ponytail at the back of your head
- Secure with a silk elastic
- Gently manipulate the crown braids to create dimension and texture
- Use edge control on your hairline for a smooth, polished appearance
Pro tip: Lightly misting your crown braids with a leave-in conditioning spray helps them maintain their shape and adds subtle shine without making them look wet.
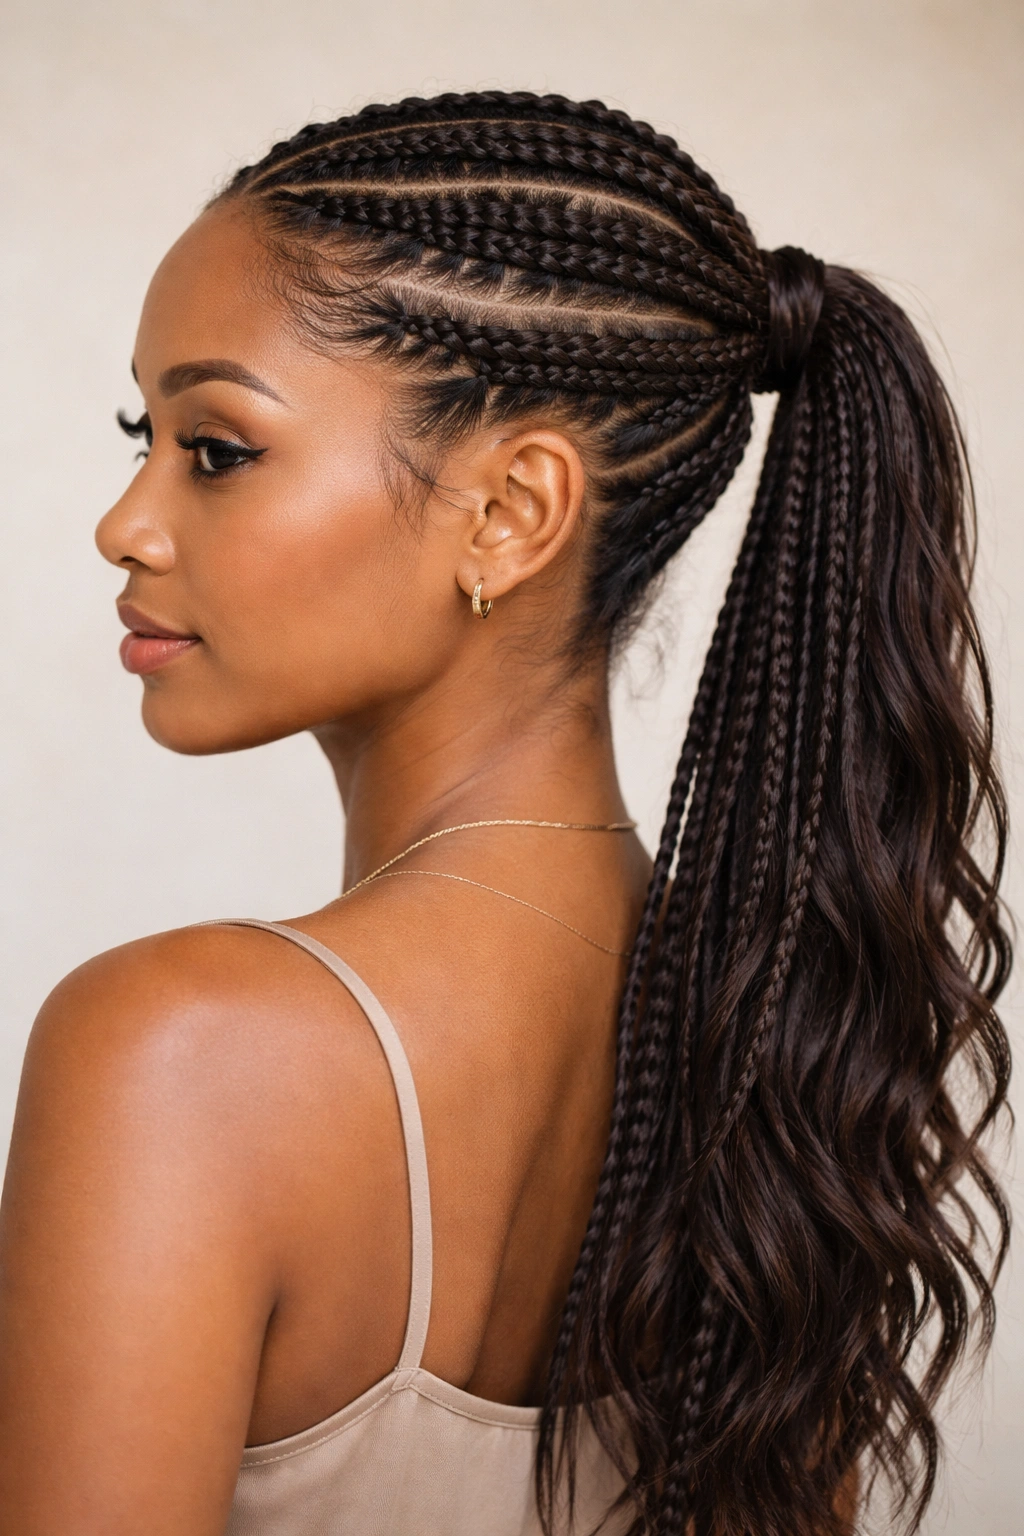
9. Zigzag Parted Ponytail With Knotless Braids
Instead of a straight center or side part, create a zigzag parting pattern and braid knotless braids along each zigzag section, then gather into a ponytail. This playful variation adds visual interest and makes your style look intentional and custom-made. The staggered parting pattern naturally distributes tension more evenly across your scalp than a traditional straight part would.
How Parting Pattern Affects Tension
A straight part can create stress along that exact line because all the hair is being pulled in the same direction from that single line. A zigzag pattern spreads that pulling force across multiple points, which means no single area of your scalp bears concentrated stress. This subtle change in parting can genuinely reduce scalp tenderness and allow you to wear protective styles for longer periods.
Steps for the Zigzag Ponytail
- Use a rattail comb to create a zigzag parting pattern starting from your hairline
- Follow the zigzag pattern down the back of your head
- Create knotless braids along each section of the zigzag pattern
- Braid braids in the remaining sections of your hair as well
- Gather all braids into a ponytail at your desired height
- Secure with a silk elastic
- The zigzag pattern will be visible at your roots, adding visual texture
- Smooth your edges with edge control
Worth knowing: Zigzag patterns are particularly flattering if you have a long face because the horizontal zigzag lines create visual balance and make your face appear shorter and wider in the best way.
10. Low Knotless Braid Ponytail With Accessory Detail
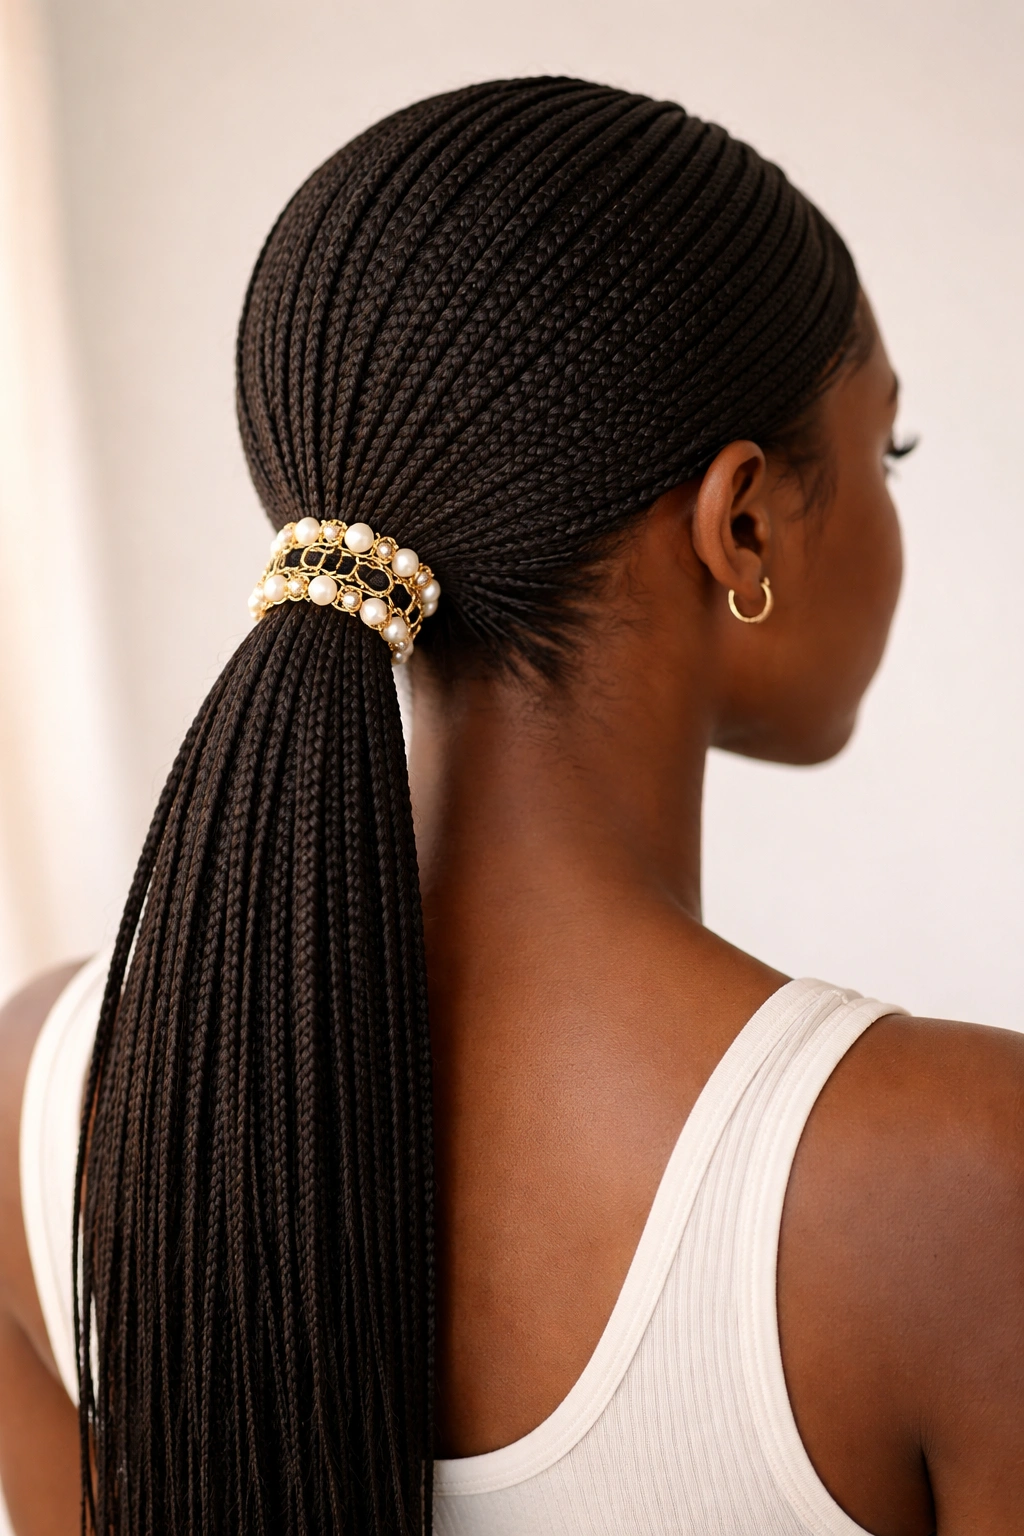
Keep it simple with a low knotless braid ponytail, but elevate the style by adding an accessory. You can use decorative cuffs, wrapped bands, or even small trinkets threaded through your ponytail. This style is perfect for minimalists who want a protective style without visual complexity. The low placement is inherently gentle on your scalp, and the accessory adds personality without requiring additional styling effort.
Comfort and Simplicity Combined
A low ponytail puts minimal stress on your hairline and crown because the weight sits lower on your head. When you use thin to medium knotless braids, you’re ensuring that whatever tension exists is distributed across multiple points rather than concentrated. Adding an accessory is purely optional and doesn’t affect the comfort of the style—it’s just for visual impact if you want it.
Creating Your Accessory Ponytail
- Braid knotless braids throughout your hair in your preferred size
- Gather all braids into a low ponytail at the nape of your neck
- Secure with a silk elastic
- Wrap a decorative cuff, metal band, or fabric wrap around the base of your ponytail
- You can also thread small beads, rings, or charms through your ponytail by carefully opening them and sliding them over the gathered braids
- Use edge control along your hairline for a finished look
- Consider adding a subtle mist of hair shine spray for luster
Pro tip: Metallic cuffs or gold-toned accessories look stunning against warm skin tones, while silver or rose-gold work beautifully on cooler undertones—choose what flatters your natural coloring.
Final Thoughts
Knotless braid ponytails genuinely change the game when you’re trying to protect your hair while maintaining styles that actually work for your life. The key is choosing a placement and braiding size that feels comfortable from day one—if your scalp is tender by evening, the style is too tight, and you should try thinner braids or lower placement next time. Most people find their sweet spot after trying two or three of these variations and paying attention to what feels best during and after styling.
The beauty of protective styling is that it shouldn’t hurt. Mild tension is normal during the first couple of days as your braids settle, but genuine pain or discomfort is your sign to loosen things up. Your hair will last longer, your edges will stay intact, and you’ll actually enjoy wearing protective styles if you prioritize comfort from the beginning. Whether you choose a sleek high ponytail or a textured bubble style, you’re giving your hair a break from daily manipulation and heat styling—which is exactly what leads to healthier, stronger growth over time.