A side-swept ponytail offers instant polish and practical elegance, but only if it actually stays where you put it. Nothing derails a good hair day faster than a ponytail that slides down by midday, leaving you with a droopy, half-deflated silhouette that looks more accident than intention. The challenge gets steeper if you’re working with fine hair, a slippery scalp, or a schedule packed with movement—running between meetings, sweating through a workout, or navigating humidity outdoors.
The good news? A high side ponytail doesn’t have to be a vanishing act. The difference between a ponytail that holds firm from sunrise to sunset and one that surrenders by 3 p.m. comes down to technique, strategic placement, and a few structural tricks that most people never learn. When you anchor your high side ponytail using the right method, add grip through intentional teasing or twisting, and use the appropriate elastics and reinforcements for your hair type, you’re working with physics and friction instead of against them.
What follows are twelve distinct approaches to the high side ponytail—each designed to stay exactly where you place it, with explanations of the mechanics behind why they work, specific step-by-step guidance for executing them, and honest troubleshooting for common hang-ups. Whether your hair is thick and prone to slip, fine and delicate, textured, or somewhere in between, you’ll find a version here that matches your hair reality and your lifestyle demands.
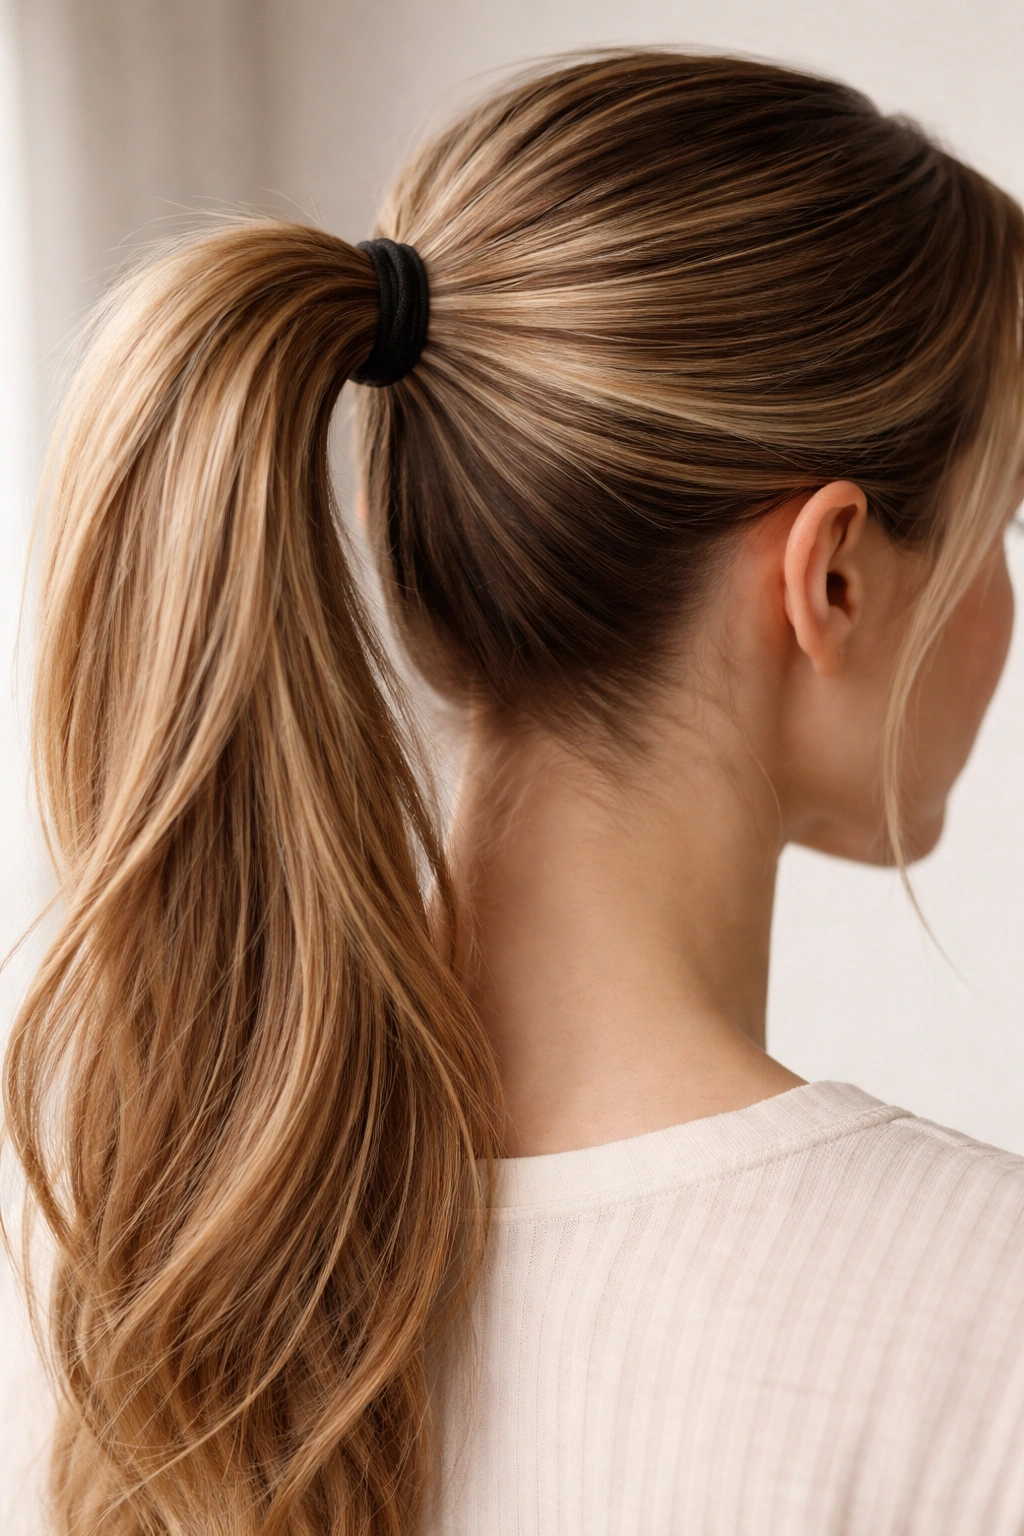
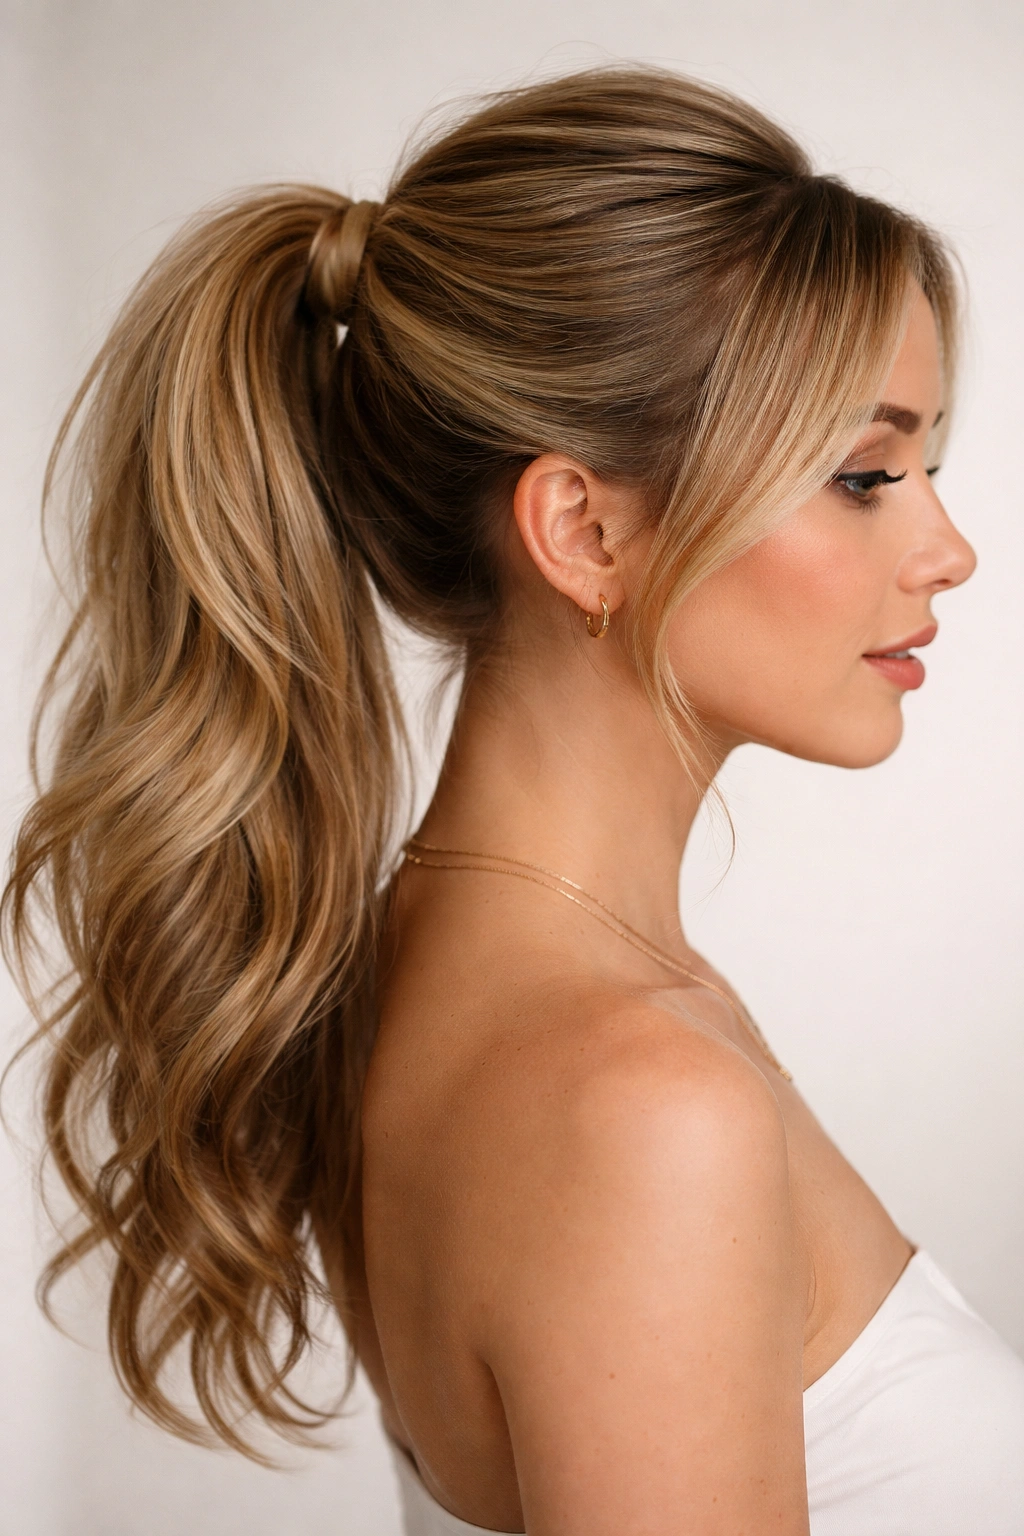
1. Classic High Side Ponytail with Face-Framing Layers
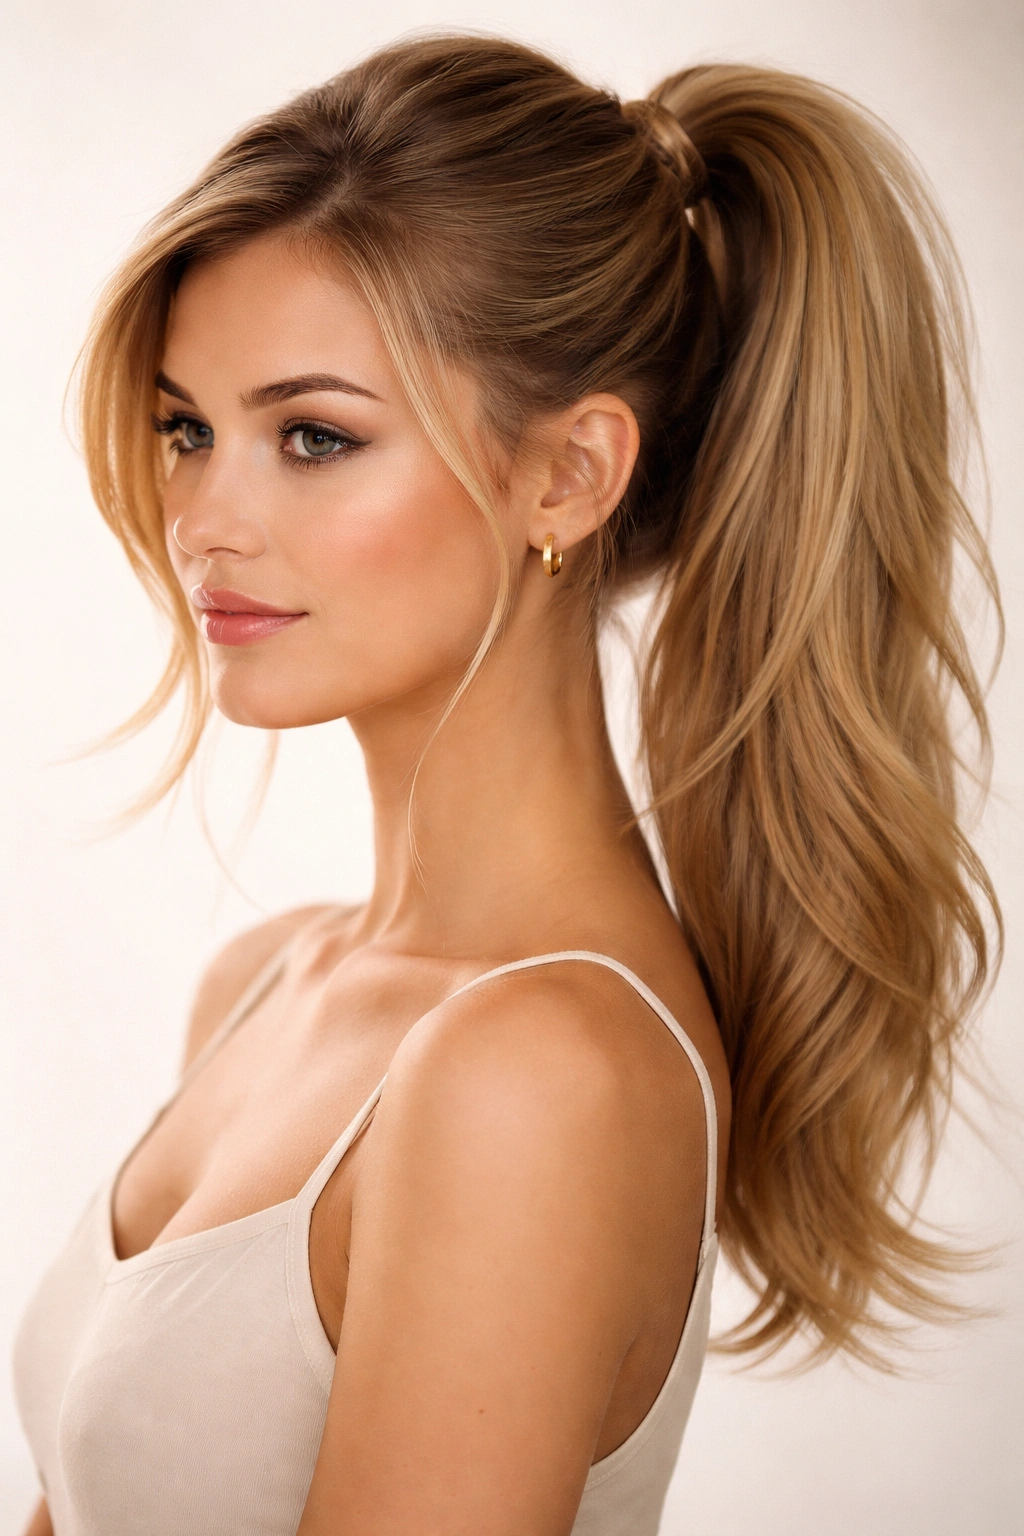
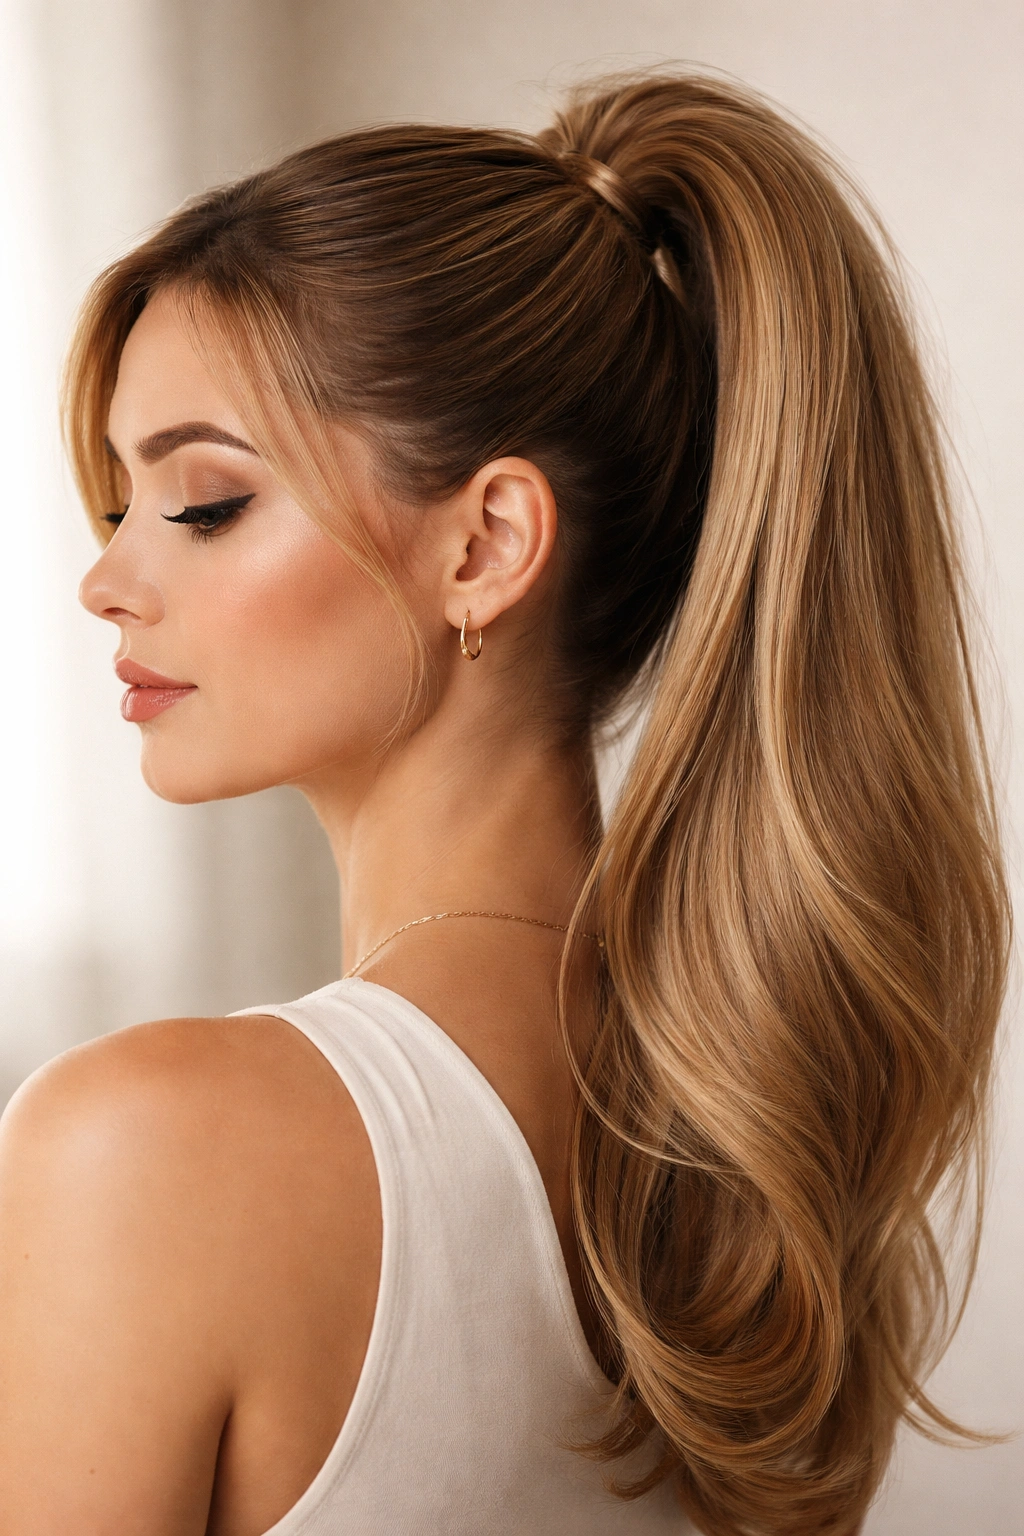
This is the foundational high side ponytail—the style that looks effortlessly chic but requires intentional placement and a deliberate technique to avoid that dreaded midday slump. The key is anchoring it high enough that gravity works with you rather than against you, while leaving just enough softness around the face to feel contemporary rather than severe.
Why This Version Stays Secure
A true high side ponytail sits at or slightly above the crown, gathered at a diagonal angle rather than straight back. This positioning matters more than most people realize. When the elastic sits too low—even just an inch lower than ideal—the weight of your hair pulls downward in a straight line, creating constant tension that gradually loosens the elastic over hours. Position it higher, and the hair wraps around the base in a way that naturally resists sliding. The side placement adds another stability factor: instead of all that weight pulling straight down, it distributes pressure at an angle, which actually makes the grip more stable.
How to Build It Right
Start by sectioning your hair with a side part that begins at one temple and extends back to the crown area. Tease the crown section gently with a fine-tooth comb—just enough to create texture and grip, not an actual backcombed mess. Gather the side section and the teased crown hair together into one hand, holding it at the highest point that feels comfortable. The gathering point should be roughly where the crown would be if you were looking straight ahead; this is higher than you might instinctively think. Smooth the front section with a fine comb or your fingers, leaving 2-3 face-framing pieces loose. Use a strong elastic (one designed for thicker hair, even if yours is fine) and wrap it three times around the base. A second, smaller elastic wrapped tightly just below the first one prevents the whole thing from gradually loosening throughout the day.
Quick Facts and Troubleshooting
- If the ponytail sits too low and slides down within a few hours, move the gathering point higher the next time—literally an inch or two makes a massive difference
- Teasing creates essential grip; skip this step only if your hair is extremely thick and naturally textured
- Hair that’s freshly washed slips more easily; apply dry shampoo before styling for better traction
- The face-framing pieces should curve softly forward; they’ll naturally move throughout the day and add to the effortless impression
Pro tip: Smooth a tiny amount of gel or edge control around the gathered base before wrapping with the elastic—this prevents baby hairs and flyaways from loosening the tension.
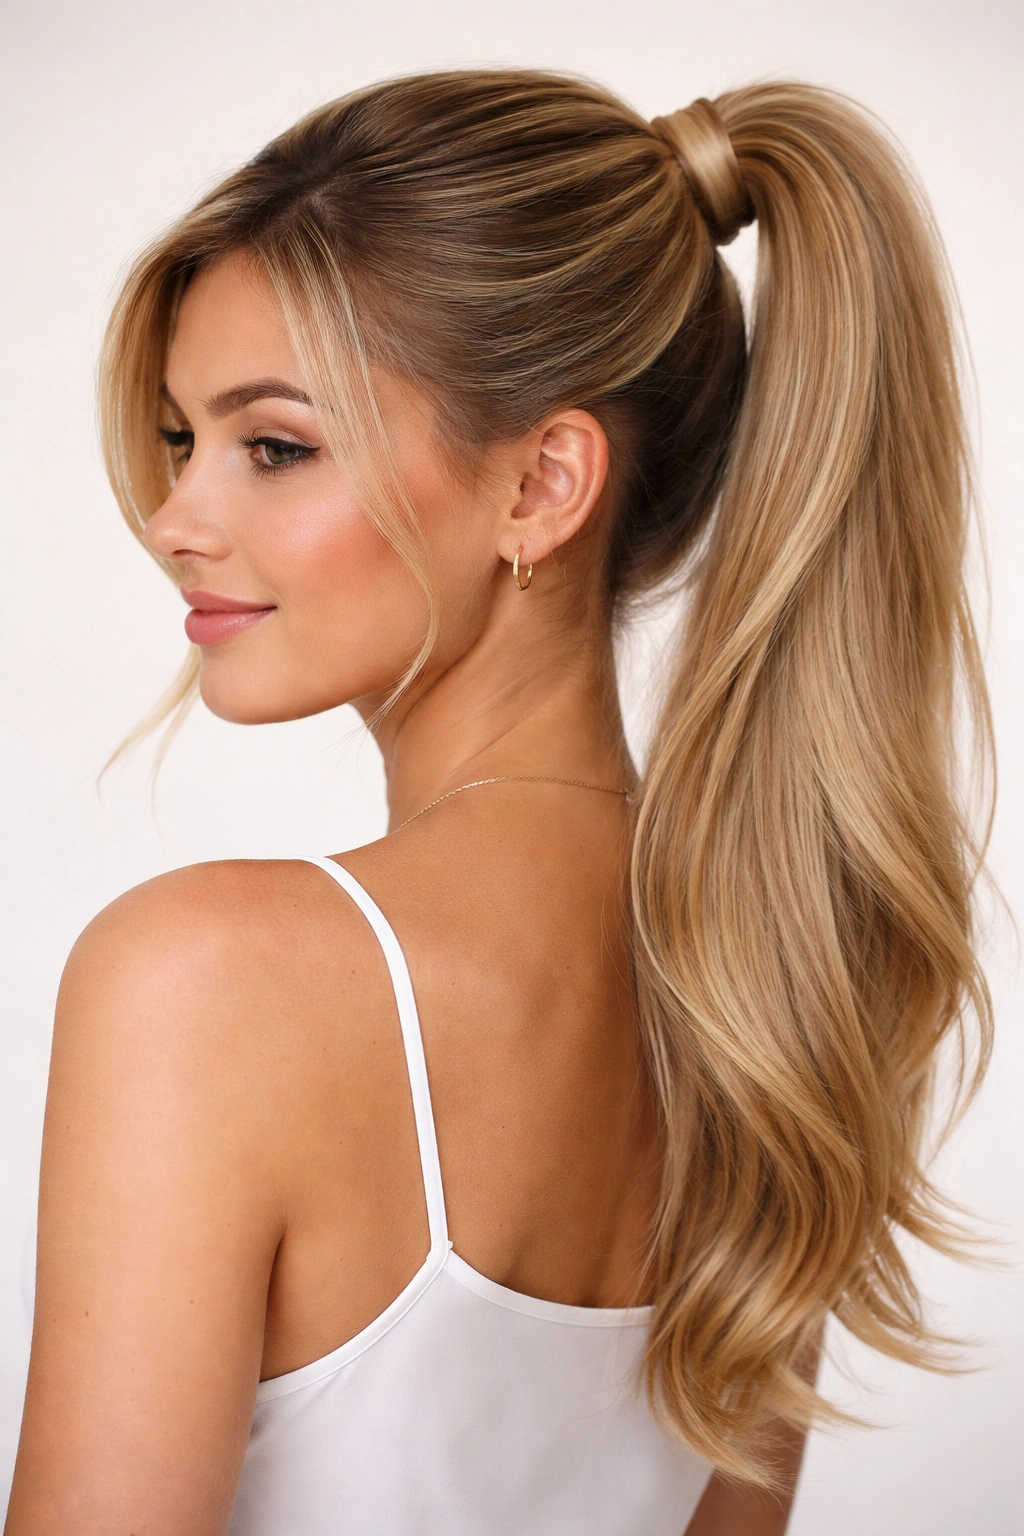
2. Sleek High Side Ponytail with Elastic Hold
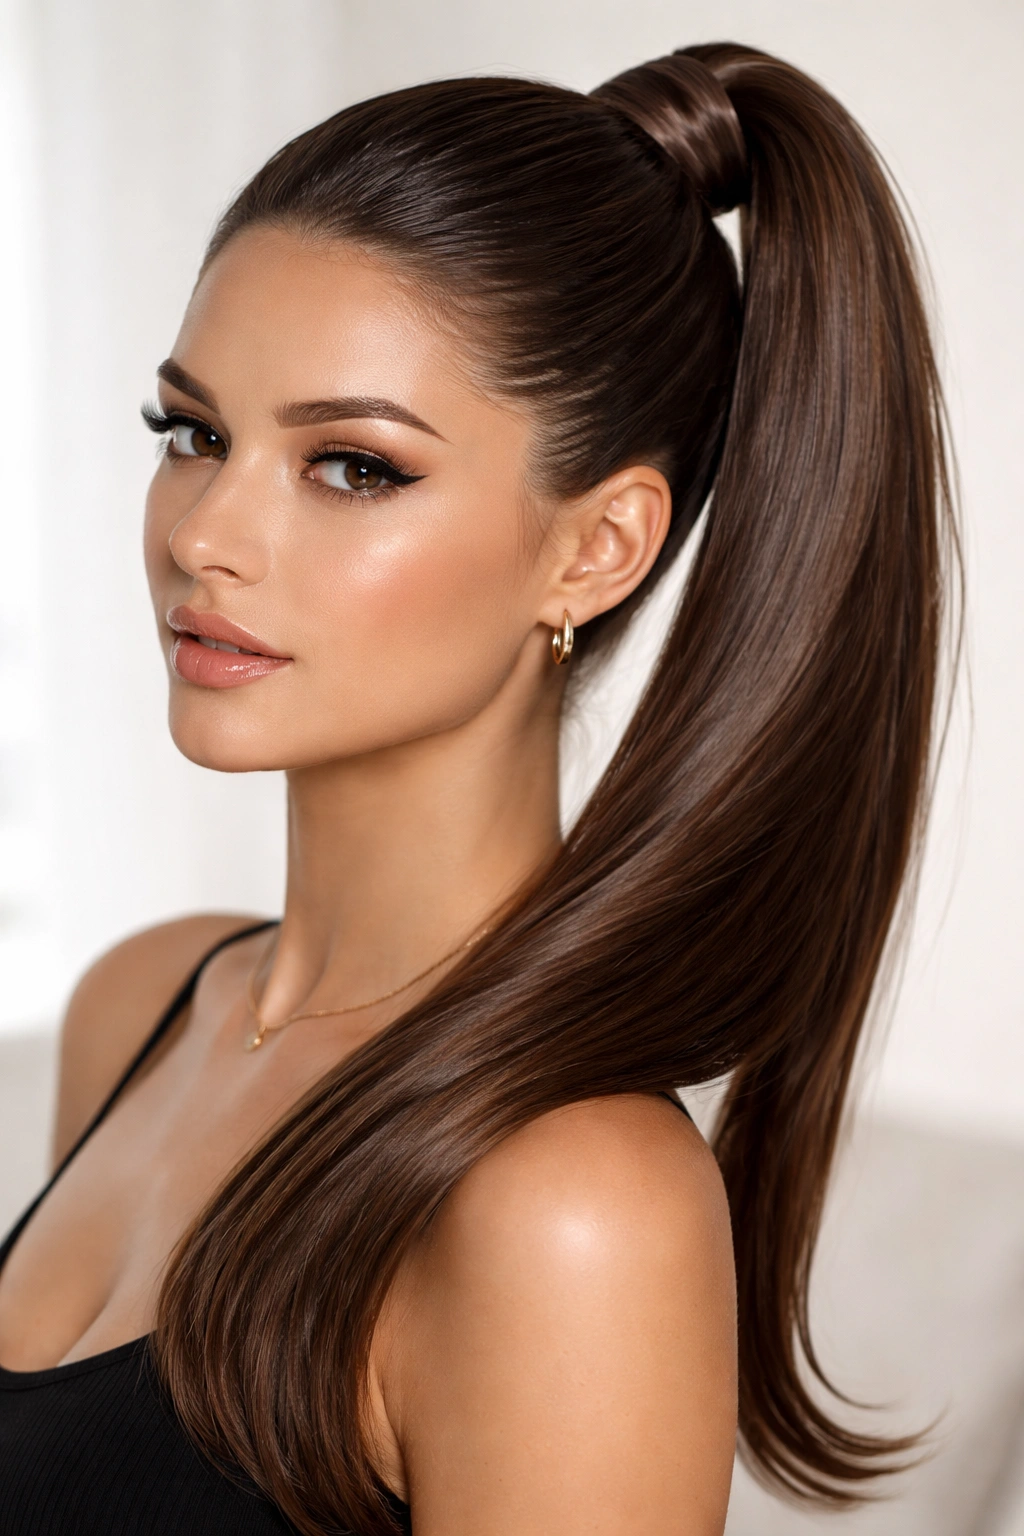
Some days you want the glossy, sculpted look of a completely smooth ponytail—no wisps, no texture, pure definition. This version prioritizes sleekness while using a specific elastic type and wrapping technique that keeps it locked in place even as you move and bend throughout your day.
The Science of Slick and Stable
A sleek ponytail feels like it might slip more easily than a textured one because there’s no tease to create grip. The counterintuitive truth is that a truly smooth, wet-looking ponytail can actually hold quite well if you use elastics that grip differently. Matte, rubber-coated elastics grip better than shiny ones. Spiral hair ties grip better than standard bands because the coils catch on hair strands. And wrapping technique matters enormously: when you wrap an elastic multiple times (at least three times minimum), you’re creating friction against the hair shaft itself, which holds better than a single wrap around loose hair.
The Execution That Makes It Stay
Begin with freshly washed or dry-shampooed hair—the slight texture helps, even though you’re going for sleekness. Apply a smoothing serum or lightweight gel to your palms and smooth the entire crown and side section backward toward your gathering point, using a fine comb to catch any loose hairs and redirect them back. The gathering point should be at the temple area in a high position—gather tighter than you think you need to. Use a matte or spiral elastic and wrap it around the ponytail base four times, pulling firmly each time. The tension on that fourth wrap should feel almost uncomfortable; this is what holds it. Smooth any flyaways with the tiniest dab of gel and a fine comb.
Application Tips and Common Obstacles
- Smoothing serum or gel goes on your hands before you touch your hair—never apply it directly to your scalp or it’ll be slippery rather than grippy
- If you have baby hairs around your face and hairline, these will refuse to stay smooth; accept this and plan light wispy framing rather than fighting it
- This style benefits from being applied to hair that’s at least one day old (not freshly washed the same morning)
- The sleeker the ponytail, the more noticeable it is if the elastic is slightly loose, so error on the side of tight
Worth knowing: Check the ponytail’s tension mid-morning and again mid-afternoon—if it’s loosened slightly, gently pull the base upward to tighten it again. This takes five seconds and extends the style’s lifespan significantly.
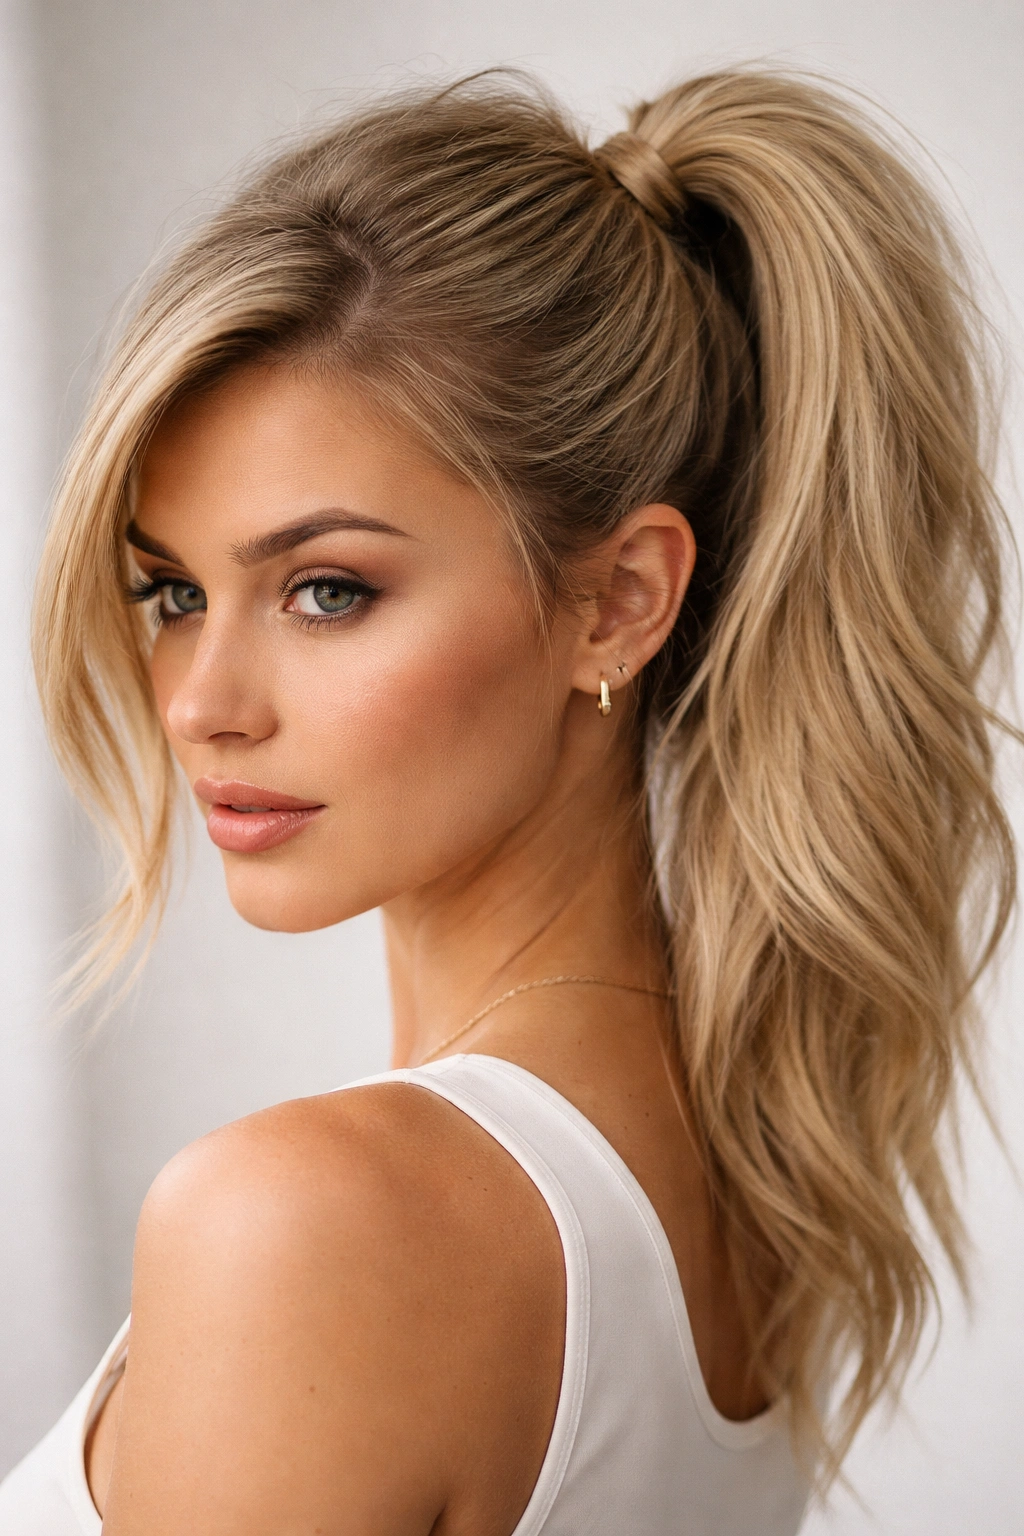
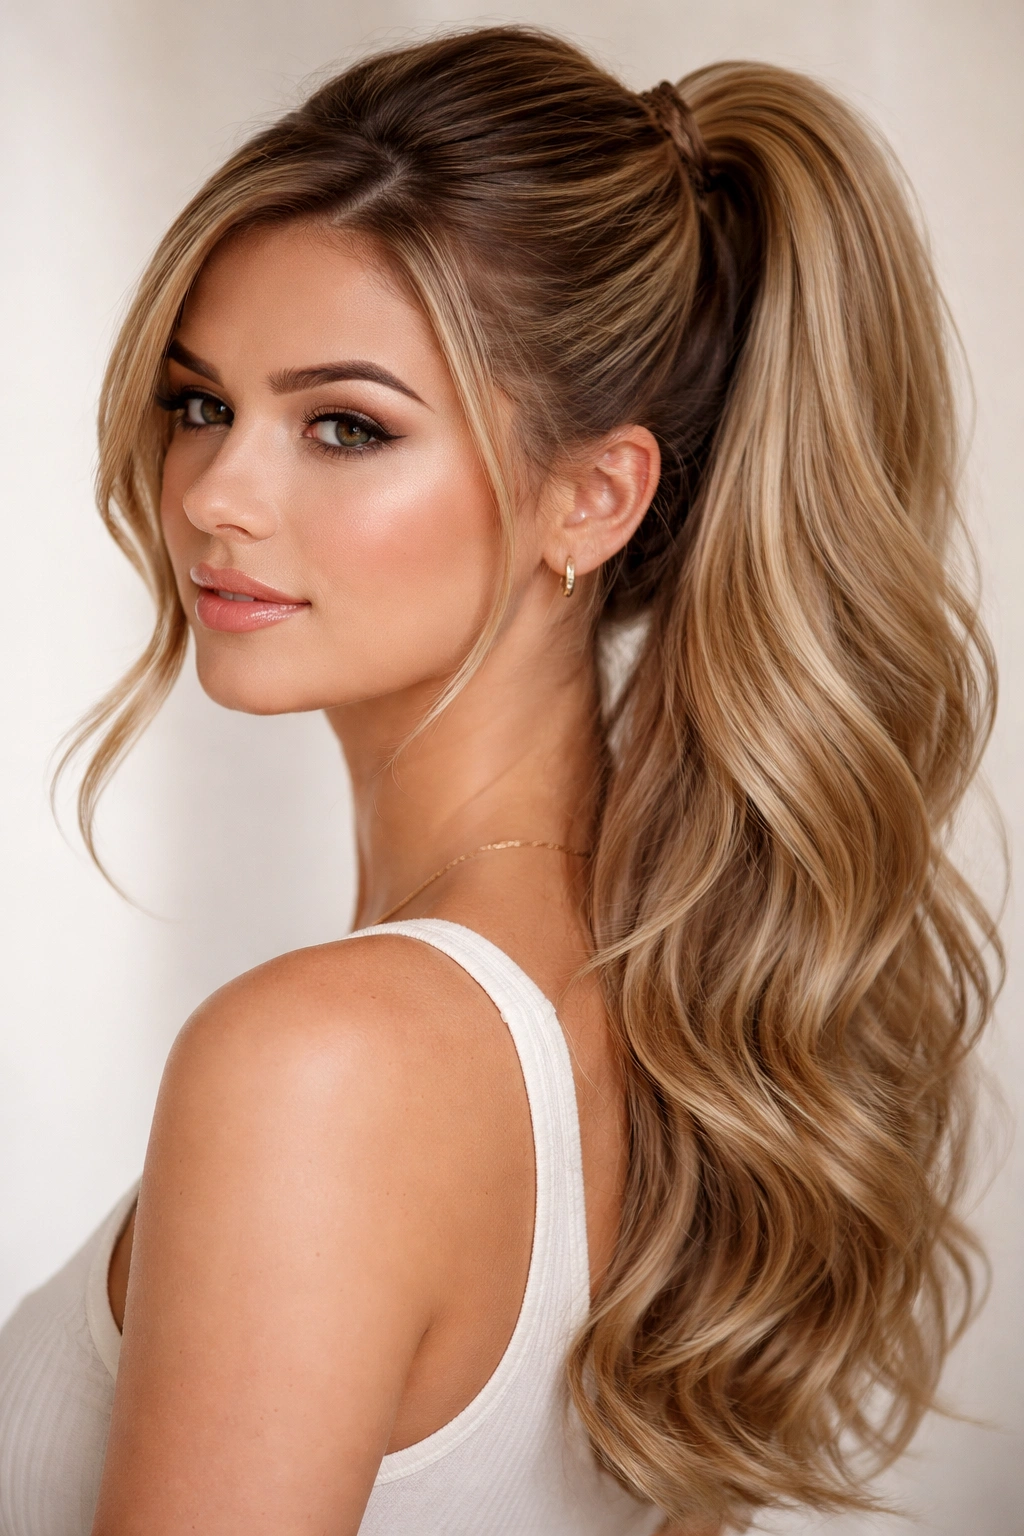
3. Voluminous High Side Ponytail with Teasing Technique
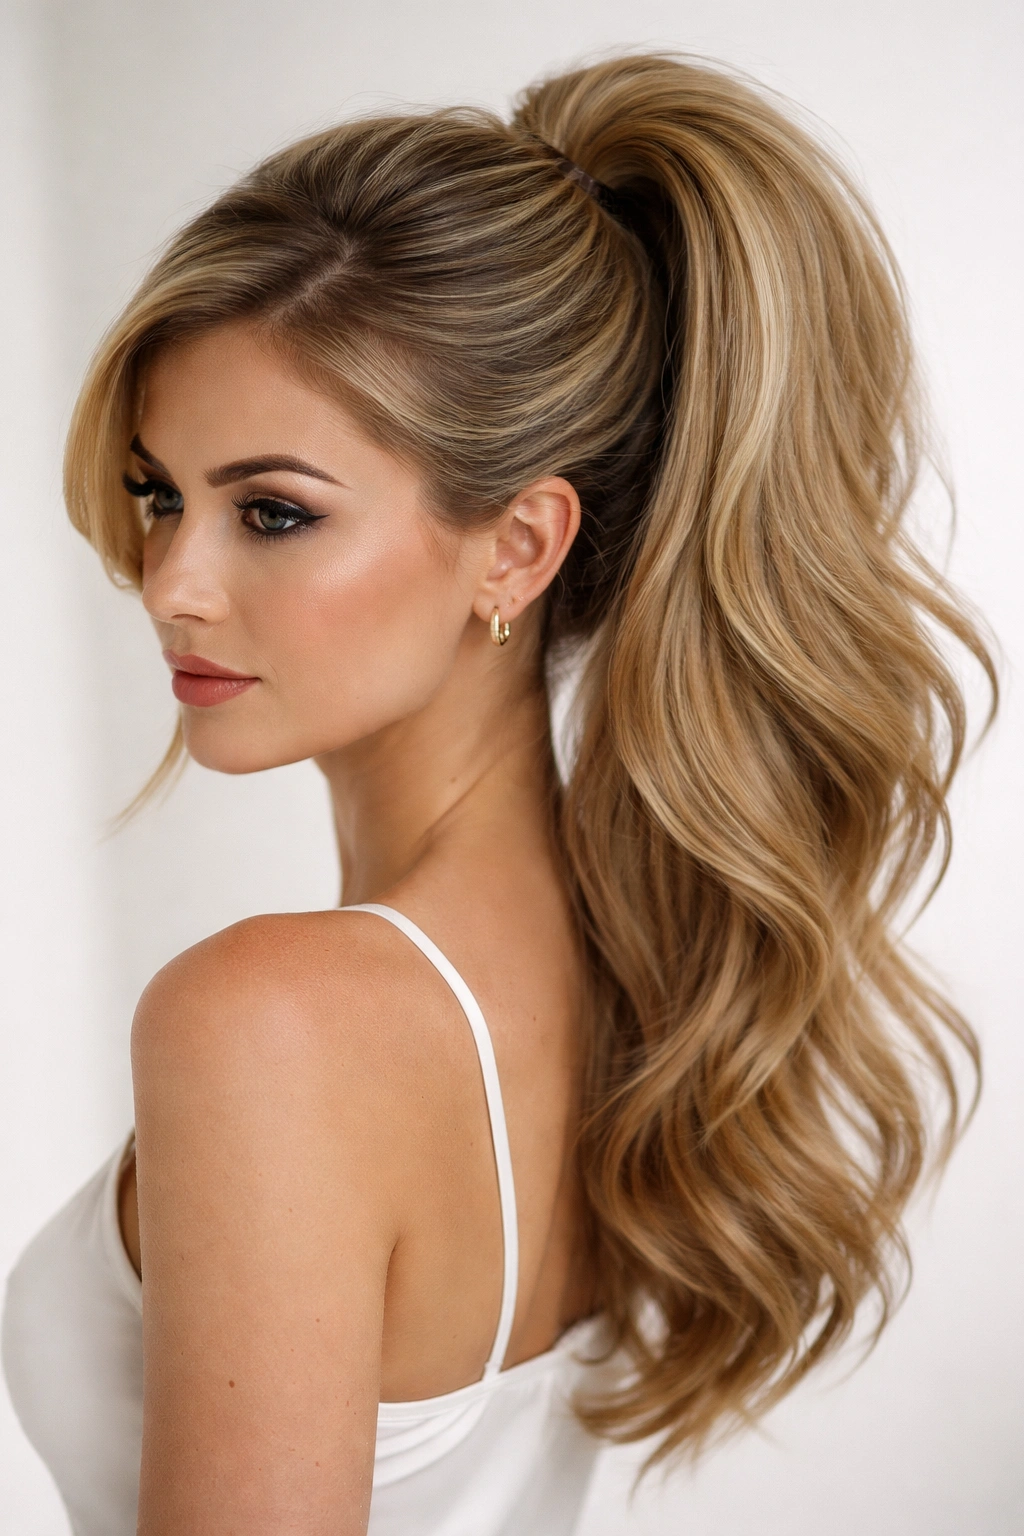
Fullness at the crown makes a ponytail look richer and more youthful, but it also requires technique to prevent that volume from gradually collapsing into a limp tail by evening. The right teasing method creates both visual impact and structural stability that lasts.
Building Volume That Holds Its Shape
Volume in a ponytail comes from how you tease—not how much you tease. The goal isn’t a ratted, crunchy texture; it’s creating tiny pockets of trapped air throughout the crown section that hold volume without feeling matted. Use a fine-tooth teasing brush (the kind with thin, closely spaced bristles) rather than a standard comb or a thick-bristled brush. Work in small 1-inch sections, teasing only the underside of each section rather than throughout the entire section. This creates invisible teasing that provides grip and support without showing texture on the surface.
The Right Application Method
Section your hair with a deep side part. On the smaller side of the part, take a 1-inch section of hair from the crown area and tease just the underside with downward brush strokes. Move to the next section and repeat until you’ve teased approximately five to seven small sections across the crown area. Now comes the crucial part: lightly smooth over the teased sections with a paddle brush or your fingertips, pressing downward gently. You’re not smoothing out the tease; you’re just redistributing the volume so the texture is internal rather than visible on the surface. Gather everything into your high side ponytail position, positioning the elastic as high as you comfortably can. Wrap with a strong elastic at least three times.
Maintaining Volume Throughout the Day
- Teasing loosens as you move, so your voluminous ponytail will naturally deflate slightly by day’s end—this is normal and not a failure of the technique
- Applying light hairspray to the crown section before you pull it into the ponytail helps the tease hold longer
- If volume droops by afternoon, gently tease the base of the ponytail again (just the underside, not the whole thing) and you’ll restore most of it
- Fine hair benefits from less aggressive teasing; use shorter, lighter strokes rather than aggressive downward scrubbing
Insider note: The best teasing happens when your hair is slightly dirty or has dry shampoo in it—freshly washed hair doesn’t hold tease nearly as well.
4. Twisted High Side Ponytail for Added Security
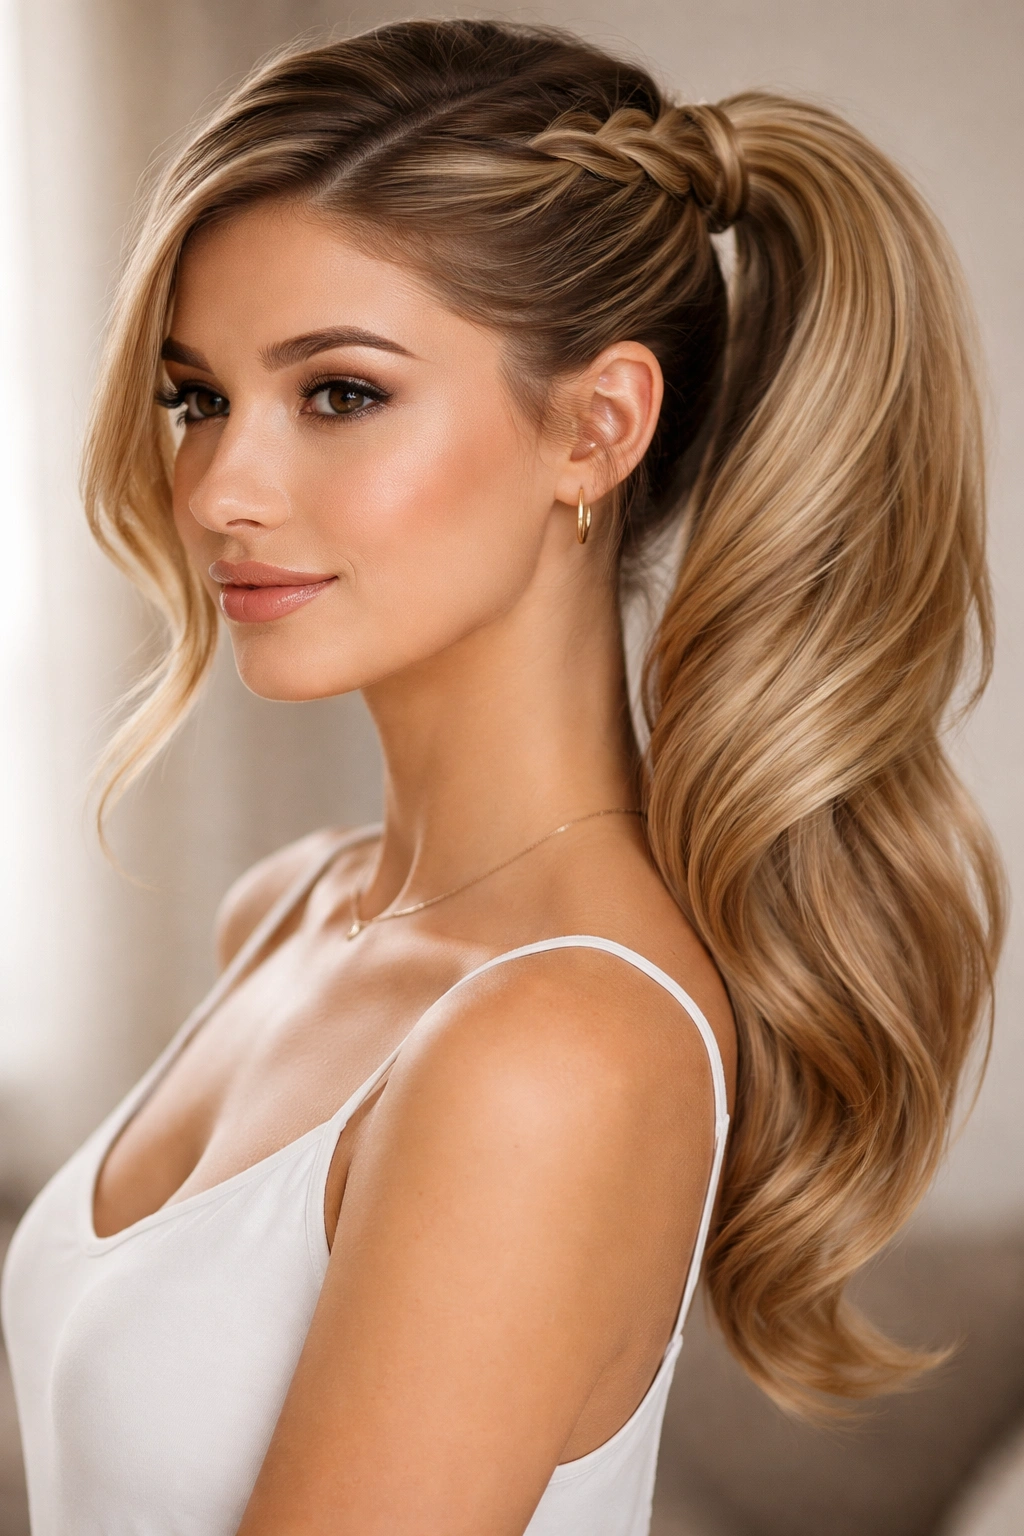
Twisting your hair before gathering it into the ponytail creates a rope-like structure that resists loosening far better than straight hair does. The twist essentially pre-loads tension into the style, which prevents the gradual slide that affects standard ponytails.
How Twist Creates Grip
When you twist hair, you’re wrapping each strand around its neighbors, which creates friction between strands. That friction becomes your primary grip mechanism. Unlike a tease (which works through air pockets and trapped hairs) or a smooth ponytail (which relies on the elastic’s grip), a twist creates mechanical resistance throughout the entire section. The twisted rope is fundamentally thicker than untwisted hair, which means the elastic has more material to grip. And because the strands are wrapped around each other, even if the elastic loosens slightly, the twist structure resists unwinding.
The Technique That Actually Works
Create your side part and section your hair. Starting at the front of your side section, take a small 1-inch section and divide it in half vertically. Twist these two pieces around each other (right strand goes over left, then left goes over right, continuously) moving backward toward your gathering point. As you twist, periodically pick up small sections of loose hair from either side of your twist, incorporating them in. This creates a twisted section that gradually incorporates more and more hair as it moves back. Repeat this process with a second twist section parallel to the first, then gather both twisted sections plus any remaining crown hair into your ponytail. The gathered ponytail now contains twisted sections, which are far more resistant to loosening.
What to Expect and How to Perfect It
- Twisted sections are visible, so this style works best when you want some texture and definition rather than sleekness
- The twist-gathering takes longer than a standard ponytail (perhaps an extra minute), but the staying power is worth it
- If your twists feel loose or fragile, you weren’t twisting tightly enough; practice with slightly more tension next time
- Twists last longer if you apply a light hairspray to the sections as you create them
Quick fact: If one of your twists starts to unravel during the day, you can quickly re-twist it by separating the section into two pieces and twisting them together again—it takes 20 seconds.
5. Braided High Side Ponytail Base for Grip
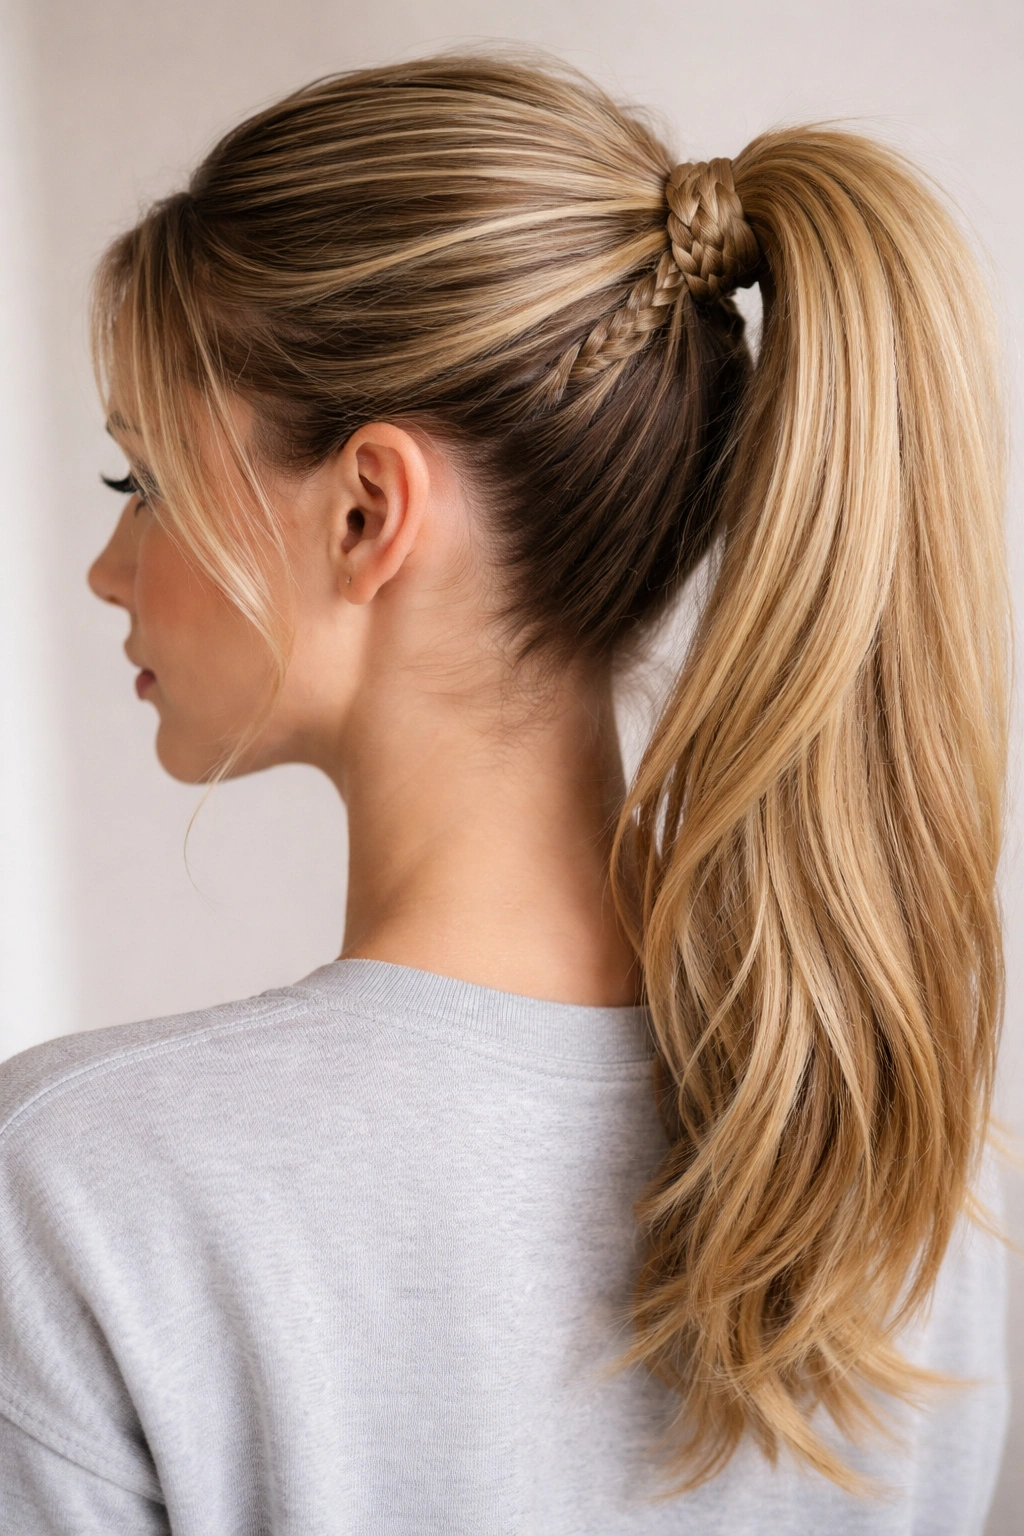
A braid at the base of your ponytail creates a structure so stable that it’s nearly impossible for the style to slip. The braid essentially locks the elastic in place by creating a textured anchor that the band can grip into.
Why Braids Create Unbreakable Hold
A braid is the most mechanically stable way to arrange hair—that’s why braided hairstyles can last for days. When you braid the hair at the base of your ponytail, you’re creating a solid structure that the elastic wraps around. Unlike a smooth ponytail (where the elastic slowly slides along the hair shaft) or even a twisted ponytail (where loosening can still happen), a braided base prevents any sliding whatsoever. The braid texture gives the elastic so many fibers to grip that it’s essentially locked.
Building the Braided Base
Gather your hair into a high side ponytail position, but only loosely—don’t secure it yet. Using the three-strand ponytail hair itself, begin a three-strand braid at the base where the elastic will sit. Braid tightly for four to six turns, then secure the end of that small braid with a tiny clear elastic. Now wrap your main elastic around the base, positioning it so it grips both the unbraided ponytail and the base of the braid. The braid doesn’t need to be long; three inches of braided texture at the base is sufficient. This approach means the style looks like a standard high side ponytail from the front, but has an invisible braided anchor at the base.
Practical Considerations and Variations
- This method requires a bit of dexterity because you’re braiding hair that’s already gathered; practice makes it smoother
- If braiding the ponytail hair feels awkward, braid the base section before gathering it all into the ponytail—create a small braid in your crown/temple area, then incorporate that braided section into the full ponytail
- The braided base is completely hidden by the gathered ponytail, so the style looks identical to a regular high side ponytail
- This version works beautifully for very fine or slippery hair because the braid provides the grip that fine hair naturally lacks
Pro tip: Use a binder clip or small claw clip to temporarily hold your loosely gathered ponytail in place while you braid the base—it frees up one of your hands.
6. High Side Ponytail with Wrap-Around Section
This technique involves taking a thin section from within the ponytail and wrapping it around the elastic base, which covers the elastic and creates an additional anchor point that prevents loosening.
The Structural Advantage of the Wrap
When you wrap a section of hair around the elastic, you’re creating a second fastening mechanism. The elastic itself might loosen imperceptibly over hours, but the wrapped section—if secured tightly—remains where you placed it. It’s like adding a safety pin to your ponytail. The wrapped section also distributes the weight of the ponytail differently; instead of all weight pulling straight down from the elastic, some of it’s held by the wrapped section, which reduces pressure on the elastic itself.
How to Execute the Wrap
Gather your hair into a high side ponytail and secure it with an elastic. Now take a thin section (about ½ inch wide) from the underside of the ponytail—this section should come from the part of the ponytail closest to the scalp. Wrap this section around the elastic base, pulling it taut as you go. Secure the end of the wrapped section with a small clear elastic, positioning the elastic at the back of the wrap where it’s mostly hidden. The wrapped section should look like a decorative band around the base of the ponytail. This isn’t just cosmetic; it’s structural reinforcement.
Tips for a Polished Wrap
- The wrapped section should be thin enough that it doesn’t look chunky but thick enough to have actual hold—aim for roughly the width of a pencil
- Make the wrap as taut as possible; loose wraps unwind throughout the day
- If you want the wrap to blend seamlessly, choose the wrapped section from hair that matches your overall color or use a color-matching elastic
- The wrap works best on medium to thick hair; on very fine hair, it might look too prominent
Worth knowing: If the wrapped section starts to unwind mid-day, simply re-wrap it. This takes 10-15 seconds and instantly restores the ponytail’s stability.
7. Double-Elastic High Side Ponytail for All-Day Grip
Sometimes the simplest solutions are the most effective. Using two elastics instead of one, positioned close together at the base, creates redundant hold that nearly eliminates slipping.
Why Two Elastics Outperform One
One elastic, no matter how tight, experiences constant tension from the weight of your hair. Over hours, that elastic fatigues slightly and loosens. Two elastics share the load, which means each one experiences less stress and loosens more slowly. Additionally, if one elastic loosens slightly, the other remains tight, so your ponytail stays in place. It’s a backup system—if the first elastic slips, the second catches it. From a grip perspective, two elastics create twice the friction against your hair, which is why this method is particularly effective for fine or slippery hair.
The Proper Two-Elastic Technique
Gather your hair into your high side ponytail position. Secure it with your first elastic, wrapping it around the ponytail base three times with firm tension. Now, immediately below the first elastic (roughly ¼ to ½ inch lower), wrap a second elastic around the same ponytail base. This second elastic should be tightened with equal firmness. The two elastics sit close together, creating a compact, super-secure base. You can use two matching elastics for a polished look, or use a decorative elastics-and-chain combination where the chain sits between the two elastics.
When to Use This Method and What to Expect
- This approach works beautifully for high-activity situations (sports, running, active work) when you absolutely cannot have your ponytail move
- The double elastic is visible, so it works best with elastics in colors that either match your hair or work as intentional accents
- Your ponytail won’t move, but it also won’t feel quite as comfortable as a single elastic; the tension is noticeably firmer
- Fine hair benefits enormously from this method because the dual grip compensates for hair’s natural slipperiness
Quick fact: If you’re wearing your hair up for 12+ hours, check the elastics every few hours and re-tighten if they’ve loosened. They’ll loosen faster under constant wear than a single elastic would.
8. Textured High Side Ponytail with Dry Shampoo
Using dry shampoo before styling creates texture throughout your hair that provides grip and hold far superior to smooth, clean hair. This method leverages chemistry and texture to prevent slipping.
The Hair Science Behind Dry Shampoo Hold
Dry shampoo works through absorbent particles (typically rice starch or talc) that coat individual hair strands and absorb scalp oils. These particles increase the friction between hairs and between your hair and the elastic. It’s the same principle as why your hair holds better when you’ve worn it up for a day or two—natural oils have partially absorbed and created grip. Dry shampoo artificially recreates this. Beyond grip, dry shampoo adds texture that makes teasing more effective and makes even slippery hair behave like coarser hair does naturally.
Application for Maximum Grip
The morning you style, apply dry shampoo to your roots and throughout your crown area—don’t be shy with it. Work it through with your fingers or a brush, making sure it’s distributed throughout rather than clumped. Wait three to five minutes for it to fully set. Now style your ponytail. The dry shampoo gives your hair a slightly matte, textured appearance that grips elastics beautifully. You can tease less aggressively than usual because the dry shampoo is already providing texture. Some people apply a very light second pass of dry shampoo specifically to the gathering area, which maximizes grip exactly where you need it most.
Considerations and Best Practices
- Dry shampoo visible in your hair can look like dandruff or product buildup if overdone; use enough for grip but not so much that it’s visible
- Dark-haired people should use brunette or dark-specific dry shampoo to avoid white residue
- The texture from dry shampoo lasts all day, so if you reapply it in the morning, your hair will be textured by evening
- This method works beautifully with fine or slippery hair but is less necessary for naturally thick, textured hair
Pro tip: If you use dry shampoo, you’ll find that you need less-aggressive teasing and smaller-sized elastics than you’d normally need—the texture is doing much of the grip work for you.
9. High Side Ponytail with Hidden Bobby Pins
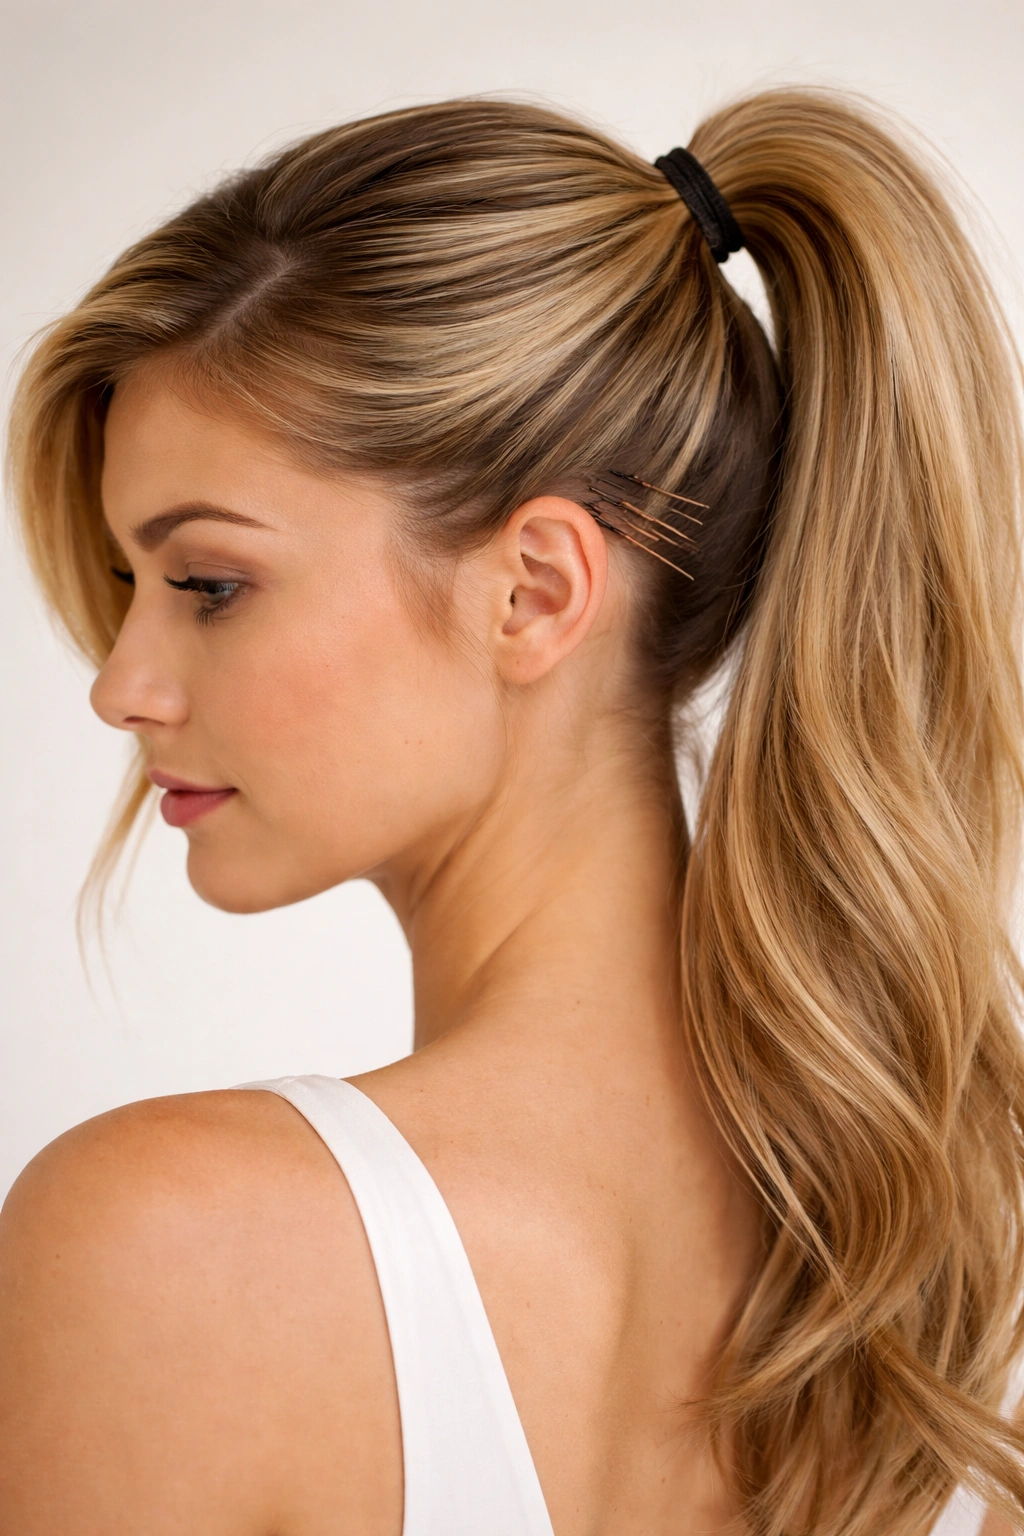
Strategic bobby pins placed beneath the elastic—hidden from view—serve as physical anchors that prevent any movement or slipping whatsoever.
Why Pins Create Immovable Hold
A bobby pin is a mechanical fastener that literally pins your hair to your head. When placed beneath the elastic at the base of your ponytail, the bobby pin grips strands at both the gathering point and deeper into the scalp area, creating a lock that prevents the entire ponytail from shifting. This is the method hairstylists use for formal events or occasions when the ponytail cannot move even slightly. It’s the most secure method available, though it’s also slightly more involved than other techniques.
The Pin Placement Technique
Create your high side ponytail and secure it with an elastic, but don’t make it your final tightness yet—leave it slightly loose. Now take a bobby pin and slide it underneath the elastic at an angle, ensuring both ends of the pin are gripping hair that’s attached to the scalp (not just the ponytail hair). Slide a second bobby pin in a slightly different location, also under the elastic. You typically need two to three pins per ponytail, positioned at different points around the elastic base. Once the pins are in place, you can tighten the elastic fully, and the pins will hold everything securely. The pins remain completely hidden beneath the elastic.
Practical Tips and Variations
- Bobby pins have a smooth side and a ridged side; place the ridged side against your scalp for better grip
- If you have fine hair, use small bobby pins; if you have thick hair, use larger standard pins
- This method requires you to remove the pins to take down the ponytail, so it’s not ideal for everyday wear but perfect for events, travel, or days when the ponytail absolutely cannot move
- Some people use clear bobby pins that are less visible if they somehow peek out from under the elastic
Worth knowing: If you’re using pins and the ponytail still feels even slightly loose, add a fourth pin. There’s no such thing as too many pins for stability.
10. Half-Up High Side Ponytail Hybrid
A half-up high side ponytail uses only the upper portion of your hair, which creates a lighter, more elegant style that stays put because it has far less weight pulling downward.
Why Less Hair = More Stability
The primary reason ponytails slip is the weight of all your hair pulling downward against the elastic. A half-up approach eliminates this problem by ponytailing only half your hair. The elastic holds less weight, so it experiences less stress and loosens more slowly. Additionally, the lower half of your hair naturally helps anchor the ponytail by providing friction against the gathered section—think of it as built-in support. For fine hair, thin hair, or anyone with thin strands, a half-up style might be the ultimate solution because it’s genuinely impossible to over-load an elastic that’s only holding half your hair.
Creating the Hybrid
Create your side part, then section only the upper two-thirds of hair (approximately from the crown down to your ears) into a side part. Tease lightly if you want volume, then gather this section into your high side ponytail position. Secure with an elastic. The lower third of your hair remains loose, framing your shoulders and back. This creates a sophisticated, relaxed silhouette while the actual ponytail portion stays perfectly secure. You can wrap a section around the base for a more finished look, or leave the elastic visible as an accent.
When This Style Works Best
- Half-up ponytails work beautifully for work, casual events, and any situation where you want hair off your face but a more relaxed look than a full ponytail
- This style is particularly flattering for round face shapes because the gathered upper portion and loose lower portion create visual balance
- The loose lower section moves freely, which many people find more comfortable than a full ponytail for all-day wear
- This version stays secure for 8-12 hours without any loosening, making it ideal for workdays or events
Quick fact: The half-up ponytail is actually one of the most stable styles despite using fewer products, because the physics are simply easier to manage with less weight.
11. Low-Tension High Side Ponytail with Bump
A ponytail doesn’t need to be pulled tightly to stay in place—sometimes a lower-tension approach with a textured bump at the crown actually holds better and is more comfortable.
Rethinking Tight Equals Stable
Most people assume a tight ponytail is a stable ponytail, but that’s only partially true. An extremely tight ponytail can actually loosen faster because the tension is so high that it eventually fatigues the hair and elastic, causing them to give way suddenly. A lower-tension approach—where the ponytail is secure but not uncomfortably tight—combined with structural support in the form of a teased bump, can actually stay in place longer because the tension is distributed and never reaches breaking point.
Building the Low-Tension Base
Create your side part and tease the crown area gently, creating a soft textured bump rather than an aggressive rat. Gather your hair into the high side position with noticeably less tension than you normally would—it should feel relaxed, almost loose. However, the elastic should be a strong type and wrapped at least three times. The teased bump underneath the gathered section provides the actual holding structure, while the elastic’s multiple wraps provide backup security. You’ll be surprised at how stable this feels once you get used to it.
Long-Term Comfort and Stability
- This style is significantly more comfortable for all-day wear because the tension on your scalp is minimal
- The teased bump is essential to this method; without it, a loose ponytail will slip regardless of elastic quality
- This approach works particularly well for people with scalp sensitivity, tension headaches, or anyone who finds tight ponytails uncomfortable
- The low-tension method stays secure for 10+ hours because the consistent, moderate tension doesn’t fatigue hair or elastic
Pro tip: This is the best style choice if you wear your hair up multiple days per week and want to minimize scalp tension and breakage.
12. High Side Ponytail with Claw Clip Reinforcement
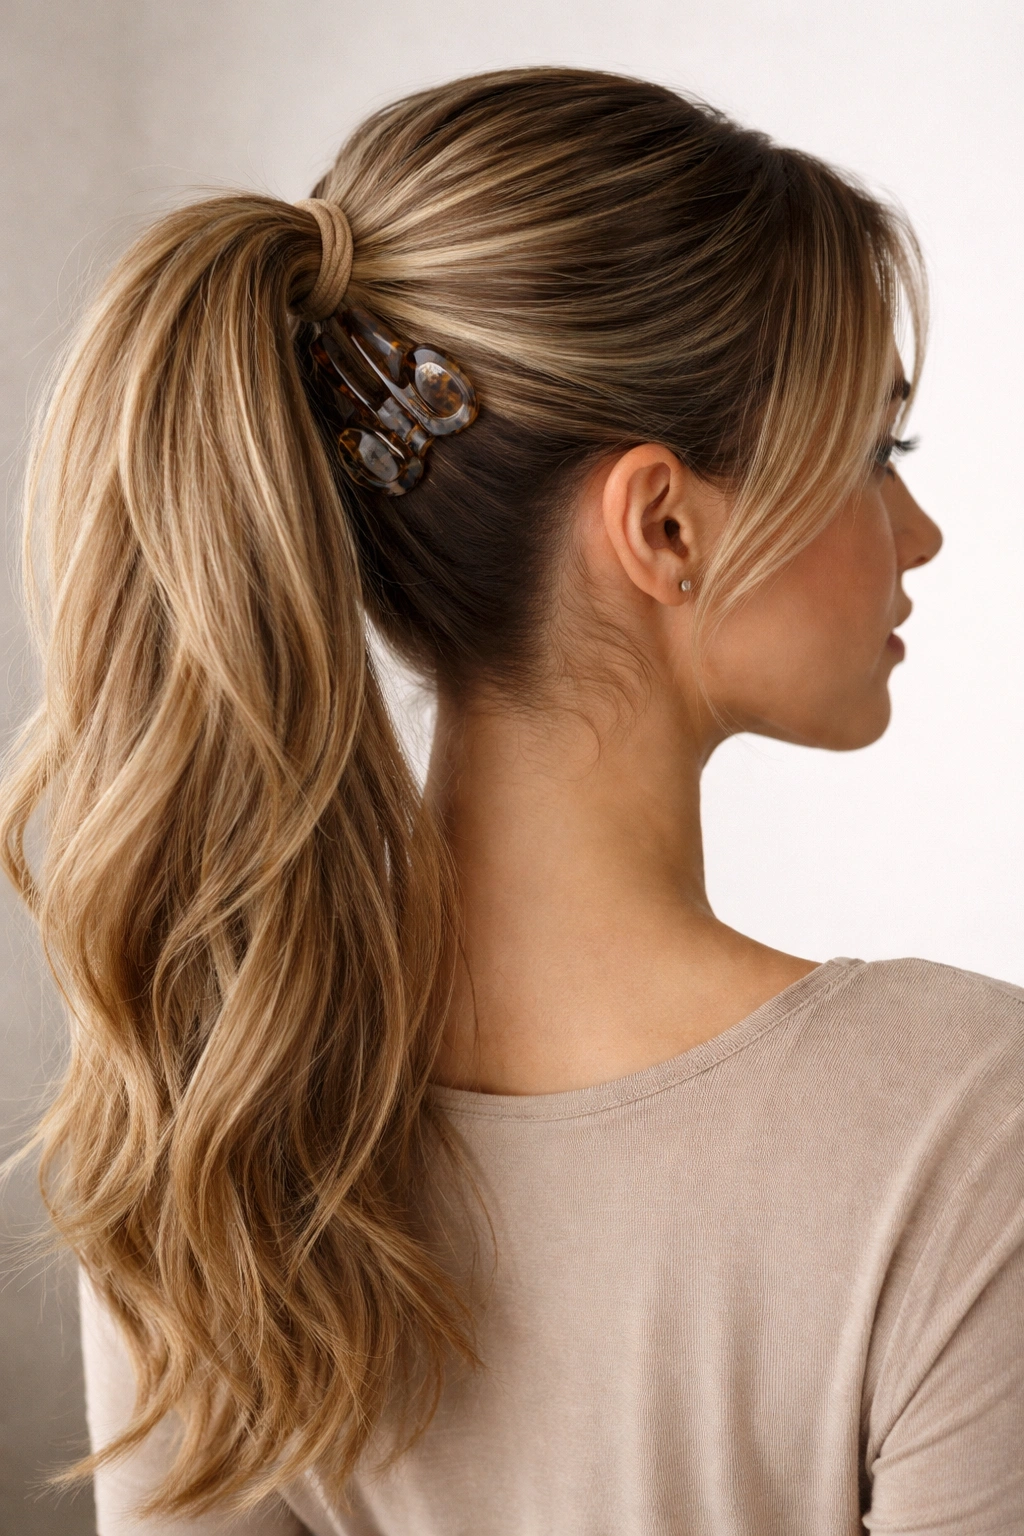
A decorative or clear claw clip positioned at the base of your high side ponytail serves as a secondary fastener that makes the style virtually slip-proof.
How a Claw Clip Adds Structural Support
A claw clip grips hair through mechanical pressure—the clips literally clamp down on your hair strands. When positioned at the base of a ponytail, the claw clip adds a second, completely independent fastening system. Even if the elastic loosened (which it does gradually), the claw clip would keep your ponytail exactly where it is. It’s genuinely impossible for a ponytail to slip when you have both an elastic and a claw clip securing it. The claw clip doesn’t replace the elastic; it works alongside it.
Placing the Claw Clip Correctly
Gather your high side ponytail and secure it with an elastic, tightened to your preferred firmness. Now take a claw clip (clear is most invisible, but decorative also works) and position it just below the elastic, gripping the base of the ponytail. Tighten the clip firmly enough that you can barely slide it once it’s in place—it should feel immovable. The clip should grip both ponytail hair and some of the hair at the scalp, creating an anchor. A clear clip makes this nearly invisible, while a decorative clip becomes an intentional style element.
Practical Considerations
- A clip-and-elastic combination is genuinely the most secure method available and is appropriate for any occasion
- Clear claw clips are nearly invisible; decorative ones become a style choice
- The clip is removable, so this method works well for everyday wear—you can adjust or remove the clip as needed
- Make sure the clip is sized appropriately for your hair thickness; a clip that’s too small won’t grip securely on thick hair, while one that’s too large will be visible on fine hair
Worth knowing: Some stylists use both a small elastic and a clip for red carpet events and formal occasions—it’s the gold standard for maximum security. You can absolutely do this for your everyday high side ponytail if you want zero movement.
Final Thoughts
A high side ponytail that actually stays in place isn’t luck—it’s technique, the right tools, and understanding how grip and weight distribution actually work. Every method above solves the staying-power problem differently: some through texture (teasing, twisting, dry shampoo), some through mechanical structure (braids, pins, clips), some through strategic placement, and some through redundancy (double elastics). The best version for you depends on your hair type, texture, thickness, and how long you’re wearing your hair up.
Start with the techniques that match your hair’s natural behavior. Fine hair gravitates toward dry shampoo, double elastics, and claw clips because these methods create grip that fine hair naturally lacks. Thick hair often stays up beautifully with just a single high placement and a strong elastic, but benefits from the security of wrapping or braiding if you’re doing anything active. And if you’ve never had success with high side ponytails before, honestly assess whether the problem is placement (too low), technique (skipping the tease), or hair condition (freshly washed slips more easily).
Once you find your method and practice it a few times, you’ll discover that a stable, all-day ponytail becomes absolutely automatic. You’ll stop checking it nervously mid-morning and stop restyling it by afternoon. That’s the payoff: a hairstyle that looks intentional, stays exactly where you put it, and never becomes a project that needs rescue during your day.