A sleek high ponytail isn’t just a hairstyle—it’s a statement. For Black women, mastering the art of a polished, smooth high ponytail opens up endless styling possibilities, whether you’re heading to a professional meeting, hitting the gym, or stepping out for a night on the town. The beauty of this versatile look lies in its ability to show off your face, elongate your silhouette, and keep your hair secure and healthy all at once.
The key to nailing a truly sleek high ponytail goes beyond simply pulling your hair back. It requires the right products, the right techniques, and understanding what works specifically for textured hair. Gel, edge control, and a sturdy elastic are your holy trinity here. When done correctly, a sleek high ponytail looks effortless and polished—the kind of look that takes people a beat to realize you’ve actually put real effort into.
What makes high ponytails particularly flattering for Black women is how they frame the face and showcase natural features, bone structure, and any makeup you’re wearing. Whether your hair is natural, relaxed, in braids, or a mix of textures, there’s absolutely a high ponytail variation that’ll work for your hair type, your lifestyle, and your personal aesthetic.
The styles below represent some of the most stunning and wearable high ponytail variations circulating right now. Each one works across different hair lengths, textures, and occasions—and each one delivers that polished, intentional vibe that makes people notice.
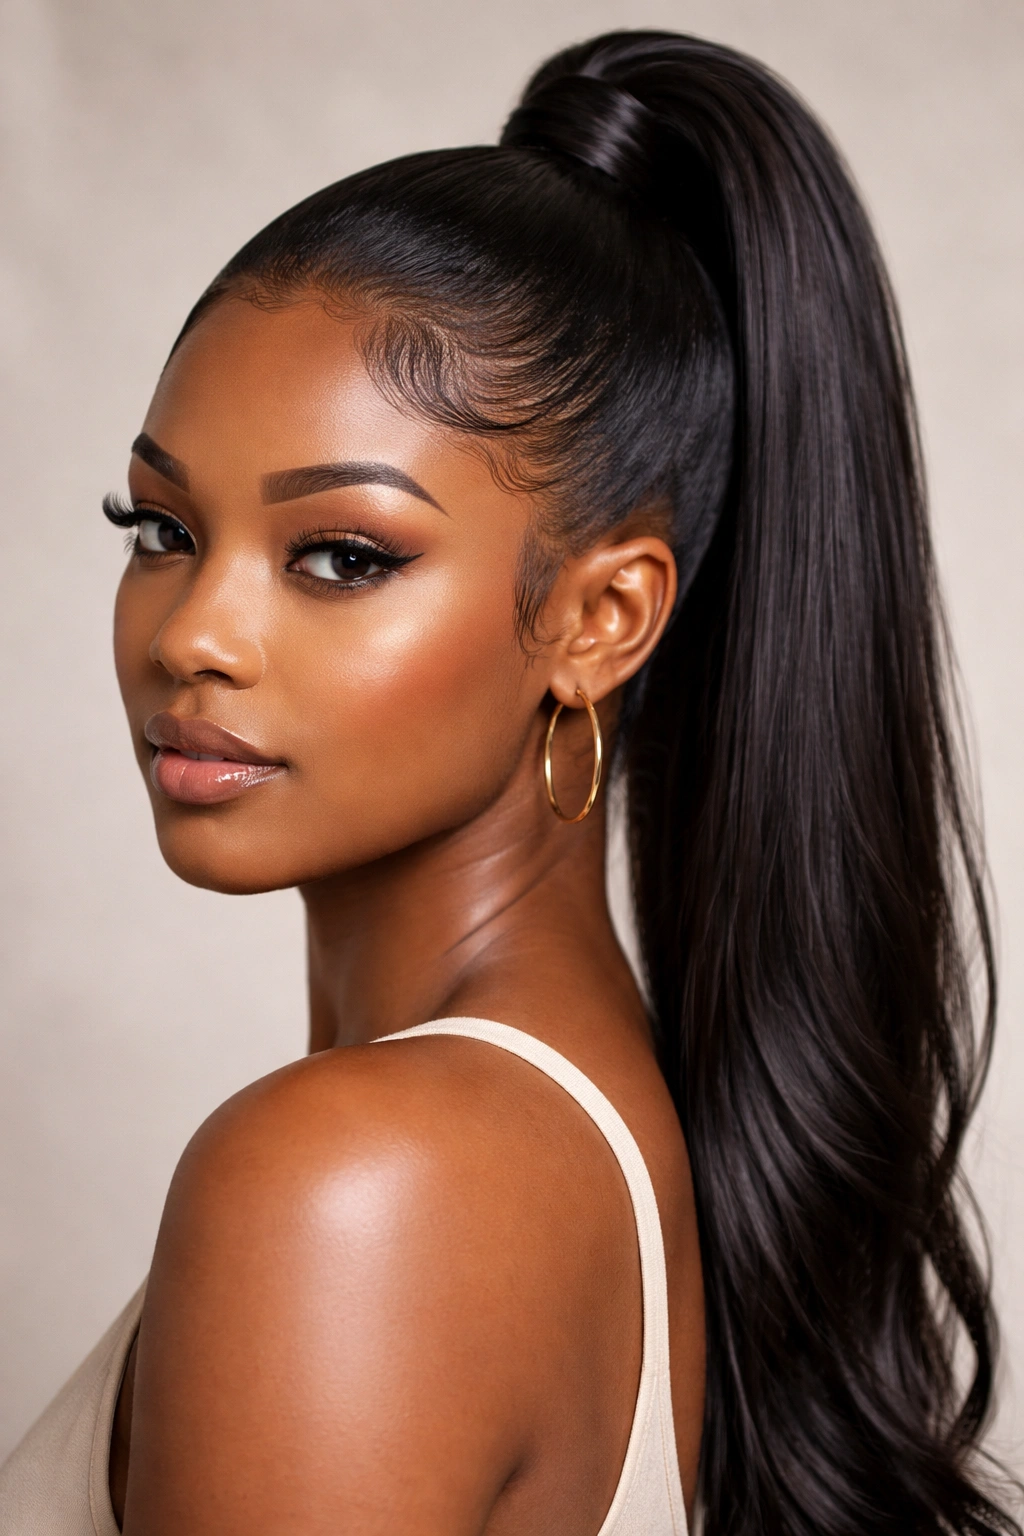
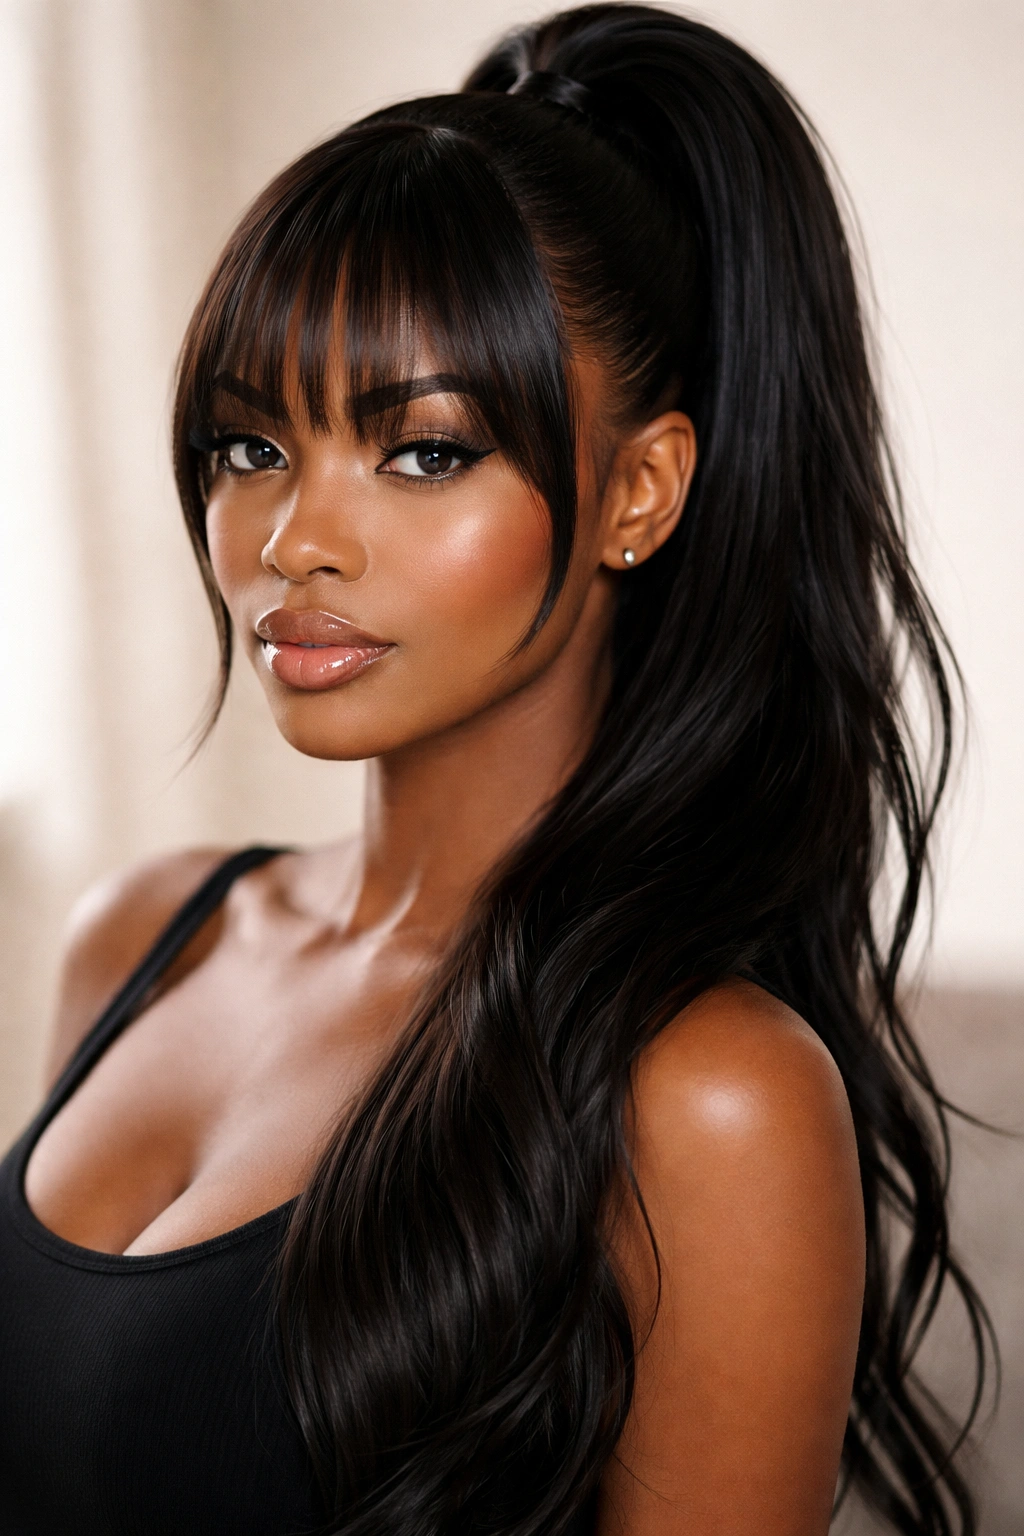
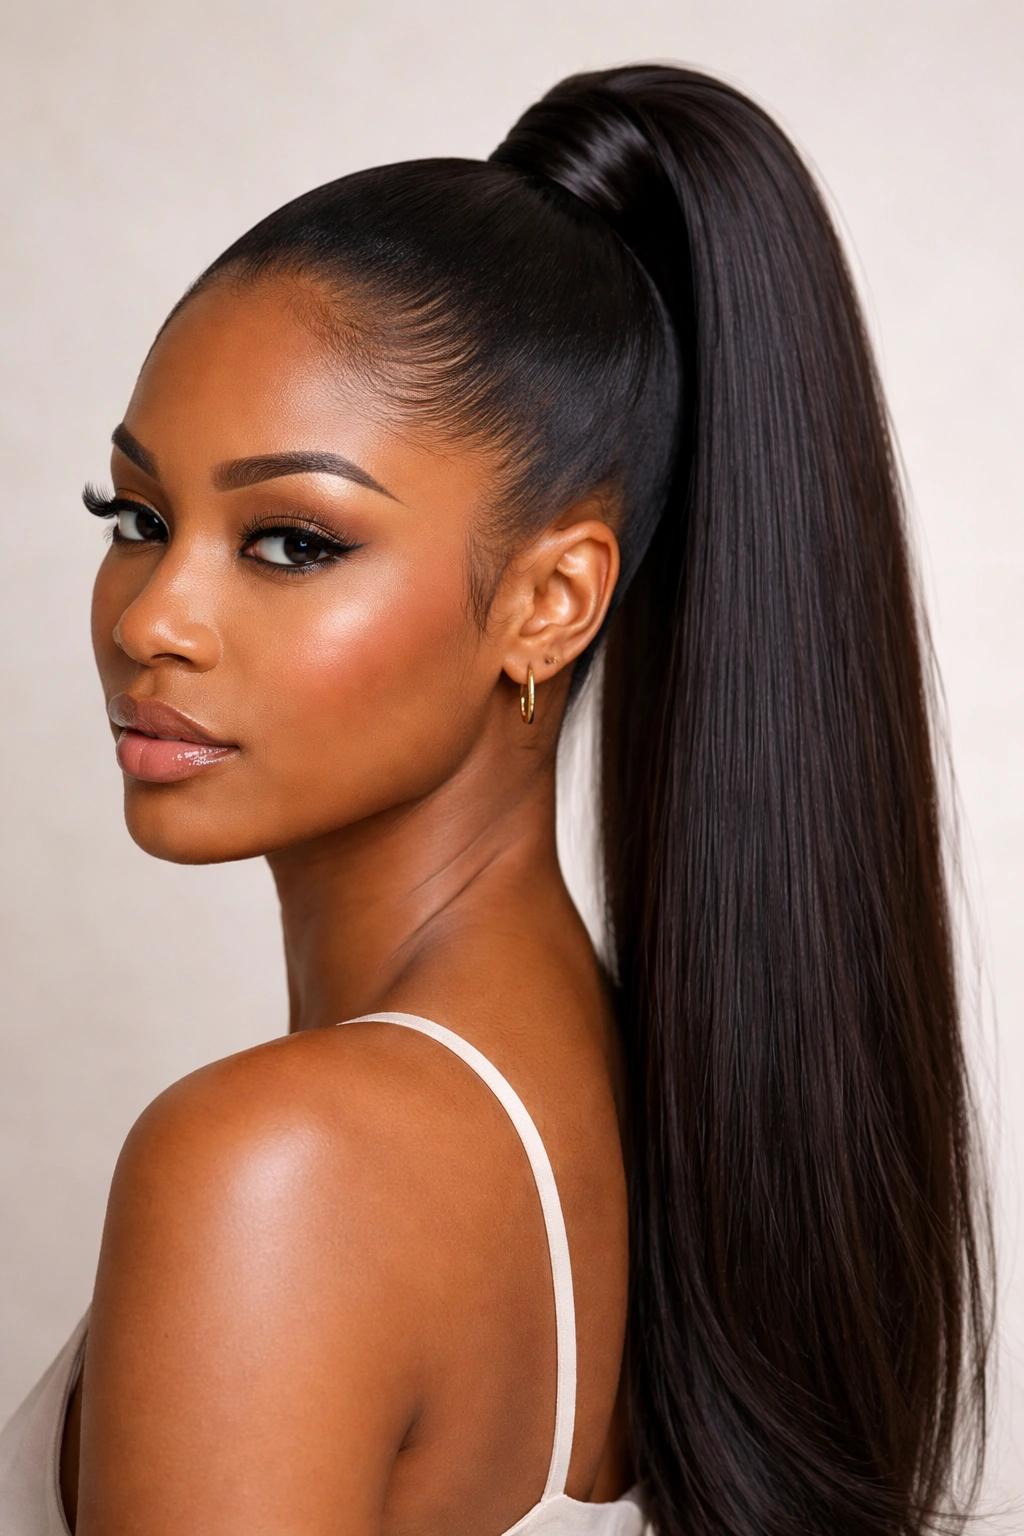
1. Classic Sleek High Ponytail
This is the foundational high ponytail style that works for literally every occasion and every hair type. The beauty of this look is its simplicity paired with maximum impact. You’re pulling all your hair straight back from your face into one cohesive, smooth bundle at the crown or slightly above it, then securing it with an elastic that matches your hair color or blends seamlessly.
Why This Works for Every Occasion
The classic sleek high ponytail is timeless because it combines sleekness with polish. You’re not adding any extra elements—no braids, no wraps, no accessories—which means the emphasis stays on the integrity of your edges, the smoothness of your hair, and the lift at the crown. This particular version flatters virtually every face shape and head shape because the vertical line created by the ponytail naturally elongates the face and neck. It reads as intentional and put-together without requiring advanced styling skills.
How to Perfect This Version
- Use a smoothing gel or edge control with strong hold on your edges and hairline before pulling back—this prevents flyaways and baby hairs from disrupting the clean lines
- Start with hair that’s either freshly washed and blow-dried smooth, or revived with a light water-and-glycerin mist
- Use a fine-tooth comb to slick your hair straight back, working from your hairline through to the crown
- Position your ponytail high on your head—crown height or slightly above—for maximum visual lift
- Secure with a sturdy elastic that won’t slip, then wrap a small section of hair around the base to hide the elastic
- Smooth any flyaways with edge control and a soft brush for a truly sleek finish
Pro tip: Finish with a light hairspray to lock everything in place without creating a stiff, crunchy feel.
2. High Ponytail with Braided Crown
This style layers elegance onto the classic high ponytail by adding a flat-twist or Dutch braid that frames your hairline before the ponytail begins. Instead of just slicking your hair straight back, you’re creating visual interest with a braid that pulls from one side of your face to the other, meeting at the back where your ponytail sits. The braid weaves through your edge hair and can frame either just your hairline or run deeper depending on how much of your hair you want to incorporate.
Why This Braid Detail Elevates the Look
A braided crown transforms a simple ponytail into something that feels more thoughtful and intentional. The braid itself draws the eye upward and frames your entire face beautifully, which is why this style is particularly stunning for formal events or professional settings. The braid also serves a practical function—it keeps shorter layers and baby hairs secured and incorporated into the style, so you don’t have stray pieces falling around your face. This version reads as significantly more intricate than it actually is to create.
How to Create This Crown Braid
- Section off a piece of hair starting from one temple and running horizontally across the back of your head
- Use a smoothing gel on your edges and the hair you’re sectioning off for a sleek braid
- Dutch braid (braiding under instead of over) this section, keeping it tight and close to your scalp
- Braid all the way from one side of your hairline to the other side, incorporating your edges as you go
- Secure the braid temporarily with a small clip, then gather all your hair—including the braid—into your high ponytail
- Wrap a small section of ponytail hair around the elastic to conceal it
- Release the temporary clip and smooth any edges around the ponytail base
Worth knowing: This style works beautifully with natural hair, relaxed hair, and even box braids if you want to switch up your braid-protective style vibe.
3. Gel-Smooth High Ponytail with Baby Hairs
This version takes the sleekness factor to its maximum by emphasizing ultra-smooth edges, a sculpted hairline, and intentionally styled baby hairs. You’re creating a high ponytail where every single hair looks like it was deliberately placed—there are no fuzzy edges, no stray pieces, and no accidental texture. The baby hairs around your hairline are either smoothed flat or styled into small, defined spirals or waves using edge control and a small brush.
Why Every Hair Should Look Intentional
A gel-smooth ponytail is all about control and precision. This isn’t a casual, effortless-looking style—it’s the opposite. You’re making a choice to style every element of your hairline and edges with intention, which signals polish and attention to detail. This style works particularly well for Black women because it celebrates and showcases the natural beauty of a defined, sculpted hairline. When done well, it’s absolutely striking. The smoothness actually highlights your face shape and features more prominently than anything else.
The Gel and Edge Control Formula
- Start with a strong-hold edge control or styling gel—look for products specifically formulated for textured hair
- Apply edge control generously to your hairline, edges, and the entire section you’re smoothing back
- Use a fine-tooth comb or a firm edge brush to smooth your hair back flat against your scalp
- For your baby hairs specifically, apply edge control in small sections and style them into your preferred pattern—flat waves, spirals, or a smooth, flat line
- Gather your hair into your high ponytail and secure with an elastic
- Wrap a small section around the base and pin it
- Finish your edges with a final layer of edge control or a lightweight hairspray to keep everything locked in
- Allow the edge control to set for a few minutes before moving around so everything dries smooth
Insider note: The heat from a hairdryer set on low speed can help edges dry smoother and longer-lasting.
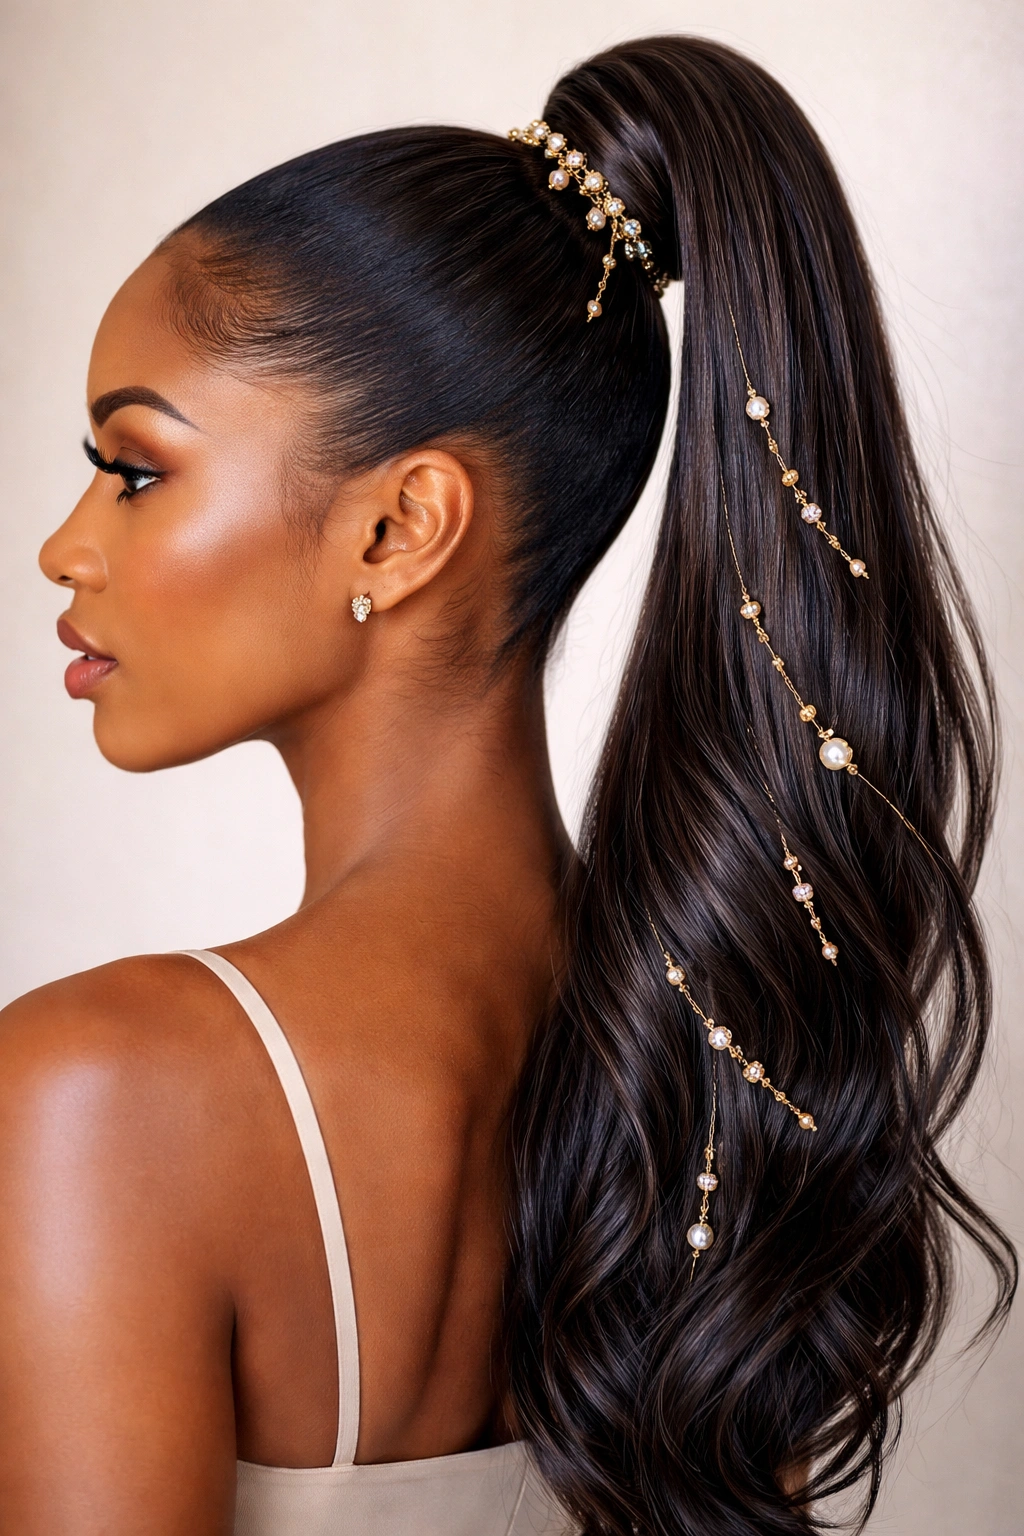
4. High Ponytail with Wrap
This variation takes your high ponytail and wraps the base with a decorative element—typically a satin or silk ribbon, a contrasting piece of hair, fabric, or even a faux-hair wrap. The wrap hides your elastic, adds visual interest, and creates a more polished, finished appearance overall. The wrap can be simple and monochromatic, or it can contrast beautifully with your hair color for added dimension.
Why the Wrap Makes a Difference
A wrap transforms a basic ponytail into something that feels more curated and complete. It creates a visual endpoint at the base of your ponytail, which actually makes your hair look healthier and fuller. Wraps also serve a protective function—they hide the elastic and reduce the direct tension on the hair right at your hairline. This version works beautifully for events, professional settings, or whenever you want your ponytail to look extra polished. The wrap can be as subtle or as bold as your aesthetic demands.
Wrap Options and How to Apply Them
- Satin ribbon wrap: Use a 1 to 2-inch-wide satin or silk ribbon that either matches your hair color or creates a contrasting pop
- Hair wrap: Take a thin section of your own hair, wrap it around the elastic base, and pin the end securely underneath
- Fabric strip wrap: Cut a fabric strip from coordinating fabric and wrap it around your elastic, securing with bobby pins
- Faux-hair wrap: Use a small section of lace-front or other textured hair to create thickness and dimension at the ponytail base
- Wrap your chosen element tightly around the elastic, starting at one edge and spiraling around until the elastic is completely covered
- Secure the end with bobby pins that match your wrap color
- Smooth your ponytail tail below the wrap to ensure it falls evenly
Pro tip: A metallic or shimmery wrap adds automatic sophistication without requiring any other styling changes.
5. Twisted High Ponytail
Instead of a braid crown, this style features two or more twisted sections that wrap around your head before meeting at your high ponytail. A twist feels softer and more fluid than a braid, which is why some women prefer it aesthetically. You’re taking sections from either side of your face or from different areas of your head and twisting them tightly until they meet at the back, then incorporating them into your ponytail base.
Why Twists Create a Different Energy
Twisted ponytails read as slightly softer and more romantic than braided versions, even though they require similar precision and skill. Twists work beautifully whether your hair is relaxed, natural, or a blend of textures. The twist pattern creates visual movement and interest without feeling overly complex. This version pairs beautifully with dressy occasions, dates, or professional events where you want to look polished but not overly formal. Twists also create less tension on your hairline than some braid styles, making them a smart protective choice.
How to Create Twisted Sections
- Section off a piece of hair from one temple, creating a horizontal or diagonal line toward the back of your head
- Apply smoothing gel to your edges and this section
- Divide the section into two pieces and twist them tightly around each other all the way to the back of your head
- Temporarily secure this twist with a small clip
- Repeat on the other side of your head, creating a balanced look
- Gather all your hair, including both twisted sections, into your high ponytail
- Secure with an elastic and wrap the base to hide it
- Release the temporary clips and arrange your twists so they’re visible around the ponytail base
Worth knowing: You can create anywhere from one twisted section to multiple twists depending on how intricate you want the style to feel.
6. High Ponytail with Clip-In Bangs
This style pairs your sleek high ponytail with clip-in bangs that add softness and dimension to your face. Clip-in bangs let you experiment with a bang style without committing to cutting your actual hair, and they pair beautifully with the structure of a high ponytail. The bangs can be blunt, wispy, curtain-styled, or textured depending on what flatters your face shape and personal aesthetic. This version feels current and fashion-forward while still maintaining that polished ponytail aesthetic.
Why Clip-Ins Add Versatility and Softness
Clip-in bangs instantly change how a high ponytail photographs and frames your face. Bangs add softness around your eyes and cheekbones while the high ponytail still provides lift and structure. This combination is particularly flattering for longer faces or faces where you want to add width around the middle. Clip-in bangs also let you change your style daily without any commitment—you can wear bangs one day and a full, open face the next. For Black women particularly, clip-in options have expanded dramatically, and you can find bangs in various textures and colors.
How to Style Bangs with Your Ponytail
- Create your sleek high ponytail first, using smoothing gel and securing it high on your head
- Wrap the base to hide your elastic
- Clip your bangs in along your hairline, parting your hair where you want the bangs to sit
- You can wear bangs at your natural hairline for a bold look, or further back for a softer, less dramatic effect
- Style your bangs with edge control and a small brush to match the sleekness of your ponytail
- Smooth the area where the clips sit so they’re not visible
- Allow your bangs to frame your face naturally, or flip them to one side for a different vibe
Pro tip: Look for clip-in bangs made from human hair that you can style with heat tools to perfectly match your ponytail texture.
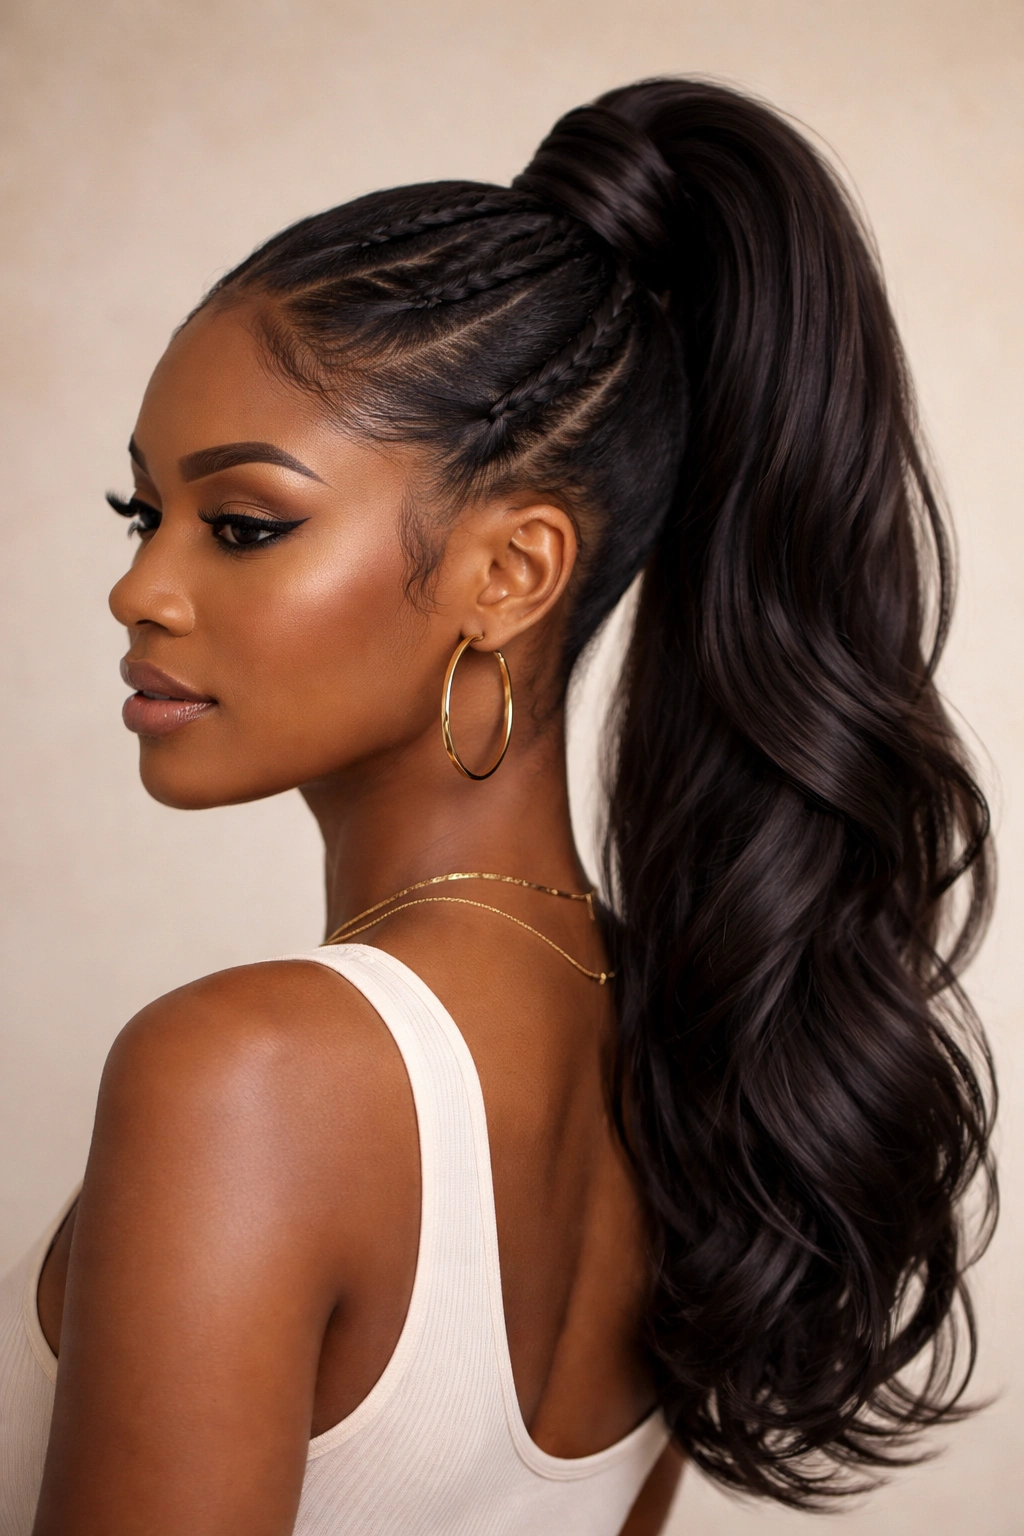
7. Sleek High Ponytail with Flipped Ends

This variation takes a traditional high ponytail and adds movement and dimension at the ends by flipping or curling the ponytail tail itself. Rather than leaving your ponytail completely straight, you’re adding waves, curls, or a flip at the very bottom. This creates visual interest and prevents the style from looking too severe or one-dimensional. The flipped ends can be subtle and soft, or they can be bold and exaggerated depending on your mood and occasion.
Why Flipped Ends Transform the Entire Look
Adding texture to your ponytail tail is a simple way to elevate a basic style without adding complexity to the parts that matter most—your edges and hairline. The movement at the ends also makes your hair look thicker, fuller, and more dynamic. Flipped ends work beautifully for events, creative environments, or any time you want a style that feels polished but not stiff. This version is also a smart choice if you’re trying to blend different hair textures or incorporate extensions that might look better with some movement.
How to Add Movement to Your Ponytail Ends
- Create your sleek high ponytail first, smoothing all edges and securing it high on your head
- Divide your ponytail tail into 3 to 4 sections
- Using a curling iron, curling wand, or even a blow dryer with a diffuser, add waves or curls to each section
- For a flip effect, use an upward motion and flip the ends of each section slightly upward
- For waves, curl each section loosely and finger-comb them out for a softer look
- Let your curls or waves cool before running your fingers through them
- Finish with a light hairspray to hold the texture without stiffening it
Worth knowing: This works beautifully whether your ponytail is your natural hair, extensions, or a blend of both.
8. High Ponytail with Decorative Pins
This style elevates your high ponytail by incorporating decorative hair pins, clips, or jewelry throughout the style. Rather than simply wearing one elastic and one wrap, you’re intentionally placing pins along your hairline, around the ponytail base, or even threading them through your ponytail tail. The pins can be delicate and minimal, or they can be bold and statement-making depending on your style and occasion. This variation transforms a simple ponytail into something that feels carefully curated and intentional.
Why Pins and Clips Add Personality
Decorative pins let you express your personal style and make a high ponytail feel distinctly yours. A minimalist might choose sleek gold or silver pins placed strategically, while someone with a bolder aesthetic might layer multiple colors and styles. Pins also serve a practical function—they help secure flyaways and baby hairs while simultaneously becoming part of your intentional aesthetic. This version works beautifully for professional settings where you can be subtle and elegant, or for creative industries and events where you can go bolder.
How to Incorporate Pins Into Your Ponytail
- Create your base sleek high ponytail first, ensuring your edges are smooth and your hair is secure
- Choose your decorative pins—aim for 3 to 5 pieces if you’re being minimal, or more if you want a statement look
- Place pins along your hairline, spacing them evenly on both sides of your face
- Add pins around your ponytail base, either in a straight line or scattered artfully
- You can thread thin pins or hair sticks directly through your ponytail for added texture and interest
- Ensure all pins are secure and positioned so they won’t shift throughout the day
- Step back and assess the balance—you want the pins to enhance without overwhelming the style
Pro tip: Vintage-inspired tortoiseshell pins or minimalist gold pieces feel particularly sophisticated with a sleek high ponytail.
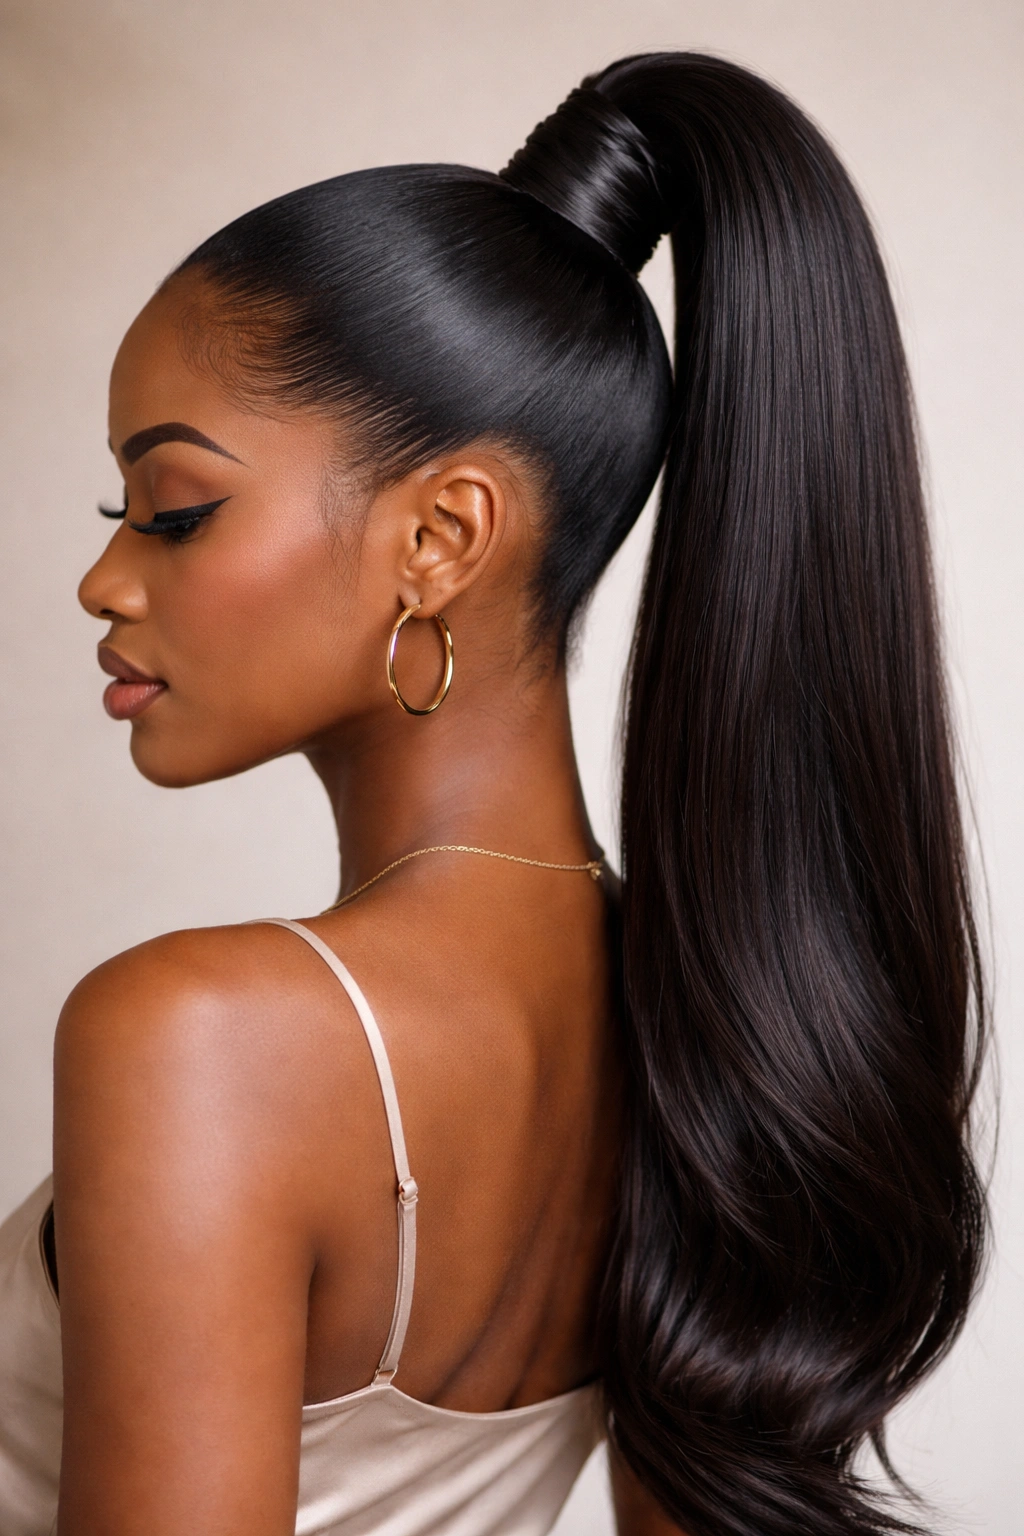
9. Slicked High Ponytail with Middle Part
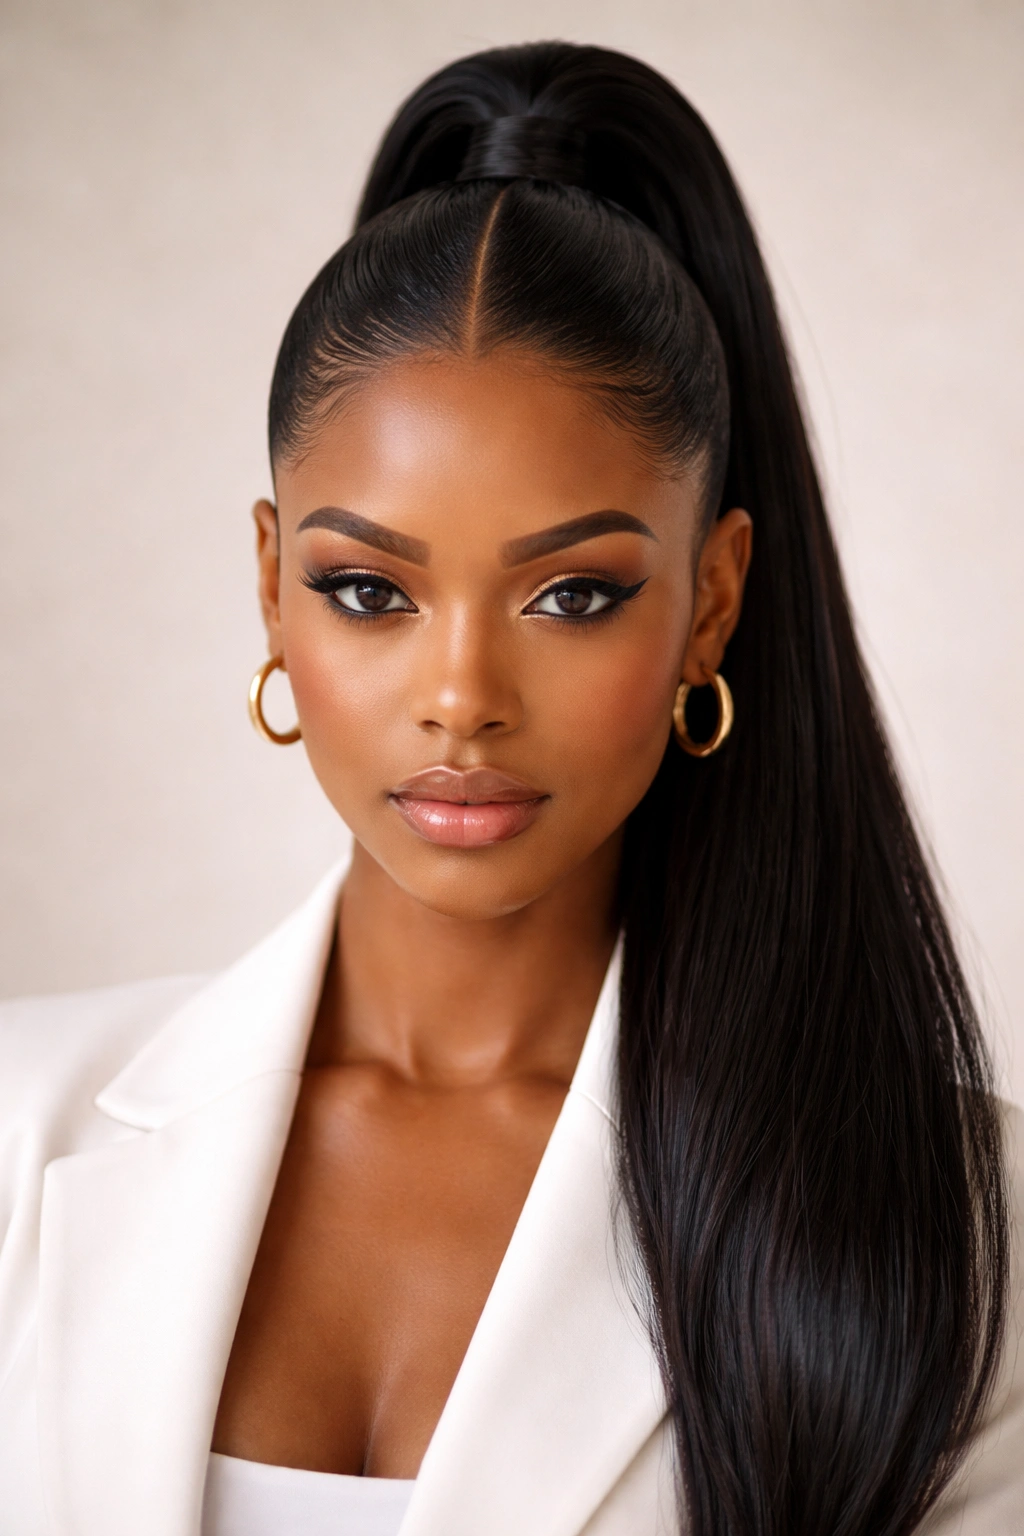
This variation emphasizes an intentional, precise middle part that runs from your hairline all the way back to where your ponytail sits. Instead of simply smoothing your hair back, you’re creating a visible, sharp line down the center of your head. This creates symmetry and an almost architectural feel to your hairstyle. The middle part can be subtle and soft, or it can be razor-sharp depending on how much definition you want.
Why a Middle Part Reads Differently
A middle part immediately creates balance and symmetry on your face, which is why it’s so flattering for so many people. The sharp line draws the eye upward and creates definition and structure. This version feels intentional and thoughtful—you’re not just pulling your hair back, you’re making a specific design choice. A middle-parted high ponytail works beautifully for professional settings, creative environments, and personal style moments where you want to feel powerful and put-together. The middle part also helps distribute your hair evenly on both sides, which can make your ponytail look thicker and fuller overall.
How to Create a Defined Middle Part
- Start with smoothly blown-out or freshly washed hair
- Use a fine-tooth comb to identify the exact center of your head from your hairline to the back of your crown
- Using edge control and the fine-tooth comb, create a precise line down the middle, smoothing each side as you go
- Continue the part all the way back to where your ponytail will sit at the crown
- Apply smoothing gel generously to each side of your part line to emphasize the definition
- Gather each side into your high ponytail, ensuring the part stays centered and sharp
- Secure your ponytail high on your head with an elastic
- Wrap the base to hide the elastic
- Use edge control to keep your part line sharp throughout the day
Worth knowing: A middle part works especially beautifully with a wrap or decorative pins that emphasize the symmetry you’ve created.
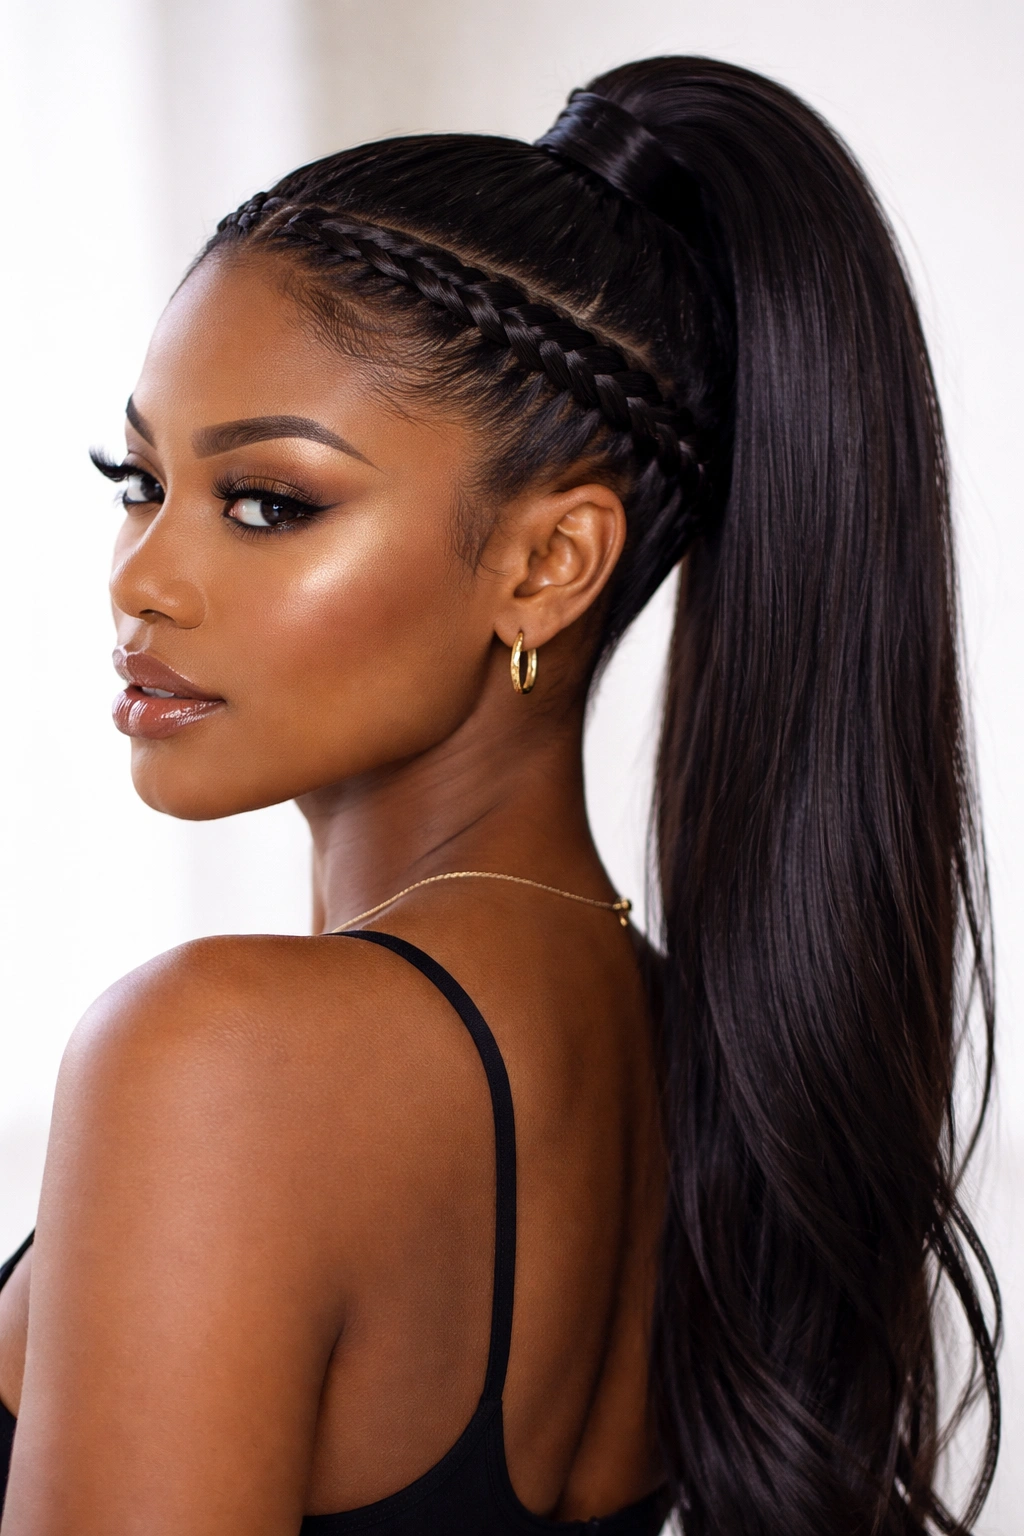
10. High Ponytail with Sleek Feed-In Braids
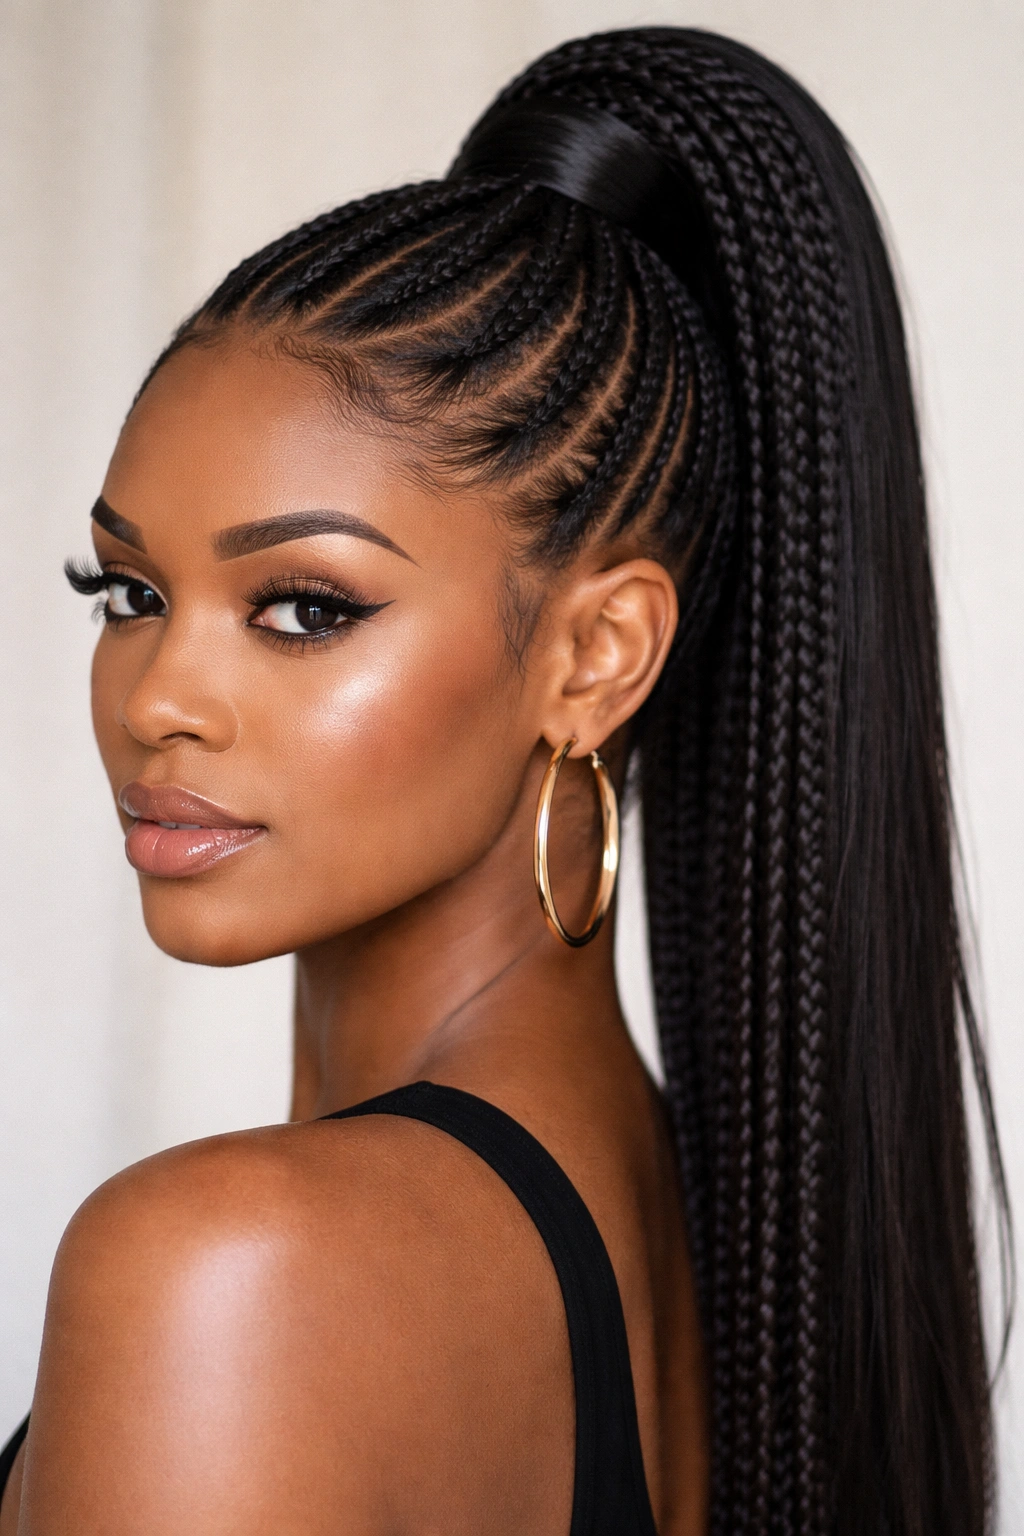
This style incorporates feed-in braids woven through your hairline and edges before meeting at your high ponytail base. Feed-in braids are thin, precise braids that create dimension and texture while still maintaining the sleek, intentional aesthetic. Rather than just smoothing your hair back, you’re creating a detailed, textured frame around your face and crown. This version requires a bit more skill, but it delivers a sophisticated, fashion-forward look that absolutely turns heads.
Why Feed-In Braids Feel Next-Level
Feed-in braids take a high ponytail from simple to statement-making. The braids themselves are an art form—they require precision and skill, and when done well, they look expensive and intentional. This style is particularly stunning because it combines sleekness (smooth edges and a polished ponytail) with texture and intricacy (the braids). Feed-in braids also work beautifully as a protective styling option if you’re incorporating extensions or if you’re giving your natural hair a break from daily styling. This version reads as seriously polished and works beautifully for events, professional settings, or whenever you want to make a strong impression.
How to Create Feed-In Braids Into Your Ponytail
- Section off your hair into the areas where you want your braids to sit—typically along your edges and hairline
- Apply smoothing gel to create clean lines between sections
- Start with a small three-strand or four-strand braid at your hairline, feeding in additional small sections of hair as you braid backward
- Continue braiding from one side of your face all the way to the back of your head
- Repeat on the other side, creating balanced braids on both sides
- You can create anywhere from two to four feed-in braids depending on how intricate you want the style
- Once your braids reach your crown, gather all your hair—including the braids—into your high ponytail
- Secure with an elastic that matches your hair color
- Wrap the base with either a section of hair or a decorative wrap to hide the elastic
- Smooth any flyaways around your feed-in braids and ponytail base with edge control
Pro tip: Feed-in braids take practice—if you’re not comfortable creating them yourself, a skilled braider is absolutely worth the investment for special events or occasions.
Final Thoughts
A sleek high ponytail is so much more versatile and nuanced than most people realize. Whether you’re choosing the minimalist elegance of a classic slicked-back version or going for the intricacy of feed-in braids, there’s a high ponytail option that fits your hair type, your skill level, and your personal aesthetic. The real secret to nailing any of these styles is investing in quality products—particularly a smoothing gel or edge control that actually works with your hair texture—and taking the time to smooth and polish every section thoughtfully.
Your edges and hairline deserve intentional styling, not as an afterthought, but as the foundation of a truly polished ponytail. When your edges are smooth, your hair is secured, and every detail is thought through, that’s when a high ponytail stops being just a hairstyle and becomes an actual style statement. Experiment with different variations, find what flatters your face and works with your lifestyle, and don’t hesitate to revisit a style multiple times as you refine your technique and build your skills. A well-executed sleek high ponytail is always worth the effort.