Low ponytails offer a sophisticated, versatile look that works beautifully with curly hair—if you know how to style them properly. Unlike straight hair that falls perfectly with minimal effort, curly textures require strategic techniques to keep your ponytail defined, voluminous, and frizz-free throughout the day. The beauty of low weave ponytails for curly hair is that they embrace your natural texture rather than fighting against it, creating elegant styles that feel authentic and manageable.
The key challenge with curly hair and ponytails is maintaining definition while preventing the crown from flattening or the sides from frizzing into an undefined halo. Weaving sections of hair through the base of your ponytail creates dimension, adds visual interest, and actually helps anchor everything in place—which is especially valuable when you’re working with the weight and movement of curly strands. A low placement keeps the style sophisticated and office-appropriate while giving you the freedom to showcase the texture that makes curly hair so striking.
What makes low weave ponytails perfect for curly hair is their flexibility. You can craft them tightly for a polished meeting-ready look, or go softer and more romantic for a weekend vibe. The weaving element transforms a basic ponytail into something that feels intentional and fashion-forward, giving the impression you spent far more time on your hair than you actually did. Whether your curls are tight coils, loose waves, or somewhere in between, these ten styles adapt beautifully to your natural texture.
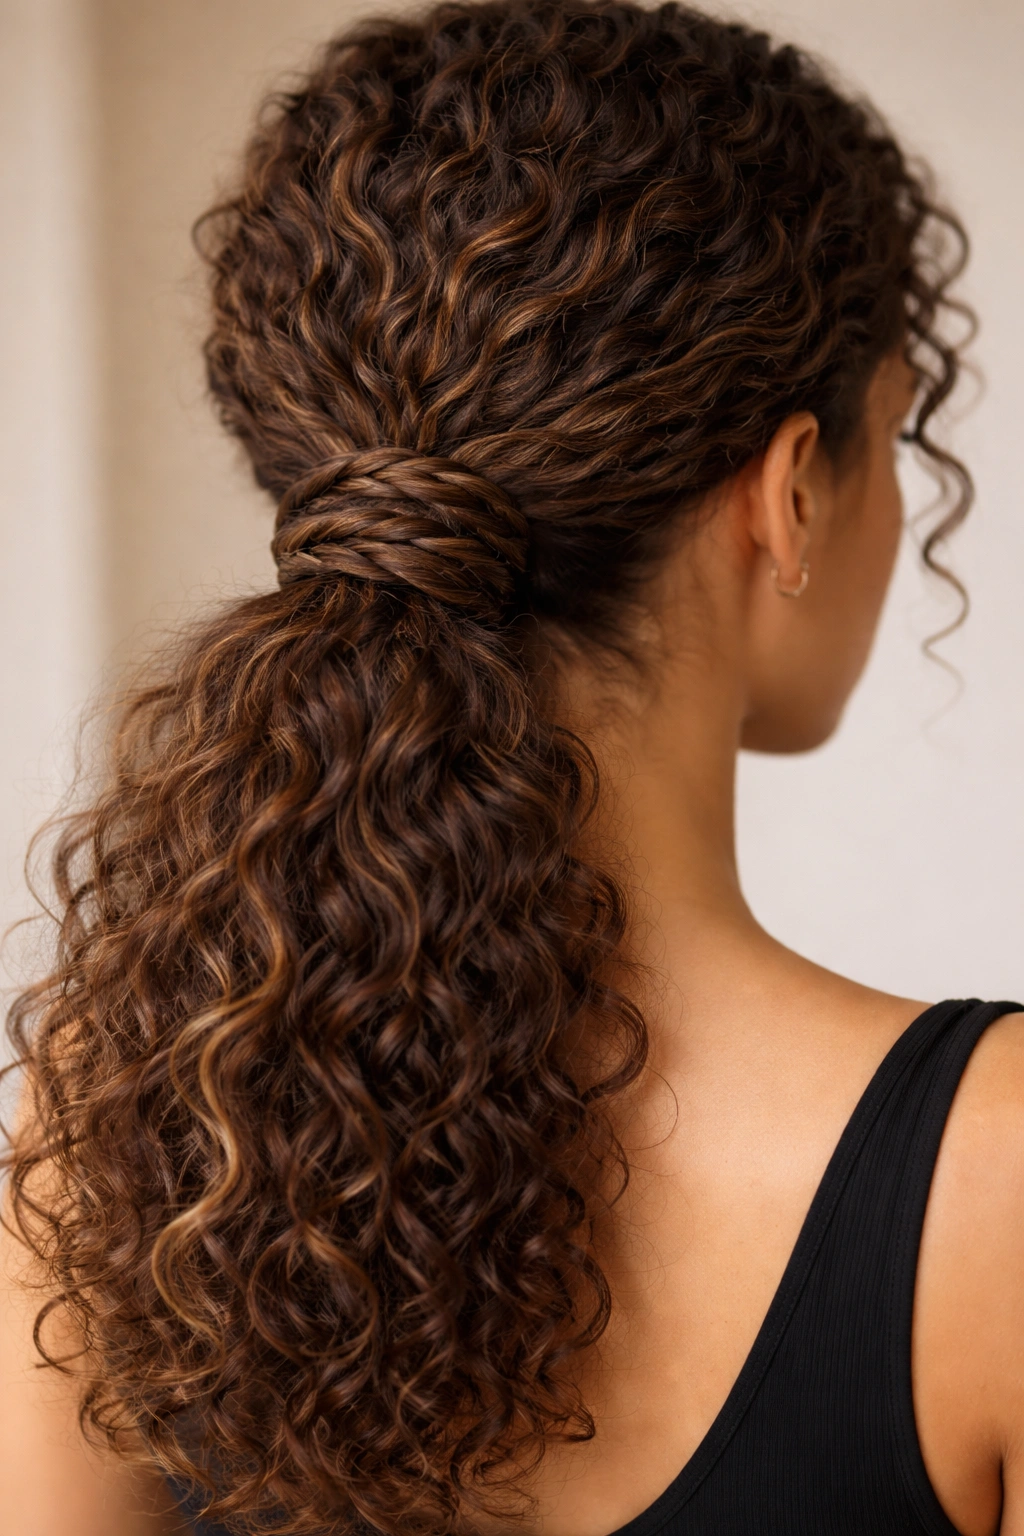
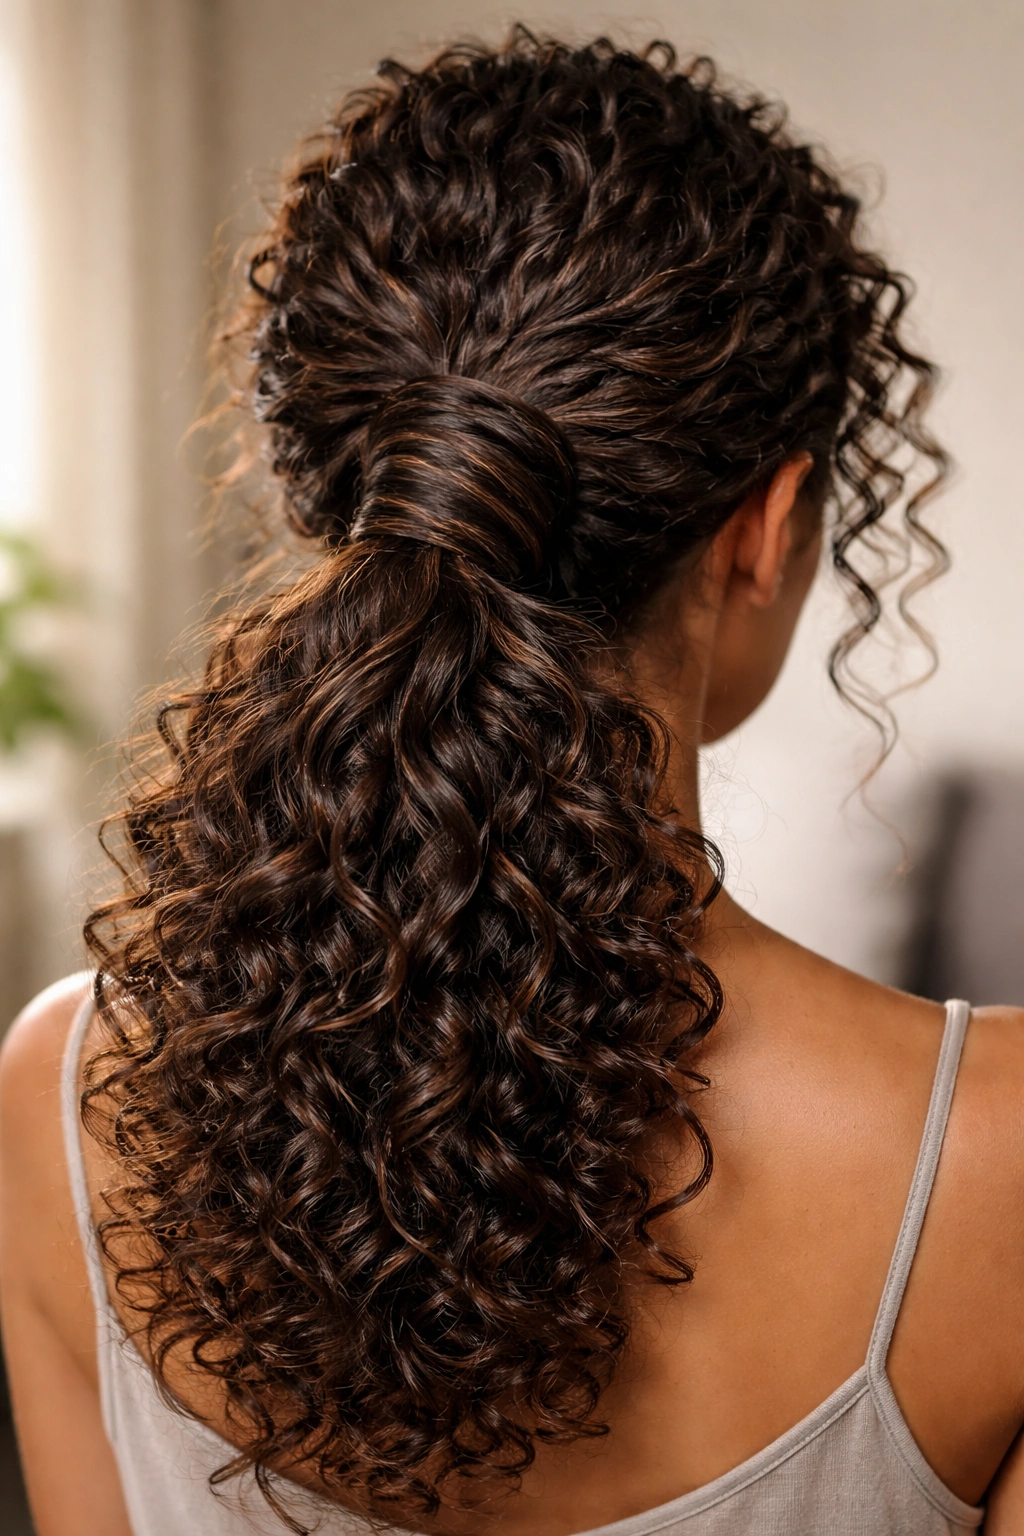
1. The Wrapped-Twist Low Weave Ponytail
This elegant style combines a low ponytail with a wrapped twist that circles the base, creating a polished look that works for both casual and formal occasions. Start by gathering your curls into a low ponytail at the nape of your neck, using a smooth elastic or ribbon to secure it. Take a small section from the side of your ponytail and twist it gently, then wrap it around the base to conceal the elastic while creating a dimensional, textured appearance.
Why This Works for Curly Hair
The twist uses the natural volume of curls to create a fuller, more luxurious base without requiring tight pulling that damages your curl pattern. The wrapping technique actually helps distribute tension more evenly, protecting your hairline and the delicate curls around your face. This style keeps flyaways contained while celebrating the dimensionality your curls naturally possess.
How to Perfect the Wrapped Twist
- Secure your low ponytail with a soft elastic that won’t crease your curls
- Twist a 1-inch section slowly, allowing your curls to stack and show their natural pattern
- Wrap the twisted section around the elastic base 2-3 times for full coverage
- Pin the wrap in place with bobby pins inserted parallel to your curls, not against them
- Use a lightweight curl cream or serum on the wrapped section to enhance shine without flattening texture
Pro tip: Create the wrap while your ponytail is still slightly damp — your curls will set into the twisted position and hold it all day without slipping.
2. The Braided Base Low Weave Ponytail
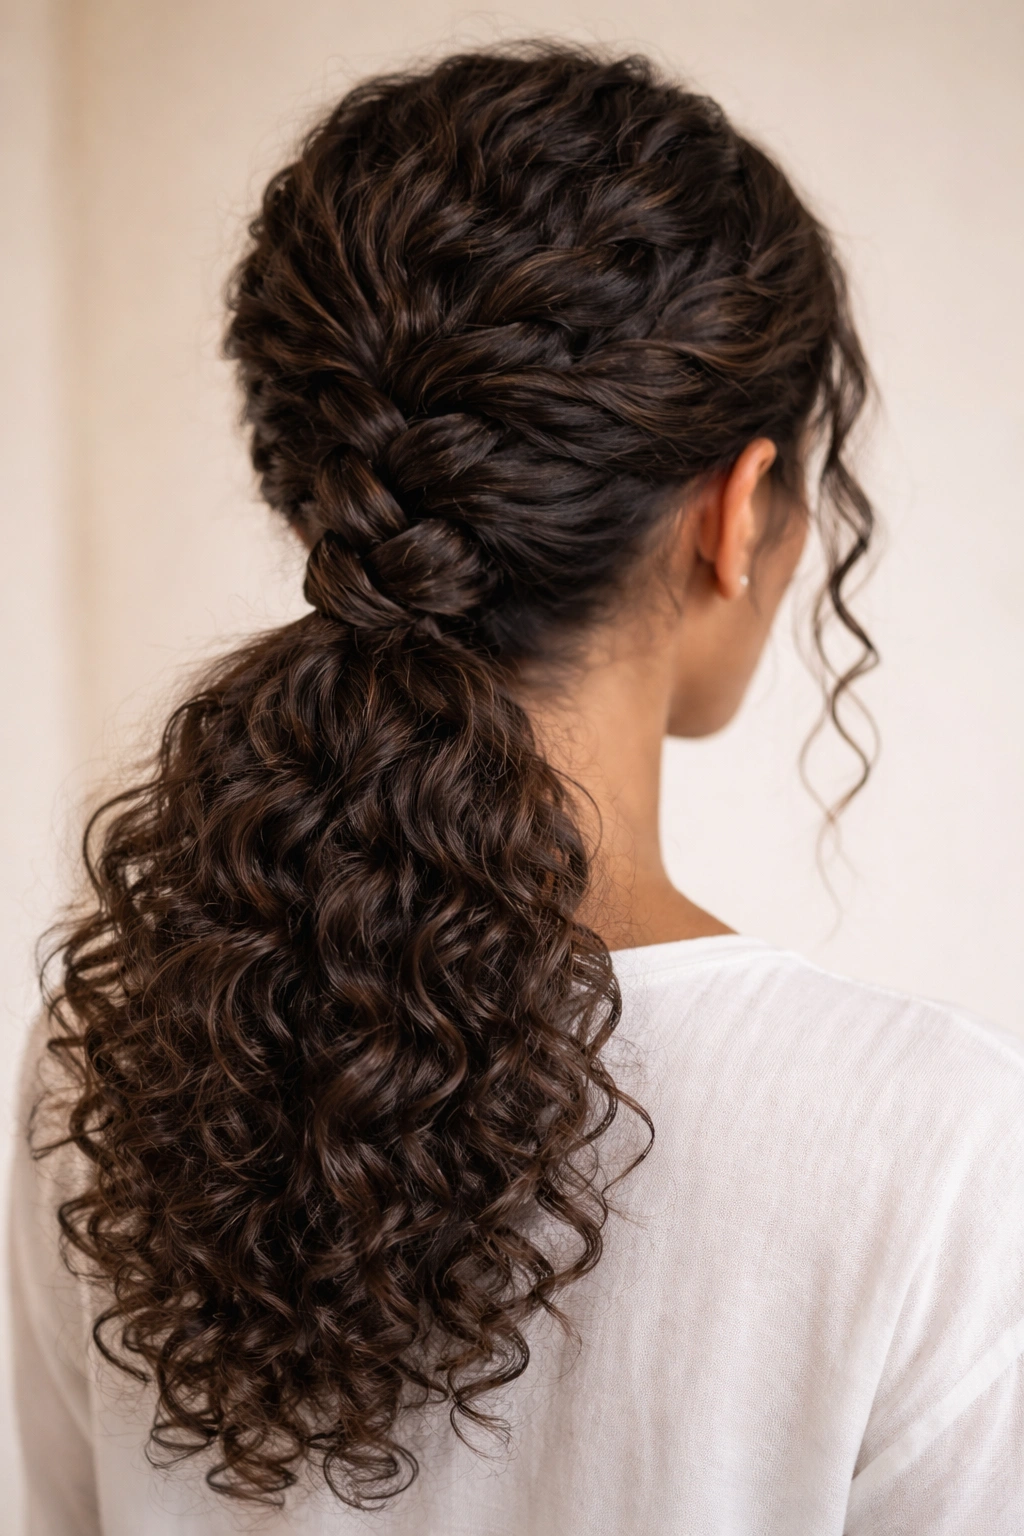
This style starts with a three-strand braid that begins near one ear, travels across the back of your head, and feeds directly into your low ponytail. The braid acts as both a design element and a functional anchor that keeps everything secure and adds visual complexity to your style.
The Texture Play
Braiding actually works remarkably well with curly hair because the braid strands naturally separate and show dimension as it’s woven. Rather than creating a smooth, sleek braid (which fights curly texture), embrace a looser, textured braid that lets individual curls puff out between the strands. This approach feels intentional and modern rather than fighting against your natural pattern.
Building Your Braided Base
- Section your hair from temple to the opposite ear, creating a diagonal line
- Begin a three-strand braid at one ear, keeping sections slightly loose
- Braid toward the center back of your head, about ear level
- As you near the center, gather the braid and remaining loose curls into one low ponytail
- Secure with a matching elastic and smooth any flyaways with a frizz-control cream
Worth knowing: If your curls are fine or prone to frizz, do this style on day-two or day-three hair when your curls have already settled into their pattern — fresh from wash day, they may be too fluffy for a controlled braid.
3. The Lattice-Weave Low Ponytail

This intricate-looking style features sections of hair woven in a crosshatch pattern through the base of your low ponytail, creating a lattice or cage effect. Don’t let the name intimidate you—the technique is surprisingly straightforward once you understand the weaving pattern.
Creating the Lattice Effect
The lattice works by taking thin sections from the sides of your ponytail and threading them through the base in alternating over-and-under patterns. This approach distributes weight evenly, prevents the top-back of your head from flattening, and creates a genuinely show-stopping design that catches light beautifully in curls.
Step-by-Step Lattice Technique
- Secure a low ponytail and gently tease the top section at the crown for volume
- Take a thin section (about ½ inch) from the right side of your ponytail at the base
- Weave it up through the back of your ponytail, then down through the front
- Take a matching section from the left side and weave it in the opposite pattern
- Repeat with additional sections, creating an intersecting lattice pattern
- Secure the woven ends with small clear bobby pins hidden among the curls
Insider note: Practice this style with slightly dampened, product-set curls rather than freshly washed ones — the product helps individual curls stay defined so your weaving shows clearly.
4. The Stacked Rope-Braid Low Weave Ponytail
This style uses one or two rope braids (two-strand twists) as weaving elements that circle your low ponytail, creating a layered, textured effect. Rope braids work especially well with curly hair because they’re less structured than traditional three-strand braids and naturally showcase the dimension of your curls.
Why Rope Braids Suit Curly Texture
Two-strand twists naturally separate in curly hair, creating a softer, more organic look than tighter braids. They’re also faster to execute and less fatiguing on your hands. You get professional-looking results without the time investment of traditional braiding techniques.
Creating Rope-Braid Weaves
- Secure your low ponytail first, then select a section from the right side at the base
- Twist two strands of that section around each other, holding slight tension
- Once twisted, wrap it around the base and pin it in place
- Repeat from the left side, stacking the rope braid just above the first one
- For a fuller effect, add a third rope braid between the other two
- Tuck the rope ends under the ponytail or clip them to the base with bobby pins
Pro tip: Twist your rope braids in the same direction (both clockwise or both counterclockwise) for visual harmony, even though they’re placed at different levels.
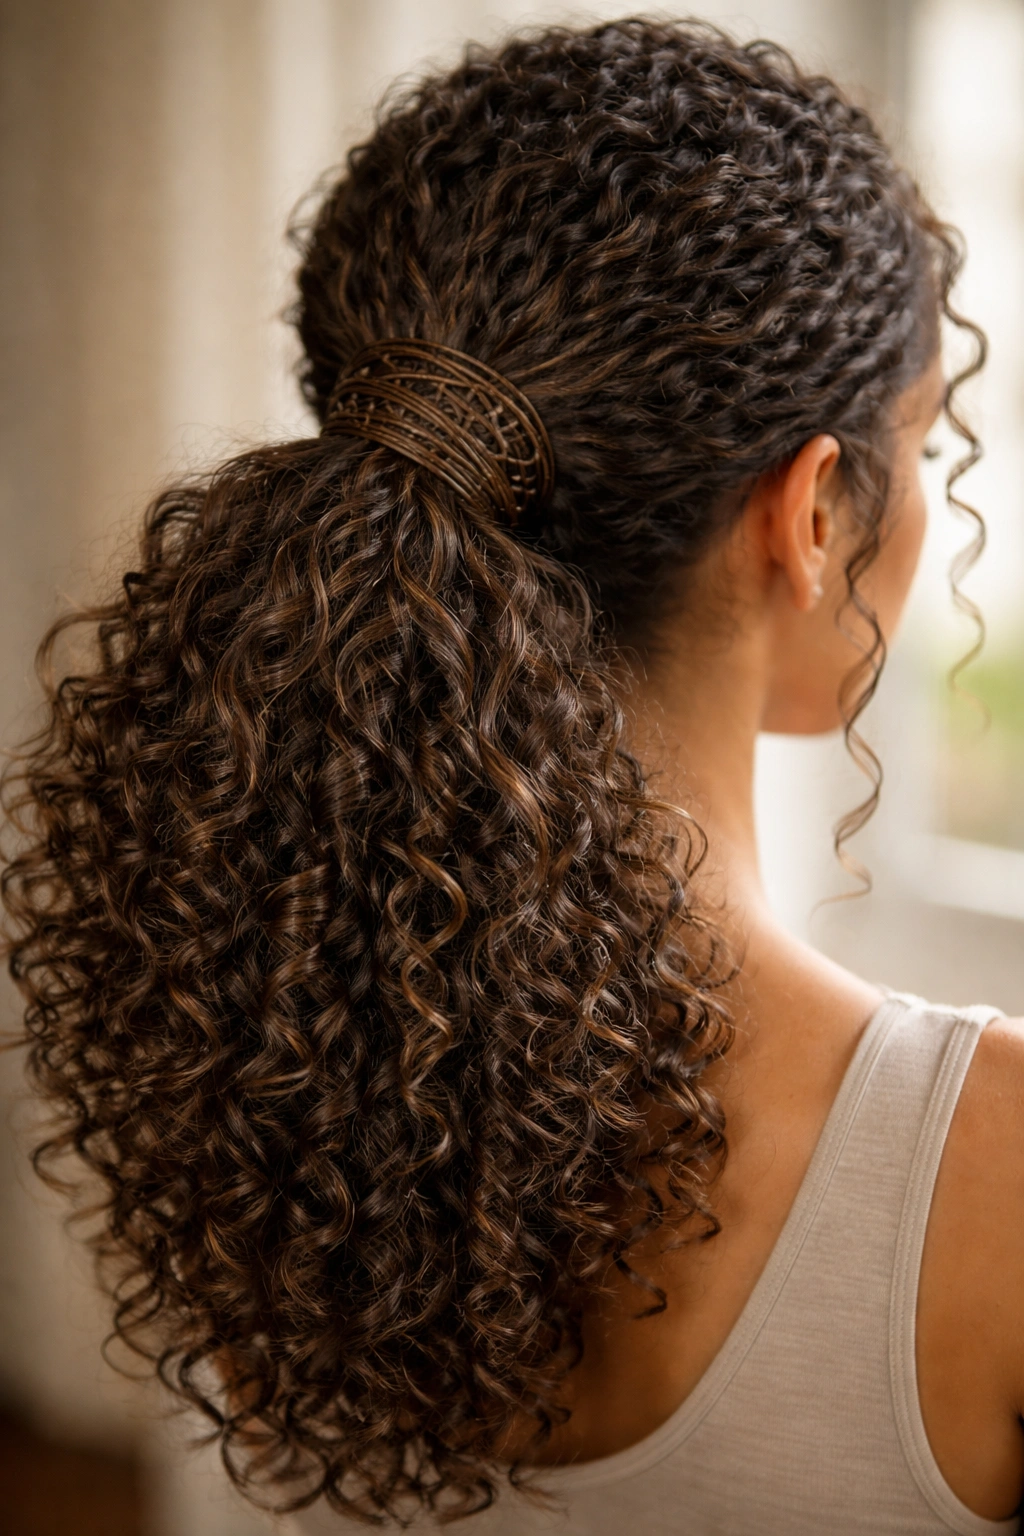
5. The Crown-Raised Low Weave Ponytail
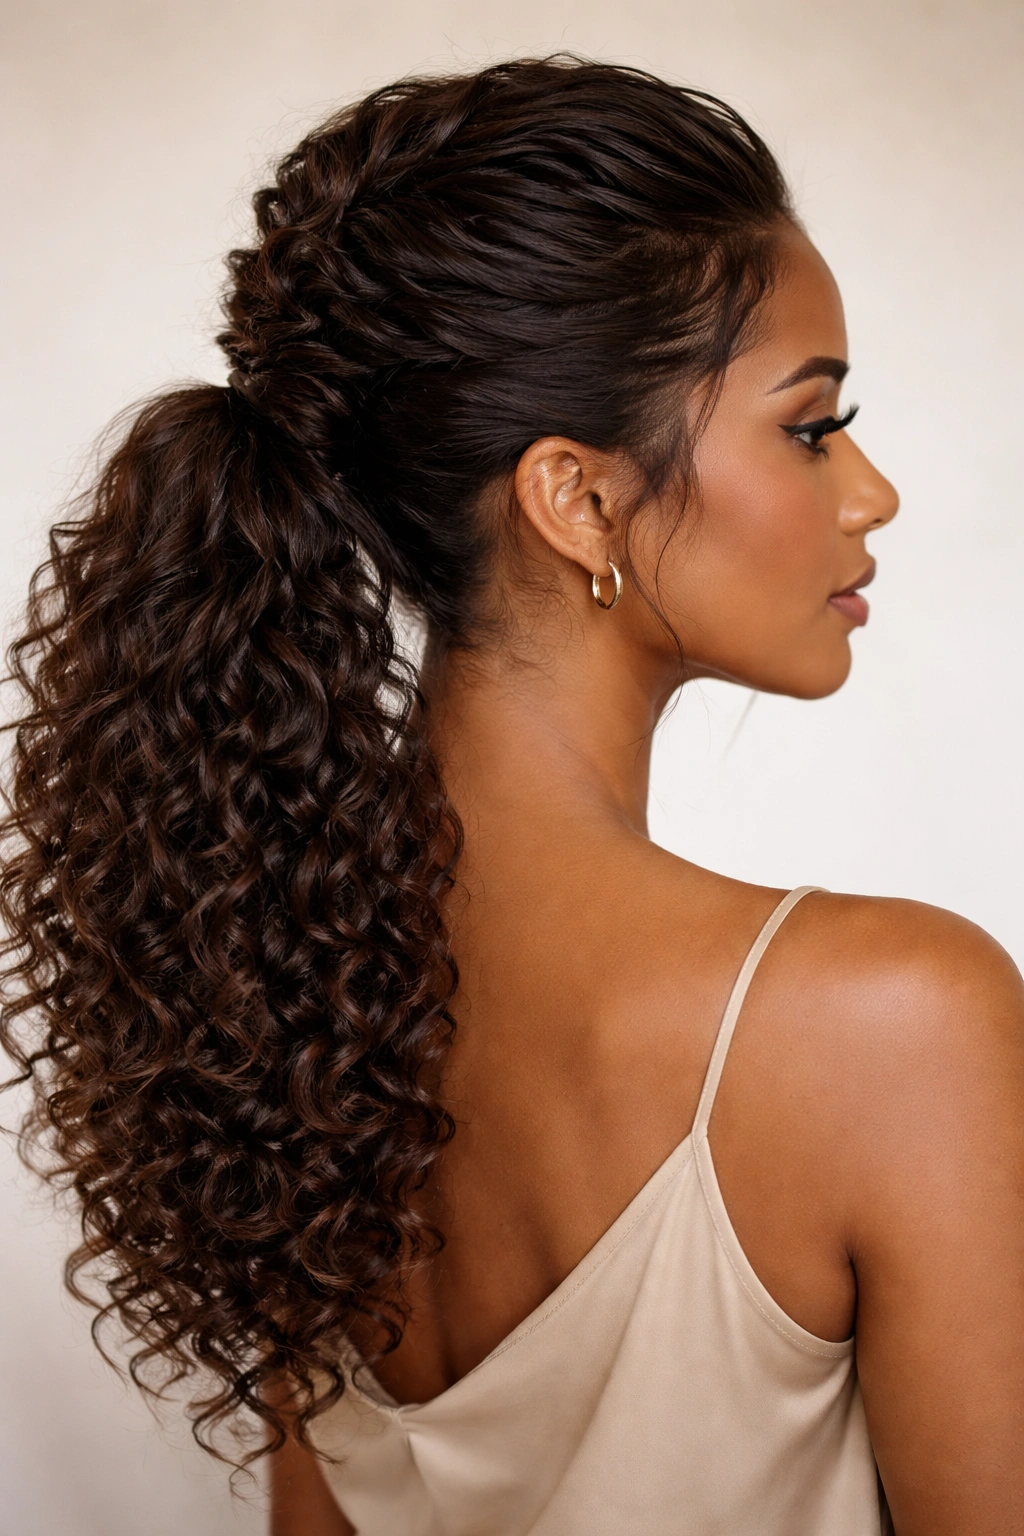
This style creates the illusion of a higher ponytail by raising and weaving the crown section, then securing the rest of the hair in a true low placement. It’s the perfect compromise if you love low ponytails but worry they’ll make your face look heavy.
Volume at the Crown
Curly hair naturally has more grip and hold than straight hair, which makes this style surprisingly stable. By pulling the crown section slightly away from your head and weaving it through the base, you create visible lift that changes the entire proportion of the style—your face appears more open and the ponytail feels less weighted down.
Execution for Maximum Lift
- Section the very top of your head (crown area) separately from the rest
- Gently tease the crown section at the roots to create volume
- Lower-section curls into a low ponytail at the nape
- Take the teased crown section and weave it down and through the base of the ponytail
- Wrap the crown section around the elastic to conceal it, then pin in place
- Smooth any flyaways and enhance the crown volume with a lightweight mousse
Worth knowing: This technique is especially flattering for round or square face shapes because the crown lift creates vertical lines that elongate your features.
6. The Curved-Weave Side-Swept Low Ponytail
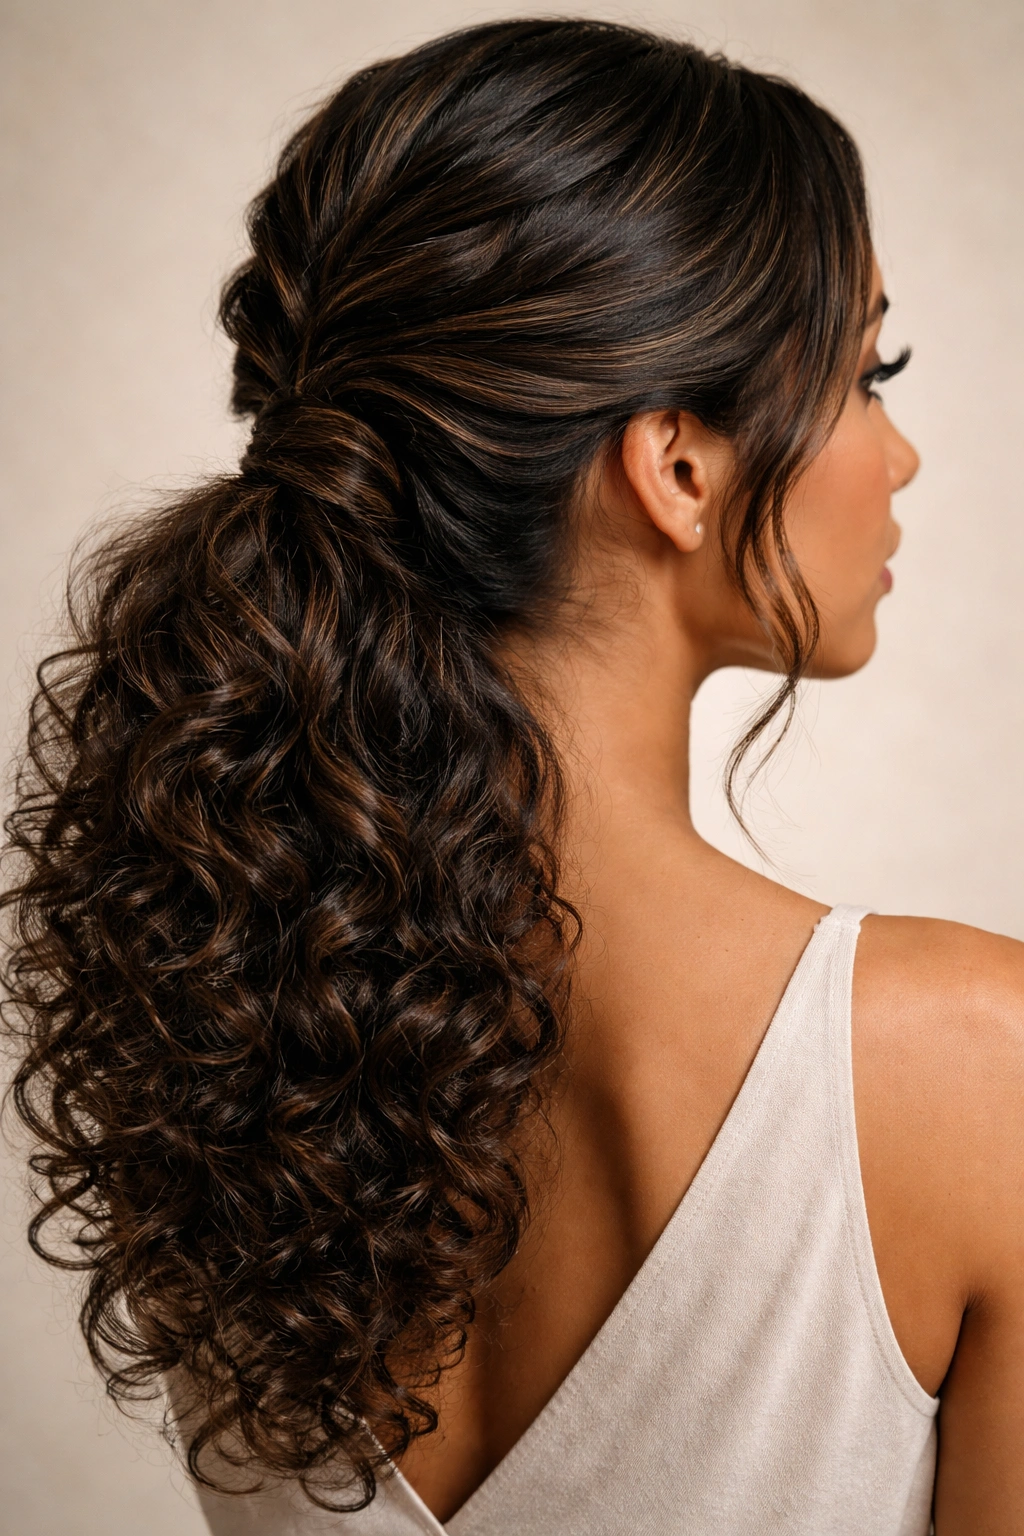
This romantic style weaves sections diagonally from one side of your head into a low ponytail positioned slightly off-center, creating movement and a softer silhouette than a centered ponytail.
The Asymmetrical Approach
The diagonal weaving creates visual flow that works beautifully with curly hair’s natural movement. Rather than fighting to create symmetry, this style embraces the way curls want to move and fall, resulting in something that feels effortless and intentional simultaneously.
Building the Curved Weave
- Create a shallow side part, sweeping more hair toward one side
- Gather hair into a low ponytail positioned slightly toward that same side
- Starting from the opposite temple, take small sections and weave them diagonally backward
- Each section weaves through the ponytail base at a slight angle, following the curve of your head
- Continue weaving until you’ve incorporated 3-4 sections for a balanced look
- Pin weaves in place and let your curls frame your face softly on the non-woven side
Pro tip: This style is gorgeous with face-framing layers because the loose curls around your cheeks soften the overall look while the weaving keeps everything contained.
7. The Reverse-Wrap Low Weave Ponytail
Instead of weaving upward into the ponytail, this style weaves downward from sections above the elastic, creating a “cap” or “cage” effect that holds everything securely while looking intricate and designer-made.
The Downward Weaving Pattern
Reverse weaving works beautifully with curly hair because the downward-looping sections actually embrace your natural curl pattern rather than fighting against it. The sections naturally sit slightly away from your head, creating volume and dimension while maintaining a polished appearance.
How to Reverse-Weave
- Create a low ponytail and secure it well
- Take a thin section from the right side of your ponytail, about 1 inch below the elastic
- Weave this section upward, looping it over and under sections of the main ponytail
- From the opposite side, take another section and weave it through in the opposite pattern
- Create 3-4 crossover points for a secure, visually interesting effect
- End the weaving sections by tucking them into the ponytail or pinning them underneath
Insider note: This style looks more dramatic in hair with defined curls or waves — it’s ideal for type 3 or 4 curls that have visible ringlets or coils.
8. The Ribbon-Threaded Low Weave Ponytail
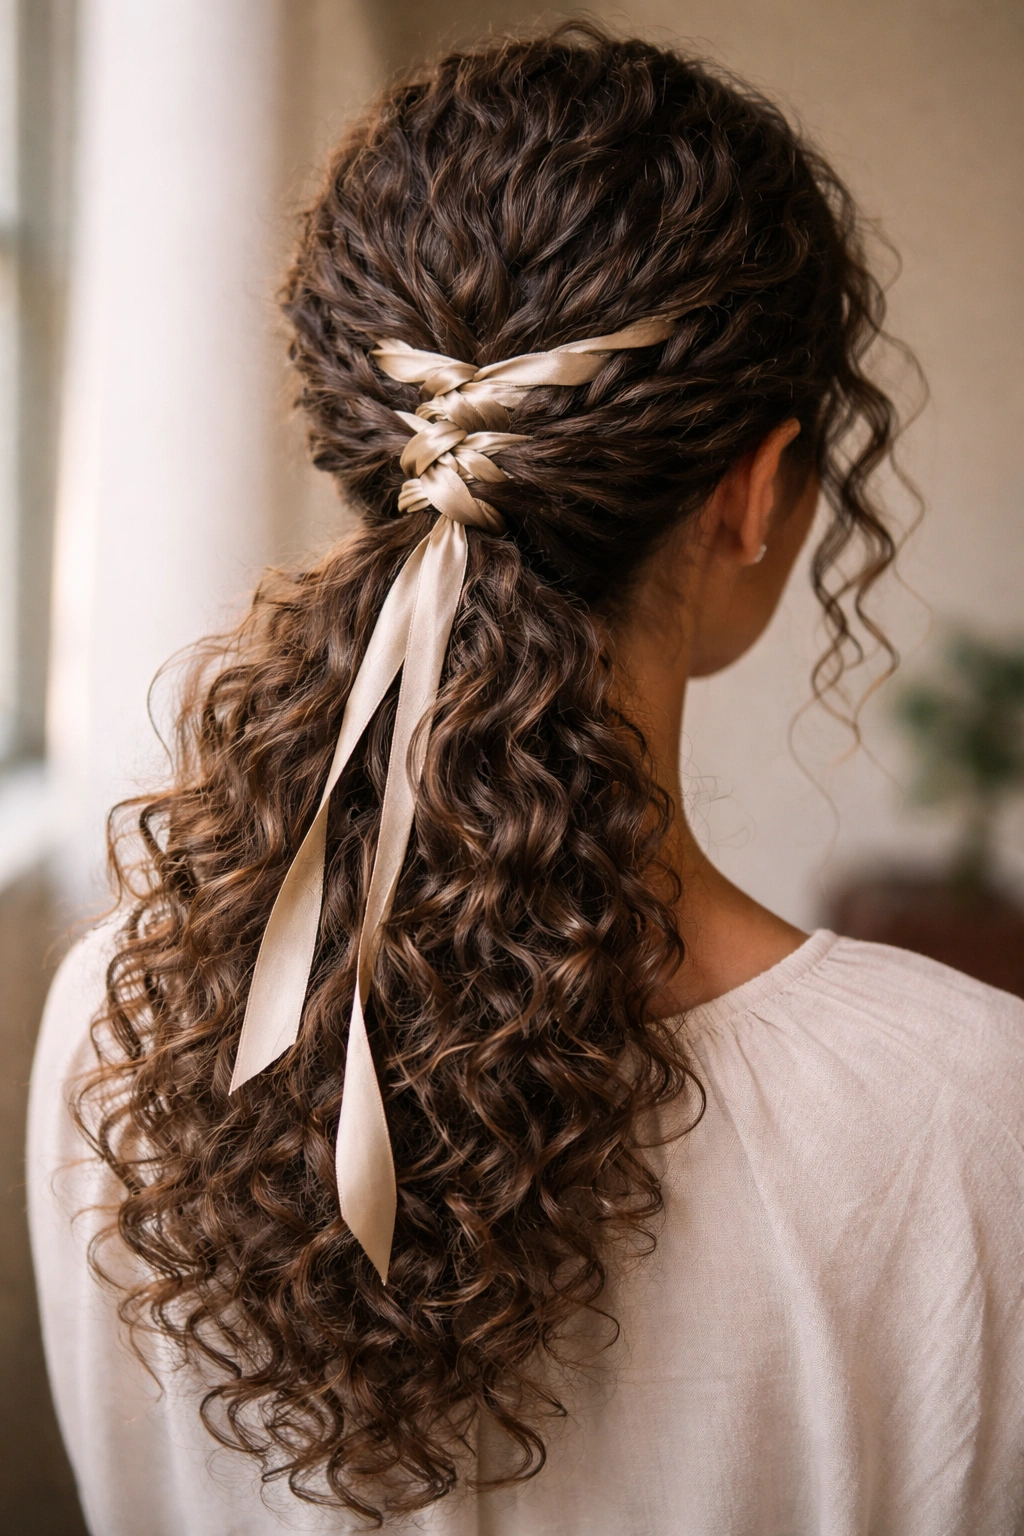
This style incorporates a silk ribbon or decorative cord woven through your ponytail sections, adding color, texture, and a touch of elegance. The ribbon serves both functional and aesthetic purposes—it helps secure weaved sections while adding a polished finishing touch.
Choosing Your Ribbon
The ribbon color and texture should complement your hair color and the overall vibe you’re creating. Silk ribbons glide smoothly through curls without snagging, while metallic or velvet ribbons add visual drama. The ribbon width matters too—thinner ribbons (¼ inch) work for intricate weaving, while wider ribbons (½ to 1 inch) create bolder visual statements.
Weaving with Ribbon
- Secure your low ponytail with an elastic that matches your hair
- Thread a length of ribbon through a bobby pin for easier manipulation
- Weave the ribbon through sections of your ponytail in whatever pattern you prefer (simple over-under, spiraling, or figure-eight)
- The ribbon can weave through lifted crown sections, side sections, or both
- Secure ribbon ends by tying them together at the back of the ponytail or tucking them inside
- Let your curls frame the ribbon for a soft, integrated look
Pro tip: Use a silk pillowcase for hair that you’re styling with ribbons—it prevents friction and keeps your curls and ribbon looking fresh longer.
9. The Multi-Strand Textured Low Weave Ponytail
This style incorporates multiple thin sections woven simultaneously in different directions, creating maximum visual texture and dimension. It’s the most intricate of the weave options but worth mastering because it looks genuinely impressive and works beautifully with curly hair’s natural volume.
Building Visual Complexity
With curly hair, more weaving actually looks better because it showcases the dimension and movement of your curls. Instead of looking busy, the multiple weaves create layers of texture that catch light differently and give depth to the style.
Creating Multi-Strand Weaves
- Start with a secure low ponytail, slightly teased at the crown for lift
- Divide the ponytail base into 6-8 thin sections around the elastic
- Designate 3-4 sections for weaving and keep the others in place
- Weave the first section over the base, under the next, over the next
- Weave the second section in reverse pattern (under, over, under)
- Continue alternating patterns with remaining sections
- This creates a complex lattice that showcases lots of curl texture
- Secure all woven sections with small pins
Worth knowing: This style takes practice—try it first when you have 30 minutes rather than rushing before an event.
10. The Floating-Loop Low Weave Ponytail

This modern style creates one or two loops of hair that appear to “float” above your base ponytail, woven through the elastic or base sections for security while creating a sculptural, dimensional effect.
Creating Architectural Interest
The floating loops work with gravity and your curl pattern to create visual interest that a basic ponytail can’t achieve. Each loop is actually a section of hair that’s looped back through the base and pinned, creating an engineered structure that showcases your curls’ natural shape.
Building Floating Loops
- Secure your low ponytail, making sure the elastic is tight enough to support loops
- Take a 1 to 1.5-inch section from the right side of your ponytail
- Loop it upward and weave it back down through the elastic or under the base section
- Pin the looped section firmly at both entry and exit points
- Repeat from the left side, creating a matching loop at the same height
- Optional: create a second set of loops slightly lower for more drama
- Gently tease and shape each loop so it sits away from your head, showcasing curl definition
Pro tip: This style photographs beautifully—it’s perfect for events or photos because the architectural loops create interesting shadows and depth in pictures.
Final Thoughts

Low weave ponytails transform curly hair from “needs a quick fix” to “this is intentional and gorgeous.” Each of these ten styles respects your natural texture while adding polish and dimension that straight-haired styles struggle to achieve. The key to success is understanding that curly hair doesn’t need to be fought into submission—it needs to be worked with, celebrated, and cleverly anchored so it stays put all day.
Your choice of style depends on your daily life, the occasion, and how much time you want to spend styling. A wrapped twist takes five minutes on a rushed morning, while a multi-strand weave is your Friday night or weekend statement piece. Start with whichever style appeals to you most, practice it a few times, and you’ll quickly develop the muscle memory to execute it in under ten minutes.
Remember that weaving techniques work best with slightly damp, product-set curls—not soaking wet, and not completely dry. A curl cream or lightweight styling gel applied before you ponytail helps sections stay defined and prevents frizz. Most importantly, embrace the texture and movement that makes curly hair beautiful, and let your ponytail celebrate rather than minimize your curls.