Curly-haired kids can be notoriously tricky to style—especially when you’re trying to keep their hair neat and off their face for school, sports, or just a day out without the constant tangle battles. Regular ponytails slide out of curls within an hour, braids seem to pull painfully tight, and by the afternoon, flyaways are everywhere. The truth is, the solution isn’t to fight curly texture—it’s to work with it by incorporating braids, which grip curls naturally and last way longer than smooth pulls.
Braided ponytails are genuinely one of the most effective styles for curly-haired kids because the braid actually holds the curl structure in place instead of fighting against it. When you braid curly hair, each curl locks around the braid strands, creating a hold that doesn’t require aggressive tension or tight elastics that can damage hair or cause breakage. Plus, braided styles look intentionally polished—not like you’re just trying to contain chaos—which means your kid actually wants to wear them.
The best braided ponytail styles for curly hair are the ones that respect the curl pattern, don’t require perfect smoothness, and stay secure even when kids are running around, sweating, or playing. We’re talking styles that still look great by day three, don’t leave indentations in the curls, and can be done on damp or dry hair depending on what works for your routine.
Here are ten genuinely different braided ponytail options that work beautifully on curly-haired kids—from simple designs that take five minutes to more elaborate styles that make your kid feel extra special.
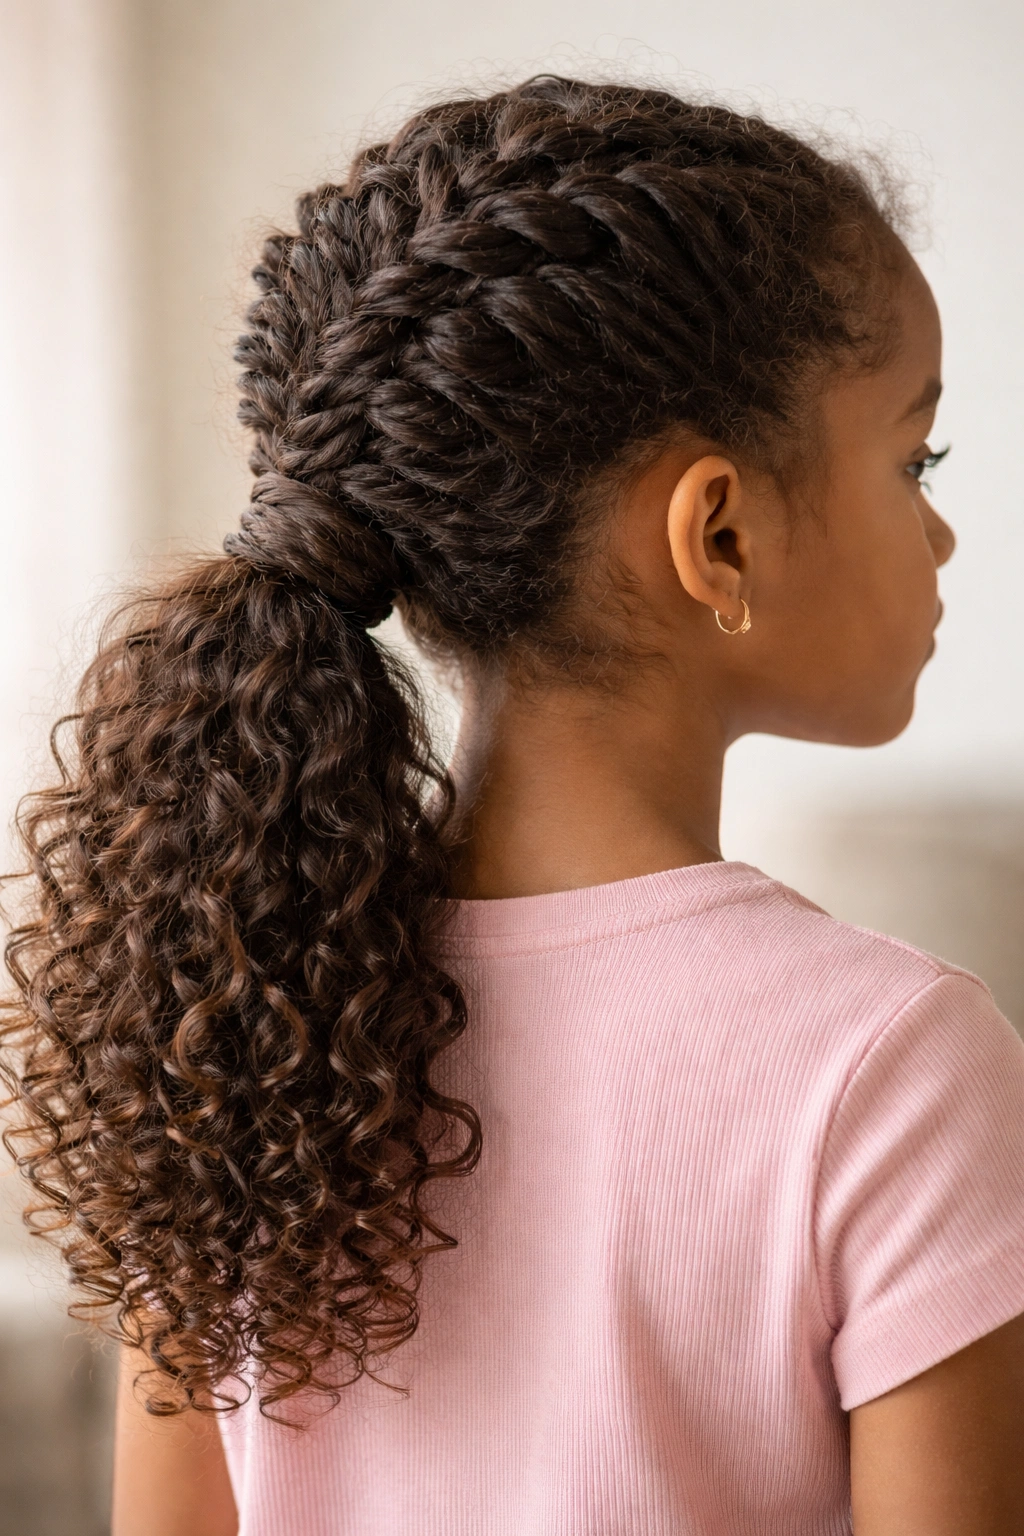
1. Classic Braided Ponytail with Defined Curls
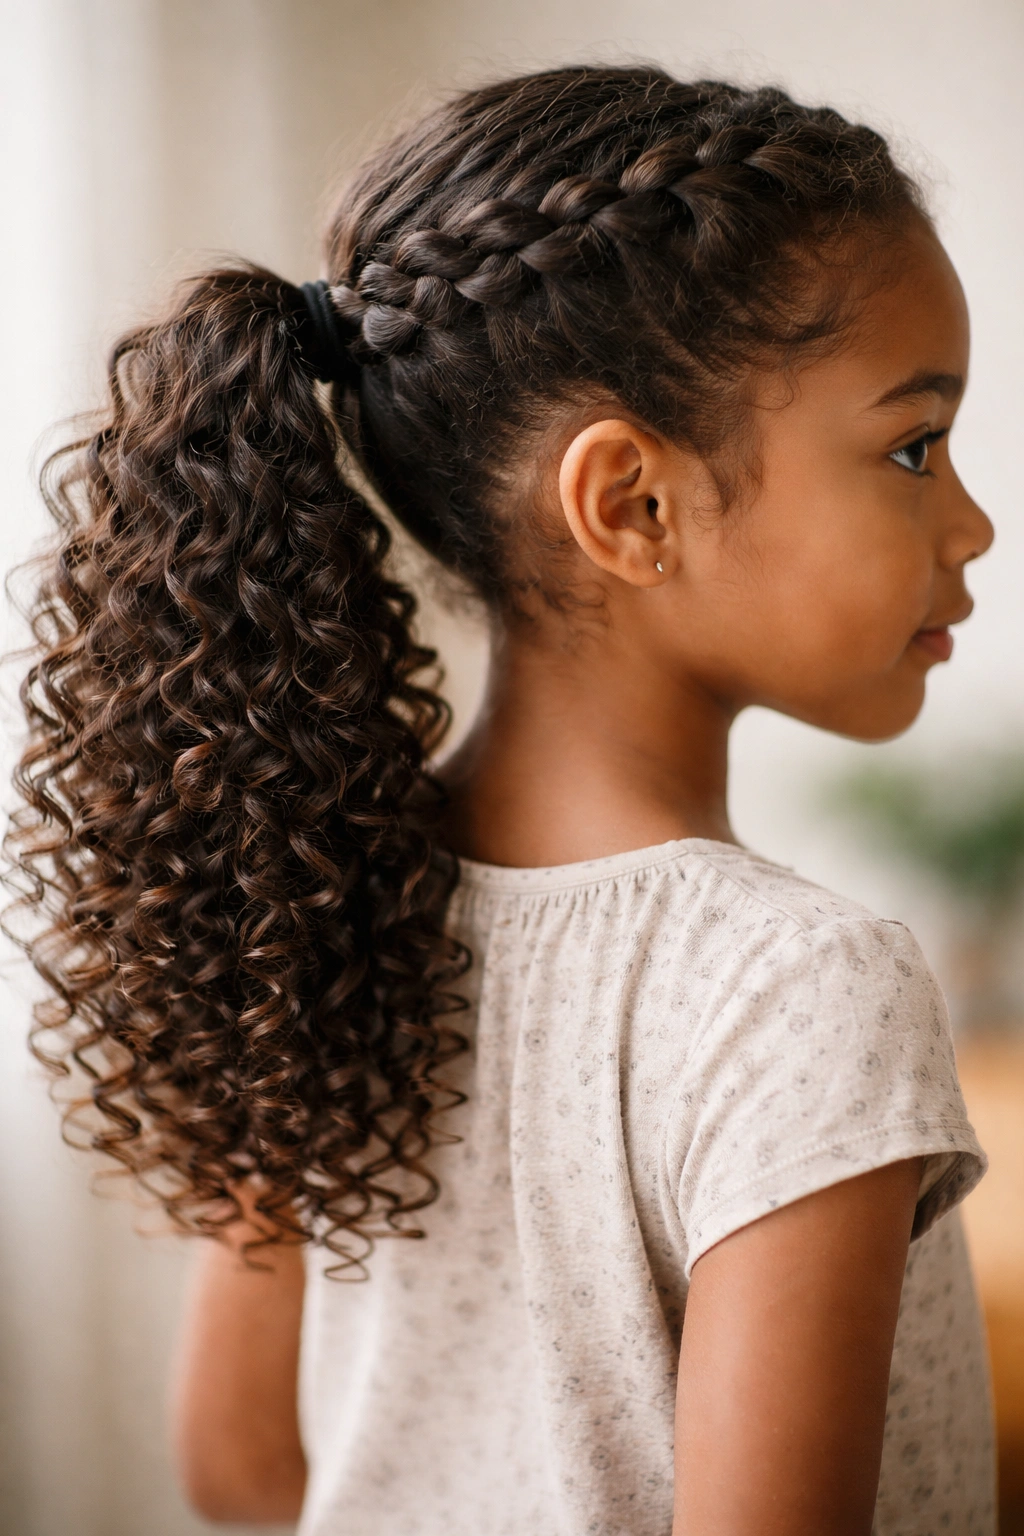
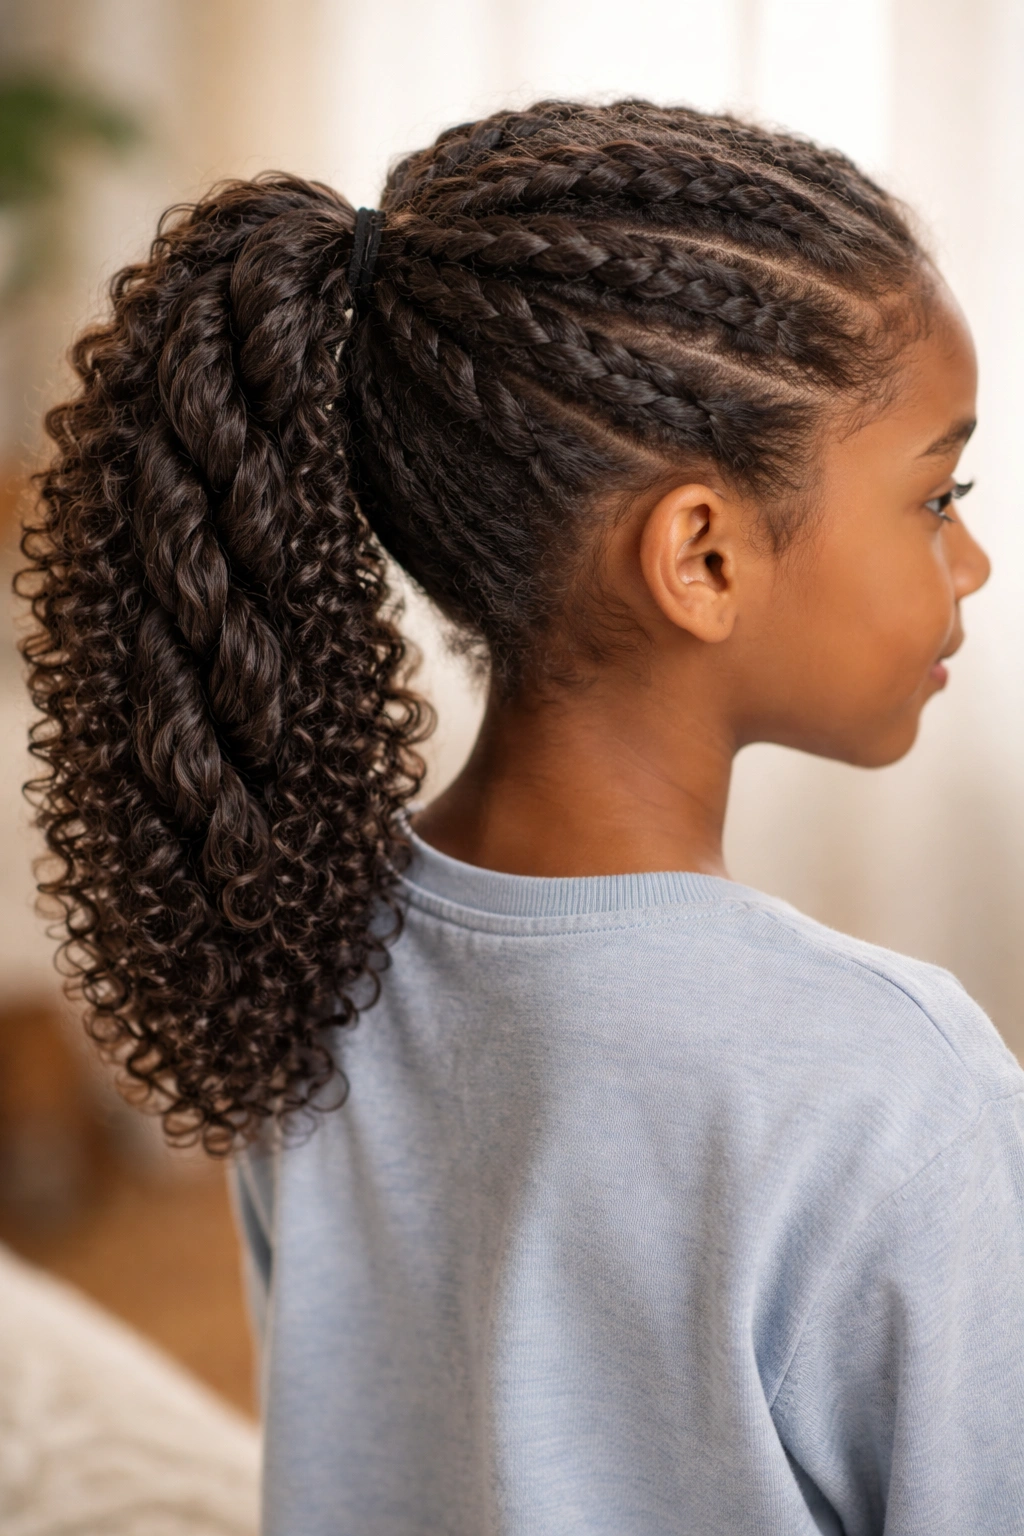
This is the foundation style—a single three-strand braid that starts at the crown and flows into a full, bouncy ponytail at the nape. The magic here is that you’re not trying to smooth the curl into submission; instead, you’re letting the curls fall free below the braid, which means the style looks full and textured rather than flat and sleek.
Why This Works for Curly Hair
The braid handles the top half of the hair, where you need the most control, while the ponytail section below stays untouched and keeps all its curl definition and volume. This means your kid actually looks like they have more hair, not less—the curls at the bottom make the whole style feel abundant and healthy. The braid itself is loose enough that it doesn’t distort the curl pattern in the sections you braid, so when you take it down, the curls spring right back without any weird crimping.
How to Make It Last
Start with slightly damp curls (not soaking wet, but with some moisture) and apply a light curl cream or mousse before braiding. Damper hair braids more smoothly and holds the braid better throughout the day. Use a soft elastic at the base—avoid the clear or colored elastic bands that have metal bits, which snag curls. At the end of the day, when you release the braid, give the hair a gentle shake and scrunch the waves back up with your hands to reactivate the curl pattern.
Pro tip: If the braid feels loose by midday (which is normal with curly texture), don’t redo the whole thing—just flip the ponytail upside down and gently tighten the base elastic, then flip it back. It takes 30 seconds and makes the hold look fresh again.
2. Two-Strand Twist Ponytail
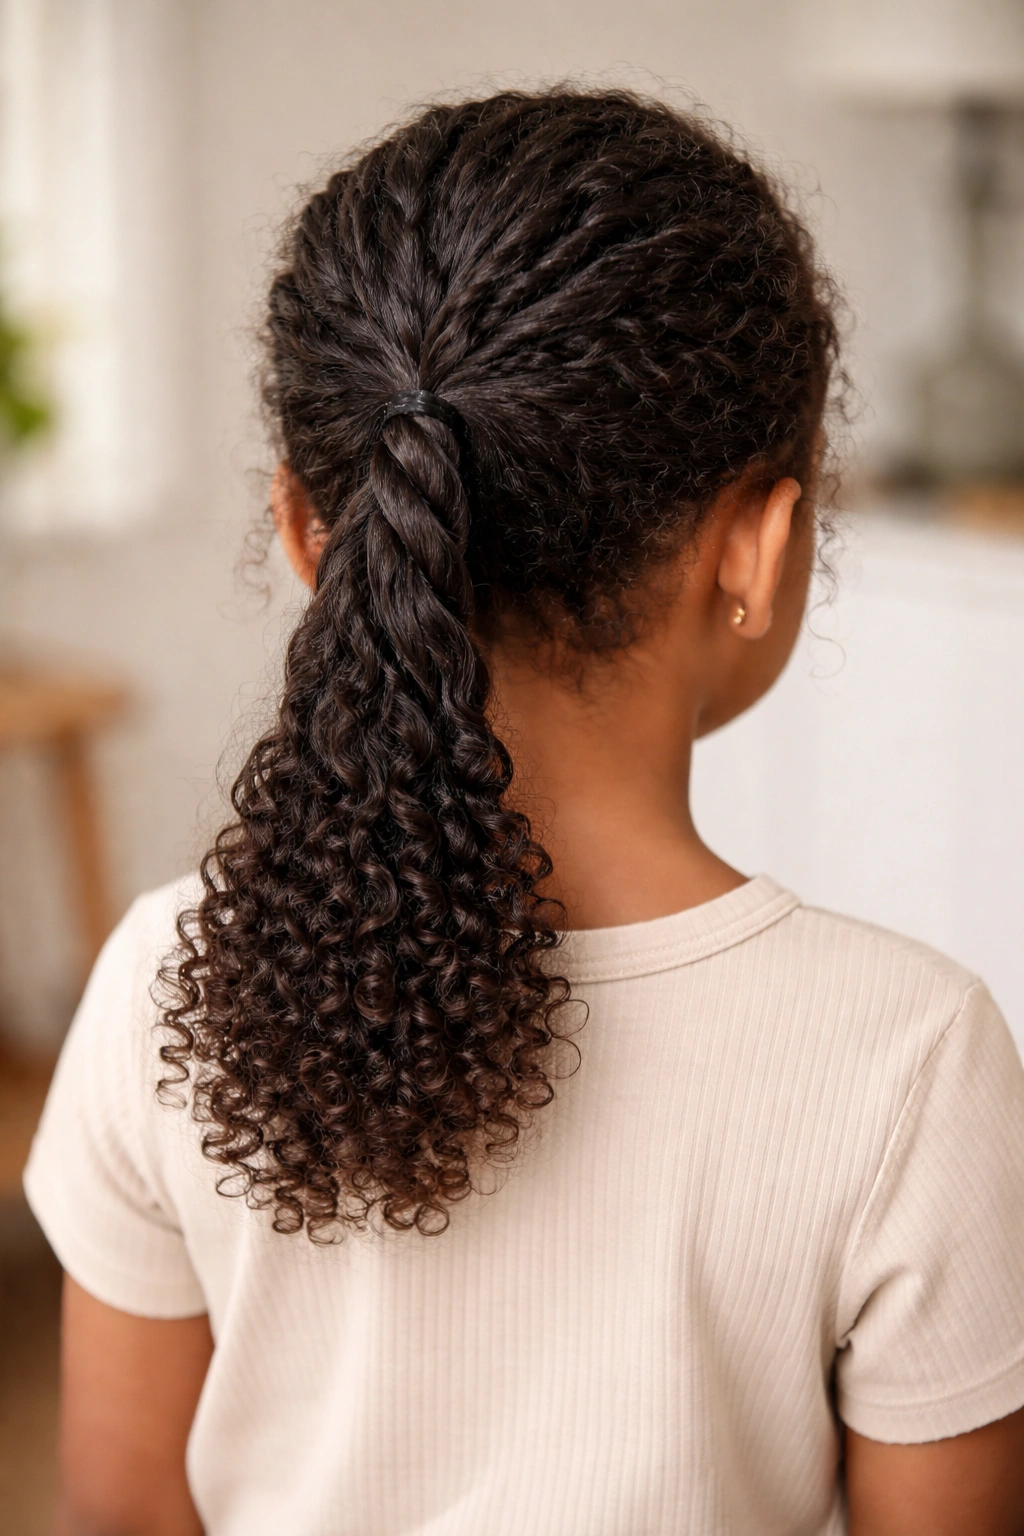
A two-strand twist is simpler than a three-strand braid, more forgiving on tangled curls, and honestly creates a really interesting visual texture. You’re essentially wrapping two sections of hair around each other in a spiral, then fastening the twisted section into a ponytail at the back.
What Makes This Different
Two-strand twists are gentler on curly hair than traditional braids because you’re not pulling three separate sections tight—you’re just twisting two sections together, which means less tension overall. If your kid’s curls are on the looser, wavier side, or if they tangle easily, this style is often easier to work with than a three-strand braid. The twist itself looks really intentional and modern, like you know what you’re doing with curly hair styling (even if it took you two minutes to create).
Real-World Durability
Two-strand twists can loosen slightly faster than three-strand braids, especially if the curls are very loosely textured, so this style works best for school days when you don’t need the hold to last 12+ hours. It’s ideal for after-school playdates, weekend activities, or mornings when you need quick coverage. The twist doesn’t need to be tight to look polished—in fact, a slightly loose, textured twist actually looks more intentional on curly hair than a super-tight one.
Worth knowing: Make sure both sections you’re twisting are roughly the same thickness, or the twist will look wonky and unravel faster on one side. The twist should feel firm but never tight enough that your kid complains about scalp tension.
3. Dutch Braid Into Curly Ponytail

A Dutch braid (the reverse of a French braid, where you weave sections under each other instead of over) creates a really striking 3D effect when you braid into curly hair. The braid sits on top of the head and follows the natural curve of the scalp, then releases into a full, gorgeous ponytail below.
Why Kids Love This Look
Dutch braids look way more impressive than regular braids, which means your kid feels fancy without the style actually being more complicated to create. The reverse-weaving pattern shows up beautifully against curly texture, and the contrast between the structured braid and the wild curls below is exactly what makes this style so visually interesting. It’s the kind of hairstyle that gets compliments from other kids and teachers.
How to Keep It Tight Enough
With curly hair, Dutch braids can get loose faster than with straight hair because the individual curl pattern makes the sections less cohesive. Start the braid slightly tighter than you normally would, and braid with sections that are a bit thicker than you’d use on straight hair—this gives you more grip. As you braid, keep light, constant tension by gently pulling each section slightly toward the center rather than waiting until the end to tighten up.
Pro tip: Do this style on day-two or day-three curls (after one or two days of wearing the curls loose). Older curls have already set into their wave pattern, which means they hold together better when you’re braiding and creating sections.
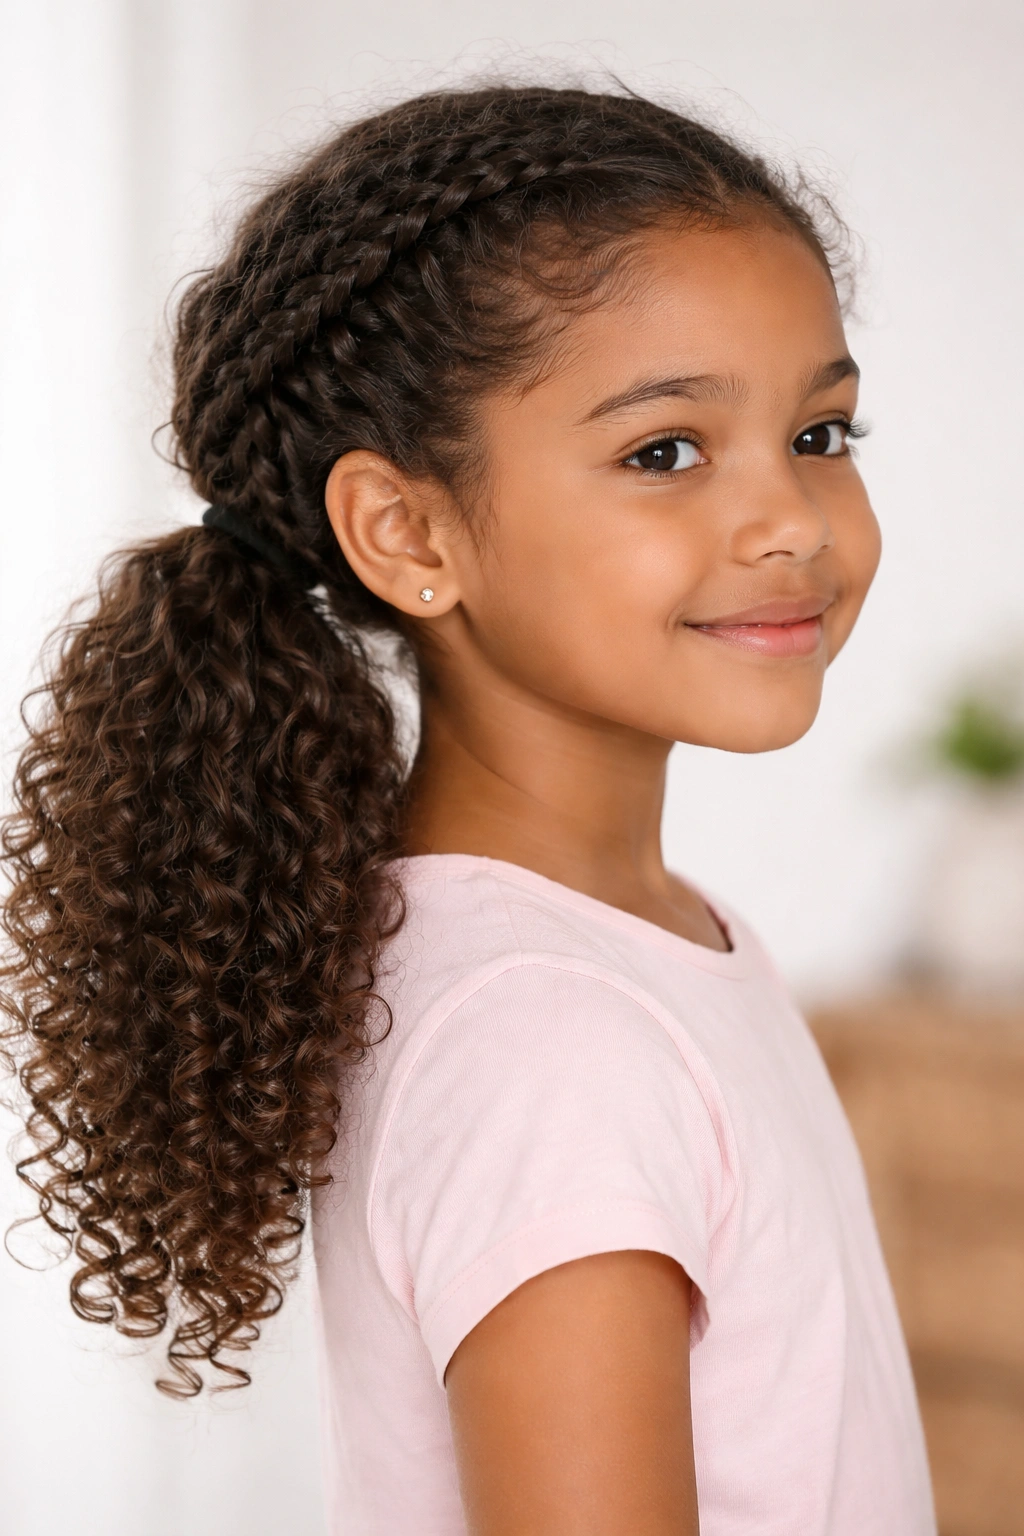
4. Braided Crown With Low Ponytail
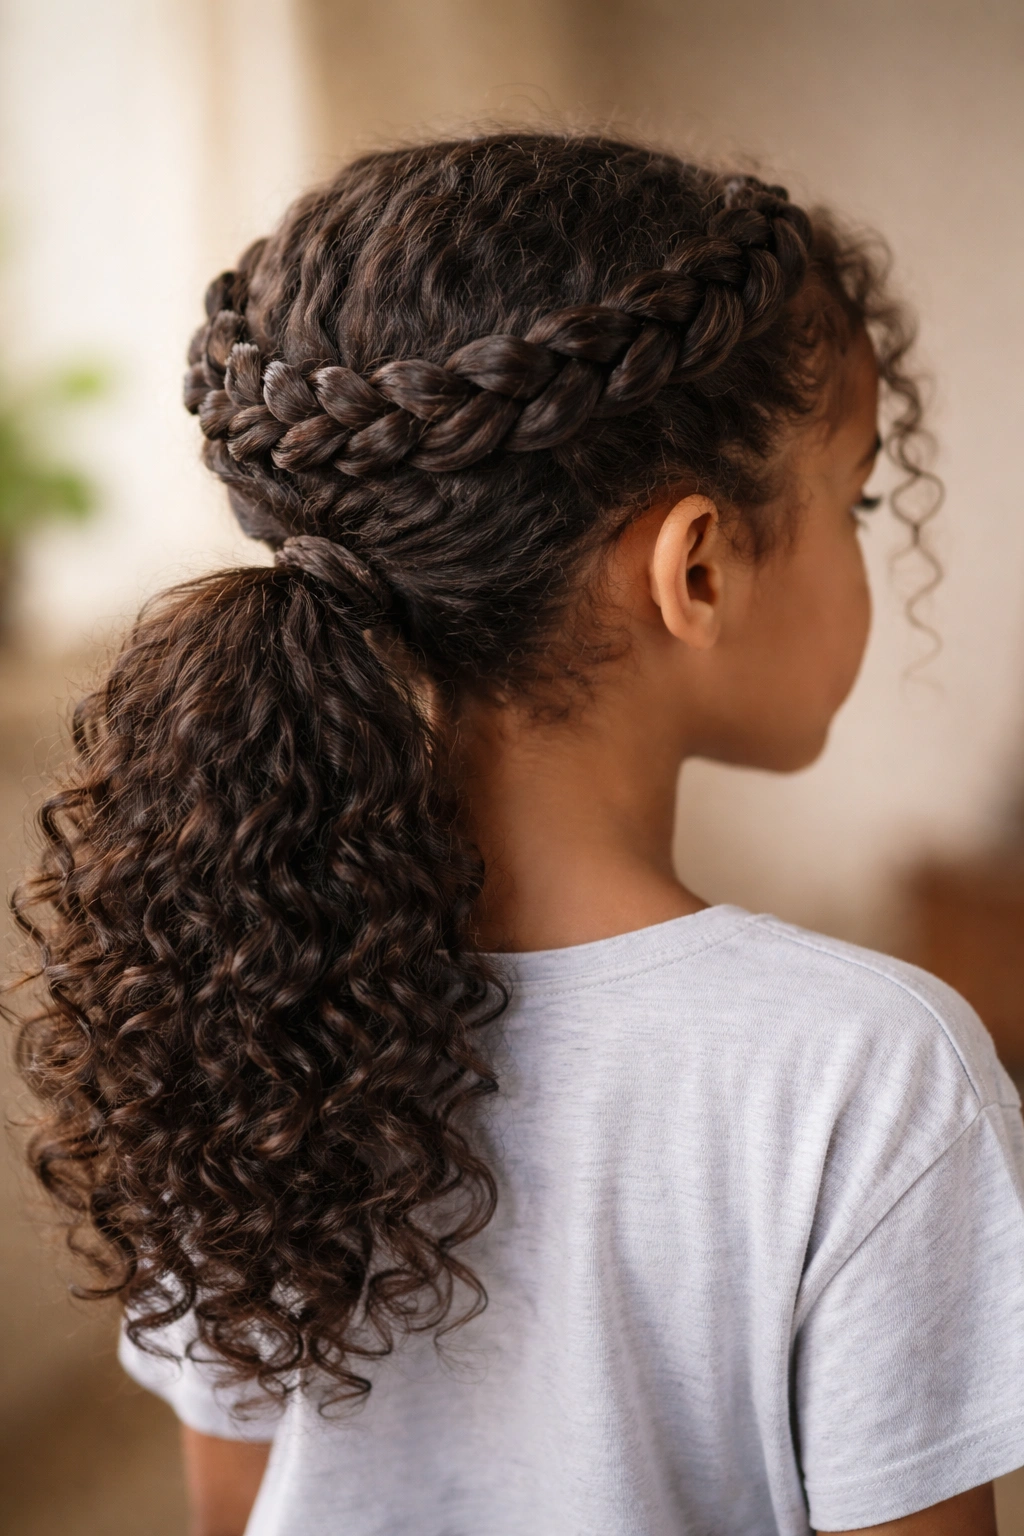
Instead of braiding from the crown straight down, you’re creating a braid that wraps around the head like a crown, starting at one ear, wrapping around the back, and ending at the other ear. All the remaining hair then falls into a low ponytail at the nape of the neck.
The Visual Impact
This style feels fancy—like your kid is ready for a special event—but it’s also practical enough for everyday wear. The braid wraps around the entire perimeter of the head, which means even if there are flyaways or loose pieces, they’re contained within the braided crown. The low ponytail hangs straight down the back, giving the impression of control and intentionality.
Technical Details That Matter
Start the braid at the temple area near one ear and braid horizontally around the back of the head (not down the back of the head). The braid path should curve with the natural shape of the head rather than fighting against it. Once you’ve wrapped around to the opposite ear, gather all the remaining loose hair into a ponytail at the nape. The ponytail sits below the braid, creating a layered effect—curly and full at the back, with the braided crown framing everything neatly.
Real talk: This takes a bit more practice than a simple back braid, so don’t be discouraged if your first attempt looks wonky. Once you’ve done it three or four times, your hands learn the path automatically.
5. Fishtail Braid Ponytail
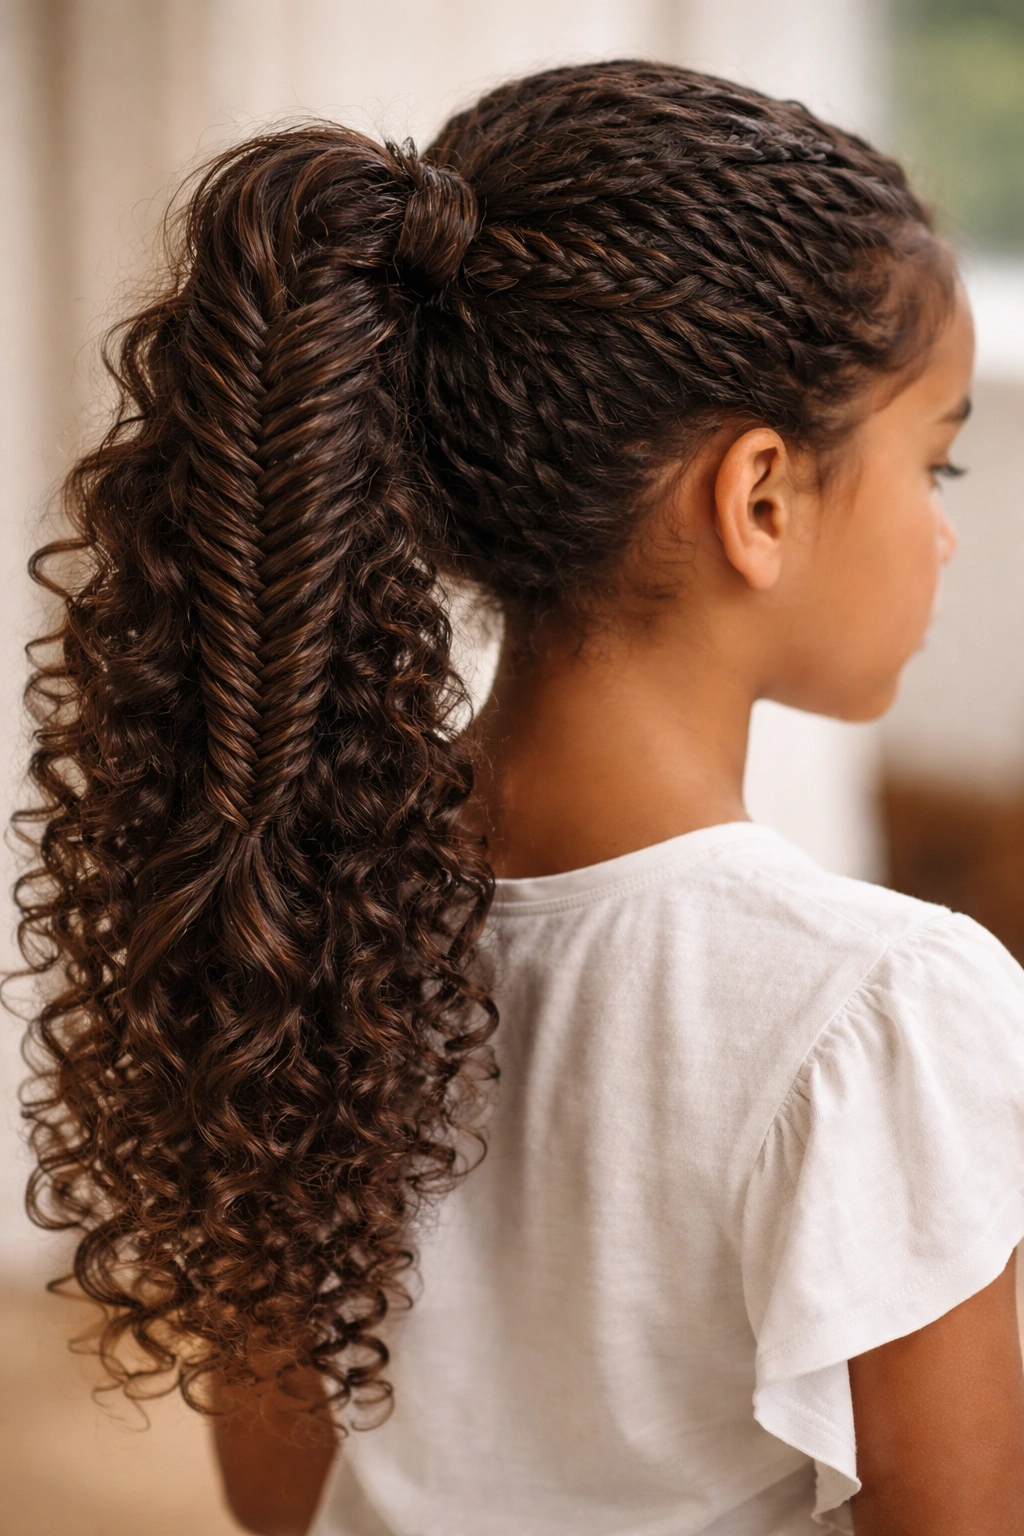
A fishtail braid looks incredibly intricate and fancy—it’s the hairstyle version of something that seems way harder than it actually is. Instead of three thick sections, you’re working with many tiny sections and weaving them in a specific pattern that creates a delicate, interwoven texture.
Why It Works on Curly Hair
Curly hair actually looks more interesting in a fishtail braid than straight hair does, because each individual curl creates texture and dimension within the braid. The fishtail pattern is so intricate that the natural texture of curls blends seamlessly into the design instead of looking messy. If you’ve been intimidated by fishtail braids on straight-haired friends, try one on curly hair—it’s genuinely easier and looks better.
The Actual Mechanics
Divide the hair into two thick sections. From the outside edge of the right section, take a tiny piece and cross it over to join the left section. Then take a tiny piece from the outside edge of the left section and cross it to the right. Keep alternating this pattern all the way down. The tiny crossover pieces create the fishtail effect. On curly hair, you don’t need to tighten these pieces as much as you would on straight hair—the curls grip automatically and hold everything together.
Worth knowing: Don’t aim for perfection with a fishtail braid on curly hair. A slightly loose, textured fishtail actually looks more intentional and beautiful than a super-tight, defined one. Let some of the individual curls poke out of the braid—that’s the whole point.
6. Rope Twist Ponytail
A rope twist is essentially a two-strand twist but done with the hair divided into four sections instead of two, creating a denser, more textured look. It’s a less common style, which means it stands out, and it holds up really well throughout the day on curly hair.
How It’s Different From a Regular Twist
Where a two-strand twist involves two sections wrapping around each other, a rope twist uses four sections twisted together, creating a rounder, thicker, more substantial-looking braid. The visual effect is somewhere between a regular braid and a twisted style—interesting and intentional. On curly hair, it looks really dimensional because each of the four sections shows its own curl pattern.
Step-by-Step Approach
Divide the hair into four roughly equal vertical sections. Pair the two left sections together and twist them around each other (like a two-strand twist), then pair the two right sections and do the same. Now you have two thick twisted sections. Twist these two thick sections around each other to complete the rope. Secure everything into a ponytail at the base.
The reality: This takes a little longer than a simple braid, so it’s better for days when you have five extra minutes rather than a rushed school morning. The payoff is that this style looks genuinely different from what other kids are wearing.
7. Three-Strand Braid With Curly Accent Ponytail
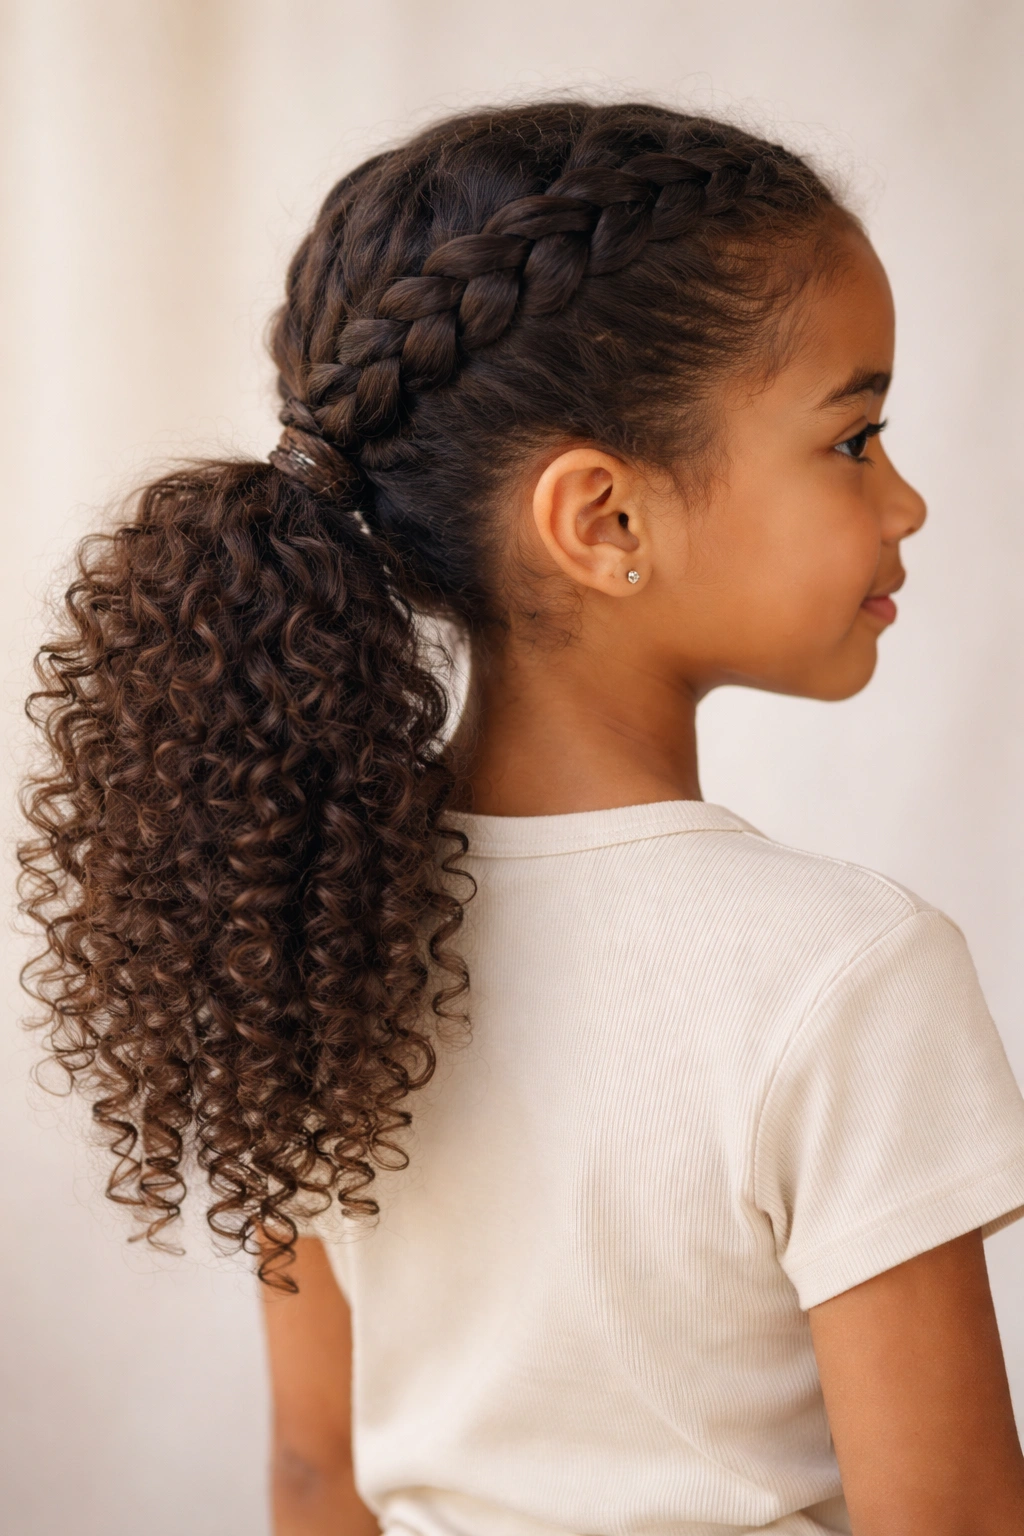
This is a very simple concept with a big visual payoff: braid the top section of hair (from the crown to about ear level), then release the bottom section into a full, curly ponytail that hangs below and slightly in front of the braid. The curly ponytail section frames the braid and creates a really interesting two-texture look.
Why This Look Works
The braid creates a polished, neat appearance, but the curly ponytail below keeps the style from looking too controlled or slicked-back. Curly-haired kids sometimes feel like braid styles make them look “too done” or overly tidy, but this style balances structure with natural curl texture. It’s the sweet spot between “looks nice” and “still looks like me.”
Creating the Two-Section Effect
Braid only the top section of the hair—you’re aiming to braid roughly from the crown to the bottom of the ears. Once you reach that point, gather both the braided section and all the loose curly hair below into a single ponytail at the nape. The visual effect is that the braid naturally transitions into the ponytail, but there’s clear definition between the structured braid and the curly ponytail section.
Pro tip: Don’t make the braided section too large, or you’ll end up with very little curly ponytail showing at the bottom. Aim for a braid that covers maybe the top third of the hair, leaving plenty of volume in the ponytail section below.
8. Side Braided Ponytail With Frizz Control
A side ponytail is inherently more playful and less formal than a centered back ponytail, and when you add a braid to control the sides, you get a style that looks effortless and put-together at the same time. The braid traces from one side of the head, and all the hair gathers into a ponytail over the shoulder.
How Frizz Control Happens Here
Because the braid runs along the sides of the head (where flyaways and frizz tend to happen first), it naturally contain the smaller, shorter hairs that usually escape from ponytails. The braid on the side means any loose curls are incorporated into the style rather than floating around the face. This is a genuine practical advantage, not just a visual one—a side braid ponytail actually keeps curly hair neater throughout the day.
The Execution
Start the braid at the temple area on one side and braid down and back toward the nape of the neck. Once you’ve braided roughly to ear level, gather all the remaining hair (both the braided section and the loose curls on the opposite side) into a ponytail. The ponytail hangs to one side (usually over the front shoulder), giving the whole style a casual, off-to-the-side energy.
Real-world note: Side ponytails are brilliant for active kids because even though the ponytail hangs to the side, the braided portion along the scalp keeps everything secured. This style actually holds better than you’d expect during sports or rough play.
9. Braided Bubble Ponytail
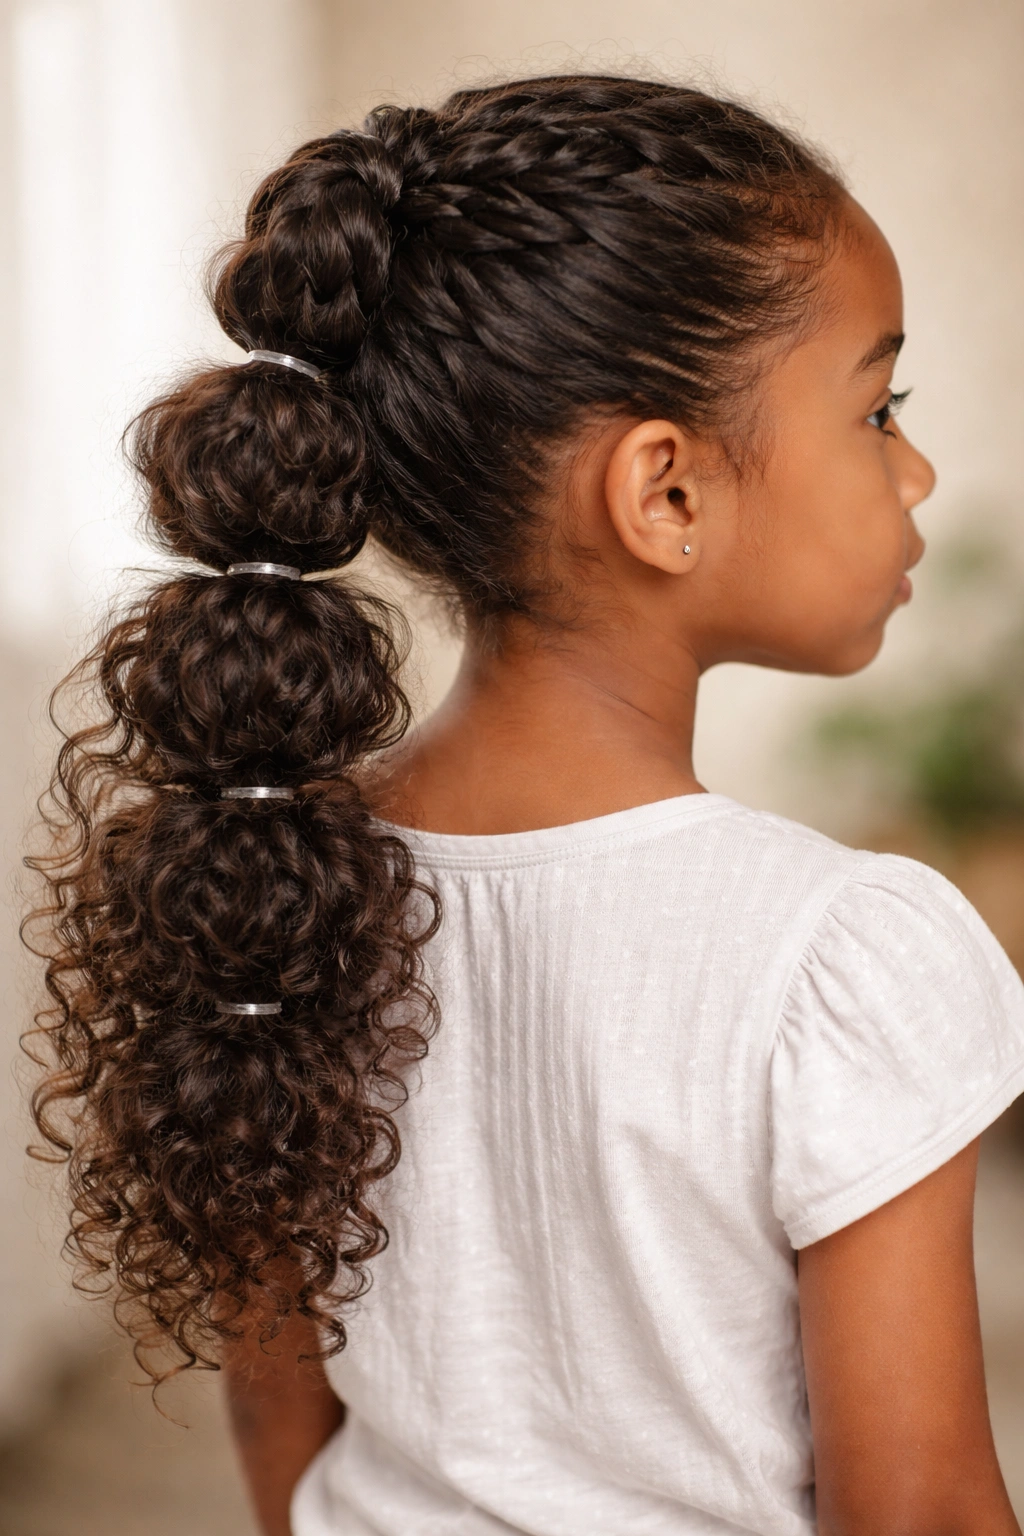
A bubble ponytail uses multiple elastics spaced down the length of a ponytail to create distinct “bubbles” of hair between each elastic. When you add a braid above the ponytail, you get a structured top with textured bubbles below—a style that’s both playful and polished.
Making Bubbles Look Intentional on Curly Hair
On straight hair, bubble ponytails can sometimes look a bit costume-y, but on curly hair, the bubbles look gorgeous and organic because the curls naturally puff out between each elastic. The curls actually define and enhance the bubble effect rather than requiring you to tease or crimp the hair artificially. Each bubble should be spaced roughly 2-3 inches apart, and the elastic placement is what creates the shape.
The Full Style Breakdown
Braid the top section of hair (crown to about the middle of the back of the head), then gather all the hair into a ponytail at the base of the braid. Now, secure additional elastics down the length of the ponytail—at about 2-3 inch intervals—to create the bubble sections. Between each elastic, gently push the hair upward and outward to make the bubble puff out. The curls do most of the work for you.
Worth knowing: This style looks amazing for 2-3 days and actually holds better on the second and third days after initial styling, because the curls have time to fully set around the elastics.
10. French Braid Wrapped Ponytail
A French braid starts at the crown and gradually incorporates more hair as you braid downward. Instead of stopping the braid at the nape and tying everything into a ponytail, you’re incorporating all the hair into the braid itself, then wrapping the end of the finished braid around the base to create a wrapped, bundled look.
The Visual Result
This style looks incredibly polished and intentional—it’s the kind of hairstyle that makes people ask “how did you do that?” even though the actual technique is just a French braid plus one extra step. The wrapped finish at the base creates a really clean, finished look that’s perfect for special occasions but also works beautifully for everyday wear.
How the Wrap Works
Once you’ve finished your French braid (which incorporates all the hair from crown to nape), you have a long braid tail at the bottom. Instead of just tying this with an elastic, you’re going to wrap it around the base of the braid—creating a coil or wrapped effect. Secure this wrapped section with bobby pins and a small elastic hidden underneath. The visual effect is that the ponytail is bundled into a neat, compact shape at the base of the head.
Pro tip: This works best on slightly damp or product-set curls, because the wrap needs to hold its shape. Use a flexible bobby pin (the kind that grips without snagging) and tuck it under the wrapped section where it won’t be visible. If pieces come loose during the day, a quick spritz of curl refresher spray resets them.
Final Thoughts
Braided ponytails are genuinely transformative for managing curly hair on active kids. These styles aren’t about fighting your kid’s natural curl texture or forcing their hair into a mold—they’re about choosing techniques and approaches that let curls do what they do best while keeping everything neat and secure.
The key thing to remember is that curly hair doesn’t need to be slicked, gelled, or perfectly smooth for a braided style to look good. In fact, the slightly textured, lived-in appearance is what makes curly-haired braided styles look intentional and beautiful. Your kid’s curls are a feature, not something to overcome.
Start with whichever of these styles feels most doable for your skill level and your kid’s hair texture, then build from there. Most kids are pretty patient when they know they’re getting to choose a style that makes them feel confident and special—and honestly, once you’ve done one of these styles a few times, your hands remember the technique and it gets faster each time.