If you’ve scrolled through any beauty feed lately, you’ve probably noticed one hairstyle dominating: the double weave ponytail. This isn’t your regular pony — it’s a sleek, sophisticated style that combines the polished look of wrapped sections with the precision of a weaved pattern. The magic happens when you weave two sections of hair around your base ponytail, creating dimension and an impossibly neat finish that somehow looks effortless. Double weave ponytails work for everything from casual Fridays to red carpet moments, and the best part? Once you understand the basic technique, the variations are endless.
The beauty of double weave ponytails lies in their versatility. You can go impossibly sleek with a high, tight wrap, or soften the look with low placement and looser weaving. Texture matters too — whether you’re working with your natural hair, adding extensions for volume, or incorporating metallic threads and ribbons for drama. The double weave technique gives you a polished base that reads as both intentional and intricate, which is exactly why this style has become the go-to for people who want their hair to look professionally styled every single day.
What makes double weave ponytails special is that they actually work on different hair types and textures. Fine hair gets visual thickness from the wrapped sections. Thick, curly hair benefits from the smoothing effect of the weave pattern. Length isn’t mandatory either — you can adapt this technique to shoulder-length hair or waist-length lengths. The technique is also incredibly forgiving; small imperfections in the weave actually add to the textured, intentional vibe.
Let’s walk through ten stunning ways to wear a double weave ponytail, each with its own aesthetic and practical advantages.
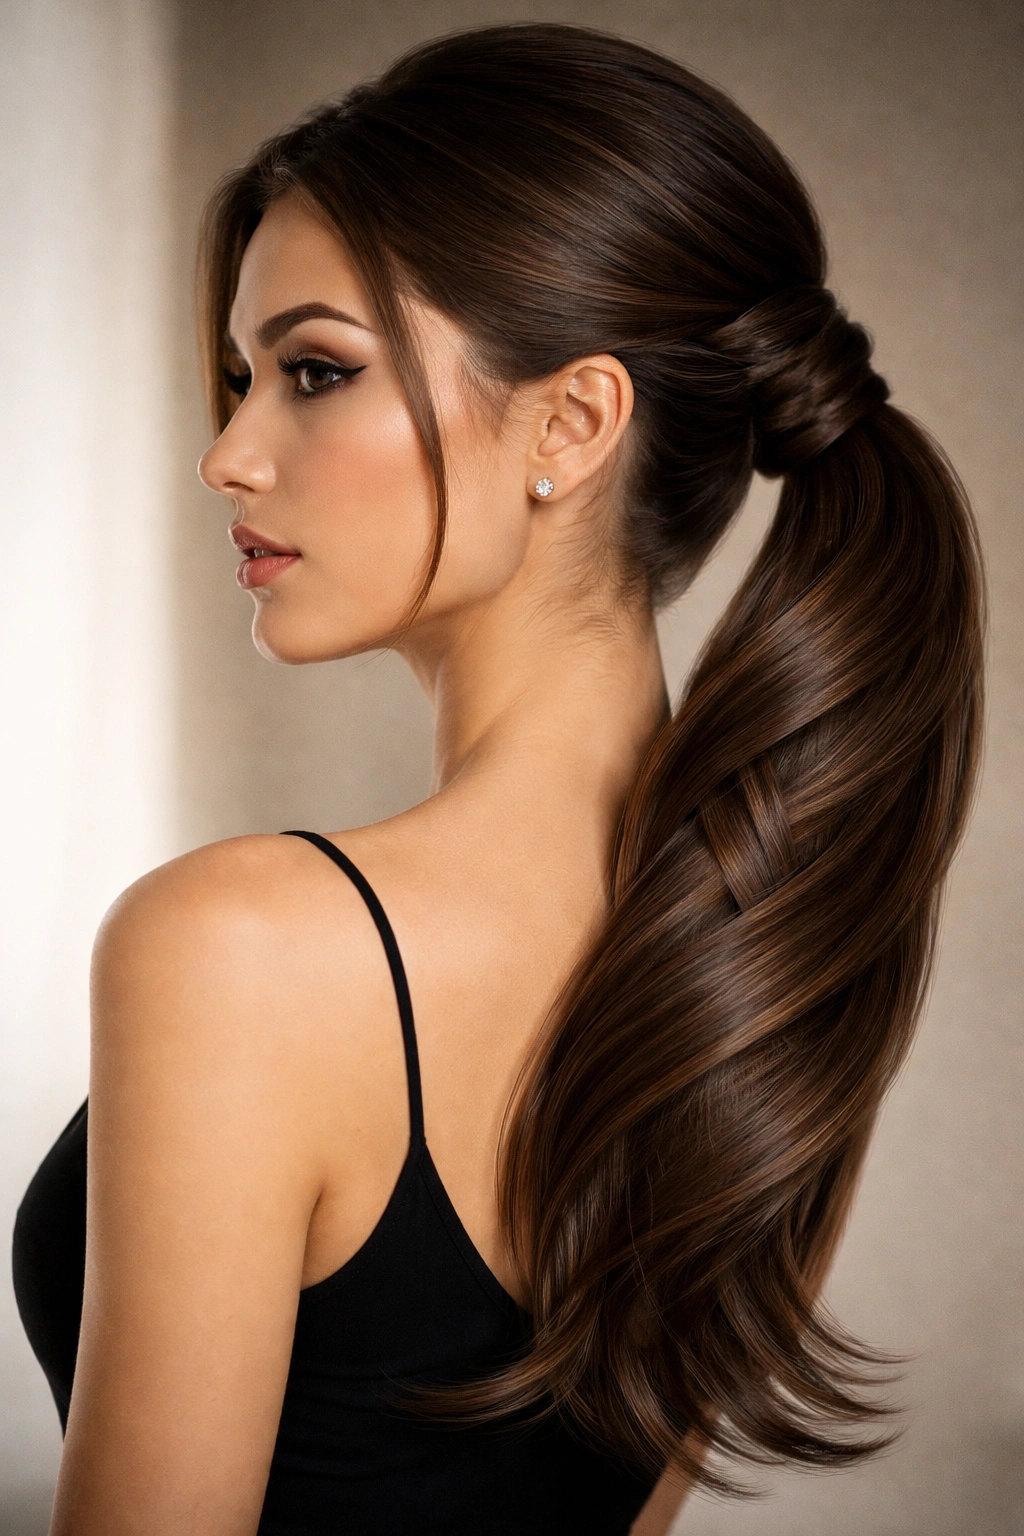
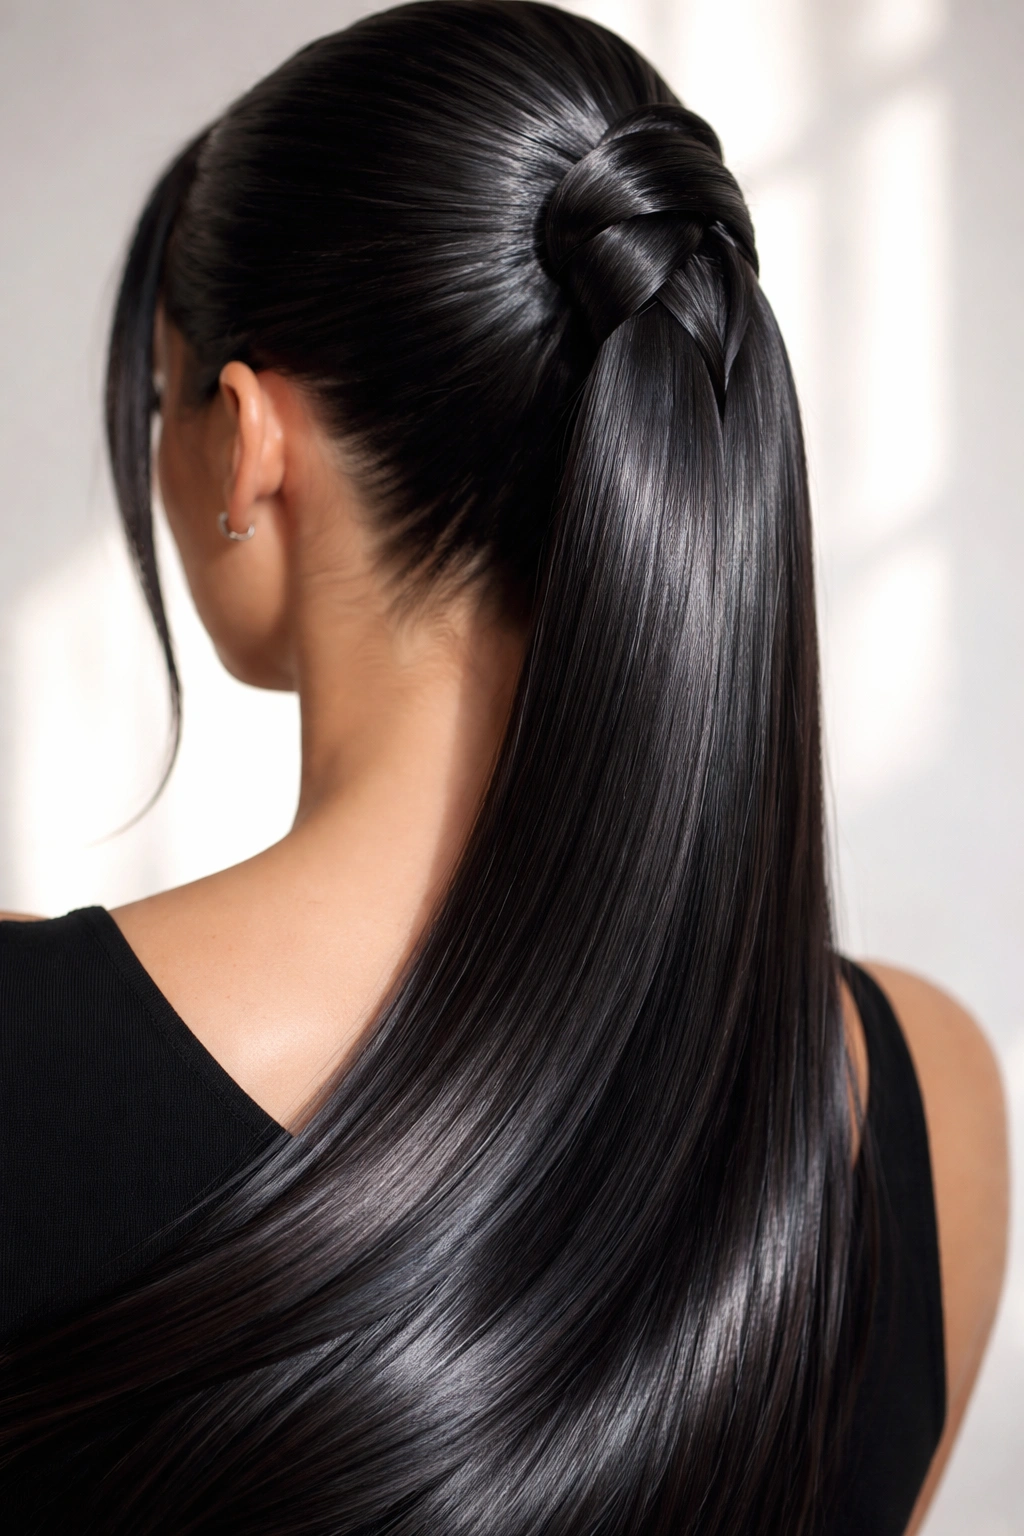
1. Classic High Double Weave with Sleek Finish
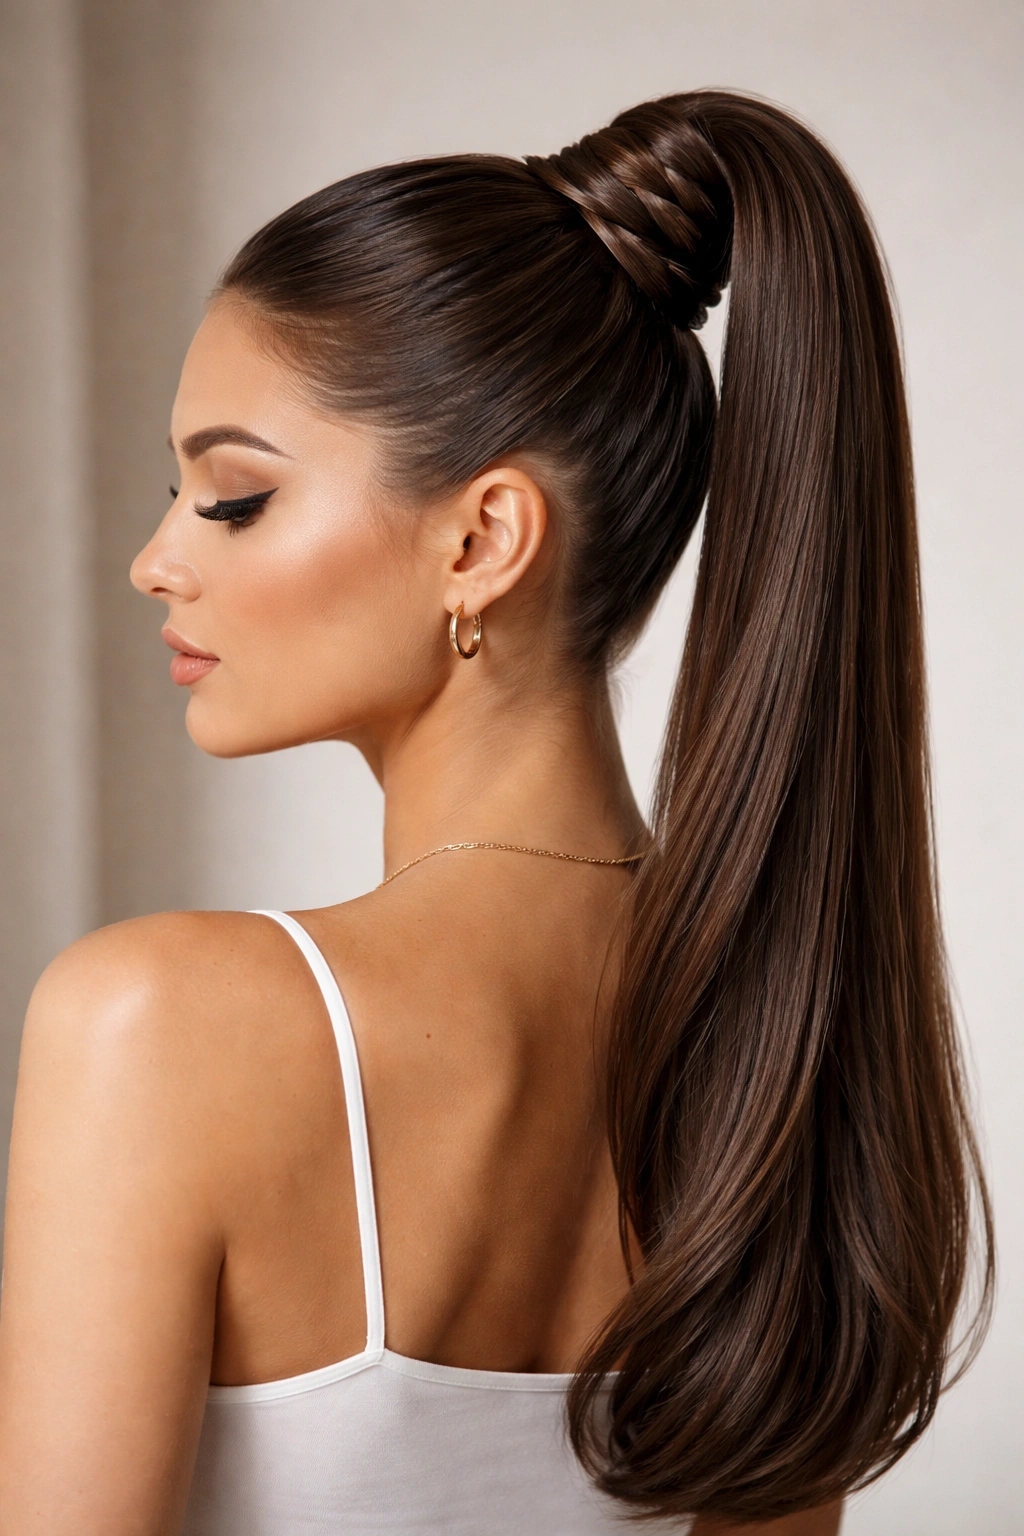
A high double weave ponytail sits at the crown of your head, creating an elongating effect that’s perfect for showing off your facial features and neck. This version is the most polished variation of the style — it reads as intentional, styled, and put-together from every angle. The height naturally lifts the face and creates a clean, graphic look that works for professional settings, special events, or whenever you want your hair to make a quiet statement.
How to Achieve the Look
Start with hair that’s either freshly washed and blown out smooth, or apply a smoothing serum to damp hair before blow-drying. Section your hair into two equal parts vertically down the center back of your head — imagine a line from your part straight down to the nape of your neck. Create your base ponytail high at the crown using a elastic that matches your hair color. Smooth any flyaways with a fine-tooth comb and a lightweight hairspray as you work.
Take the first section from the left and begin wrapping it around your base ponytail in a weaving pattern — over, under, over, under — working your way down the elastic. Secure the end of this section with a small clear elastic or bobby pin. Repeat with the second section on the right side, interweaving it with the first section as you go. The finished weave should sit snugly against your elastic without any loose ends visible.
Why This Version Stands Out
The high placement creates an immediate face-framing effect that draws attention upward. The double weave structure adds visual dimension without any extra volume needed — your two-section weave creates the illusion of an intricate pattern even if you’re working with moderate hair thickness. This style photographs beautifully and holds all day without slipping or loosening, making it ideal for long days, special events, or professional settings where your hair needs to look flawless from morning through evening.
Key Points to Remember
- Use a fine-tooth comb to smooth hair before securing the base ponytail
- Choose elastics in your hair color to create an invisible finished effect
- The weave pattern should be snug but not so tight that it creates tension headaches
- A lightweight hairspray keeps flyaways in place without the stiffness of heavy product
- This style works best on hair that’s at least shoulder-length for enough length to weave properly
2. Low Sleek Double Weave for Effortless Sophistication
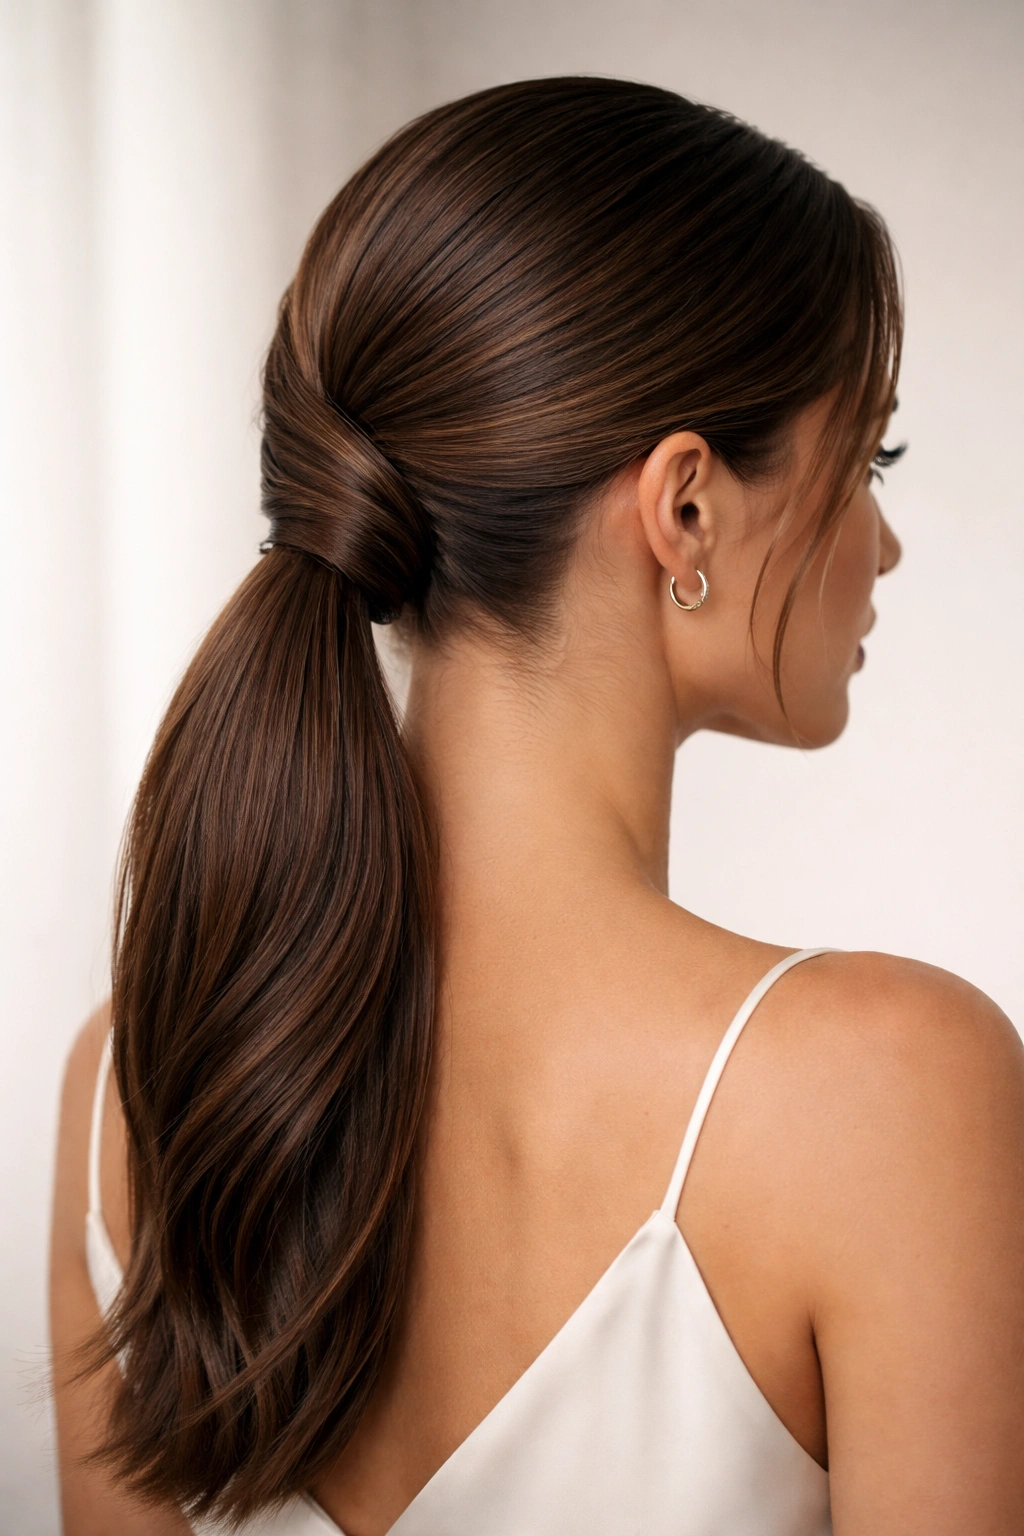
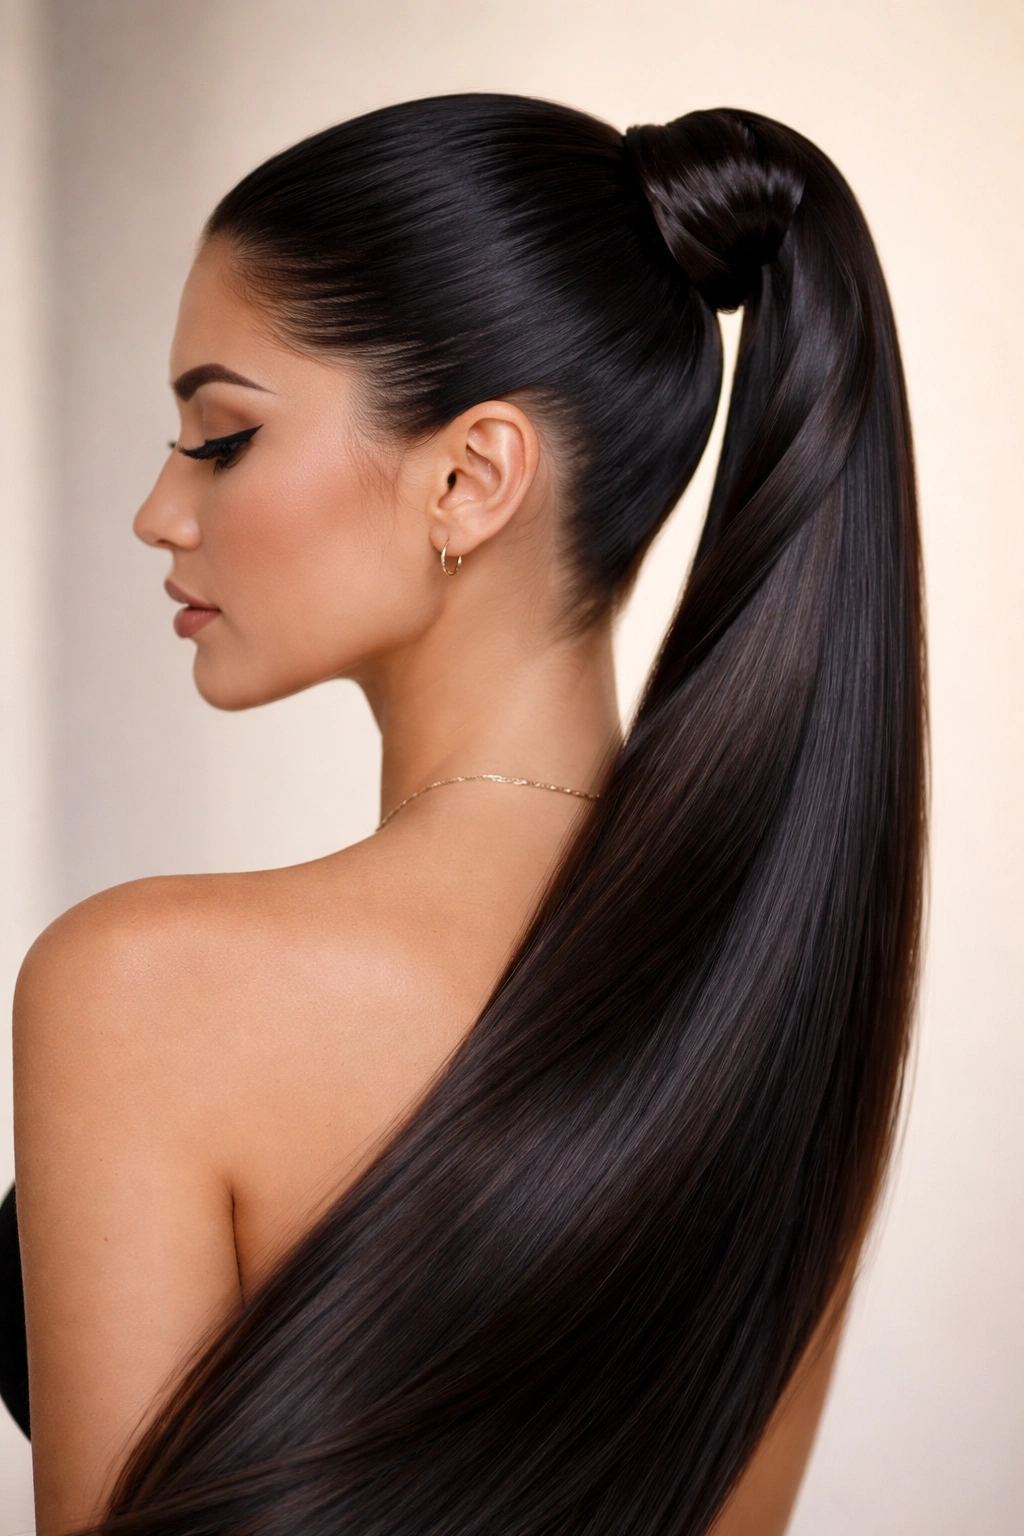
A low ponytail sits at the nape of your neck, creating a completely different energy than its high counterpart. This version reads as more relaxed and sophisticated simultaneously — it’s elegant without trying too hard. The low placement balances longer faces beautifully and creates an elongating line from the side profile. This is the version celebrities wear when they want to look polished but not over-styled.
Building Your Low Weave
Begin with smoothed hair — a light serum or smoothing cream applied to damp hair before blow-drying creates the sleekest possible base. Gather your hair low at the nape of your neck and secure with an elastic. Position this base ponytail slightly off-center rather than directly at center back; this asymmetrical placement adds visual interest and prevents the style from looking too rigid.
Divide the ponytail into two equal sections. Begin with the section closest to your dominant hand and start your weaving pattern, wrapping it around the base elastic. Each pass should be deliberate and even — the more consistent your weave pattern, the more intentional and polished the final result looks. Work methodically down the elastic, securing the end of your first section. Then repeat with the second section, weaving it in a contrasting pattern so the two sections interact visually rather than just sitting parallel to each other.
What Makes the Low Placement Special
Low ponytails with double weaving create a sense of calm sophistication. There’s no tension pulling your face upward, so the style feels easier to wear for extended periods. The nape placement allows the weave pattern to be clearly visible from behind, which means this is the perfect version if you want other people to see the intricate work you’ve put into your hair. Photographed from the side, a low double weave creates an elegant line from ear to nape that’s incredibly flattering.
Styling Notes
- Smooth flyaways at the nape with a small brush and lightweight hairspray
- Secure your weave ends with bobby pins that match your hair color for invisibility
- This style works beautifully with a middle part or a deep side part
- Adding a silk elastic instead of a standard hair tie reduces friction and breakage
- The low placement means this style is comfortable enough for all-day wear
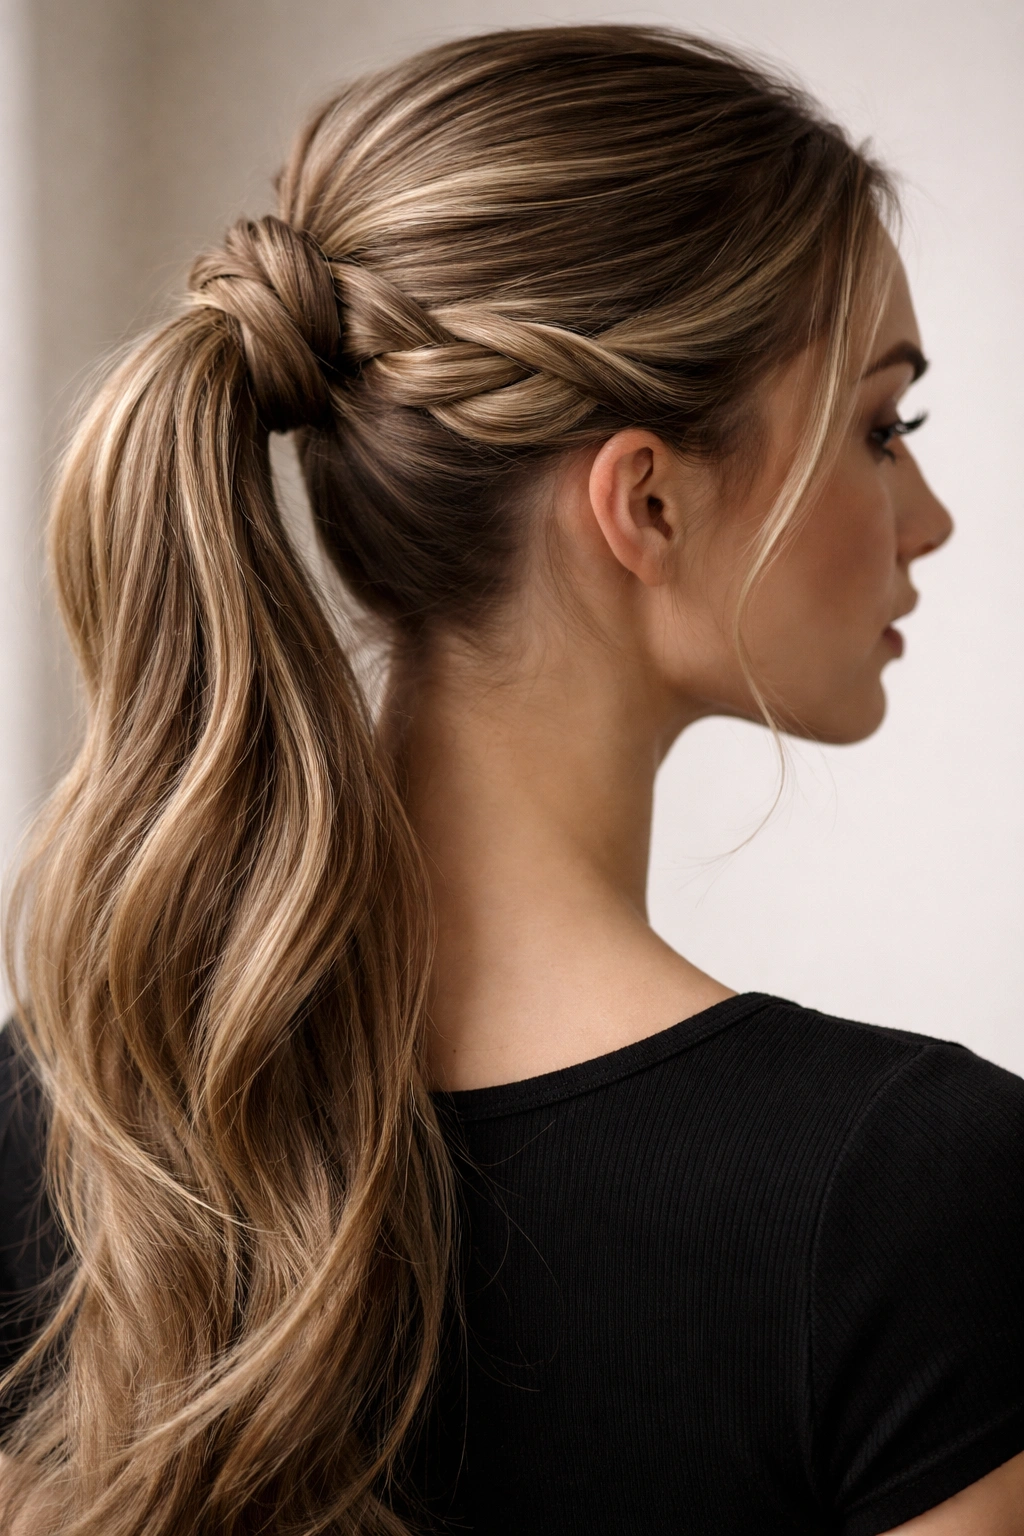
3. Braided Double Weave with Texture and Dimension

Adding a braid component to your double weave takes the style from simple to statement. When you incorporate a braid into one or both sections before weaving them around your base, you create layers of texture that catch the light and add visual depth. This version works beautifully on finer hair types because the braid adds the appearance of fullness without requiring you to tease or backcomb.
The Braiding Technique
Before you gather your ponytail, decide which section you want to braid. A classic approach is to braid just one side — typically the right side if you’re right-handed, as it’s easier to create an even, tight braid. Create a three-strand braid starting near your ear or temple and working toward the back of your head, incorporating hair as you braid to create a traditional French or Dutch braid depending on your preference (Dutch braid sits on top; French braid sits slightly beneath the surface).
Gather your hair into your base ponytail, positioning the finished braid so it wraps naturally around the elastic. Now take your plain second section and weave it around the base ponytail alongside the braided section. The plain weave interacts with the braided texture, creating a mixed-media effect that’s far more complex looking than it actually is to execute. The final result reads as intricate and designer-level even though it’s achievable in fifteen minutes with practice.
Why Texture Transforms the Style
A braided double weave works because texture catches light differently than smooth sections do. This means even fine or thin hair reads as fuller and more dimensional. The braid also adds a detail layer that draws the eye and makes people assume you’ve spent hours on your hair when you’ve actually just added one simple braid to your routine. This style bridges casual and formal perfectly — it’s polished enough for professional or special-event settings, but the texture keeps it from feeling overly formal.
Pro Tips for Braided Weaves
- Braid slightly looser than you think you need to; this creates volume and prevents the braid from pulling too tightly
- Use a fine-tooth comb to smooth your second section before weaving to create contrast with the textured braid
- Mist the finished style with a flexible-hold hairspray that allows movement rather than locking everything in place
- If your braid feels too tight, gently tug at the edges to loosen and fluff it
- This version photographs especially well because the texture creates natural dimension
4. Curved Double Weave Wrap for Visual Interest
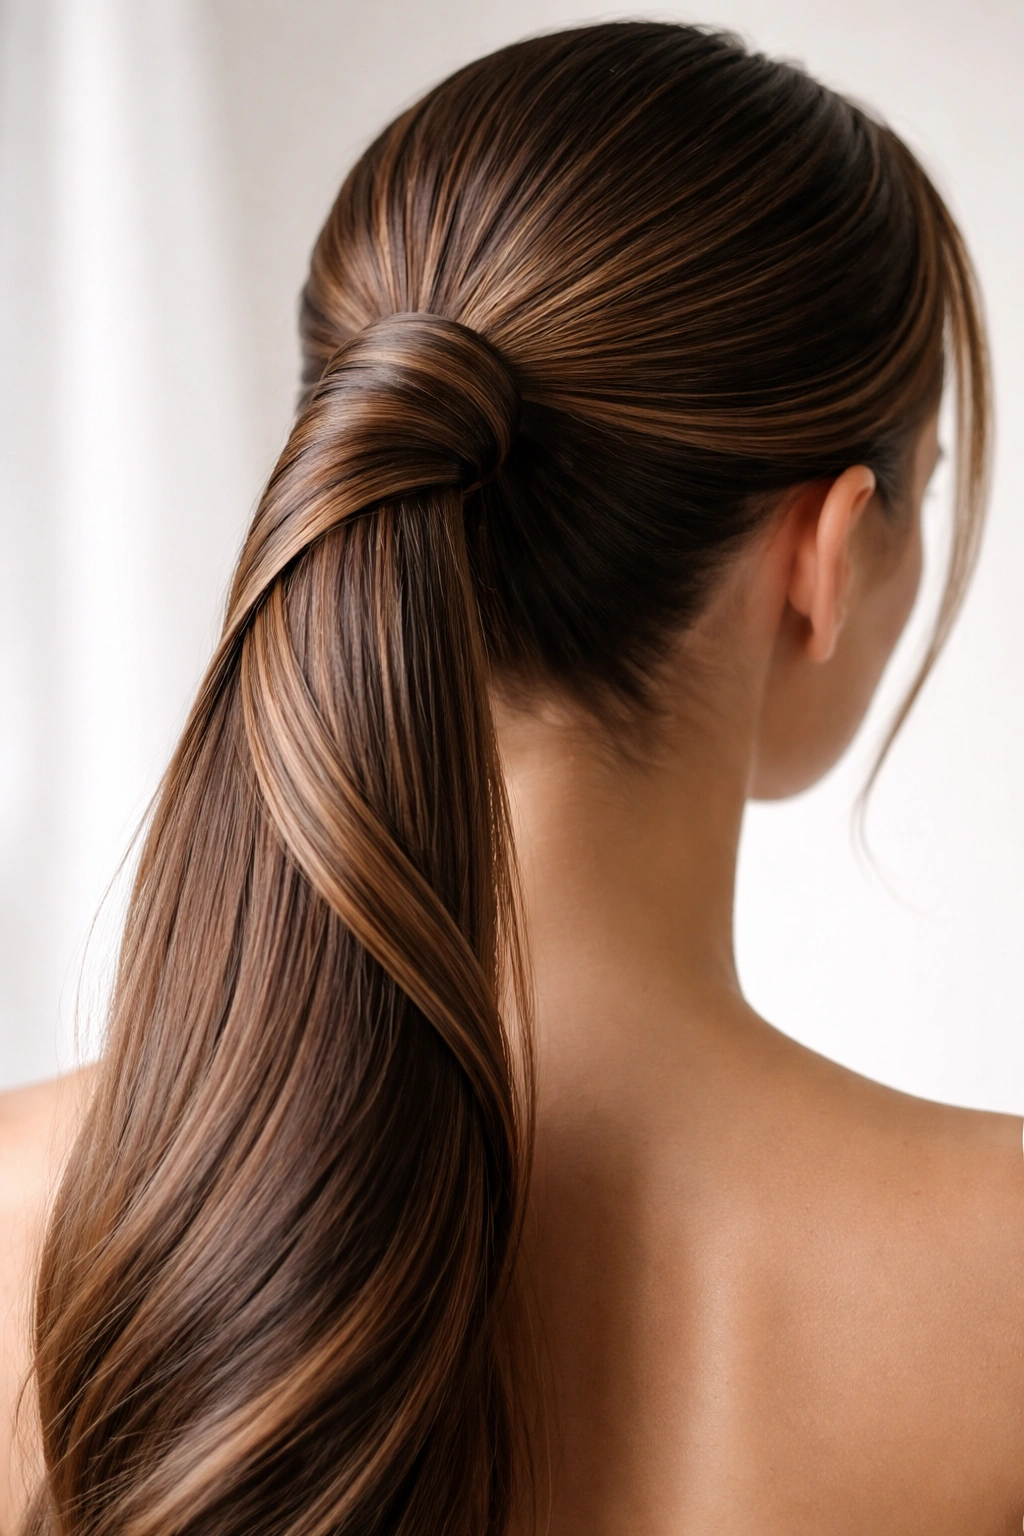
Instead of weaving straight down, a curved double weave wraps around your ponytail base in a spiral or diagonal pattern. This variation changes the entire visual dynamic of the style by adding movement and visual flow. Where a straight weave creates a graphic, structured look, a curved weave feels more organic and fluid while maintaining that sleek, polished aesthetic.
Creating the Curved Pattern
Start with your base ponytail secured high or low depending on your preference. The curved effect works better with a slightly looser base than you’d use for a straight weave, as you need room for your sections to spiral around the elastic without tension. Take your first section and begin weaving at an angle — instead of going straight down, angle your path so the weave naturally curves as it descends toward the end of your elastic.
Each pass of your weaving section should move diagonally as well as vertically. If you’re working on a right base ponytail, angle your first section to spiral clockwise around the elastic. Your second section spirals counter-clockwise, and the two sections create a helix or double-helix effect around your ponytail base. This technique requires slightly more concentration than a straight weave, but once you understand the pattern, it becomes second nature.
The Visual Impact of Curved Weaving
A curved weave creates movement even though your hair is secured and still. The spiral pattern draws the eye downward and creates a sense of motion. This version is especially flattering on longer ponytails because the curved pattern becomes increasingly visible as you move down the length. From certain angles, a curved double weave looks like your hair is naturally spiraling, which creates an almost mesmerizing effect.
Execution Tips
- Mark where you want your spiral to go by mentally dividing your elastic into three zones: top, middle, bottom
- Plan your angle before you start weaving so both sections follow the same spiral direction
- Tighter spirals create a more defined pattern; looser spirals look more organic
- This curved style pairs beautifully with center parts and side parts equally
- Curved weaves work especially well on thicker hair where the texture holds the spiral shape
5. Double Weave with Layered Texture Integration
Mixing smooth sections with textured, slightly crimped, or wave-styled sections creates a double weave that has multiple levels of visual interest. This version is perfect if you want dimension and sophistication without looking overly formal. The layered texture approach works beautifully on all hair types and actually benefits from hair that isn’t perfectly smooth.
Creating Intentional Texture Contrast
Before you gather your ponytail, style one section with a waver tool, curling iron, or crimper to add texture. Keep the texture loose and subtle rather than tight curls — you want the section to feel voluminous and textured, not obviously curled. Your second section remains smooth and sleek. The contrast between smooth and textured sections is what makes this version visually interesting.
Gather your hair into a base ponytail. Begin weaving your textured section around the elastic first, letting the waves or texture show. Then weave your smooth section alongside it. The smooth section emphasizes the texture of the first section, and together they create a style that reads as intentionally mixed-media rather than like one section is smooth and one is wavy.
Why Texture Contrast Works
Texture contrast prevents the double weave from looking too rigid or formal. It adds personality and movement while maintaining the sleek, polished vibe. This approach also means you don’t have to achieve perfect smoothness with heat tools and serums — you’re actually celebrating texture rather than fighting against it. People with naturally textured or curly hair can rock this version beautifully by simply not completely smoothing one section before weaving.
Building Texture Intentionally
- Use a waver tool for soft, uniform waves that integrate seamlessly
- A curling iron creates looser, more romantic texture than a crimper
- Rough-dry one section with a blow dryer for organic-looking volume
- Smooth one section with a flat iron or smoothing serum for maximum contrast
- The more obvious your contrast between sections, the more intentional your style looks
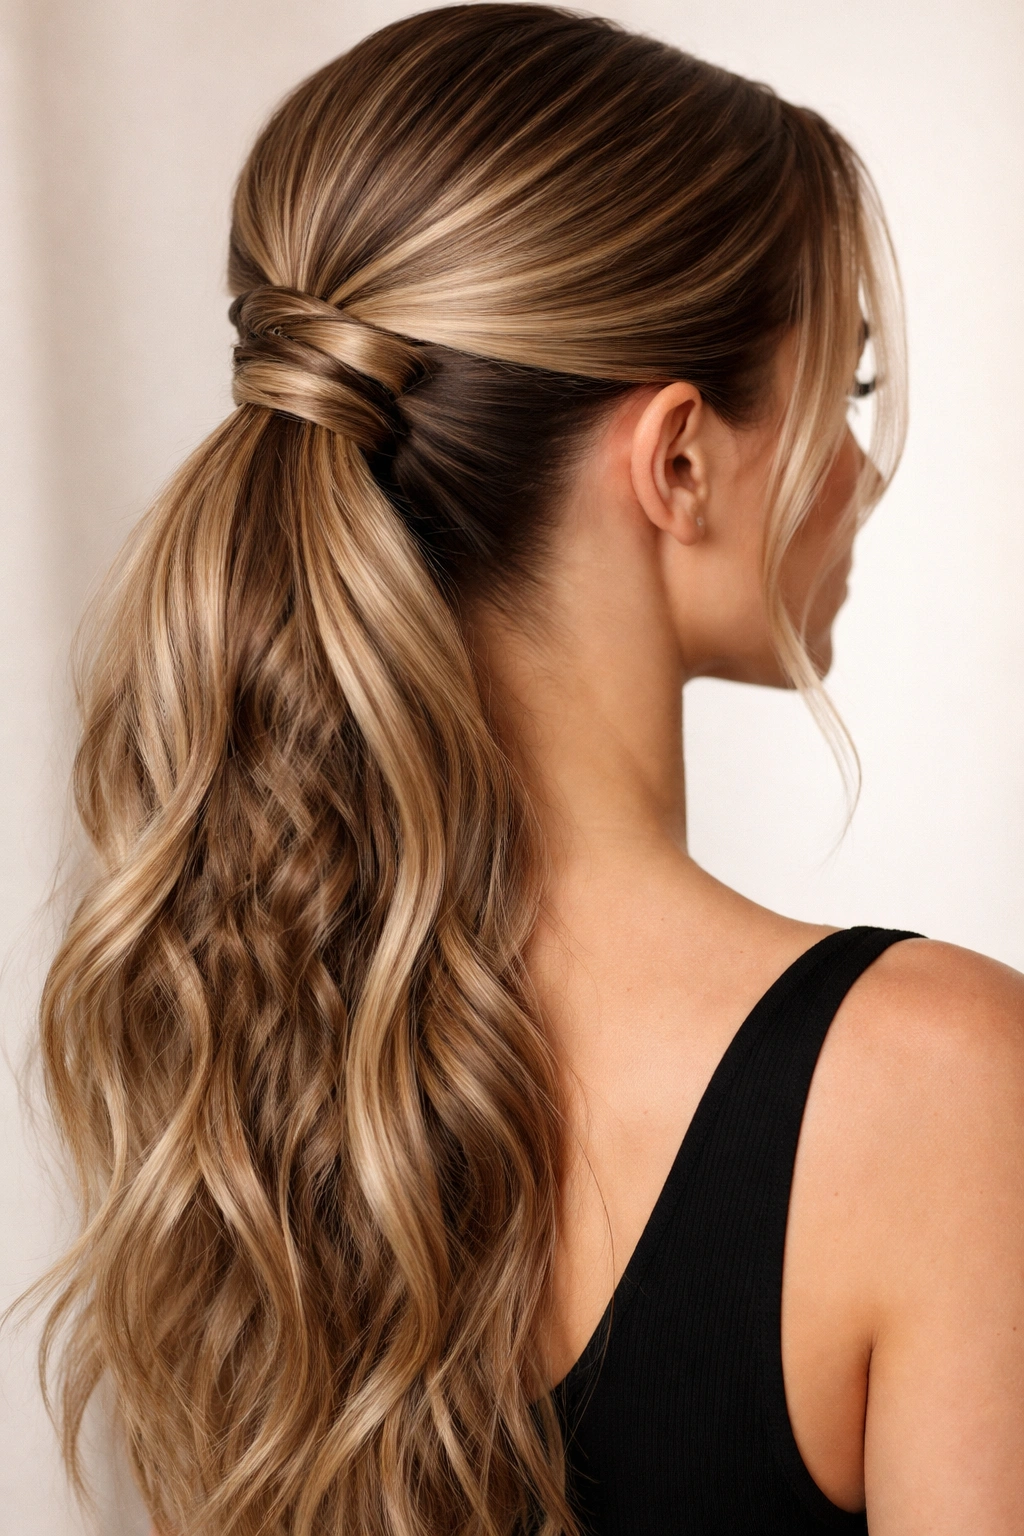
6. Side-Swept Double Weave for Asymmetrical Impact
A side-swept double weave pulls the entire composition off-center, creating an asymmetrical silhouette that’s both modern and flattering. This version works brilliantly if you’re wearing your hair down in front but want it off your face in back, or if you simply prefer the visual balance of an off-center ponytail. The side placement adds sophistication and an unexpected edge to the traditional ponytail shape.
Positioning for Side-Sweep Impact
Create your base ponytail significantly off-center — think one-third to the side rather than directly at center back. A deep side part complements this style perfectly and creates a cohesive line from your part through to your ponytail placement. The off-center base automatically pulls your hair in one direction, so your weaving sections naturally follow that directional flow rather than fighting against it.
Begin your weave with whichever section sits closer to your dominant hand, and let the pattern naturally follow the direction your hair is already being pulled. The beauty of the side-swept version is that it looks less formal and more effortlessly styled than a centered double weave. Even though you’ve used the same technique, the placement creates an entirely different energy.
The Visual Benefits of Off-Center Placement
Side-swept ponytails balance broader faces by creating an asymmetrical line that draws the eye away from width. They also create a sense of movement and modernity — this is the version to choose if you want your double weave to feel contemporary rather than classic. From the front, a side-swept double weave is barely visible; the style reveals itself more dramatically from behind and in profile, which is perfect if you prefer subtle sophistication.
Styling Considerations
- A deep side part creates the most flattering frame for side-swept placement
- Smooth any baby hairs on the side that’s been combed away from your face
- The off-center positioning means this style is less symmetrical and more forgiving of minor imperfections
- Side-swept ponytails feel less formal and work beautifully for casual, everyday wear
- This version pairs well with statement earrings since one side of your face and ears are more exposed
7. Double Weave with Metallic Accent Thread for Evening Drama
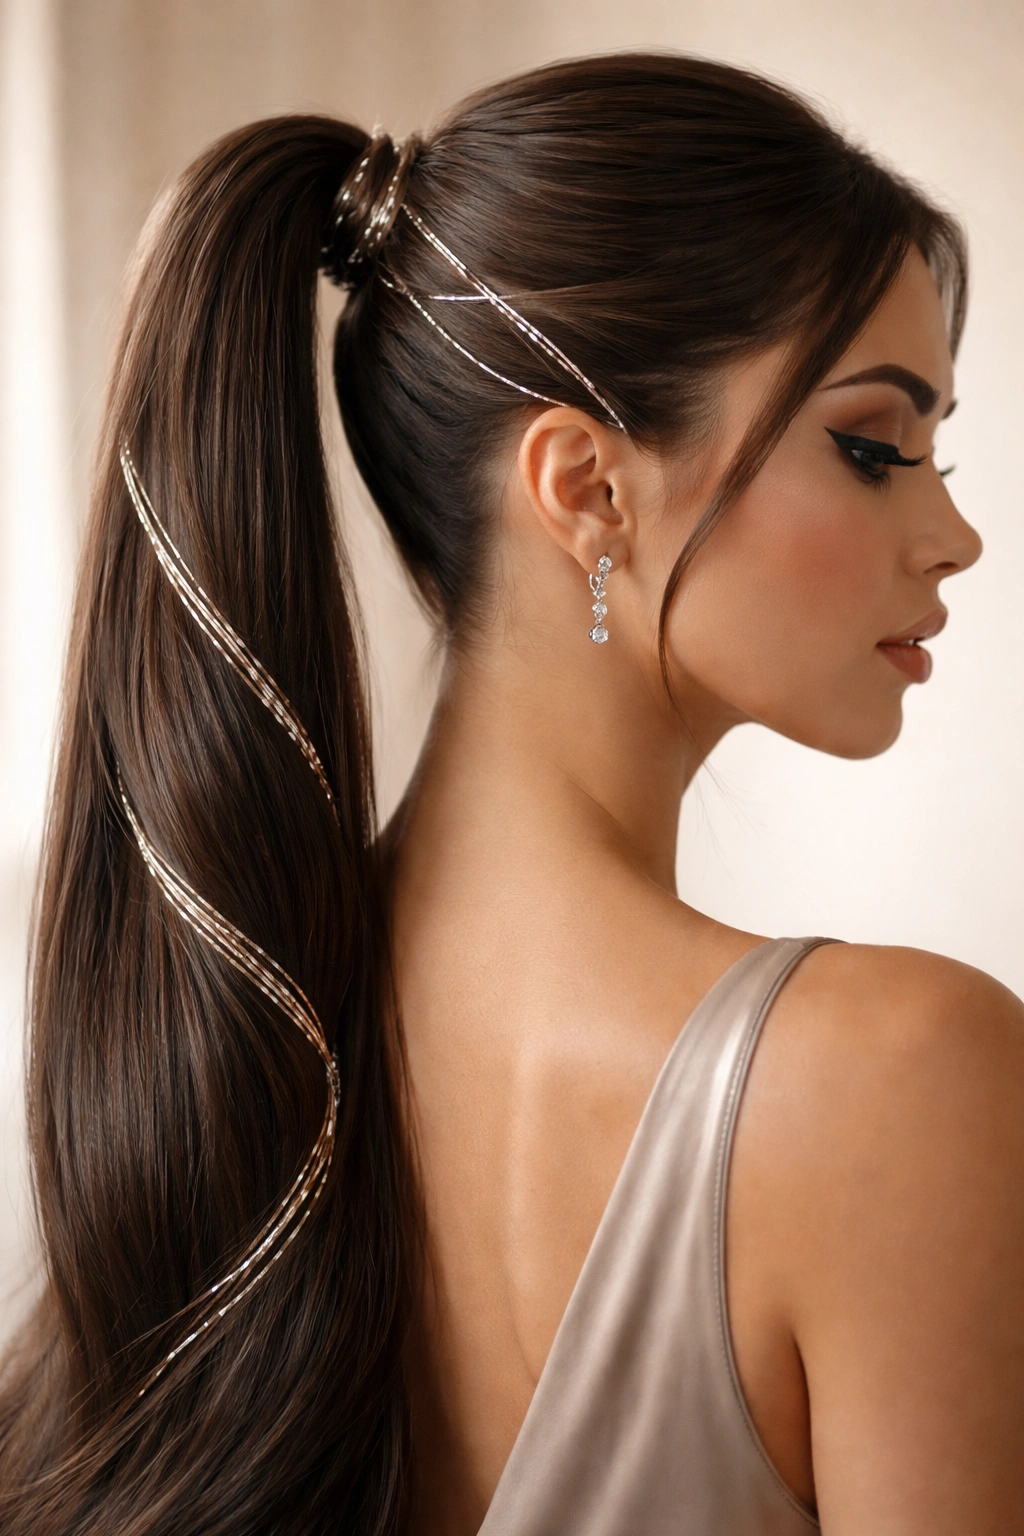
Incorporating a metallic thread, ribbon, or thin cord into your double weave instantly elevates the style from everyday to special occasion. This is the version to choose when you want your double weave to feel luxe and intentional. A gold, silver, or copper accent thread catches light and adds a subtle jewelry-like quality to your hairstyle without requiring you to add any actual accessories.
Integrating Metallic Elements
Choose a metallic thread or thin ribbon that complements your hair color and skin tone. Gold works beautifully on warmer hair tones and deeper skin; silver flatters cooler hair tones and fairer complexions; copper bridges warm and cool undertones. Thin ribbon or embroidery floss works better than chunky cord, as you want the accent to read as a delicate detail rather than dominating your ponytail.
Secure your base ponytail and position your metallic thread or ribbon so it lies against the elastic and begins at the top of your weaving pattern. As you weave your first section around the base, incorporate the metallic thread into every pass — over when your hair goes over, under when it goes under. This creates a spiraling metallic detail that interweaves with your hair sections. Finish by securing the end of your metallic element with a bobby pin that matches either your hair or the metallic finish, depending on which creates a more cohesive look.
Why Metallic Details Elevate the Style
A metallic accent instantly transforms a sleek double weave into an evening style. It adds luxury and intention without requiring you to change your technique or add volume. The metallic element catches light as you move, creating sparkle and dimension that makes your hair feel more dynamic. This version works beautifully for date nights, parties, or any occasion where you want your style to feel elevated beyond everyday.
Choosing Your Metallic Accent
- Gold thread complements warm skin tones and brunette, copper, or warm blonde hair
- Silver thread works best with cool undertones and ash-blonde or platinum hair
- Thin ribbon (3-4mm width) creates more visible sparkle than thread
- Embroidery floss adds texture variation while still maintaining the metallic sheen
- You can use multiple threads in different metallic finishes for additional complexity
8. Twisted Double Weave Fusion for Textured Elegance
A twisted double weave combines twisted sections with weaving for a style that feels more textured and organic than a standard weave. Instead of separating your sections into three-strand braids, you create two-strand twists that wrap around your base ponytail. This variation works beautifully if you love the idea of a double weave but want something that feels less structured and more free-flowing.
The Twist-Weave Hybrid Technique
Create your base ponytail as usual. Take your first section and divide it into two subsections. Twist these two subsections tightly around each other, creating a rope-like texture. Now wrap this twisted section around your base ponytail in your weaving pattern. The twist creates natural texture and definition as it winds around. Repeat with your second section, creating another twist and weaving it around the elastic alongside your first twisted section.
The final result reads as more textured than a smooth weave but more structured than a loose braid. You’re combining the visual interest of twisted texture with the graphic precision of a weave pattern. This hybrid approach is perfect if you want dimension and detail without the tightness that sometimes comes with triple-strand braiding.
Why Twisted Sections Add Dimension
Twists are thicker and chunkier than braids, so they naturally add visual volume to your style. They also catch light differently than smooth sections, creating more depth in your finished ponytail. A twisted double weave reads as more intentional and designer-level than a simple smooth weave, but it’s actually easier to execute once you understand the basic twist technique. This version also photographs beautifully because the twisted texture is clearly visible and creates obvious visual interest.
Execution Notes
- Create tight, even twists to maintain the cohesive look of your weave
- Two-strand twists are faster to create than three-strand braids
- Slightly loosen your twists after securing them for a more organic appearance
- This version works especially well on longer hair where the texture is clearly visible
- Twisted weaves hold all day without slipping, making them practical for long events
9. Bubble Double Weave Pony for Playful Sophistication
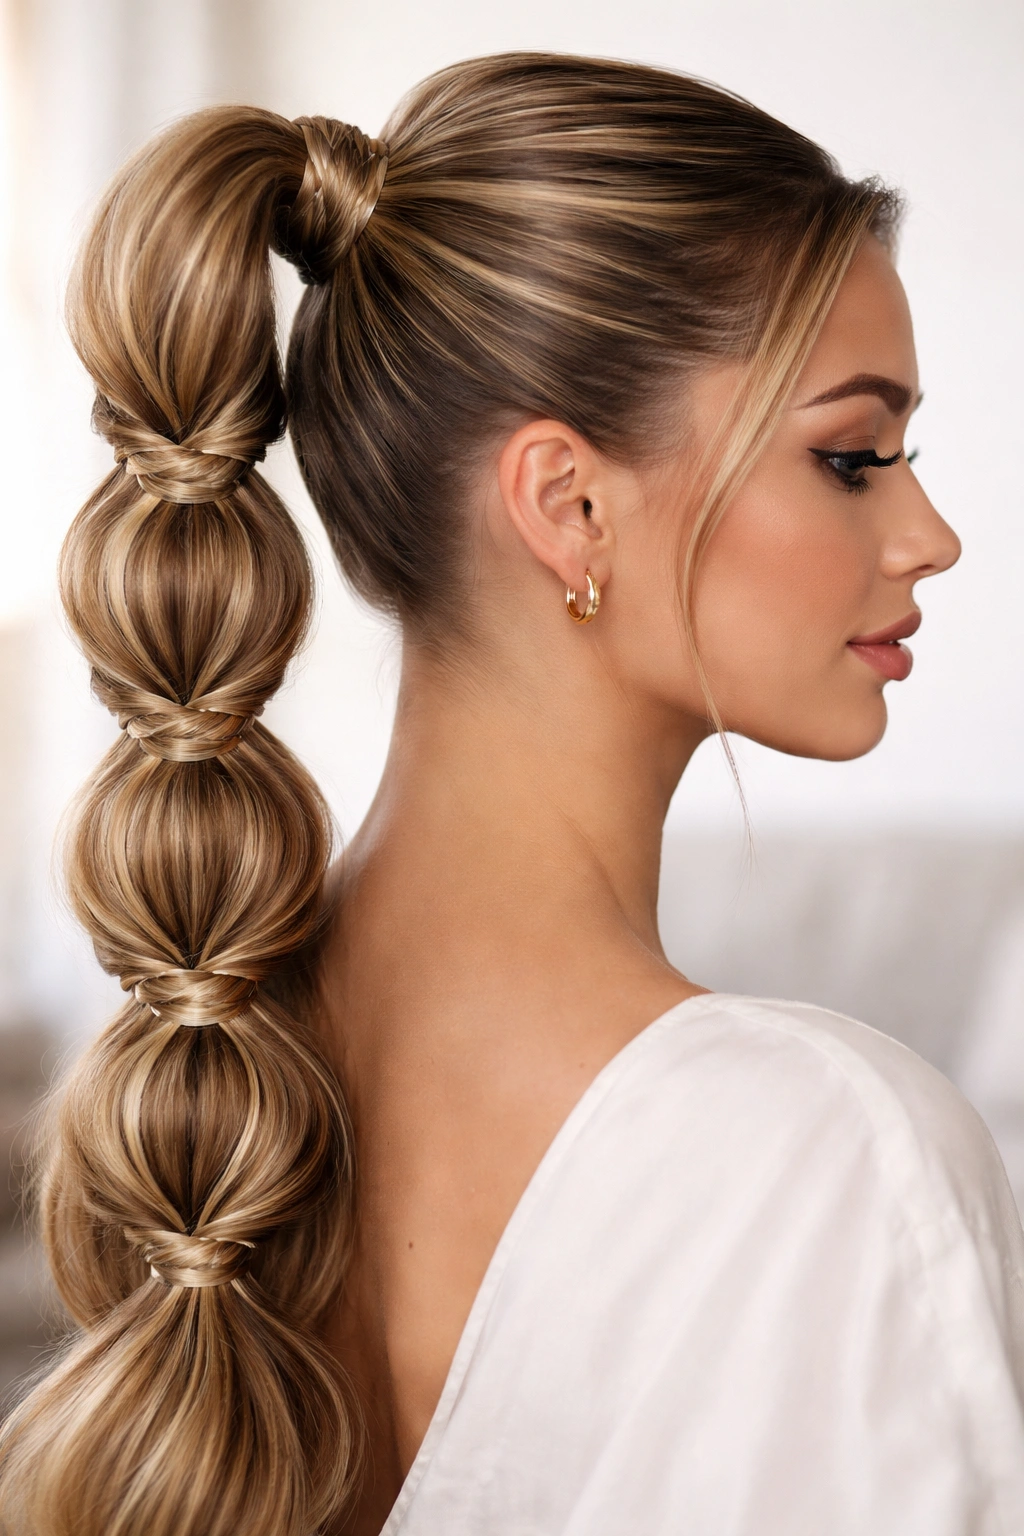
A bubble ponytail incorporates sections that are cinched at regular intervals with small elastics, creating a segmented, dimensional effect. When you combine a bubble ponytail structure with double weaving, you get a style that’s playful and sophisticated simultaneously. This version is perfect if you want your ponytail to feel more youthful and less formally polished.
Creating Your Bubble Base
Secure your initial ponytail at the crown or nape depending on your desired placement. Below the base elastic, secure a second elastic about two inches down your ponytail length, pinching a section of hair between the two elastics. Below that, add another elastic, creating another bubble, and continue this pattern down your ponytail length. You’ll end up with 4-6 segmented bubbles depending on your ponytail length.
Now apply your double weave technique, but instead of weaving straight down, wrap each weaving section around multiple bubbles. Your first section might spiral down and around three bubbles while your second section does the same, creating an intertwined effect that works with the bubble structure rather than against it. The weaving pattern adds additional dimension to the already-dimensional bubble structure.
The Playful-Yet-Polished Balance
A bubble weave ponytail feels youthful and fashion-forward, but the weaving component keeps it from reading as overly cute or juvenile. This is the version to choose if you want to feel polished and put-together while maintaining a sense of personality and playfulness. It works beautifully for creative professions, casual events, or any time you want your style to feel confident and a bit unexpected.
Building Your Bubble Weave
- Create evenly-spaced bubbles for the most balanced, intentional look
- Tighter bubbles create more defined segments; looser bubbles feel more organic
- Use clear or colored elastics that match your hair or complement your aesthetic
- The bubble structure makes this style ideal for slightly thicker hair that has natural fullness
- This version holds beautifully throughout the day and actually improves as loose hairs escape and soften it
10. Double Weave Wrap with Glossy Finish for Maximum Shine
A glossy double weave emphasizes shine and smoothness, creating a style that looks almost liquid in its polish. This version uses specific products and techniques to amplify reflectivity and creates a look of absolute perfection. Choose this when you want your double weave to feel magazine-worthy and intensely polished, with hair that appears to shine from within.
Achieving the Glossy Finish
Begin with hair that’s been treated with a moisturizing mask or deep conditioner the night before or several hours before styling — hydration is what creates shine. Blow-dry your hair smoothly using a brush and a lightweight serum or oil. The smoothing serum should be applied sparingly to damp hair before blow-drying, not after, as this helps it distribute evenly and creates genuine shine rather than a greasy appearance.
Create your base ponytail and apply your double weave with precise, tight weaving that leaves no bumps or inconsistencies. Once your weave is complete, apply a glossing spray or lightweight hair oil to the entire ponytail section. This final step amplifies shine and creates a cohesive, high-shine appearance. The glossy finish makes the weave pattern even more visible and emphasizes the architectural precision of your style.
Why Gloss Matters
Glossy finishes make everything look more expensive and intentional. When your double weave has obvious shine, people immediately perceive it as a professionally styled look. Gloss also emphasizes the weave pattern itself, making your technical work more visible and appreciated. This is the version to choose for photos, special events, or any situation where you want maximum visual impact.
Creating Maximum Shine
- Deep condition your hair 24 hours before styling for hydration-based shine
- Apply smoothing serum to damp hair before blow-drying, not after
- Use a fine-tooth comb during weaving to prevent frizz that dulls shine
- Finish with a glossing spray formulated specifically for shine enhancement
- Avoid heavy styling products that can dull hair; stick to lightweight formulas
- A light hairspray that’s specifically designed to enhance shine works better than traditional hold-focused sprays
Final Takeaway
Double weave ponytails work because they deliver both simplicity and sophistication. Once you master the basic weaving technique — that fundamental over-under-over pattern — you have the foundation to create ten completely different styles by adjusting placement, adding texture, incorporating metallic accents, or changing your finish. The technique itself is straightforward enough that you can execute it in about fifteen minutes once you’ve practiced a few times, but the results look intricate and designer-level.
The best part about these variations is that they’re completely adaptable to your hair type, length, and styling preference. Fine hair reads as fuller in a braided double weave. Thick hair looks polished in a glossy finish version. Short hair works beautifully in a low, tight weave. Long hair becomes a canvas for curved spirals or bubble segments. Every hair type and texture can work with double weave ponytails — you just choose the variation that complements your hair’s natural qualities rather than fighting against them.
Start with whichever version speaks to you, practice the technique a few times until it feels natural, and then experiment with the other variations. You’ll quickly discover which versions make you feel most confident and which work best with your daily routine. The weaving technique itself becomes automatic with repetition, freeing you up to focus on the details that transform a basic ponytail into a sleek, intentional style that makes you feel polished and put-together every single time you wear it.