A sleek weave ponytail combines the protective benefits of a weave with the polished, put-together vibe that works for virtually any occasion. Whether you’re heading to the office, a special event, or just want a hairstyle that looks professionally done with minimal daily styling, a sleek weave ponytail delivers sophistication with serious staying power. The beauty of this look lies in its versatility—you can wear it high and dramatic, low and understated, side-swept for an edge, or adorned with braids and accessories for extra flair. What makes a weave ponytail truly stand out is how it combines the fullness and length that quality weave provides with the slicked, polished edges that signal intentional styling. Real talk: getting this right takes understanding the difference between a basic ponytail and one that actually turns heads, which means knowing how to blend your natural hairline seamlessly, control flyaways, and create those clean, sculpted lines that make the whole look read as high-maintenance and expertly done.
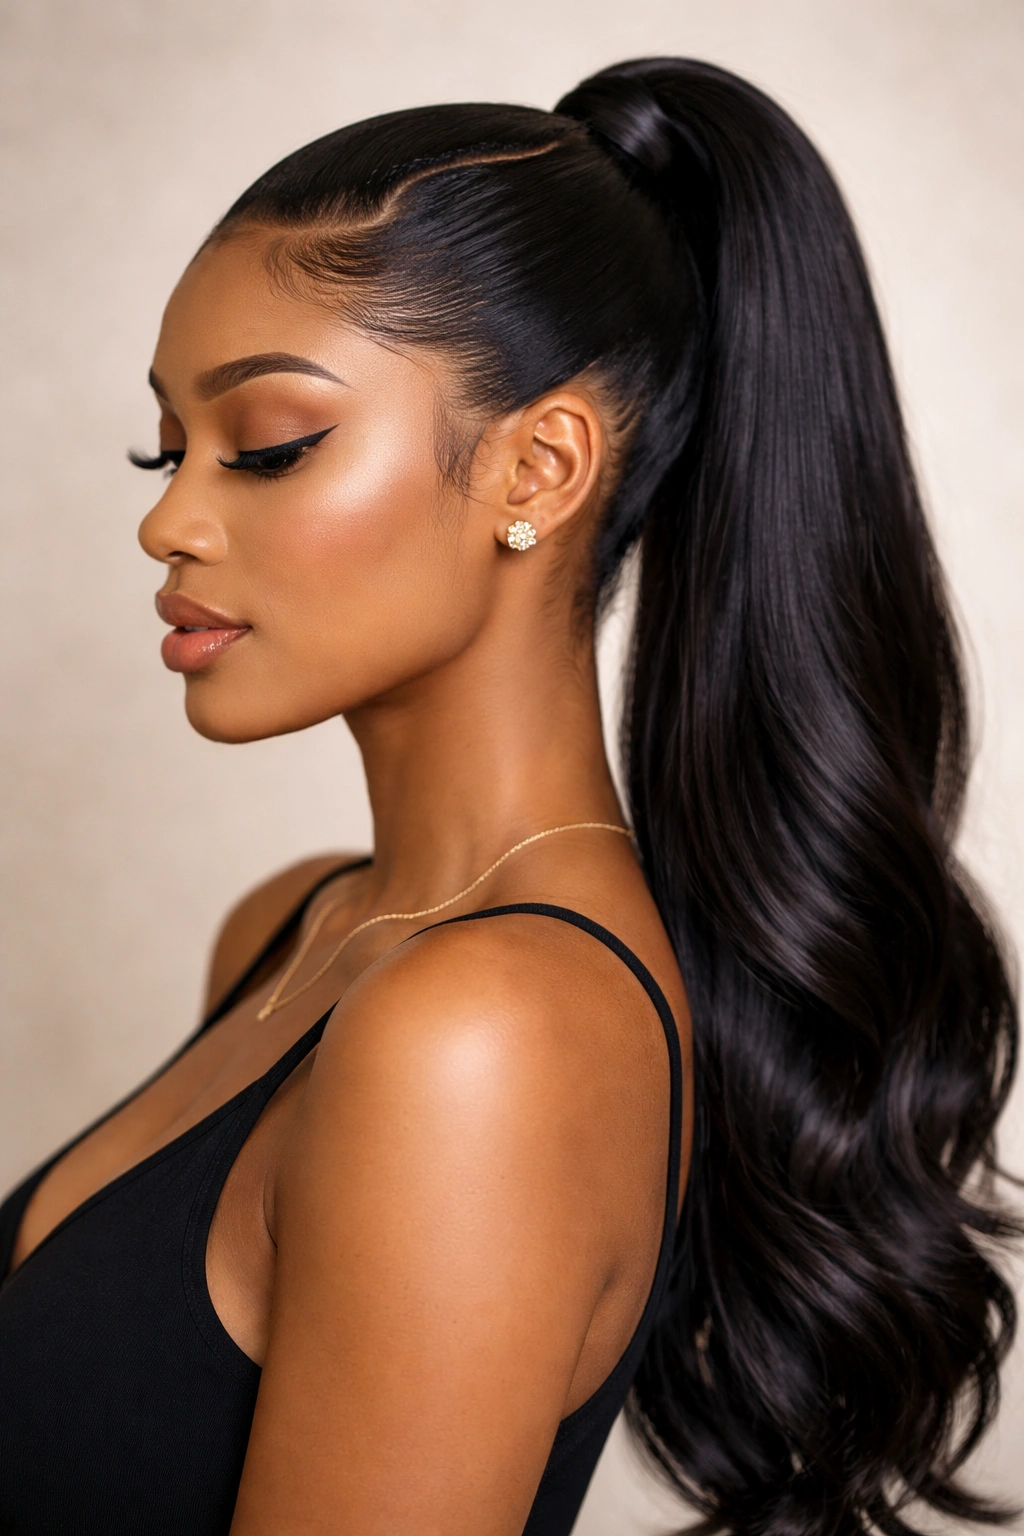
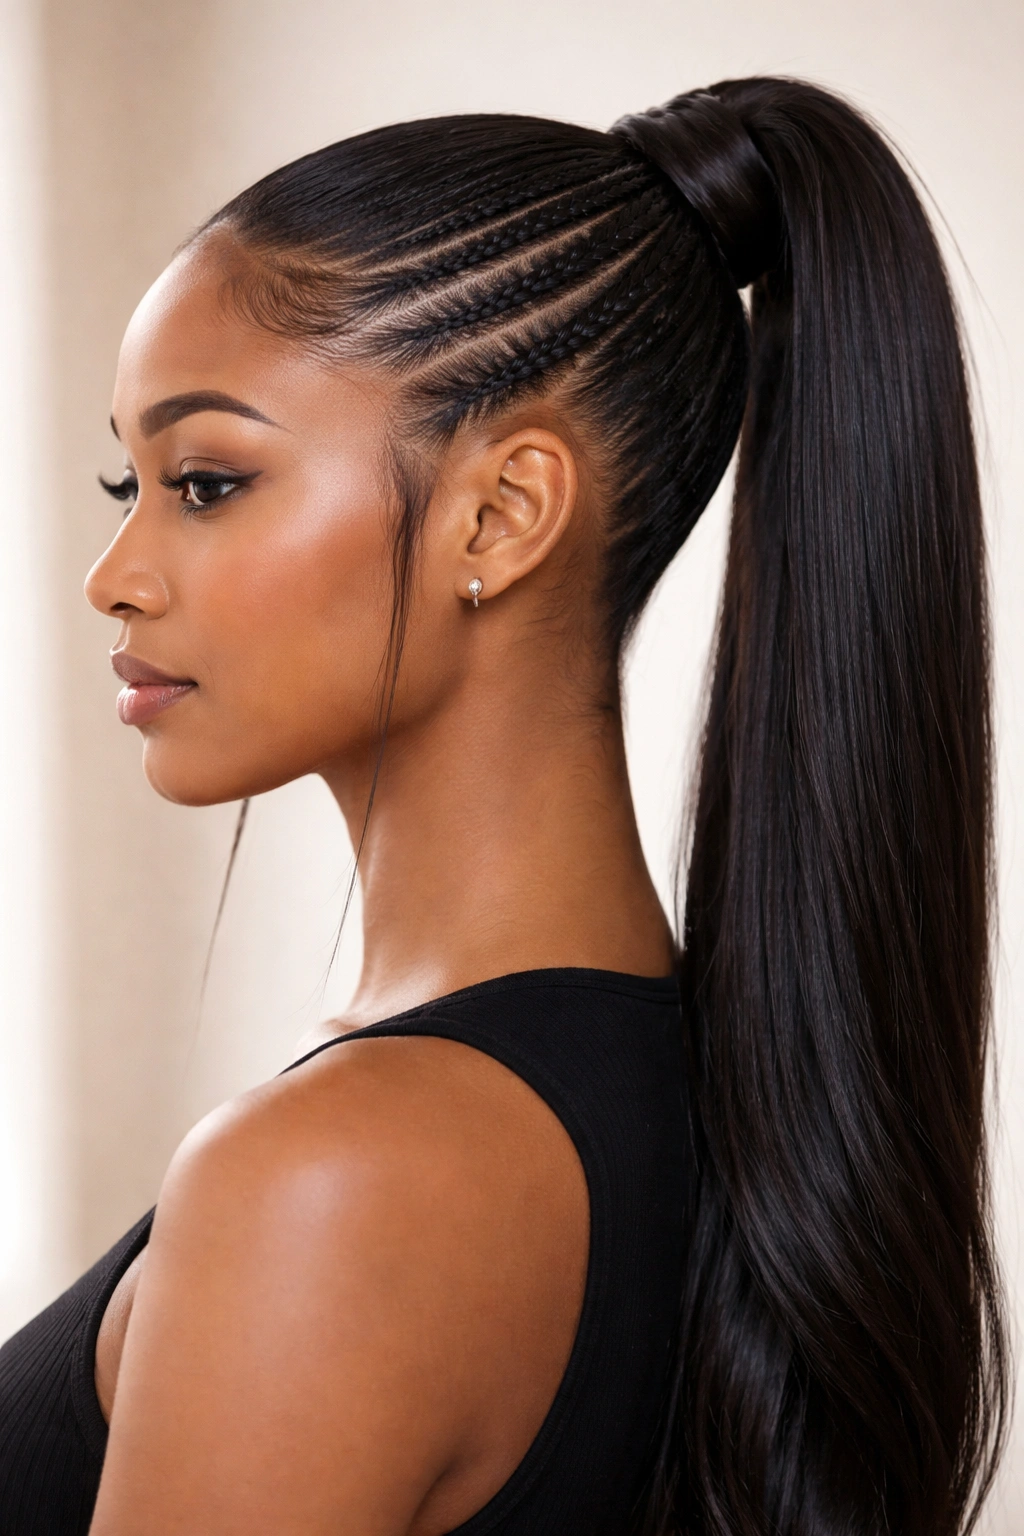
1. High Weave Ponytail with Sleek Edges
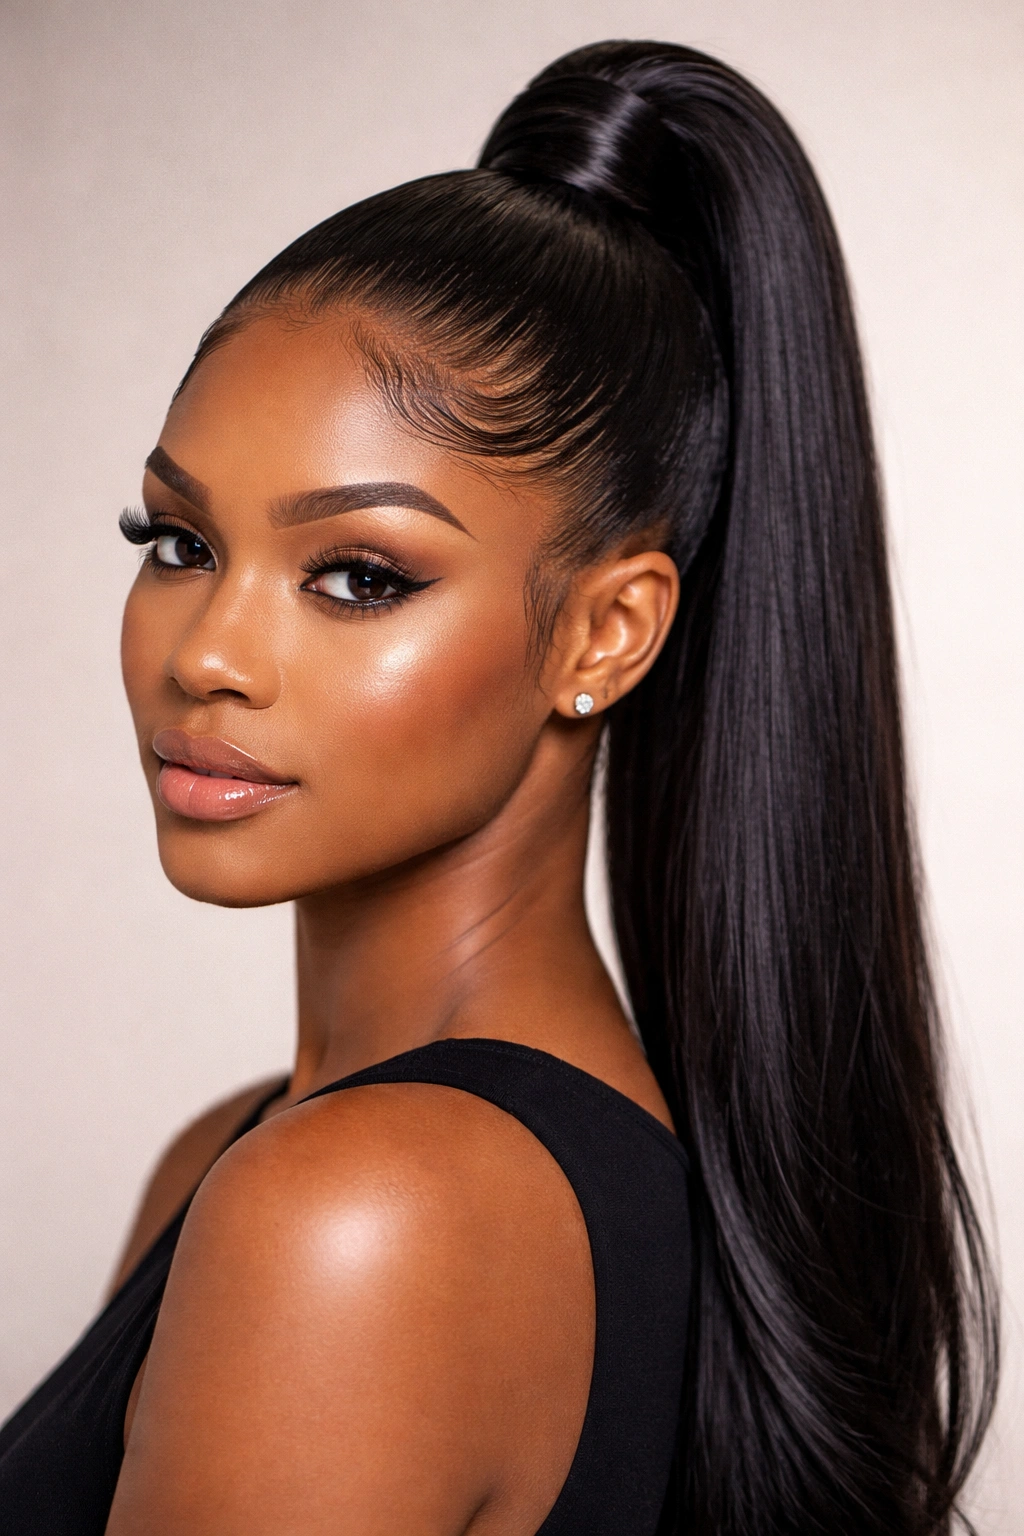
A high weave ponytail positioned at the crown creates instant lift and an elongating effect that flatters almost every face shape. This placement sits dramatically at the very top of your head, pulling the visual focus upward and creating a sleek line from the back of your neck all the way up. The magic happens when you pair this high placement with meticulously slicked-back edges—smooth baby hairs, a razor-sharp part, and a polished hairline make this style read as intentional and controlled rather than casual.
The Technique and Application
Start by applying a smoothing cream or edge control product to your hairline and edges—you’re aiming for shine without greasiness. Using a fine-tooth comb or a soft brush, brush all your natural hair straight back from your face, creating a smooth base at the crown where the ponytail will sit. If you’re using a wig or weave, position it at the very highest point of your head for maximum drama and impact.
Essential Details for This Style
- Edge control product choice matters enormously—gel-based products work faster but can flake, while cream products take longer to set but look more natural and last longer throughout the day
- Hair positioning: Pull everything straight back with zero bumps or ridges underneath; any lumps will show through the sleek surface
- Securing method: Use a clear elastic band or a fabric-wrapped band at the crown, and smooth down any flyaways with a toothbrush dipped in edge product
- Accessory placement: A decorative cuff, gold ring, or pearl hair clip at the base of the ponytail adds polish without competing with your edges
- Daily refresh: A light spray of edge control in the morning keeps your look fresh even if you slept in it
Pro tip: If you have baby hairs that refuse to stay down, try a silk or satin scarf wrapped around your hairline for 10 minutes before a night out—the smooth texture helps hair lay flat without additional product buildup.
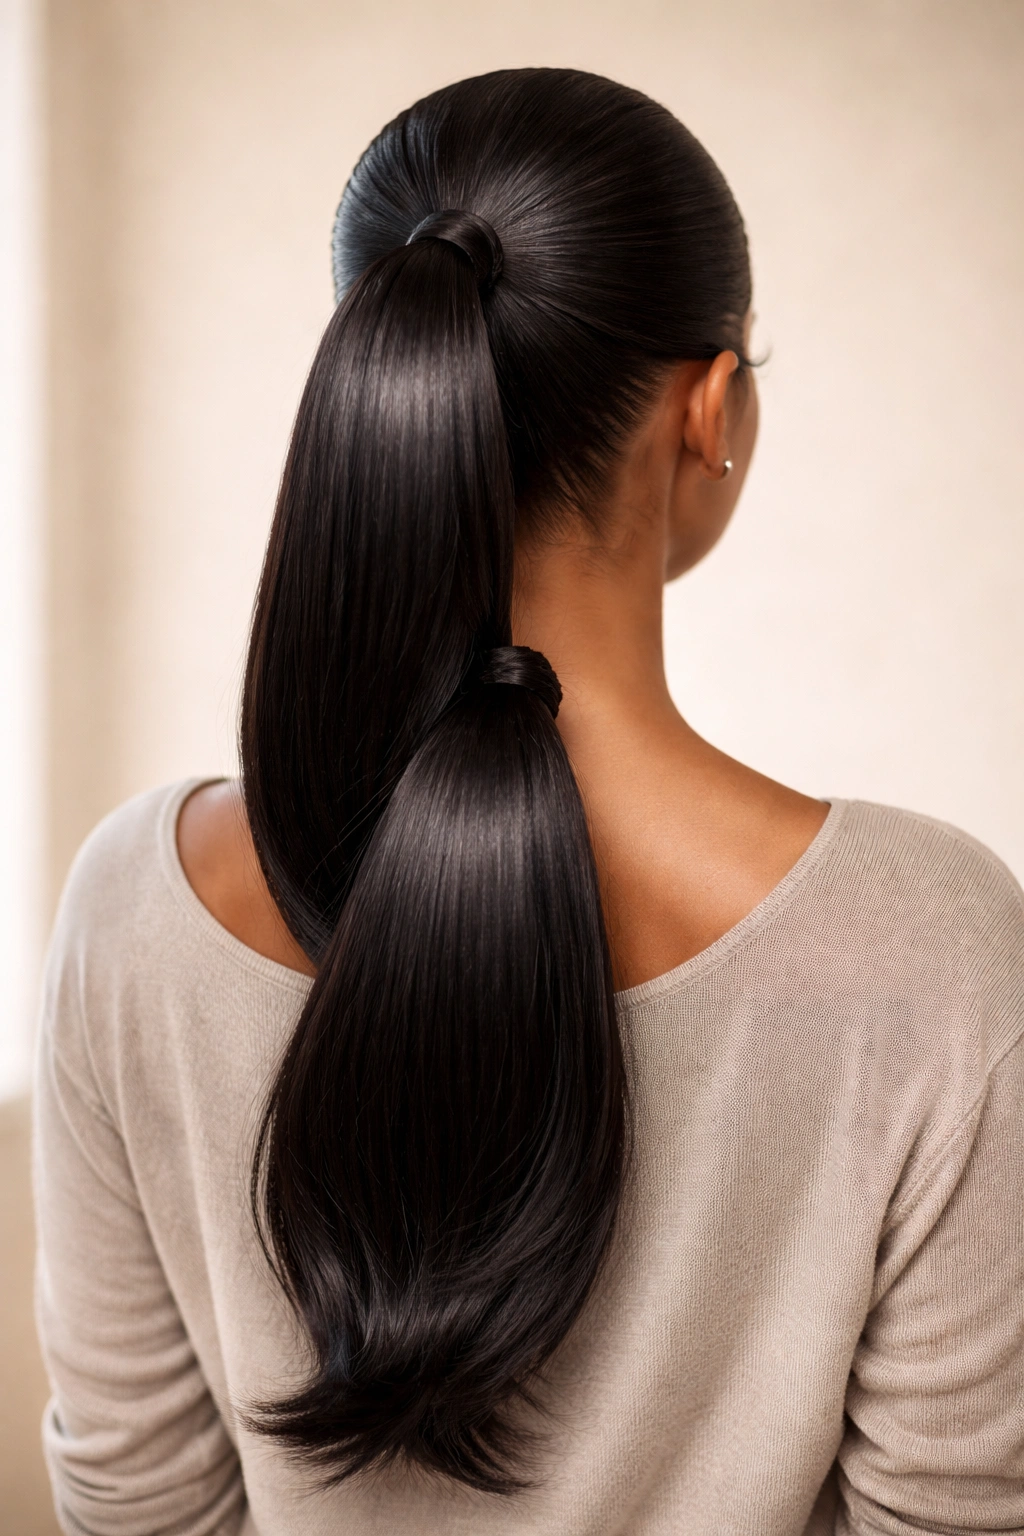
2. Low Weave Ponytail with Wrap

A low weave ponytail sits at the nape of your neck, creating an elongated, elegant silhouette that feels both professional and effortless. This placement is perfect when you want your face completely visible and unframed, or when you’re wearing statement earrings that deserve their moment. The addition of a wrap—a section of hair, ribbon, or fabric wound around the base of the ponytail—transforms it from simple to sophisticated instantly.
Styling the Low Placement and Wrap
Position your weave and natural hair at the nape of your neck, about two inches above where your neck meets your collarbone. This lower placement instantly feels more refined than a mid-height ponytail. For the wrap, take a thin section of hair from underneath the ponytail, twist or braid it gently, then wind it around the elastic band at the base. Secure with a bobby pin tucked underneath so it’s invisible.
Wrap Alternatives and Pro Techniques
- Hair wrap: Use your own hair for the most natural, seamless look; this also adds texture and movement
- Ribbon or fabric wrap: Satin ribbon, silk scarves, or metallic trim wrapped around the base reads as intentional styling and adds a decorative element
- Beaded wrap: Small gold or pearl beads threaded onto the wrap add luxury without bulk
- Twisted weave wrap: Take two thin strands from the ponytail, twist them together, and wind the twisted section around the base for dimensional texture
- Invisible wrap: Use a clear elastic band, then apply edge control or shine spray over it so the base looks smooth and polished
The wrap serves a dual purpose—it hides the elastic band while adding visual interest and allowing you to dress up or dress down the look depending on the occasion and the wrap material you choose.
3. Side-Swept Sleek Weave Ponytail
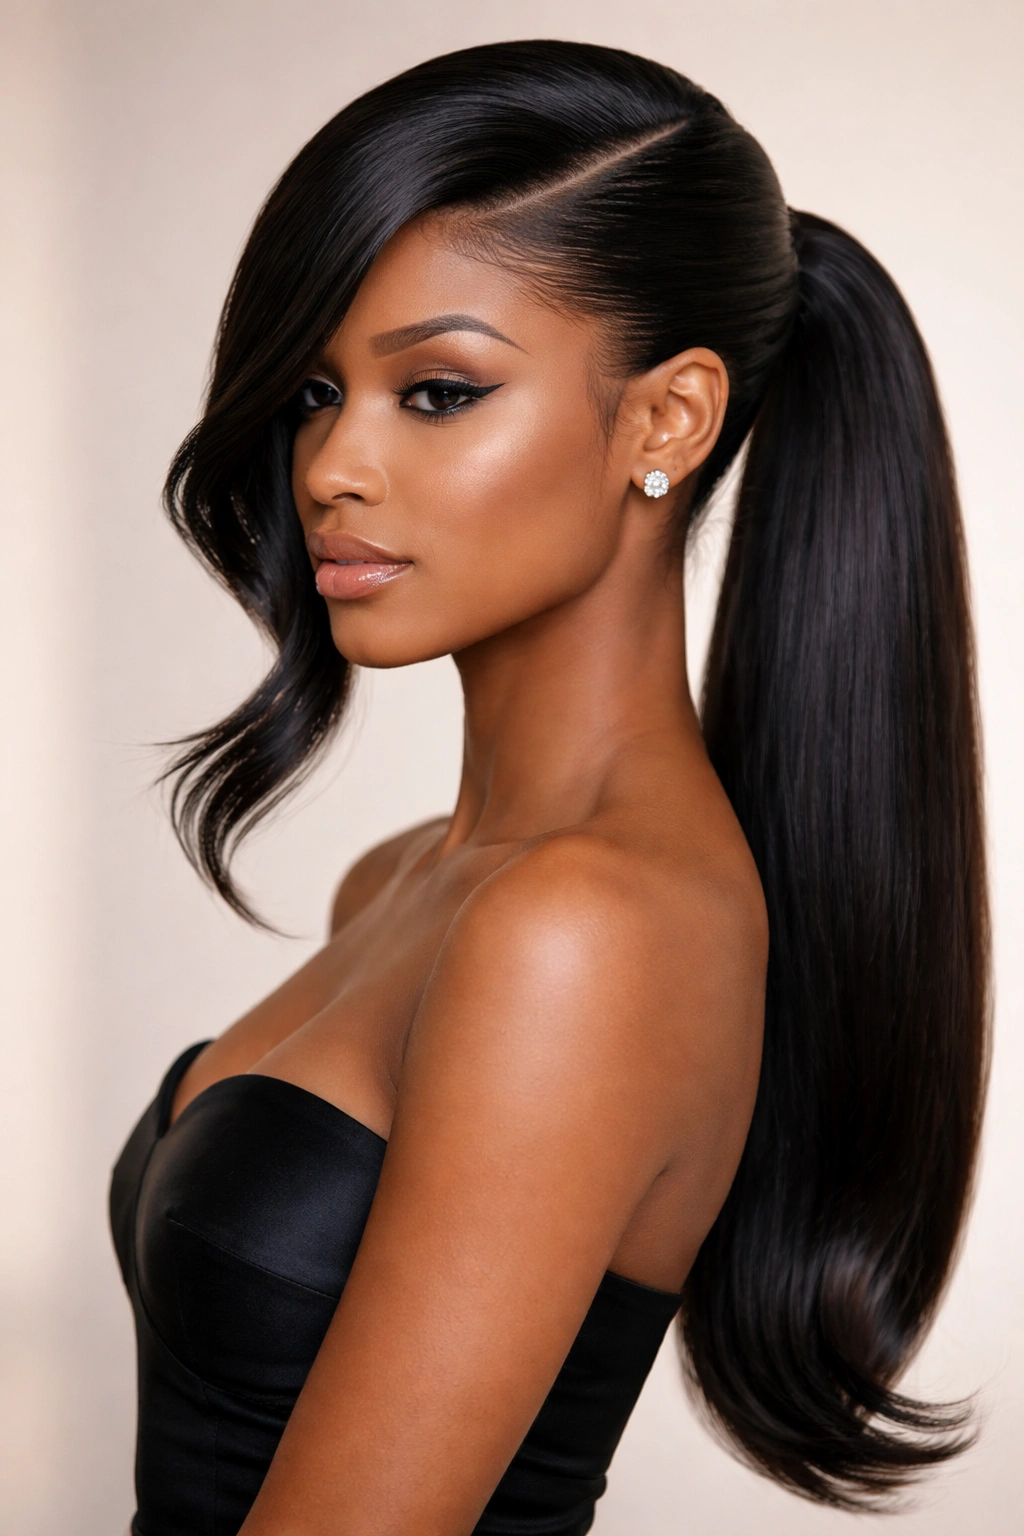
A side-swept ponytail pulls all your hair dramatically to one side, creating an asymmetrical, fashion-forward look with major edge. Instead of centering the ponytail, you’re positioning it toward one side of the head—some people place it just behind the ear, while others sweep it all the way to the opposite shoulder for maximum drama. This style instantly reads as intentional and styled rather than a quick, utilitarian ponytail.
Creating the Side-Swept Silhouette
Start by parting your hair deeply on one side—this isn’t a subtle part, it’s dramatic and obvious. Smooth all your hair toward the side where you want the ponytail to sit, using a smoothing cream to keep everything sleek and in place. The ponytail itself can sit at the nape of your neck on one side, or even lower at your mid-back if you’re going for maximum sweep and movement.
Details That Make This Work
- Part placement: A deep side part should start near your temple and sweep back toward your crown; the deeper the part, the more intentional the style reads
- Smoothness on both sides: Even the side where hair is being pulled away should be smooth and polished, not wispy or flyaway
- Elastic position: Position your elastic slightly off-center so the tail hangs to the side rather than straight down your back
- Adding shine: A light spray of hair shine or serum on the swept section makes the sleekness pop visually
- Length consideration: Longer ponytails look more dramatic when swept to the side; a chin-length or longer weave works better than shorter lengths for this style
Side-swept ponytails pair beautifully with statement earrings on the exposed side and look especially polished with minimal face-framing or completely slicked edges.
4. Sleek Weave Ponytail with Braided Detail
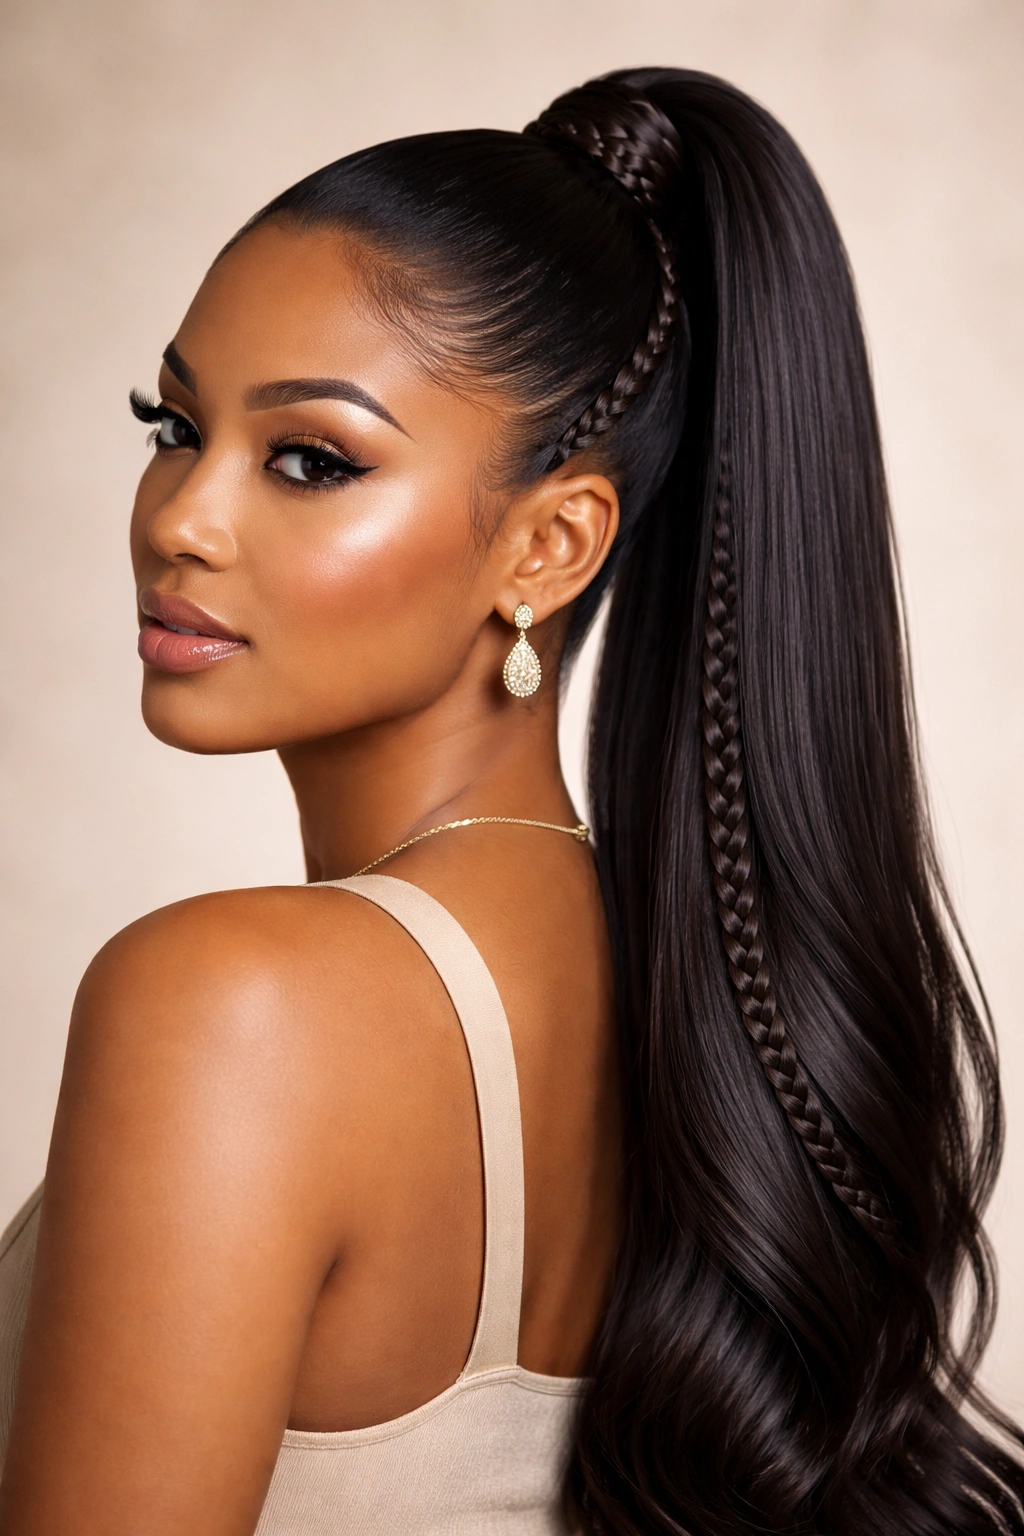
Combining a sleek ponytail with an incorporated braid adds texture, visual interest, and a touch of intricacy that signals investment in your styling. Rather than a plain ponytail, you’re weaving (sometimes literally) a three-strand braid or a more decorative braid pattern into the design—this could be a braid wrapped around the base, braids incorporated into the ponytail itself, or even a braid that forms the side part and leads into the ponytail.
Braid Integration Techniques
Position your weave in a high or mid-height ponytail, then take a thin section from underneath the base of the ponytail and braid it gently. Wind this braid around the elastic band at the base for a wrapped effect that’s more intricate than a simple hair wrap. Alternatively, you can create a side braid that starts at your temple, curves around the side of your head, and feeds directly into a low or side-swept ponytail—this creates a cohesive, intentional look.
Braid Styles and Variations
- Three-strand braid wrap: Classic and timeless, a simple three-strand braid wound around the base adds texture without overwhelming the sleekness
- Dutch braid into ponytail: A dutch braid (braided on top of the scalp) that starts at the crown and feeds into a high ponytail creates a strong, athletic aesthetic
- Feed-in braids: Multiple thin braids incorporated into the ponytail itself add visual dimension and work beautifully with longer weaves
- Fishtail braid detail: A delicate fishtail braid wrapped around the base or incorporated into the side of the ponytail reads as more sophisticated and intricate
- Cornrow accent: A single cornrow that runs from your temple to the back and feeds into the ponytail adds an edgy, modern element
A braided detail transforms a simple sleek ponytail into something that looks like it required genuine skill and time to create, even if it actually takes only a few extra minutes.
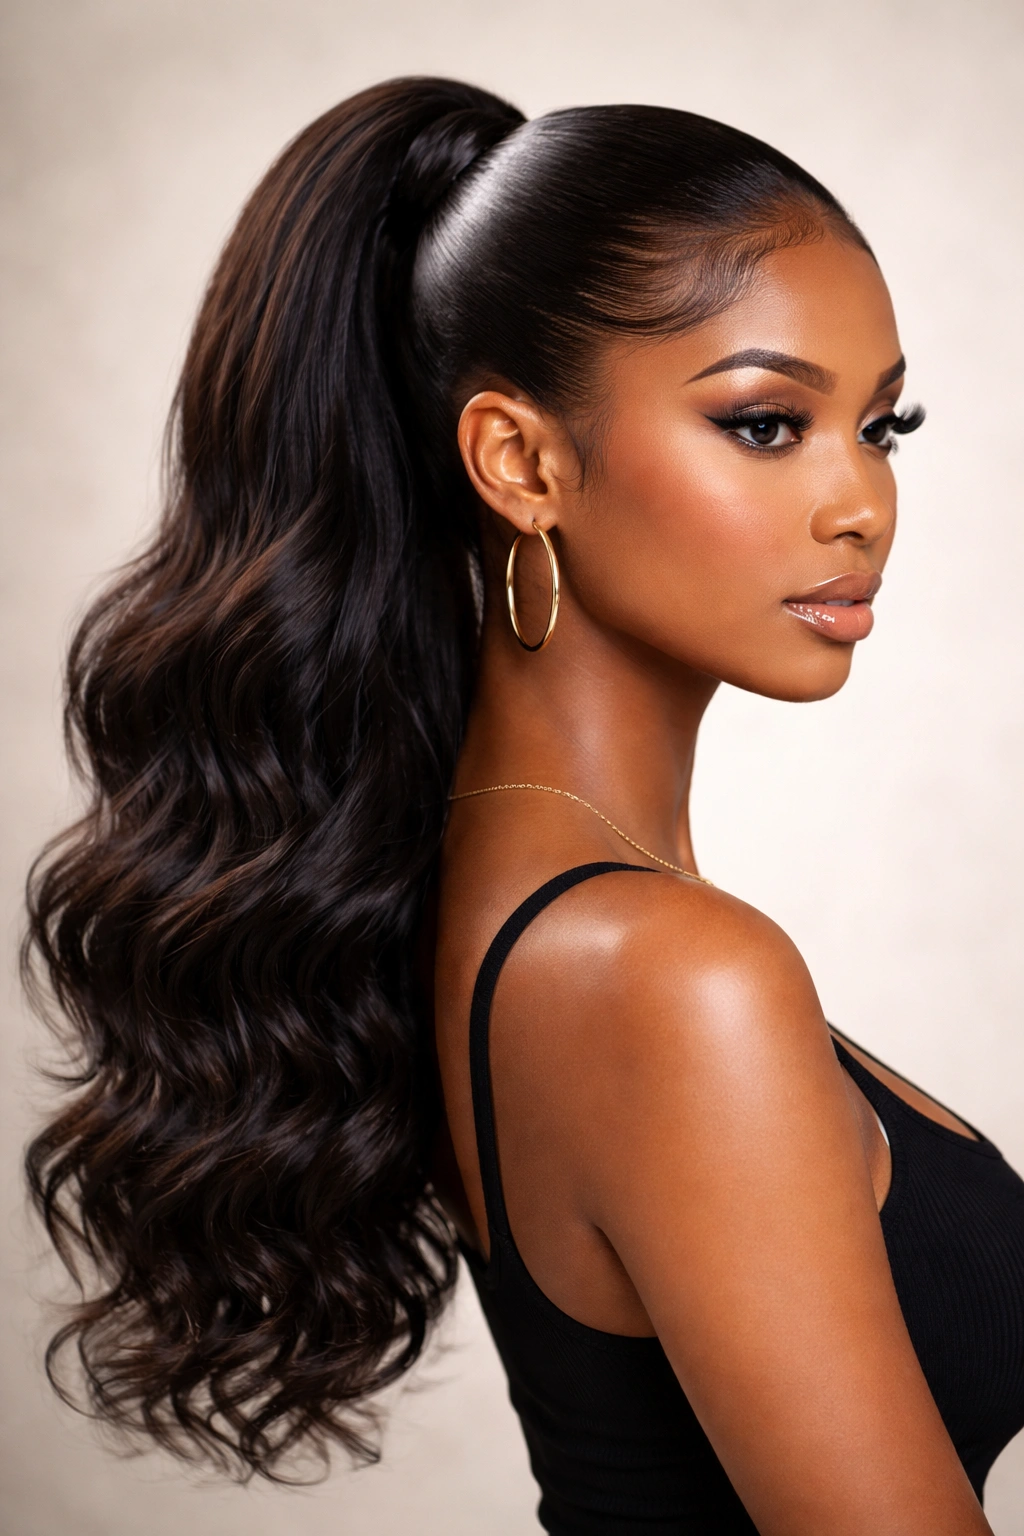
5. Slicked Back High Weave Ponytail
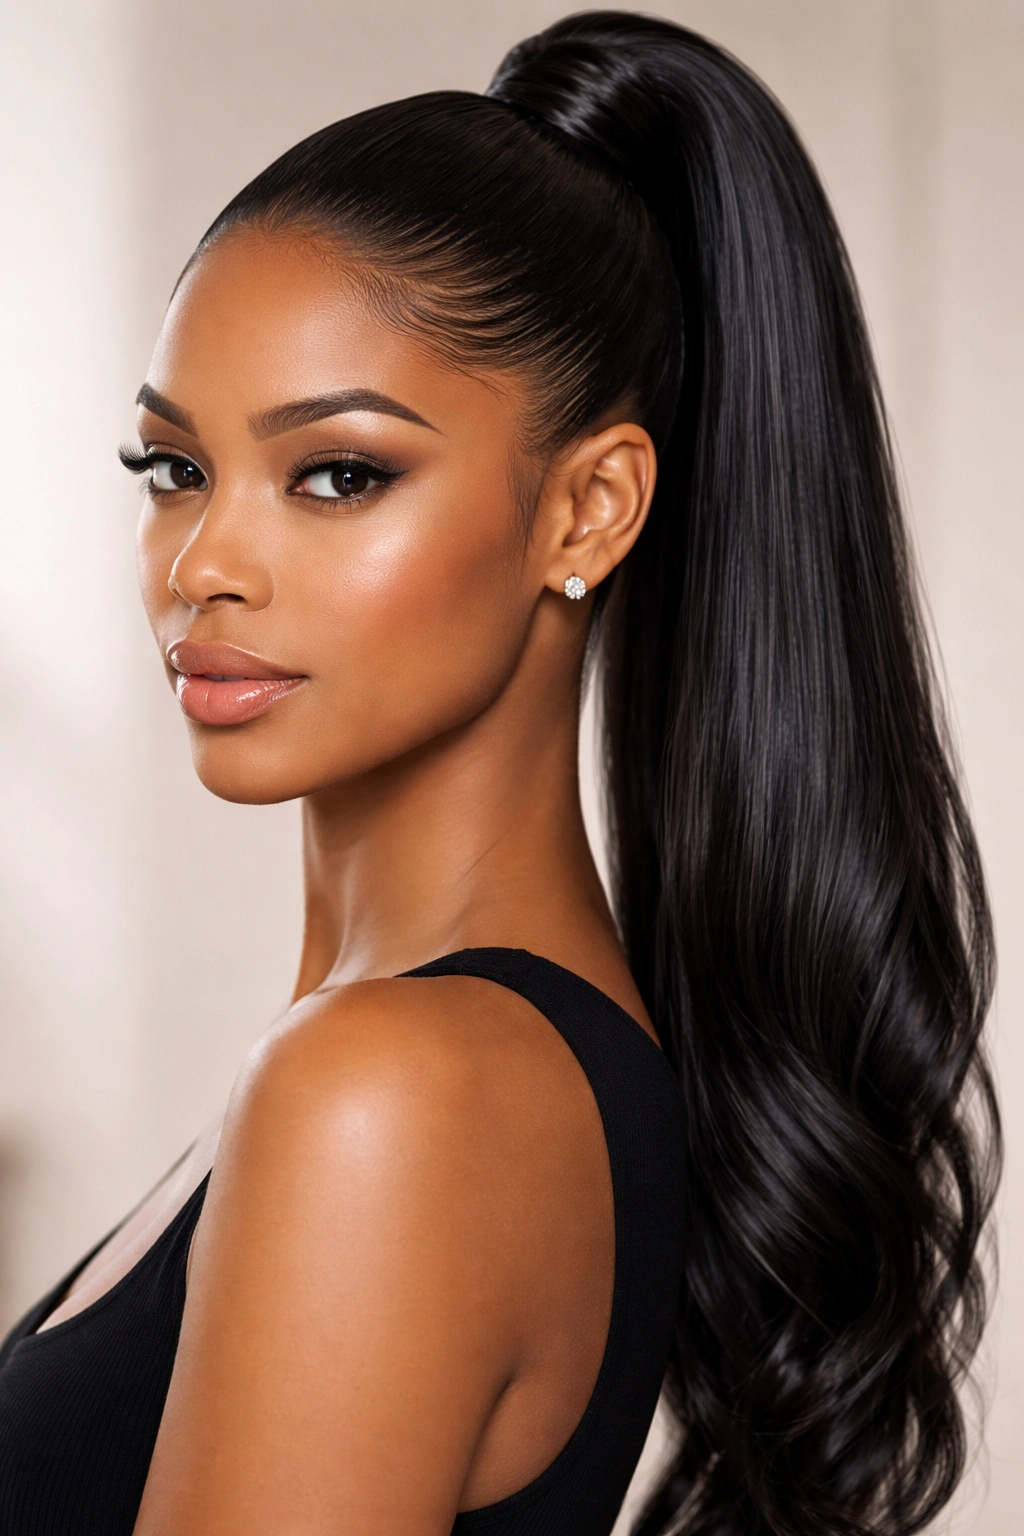
This is the ultimate statement ponytail—everything pulled straight back to the crown with maximum shine and zero flyaways, creating a look that’s part athlete, part fashion model, part boss. The slicked-back aesthetic is all about control and intentionality; every hair is exactly where it should be, and the hairline is so polished it looks painted on. This style works for athletic wear, formal events, or anytime you want to project confidence and authority.
Achieving the Slicked-Back Look
The foundation of this style is a powerful edge control product—gel, pomade, or styling butter applied generously to your hairline and edges. Use a fine-tooth comb or brush to pull every hair back tightly from your face, smoothing in the direction of your crown. Tension is key here; you’re creating a smooth, sculpted surface that follows the natural curve of your skull. The ponytail sits as high as possible at the crown, amplifying the elongating effect.
Product Selection and Application Strategy
- Gel products: Set fastest and provide the strongest hold; best for athletic activities where you need staying power all day
- Edge control creams: Smooth and forgiving, they dry more naturally looking but require a bit more precision in application
- Pomade or styling butter: Rich and luxurious looking, these products create shine and dimension but can look heavy if overapplied
- Layering products: Start with a base layer of lightweight smoothing cream, then apply edge control over it for a long-lasting hold without stiffness
- Setting technique: Apply product in small sections and smooth outward from your hairline toward the crown; each section should overlap slightly to prevent gaps
A slicked-back ponytail demands daily maintenance—refresh your edges in the morning with a light spray of water and a touch of product, and keep a small edge control stick in your bag for midday touchups if you’re out all day.
6. Weave Ponytail with Curved Part
Rather than a traditional straight part, a curved or zigzag part creates visual movement and adds dimensionality to a sleek weave ponytail. A curved part that follows the natural contours of your scalp can actually be more flattering than a straight line, especially if you have a round face shape. The curved line creates the illusion of length and can even make a standard ponytail look more intentional and fashion-forward.
Creating the Curved or Zigzag Part
Start at one side of your hairline near your temple and use a fine rattail comb to create a part that curves gently as it moves back toward your crown. Some people prefer a gentle wave, while others go for a dramatic zigzag that really stands out. The key is to make the part deliberate and visible—if it’s too subtle, it won’t create the visual interest you’re going for. Once the part is in place, smooth one section with edge control and keep the ponytail positioned so the part remains visible and defined.
Part Styling Options and Impact
- Gentle wave part: A subtle S-curve part looks elegant and is easy to maintain throughout the day
- Sharp zigzag part: A pronounced zigzag starting at your hairline creates instant edge and reads as more fashion-forward
- Two-part design: Create two curved parts that meet at the back of your head, creating a V or U shape that frames your face
- Colored part: If you use edge control with shimmer or a temporary hair chalk, highlight your curved part to make it pop even more
- Reverse part: If you usually wear a center or side part, switching to the opposite side with a curve can refresh your look entirely
A curved part paired with a sleek ponytail reads as more intentional than a basic straight part, making even a simple style feel designed and polished.
7. Textured Weave Ponytail with Sleek Top
This style pairs a smooth, sculpted crown and hairline with textured, voluminous weave in the ponytail itself, creating contrast and visual interest. Instead of smoothing your entire weave straight back, you keep the top and edges sleek while allowing the ponytail portion to retain waves, curls, or texture. This hybrid approach gives you the polished look of a sleek ponytail with the dimensional, fuller aesthetic that texture provides.
Balancing Sleekness and Texture
Apply smoothing cream to your hairline and top portions of your head, slicking everything back to your crown with a comb and edge control product. The ponytail itself sits at your chosen height (high, mid, or low), but instead of straightening it completely, you leave the weave in its natural texture or even enhance it with curling tools after securing the ponytail. This creates a striking visual contrast—polished sophistication at the top, movement and dimension below.
Texture Techniques and Enhancement
- Loose waves in the ponytail: Use a large-barrel curling iron on the ponytail portion after securing it; waves add elegance and movement
- Kinky or coily texture: Leave the weave in its natural kinky texture or refresh it with a curling iron for maximum volume
- Braided accents: Add thin braids throughout the ponytail for texture and intricate detail while keeping the crown sleek
- Half-up texture: Keep the top completely sleek but pull only half the ponytail length through the elastic, creating a layered, dimensional effect
- Curl refresher spray: A light mist of curl-refreshing spray on the ponytail portion reactivates any waves or curls and adds bounce
This style is perfect if you love the look of texture but need a polished, professional appearance—you get both without compromise.
8. Double Weave Ponytails
Double ponytails—one positioned higher and one lower on the back of your head—create a playful yet polished look with serious visual impact. This style works beautifully with longer weaves and reads as intentional and designed rather than accidental. Both ponytails can be fully sleek, or you can keep the top sleek and textured the bottom for added dimension.
Positioning and Technique
Create two distinct sections: the first ponytail sits at your crown with sleek edges, while the second sits at the nape of your neck, partially hidden behind the first. Both should be positioned toward the center back of your head, aligned vertically. Secure the top ponytail first at the crown, then gather the remaining hair and weave below it and secure with a second elastic band. The top ponytail should be full and visible, while the bottom one can peek out from underneath.
Double Ponytail Variations and Styling
- Both sleek: Both ponytails fully smoothed and polished for a coordinated, intentional look
- Top sleek, bottom textured: Sleek edges and crown with textured waves or curls in the lower ponytail for contrast
- Offset positioning: Rather than vertically aligned, position them slightly to the sides for an edgier, modern interpretation
- Different textures: Use different weave textures in each ponytail—one straight, one wavy—for visual contrast
- Wrap detail on both: Wrap the base of each ponytail with hair, ribbon, or accessory to frame each section distinctly
- Accessory coordination: Clip or pin a decorative element on the top ponytail, leaving the bottom one clean and simple
Double ponytails require enough weave length to pull off convincingly—chin-length or longer weave works best, as shorter lengths might look thin when split between two ponytails.
9. Sleek Weave Ponytail with Accessory
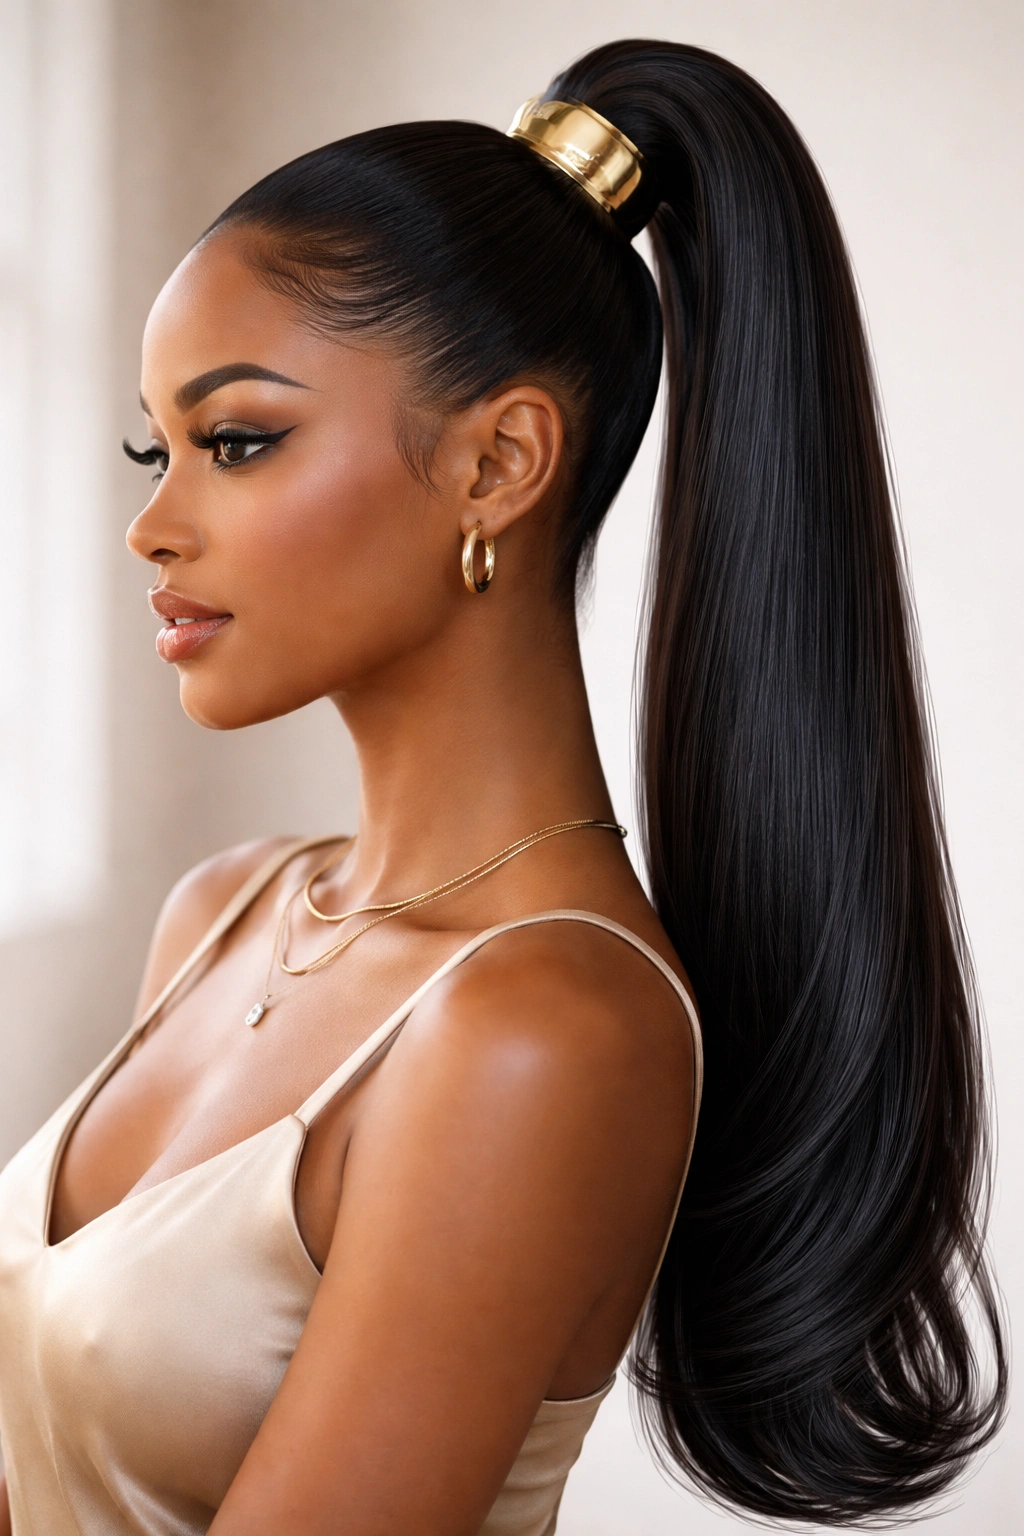
Elevating a basic sleek ponytail with the right accessory transforms it from simple to statement in seconds. Whether you choose a metallic cuff, decorative hair clip, pearl barrette, or silk hair tie, the accessory becomes the focal point and allows you to coordinate with your outfit and overall aesthetic. The key is choosing an accessory that complements your style without overwhelming the sleekness of the ponytail itself.
Accessory Placement and Selection
Position your sleek ponytail at your chosen height, then secure it with a clear elastic or basic hair tie. Immediately above the elastic (at the base of the ponytail), slip on your chosen accessory—a gold or silver cuff that slides over the base, a decorative clip that clamps around the elastic, or a silk scrunchie that replaces the elastic entirely. The accessory should sit directly at the base, where it draws the eye without adding bulk to the ponytail itself.
Accessory Options and Styling Impact
- Metal cuffs: Gold, silver, or rose gold cuffs slide over the elastic and add instant luxury and shine
- Hair clips and barrettes: Decorative clips, especially larger statement pieces, sit at the base and add visual interest and color
- Silk or satin scrunchies: These protect your hair while adding elegance; choose jewel tones or metallics to coordinate with your outfit
- Pearl or beaded hair ties: Delicate and refined, beaded ties add texture and sophistication to any sleek ponytail
- Ribbon or fabric ties: Wrap ribbon or silk around the base of your ponytail or use a fabric tie instead of elastic for a soft, refined look
- Chain details: Delicate chains or chunky chain ties add an edgy, modern element while keeping the ponytail sleek
An accessory can completely change the vibe of an outfit—choose something that either matches your jewelry or complements your top for a cohesive, styled appearance.
10. Weave Ponytail with Feed-In Braids
This advanced style incorporates thin braids directly into the ponytail, creating an intricate, labor-intensive look that actually reads as professional and deliberately designed. Feed-in braids start at your hairline and follow along the sides of your head, incorporating weave as they go, before converging at the back of your head where they feed into the main ponytail. This creates a frame around your face while keeping everything off your neck and back.
Executing Feed-In Braids
Start by creating a thin feed-in braid on one side of your head, beginning at your temple and working toward the back of your head. As you braid, gradually incorporate weave into the braid, adding more hair as you progress backward (this is the “feed-in” technique). Once both side braids reach the back of your head, gather them along with the remaining weave and secure everything into a single high or mid-height ponytail. The braids frame your face while the ponytail sits at the back.
Feed-In Braid Details and Variations
- Single feed-in braid: One braid starting from the center of your hairline and feeding back to join the ponytail creates a subtle frame
- Double feed-in braids: Two braids, one on each side, that converge at the back before feeding into the ponytail—the classic Instagram-worthy look
- Multiple thin braids: Three or four very thin feed-in braids on each side for maximum intricacy and texture
- Colored braids: Incorporate colored hair or use temporary hair chalk on your feed-in braids for a pop of color
- Tight versus loose: Tighter braids look more polished and professional, while looser braids feel more bohemian and textured
- Braid thickness variation: Start with thin braids at your hairline and gradually make them thicker as you move back for visual progression
Feed-in braids require some practice and patience, but they transform a standard weave ponytail into something that reads as genuinely skilled and intentionally designed—worth the extra effort for special occasions or when you want to showcase your styling abilities.
Final Thoughts
A sleek weave ponytail sits at the intersection of practical and polished—it’s a hairstyle that keeps everything off your face and neck while looking intentionally styled and put-together. The difference between a basic ponytail and a genuinely impressive one comes down to attention to edge control, hair placement precision, and understanding how accessories and details elevate the overall look. Whether you’re drawn to the drama of a high, slicked-back crown, the sophistication of a low placement with an elegant wrap, or the intricacy of feed-in braids and textured details, there’s a sleek weave ponytail that matches your style and skill level.
The styles covered here range from beginner-friendly options like a high ponytail with clean edges to more advanced techniques like feed-in braids and double ponytails. Start with what feels achievable, master your edge control and hair placement, then gradually experiment with more complex variations as you build confidence. Real results come from practice—your first attempt at a curved part or braided detail might not look polished, but by your fifth or sixth time, the technique becomes second nature and the results speak for themselves. A sleek weave ponytail done well signals that you care about the details, understand your personal style, and put thought into how you present yourself.