There’s something undeniably elegant about a well-executed low ponytail, especially when you’re standing beside the bride in formal wedding attire. Low ponytails sit at that perfect sweet spot — they’re polished and sophisticated enough for the occasion, yet far more wearable and comfortable than intricate updos, allowing you to eat, dance, and actually enjoy the celebration without a throbbing scalp. They keep hair off your face and neckline (crucial if you’re wearing a strapless or sweetheart-neckline dress), they photograph beautifully from every angle, and they work with nearly every dress style and personal aesthetic bridesmaid duties might demand.
The real magic of a low ponytail lies in its versatility. There isn’t just one “bridesmaid ponytail” — the style can range from sleek and minimalist to romantic and tousled, from playfully textured to dramatically voluminous. What works for a formal black-tie wedding is completely different from what suits a garden ceremony, and a ponytail that complements long, thick hair might need adjustment for someone with fine or shorter locks. The twelve styles below represent the most flattering, practical, and photograph-worthy low ponytail variations that bridesmaids are actually requesting — styles that have proven themselves in real wedding scenarios, not just on Pinterest boards.
Each style includes specific styling techniques, the hair type and hair length it suits best, and honest troubleshooting advice for common challenges. Whether you’re the one wearing the ponytail or you’re a hairstylist preparing multiple bridesmaids, these options provide both inspiration and actionable direction. Let’s dive into the styles that will keep you looking polished, comfortable, and genuinely beautiful throughout the entire event.
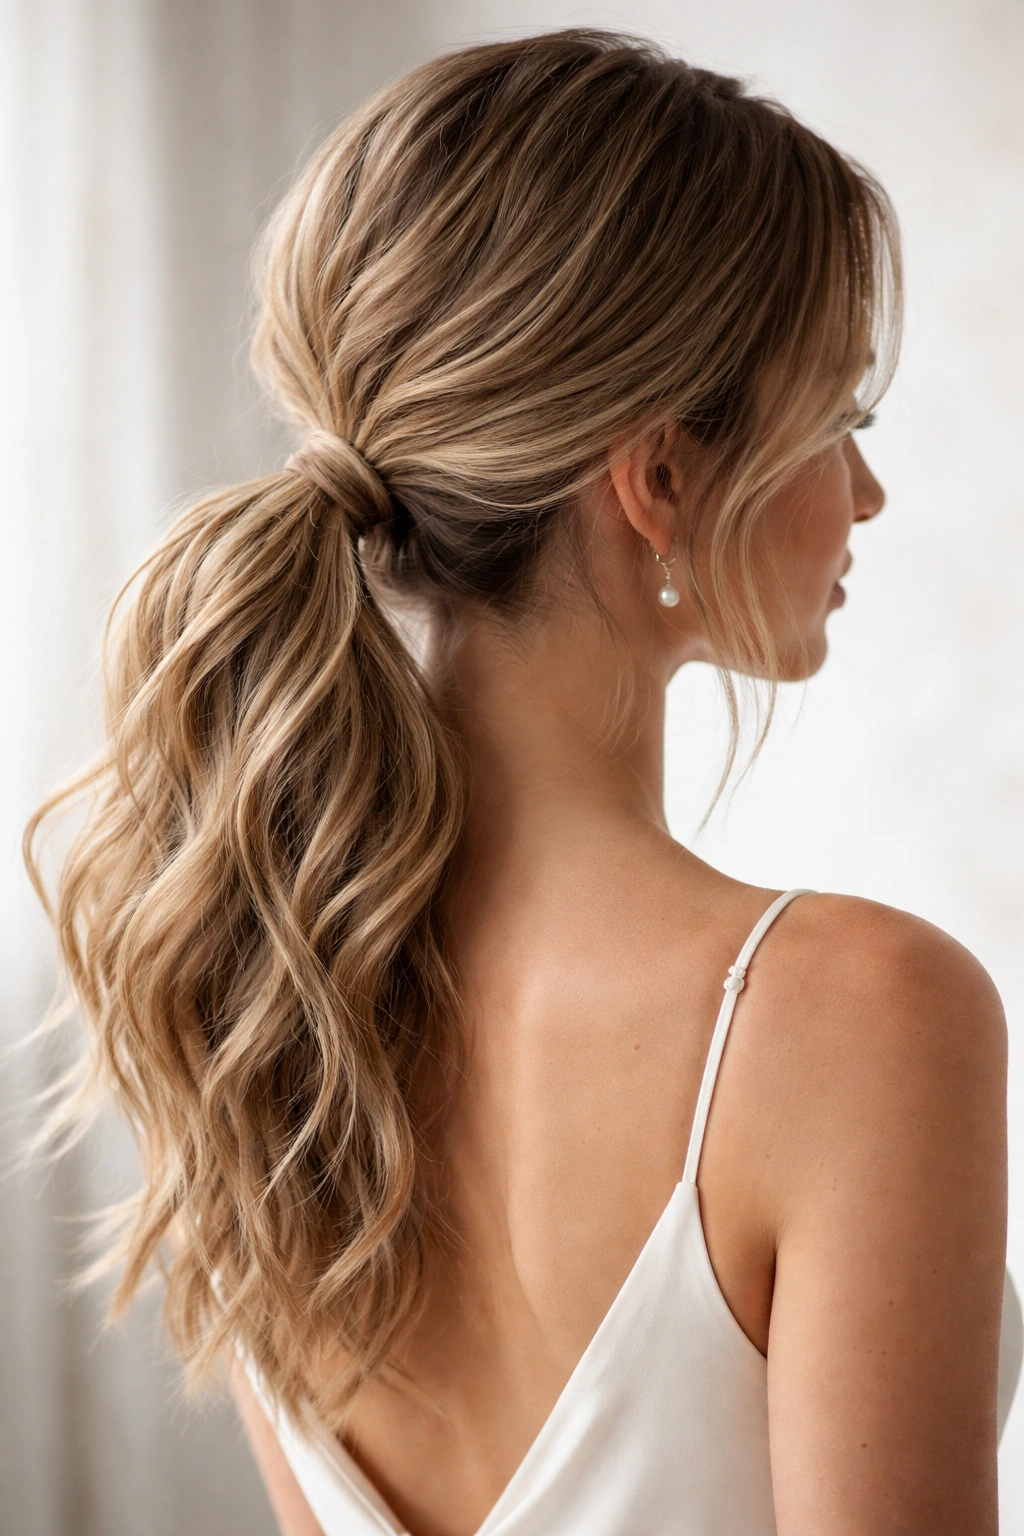
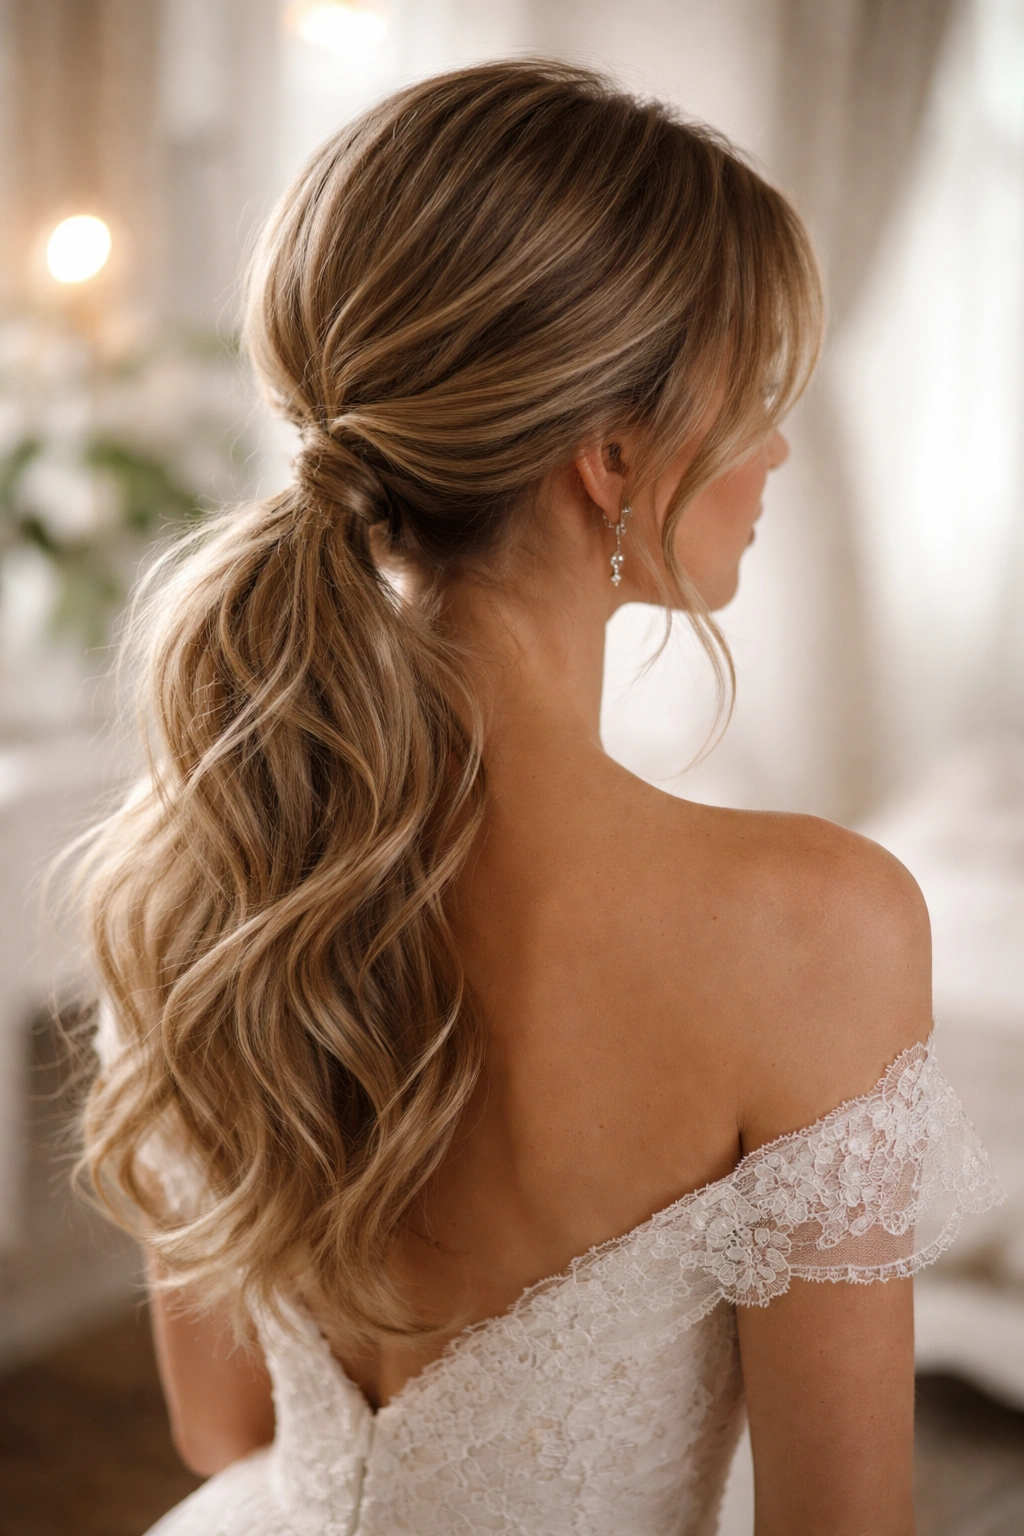
1. The Sleek Low Pony with Face-Framing Pieces
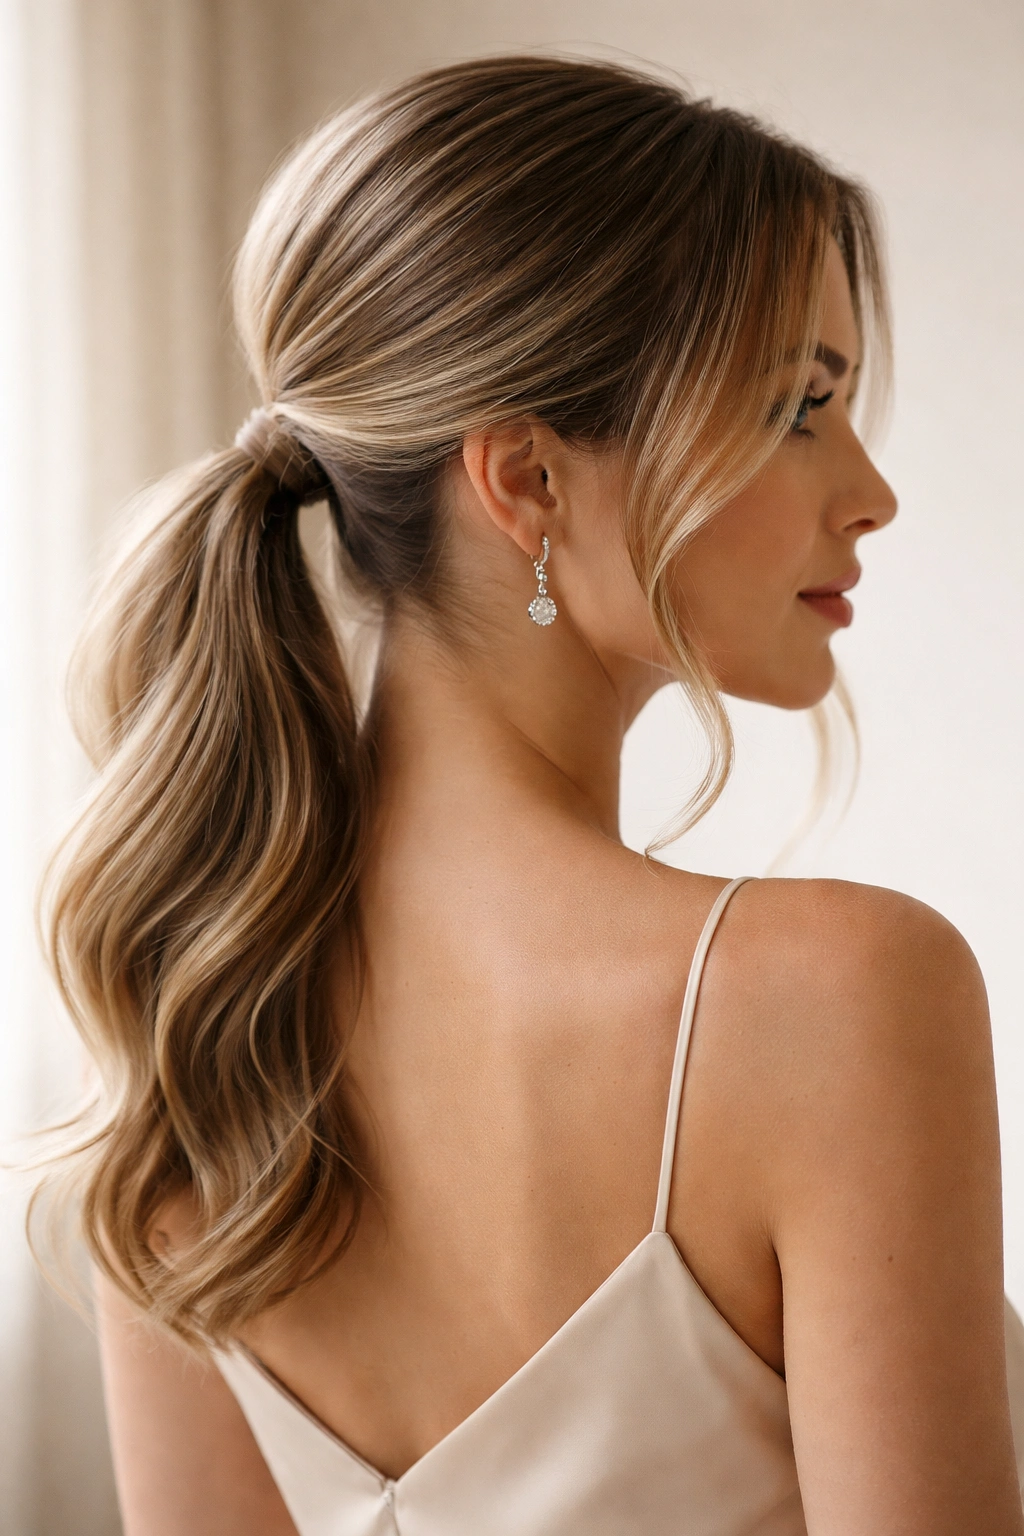
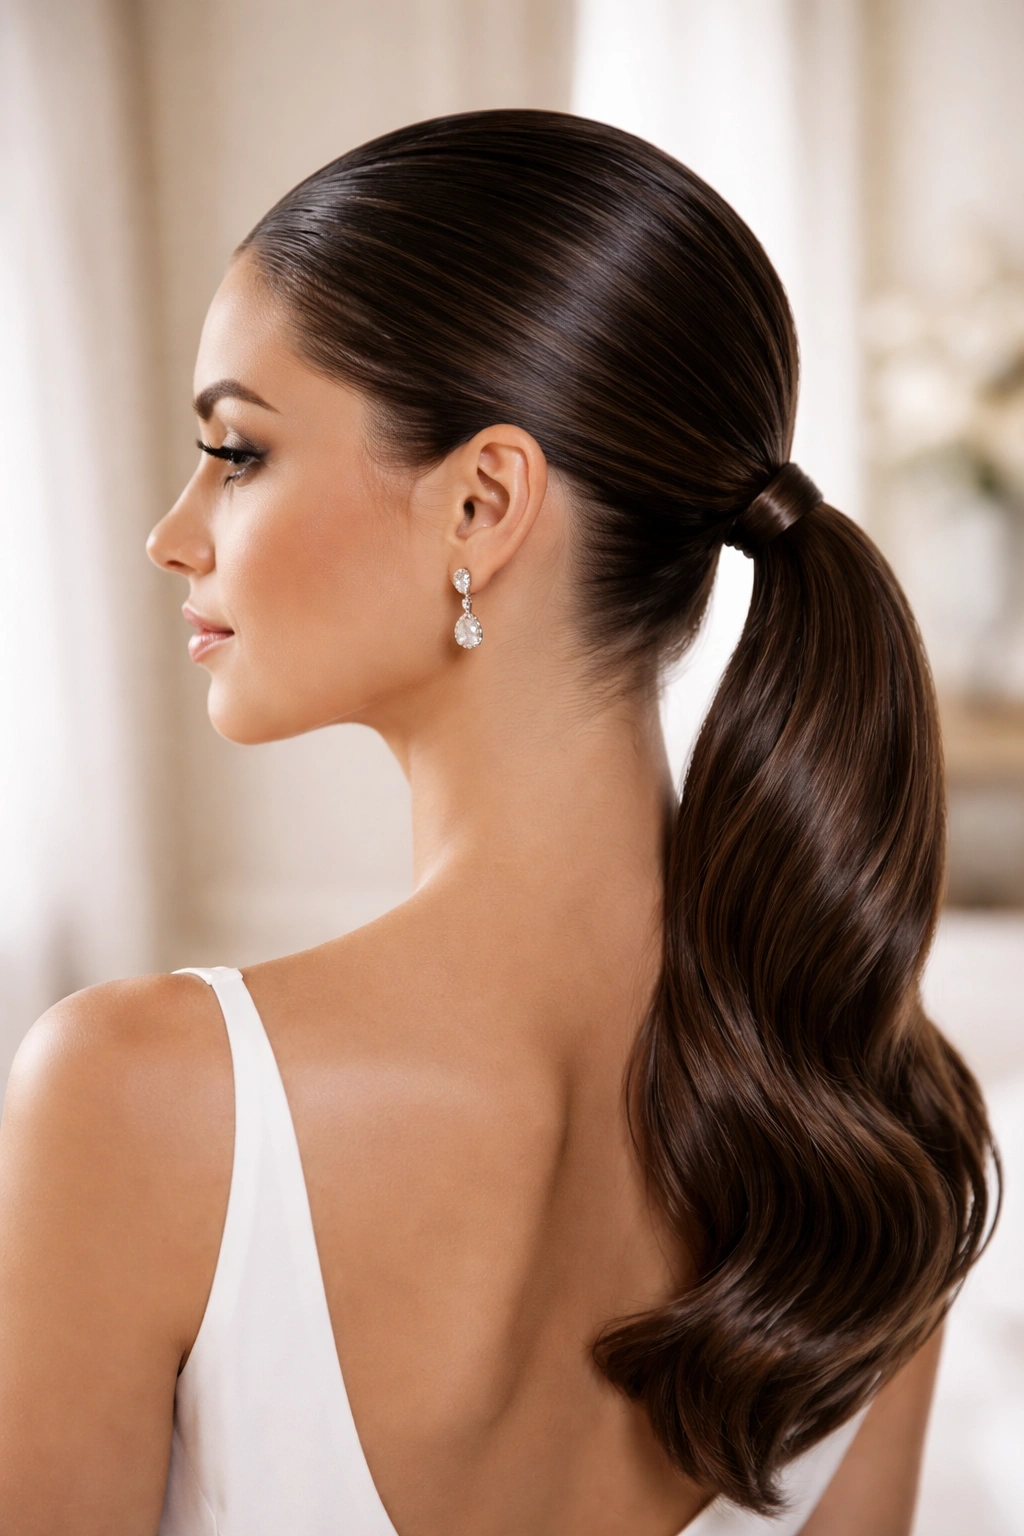
This is the classic bridesmaid move — the style that reads “effortlessly elegant” and works for almost every face shape, age, and wedding aesthetic. The foundation is a smooth, gel-finish low ponytail positioned just below the occipital bone (where your head curves at the base of your skull), with two or three intentionally loose, face-framing pieces that softly bracket your face.
Why It Works for Weddings
The face-framing pieces serve a crucial purpose beyond aesthetics — they create dimension that photographs beautifully, add softness to formal styling without looking casual, and help define your face rather than pulling everything so tightly back that the structure becomes harsh. The contrast between the sleek body of the ponytail and the softer, sometimes slightly curled pieces around the face creates visual interest that prevents the whole look from feeling severe or dated.
How to Execute It Perfectly
Start with completely dry or blow-dried hair — wet hair will lose the sleek finish as it dries. Apply a smoothing serum or anti-frizz cream to damp hair before blow-drying, working it through from mid-length to ends. Blow-dry sections straight, using a paddle brush and medium-high heat. Once completely dry, apply a firm-hold gel or mousse to the roots and smooth the hair back with a fine-tooth comb, using your fingers to distribute the product evenly. Gather hair at the base of your skull, leaving two thin sections (about 1-1.5 inches each) loose on either side of your face. Secure the ponytail with a small elastic, then wrap a small section of hair around the base to hide the elastic — secure with bobby pins. Curl the face-framing pieces lightly with a 1.5-inch curling iron, curling away from the face, then gently pull the curl apart with your fingers for a softer, more natural wave. Finish with light hairspray.
Pro Tips for Success
- Use a shine spray on the smooth sections to make them catch light in photographs
- Don’t pull the ponytail so tight that you look perpetually surprised — “sleek” doesn’t mean painful
- If your hair is particularly fine or has shorter layers, these face-framing pieces will enhance rather than detract, as they add texture and movement where needed
2. The Twisted Rope Low Ponytail
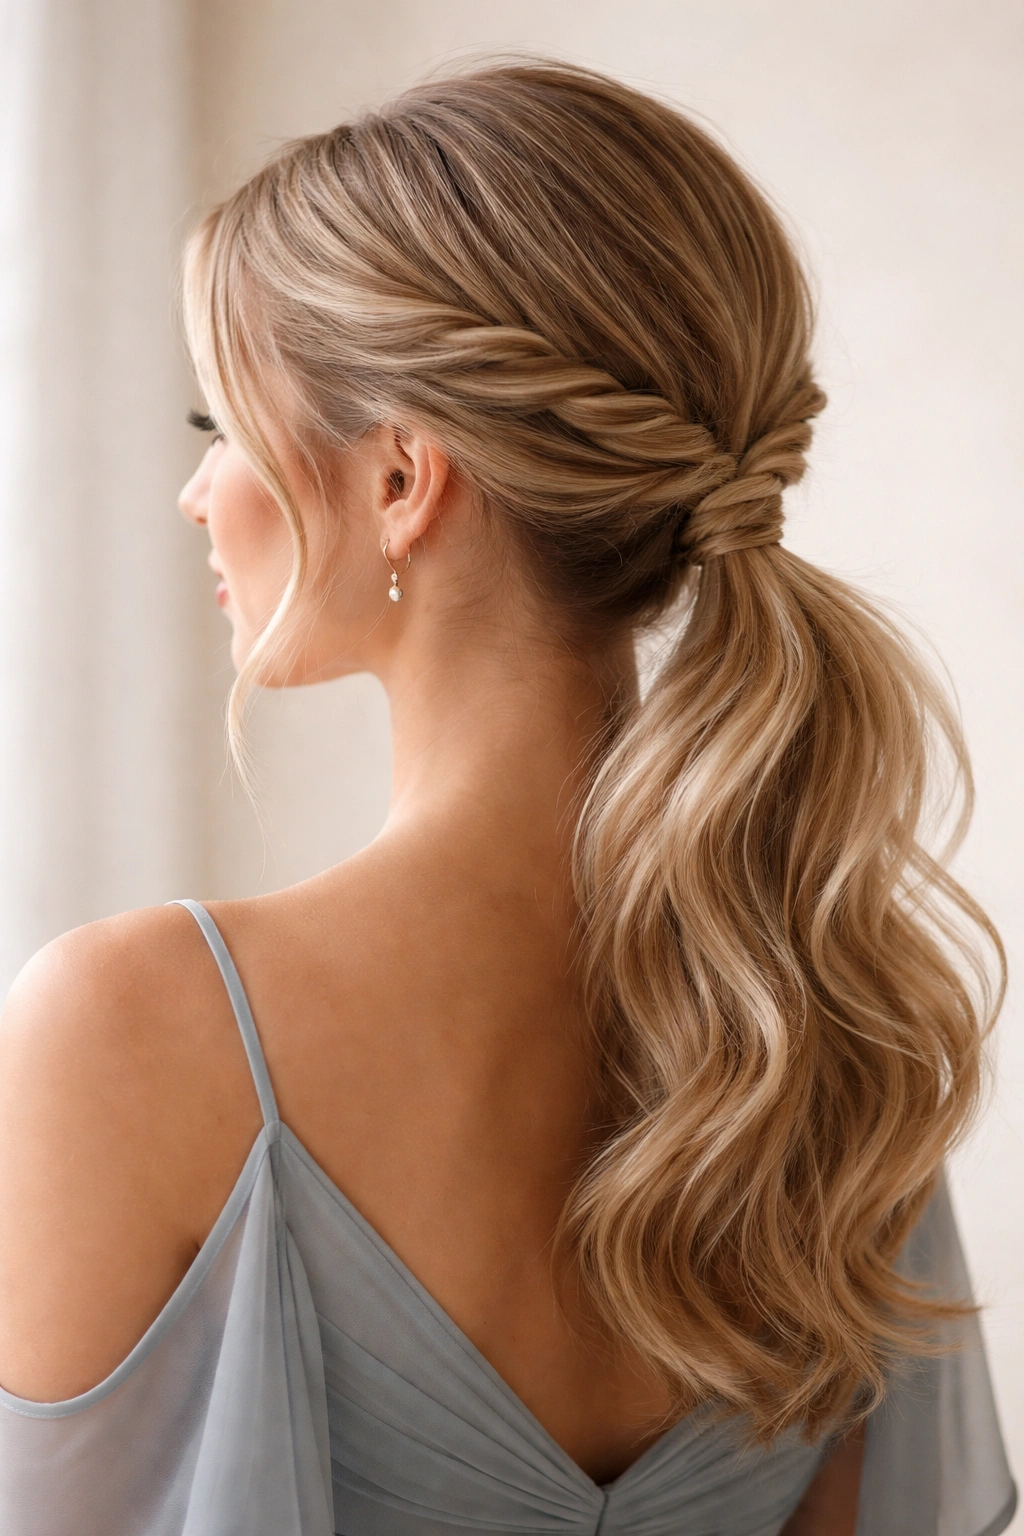
Two-strand twists on either side of the head that spiral down and wrap into a low ponytail create a ponytail that looks infinitely more intricate than the five minutes it takes to create. This style bridges the gap between simple and special without requiring braiding skills or fancy technique — it’s genuinely bridesmaid-proof.
Why This Style Stands Out
Two-strand twists are more forgiving than braids for bridesmaid hair prep, especially if you’re styling multiple people with varying hair texture and thickness. The twists create visual texture and movement that elevate a simple ponytail, and because they wrap around the head, they create a subtle halo effect that photographs exceptionally well. The style works beautifully for second-day hair or hair that isn’t freshly washed — in fact, day-old hair often holds twists better than squeaky-clean strands.
Step-by-Step Technique
Blow-dry hair smooth and straight. Starting at one temple, take a 1-inch vertical section of hair and divide it into two strands. Twist the two strands around each other, adding small sections of hair as you spiral back toward the opposite ear — this is exactly like a two-strand twist braid, but you’re not crossing the strands over each other, just twirling them together. Continue until you reach the back of the head, roughly at ear level. Secure that twist temporarily with a bobby pin. Repeat on the other side of the head, mirroring the placement. Gather both twists and your center hair into a low ponytail at the base of your skull. Wrap a section of ponytail hair around the elastic to hide it, securing with bobby pins. Use hairspray to secure any loose pieces. If you want extra texture and dimension, gently pull the twists apart slightly — this relaxes them and makes them look intentionally undone rather than tight and neat.
What to Know About This Style
This works beautifully on medium to thick hair. If your hair is very fine, use volumizing mousse on the roots before twisting to give the twists more grip and body. The twists will hold better if you sleep on them (literally sleep with them loosely twisted and pinned, then reinforce them before the event).
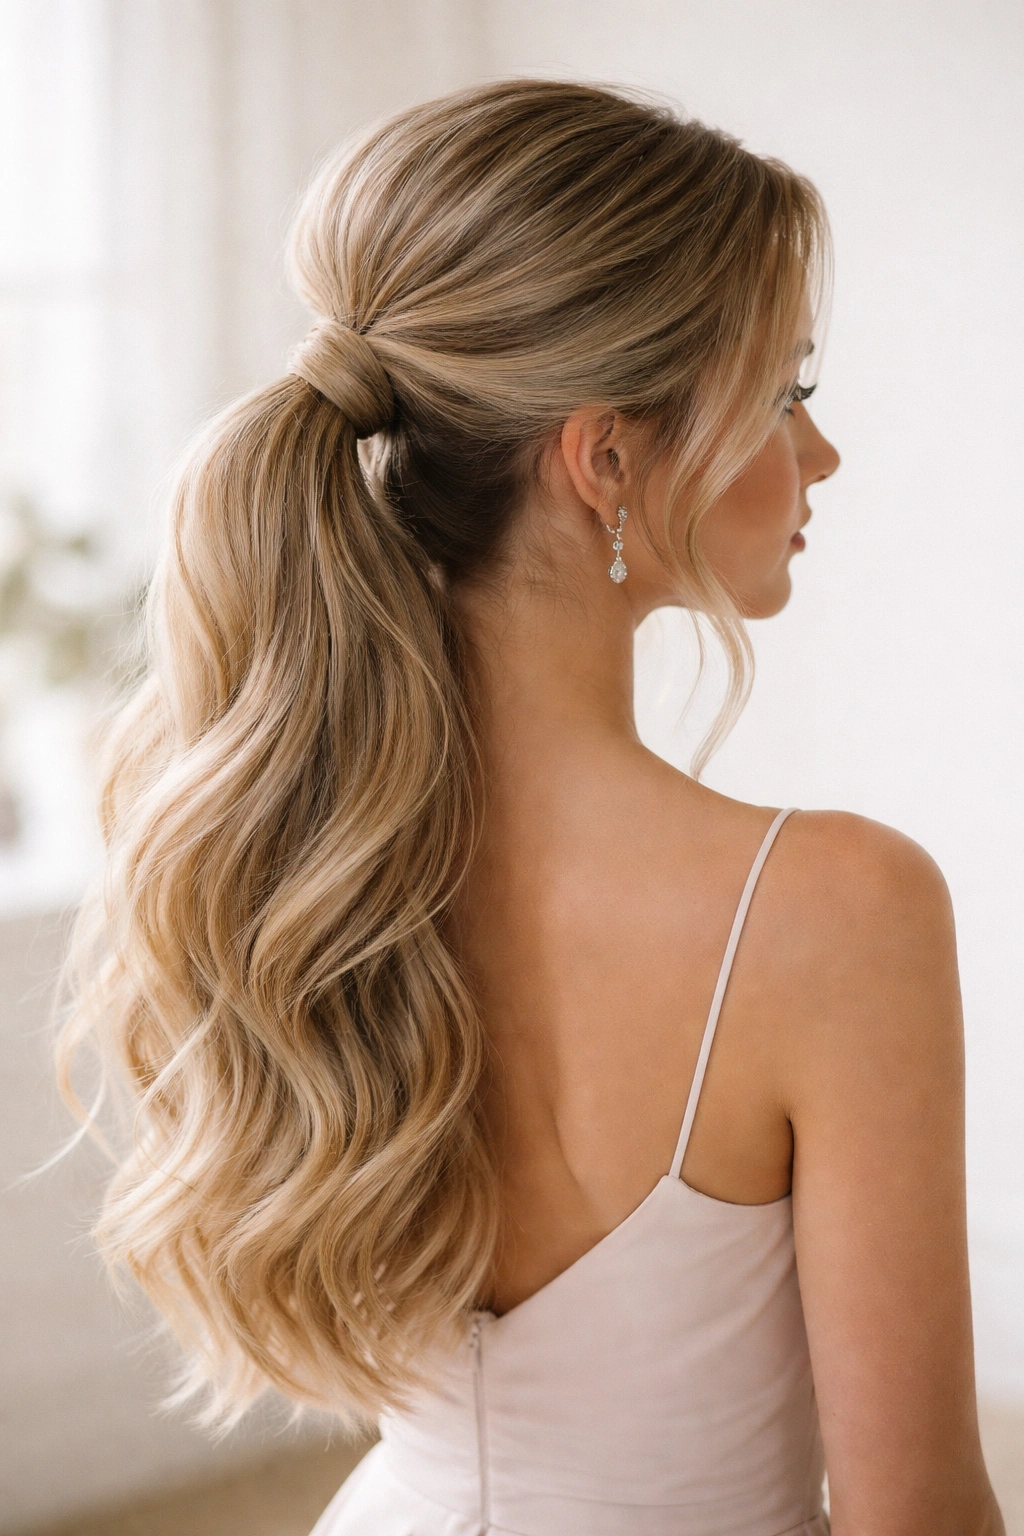
3. The Voluminous Low Bun Ponytail
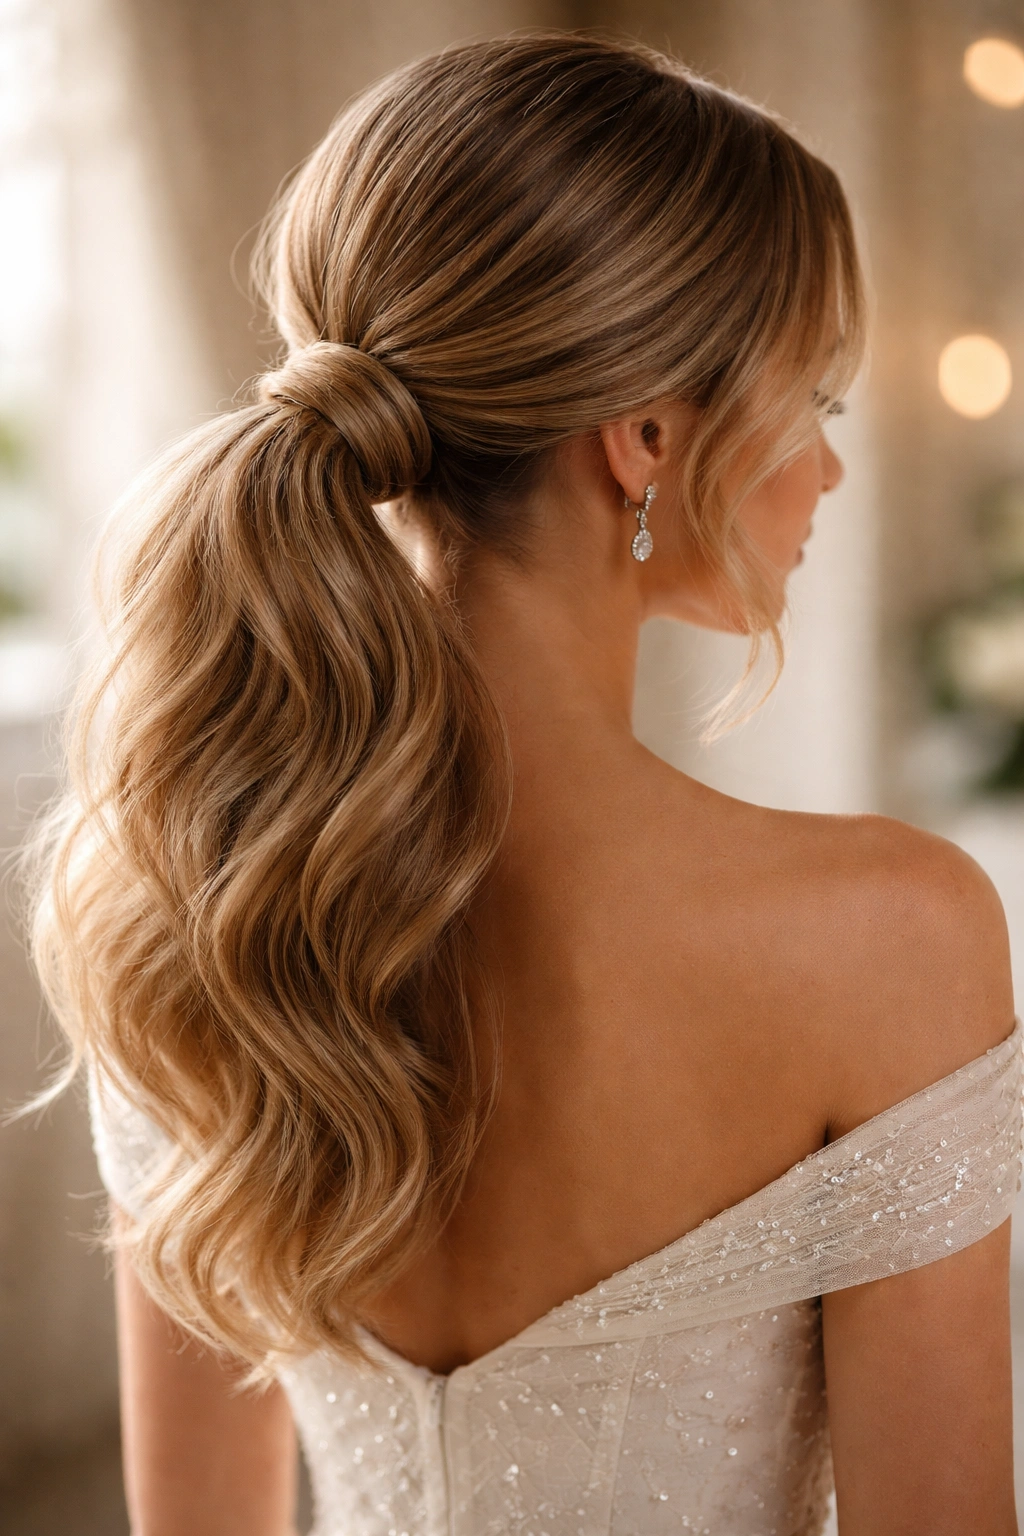
Sometimes the goal isn’t sleek — it’s romantic, textured, and visually generous. This style creates a soft, rounded shape at the base of the ponytail that reads as luxe and intentional. It sits somewhere between a true low bun and a low ponytail, with volume throughout the ponytail itself rather than just at the base.
Why It Suits Formal Events
The rounded shape is incredibly flattering, especially for oval and longer face shapes. It creates a visual emphasis at the back of the head and neckline, which is perfect if you’re wearing a backless, low-back, or daring neckline dress. The softness and volume of this style photograph beautifully, catching light and creating dimension that flatter images can’t quite capture in person.
How to Build Real Volume
This style requires some strategic teasing. Blow-dry hair with maximum volume — flip your head upside down, blow-dry with a round brush, and focus heat on the roots. Once completely dry, section off the top layers you’ll keep smooth. Tease the underneath sections aggressively at the roots using a fine-tooth teasing brush, working vertically to build maximum height and texture. Smooth the top layers over the teased sections with a paddle brush. Gather everything into a low ponytail, making sure the elastic is positioned snugly but not painfully. Now here’s the key step: separate the ponytail into sections and tease each section lightly, then smooth the outermost layer of each section. This creates texture throughout the ponytail without making it look matted or messy. Wrap a section of hair around the base and secure. You can curl the ends loosely for extra softness, or leave them straight for a more modern look.
Styling Products That Matter
Use a texturizing spray before teasing — it gives grip and helps the tease hold all day. Finish with a flexible-hold hairspray that doesn’t make hair look crunchy (avoid hard-hold formulas for this style).
4. The Braided Crown Low Pony
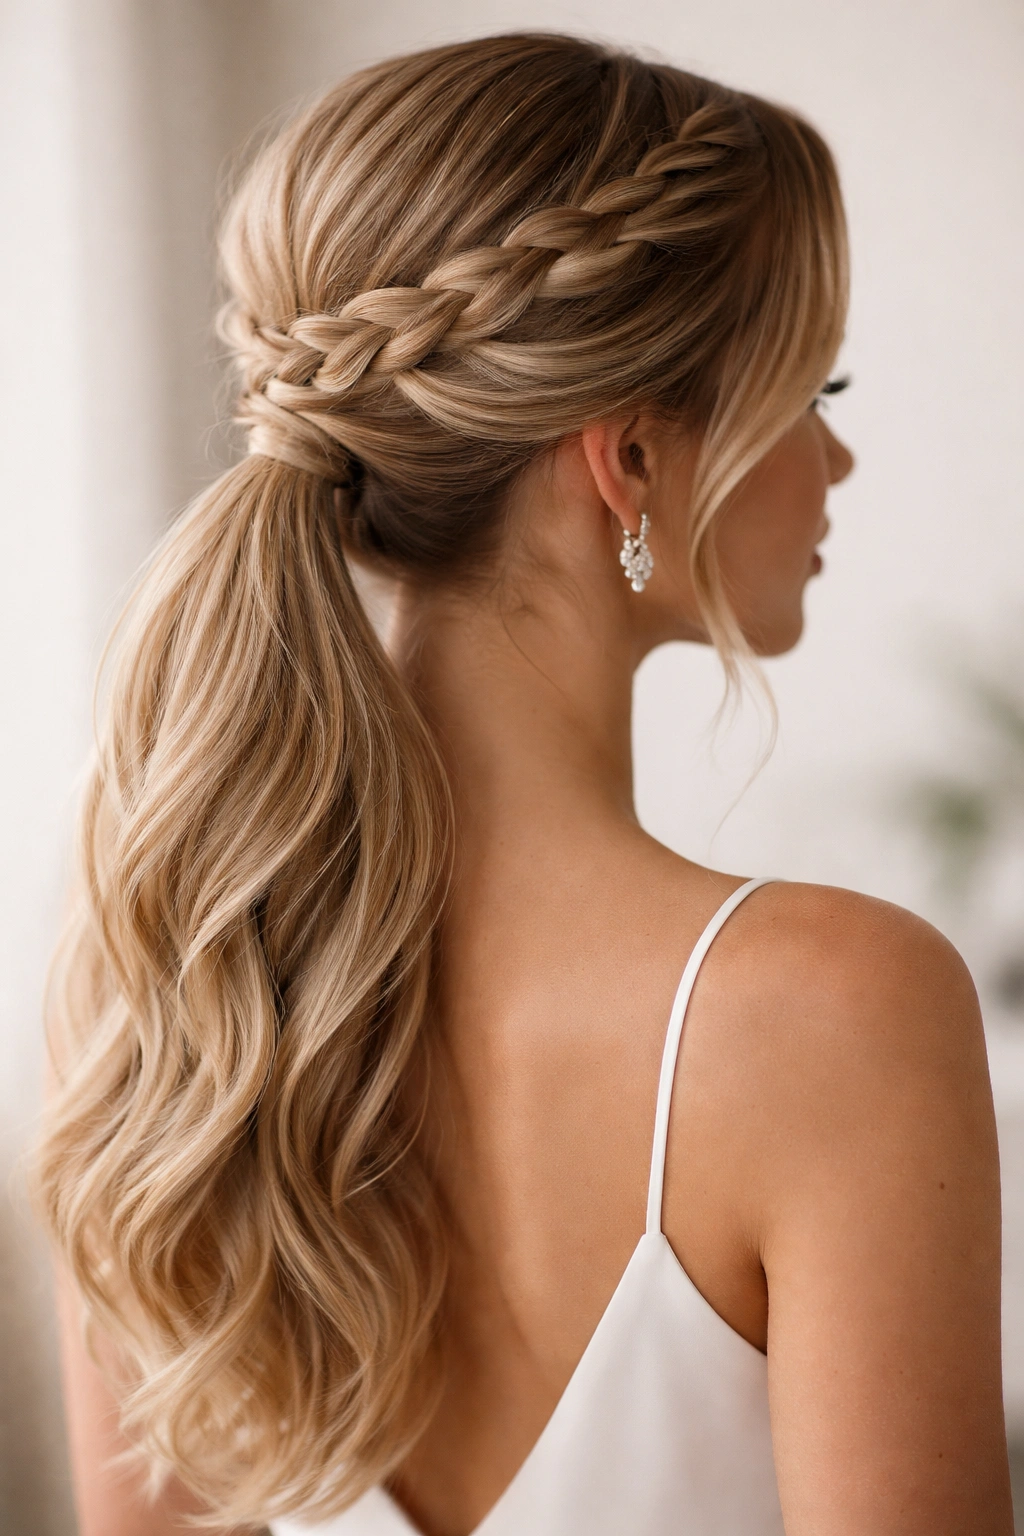
A simple braid that starts at one side of the head, travels across the crown, and merges into a low ponytail creates the impression of a far more elaborate style than is actually required. This works for bridesmaids who want something distinctly different from a simple smooth ponytail but don’t want to commit to a full braided updo.
What Makes This Style Special
The braid creates a framing element that’s romantic and bride-appropriate without being overly trendy or playful. It adds movement and dimension while keeping hair off the face and away from the neckline. The braid also serves a practical purpose — it’s a built-in anchor that helps keep the whole style in place throughout a day of movement, eating, and celebration.
Braiding Technique That Actually Works
Start with smooth, dry hair. Part your hair slightly off-center (closer to one side). Begin a three-strand French braid at the temple of the fuller side, braiding upward and backward toward the crown. As you braid, gradually incorporate hair from the top and sides of the head. Once you reach the opposite ear, finish with a simple three-strand braid the rest of the way back. Secure the end of the braid with a small elastic. Gather the braid and remaining loose hair into a low ponytail, positioning it just below the crown. Secure with an elastic and wrap a section of hair around the base. Gently pull the braid apart to loosen and soften it — this takes it from “neat” to “romantic” instantly. Set everything with hairspray.
Real Talk About Braiding
If French braiding isn’t your strong suit, use a Dutch braid (braiding underneath instead of over) or even a basic three-strand braid that travels diagonally across the head. The exact braid technique matters less than the overall effect. Most guests won’t know the difference between a French braid and a Dutch braid — they’ll just see “braided,” which reads as more formal and intentional than a plain ponytail.
5. The Textured Tousled Low Ponytail
This style looks effortlessly undone while being entirely intentional. It’s for bridesmaids who want polish and formality but also want their hair to look like something they could have naturally woken up with — the “undone wedding guest” vibe but elevated to actual bridesmaid sophistication.
Why Texture Matters for Photography
Smooth, sleek hair photographs beautifully in certain lighting, but textured hair creates visual interest and depth in images from nearly every angle. The slight imperfection of this style actually reads as more modern and relatable than severe slickness. It’s also genuinely more comfortable to wear for twelve-plus hours because there’s less tension on the scalp.
Creating Intentional Texture
Start with day-old or texturized hair — apply dry shampoo liberally if you have fresh-from-the-shower hair, and work it through with your fingers to add grip and texture. Using a 1.5-inch curling iron, curl all your hair away from the face in loose waves, letting each curl cool before handling it. Once everything is curled, run your fingers through your hair to break up the curls into waves rather than individual ringlets. Flip your head upside down and gently shake it to distribute texture throughout. Gather hair into a low ponytail, making sure it’s slightly loose rather than tight — you want some pieces to escape and create a soft, undone feeling. Don’t worry about perfect smoothness in the ponytail itself. Use a flexible-hold hairspray rather than a firm-hold version, which will help everything stay in place while maintaining a soft, natural look.
Styling Reality Check
This style works beautifully on thick, wavy, or textured hair. If your hair is very fine, start with volumizing mousse applied to dry roots and blow-dry upside down to build body. Use the curling iron to add waves, skip the “breaking up” step, and keep the texture a bit more defined since thin hair can look limp if you over-manipulate the waves.
6. The Half-Down Half-Up Low Pony
This is the style for bridesmaids who love the idea of a low ponytail but aren’t ready to commit to pulling all their hair back. The half-down half-up style satisfies both desires — it’s formal enough for wedding standards, still shows off length and texture through the loose hair, and creates a softer overall appearance than a full ponytail.
When to Choose This Version
This style works beautifully if you have thick, long hair and you want to avoid a ponytail that feels heavy or thick. It’s also ideal if you prefer a slightly softer, less severe look. The half-down approach creates a romantic, princess-adjacent aesthetic that photographs beautifully and suits boho, garden, and casual-elegant weddings particularly well.
The Proper Execution
Blow-dry all your hair wavy or straight, depending on your preference. Take the top half of your hair (from ear to ear across the crown) and brush it smooth. Gather this top section loosely — you’re not aiming for a tight grip, just a gathered half-ponytail that sits just above the crown. Secure with an elastic. Wrap a small section of hair around the elastic to hide it. Now you can either leave the bottom half completely loose, or you can curl it loosely to add softness and movement. The contrast between the controlled top and the loose, flowing bottom creates visual balance.
Pro Tips for Volume and Balance
If you have very thick hair, tease the gathered top section slightly before securing to add height and prevent an overly heavy, slicked-back appearance. Make sure the elastic is positioned high enough on the crown that it’s visible only from behind — you don’t want it appearing in the middle of the side of your head. Use the loose hair to frame your face naturally rather than pushing it all to the back.
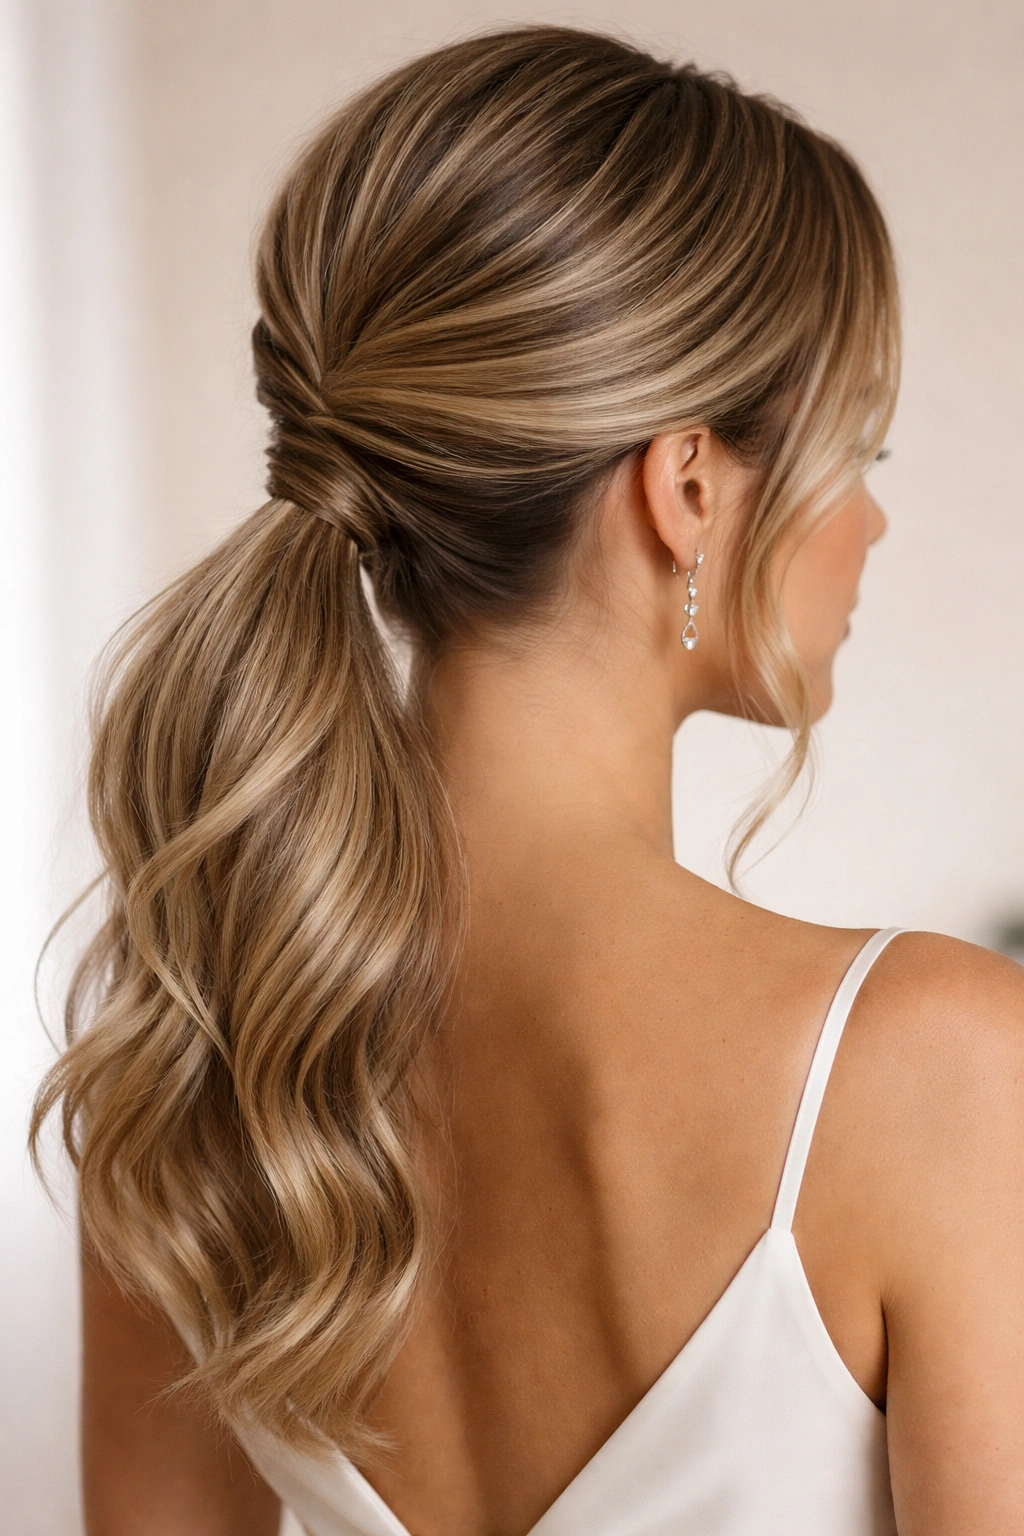
7. The Sleek Gel-Finish Low Ponytail
This is the modern, edge-forward option for bridesmaids who want absolute sleekness and don’t mind a more contemporary aesthetic. The gel finish creates a polished, almost wet-look appearance that’s undeniably chic and photographs with crisp, clean lines.
Why This Works for Modern Weddings
Contemporary and minimalist weddings have moved away from romanticized, soft hairstyles. A sleek gel-finish ponytail reads as intentional, current, and sophisticated in these settings. The sharp lines and shine create a striking visual that translates beautifully to photos, especially in professional lighting. This style also stays put completely — there’s zero risk of loose pieces escaping throughout the day.
Creating the Gel-Finish Look
Start with completely dry hair and apply a smoothing serum to damp hair before blow-drying. Blow-dry thoroughly, ensuring every section is completely dry. Once dry, apply a strong-hold gel to your hands and work it through your hair, particularly around the face and sides where flyaways tend to emerge. Use a fine-tooth comb to smooth the hair back and create a polished, uniform appearance. Gather hair into a low ponytail — the gel will hold it firmly without needing a tight elastic, which is actually more comfortable. Secure with a small elastic and wrap a hair section around the base. For maximum shine, use a shine spray or serum on the ponytail itself. The gel finish should look intentional and polished, not greasy or dirty — if you’re concerned about the line between “sleek” and “unwashed,” use less gel and let the blow-dry style do most of the heavy lifting.
Product Considerations
Not all gels are created equal for this purpose. Look for flexible-hold gels designed for smoothing (not super-firm sculptural gels). Application matters — work the gel through evenly to avoid clumpy texture. Test your gel choice before the wedding day to ensure it provides the hold you want without leaving white residue or looking obviously product-heavy.
8. The Curled Low Ponytail with Tendrils
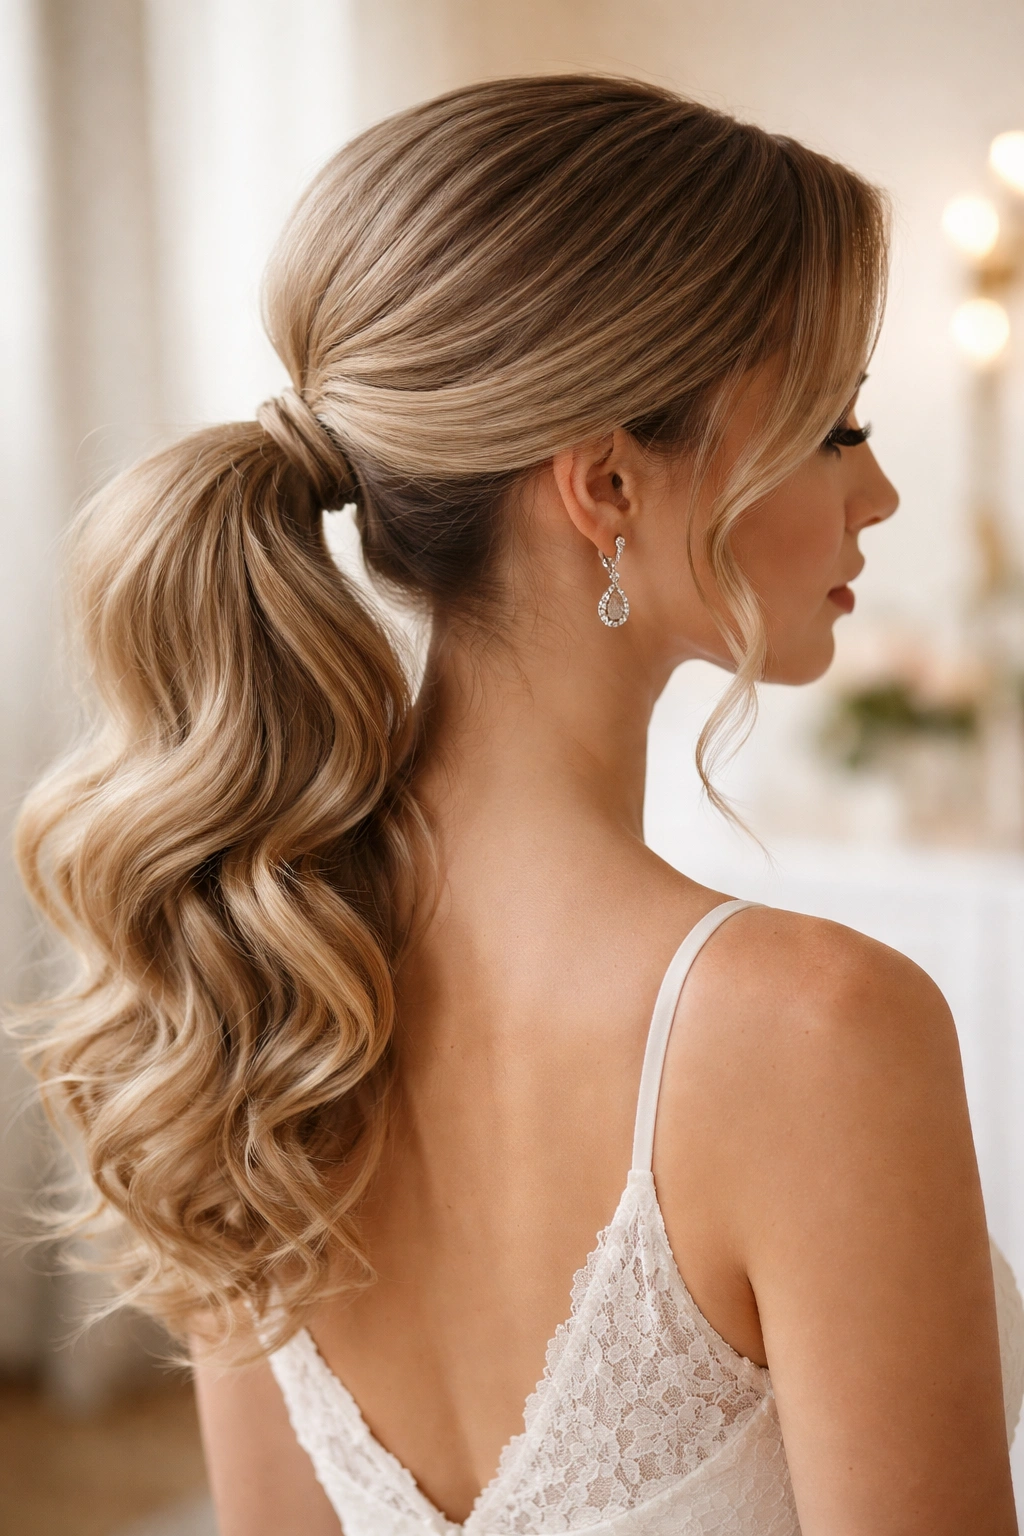
This style marries the sophistication of a low ponytail with the romance of soft waves and curls. Strategic loose tendrils around the face and delicate curls throughout the ponytail itself create movement and a notably softer appearance than a smooth ponytail alone.
Why Curls Add Dimension
Curls catch light beautifully and create texture that photographs with depth and dimension. The contrast between the controlled shape of a low ponytail and the organic movement of curls creates visual interest that sophisticated viewers recognize as intentional and well-executed. This style feels special without feeling costume-y or over-the-top.
Technique for Long-Lasting Curls
Blow-dry hair smooth and straight as a foundation. Once completely dry, take vertical sections and curl with a 1.5-inch curling iron, curling the top and middle sections away from the face and curling the underneath sections slightly toward the face for dimension. Allow curls to cool before touching them. Gather the back into a low ponytail, leaving two small sections loose at the temples as tendrils. Secure the ponytail with an elastic and wrap a section around the base. Now comes the key: gently pull each curl apart to soften and loosen the ringlet shape into more of a wave — this prevents the style from looking too formal or pageant-y. The tendrils can either remain as defined curls or be gently softened as well, depending on the overall vibe you want. Set everything with a flexible-hold hairspray.
Making Curls Last All Day
Use a curl-setting spray before curling for extra hold. After creating all curls and before pulling them apart, mist everything with hairspray and allow it to dry completely before handling the hair. This “sets” the curl shape. Use a finishing spray rather than a true hairspray at the very end — it holds movement without making hair feel stiff.
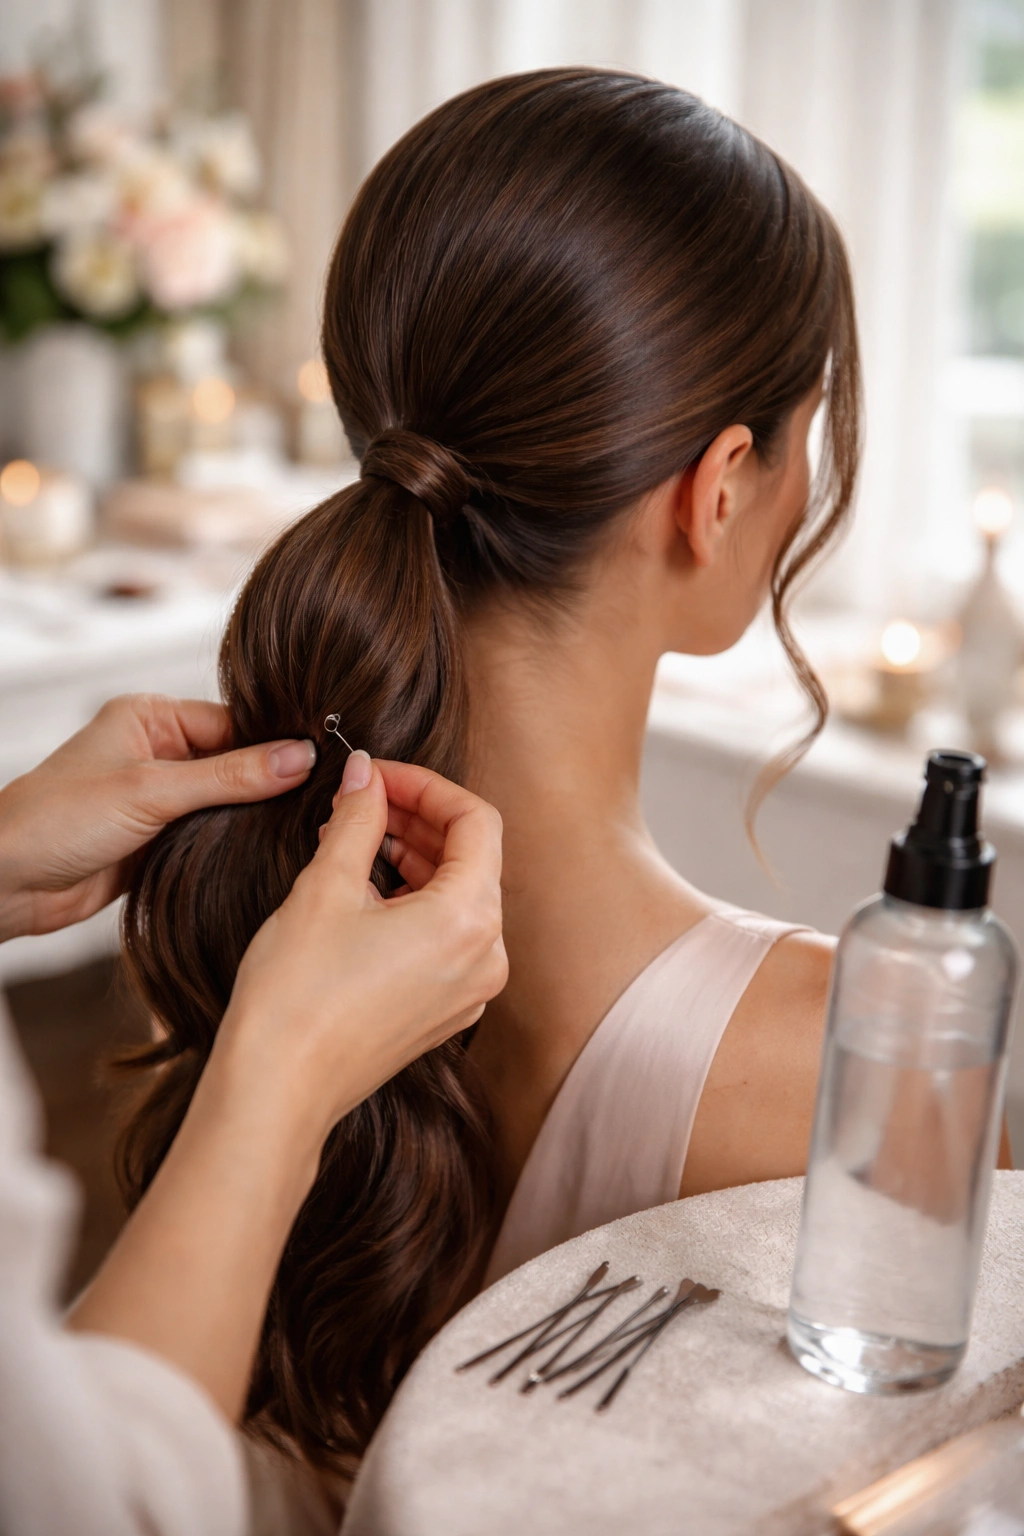
9. The Wrapped Ponytail with Pearl Accent
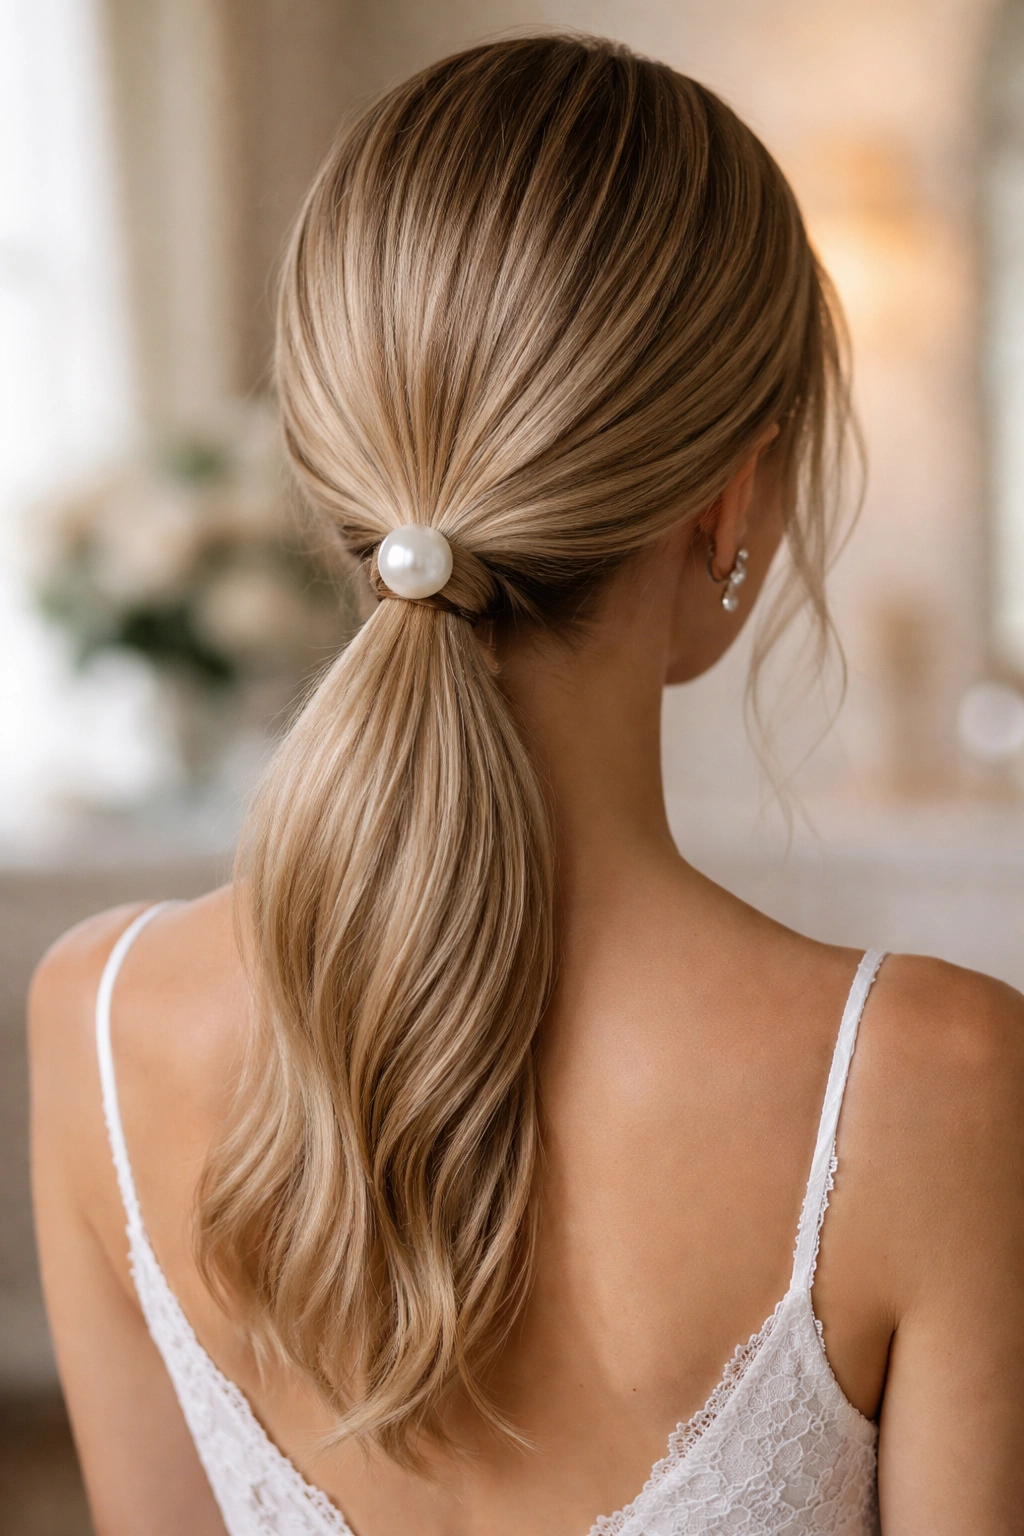
This style adds a decorative element that transforms a simple low ponytail into something distinctly special and wedding-appropriate. A delicate pearl hair clip, decorative bobby pin, or thin metallic hair wrap creates a focal point that draws the eye and adds sophistication without bulk.
Jewelry for Hair, Done Right
A single pearl accent or a cluster of pearl bobby pins positioned at the base of the ponytail works for classic, romantic, and traditional weddings. For modern or minimalist events, a sleek metallic hair cuff or a thin gold or silver wrap creates polish. The key is restraint — one focal point accent reads as intentional; multiple sparkly elements everywhere reads as costume jewelry. Coordinate the finish (gold, silver, pearl, rose gold) with the bride’s jewelry and wedding palette.
Styling to Showcase the Accent
Keep the ponytail itself relatively simple and smooth so the accent becomes the visual focal point. A sleek, straight ponytail with a pearl accent is infinitely more elegant than a chaotic, textured ponytail with the same accessory — the accent needs clear space to read as special. Position the accent directly at the center back where the elastic sits, so it’s visible primarily from behind and the side. If you’re wearing the ponytail yourself and you’ll be hugging people throughout the event, consider how visible the accent will be from various angles.
Where to Find Appropriate Accessories
Bridal boutiques and upscale hair accessory retailers carry specifically wedding-appropriate options. Etsy also has beautiful handmade options with pearl, crystal, or metallic finishes. Don’t use costume jewelry hair clips — the quality difference is noticeable in photographs and in person. If the bride or wedding planner hasn’t specified an accessory, choose something subtle in metal finish rather than plastic-y sparkly options.
10. The Undone Romantic Low Pony
This is the style for bridesmaids who identify with “romantic” and “soft” — the aesthetic is dreamy, approachable, and intentionally imperfect. It looks like you woke up with this aesthetic naturally, even though it absolutely required strategic styling.
Creating Soft, Romantic Texture
Start with two-day-old hair or use dry shampoo to add texture to freshly washed hair. Apply a texturizing spray throughout. Curl all your hair loosely with a 1.5-inch curling iron, creating soft waves rather than defined ringlets. Let curls cool completely. Once cooled, run your fingers through to break the curls apart into waves, working from the ends upward. Flip your head upside down and shake gently to redistribute texture. Gather hair into a low, slightly loose ponytail — this isn’t about a perfect, tight silhouette. You want the back of your head to look gently rounded rather than severely pulled back. Use flexible-hold products rather than firm-hold, so everything stays in place without looking plastic or product-heavy.
Adding Softness Without Sacrificing Structure
A few carefully placed bobby pins hidden in the soft, textured sections can help keep loose pieces in place without creating visible structure. Use them sparingly and hide them completely in the texture. Let a few small pieces escape from the ponytail around the face and low at the nape of the neck — these create the “undone” quality that defines the style.
The Mindset Shift
Romantic and undone doesn’t mean messy or unprepared. Every element is intentional; it just appears effortless. This requires actual execution and product, even though the final appearance suggests minimal effort.
11. The Diagonal Twist Low Ponytail
This style adds visual sophistication through an asymmetrical element — instead of gathering hair straight back into a low ponytail, you gather it with a slight diagonal placement and add a twisted detail that travels from one side toward the ponytail.
Why Diagonal Works Visually
A perfectly centered, symmetrical ponytail is beautiful but straightforward. A slight diagonal element creates visual interest and a sense of movement even in a stationary hairstyle. It’s modern and sophisticated while remaining entirely appropriate for formal events. The diagonal twist also works beautifully with asymmetrical faces or off-center facial features.
Creating the Diagonal Effect
Blow-dry hair smooth. Instead of gathering hair straight back from the middle of the head, gather it slightly to one side — so the gathered ponytail sits just slightly left or right of center rather than perfectly middle. Starting from the opposite temple (if you’re gathering slightly right, start from the left temple), create a two-strand or three-strand twist that travels diagonally back toward where the ponytail will sit. Secure the twist temporarily with a bobby pin. Gather the twist and remaining loose hair into the low ponytail. Secure with an elastic and wrap a section around the base. Gently loosen the twist to soften it slightly. The final effect should look intentionally asymmetrical without looking like you’ve made a mistake — the diagonal element should feel like a deliberate design choice.
Who This Works For
This style works beautifully on longer hair and particularly flatters people who prefer less symmetry in their styling. It also works well if you’re trying to create the illusion of balance on a face that’s naturally asymmetrical.
12. The High-Volume Teased Low Ponytail

For bridesmaids who want genuine volume and presence without resorting to a full updo, strategic teasing creates a low ponytail with serious height and drama. This is the option when you want to feel genuinely special and pampered.
The Role of Teasing in Formal Hair
Teasing isn’t just for creating 1980s volume — when done skillfully, it creates structure and hold while making hair look fuller and more luxe. Professional stylists use teasing as a foundational technique for nearly every formal hairstyle. It’s not a shortcut; it’s a legitimate professional method.
Strategic Teasing for Maximum Impact
Section your blow-dried hair into the top layer (which you’ll keep smooth) and the bottom layers. Tease the bottom layers aggressively at the roots using a fine-tooth teasing brush, working vertically to create maximum volume without creating obvious texture. Smooth the top layer over the teased sections with a paddle brush. At the crown and around the face, you can tease slightly for height without creating a heavy, matted appearance. Gather everything into a low ponytail. To create volume throughout the ponytail itself, separate it into sections and tease each section at the base lightly, then smooth the outer layer. This creates a ponytail that’s full and rounded rather than flat and thin.
Product Support for Teased Hair
Use a volumizing mousse on damp roots before blow-drying — this gives the teasing something to grip. Use a texturizing spray before teasing to improve grip and hold. Finish with a light hairspray that holds without feeling heavy or crunchy. Avoid brushing through teased sections aggressively after styling — gently smooth with your fingers instead to preserve the teased texture underneath.
Bridesmaid Ponytail Tips and Preparation
Proper preparation determines whether your ponytail looks freshly done at the 2pm ceremony and maintains that look through the 11pm send-off. Several hours before the wedding, eat something substantial and drink water — you want to feel your best, not lightheaded, especially if you’re standing for the ceremony. Schedule hair styling for the day-of rather than the night before when possible; overnight styling rarely stays perfect. If you must style the night before, sleep on a silk pillowcase to prevent frizz and breakage.
Use a primer-quality hairspray as a foundation, applying it before you even blow-dry. This improves the hold of every styling technique you use afterward. Consider a light texturizing spray the day before the event, applied to damp hair — this gives you a head start on texture and hold without requiring extra product application on wedding morning. On the day itself, use dry shampoo at the roots about two hours before the event, working it in gently with your fingers and allowing it to sit before brushing through.
Bring backup supplies: bobby pins in a color that matches your hair (not just brown, but actually matching your specific shade), two small hair elastics, a small bottle of flexible-hold hairspray, and bobby pins with pearl or decorative heads to secure any loose sections. A silk hair wrap or bonnet protects your style during the car ride to the venue. If you’re having your hair professionally styled, arrive with clean but not freshly-washed hair — hair that’s 1-2 days old holds styling far better than squeaky-clean hair.
Communicate with the wedding planner or bride about whether you need to match the other bridesmaids’ styles or whether individual interpretation is welcome. Even if styles match the other bridesmaids, small differences in texture, curl pattern, and length mean each person’s interpretation will look slightly different. Embrace that rather than stress about pixel-perfect matching. Test your style at home before the wedding day if this is a style you’ve never worn — video yourself from different angles to see how it photographs and how it looks when you move and sit.
How to Customize These Styles for Different Hair Types
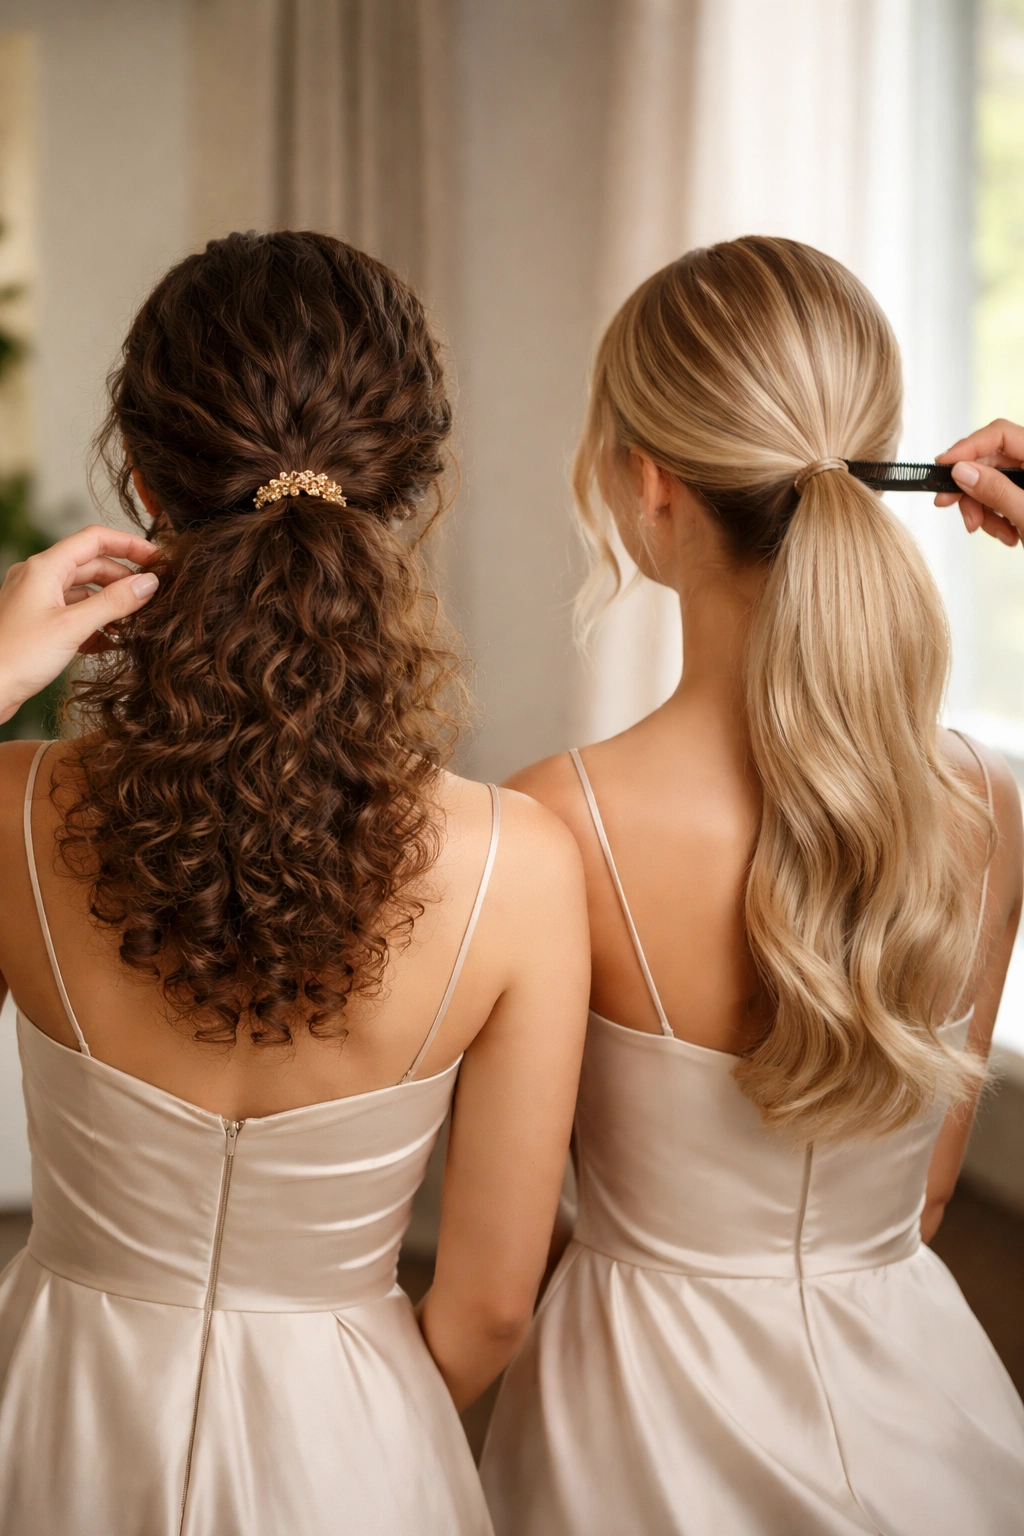
The most critical step for any ponytail style is honest assessment of your actual hair type and texture — not what you wish your hair were, but what it genuinely is. Fine, thin hair requires different techniques than thick, coarse hair. Curly hair poses different challenges than straight hair.
For fine or thin hair: Avoid styles that pull all your hair into a tight knot, which will show scalp and look thin. Instead, choose the voluminous low bun ponytail, the textured tousled low ponytail, or the high-volume teased low ponytail — these styles use technique to create the appearance of more hair than you actually have. Volumizing mousse applied to damp roots is essential. Use the curling iron to create waves rather than relying on sleekness. Consider the face-framing pieces style if you’re concerned about overall thinness — the loose pieces around your face create fullness and movement. Avoid firm-hold gels and products that weigh hair down.
For thick, coarse, or textured hair: You have the advantage of working with hair that naturally holds styling well. The sleek gel-finish ponytail, the twisted rope low ponytail, and the braided crown low pony all work beautifully. Thick hair can support more complex styles and decorative elements without looking overdone. Your challenge is smoothness rather than volume — use a smoothing serum and good blow-dry technique. The textured tousled low ponytail is particularly forgiving on this hair type since your natural texture becomes part of the intended aesthetic.
For wavy or naturally curly hair: Play to your hair’s strengths rather than fighting them. The curled low ponytail with tendrils, the undone romantic low pony, and the textured tousled low ponytail are all ideal. You don’t need to blow-dry straight and start from scratch with a curling iron. Instead, define your natural curls or waves using a curl cream, and let them inform your ponytail’s character. The half-down half-up low pony works beautifully on curly hair because the curls themselves create fullness and movement. Use a dedicated curl product rather than general hair products, which can make curls look frizzy or undefined.
For short hair: Most of these styles require at least shoulder-length hair (truly, the ponytail needs to be graspable). If your hair is shorter, consider a half-down half-up approach, the sleek low ponytail with just a few face-framing inches, or possibly a low half-bun instead of a full ponytail. If you have pixie-cut or very short hair, discuss updo alternatives with the bride — perhaps a small decorative piece or a hairpiece that complements your actual style.
For long hair: You have the luxury of choosing any style without concern about whether you have enough hair. Your challenge is weight and strain — a very heavy, long ponytail can cause genuine discomfort and headaches throughout the day. Consider the half-down half-up low pony to distribute weight, or choose a style with strategic layering or curling that breaks up the length visually without requiring you to cut or change anything.
Final Thoughts
The bridesmaid ponytail that’s right for you isn’t about choosing what’s “most trendy” or what you saw on a celebrity. It’s about choosing what makes you feel beautiful, confident, and genuinely comfortable for a full day of celebration. The best bridesmaid hairstyle is one you can honestly forget about because it feels so natural and secure that you stop thinking about it and simply enjoy the event.
Take time before the wedding to try at least one version of your chosen style at home. This isn’t about obsessive perfection — it’s about building the confidence that comes from knowing you can execute the style, that you understand how long it actually takes, and that you know exactly what products and tools you need. Bring backup supplies to the wedding venue. Text the bride a photo of your hair once it’s complete so she knows what to expect. And most importantly, remember that the bride chose you because she wanted you by her side — your ponytail, whatever style it is, is simply the frame for the joy and support you’re bringing to the day.