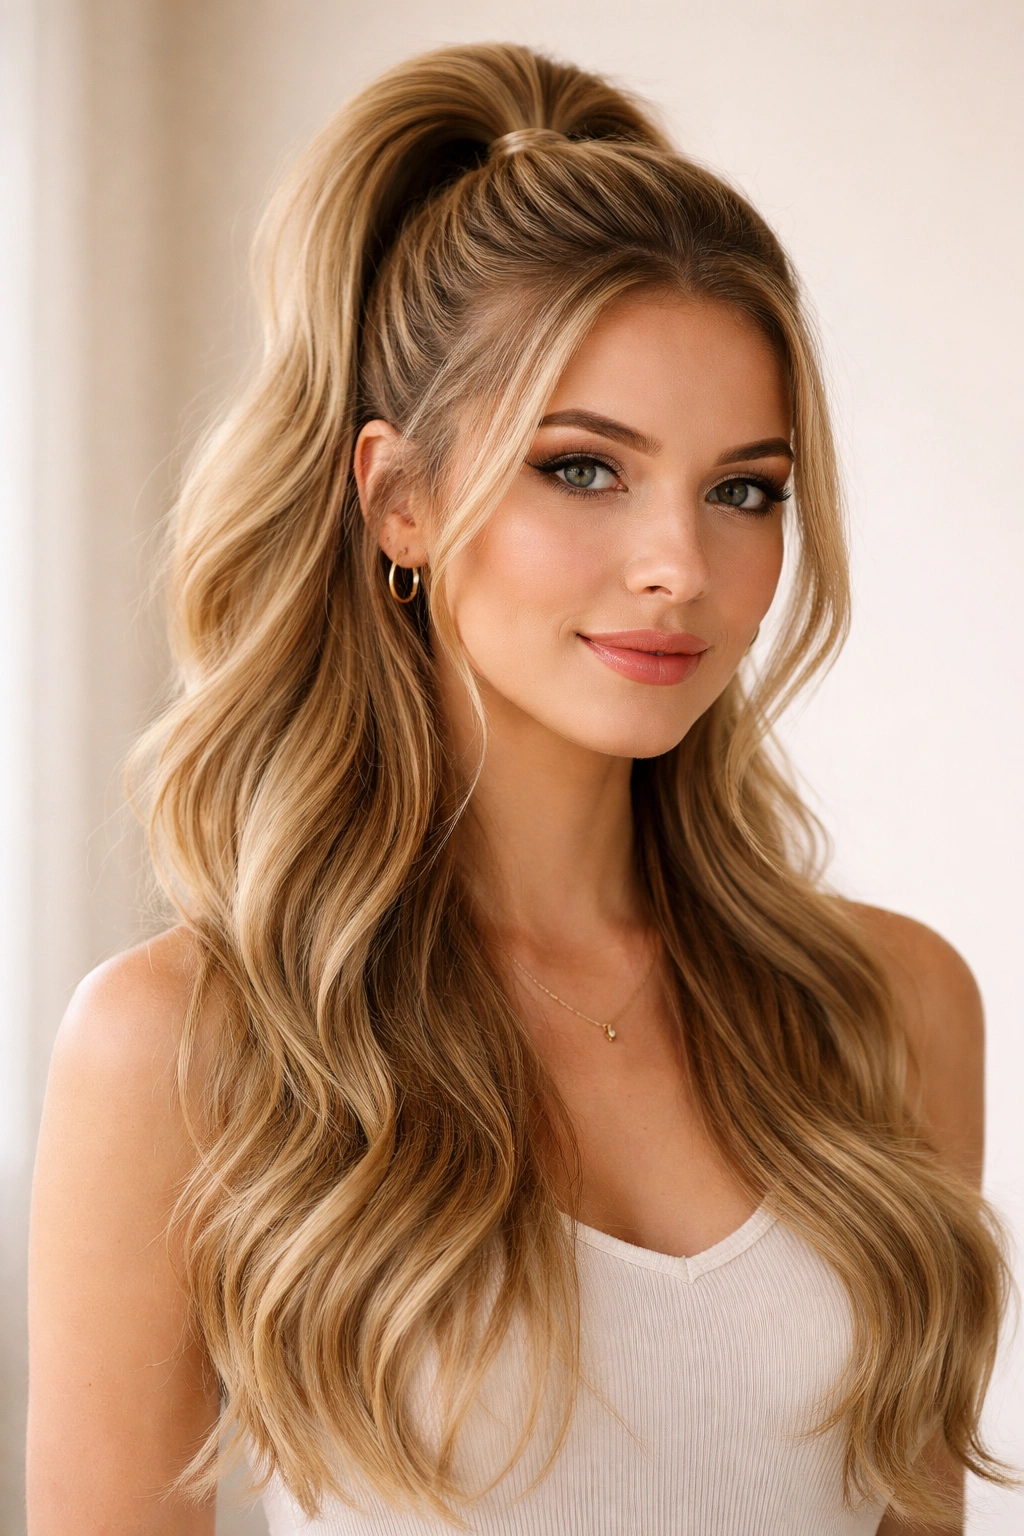
Long hair is genuinely versatile — one moment it’s flowing down your back, and the next it’s transforming into a polished updo that takes you from your morning commute straight to an evening event. Updo ponytails occupy this magical middle ground between casual and elegant, which is exactly why they’ve become the go-to choice for people who want a put-together look without spending an hour in front of a mirror. Whether you’re styling your hair for a regular day at work, a special occasion, or simply because you want to keep hair off your neck while still looking intentional, an updo ponytail delivers.
The thing about long hair is that it gives you an enormous canvas to work with — you can create movement, add texture, weave in braids, play with height, and build volume in ways that shorter hair simply can’t accommodate. What makes updo ponytails particularly appealing is how they work across different hair types and textures. Straight hair looks sleek and modern in a graphic ponytail, while wavy and curly hair absolutely shines in textured, voluminous updos. You can dress them down with a t-shirt and jeans or elevate them with a formal gown, which means you’re getting real daily mileage out of learning to execute these styles well.
The styles below aren’t just single-note looks — each one comes with technique breakdowns, styling tips drawn from real practice, and the kind of troubleshooting insight that comes from knowing exactly what goes wrong and how to fix it. You’ll find both classic styles that work for nearly any occasion and more trend-forward options that let you express personality through your hair.
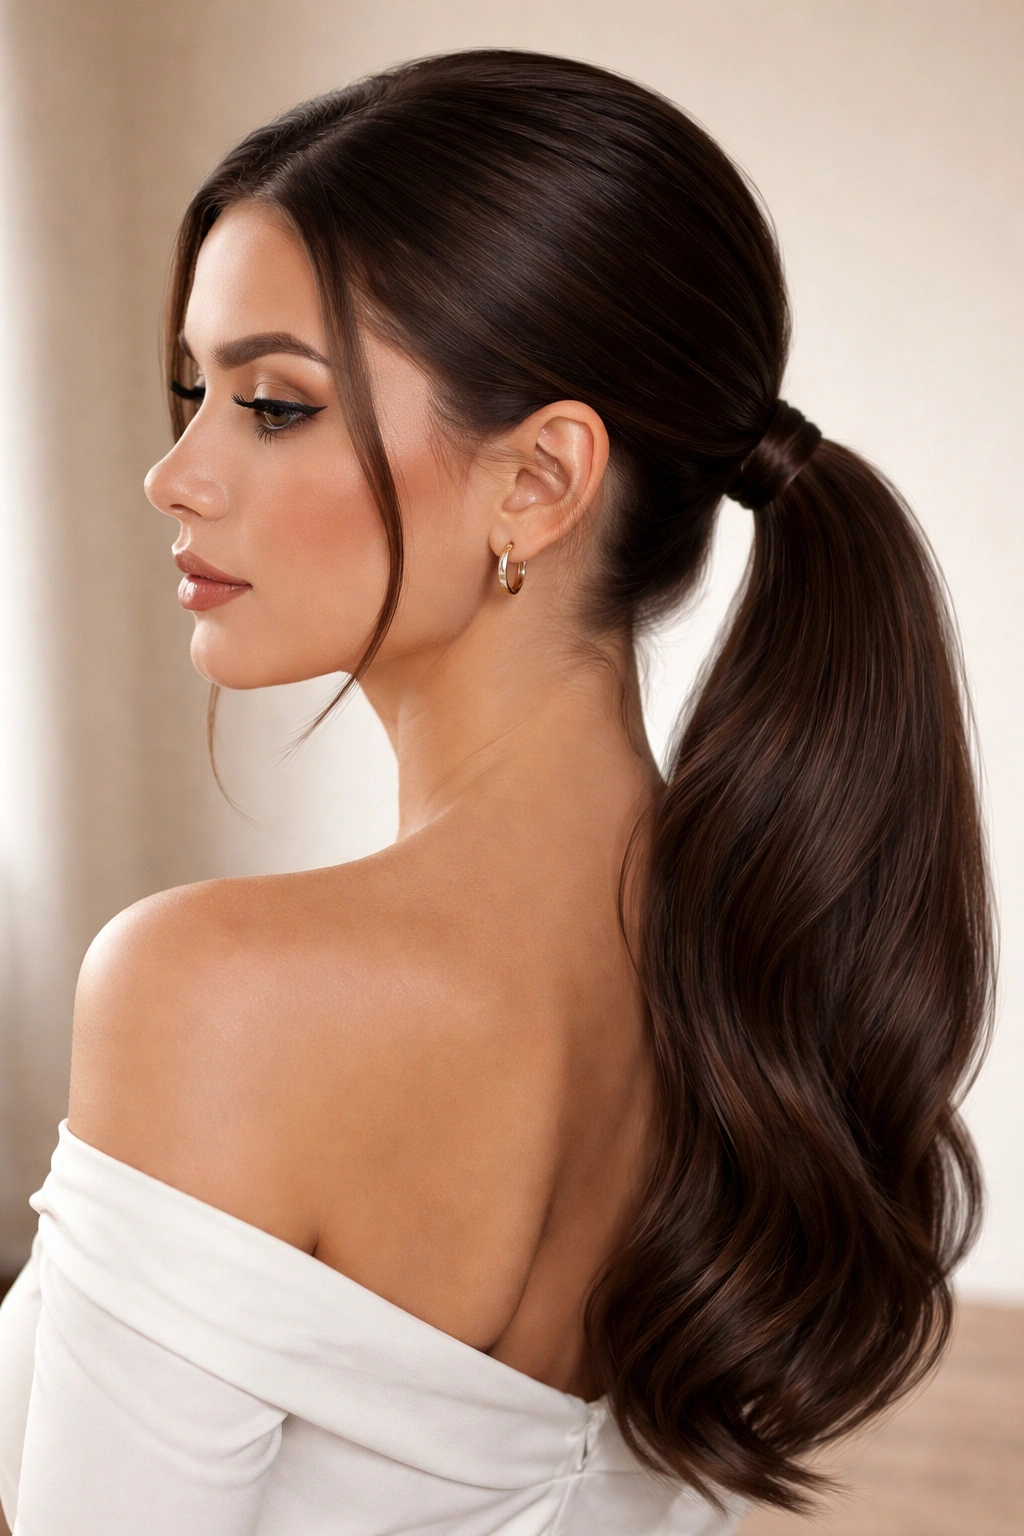
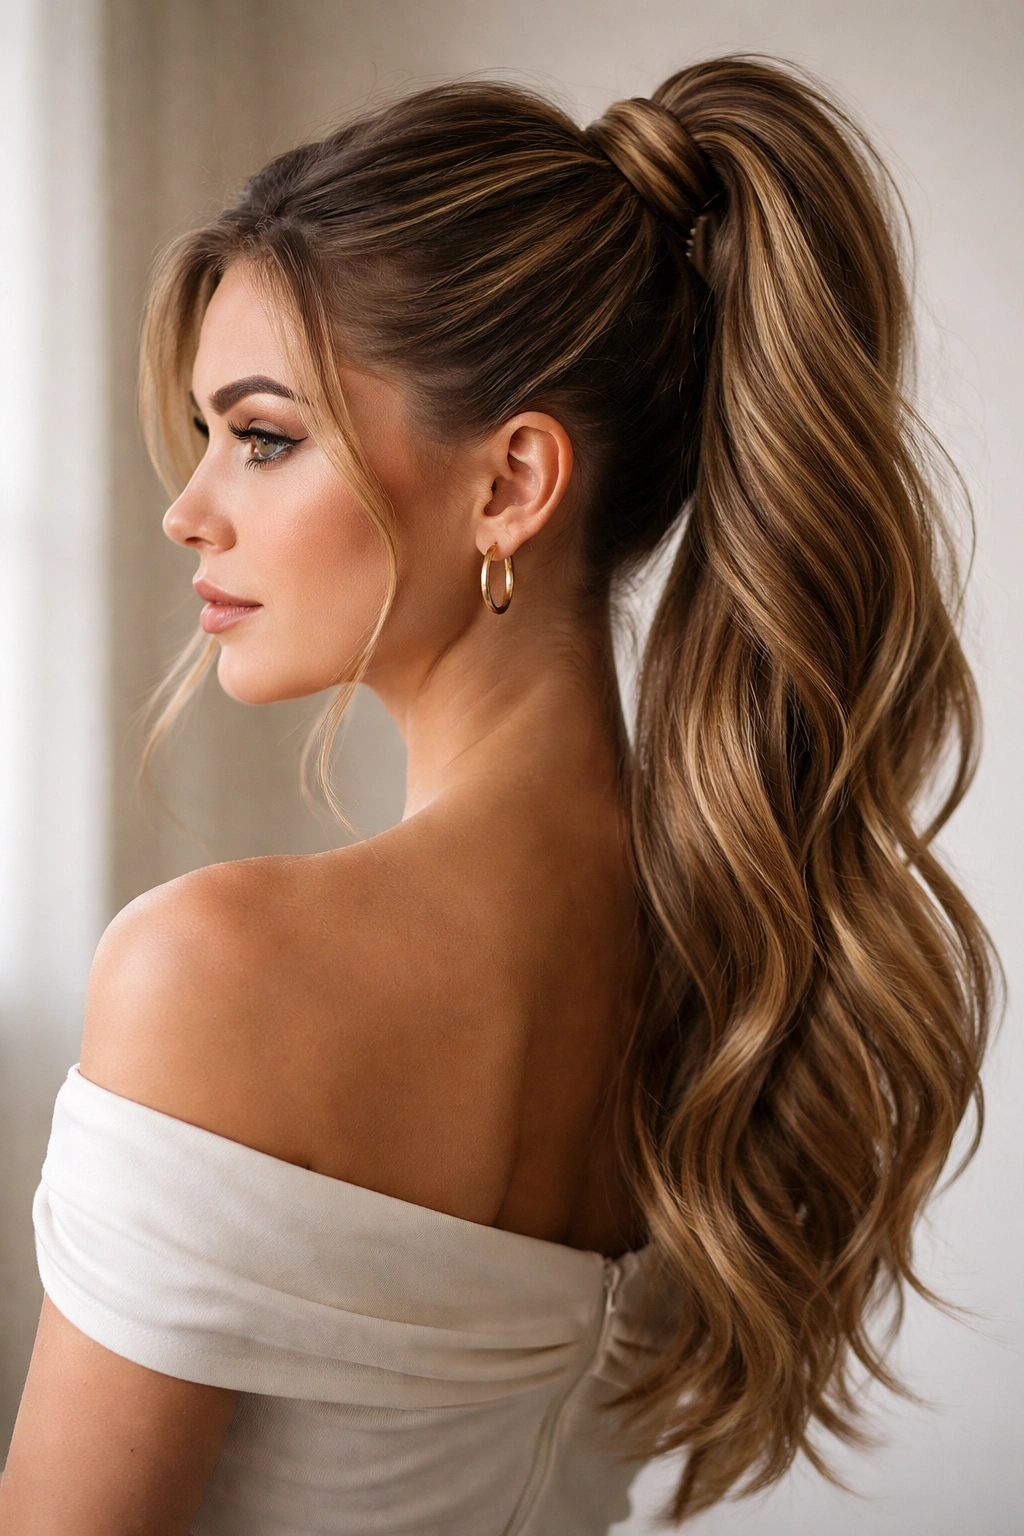
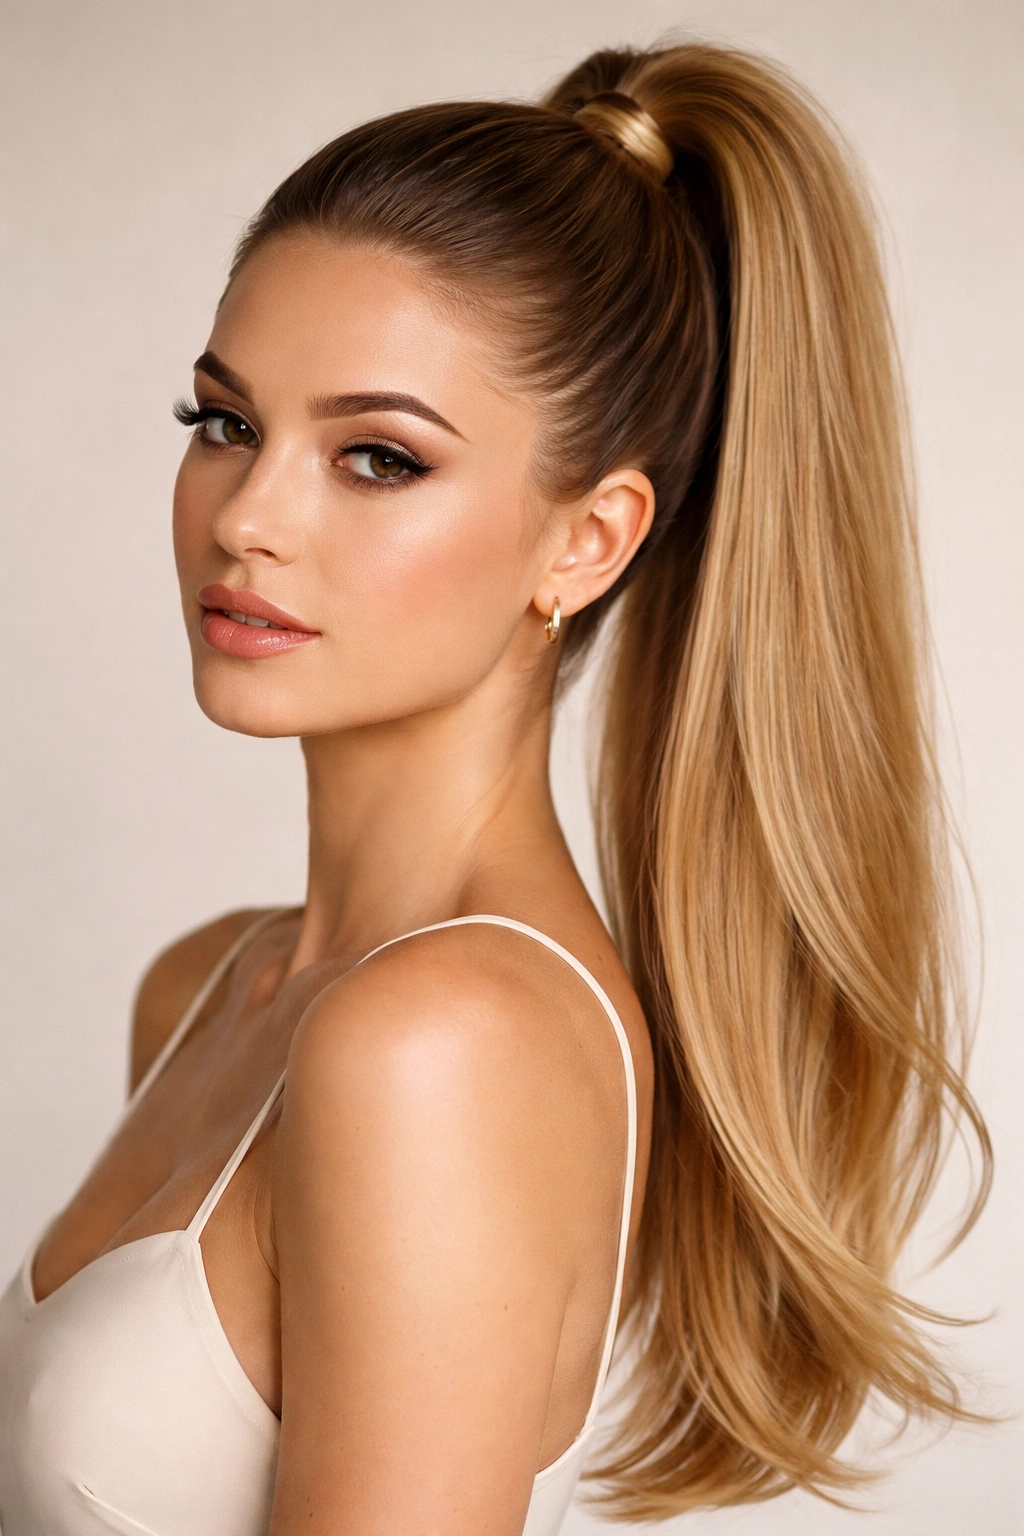
1. Classic High Ponytail
The high ponytail is the foundation of updo styling, and it remains timeless because it genuinely works — there’s a reason it’s been a go-to for decades. A well-executed high ponytail is crisp, polished, and instantly makes you look like you’ve put effort into your appearance, even if you threw it together in five minutes. The key to elevating a high ponytail from ordinary to genuinely impressive is understanding where exactly “high” sits and how to create smooth tension that shows off your face.
How to Create a Classic High Ponytail
The placement of a high ponytail should sit roughly an inch or two below the crown of your head — not directly on the very top of your head, but high enough that it draws attention upward. Brush your hair smoothly, then use a fine-tooth comb to gather hair at your chosen height, working from both sides toward the center back. The gathering technique matters: start at one temple, brush smoothly back, then grab from the other temple and bring those pieces into the same elastic. This creates even tension rather than awkward tugging.
Use a elastic that matches your hair color — this sounds basic, but a contrasting elastic immediately makes a ponytail look less refined. Secure the elastic low enough that you can still wrap a small section of hair around it to conceal the elastic itself. This wrapped section is what separates a polished ponytail from a casual one.
Quick Styling Facts
- Tension matters: Hair pulled too tightly causes headaches and can damage your hairline over time. Secure enough that it won’t slip, but not so tight that you feel pressure at your temples.
- Smoothness is key: Use a lightweight smoothing serum or spray on the crown and sides to eliminate flyaways and create that sleek appearance that reads as intentional.
- Wrapping the elastic: After securing, take a thin section of hair from the ponytail base itself, wrap it around the elastic 2-3 times, and secure it with a small bobby pin tucked underneath — this creates a seamless, polished finish.
- Longevity: A high ponytail can hold for 8-10 hours without loosening if you’ve secured it correctly and used the right elastics.
Pro tip: If your hair tends to slip out of elastics, apply a tiny dab of texturizing spray to your hair where the elastic sits before securing — this gives the elastic something to grip without making hair look wet or dirty.
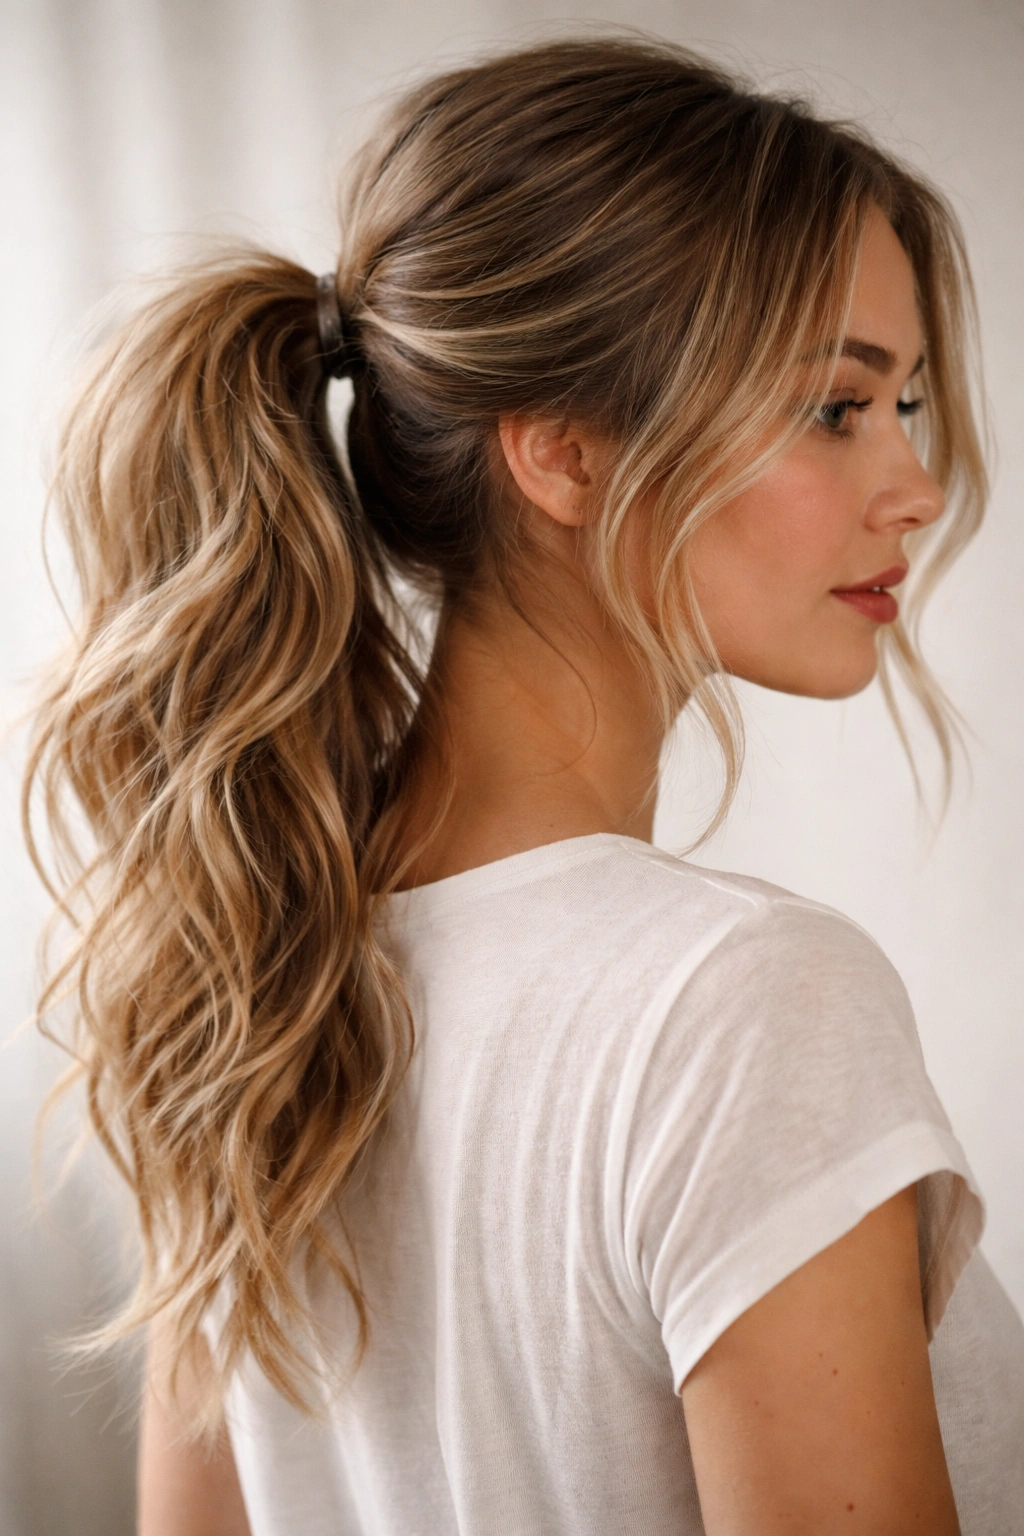
2. Sleek Low Ponytail
The low ponytail sits at the nape of your neck and carries an entirely different energy than its high counterpart — it reads as sophisticated and polished rather than playful. A low ponytail works beautifully on formal occasions, business settings, and whenever you want an updo that feels mature and intentional without being dramatic. The challenge with a low ponytail is maintaining smoothness from crown to ponytail base while creating volume in the ponytail itself — you want the base to look sleek and controlled, but the tail to feel full and healthy.
Building the Perfect Low Ponytail
Start with smooth, brushed hair — if you have texture or waves, apply a lightweight smoothing cream while hair is still damp and blow-dry it straight, or use a flat iron to create a sleek base. Gather your hair at the nape of your neck, which is typically just above where your hairline ends at the back of your neck. Brush the gathered section firmly to eliminate bumps, then secure with a matching elastic.
The polish comes in the details: smooth any flyaways with a fine-tooth comb, apply a lightweight smoothing serum to the crown and sides, and consider using a boar-bristle brush to polish the surface of the ponytail. Wrap a thin section of hair around the elastic and pin it for that seamless finish.
What to Know About Low Ponytails
- Forehead exposure: Because a low ponytail pulls hair back gently, it exposes your entire face and forehead, so this style shows off clear skin and defined eyebrows beautifully — but also requires confident brows.
- Crown volume: Create subtle lift at the crown by backcombing gently before securing, which adds dimension without the high-tension look of a high ponytail.
- Texture options: While sleek low ponytails are classic, you can also create a low ponytail from soft waves or curls for a more romantic feel — just ensure the gathering point is smooth even if the ponytail itself is textured.
- Holding power: Low ponytails can loosen more easily than high ones throughout the day because there’s less gravity helping to hold them in place, so use sturdy elastics and check periodically.
Worth knowing: If you have flyaways at your hairline, use a tiny soft-bristled toothbrush dampened slightly with hairspray to smooth them against your head before you secure the ponytail — this takes 10 seconds but completely changes how polished the style looks.
3. Textured Bubble Ponytail
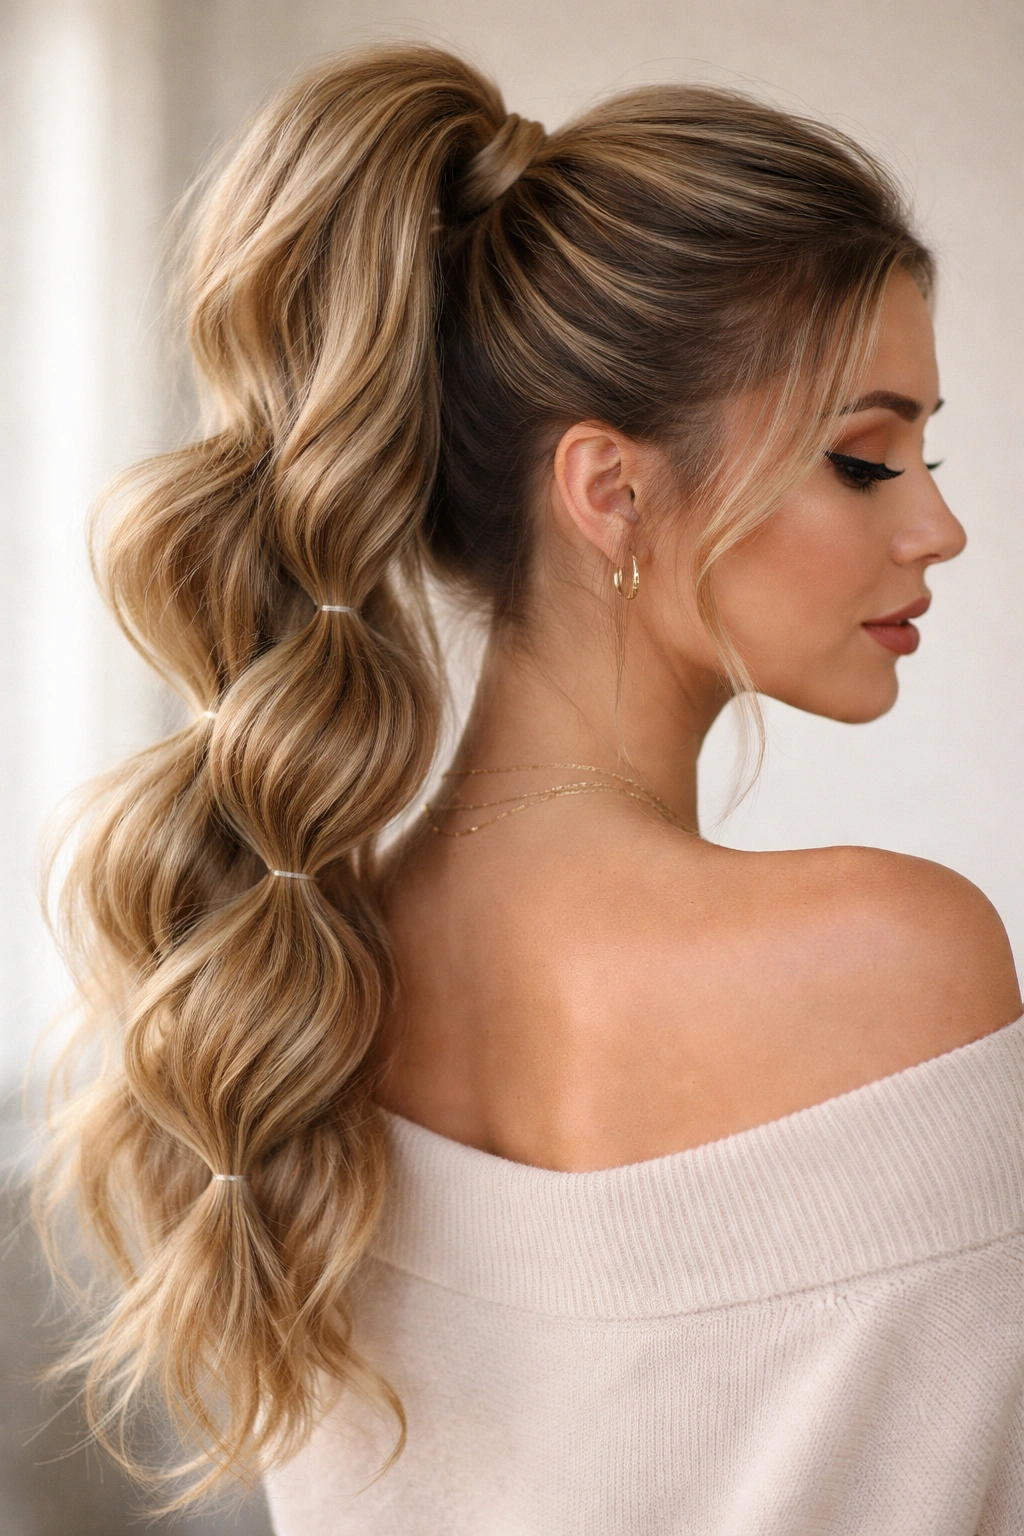
The bubble ponytail is the style that looks more complicated than it actually is, which makes it perfect for days when you want an updo that feels special and intentional. Sometimes called a “stacked ponytail,” this style creates distinct sections of volume that give the illusion of multiple ponytails stacked vertically, creating visual interest and texture even if your hair is naturally straight. It works on nearly every hair type and is genuinely forgiving to learn.
Creating Bubble Ponytail Sections
Start with a high or mid-height ponytail, secured with a sturdy elastic. This is your base. Now, starting just below the elastic, divide your ponytail into three to four distinct sections by placing elastics horizontally down the length of your ponytail, spacing them about 2-3 inches apart. Between each elastic, use your fingers to gently tease and fluff the hair, creating a bubble effect — this is where the style gets its name and visual appeal.
The teasing is key: use a teasing brush or old toothbrush and backcomb gently against the direction of hair growth, then smooth the surface layer down with your brush. This creates fluffy, textured sections while maintaining an overall polished appearance.
Bubble Ponytail Styling Guide
- Elastic placement: Use elastics in the same color as your hair so they’re visually subtle and don’t break up the design. Alternatively, use decorative elastics or hair clips as intentional design elements.
- Teasing technique: Backcomb only the underlayers of each section, not all the way through — this creates volume without making your hair look damaged or overly messy.
- Number of bubbles: You can create 2 large bubbles for a minimal, modern look or 4-5 smaller bubbles for a more playful, textured vibe. Experiment to find what feels right for your hair length.
- Volume distribution: Make upper bubbles fuller and lower bubbles slightly smaller to create a balanced silhouette that’s flattering to most face shapes.
Insider note: Spray a light texture spray on each section before securing the elastics below it — this adds grip and helps the bubbles stay fluffy throughout the day rather than flattening as the style settles.
4. Side-Swept Romantic Ponytail

The side-swept ponytail has an inherently romantic, slightly undone quality that works beautifully for dates, weddings, garden events, and any occasion where you want to look effortlessly put-together. Unlike a centered ponytail, the side-swept version gathers hair to one side of your head, which naturally creates a cascading effect and shows off one side of your face and neck while keeping hair off the other. This asymmetry is what gives it that romantic, intentional-but-not-trying-too-hard vibe.
Positioning a Side-Swept Ponytail
The gathering point should sit behind your ear on one side — not quite at the very nape of your neck, but lower and more to the side than a traditional centered ponytail. This off-center placement is what creates the signature swept look. Brush your hair smoothly, then use a fine-tooth comb to gather hair starting from the opposite temple (if you’re sweeping to the right, start from the left side), smoothly bringing it back and around.
Once gathered, you have styling choices: keep it sleek and sophisticated, or add waves and texture to amplify the romantic feel. If you choose to add texture, curl your hair in loose waves before gathering it into the side-swept ponytail — the waves will cascade down the length of the tail beautifully.
Side Ponytail Details Worth Knowing
- Face-framing pieces: Consider leaving a few delicate pieces unclipped around your face to soften the look further and add movement. These pieces don’t need to be structured; they can be gently waved and left to fall naturally.
- Elastic wrapping: Use a thin section of hair to wrap around the elastic, securing it with a bobby pin for seamlessness, just like with centered ponytails.
- Waves and curls: If your hair is naturally straight, add loose waves or curls before creating the ponytail — straight hair in a side sweep can sometimes look a bit flat, while texture gives it dimension and romance.
- Occasion flexibility: Side-swept ponytails work for casual outings and formal events equally well depending on how you finish them — keep it simple for everyday wear, add decorative pins or jewelry for special occasions.
Pro tip: If you’re creating this style with wave-textured hair, apply a curl-defining cream or gel to damp hair before blow-drying to enhance the natural texture and make sure your side-swept tail has beautiful, defined waves rather than undefined frizz.
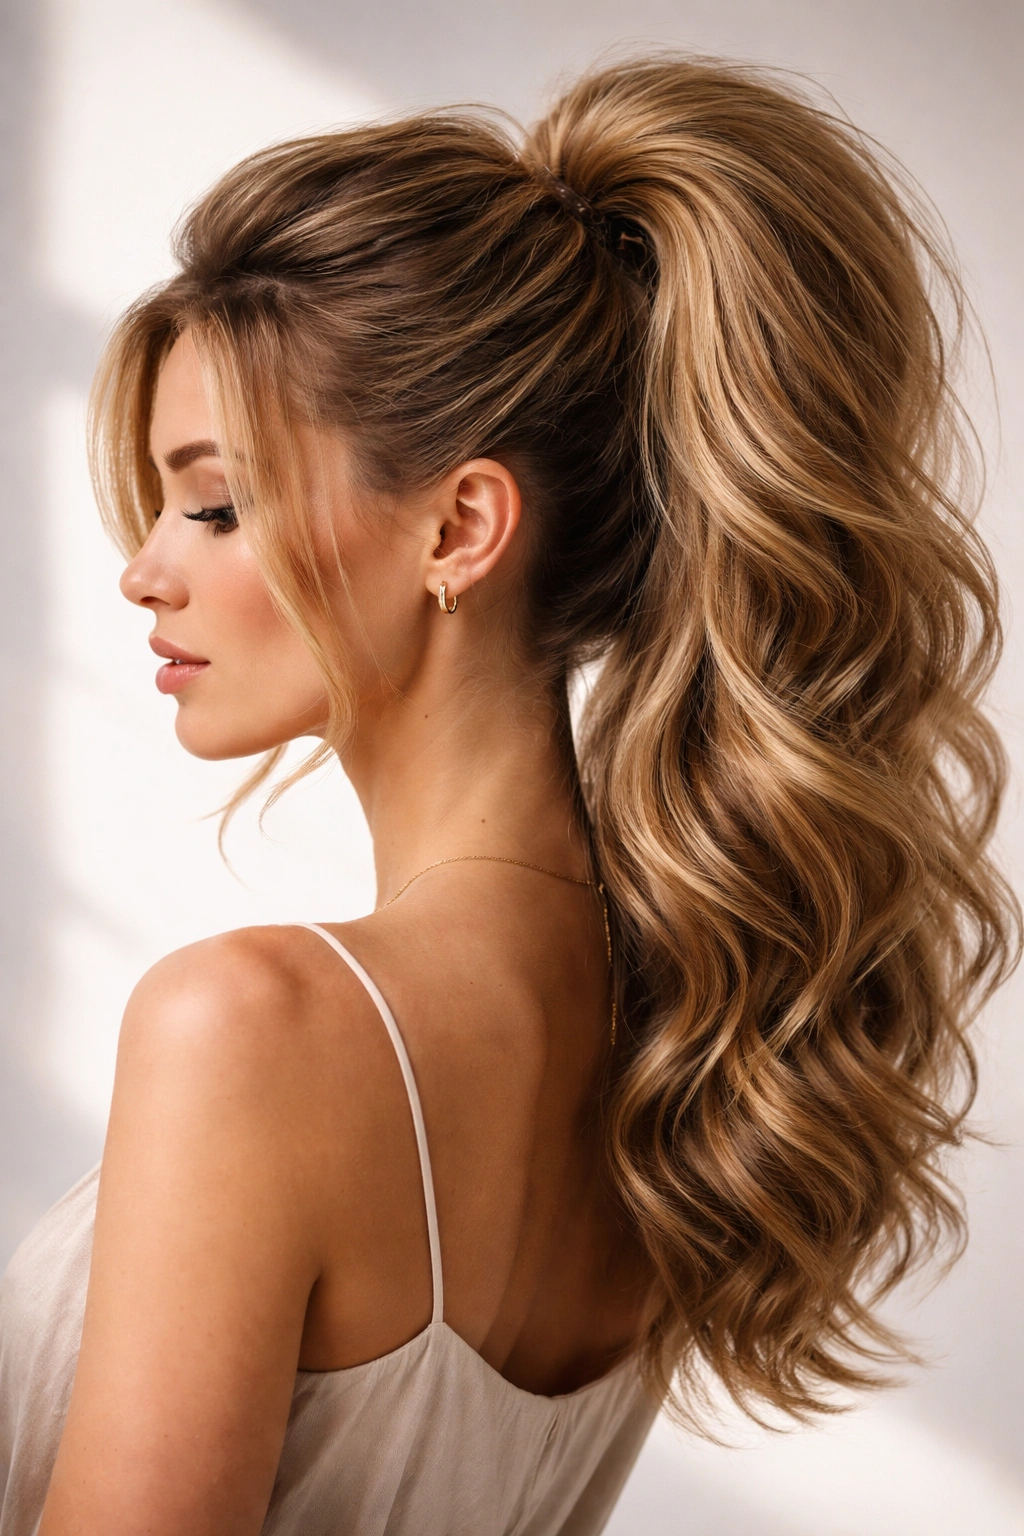
5. Twisted High Ponytail
The twisted high ponytail takes the simplicity of a classic high ponytail and adds visual complexity and sophistication through the power of twisting. Rather than simply pulling hair straight back, you create two or three twisted strands that spiral into the ponytail, which adds texture and prevents the style from reading as too severe or plain. It’s an easy way to level up from a basic ponytail and works beautifully on straight hair.
How to Execute the Twists
Create your high ponytail as you normally would, but instead of gathering hair all at once, divide it into two or three sections. Starting from one temple, take a section of hair and twist it firmly as you bring it back toward the center, securing it with a bobby pin at the gathering point. Repeat with another section from the opposite side, and if you want three twists, create one from the very top of your head as well.
Once all twists are pinned in place at your high ponytail point, secure the entire gathered section with your elastic. The twists create a beautiful textured base that adds dimension and elegance even though the ponytail itself might be sleek and simple.
Twisted Ponytail Technique Breakdown
- Twist tension: Twist firmly enough to create defined spirals that won’t unravel, but not so tight that you’re creating tension or potential breakage.
- Twist direction: Decide whether all your twists spin in the same direction or if you want to vary them — twisting all in the same direction creates a more unified look, while alternating directions creates more visual interest.
- Bobby pin placement: Secure each twist with a bobby pin that matches your hair color, placing the pin horizontally across the twist to hold it in place within the ponytail gathering point.
- Wrapping the base: After securing the elastic, wrap a thin section of hair around it to hide the elastic and all the bobby pins for a polished finish.
Worth knowing: Twisted sections tend to loosen slightly as the day goes on, so consider securing each twist with two bobby pins rather than one — you don’t need to be obvious about it, but the extra security makes the style last longer without looking overdone.
6. Braided Ponytail
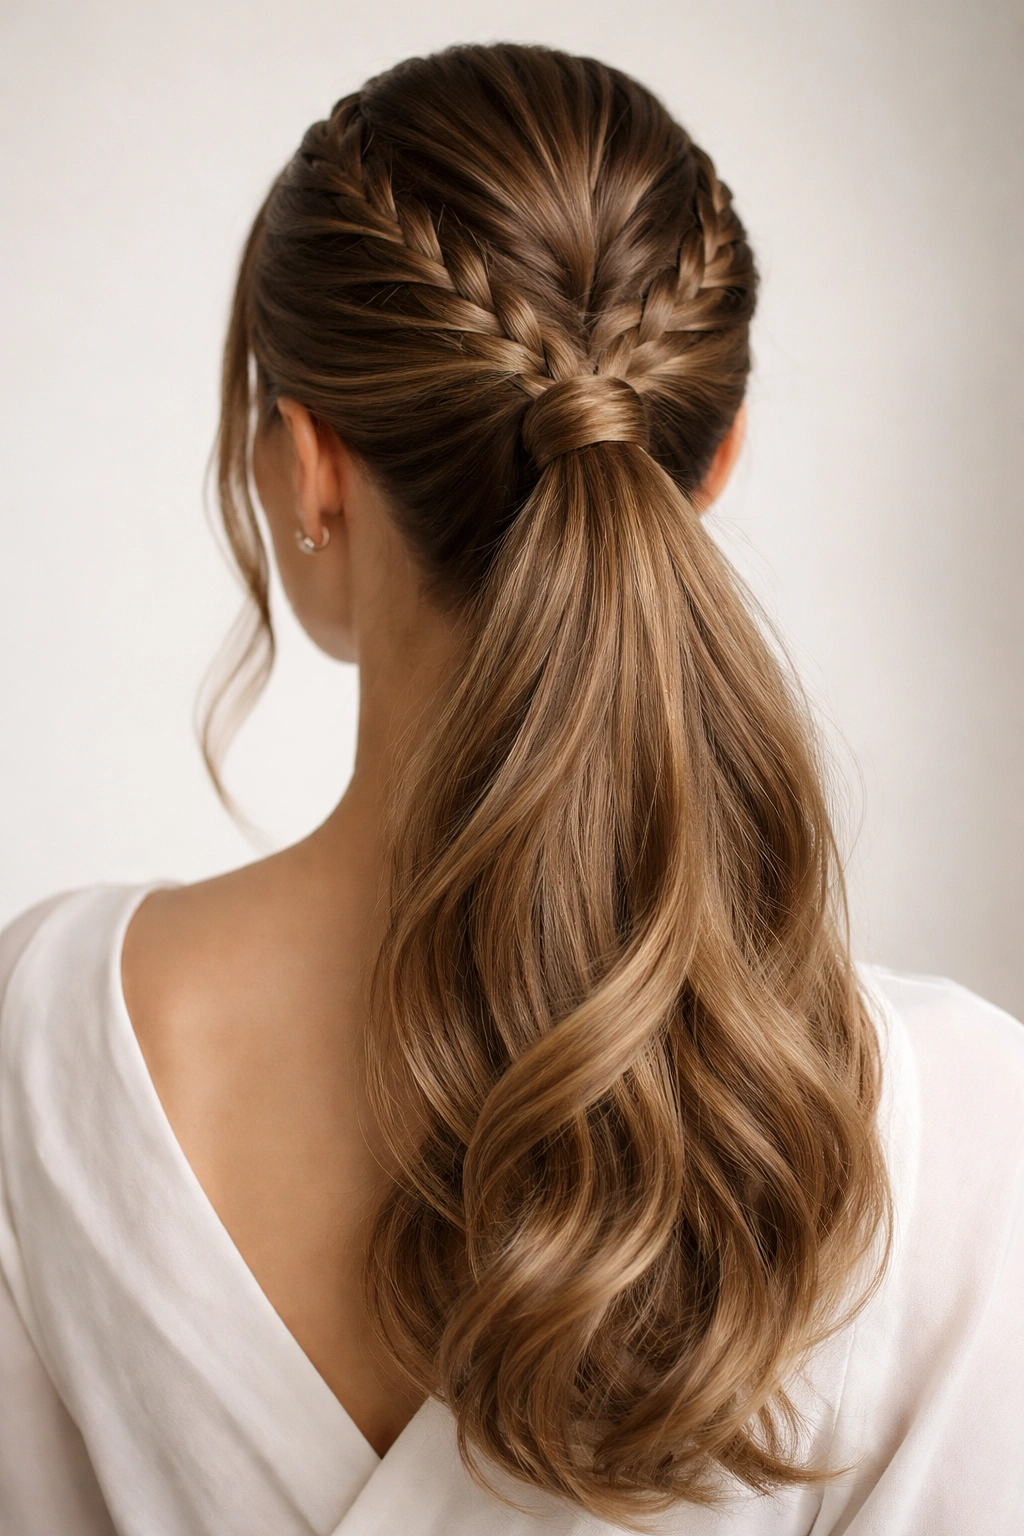
The braided ponytail combines two classic updo elements — braiding and the ponytail — to create something that feels more dressed-up and intentional than either element alone. You can create a full braid that feeds into a ponytail, or create multiple thinner braids that weave together at the gathering point, depending on how dramatic you want the effect to be. Braided ponytails work on nearly every hair type and length, from fine straight hair to thick wavy hair.
Building a Braided Ponytail
Start with smooth, detangled hair — if you have texture or waves, consider smoothing it with a blow dryer or flat iron so your braids have clean definition. Section your hair into two or three sections from your hairline going back. Create a standard three-strand braid down each section, bringing all the braids together at your chosen ponytail height (high, mid, or low). Secure all the braid ends together with a matching elastic.
The key to a beautiful braided ponytail is ensuring the braids are tight enough to hold their structure but not so tight that they look strained or feel uncomfortable. Looser, slightly undone braids often read as more sophisticated than super-tight ones, which can look overly controlled.
Braided Ponytail Styling Options
- Number of braids: Two larger braids flanking the center often create the most flattering silhouette, but three thinner braids can create a more textured look.
- Braid tightness: Modern, sophisticated braids are often slightly loose and flowing rather than super-tight — this is easier to achieve and looks less severe.
- Incorporating texture: If your hair is wavy or curly, braid it while it’s damp or lightly misted with water so the braids hold structure without needing to be braided ultra-tightly.
- Braid variation: You can create standard three-strand braids, French braids that start at the hairline, or Dutch braids for a different visual effect — each creates a different look.
Pro tip: After creating your braids, gently pull and fluff each strand slightly to make the braids look softer and more voluminous — this is called “pancaking” the braid and creates a more romantic, less structured appearance while maintaining the braid’s integrity.
7. Half-Up Half-Down Ponytail
The half-up half-down ponytail occupies an interesting space between a full updo and completely loose hair, which is precisely why it’s so versatile and genuinely appealing. You secure roughly half your hair in a ponytail at the crown or slightly below, allowing the remaining length to flow freely down your back. This style works beautifully for everyday wear, can be dressed up for special occasions, and is particularly flattering because it shows off length and volume while still keeping hair organized.
Creating a Half-Up Ponytail
Begin with smooth, brushed hair. Starting at one temple, brush hair straight back toward the crown, gathering a section from each side of your head. This gathered section should comprise roughly half your total hair — not too much, or it stops looking like a true half-up style, and not too little, or it looks like a tiny knot perched on your head. Secure this gathered section with a matching elastic.
You now have choices for the remaining loose hair: leave it completely straight, add waves or curls, or leave it tousled and textured. All options work, but adding some texture to the loose portion usually looks more intentional than leaving it completely straight.
Half-Up Styling Variations
- Height options: You can position the gathering point high on the crown for a more playful look or lower, closer to the middle of the head, for a more mature, elegant appearance.
- Width of gathered section: Gathering a wider section from each side creates a fuller, more dramatic look, while a narrower section creates something more delicate and subtle.
- Loose section texture: Curling or waving the loose portion creates visual contrast and makes the style feel more complete — straight hair looks beautiful, but texture adds dimension.
- Wrapping the base: Use a thin section from the loose portion to wrap around your elastic for a seamless finish, then pin securely underneath.
Worth knowing: If you have fine hair, this style can sometimes look a bit thin because you’re only securing half of it, so consider teasing gently at the crown before gathering to add subtle volume where the ponytail begins.
8. Voluminous Teased Ponytail
The voluminous teased ponytail is all about creating maximum fullness and height, which instantly adds polish and presence to your overall look. This style involves strategically backcombing sections of your hair to create volume at the crown and throughout the ponytail itself, rather than relying on your natural hair density. It works beautifully on fine or thin hair because teasing makes even modest amounts of hair look full and luxurious.
Teasing Technique for Maximum Volume
Begin with completely dry hair — teasing works significantly better on dry hair than damp hair because moisture reduces grip. Section your hair into quadrants: left front, right front, left back, and right back. Starting at the crown, use a teasing brush or old toothbrush to backcomb a small section of hair, working from the ends upward, against the direction of hair growth.
The goal is to create texture and volume within your hair without making it look damaged or ratty. Tease only the underlayers of each section, smoothing the surface layer gently with your brush once you’ve built the desired volume. This creates a polished look with hidden texture underneath.
Voluminous Ponytail Construction
- Crown teasing: Focus most of your teasing effort at the crown and upper sections where volume is most visible and impactful.
- Layered teasing: Tease small sections throughout your hair rather than doing one large section — this distributes volume more naturally.
- Smoothing layers: Once you’ve teased, smooth the outer layer gently so the style looks intentionally voluminous rather than messy.
- Spray and pin: Use a light hairspray to hold your teased sections, then gather your hair into a high ponytail and secure.
- Post-securing fluff: After securing the elastic, tease gently at the base of the ponytail itself to create volume even in the tail.
Insider note: For a voluminous ponytail that lasts all day, tease your crown before you even get dressed, then let it set for a few minutes while you’re getting ready — this gives the texture time to hold so it doesn’t collapse as the day goes on.
9. Sleek Graphic Ponytail
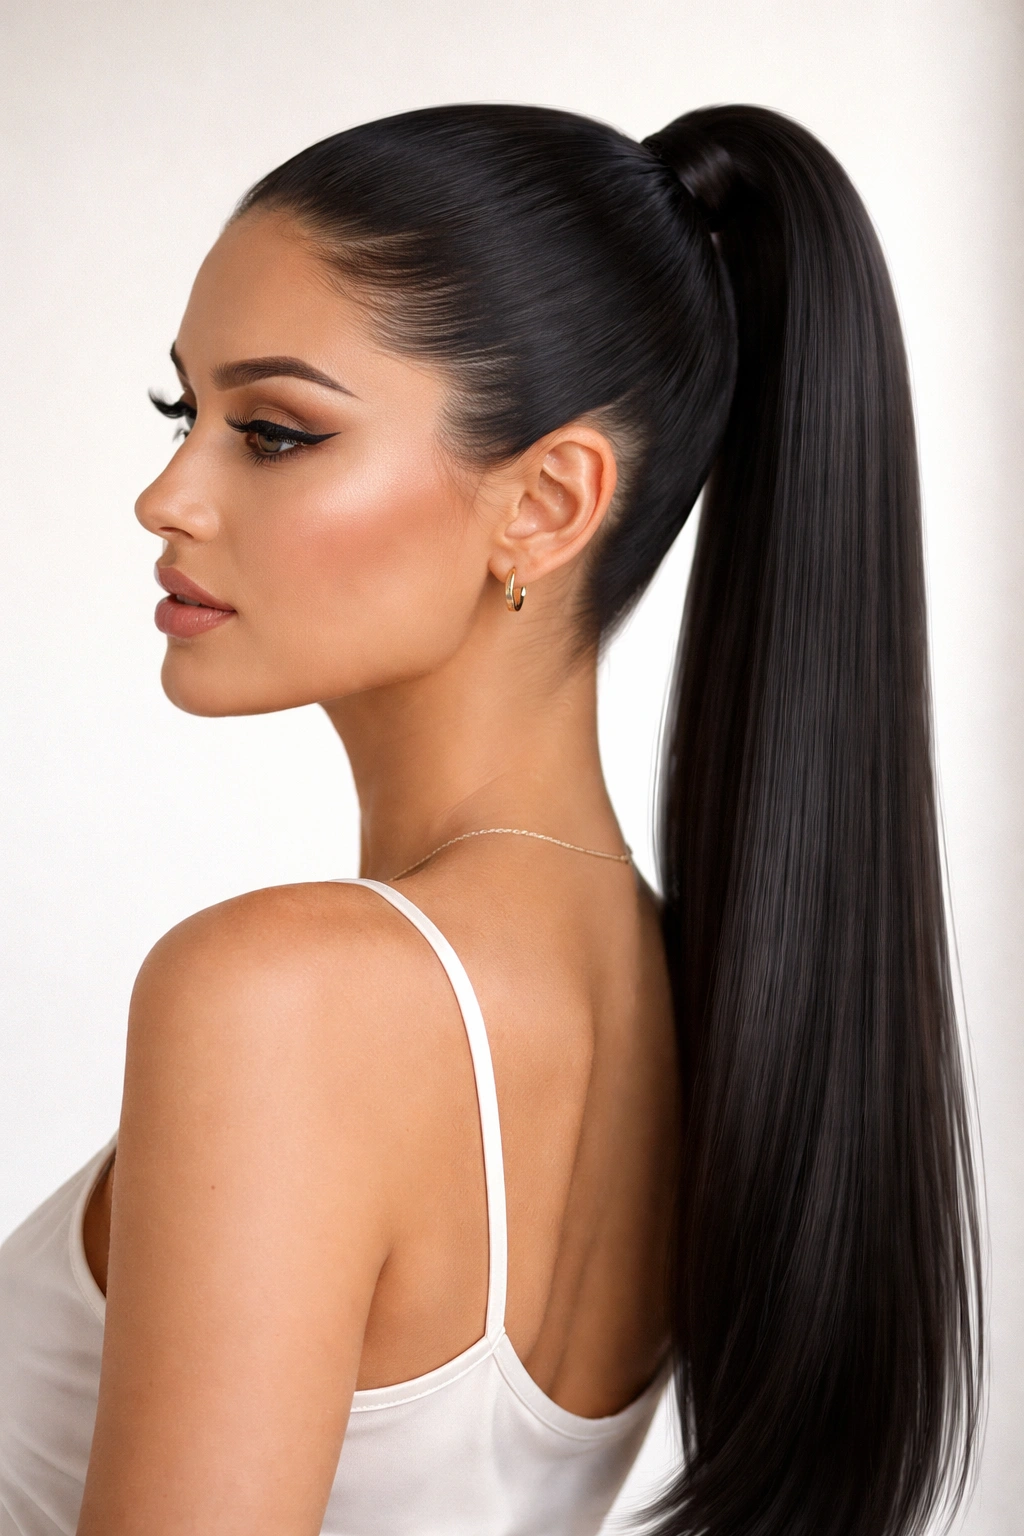
The graphic ponytail is the minimalist, modern cousin of the classic ponytail — it’s about creating perfectly smooth, geometric lines and sharp silhouettes that feel contemporary and intentional. Everything is polished, nothing is undone, and every edge is defined. This style looks spectacular with sleek, straight hair and is particularly striking on people with strong bone structure because it fully exposes the face and neck.
Creating Sharp Graphic Lines
Start with very smooth hair — a flat iron is helpful for creating the sleek base this style requires. Apply a smoothing serum or light gel to your hair to eliminate any flyaways or frizz, which break up the graphic quality of the style. Gather your hair at your chosen height (high or low) and secure firmly with a matching elastic.
The defining characteristic of a graphic ponytail is the treatment of the edges: every visible line should be sharp and defined. Smooth the crown and sides obsessively with a fine-tooth comb, apply more smoothing product to any flyaways, and consider using a tiny bit of edge control on your hairline and the sides of your face where hair meets skin.
Graphic Ponytail Details
- Elastics and hardware: A graphic ponytail actually benefits from intentional hardware — use a sleek metal cuff, a metallic elastic, or a geometric clip rather than hiding the elastic with a hair wrap. This plays into the modern, sharp aesthetic.
- Smoothing priority: More than any other style, this one lives or dies on smoothness — any texture, frizz, or visible bumps undermine the graphic effect, so don’t skip the smoothing steps.
- Face and neck exposure: This style fully exposes your forehead and face, so it’s best when you’re confident in your skin and brows.
- Occasional texture accent: While the overall look is sleek, you could add one small braided accent or a thin twisted section at the base for subtle visual interest without sacrificing the graphic aesthetic.
Pro tip: Use a smoothing gel rather than just serum on your edges and any fine baby hairs around your face — gel holds the hair in place and creates sharper lines than serum alone.
10. Messy Textured Ponytail
The messy textured ponytail is deceptively sophisticated — it looks deliberately undone while actually requiring intention and technique to execute well. This is the style for when you want to look beautiful and put-together while maintaining an approachable, laid-back energy. The key is creating texture that reads as charmingly imperfect rather than actually unkempt, which is achieved through waves, strategic teasing, and loose gathering.
Building Intentional Texture
Start with textured hair — if your hair is naturally straight, add waves or curls with a curling iron or wand before gathering. If you have naturally wavy or curly hair, enhance the texture with curl-defining products and light scrunching. Tease gently at the crown to add subtle volume, then gather your hair into a ponytail (high, mid, or low) with a slightly loose gathering technique — you’re aiming for relaxed, not sloppy.
Leave a few longer pieces around your face unclipped and allow them to fall naturally, which adds to the undone quality. You can use a texture spray to enhance waves and separate any defined curls, creating movement throughout the ponytail.
Messy Ponytail Technique Breakdown
- Wave creation: Add loose waves rather than tight curls — use a 1.5-inch curling iron or wand and curl larger sections for relaxed, flowing waves.
- Teaseing subtlety: Backcomb lightly at the crown and throughout the ponytail — you want texture and lift, not a heavily teased look.
- Gathering technique: Gather your hair with a relaxed hand rather than precision — looser gathering automatically creates a more undone appearance.
- Flyaway strategy: Paradoxically, this style works better when you control major flyaways while allowing some texture to escape — it should look intentionally tousled, not actually frizzy.
- Finishing touches: Spray with a light texture spray and use your fingers to separate and shape the ponytail for maximum movement.
Worth knowing: This style actually photographs beautifully because the texture and movement create dimension in photos that a sleek ponytail sometimes lacks — it looks effortlessly polished and photogenic simultaneously.
Final Thoughts
Updo ponytails are genuinely one of the most practical and versatile tools in your styling arsenal, and the range here means you can adapt to nearly any occasion, mood, or aesthetic preference. The most successful version of any of these styles comes down to understanding the core technique — whether that’s precise smoothness for graphic styles, intentional texture for messy ones, or strategic teasing for volume — and then practicing until it becomes automatic.
The beautiful part is that updo ponytails improve with practice in ways that feel genuinely rewarding. The first time you create a twisted high ponytail might take ten minutes and look slightly uneven, but by the third or fourth time, your hands understand the movement and it takes maybe three minutes. The same applies to any style here — what feels challenging at first becomes intuitive with repetition.
Your hair type, length, and personal style preference all influence which of these options will become your go-to. Some people find themselves reaching for the classic high ponytail because it’s dependable and quick. Others fall in love with the romantic side-swept version or the modern graphic ponytail. The smartest approach is trying each one at least once, noticing which ones actually work with your hair’s natural texture and which ones feel comfortable and confident on you. That’s where your signature updo ponytail will come from — not from which one is technically “best,” but from which one lets you feel like the best version of yourself.