Straight hair has a natural elegance that makes it the perfect canvas for a polished, sophisticated ponytail. Whether you’re heading to the office, attending a formal event, or simply want a clean, put-together look for everyday wear, the right ponytail can transform your entire appearance in minutes. The beauty of wearing your straight hair pulled back is how it immediately highlights your face, elongates your neck, and creates clean lines that feel both modern and timeless.
The challenge, though, is knowing which ponytail style actually suits straight hair best — and more importantly, how to execute each one so it looks intentional rather than like you’ve simply scraped your hair back in frustration. The wrong technique can leave your ponytail looking flat, wispy, or incomplete. But with the right approach, straight hair actually holds a ponytail beautifully, and the clean texture means every detail shows.
What makes straight hair special when it comes to ponytails is the lack of texture to hide imperfections, which means your styling technique really matters. But it also means that when you get it right, the result is incredibly sleek and polished. In this guide, you’ll discover twelve distinct ponytail styles specifically suited to straight hair, along with the exact techniques to achieve each one and the best occasions to wear them.
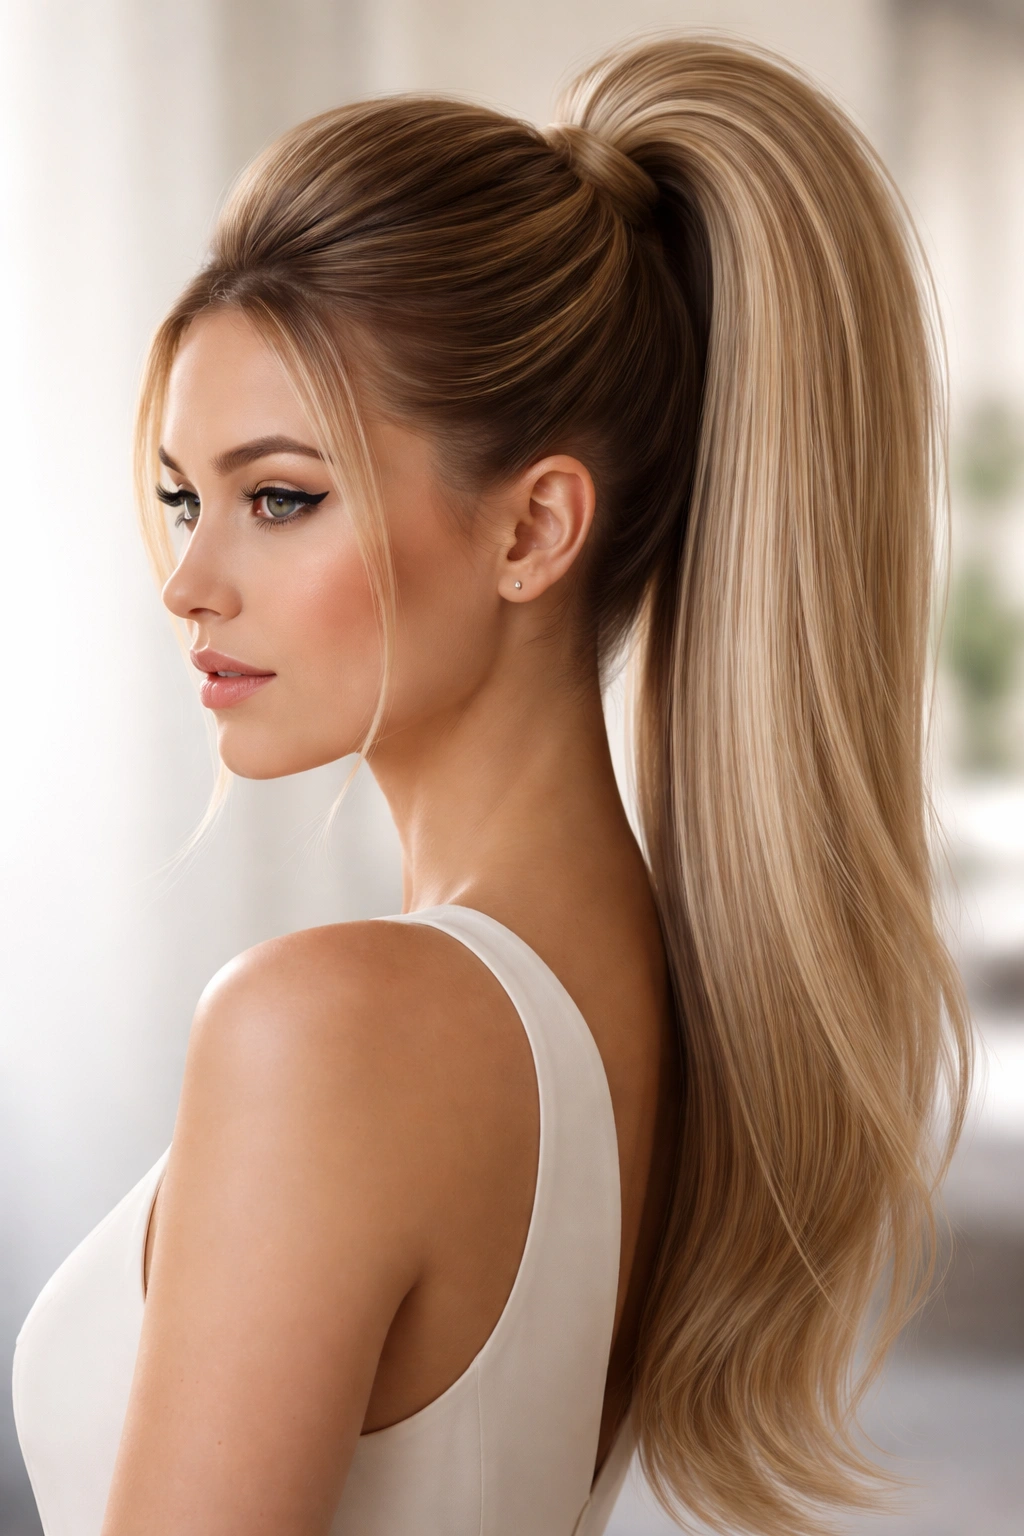
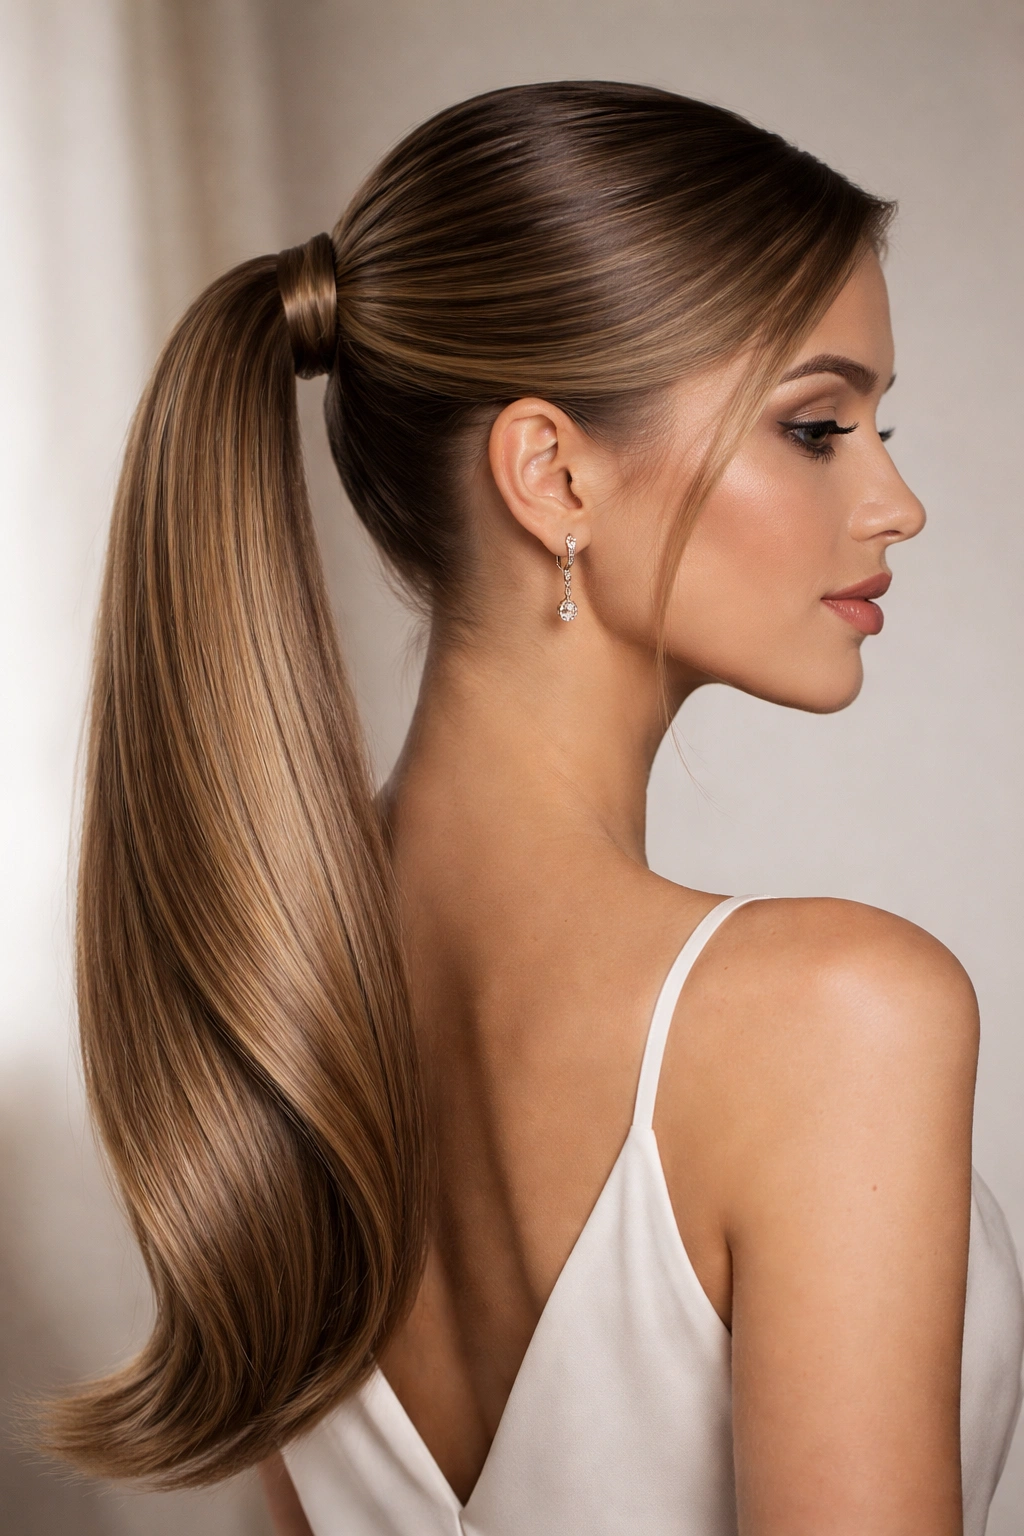
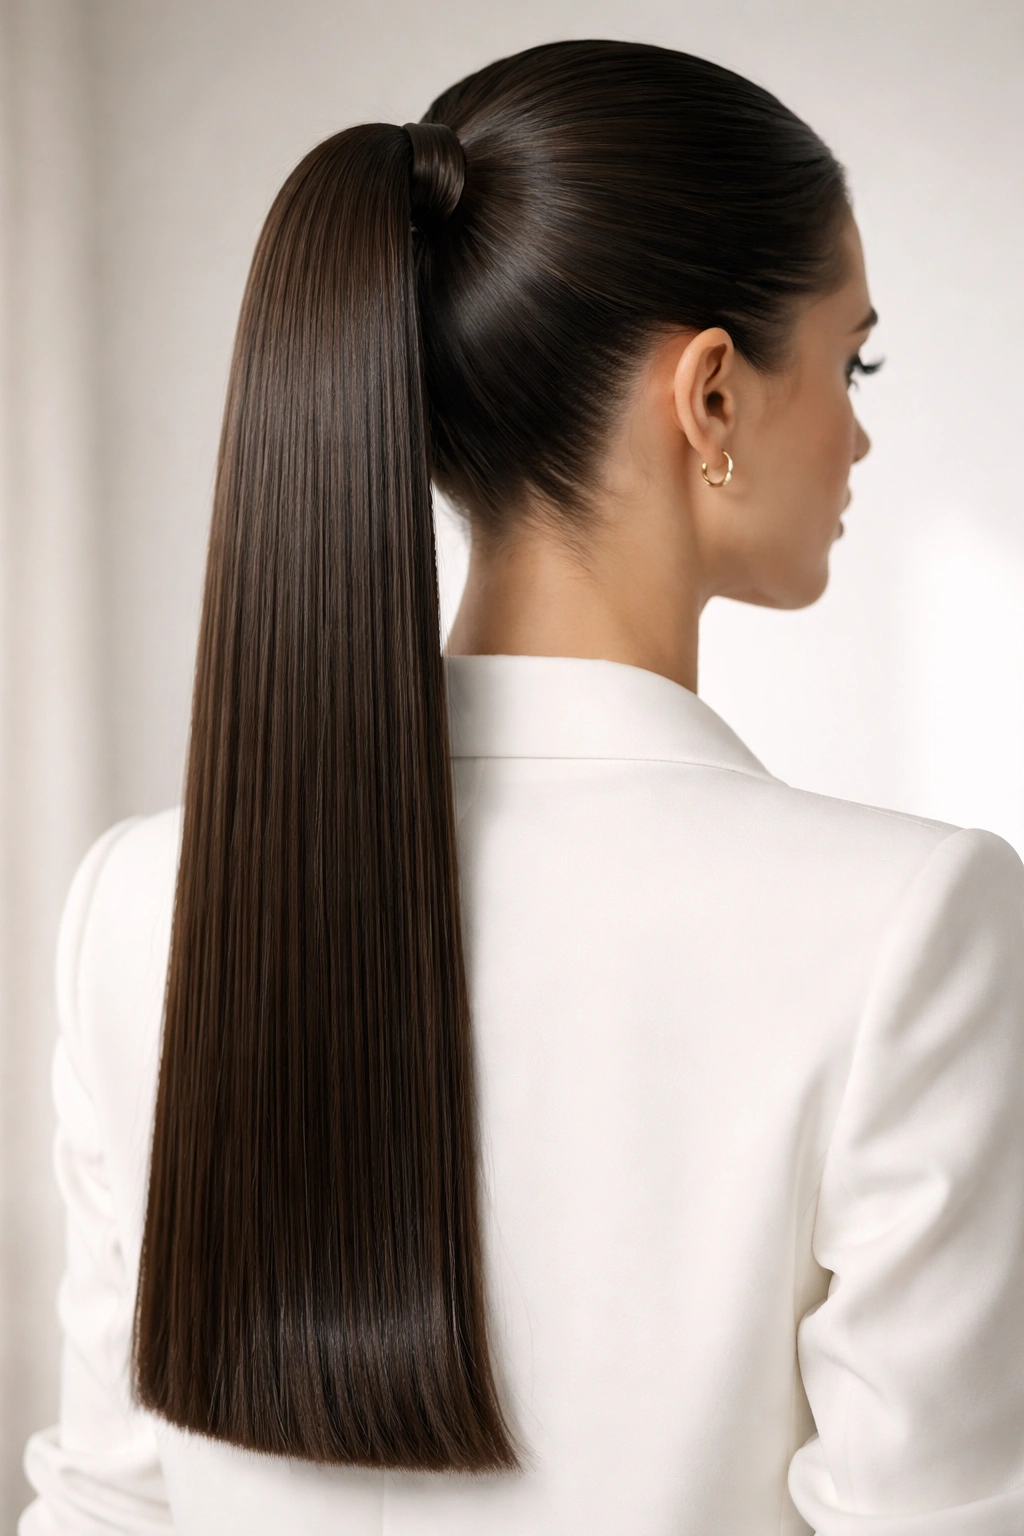
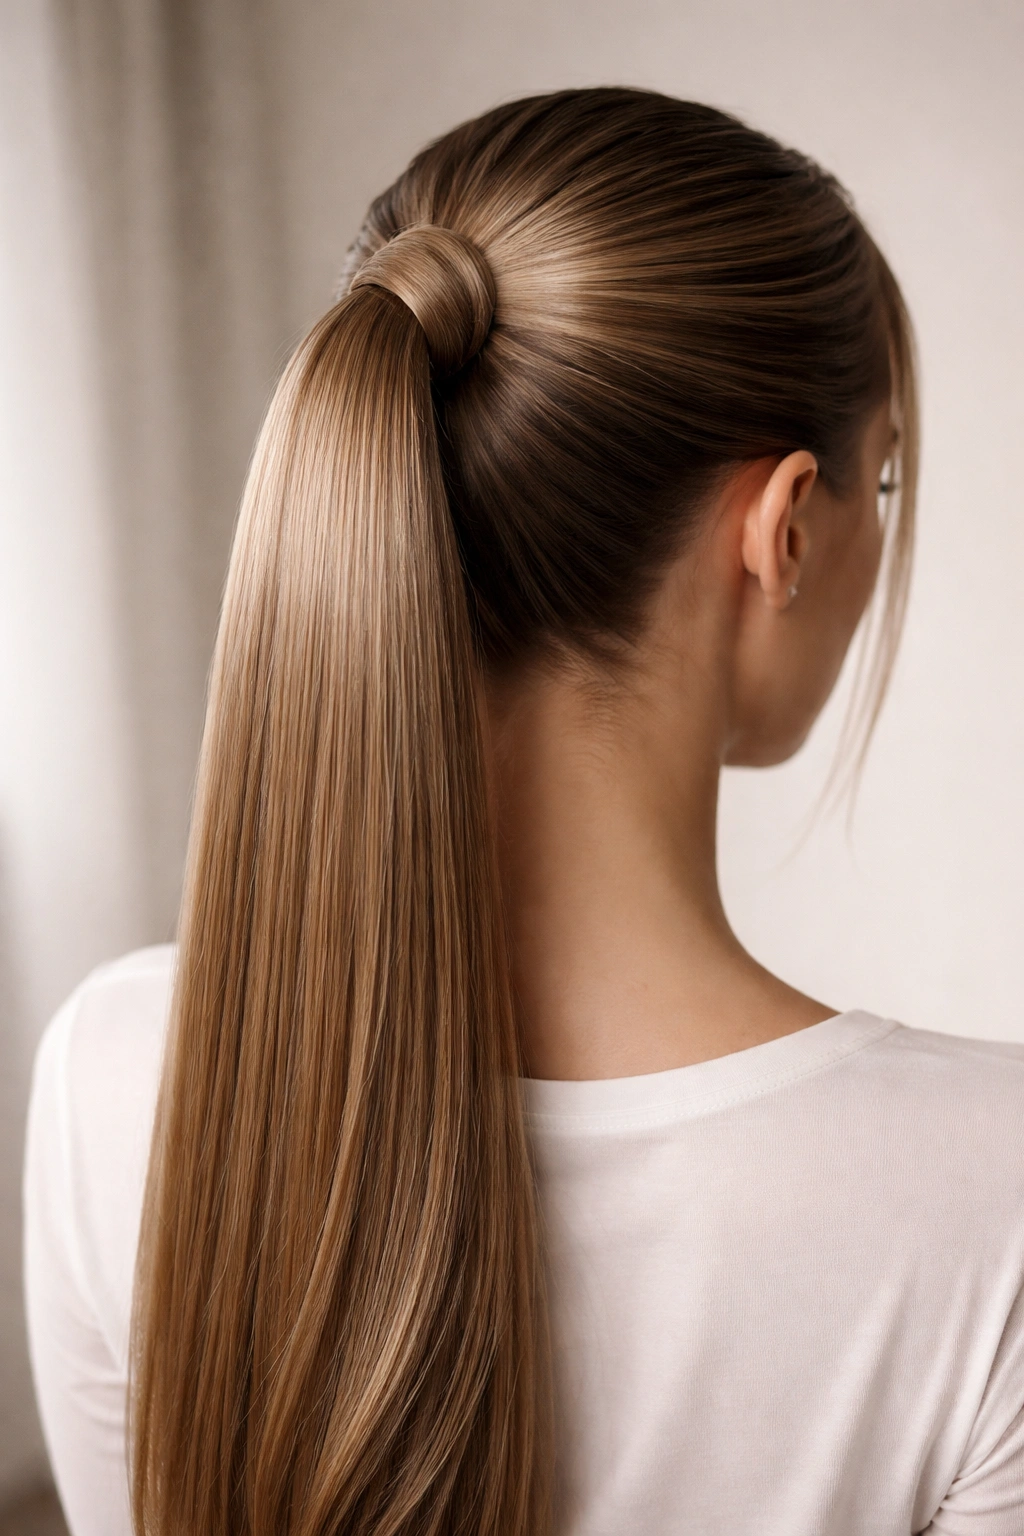
1. The Classic High Ponytail
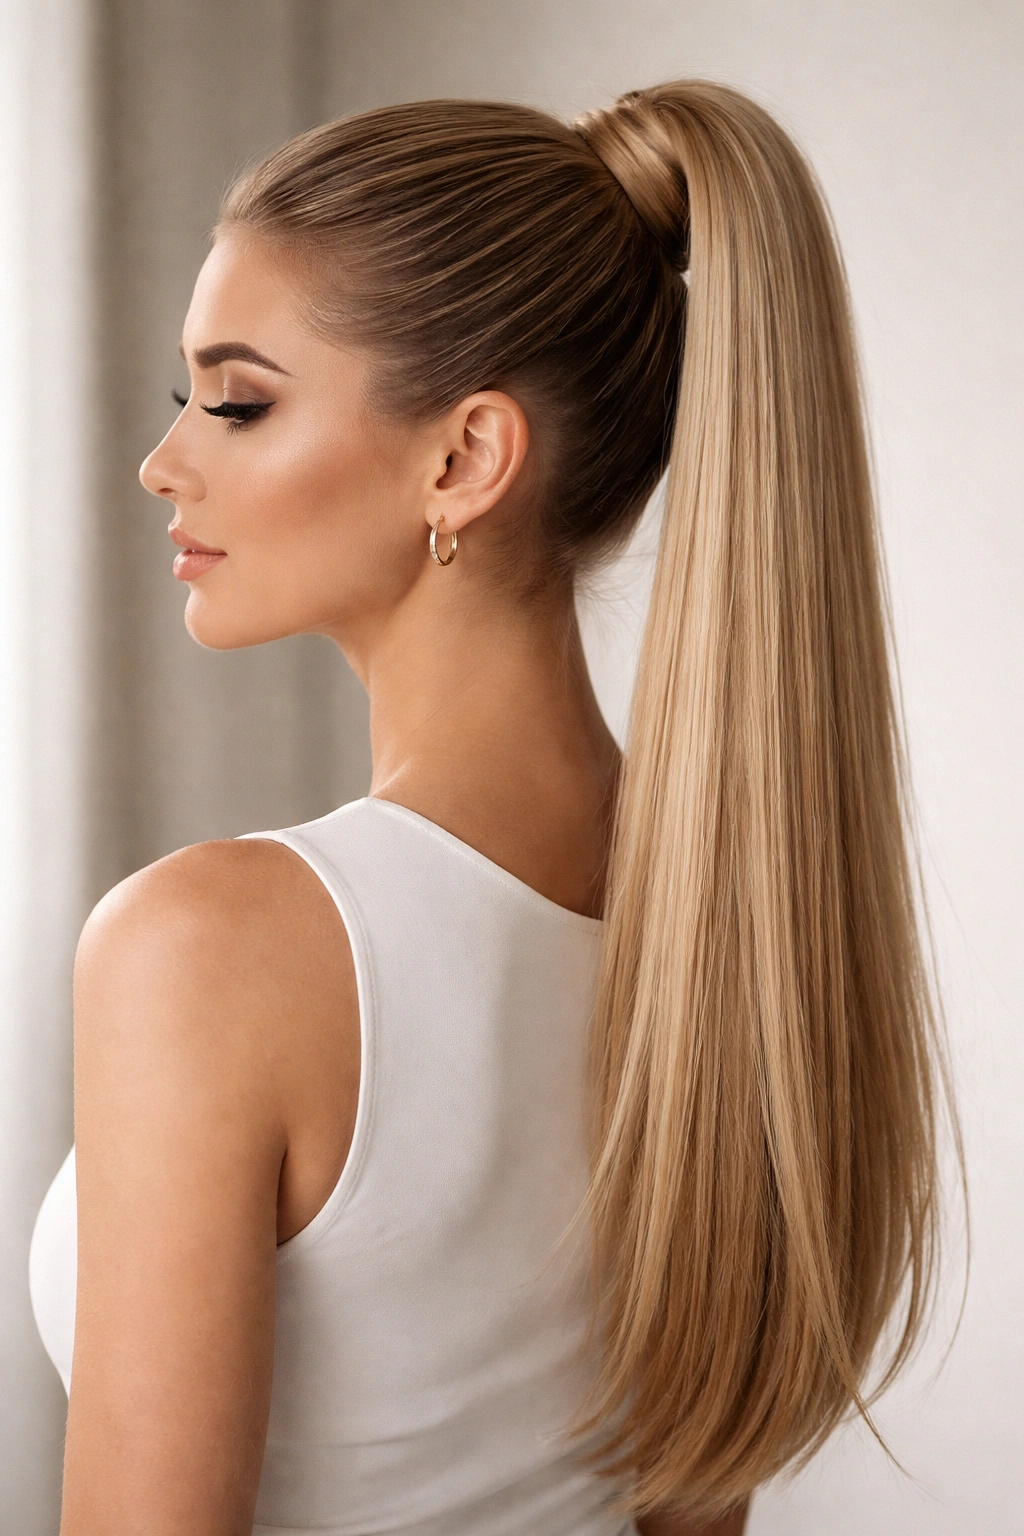
A high ponytail sits near the crown of your head and creates instant lift and sophistication. This is the foundation style that works for virtually every straight-haired person, and once you master the technique, you can modify it for different occasions and moods.
Why Straight Hair Shines in This Style
Straight hair creates an incredibly smooth, sleek appearance when gathered into a high ponytail. There’s no frizz or texture working against you, which means your ponytail stays neat all day long. The clean lines emphasize the height of the placement, making your face appear longer and your features more defined.
How to Create the Perfect High Ponytail
Start by brushing your hair thoroughly with a paddle brush or wide-tooth comb to remove any tangles and create a smooth base. Flip your head upside down and brush from the nape of your neck toward the crown — this creates volume at the roots. Flip back up and use your fingers to position where you want your ponytail to sit, roughly two inches back from your hairline. Secure with a clear elastic or your preferred hair tie, then take a small section from the ponytail itself and wrap it around the base to hide the elastic. Pin the wrapped section in place with a bobby pin for a polished, finished look.
Styling Tips for Longevity
Spray the base of your ponytail lightly with hairspray to help secure flyaways and keep everything in place throughout your day. If you notice the ponytail loosening after a few hours, don’t re-tighten it with the same elastic — instead, use a fresh elastic higher up on the ponytail to avoid creating a visible crease or weak point. For evening wear, straighten your ponytail with a flat iron after securing it to give it an extra sleek, polished finish.
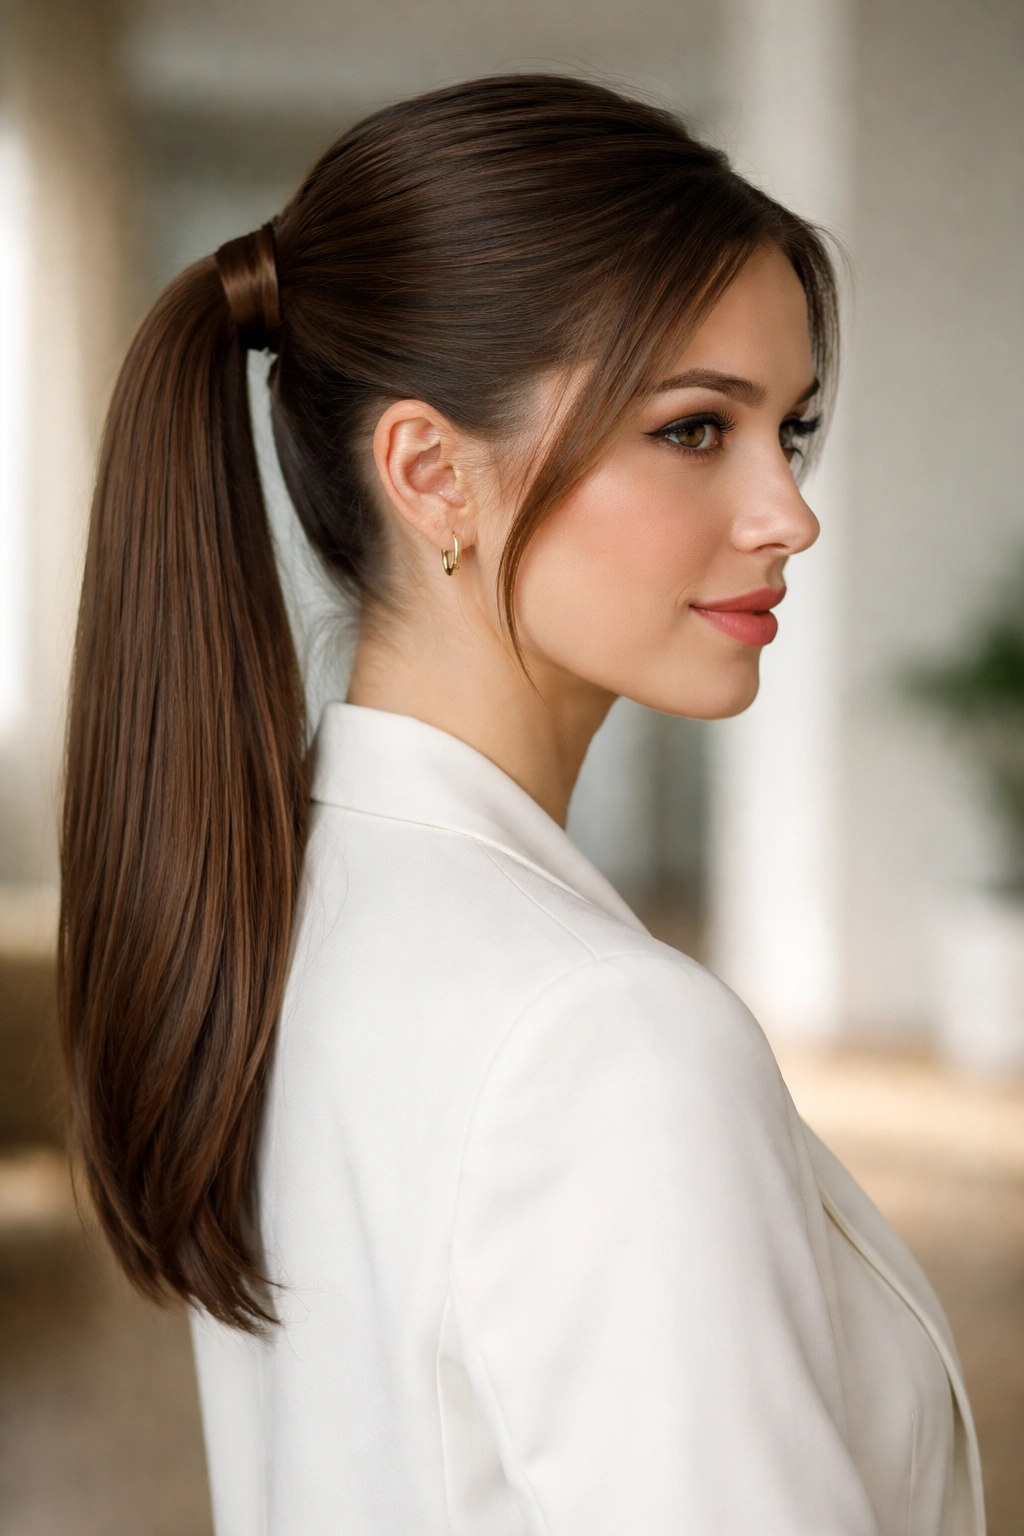
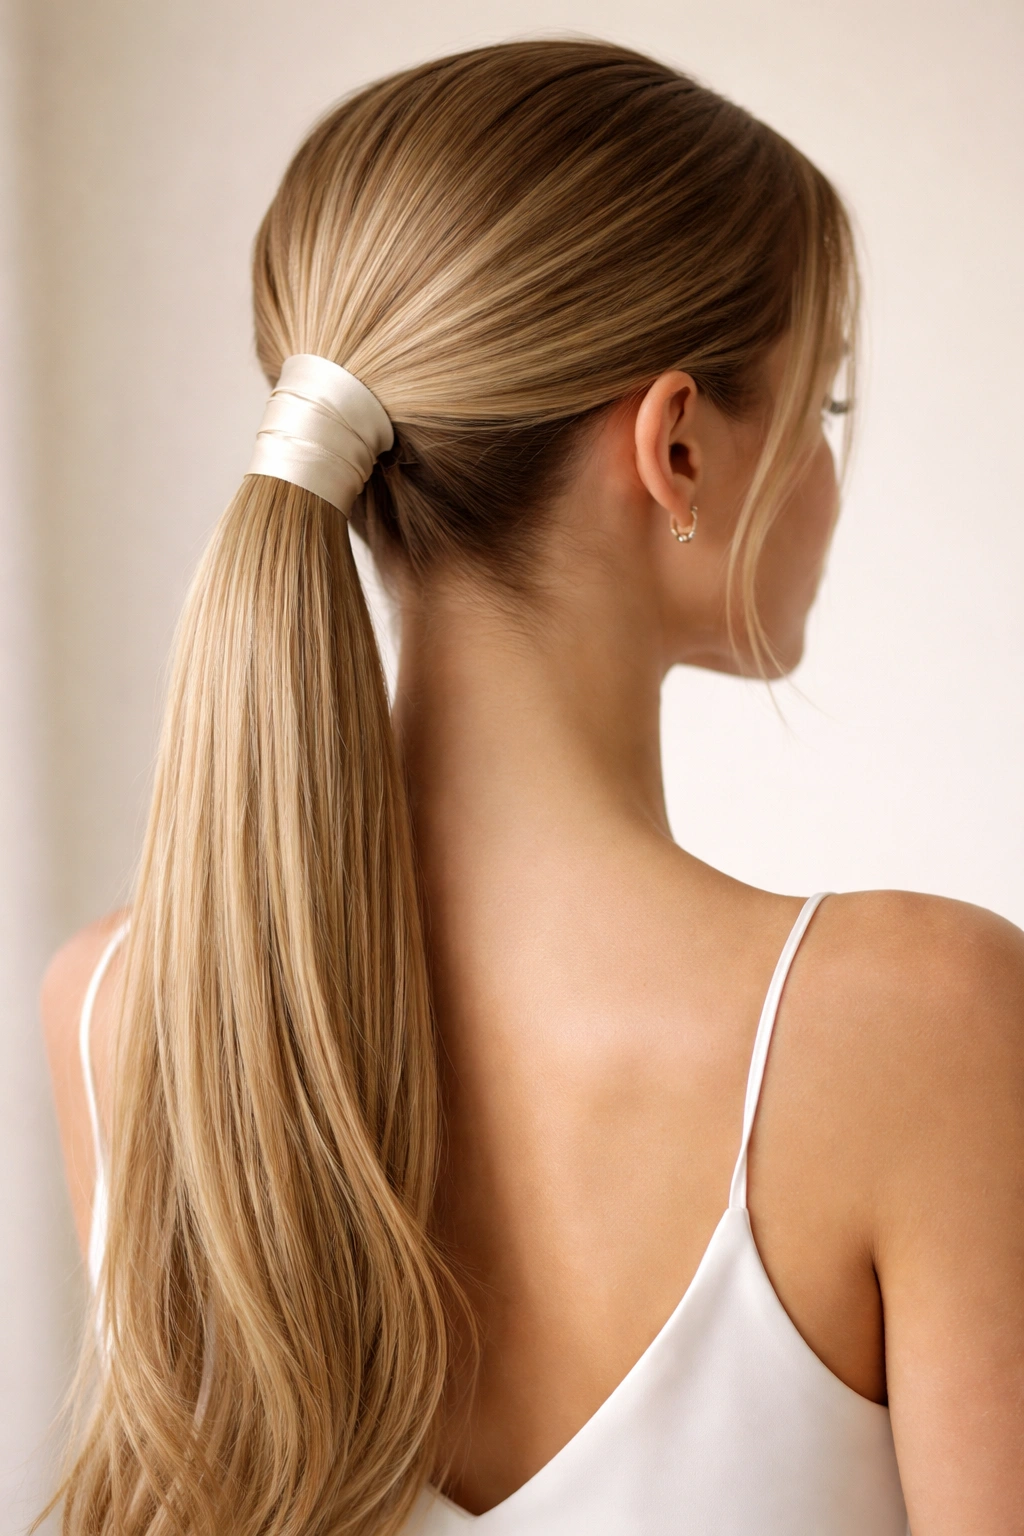
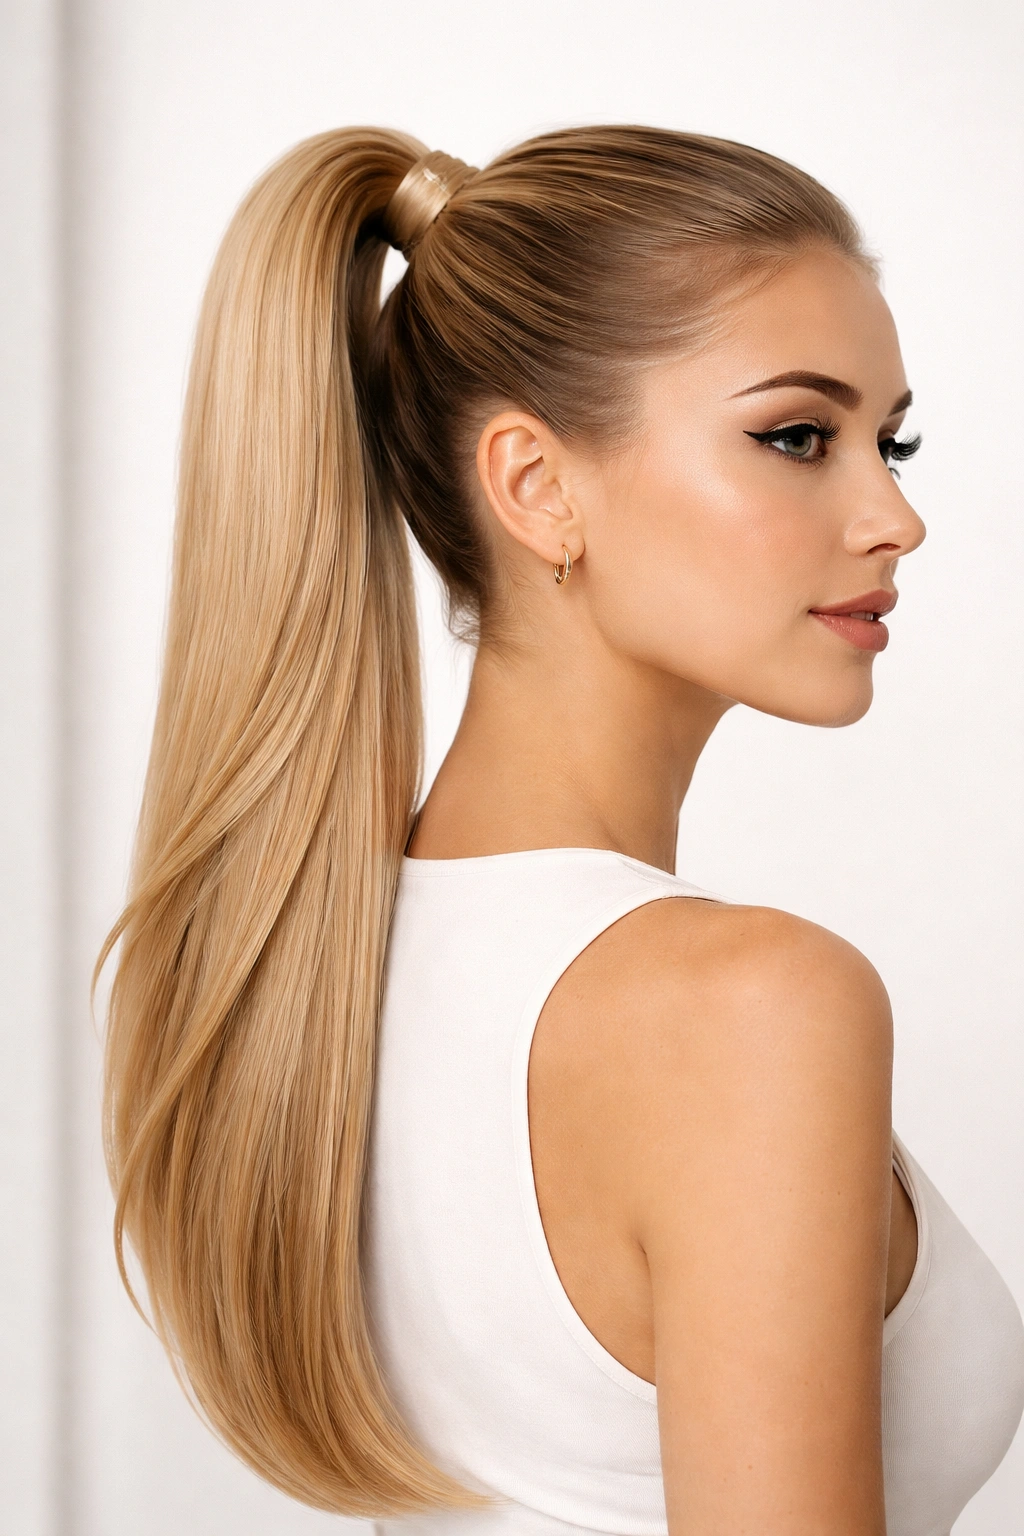
2. The Sleek Low Ponytail
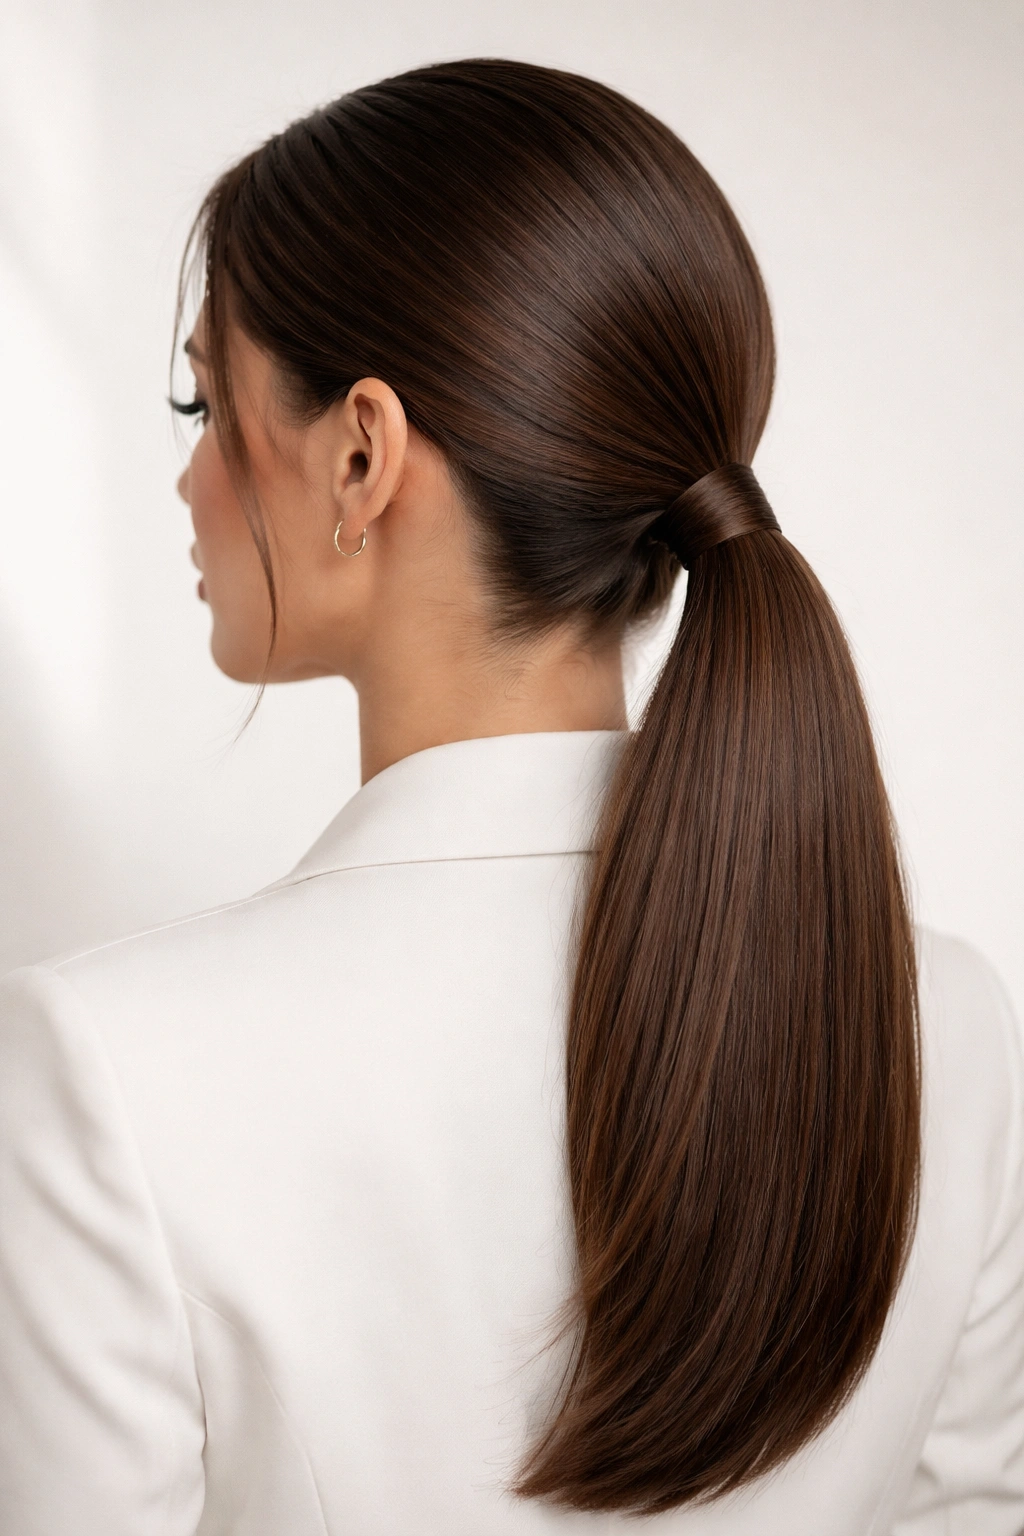
A low ponytail positioned at the base of your neck creates an understated, sophisticated look that works for both professional settings and casual outings. This style is particularly flattering because it’s less severe than a high ponytail while still keeping your hair completely off your face.
The Appeal for Straight Hair
The lower placement of a low ponytail means gravity naturally pulls the hair smooth and taut, with minimal effort required to maintain that sleek appearance. Straight hair cooperates beautifully in this placement because there’s no texture to create bulk or puffiness at the base of your neck.
Step-by-Step Execution
Begin with freshly brushed hair or hair that’s been straightened with a flat iron for extra smoothness. Tilt your head slightly forward and gently brush all your hair toward the nape of your neck, using a fine-tooth comb to smooth any wisps. Secure with a medium elastic, then use a fine-tooth comb or soft-bristle brush to gently smooth the front sections and any baby hairs around your face. Take a thin strand from the ponytail and wrap it around the base, securing with a bobby pin that matches your hair color.
Occasions That Call for This Look
Wear a low ponytail to job interviews, professional presentations, business dinners, or any formal event where you want to appear polished without being overly dramatic. This style also works beautifully for date nights or sophisticated casual outings where you want to look put-together but not over-styled.
3. The Textured Ponytail with Waves
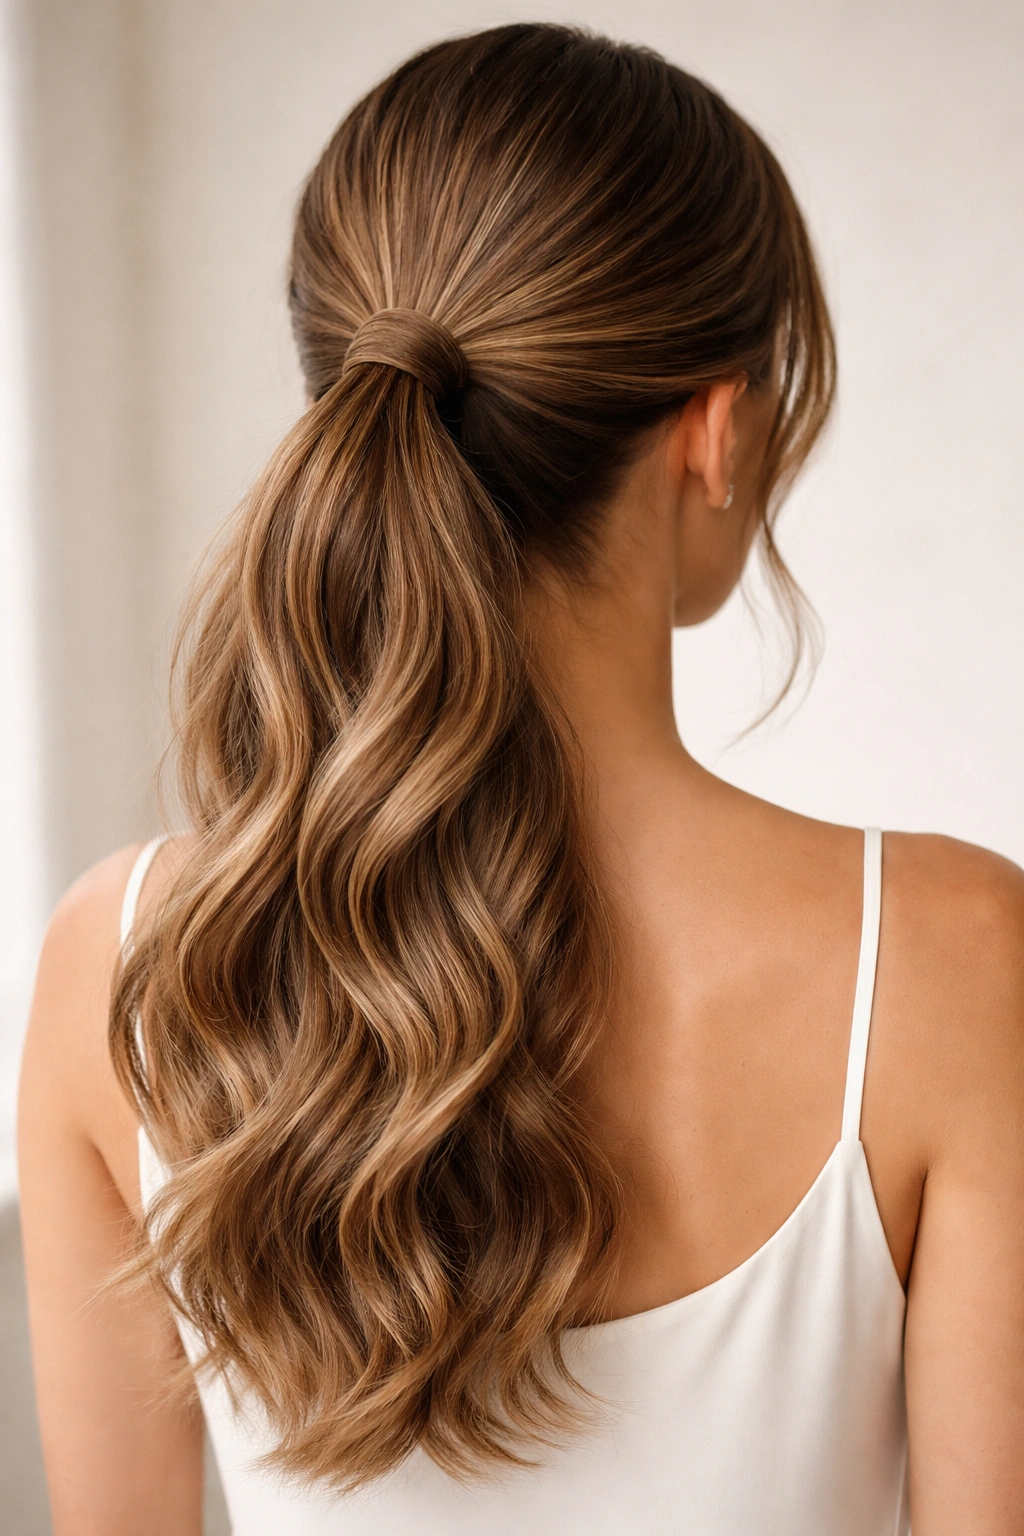
Even though your hair is naturally straight, you can create a softer, more romantic version of the ponytail by adding waves or loose curls to the actual ponytail section before securing it. This adds dimension and movement while keeping the sleekness of the pulled-back style.
Creating Wave Texture in Straight Hair
Use a curling iron or a straightener held at an angle to create loose waves throughout the length of your ponytail. The key is not to make tight curls, but rather to create a gentle S-wave pattern that adds visual interest. Hold each section for just 1-2 seconds with the iron to avoid creating permanent crimp marks that won’t relax once the hair cools.
Securing Waves Without Losing Them
Before creating waves, secure your hair into the ponytail first. Then, working with the ponytail while it hangs down your back, use your heat tool to add waves. This prevents the waves from being smoothed out when you brush the hair back. Finish with a texturizing spray or light hairspray to help the waves hold their shape and prevent them from falling flat.
When to Wear This Style
This version of the ponytail is perfect for weddings, parties, date nights, or any occasion where you want to feel a bit more dressed up but still maintain the sleekness of having your hair pulled back. It’s also an excellent choice for straight-haired people who feel that a completely smooth ponytail seems too severe or corporate for certain settings.
4. The Slicked-Back Ponytail
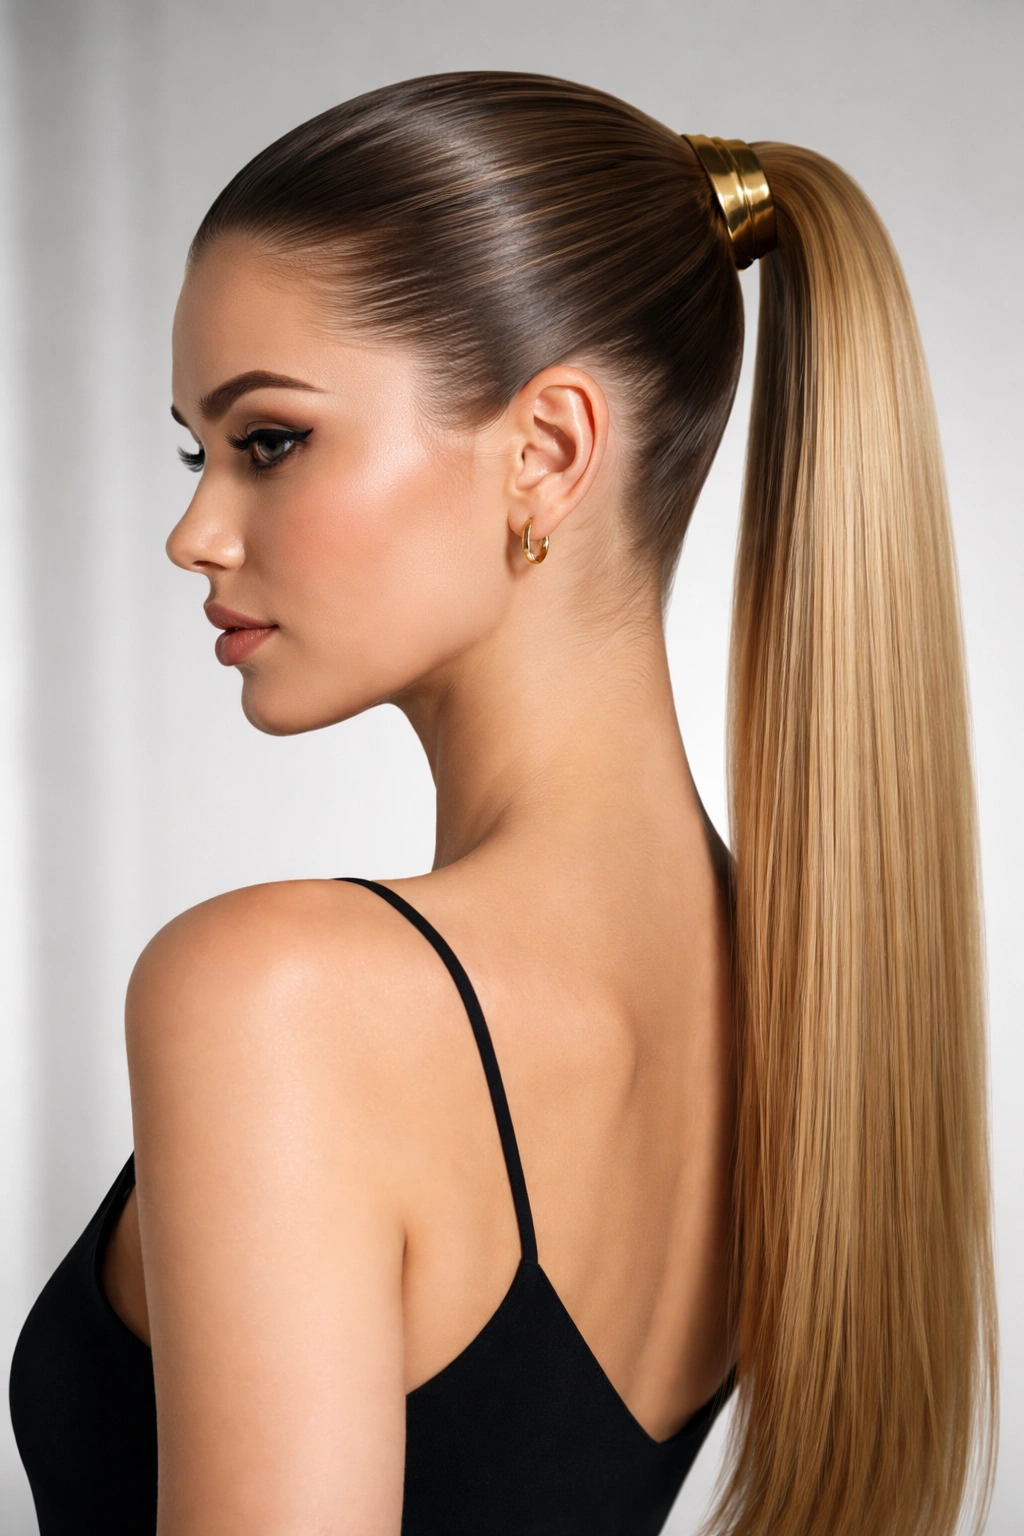
A slicked-back ponytail pulls hair firmly against the scalp, creating maximum smoothness and definition. This is an intentionally severe, modern look that works best on people with strong facial features and the confidence to carry off a no-nonsense style.
Achieving the Slicked Look on Straight Hair
Apply a gel, pomade, or edge control product to your hairline and throughout your hair before pulling it back. Use a fine-tooth comb to smooth every section tightly against your scalp, working from your face backward. A dedicated edge control stick works particularly well for creating a polished hairline and keeping baby hairs smooth. The goal is not a single wisp of hair out of place.
Securing and Maintaining the Look
Use a strong-hold elastic or a sleek metal hair cuff to secure the ponytail at your chosen height. Once secured, take a comb and smooth the ponytail itself one more time to ensure it’s perfectly neat. Reapply gel to the hairline throughout the day to maintain that slicked appearance, as flyaways and baby hairs can detract from the intentional severity of this style.
Who Should Wear This Style
The slicked-back ponytail suits athletic activities, modern fashion shoots, minimalist aesthetic preferences, and people who appreciate a bold, sculptural approach to hairstyling. It’s also excellent for workouts or athletic pursuits because it’s the most secure, longest-lasting ponytail style for active movement.
5. The Elevated Ponytail with a Bouffant Crown
An elevated ponytail combines volume at the crown with a sleek, polished ponytail, creating the illusion of thicker hair and a more dynamic silhouette. This style requires a bit more technique but delivers a noticeably more sophisticated result than a standard ponytail.
Building Volume Without Texture
Tease gently at the crown and the area directly behind where your ponytail will sit. Use a soft paddle brush to smooth the teased sections while maintaining the volume underneath — the goal is to create height without visible texture. This works on straight hair because the teasing creates internal structure that smooth strands lack naturally.
Securing the Volume Properly
Once you’ve created your bouffant, use bobby pins to anchor the volume before creating your ponytail. Then position your elastic slightly higher than you normally would, incorporating those voluminous crown sections into the ponytail itself. The result is a ponytail that appears to start higher on the head and looks fuller throughout.
Styling Products That Help
A volumizing mousse applied to damp roots before blow-drying creates longer-lasting volume than teasing alone. Apply the mousse to the roots of your crown section, then blow-dry that area with your head tilted downward to encourage lift. Once your hair is dry, teasing becomes easier and the structure lasts much longer throughout the day.
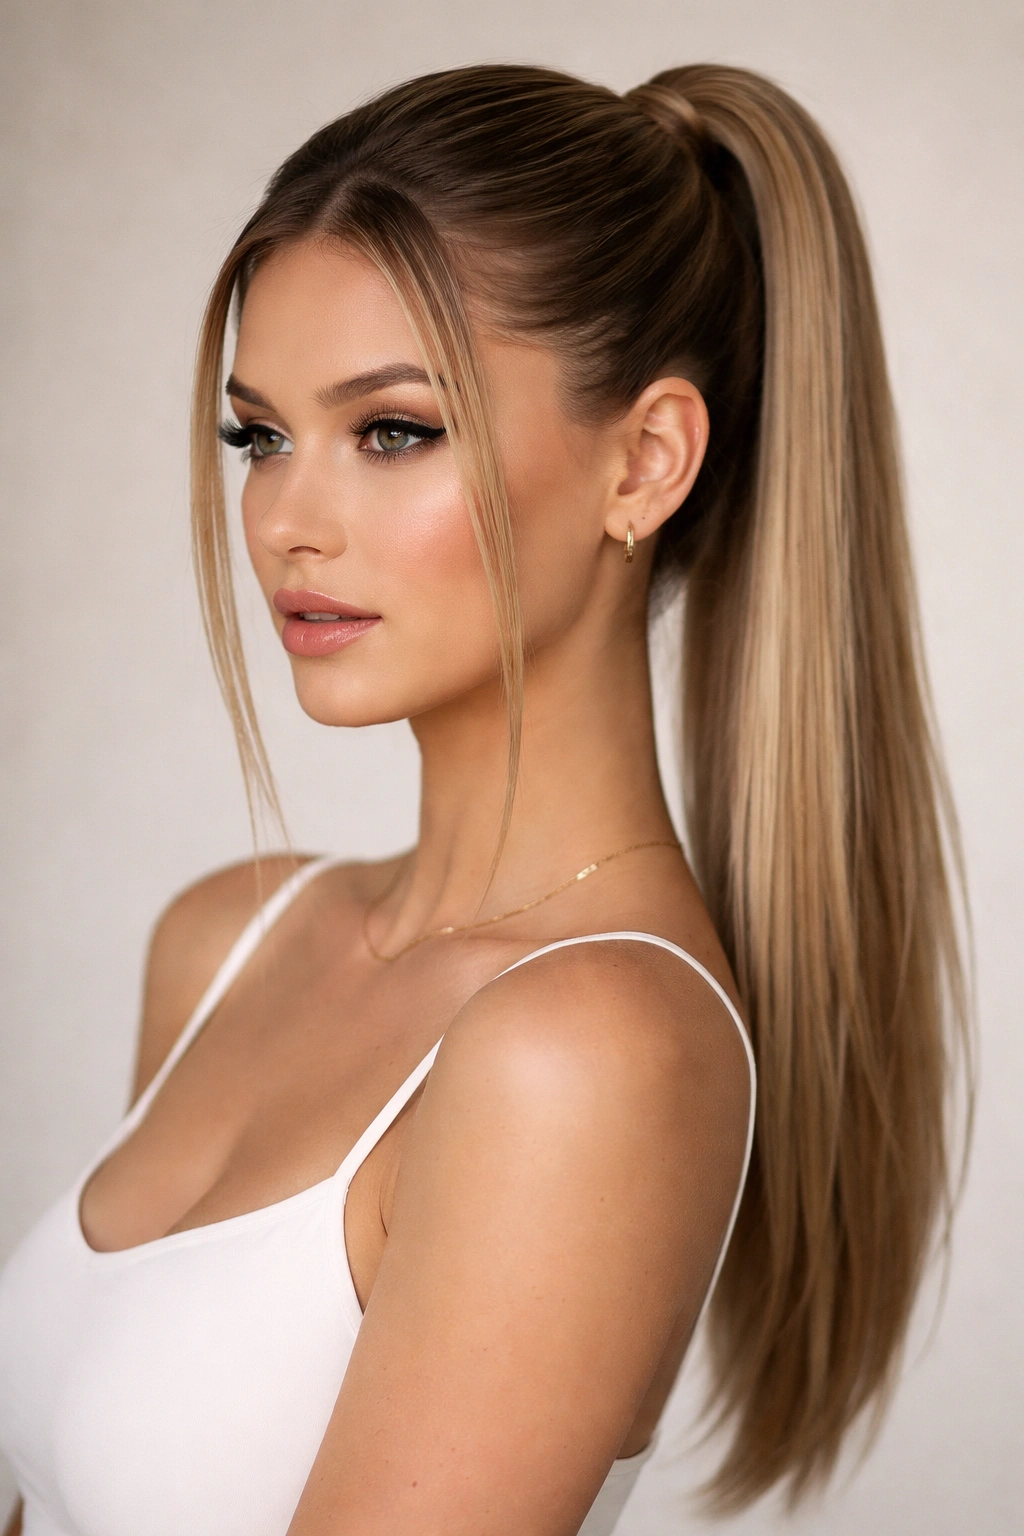
6. The Middle-Height Practical Ponytail
Positioned between high and low, a middle-height ponytail offers the perfect balance between practicality and polish. It’s high enough to keep hair completely out of your face and neck, but low enough to feel approachable and less severe than a true high ponytail.
Finding Your Ideal Placement
Position your ponytail about two inches above where your ear begins when you’re looking straight ahead. This is the sweet spot that works for most face shapes and looks equally professional and casual depending on how you style the rest of your hair and what you’re wearing.
Creating a Polished Finish
Start with a very smooth base by blow-drying your hair straight, then brushing it back smoothly. Secure with a clear or matching elastic, then wrap a thin section from the ponytail around the base and pin it. You can leave this wrapped section looking clean and finished, or gently curl it slightly with a curling iron for a more relaxed vibe.
The Versatility Factor
This height works beautifully whether you’re wearing it to work, running errands, attending casual social events, or even dressing up for dinner. It’s the most versatile ponytail placement because it adapts well to different contexts and styling choices. Pair it with a sleek, professional outfit and it looks corporate. Pair it with athleisure and it looks sporty. Add waves and it becomes romantic.
7. The Sleek Ponytail with Face-Framing Layers
Instead of pulling every single strand back, this style keeps a few carefully chosen face-framing pieces loose to soften the overall look and add dimension. On straight hair, these face-framing pieces should be razor-straight to look intentional rather than accidental.
Choosing Which Pieces to Leave Out
Select thin sections from the area in front of your temples — roughly an inch-wide section on each side. These pieces should be thin enough that they don’t interfere with your vision or constantly end up back in the ponytail. The goal is subtle face-framing, not a half-down, half-up situation.
Styling the Frame-Pieces
Use a straightener to ensure these pieces are perfectly smooth and aligned with the rest of your straight hair. You can style them to curve slightly around your face or keep them perfectly straight — both work beautifully. If you want them to stay in front of your face rather than tucking behind your ear, apply a tiny bit of gel to the inside ends to help them stay put.
Best Uses for This Variation
This style works wonderfully when you want to keep hair out of the way but don’t want to appear overly formal or severe. It’s perfect for days when you’re not quite ready to commit to having all your hair pulled back, or when you want a style that photographs well from the side (the face-framing pieces photograph beautifully and add softness to your profile).
8. The Wrapped Ponytail with Ribbon or Fabric
Transform a basic straight-hair ponytail into something more polished and intentional by wrapping the base with ribbon, fabric strips, or decorative tape. This simple addition elevates the entire look and gives the impression that you’ve put considerable effort into your appearance.
Choosing Your Wrapping Material
Silk ribbon, velvet ribbon, or fabric strips in complementary colors create a luxurious appearance. Choose materials that coordinate with your outfit — a gold ribbon for warm tones, silver for cool tones, or a bold jewel tone that complements your hair color. The width should be roughly three-quarters to one inch wide for a balanced appearance.
Wrapping Technique
After securing your ponytail with an elastic, place the beginning of your ribbon at the base and wrap it tightly around the elastic and base of your ponytail, overlapping slightly with each wrap. Continue wrapping downward about an inch, then tie or tuck the end of the ribbon. For extra durability, use a bobby pin to anchor the knot against your hair.
When This Style Shines
Wrapped ponytails are perfect for weddings, bridal parties, formal events, and occasions where you want to appear elegant and intentional. They also work beautifully for fashion-forward casual settings where you’re comfortable making a style statement. A sporty ribbon wrap (like a metallic or neon option) can even elevate an athletic ponytail.
9. The Curved or Sideswept Ponytail
Instead of gathering hair directly behind your head, position your ponytail to one side, creating an asymmetrical, modern look that’s both flattering and fashion-forward. This style works particularly well on straight hair because the sleekness emphasizes the dramatic angle.
Creating the Curve
Brush all your hair to one side — typically the side away from your dominant hand makes it easier to secure. Position your ponytail at roughly ear level on the side of your head. The curve should flow naturally from one side of your head down to the positioning point, not look obviously swept in an artificial way.
Styling for Impact
Straighten your hair first for maximum sleekness, then use a fine-tooth comb to smooth the curved sections. You want the curve to look deliberate and polished. Some people add a slight wave to the curved section to make it even more intentional and less severe.
Face Shape Considerations
This style works beautifully for oval and rectangular face shapes, as it adds width and softness. It can also work for heart-shaped faces if you position it toward the broader side of your face to create balance. If you have a very round face, this style might emphasize that roundness, so consider pairing it with a high placement or adding some texture.
10. The Double Ponytail with Stacked Height
Creating two ponytails, one on top of the other, adds visual impact and creates the illusion of extremely thick, voluminous hair. This style requires straight hair to truly shine because you can see exactly how much hair you’re working with at each section.
The Two-Section Approach
Divide your hair into two sections: an upper section that will become your high ponytail, and a lower section that will become your second ponytail just below it. Secure the upper section first, then secure the lower section directly beneath it. Both elastics should be positioned to create a visually clear separation between the two.
Creating the Visual Impact
The key to making this look intentional rather than like a styling accident is to ensure both ponytails are absolutely sleek and smooth. Brush carefully between securing each one. Many people curl or wave each ponytail section after securing them to add dimension and make the style feel more special.
Occasions That Call for Drama
Wear a double ponytail to parties, festivals, creative professional environments, or any time you want to make a bold hair statement. This style is particularly popular among people who appreciate avant-garde fashion and aren’t afraid of a more editorial approach to hairstyling. It also works beautifully for creative photo shoots or when you simply want to feel confident and distinctive.
11. The Sleek Ponytail with Straightened, Polished Ends
While many ponytail styles end with whatever texture your ponytail naturally has, this version specifically uses a straightener on the actual ponytail section after securing it to create an extra-polished, intentional appearance. The result is a ponytail that looks professional and manicured from root to tip.
Why Straightening the Ponytail Makes a Difference
Even though your hair is already straight, straightening it again after securing the ponytail gives it an extremely sleek, polished appearance that looks intentional rather than simply neat. The straightener smooths out any texture from being pulled back tightly and creates uniform shine throughout the length.
Technique for Safe Straightening
Wait at least 30 seconds after securing your ponytail before using heat, to ensure your elastic is fully set and won’t slip. Work in thin sections, straightening the ponytail slowly from roots to ends. Be careful not to straighten over your elastic (you’ll melt it) and not to create crimps or unwanted texture by moving the straightener too quickly.
The Result
Your ponytail will have exceptional shine, smoothness, and a visibly polished appearance that photographs beautifully. This is an excellent choice for professional settings, events where you’ll be photographed, or any time you want your ponytail to look like a deliberate style choice rather than a practical hair solution.
12. The Braided Ponytail Base with Sleek Tail
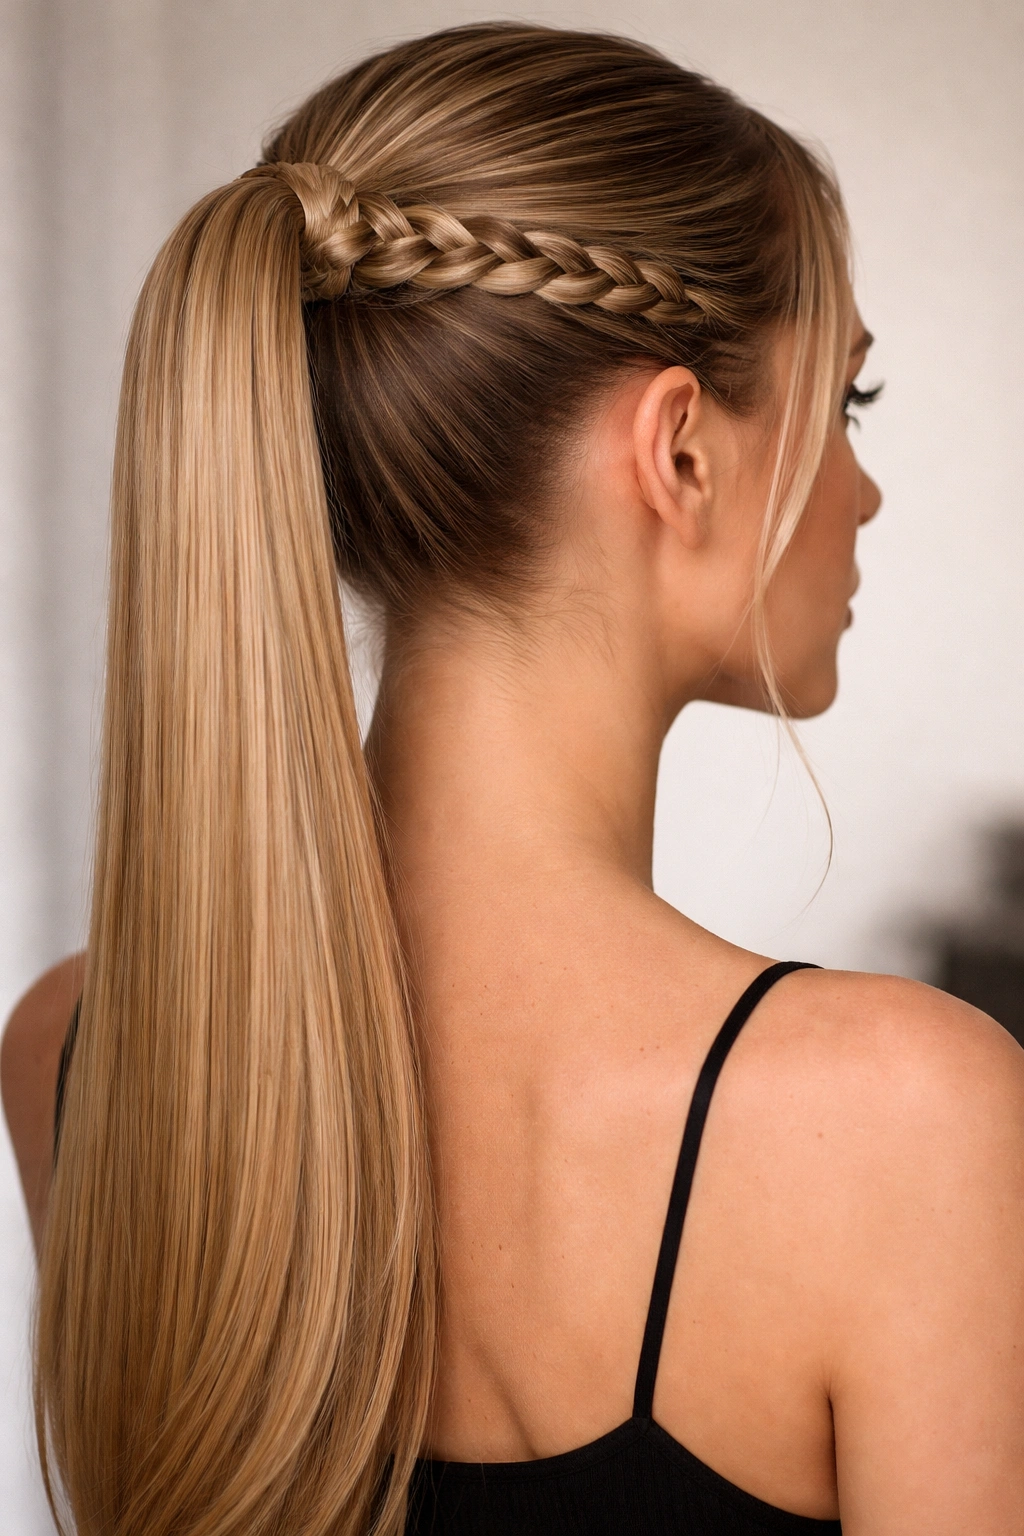
Instead of creating a simple elastic base, braid a small section of hair and use that braid as your base before gathering the rest of your hair into a ponytail. This adds instant visual interest and makes a standard ponytail look significantly more intentional and styled.
Creating the Base Braid
Start with a small section of hair from the front of your crown and braid it straight back to where you want your ponytail to sit. Use three-strand braiding or a thinner Dutch braid for a delicate appearance. Secure the braid with a small elastic, then gather all your hair (including the braid) into a ponytail at that same point.
Styling the Braided Section
You can leave the braid visible as an interesting textured element at the crown, or tuck it slightly under the ponytail elastic so it’s less obvious. Both approaches look beautiful — visible creates more visual interest, while tucked-in creates a more minimalist appearance.
Variations That Work
You can create this style with just one thin braid, two side braids that meet in the center, or even a Dutch braid for extra texture and visual impact. On straight hair, the contrast between the textured braid and the smooth ponytail is particularly striking and looks intentionally styled.
When This Style Shines
Wear a braided-base ponytail when you want something more interesting than a standard ponytail but less dramatic than a full braided style. It’s perfect for casual settings where you still want to look put-together, creative professional environments, or any time you want a style that’s noticeably more effort-intensive than it actually is.
Final Thoughts
The versatility of ponytails for straight hair comes down to understanding how placement, texture, and finishing details can completely transform a basic style. Whether you’re drawn to sleek minimalism, romantic waves, dramatic asymmetry, or intricate braided elements, straight hair provides the perfect foundation for executing any of these styles with precision and polish.
The real secret to looking intentional rather than haphazard is focusing on the details that most people skip: smoothing your base properly, choosing the right height for your face shape and occasion, wrapping or finishing your elastic so it doesn’t show, and taking time to perfect any texture or styling elements you’re adding. These details are what separate a ponytail that looks like you threw it together from one that looks like you’ve put genuine thought into your appearance.
Start by mastering whichever of these styles calls to you most strongly, then experiment with the others until you’ve built a repertoire of go-to looks for different occasions and moods. Once you understand the core technique of each style, you can adapt and customize them further based on your face shape, outfit, and personal aesthetic preferences. The beauty of having straight hair is that your styling options are endless — all these styles work beautifully, and the clean texture means every detail you add shows intentionality and care.